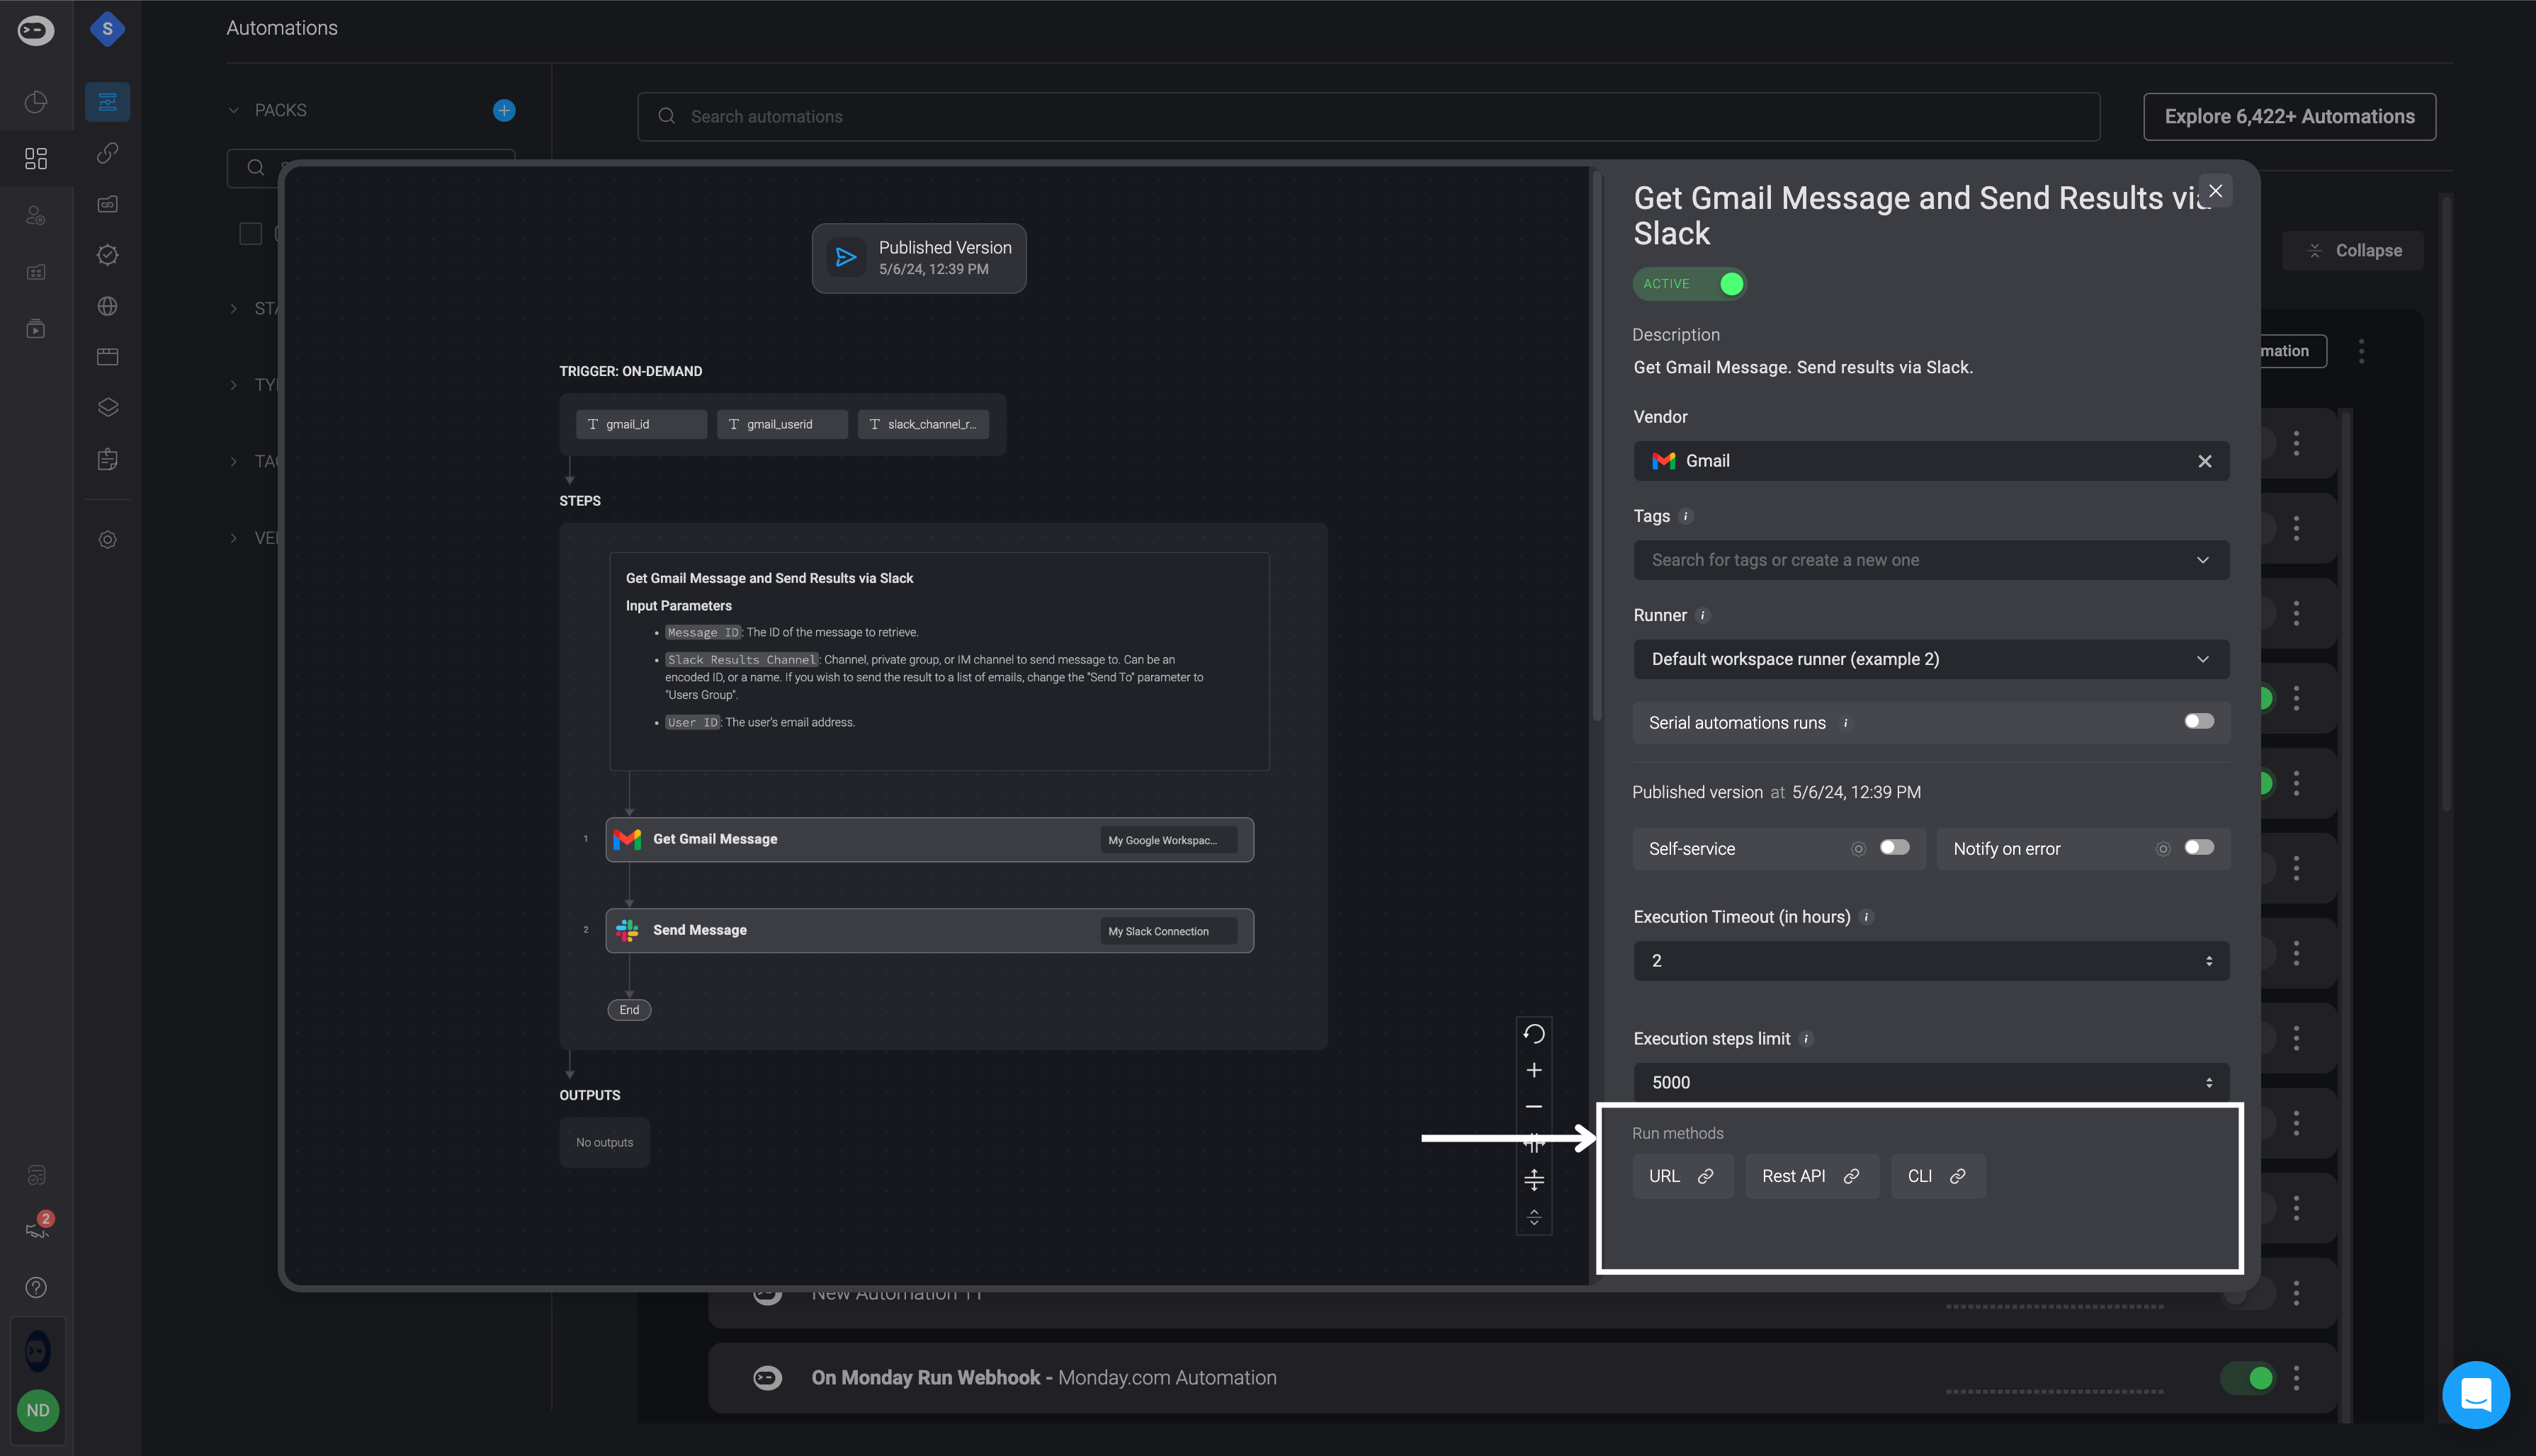
On-Demand and Scheduled Workflows
Run methods for On-Demand and Scheduled Workflows include:Manual
URL
Rest API
In the Workflow Overview page, you can see all the Run Method options displayed.
Manually Running a Workflow

URL
Click the Overview button
Open the Workflow run URL in your browser
URL into the browser address bar. A dialog box will open.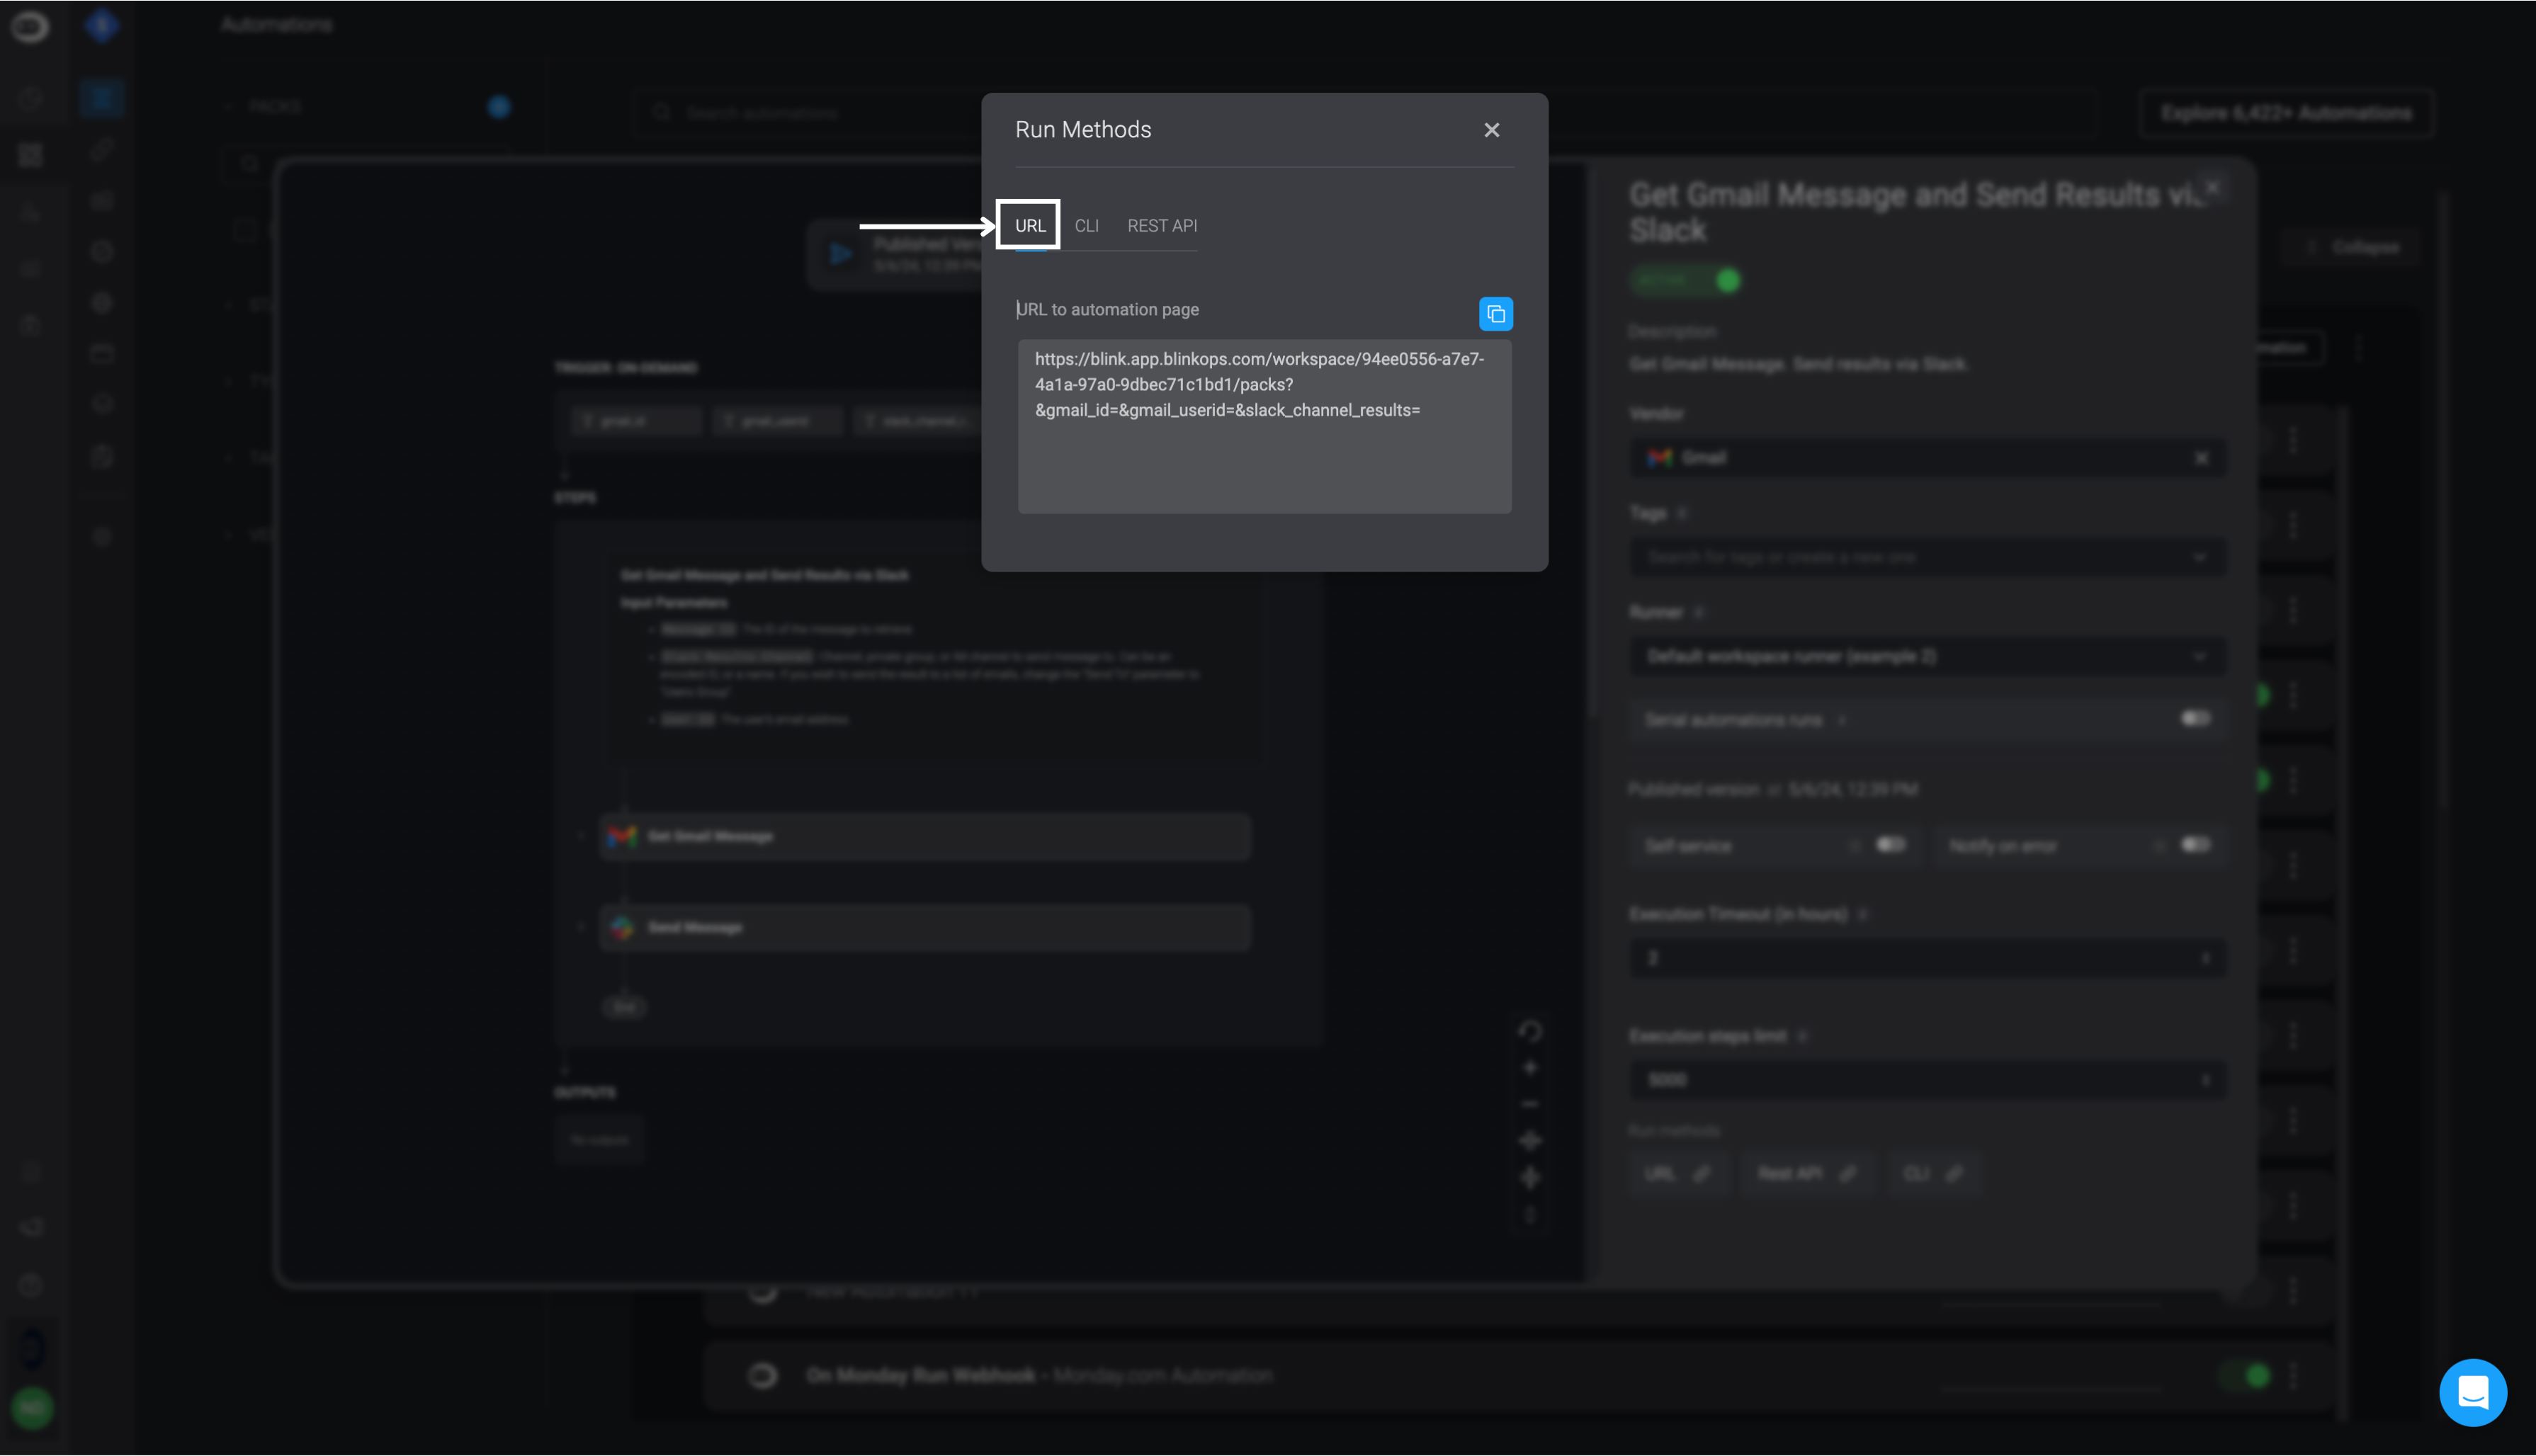
REST API
Running a Workflow using a rest HTTP call. This method can be used to run Workflows from other tools or from the command line using the cURL utility like in the following example. The example is usingcURL, but any utility that can run an HTTP call can be used.
Click the Overview button
Add your personal API key
REST API- Use Case Example
REST API- Use Case Example
Synchronous REST API invocation
Synchronous REST API invocation
run_sync parameter and optionally timeout parameter. For example: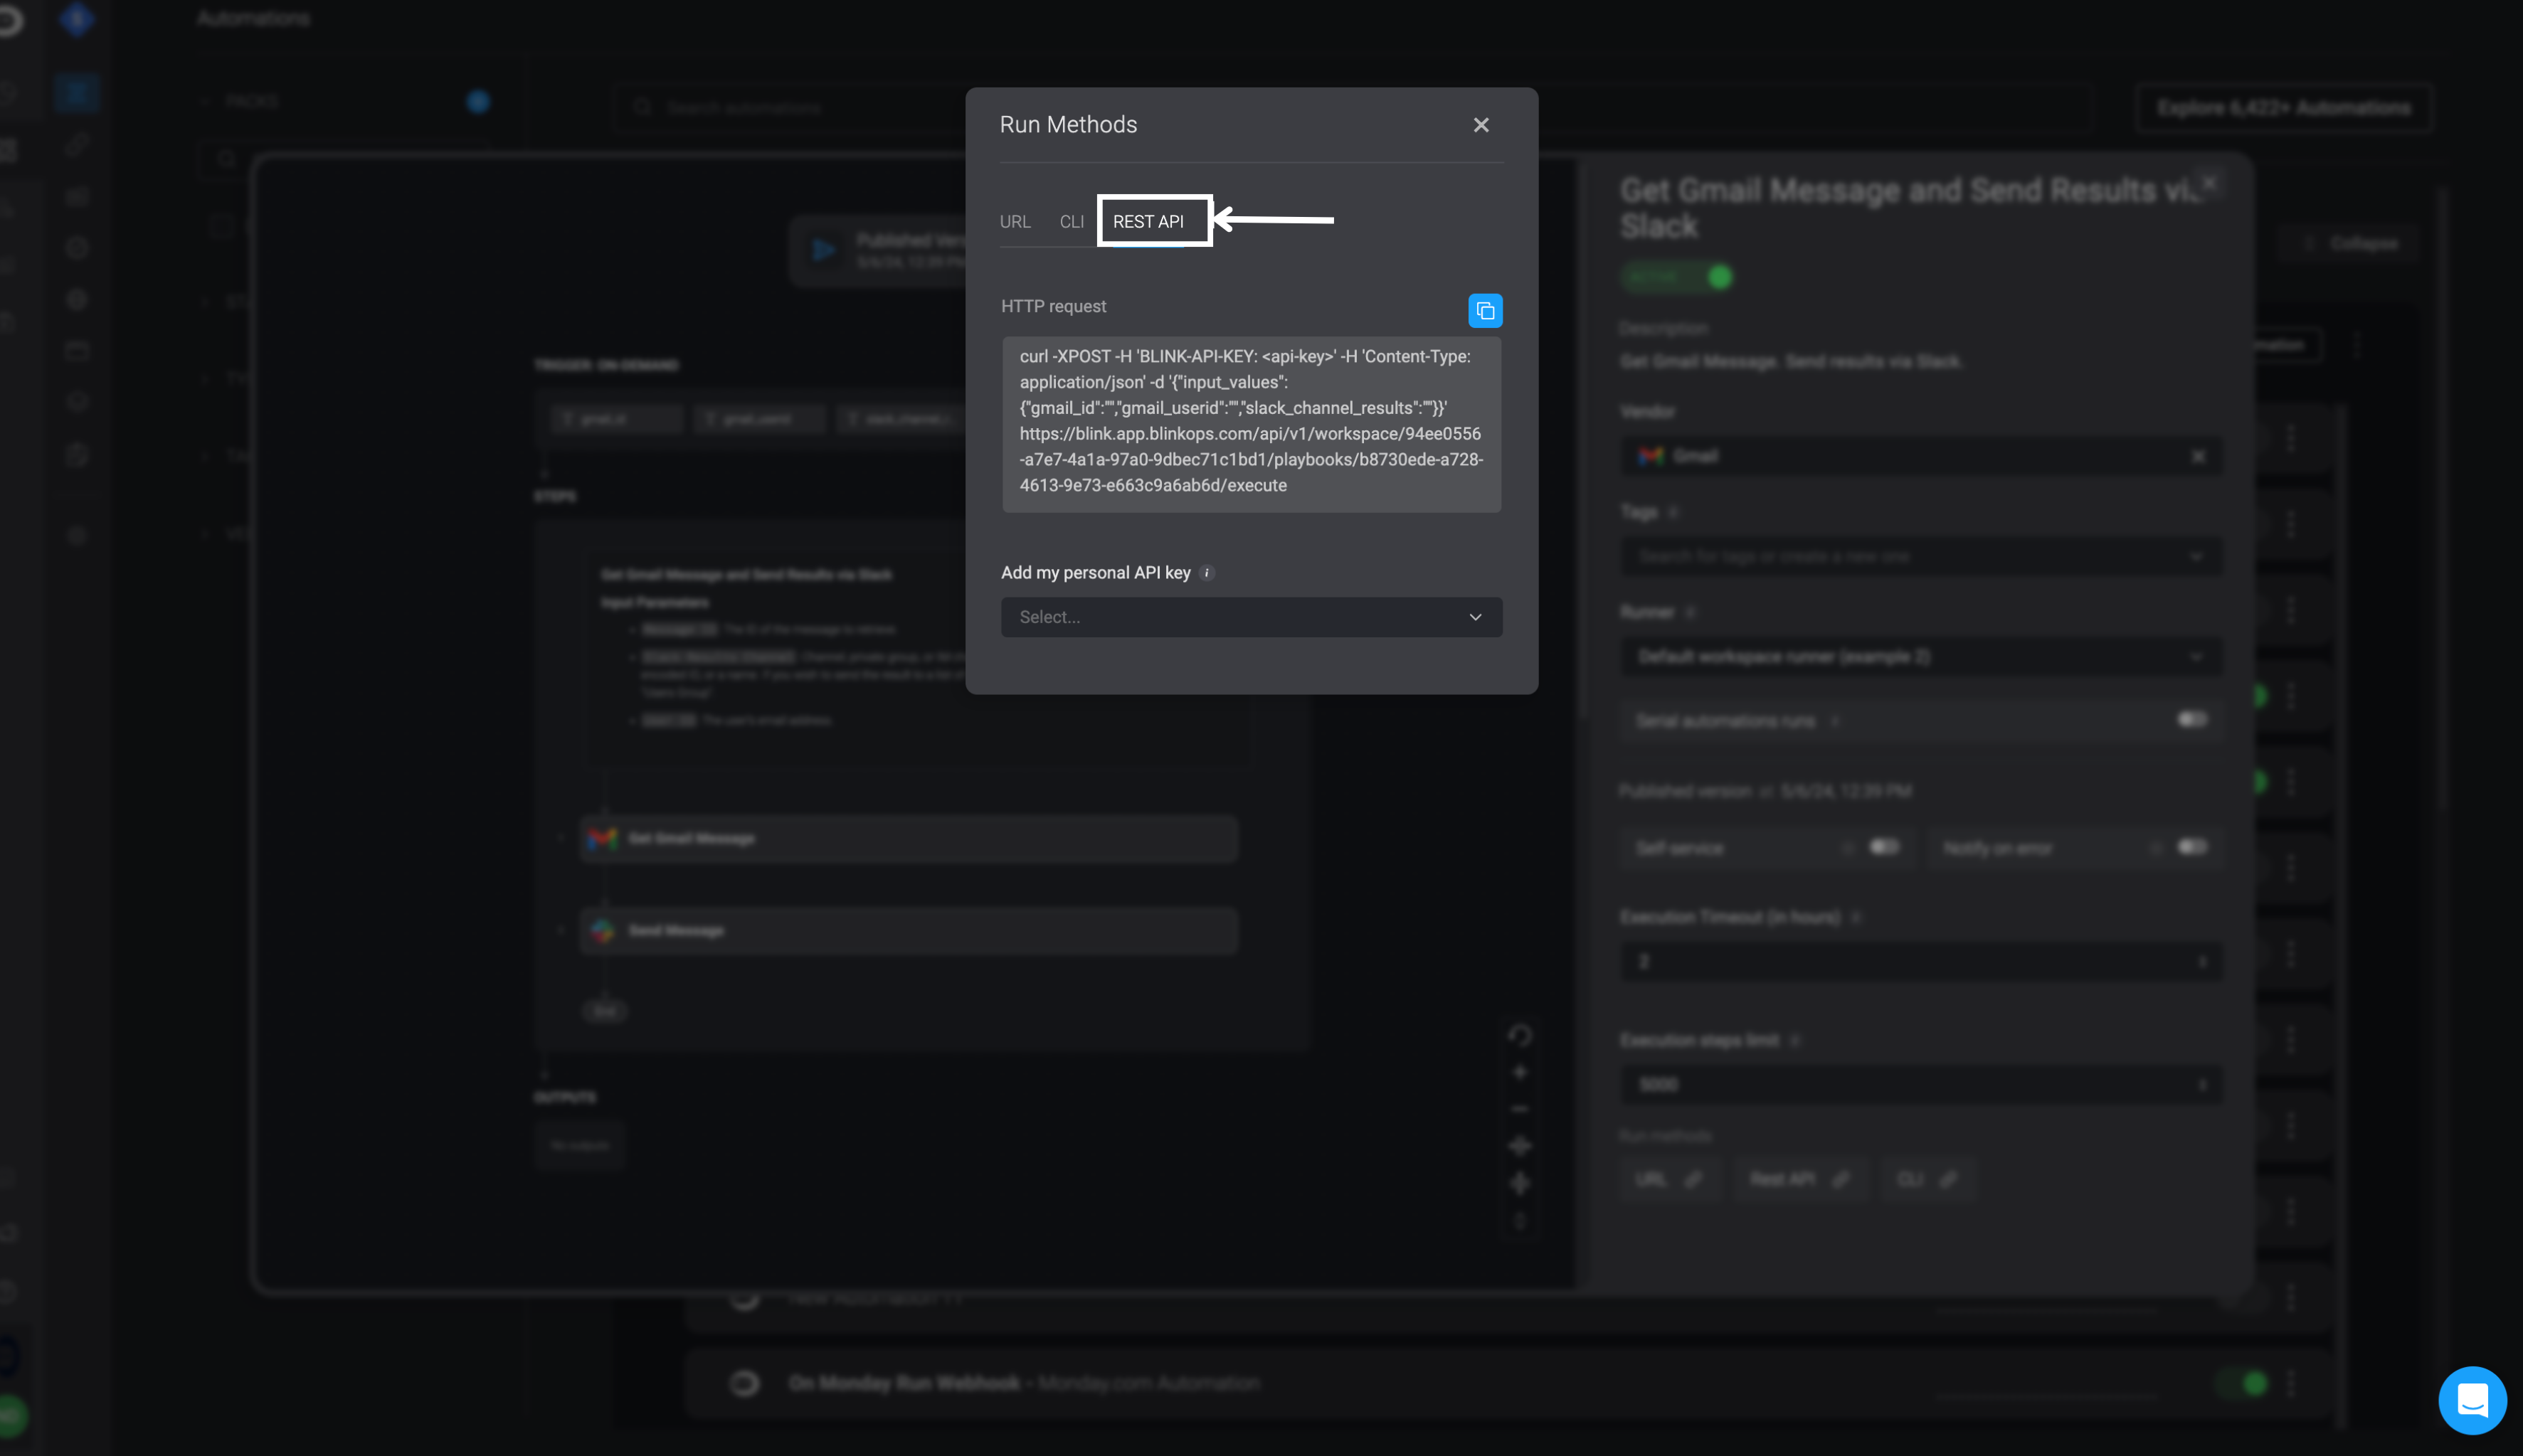
Activity Status
For more information about the execution queue, please navigate hereRunning Workflows Steps Asynchronously
When using one workflow within another, known as a subflow, you have the option to run it asynchronously. Running a subflow asynchronously can improve overall execution speed, as it allows the subflow to run independently of other steps in the main workflow.Running Event-based Workflows
Event-based Workflows provide an easy way to execute a workflow when an event happens on an external system. To achieve this, the external system must perform an HTTP POST to the custom webhook’s URL. Meanwhile, other Event-Based Workflows function by periodically polling the external system to check for new events.Custom Syslog
Custom Syslog offers real-time event triggering in the Blink system when a Syslog event occurs, by receiving events from an external Syslog client provider. Custom Syslog is a service which converts Syslog messages into webhooks and activates the webhook with the content of the Syslog message as the payload.Syslog Message Conversion
Syslog Message Conversion
-
Standard Syslog Message (before conversion):
-
Converted Syslog Message (after being processed by the Custom Syslog service):
Custom Syslog-Deployment and Configuration
Custom Syslog-Deployment and Configuration
Create an Event-based Workflow with Custom Webhook
Copy the Webhook URL into the Docker command
Deploy the Syslog container and run the Docker command
Expose the Syslog container to clients
Azure EventHub
Blink Azure EventHub offers real-time event triggering in the Blink system when an Azure EventHub event is ingested. Blink Azure EventHub is a service which converts Azure EventHub events into webhooks and activates the webhook with the content of the event data as the payload.EventHub- Deployment and Configuration
EventHub- Deployment and Configuration
Create an Event-based Workflow with Custom Webhook
Construct your full Webhook URL
your_webhook_url = <Webhook URL>?apikey=<API Key>Get your Azure EventHub connection string
- Log in to the Azure portal.
- In the EventHub menu, select the EventHub you want to use.
- Under ‘Settings’, click on ‘Shared access policies’.
- Create a new SAS policy and select the ‘Listen’ permission.
- Copy the ‘Connection string–primary key’ from the new SAS policy.
Get your Azure Blob connection string and blob name
- Log in to the Azure portal.
- In the Storage Accounts menu, select the account you want to use.
- Under ‘Security + Networking’, click on Access Keys’ and copy one of the ‘Connection Strings’.
- Under ‘Data Storage’, click on ‘Containers’ and create a new container with the ‘Blob Name’ you want to use.
Paste your credentials into the Docker command
Deploy the Docker container and run the command
EventHub Message Example
EventHub Message Example
Polling: Events Occurring on an External Service Provider
There are no manual run methods available from the Blink platform for this type of Workflow. Instead, the Workflow is automatically triggered when the polling mechanism detects new events from the external system.Create a polling-based Workflow