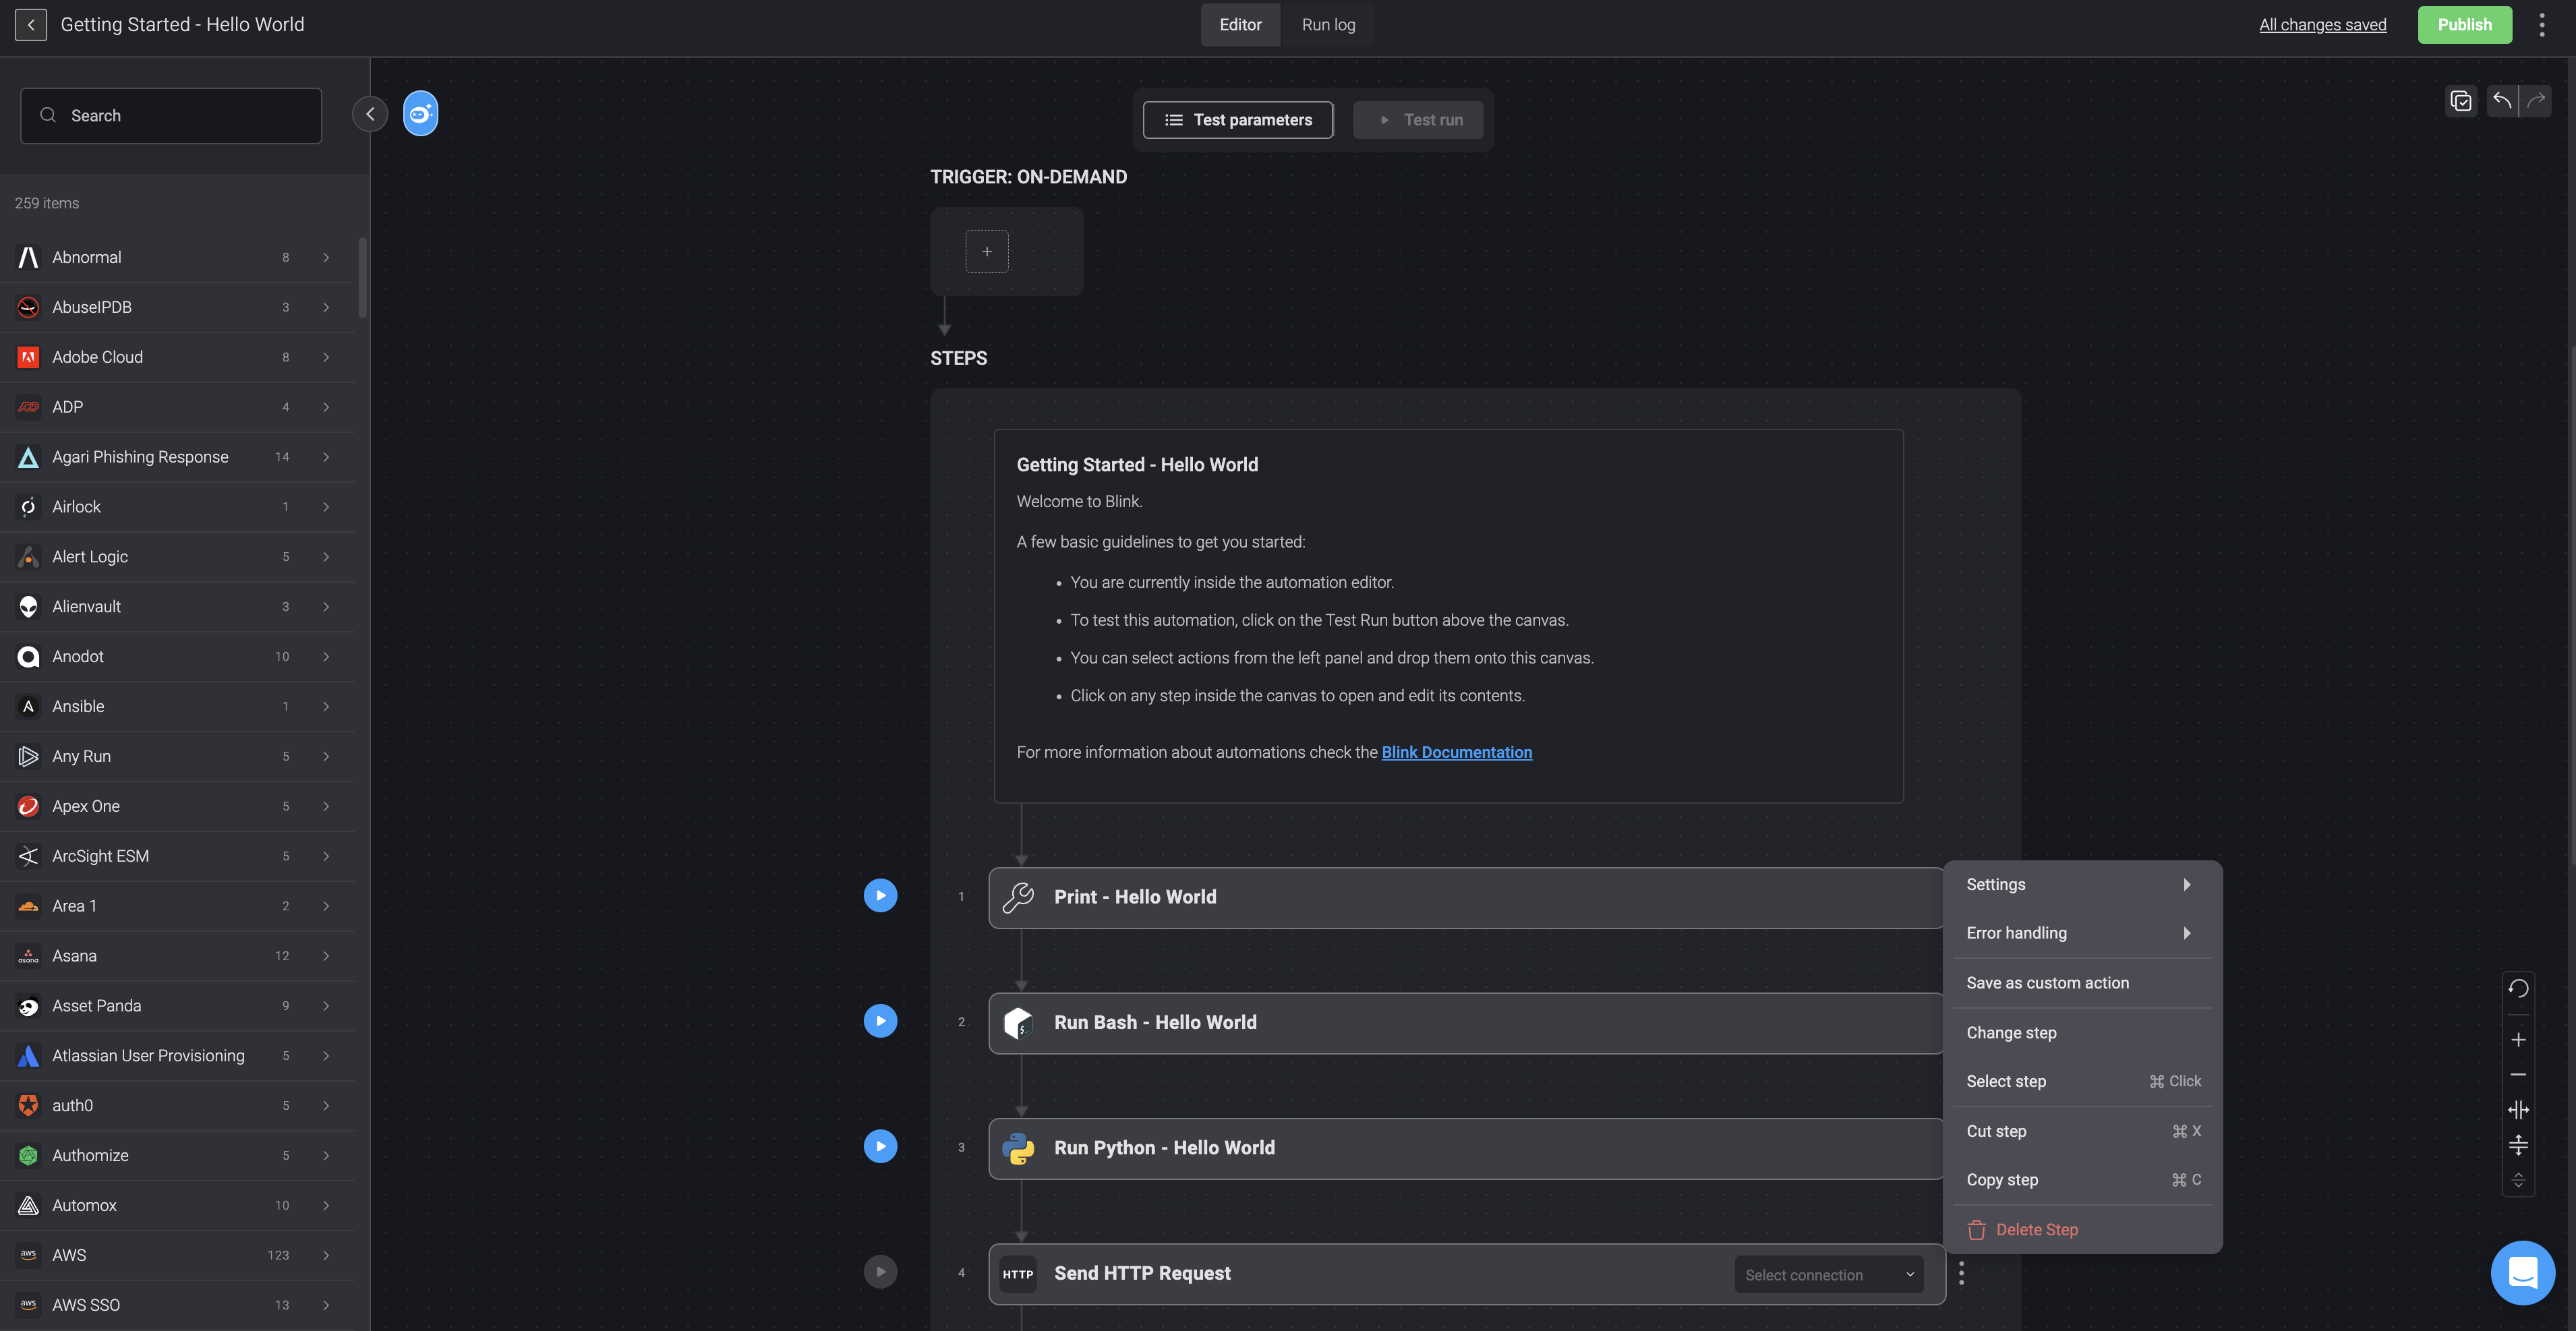
Step Settings
Step settings allow you to customize the behavior and execution of each individual step in your workflow. These settings control how the step runs, how its output is handled, and how errors are managed. They provide flexibility for advanced use cases, such as handling failures gracefully, controlling execution time, reusing logic across workflows, and securely managing sensitive data.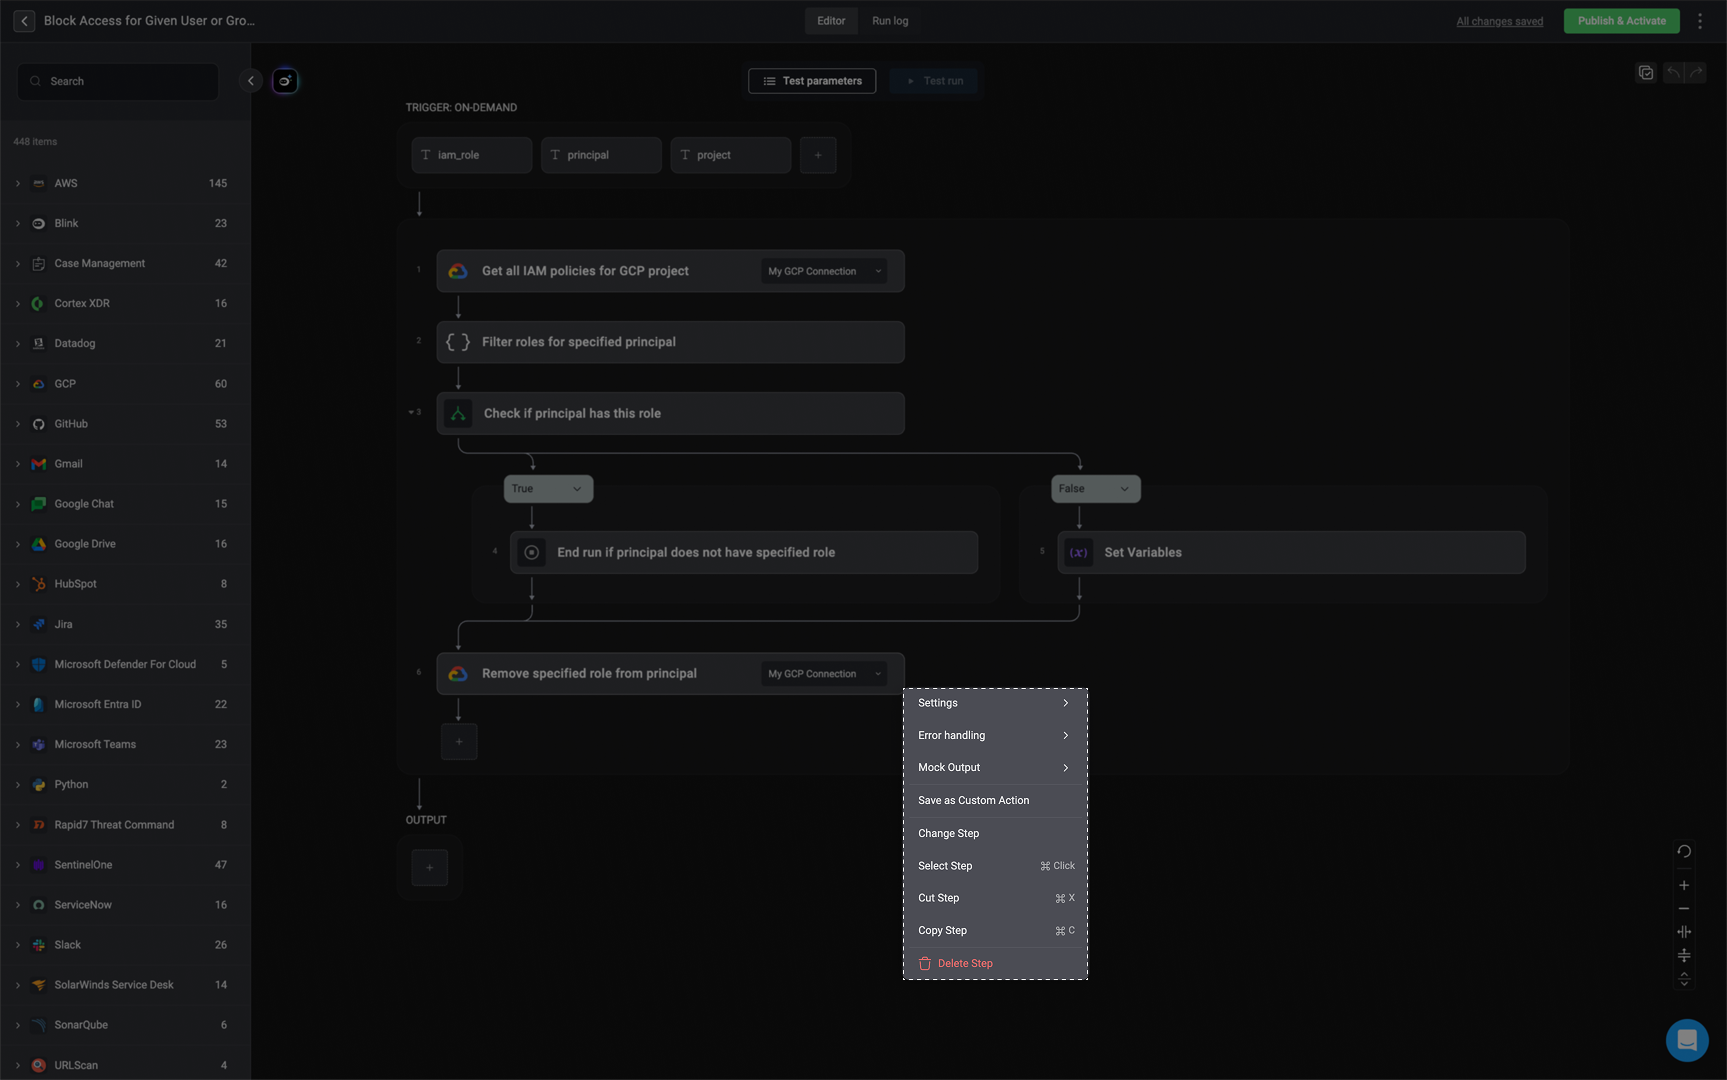
Below is a detailed explanation of each step setting, outlining how you can customize execution behavior, error handling, output management, and reusability for individual workflow steps.
Settings
Settings
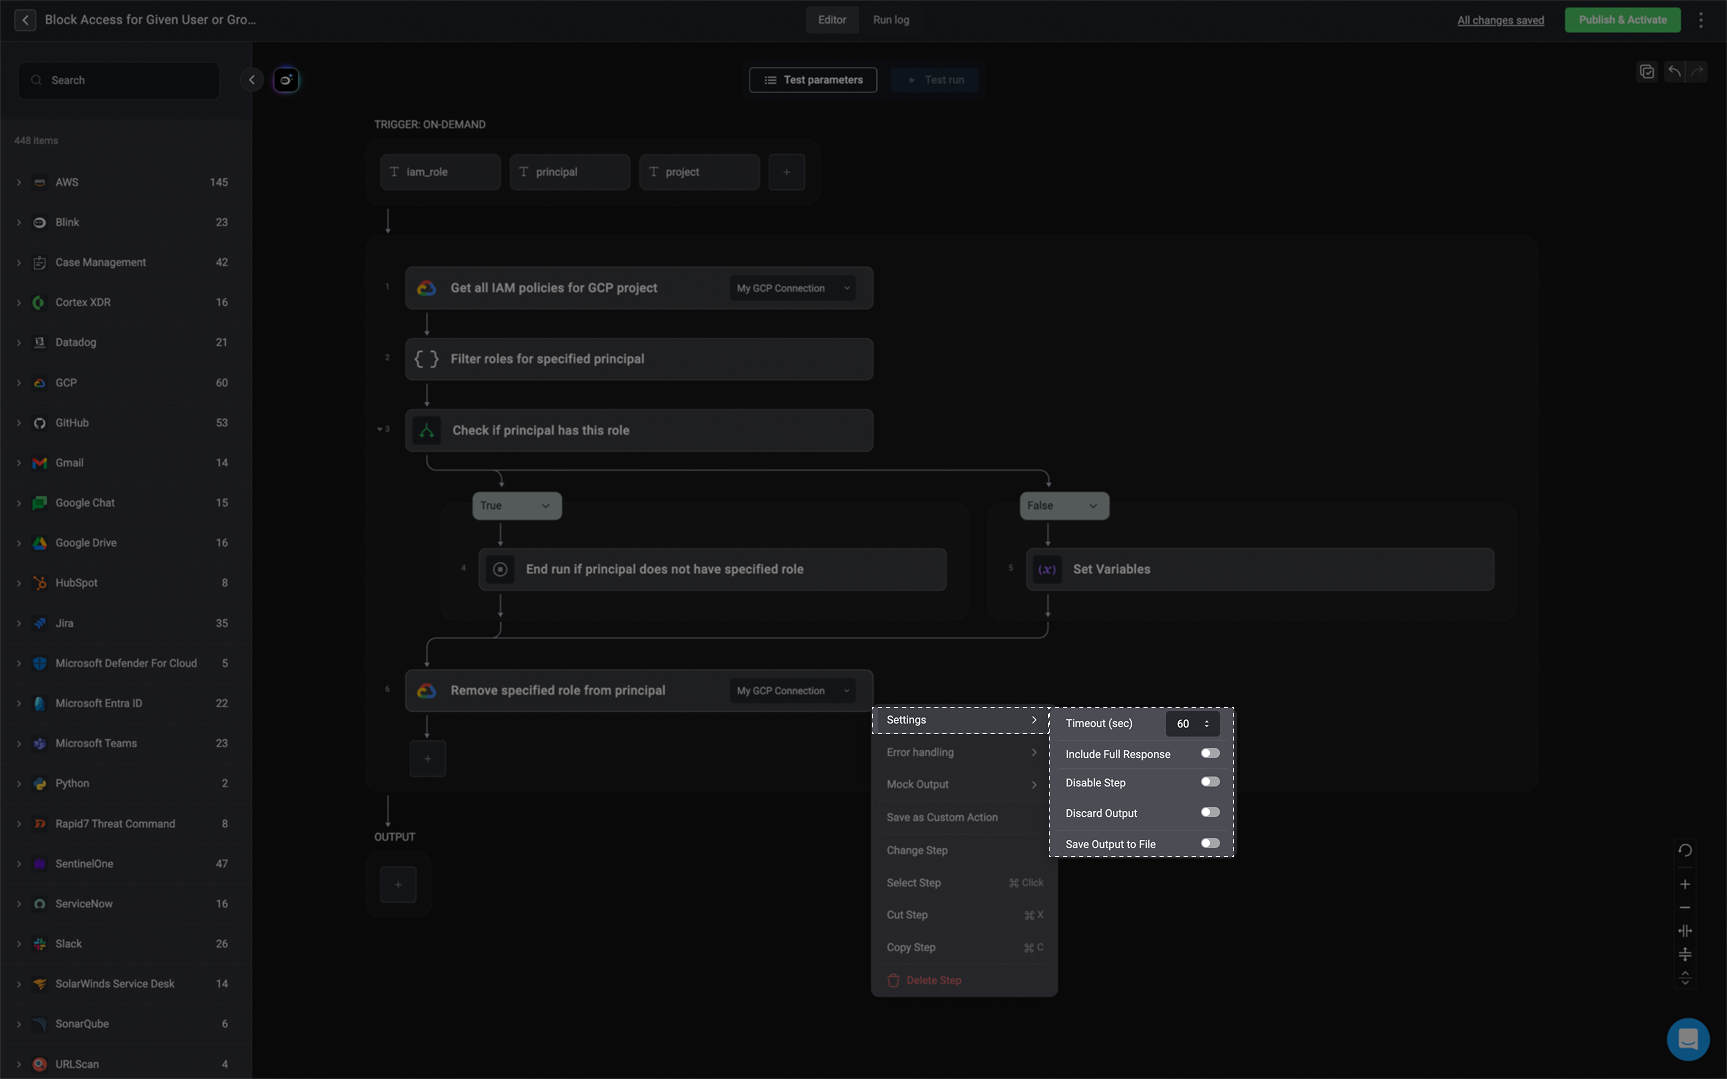
Timeout (sec)
Defines the maximum amount of time (in seconds) the step is allowed to run. If the step doesn’t complete within the specified time, it will be forcefully stopped and marked as failed.2 and 12 hours. If needed, a step can stay paused for up to 14 days. Internal steps (like, the Print action, the Flow control actions and certain Utility actions) follow the main execution timeout, while external steps (like HTTP actions, Python actions, or Bash actions) default to 60 seconds but can be set anywhere from 1 second up to the overall execution timeout. For more information, visit the workflow limitation documentationInclude Full Response
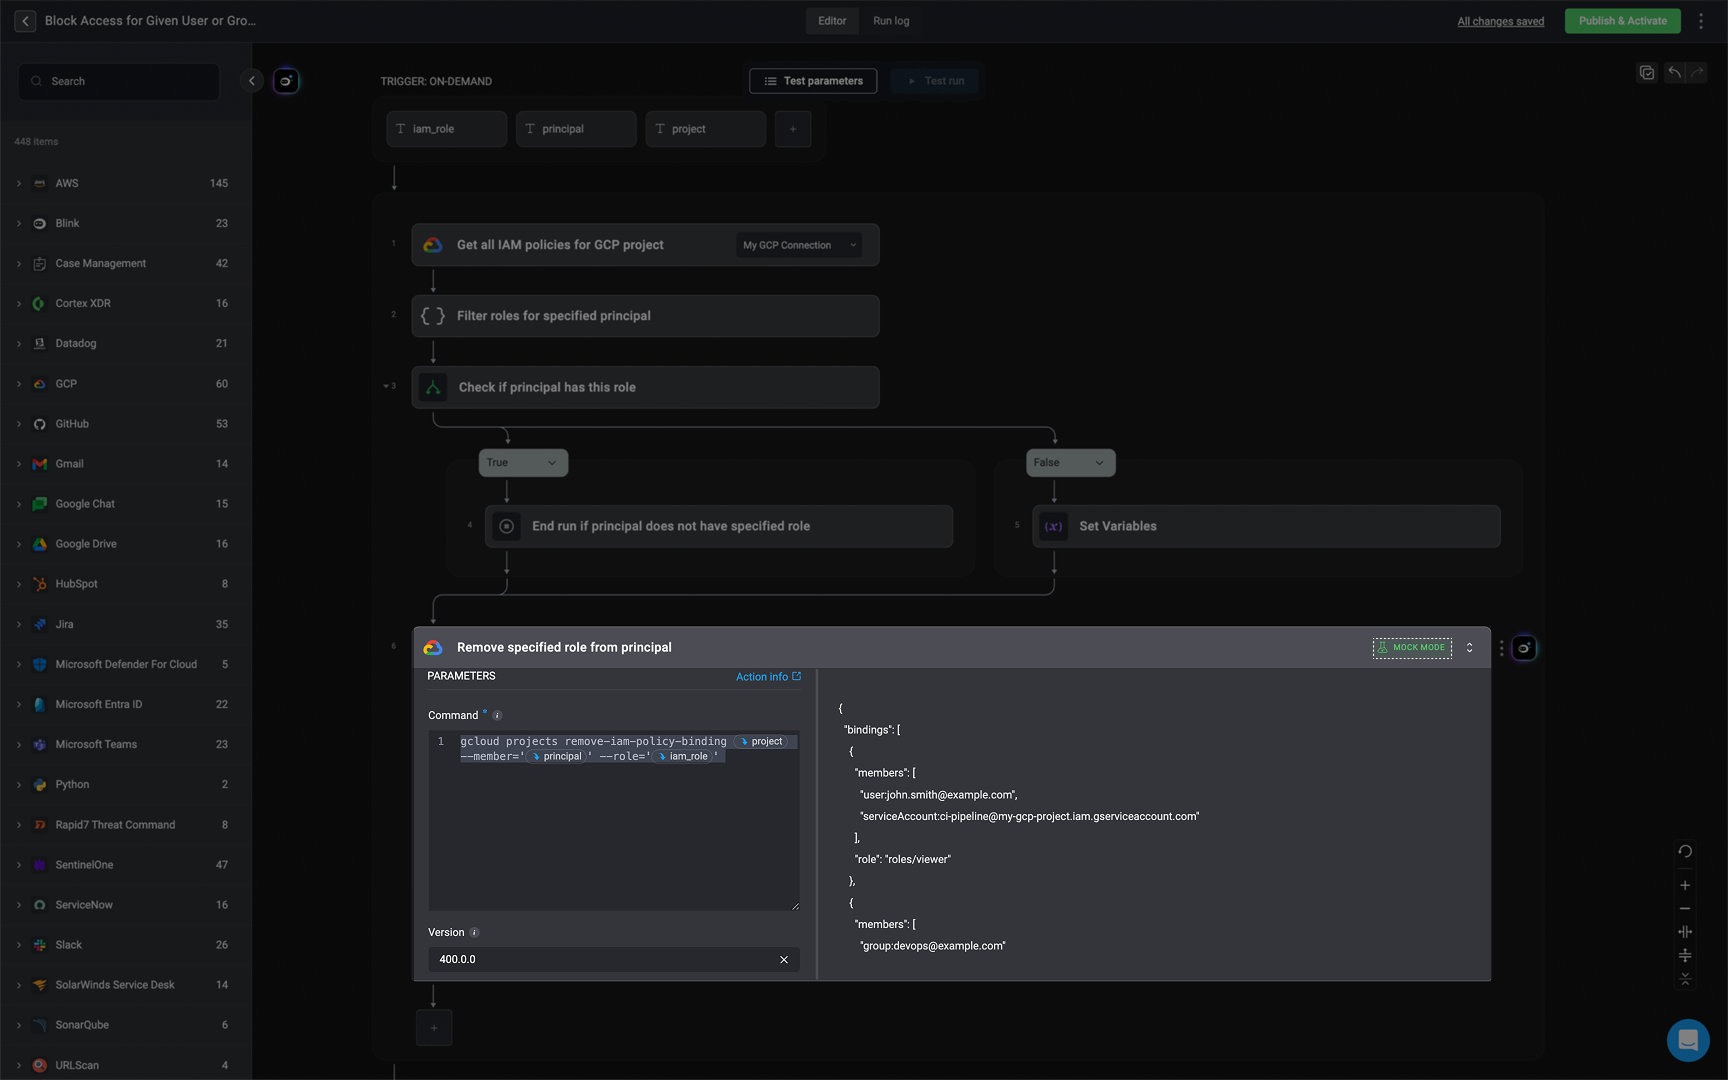
When enabled, the full raw response from the integration or action (including headers, metadata, and status codes) is included in the step output. This is useful if you need to access detailed response information beyond just the data payload.Disable Step
Skips this step during workflow execution. Use this setting when you want to temporarily remove a step from running without deleting or modifying it.Discard Output
If enabled, the step’s output will be permanently discarded after the workflow runs. This means the data will not be saved in the workflow’s run log, step output, or database. Ideal for steps that handle sensitive or temporary data that shouldn’t be stored.Save output to file
Enables saving the step’s output to a file that can be used in later steps. After enabling this option, you’ll need to provide an Output File Identifier to reference the file in subsequent steps.Error Handling
Error Handling
Continue on Error
Allows the workflow to continue running even if this step fails. The step’s failure will be logged, but it won’t stop the execution of the remaining steps.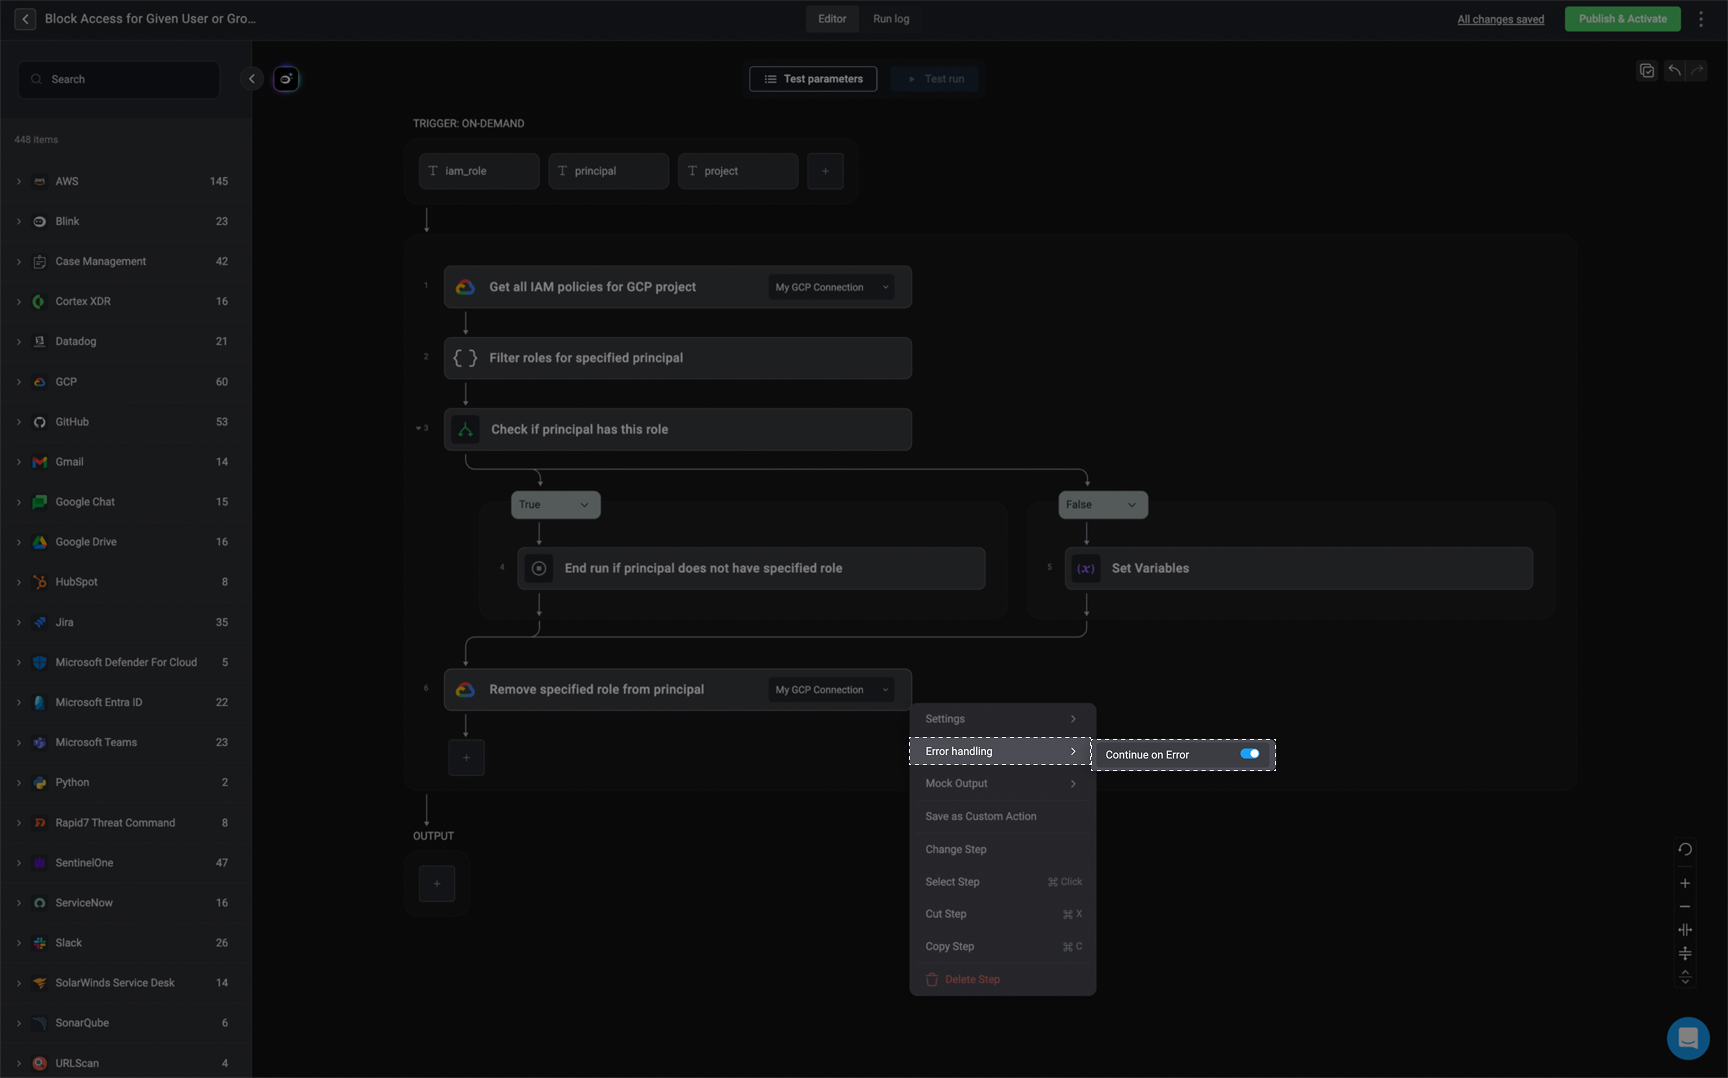
Retry
Interaction Between Step-Level Timeout and Retry Mechanism
The step-level timeout and the retry mechanism operate independently, and it is important to understand how they behave in the workflow engine:- Step Timeout is enforced by the engine itself. It measures the time from when a step first begins execution, and it doesn’t reset or adjust based on retries. Once the timeout is reached, the engine considers the step as failed — regardless of how many retry attempts have occurred.
- Retry, on the other hand, is typically implemented within the plugin (e.g., an HTTP plugin). This means:
- The plugin manages its own retry logic — including how many times it retries, how long it waits between attempts, etc.
- The engine is not aware of these internal retries; from the engine’s perspective, the plugin is still “executing.”
Configuring the Retry Mechanism
Navigate to the step settings
On the right-hand side of your selected step, click the icon.
Enable Retry Option
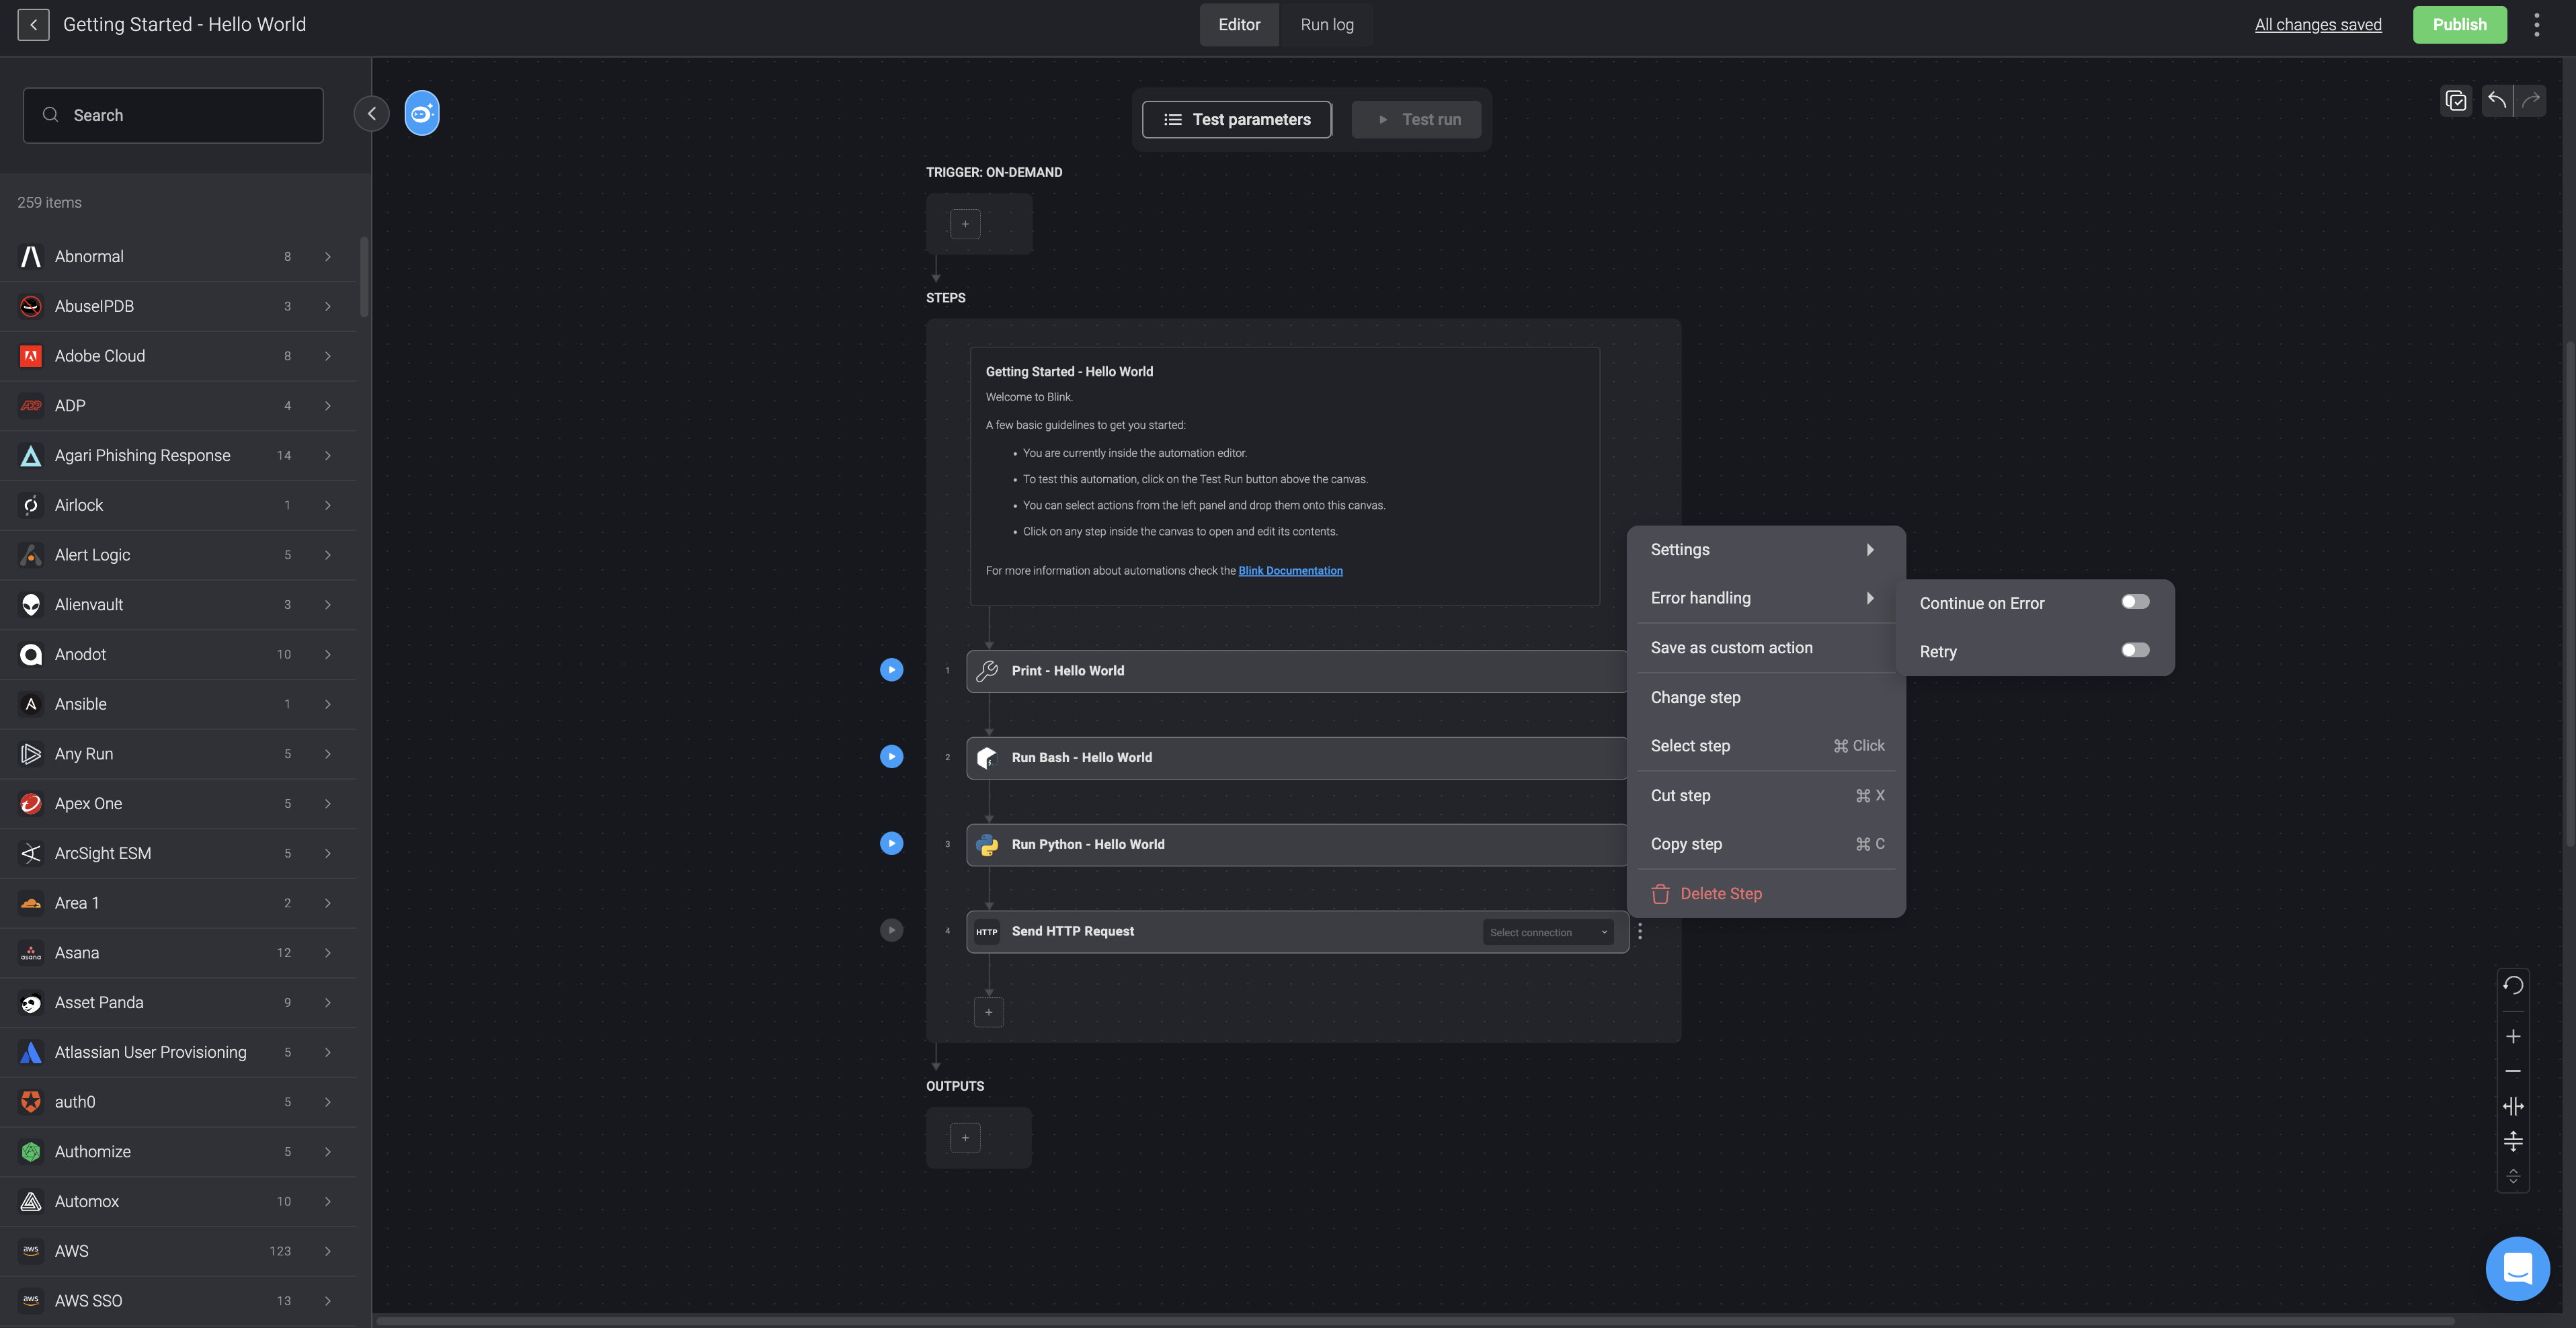
Configure Retry Parameters
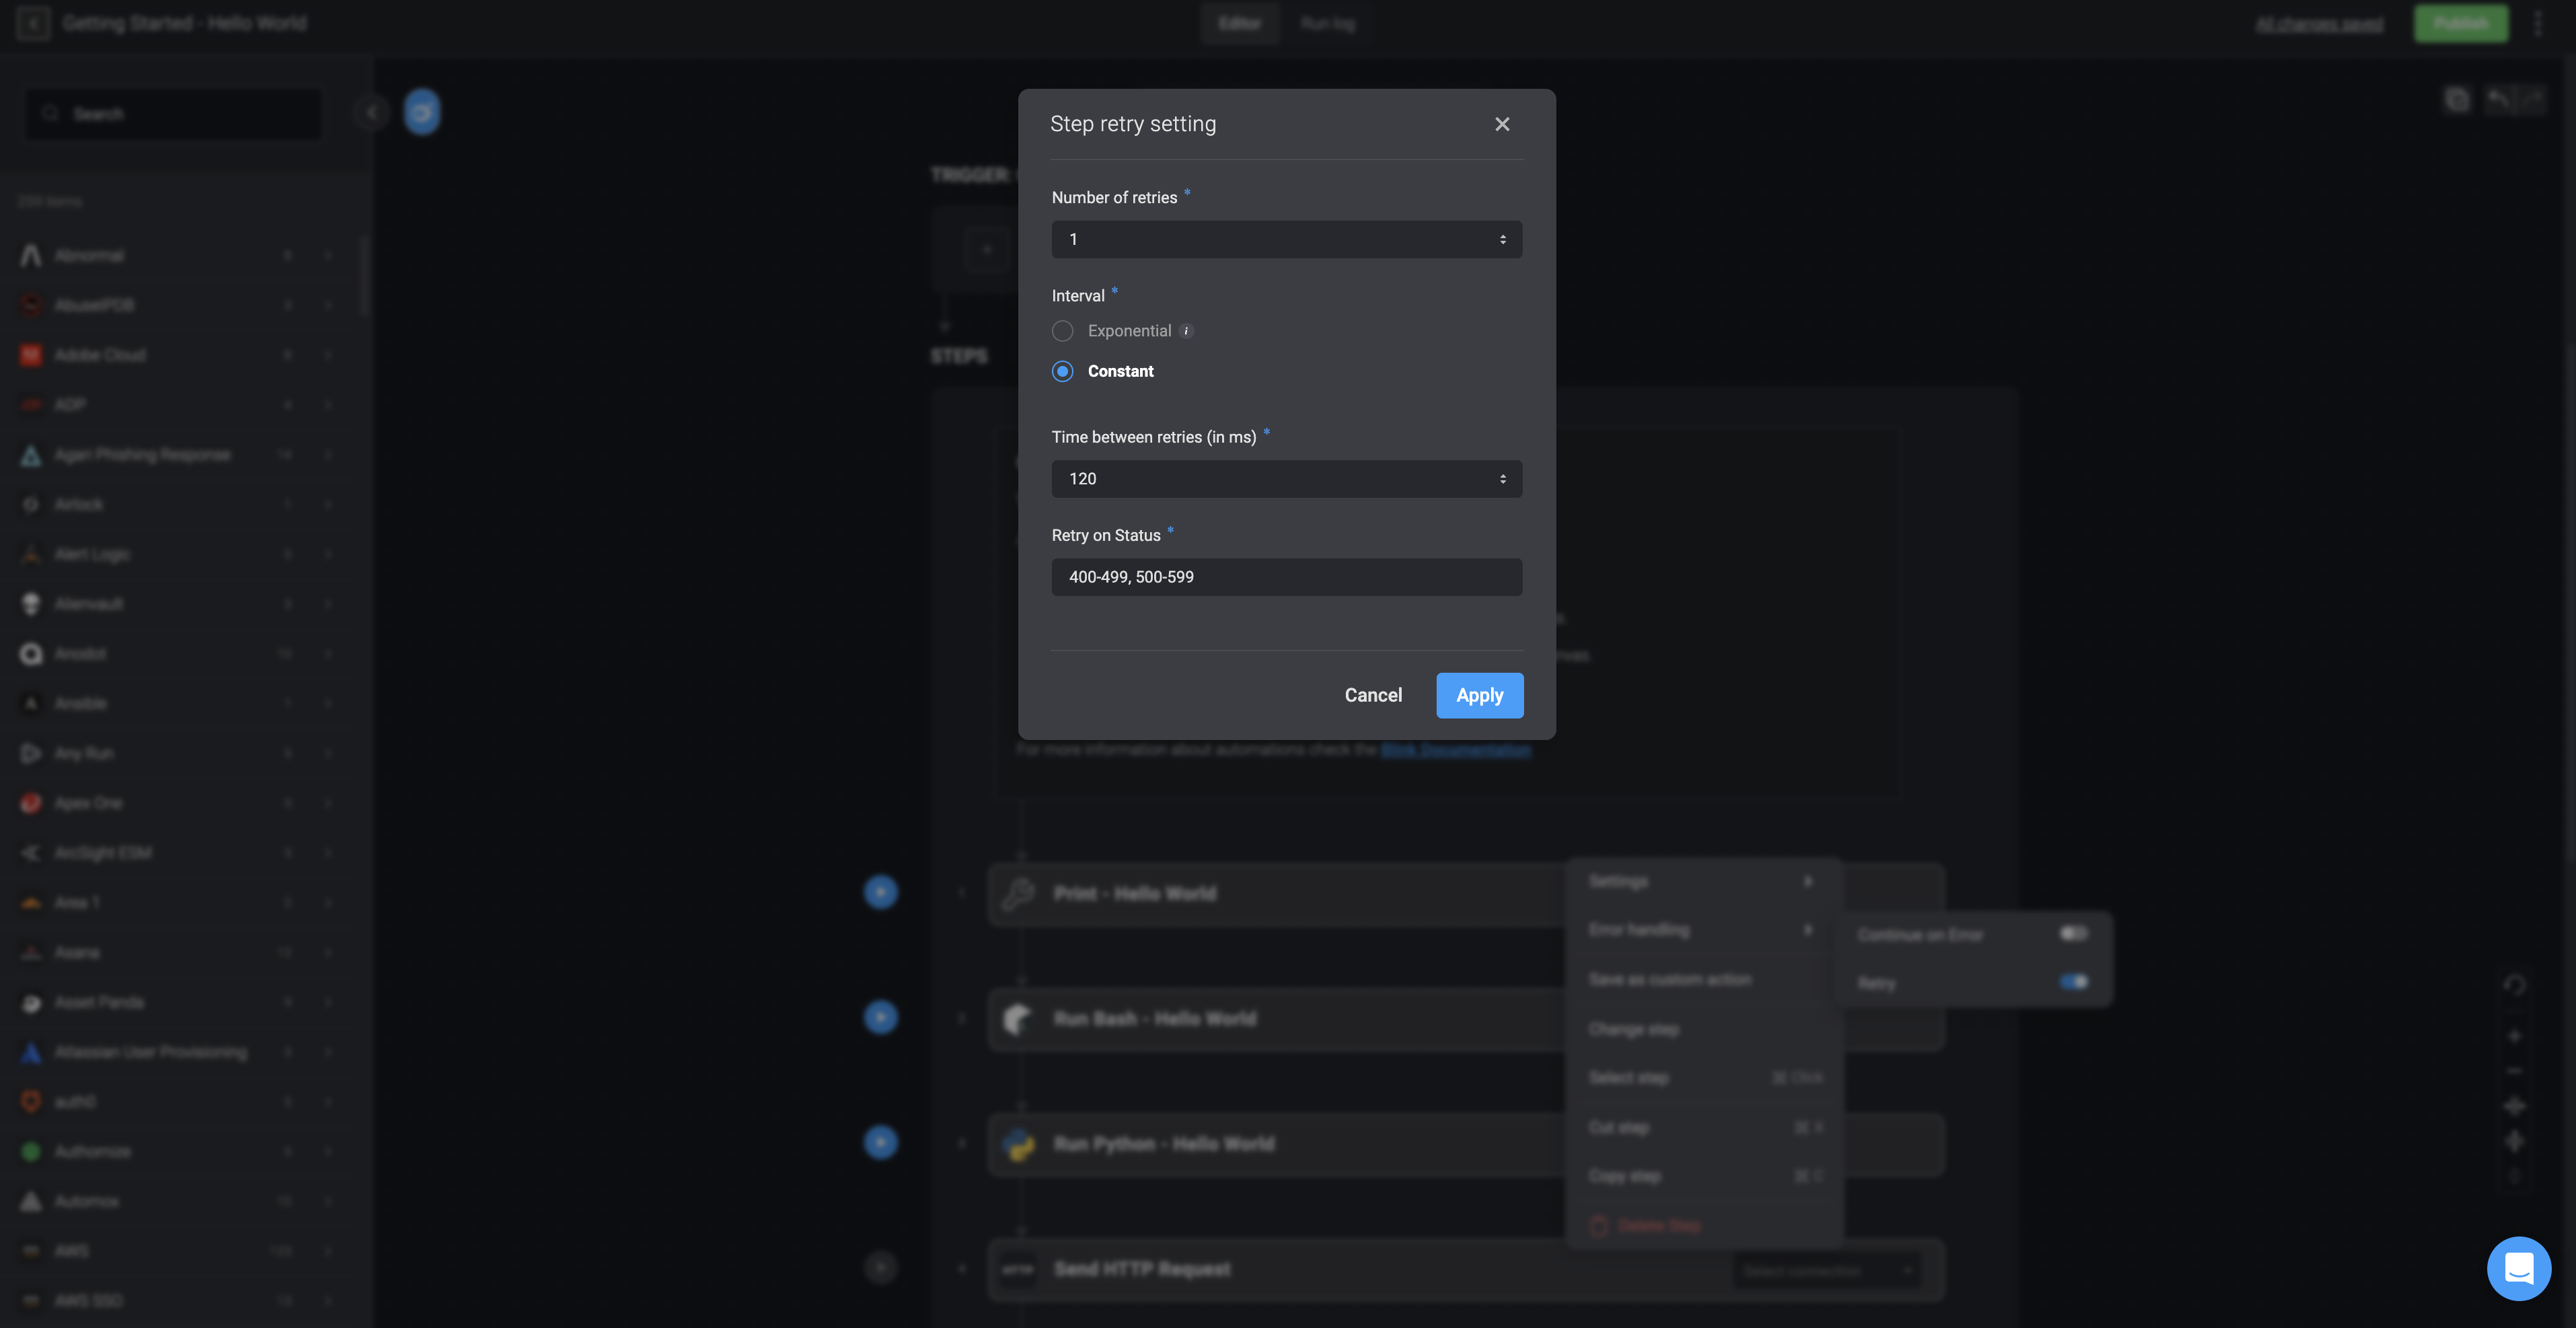
Apply Settings
Mock Output
Mock Output
Overview
The Mock Output feature allows users to simulate the response of a workflow action without executing it against live data. This is especially helpful during development and testing, as it allows you to safely validate workflow logic and downstream behavior without relying on live systems or external APIs. It also speeds up iteration and makes debugging easier.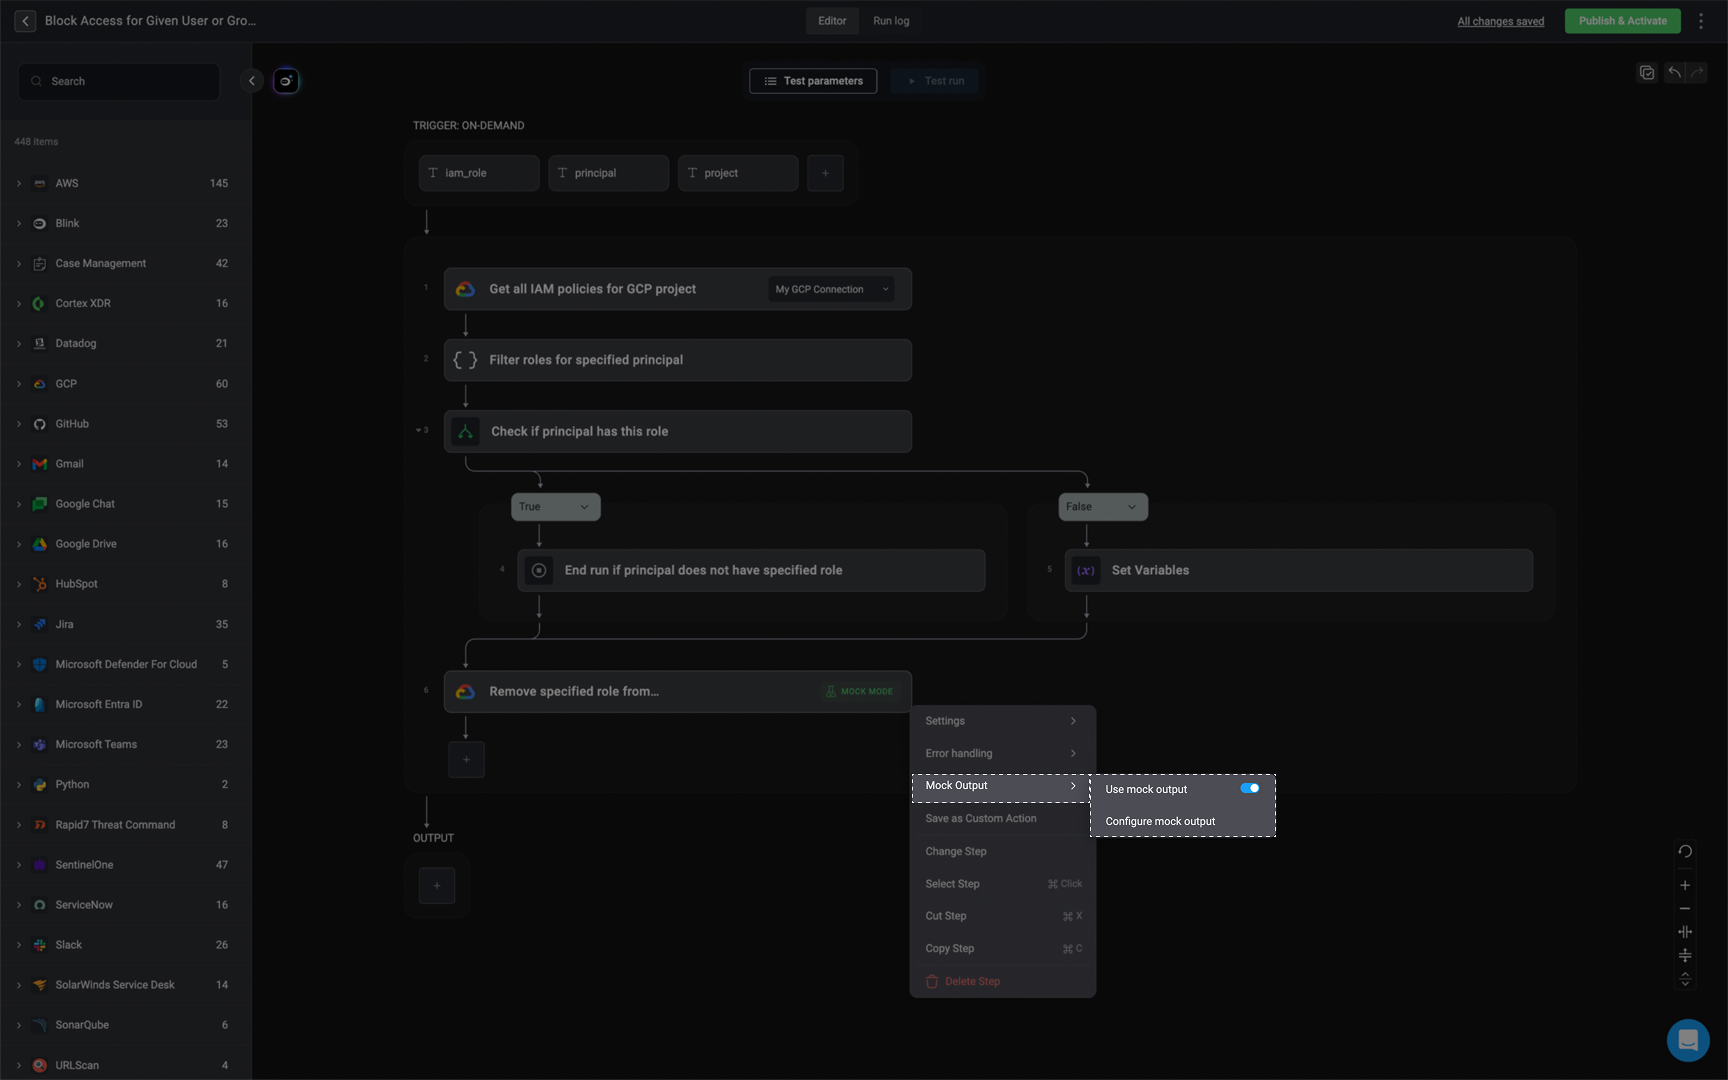
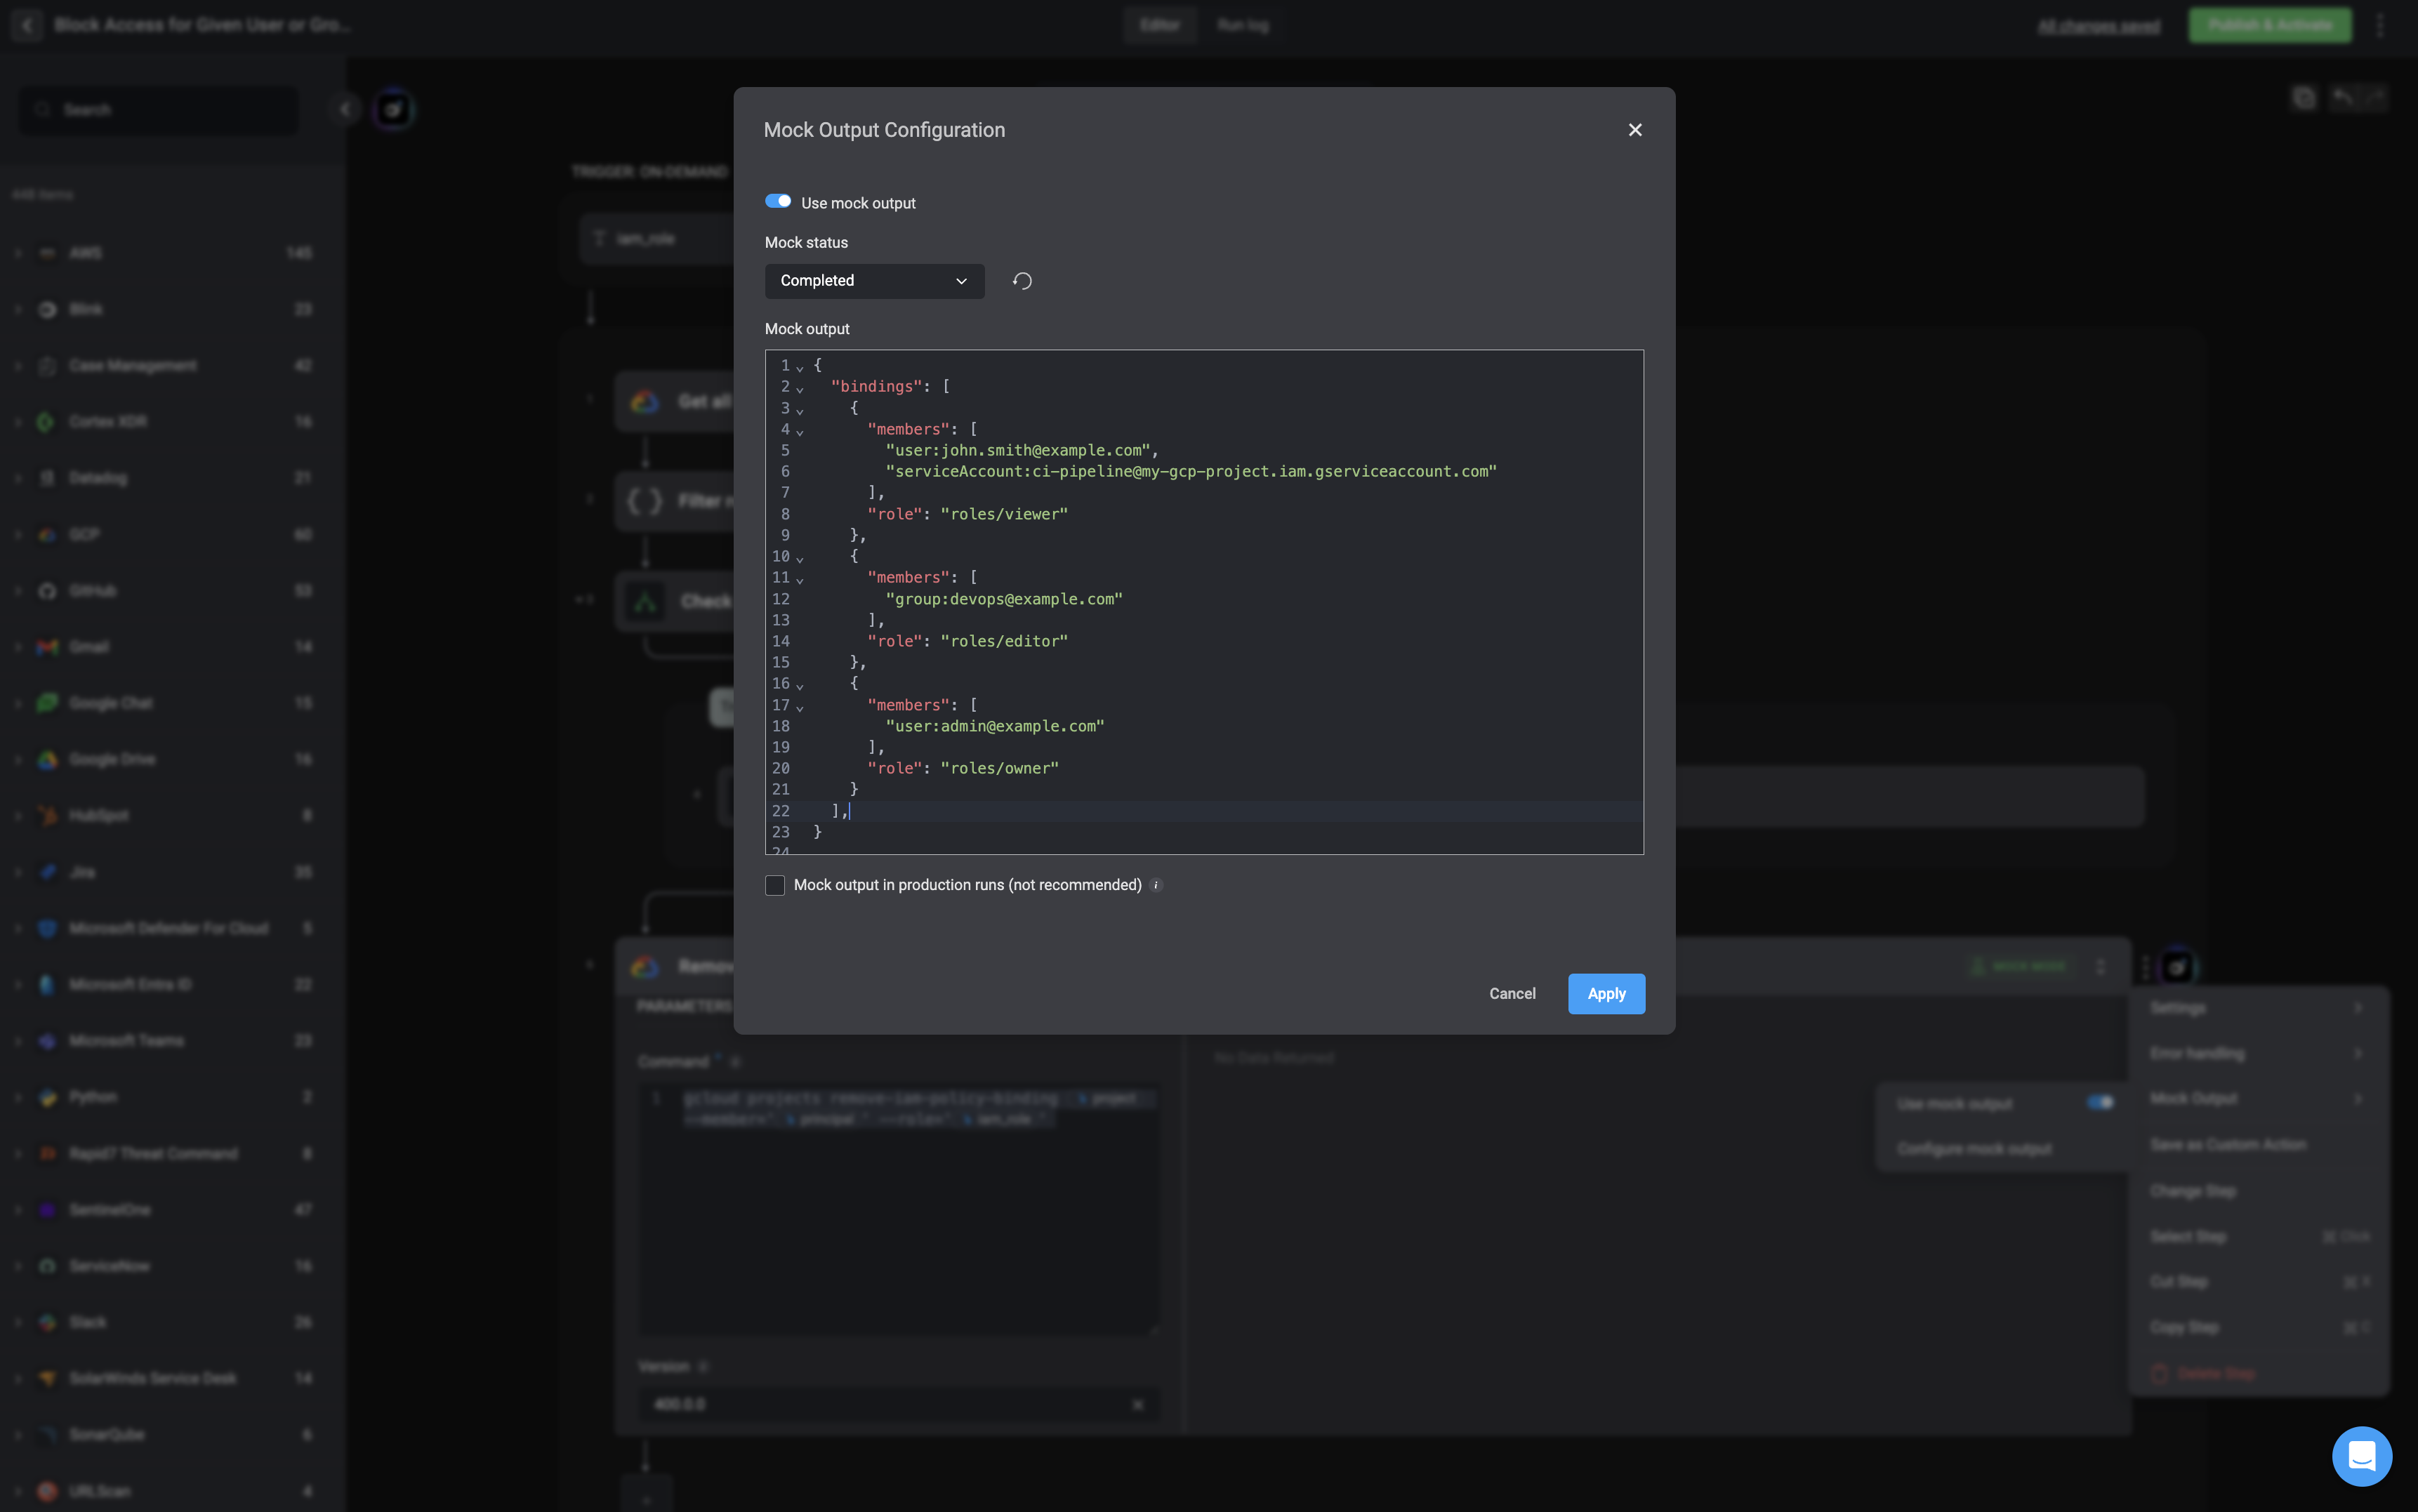
Configure the Mock Output
To set up a mock output for a workflow step, click the Configure Mock Output option. This will open a configuration popup where you can define the simulated response for the step’s output.Within the mock output configuration popup, you can:- Enter your mock output in the provided text field. This should match the expected format of the step’s real response
- Set the mock status to reflect how the step should behave during testing:
Failed,Completed, orTimed Out. - Enable or disable the mock output using the toggle switch. When enabled, the workflow will use this mock response instead of executing the actual action.
- Reset the mock output at any time by clicking the button.
- Mock output in production runs(not recommended) - If enabled, this step will always use the configured mock output, even in production runs. This may cause workflows to process fake data. Recommended only for testing.
Mock output configurations are saved with the workflow and can be enabled or disabled at any time by toggling the ‘enable mock data’ option in the step’s settings.
Run Logs with Mock Data
Users will be able to view historical step executions in the ‘Run Log’ tabs and reuse those outputs as mock data, further enhancing development speed and flexibility.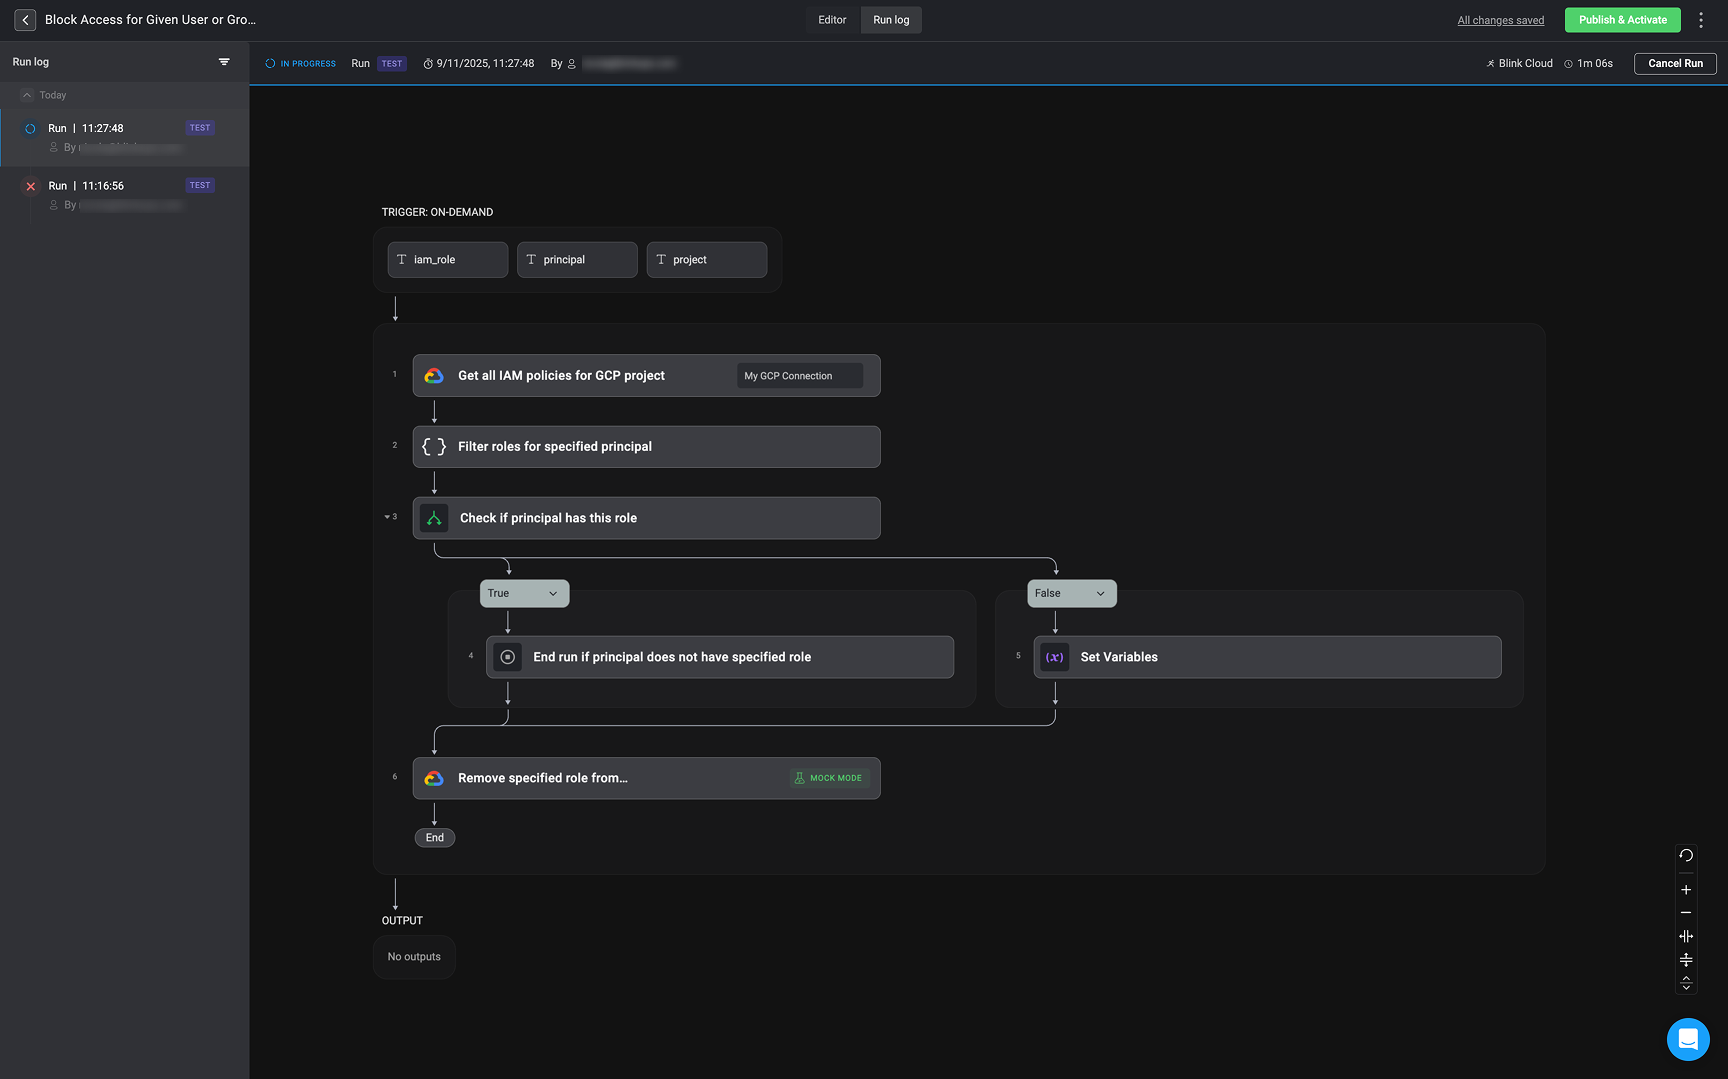
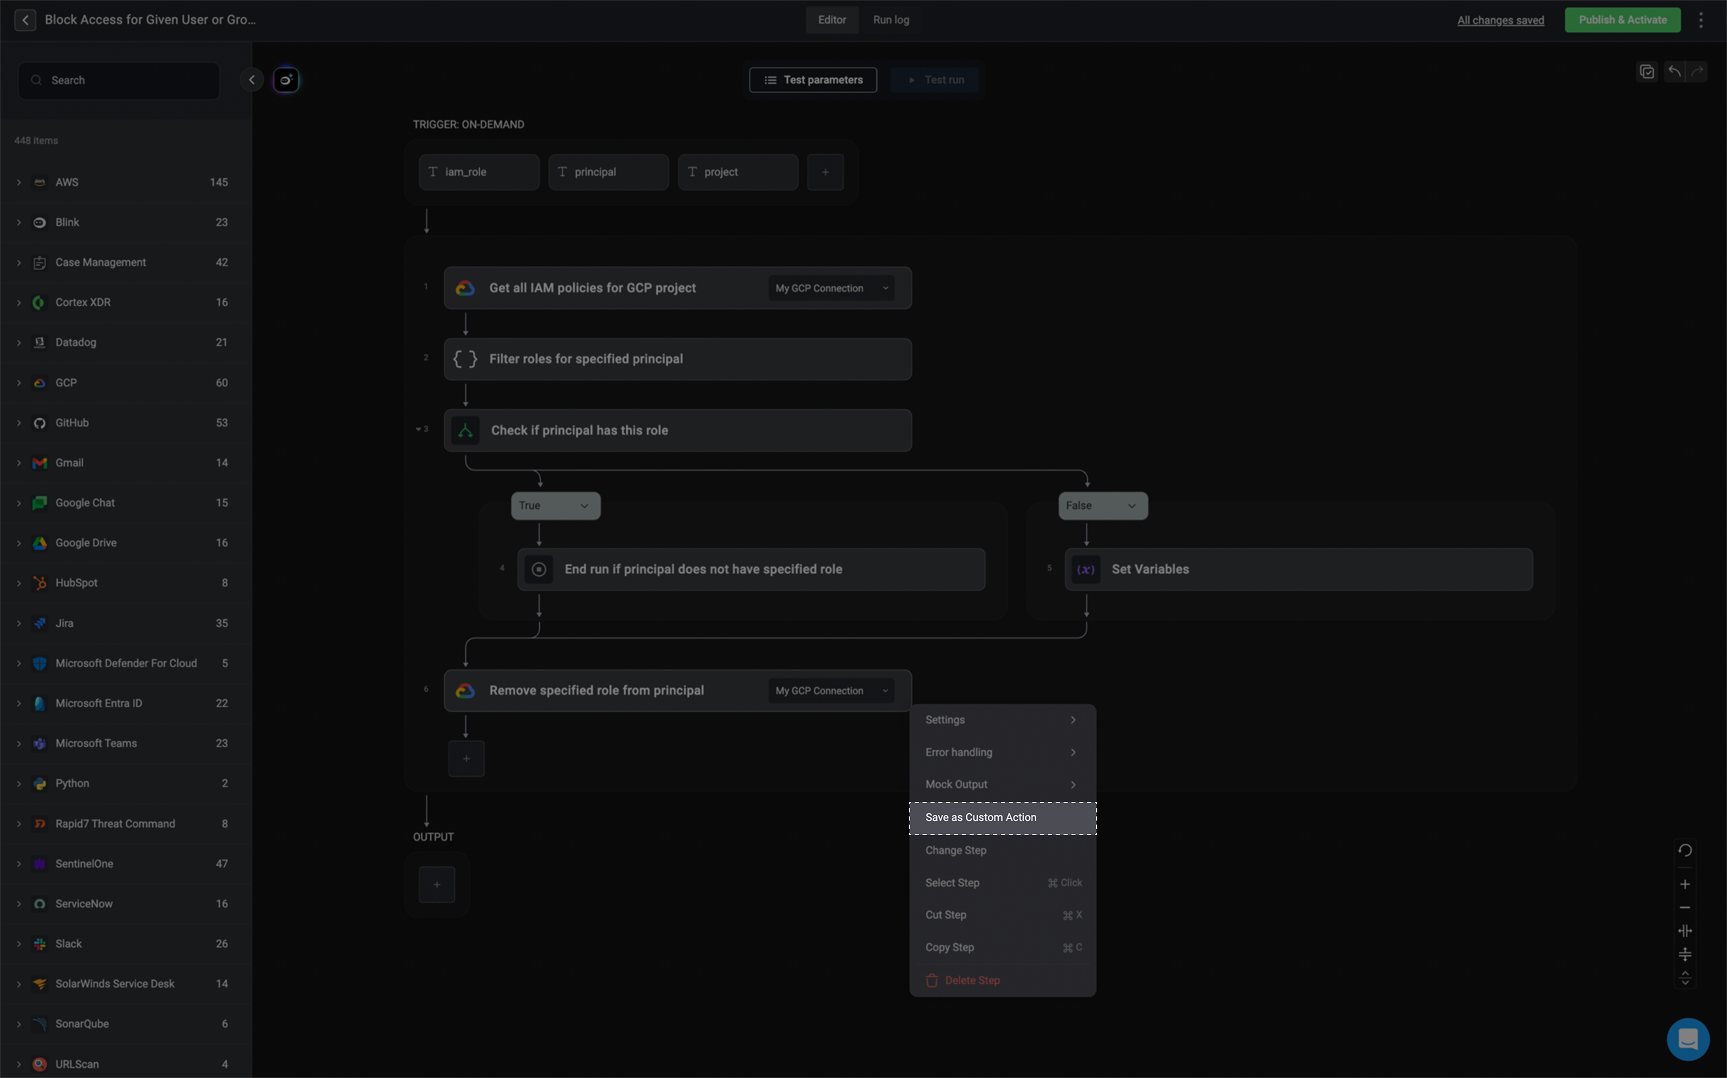
Save as Custom Action
Save as Custom Action
Single Step Actions
Single Step Actions
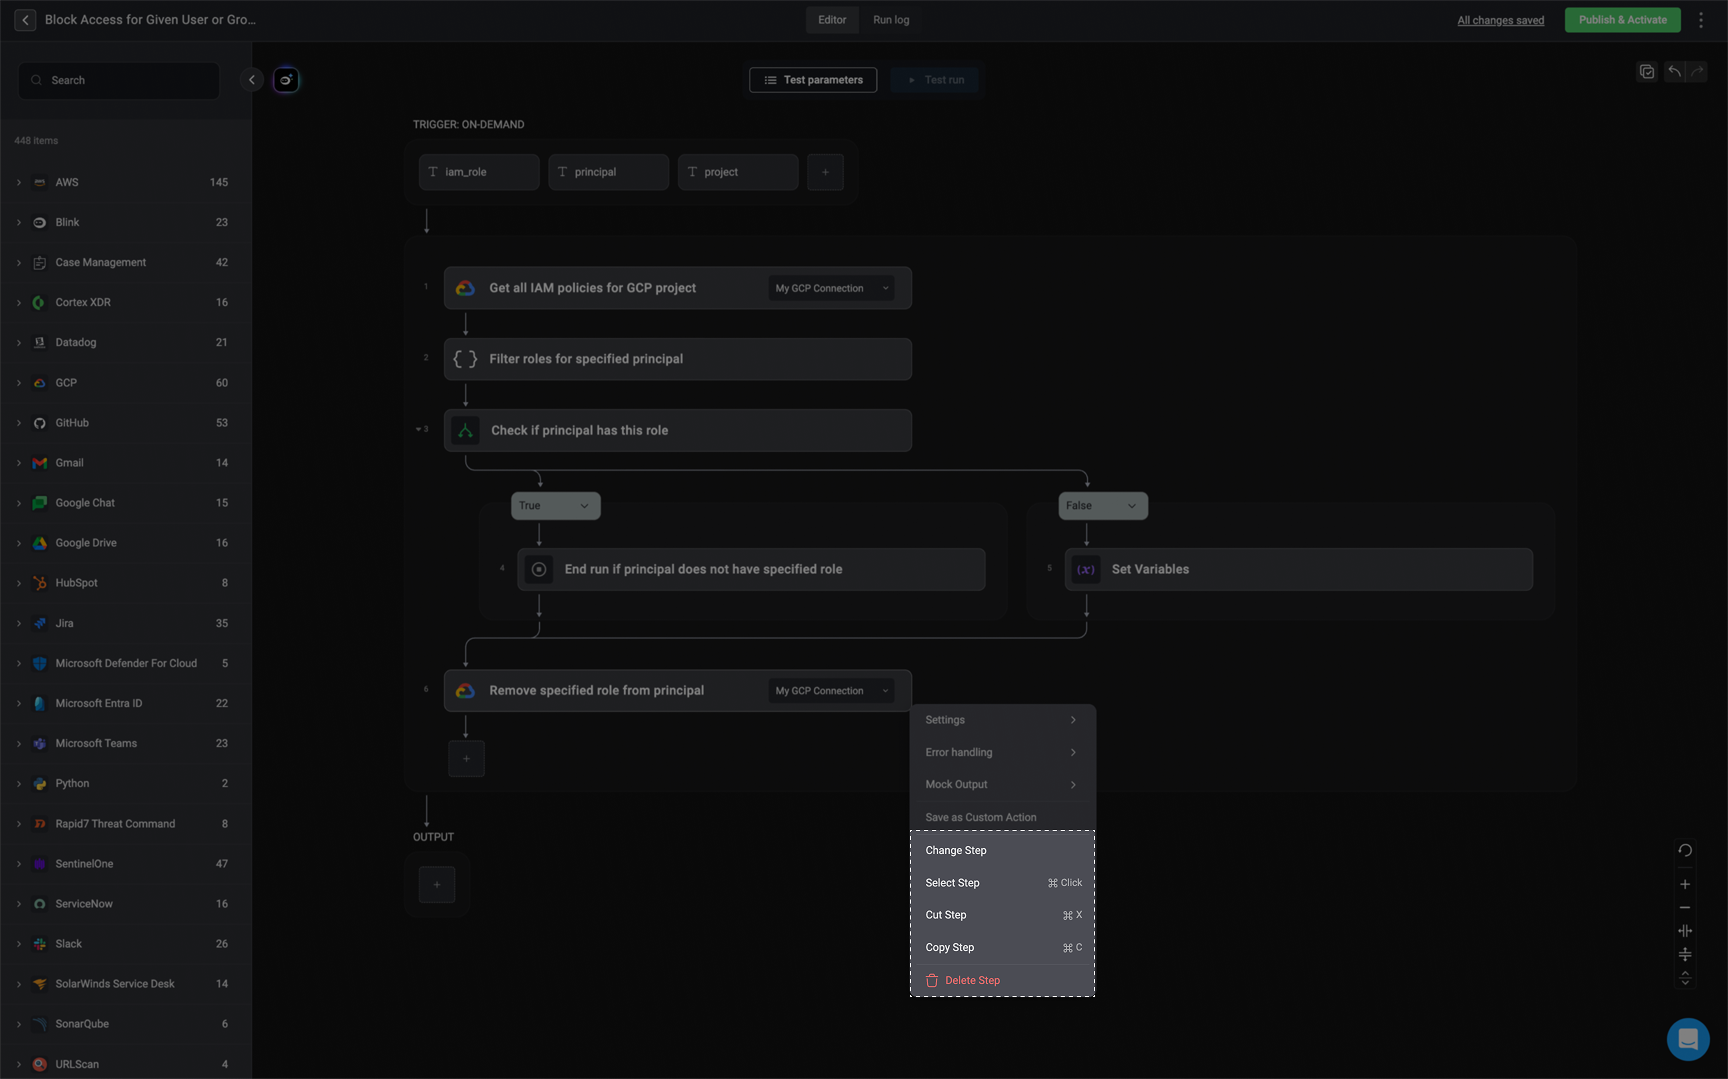
- Change Step- Select a different action for this step.
- Select Step- Selects one or multiple steps.
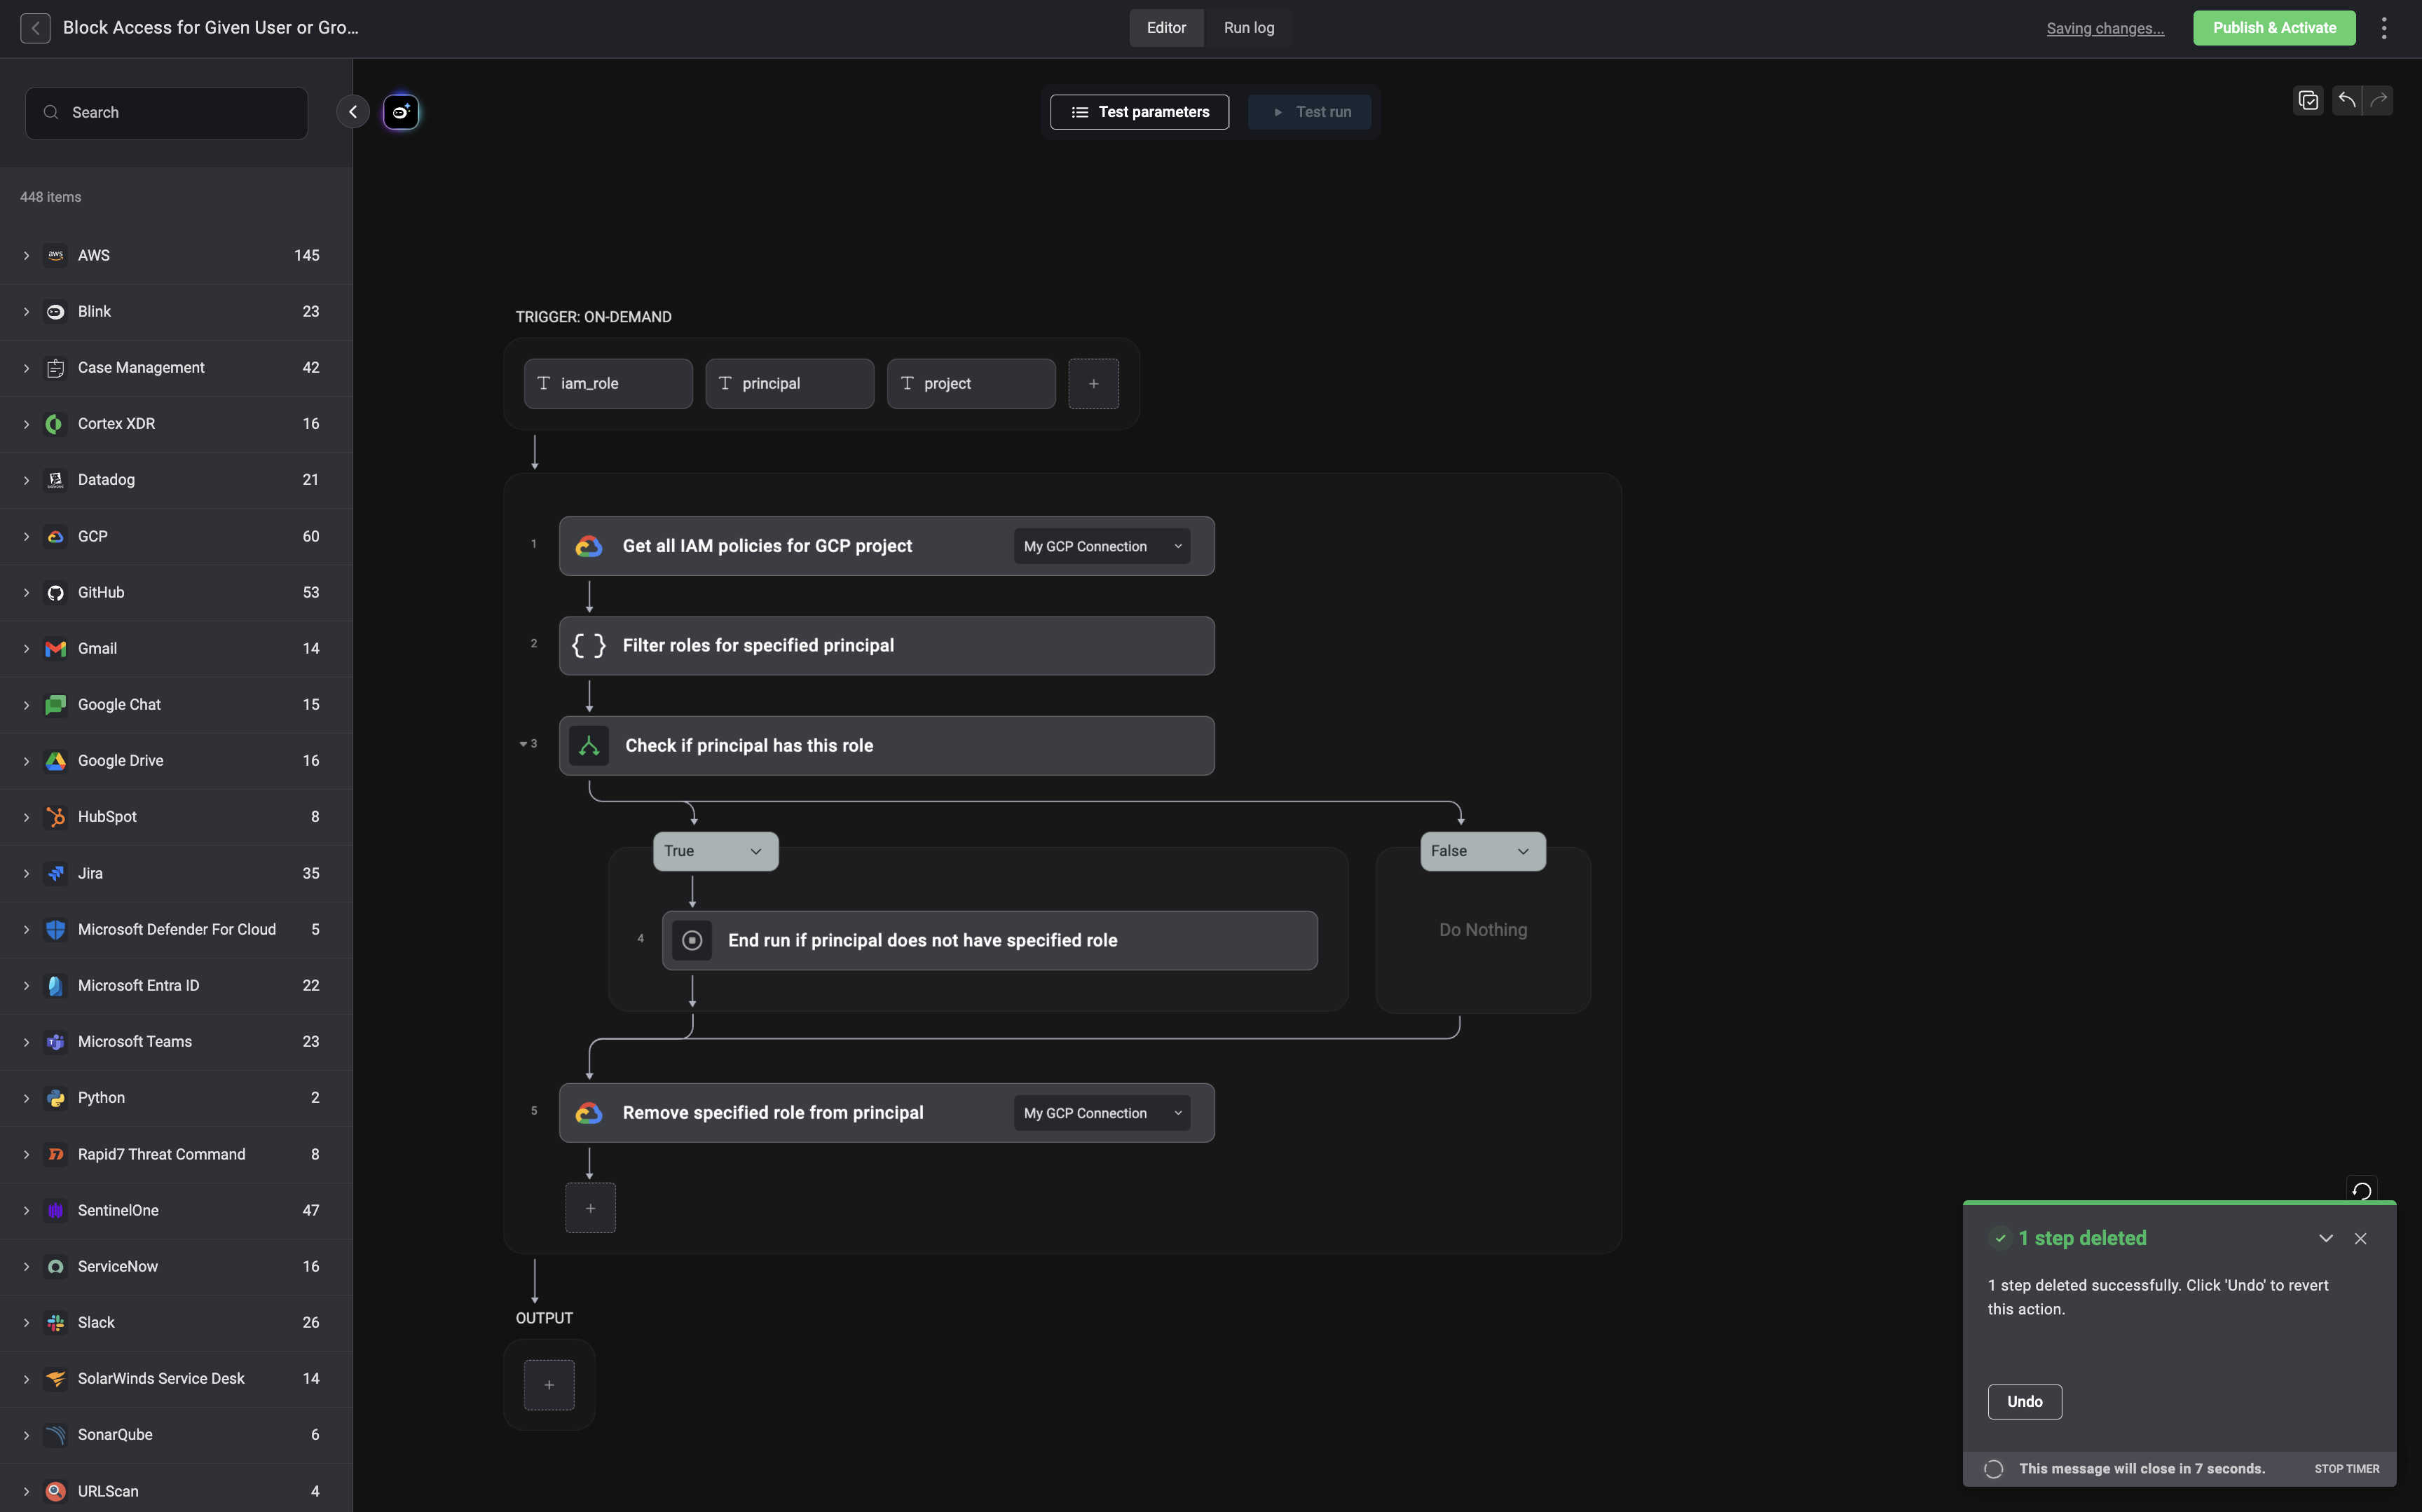
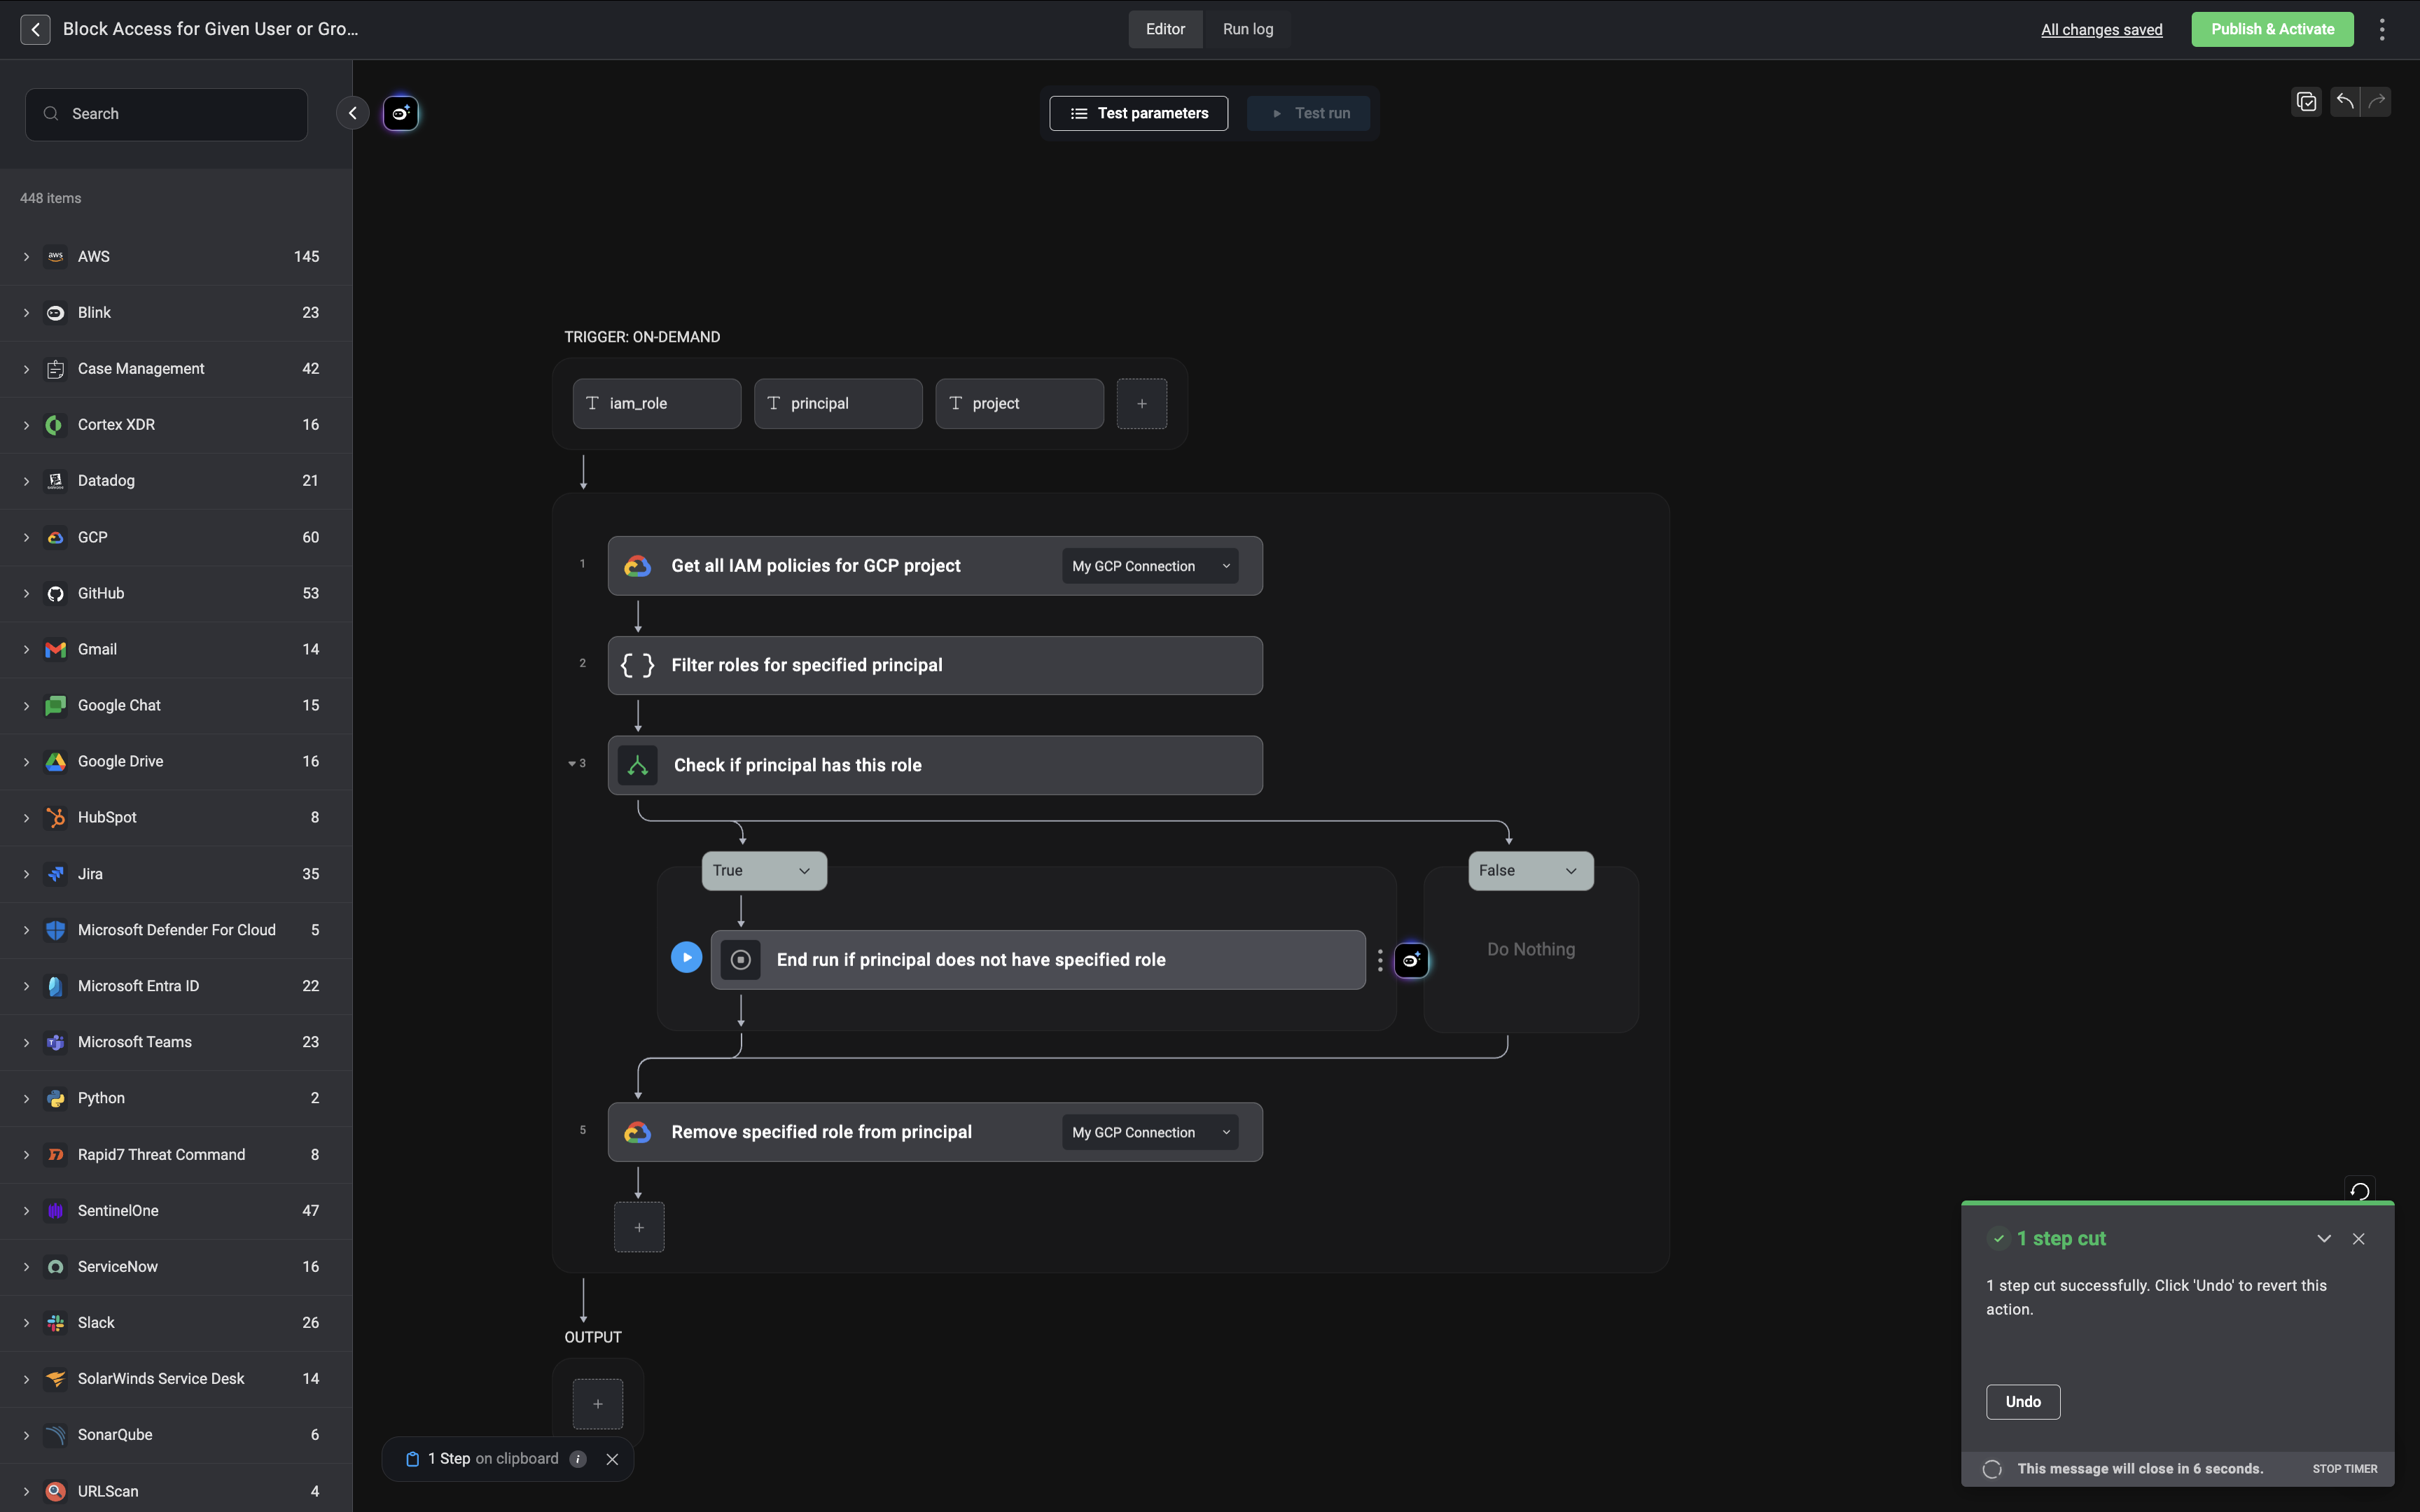
- Cut Step- Cuts the selected step from the workflow.
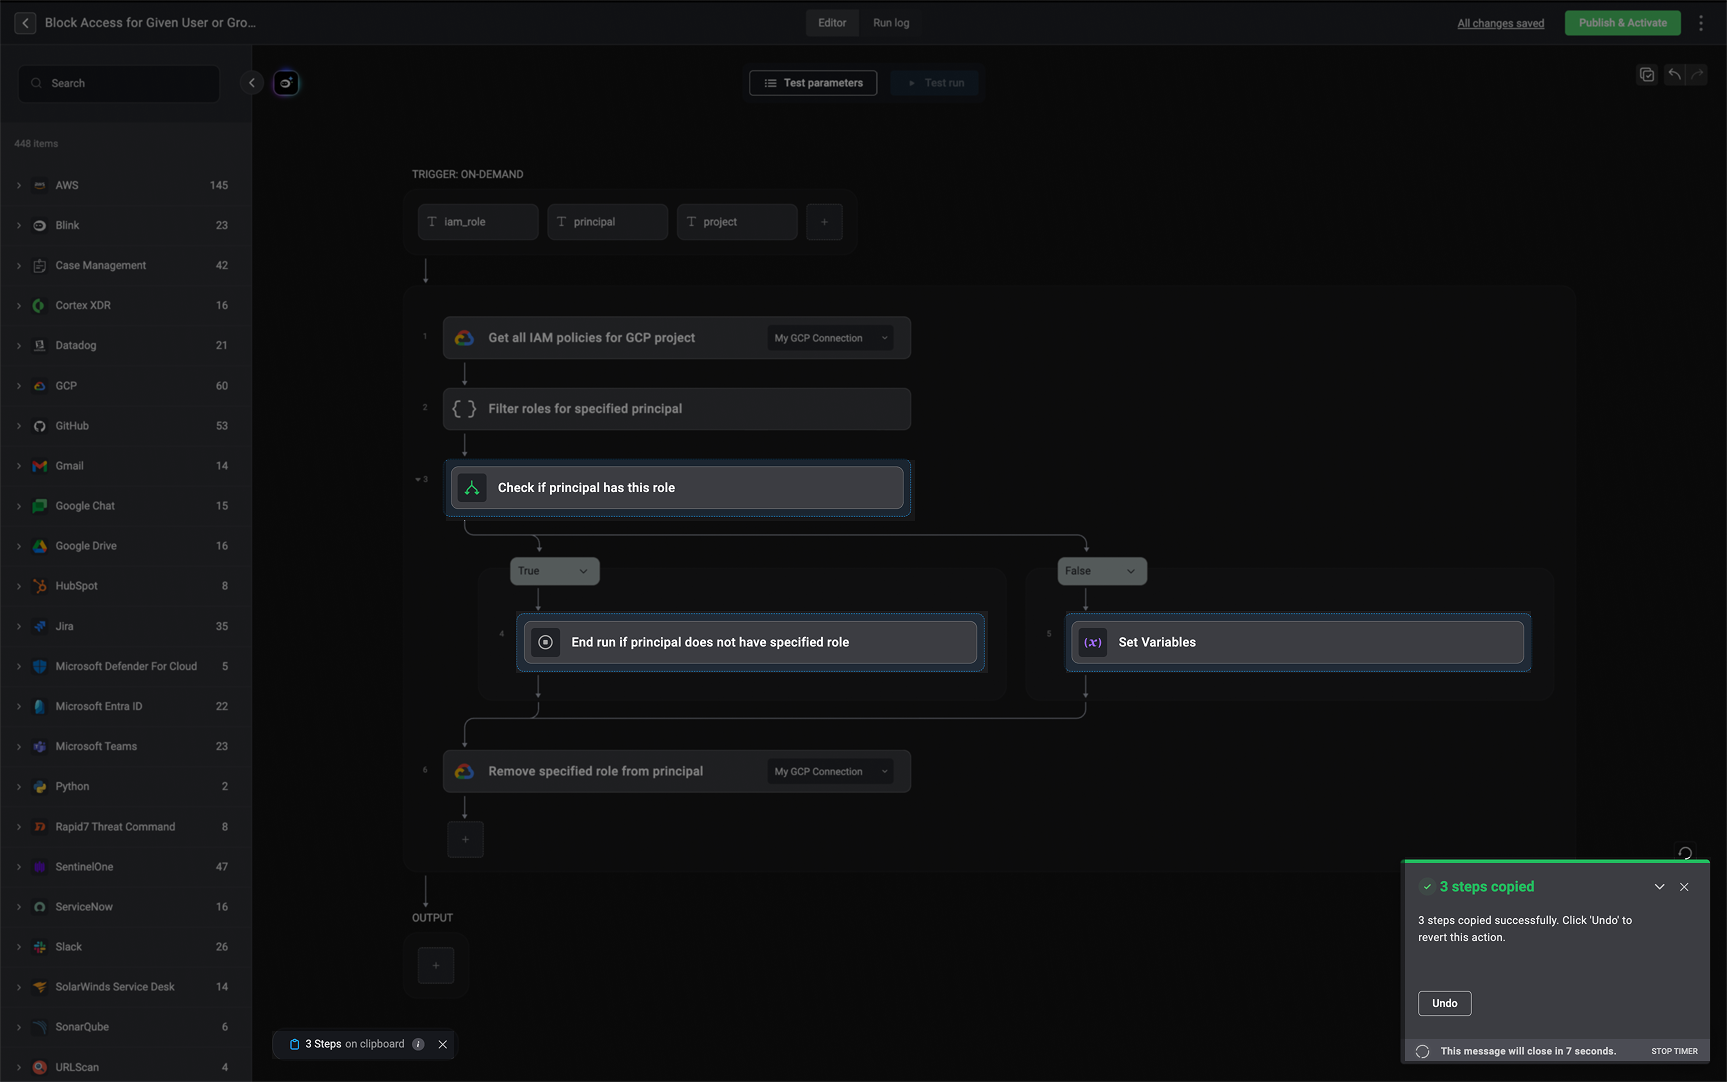
- Copy Step- Copies the selected step.
- Delete Step- Deletes the selected step.
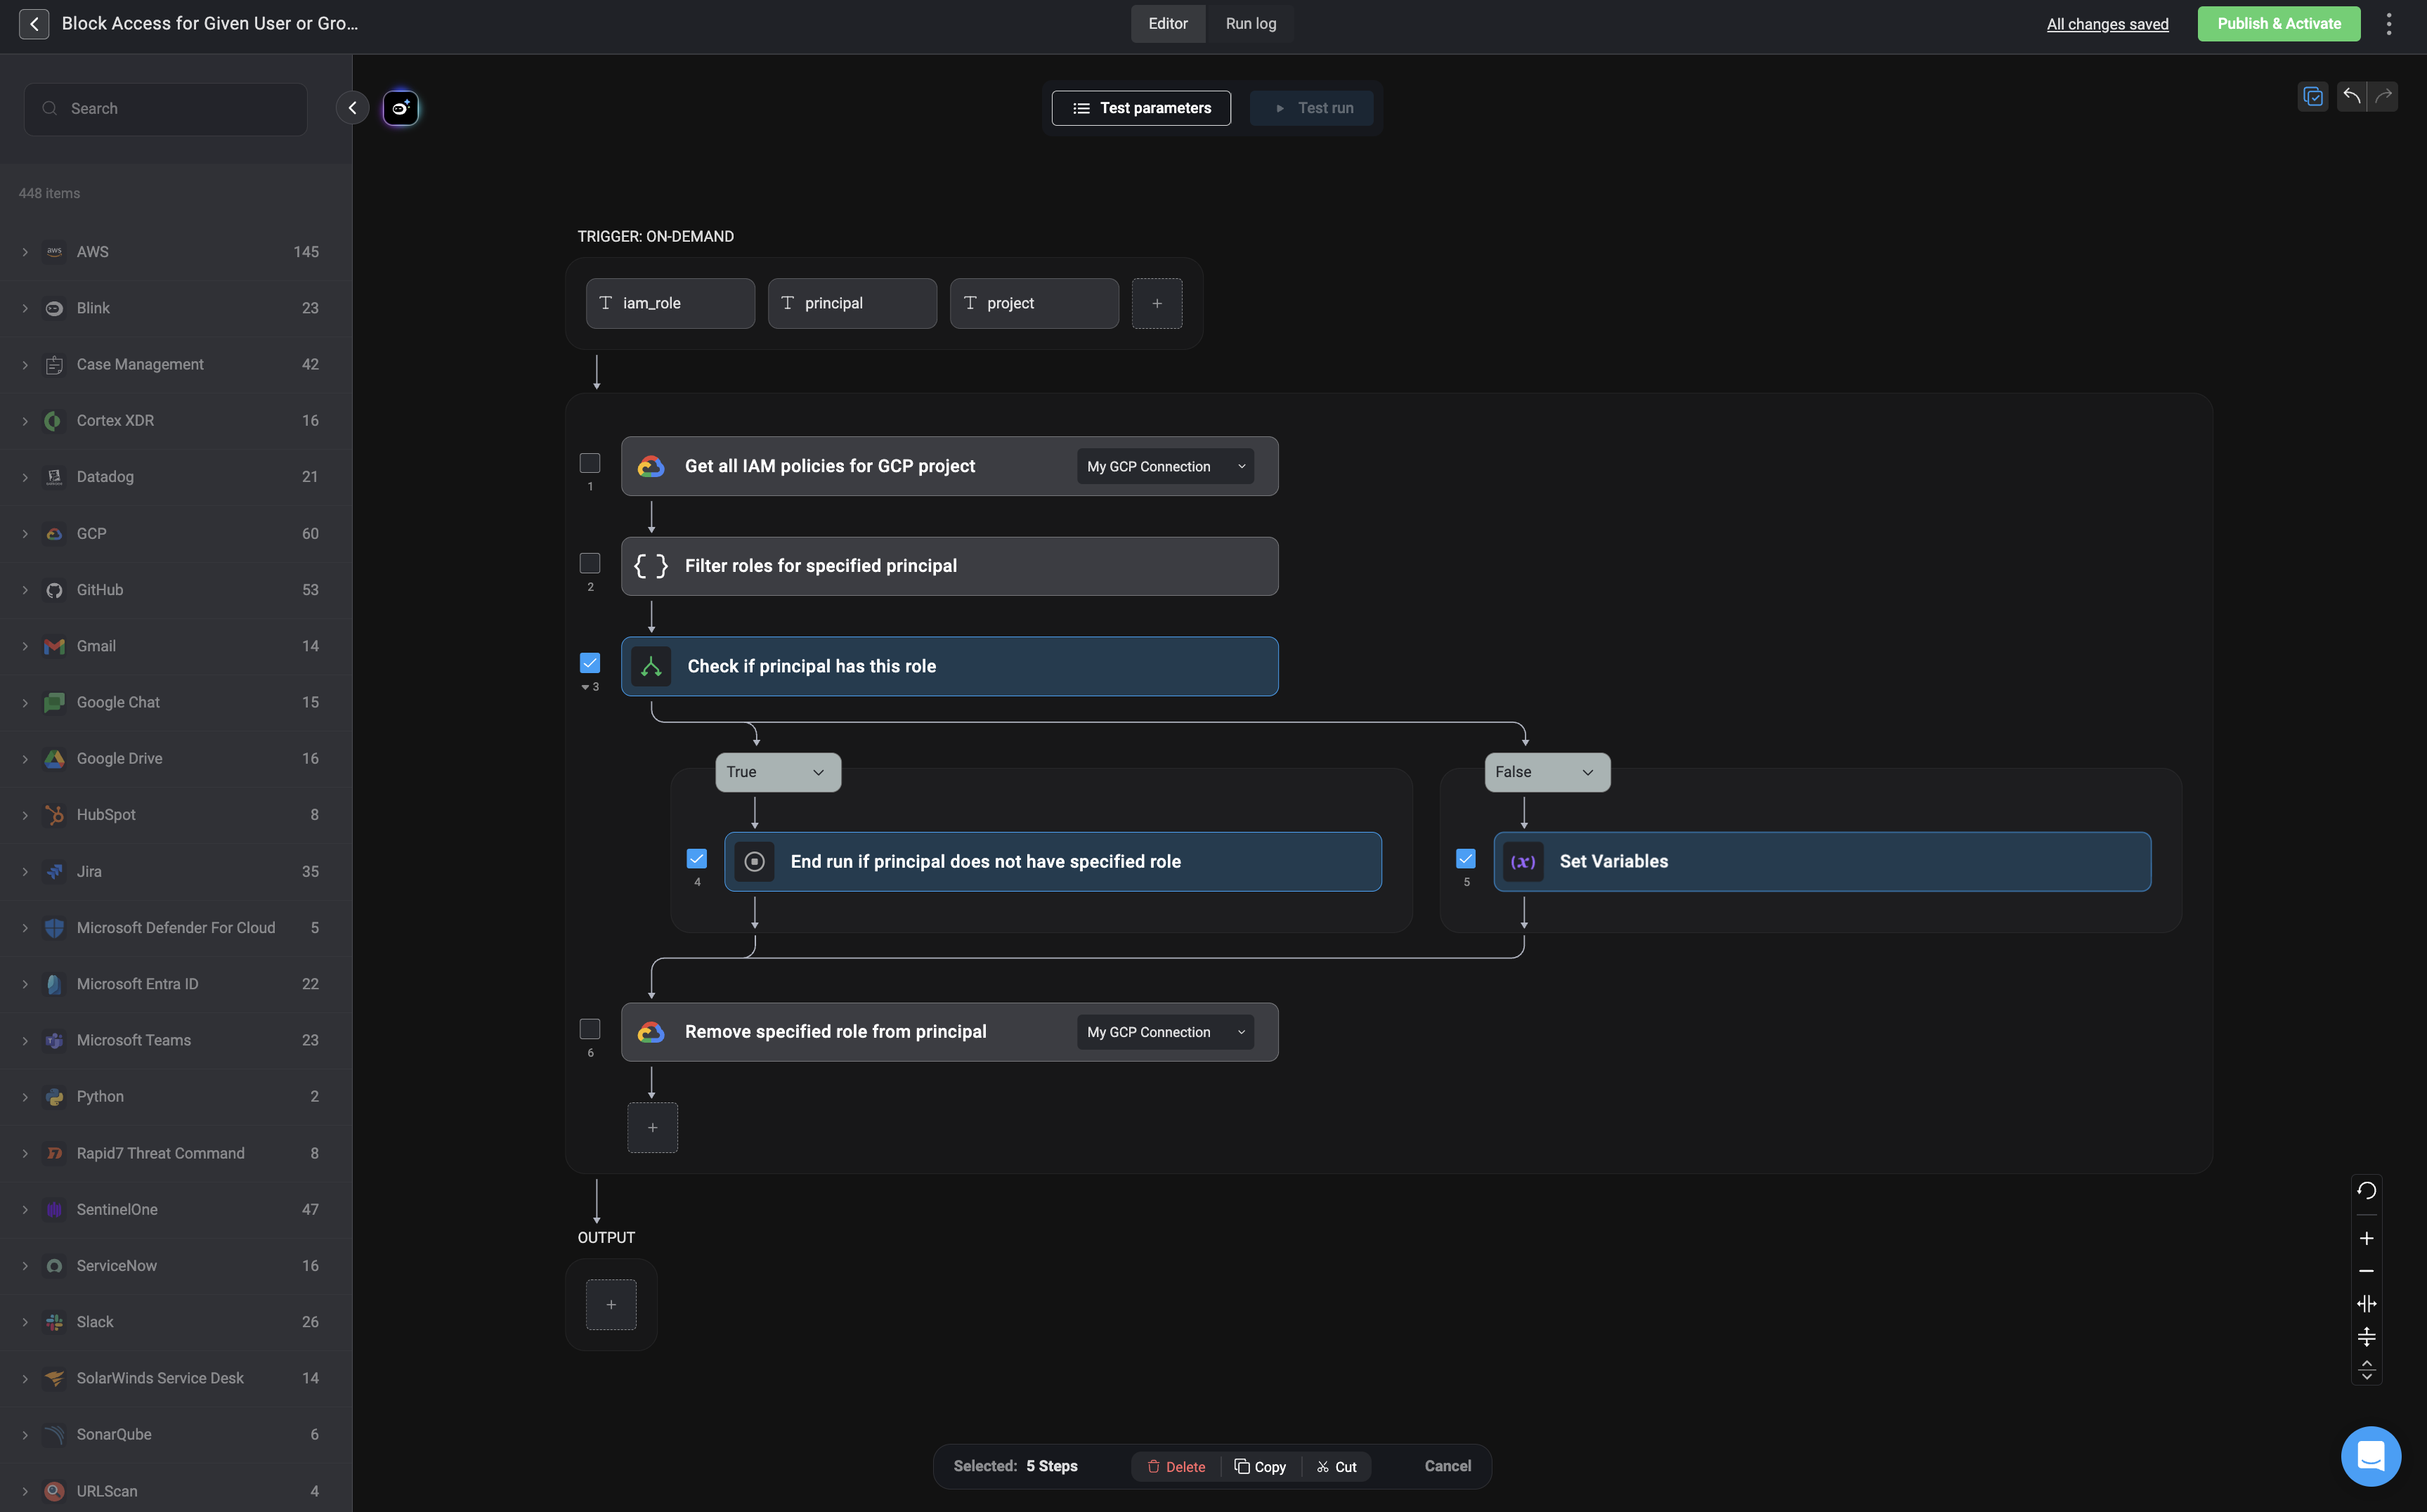
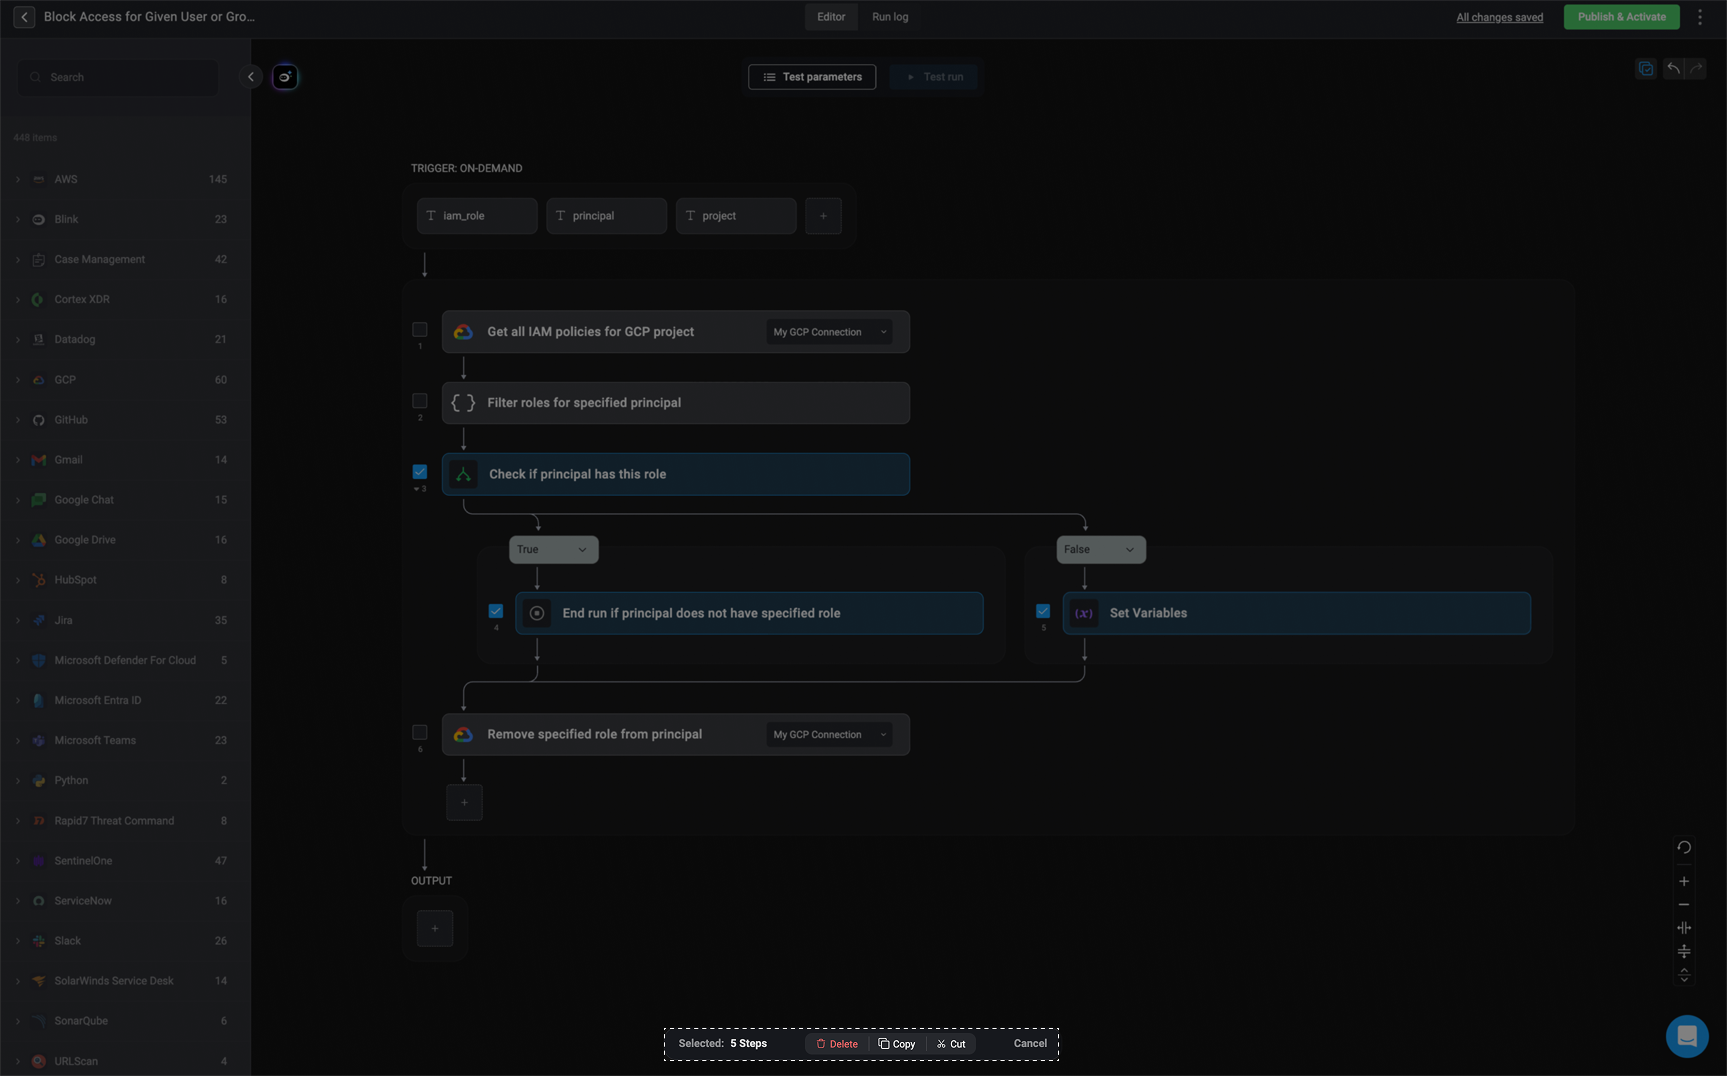
Multiselect Step and Bulk Actions
The ‘Multiselect Step and Bulk Actions’ feature allows you to select multiple steps at once in the Workflow editor and perform bulk actions on the selected steps such as delete, copy and cut as well as dragging the selected steps to a new position.The Delete Bulk Action
The Delete Bulk Action
The Copy Bulk Action
The Copy Bulk Action
- Upon selecting the ‘Copy bulk’ action, the copied steps will be outlined with dots, a visual cue that will stay until you perform one of the actions outlined in the leaving the multi-selection mode.
- You can also paste the copied step(s) into a different Browser tab.
- Copying and pasting a step in a different web browser is only compatible with
Chrome. Other web browsers are not currently supported. - By default, if you try to copy a step containing a “Send HTTP request” action with an invalid link, you will encounter an error and won’t be able to copy the step successfully.
Allow Access Permissions
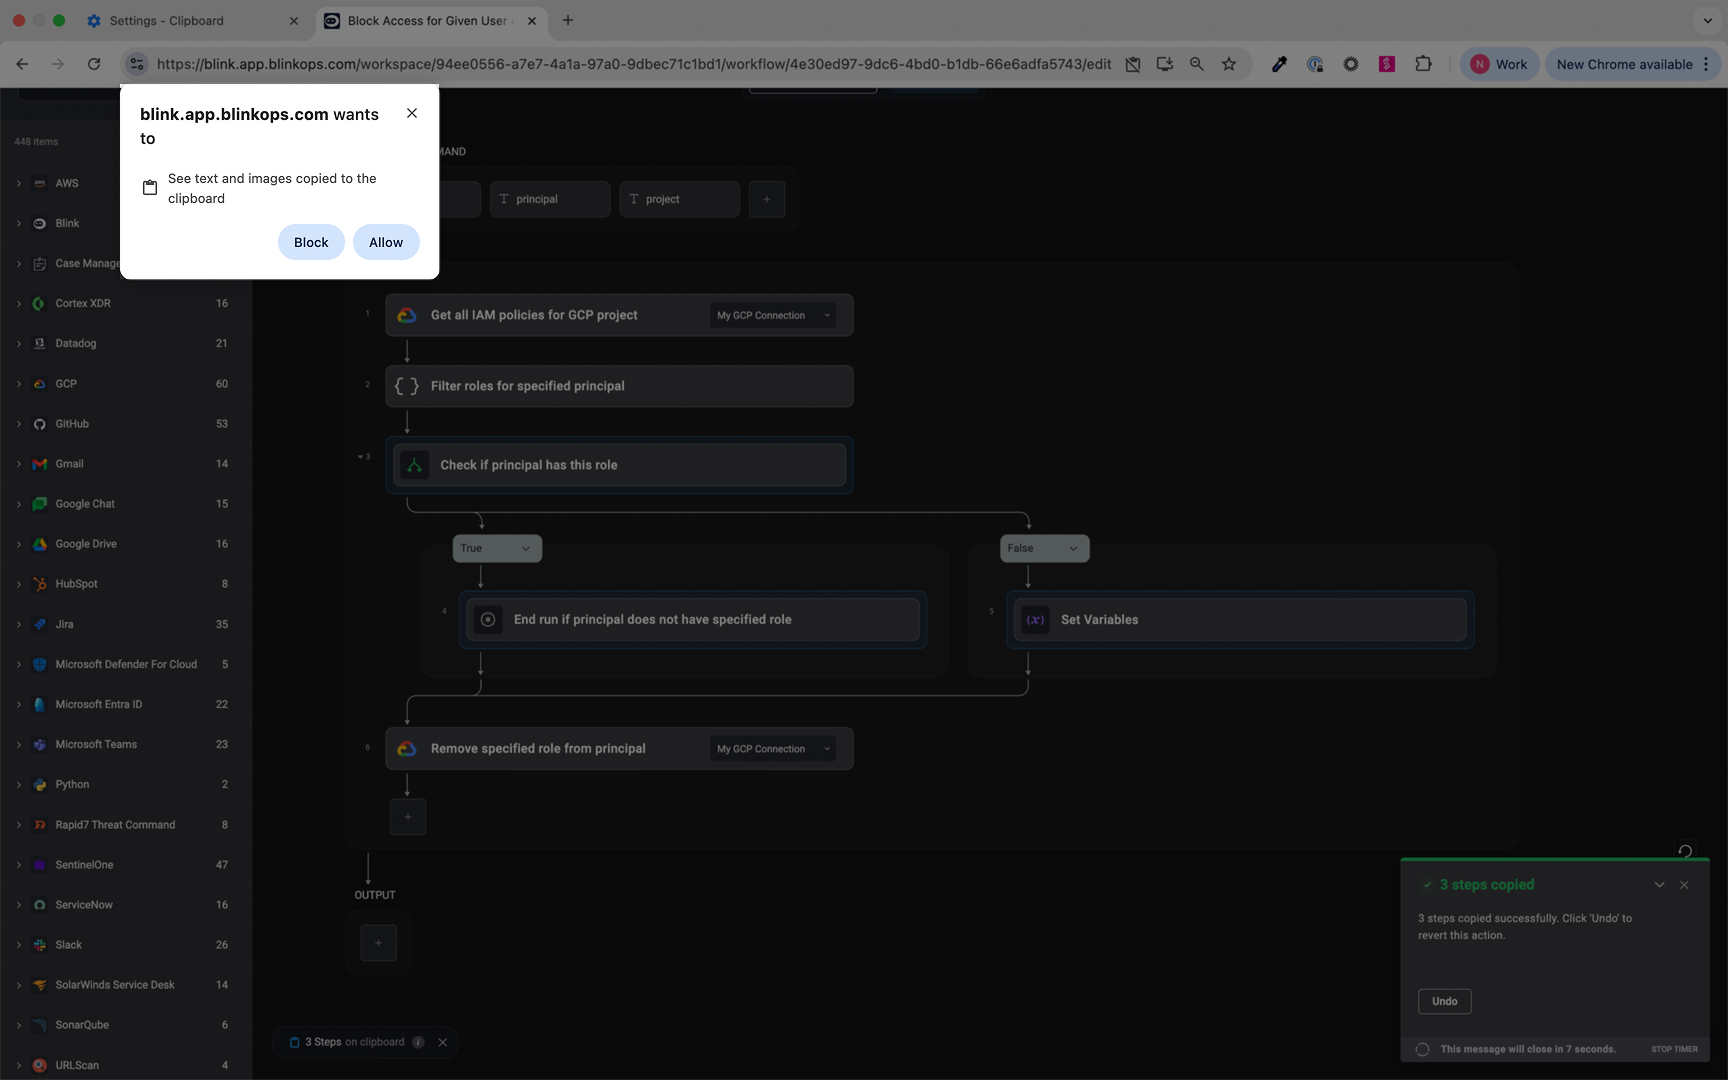
Enable or Disable Copy/Paste Functionality
- By clicking “Allow,” you enable the functionality to copy and paste steps in a different Browser tab.
- By clicking “Block”, you disable the functionality that allows you to copy and paste steps in different Browser tabs.
To Enable the Functionality:
- Go to Chrome settings.
- Select “Settings and privacy”.
- Then “Site Settings”.
- Under “Recent Activity”, click “Clipboard Blocked”.
- Scroll down to the clipboard icon and choose “Allow”.
- Close your chrome settings and navigate back to your Browser tab where you copied the step(s).
- Click the reload button to apply the changes.

The Cut Bulk Action
The Cut Bulk Action
Enabling the Multi-selection Step Mode
Initiating the 'Multi-selection Step Mode' can be done in a few ways:
- Selecting the checkbox icon on the top right corner of the canvas.
- Command/control + clicking a step
- Right-click and select the Select step from the step contextual menu.
View Step Selection Checkboxes

Select Steps
Use the Bulk Action Toolbar
Confirm Bulk Actions
Leaving the Multi-selection Step Mode
- Clicking on the cancel button on the floating selection element.
- Clicking on the multi-select icon in the top-right corner.
Mouse and Keyboard Shortcuts
- Right-clicking on a step will open the step contextual menu.
-
Holding down the Command key ( - for Mac users) or the Control key (Ctrl- for Windows users) and clicking on specific steps, will transition the canvas to selection mode and mark the steps as selected.
-
Pressing Command/Control + C will copy steps.
-
+ C (Mac) / Ctrl + C (Windows)
-
-
Pressing Command/Control + X will cut steps.
-
+ X (Mac) / Ctrl + X (Windows)
-
-
Pressing Command/Control + V will paste steps from the clipboard to the bottom of the canvas.
-
+ V (Mac) / Ctrl + V (Windows)
-
- Pressing Shift+click will select all in-between steps from the last selected checkbox.