Prerequisites
Prerequisites
Before configuring webhooks in Blink, ensure that:
- The external vendor system supports webhooks and:
- Can send HTTP POST requests.
- Supports at least one of the following: API key or signature authentication.
- You have:
- Necessary permissions to create webhooks in the external vendor system.
- A basic understanding of webhooks overall, and specifically of the webhook payload structure used by the external vendor system.
How Webhooks Work
Webhooks operate through HTTP POST requests when specific events occur. The workflow follows these basic steps:1
Send an HTTP POST Request
The external vendor system sends an HTTP POST request to the Blink webhook URL.
2
Authenticate the Request
Blink authenticates the request using an API key or signature.
3
Process the Event
If authentication succeeds, Blink processes the event and triggers the workflow.
4
Acknowledge Receipt
Blink acknowledges receipt, ensuring data integrity, and the next steps of the workflow are triggered if the necessary conditions are met.
Example Use Case
Example Use Case
Imagine you need to monitor activity in a GitHub repository and trigger a workflow when a new issue is created. You can use a webhook to listen for new issue events and trigger a workflow in Blink.Here’s how you can set up a basic API key-authenticated webhook in GitHub to trigger a workflow in Blink:When a new issue is created in the GitHub repository, GitHub sends an HTTP POST request to the webhook URL provided by Blink. Following is an example of the payload sent by GitHub:
1
Create a new workflow
Create a new workflow in Blink and select Event-Based Workflow.
2
Select GitHub Connection
Choose the GitHub connection, select the GitHub Webhook Event, and click Continue.
3
Copy Webhook Details
Copy the Webhook Full URL and API Key provided by Blink.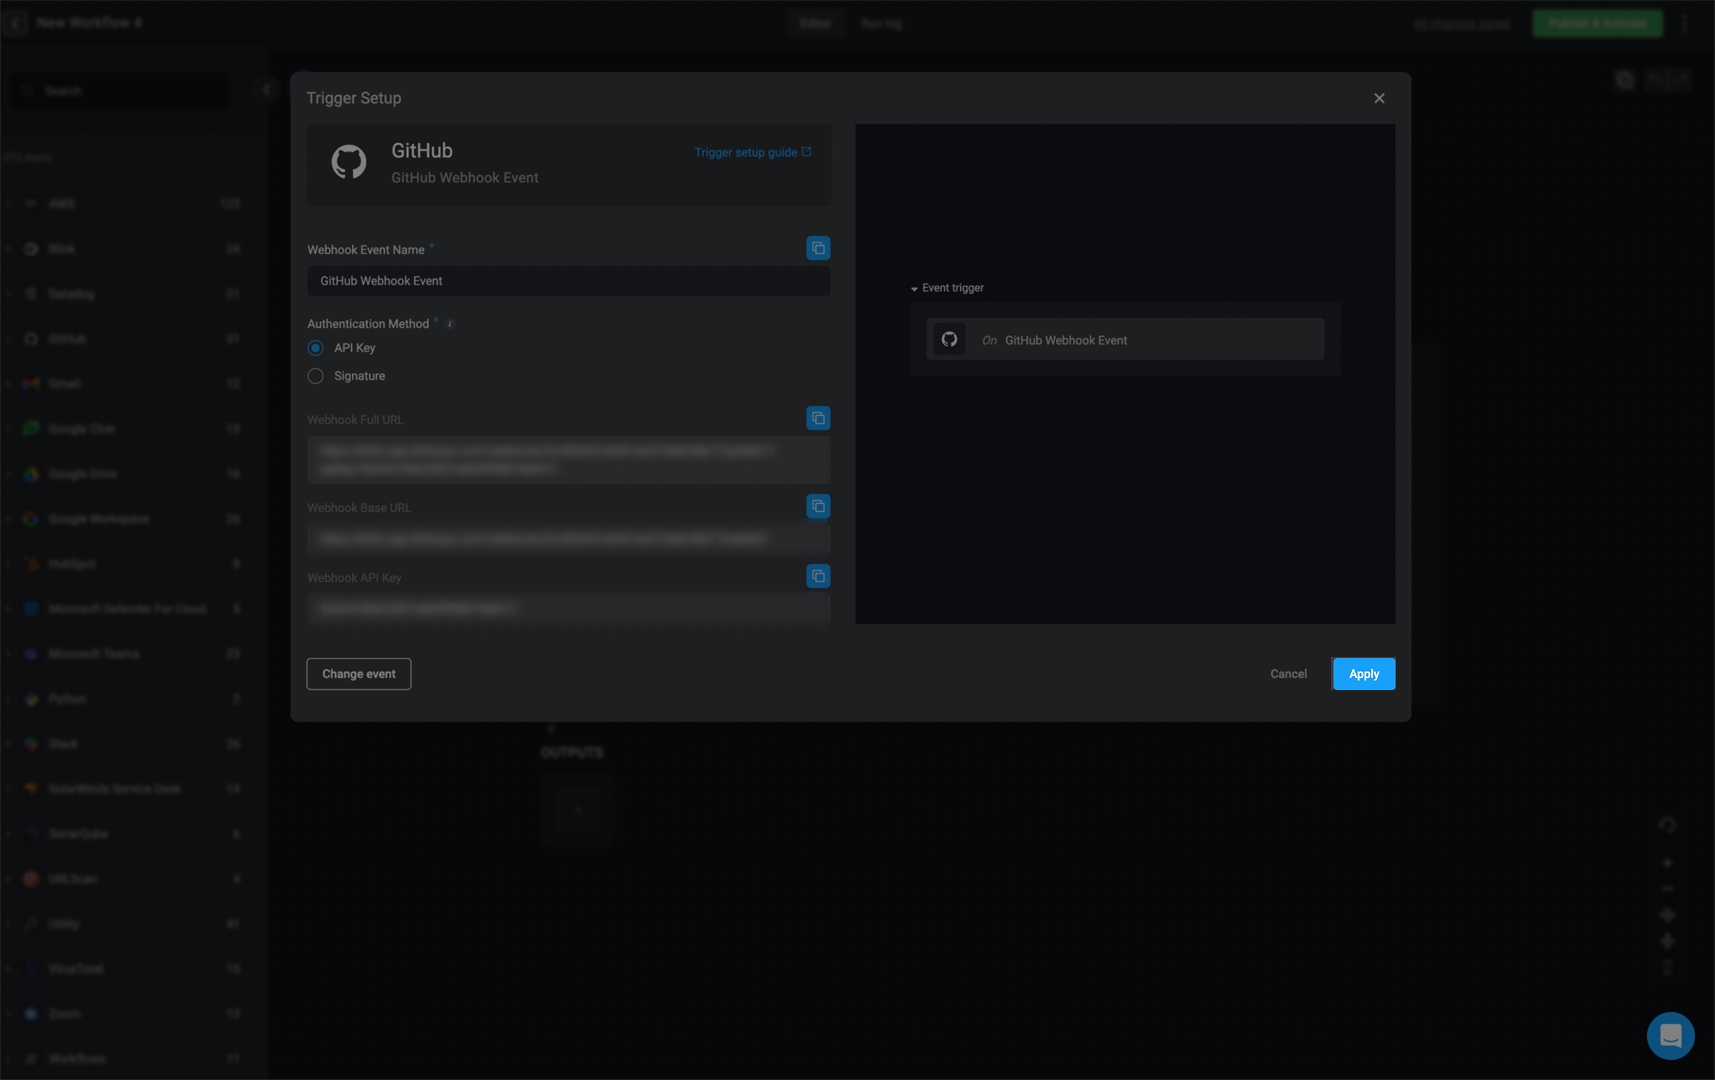
4
Apply the Configuration
Click Apply.
5
Create Webhook in GitHub
In GitHub, go to the repository settings and create a new webhook.
- Paste the Webhook URL in the Payload URL field.
- In the Secret field, paste the API Key provided by Blink.
- Select the events you want to trigger the webhook (e.g., Issues).
- Click Add webhook to save the configuration.
Git Payload Example
Git Payload Example
Authentication Methods
Webhook requests in Blink support two authentication methods:API Key Authentication
This method allows the external service to execute the webhook using a static API key provided by Blink. When an external service wants to trigger an event or send data to your application, it can do so by calling . To ensure that only authorized services can trigger this webhook, an API key is used. The API key acts as a secret token that the external service must include in its request to authenticate itself. If the API key is valid, the webhook is executed, and the desired action is executed.More About API Key Authentication
More About API Key Authentication
1
Retrieve the API Key
The API key is provided in the webhook configuration screen. The external service must include this key in its request to authenticate.
2
Send the Request with the API Key
The external vendor system sends an HTTP POST request to the webhook URL with the API key included in the request header. The request is typically sent using Where:
curl and may be similar to one of the following examples:<sub-domain>is the Blink instance base URL subdomain.<path>is the specific webhook trigger path.<apikey>is the API key provided by Blink.
Signature Authentication
For each request, the external vendor system generates a cryptographic signature to verify that the request is genuine. This signature is included in the request and verified by Blink to ensure the request’s integrity and authenticity. Unlike API Key authentication, the API key is not sent in the request. Instead, it is used to generate a unique signature for each request. Signature authentication provides several benefits:- Prevents spoofing – Ensures that only legitimate sources send webhook data.
- Guards against tampering – Verifies that the payload wasn’t modified in transit.
- Adds an extra security layer – Unlike API keys, which can be reused, signatures are unique to each request, making replay attacks difficult.
More About Signature Authentication
More About Signature Authentication
1
Provide the API Key
The API key is provided to the external vendor system when configuring the webhook.
2
Generate a Signature for Each Request
The external vendor system generates the HMAC-SHA256 signature using the API key as the secret and the request components. The signature is generated using the following format:The external vendor system computes an HMAC-SHA256 hash using the API key as the secret:The external vendor system attaches the generated signature in the request header:
3
Send the Request with the Signature
The external vendor system includes the signature in the request header when sending the HTTP POST request to the webhook URL. The request is typically sent using Where:
curl and may be similar to the following example:<TS>is the current Unix timestamp at the time of the request.<URL>is the full webhook endpoint URL, including the scheme (https://).<BODY>is the raw JSON payload containing the event data.<SIG>is the cryptographic signature generated using HMAC-SHA256.<API_KEY>is the secret key used to compute the HMAC-SHA256 signature.<sub-domain>is the Blink instance’s subdomain (e.g.,yourcompany.app.blinkops.com).<path>is the specific webhook trigger path assigned in Blink.
Best Practices
When configuring your workflow, consider validating payloads to ensure they match expected structures. This helps prevent malformed or malicious payloads from triggering the workflow and prevents errors when the workflow runs.Configure a Webhook
There are two ways to configure a webhook for Blink:- Using the webhook event configured for a specific external vendor
- Creating a custom webhook trigger: Useful when the relevant connection is not pre-configured in Blink.
-
Create a new workflow and select Event-Based Workflow.
-
Click Click to select an event to open the Trigger Setup popup.
-
Select a connection from the list and choose the relevant webhook event. If the connection isn’t currently supported by Blink, select Custom Webhook, then click Apply.
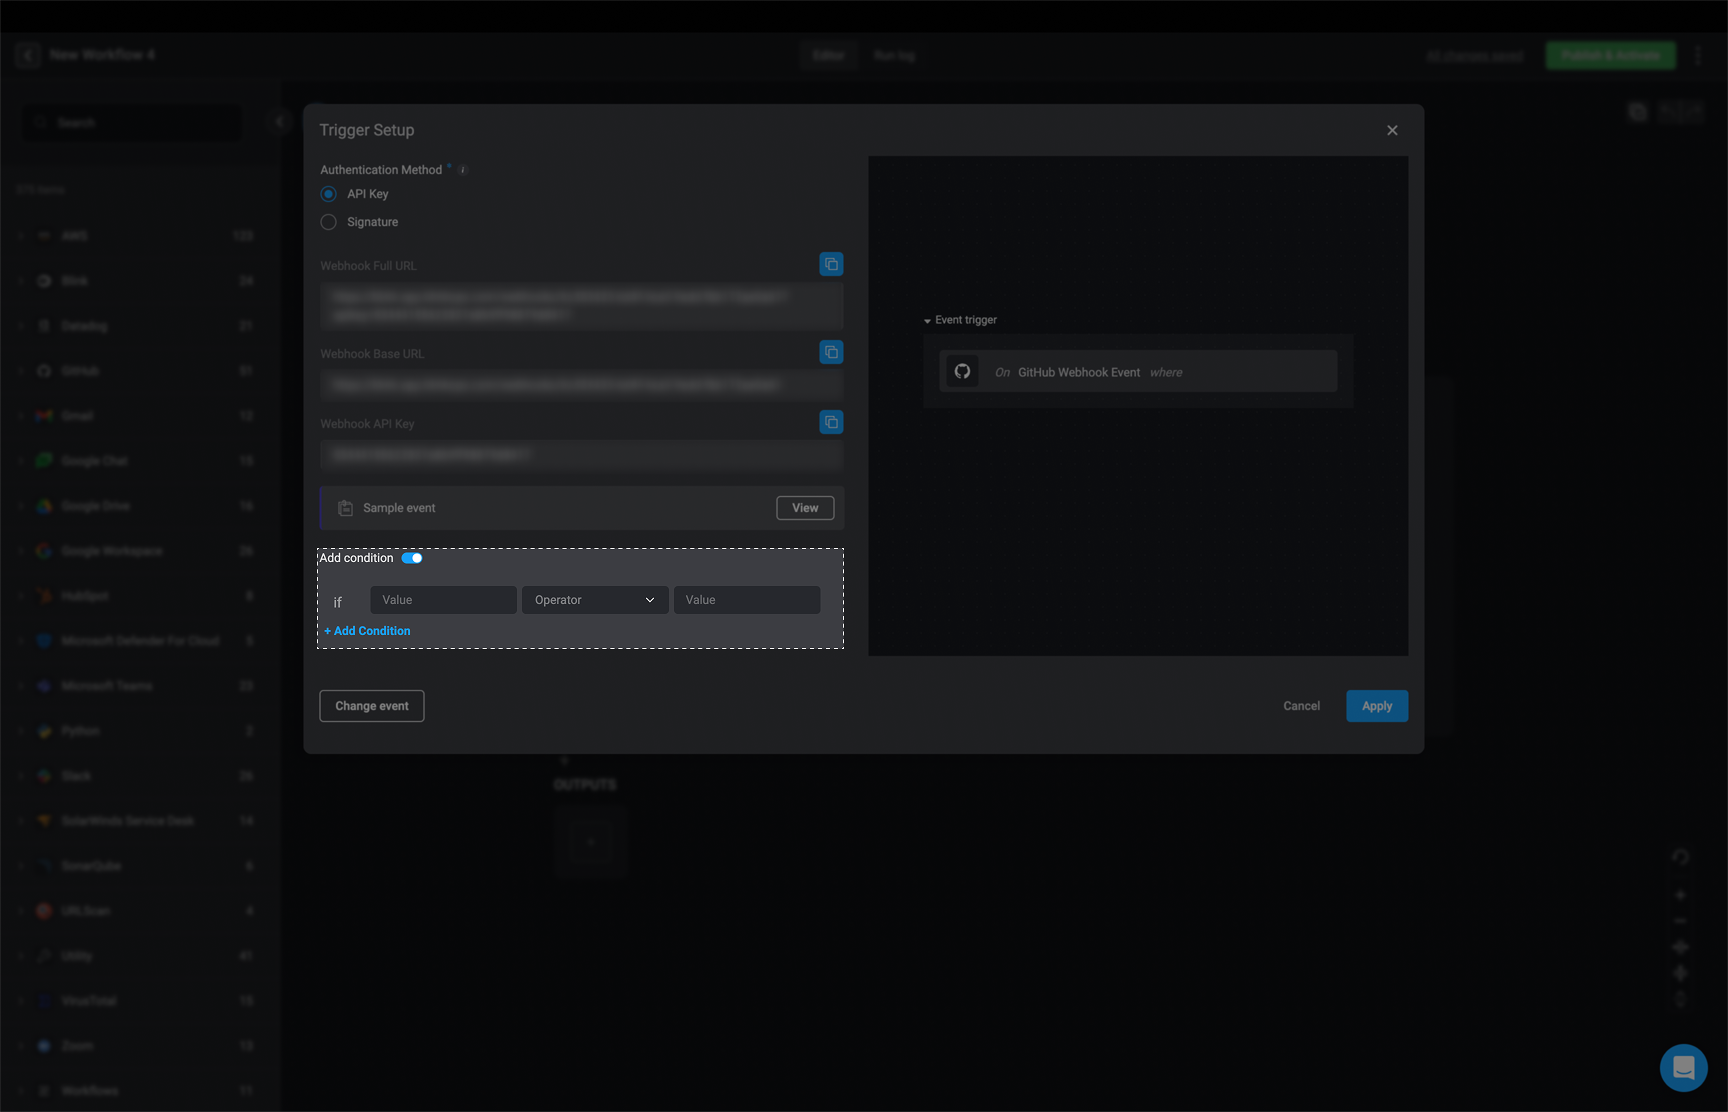
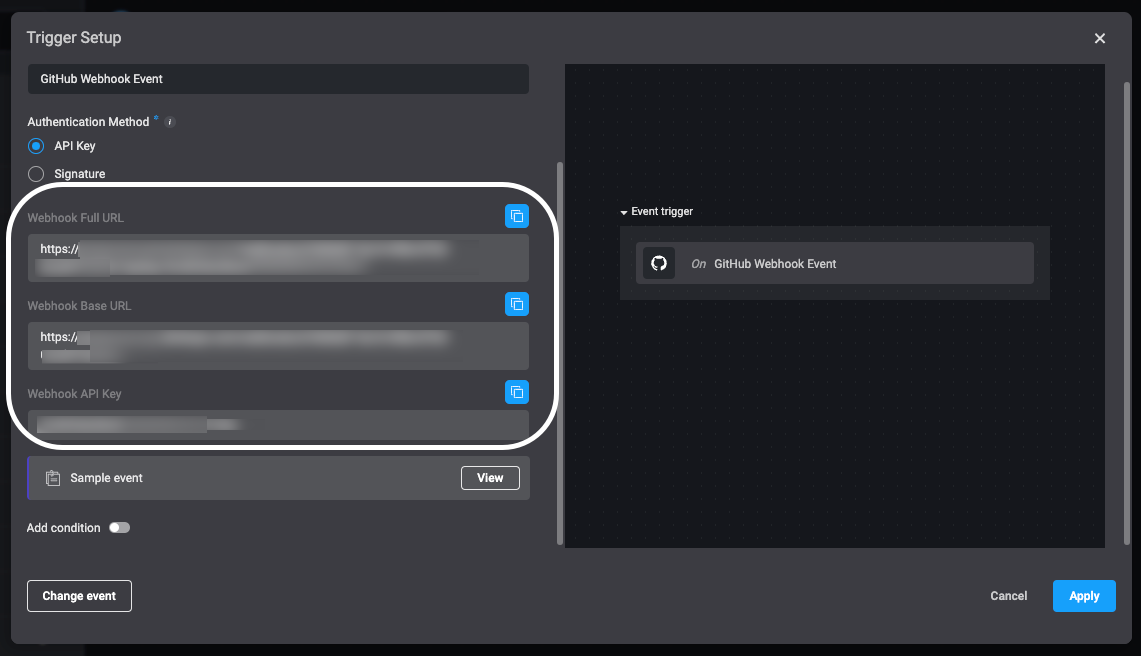
Following is a description of the fields displayed in the Trigger Setup popup:
 API Key is selected as the authentication method. The Webhook Event Name, Webhook API Key, Webhook Full URL, and Webhook Base URL are displayed in their respective fields.
 -
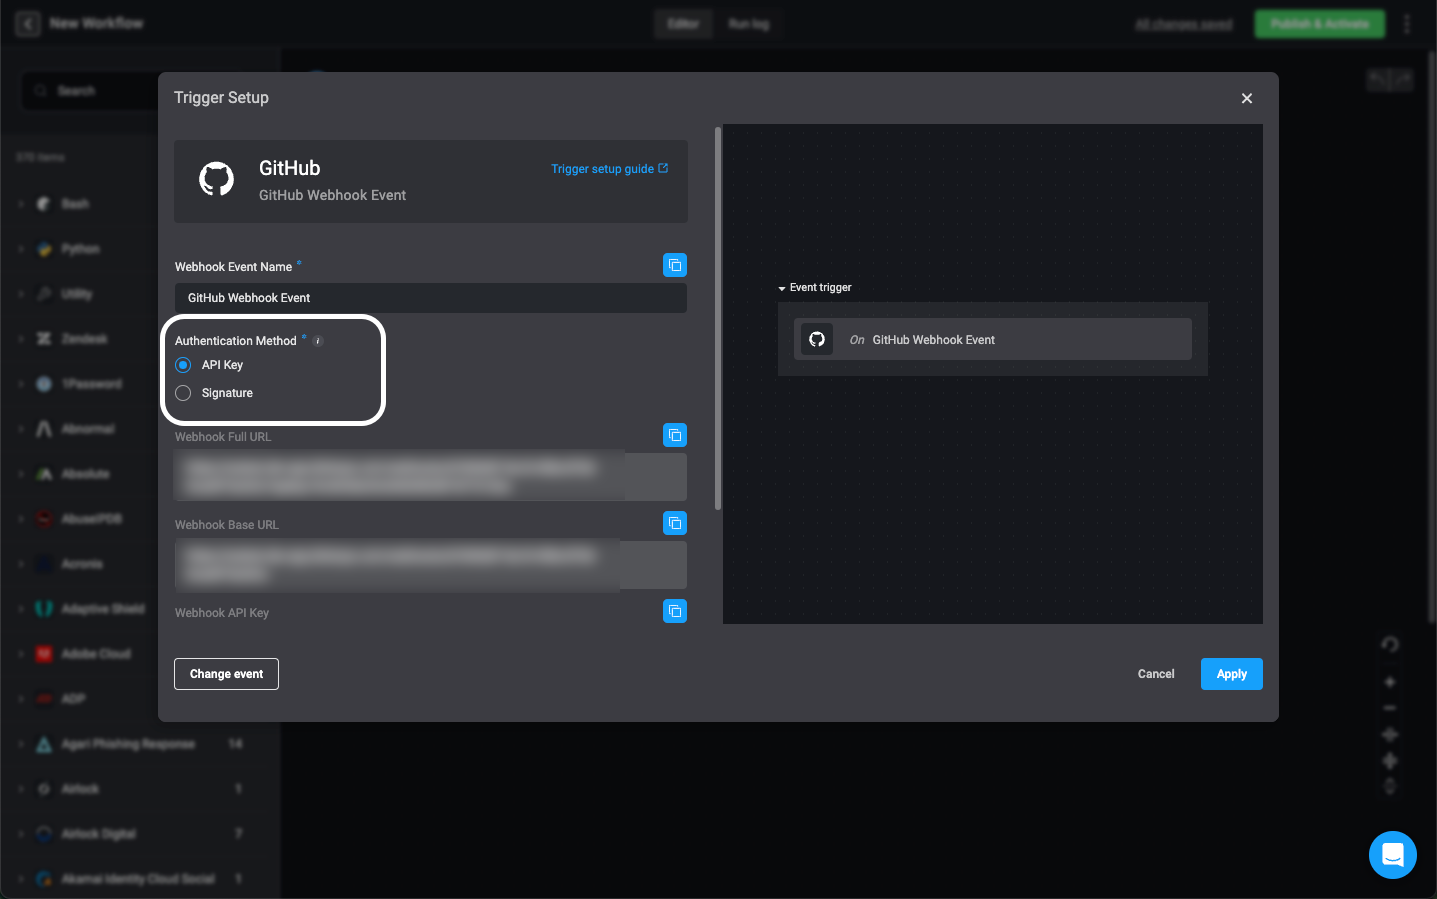
Optionally, choose Signature for the authentication method.
The Webhook Base URL and Webhook API Key are generated and displayed in their respective fields.
-
Copy the automatically generated details and save them. You’ll need these to configure the webhook in the external vendor system.
Notice that the Full URL contains the API key embedded in it. Whereas, the Base URL is only the link to the endpoint. Use the Base URL when embedding the key in the header.
-
Optionally, click Add condition to define additional trigger conditions.
-
Now, get Blink ready to listen for a test event:
a. Next to Sample Event, click View.
The Sample Webhook Event popup opens.
b. Click Listen to event to start listening for events.
-
Go to the external vendor system:
a. Configure the webhook, providing the webhook URL and API key in the relevant fields.
b. Send a test event to verify that Blink receives it.
In order for the test event to be accepted by Blink, you must first trigger the listening, as explained in the previous step.
- From Blink, watch the Sample Webhook Event window for the payload to load. When the event arrives, Blink captures and analyzes the payload.
-
Click Apply to confirm the detected schema and close the sample popup. Click Apply again to complete the configuration and close the Trigger Setup popup.

See It In Action
Watch a demo of custom webhook creation:Related Articles
Creating a Workflow
Learn how to create and configure workflows in BlinkOps.
Using the Condition Builder
Add advanced logic to your workflows.
Event-Based Triggers
Explore how event-based triggers work and how to configure them.