1
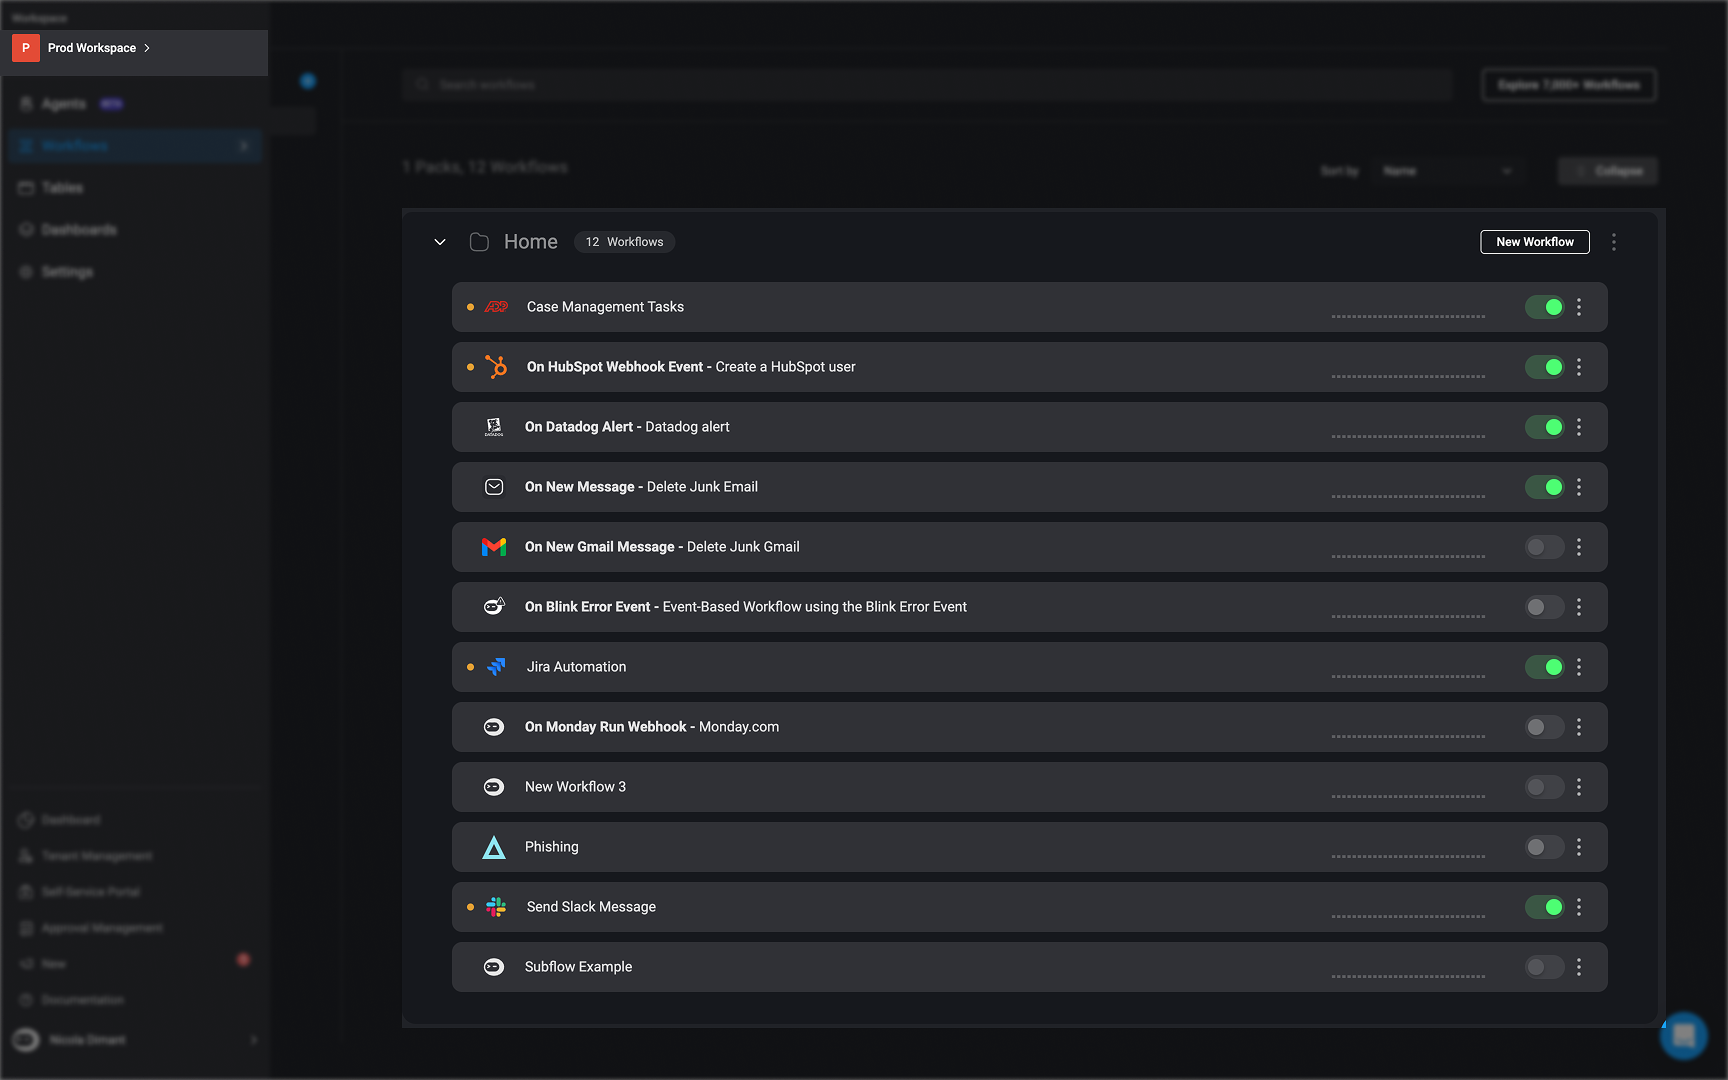
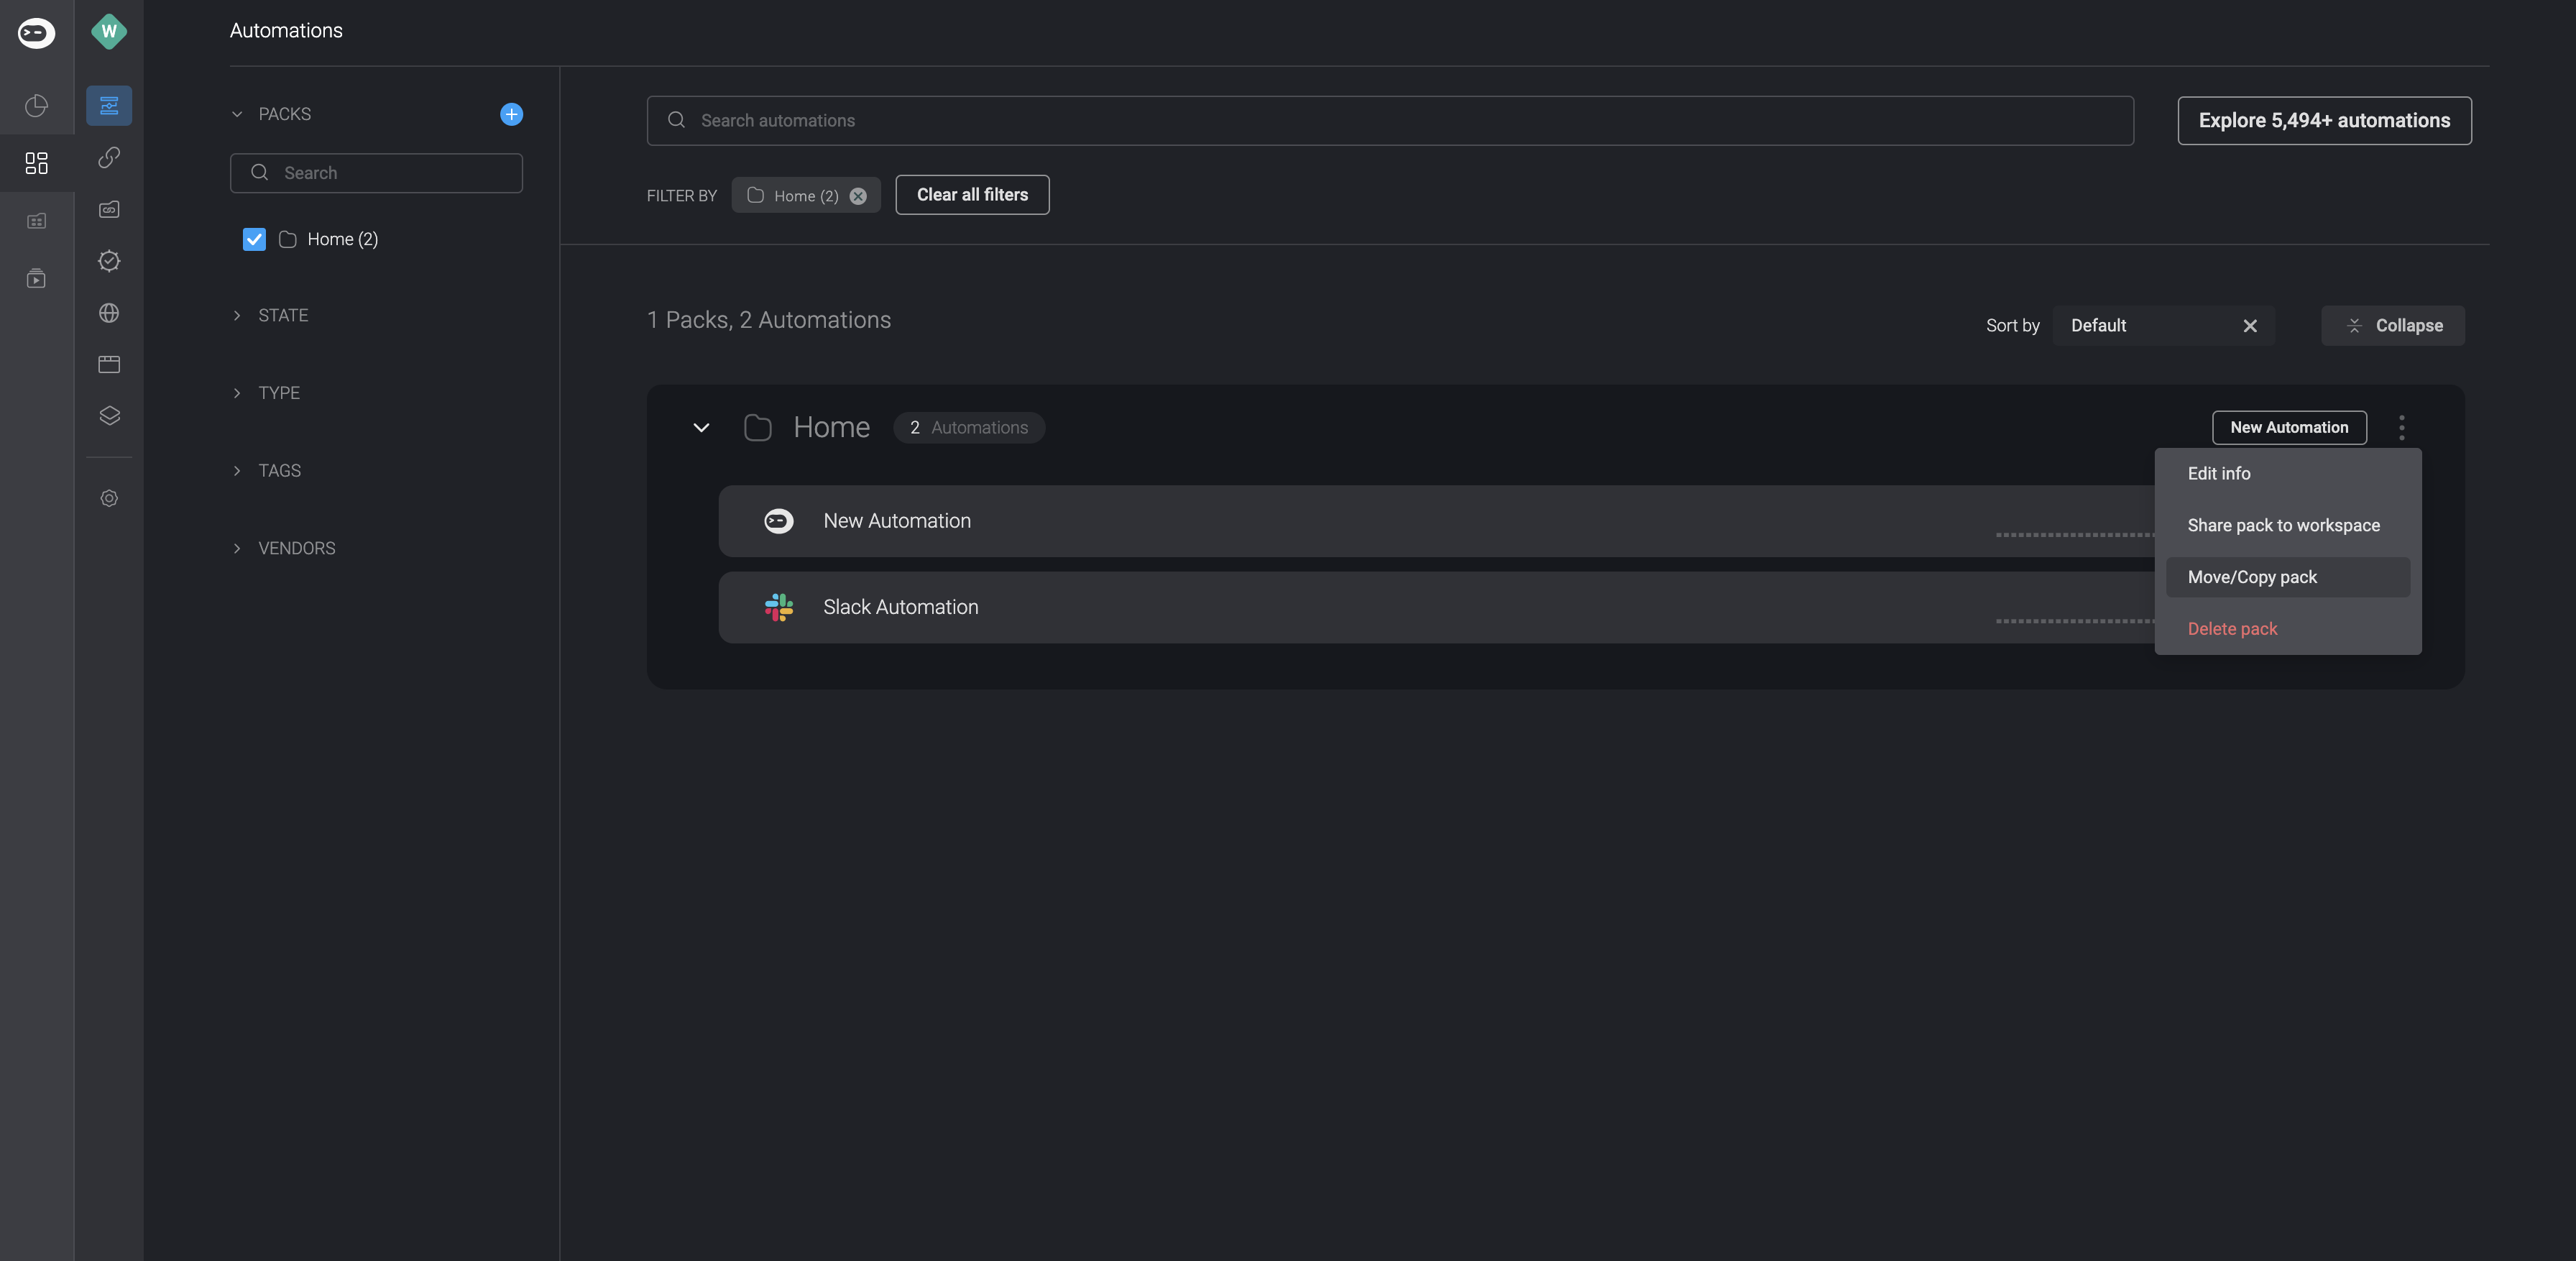
- Click on the three dots button in the top-right corner of the workflow pack and select the move/copy option.
2
Select Target Workspace
This will open the Copy/Move wizard, where you can select which workspace you want to Copy/Move the pack to. First select the workspace, then select the target pack, and choose whether you wish to Copy or Move the selected pack to the target workspace.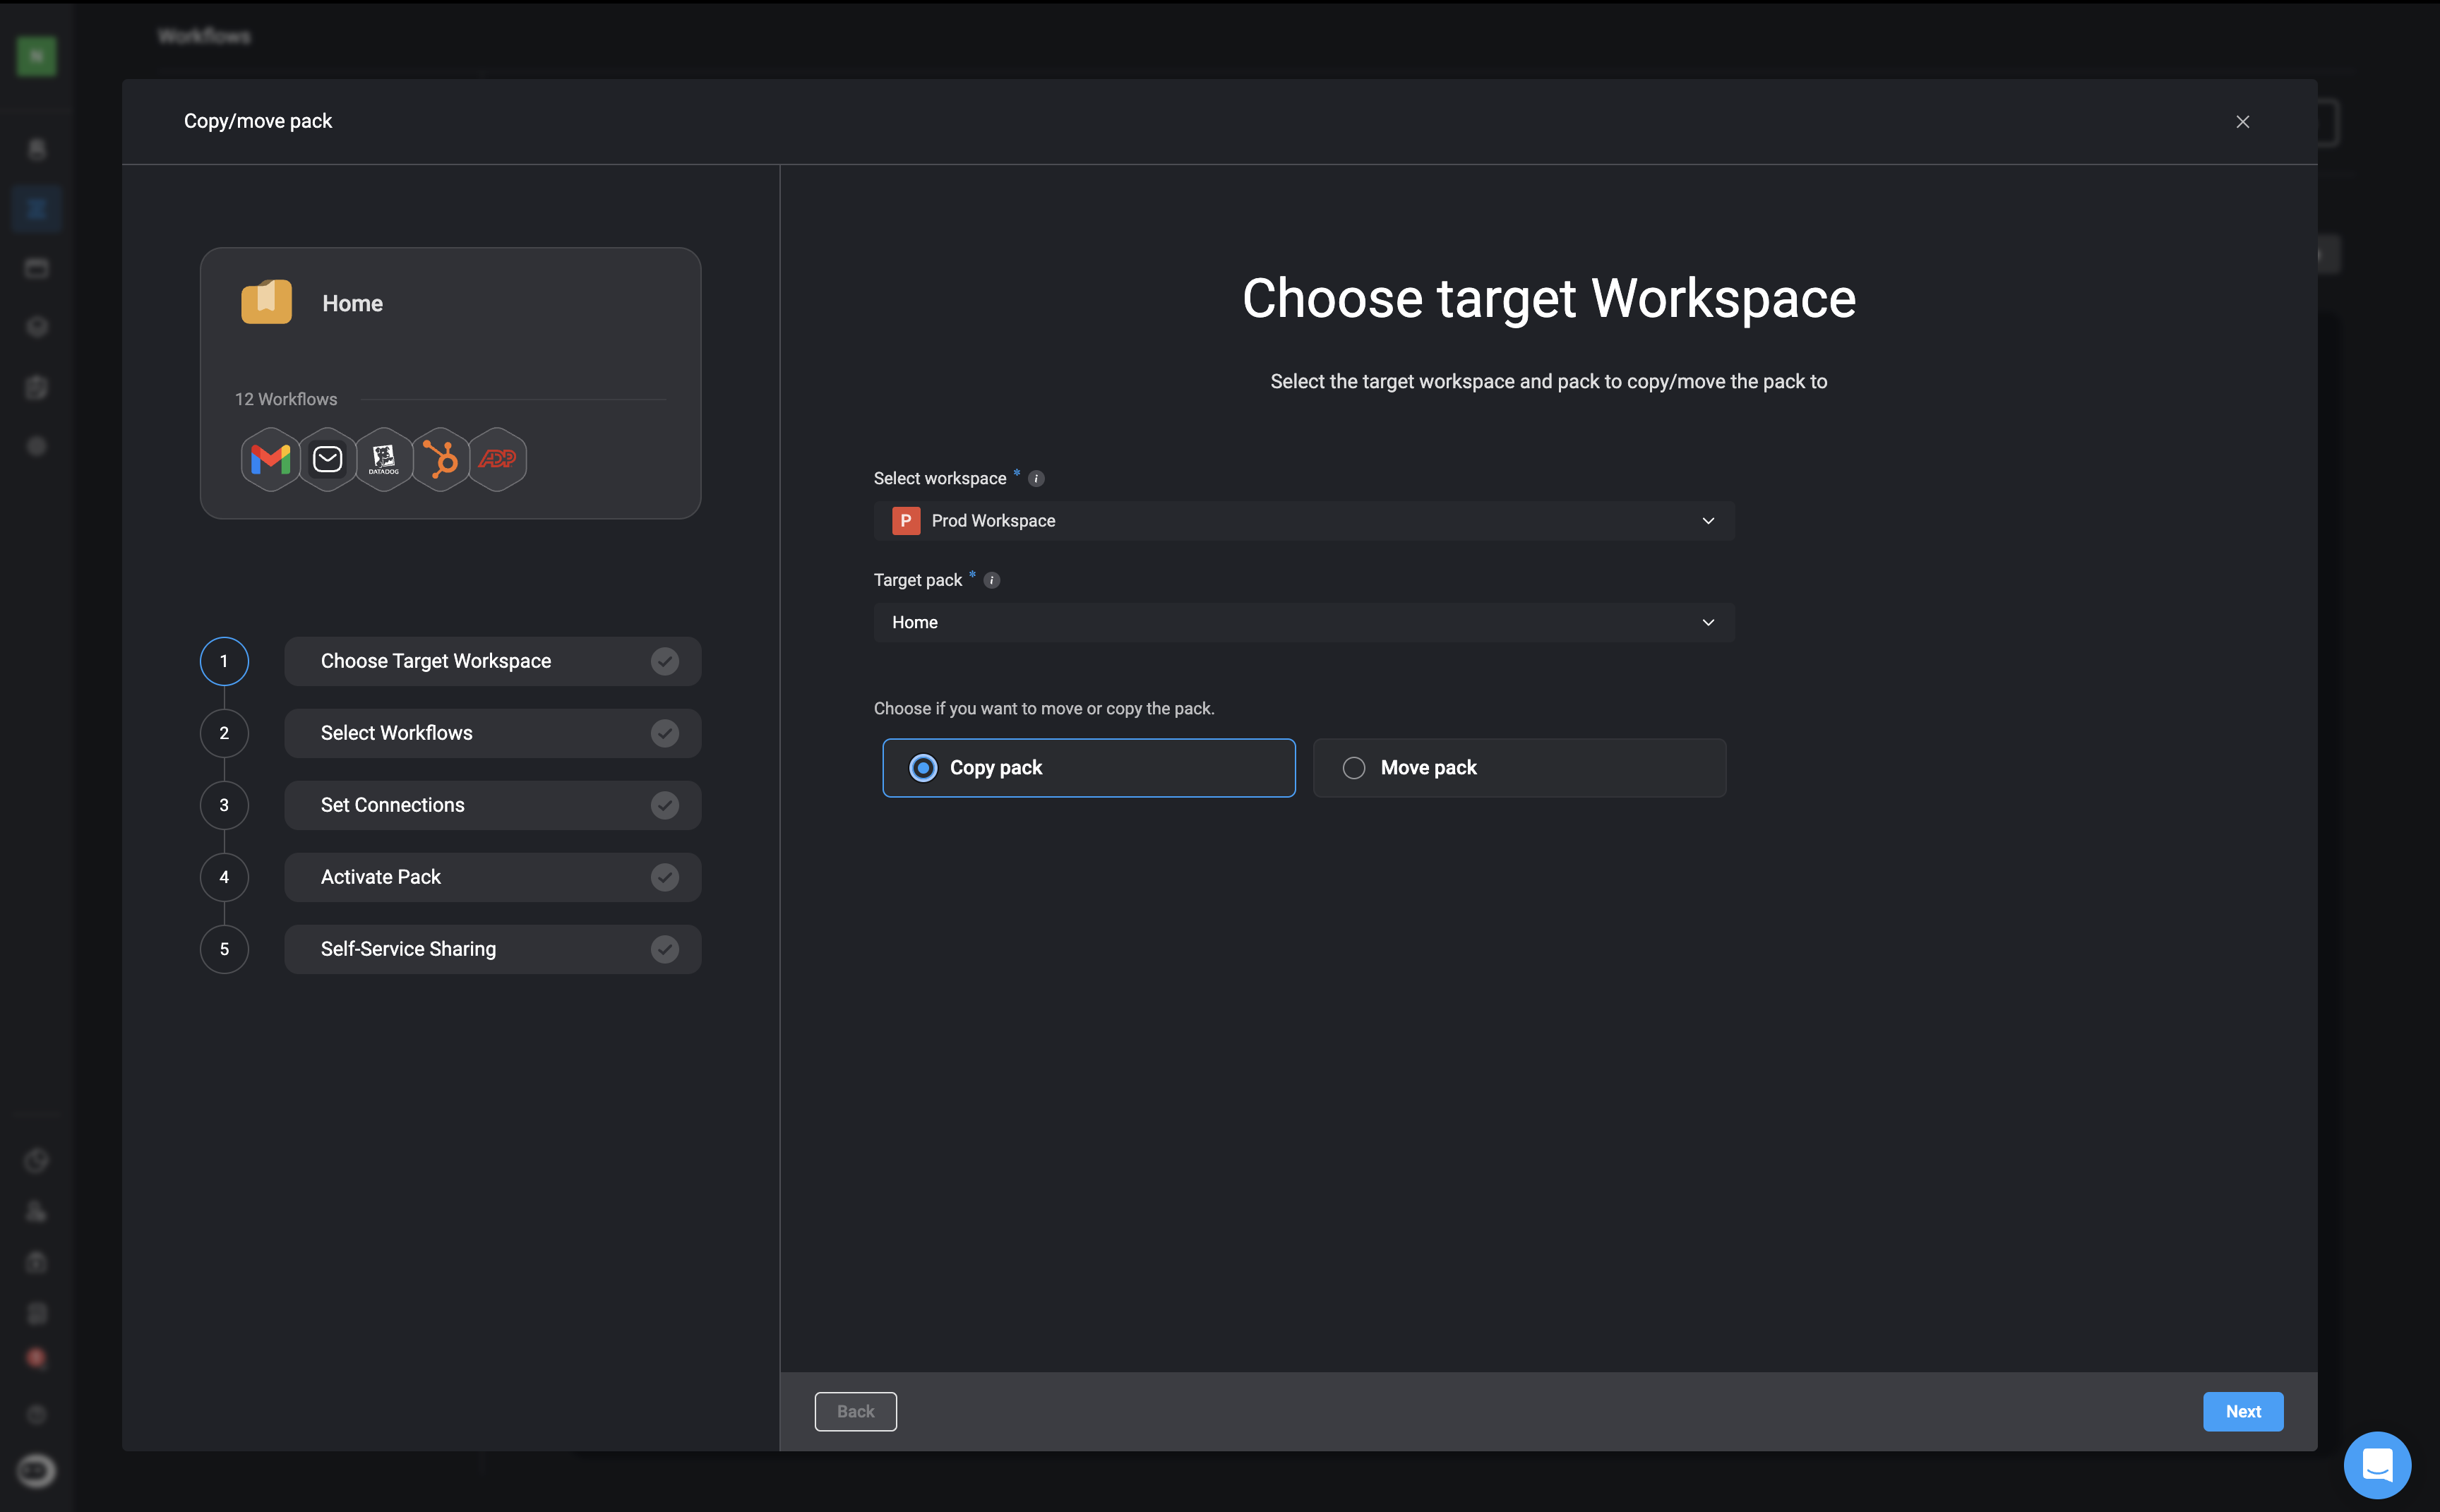
3
Select workflows
Choose the workflow(s) you want to Copy/Move to the target workspace by checking the checkboxes next to them.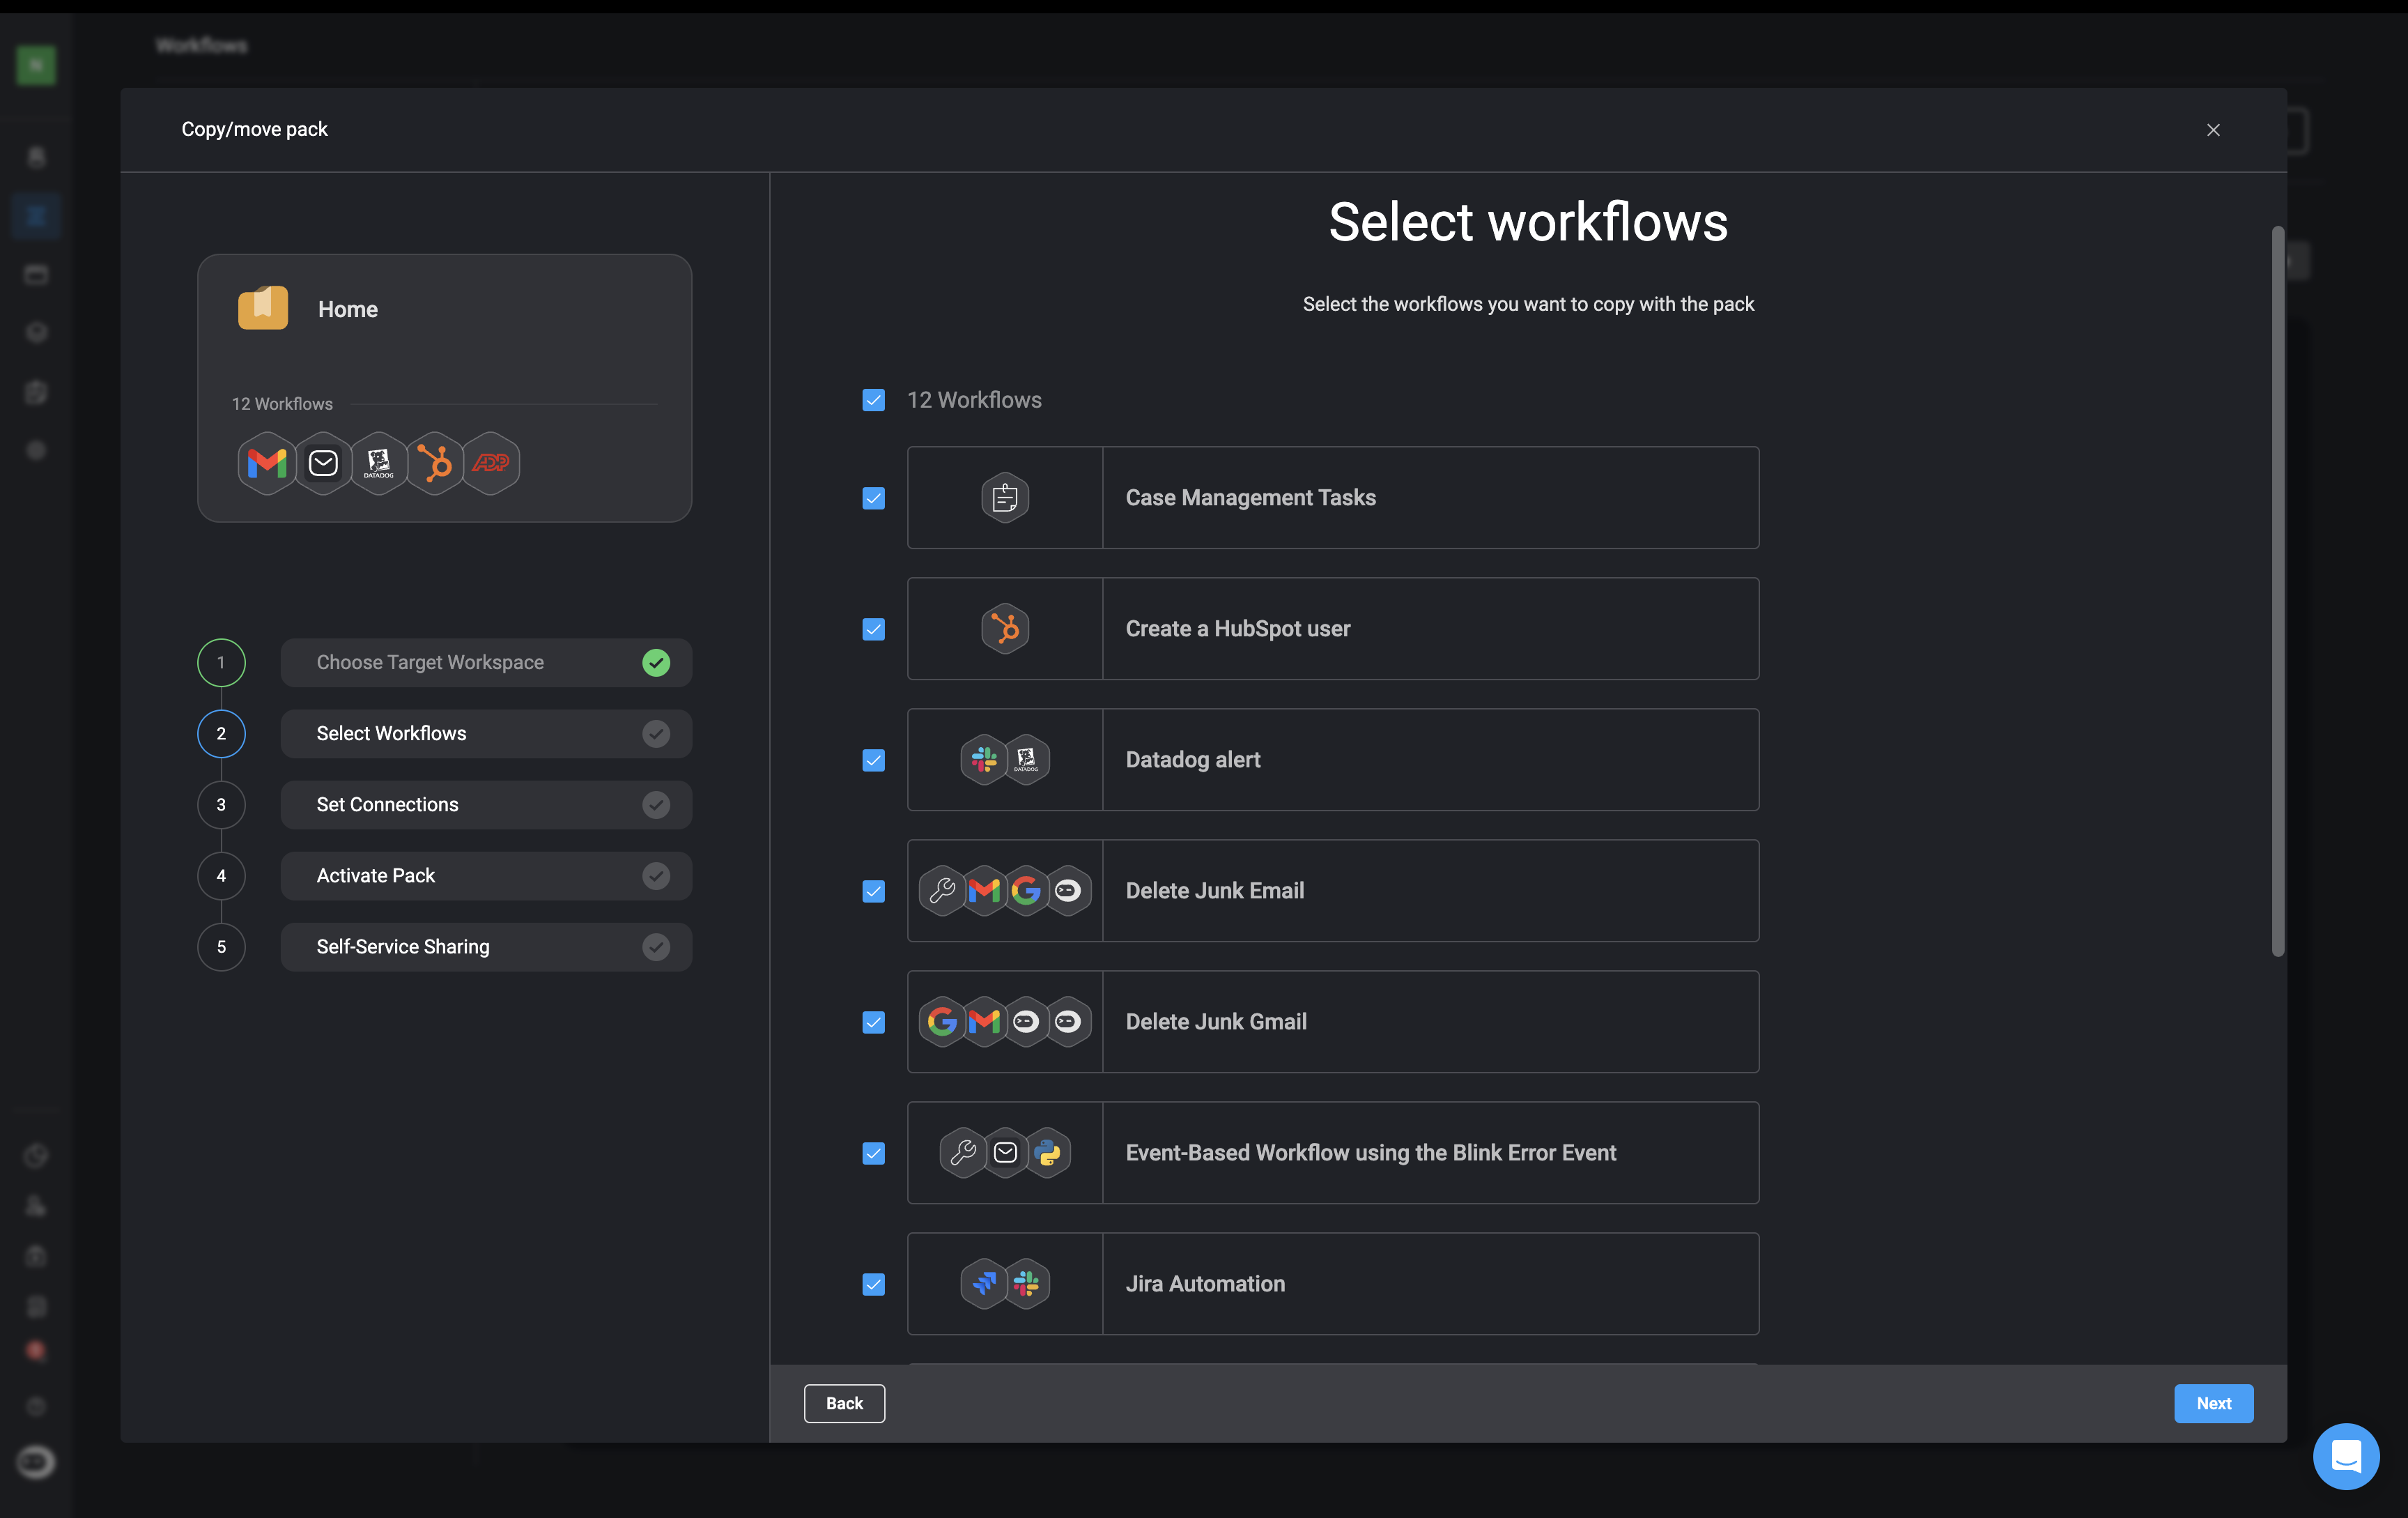
4
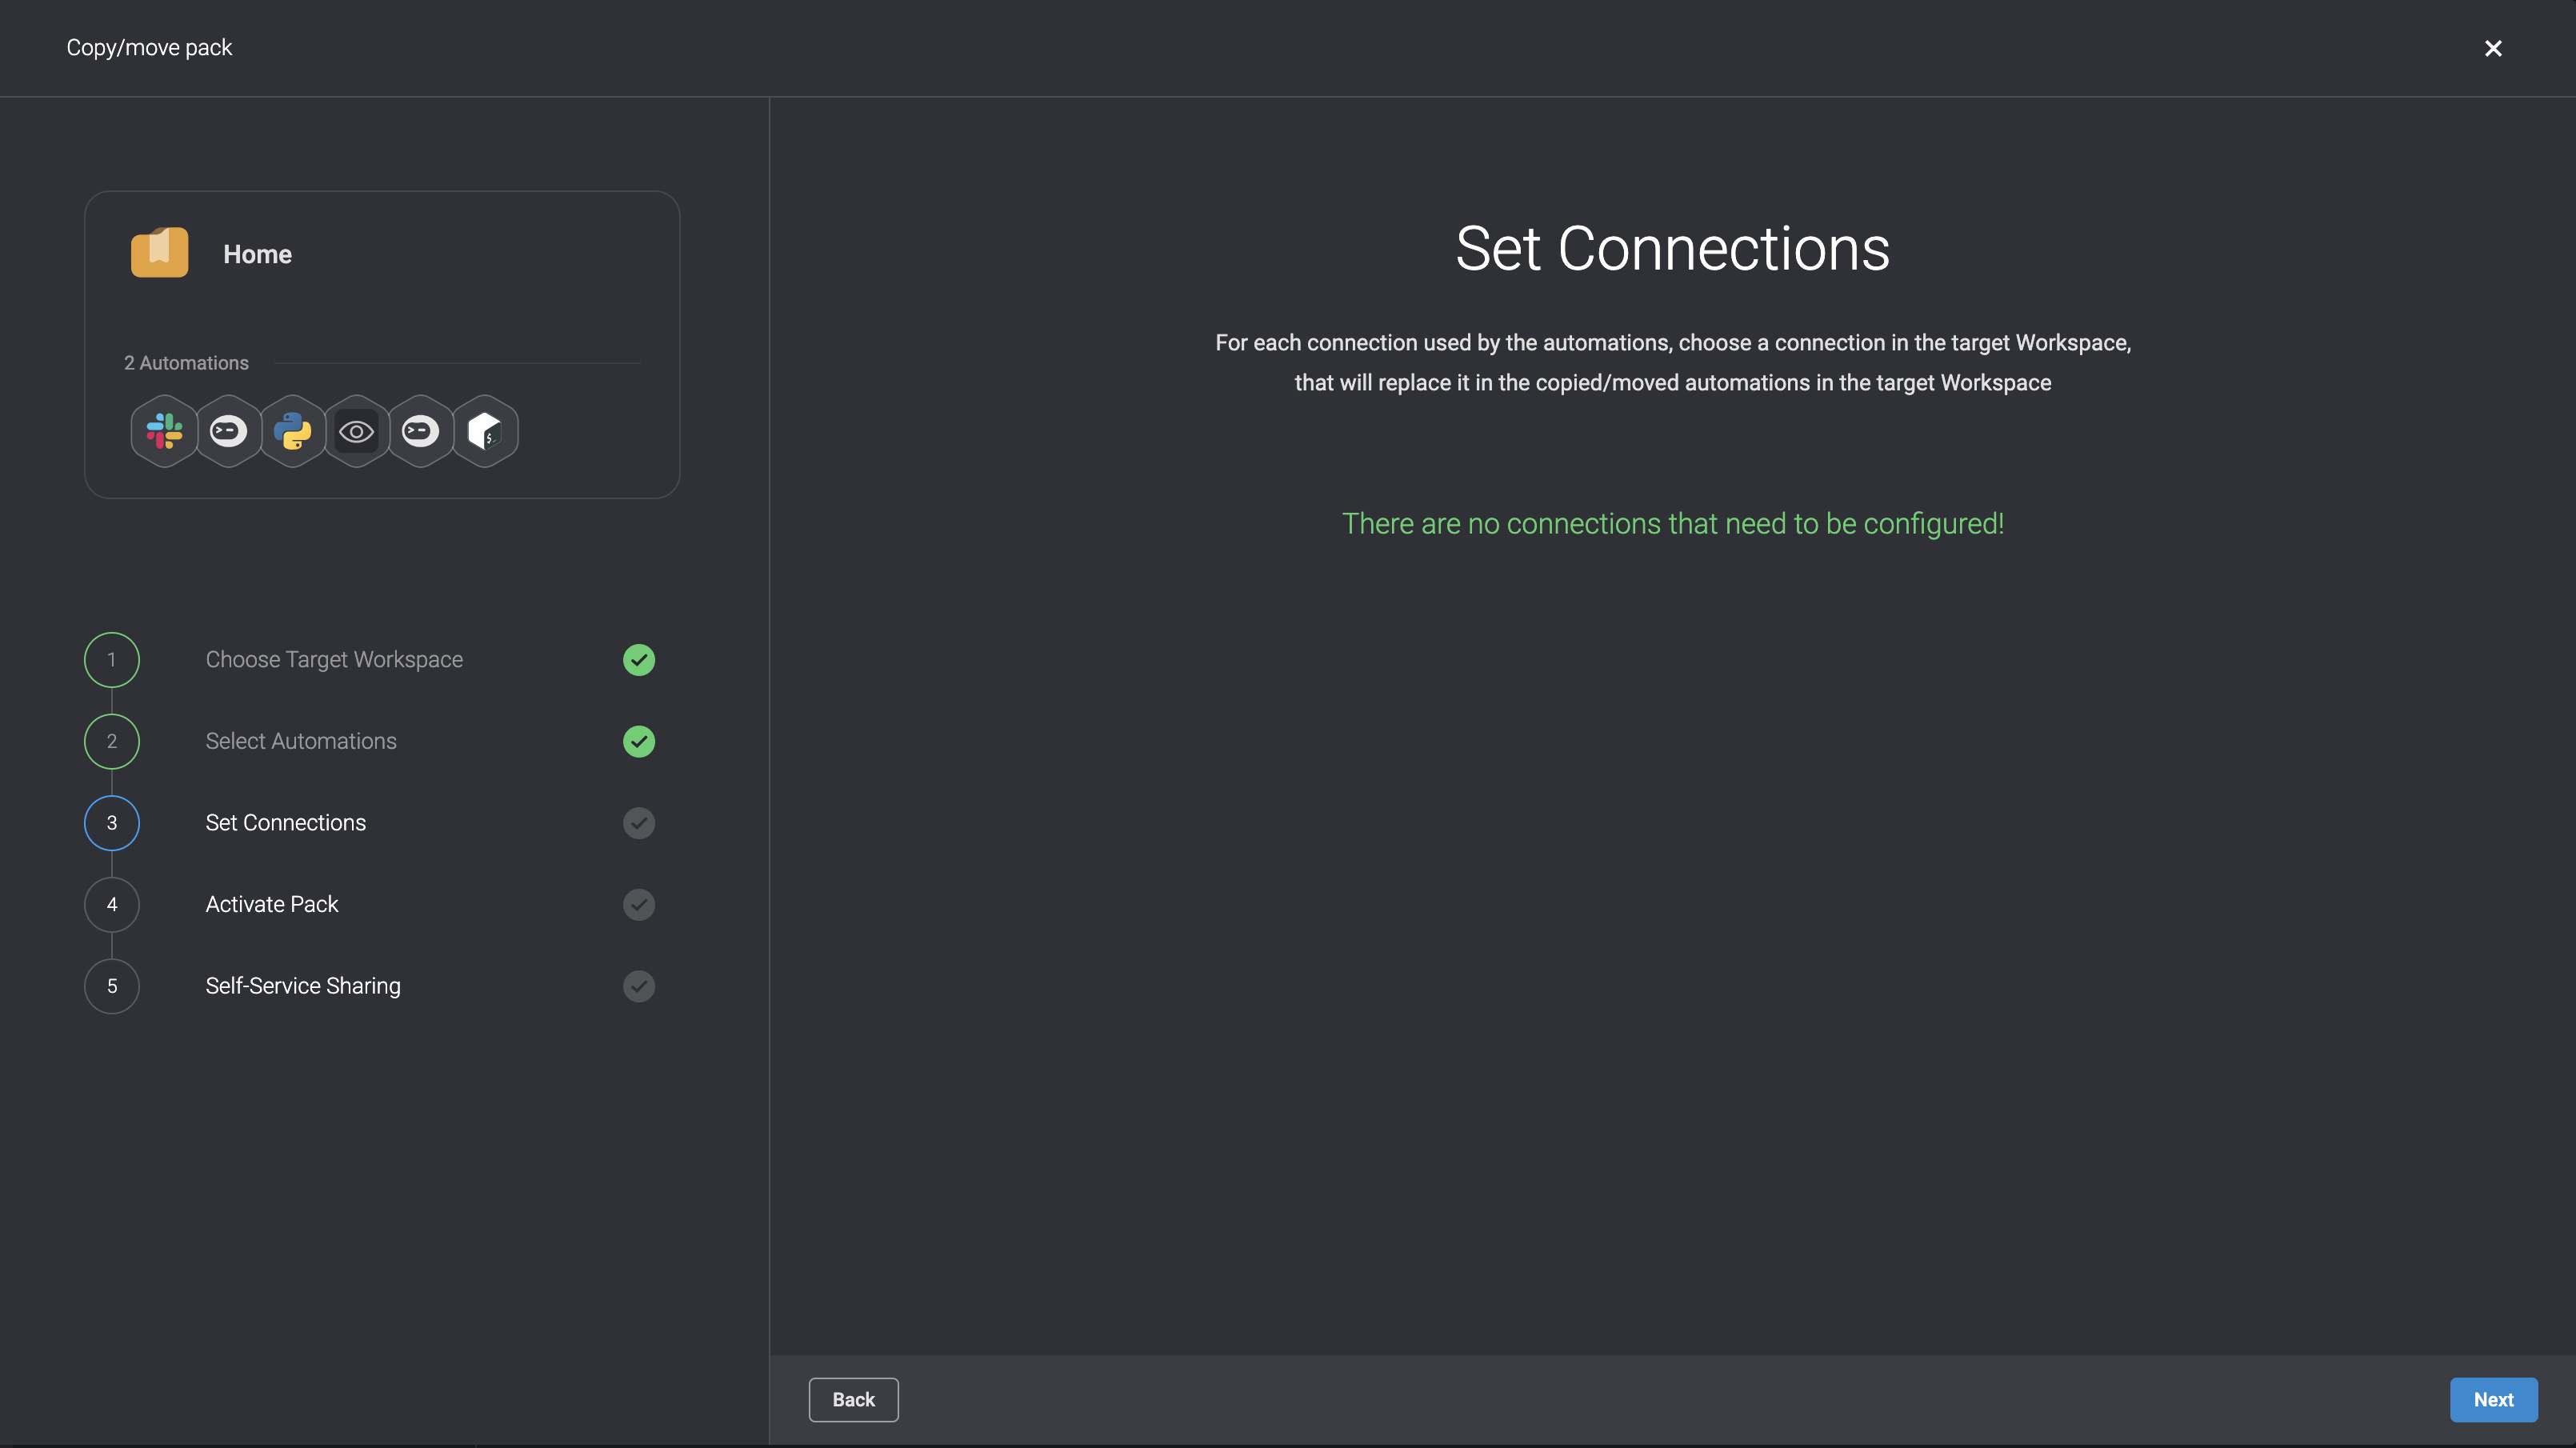
Set the connections
For each connection used by the selected workflows, set a connection in the target workspace, that will replace it in the copied/moved workflows.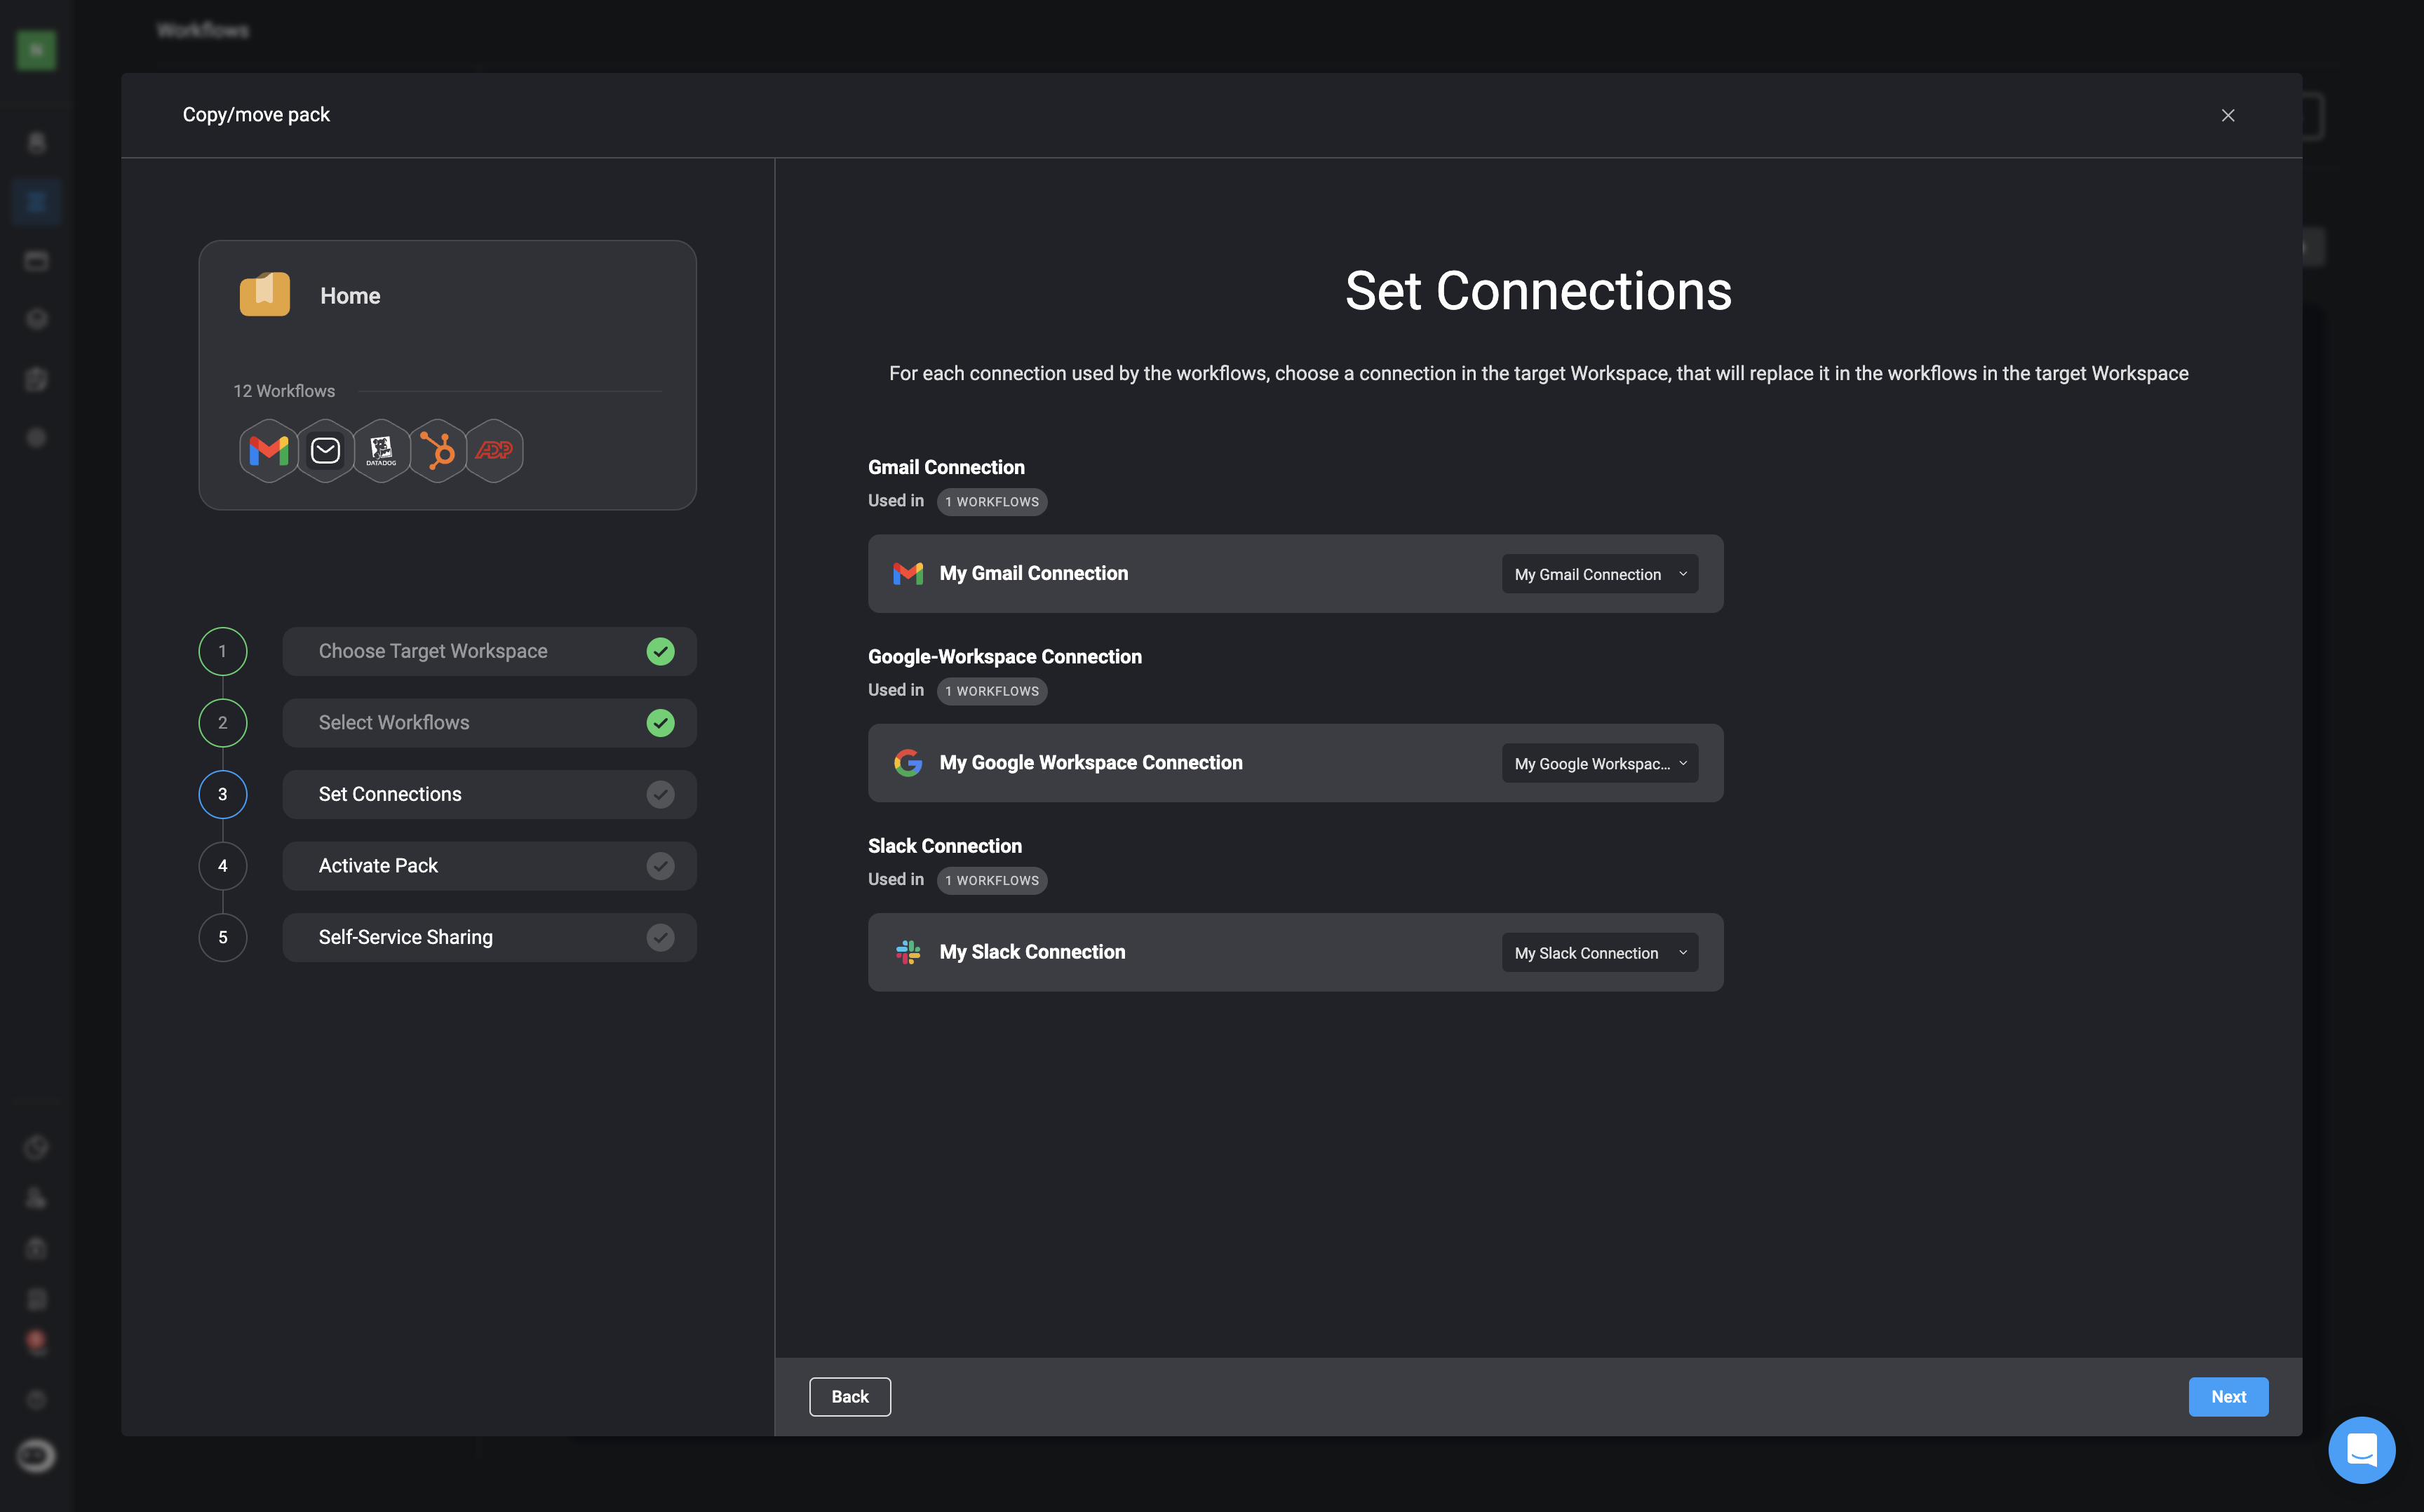
5
Activate Pack
Choose the activation status of the Copied/Moved workflows in the pack in the target Workspace. You have two options: you can either Activate all workflows by clicking the toggle button next to this option or you can activate specific workflows by toggling the button next to each one individually.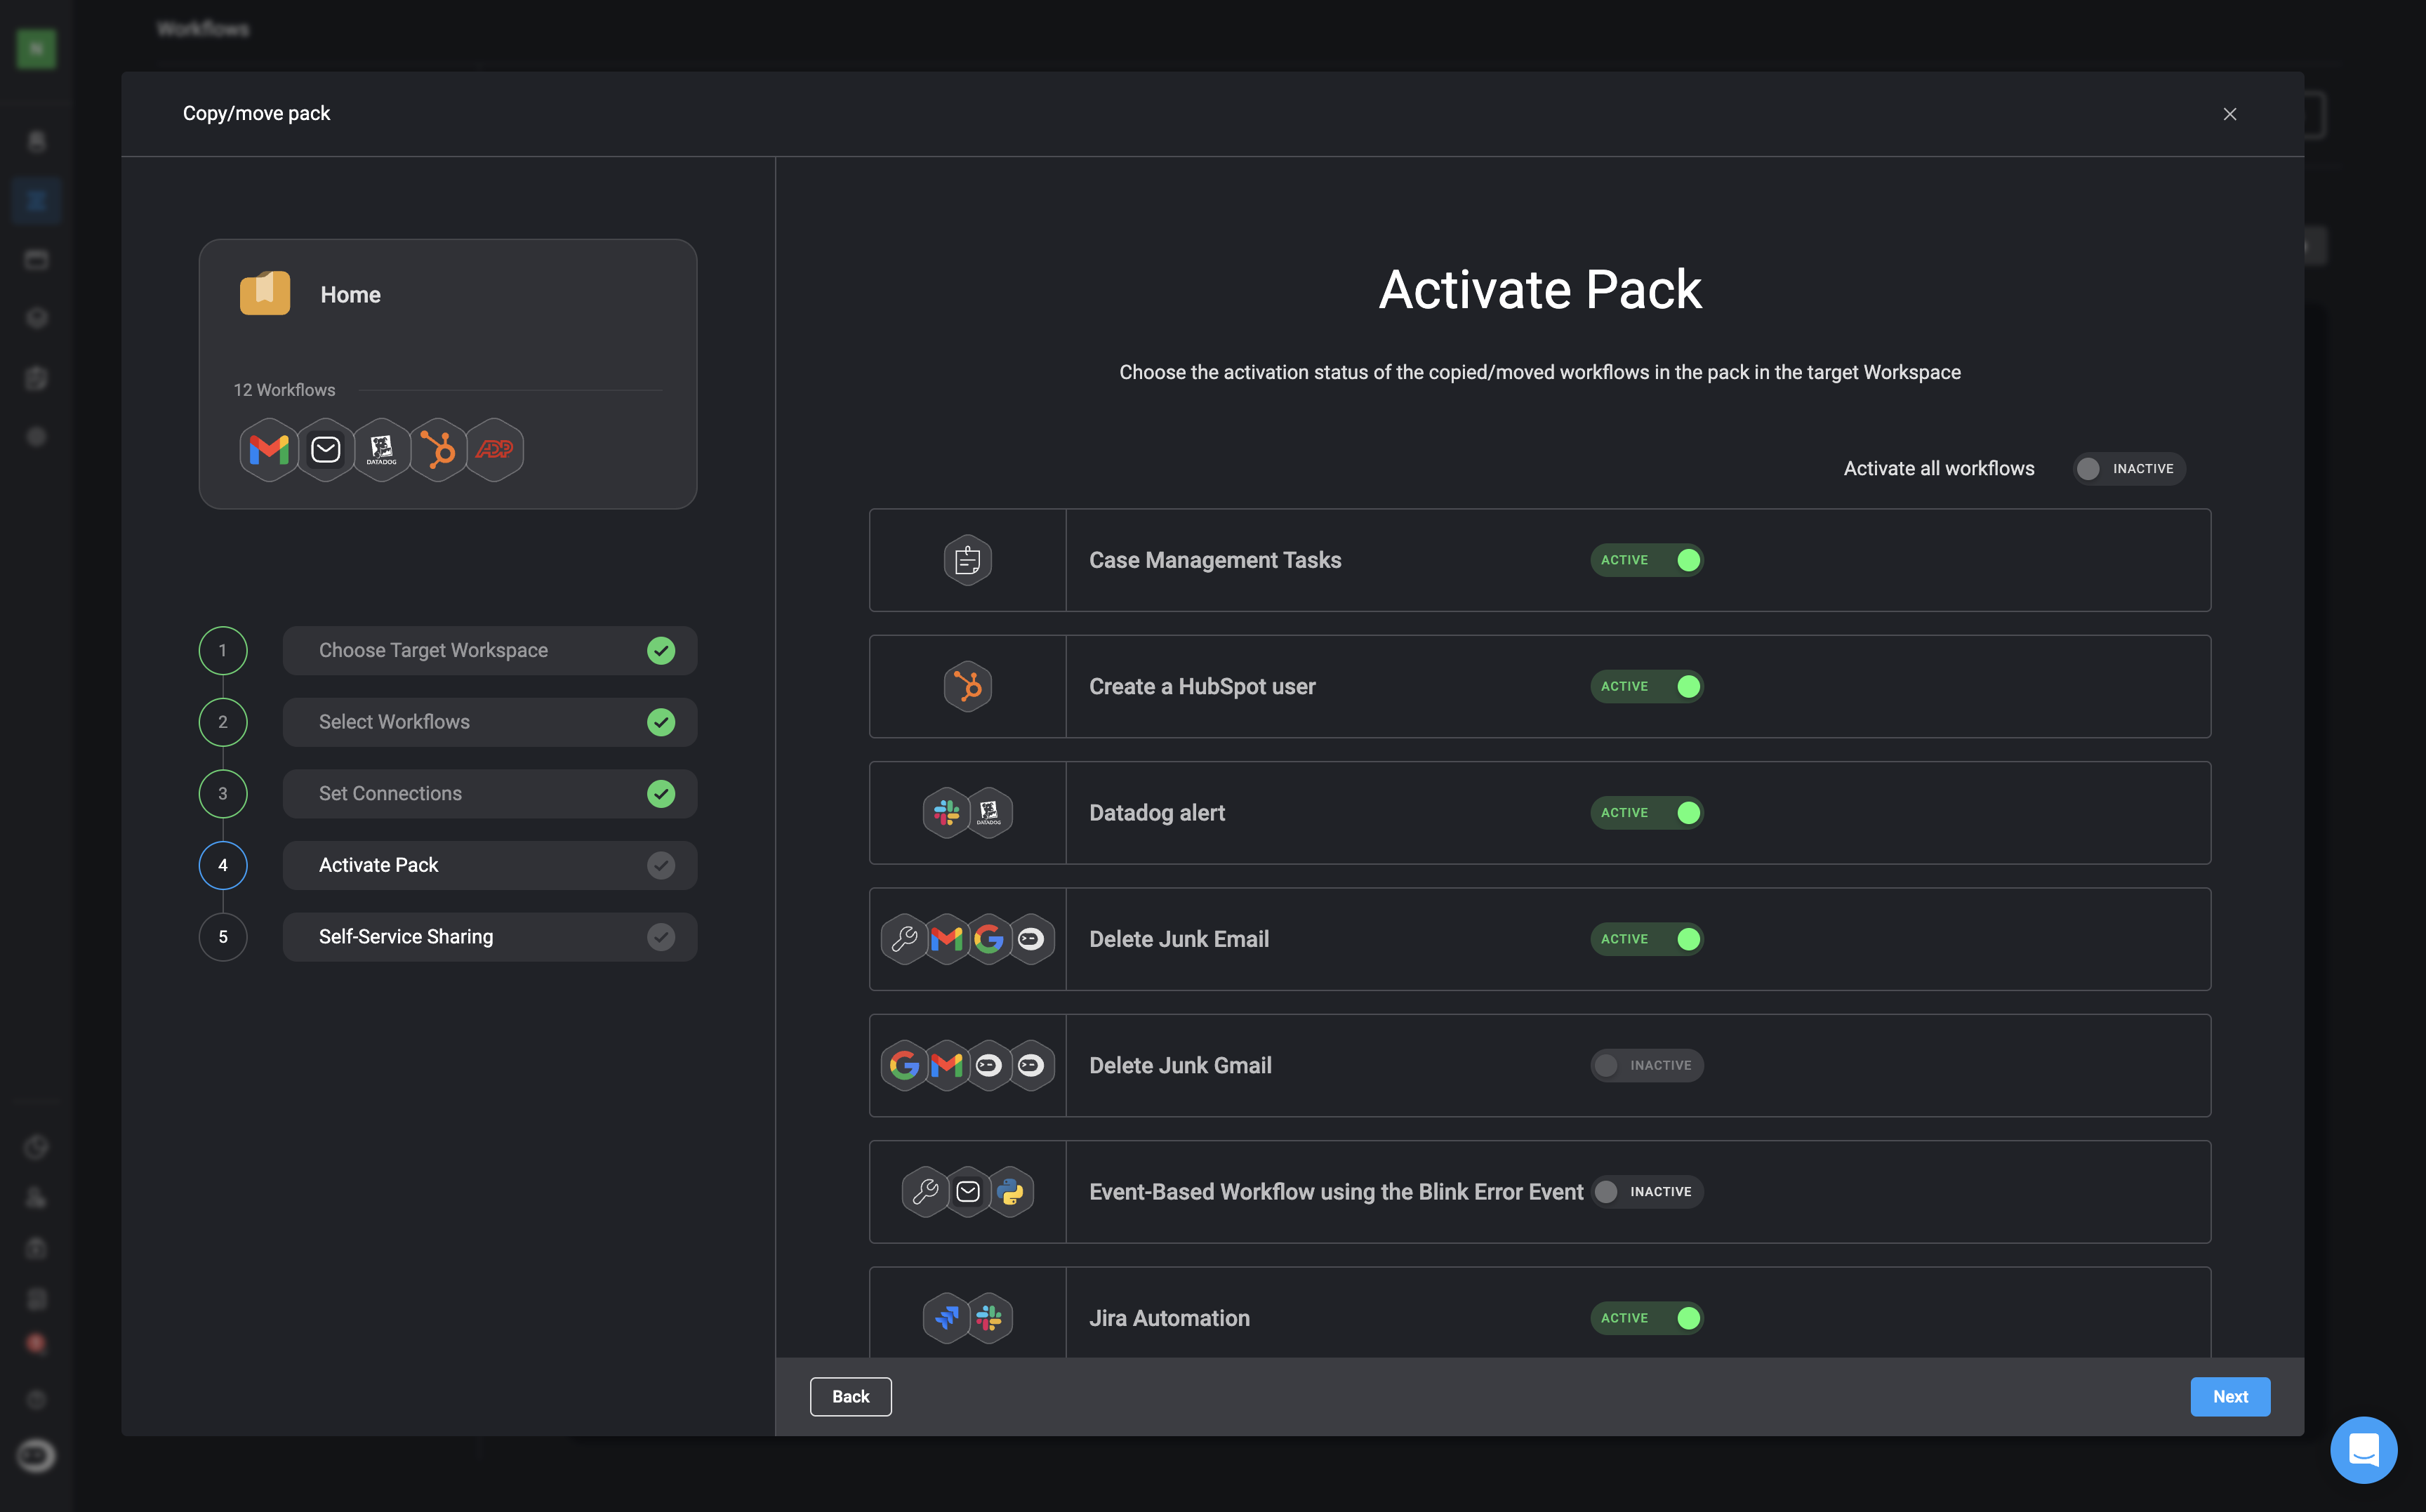
6
Self-Service Sharing
Decide whether you want to share the Copy/Move workflow(s) on the self-sharing portal by toggling the button.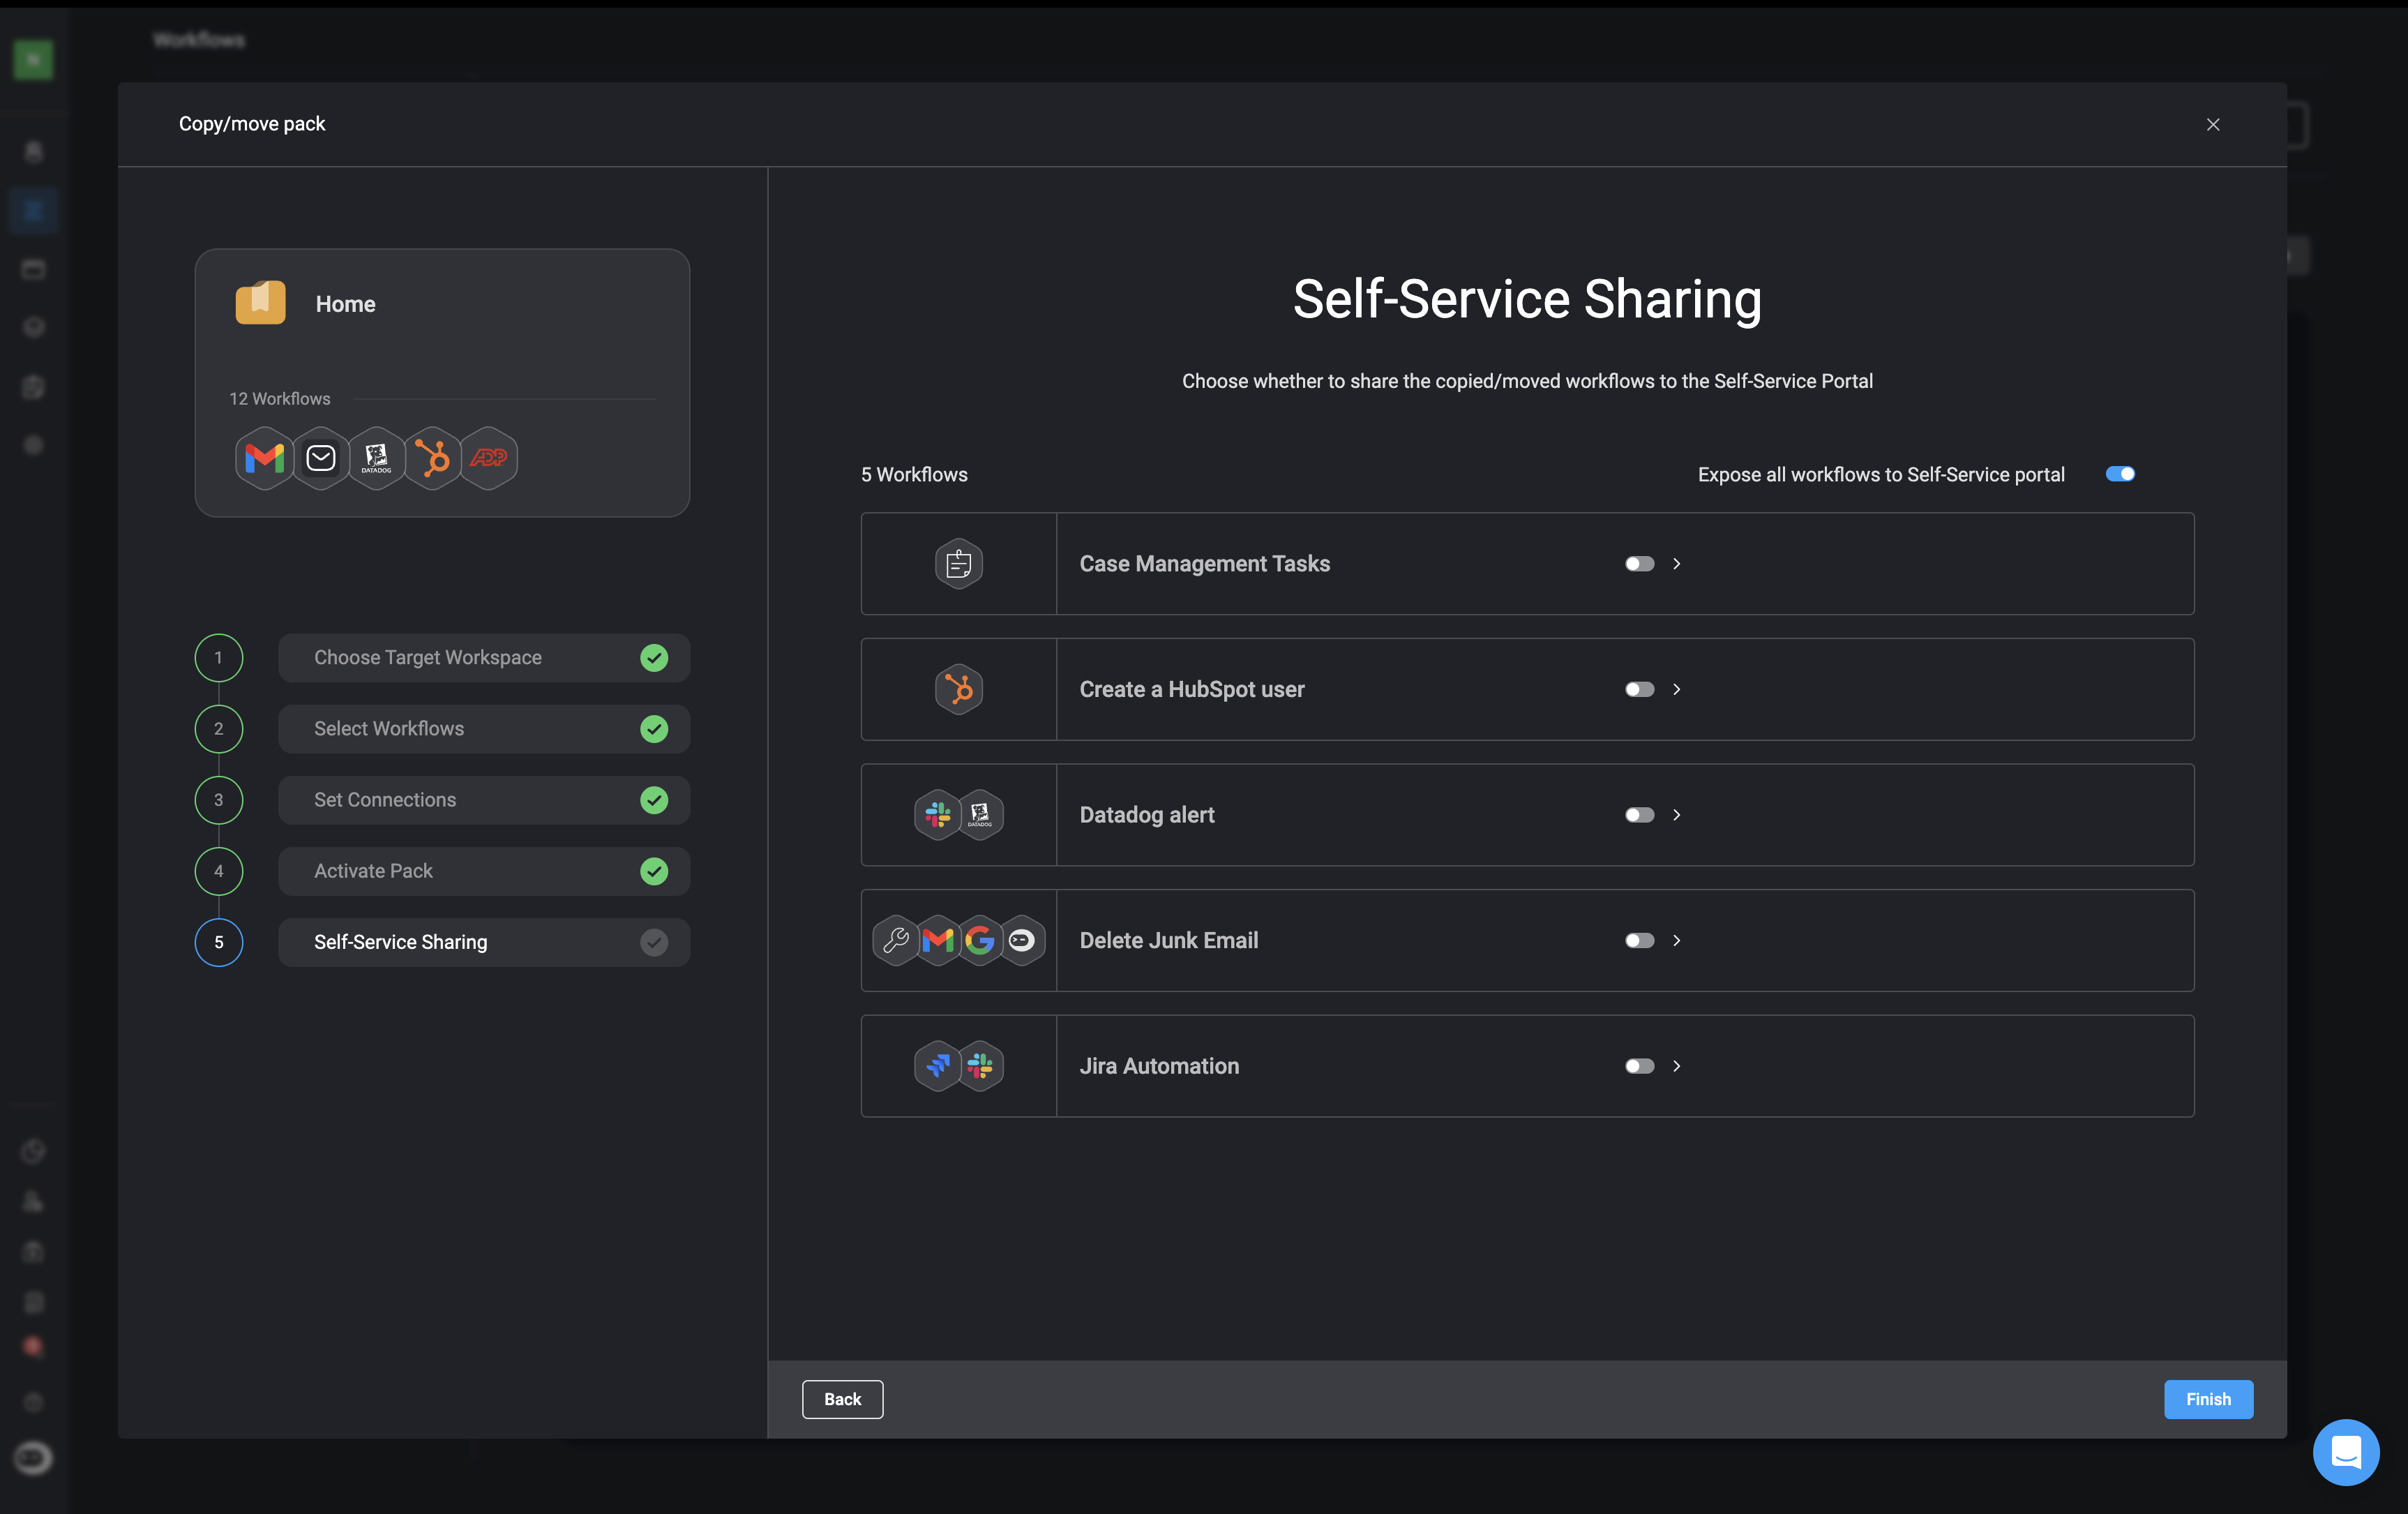
Please note that you can share the Copy/Move workflow(s) on the self-sharing portal, only if you set the workflow as active in the previous step.
7
To complete the process, simply click the Finish button located in the bottom-right corner. An Operation-Result popup will then appear in the bottom-right corner confirming that the pack has been copied or moved.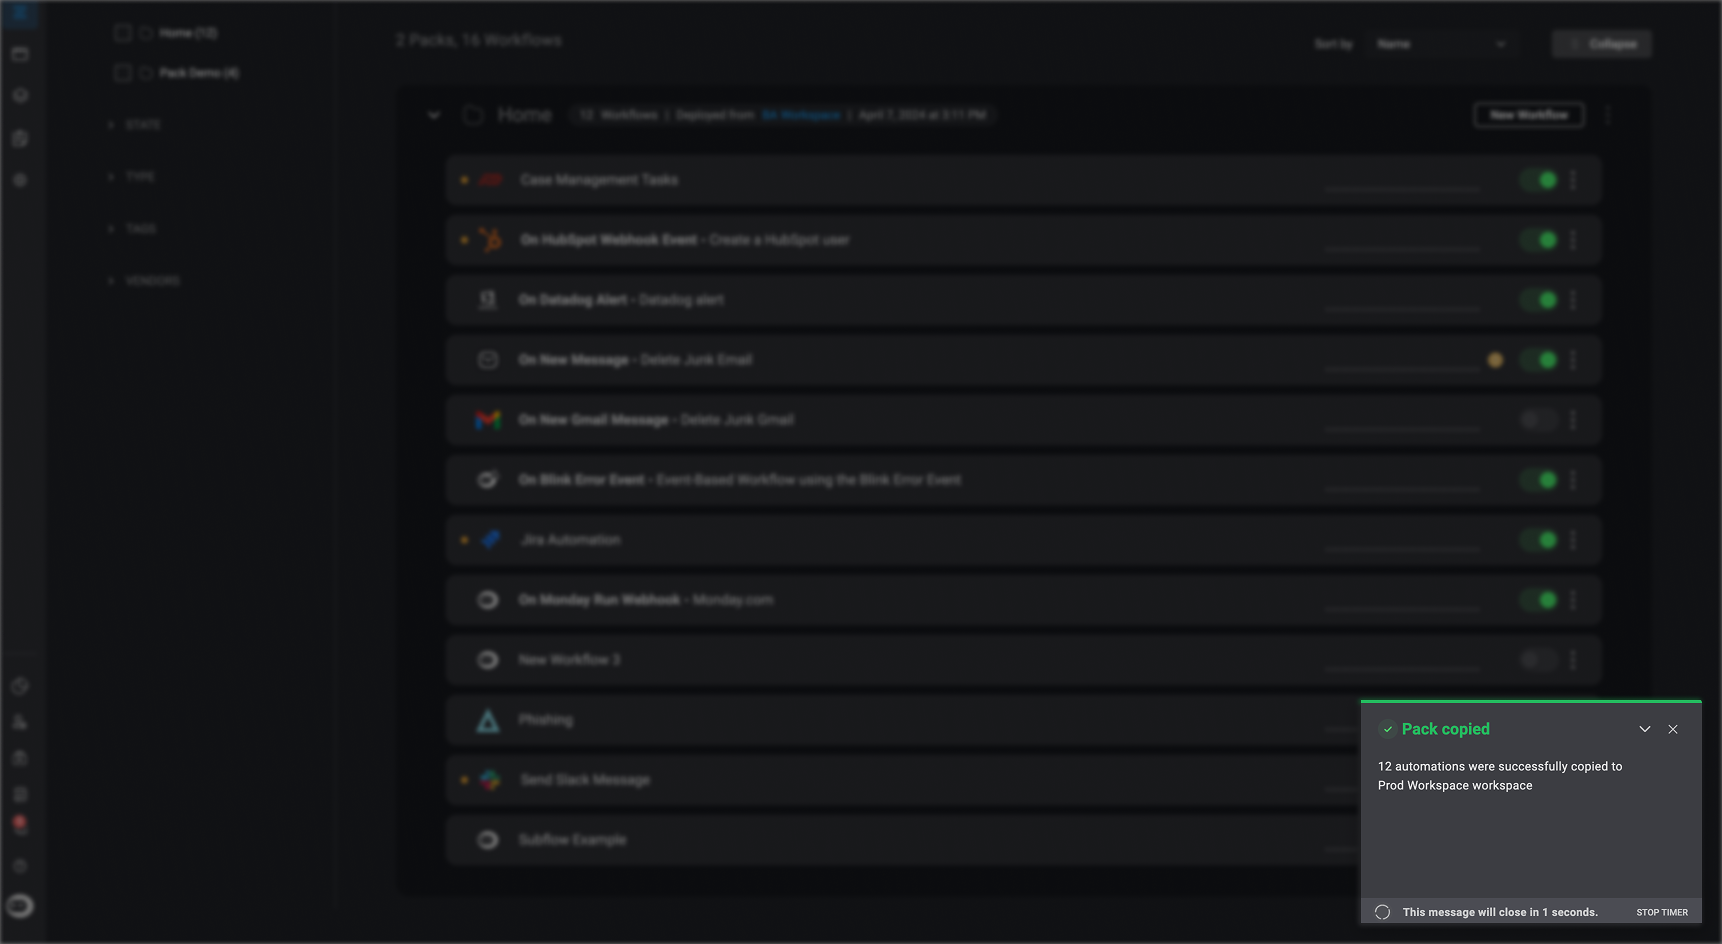
8
You can then navigate to the target workspace where you can access the copied/moved pack and workflow(s).