The new workflow editor is in its beta phase of testing. You can switch between the classic and new editor at any time by clicking the ‘Try New Editor’ button in the top-right corner of the workflow editor.
The Workflow Editor’s Interface
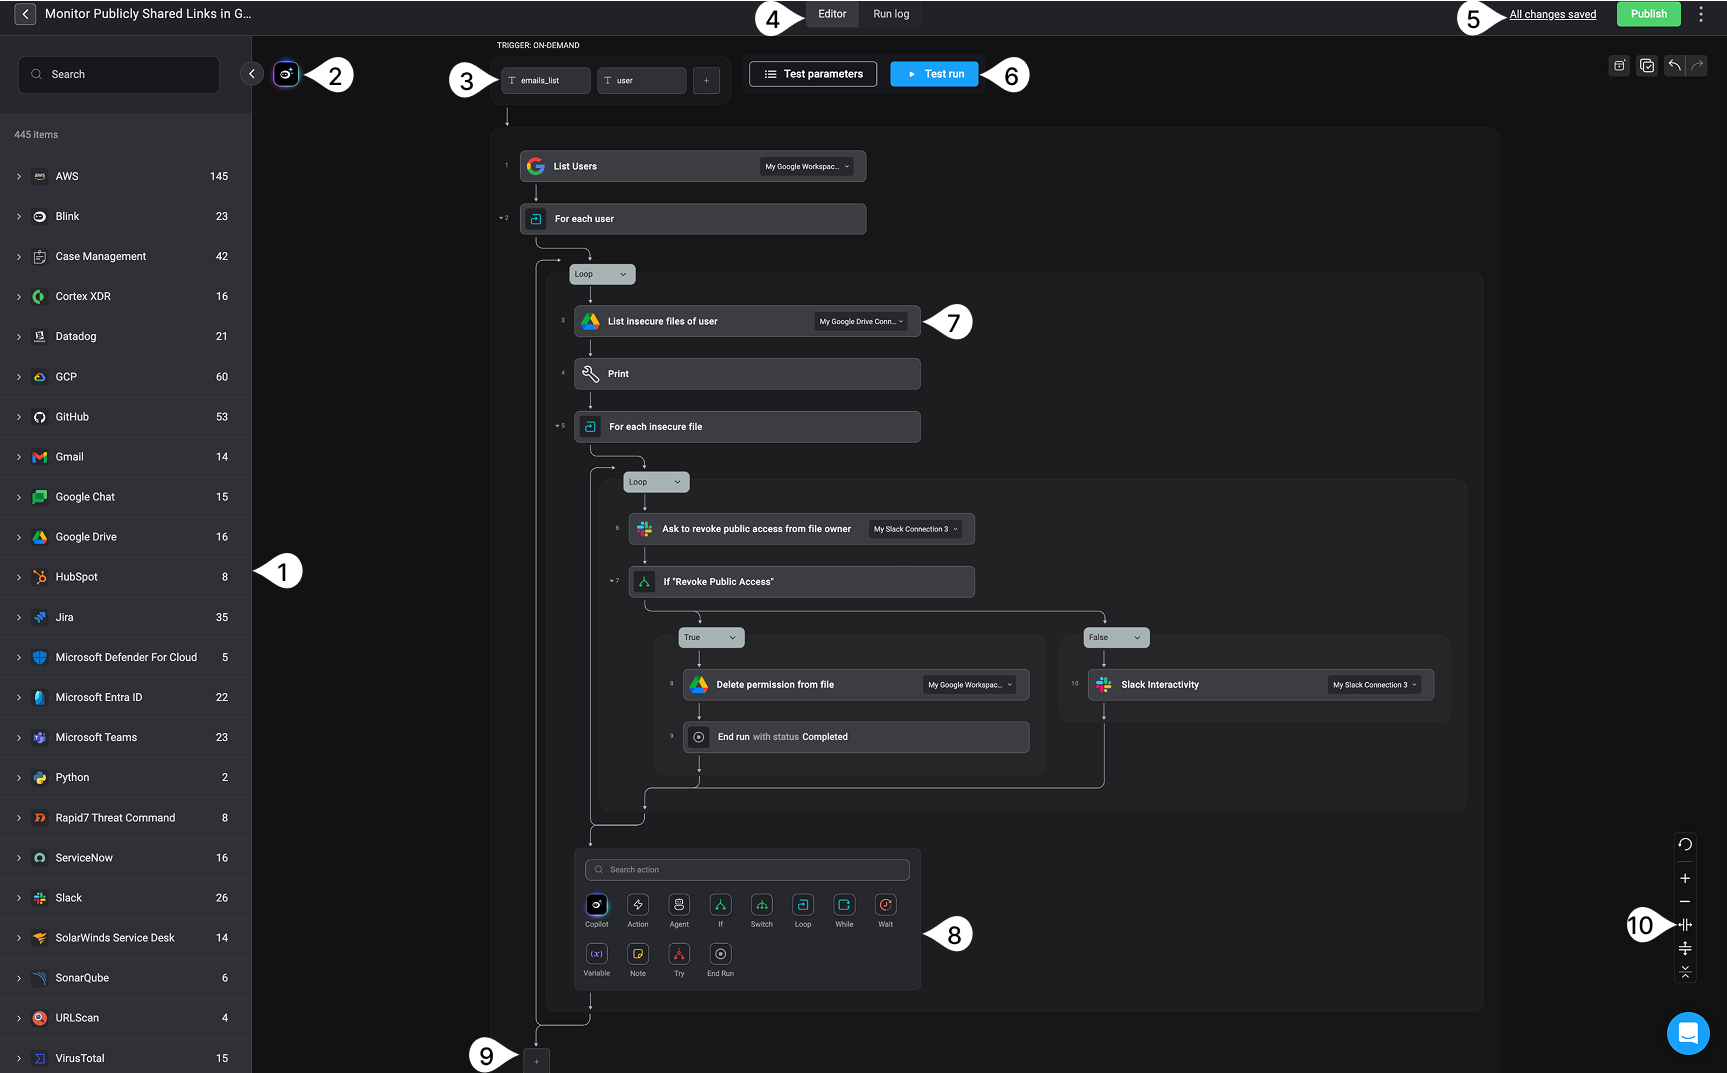
The following image illustrates the Workflow Editor’s Interface and its core components.Note: This image is provided as an example of the Workflow Editor interface. The appearance of your own workflow may vary depending on how you configure your triggers, steps, and actions.
Adding Actions to Steps
In the editor, you can add actions to a step in one of two ways.Drag and Drop
To create a step using drag and drop, select an action from the Action Panel on the left and drag it onto the canvas.
Inline Adding
Alternatively, click the icon in the center of the canvas to open the inline action panel, choose an action and add it to a step. You can choose from flow control actions, subflow or use the search bar to find a specific action across all integrations.
To learn more about how steps work in the Workflow Editor—including their logic, configuration, and behavior—refer to the steps documentation.
Understanding the Inline Action Panel

- Search Bar – Quickly locate a specific action by typing its name into the search bar.
- The Builder Copilot - Your AI assistant for building step logic. Use Builder Copilot to describe what you want to achieve in the step, and it will suggest the right action for you. You can add a single step or multiple steps.
-
Actions
A categorized list of all available actions you can use in your workflow:- All Actions: Browse the complete library of Blink’s built-in actions.
- Utility Actions: General-purpose actions like formatting text, transforming data, or waiting for a specified duration.
- Subflows:
- Subflows are reusable on-demand workflows that can be called as a step from other workflows. They help modularize your automation logic, reduce duplication, and simplify maintenance.
- Agents- All your custom built Agents
-
Flow Control Actions
- These actions help define the logic and structure of your workflow. Use them to add conditions, loops, parallel branches, or control how and when different parts of your workflow are executed.
Workflow Editor Settings
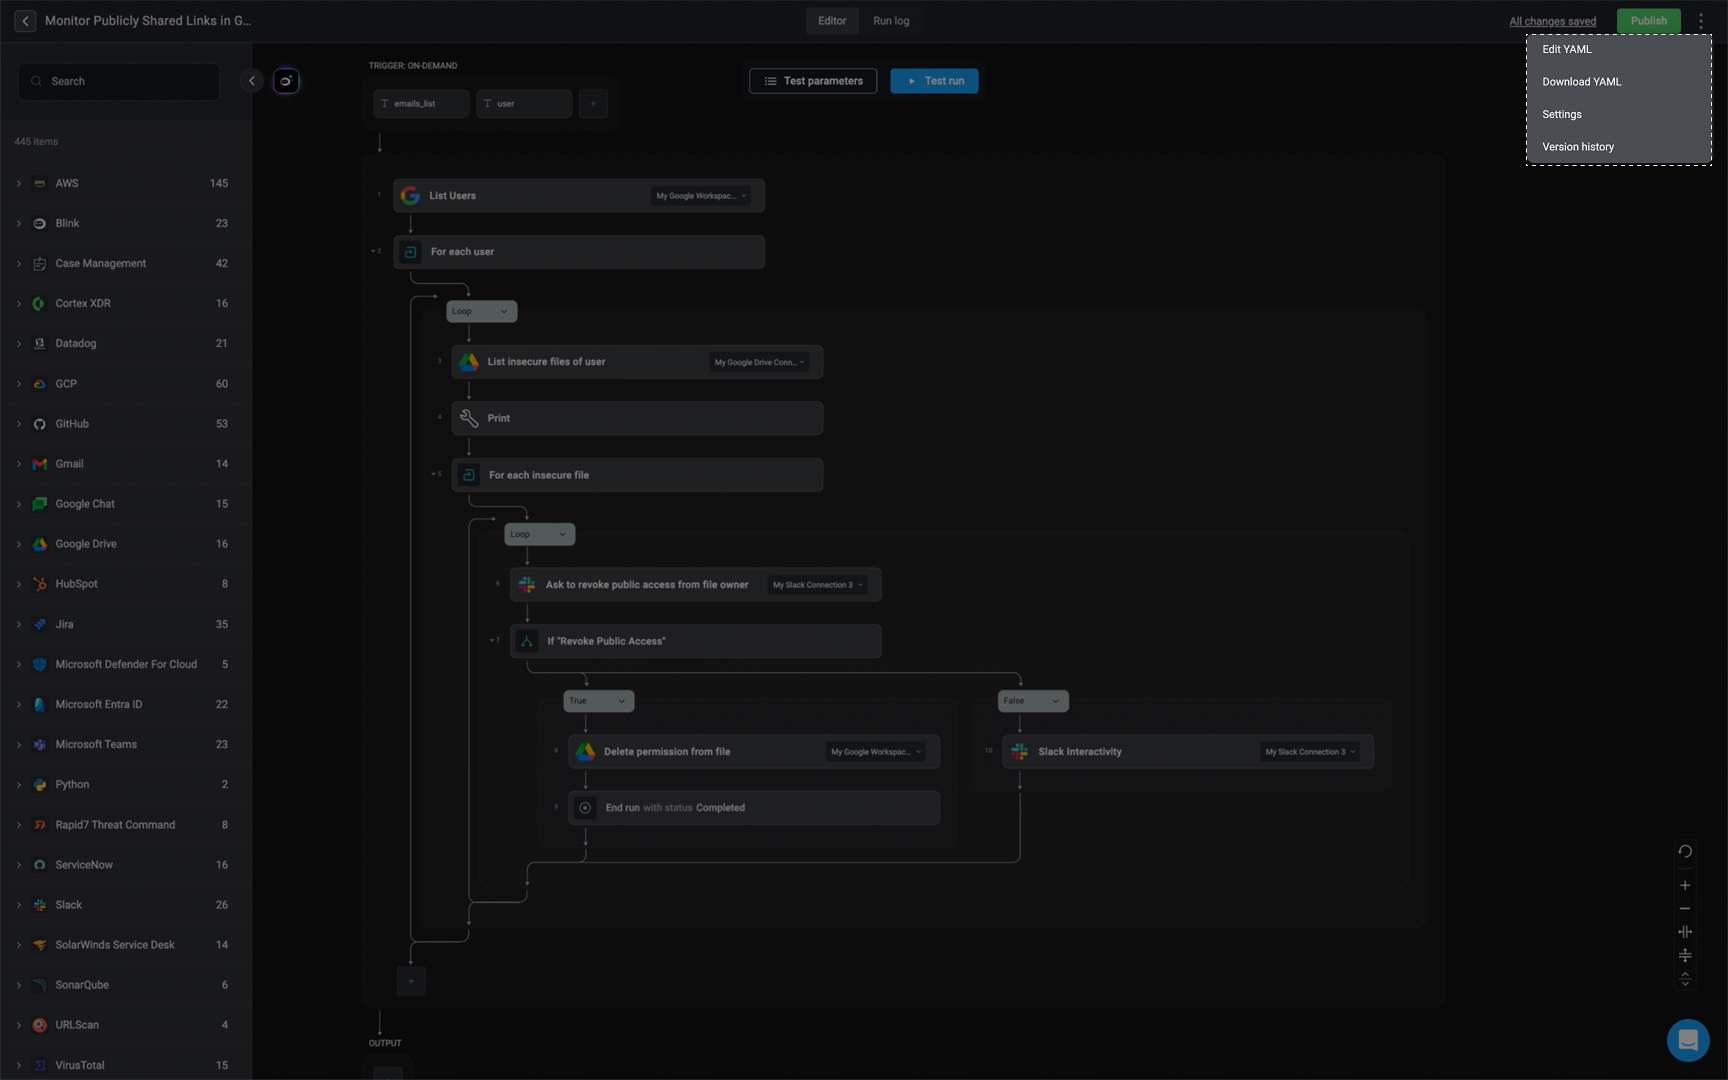
In the top-right corner of the Workflow Editor, you can access the setting by clicking on the menu and choosing from the following
- Edit Yaml- Open the
YAMLview of your workflow and make any desired changes. - Download YAML- Download your workflow in YAML format.
- Settings - This opens the Workflow Overview page. Manage workflow-level settings such as its name, description, tags, or visibility settings.
- Version History- View and manage the workflow’s version history. You can compare changes, see timestamps, and restore previous versions if needed.
Autosave and Manually Save Workflow Draft
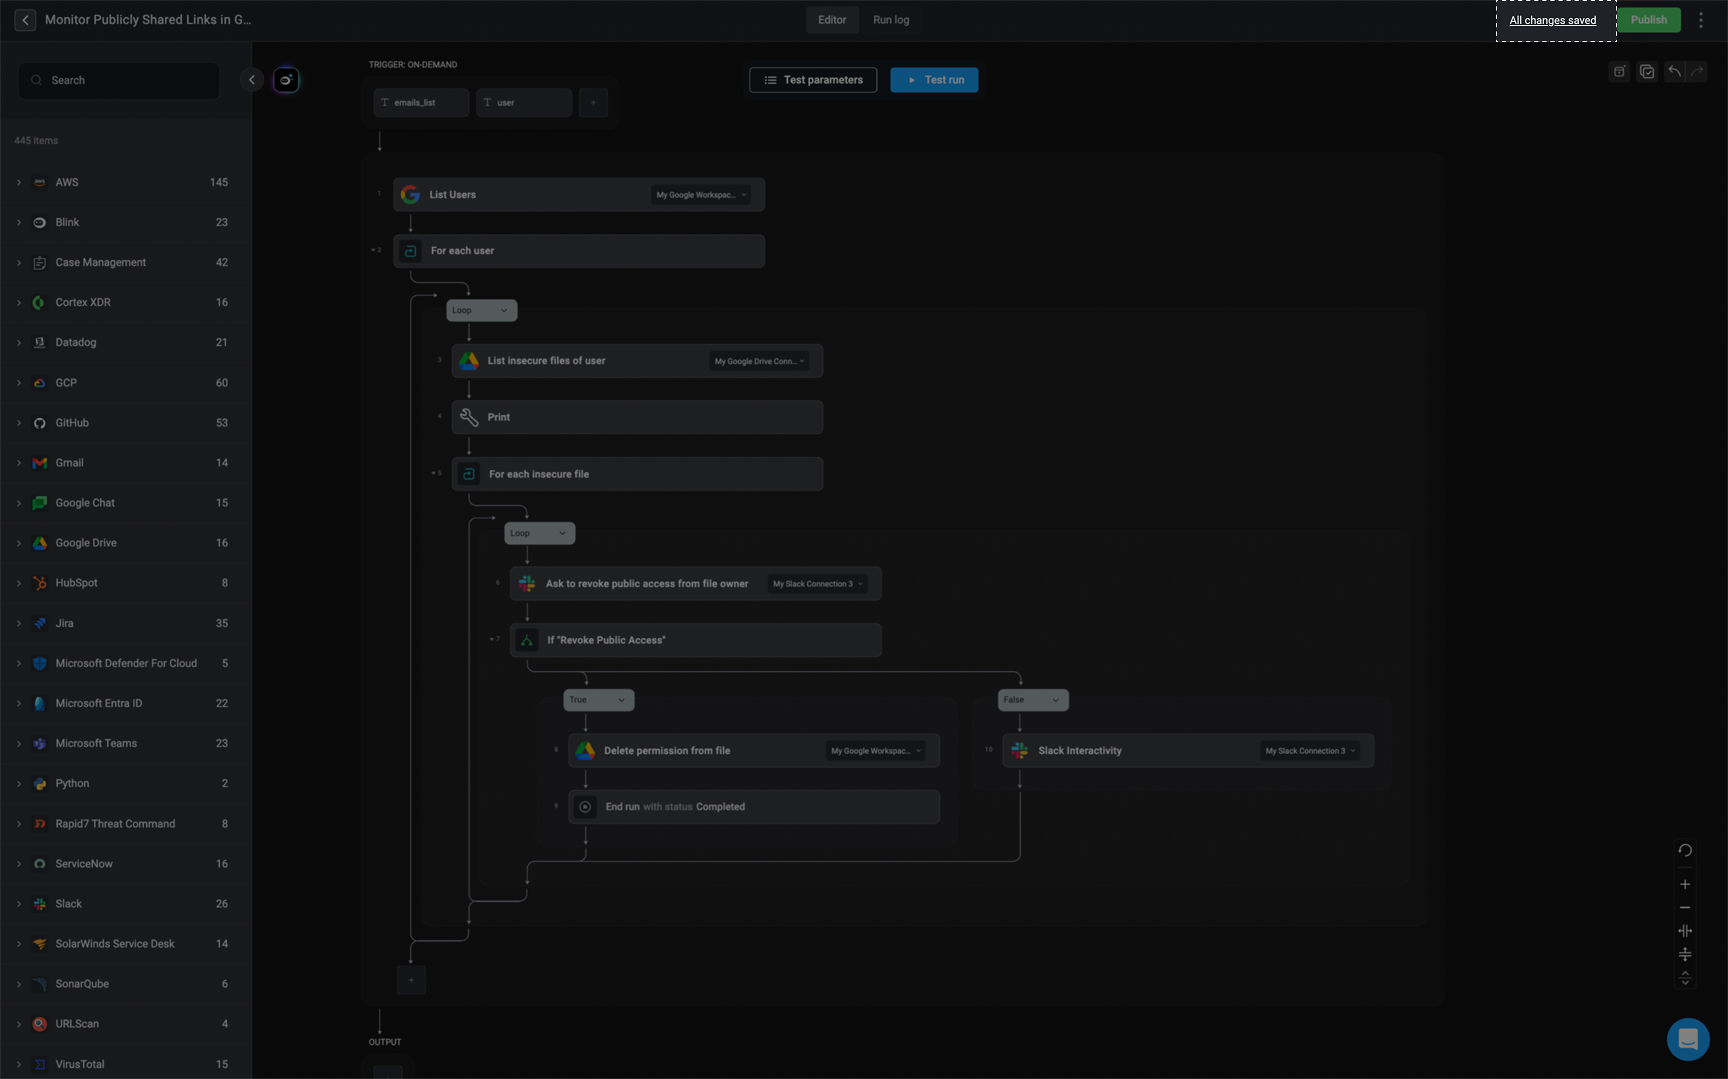
When you make changes to a workflow in the Workflow Editor:- Your changes are automatically saved by the system
- To view the timestamp of your most recent update, hover over the All Changes Saved indicator in the top-right corner. Clicking this indicator opens the version history, where you can review previous versions or restore a prior state if needed.
- If the workflow fails to save (for example, due to a lost internet connection), the autosave indicator will change to Not Saved. Hover over it to view additional details, if available.
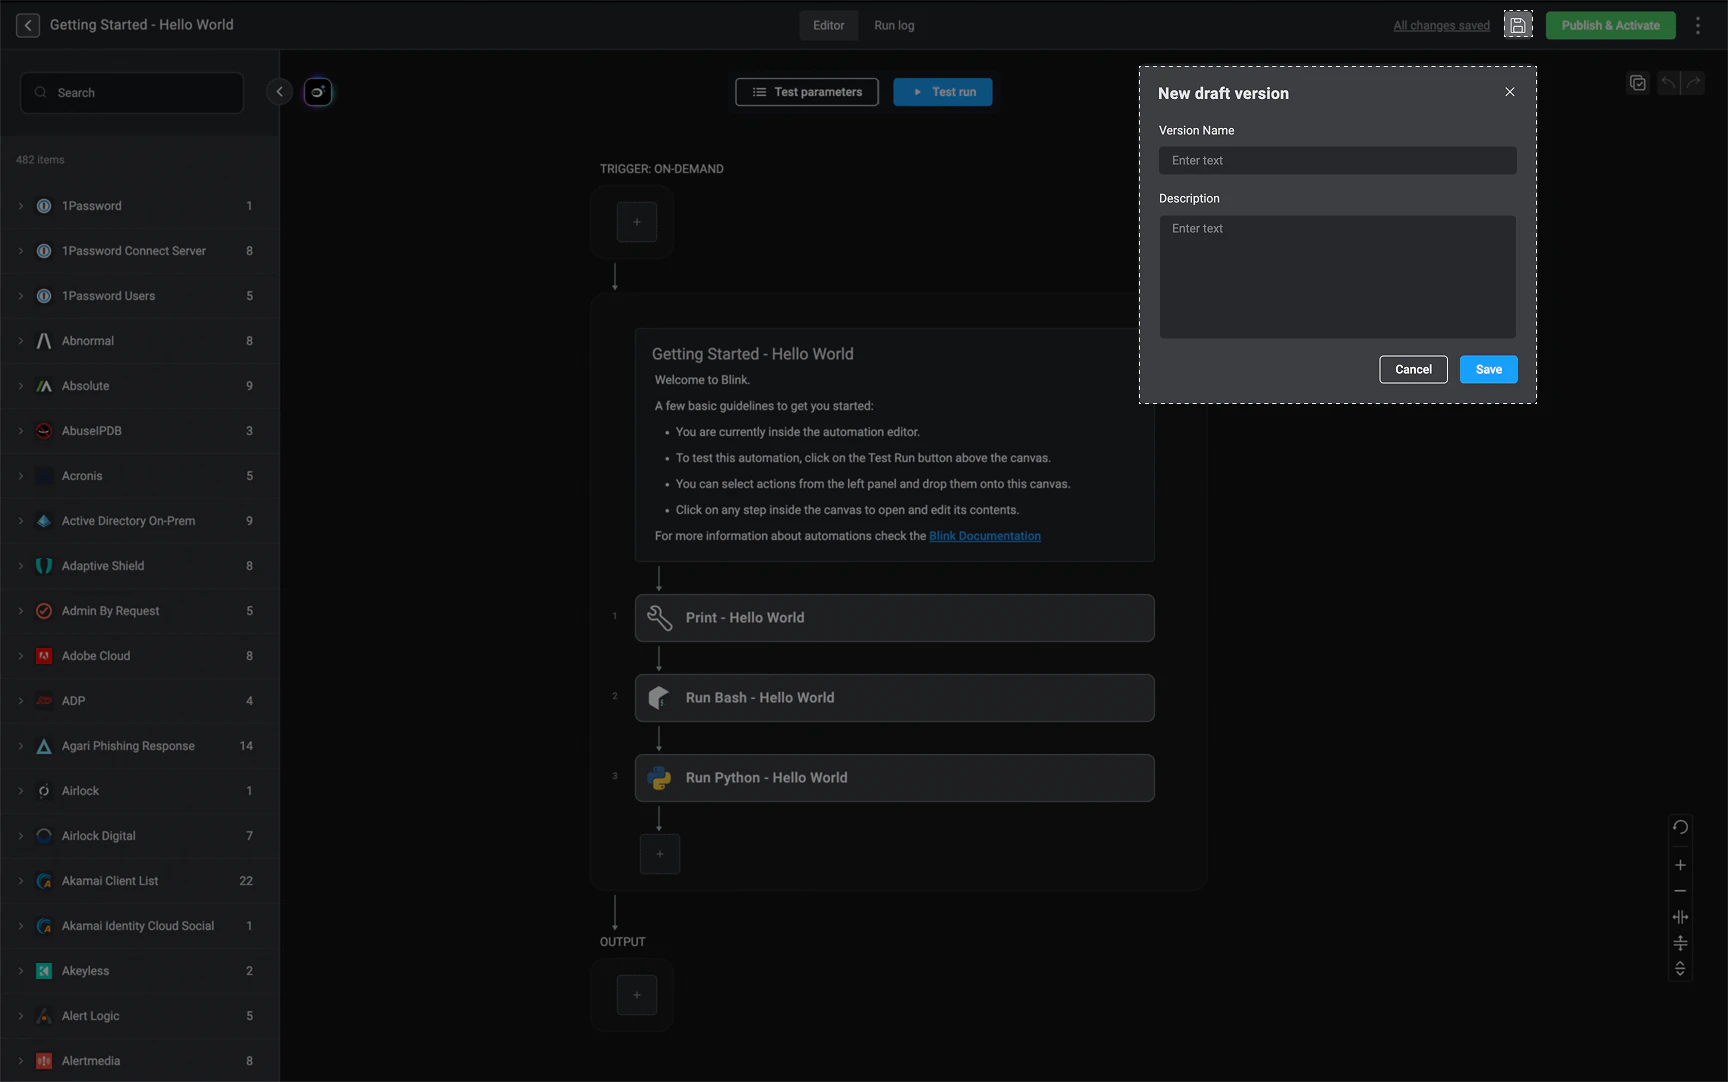
- You can also manually save a draft version
- Click the icon next to the Publish button, then enter a version name and an optional description. This will create a new draft version of the workflow.
Note: To avoid conflicts or potential loss of work, please be aware that concurrent editing is restricted. If a user is currently working in the editor, others will be unable to edit the same workflow to ensure a seamless process.
Published Workflows Vs Unpublished Workflows
When managing workflows, it is essential to differentiate between published and unpublished workflow versions. Unpublished workflows represent draft versions with changes that have not been published yet, while published workflows are finalized and ready for execution. You can identify the status of a workflow in multiple places: the workflow list, the workflow overview page, or the workflow editor. You can distinguish between a published and an unpublished workflow by looking at the:The Workflow Editor
The Workflow Editor
The Workflow Editor: Within the Workflow Editor, hover over the Published button. If there are unpublished changes, a notification will appear, stating that certain changes are not included in the published version. You can also access the Version History to review all changes made to the workflow.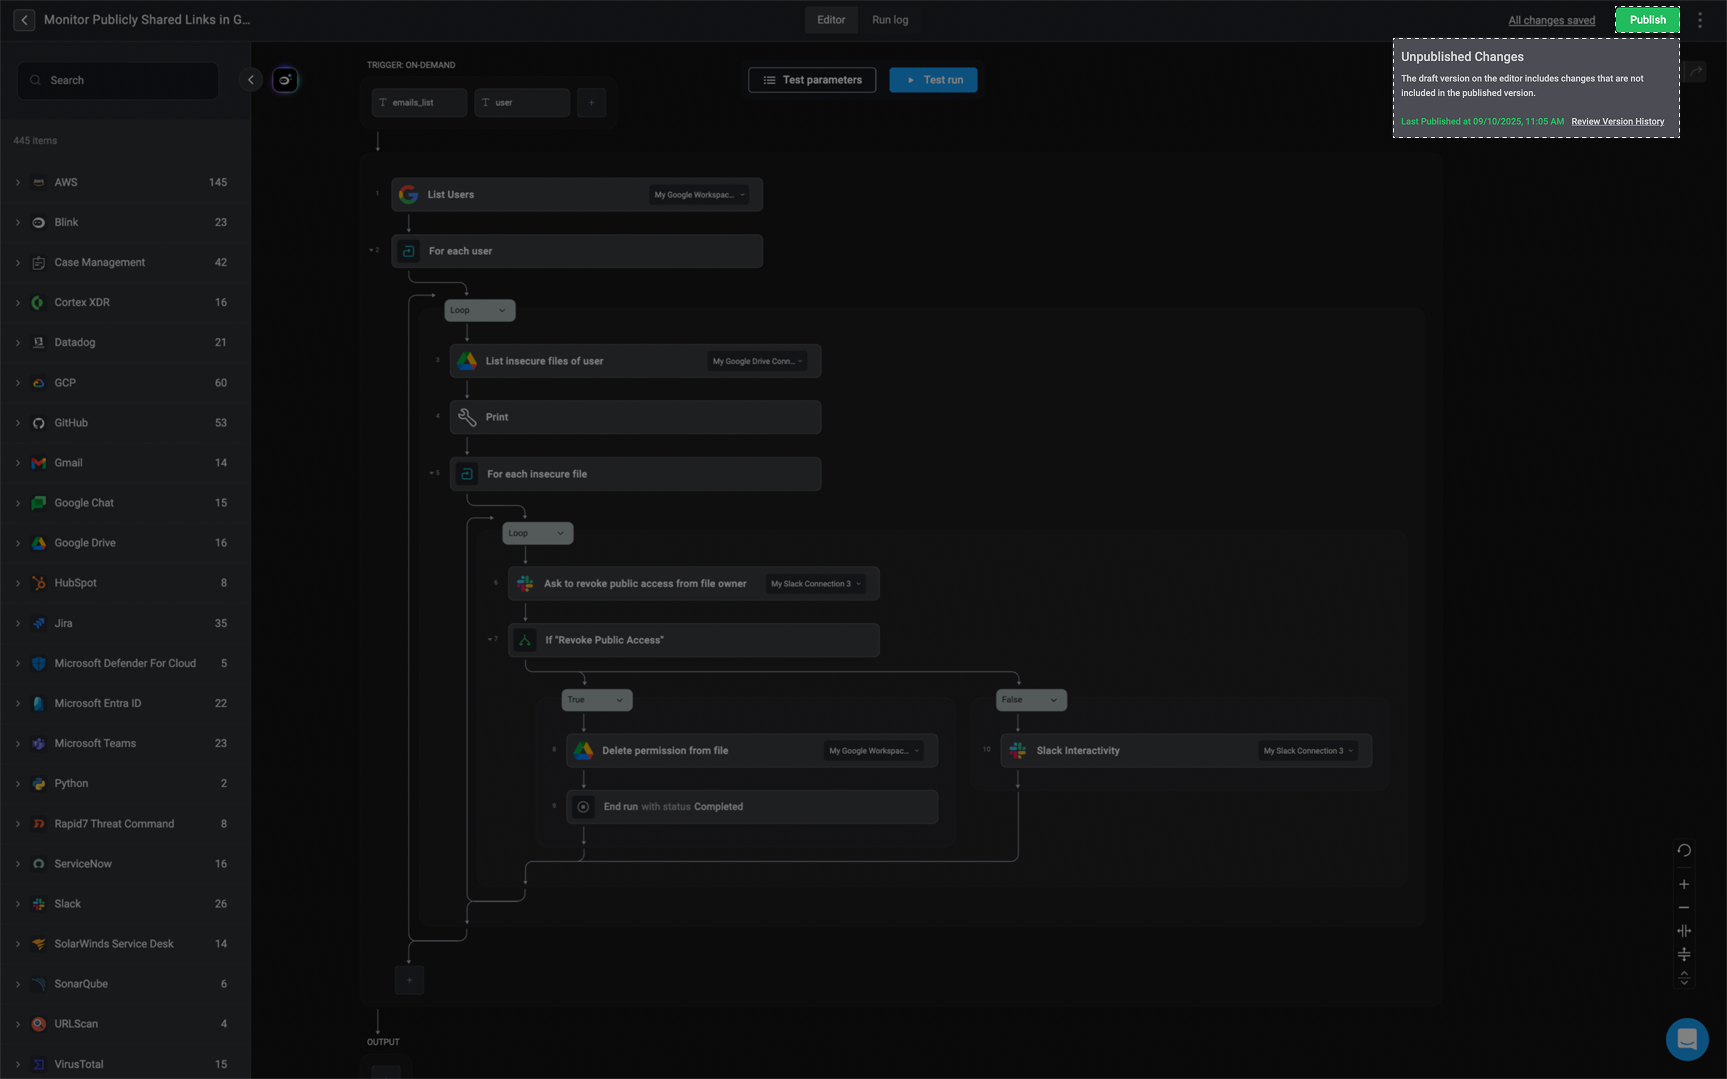
The Workflow Page
The Workflow Page
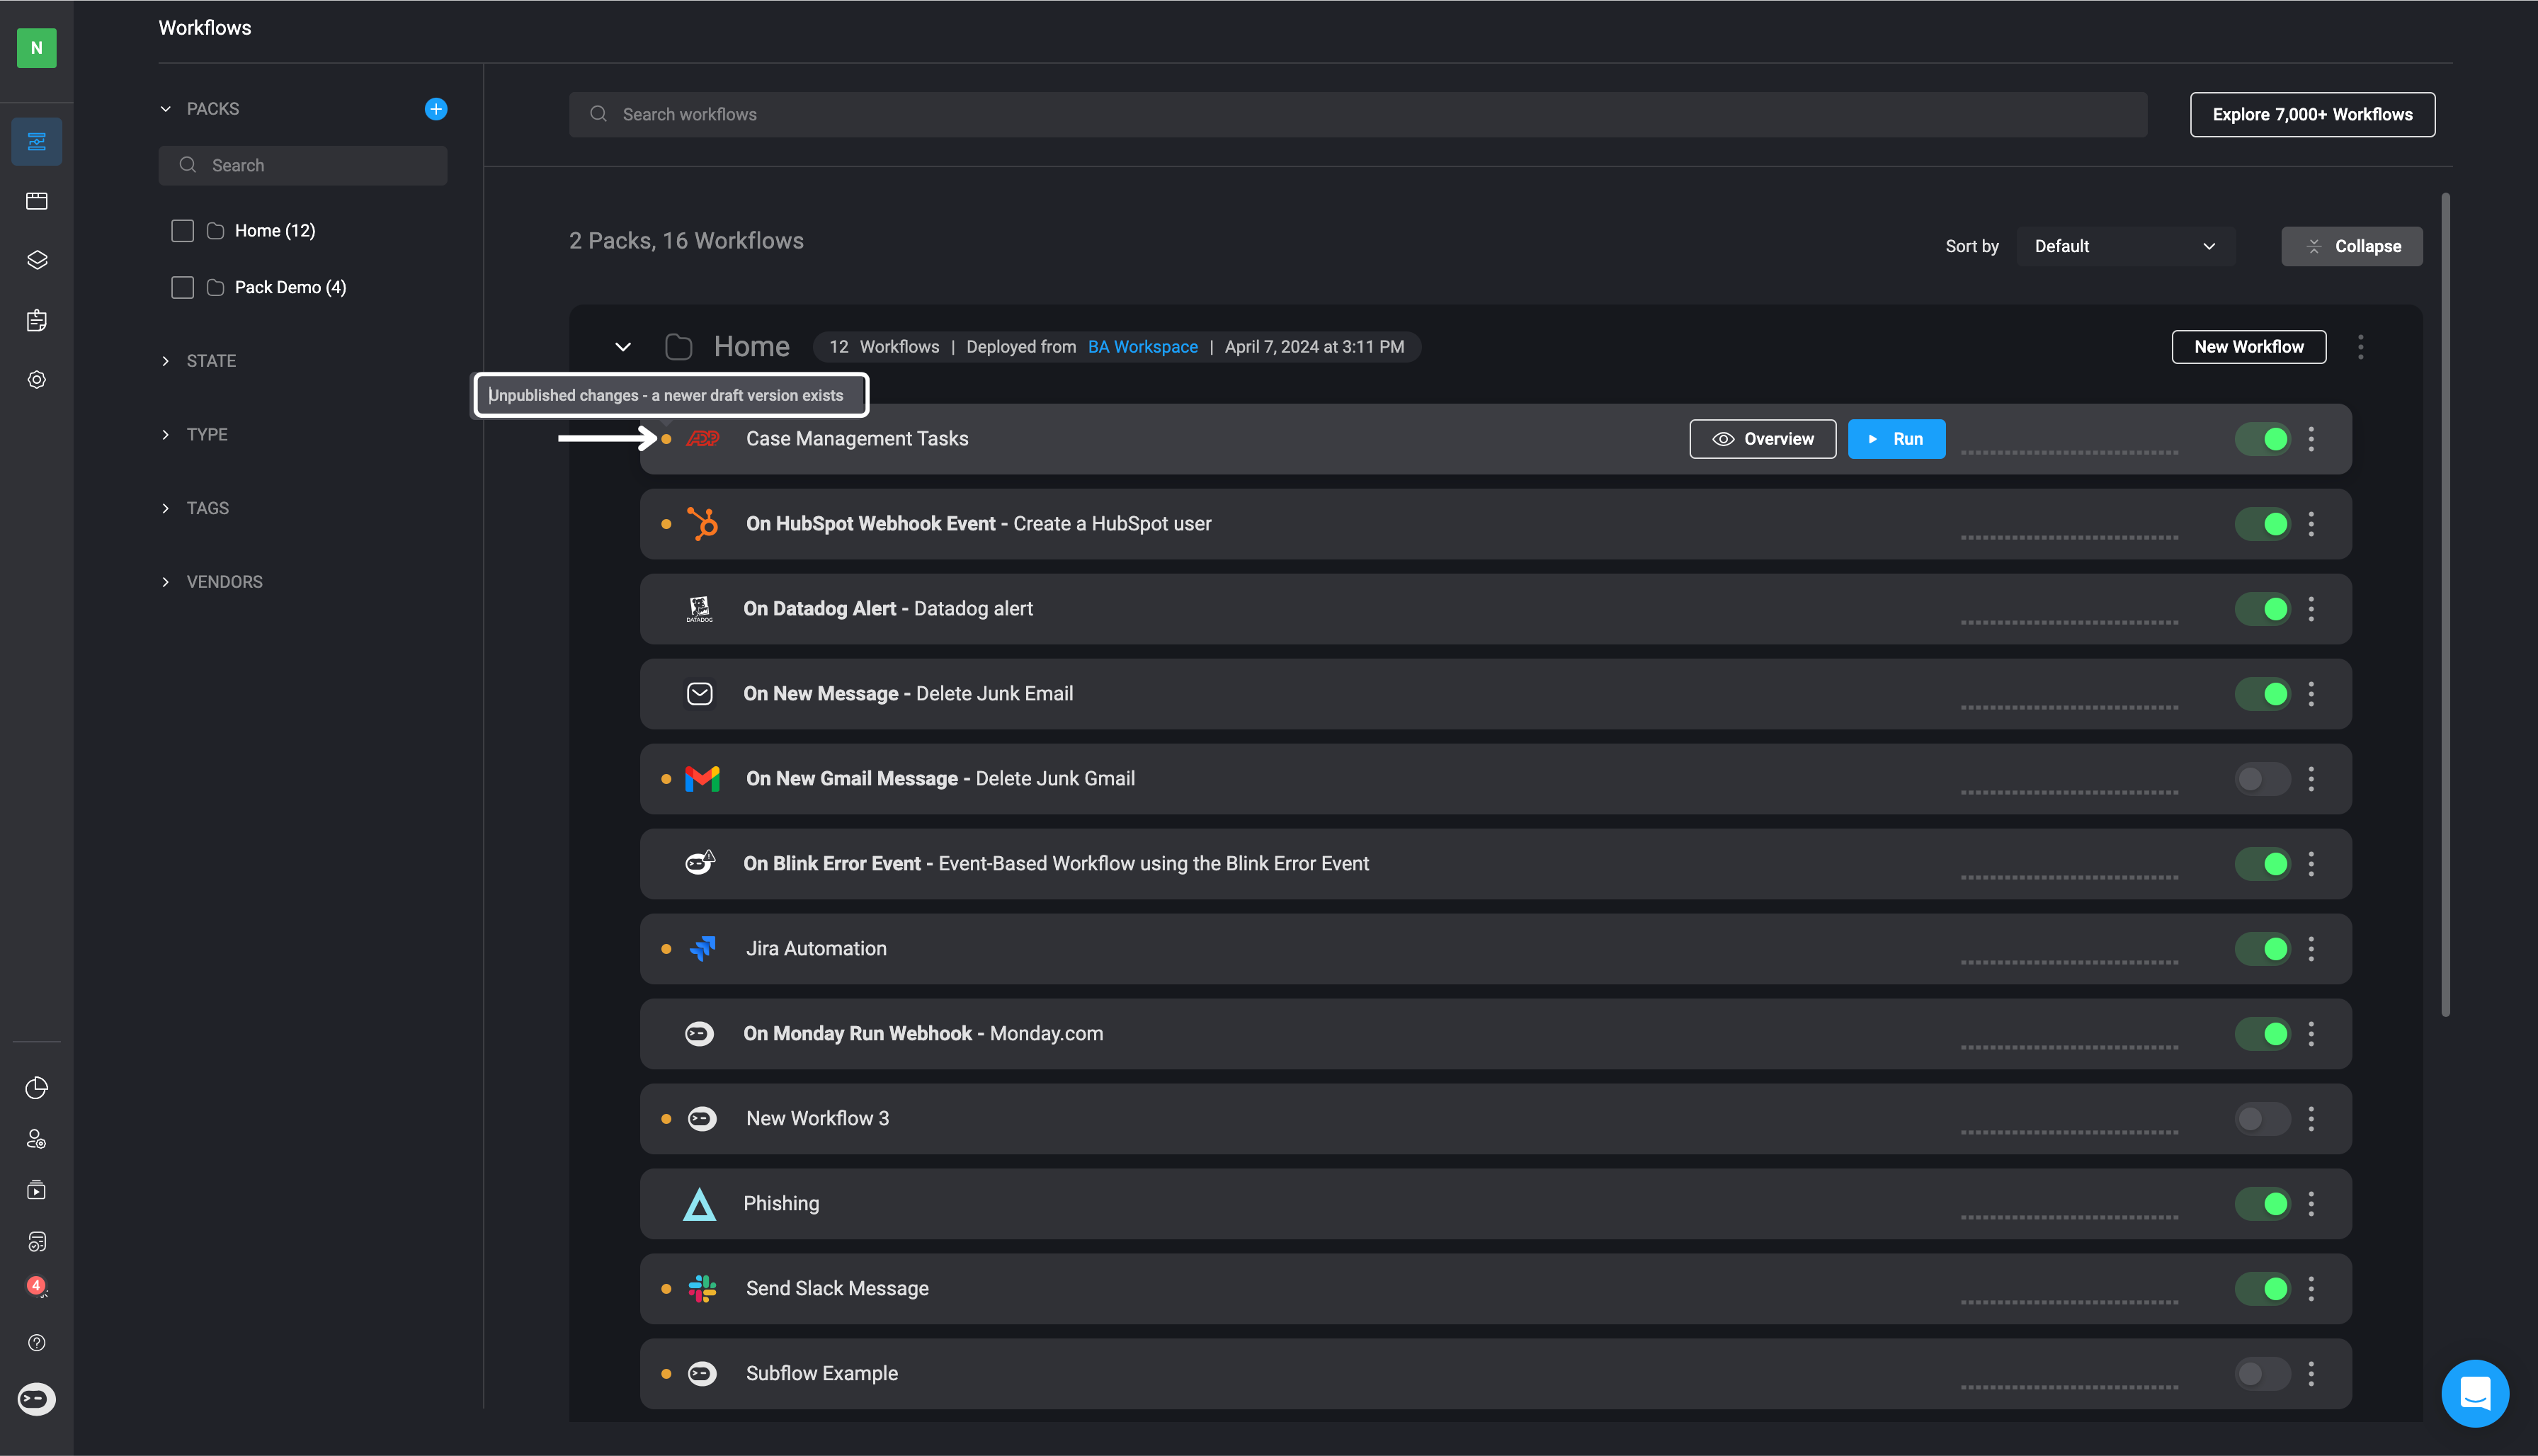
Workflow Page: A yellow dot () appears on the left-hand side of any workflow with unpublished changes. This serves as a quick visual indicator that a newer draft version exists.
The Workflow Overview Page
The Workflow Overview Page
The Workflow Overview Page: To view more details, select the workflow and click the Overview button. On the Workflow Overview page, you will see a notification at the bottom highlighting that unpublished changes exist. Additionally, you’ll find an option to view the latest draft of the workflow for further details.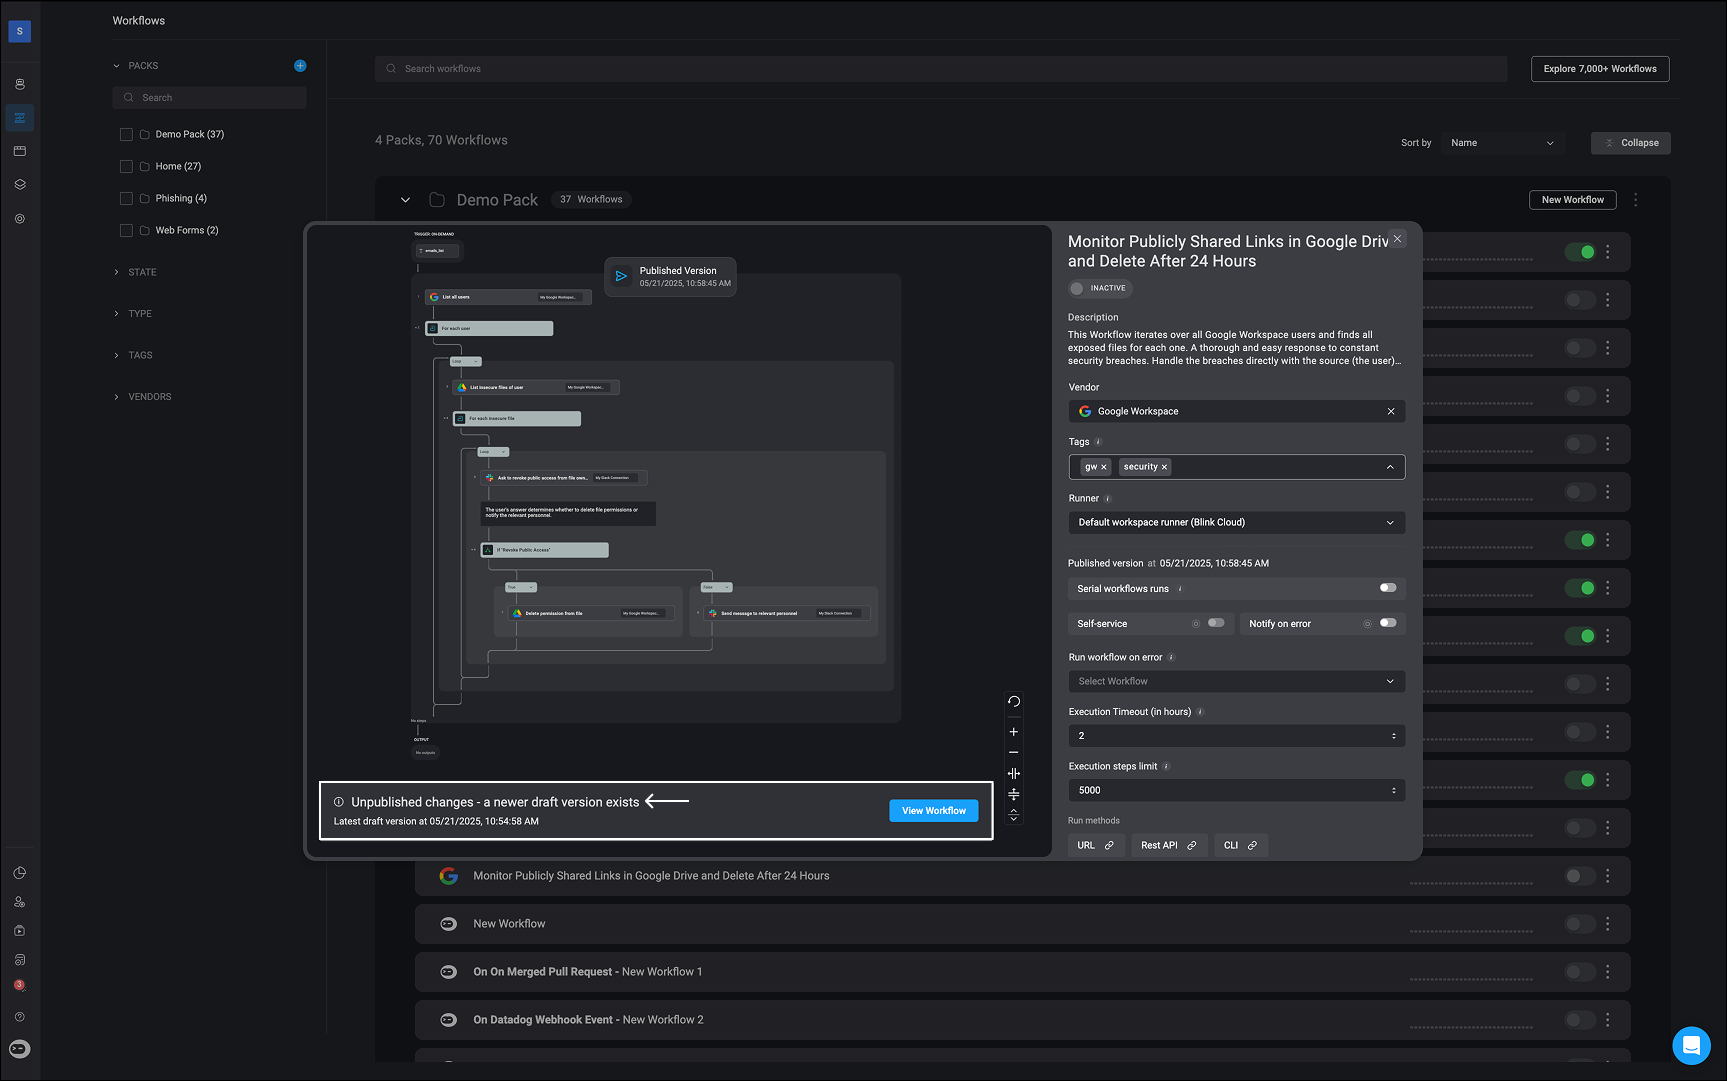
Related Articles
Triggers
Configure triggers to start workflows based on events.
Steps
Define and organize actions within a workflow.
Conditions
Add logic to control workflow execution paths.
Creating a Workflow
Build a new workflow from scratch in Blink.