if or if else actions. The builder supports logical operators like AND and OR, as well as a wide range of comparison types, helping you create precise, event-driven workflows.
Using the Condition Builder in the Blink platform
The Condition Builder is used in several areas across Blink’s platform, including the following scenarios:The following are illustrative examples intended to help you understand how the Condition Builder can be used across the Blink platform. Your actual configuration may vary depending on your specific use case and requirements.
Event-Based Workflows
Event-Based Workflows
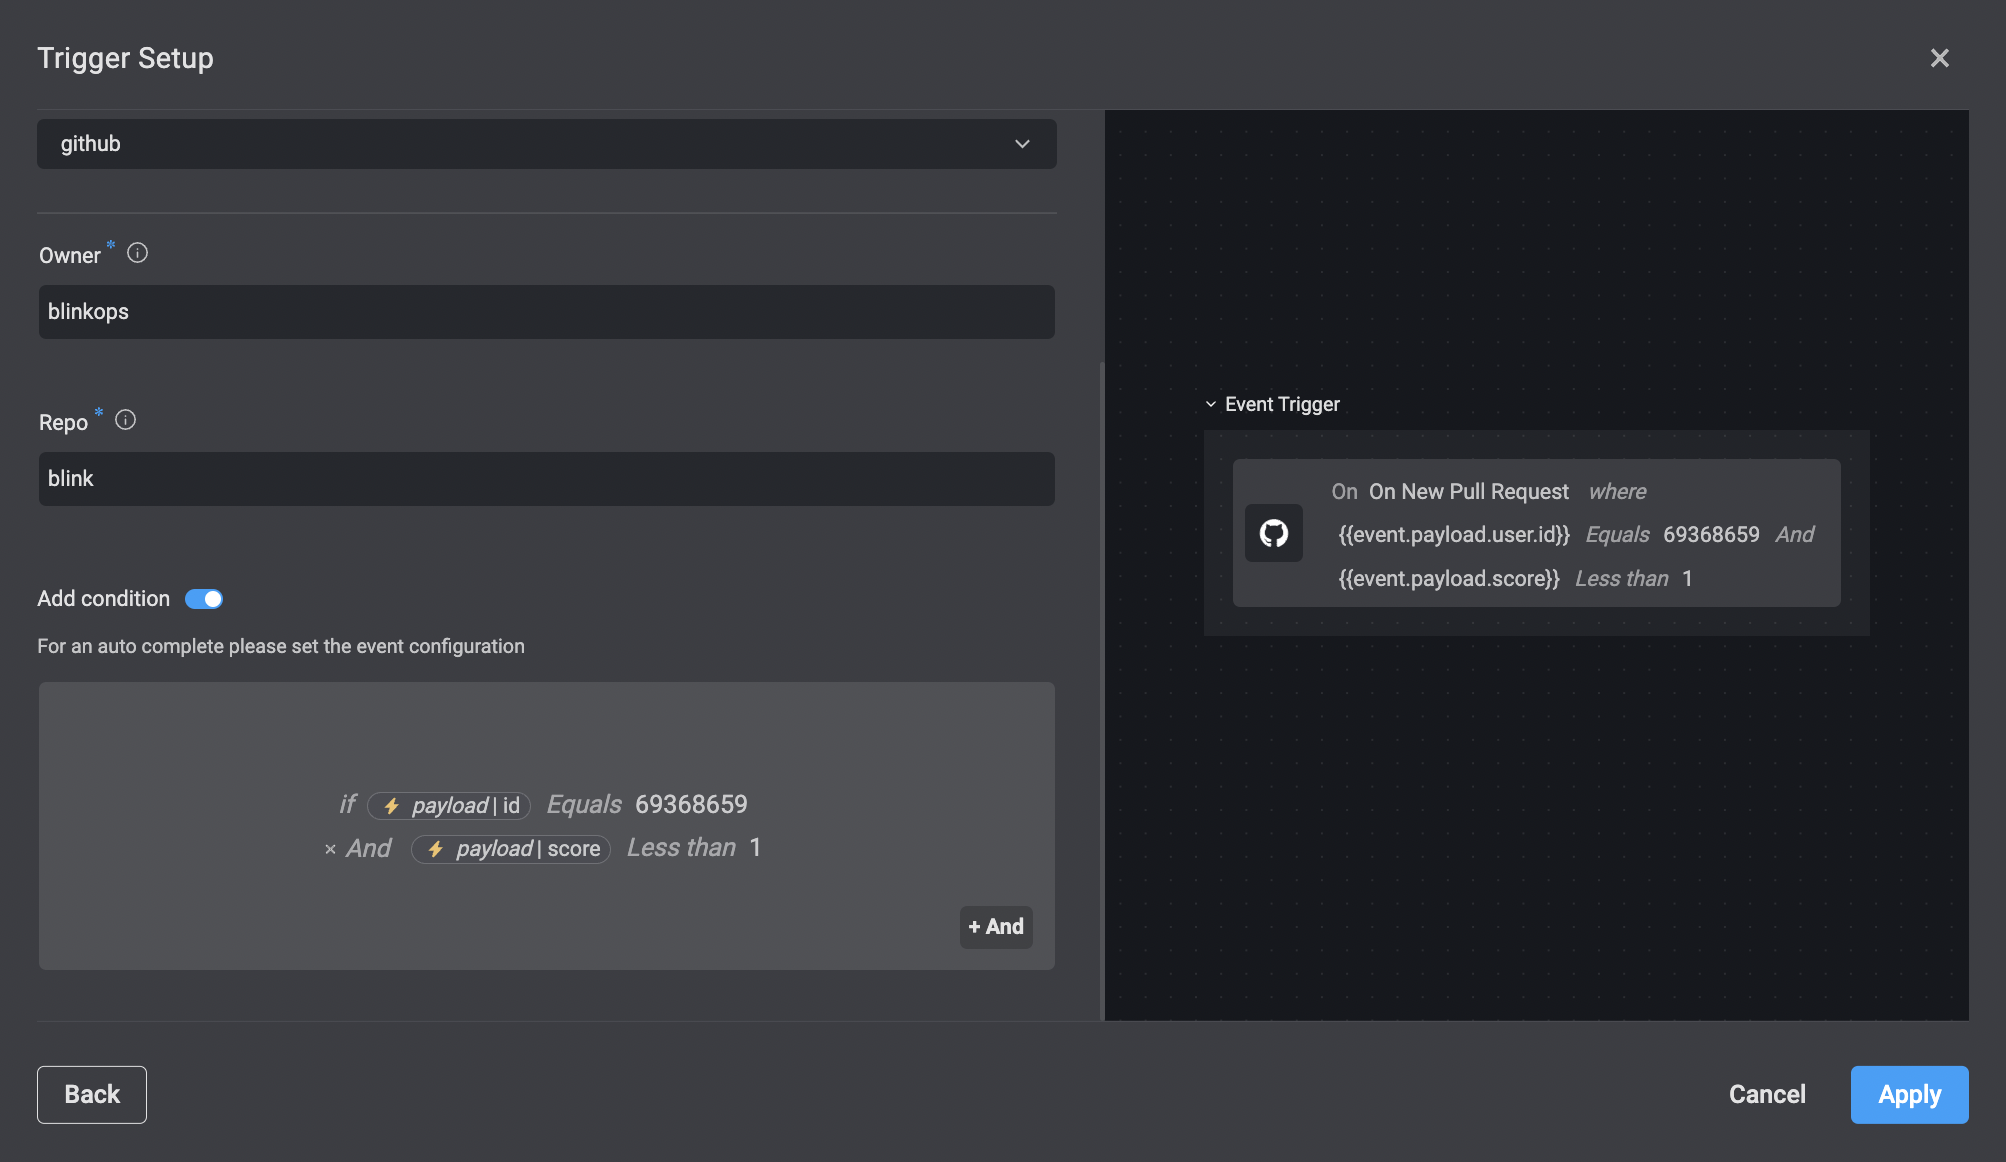
Additional conditions can be applied to limit which events trigger a Workflow. For example, if your Workflow is triggered when an event is received, you can add a condition stating that it will run only if it is received by a user with a specific ID. For more information about the about Event-Based Workflows, navigate here
1
Select Trigger Source and Action
When creating an Event-Based Workflow, in the ‘Trigger setup’, select a service provider, and the event you wish to trigger the Workflow.
2
Enable Conditions
Toggle the ‘Add condition’ button. The condition builder consists of three parts: the left value, the operator, and the right value.
3
Set Condition Values
To apply a condition, click on and enter each value. Select an operator from the dropdown menu that appears when you click on it.
4
Add Logical Operators
Use
AND or OR operators to further define your statement. The condition appears in the text window on the right side.5
Apply the Condition
Click Apply.
Using the Condition Builder in an `If` Action
Using the Condition Builder in an `If` Action
For more information about the
If action, navigate here 1
Add an `if` or `if else` Action
In the Workflow Editor page, select an if action.
2
Define the Condition
To apply a condition, click on and enter each value. Select an operator from the dropdown menu that appears when you click on it.
3
Add Logical Operators
Use 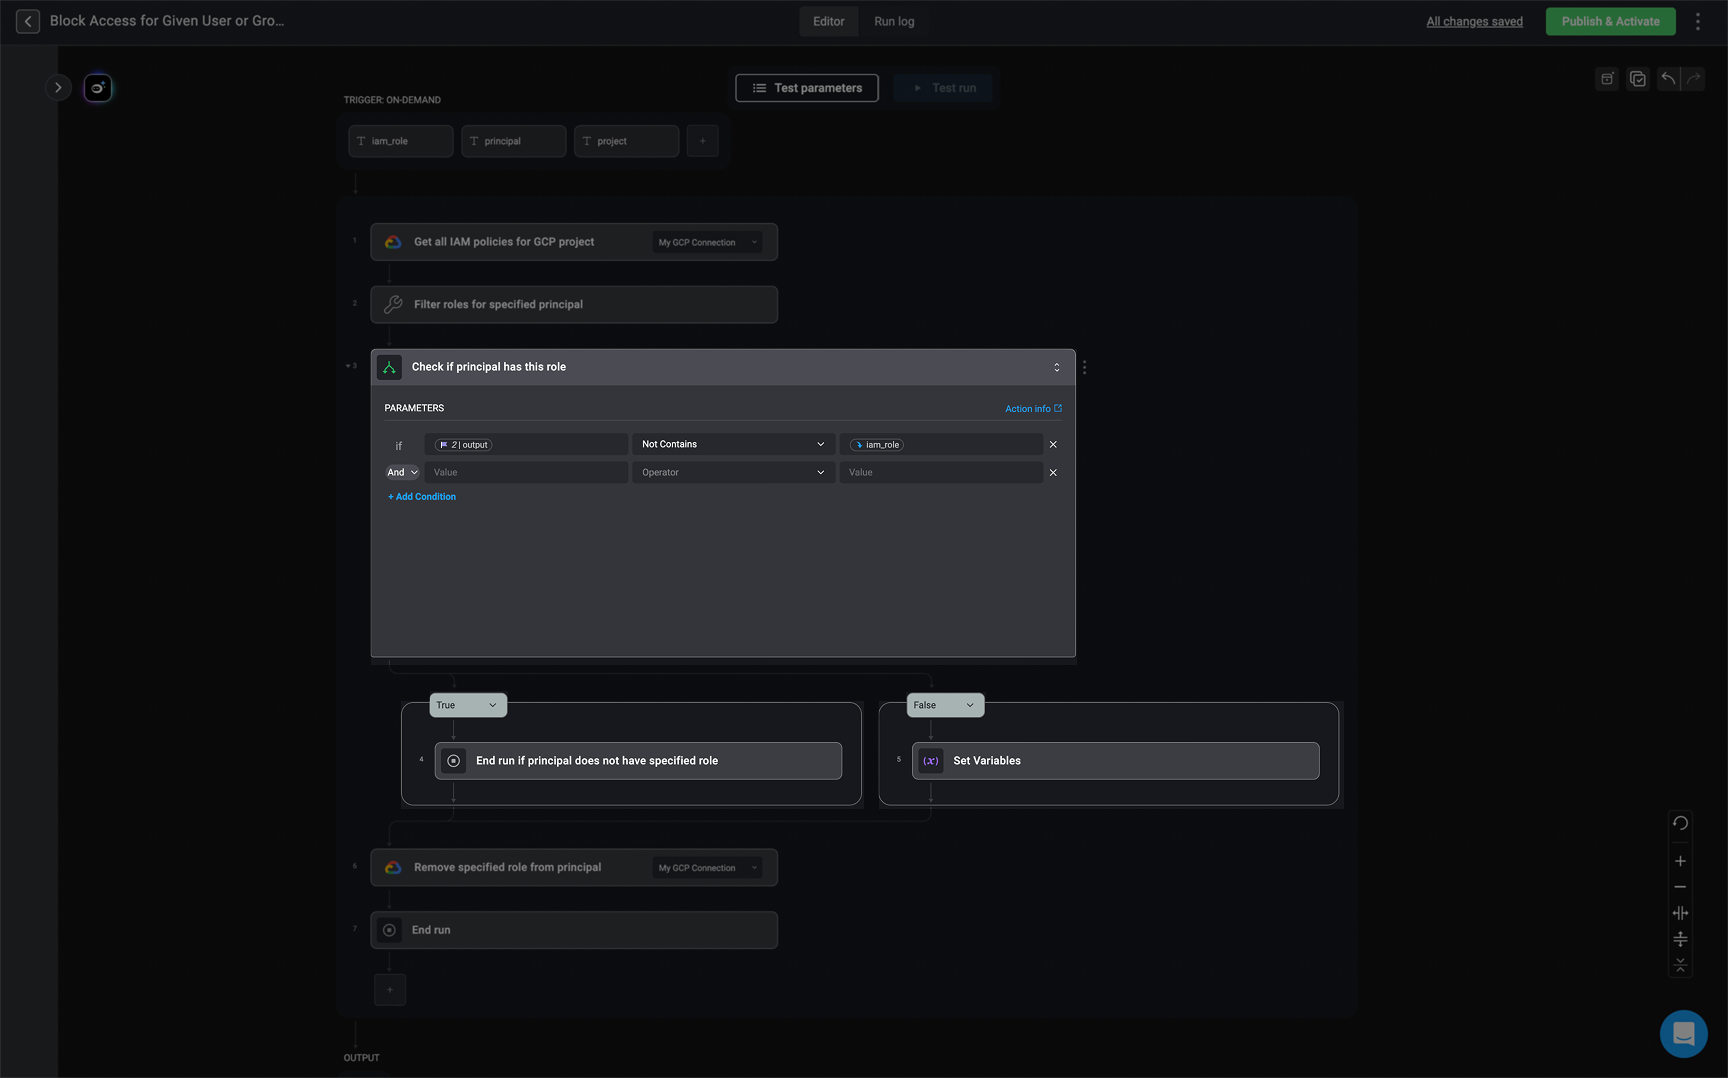
AND or OR operators to further define your statement. The condition appears in the text window on the right side.Using the Condition Builder in Tables
Using the Condition Builder in Tables
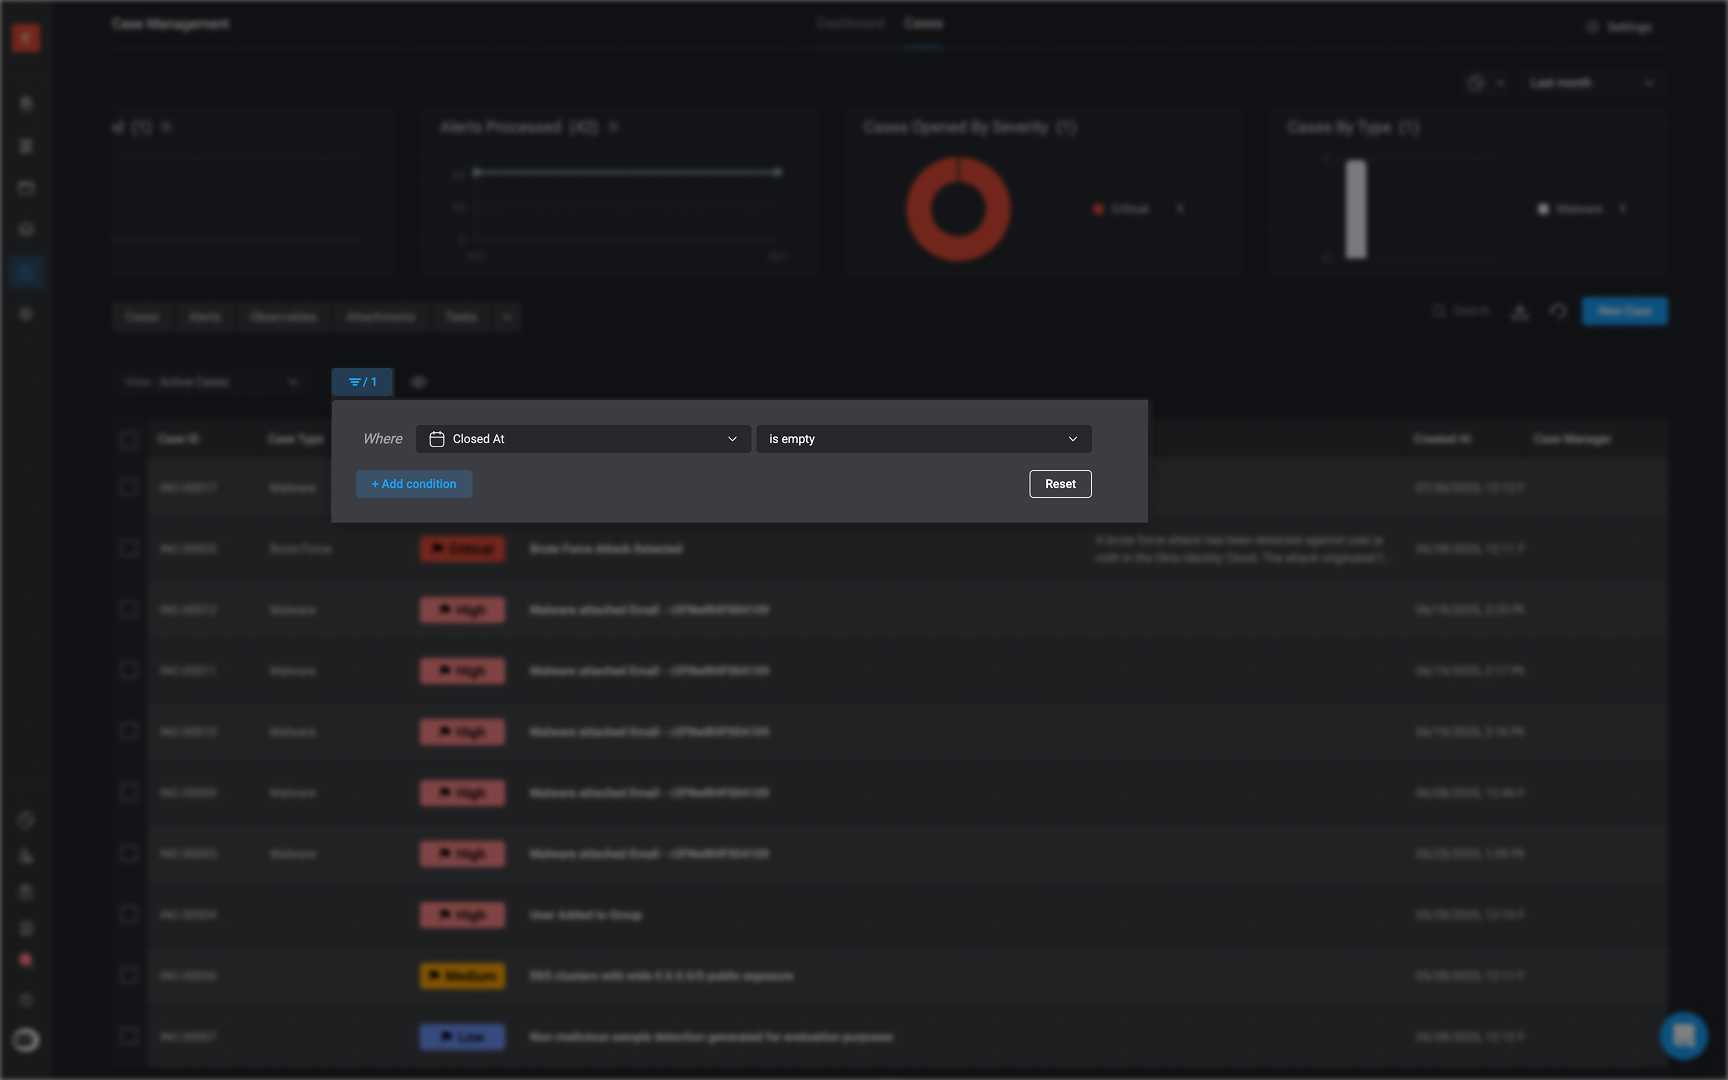
For more information about Table Views, see the relevant sections in both Case Management Tables and Tables.
Using the Condition Builder in Dashboards
Using the Condition Builder in Dashboards
For more detailed information about the ‘Filter Widget’, navigate here
1
Choose the Filter Widget
Select ‘Add Condition’ under the filter section. The condition builder will appear.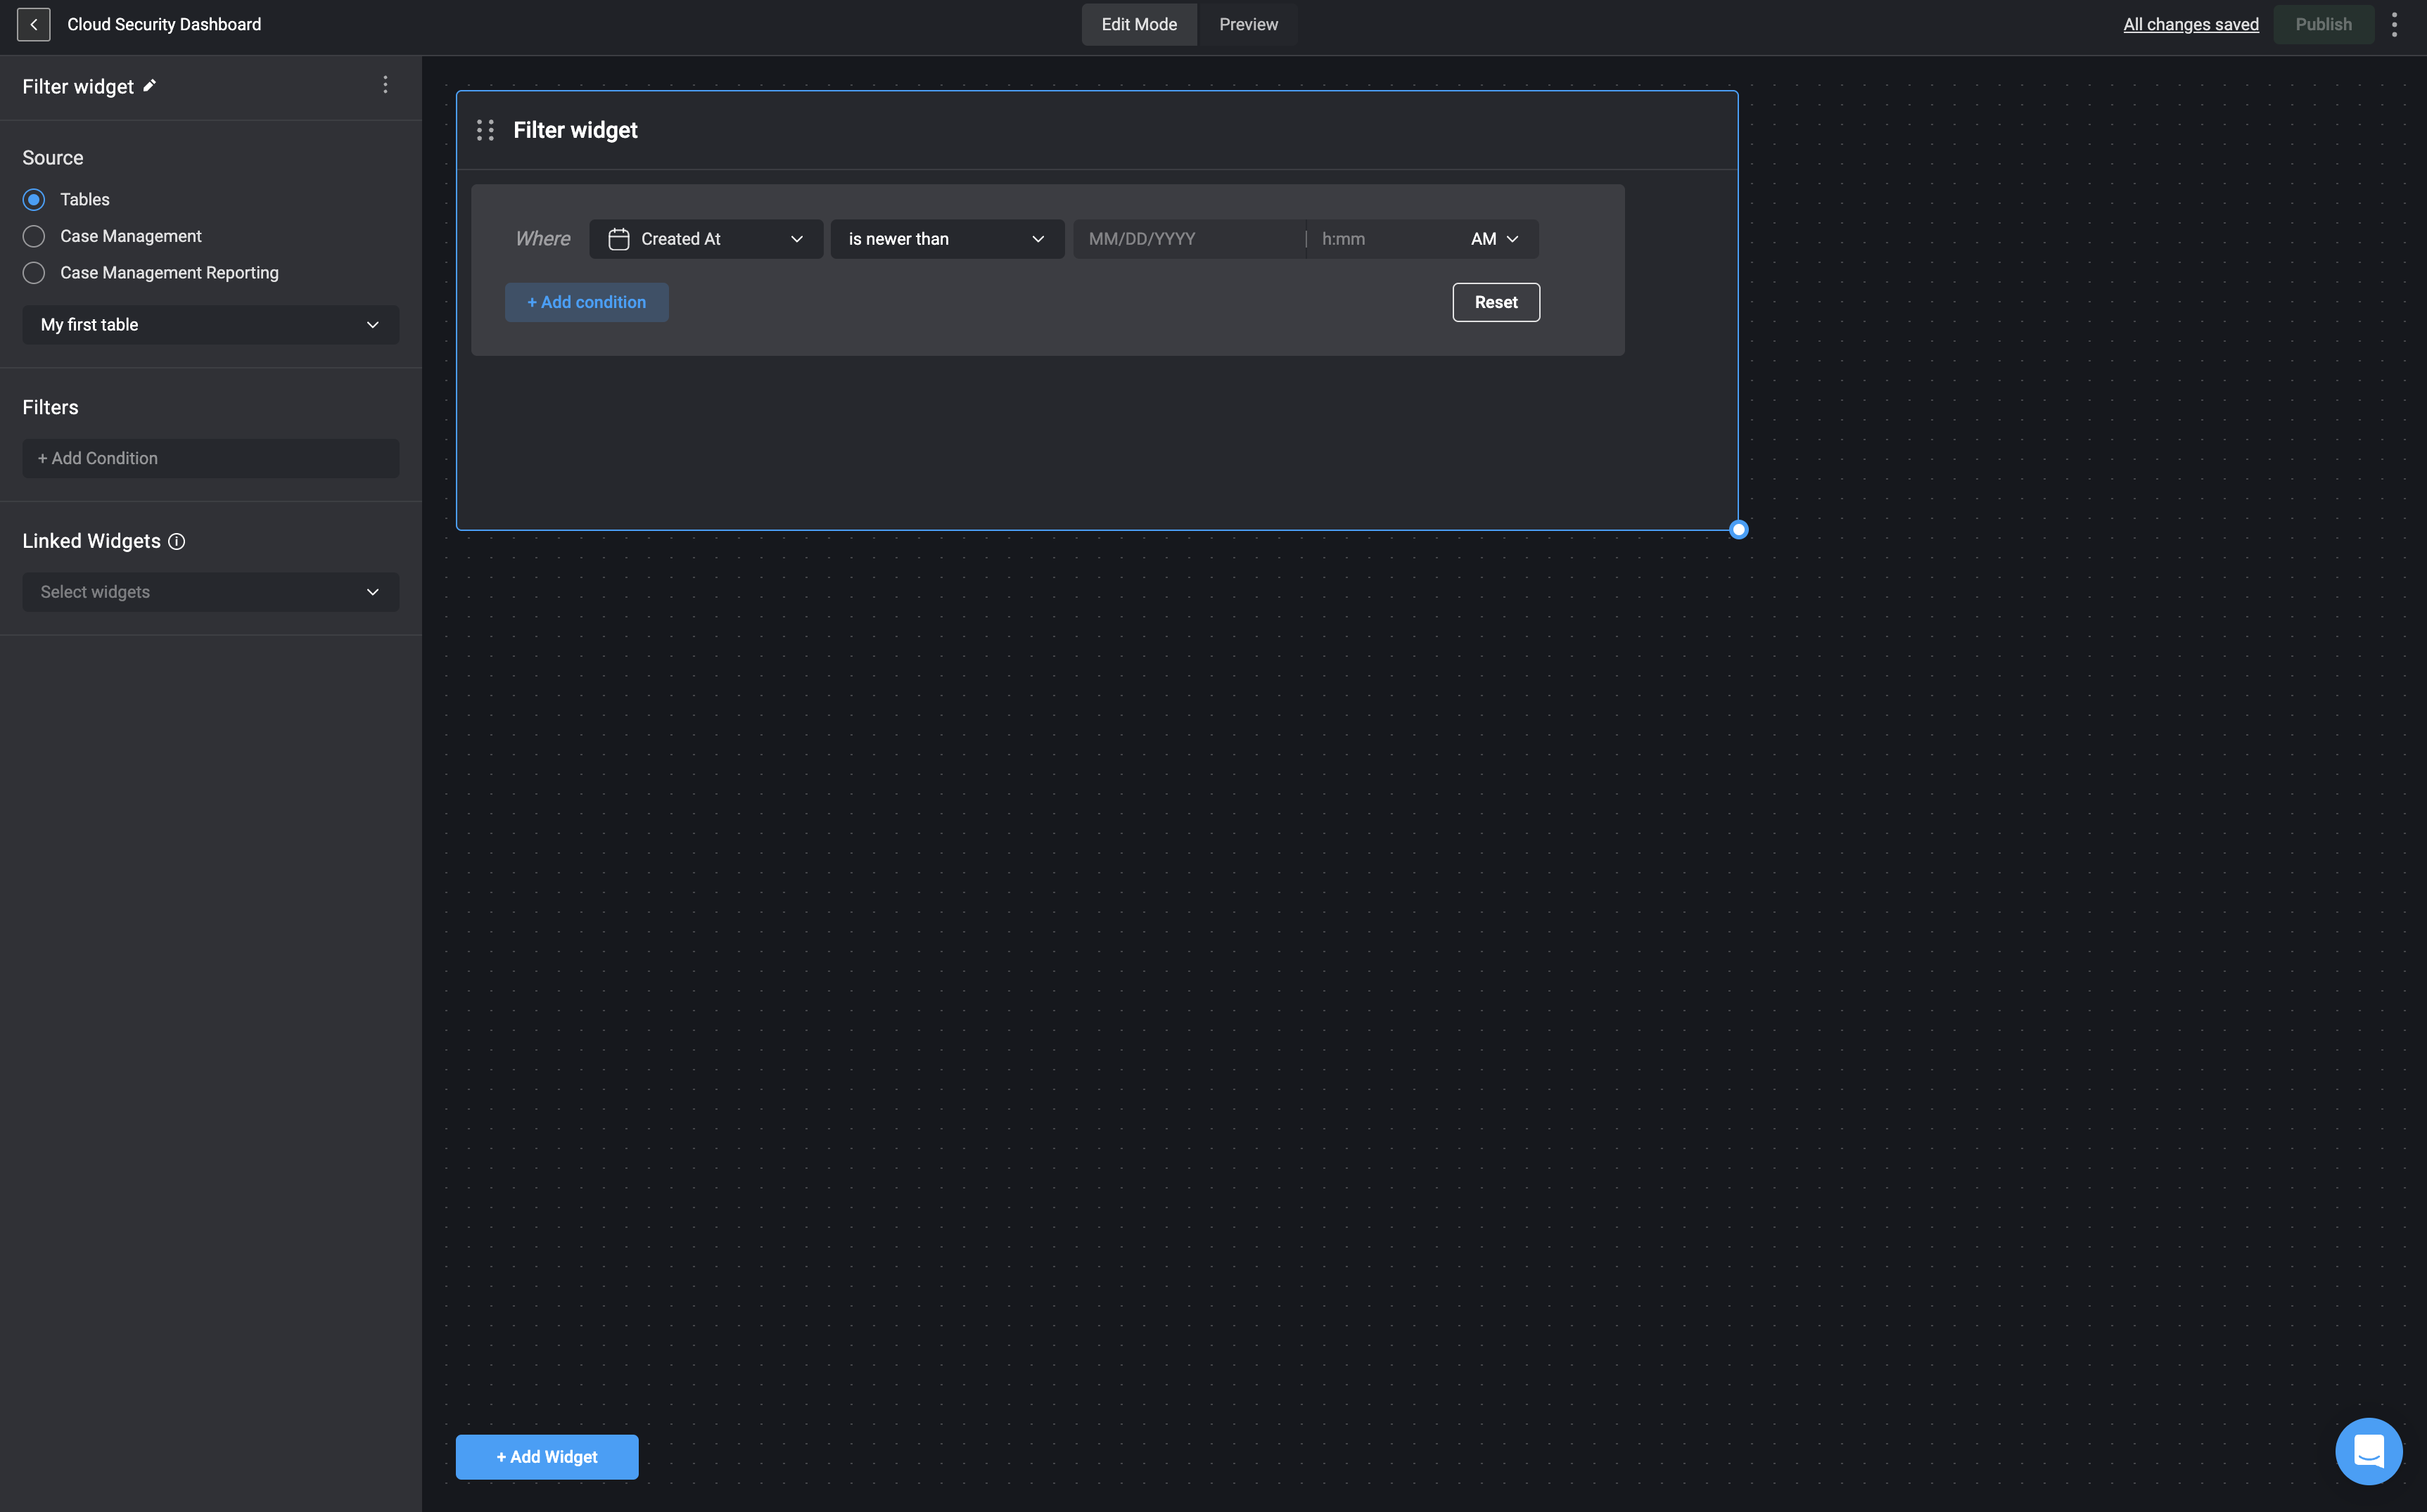
2
Define the Condition
Apply the condition by applying the values and choose an operator from the dropdown menu that appears when you click on it.
3
Add Logical Operators
Use 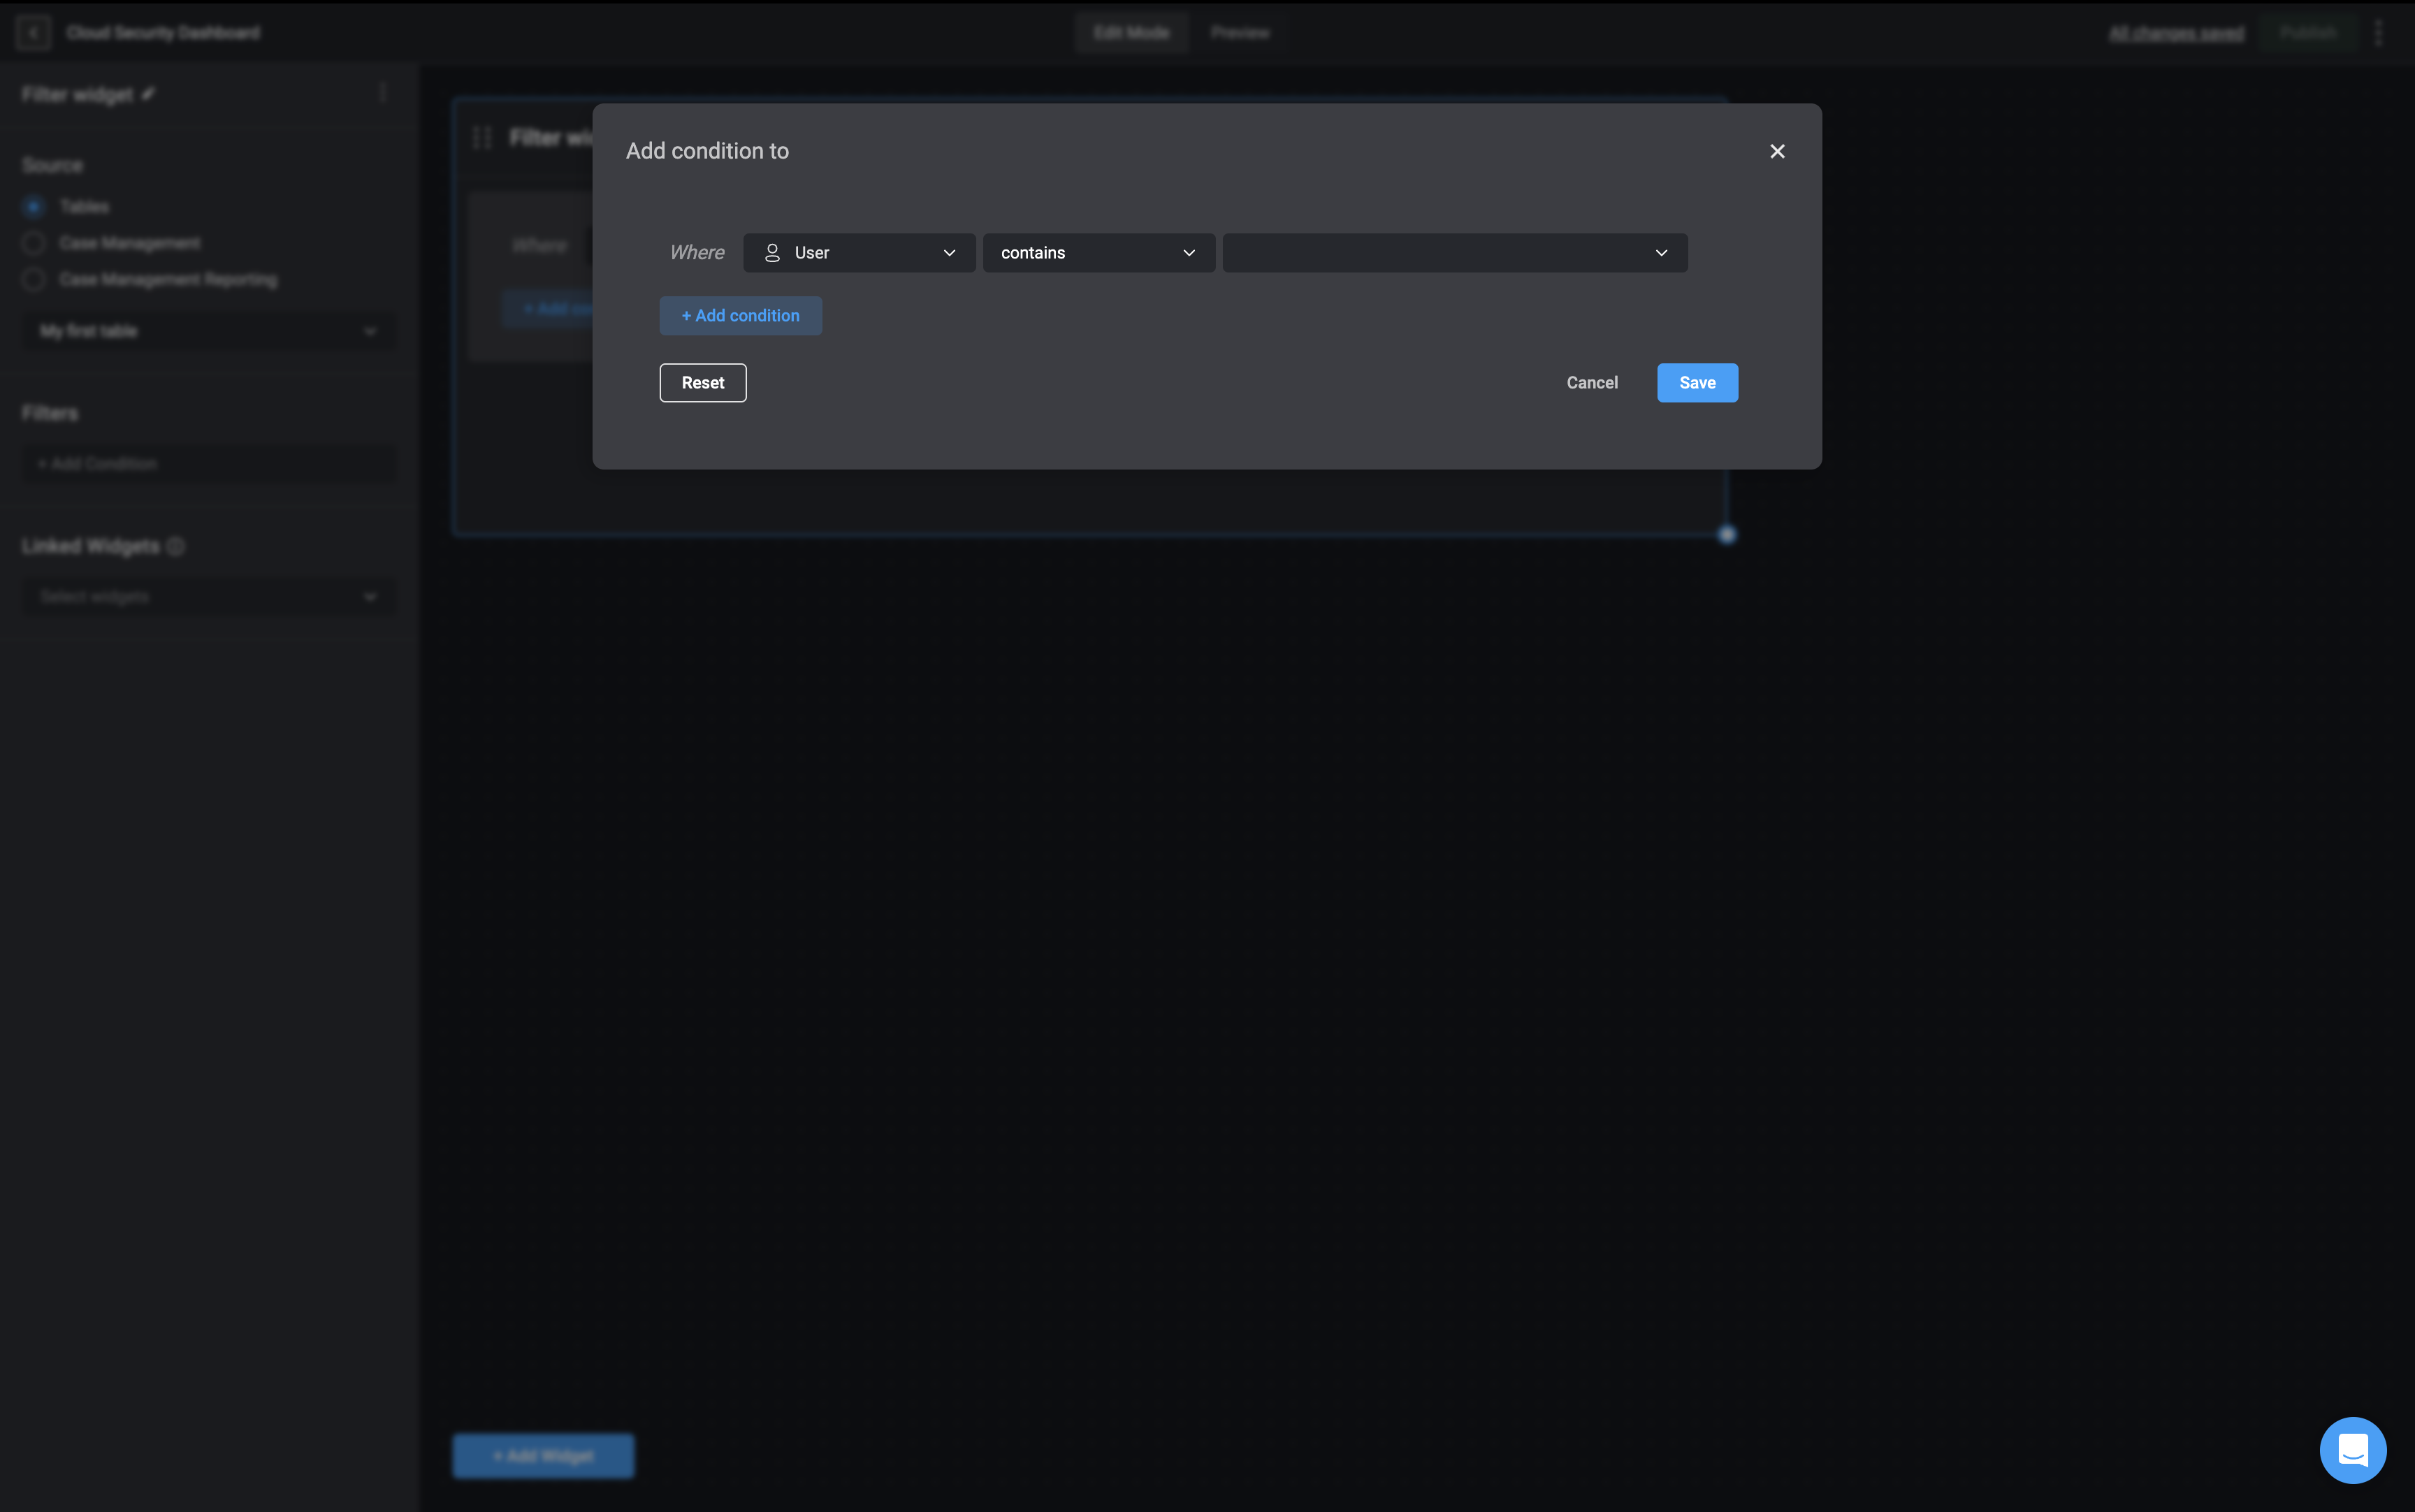
AND or OR operators to further define your statement. The condition appears in the text window on the right side.Condition Operators
The following condition operators can be used to create a condition statement:Note: The list of available condition operators will vary depending on the type of input or data you’re working with. For example, numeric fields may include operators like
greater than or less than, while date/time fields support options like before, after, or is within the last. This ensures that only relevant operators are shown for each condition. Equals
x = bThe condition is true when the left value is exactly equal to the right value.Not Equals
x != yThe condition is true when the left value is not equal to the right value.Less than
The condition is true when the
left value is less than the right value.Less Than or Equals To
The condition is true when the left value is
less than or equal to the right value.Greater Than
x > yThe condition is true when the left value is greater than the right value.Greater Than or Equals To
x >= yThe condition is true when the left value is greater than or equal to the right value.Contains
The condition is true when the left value
contains the right valueExample- a substring in a string or an item in a list.Not Contains
The condition is true when the left value
does not contain the right value.Starts With
The condition is true when the left value
starts with the right value.Ends With
The condition is true when the left value
ends with the right value.Regex Match
The condition is true when the left value
matches the specified Regular Expression pattern.Is Empty
The condition is true when the left value
is empty or null.This includes empty strings, arrays, objects, or a null value.Is Not Empty
The condition is true when the left value
is not empty or null.This operator does not require a right-hand value.Is True
The condition is true when the left value is
true(boolean).This operator does not require a right-hand value.Is False
The condition is true when the left value is
false(boolean).This operator does not require a right-hand value.Note: When using the contains or not contains operators in the condition builder, if the field type is a list, the condition checks whether a specific item is present or absent within that list.contains: Returns true if the specified value is found as an item within the list.not contains: Returns true if the specified value is not found as an item within the list.