1
Access Okta Applications
Log in to Okta, go to the admin dashboard, and select “Applications” in the navigation panel.
2
Create New App Integration
Select “Create App Integration”.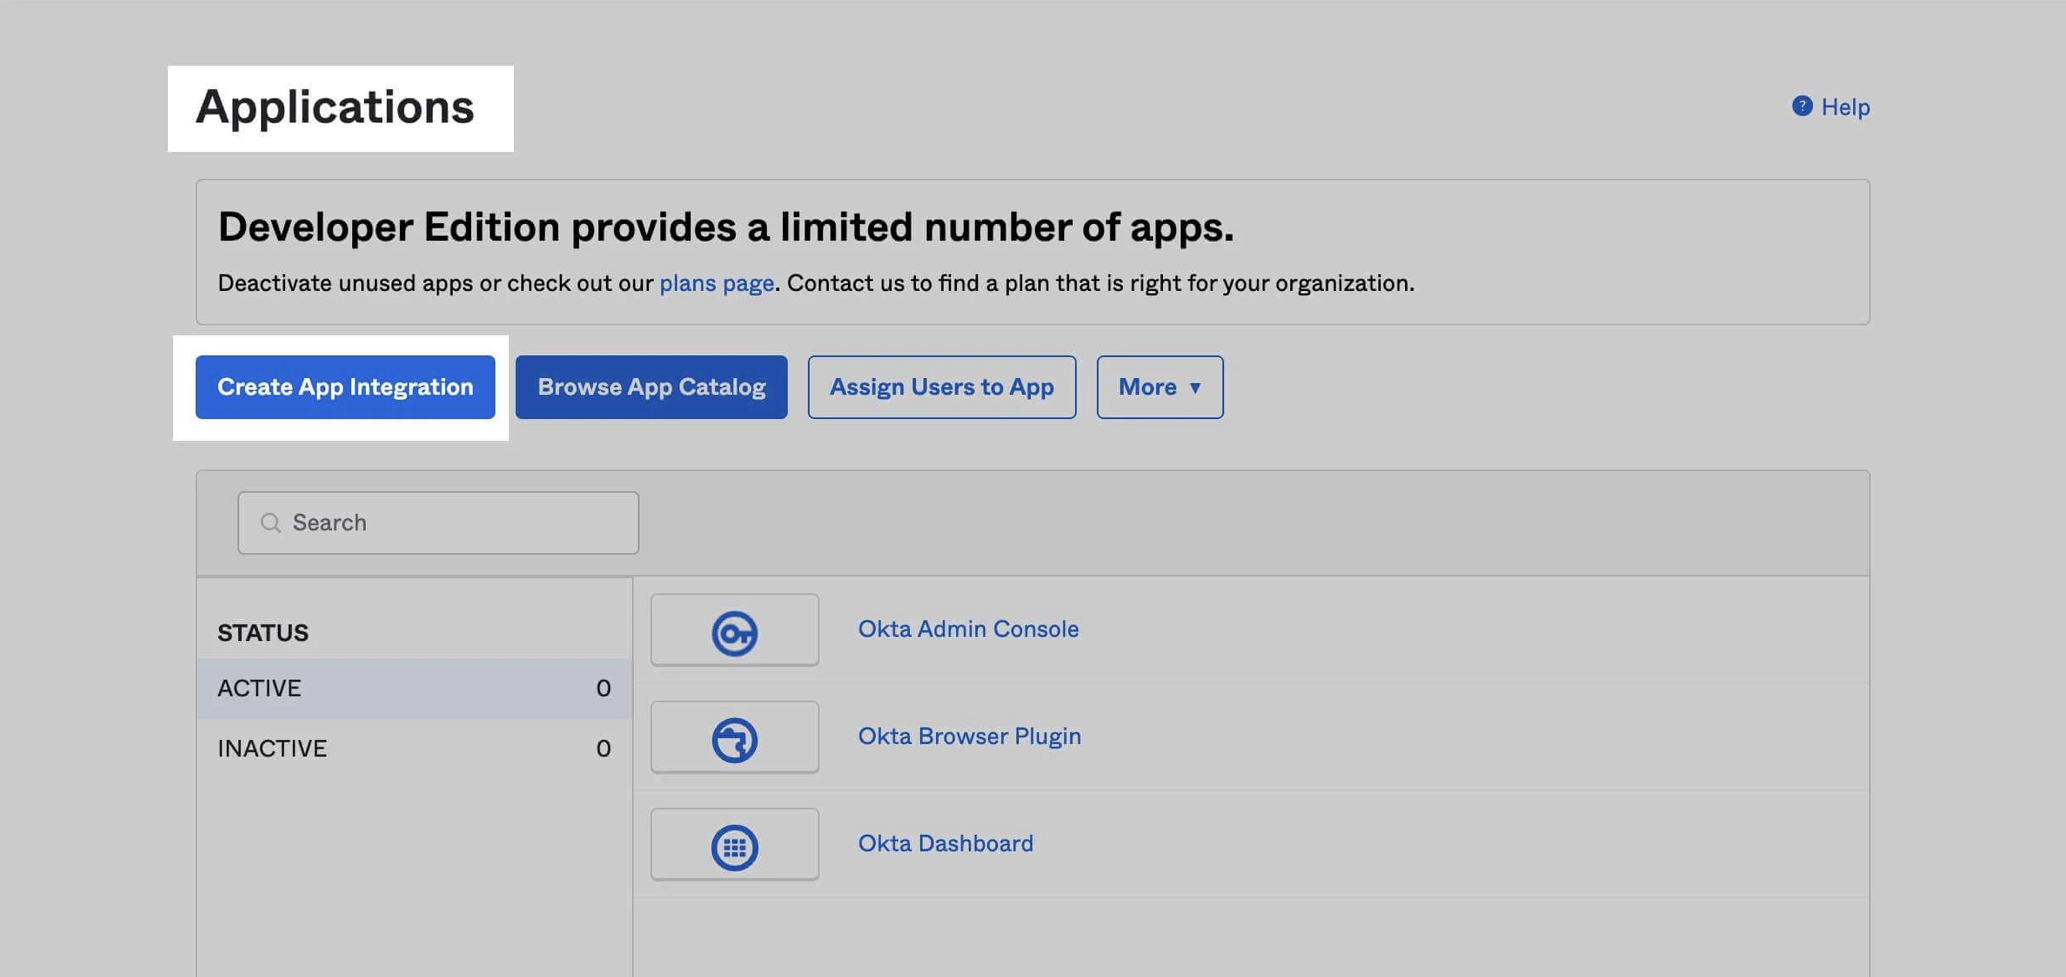
3
Choose SAML 2.0 Integration Type
Select “SAML 2.0” and click ‘Next’.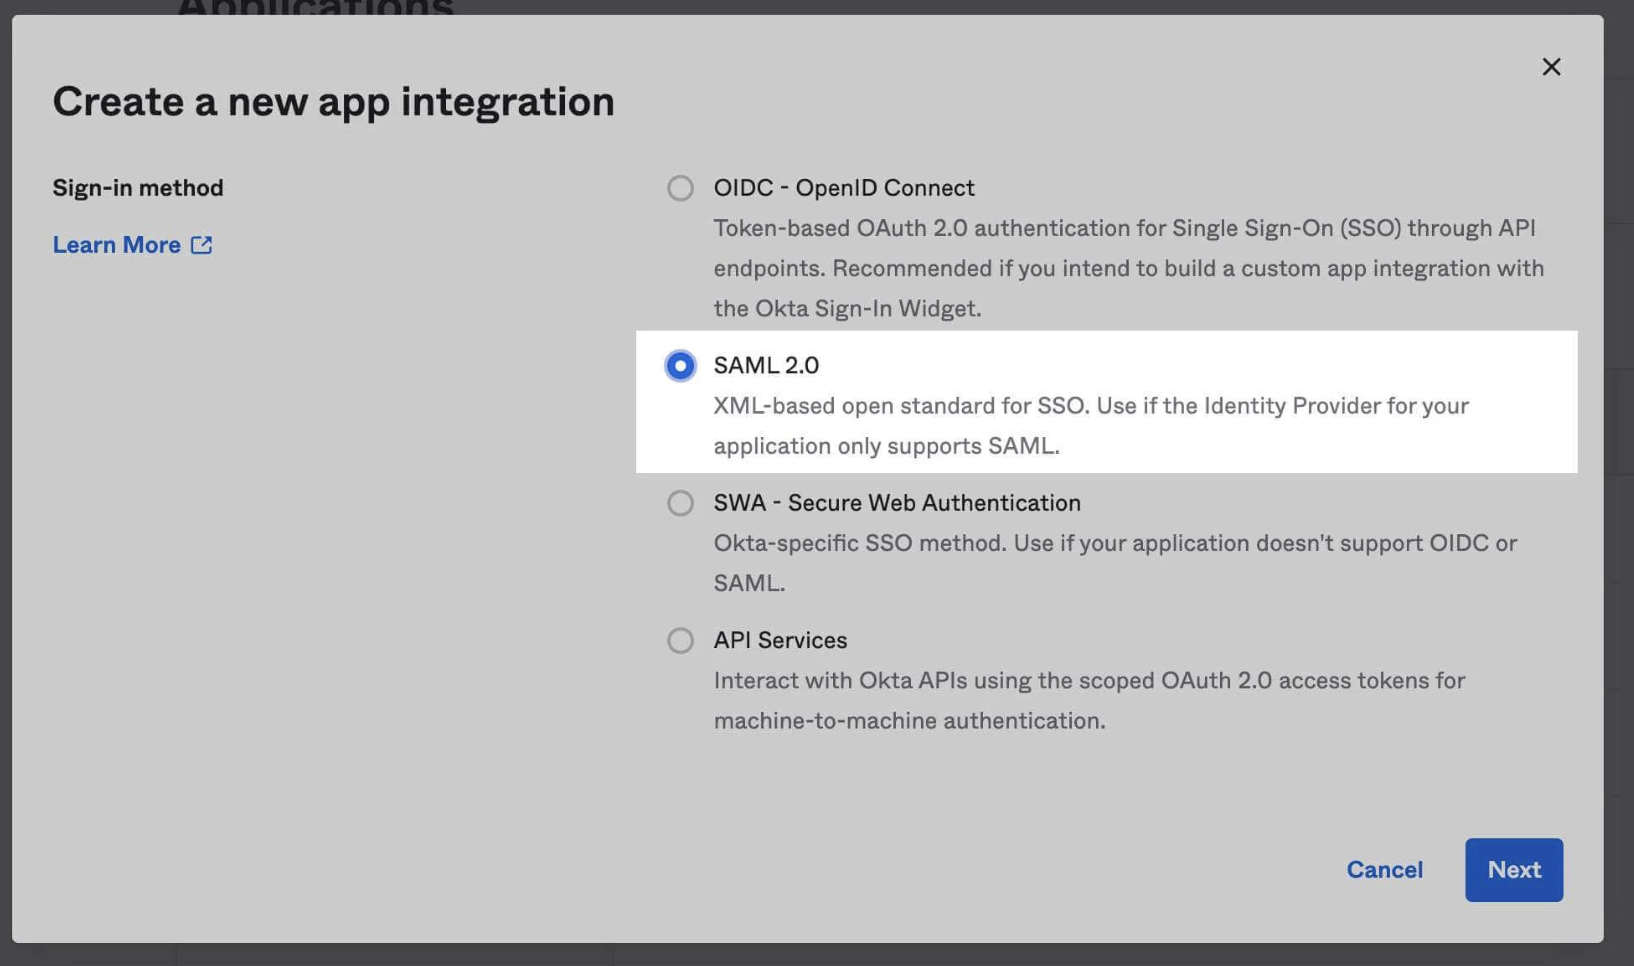
4
Choose SAML 2.0 Integration Type
Enter an “App Name” and click Next.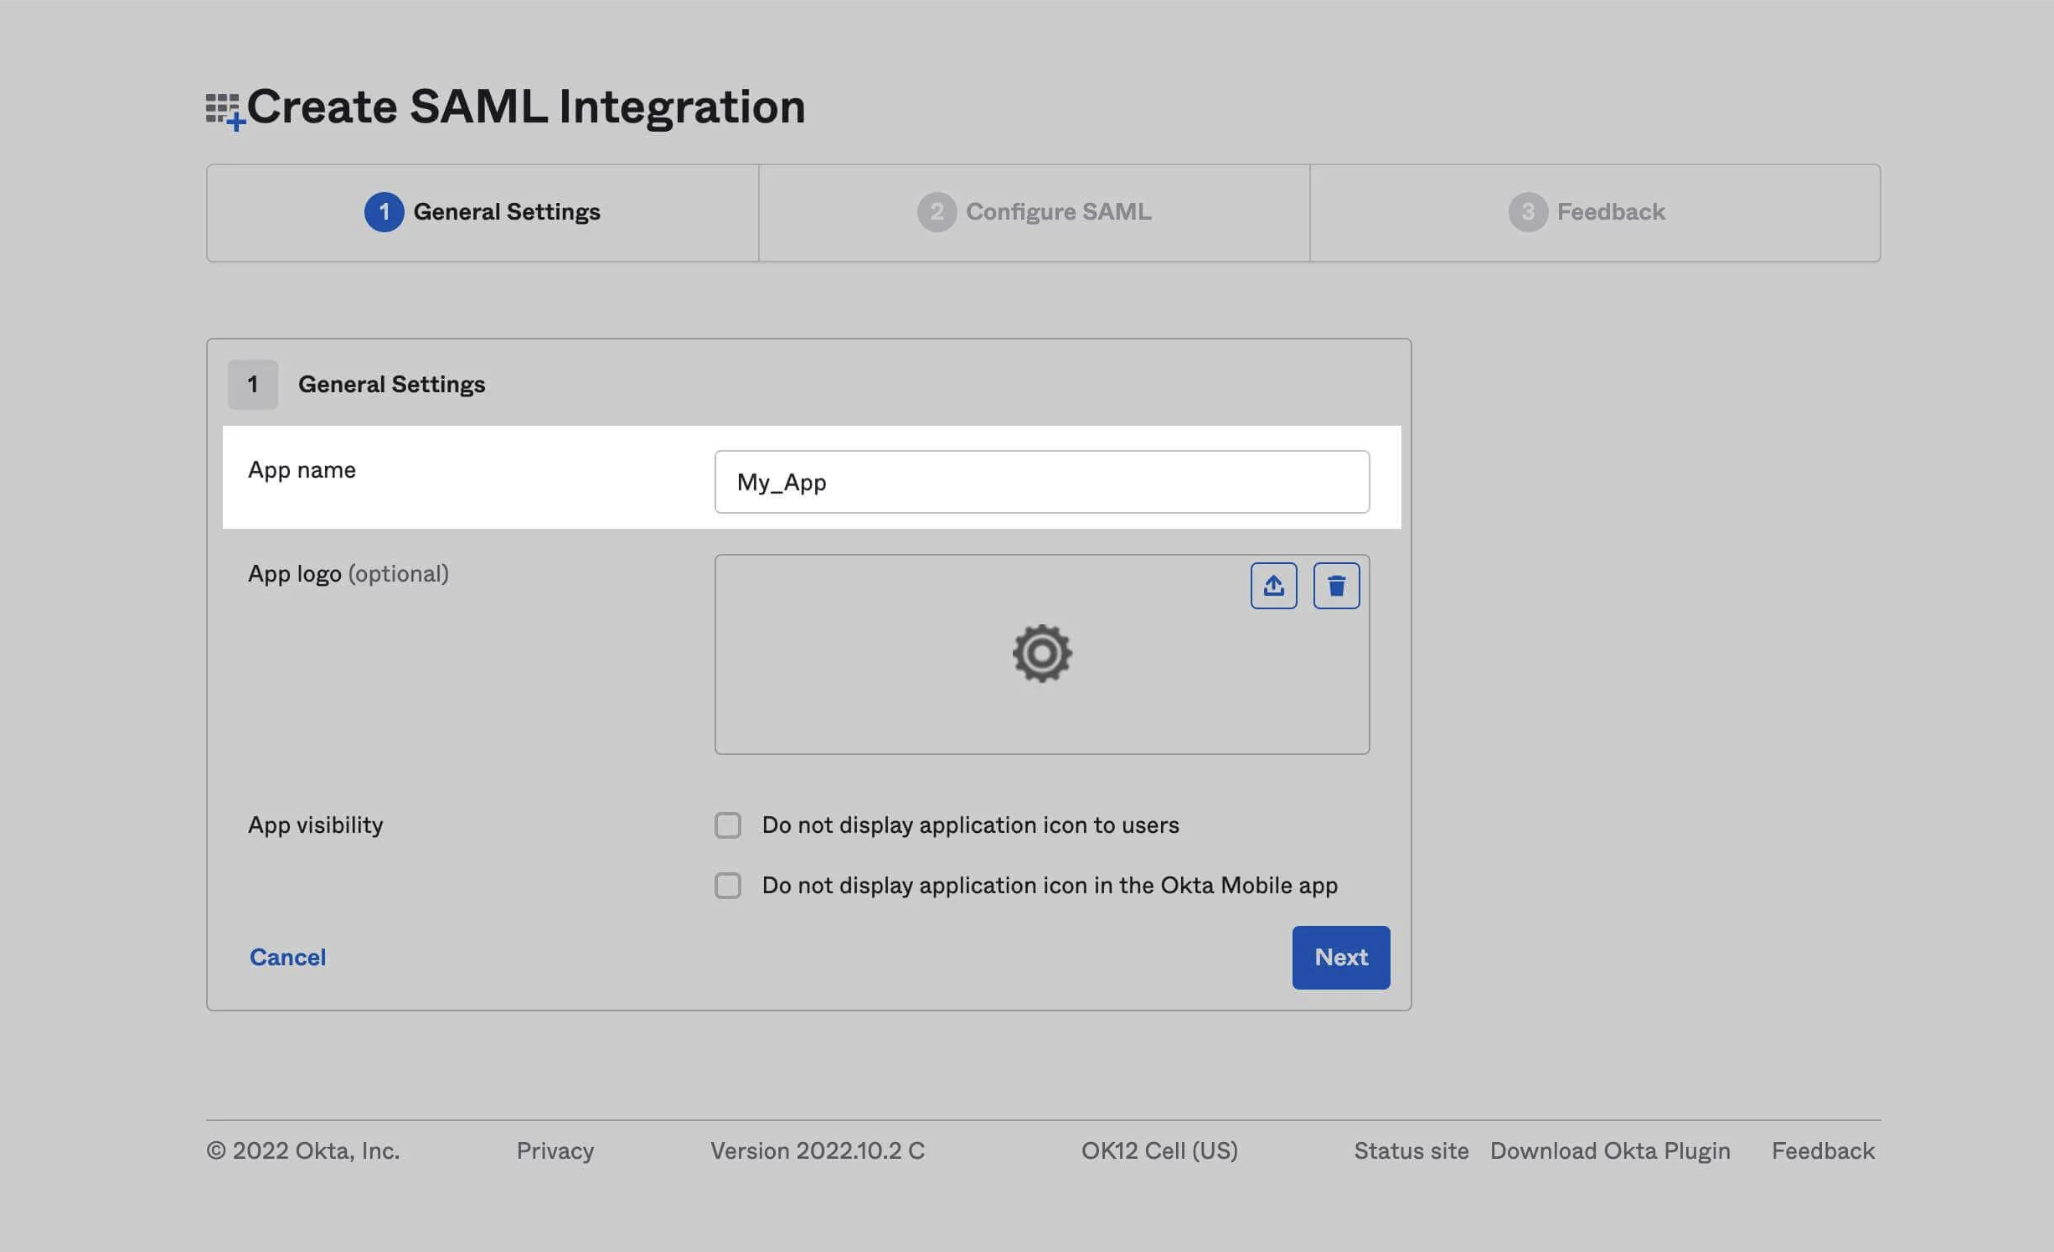
Please note that the IdP-Initiated Login URL, Service Provider ID (SP Entity ID), Service Provider Login URL (SSO URL) and Service Provider Logout URL (SLO URL) can be located within the SAML tab under the Account Management Settings section within the Blink Platform.IdP-Initiated Login URL : Please look in the Account Management Settings section within the Blink Platform to find your unique IdP-Initiated Login URL.Service Provider ID (SP Entity ID) : urn:amazon:cognito:sp:us-east-1_Nu63sypSSService Provider Login URL (SSO URL) : 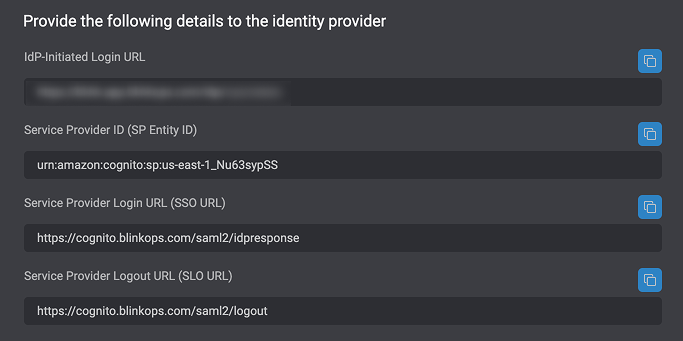
https://cognito.blinkops.com/saml2/idpresponseService Provider Logout URL (SLO URL) : https://cognito.blinkops.com/saml2/logout Please Note users who use on-premise deployment, please do not use the above values to complete the Create SAML Integration section of the Okta application, instead you should login to your own on-premise deployment app and use the unique values provided in the SAML tab under the Account Management Settings.
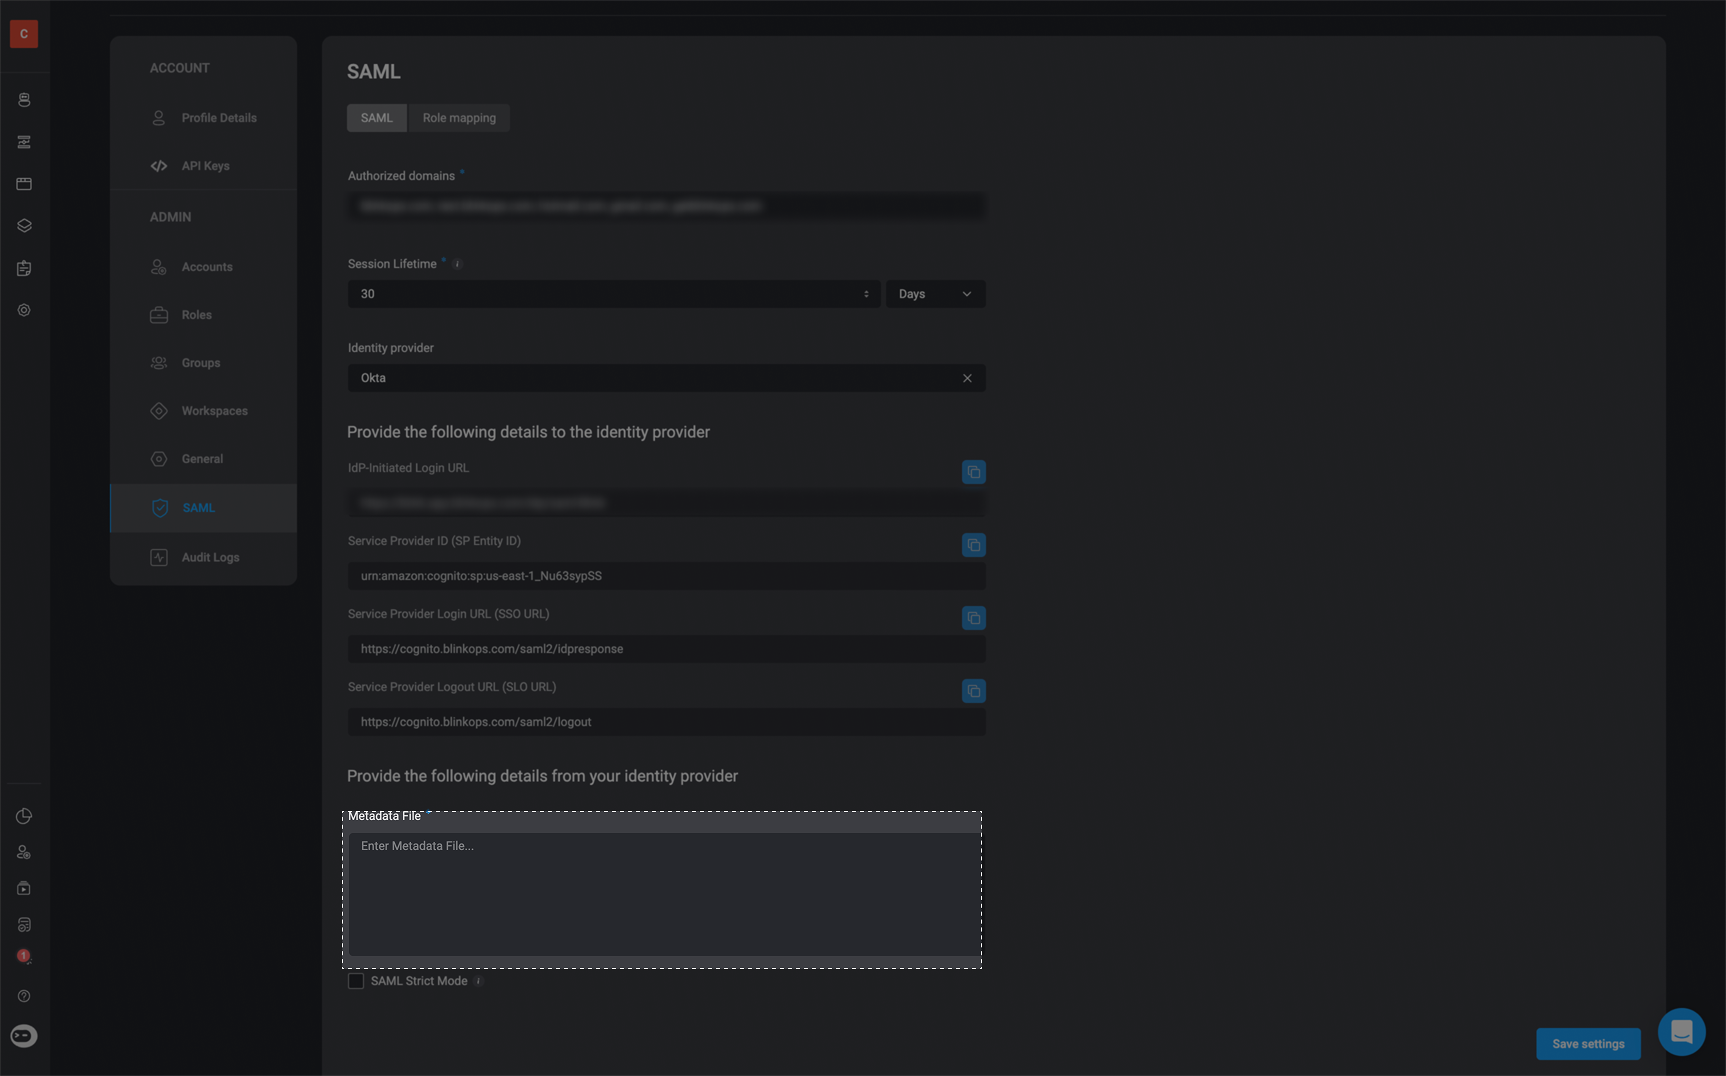
5
Enter Blink SAML URLs and Identifiers
Using the unique IdP-Initiated Login URL available in the SAML tab under the Account Management Settings section within the Blink Platform, proceed to the Create SAML Integration section of the application and copy and paste the URL value in the Single Sign-On URL text field. Then copy and paste the Service Provider Login URL (SSO URL) value in both the Recipient URL text field and the Destination URL text field. Lastly copy and paste the Service Provider ID (SP Entity ID) value in the Audience URI (SP Entity ID) text field.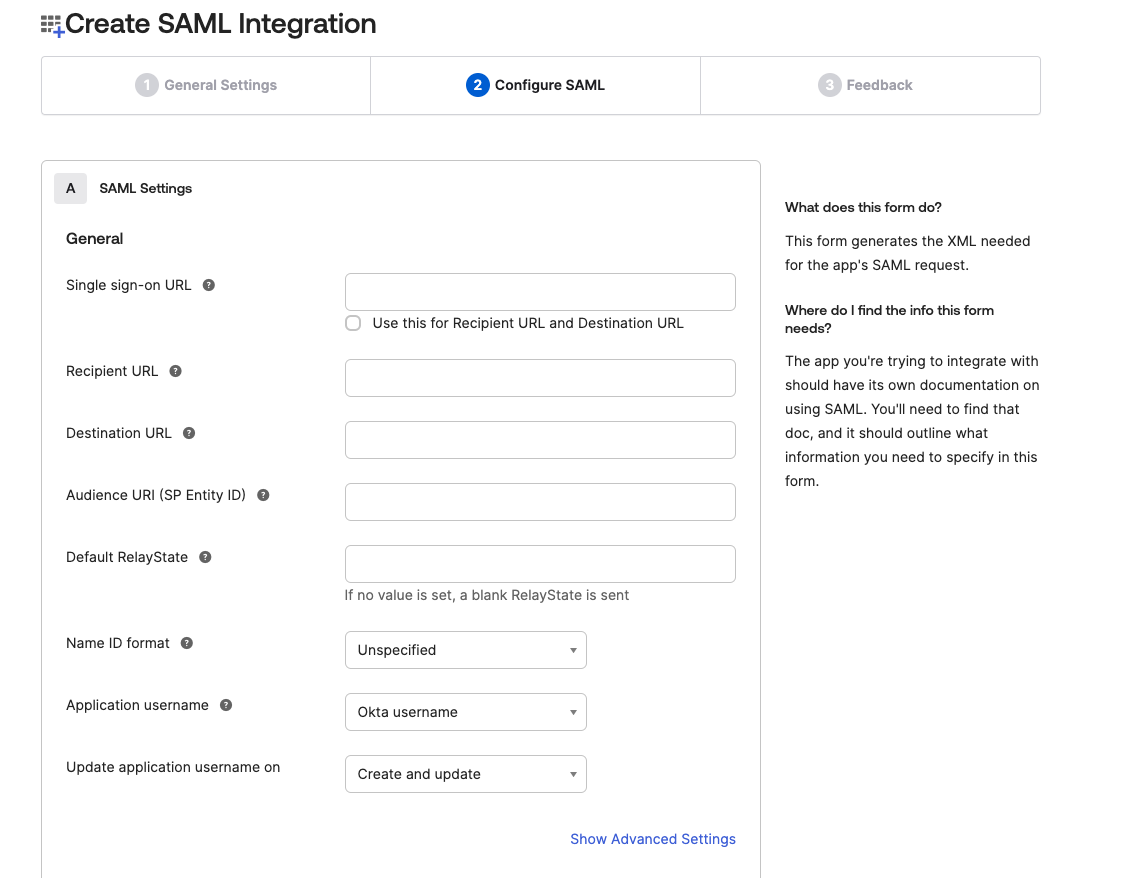
6
Configure Attribute Statements
Scroll down to the “Attribute Statements” section and add the following key-value pairs, and then click Next.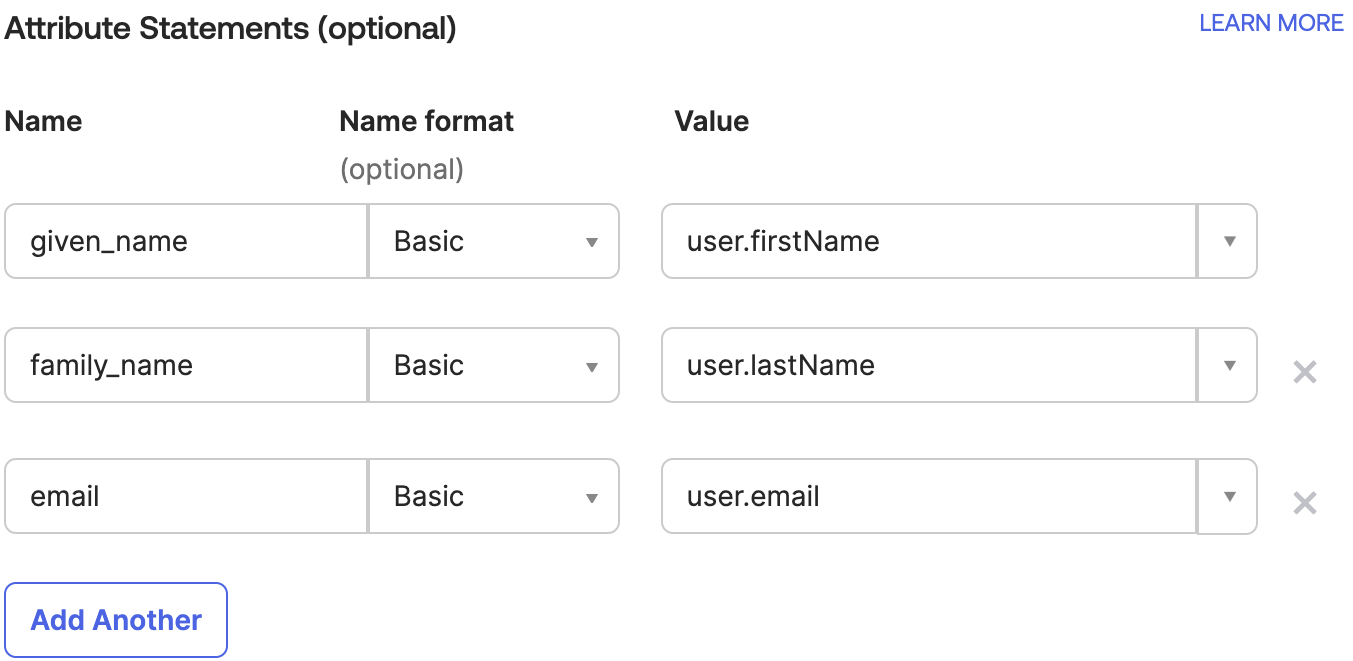
7
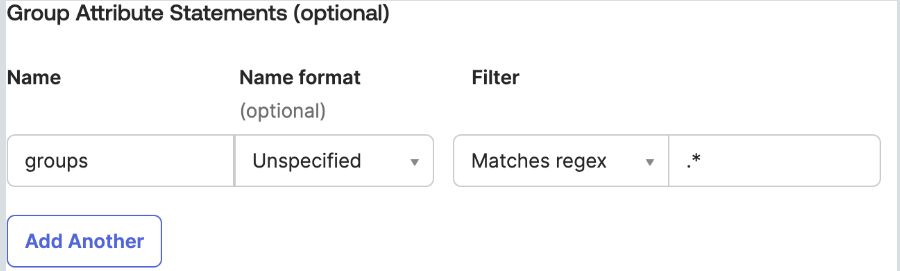
Add Group Attribute Statement
Then scroll down to the “Group Attribute Statement” section and fill out the following fields like portrayed in the following image:
Resolving SAML Group Mapping Errors with AWS Cognito
Resolving SAML Group Mapping Errors with AWS Cognito
The error message in the image indicates: “Invalid SAML response received: The value of the attribute custom:groups must have a length less than or equal to 2048 characters.”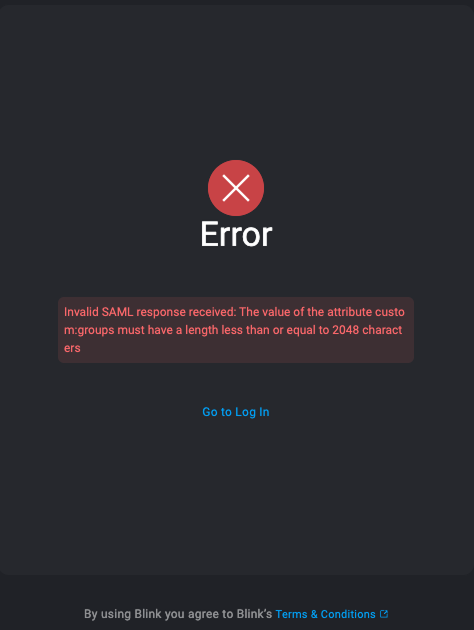
Cause of the Error:
This error occurs because the SAML response from the client’s Identity Provider (IdP) includes acustom:groups attribute whose total character length exceeds AWS Cognito’s 2048-character limit for string attributes.In this specific case:- The client configured group mapping using a wildcard, which sends all the user’s group memberships via SAML.
- As a result, Cognito receives a very long string of group names combined, pushing the total value over the 2048-character limit.
- Cognito then rejects the login attempt, since it cannot store or process that oversized attribute.
Recommended Solution:
To fix this, stop using wildcard group mapping and instead implement manual group mapping in the IdP SAML configuration.What to do:
-
The client should explicitly map only the relevant groups required by Blink, such as:
Blink BuildersBlink UsersBlink Admins
-
This will limit the number and size of the groups included in the SAML assertion, ensuring the
custom:groupsattribute stays within Cognito’s size constraints.
8
Map Roles in Blink Platform
Then head to the SAML tab under the Account Management Settings section within the Blink Platform and click the Role Mapping section and select the applicable values.When a user belongs to multiple Okta groups, Blink resolves role assignment in SAML SSO using a top-down priority order based on the 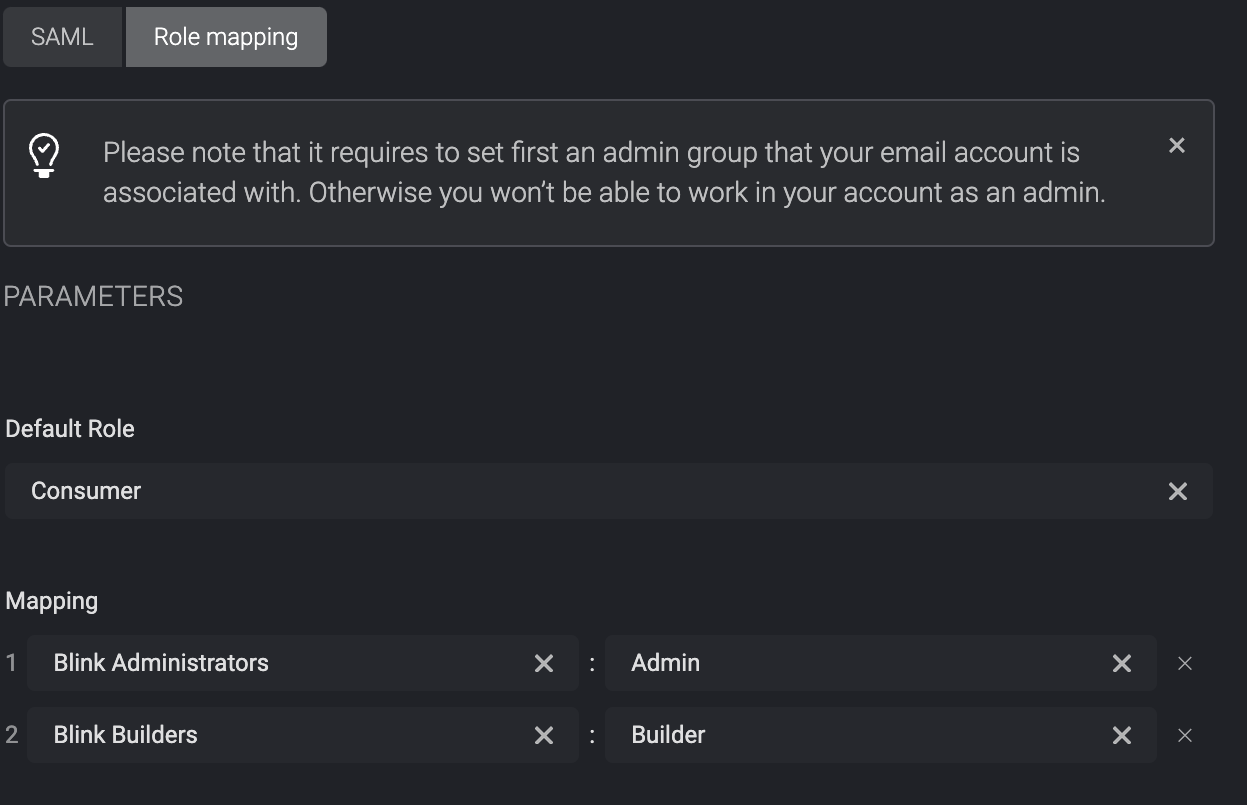
Group:Role mapping table. The first matching group in the list determines the assigned role.9
Finish SAML App Setup in Okta
Select “I’m an Okta customer adding an internal app” from the options menu, and then click Finish.
10
Assign Users or Groups to the SAML App
To give users permission to authenticate via this SAML app, you will need to assign users or groups.
11
Go to Assignments Tab
Click on the “Assignments” tab and assign the users or groups you require.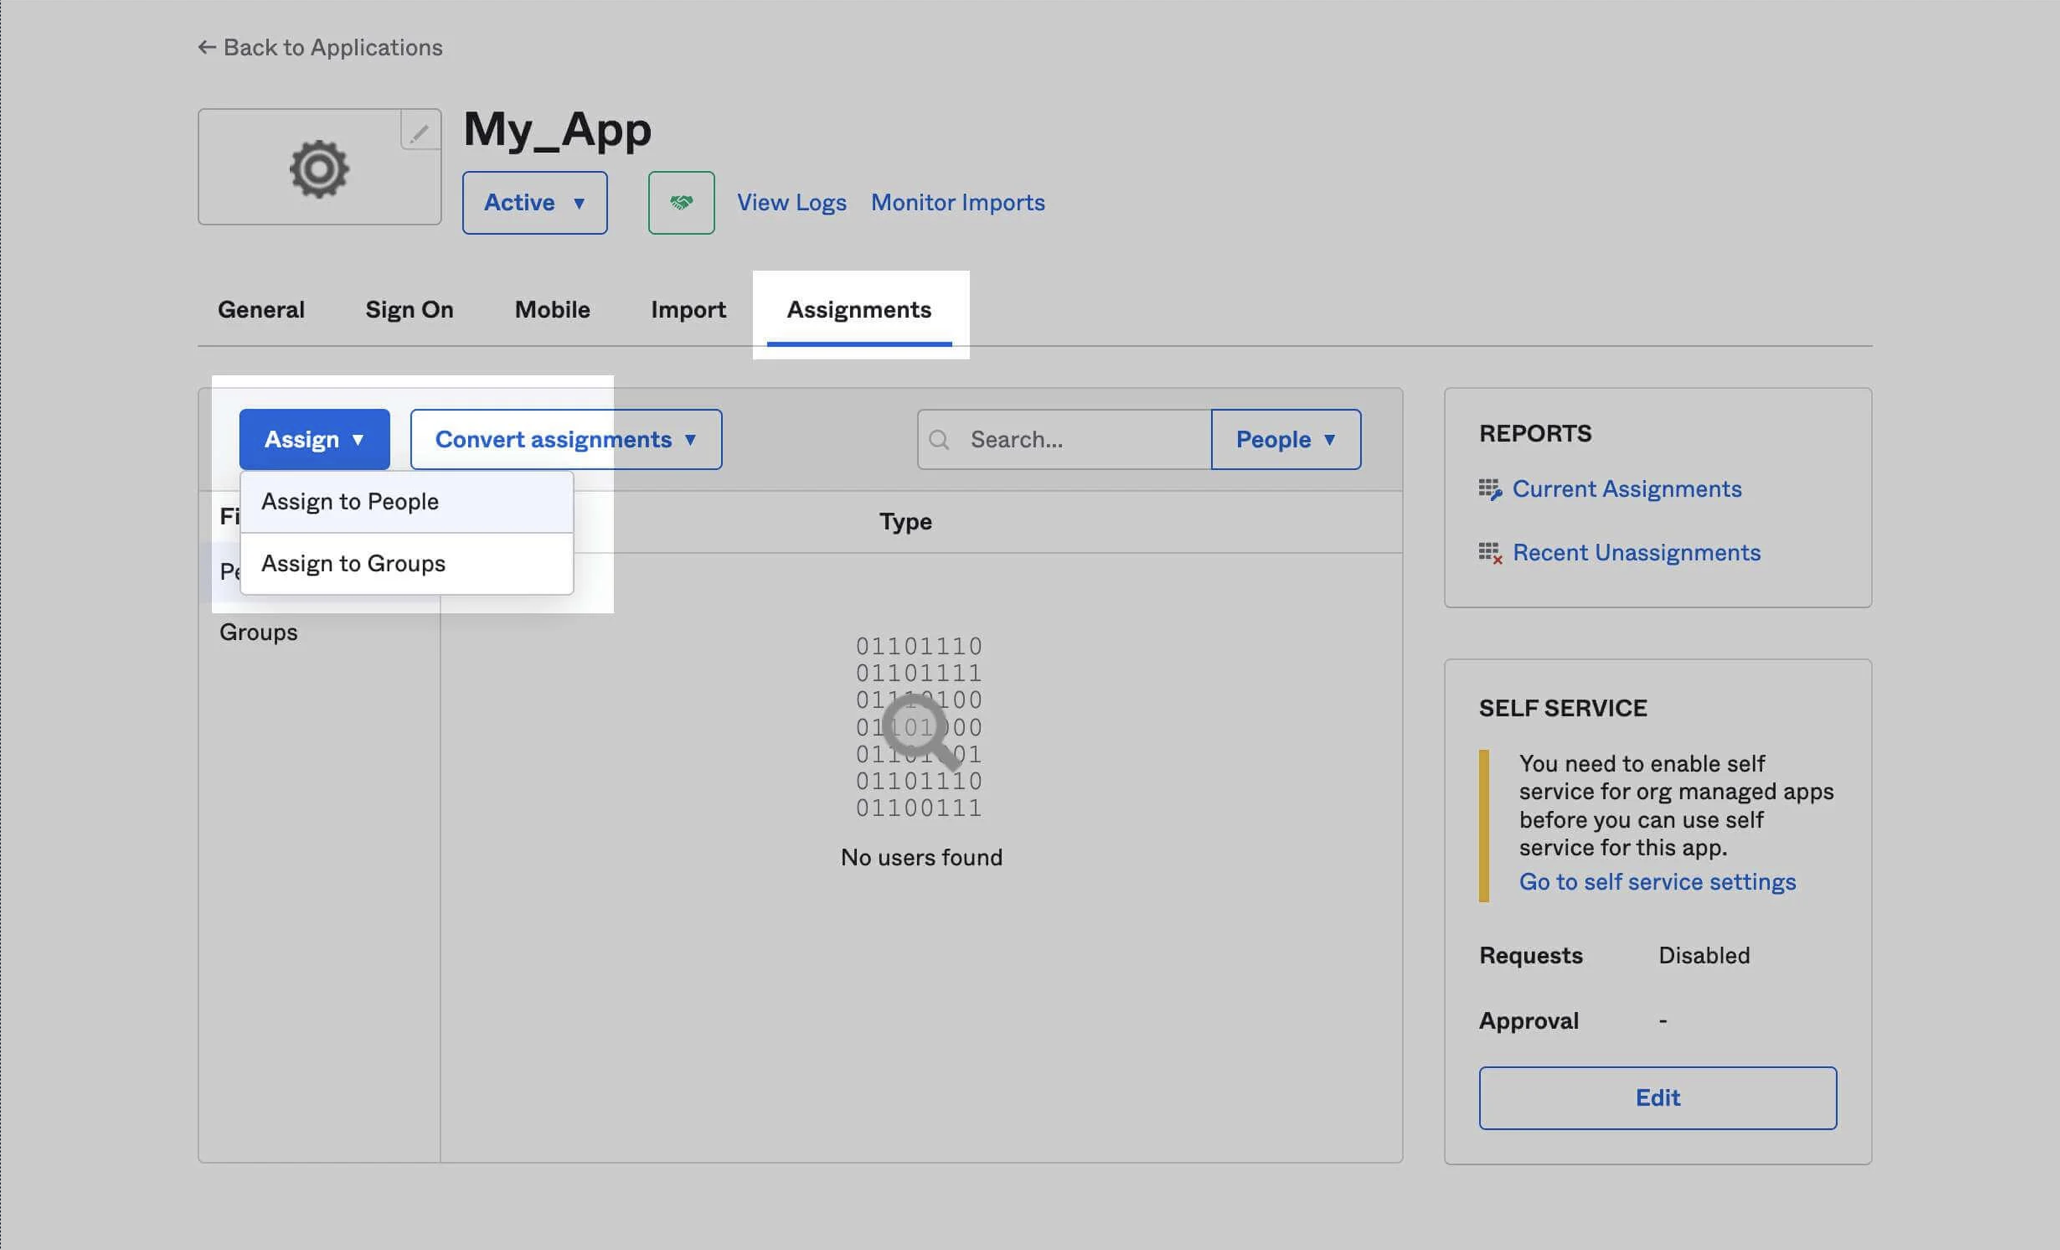
12
Open Sign On Tab and Locate Certificates
Click on the “Sign On” tab and scroll down to the “SAML Signing Certificates”.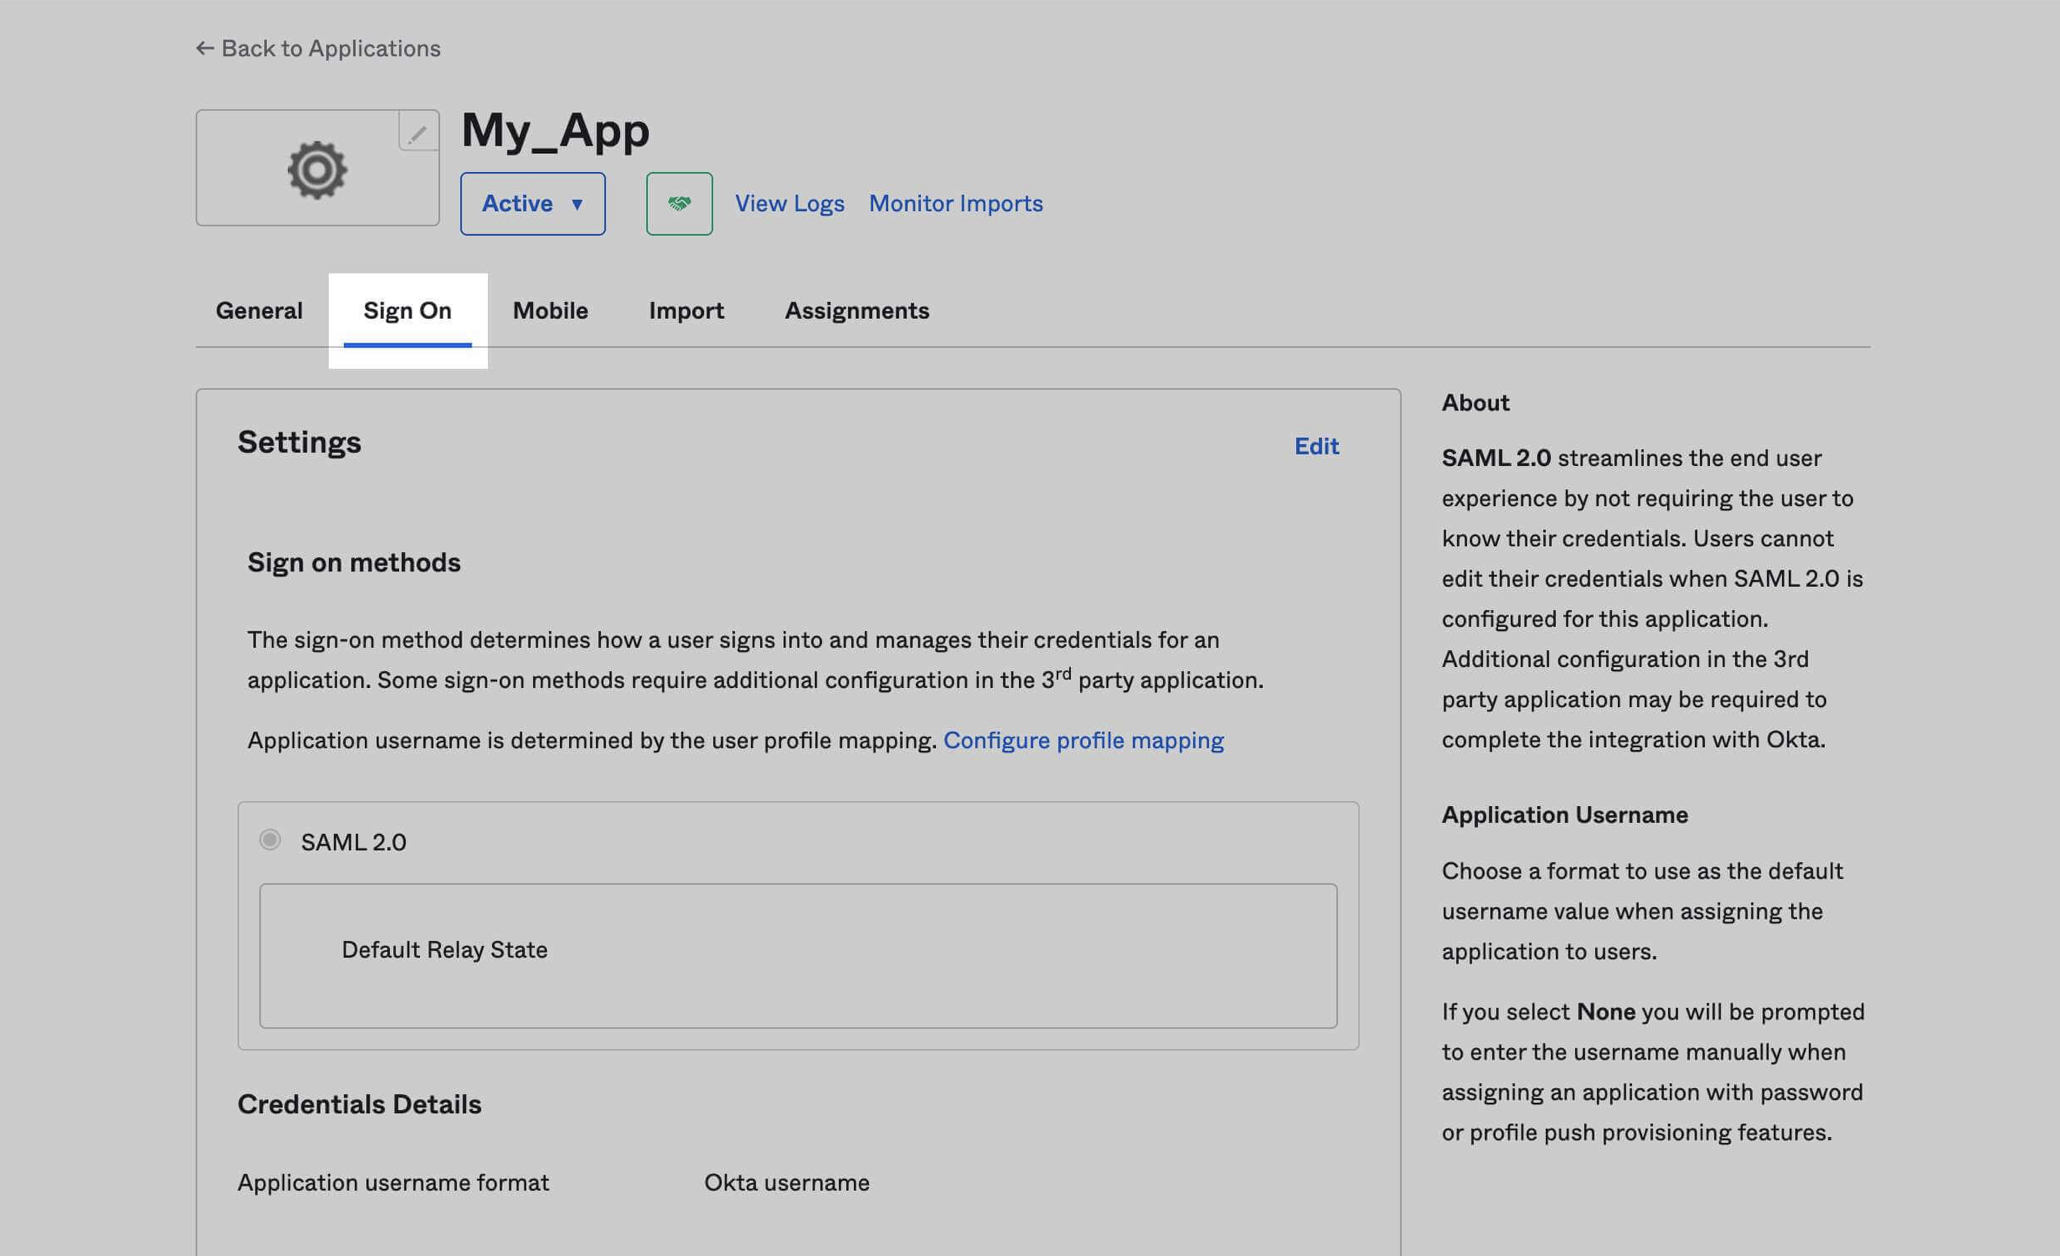
13
View SAML Setup Instructions
Click on “View SAML setup instructions”.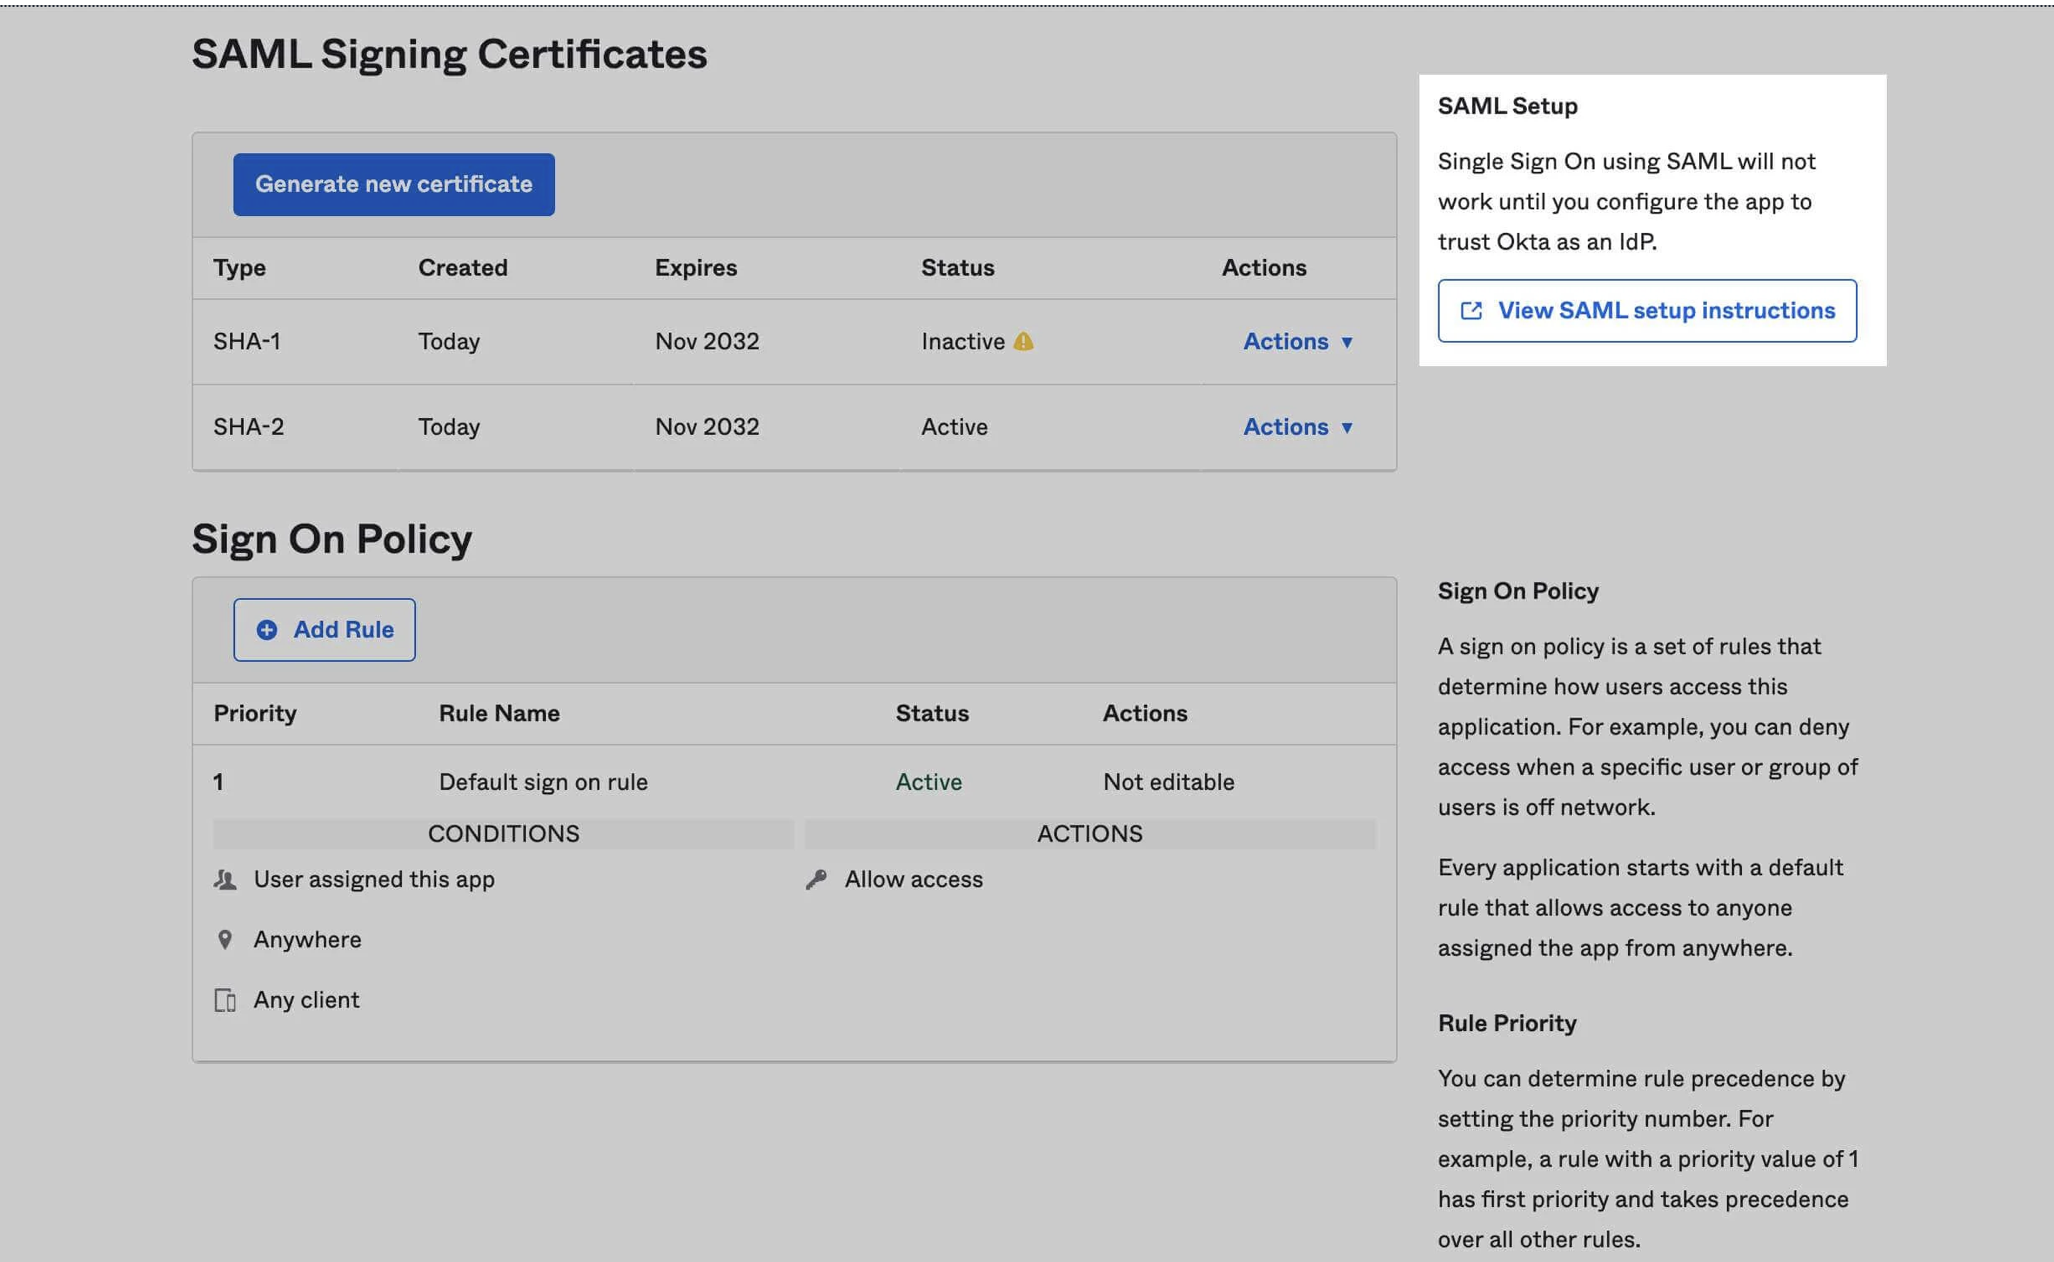
14
Copy IDP Metadata Values
Next, under the Optional section at the bottom, copy the IDP metadata values.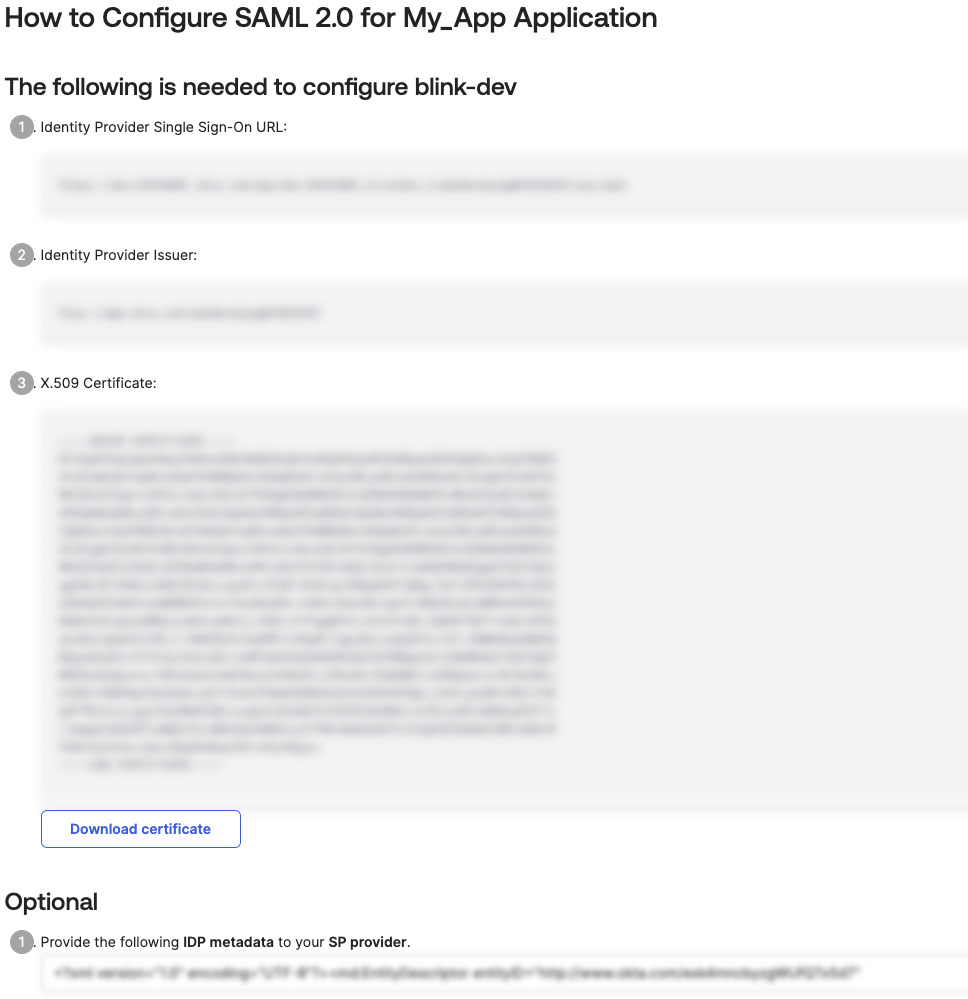
15
Paste Metadata in Blink Platform
Next, navigate to the SAML section found within the SAML tab in the Account Management Settings. Paste the IDP metadata values into the designated text field labeled ‘Metadata File’.