Table Actions
Blink provides powerful workflow actions that allow you to automate the management of table records. These actions enable you to add, update, retrieve, and delete records dynamically within your workflows.Create Table from Data
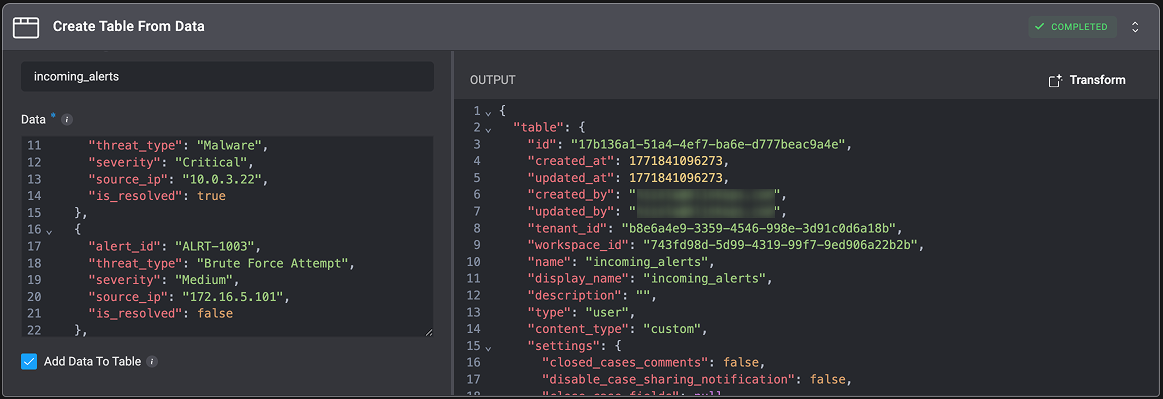
Add a Record
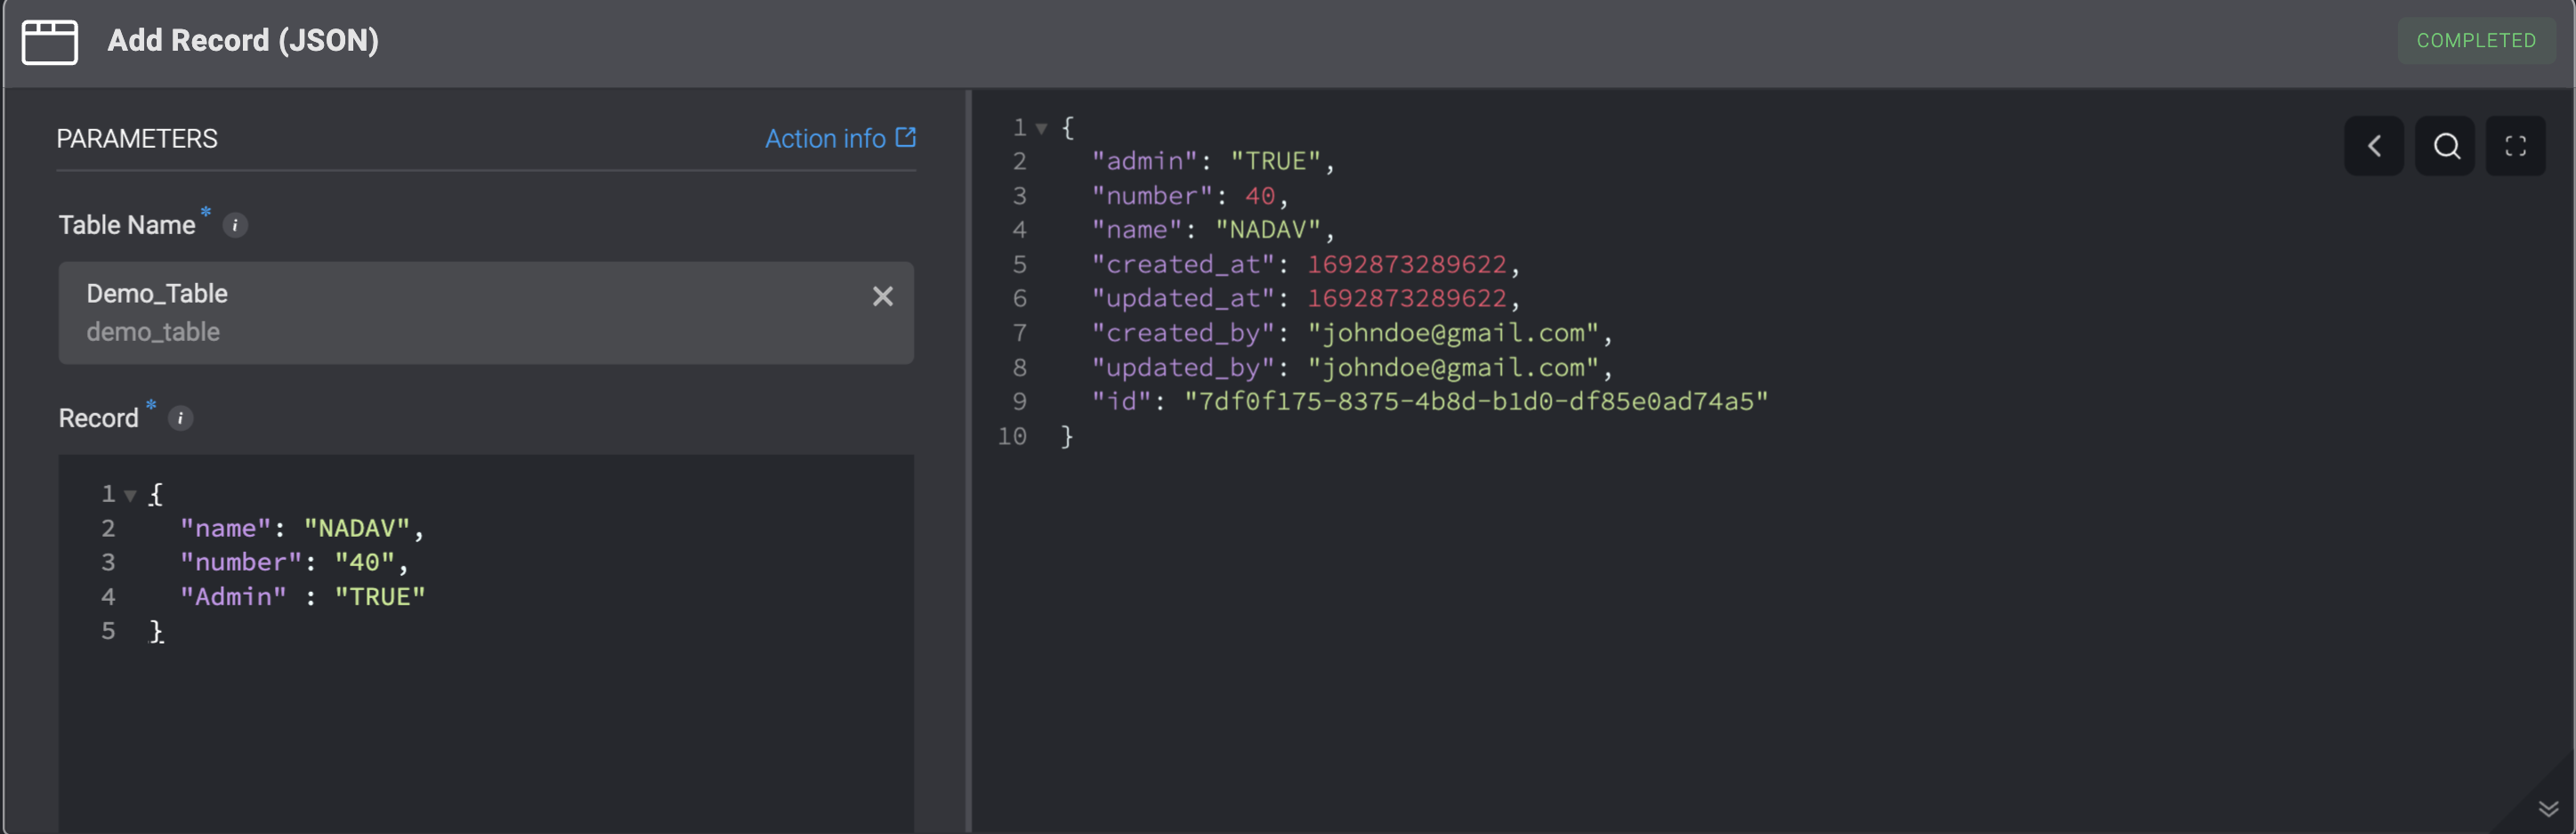
Add new records to a table by entering field names and values or by providing data inJSON format.JSON input supports bulk creation, allowing multiple records to be added simultaneously in a single action.
- Typed-in Values
- JSON Format
Add a record to a table by entering the table field name and the table field value.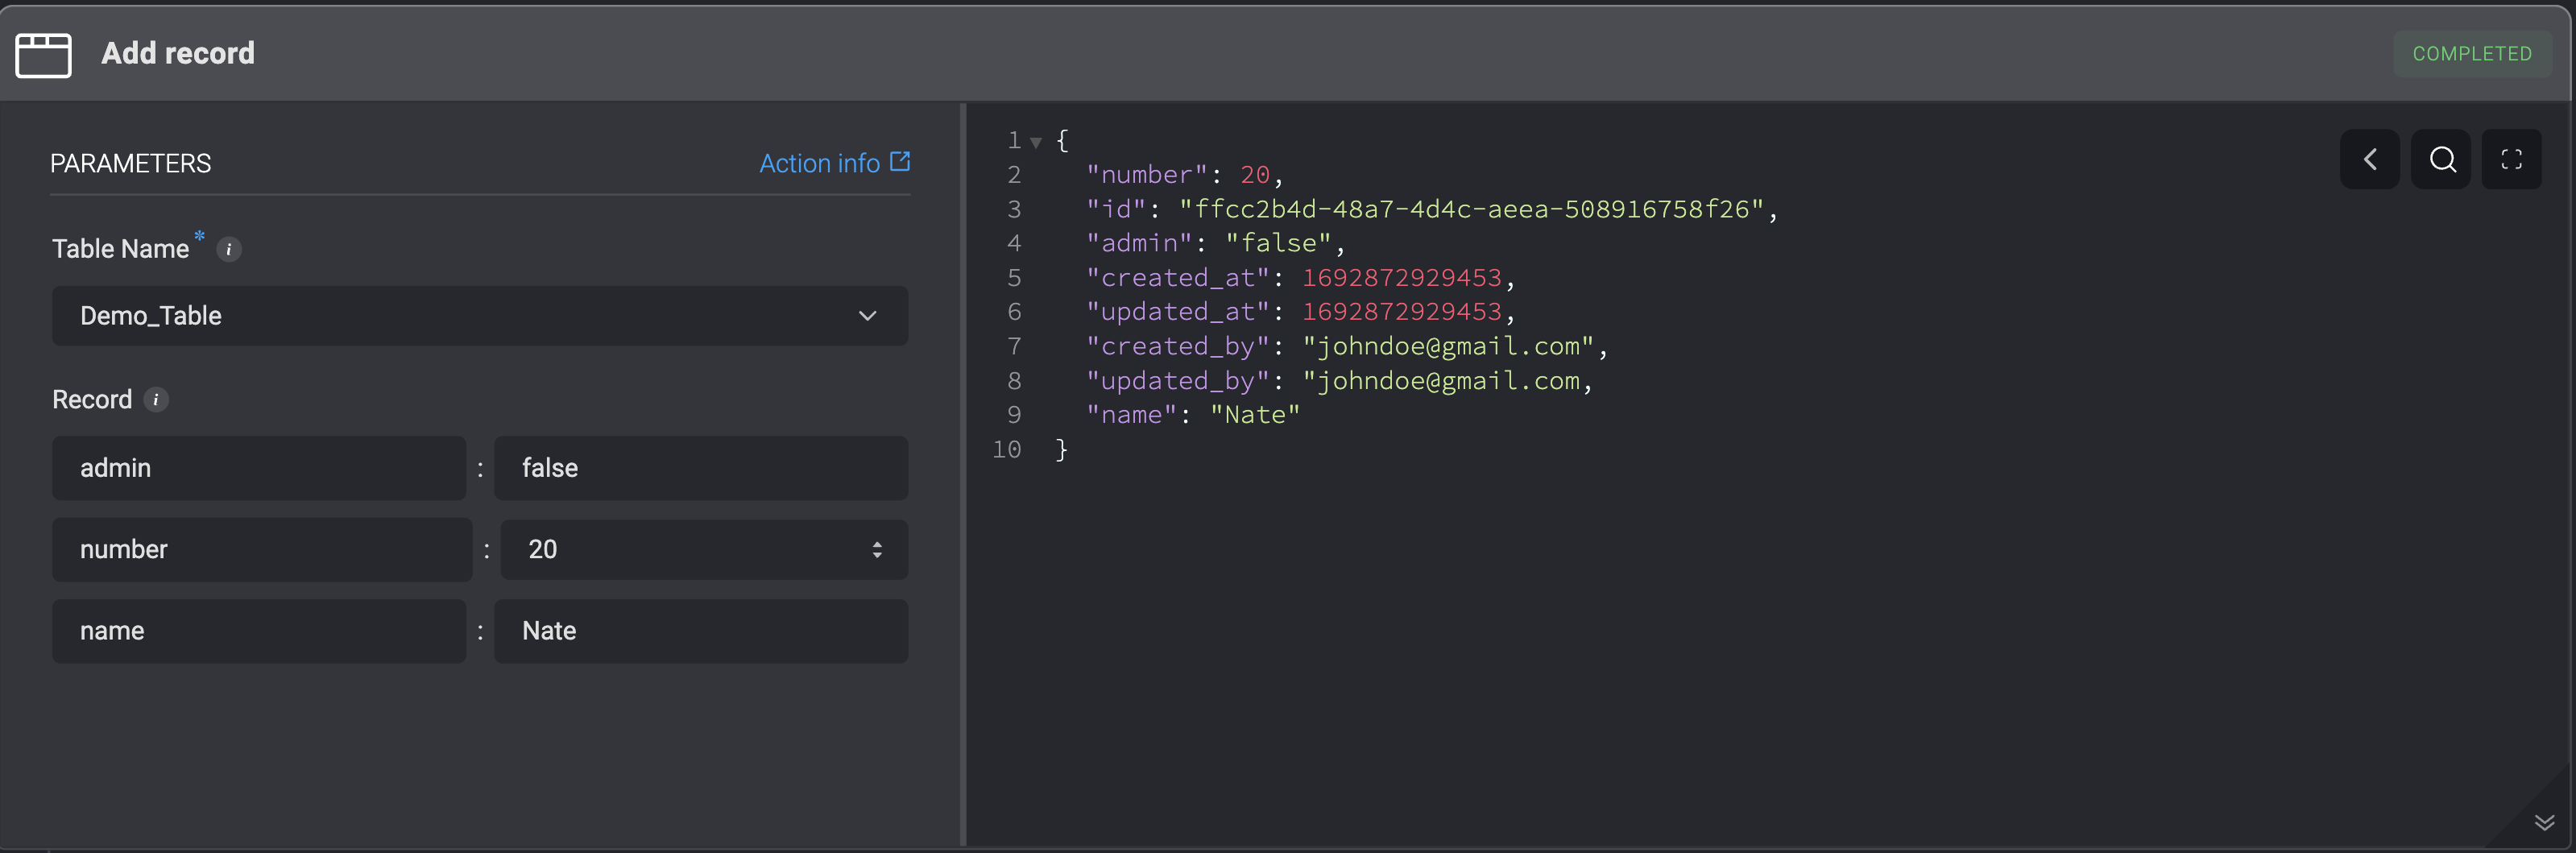
Create or Update Record
Ensure data consistency by either updating an existing record or creating a new one if no match is found. You can define specific conditions to determine whether a record should be updated or newly inserted. Supports both direct value input and JSON formatting for structured updates.- Entire Record
- JSON Format
- By Field
Create or Update an entire Record in a table by selecting the entire record option.
Note: Please note that if you leave any fields empty in the Create or Update Record action, the existing values in the table will remain unchanged.
Use Case Example: Ensuring Accurate Privileged User Access Tracking
Use Case Example: Ensuring Accurate Privileged User Access Tracking
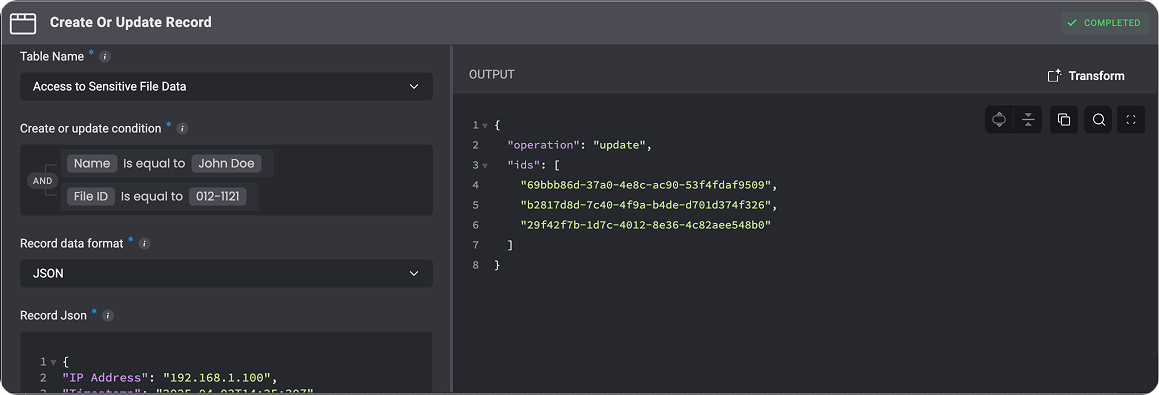
Scenario: You need to track users with privileged access in a security system. If a user is added to the list of privileged users, you want to update their access record; if the user is already on the list, their record should be updated instead of adding a duplicate.Solution: Use the Create or Update Records action to ensure that any changes to a privileged user’s access rights are properly reflected in the table without creating duplicate record.In the ‘Create or Update Records’ action, a condition to check for users who already have access listed in the table.
- If the user is not found (i.e., their record does not exist), create a new record with their user ID, access level, and timestamp.
- If the user’s record already exists, update the record with the new access level or other relevant information.
Use Case Example: Tracking Failed Login Attempts for Users
Use Case Example: Tracking Failed Login Attempts for Users
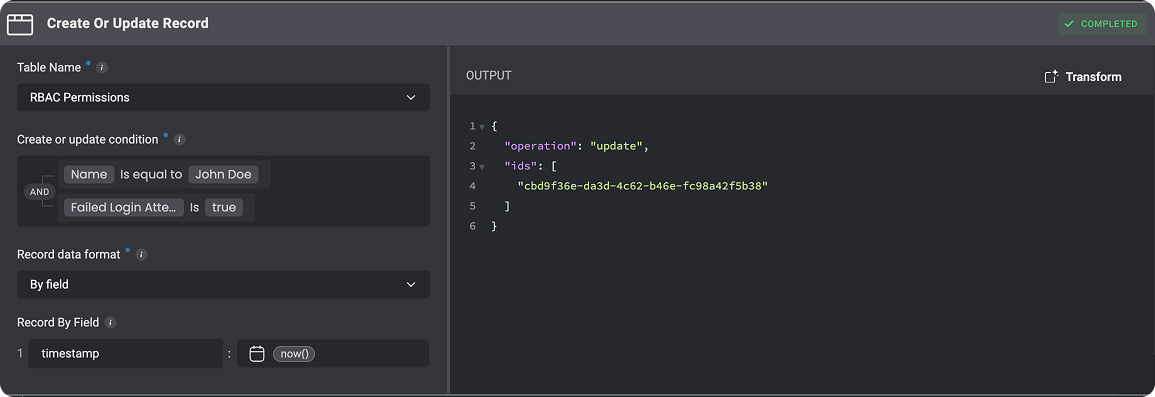
Scenario: You are building a system to monitor user login attempts. If a user fails to log in multiple times within a short period, you want to flag their account as potentially compromised, but you don’t want to duplicate records for each failed attempt.Solution: Use the Create or Update Records action to update the record for failed login attempts instead of creating a new record for every failure.Set a condition in the Create or Update Records action to check if the user already has a record of failed login attempts.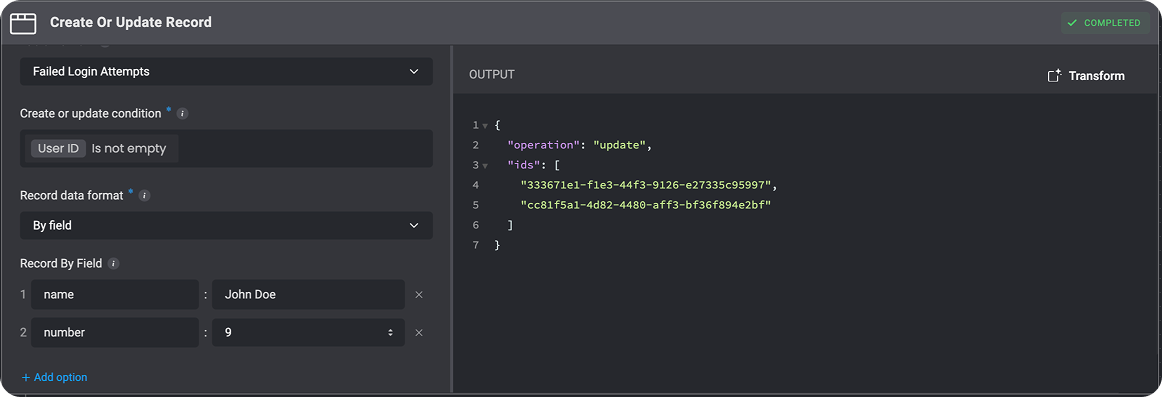
- If a failed login attempt is detected and the user has a record, update the record by incrementing the failed attempt counter and updating the timestamp.
- If no record exists for the user’s failed attempt, create a new record with the user’s details and an initial failed attempt count.
”Add Records” Action vs. “Create or Update Records” Action
When adding data to a table, choosing the right action ensures accuracy and prevents duplication. Use “Add Records” when you need to insert new data without verifying existing entries. If you want to update existing records or avoid duplicates, “Create or Update Records” is the better choice, as it checks for a match before adding new data. The table below outlines the key differences between these actions.Update Records (In Bulk)
This action allows you to update multiple records in a table in a single operation.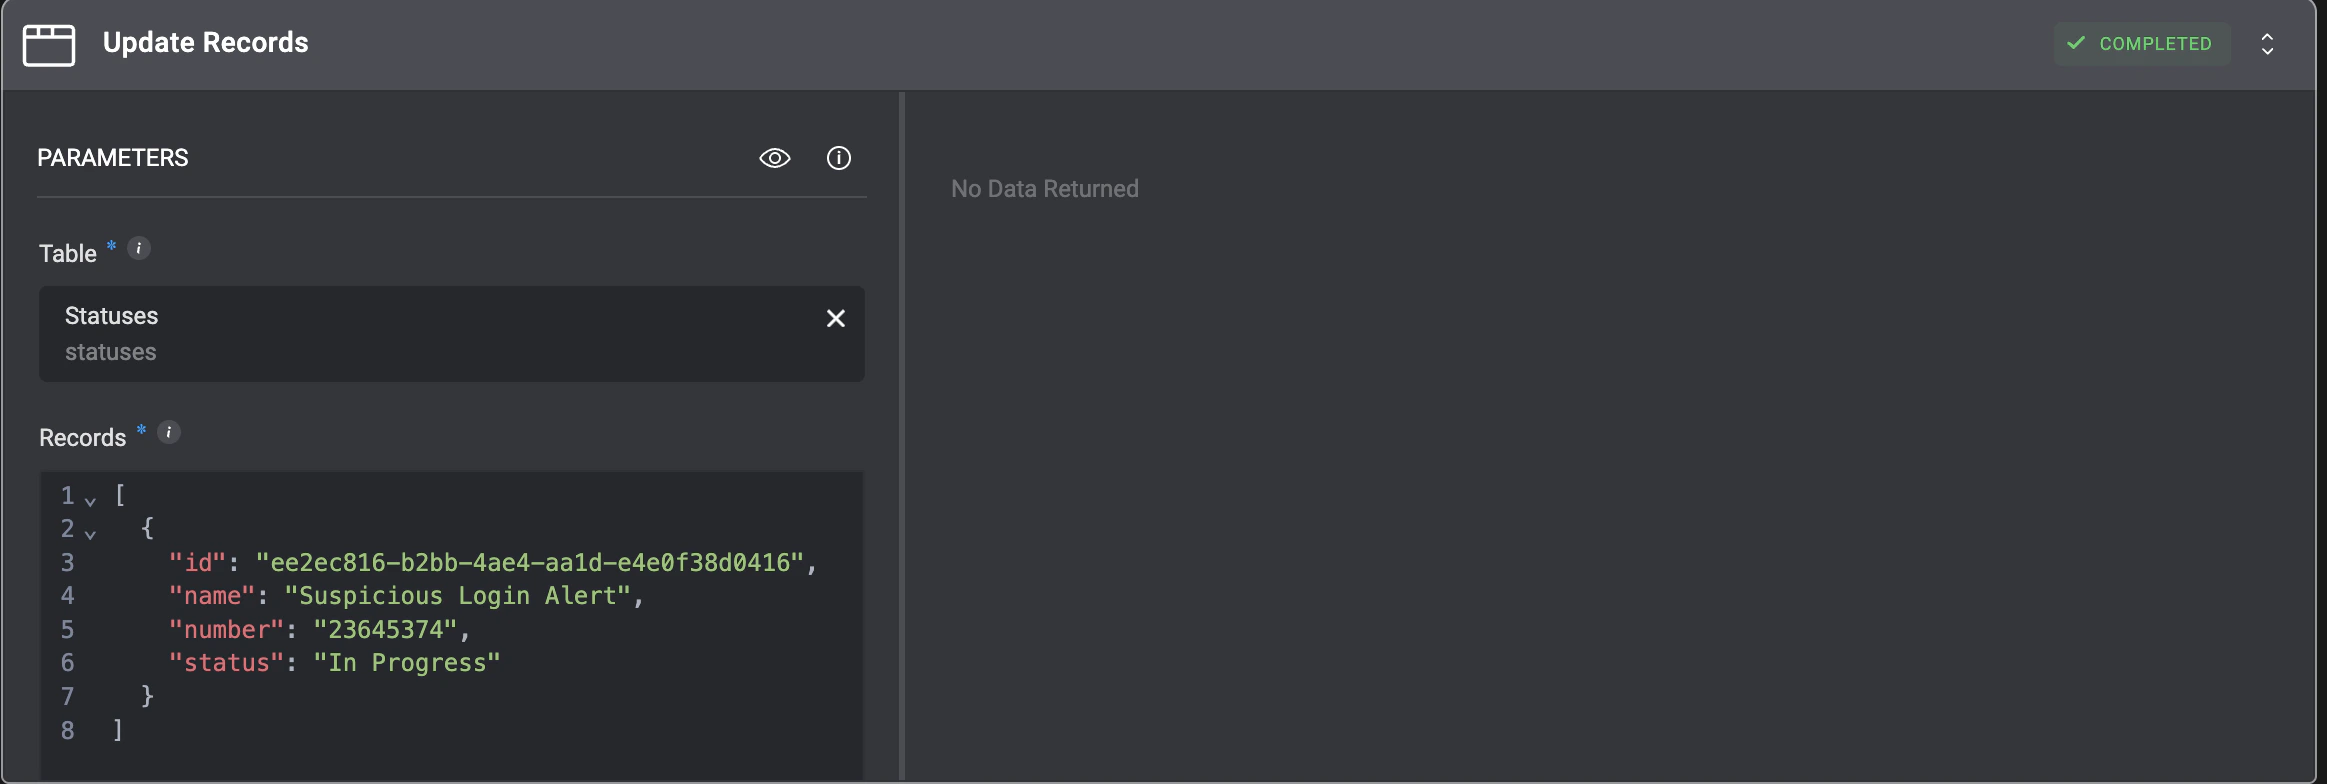
Update File Column
The ‘Update File Column’ action updates the file stored in a table’s file column.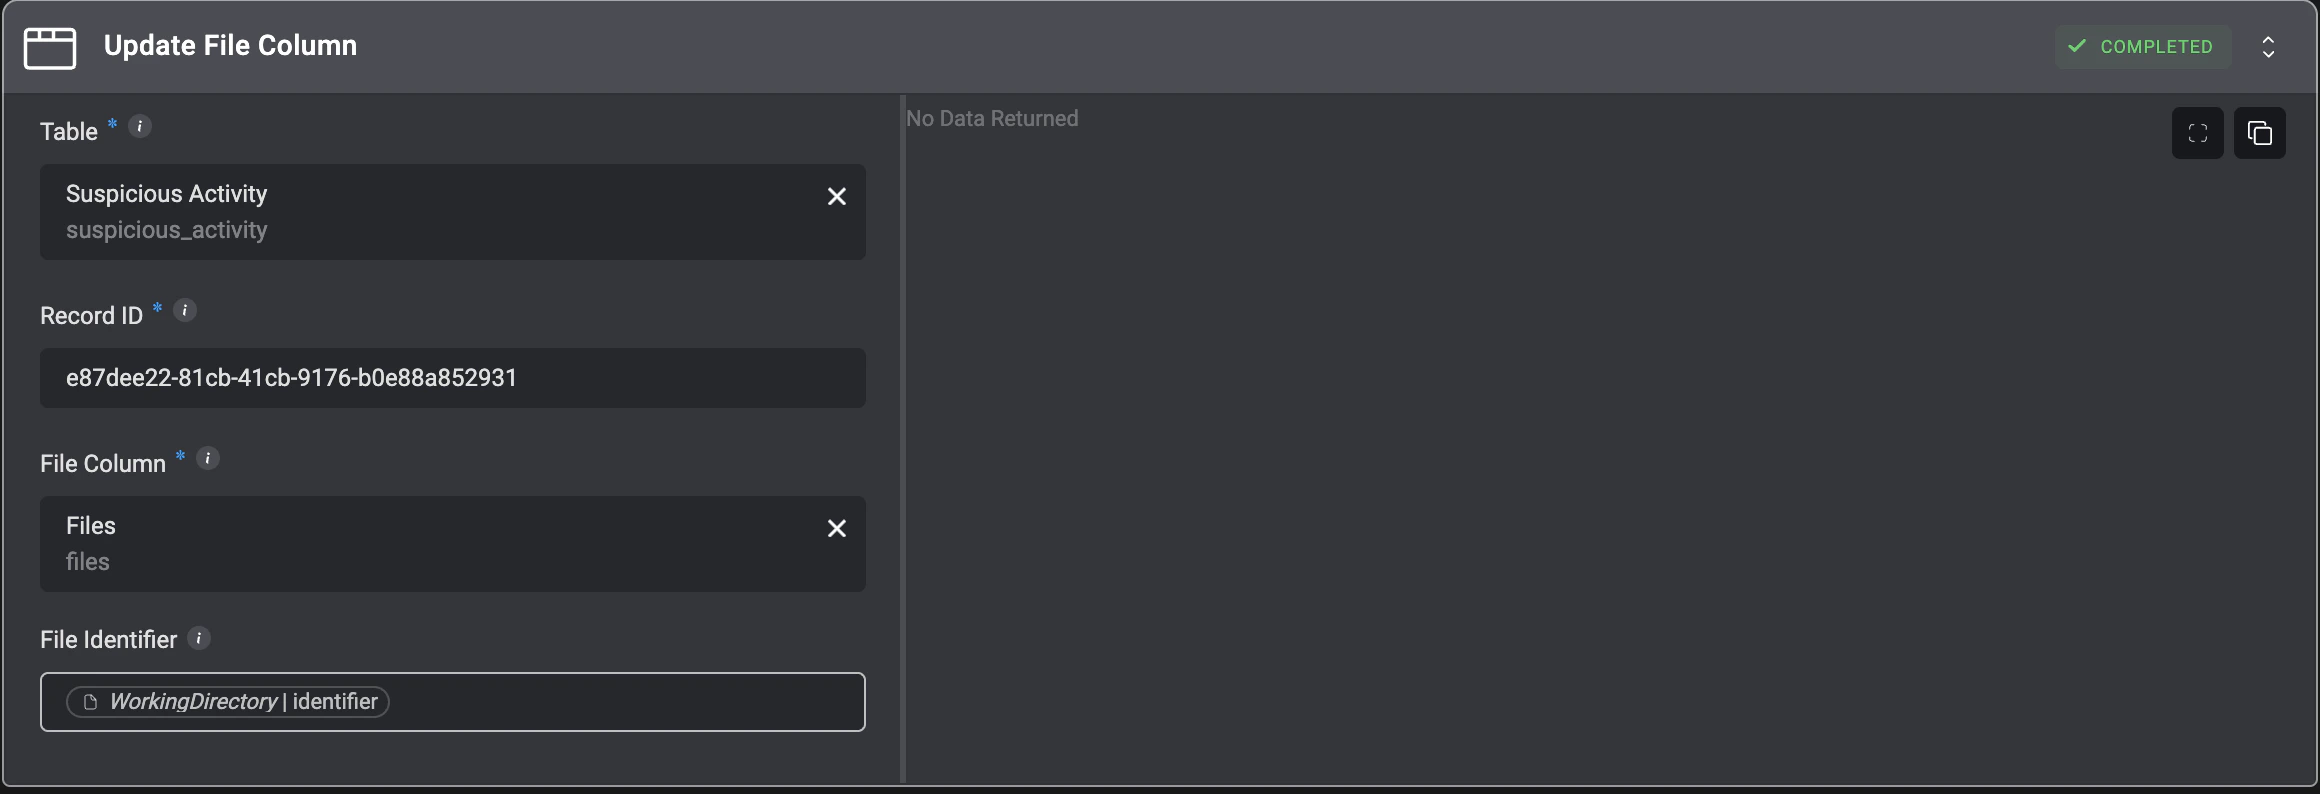
Get a Record
Fetch table data based on specified criteria using conditions, RQL queries, or SQL queries. Choose how the data is structured in the output (Table, JSON, or CSV) and refine results by applying filters, sorting, limits, and pagination options.Tip: When to Use Each Query Method
Tip: When to Use Each Query Method
Each query method is designed for different use cases, depending on the complexity of your query and the level of filtering or customization required. Here are our recommendations on when to use each query method.
By Condition
Best For: Simple Queries with Basic Filtering- Use this method when you need to retrieve records based on straightforward conditions, such as checking if a user has a specific access level or finding all records created after a certain date.
- Conditions are easy to configure without needing complex query syntax.
- Retrieve all users with
AccessLevel = "Administrator"to audit privileged accounts.
RQL Format
Best For: Flexible Queries with Advanced Filtering- Use RQL when you need more precise filtering with operators like
$gte,$lte,$contains_any, or$like. - Ideal for dynamic queries where conditions may change based on user input or external events.
- Fetch all users who have accessed the system in the past 24 hours:
- Retrieve all users with an AccessLevel of “Administrator” or “Manager”:
SQL Query
Best For: Complex Queries, Joins, and Aggregations- Use SQL when you need to perform multi-table joins, grouping, aggregation, or subqueries.
- Ideal for reporting and analytics, such as tracking security incidents over time.
- Detect Privilege Escalation Attempts by finding users who had an access level change in the last 7 days:
- Cross-reference users with recent failed login attempts:
- By Condition
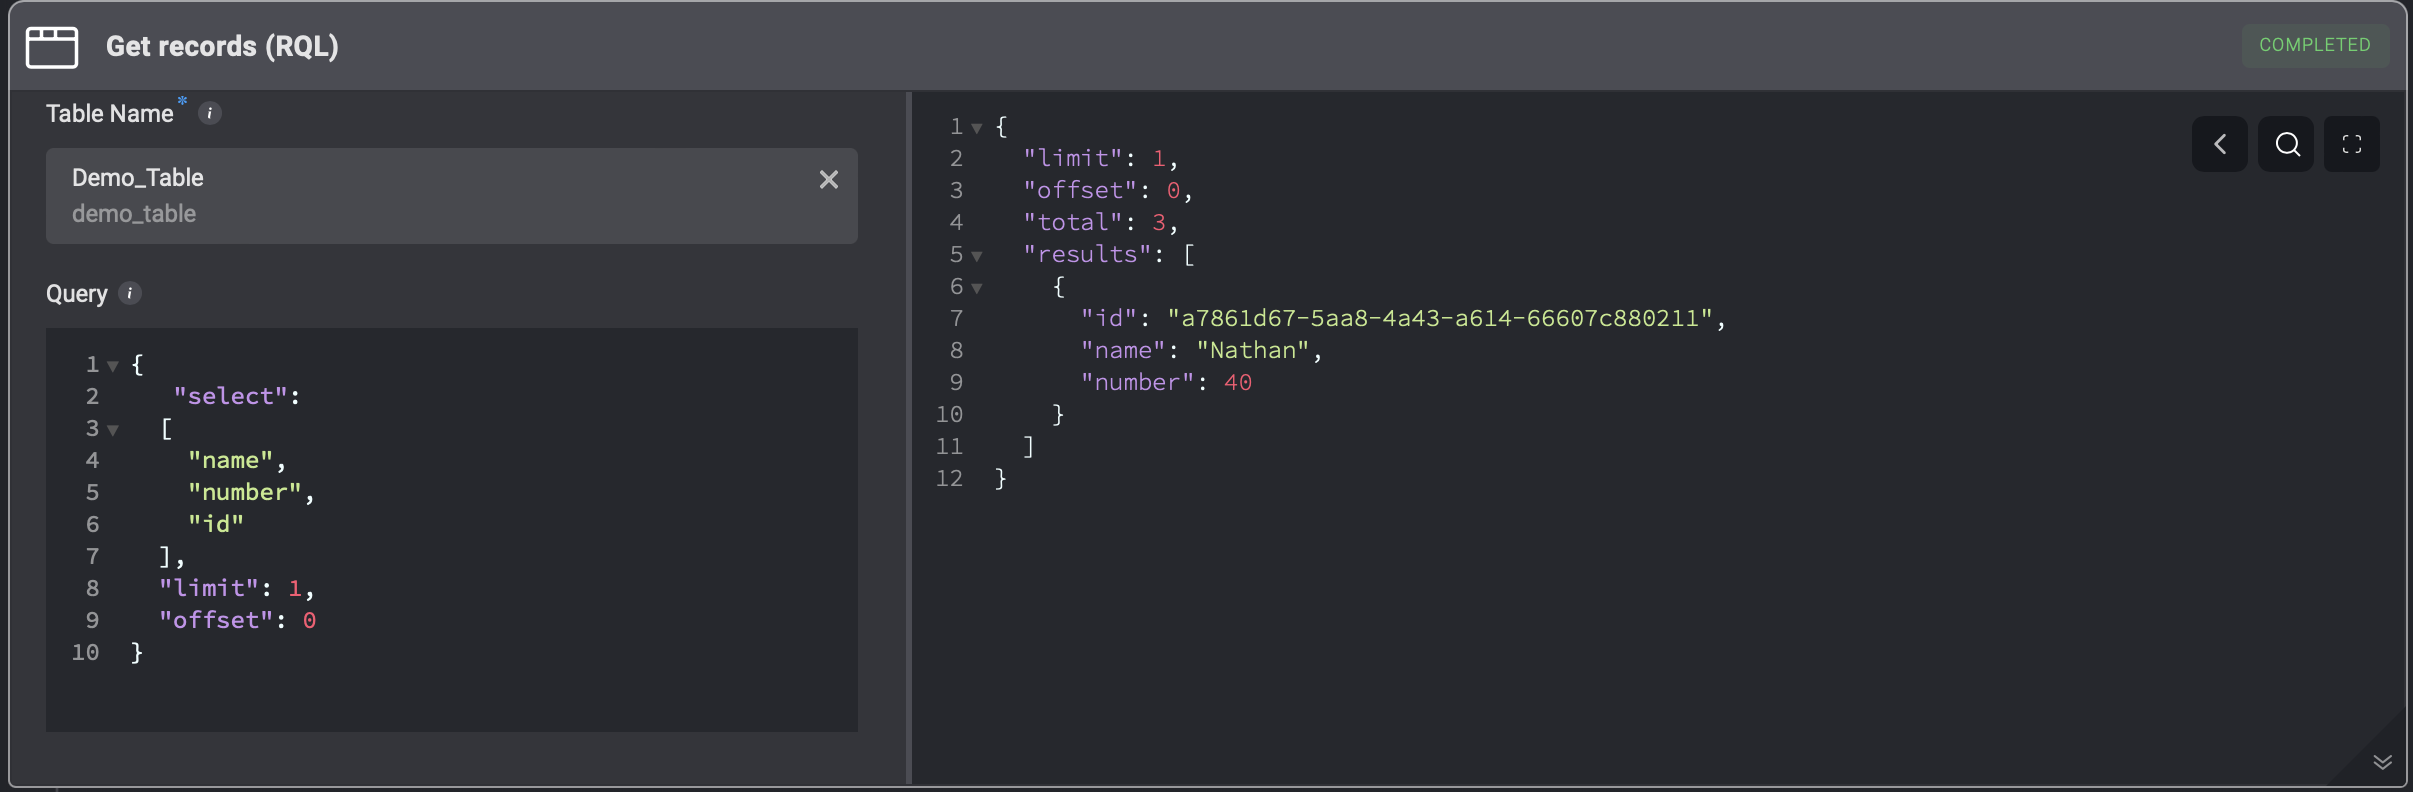
- RQL Format
- SQL Query
Get a Record from a table by using a
condition. All records that match the condition will be returned.By Condition- Exception Rule
By Condition- Exception Rule
When querying a table using a condition, and you are using both the 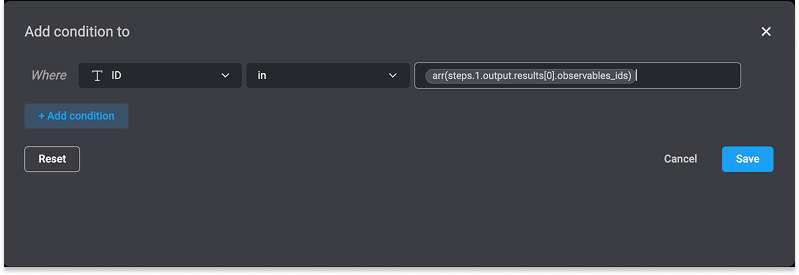
in operator, it is essential to use the arr() function when working with arrays. Failing to do so will cause the workflow action to fail.For Example:Use Case Example: Get Table Records According to a Specified Condition.
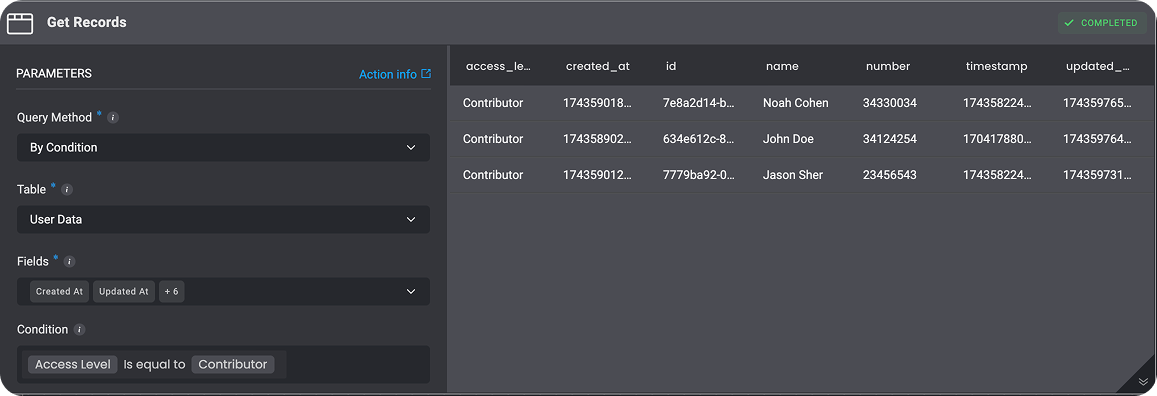
Use Case Example: Get Table Records According to a Specified Condition.
The action retrieves specific records from the “User Data” table using the “By Condition” method, selecting fields like Created At, Updated At, and more, while filtering for users with an Access Level of “Contributor.”

Delete a Record
Remove specific records from a table by referencing their uniqueID or by setting a condition to delete multiple records that meet certain criteria. This ensures precise control over data removal while preventing accidental deletions.
- Record ID
- Conditional Statements
Deletes a record from a table by the 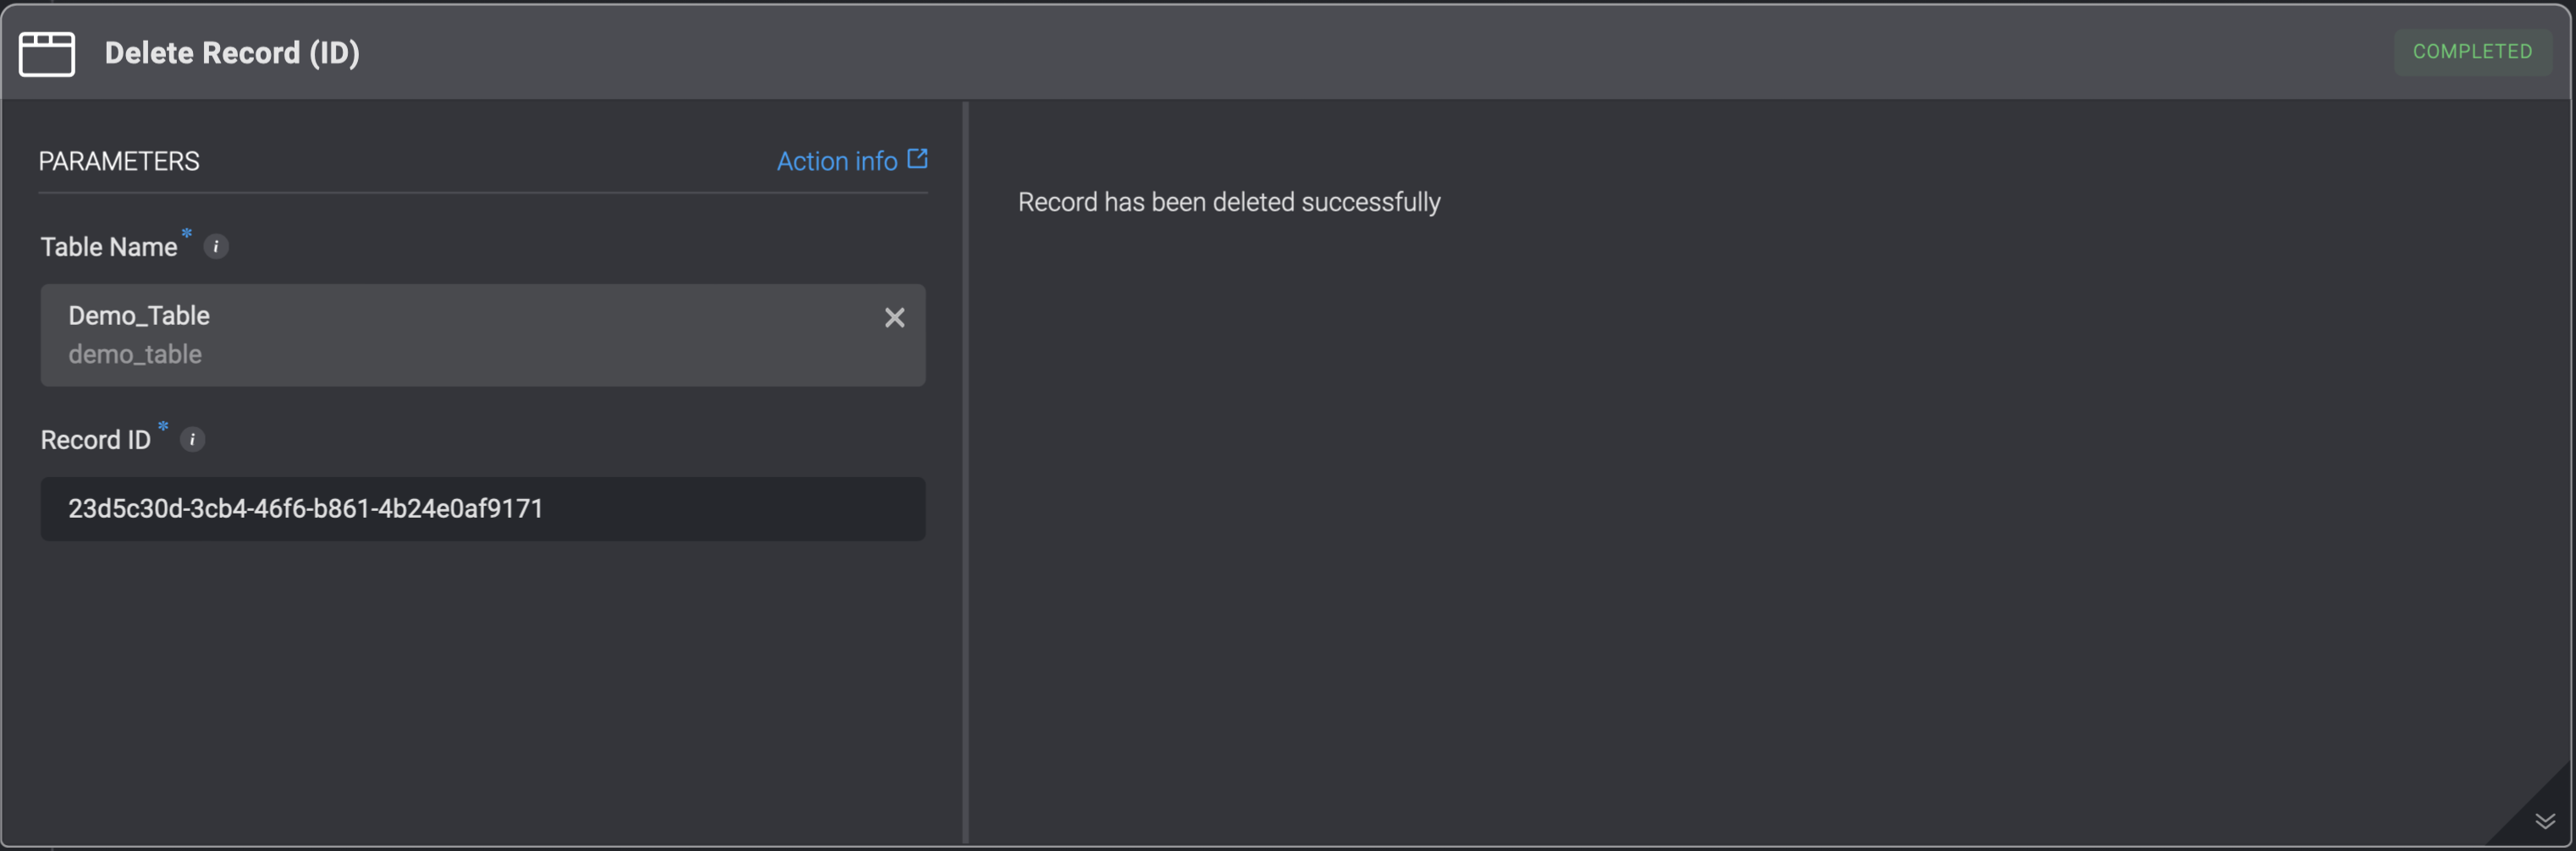
Record ID.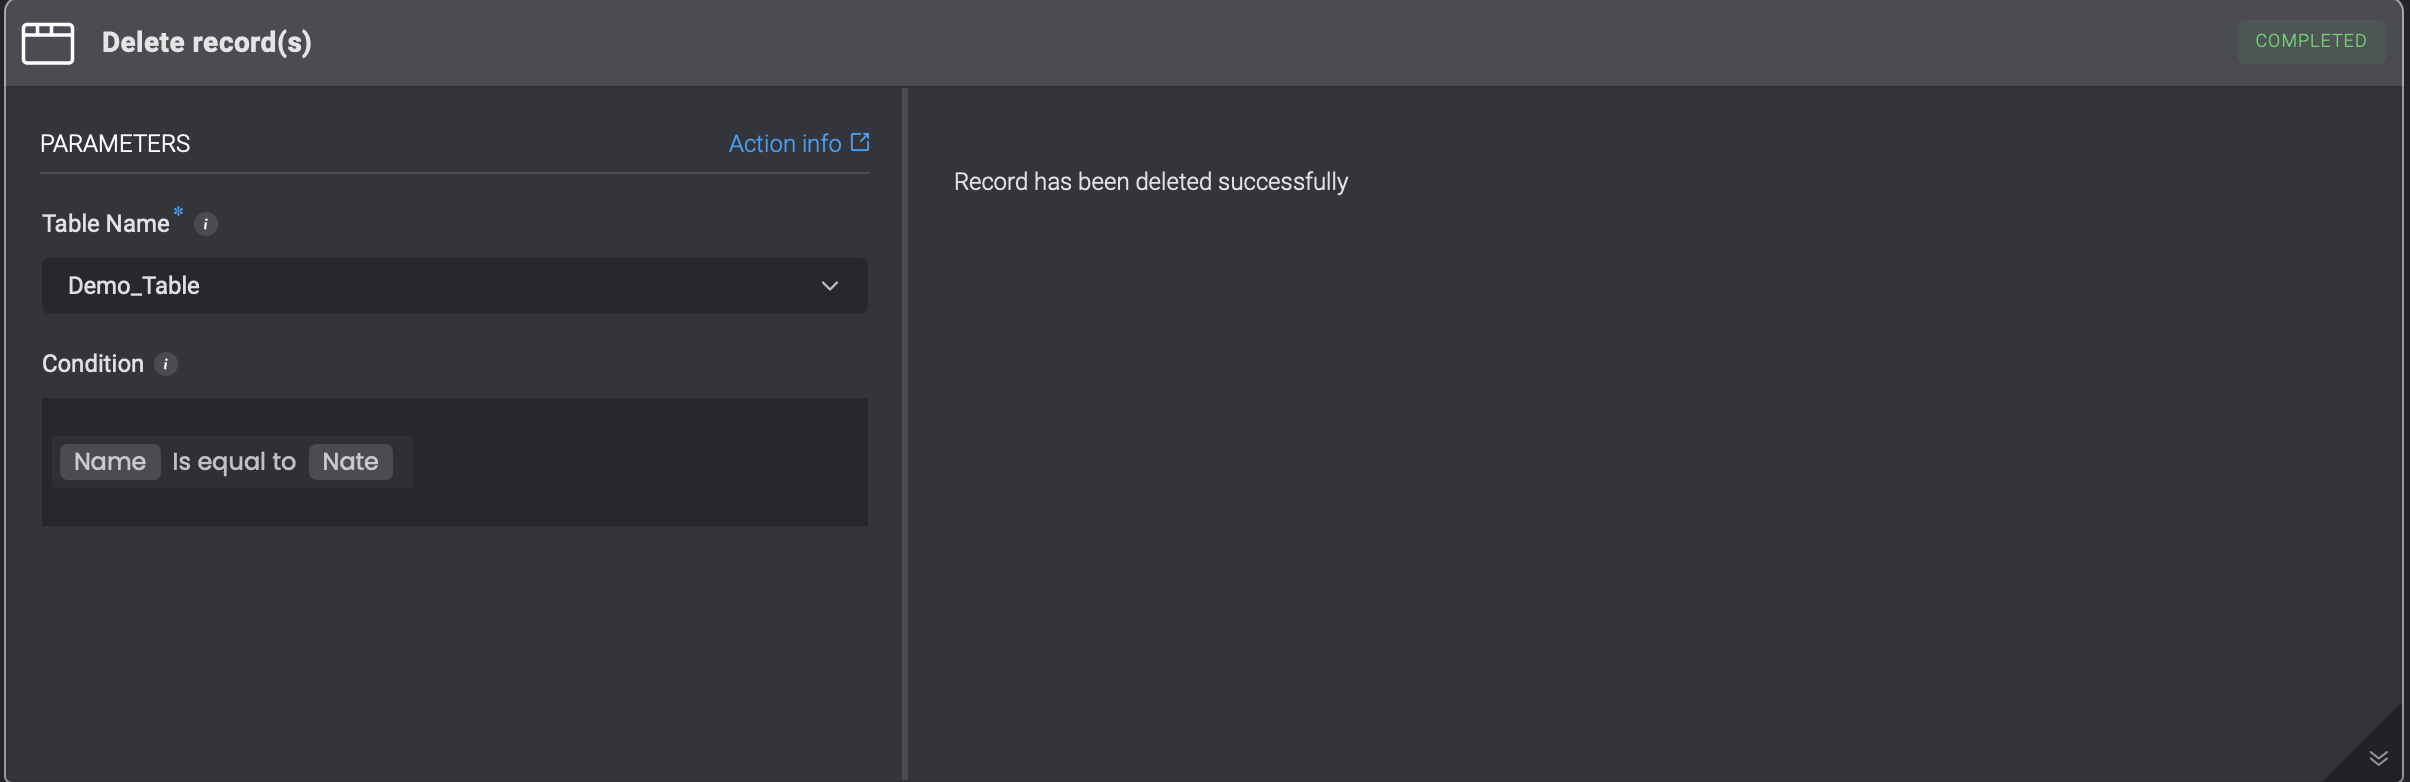
Managing Tables with Workflow Actions
Blink provides powerful workflow actions that allow you to automate the management of tables. These actions enable you to create, clear, retrieve, copy and delete tables dynamically within your workflows.Create a Table
Create a table based on a schema.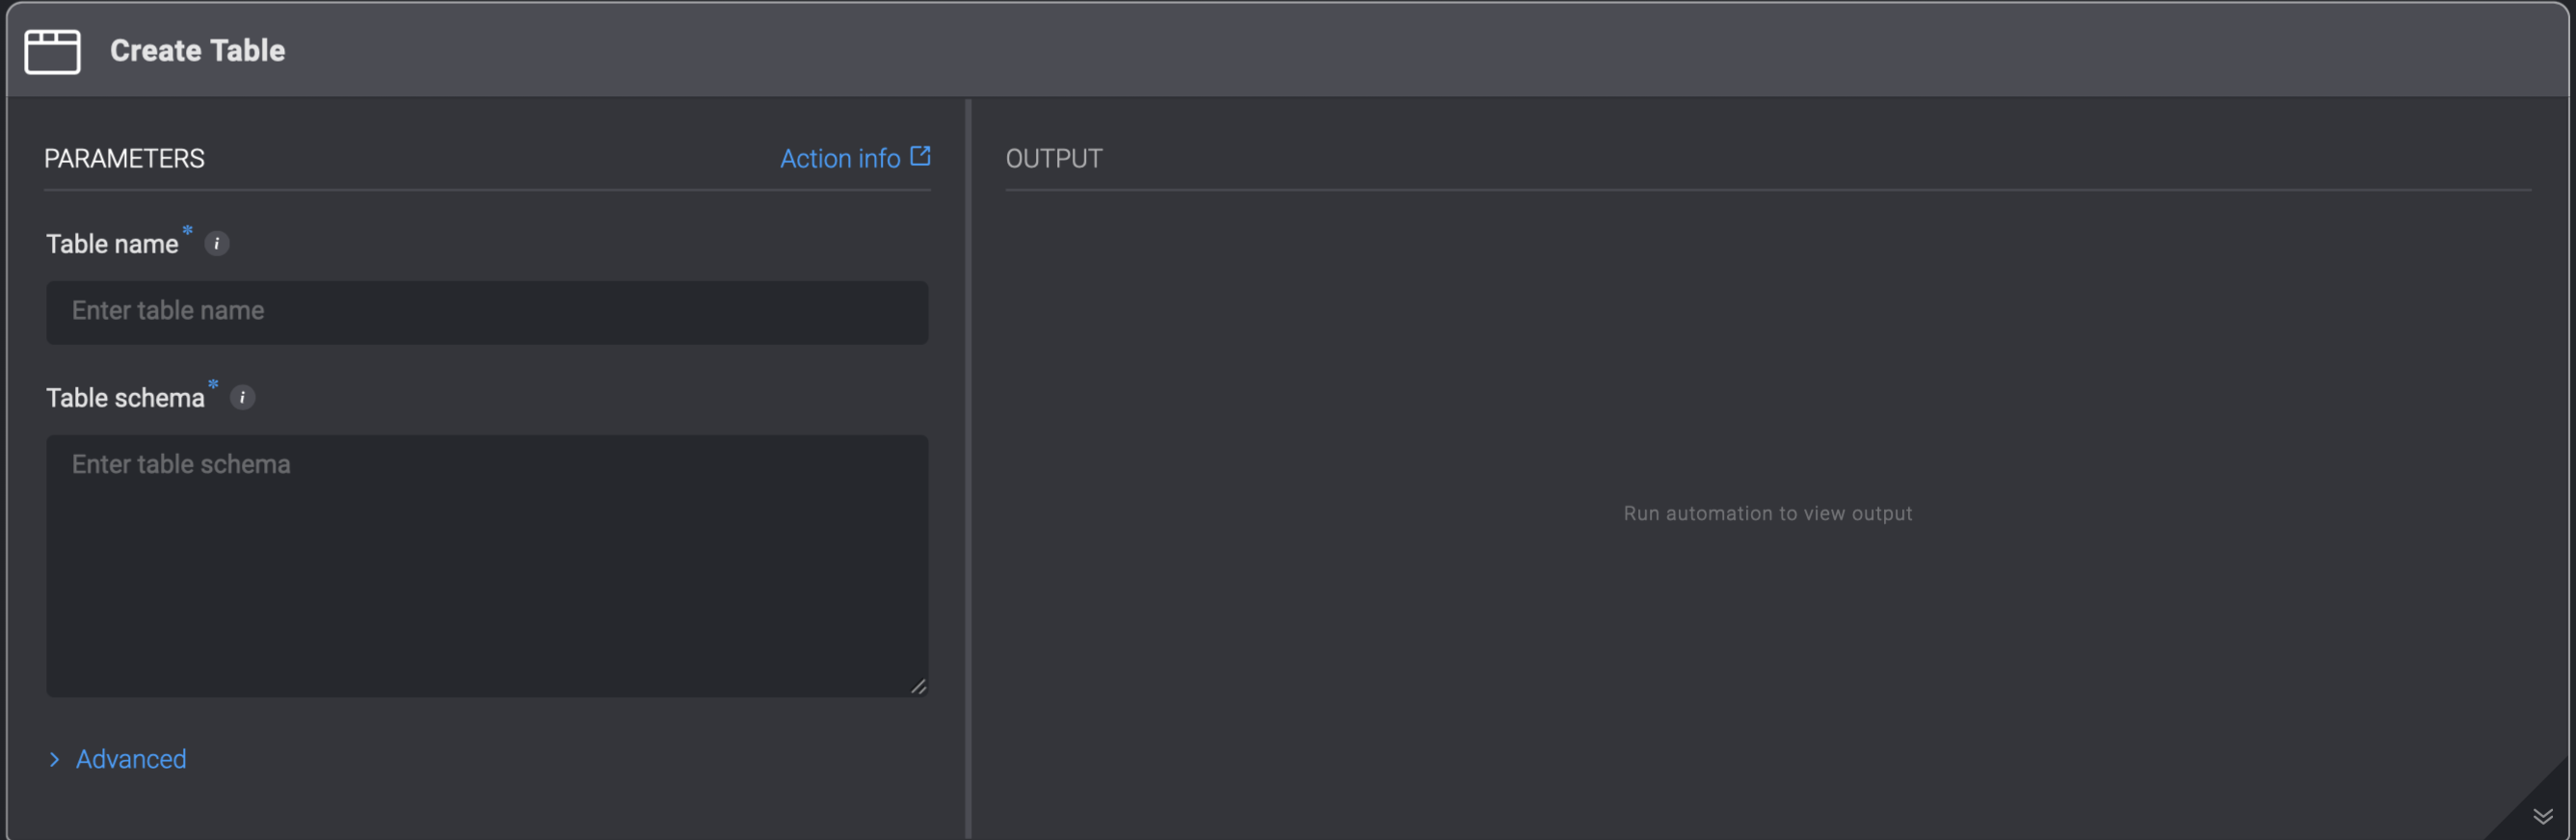
Copy Table Schema
For each table that is created, there is a table schema.Learn how to Copy a Table's Schema
Learn how to Copy a Table's Schema
Click the 3 dots menu of the table > Copy table scheme.
Click Here to View the Whole Table Schema
Click Here to View the Whole Table Schema
Example of a Table Schema:
Does Table Exist
Check if a table with a given display name exists.Use Case Example: Creating a Table Only If Table Name Doesn’t Already Exist
Use Case Example: Creating a Table Only If Table Name Doesn’t Already Exist
Before creating a new table, it is important to check whether a table with the same name already exists to avoid failures.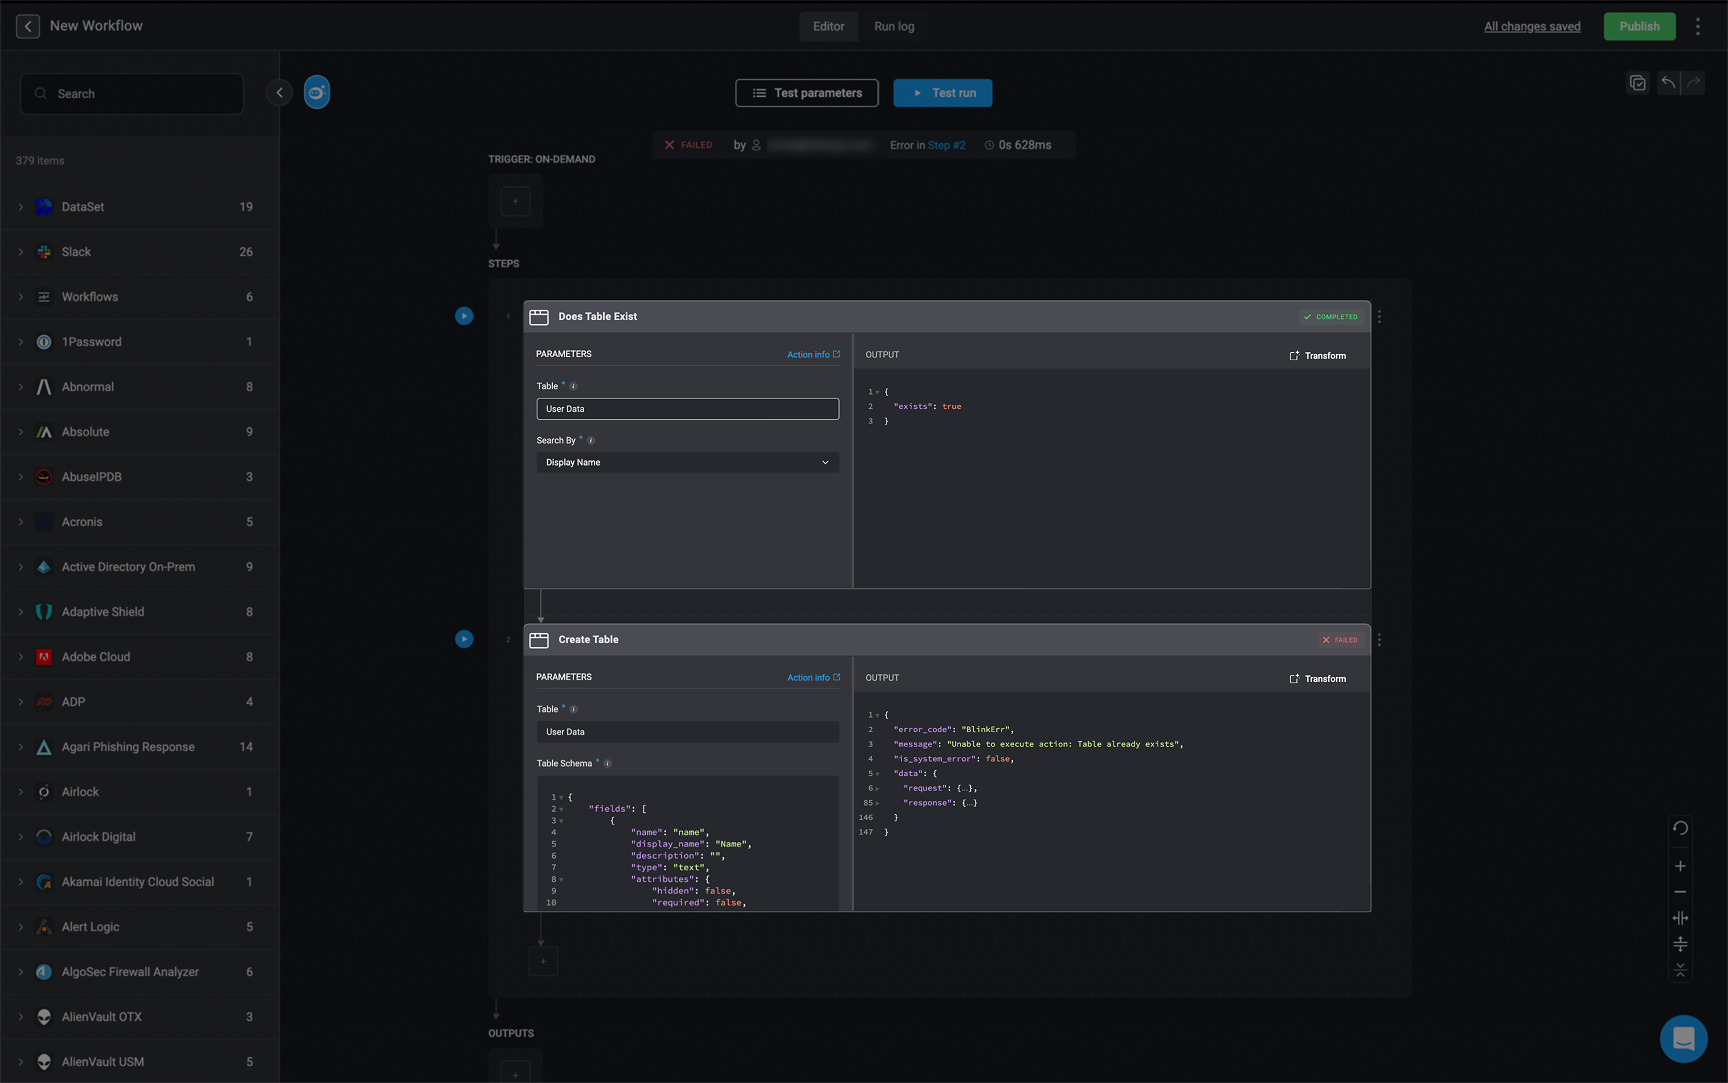
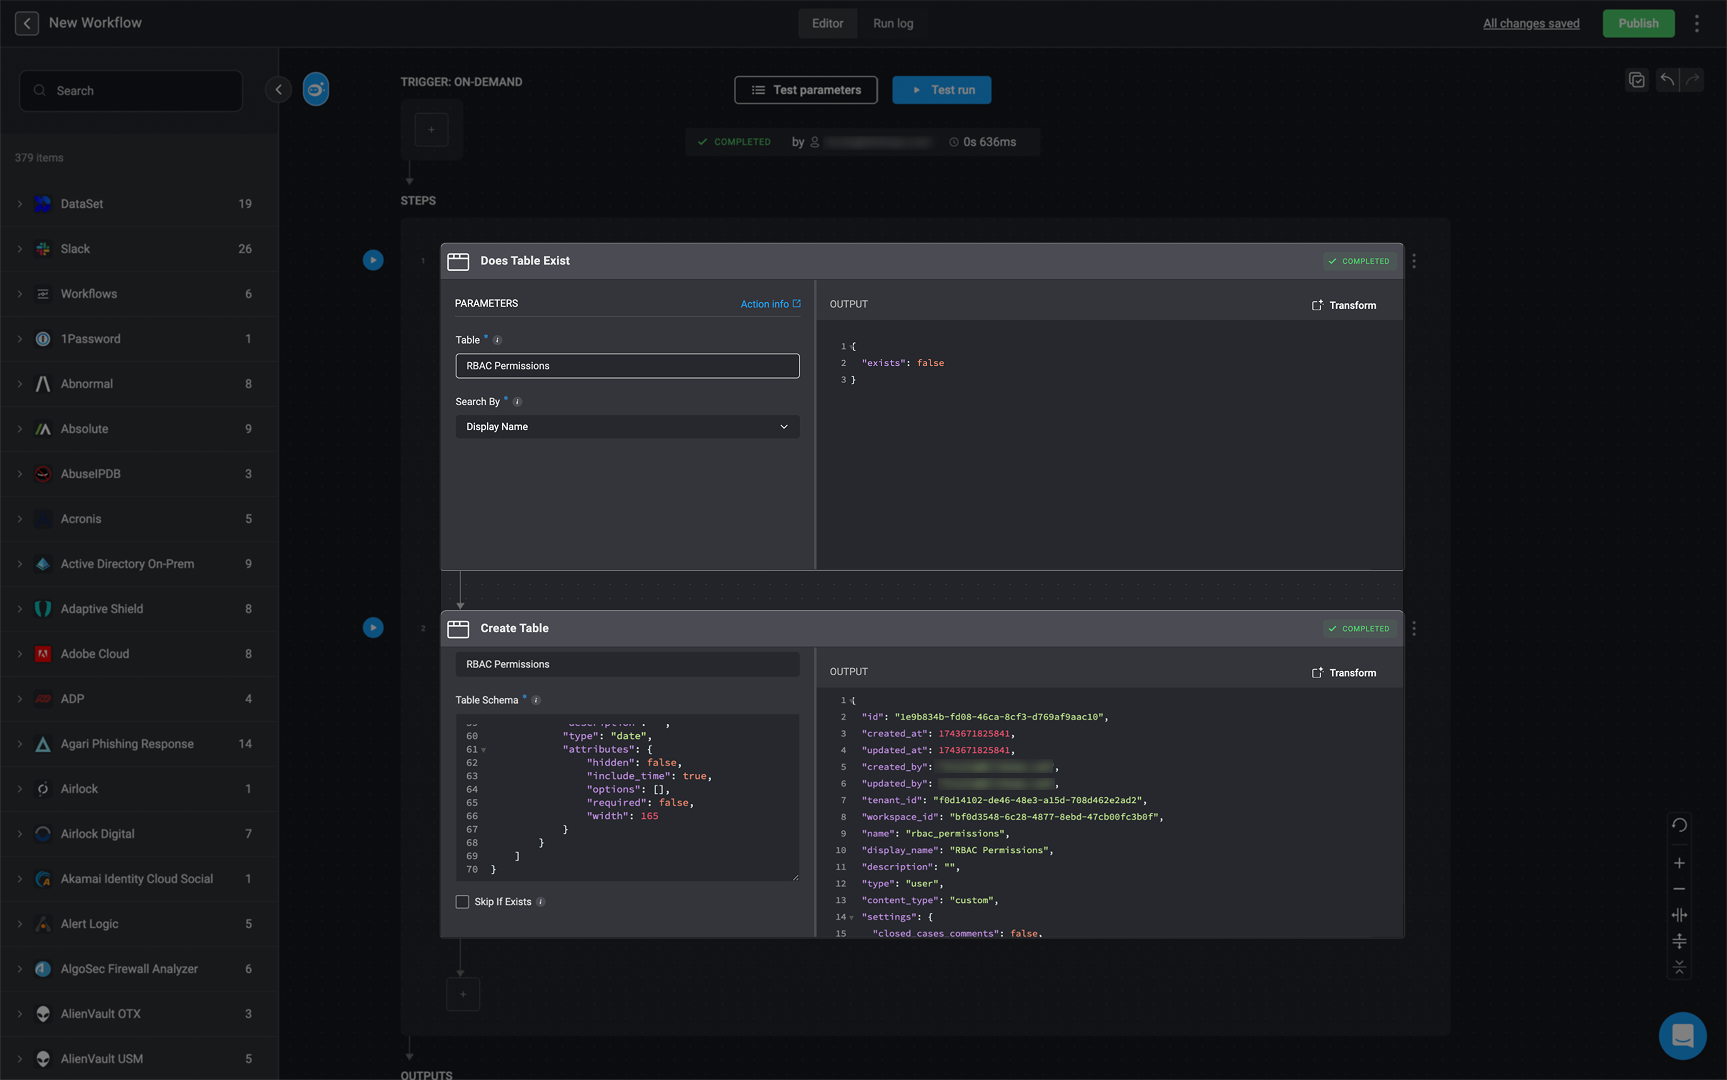
- If the table name already exists, the workflow will fail.
- If the table name does not exist, a new table will be created successfully.
Clear a Table
Clear all table records.Delete a Table
Deletes the entire table.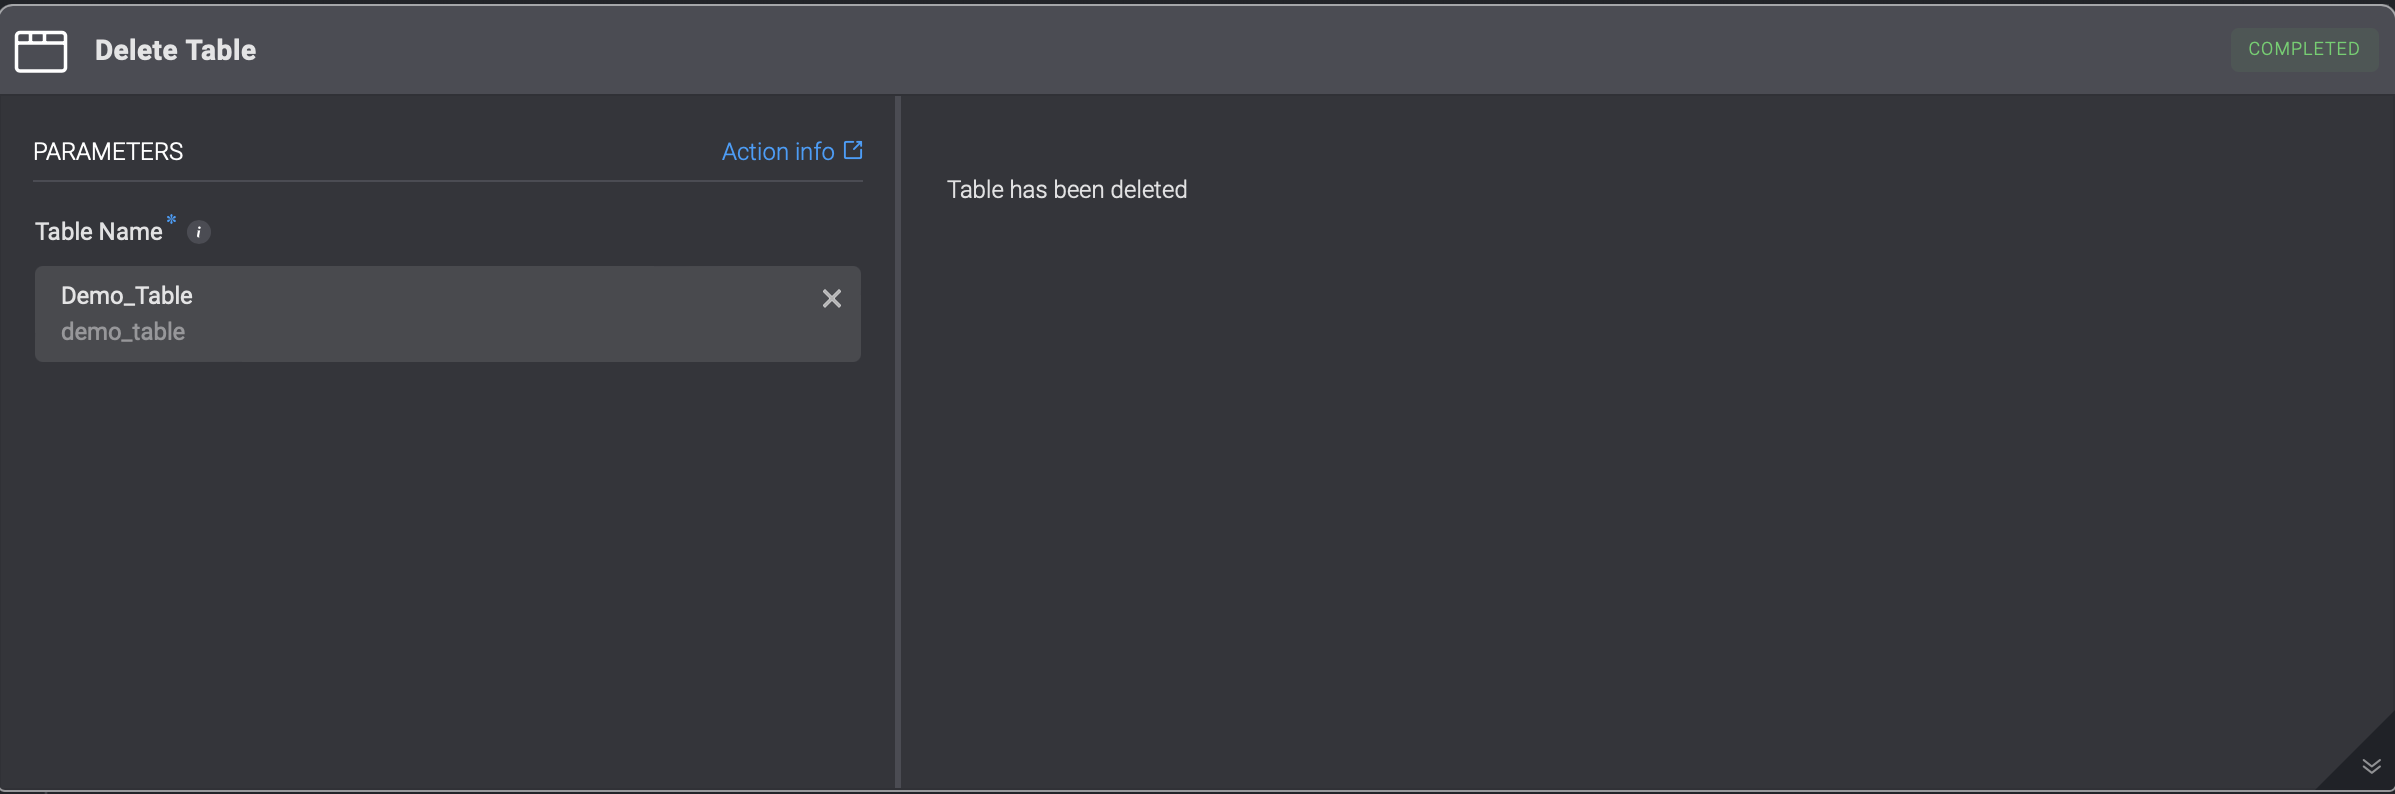
Event-Based Triggers for Table Events
New Table Record
The New Table Record option is an Event-Based Trigger event that executes the workflow every time a new record is added to the selected table.Table Record Updated
The Table Record Updated option is an Event-Based Trigger event that executes the workflow every time a record in the selected table is updated.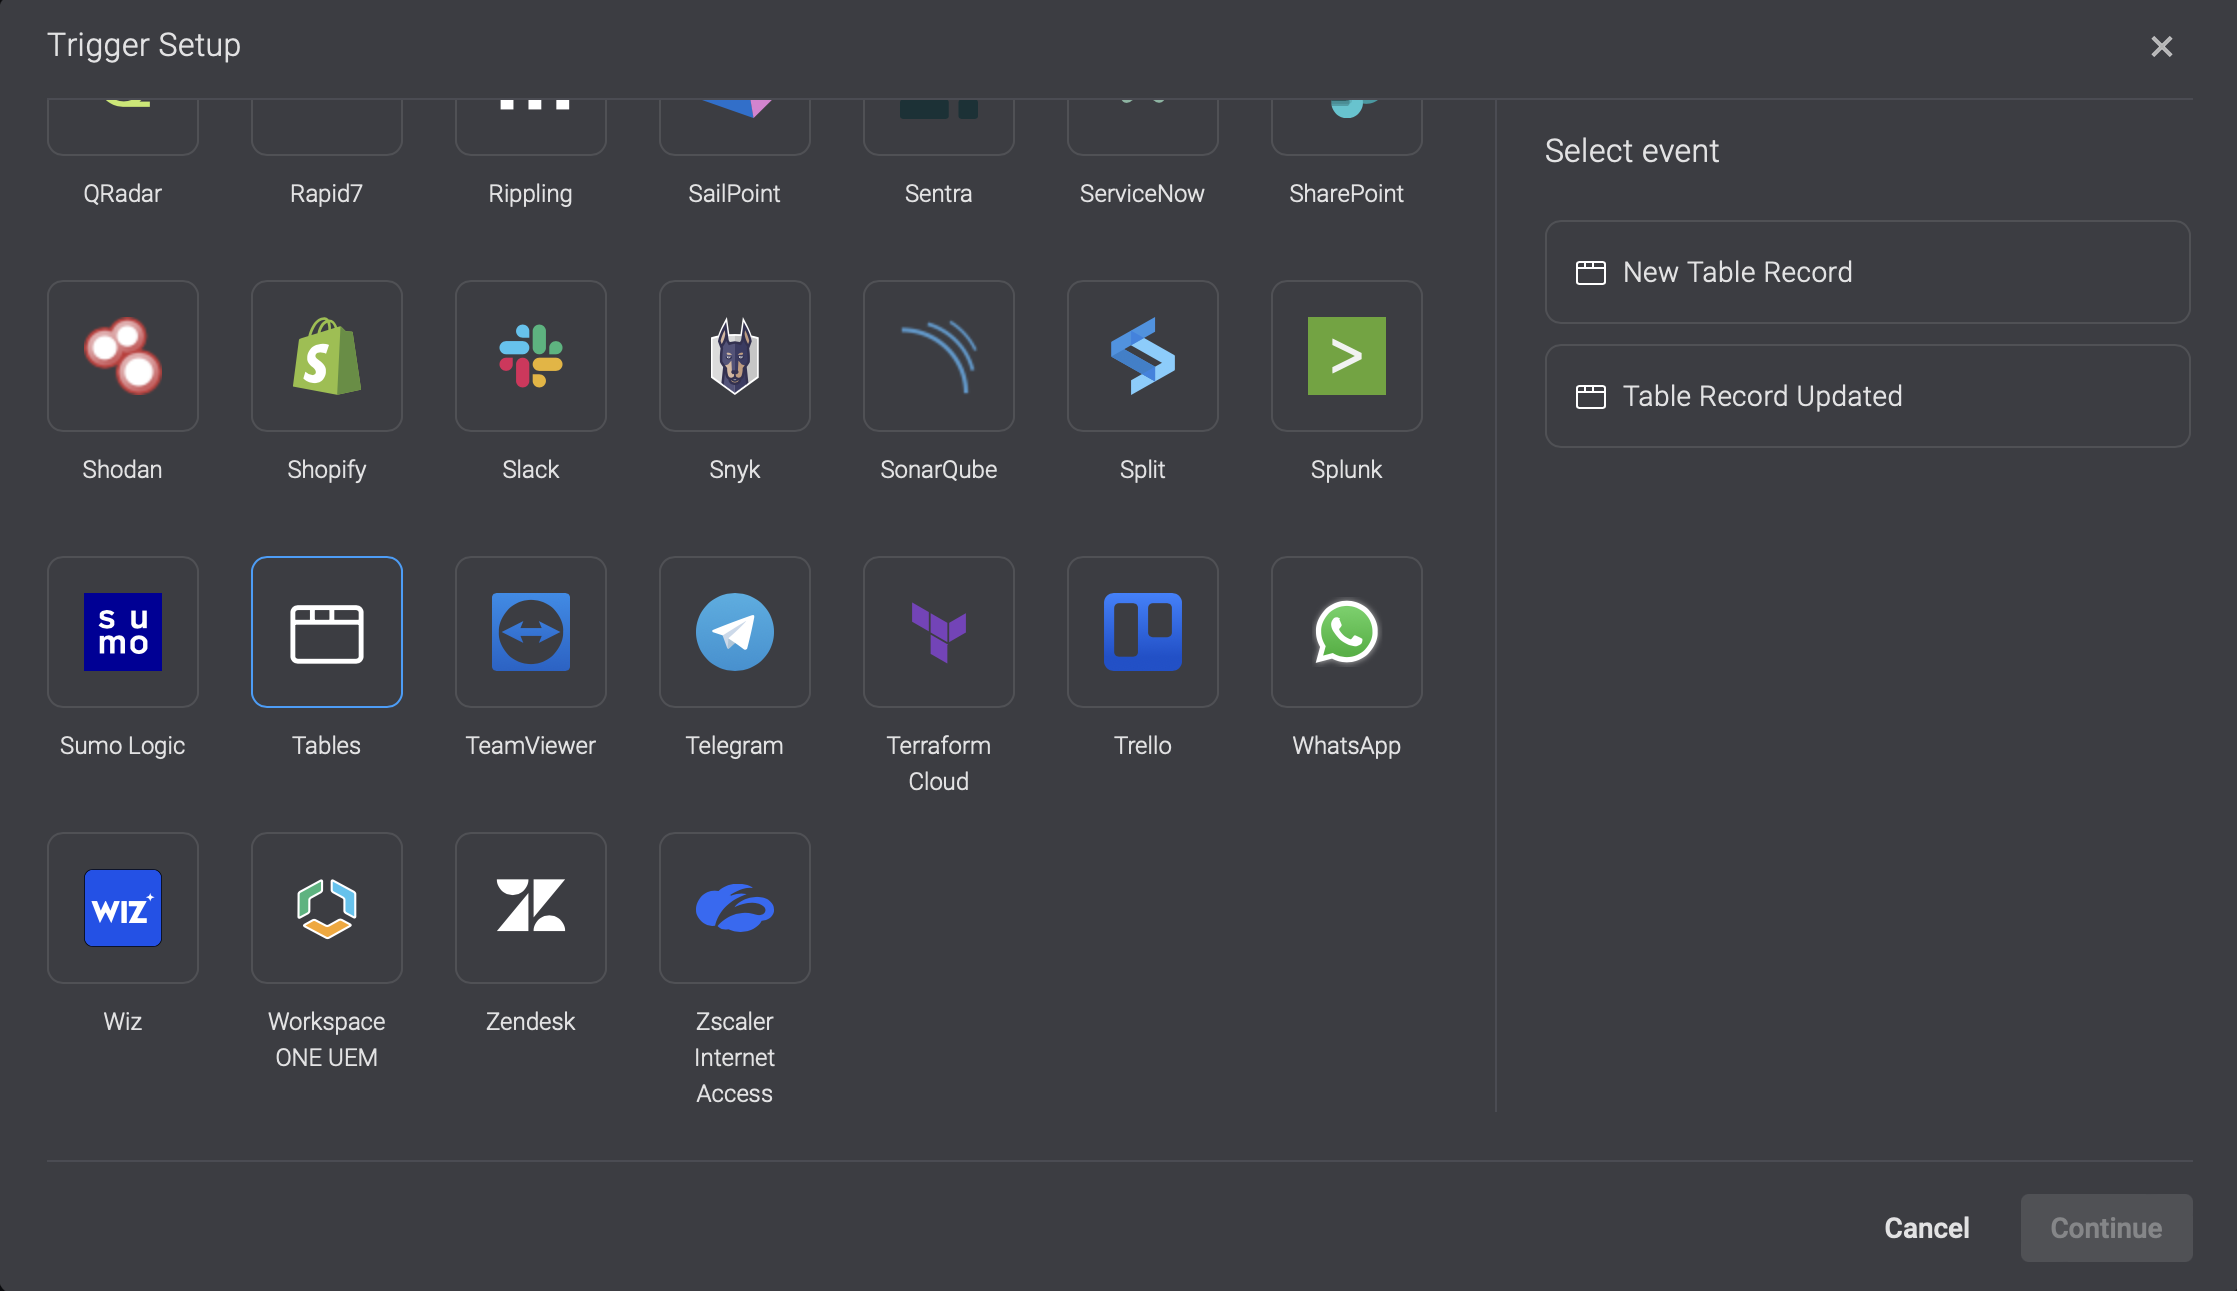
Related Articles
Tables
Learn more about tables in the Blink Platform
Using Tables in Workflows
Learn more about creating and using table actions in Workflows
Basic Table Operations
Learn more about basic table operations
Viewing Tables
Learn more about filtering, sorting, ordering and browsing the table records