1
Log in to Azure Active Directory Portal
Log in to Azure Active Directory Portal, and select “Enterprise applications” in the navigation panel.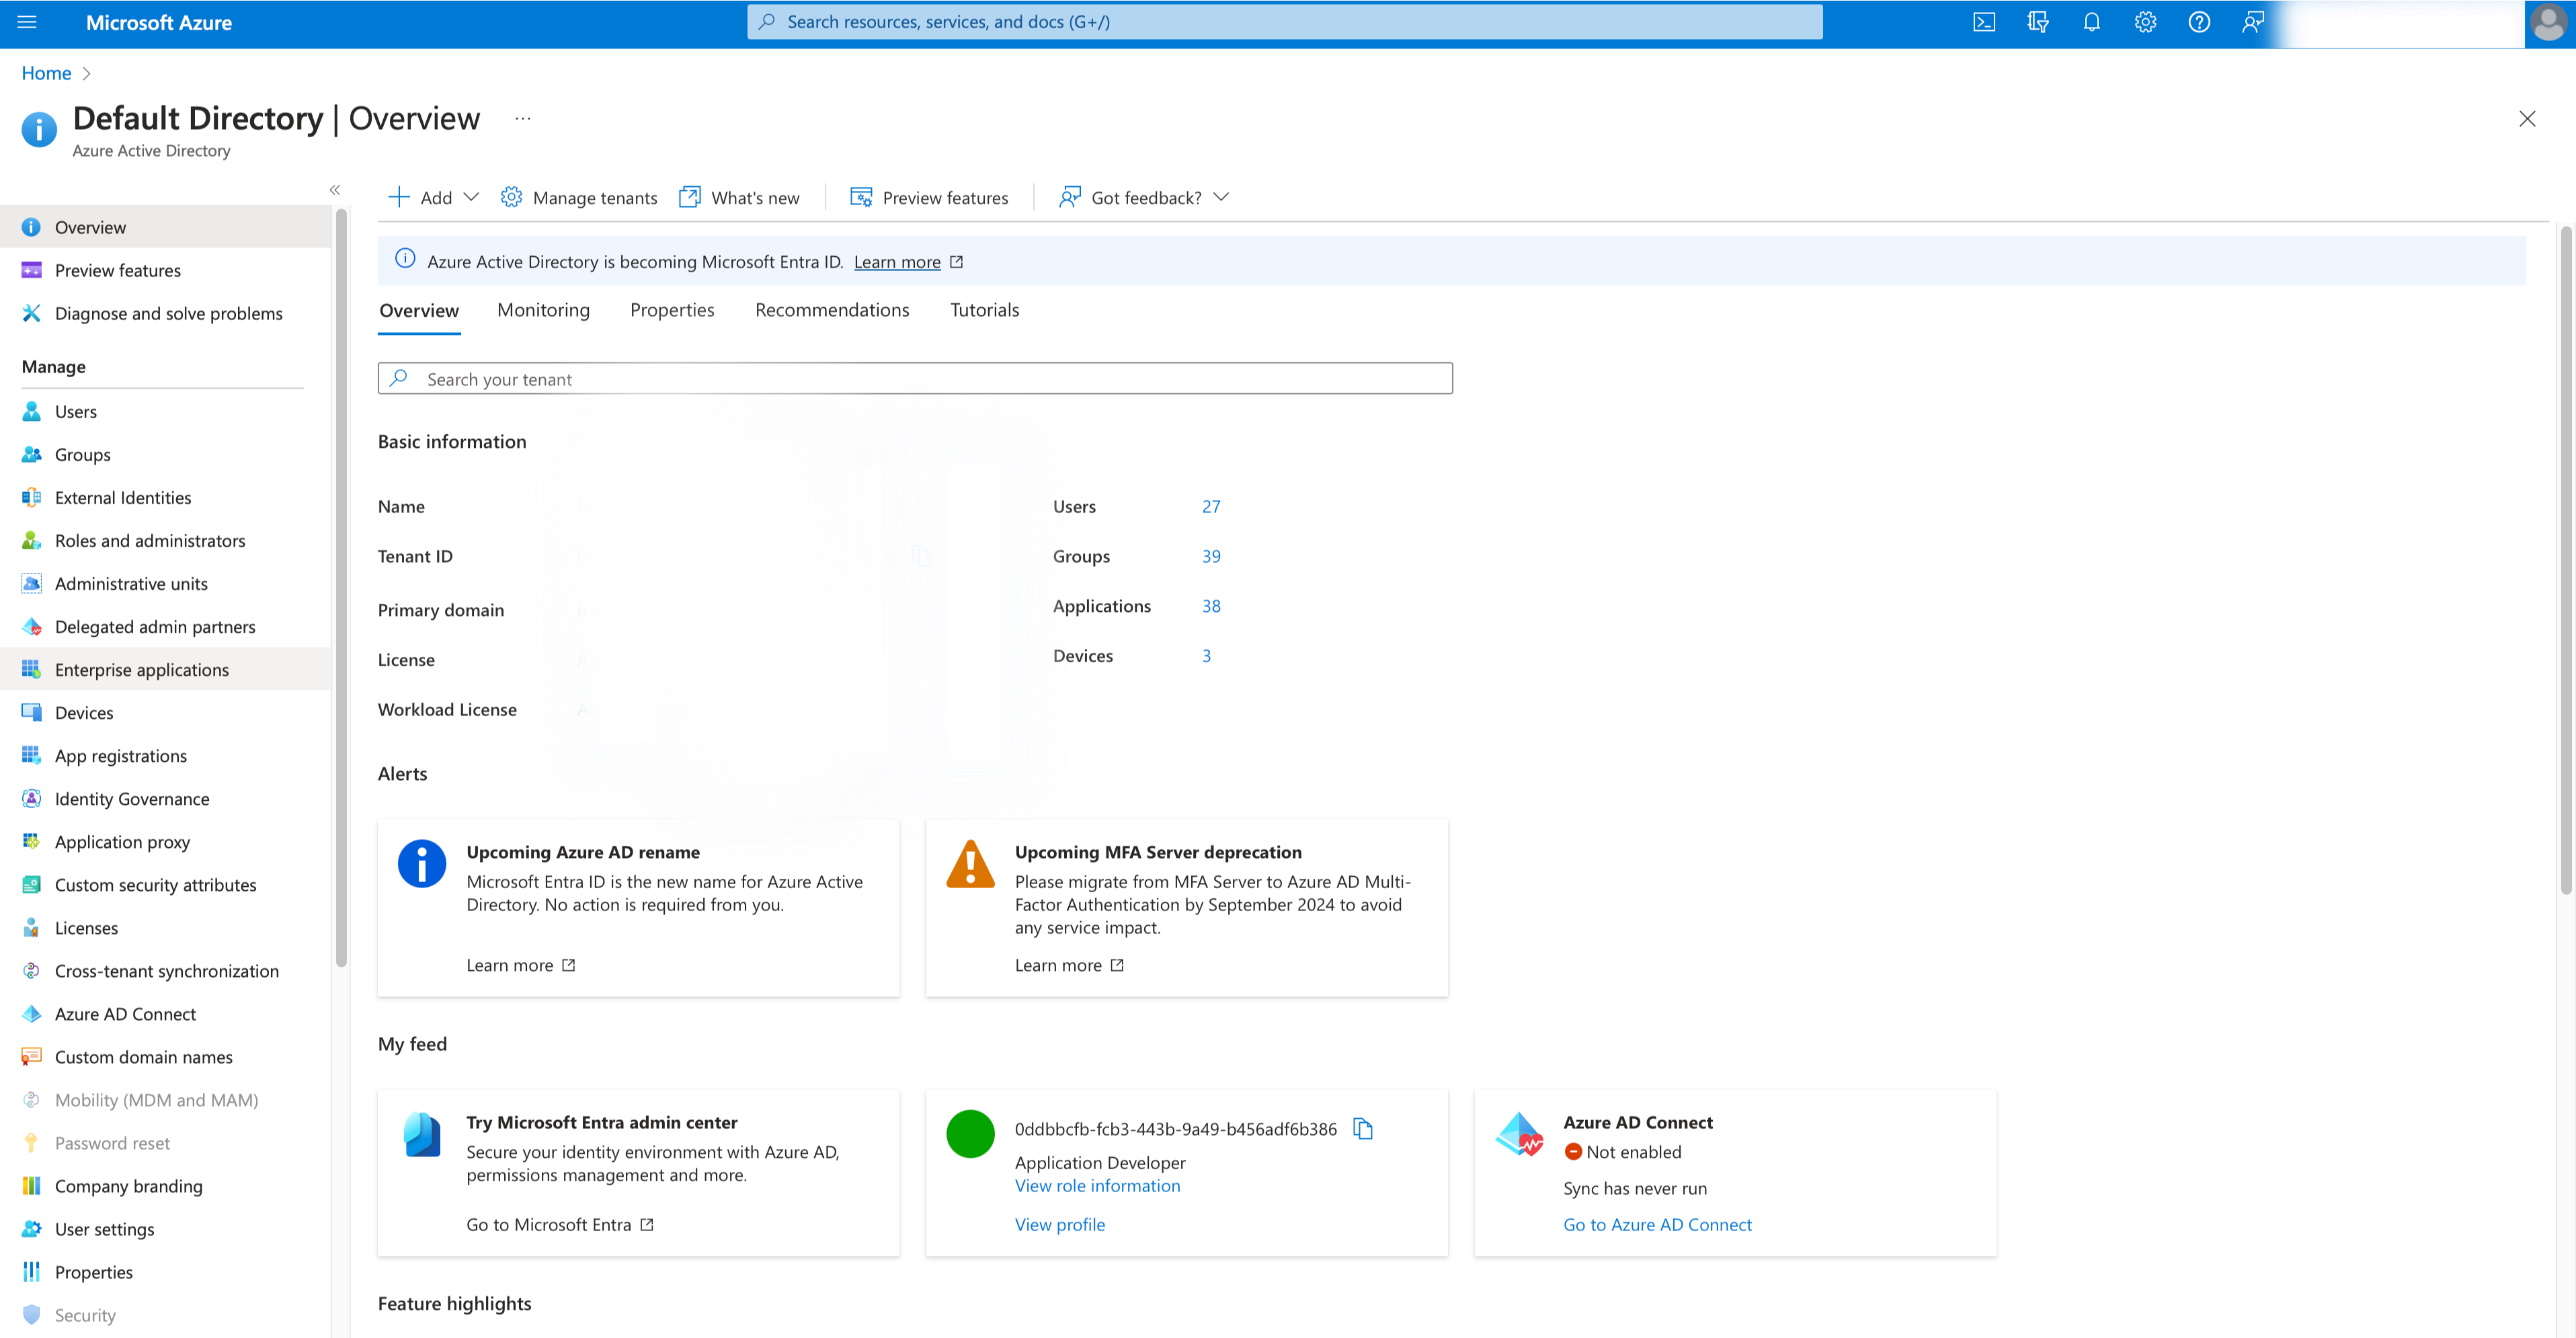
2
Start Creating a New Application
Click on “New application”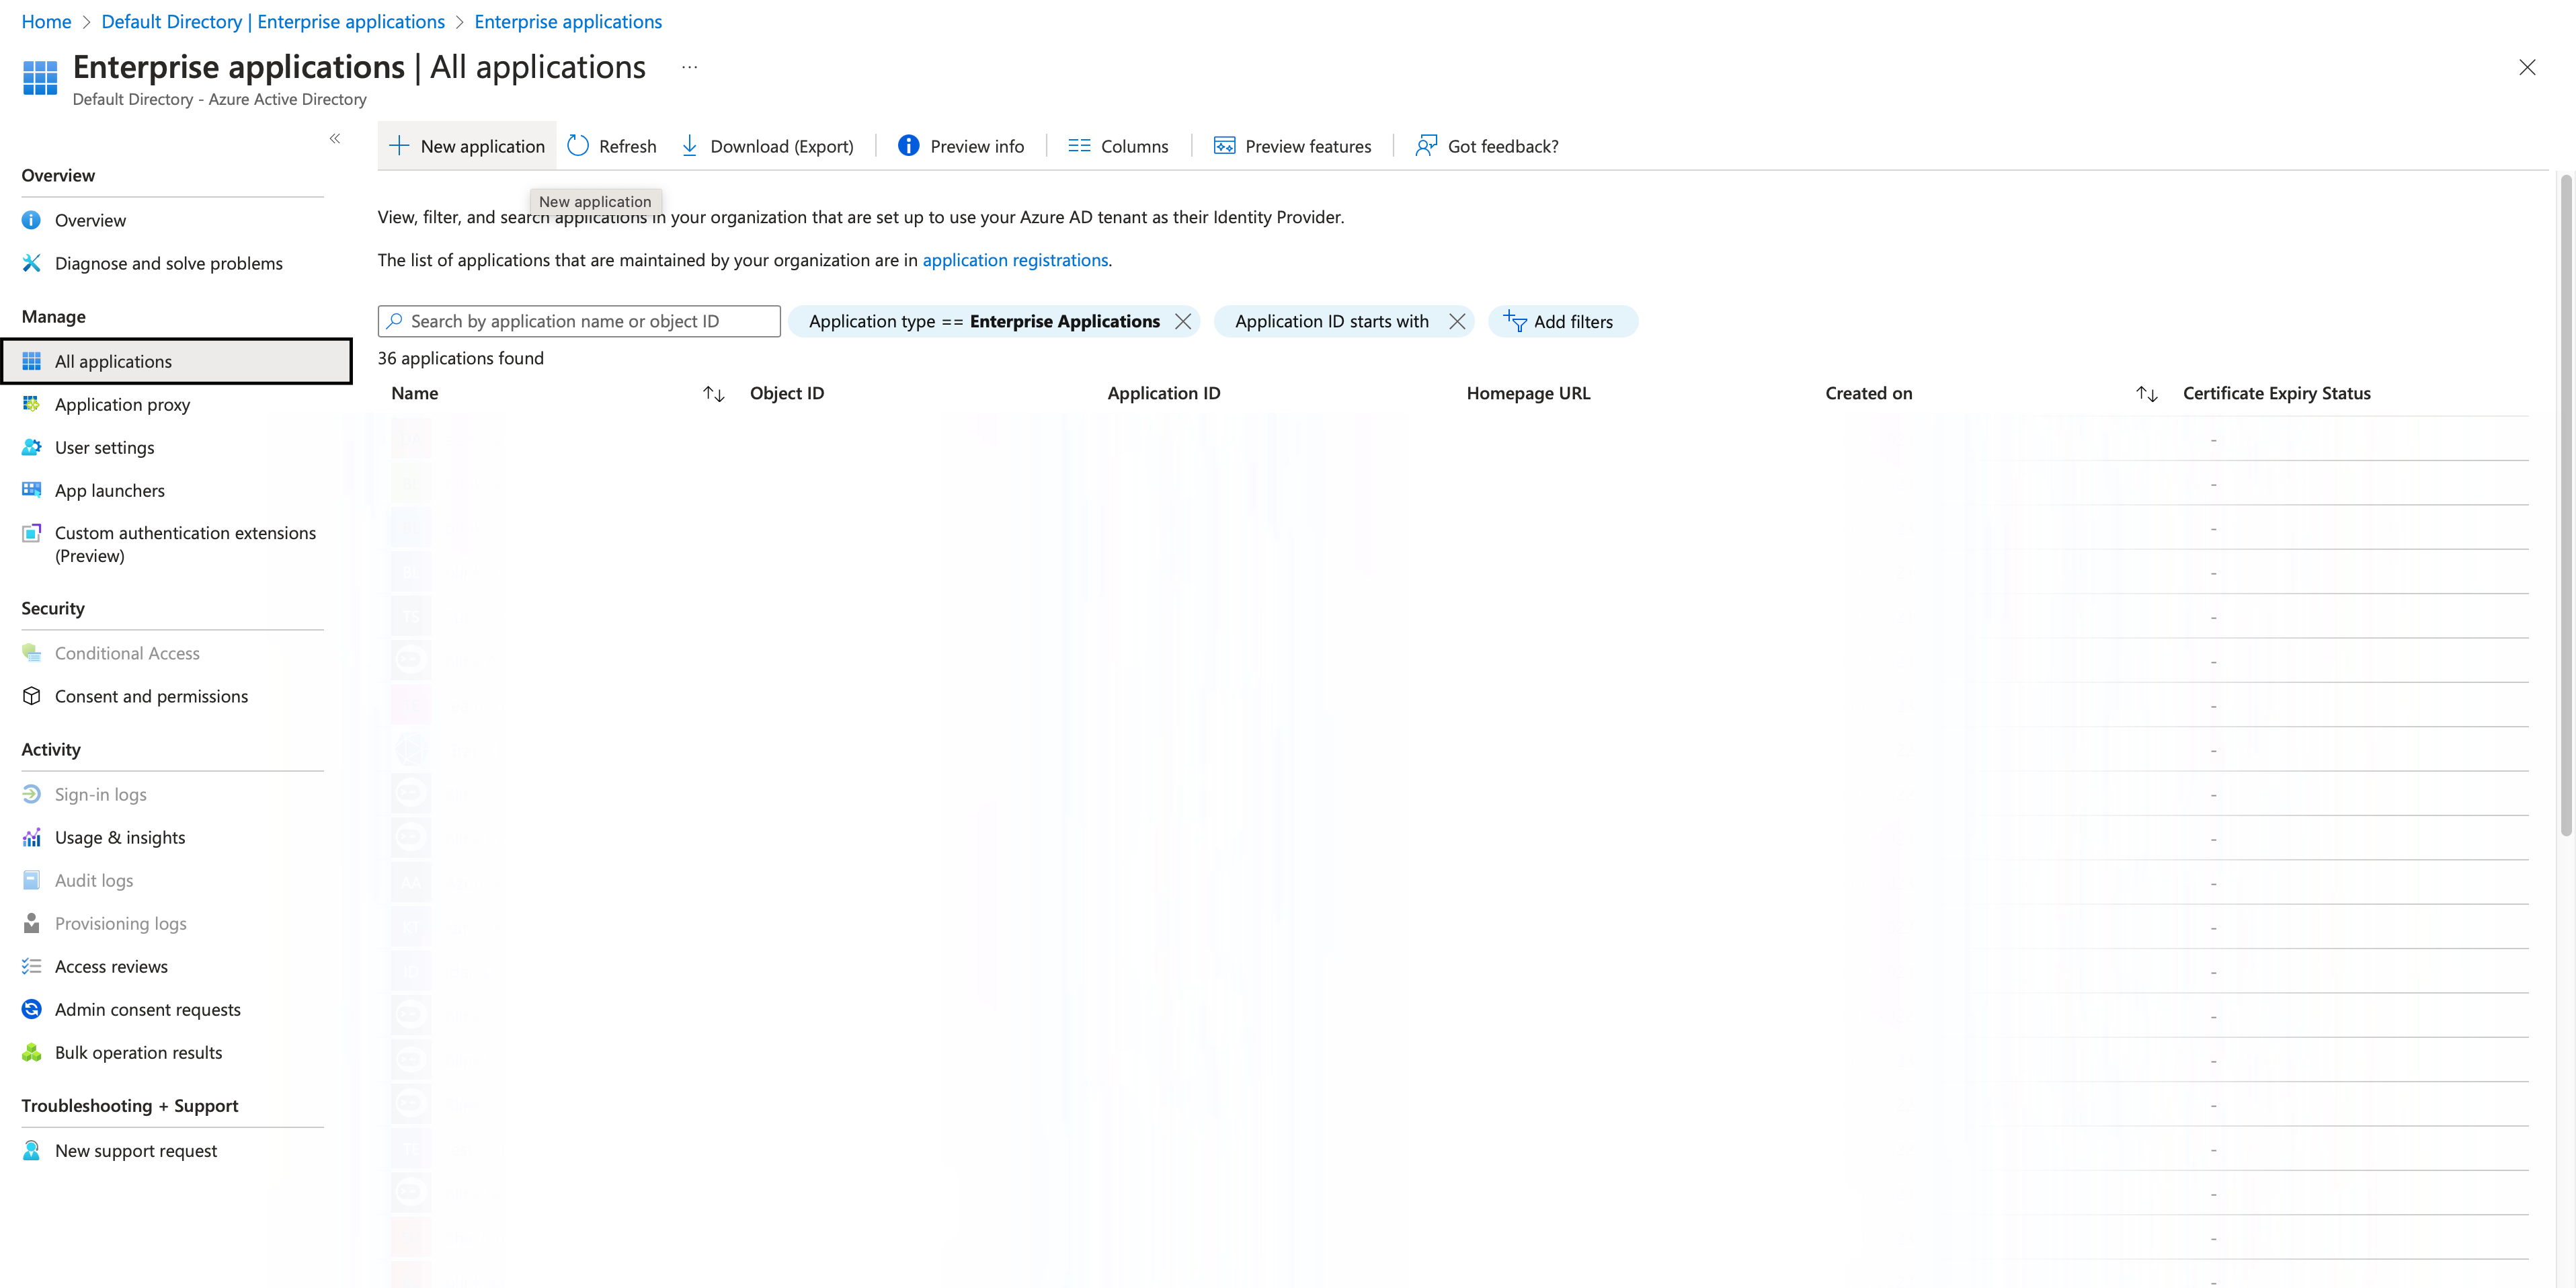
3
Choose to Create Your Own Application
Click on “Create your own application”.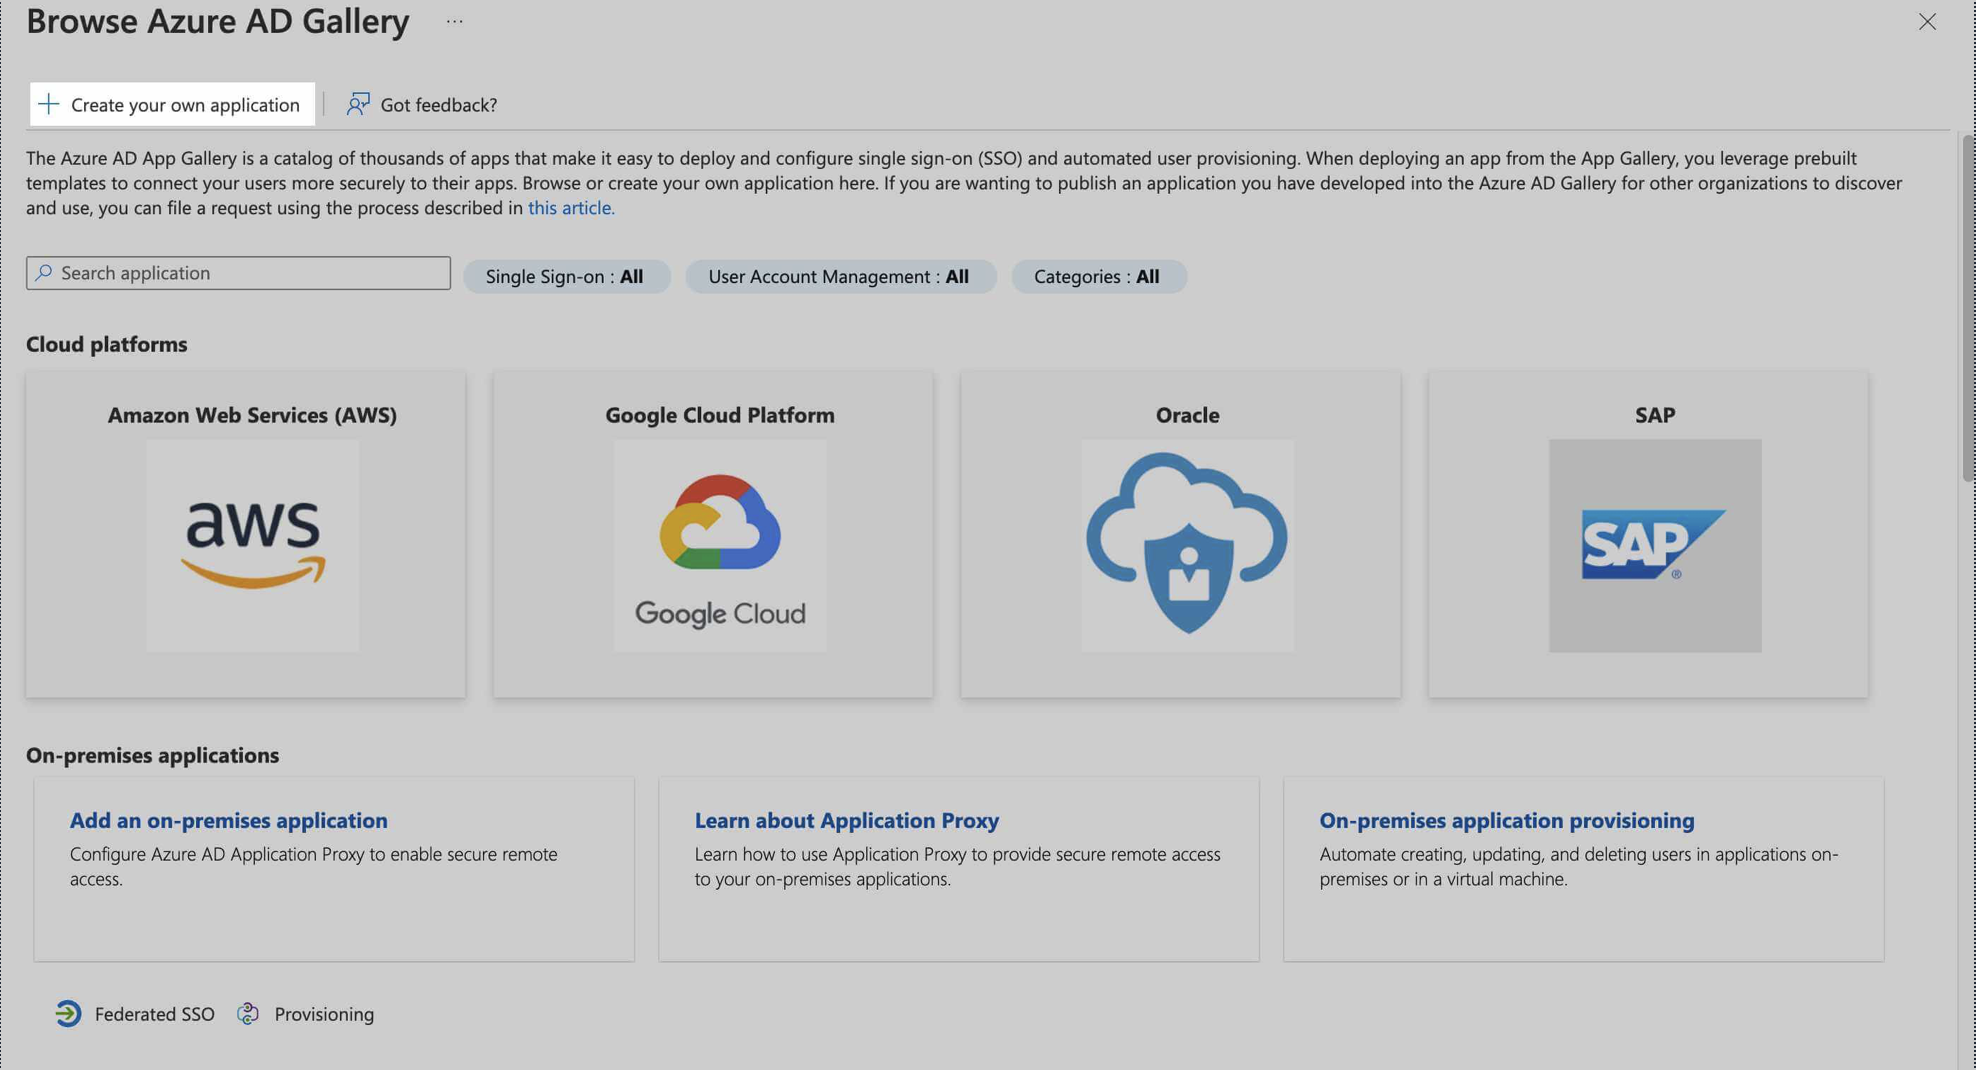
4
Configure App Name and Integration Type
In the panel on the right, enter an app name and select the “Integrate any other application you don’t find in the gallery (Non-gallery)” option, and click “Create” in the bottom-left corner.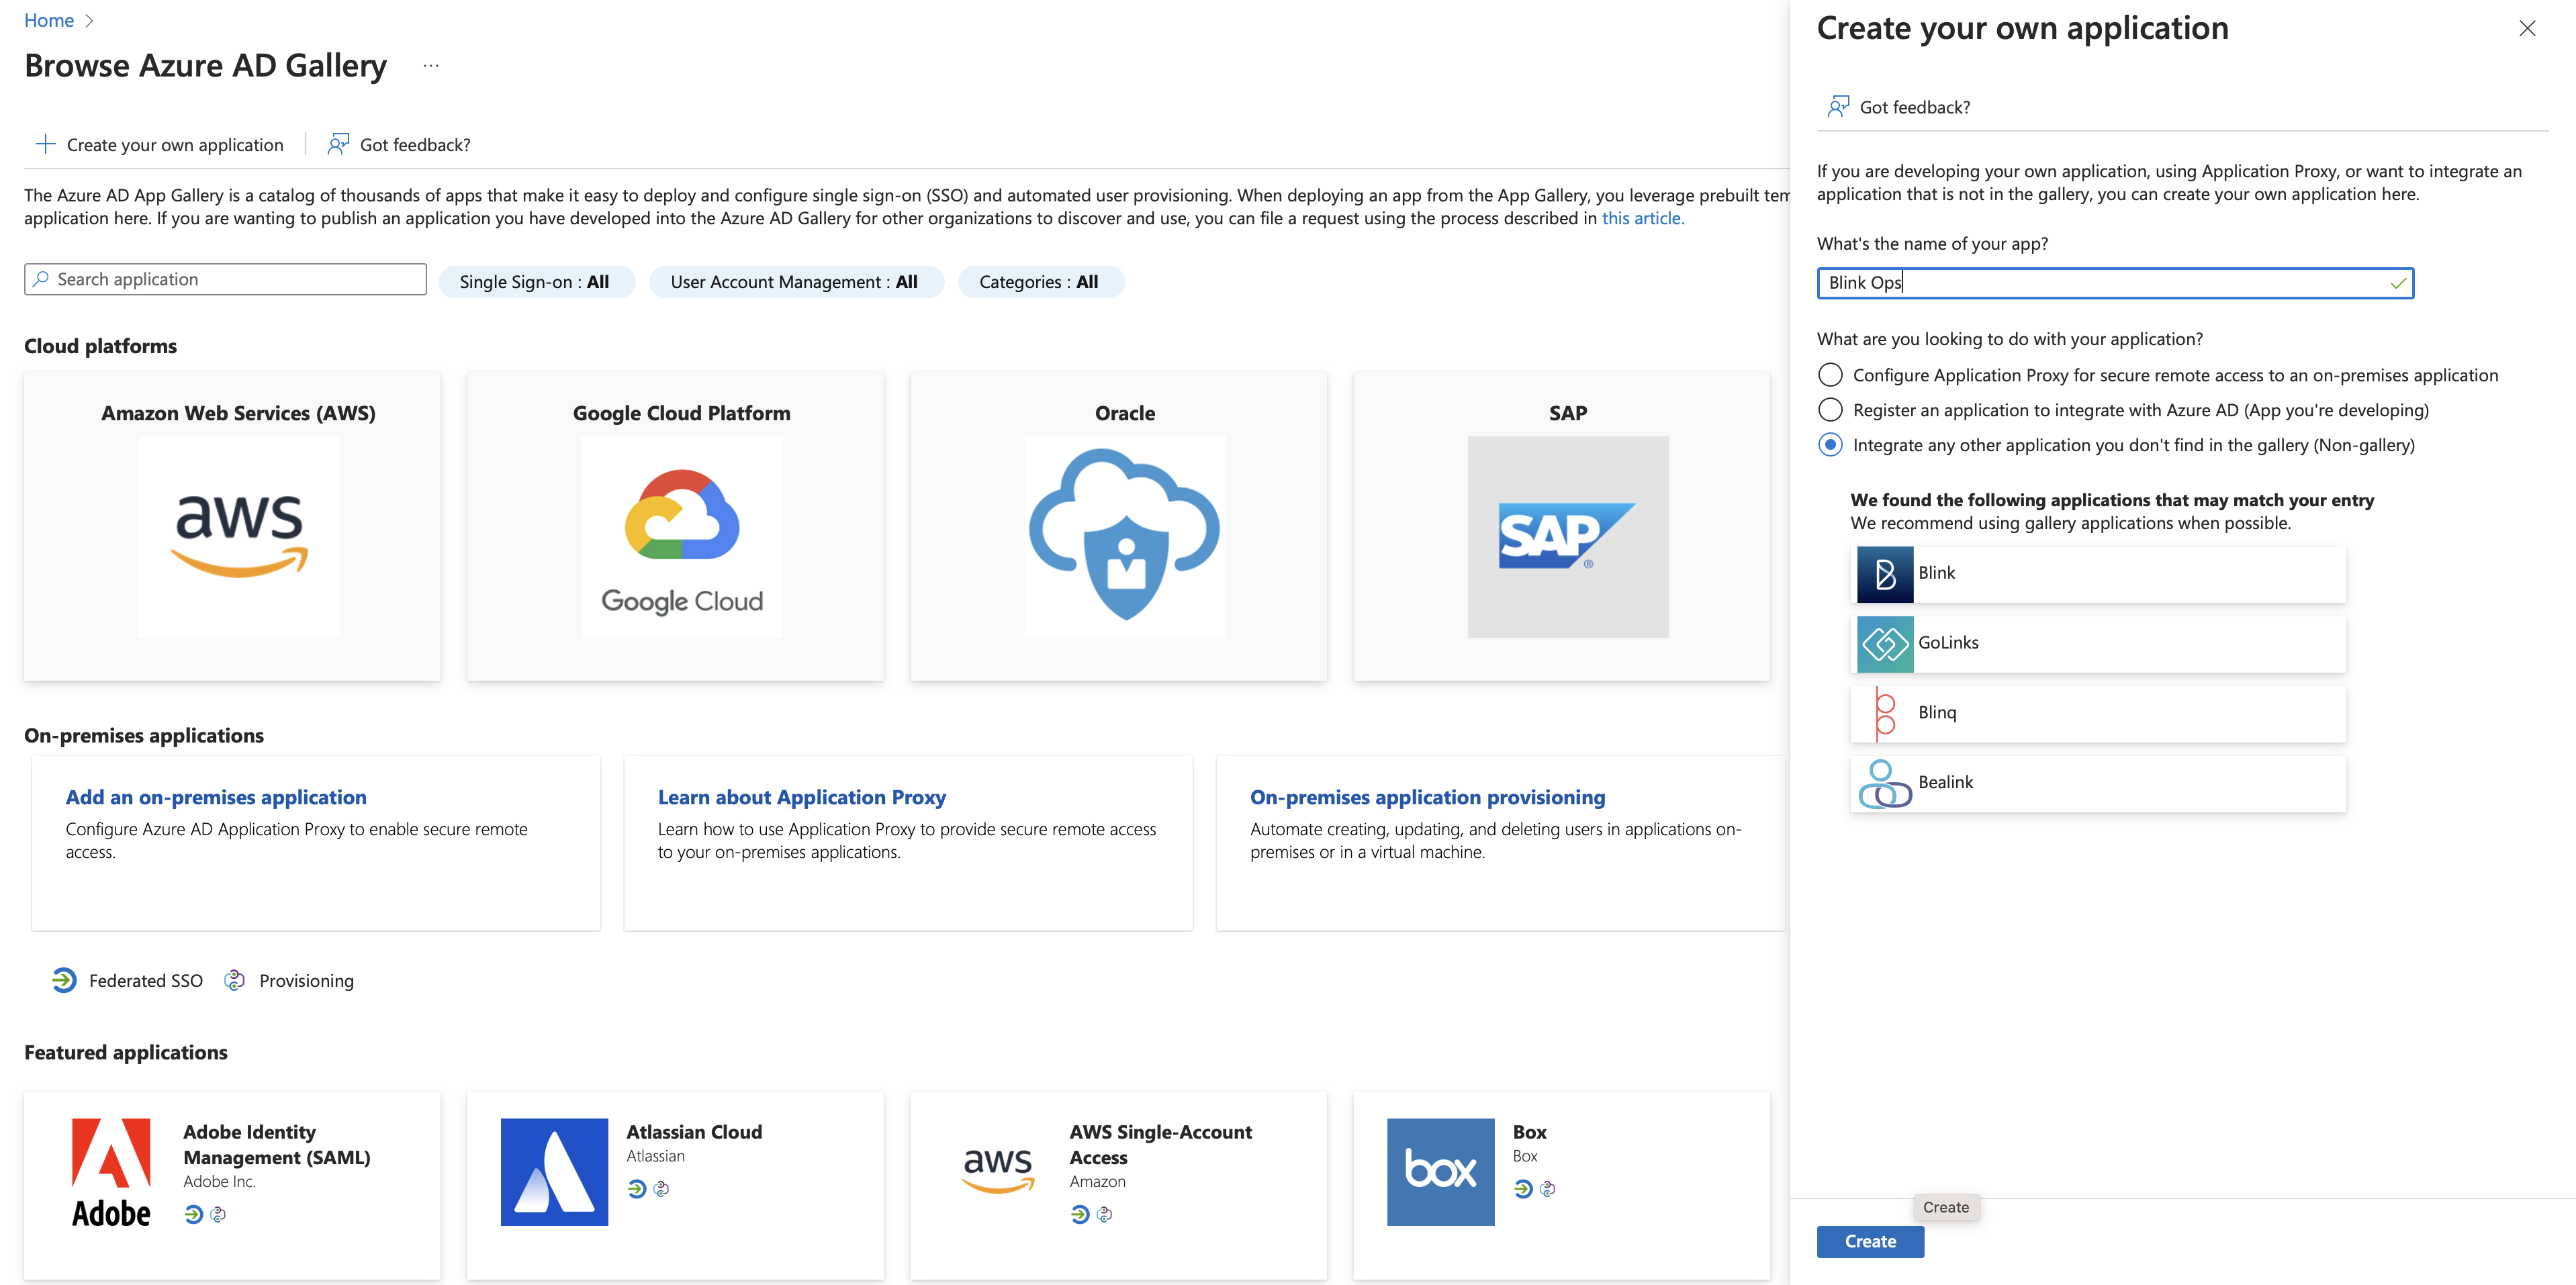
5
Select SAML as the Single Sign-On Method
Click on “Single sign-on” on the left pane, and select “SAML”.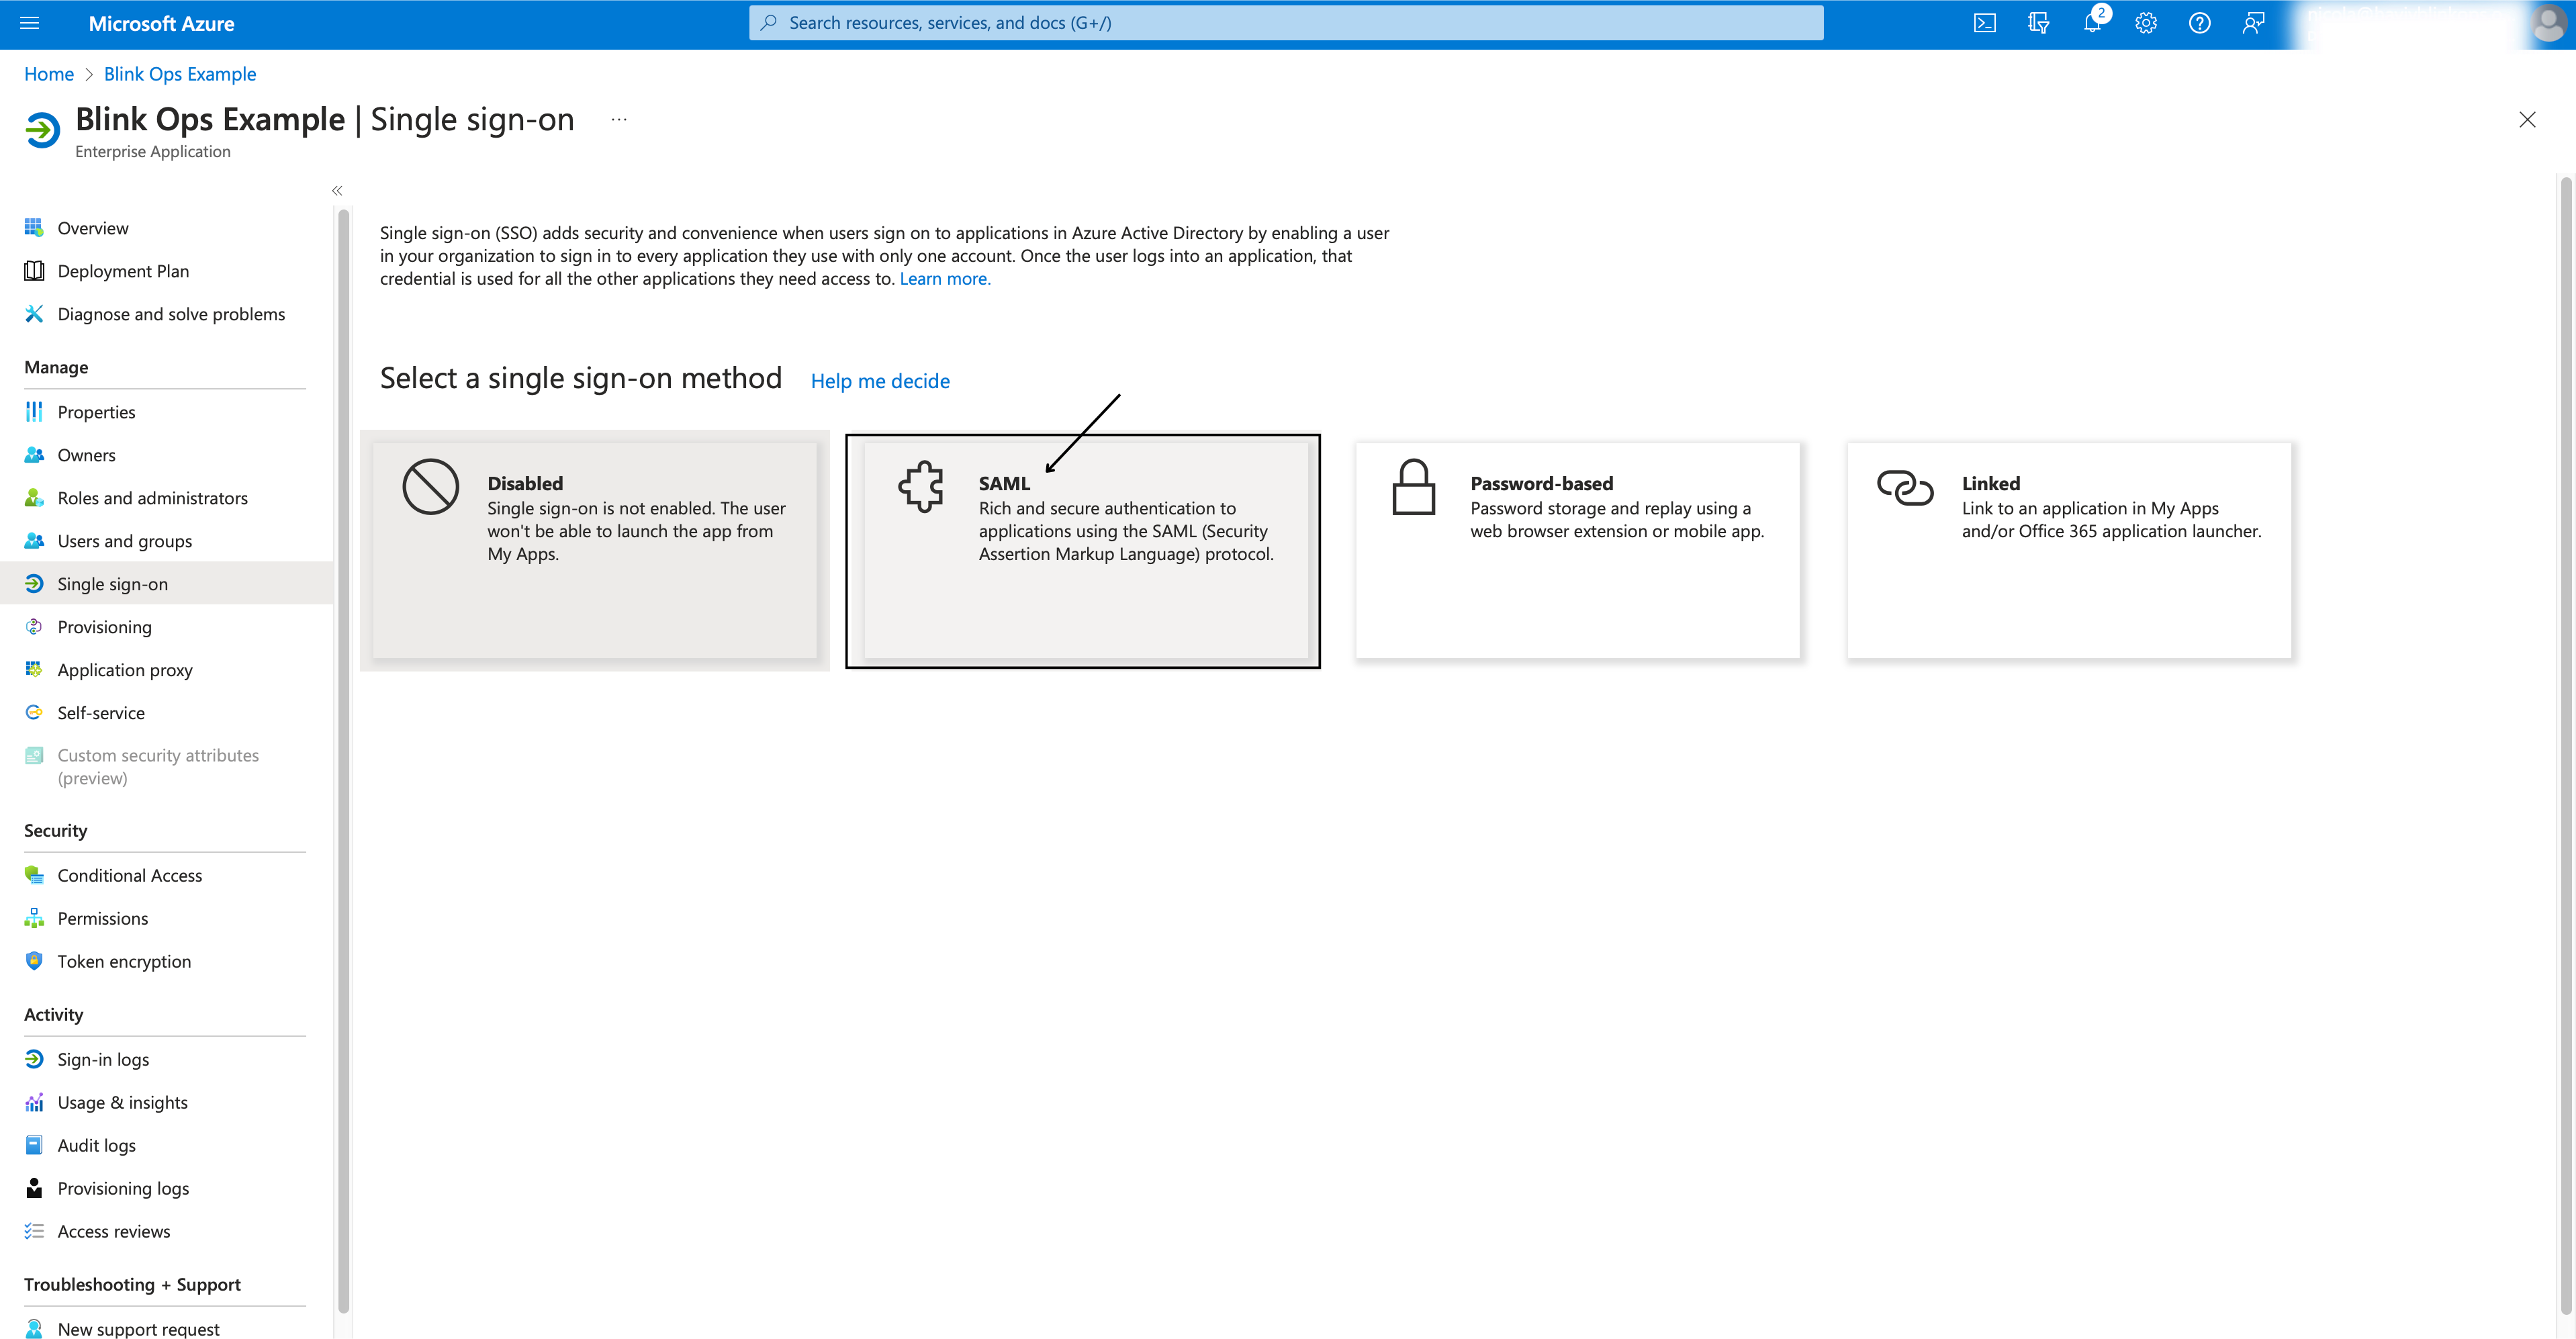
6
Edit the Basic SAML Configuration
Click on “Edit”.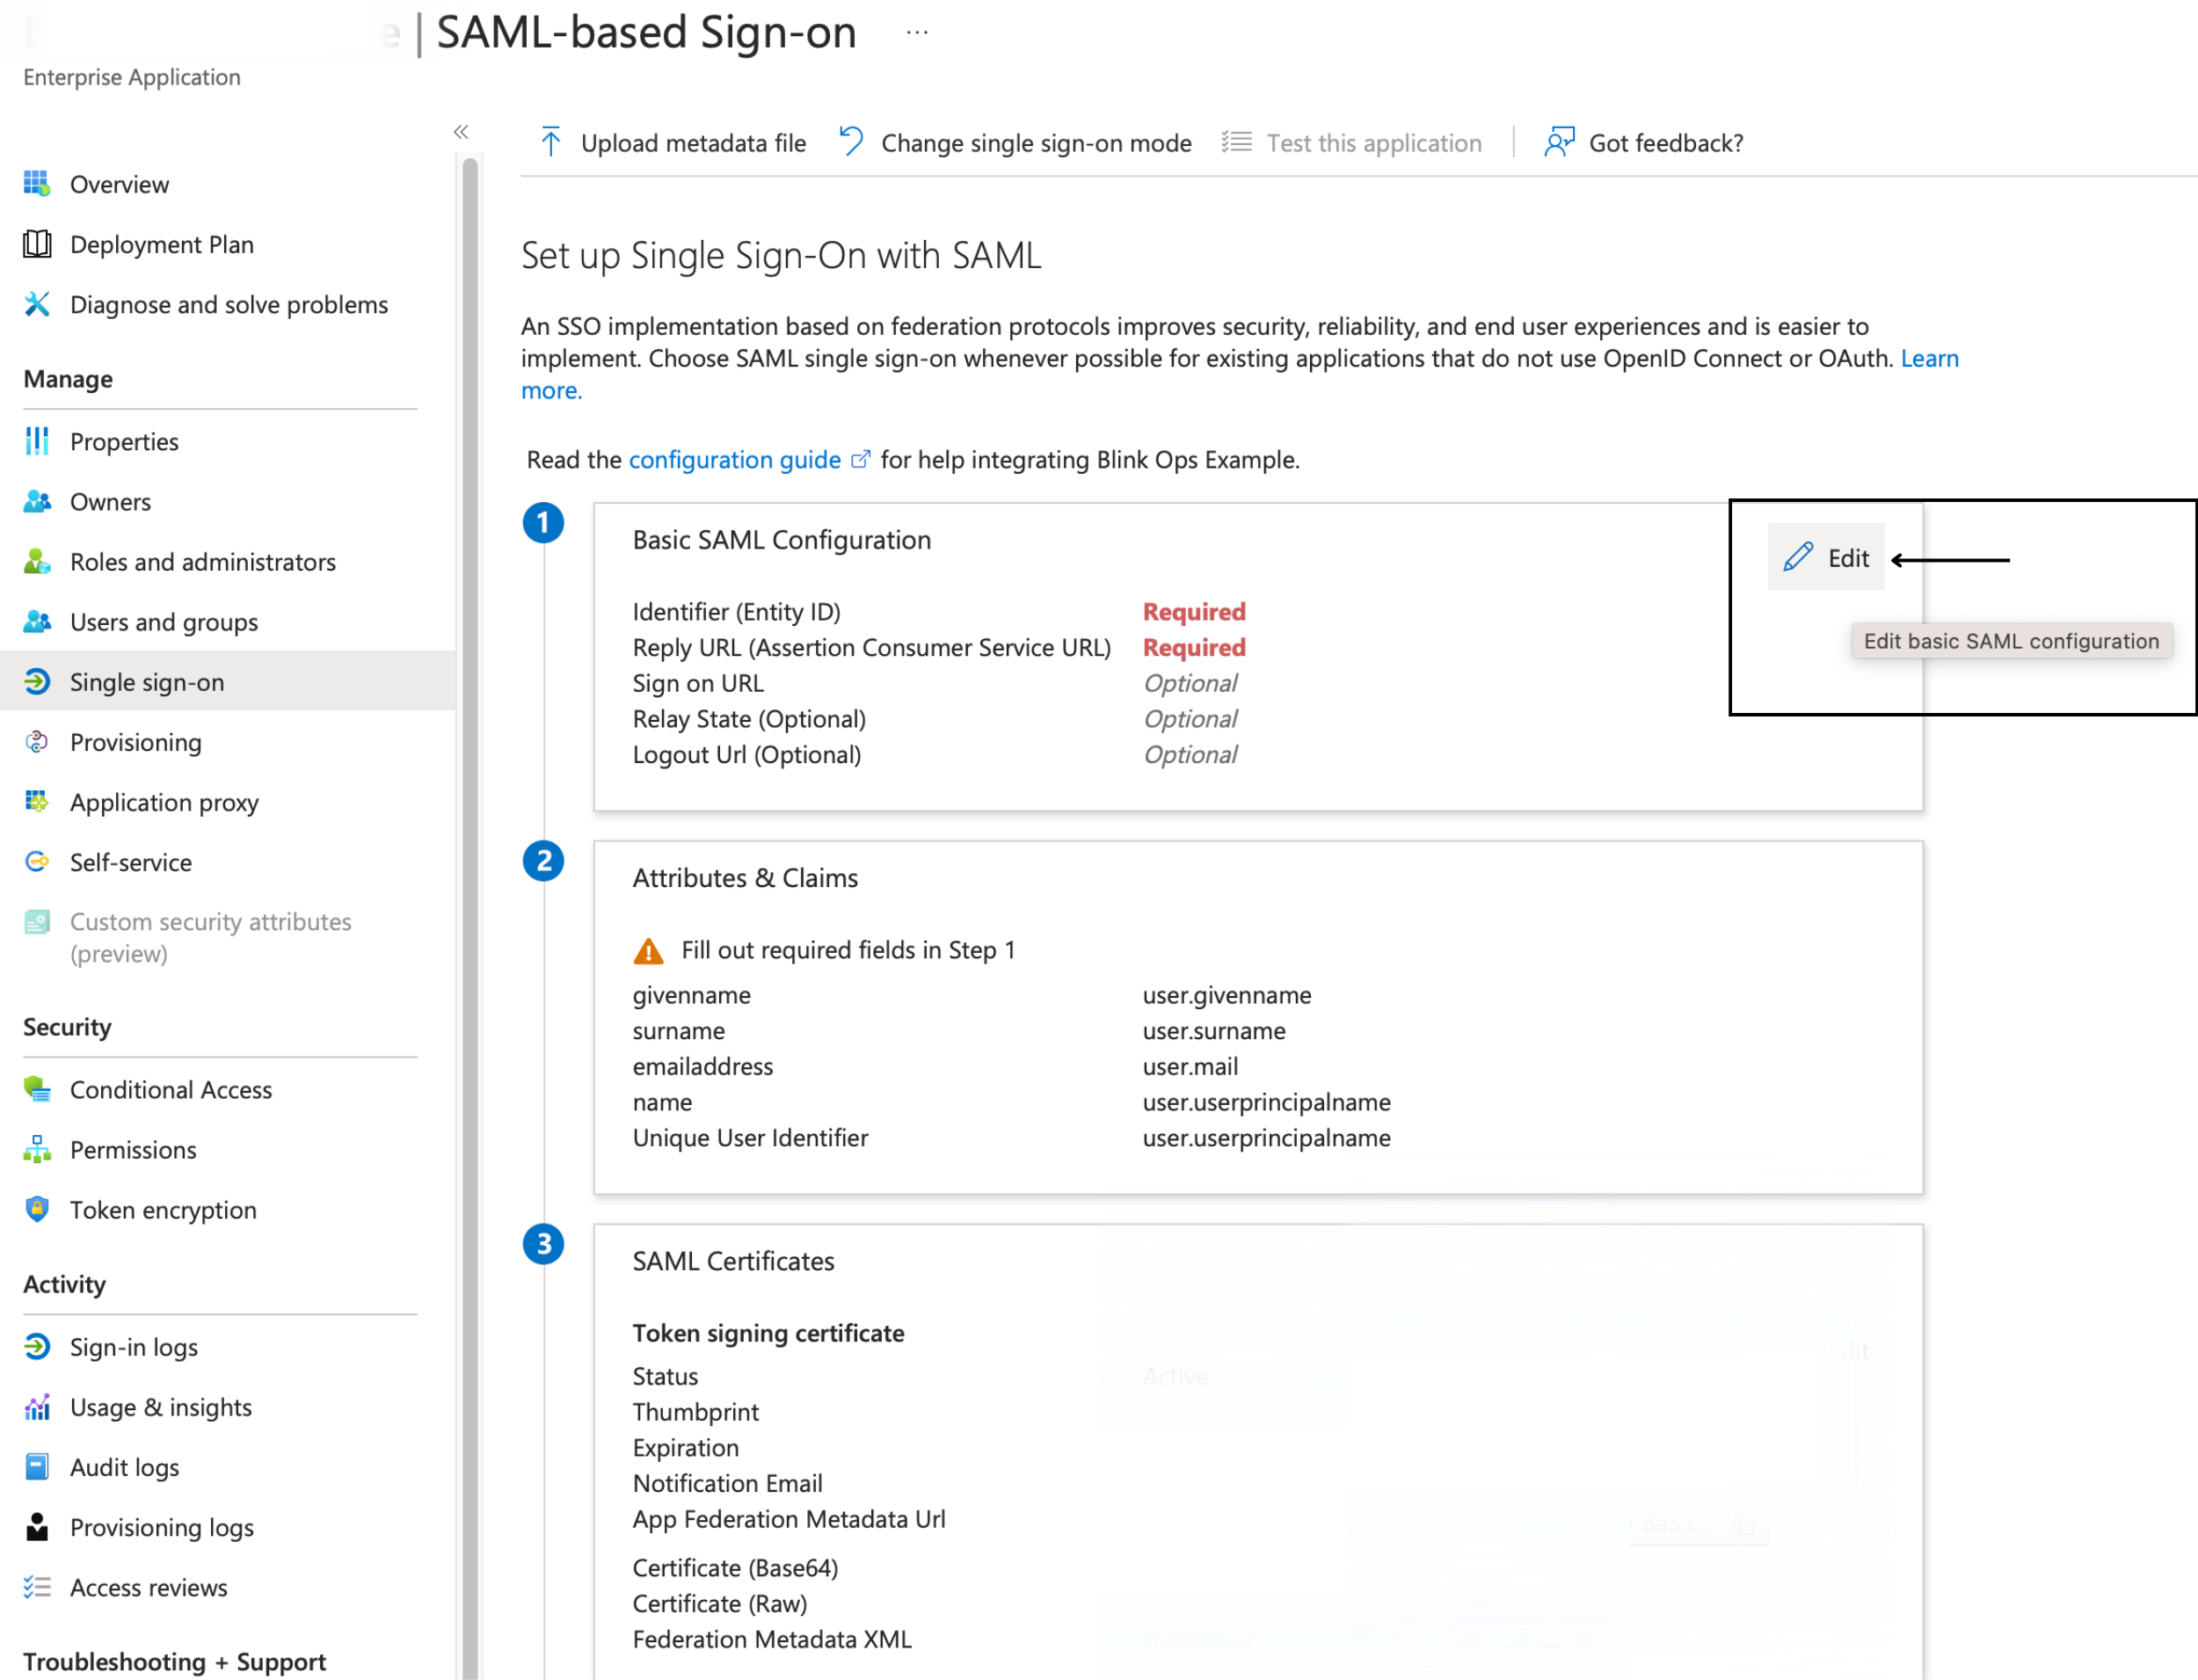
NOTEPlease note that the Identifier (Entity ID) value, along with the Single Sign-On URL, can be located within the SAML tab under the Account Management Settings section within the Blink Platform. The Reply URL (Assertion Consumer Service URL) is not available under the SAML tab, therefore you can find it below:The Entity ID : 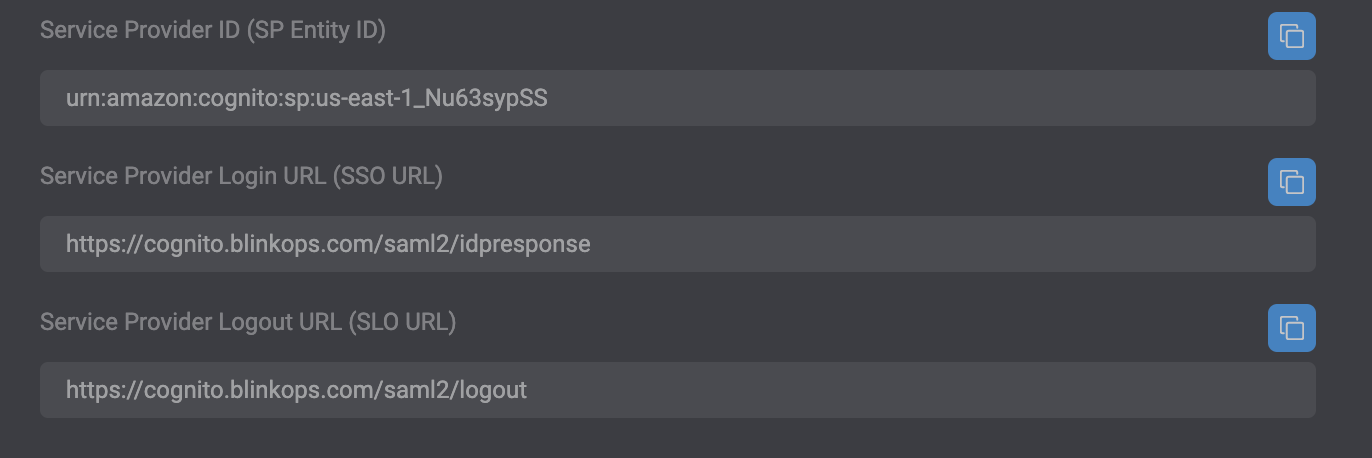
urn:amazon:cognito:sp:eu-west-1_NEemCMO1LThe Reply URL (Assertion Consumer Service URL) : https://cognito.blinkops.com/saml2/idpresponseSingle Sign-On URL : Please look in the Account Management Settings section within the Blink Platform to find your unique Single Sign-On URL.7
Populate SAML Configuration Fields
Using the Reply URL (Assertion Consumer Service URL), as well as the Identifier (Entity ID) value as well as the Single Sign-On URL value located within the SAML tab under the Account Management Settings section within the Blink Platform, copy and paste the values in the following text fields as demonstrated in the image below: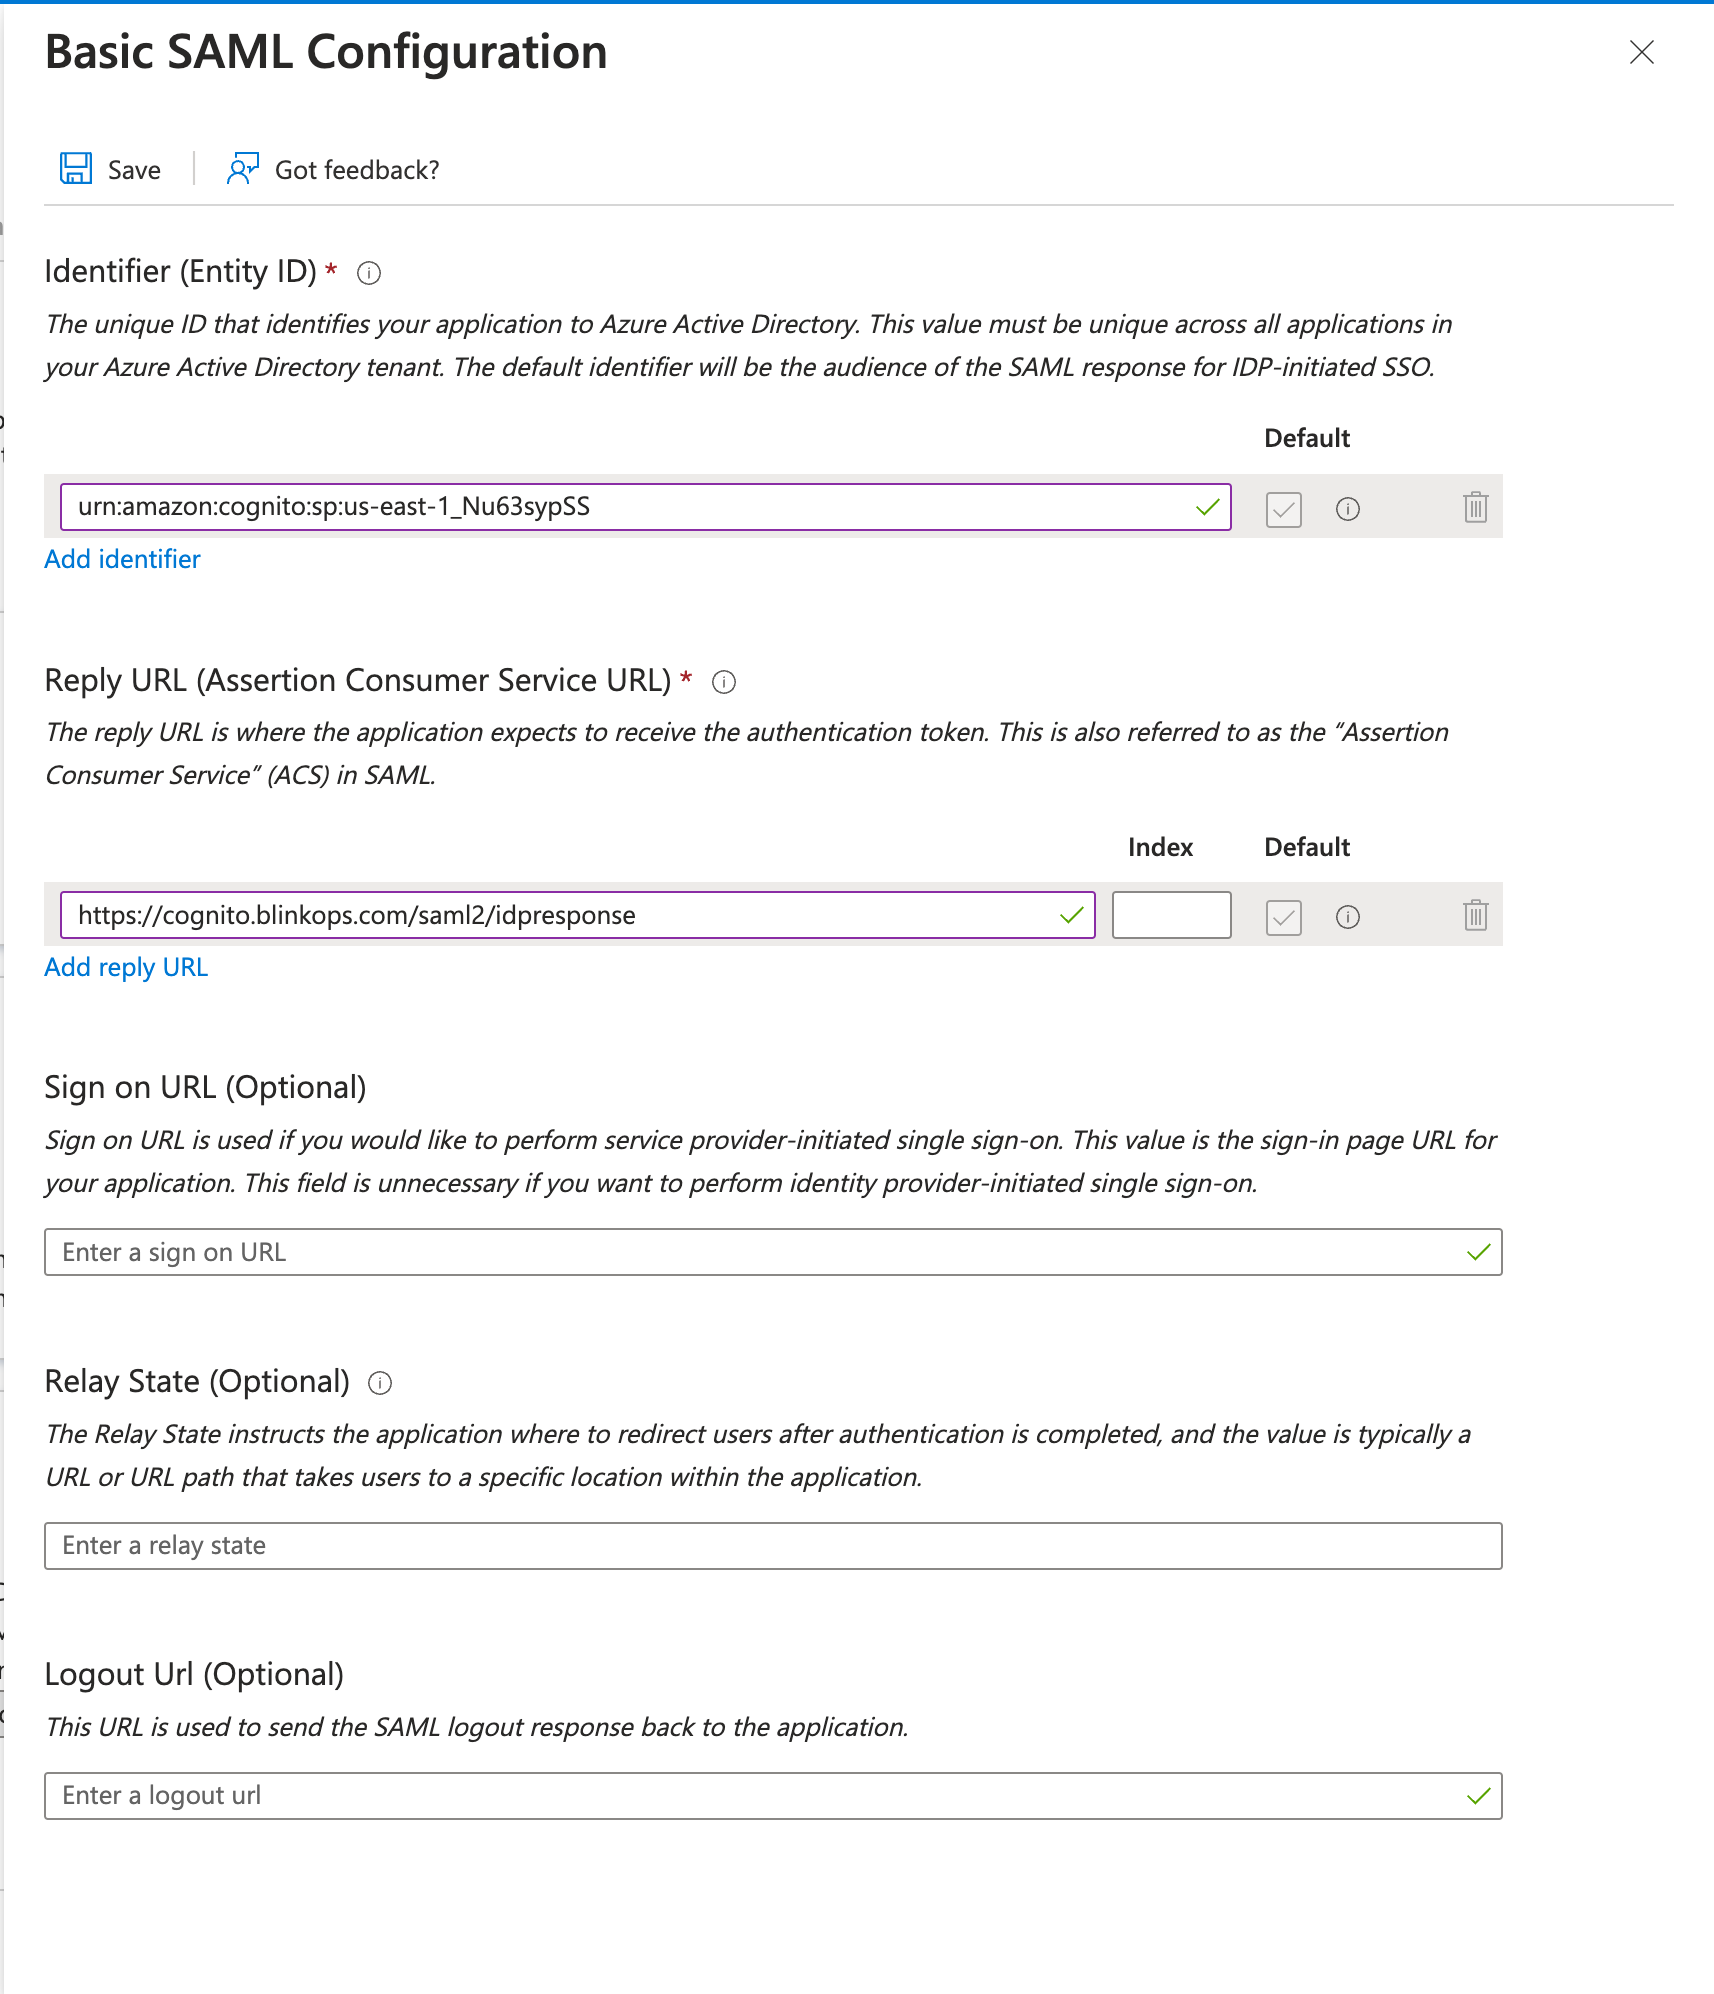
8
Add Custom Claims in the Attributes Section
Next, scroll to the Attributes & Claims section and select the add new claim option in the top-left corner. Then under the Additional Claims section, ensure that the claim names, type and value correspond to the values as demonstrated in the image below: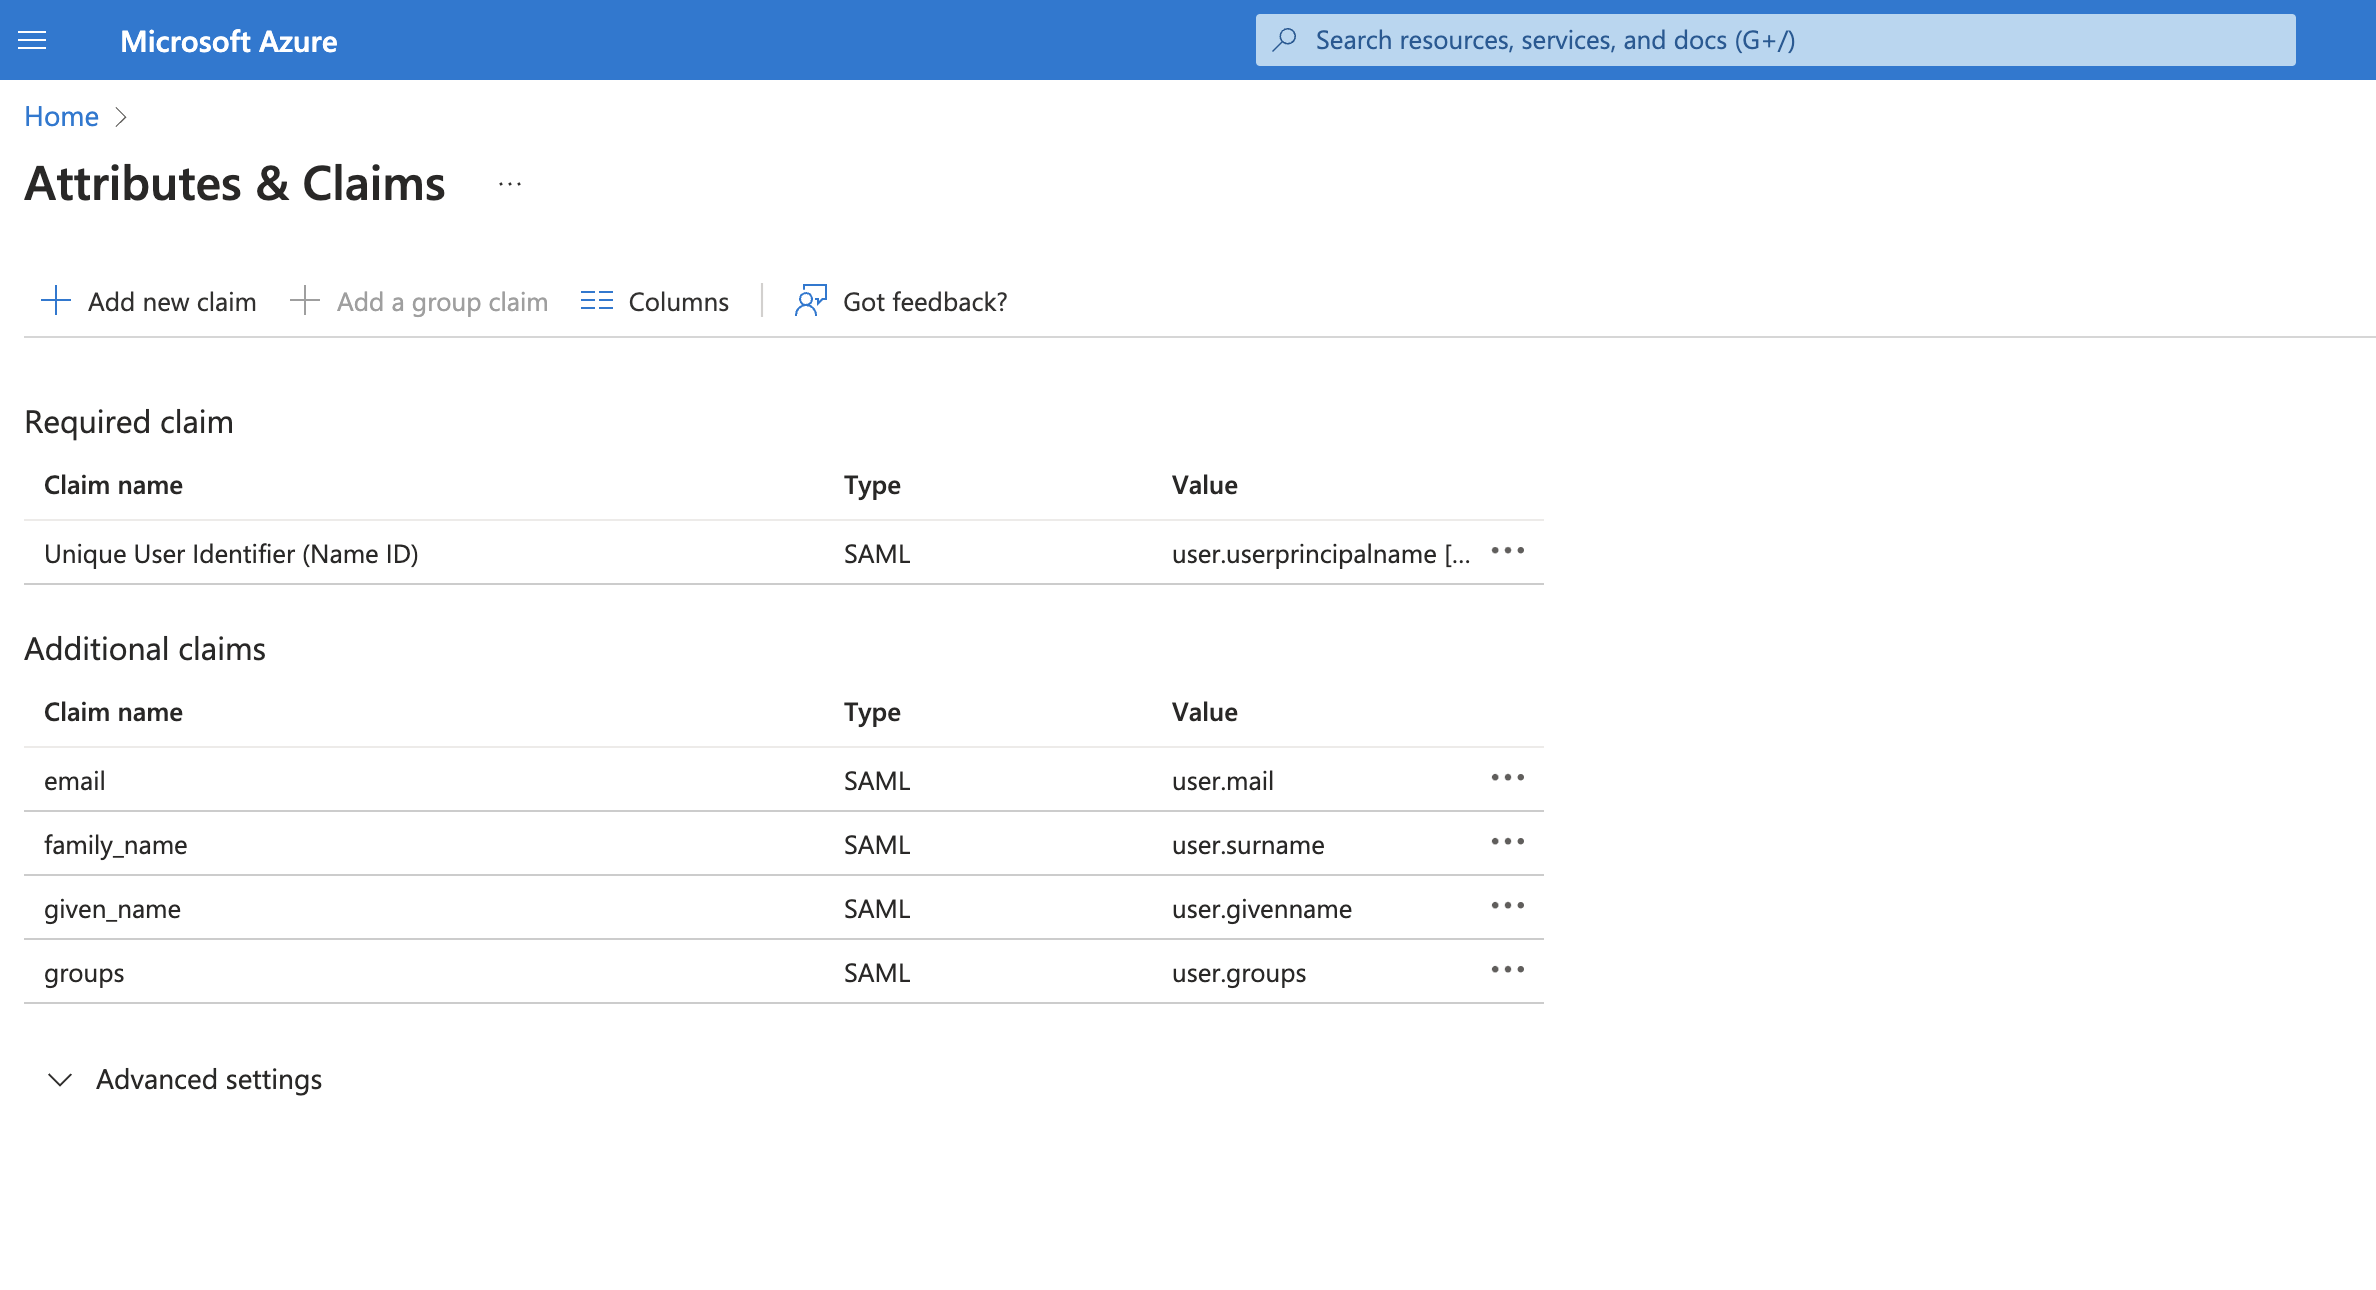
9
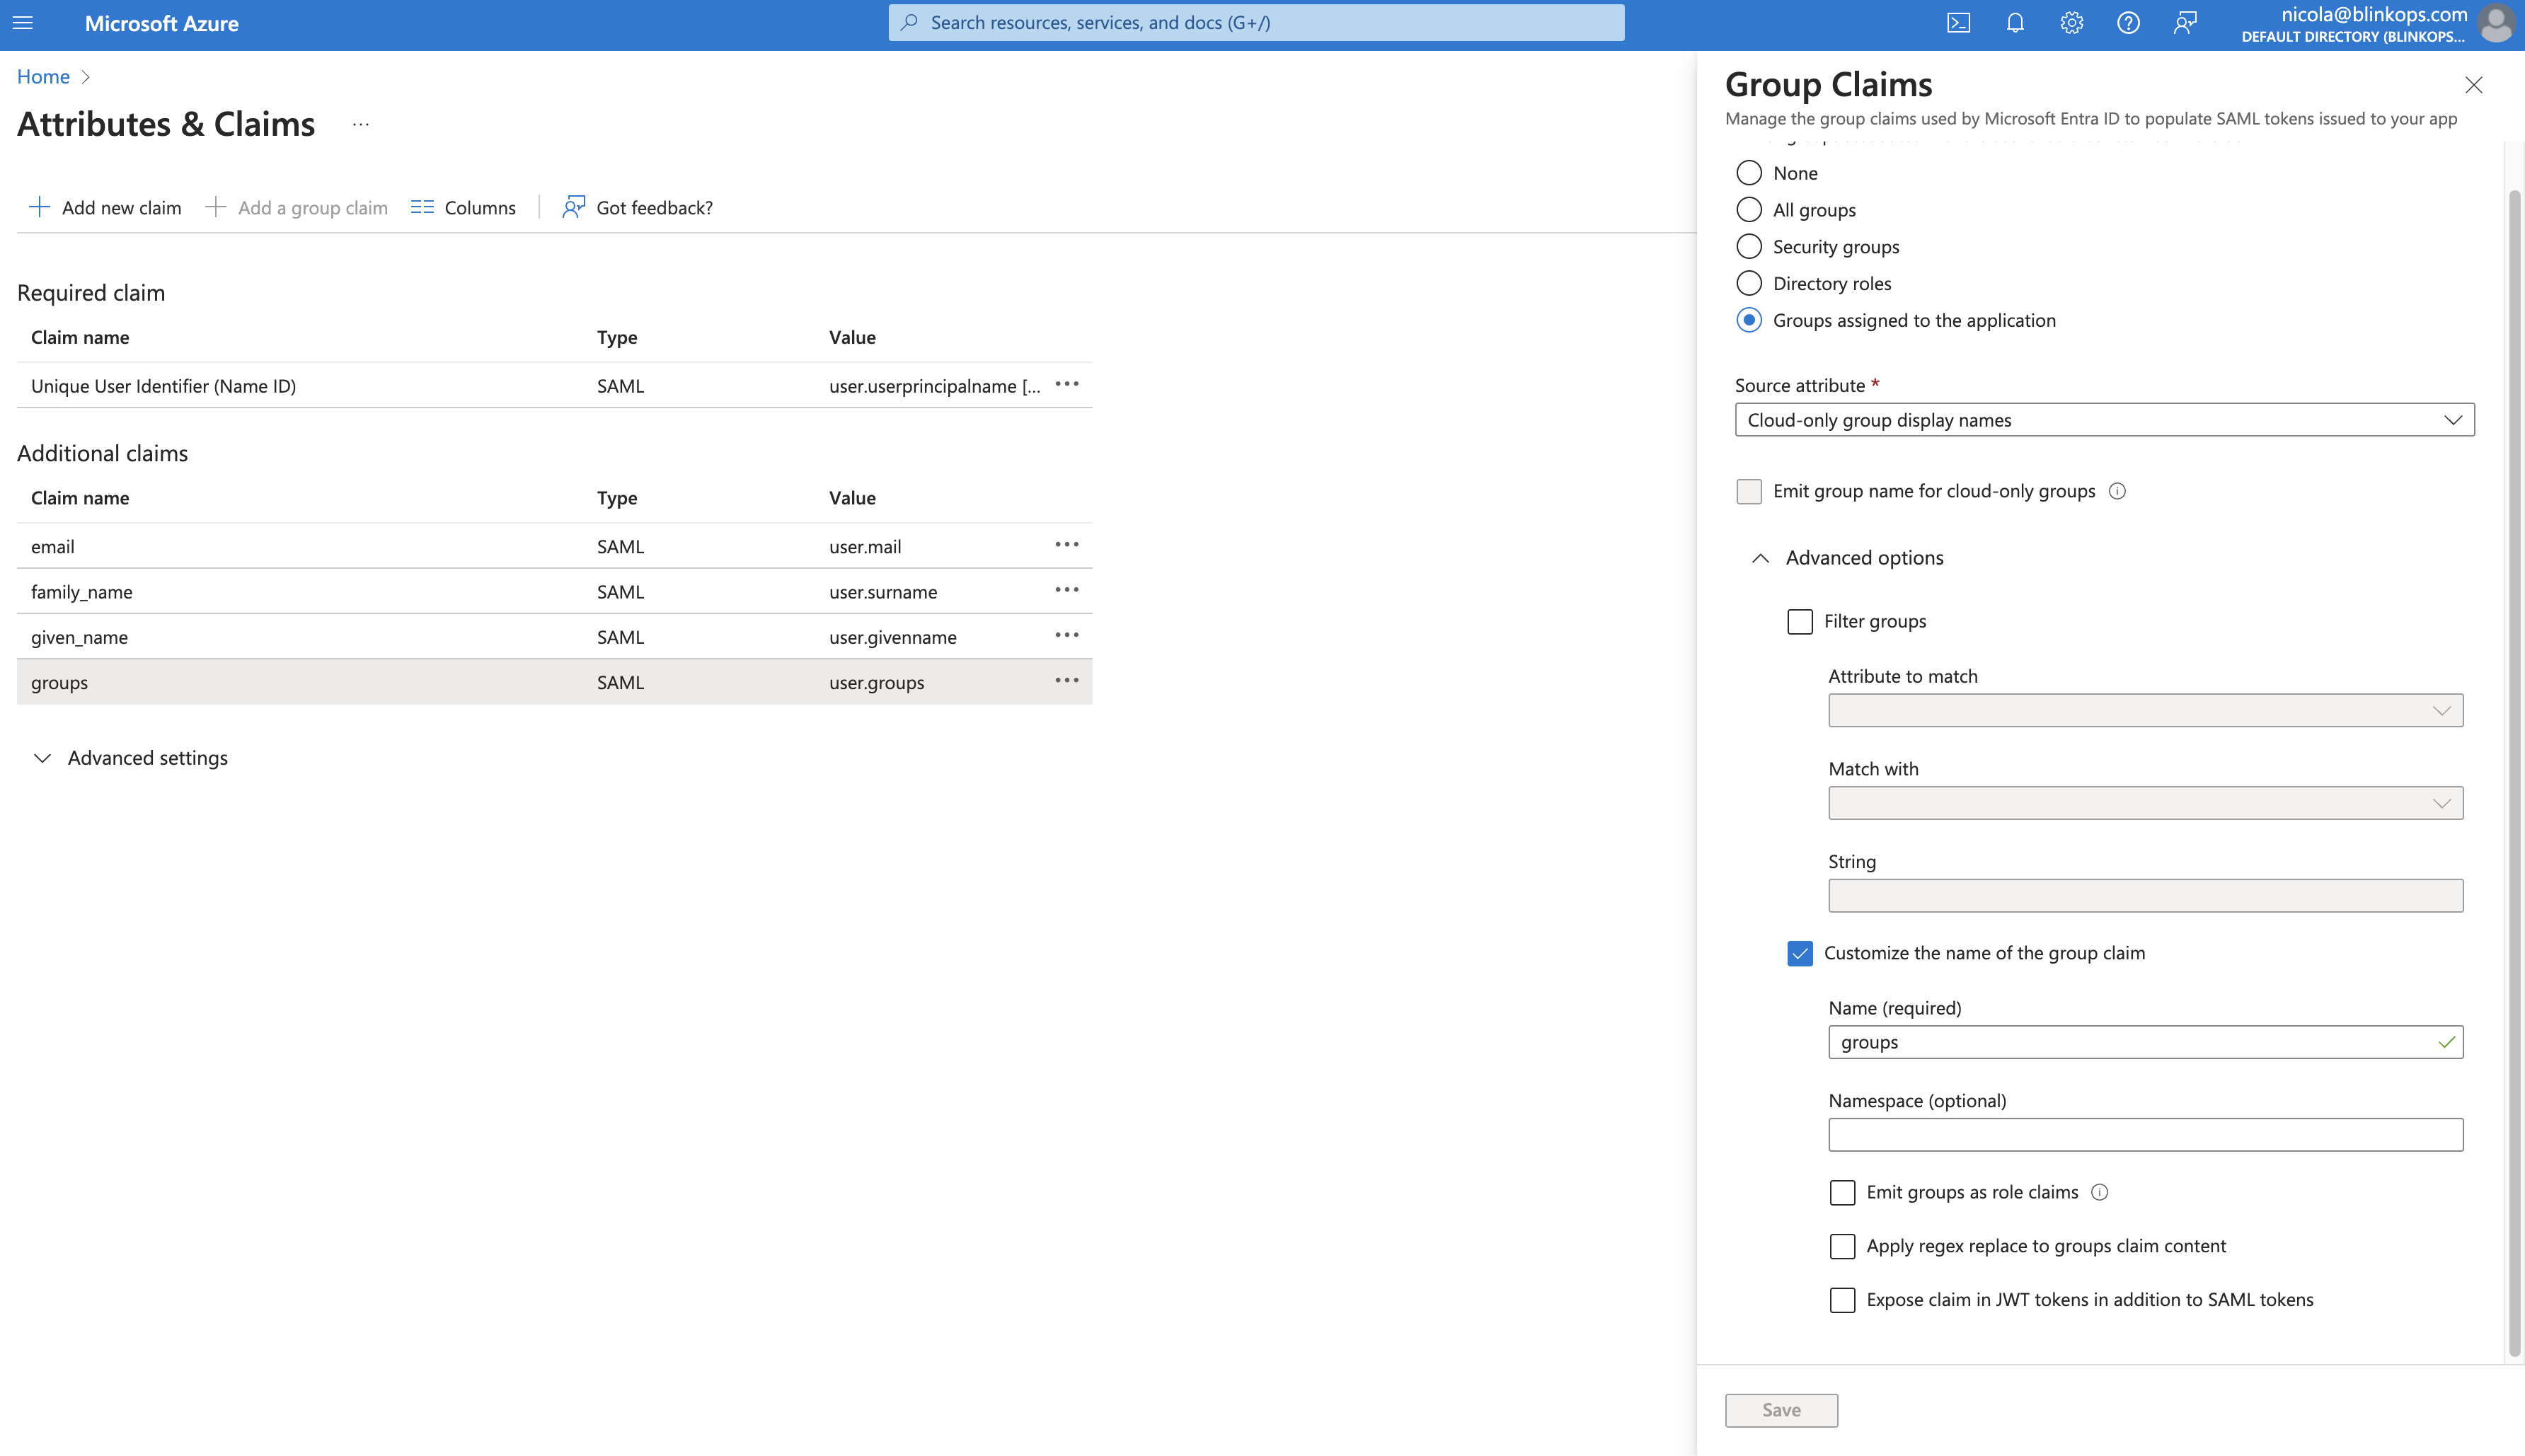
Set Up Group Claims
Proceed by clicking on the groups claim option and provide all the required information on the sidebar to the right. Then, complete the process by clicking on the “Save” button.