1
Add a Custom SAML App in Google Admin
Log in to Google Admin account, press “Apps” on left sidebar, and under it “Web and mobile apps”, then press in main window “Add app” and choose “Add custom SAML app”: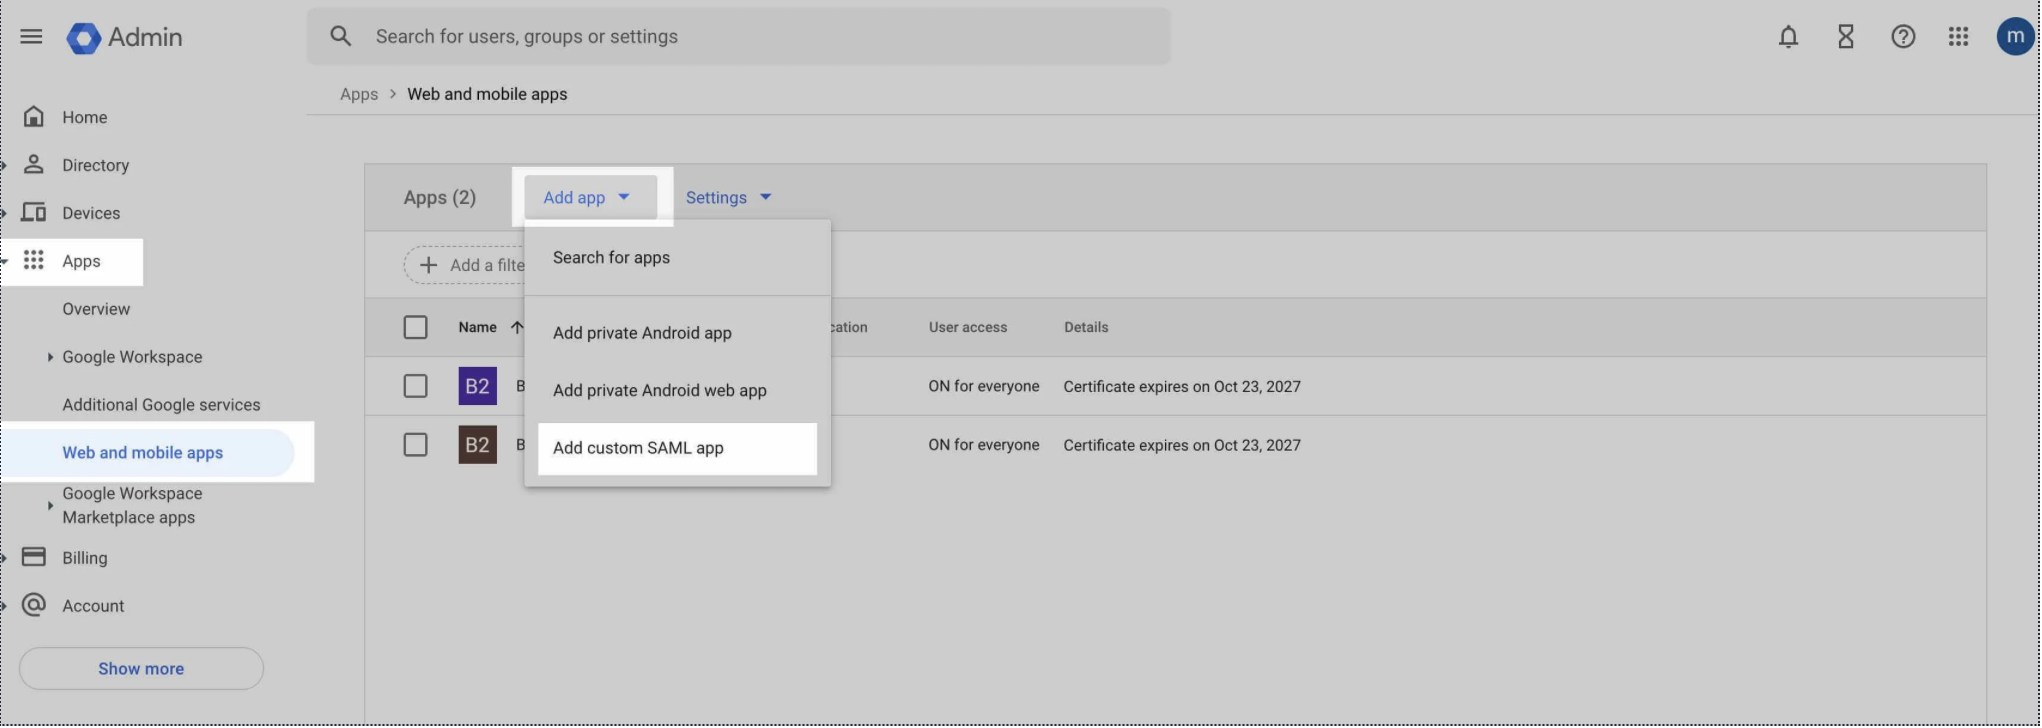
2
Name Your Custom SAML App
In “Add custom SAML app”, give App name, and press continue:
3
Download IdP Metadata
In the IdP page, click on the ‘download metadata’ button.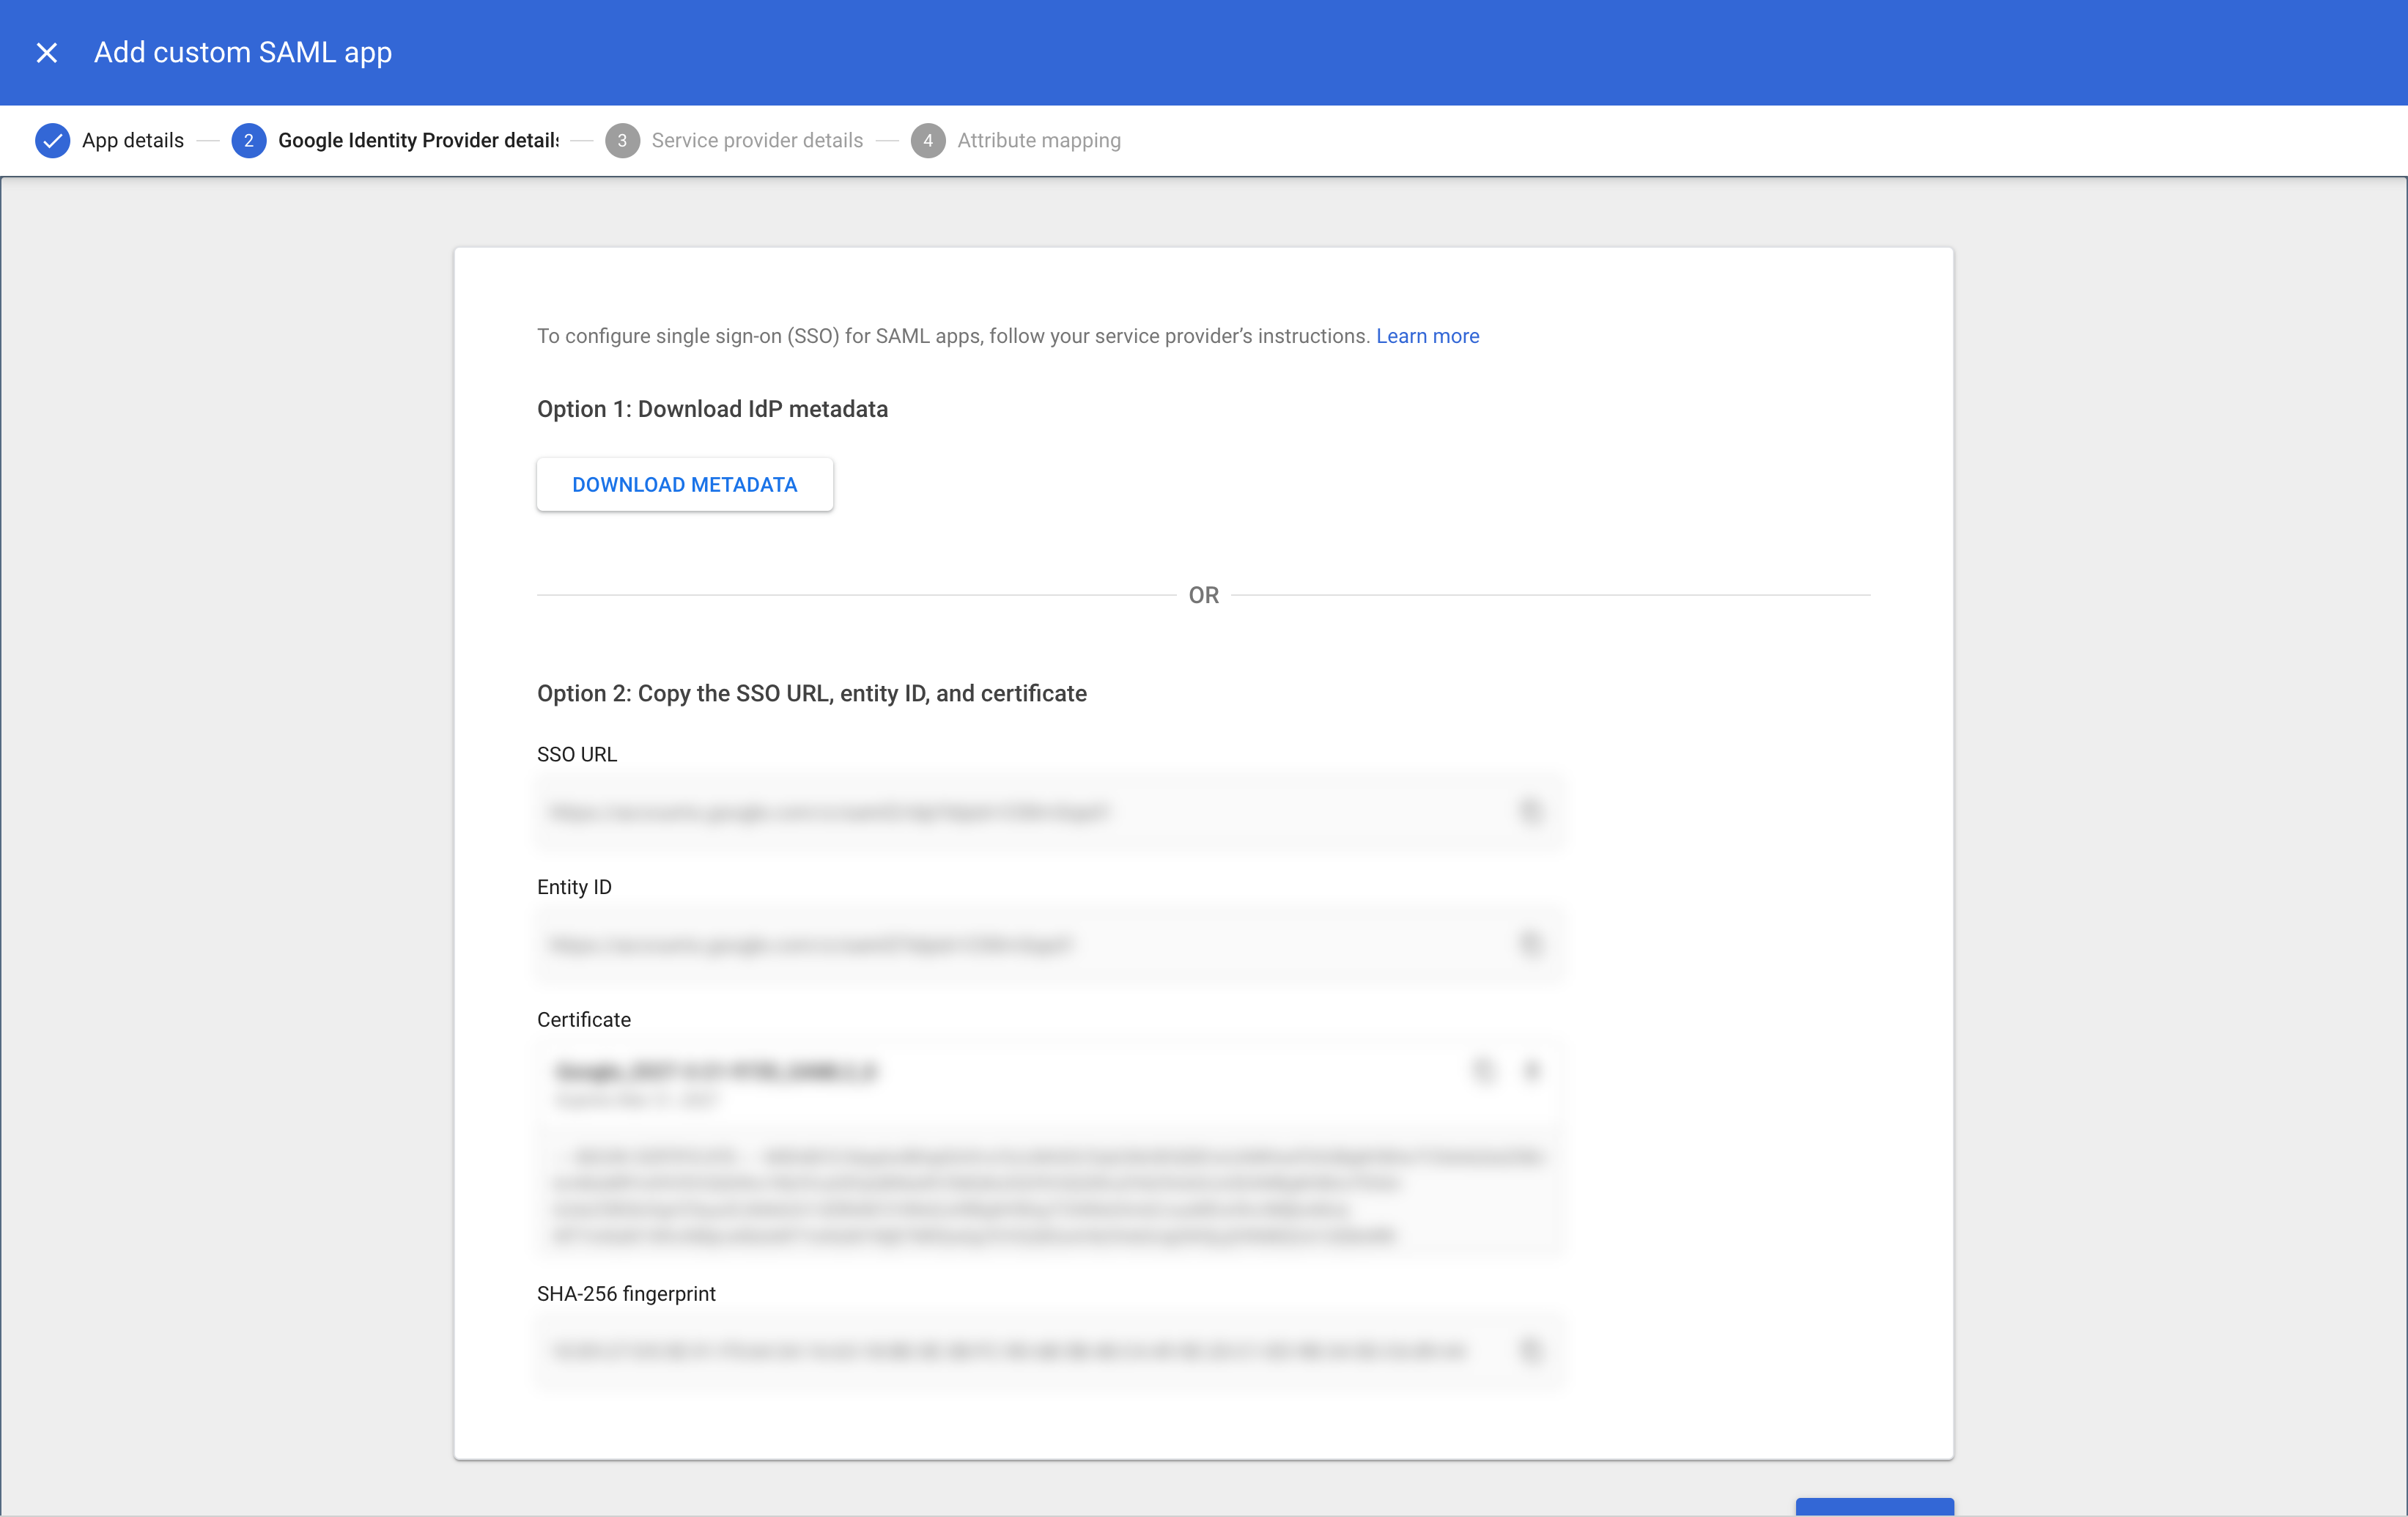
4
Upload Metadata File in Blink Platform
Once the file is downloaded, navigate to the Metadata File section found within the SAML tab in the Account Management Settings. Paste the downloaded metadata values into the designated text field labeled Metadata File.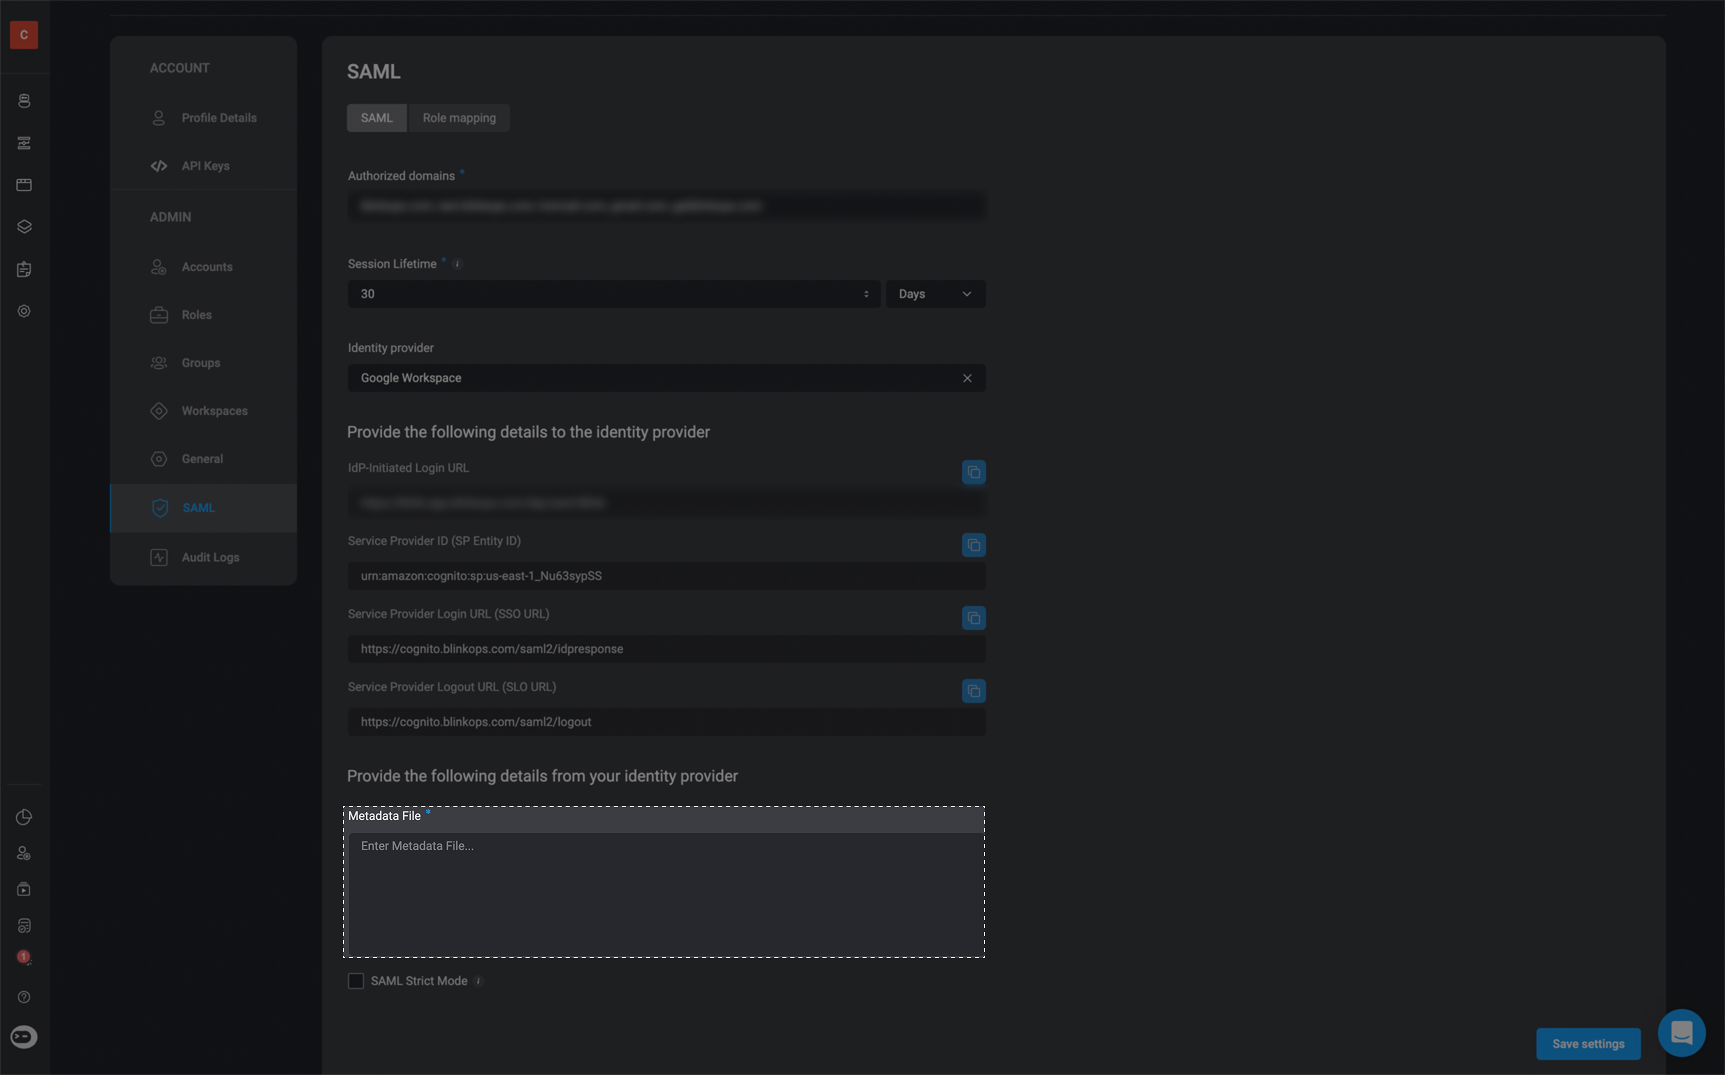
NOTEPlease note that the Identifier (Entity ID) value, along with the Single Sign-On URL, can be located within the SAML tab under the Account Management Settings section within the Blink Platform. The ACS URL is not available under the SAML tab, therefore you can find it below:The Entity ID :
The ACS URL :
Single Sign-On URL : Please look in the Account Management Settings section within the Blink Platform to find your unique Single Sign-On URL.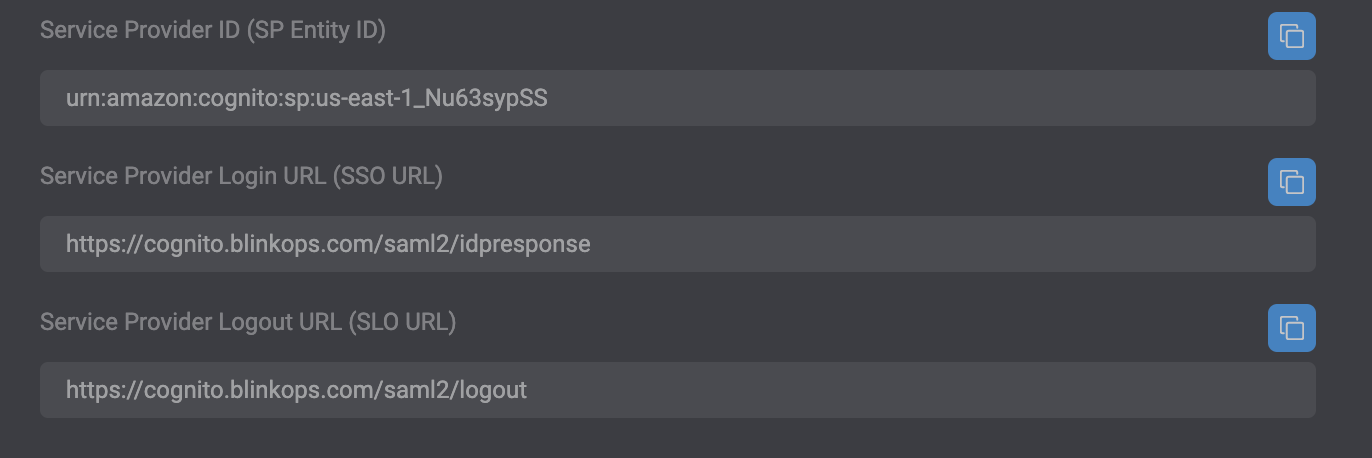
urn:amazon:cognito:sp:eu-west-1_NEemCMO1LThe ACS URL :
https://cognito.blinkops.com/saml2/idpresponseSingle Sign-On URL : Please look in the Account Management Settings section within the Blink Platform to find your unique Single Sign-On URL.
5
Enter SAML Configuration Details
Using the ACS URL, as well as the Identifier (Entity ID) value and the Single Sign-On URL available in the SAML tab under the Account Management Settings section within the Blink Platform, proceed to copy and insert these values into the designated text fields below.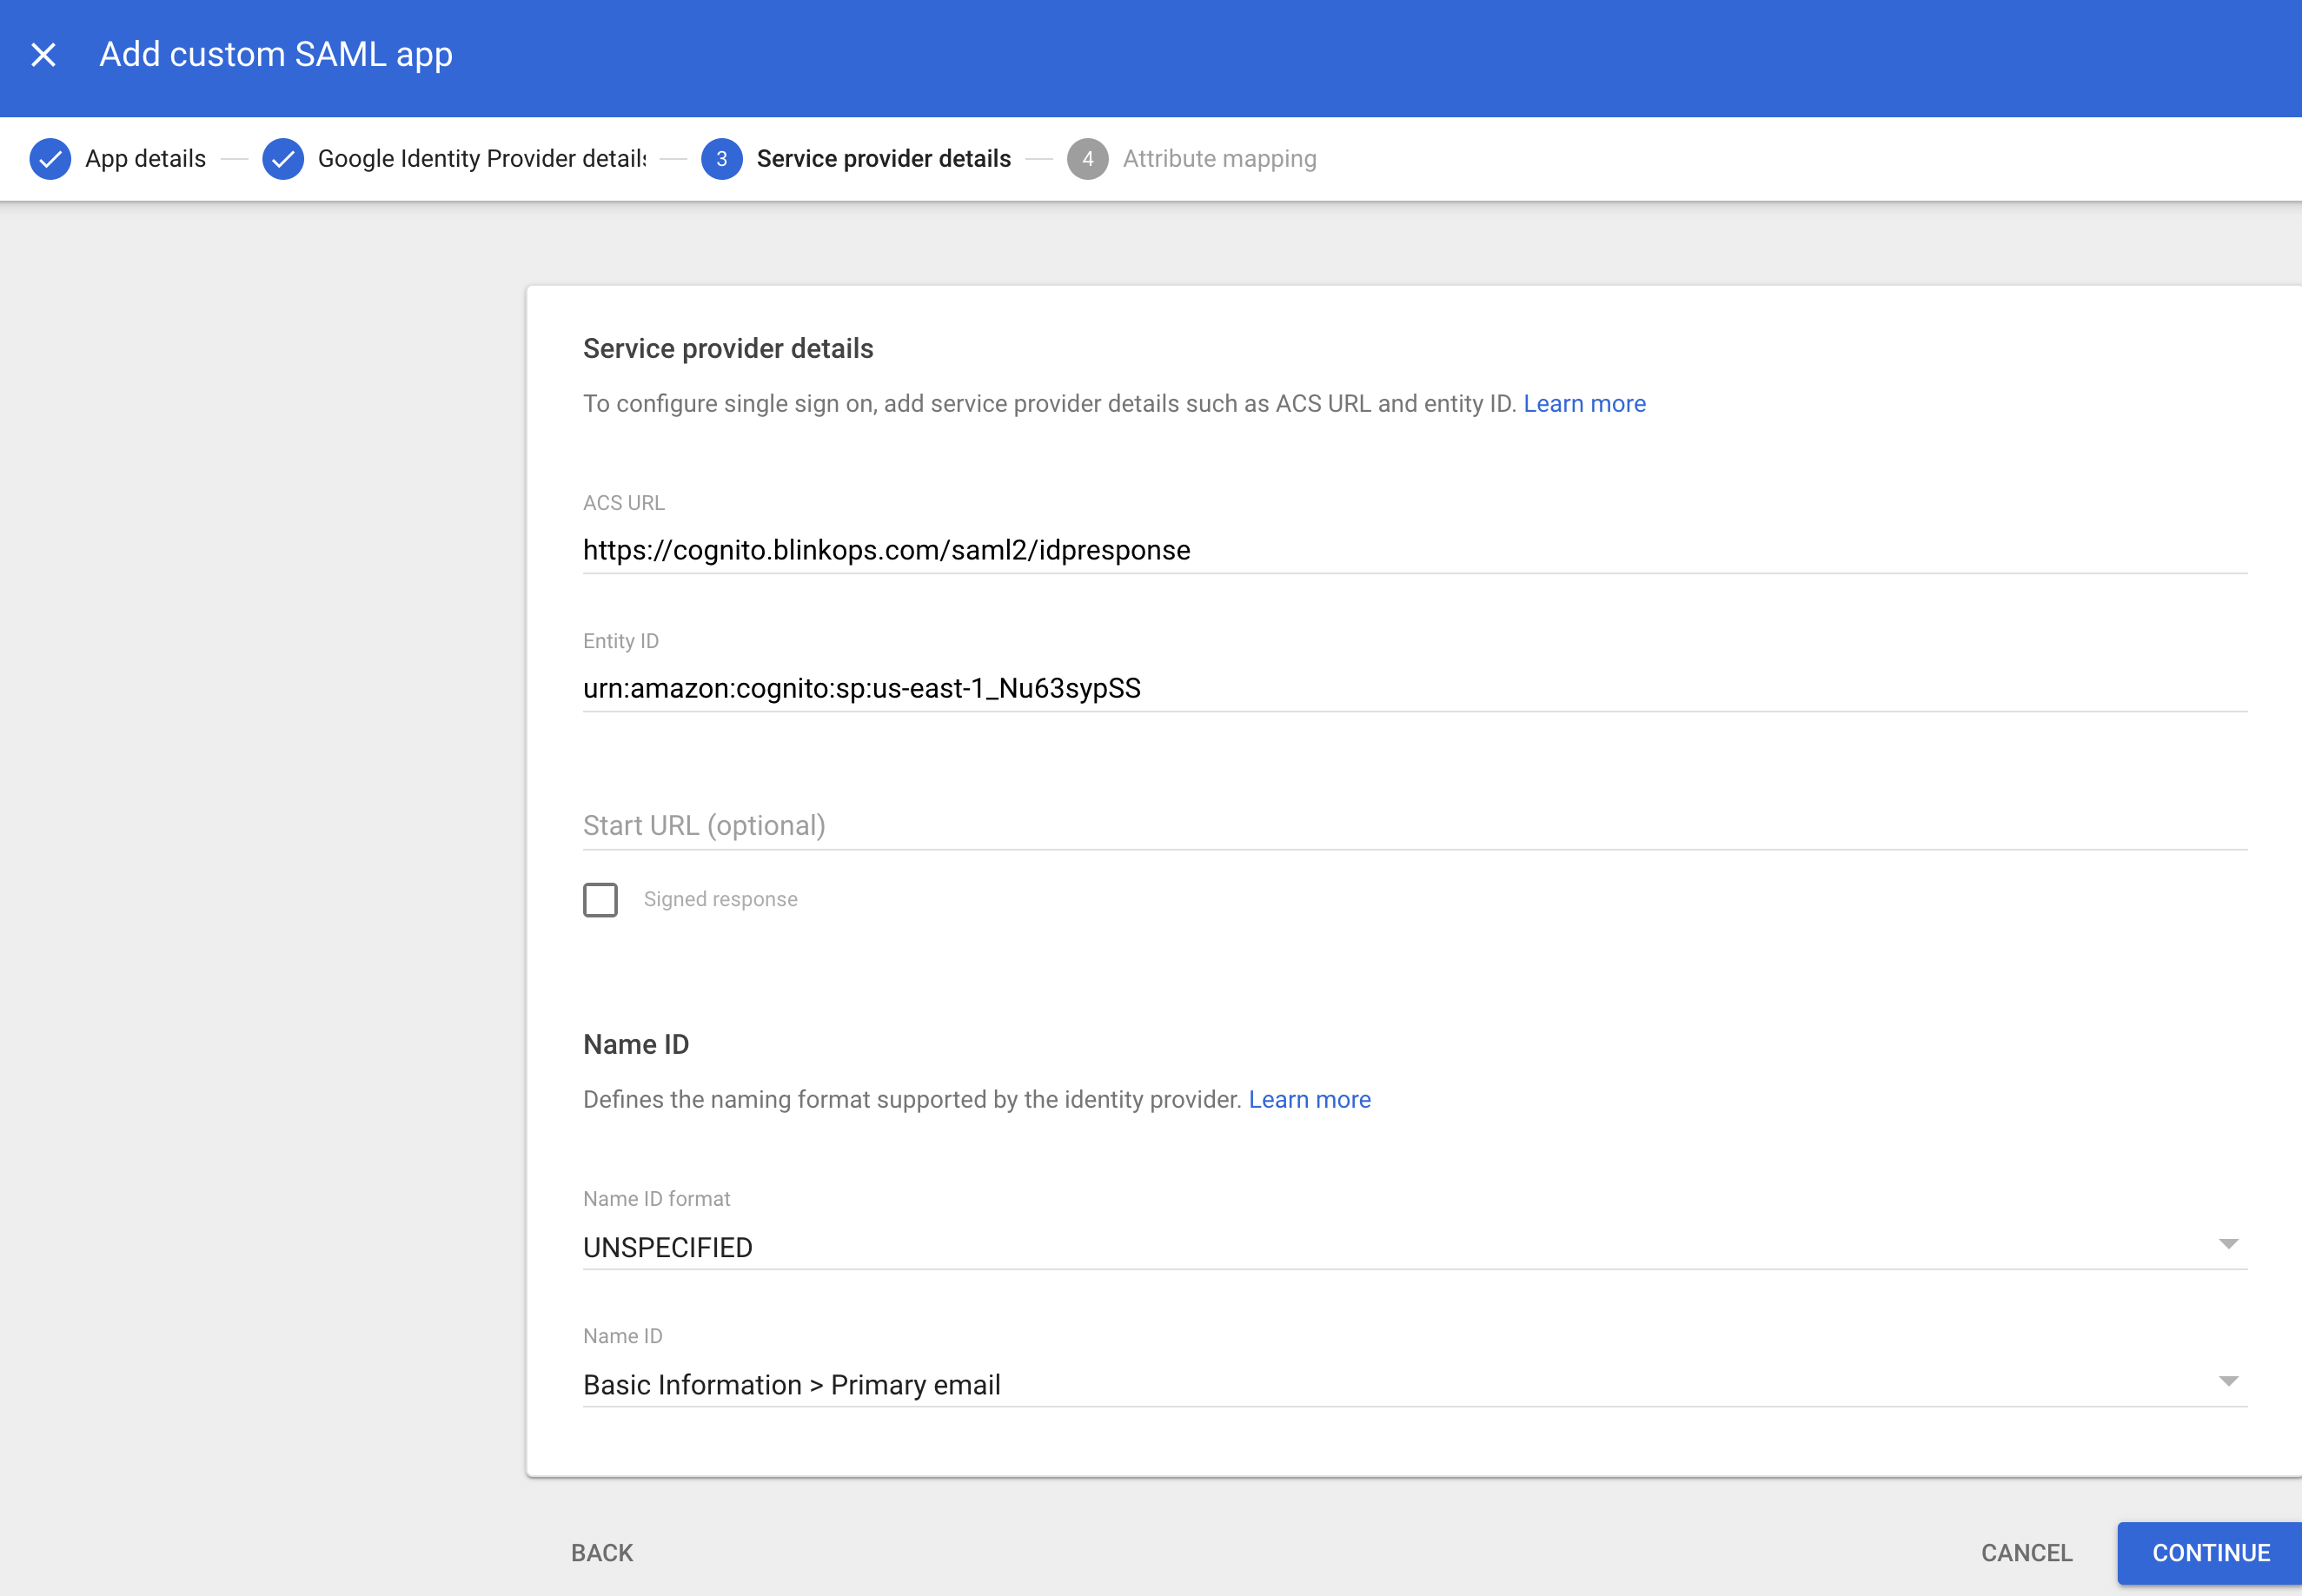
Note: Paste the Single Sign-On URL value in the START URL text field.
6
Continue to Next Step
Press continue
7
Configure Attribute Mapping
In the Attribute mapping page, map “First name” to “given_name”, Last name to family_name, and “Primary email” to “email”.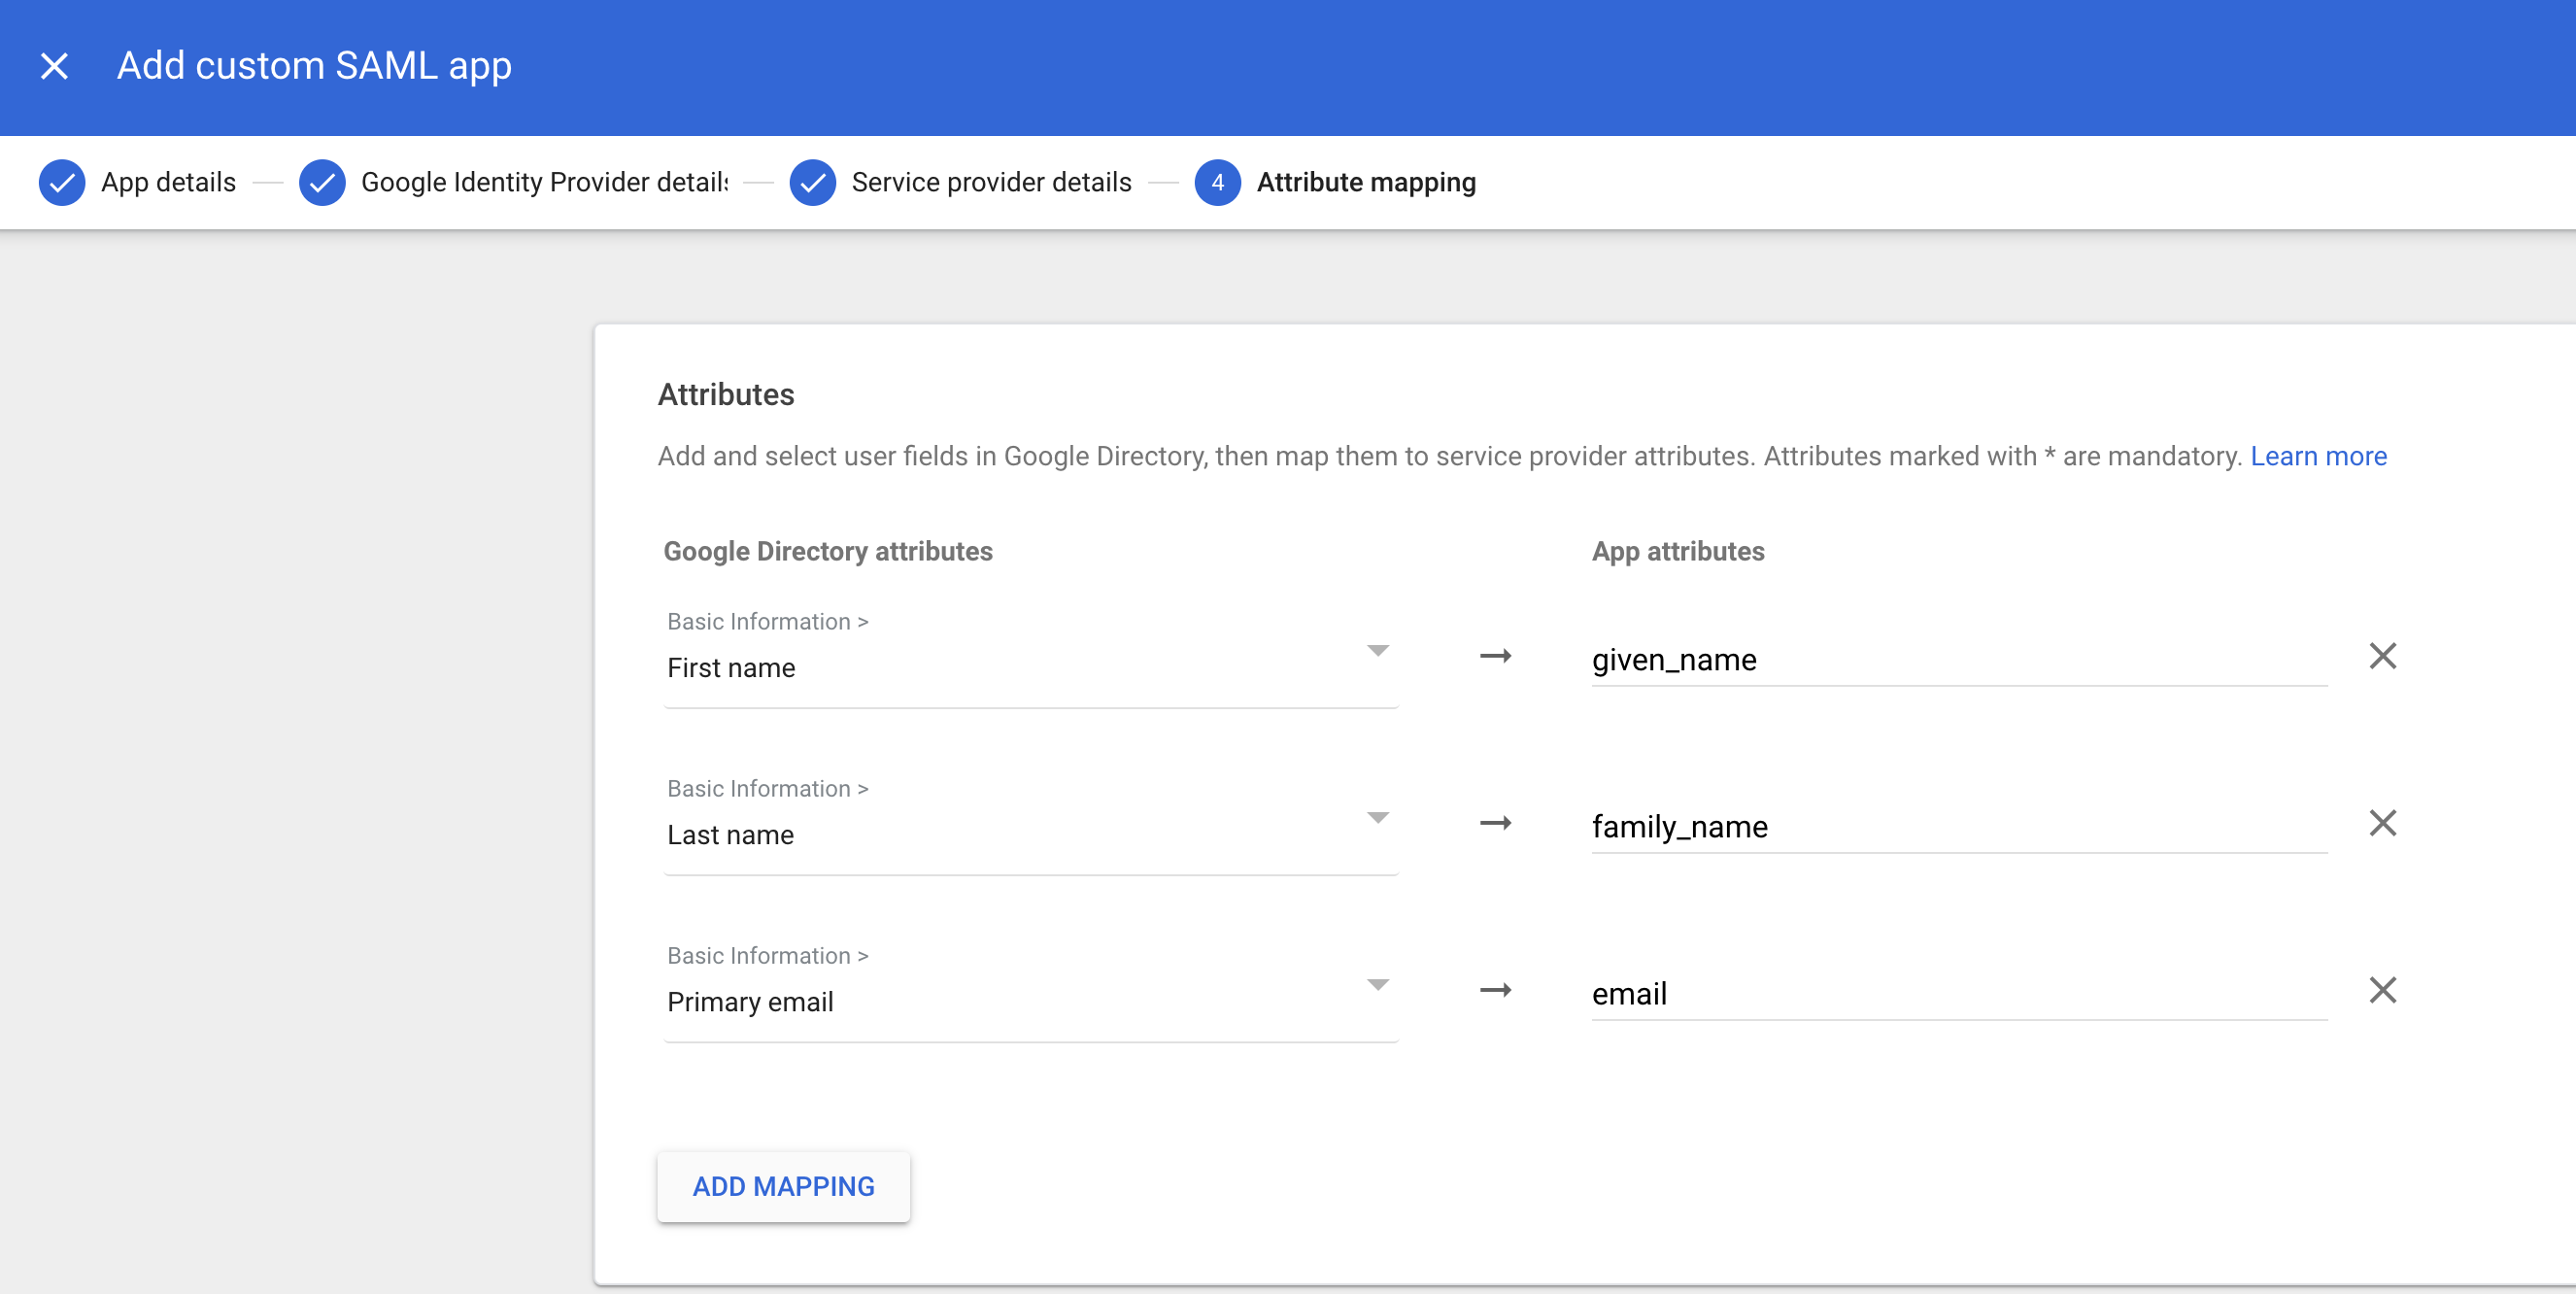
8
Set Up Group Mapping and Role Mapping in Blink
Next, scroll to the Group Membership section, select your Google Groups, and set the App attribute value as group and click ‘FINISH’. Then head to the SAML tab under the Account Management Settings section within the Blink Platform and click the Role Mapping section and select the applicable values.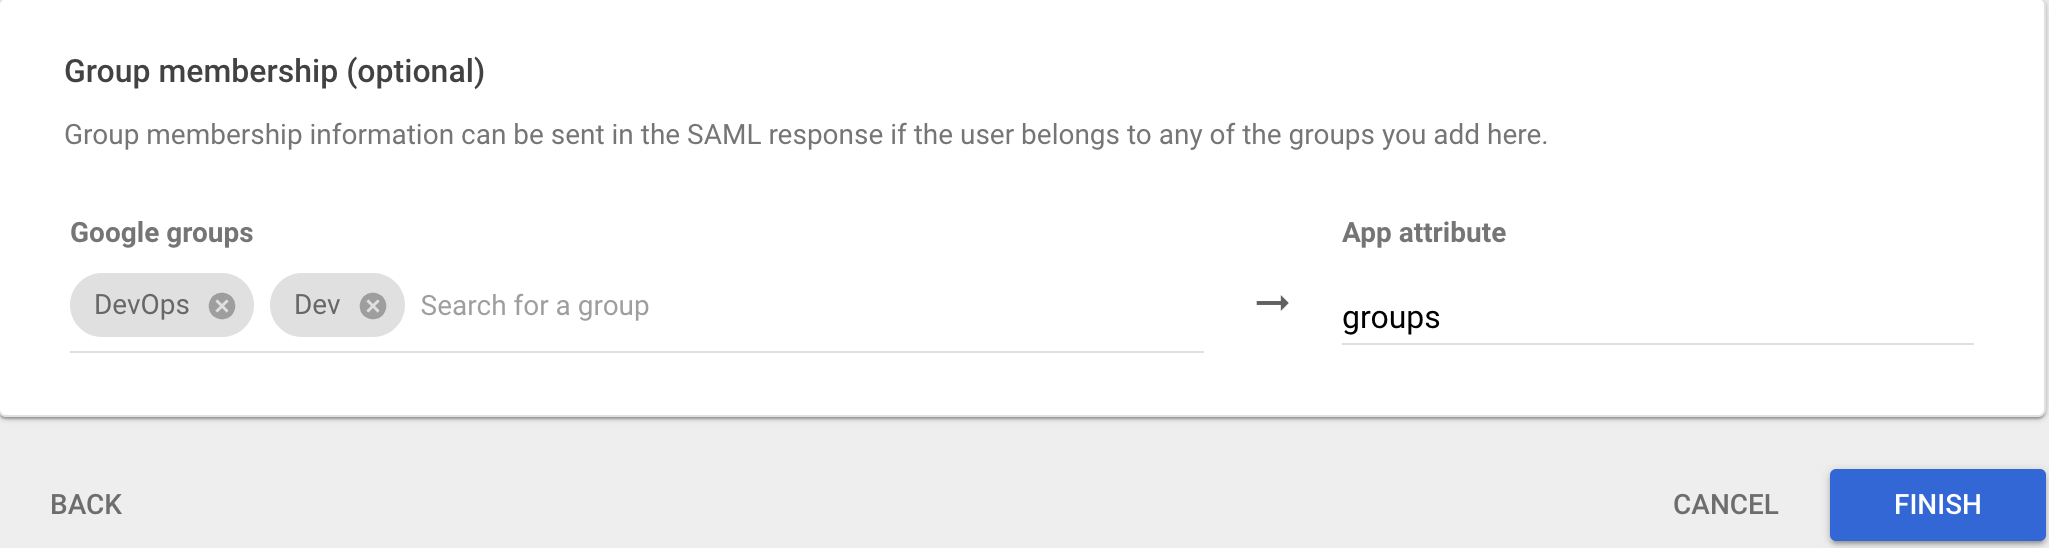
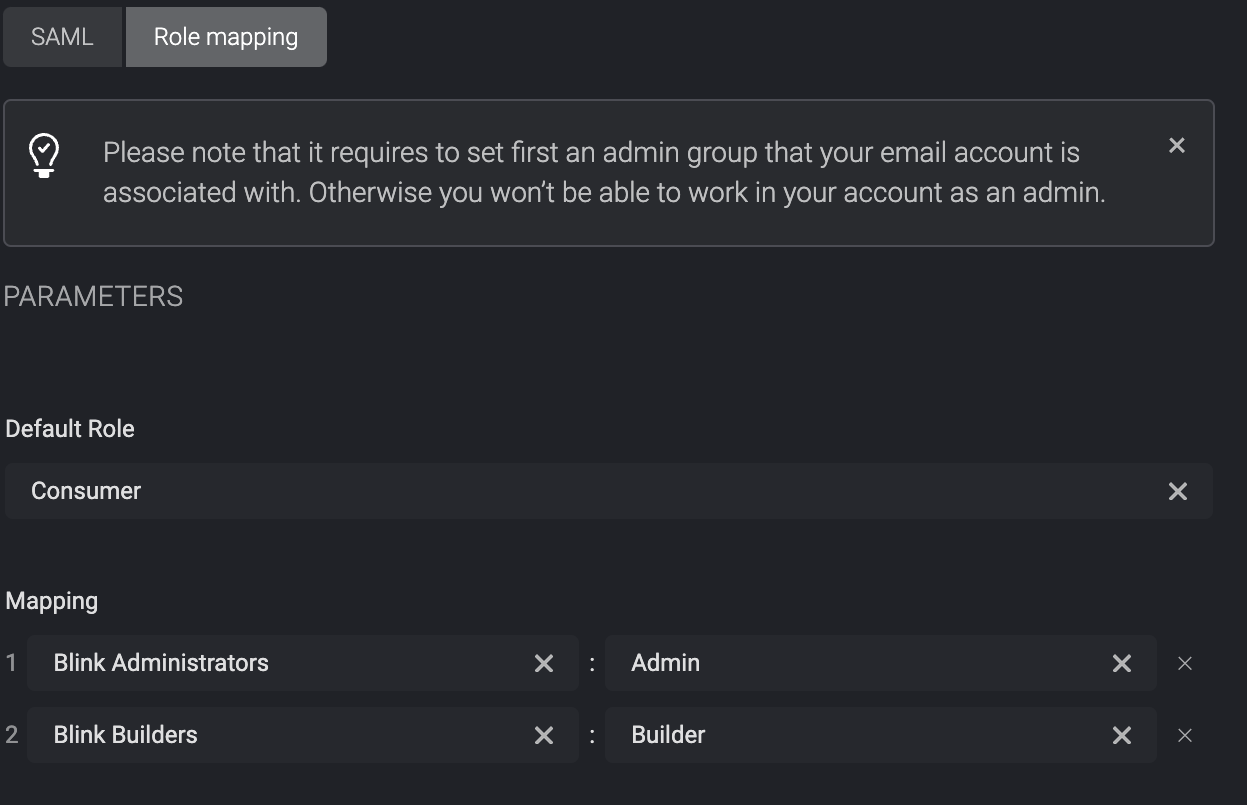
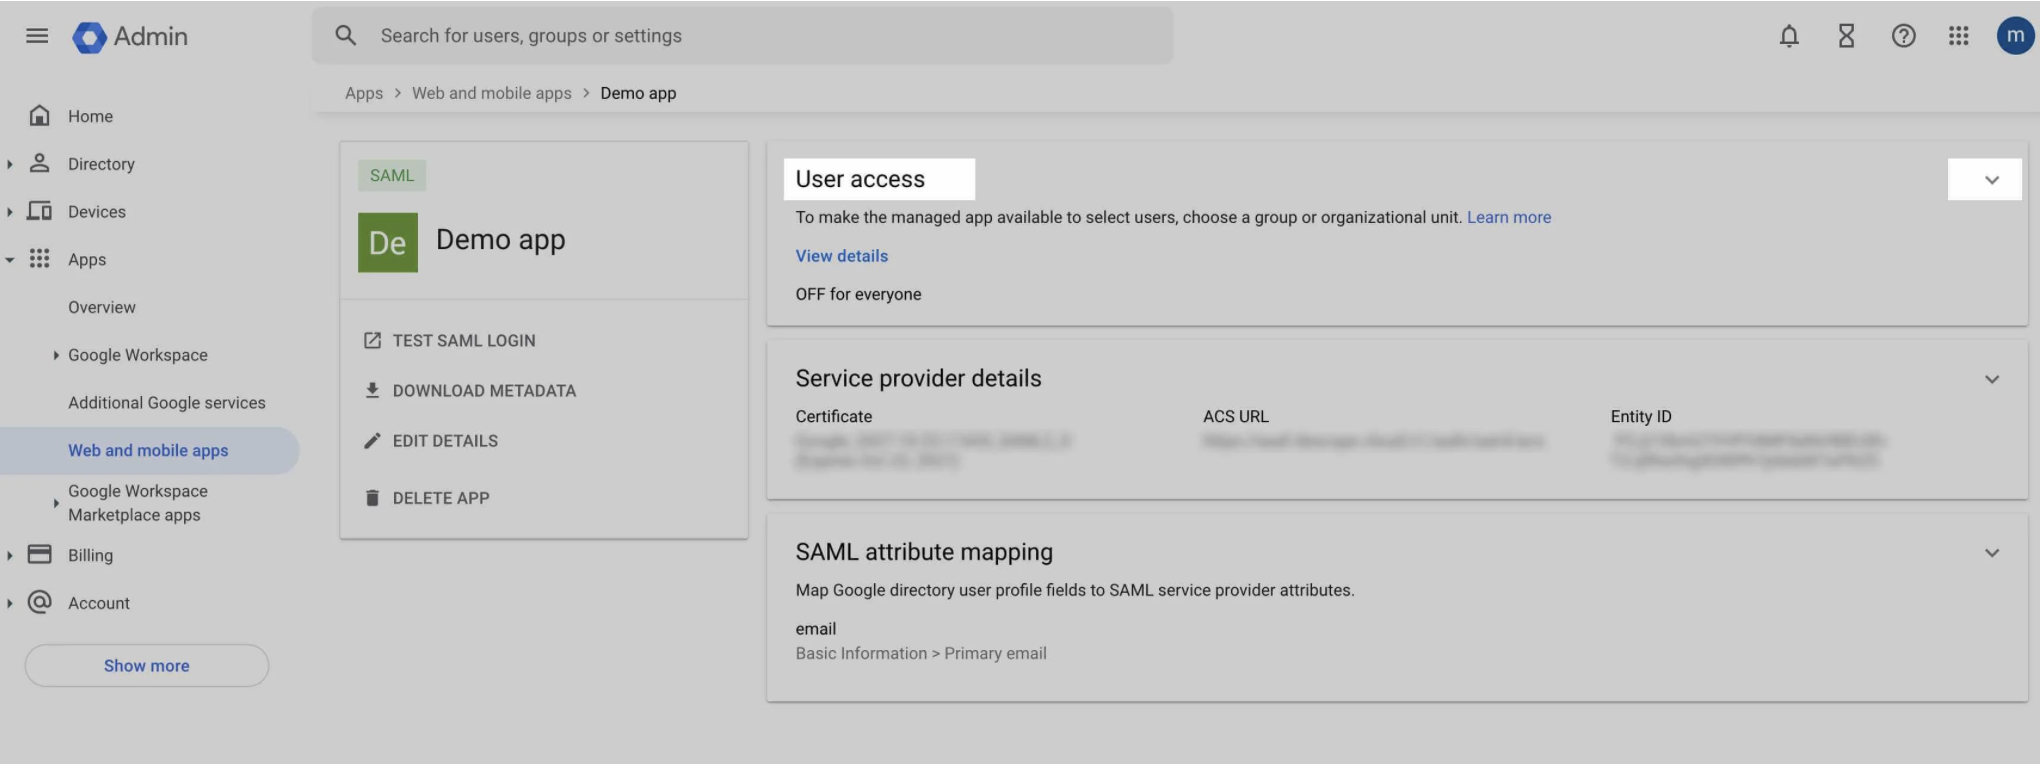
Group:Role mapping table. The first matching group in the list determines the assigned role.9
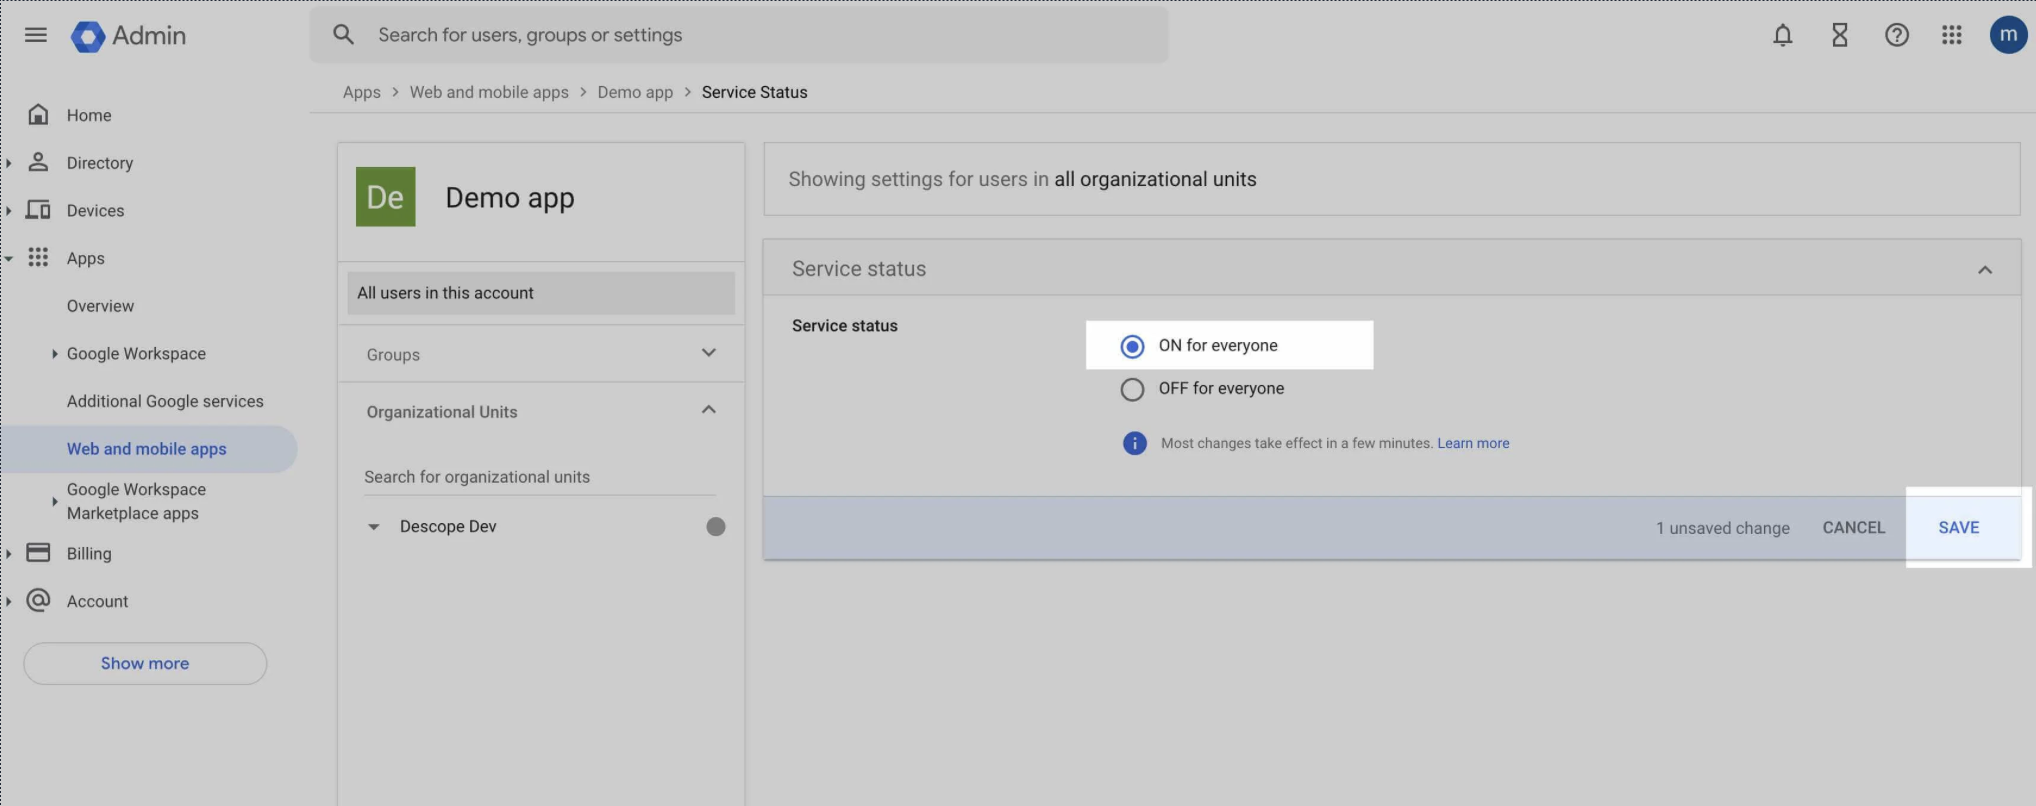
Enable User Access for Organizational Units
After you finish SAML app creation, you can set up User access by changing the status to ON for all organizational units: