Create a New Workspace
Navigate to Account Settings by selecting the circle displaying your initials in the bottom-left corner.
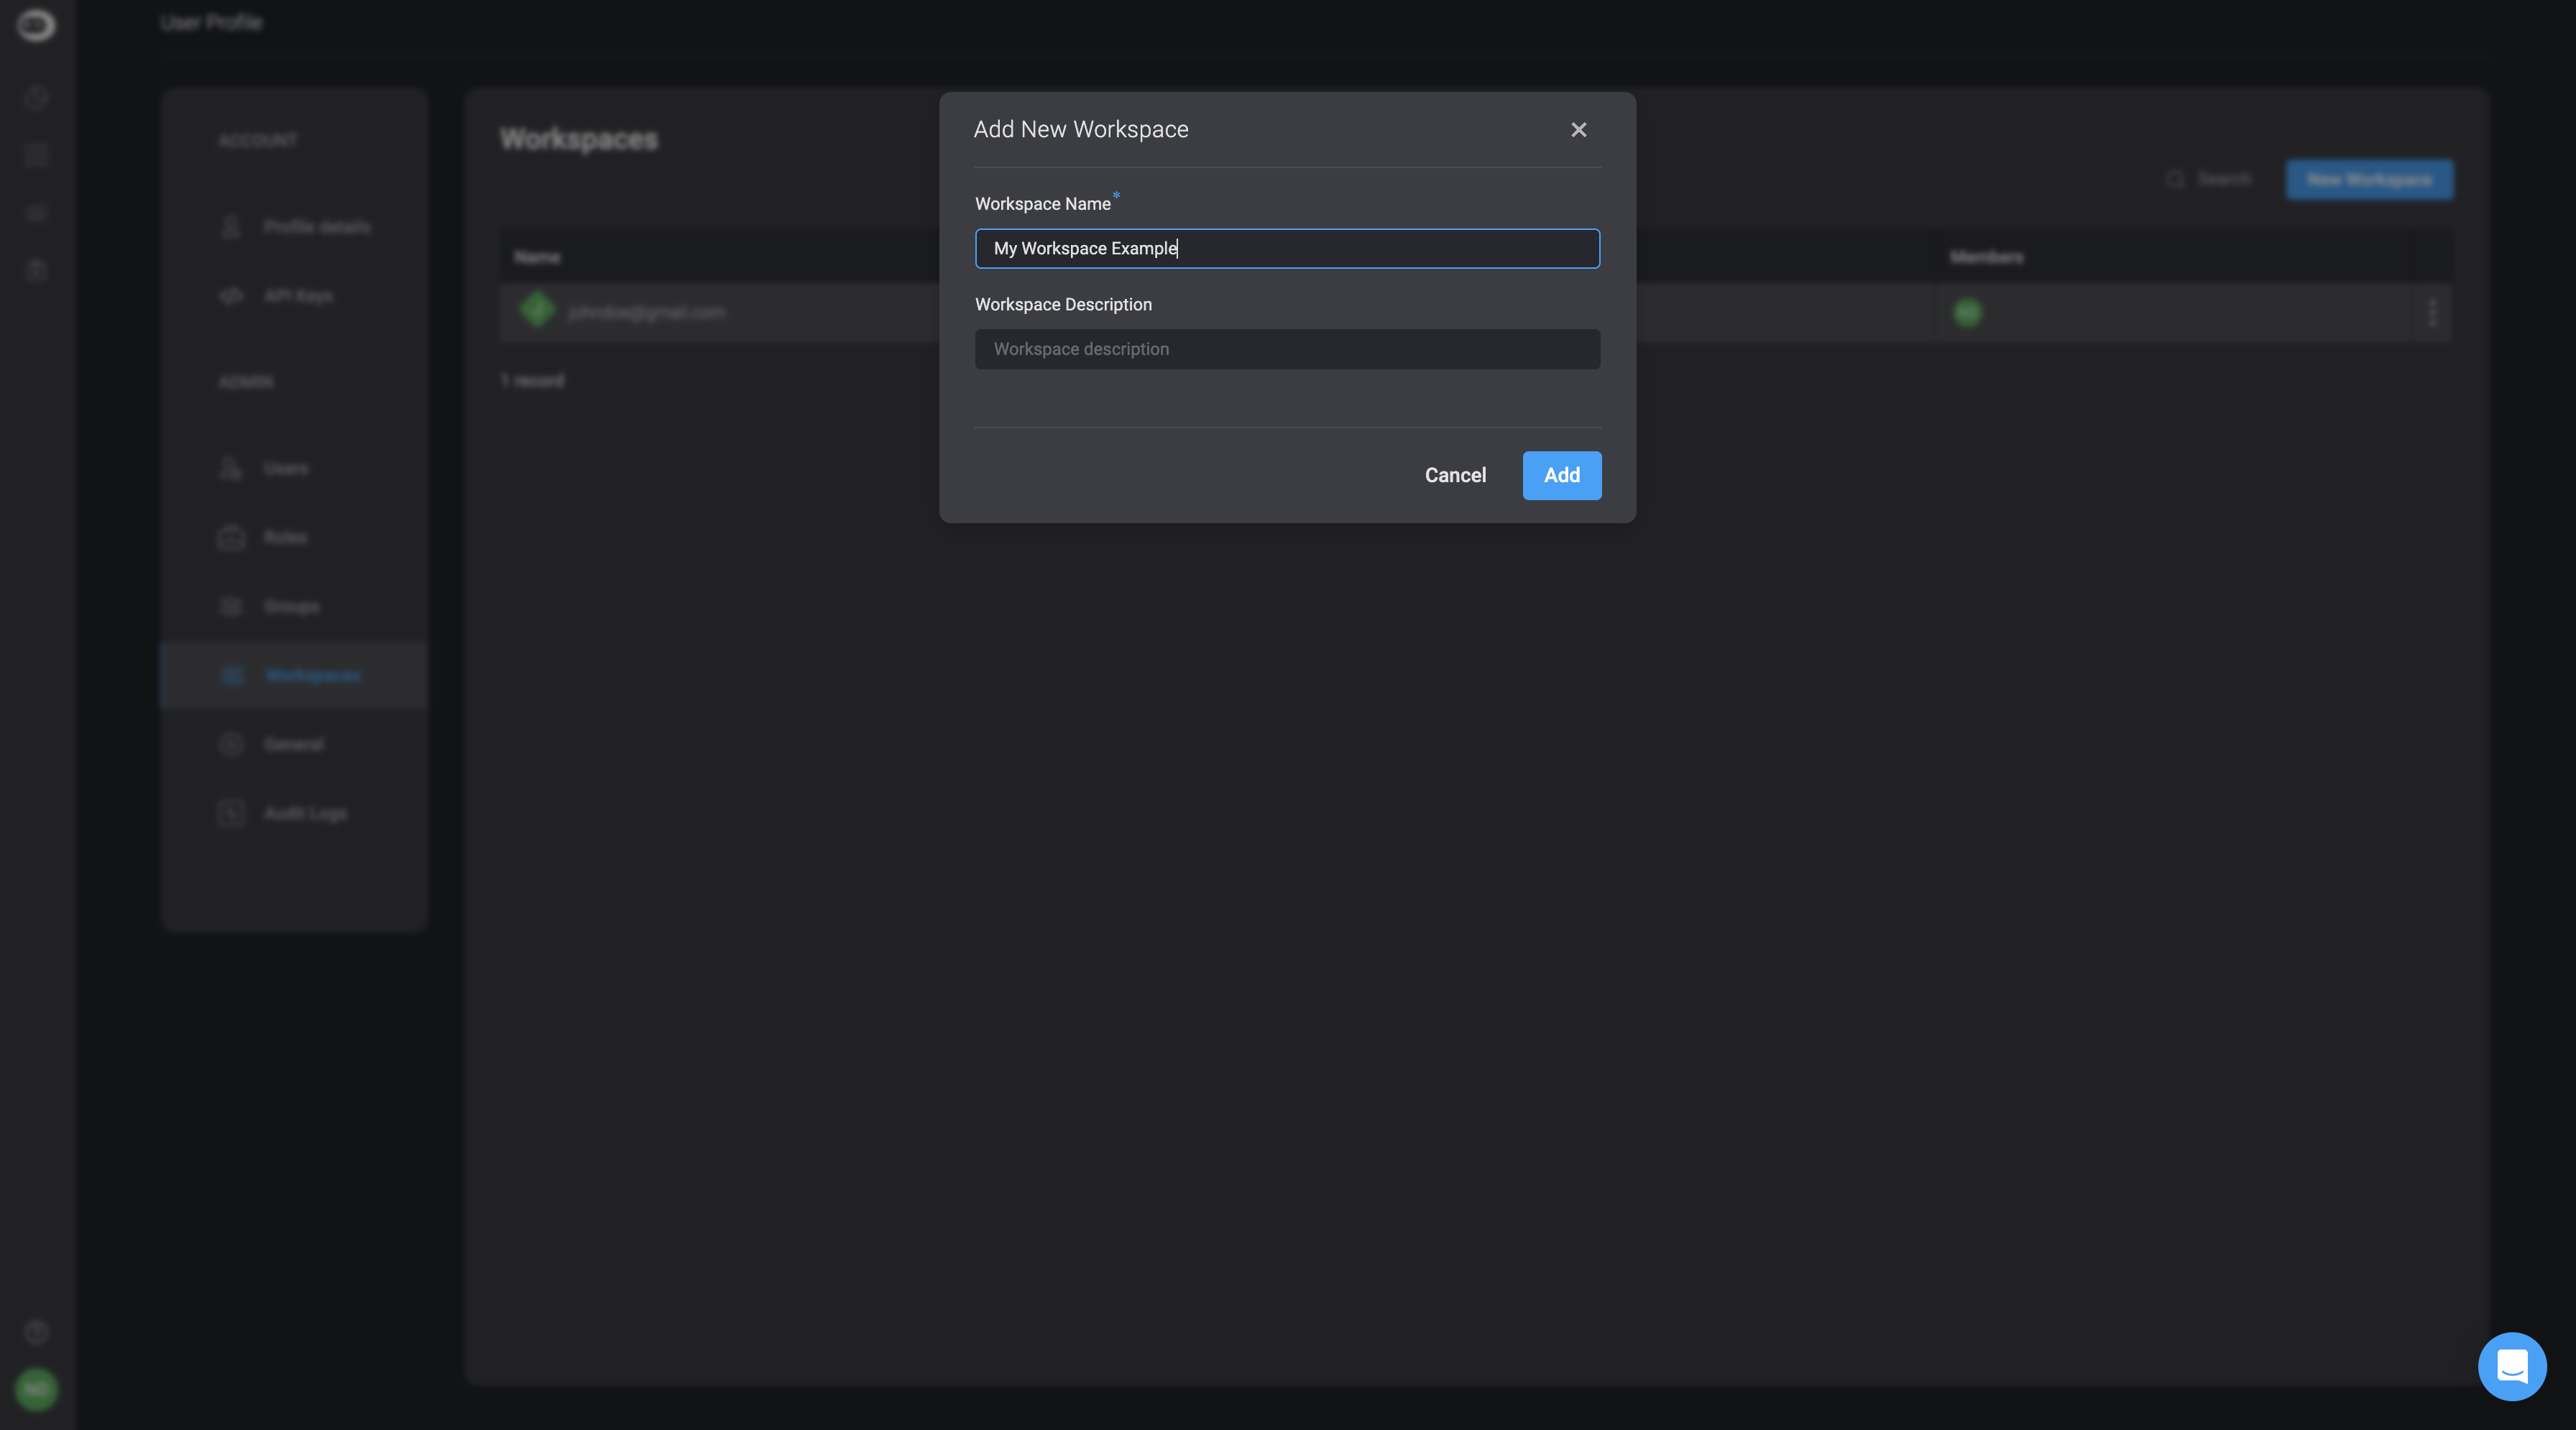
You will be directed to the Workspaces settings. In the top-right corner select the New Workspace button.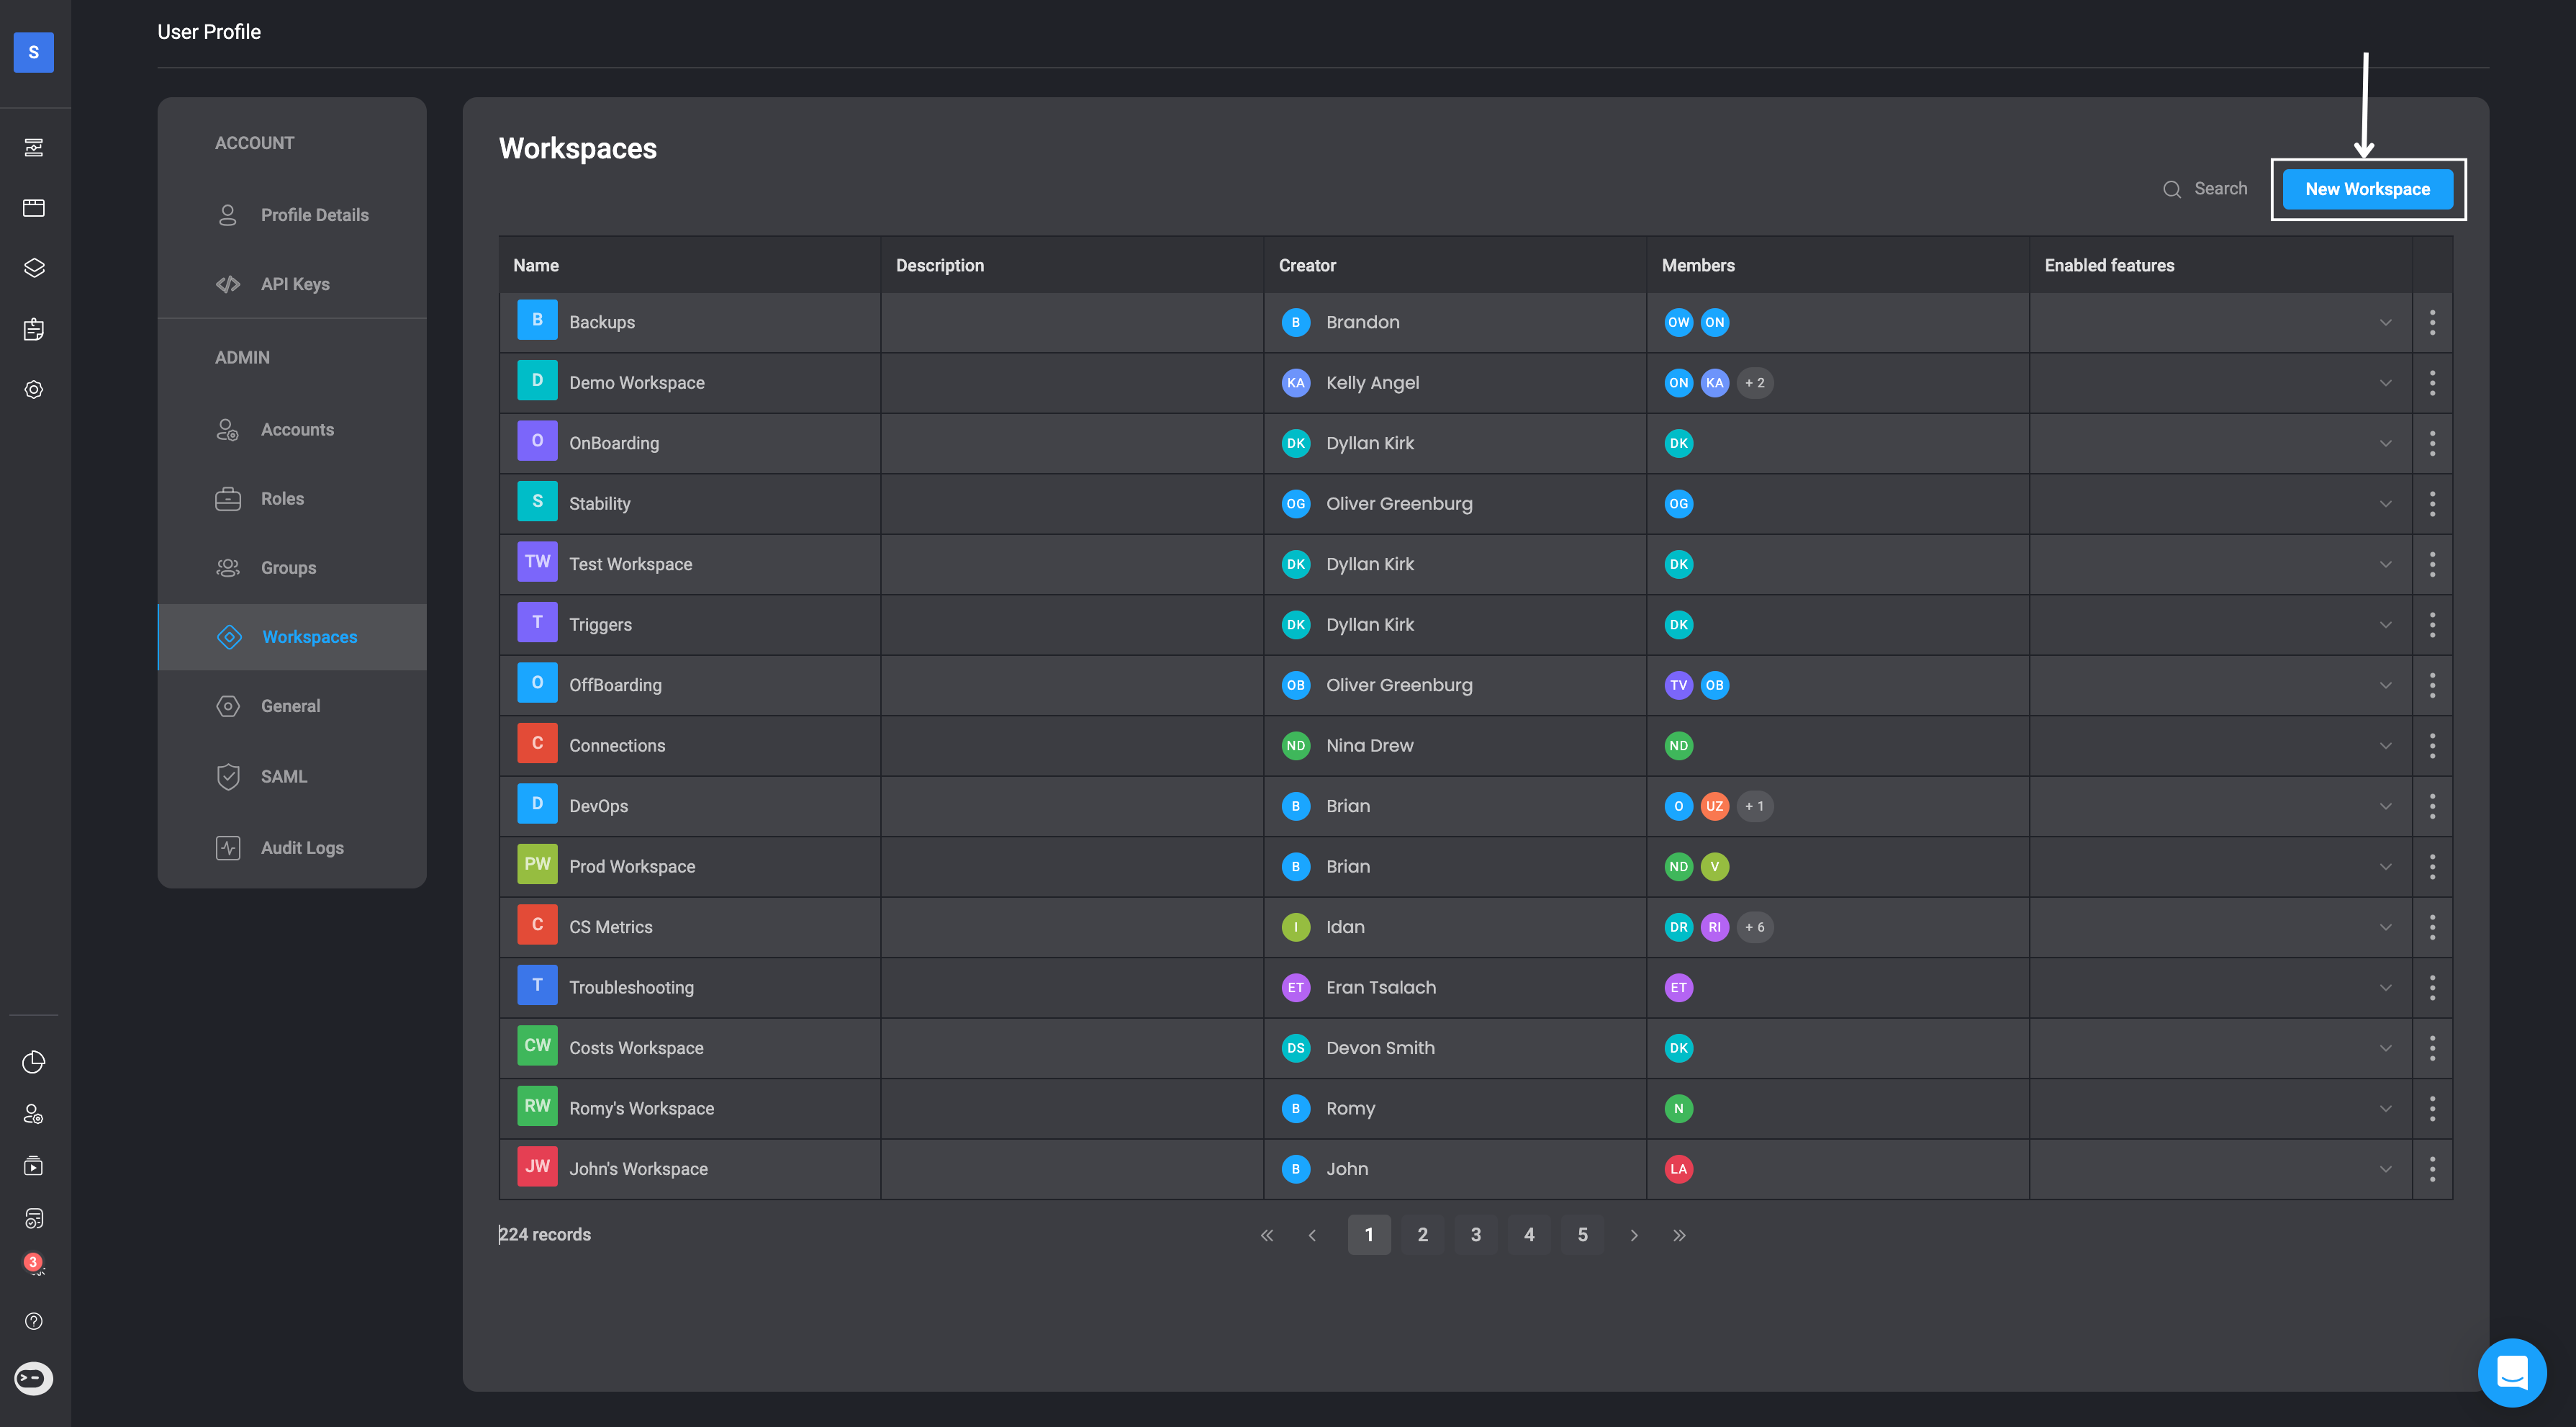
Editing Workspace
If you wish to edit any details to the workspace table, simply double-click on the cell you want to modify. Make the necessary changes and then click outside the cell to automatically save your updates. For Example: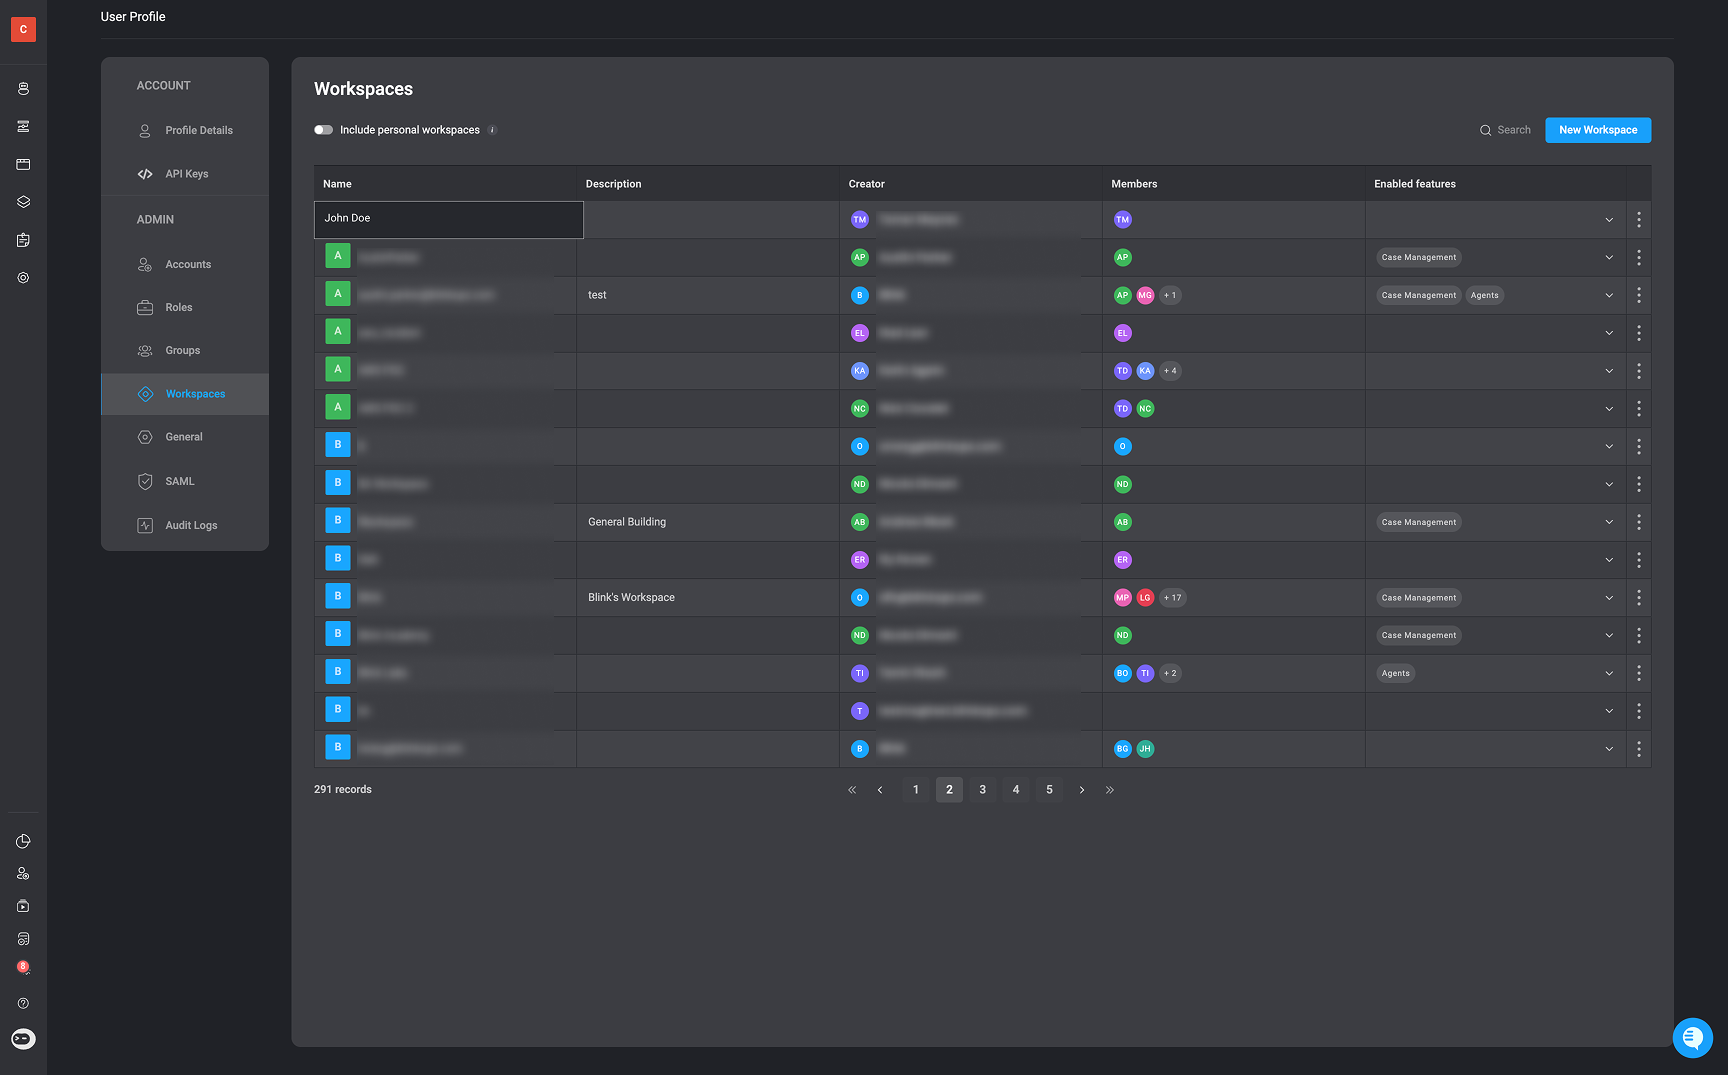
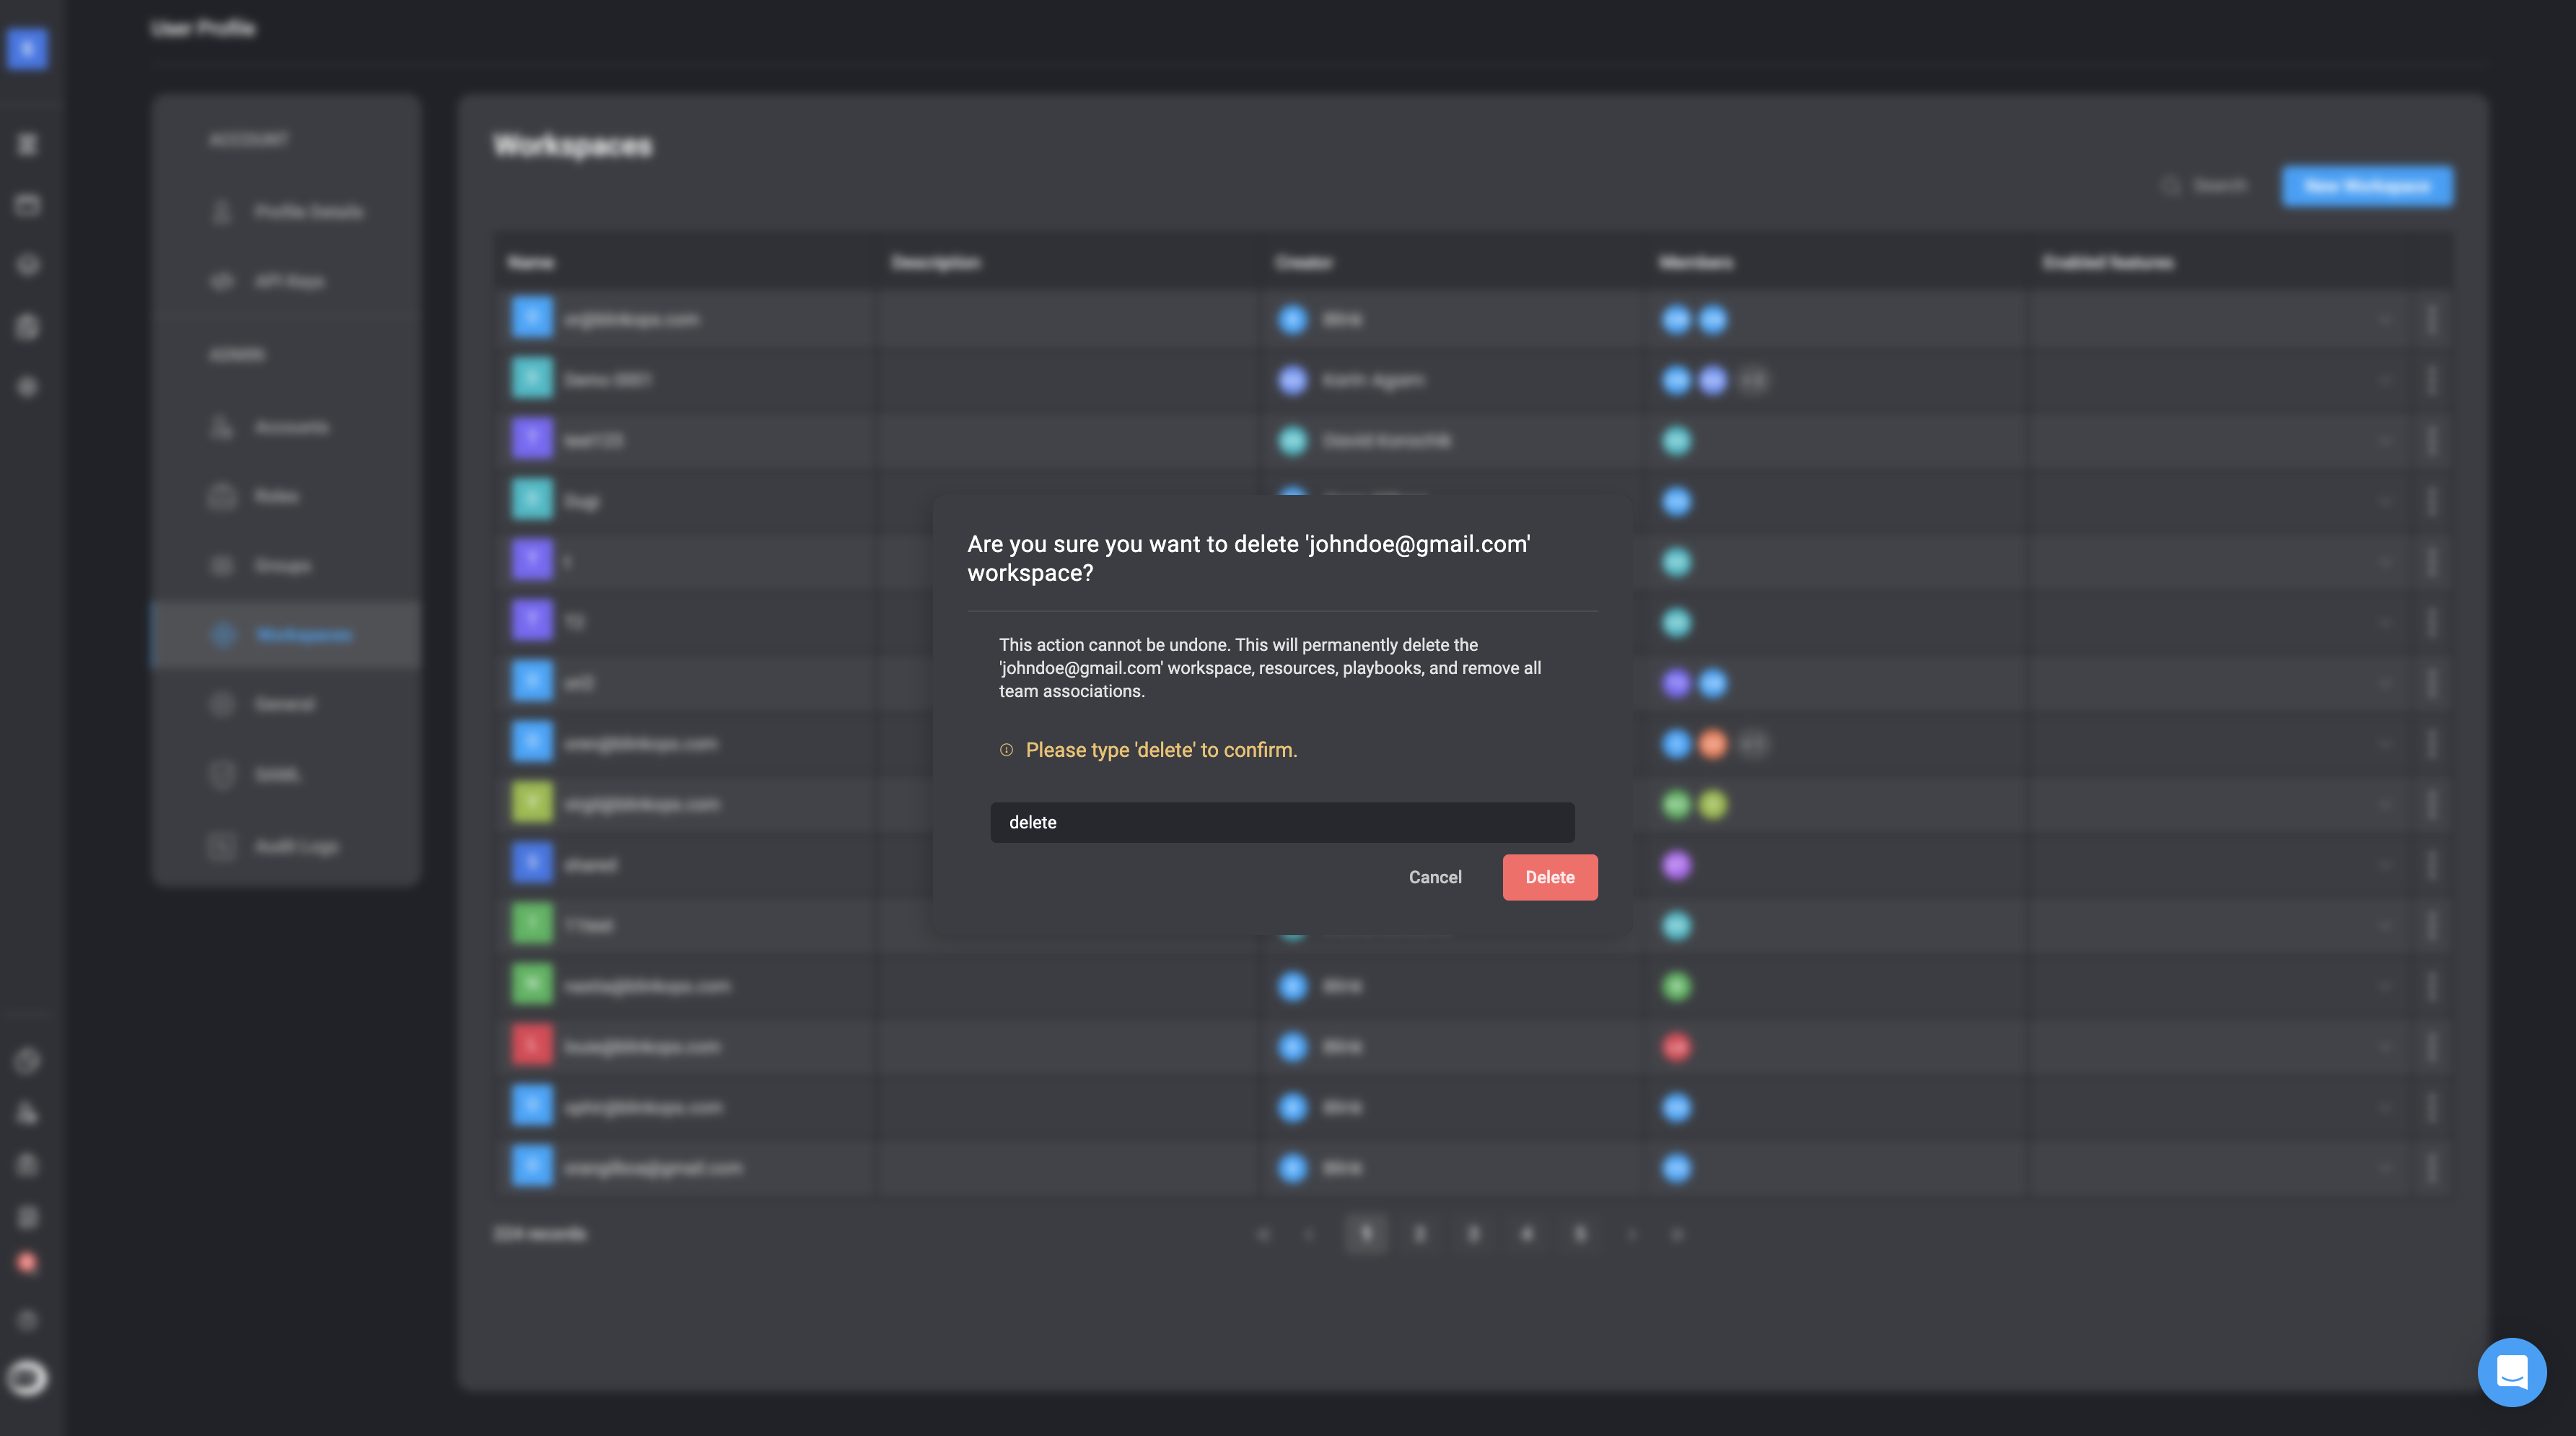
Deleting a Workspace
If you would like to delete a Workspace from the table, click on the icon on the right-hand side of the row and select the delete option.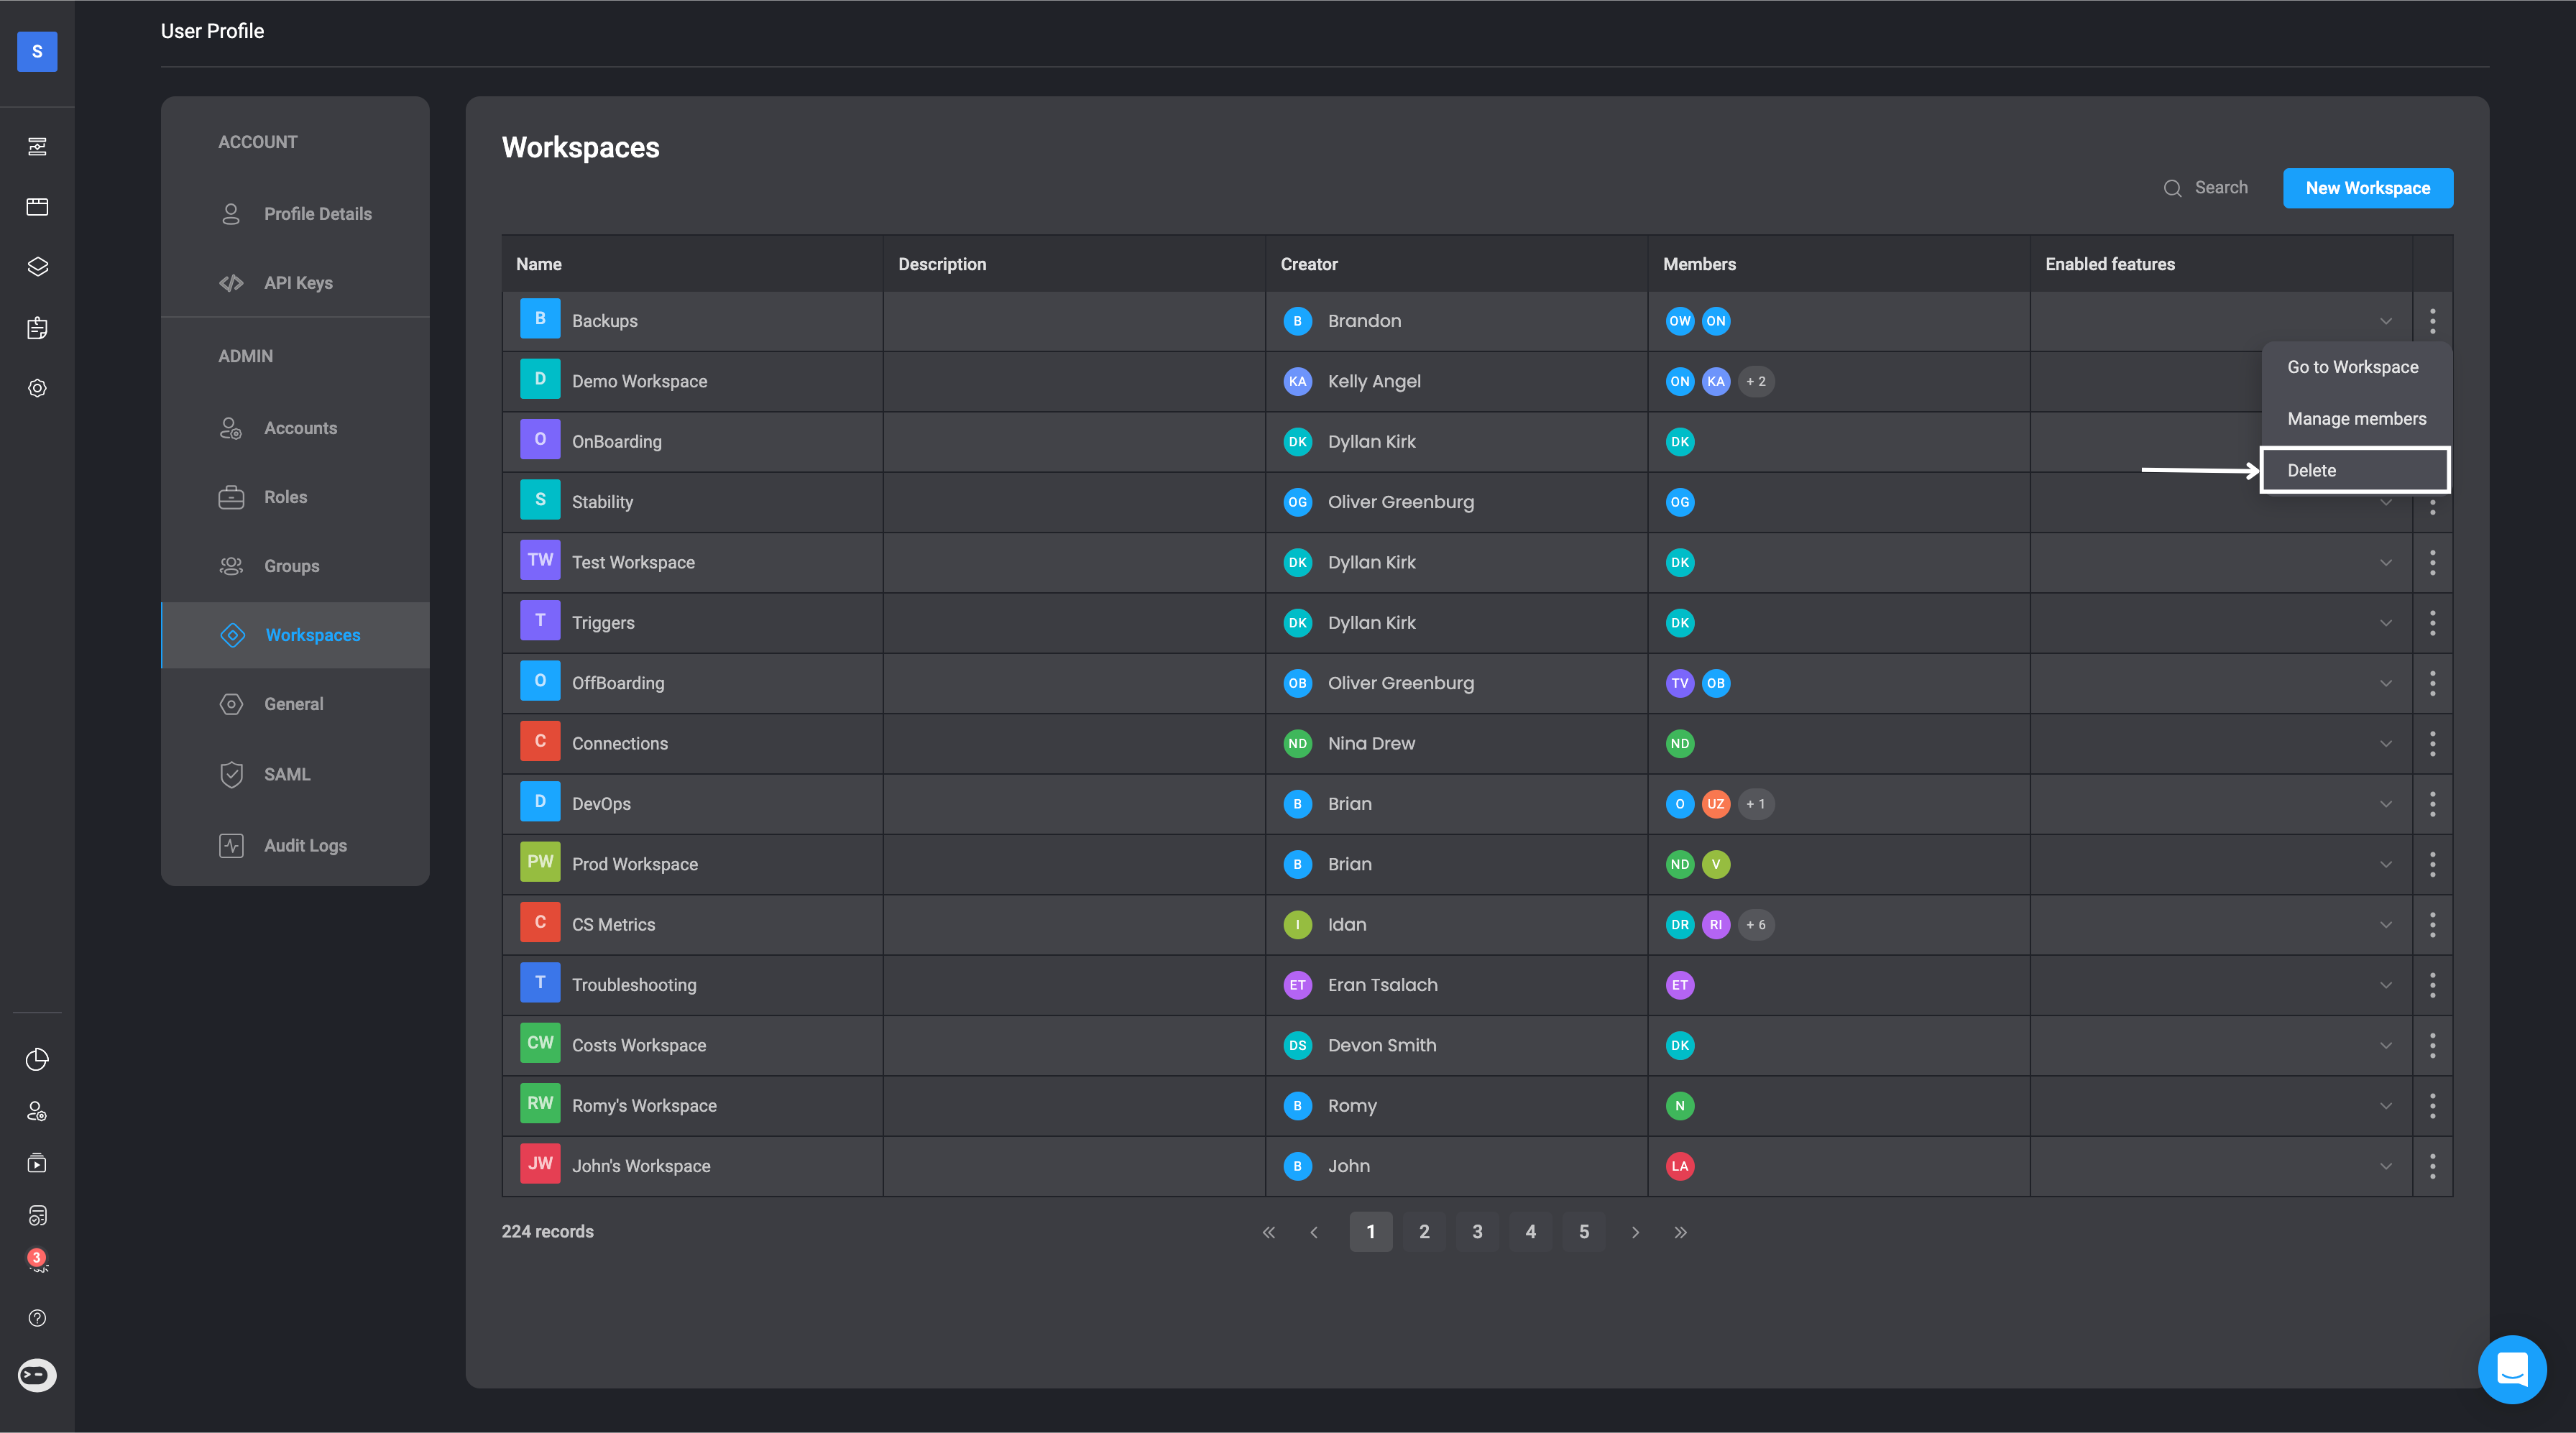
A popup box will appear asking you to type “delete” to confirm the removal of the selected workspace.