Prerequisites for Runner Group Installation
- The original Runner installation key that was used in the installation of the first Runner in the group (the Runner which you want to scale)
- If an external secret manager is used, all Runners must be configured with the same secret manager configuration
- If internal network resources are used by the Runners, all Runners must be capable of reaching these resources through their network configuration
Reasons for Installing Multiple Runners
- Redundancy:If a Runner isn’t reachable or isn’t available, having more than one configured Runner will decrease the chances of Workflow downtime.
- Scale: If a single machine/container with a Runner cannot handle the amount of executions, having more than one Runner installed results in load-distribution between the installed Runners.
- Isolation: Installing multiple Runners allows you to isolate workloads based on environments (e.g., staging vs. production), teams, or use cases. This ensures sensitive workflows don’t share execution environments and helps with compliance or audit requirements.
- Geographic Proximity: Deploying Runners in different regions can reduce latency when interacting with region-specific services or APIs, improving overall workflow performance and responsiveness.
- Maintenance Flexibility: With multiple Runners, you can take individual Runners offline for upgrades or maintenance without affecting workflow availability, ensuring continuous operation.
Balancing the Load within a Runner Group
When you first deploy a Docker or Kubernetes Runner Group, it includes only a single runner instance by default. To improve performance and ensure better load distribution, it’s recommended to add multiple runner instances to the group.How to Add Additional Runner Instances in Docker
- Use the same deployment command provided by Blink during the installation of the first runner.
- Deploy each new runner on a separate machine to ensure effective workload distribution.
- Because all instances use the same authentication key, they will automatically join the existing Runner Group.
How to Add Additional Runner Instances in Kubernetes
- In Kubernetes, set the runner hpa and plugins hpa to ‘true’
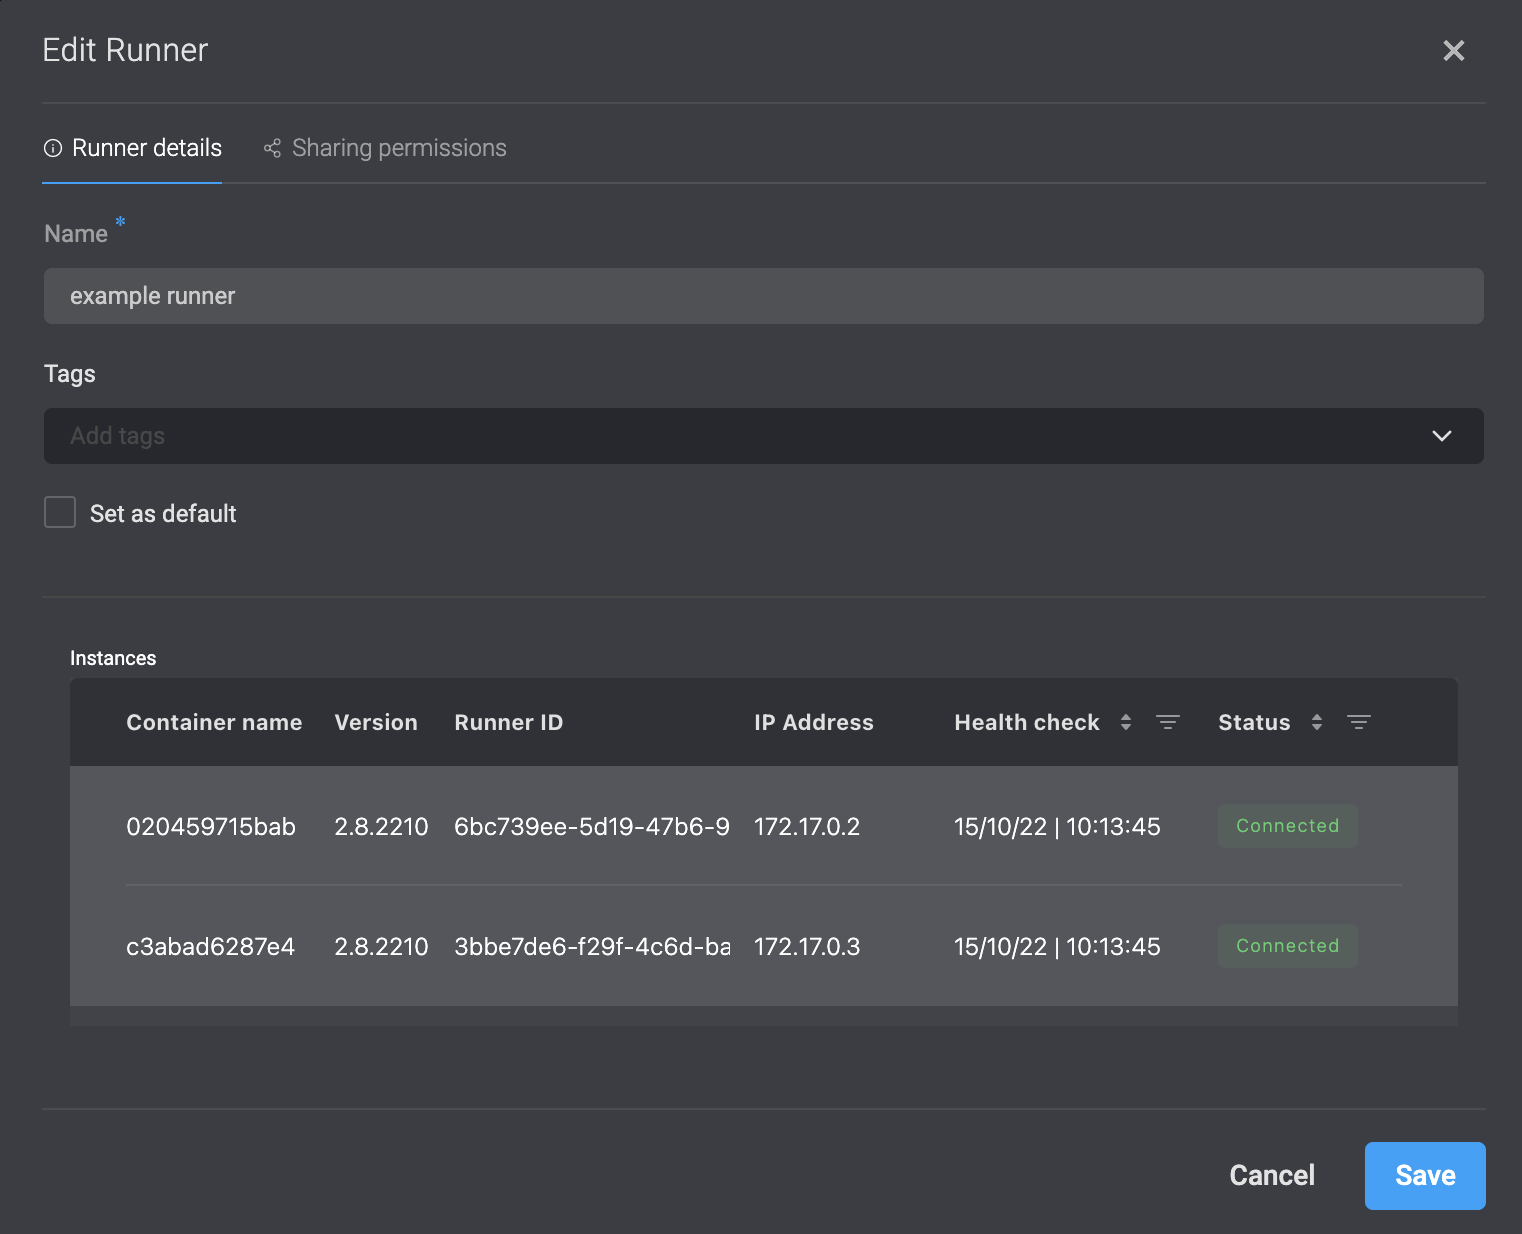
Viewing the Number of Instances in a Runner Group
1. Click the on the runner and select Edit. A dialogue box opens.
- Under Instances, you can see a list of instances and their status, that are used in the runner group.
Scaling up a Runner Group in Docker
Retrieve the Current Runner Installation Key
Identify the Runner you want to scale and ensure you have access to the Runner installation key used during its original setup.
- In the Blink platform, navigate to your workspace > Runners > New Runner.
- Select Docker Runner
- In the command, replace the key value with the same key that was used during the initial setup.
Flow Diagram - Scale with Kubernetes/Docker Runners
This diagram displays top-down flow of scaling plugins where a central Controller passes an action(s) to the runner groups (eg. Kubernetes Runners or Docker Runners), and one of the runners within the group will be randomly assigned the action. Each Runner can then leverage different types of plugins—here, an HTTP Plugin for handling HTTP requests and responses, and a Core Plugin for CLI and code functionalities. The Controller orchestrates execution by assigning work to the runner group, which in turn utilize the appropriate plugin to complete their specific actions.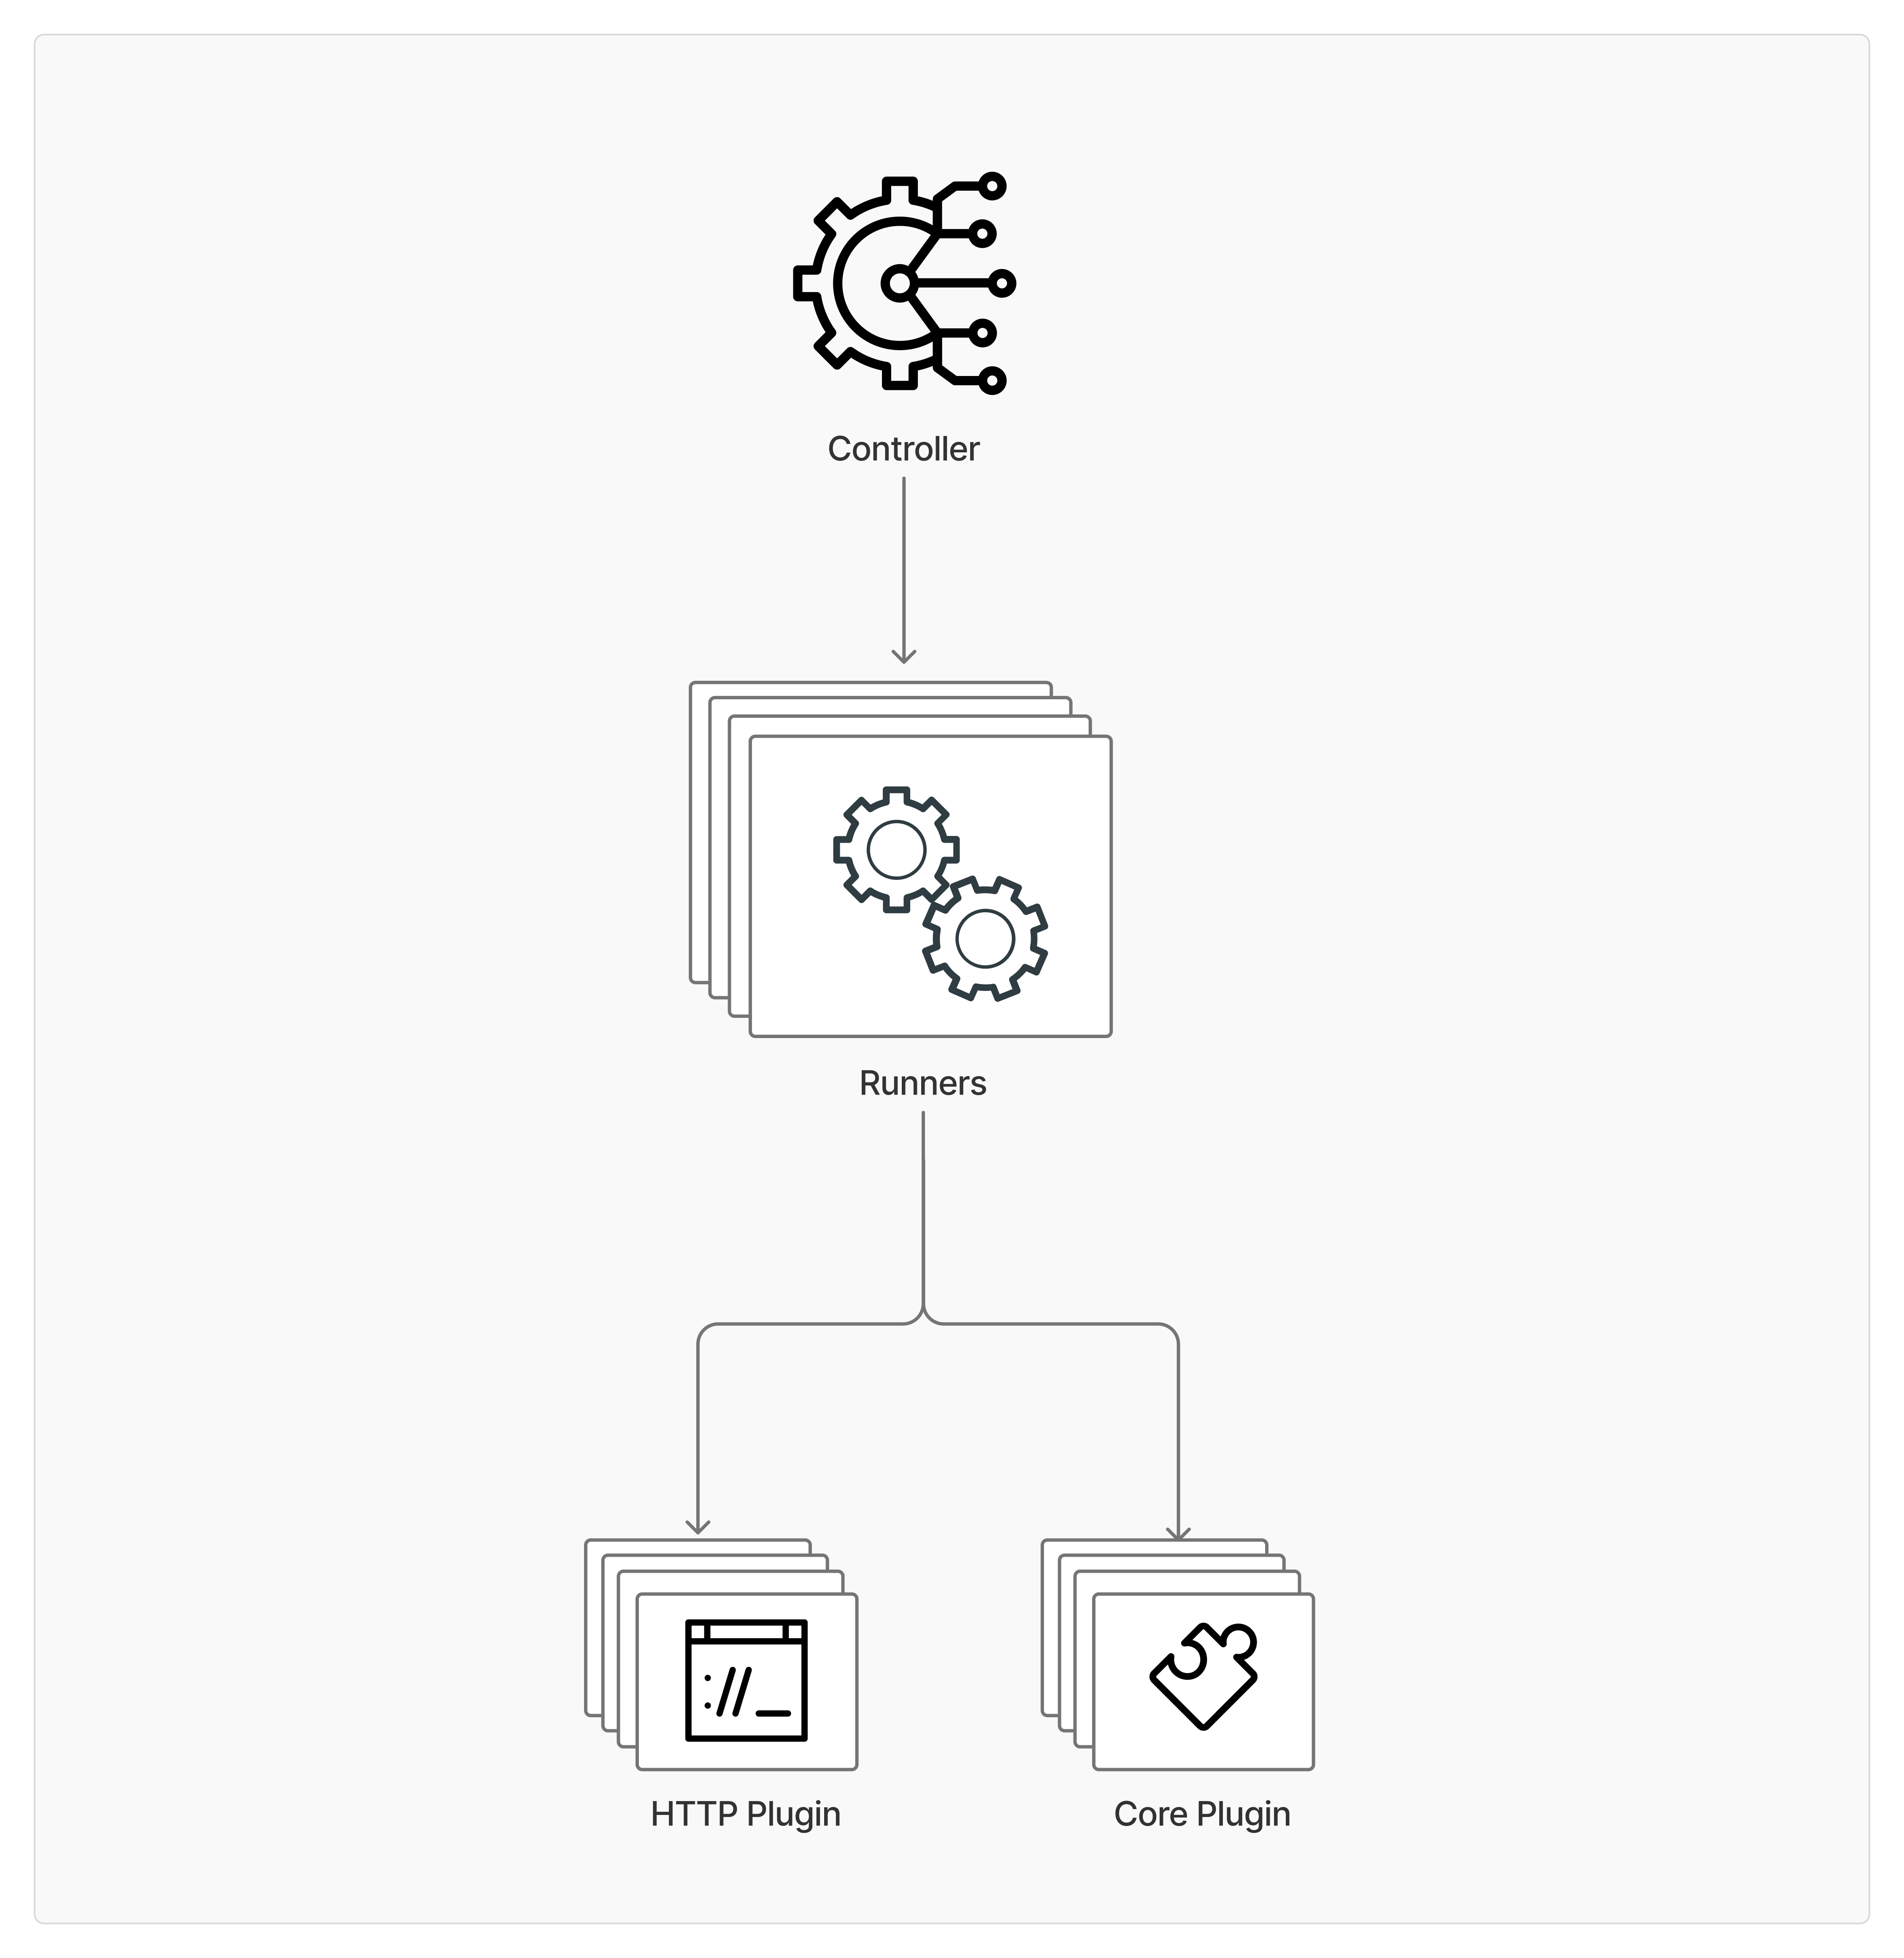
Related Articles
Runners
Learn about Runners and how they work in the Blink platform.
Deploying a Runner with Kubernetes
Guide to installing, configuring and deploying a Runner using Kubernetes
Deploying a Runner with CloudFormation
Guide to installing, configuring and deploying a Runner using CloudFormation
Deploying a Runner with Docker
Guide to installing, configuring and deploying a Runner using Docker