

Prerequisites
- Docker Engine: Install and start Docker Engine on the host.
-
At least 40 GB of available disk space: The file system that stores Docker data must have at least
40GBof free space for the Runner and plugin images. Check the available space on the Docker data file system:In the output, confirm that theAvailvalue is at least40G. -
Docker Hub authentication: Authenticate before deployment to prevent rate limits, TLS handshake timeouts, or image pull failures:
-
Blink permissions: Your Blink user must have the Owner role, Contributor role, or a custom role with the
runners:viewandrunners:editpermissions.
Network requirements
Before deploying the Runner, verify the following:- Container communication: If the host uses a hardened firewall configuration, allow Docker containers to communicate with each other. Docker assigns ports dynamically, so the rule must permit internal container-to-container traffic rather than a single fixed port.
- DNS resolution: Confirm that every DNS server configured on the host resolves external addresses correctly.
- Outbound HTTPS: Allow the Runner to connect to Blink services and Docker Hub over port
443. See Runner network requirements for the required destinations.
Deploy the Runner
1
Navigate to the Runners page
In the Blink console, select Runners in the left navigation, then click New Runner.
2
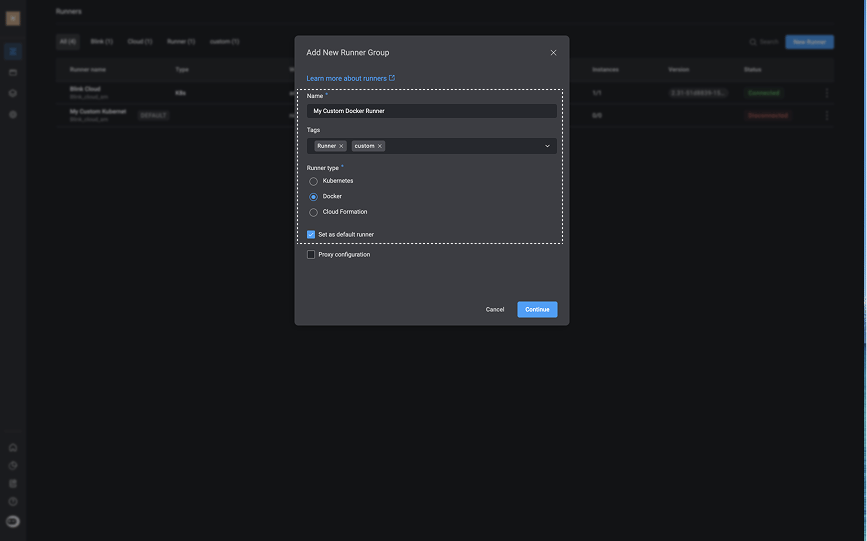
Configure the Runner Group
- Runner types: Docker
- Name: Enter a name for the Runner group.
- Tags: Add or create tags (optional).
-
Set as default runner: Check this box to set this Runner group as the default. When enabled, any workflows that do not explicitly specify a Runner group will automatically be assigned to this one.
-
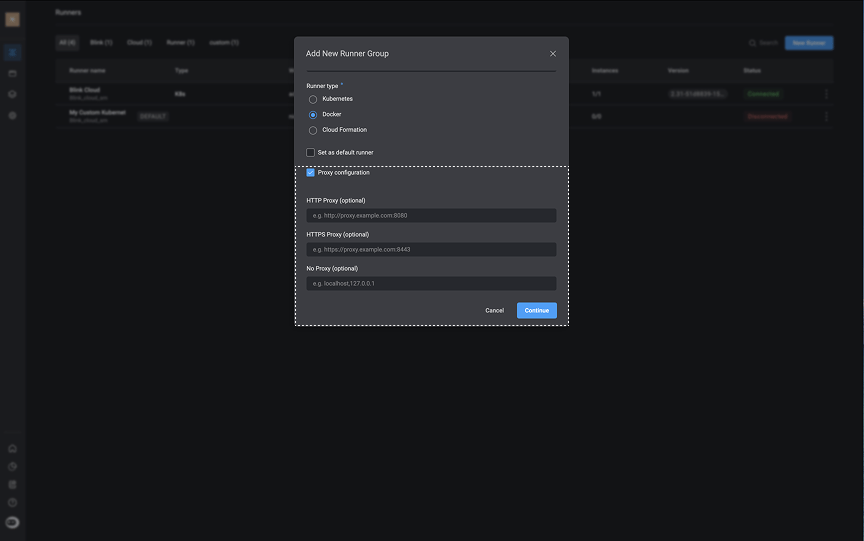
Proxy Configuration: When enabled, it allows you to configure a proxy server that all runners in the runner group will use for outbound network traffic. This enables secure, controlled access to external resources through your organization’s network.
- HTTP Proxy (optional)- eg.
http://proxy.company.com:8443 - HTTPS Proxy (optional)- eg.
https://proxy.company.com:8443 - No Proxy (optional)- eg.
localhost,127.0.0.1Note: If you enable ‘Proxy Configuration’ and configure the proxy settings, they will automatically be included in the installation command shown in the next steps.
- HTTP Proxy (optional)- eg.
3
Copy the installation command
Click the icon in the top-right corner of the command box.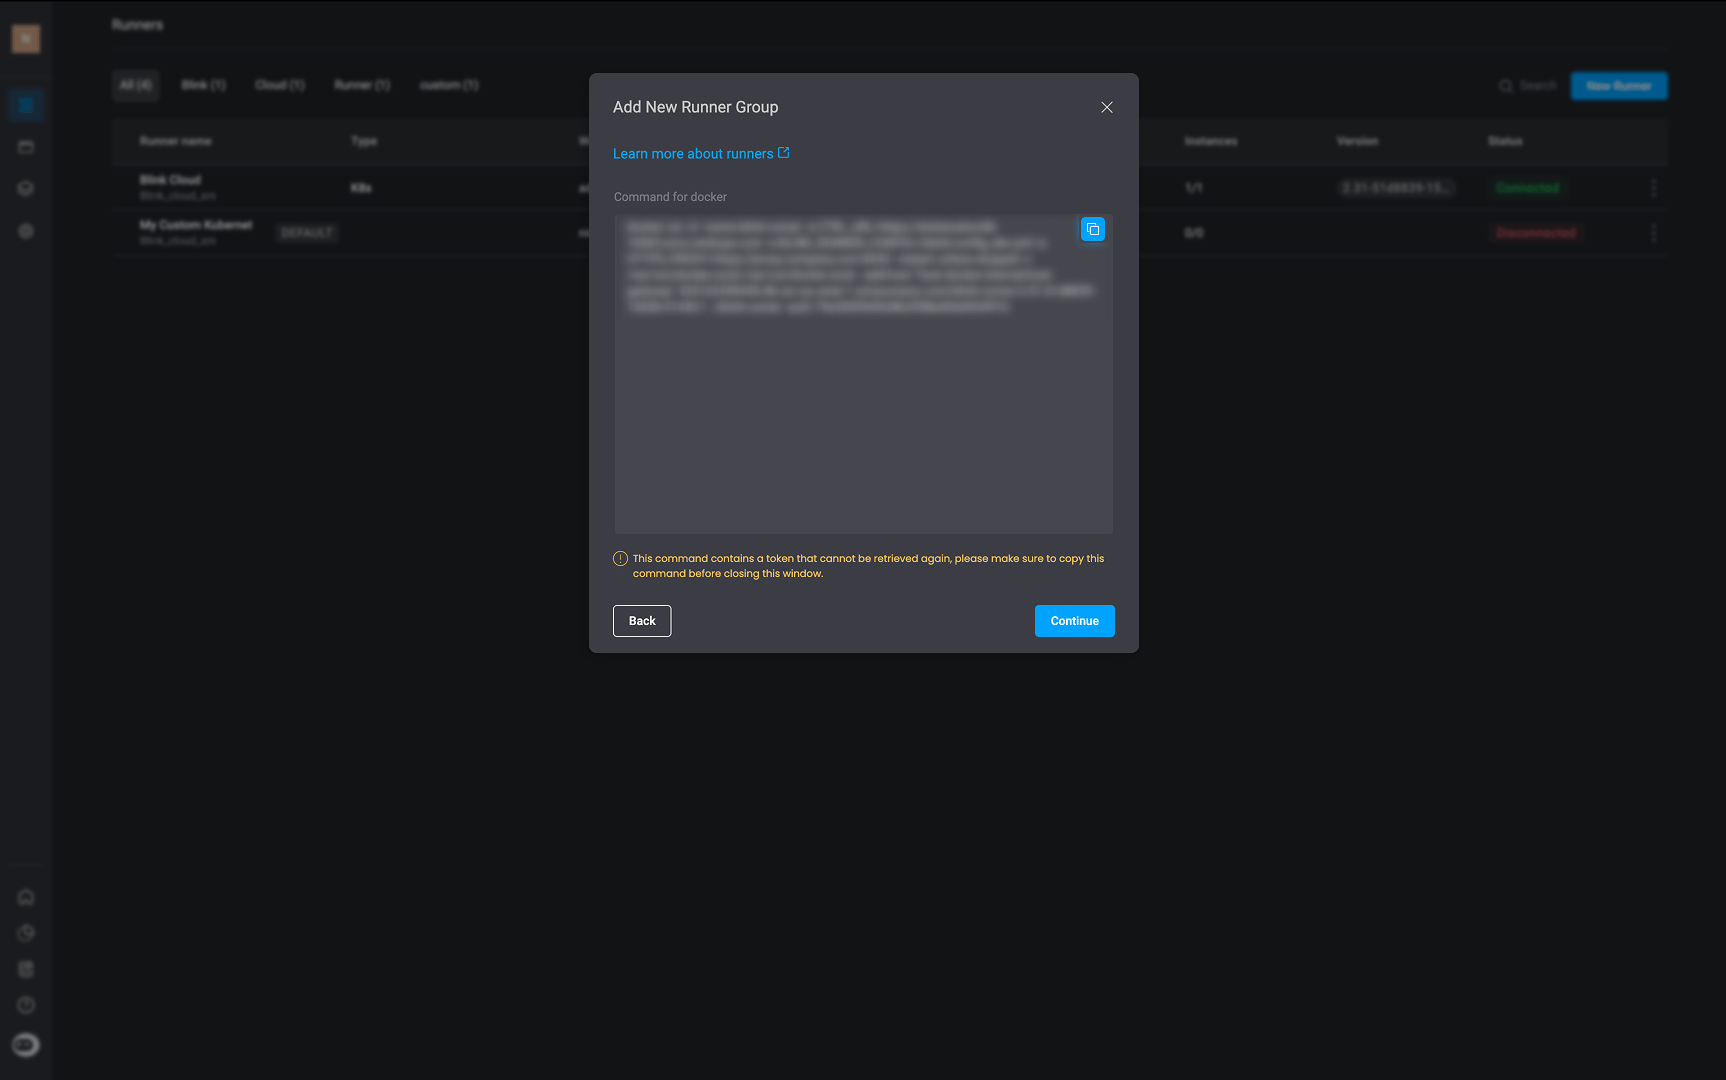
4
Run the installation command
On the Docker host, paste and run the copied command. Wait for the installation to complete, then return to the Runners page and confirm that the Runner status is Connected.
Related Articles
Balancing the Load within a Runner Group
Learn how to balance workloads across a Docker or Kubernetes Runner group.
Scaling up a Runner Group
Learn how to scale a Docker or Kubernetes Runner group.