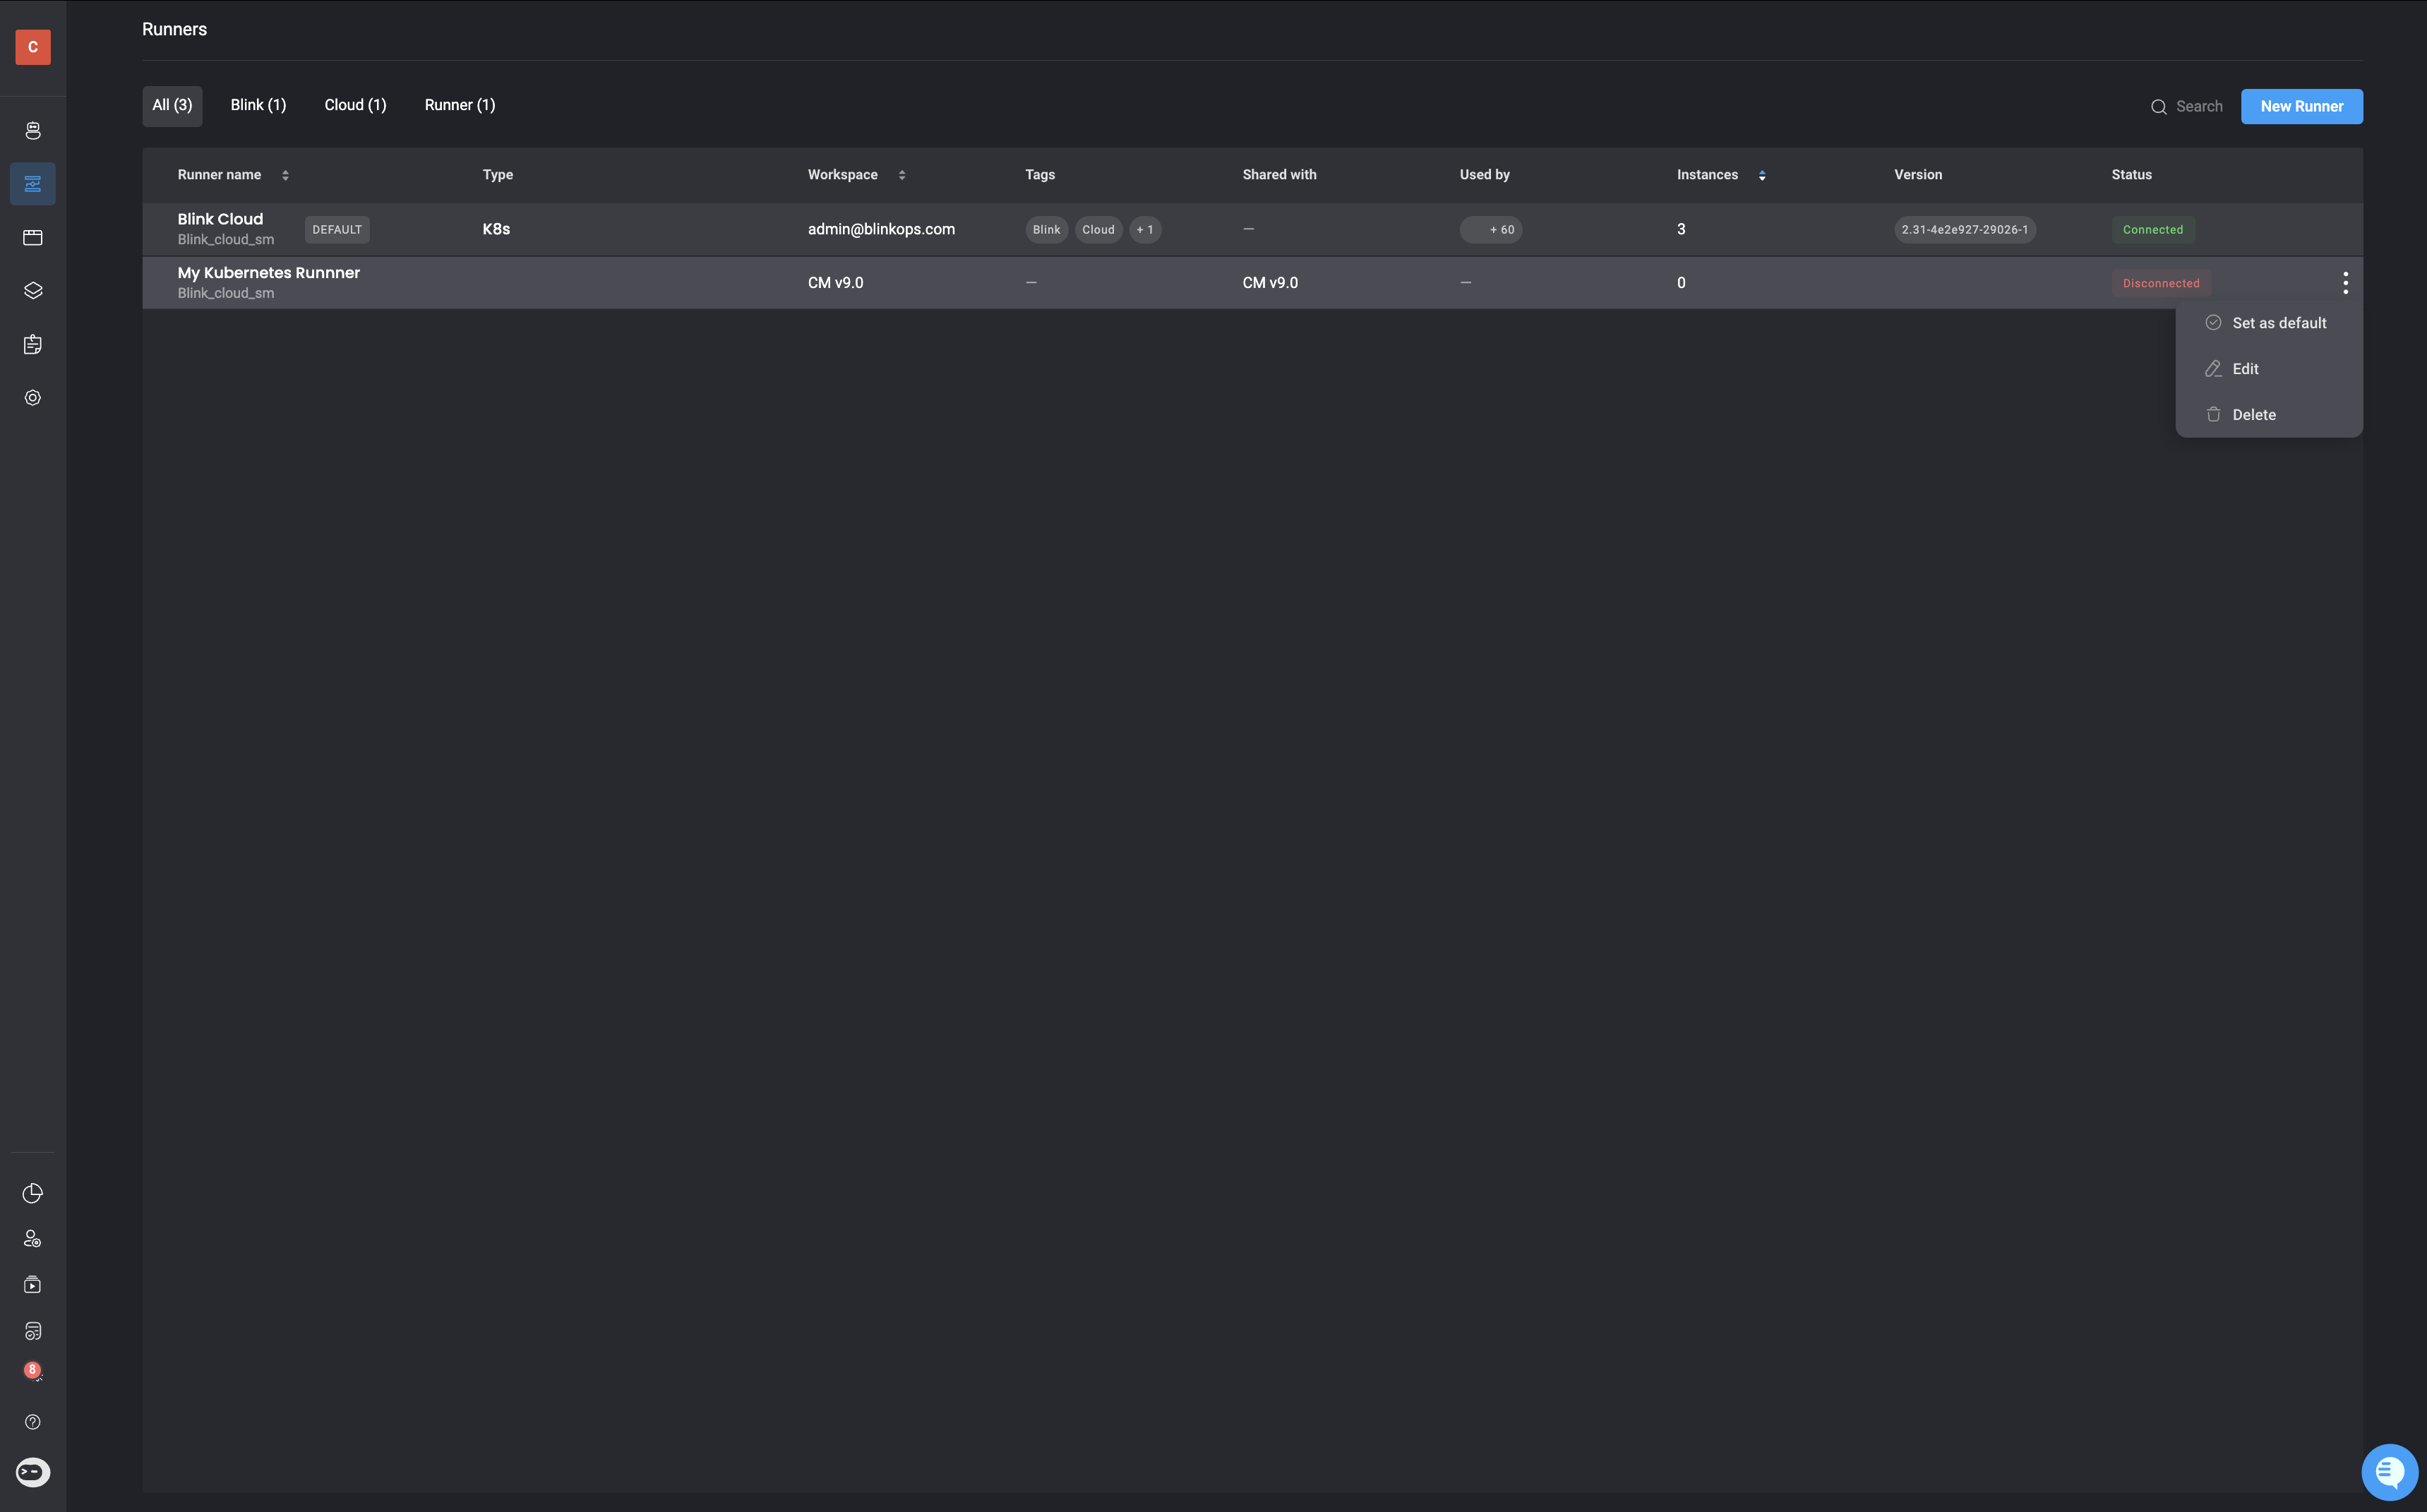
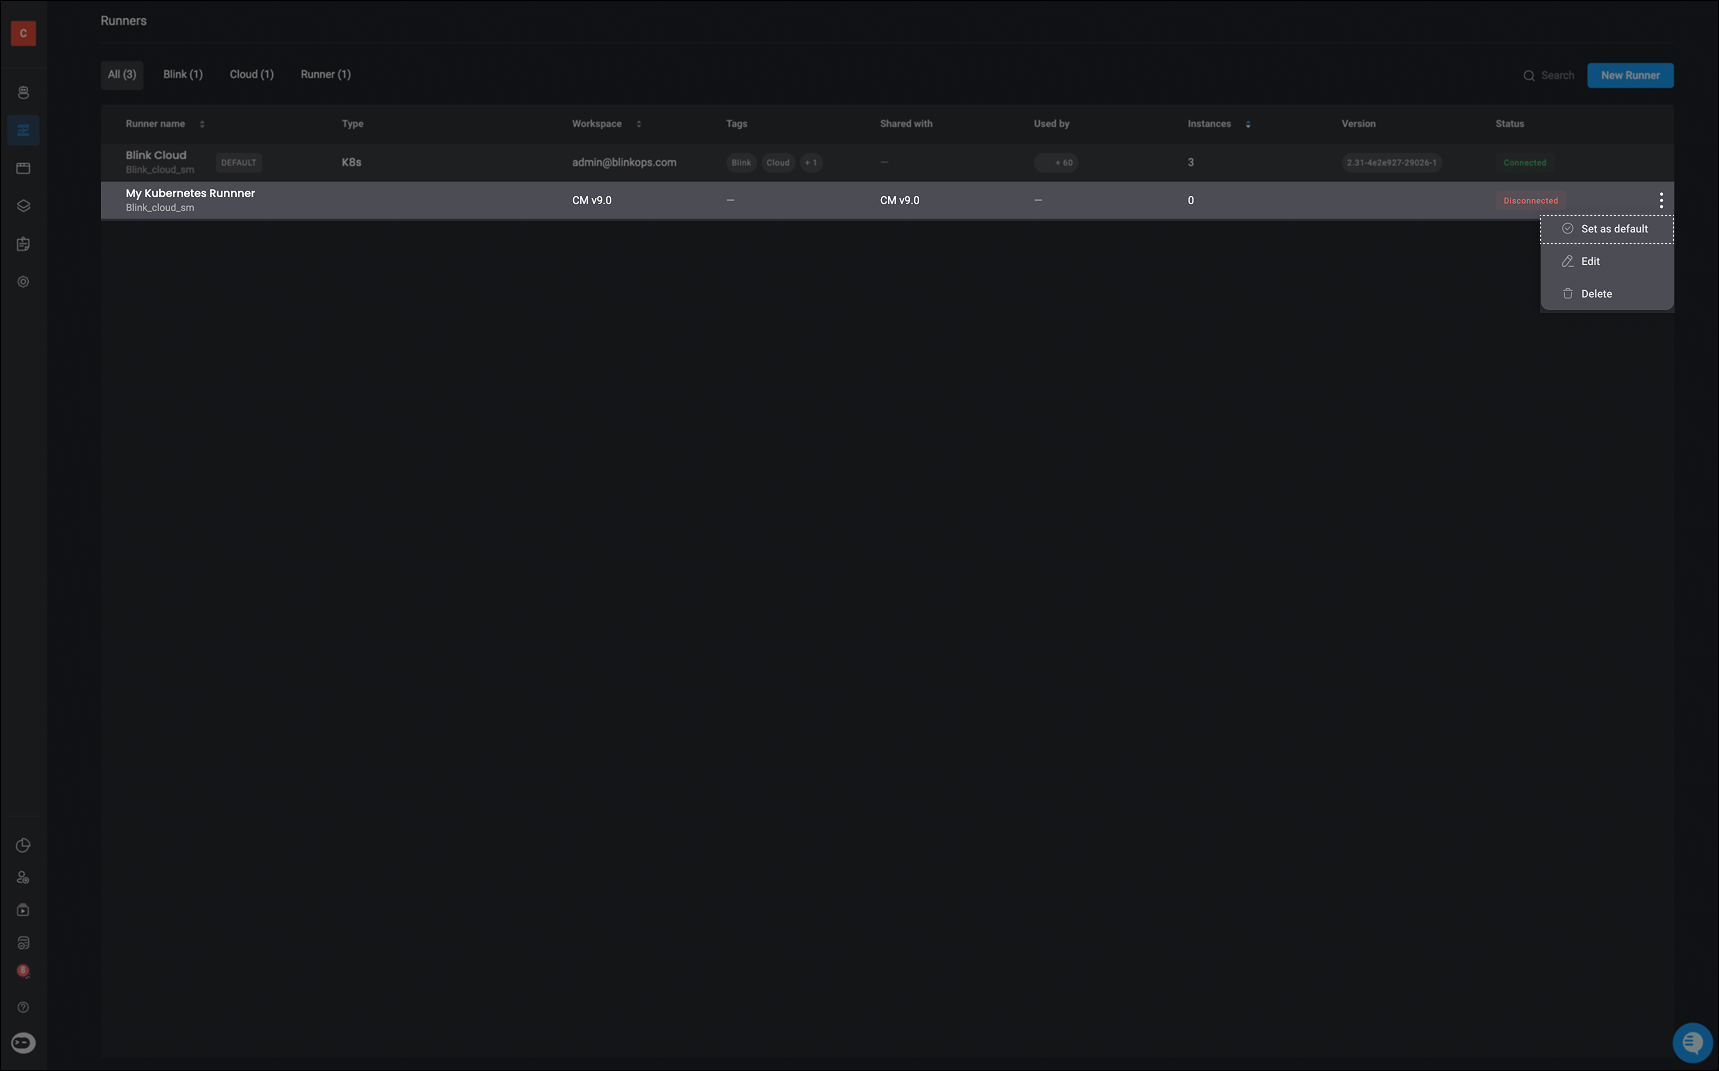
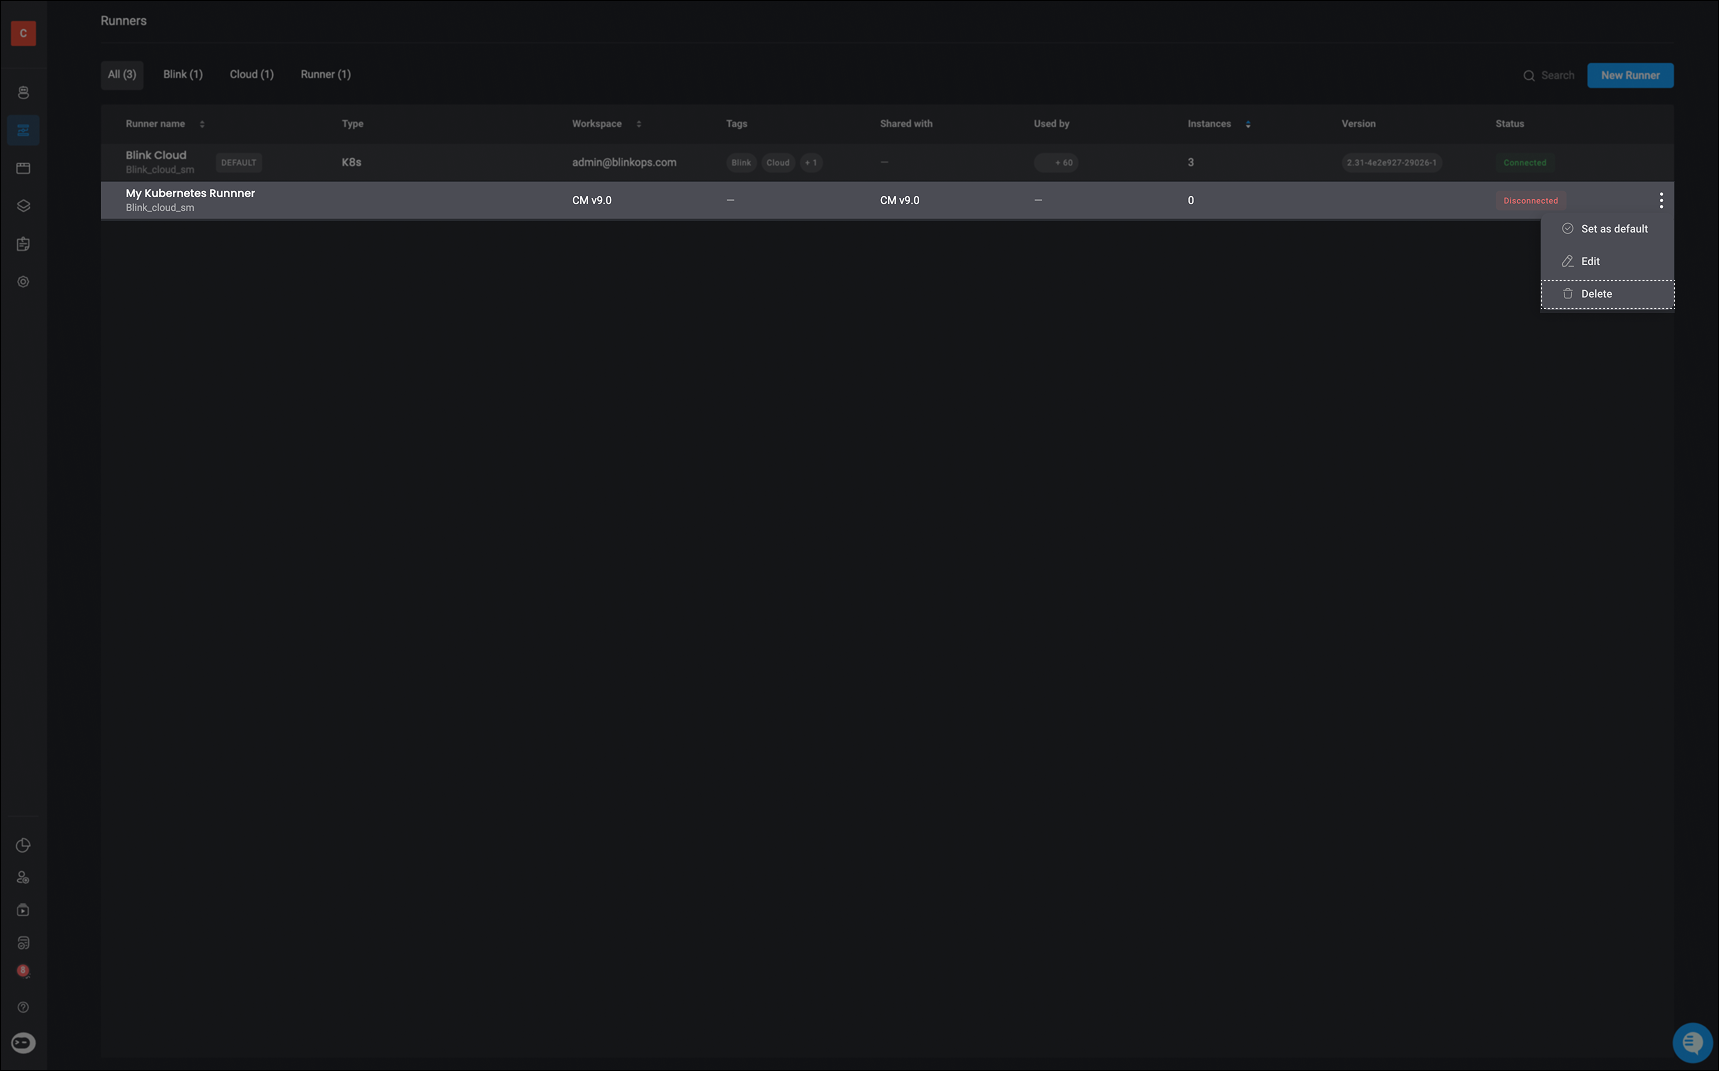
On the Runners Page, you can click the button beside a particular runner and then pick from these options: set as default, edit, or delete.
Set Runner as Default
Set Runner as Default
Blink Cloud Runner Group.To designate a different runner as the default, click the icon and select the “Set as Default” option.
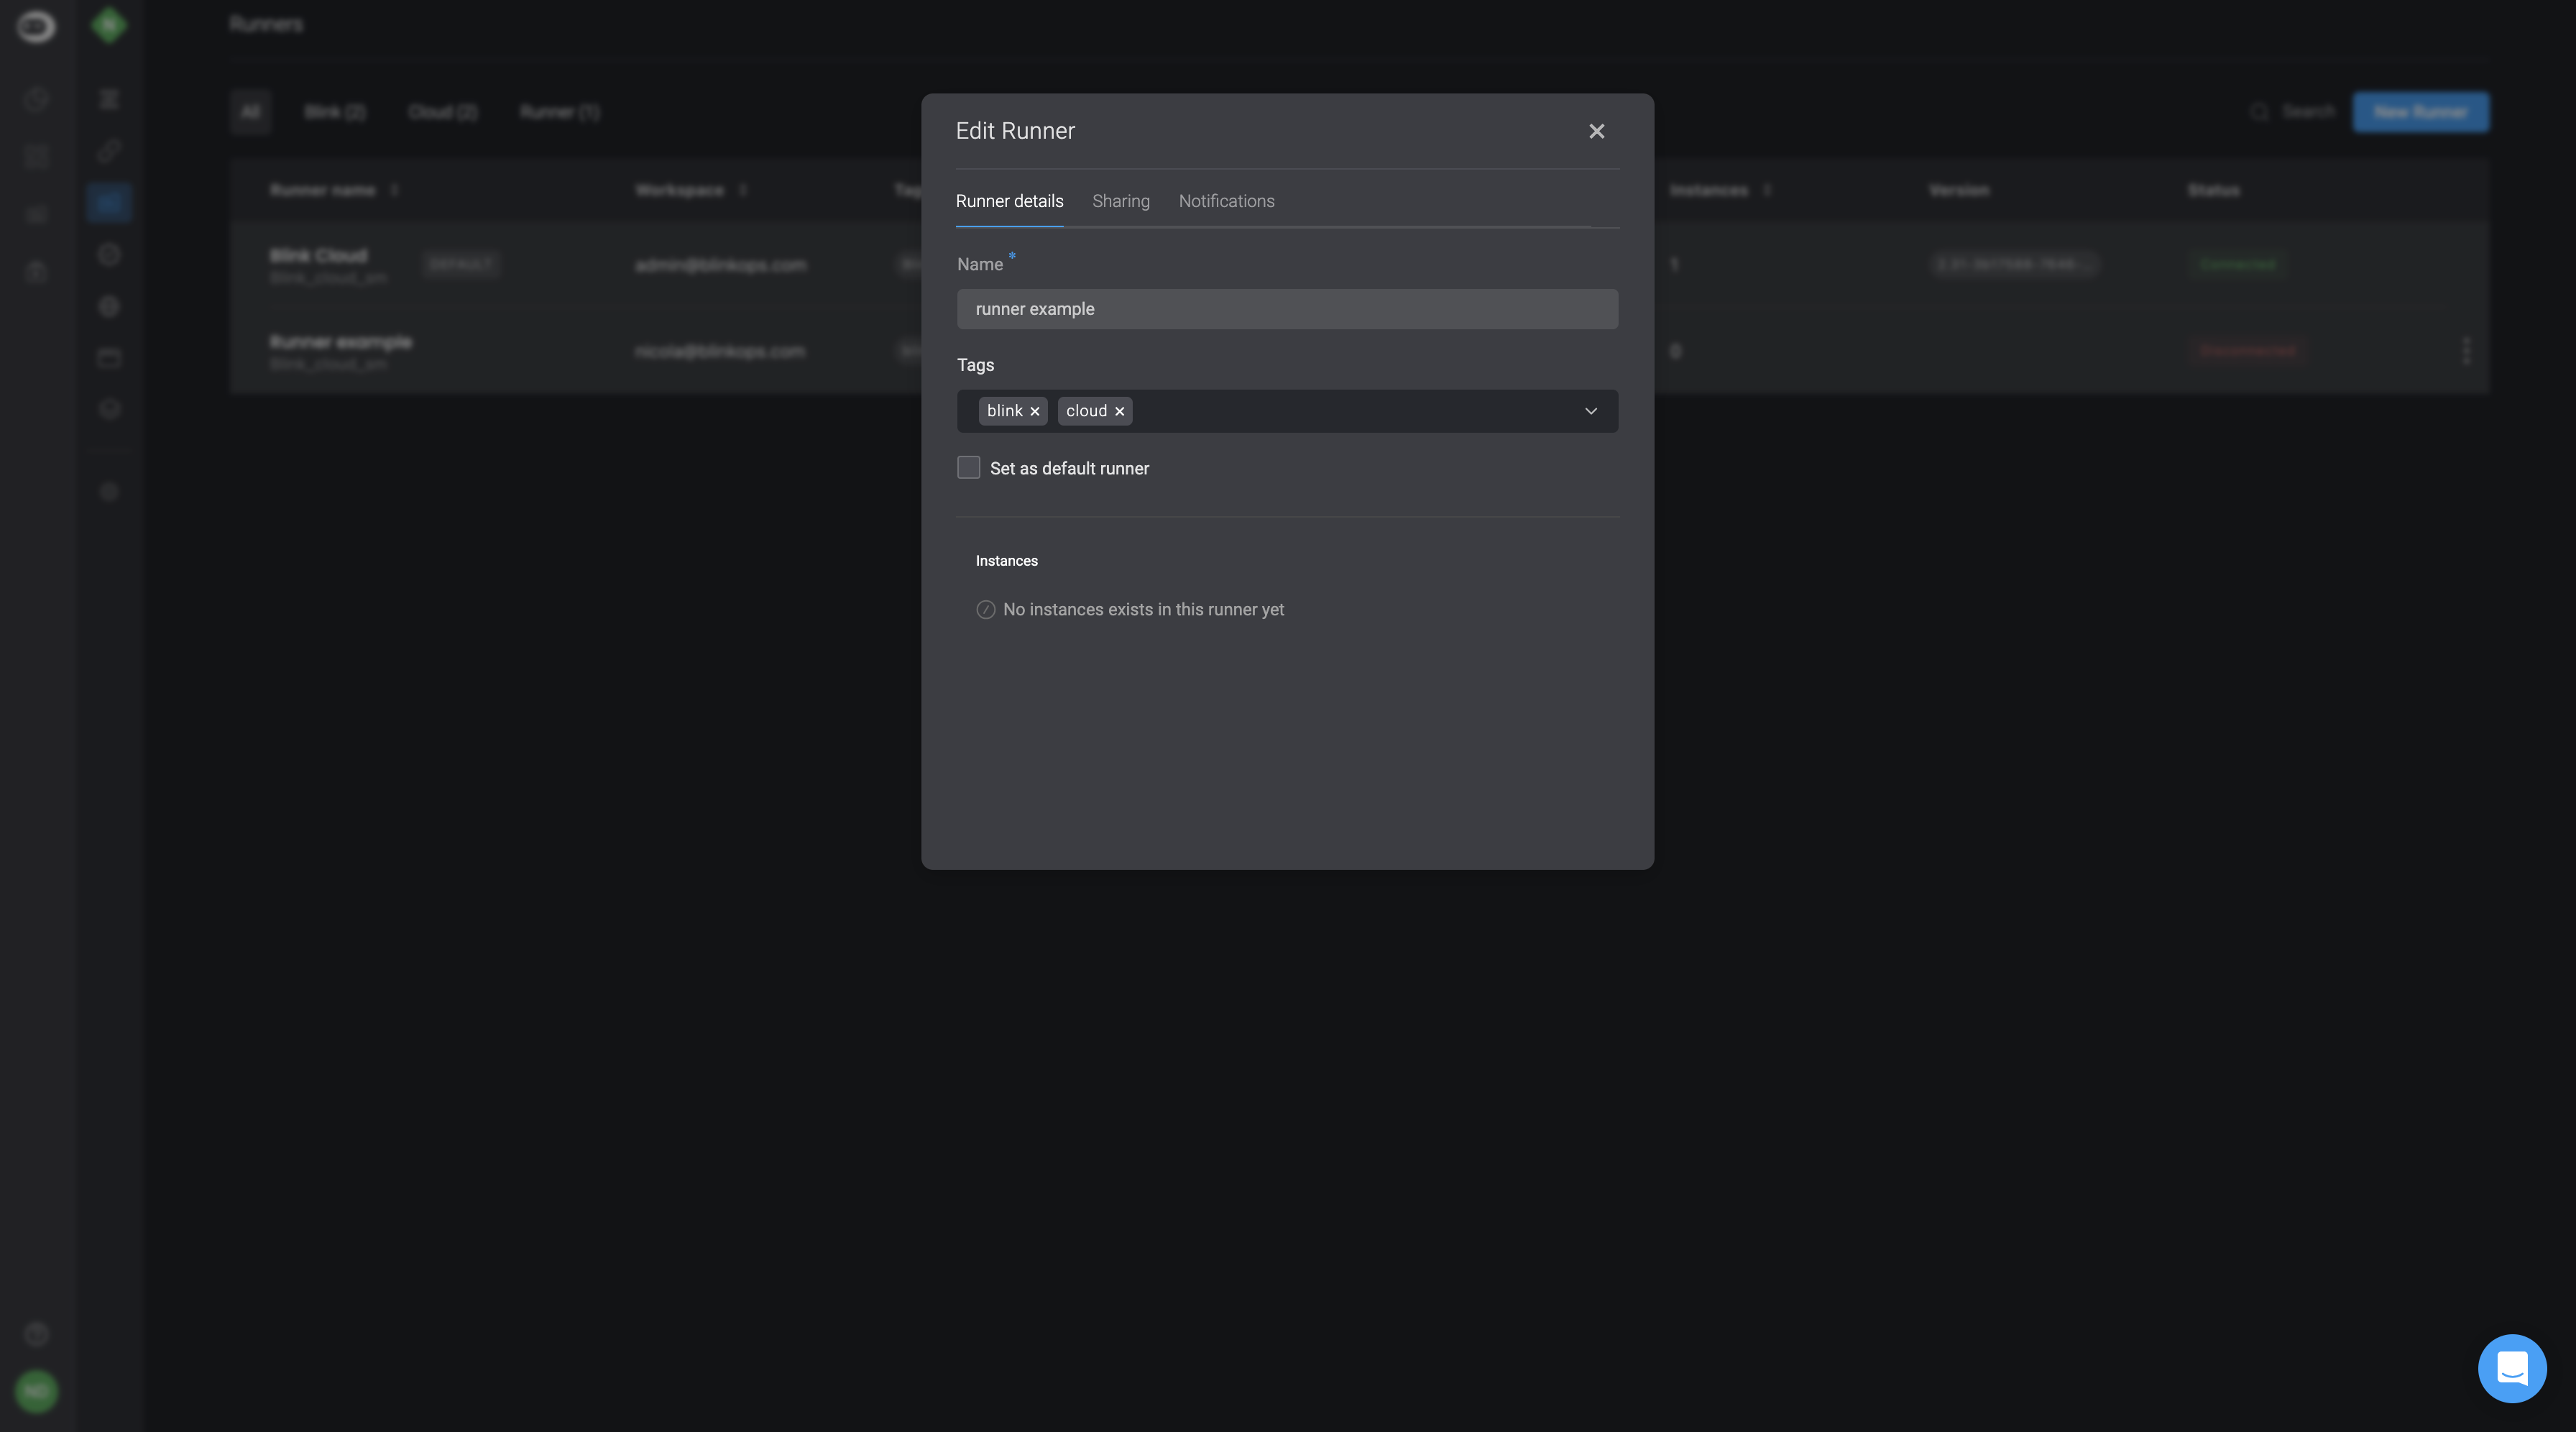
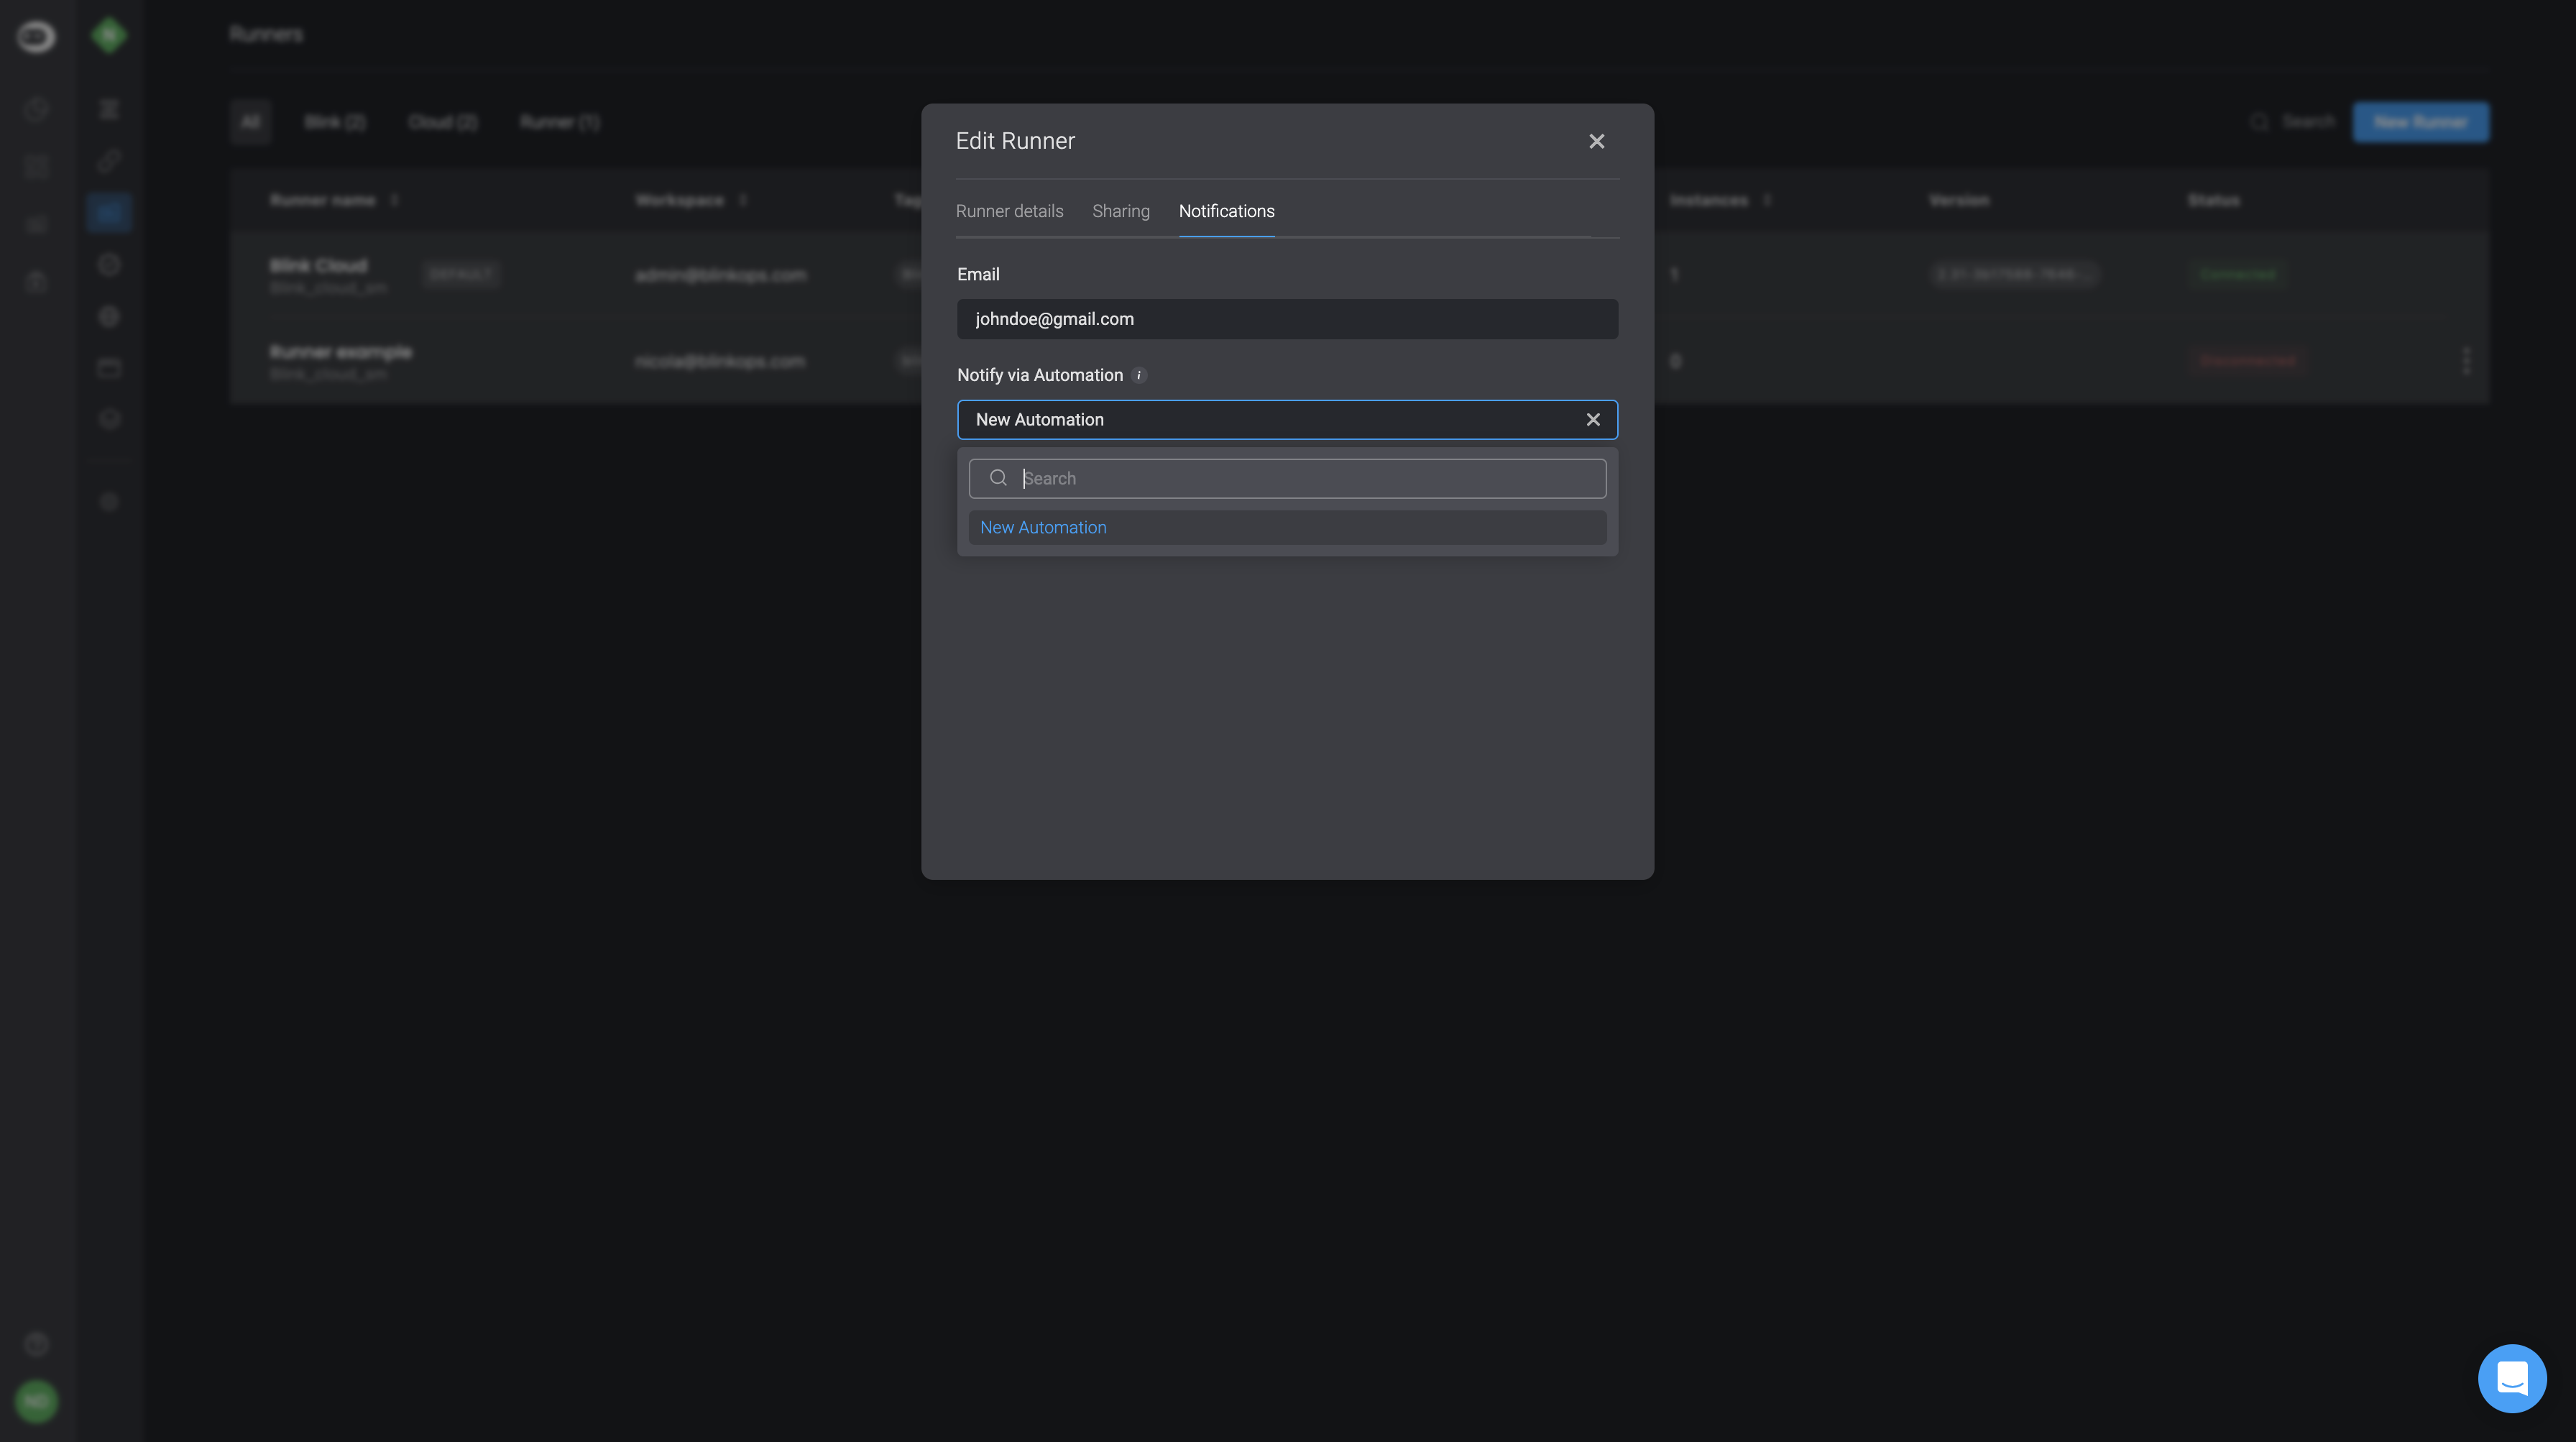
Edit Runner
Edit Runner

Updating a Runner
Updating a Runner
Disabling Auto-Update of a Runner
Auto-updating is enabled by default. To disable, do as follows:Option 1: Updating a Runner Manually
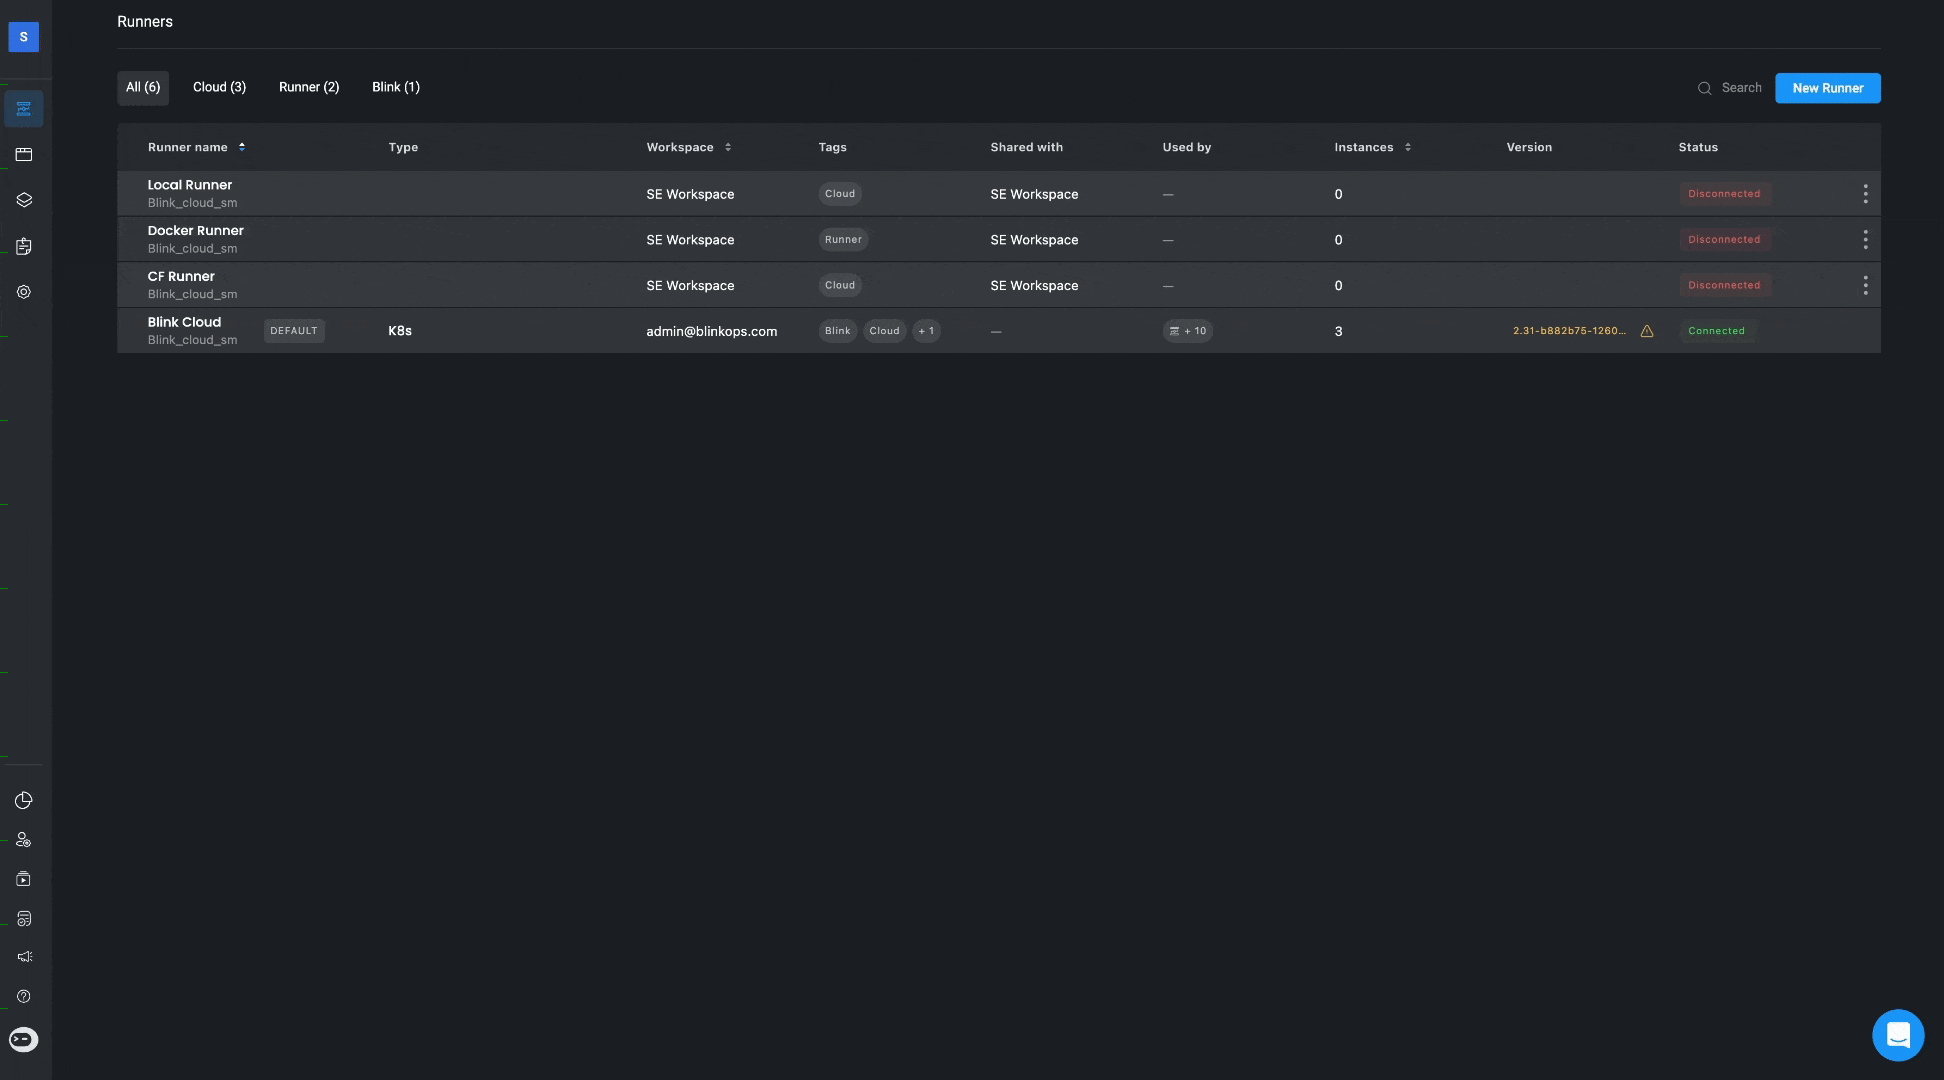
A runner can be updated manually from the Runners page. In the Version column, updated runners name and version appear in white, and runners that need to be updated have a warning sign next to their version.To see the status of the Runner, click > Edit. As the Runner is being updated, the status will change from Connected to Shutting down, and back to Connected.
Option 2: Manual Update via CloudFormation
To update a runner via CloudFormation stack configuration, assuming you have a runner that was deployed via CloudFormation, follow these instructions:Option 3: Updating a Runner via CLI
Kubernetes Manual Update via CLI
To update a Runner via the CLI in the Helm client, use the following command:Docker Manual Update via CLI
To update a Runner via the CLI in the Docker client, use the following command:Click on the three dot menu next to the Runner you would like to share.

Delete a Runner
Delete a Runner
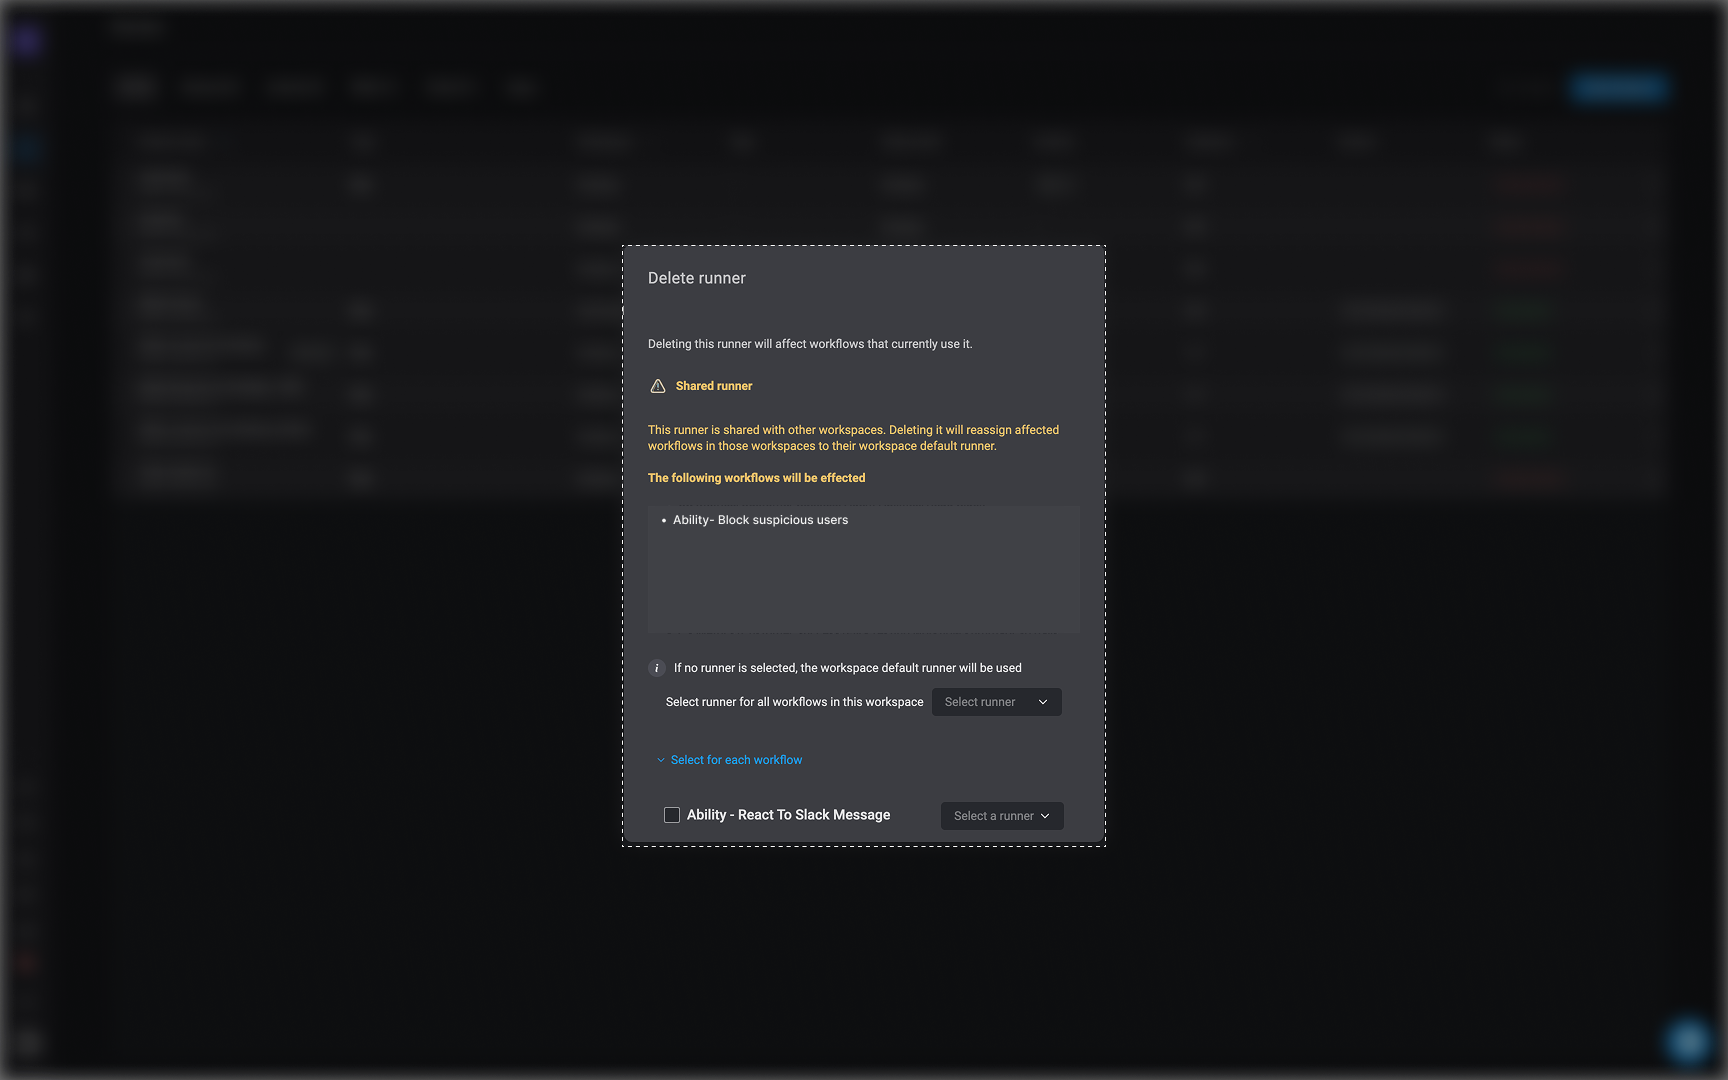
To delete a runner, click on the button next to the desired runner and choose the delete option.
- If no runner is selected, the workspace’s default runner will be used
- If you are trying to delete a runner that is shared across multiple workspaces, deleting it will automatically reassign any workflows using that runner in other workspaces to each workspace’s default runner.
The Runners Table
Runner Instances- Statuses
- Connected- The runner is online and operating normally, fully able to accept and process new actions.
-
Degraded- The runner is partially operational and may be experiencing limited connectivity, reduced capacity, or transient issues affecting performance.
-
How a Runner Becomes Degraded
-
Plugin Health Determines Runner Health
- If a plugin fails 3 times in a row, it is marked as Unhealthy.
- If a plugin successfully connects at least once, it is considered Healthy.
-
Runner Status Calculation
- If any plugin on a runner is unhealthy, the runner status changes to Degraded.
- This means the runner is partially operational and may have limited functionality.
-
Recovery Checks
- Health recovery checks run periodically to detect if previously unhealthy plugins have returned to Healthy status.
- If all plugins recover, the runner automatically returns to a connected/healthy state.
-
Runner Selection Logic
- When assigning tasks, the system prefers runners in the Connected state.
- Only if no fully healthy runners are available will tasks be routed to Degraded runners.
-
Plugin Health Determines Runner Health
-
How a Runner Becomes Degraded
-
Disconnected- The runner is no longer connected and cannot process actions.
- Disconnected runners are automatically cleaned up every
10 minutes.
- Disconnected runners are automatically cleaned up every
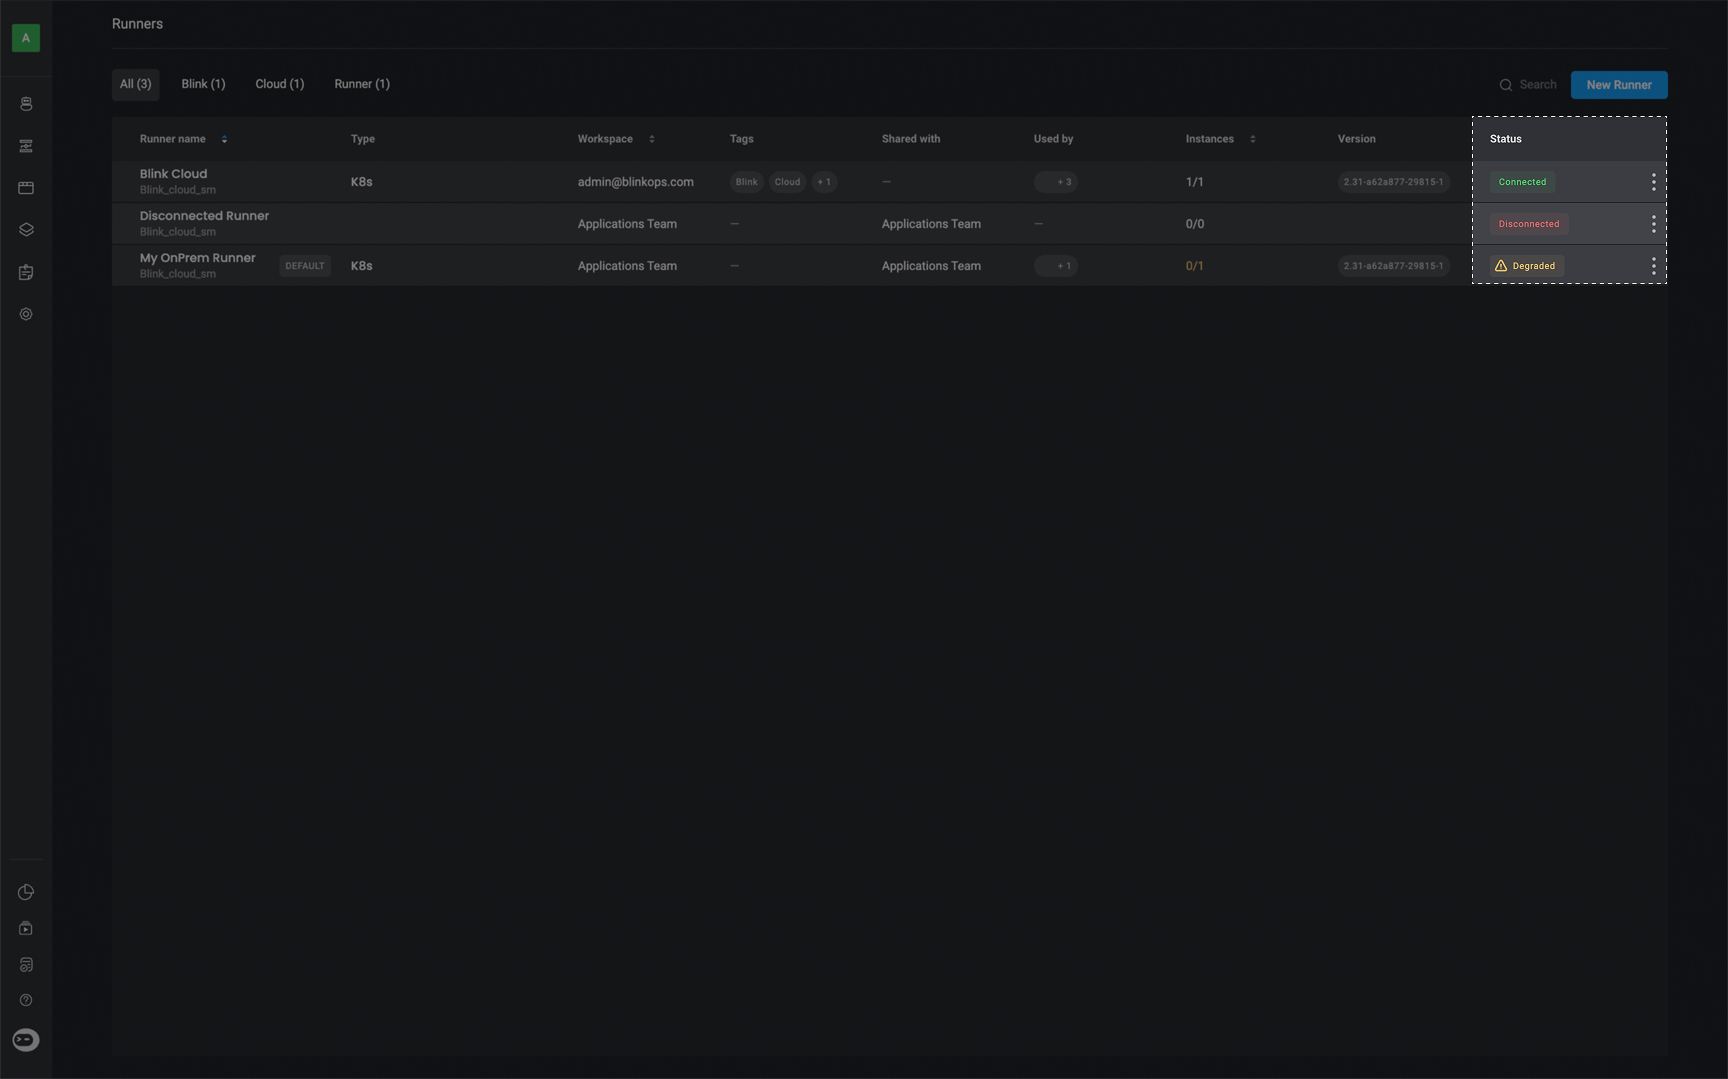
Runner Group – Statuses
Number of instances: Displays the number of connected instances out of the total number of connected + at-risk instances.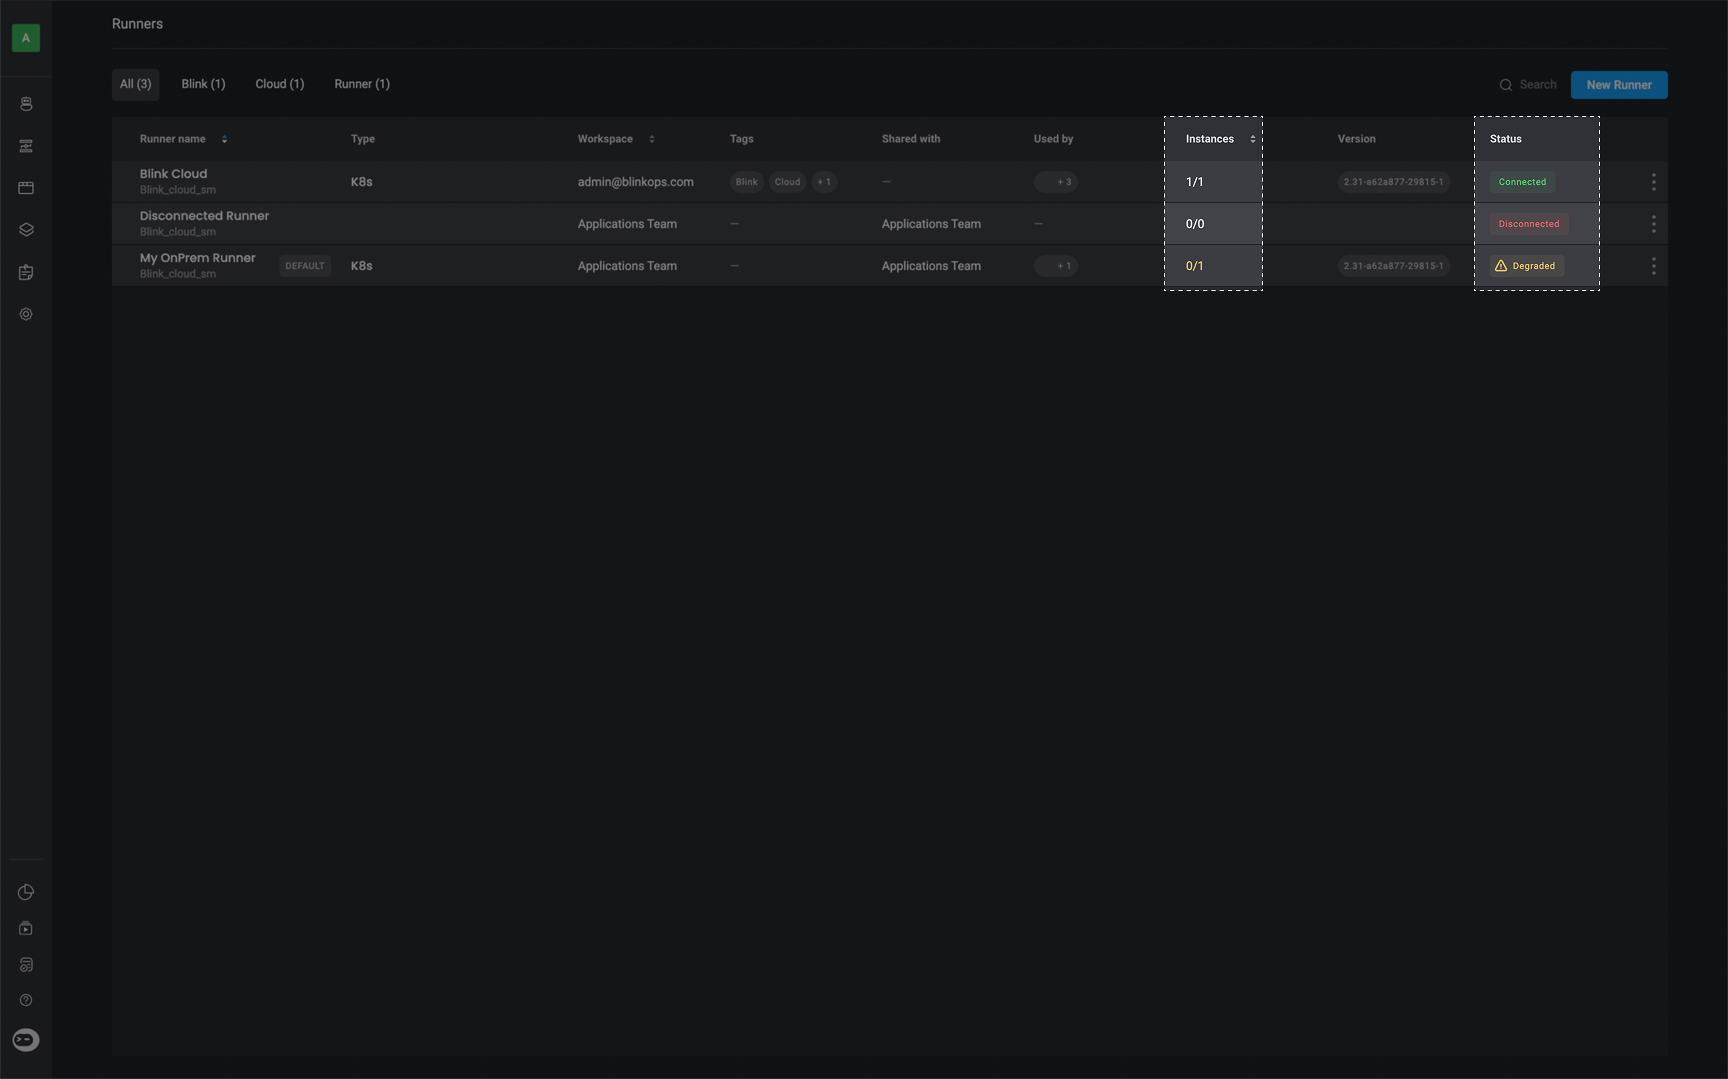
- Connected- At least one runner instance is currently connected.
- Degraded- No runner instances are connected, but one or more instances are in a degraded (at-risk) state.
- Disconnected- No runner instances are connected or at risk.
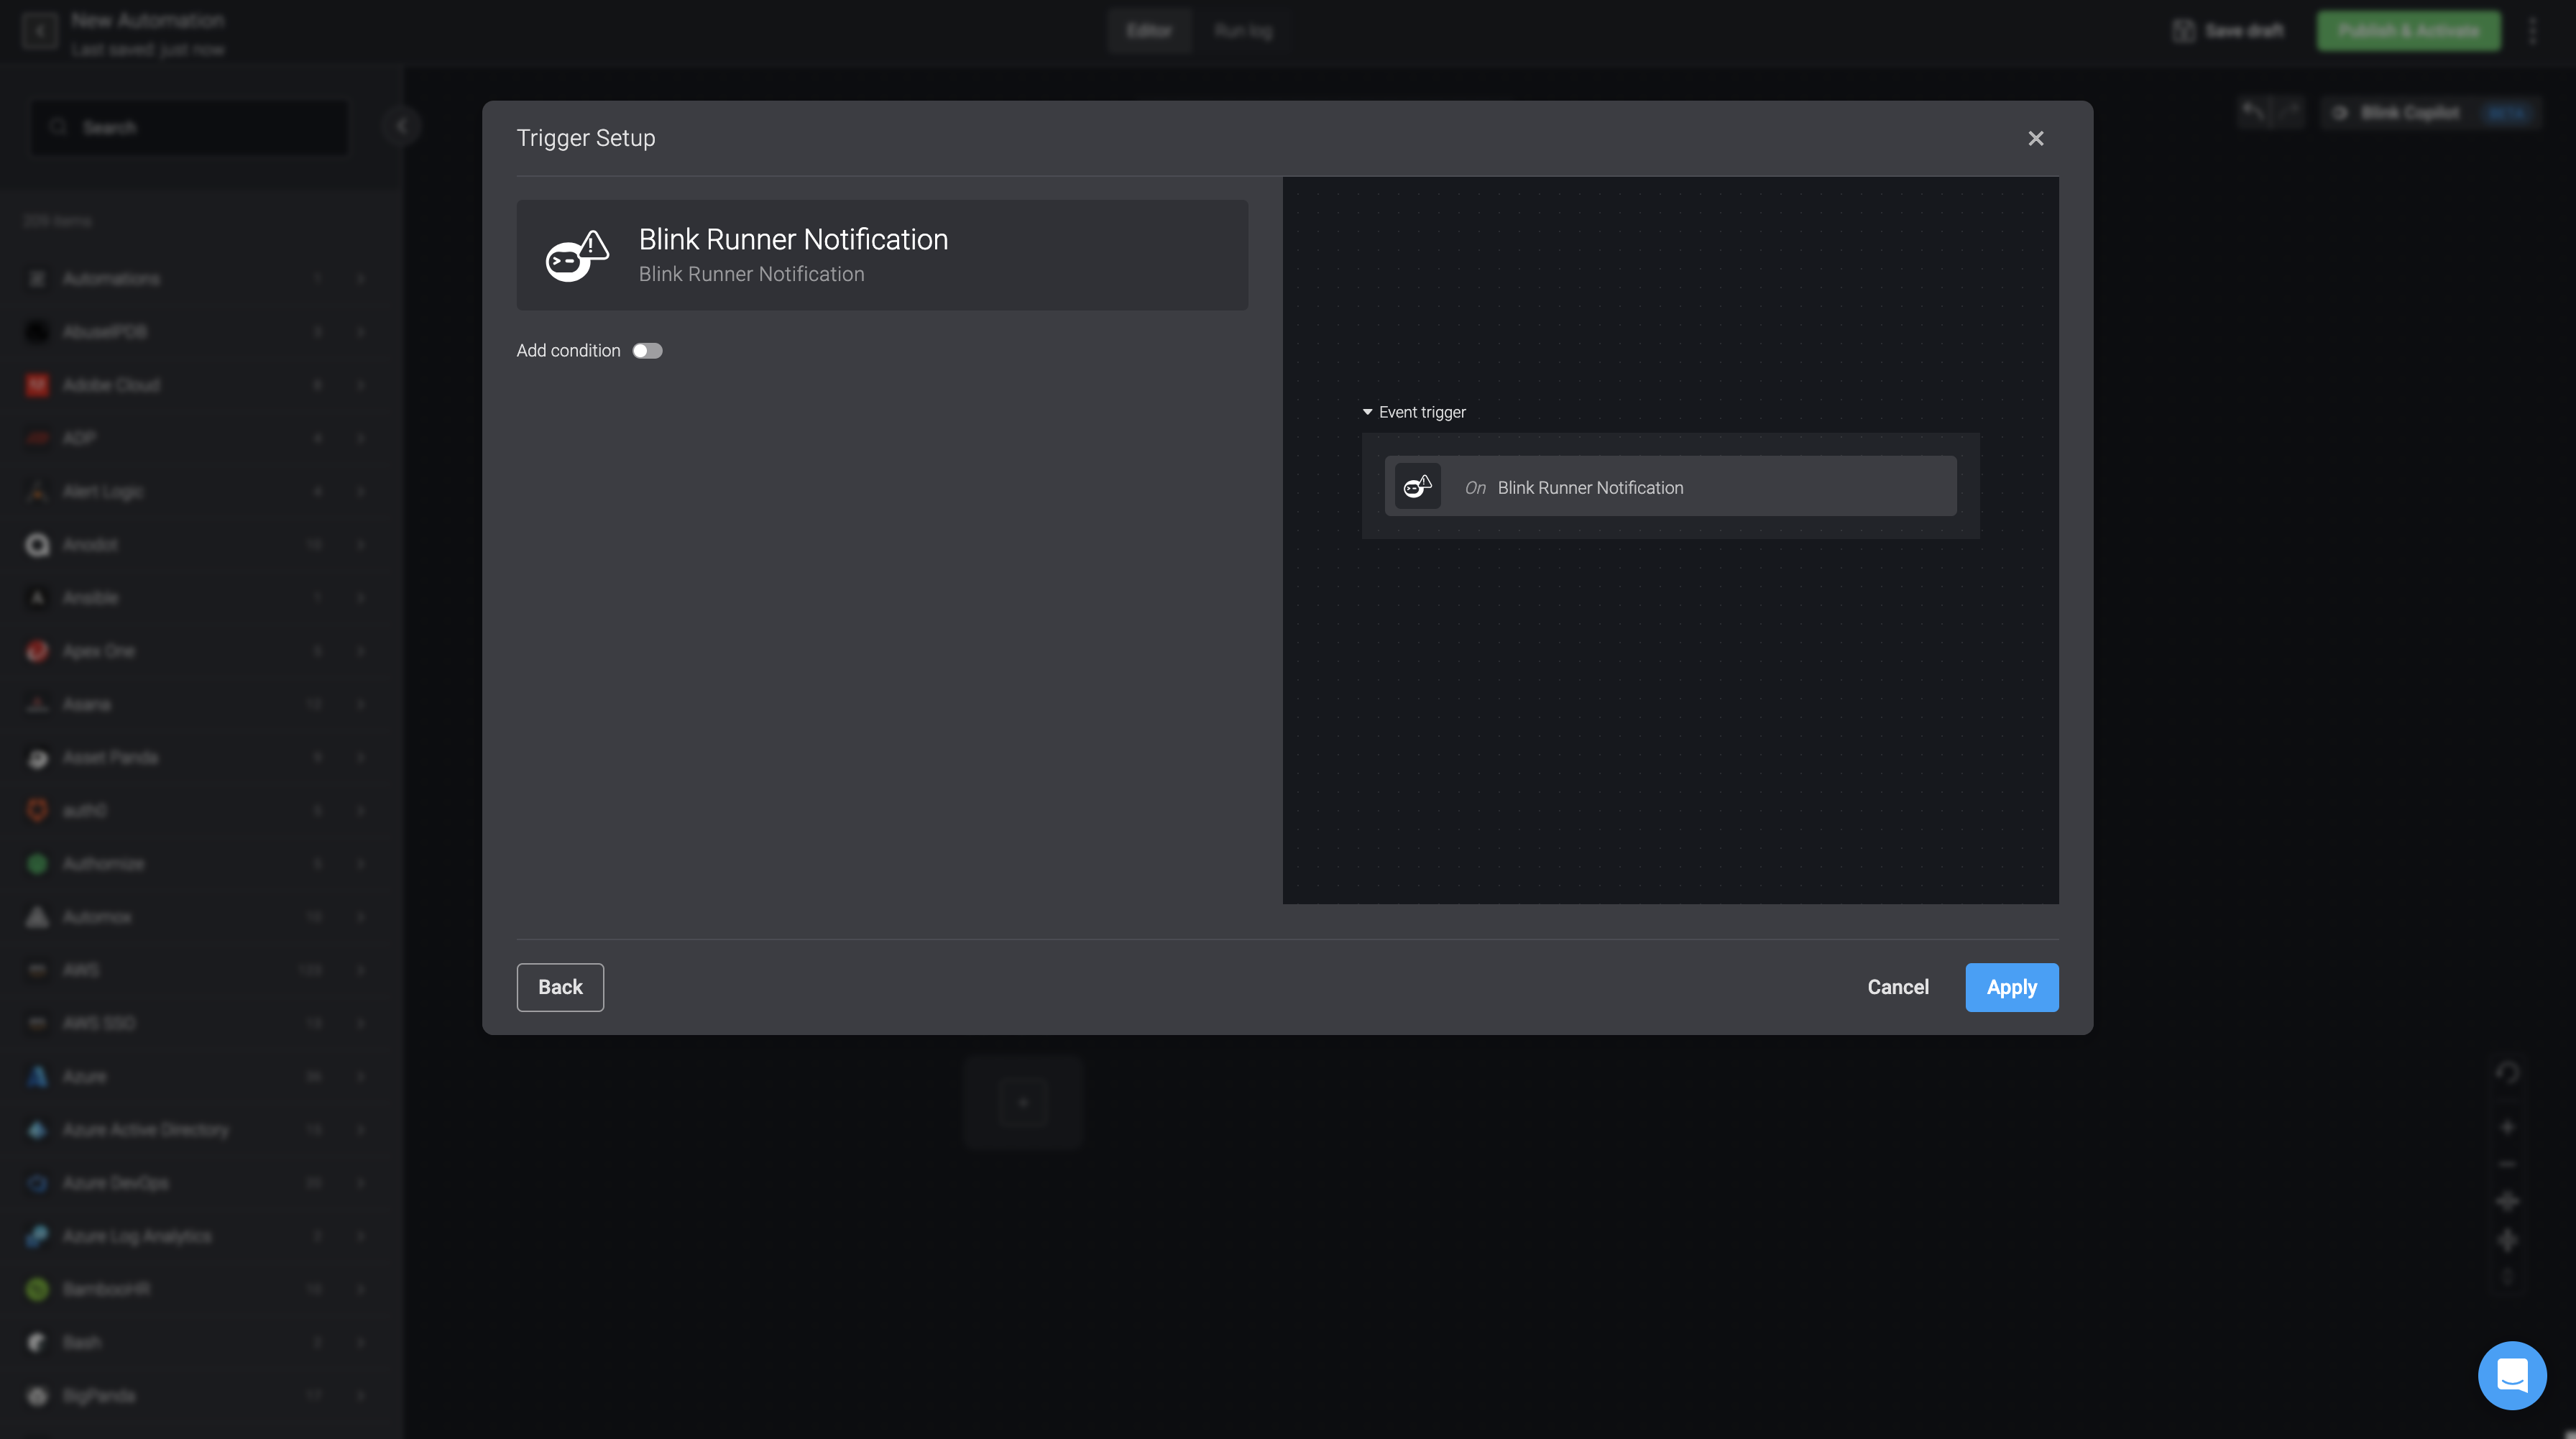
How to Set up a Runner Notification Workflow
'Runner Notification' Workflow
'Runner Notification' Workflow
In the Workflow Editor
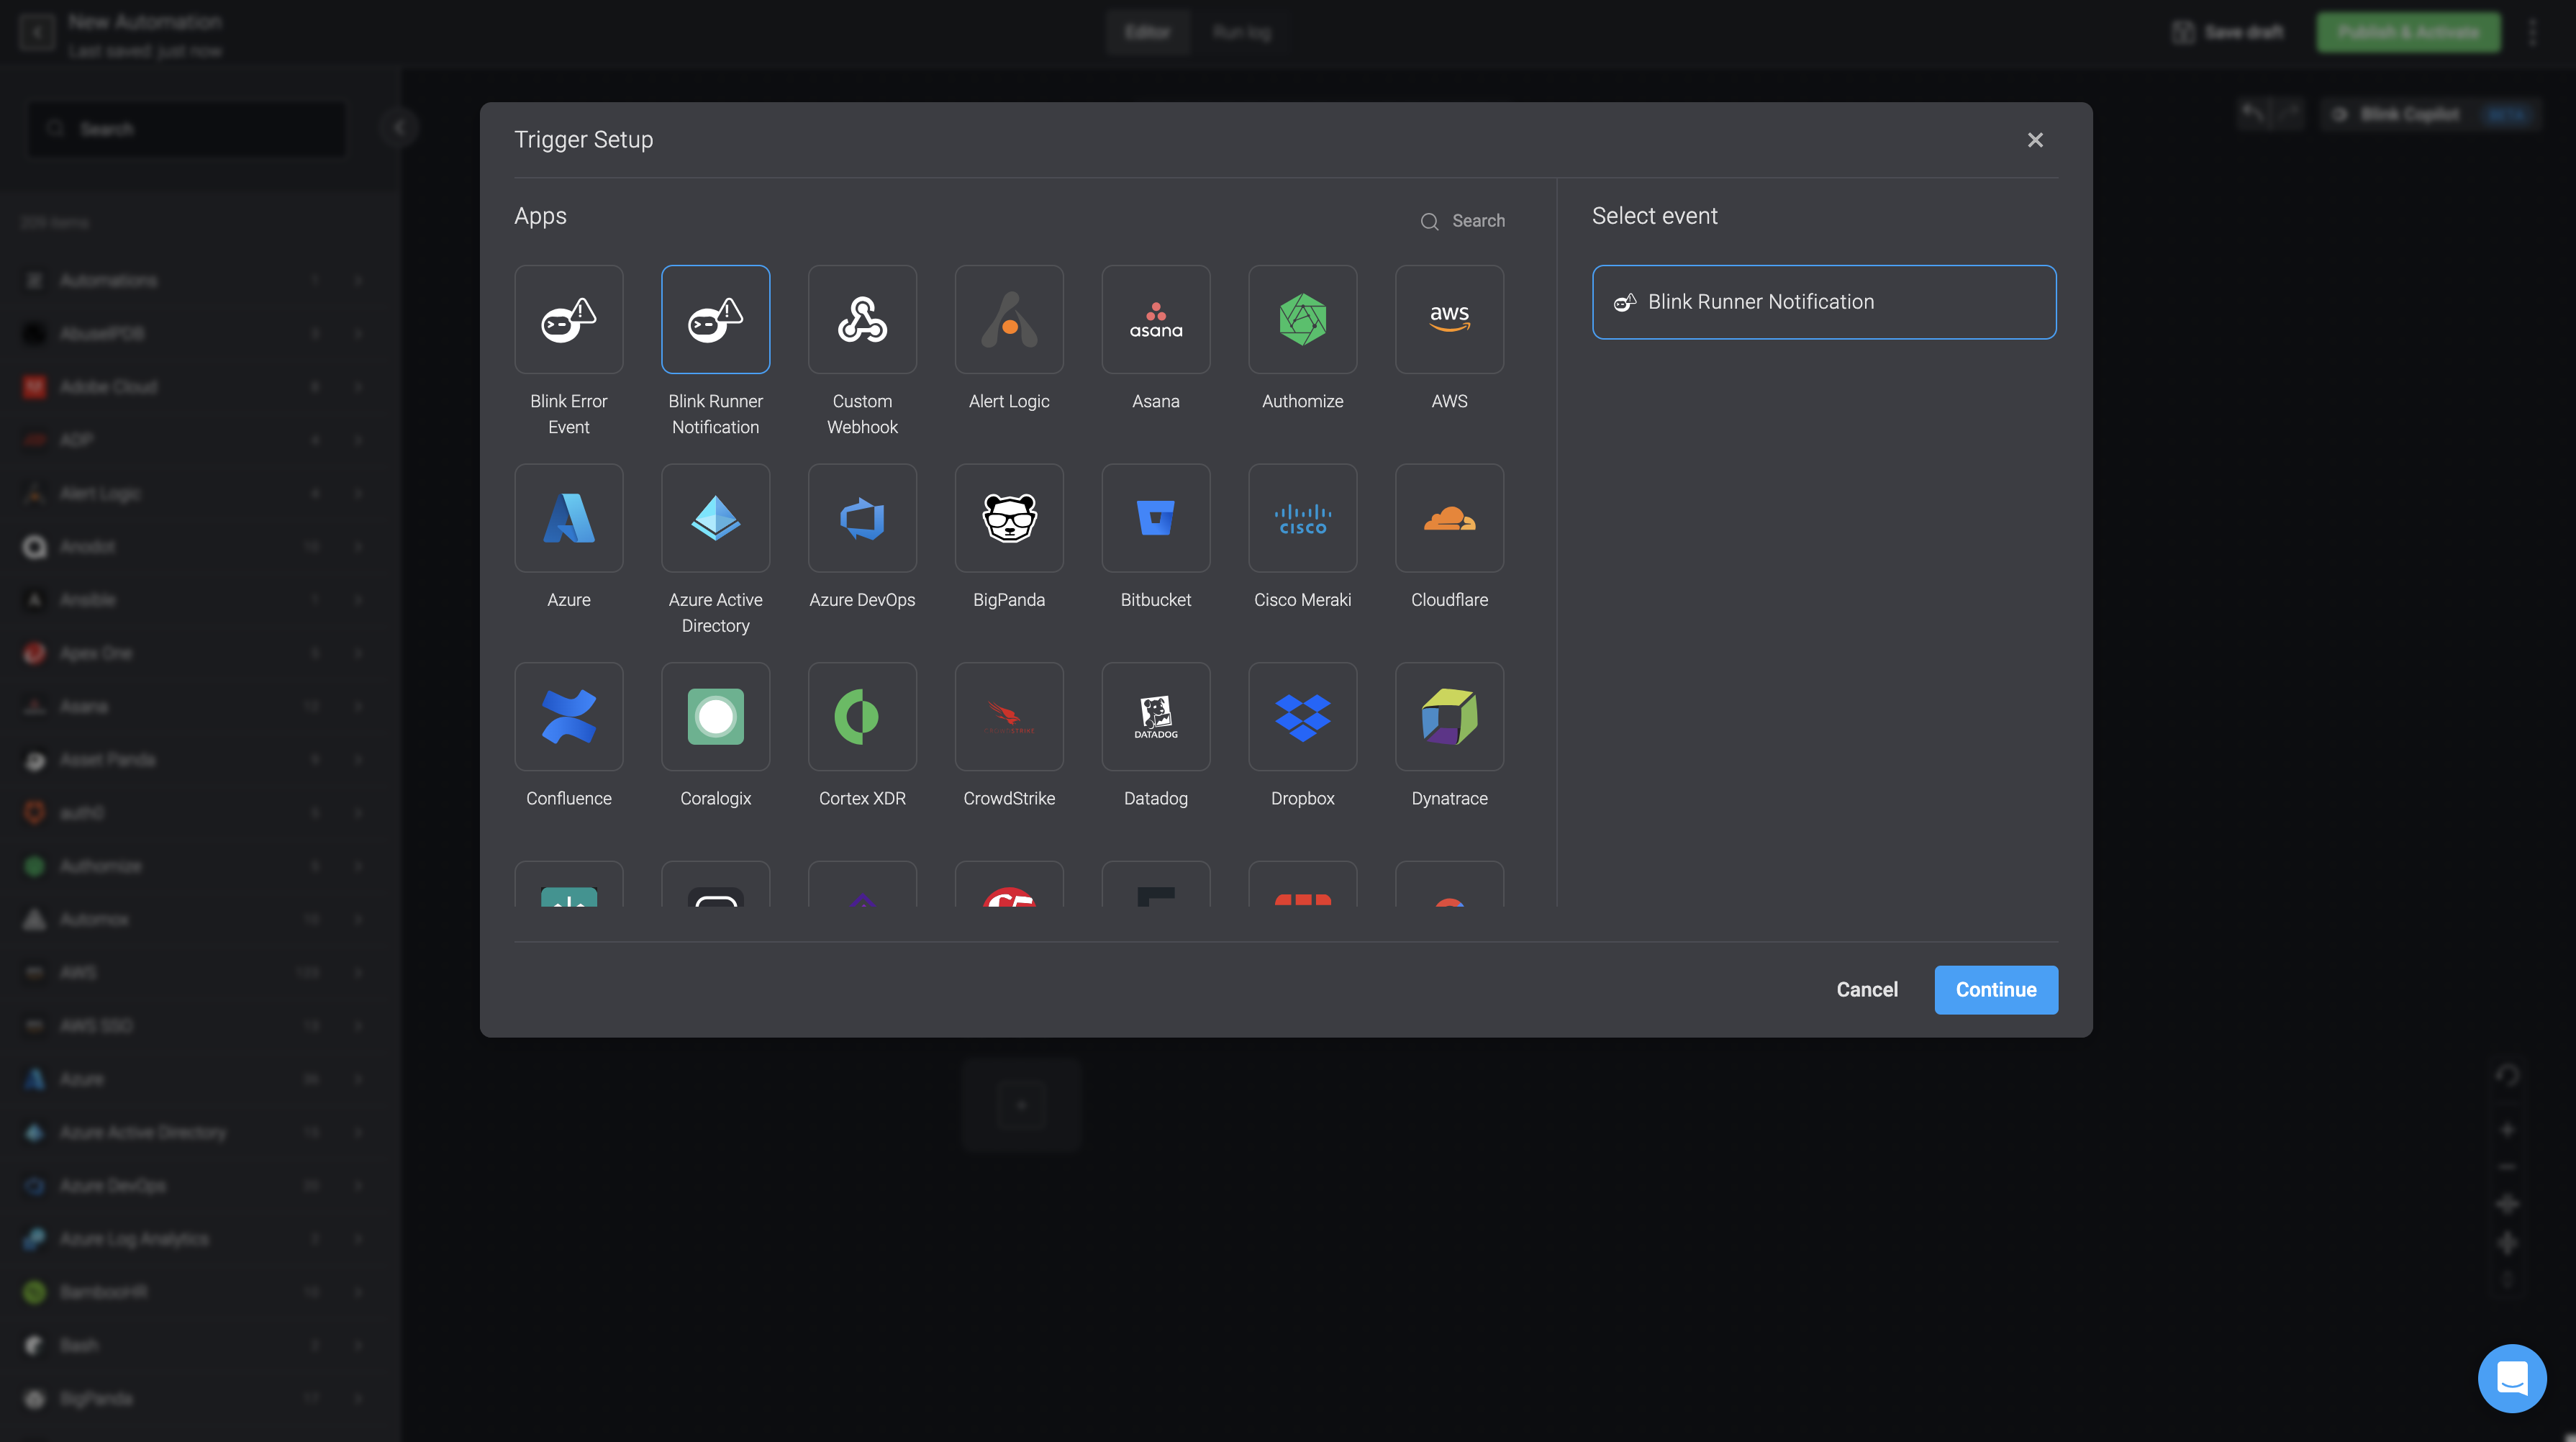
Proceed by navigating to the Runners Page and click the button beside a particular runner and select the Edit Runner option.
- Runner Outdated: When the runner version is outdated, and automatic runner updates are disabled.
- Runner update failed: When a runner automatic update fails for any reason, when automatic updates are enabled.
- Runner Disconnected: For when a Runner has been disconnected for over 10 minutes.