Begin by Creating an S3 Bucket
- Login in to your AWS account and navigate to the AWS S3 console dashboard
- Click the “Create Bucket” button to start the process.

General Configuration Setup
-
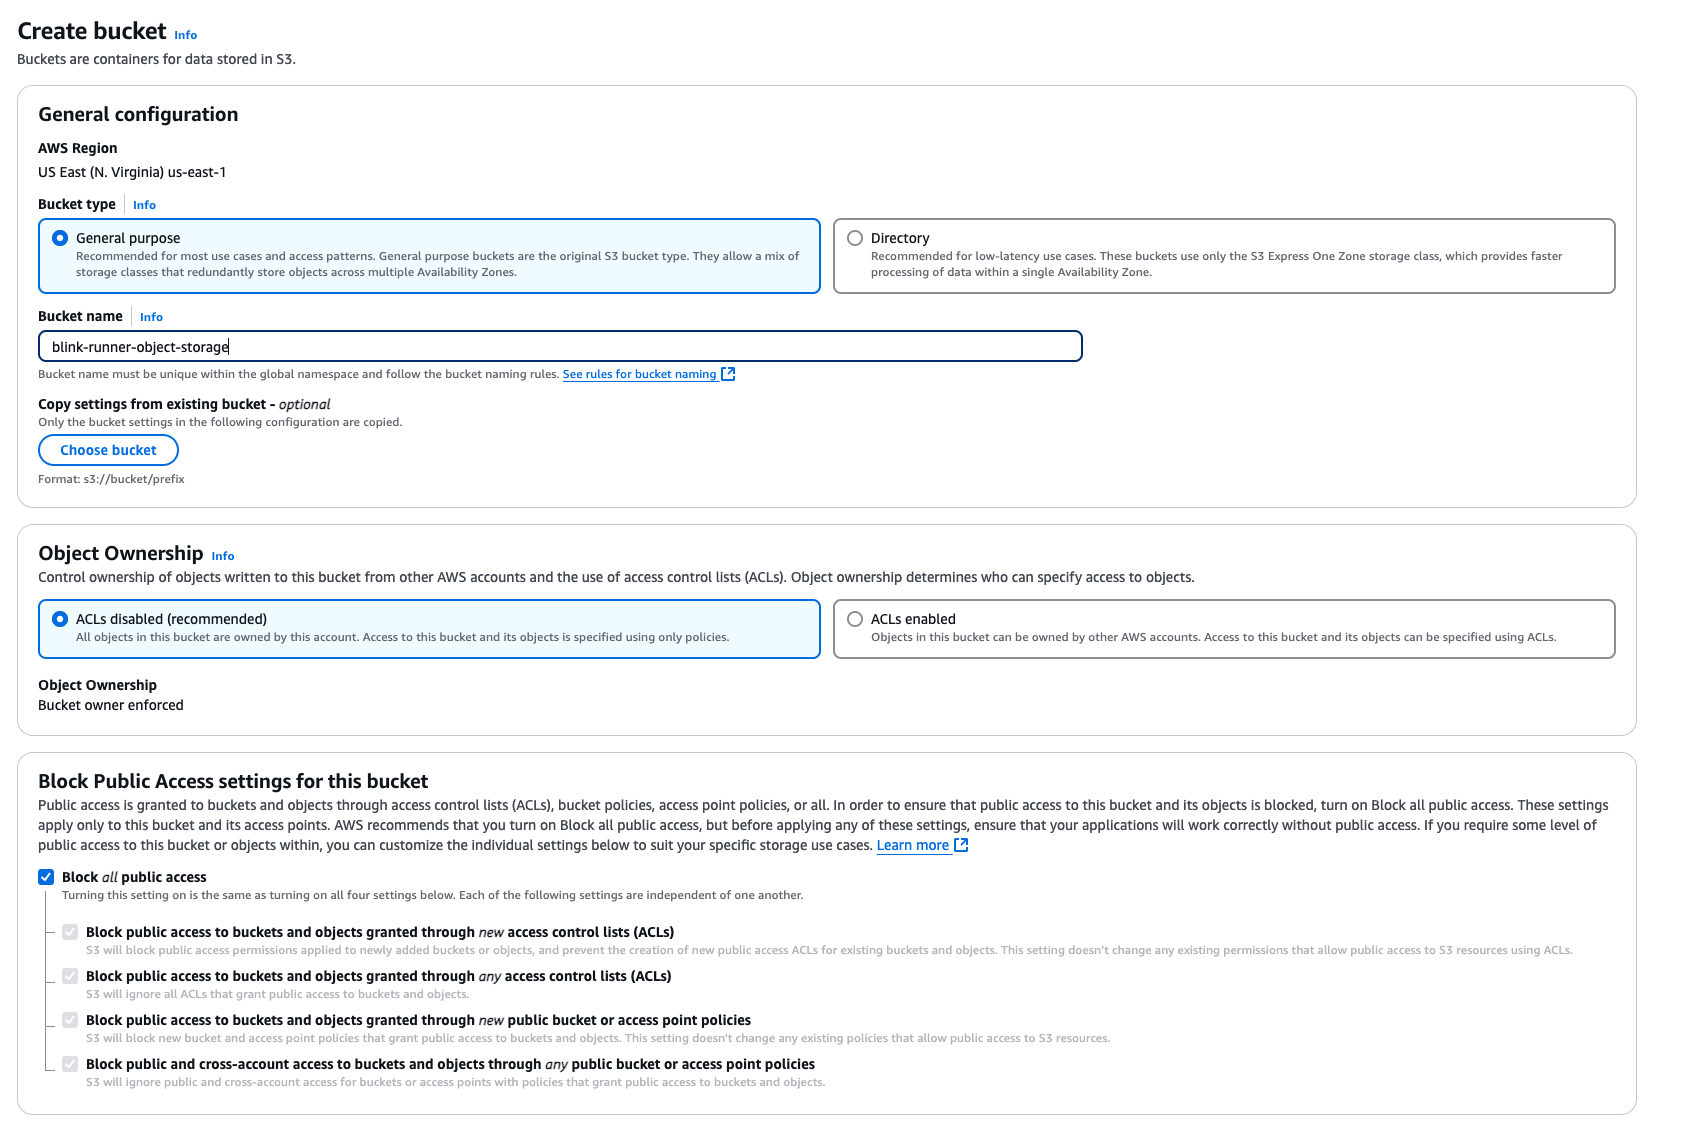
AWS Region: Select the region where you want the bucket to be created. In this example, the region is US East (N. Virginia)
us-east-1. - Bucket Type: Choose General purpose for a standard bucket with redundancy across multiple Availability Zones. Alternatively, select Directory for low-latency use cases where data is stored in a single Availability Zone.
-
Bucket Name: Enter a unique name for your bucket. For example: blink-runner-object-storage.
Follow AWS bucket naming rules for a valid name.

- Under Object Ownership:
- Select ACLs disabled (recommended). This ensures that all objects in the bucket are owned by your AWS account, and access is specified via bucket policies only. Alternatively, you can enable ACLs enabled if you need objects to have different ownership rules.
- Ensure that Bucket owner enforced is shown as the Object Ownership setting.
-
Set Block Public Access Settings
- Enable the Block all public access option. This is highly recommended for security unless you specifically need public access for your use case.
-
Ensure all the following options are checked:
- Block public access to buckets and objects granted through new access control lists (ACLs).
- Block public access to buckets and objects granted through any access control lists (ACLs).
- Block public access to buckets and objects granted through new public bucket or access point policies.
- Block public and cross-account access to buckets and objects through any public bucket or access point policies.
Create a New IAM User
Set up a user to manage access to the S3 bucket:
- Navigate to the IAM Console and to the IAM (Identity and Access Management) service.
- Specify user details by providing a user name and then click the “Next” button.

Set Permissions
- Choose the “Attach policies directly” option.

- Next, Click the “Create Policy” option.

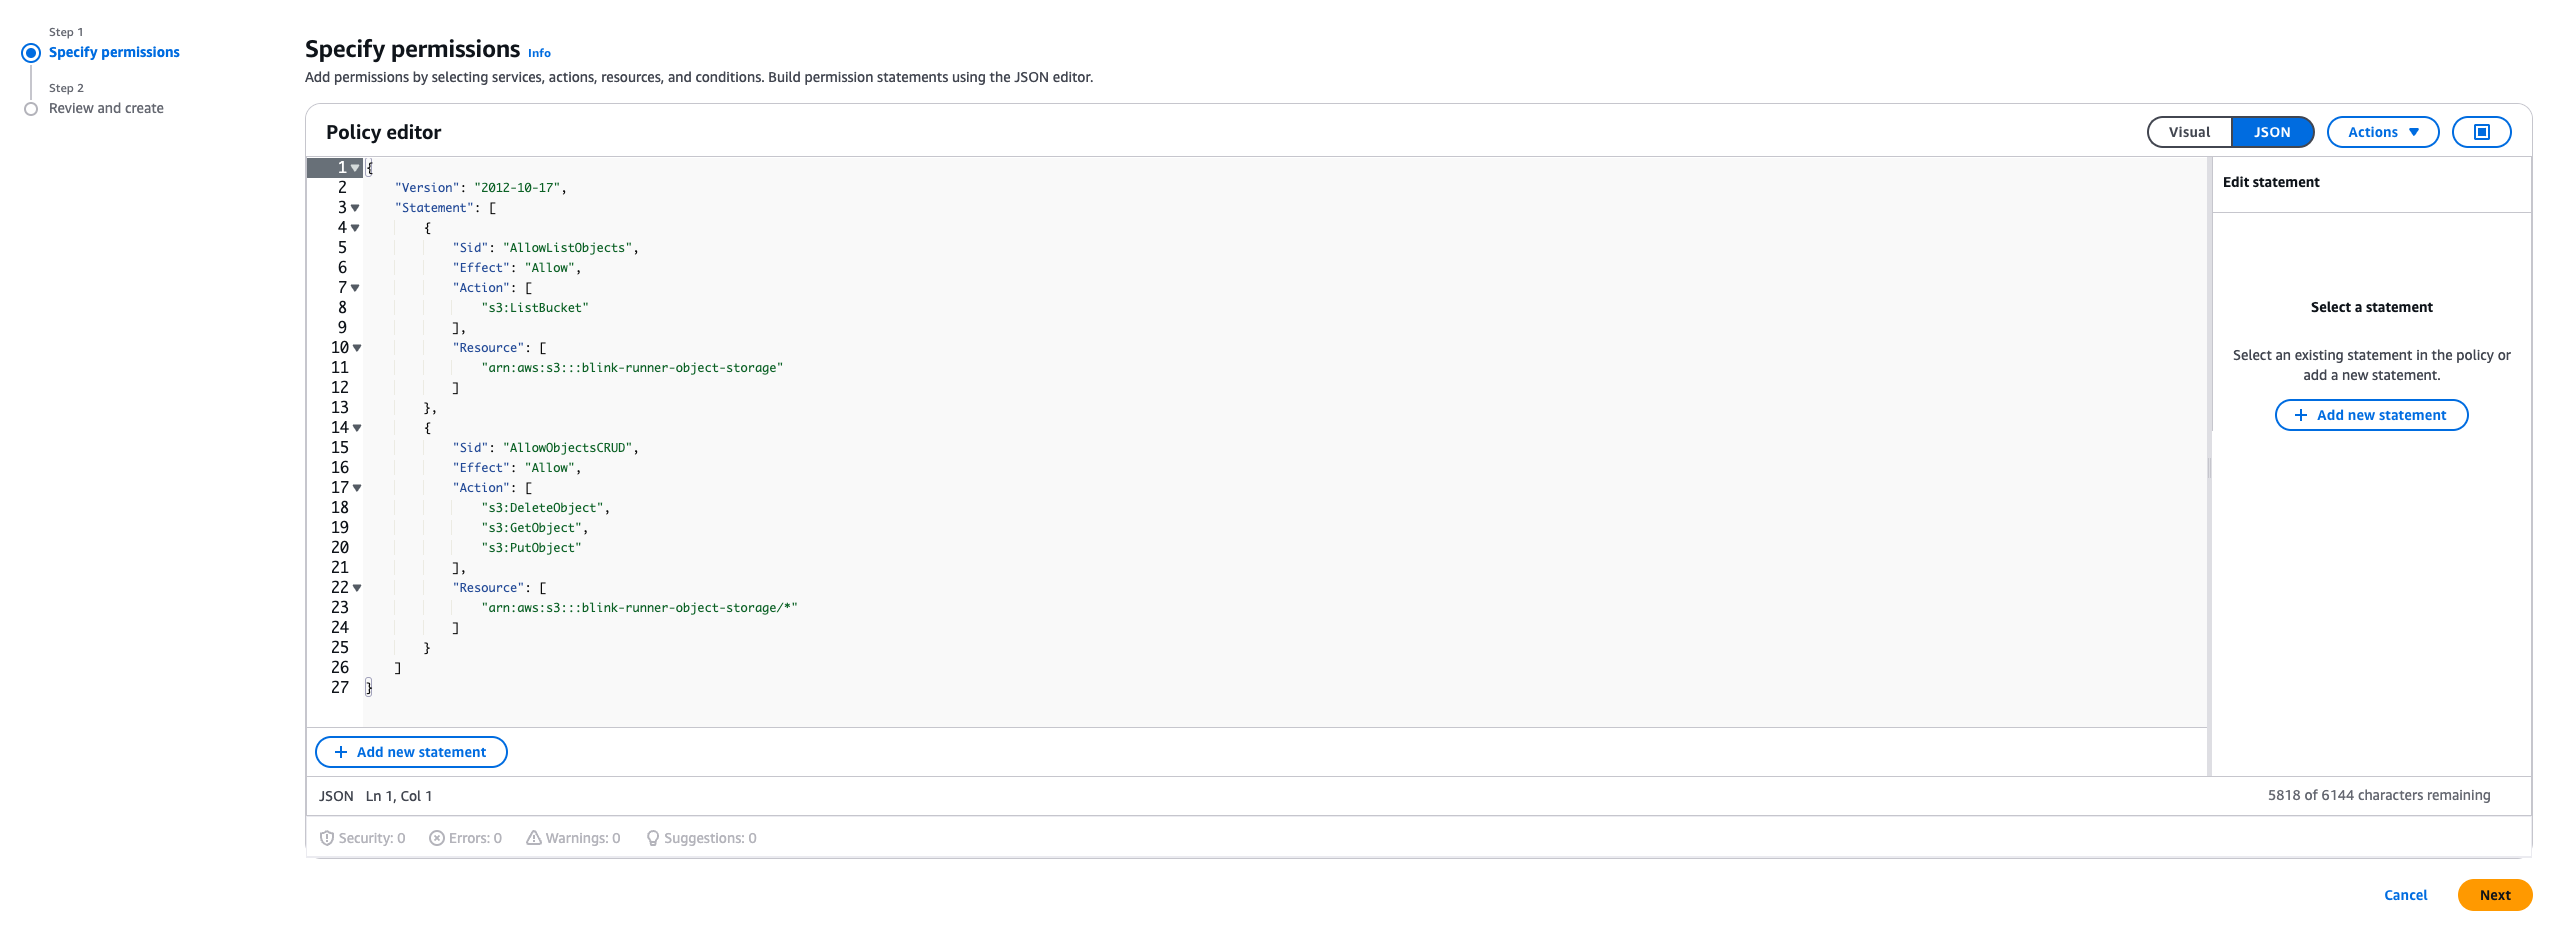
- Paste the provided
JSONpolicy in the policy editor and replace<bucket>with Blink’s storage bucket, then proceed.

Review and Finalize the Policy
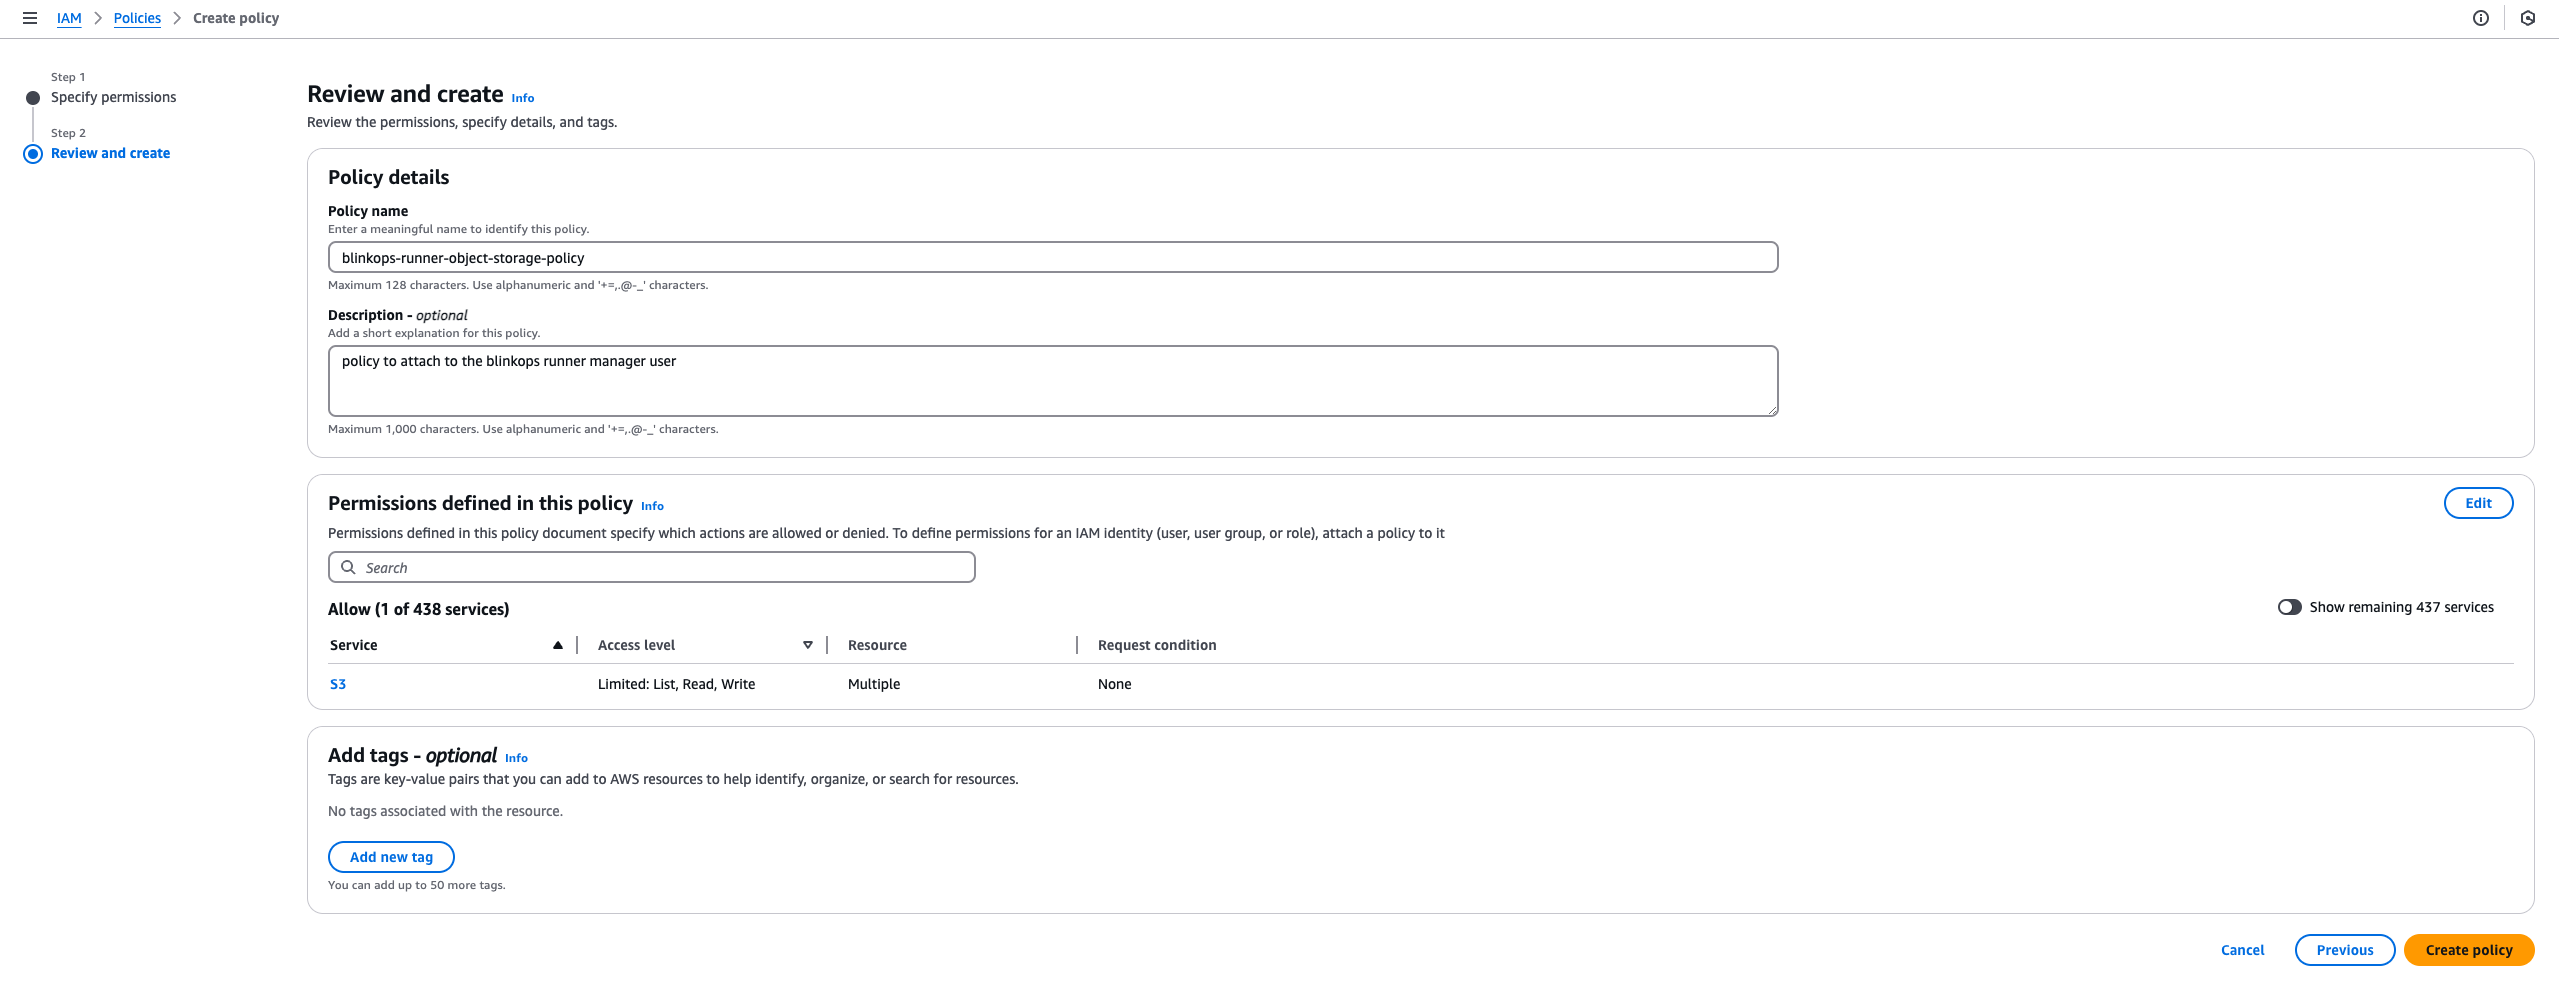
Review the Policy Details: Once you’ve reviewed and confirmed the details, click the Create policy button at the bottom right of the screen.

Review and Create User
Carefully review all the details, and complete the process by clicking “Create User”.

Enable Security Features for the IAM User
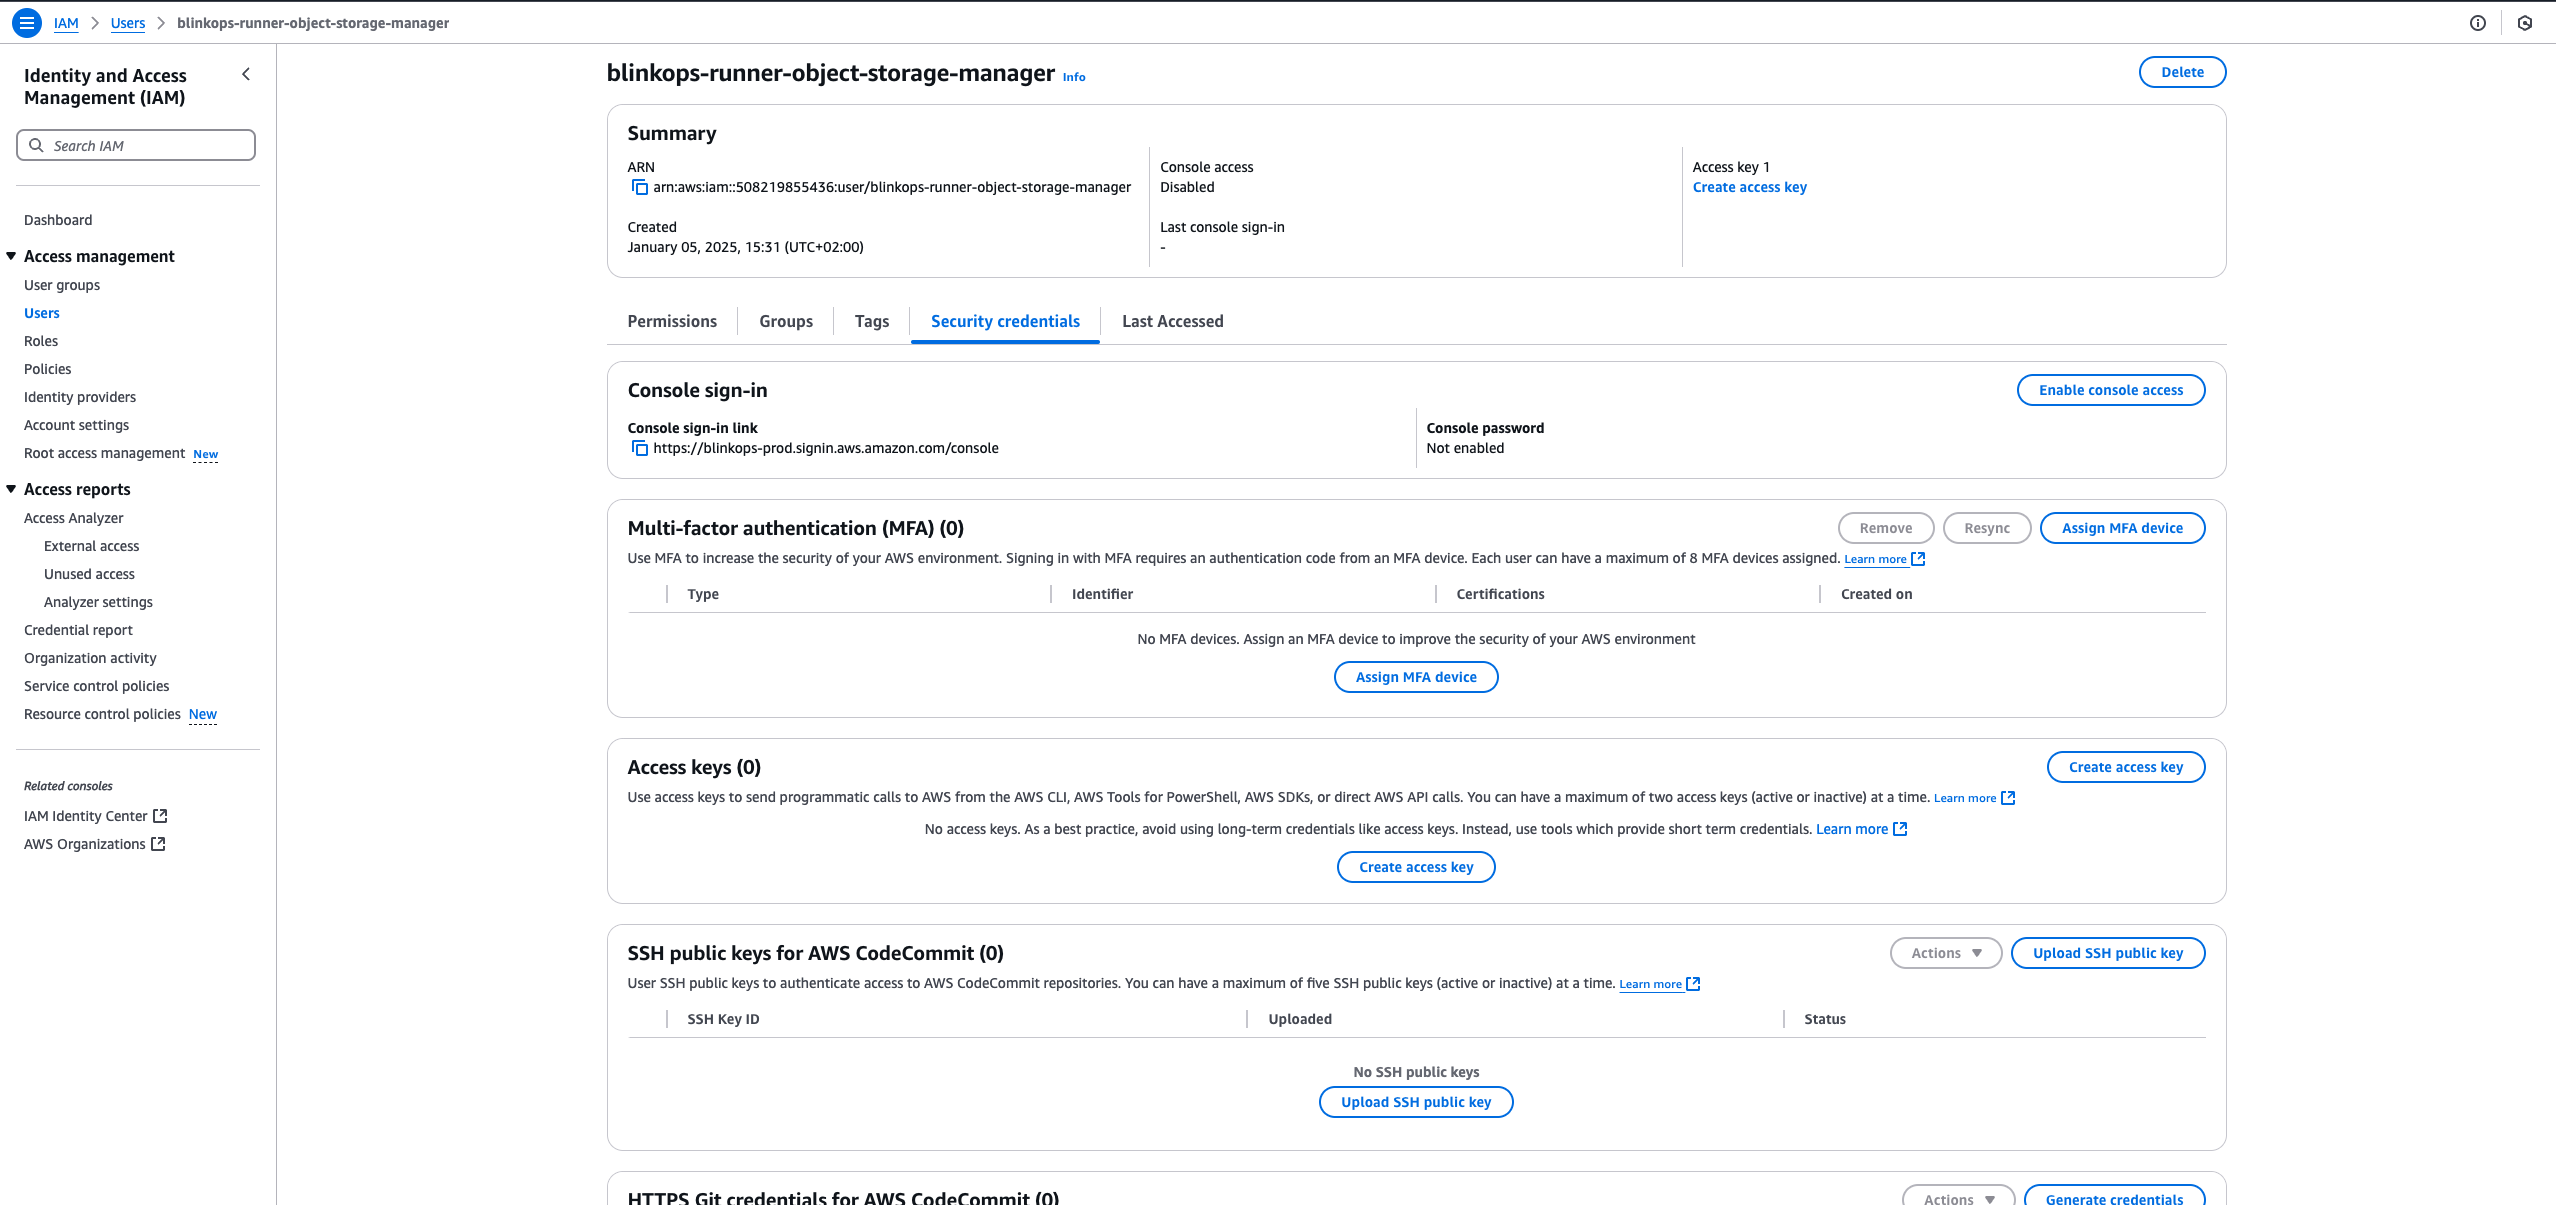
- Navigate to the Security Credentials Tab:
-
Create an Access Key: In the Access keys section, click the Create access key button and follow the steps:
- Purpose: Select the appropriate use case for the access key (e.g., programmatic access).
- Download Credentials: After creating the access key, securely download and store the key pair (Access Key ID and Secret Access Key). This is your only chance to view and save the secret access key.
Treat the access key as sensitive information and avoid hardcoding it into your applications. Use AWS Secrets Manager or environment variables instead.
Deploy the Blink Runner Using AWS S3 Storage Credentials
After creating and securely storing the AWS credentials, use them to deploy the Blink Runner. Follow the appropriate instructions for Kubernetes or Docker deployment:
Deploying the Runner in Kubernetes
Run the Helm command provided by Blink, but make sure to include the additional configurations below to enable object storage for the runner:- Replace <access_key_id> and <secret_access_key> with the credentials created in
Step 7. - Replace blink-runner-bucket with the bucket name created in
Step 2. - Ensure the region matches your bucket’s region (e.g., us-east-1).
Deploying the Runner in Docker
Run the Helm command provided by Blink in the UI, but make sure to include the additional configurations below to enable object storage for the runner:- Replace <YOUR_AWS_ACCESS_KEY> and <YOUR_AWS_SECRET_KEY> with the credentials created in
Step 7. - Replace <auth_key> with the authentication key for the runner.
- Ensure the region matches your bucket’s region (e.g., us-east-1).
- Replace blink-runner-bucket with the bucket name created in
Step 2