1
Retrieve the dashboard details
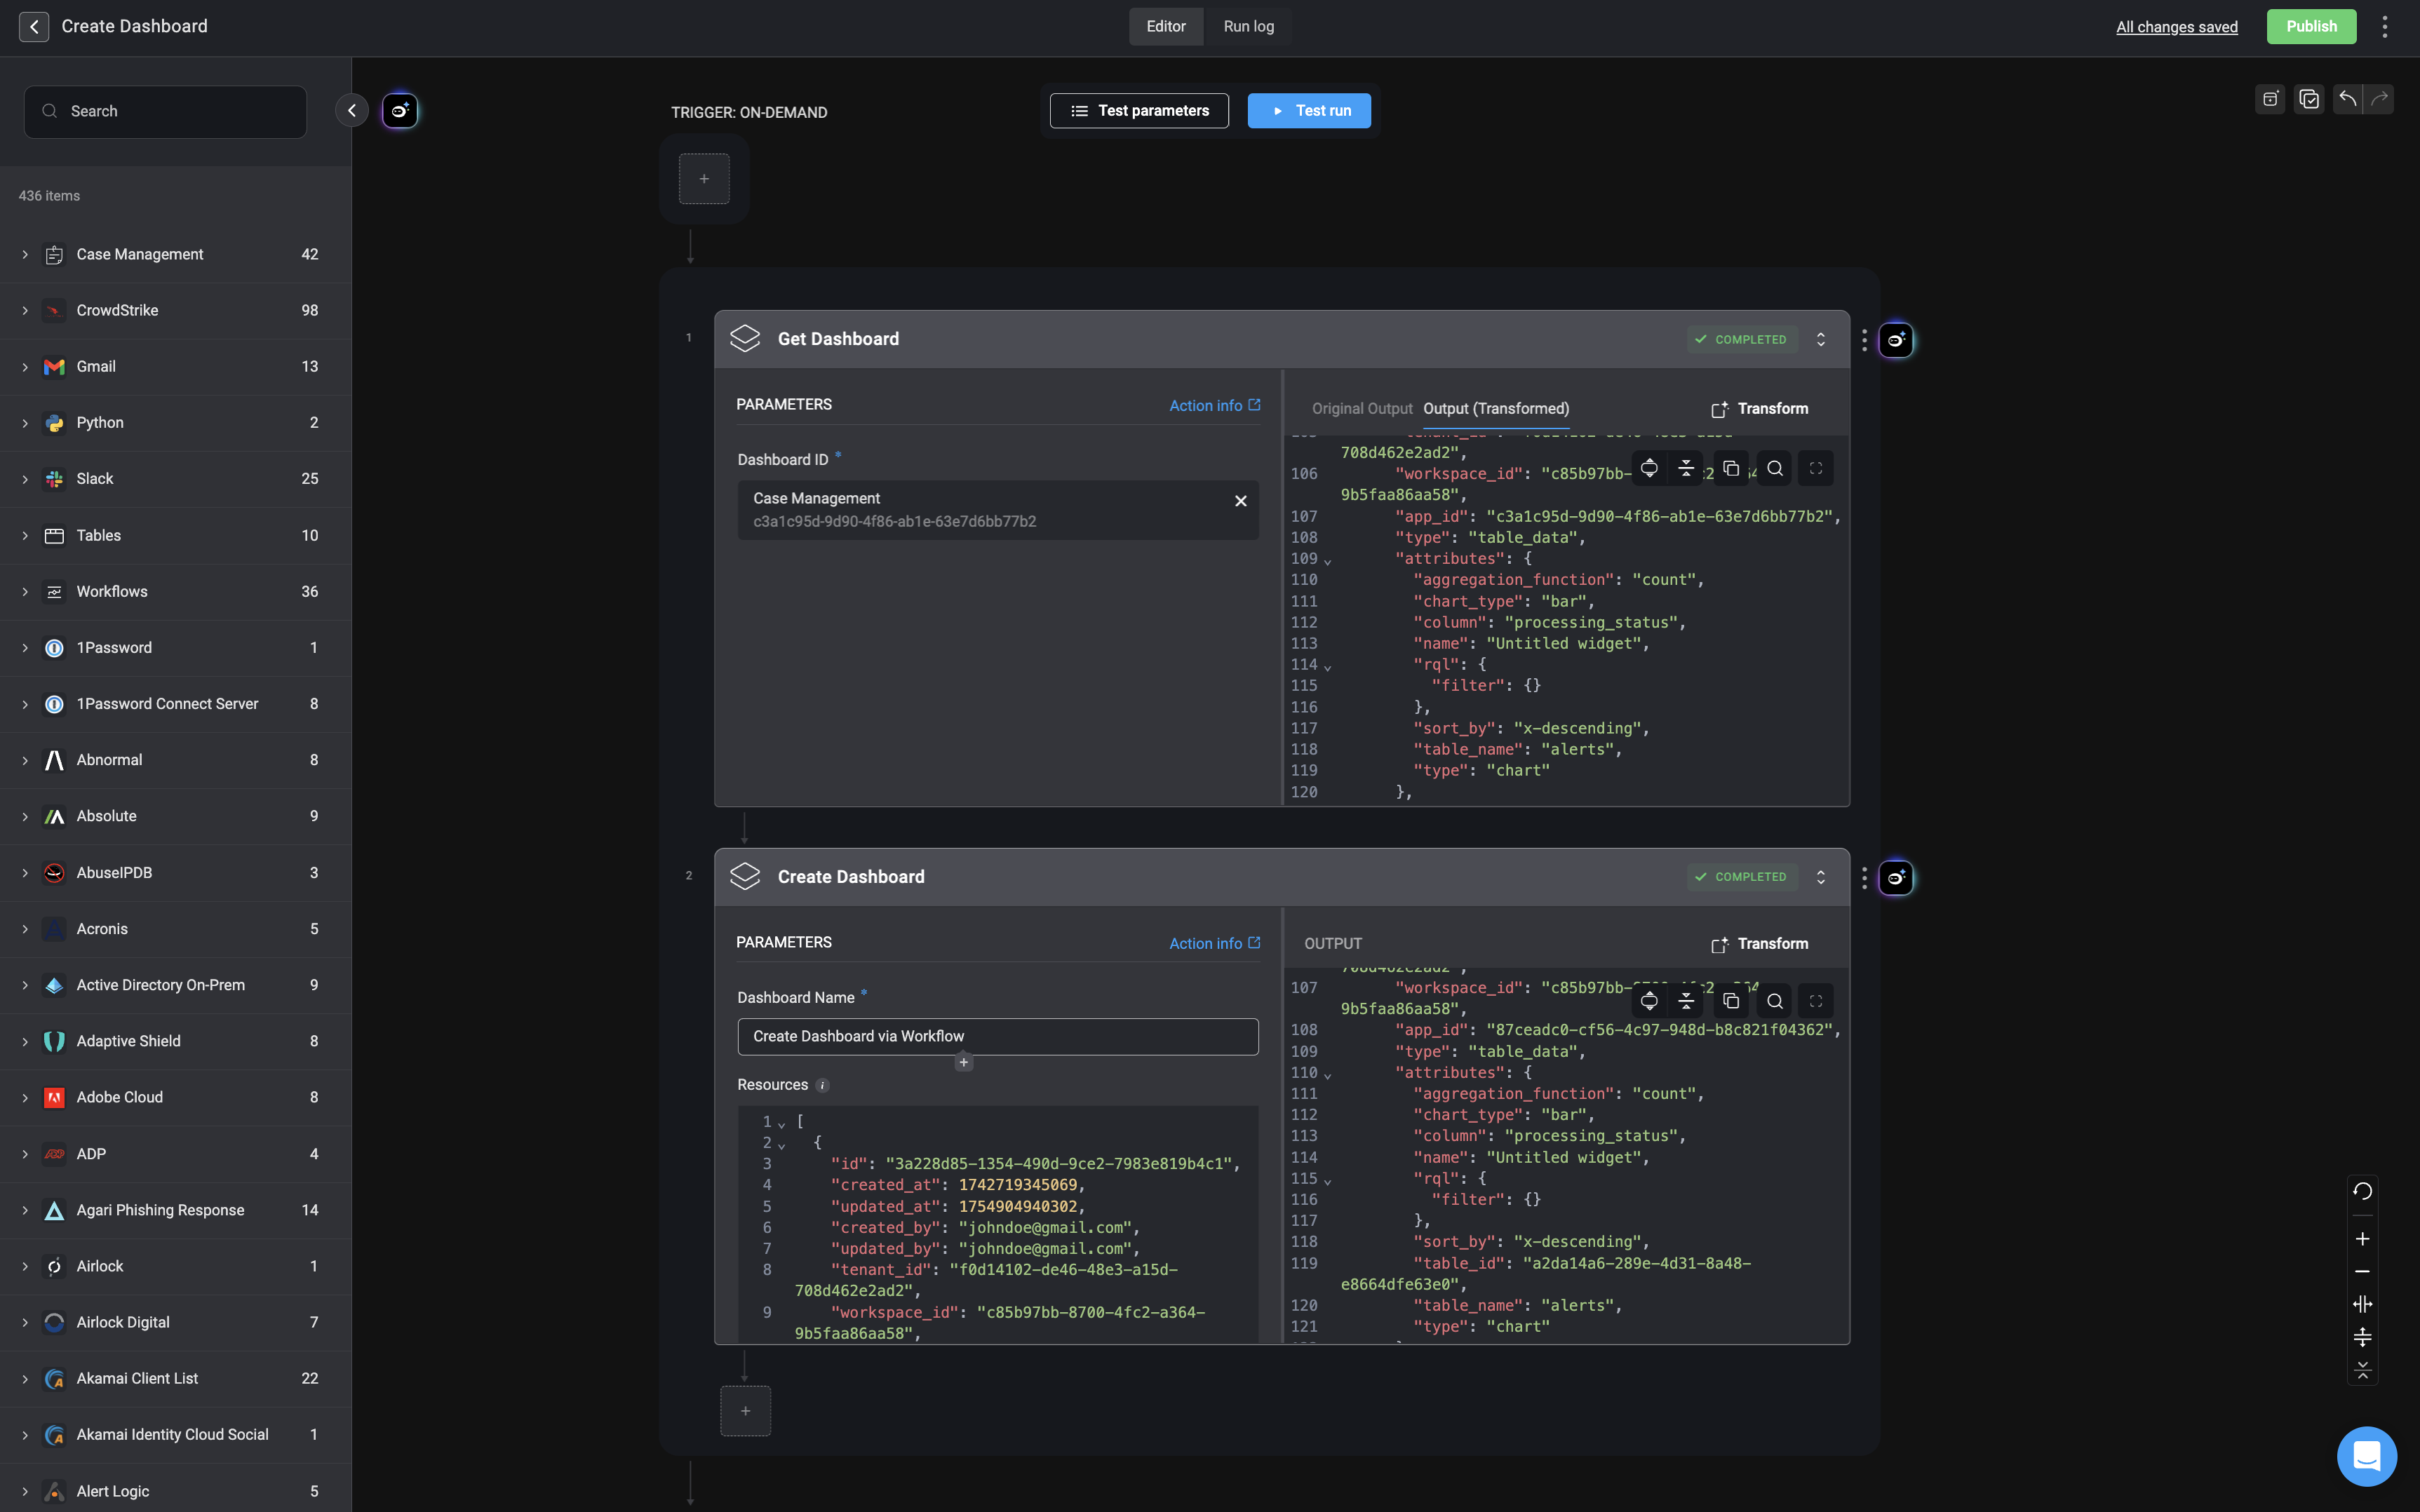
Start by configuring and executing the Get Dashboard action. This action retrieves the complete configuration of an existing dashboard using its dashboard ID.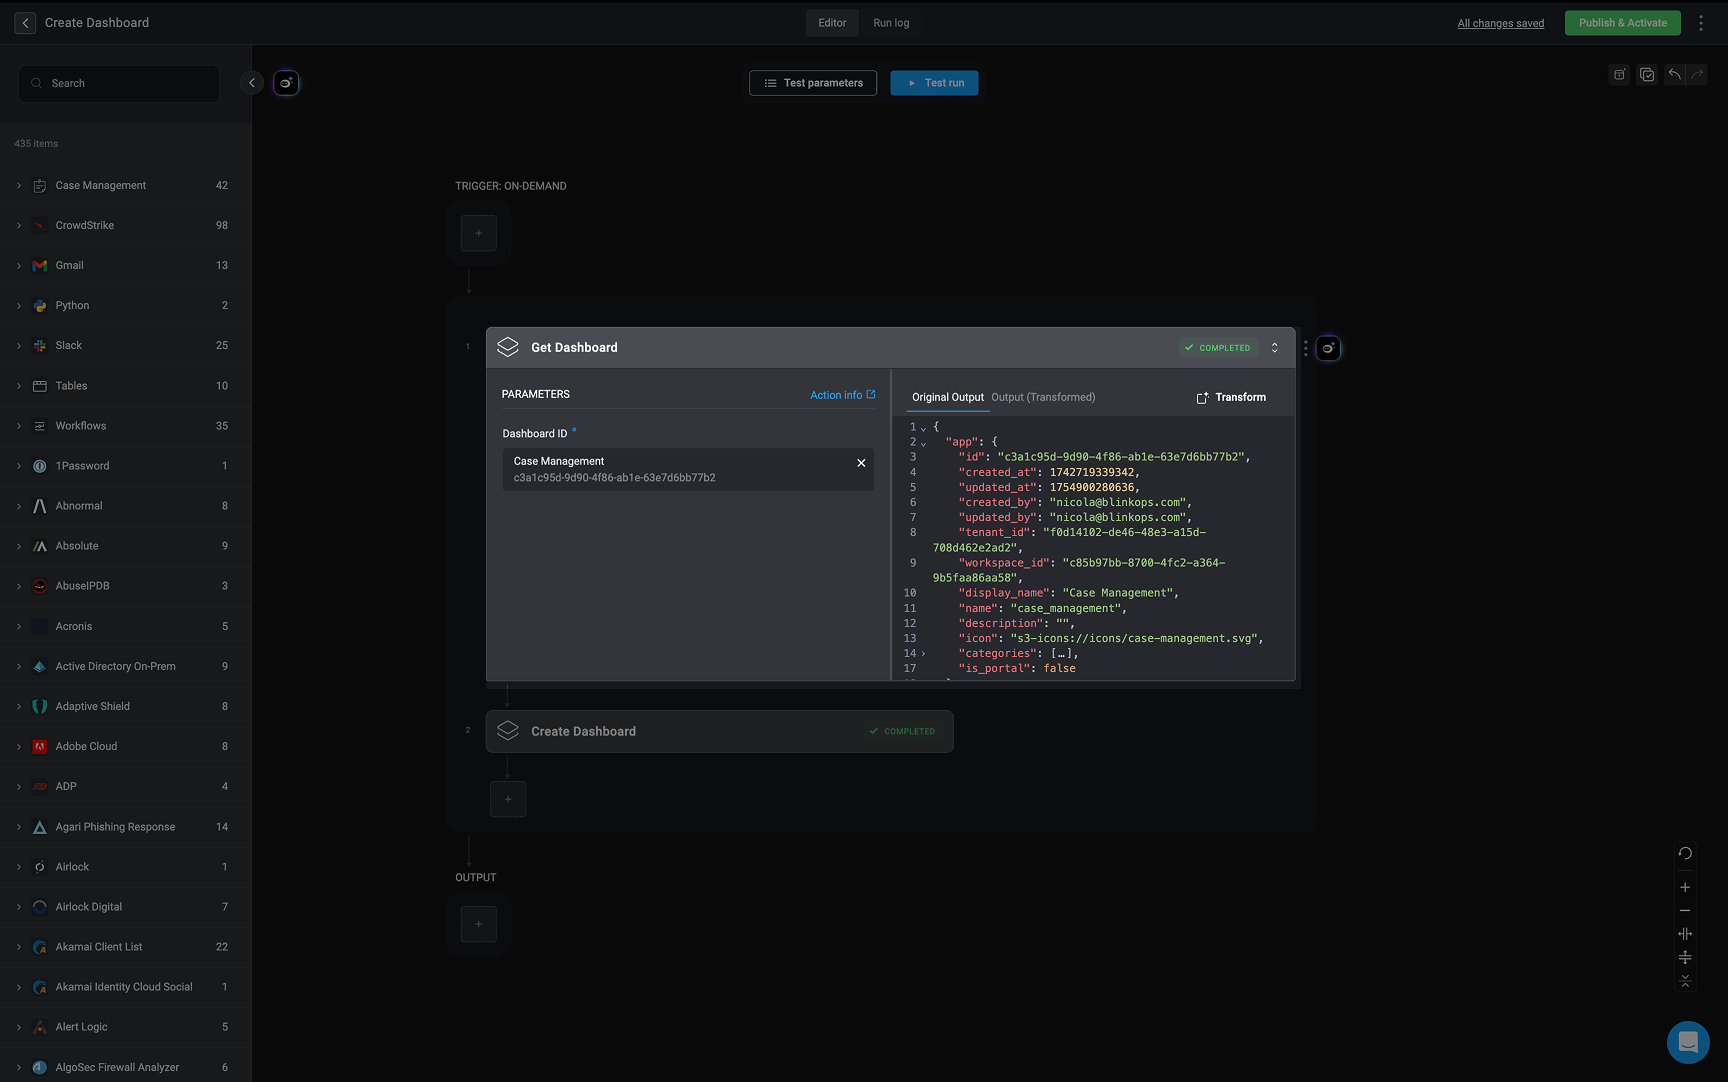
2
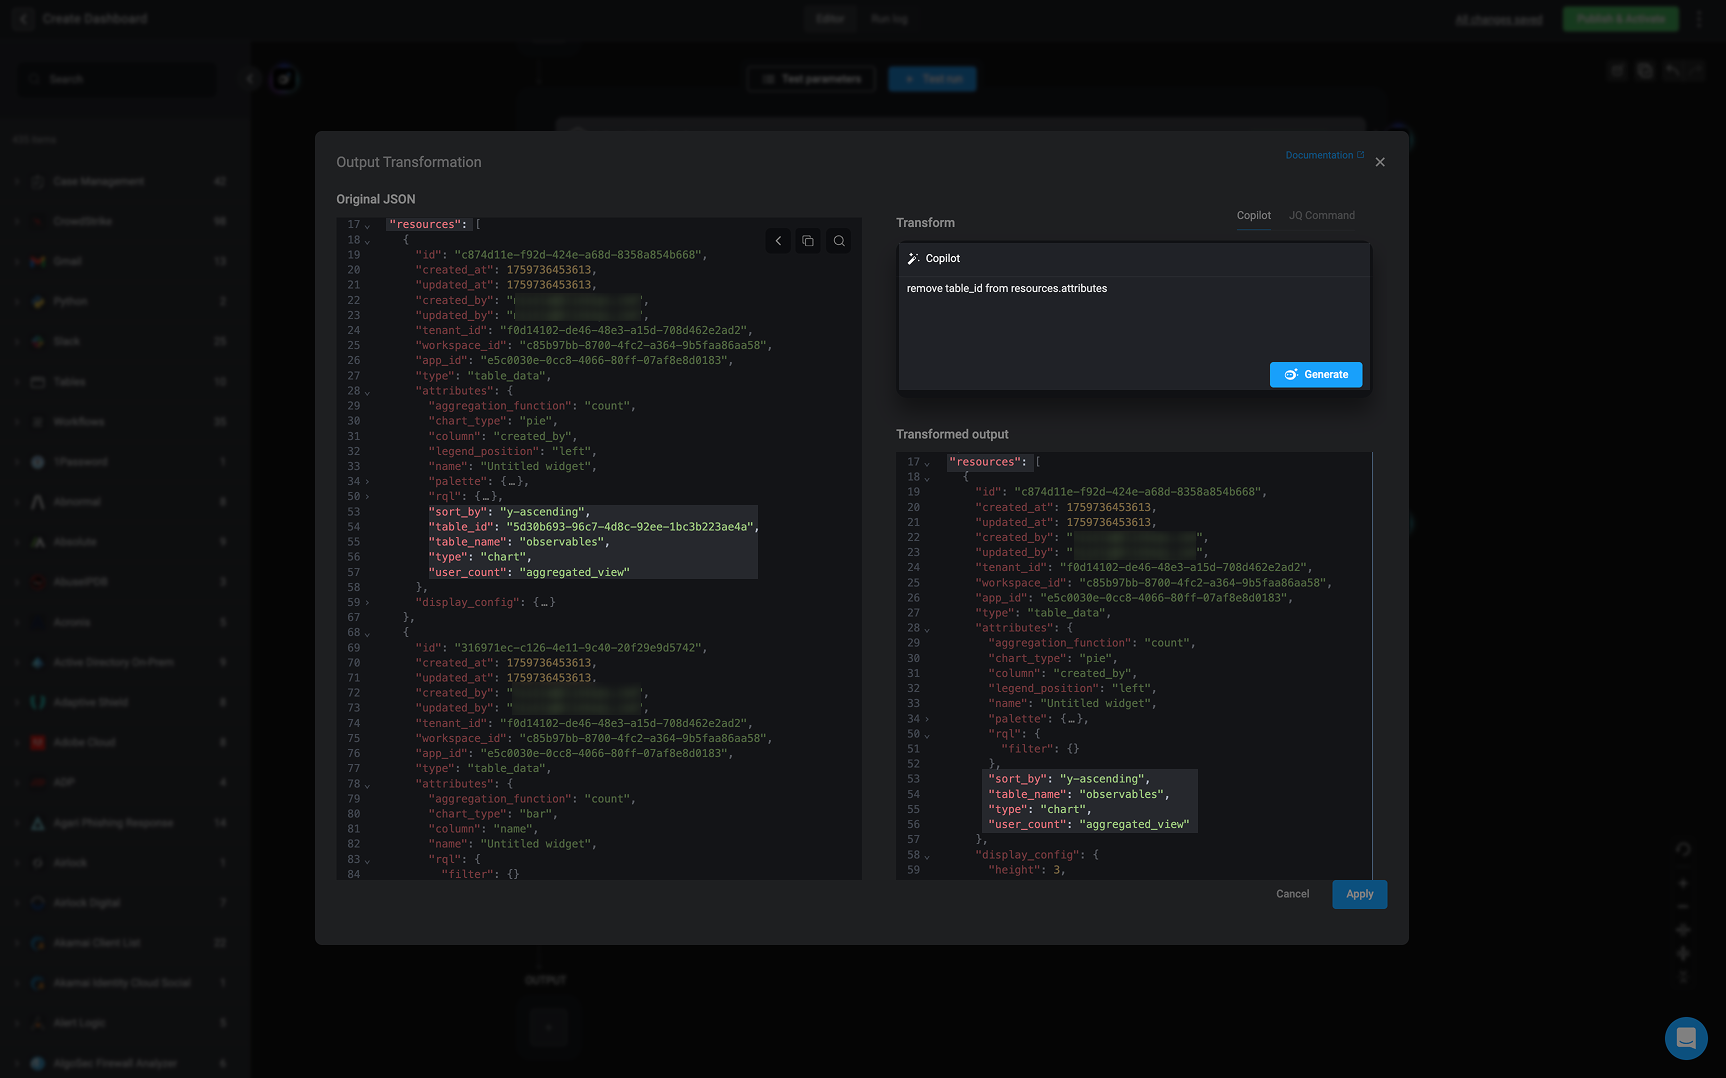
Remove all `table_id` fields from the output
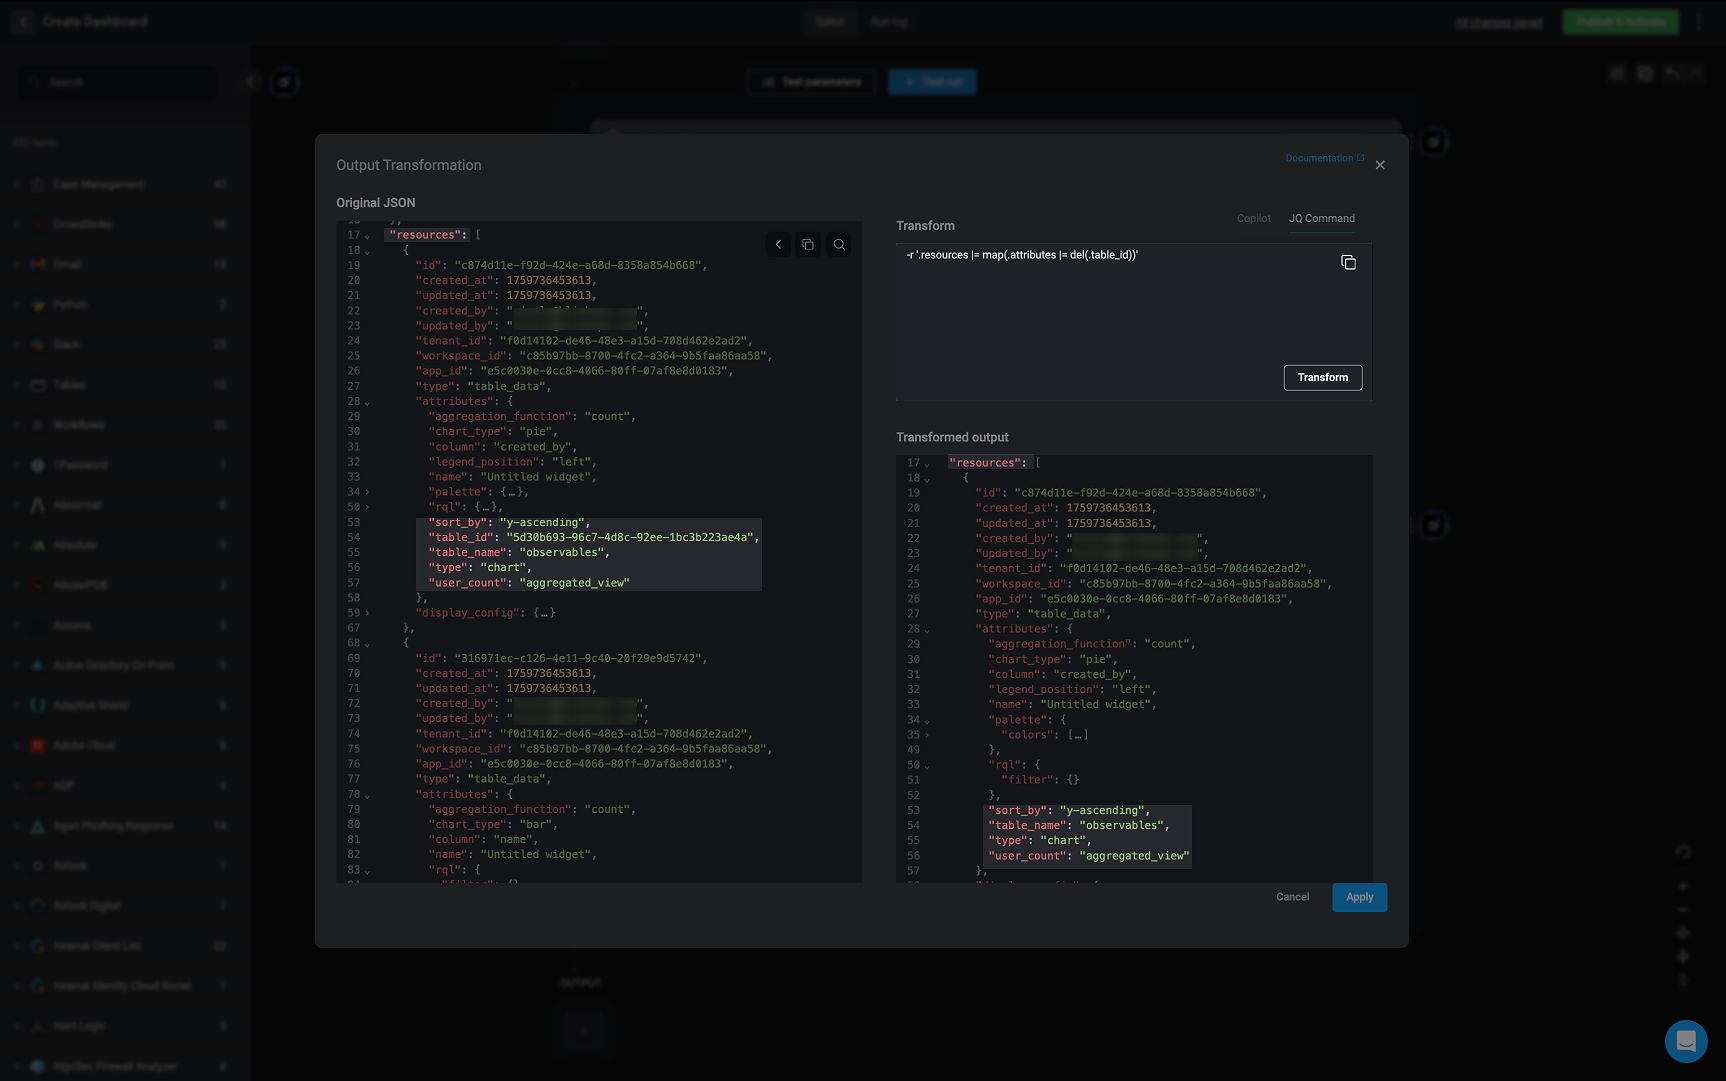
Next, use the Step Output Transformation feature to remove all instances of the 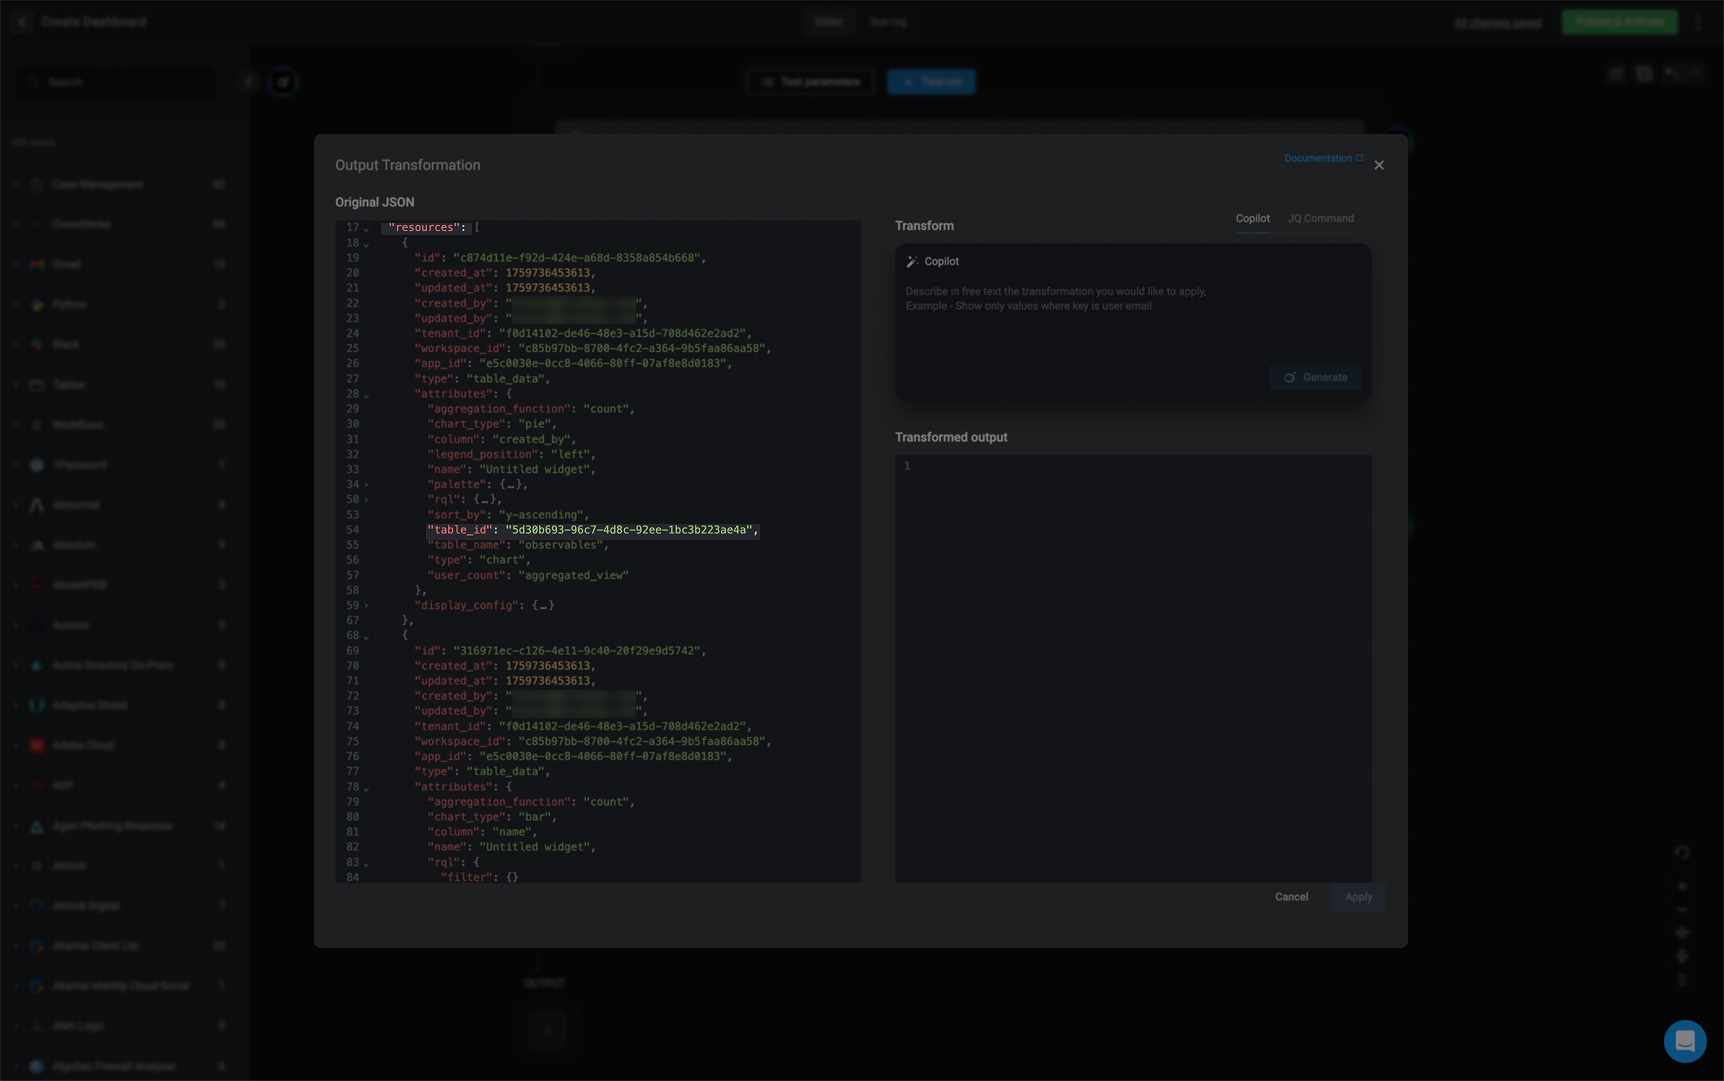
table_id key-value pairs from the JSON output.-
Using Copilot – Run the following prompt in the Copilot:
- “remove table_id from all resources”
-
Using a JQ Command – Apply the following command:
3
Prepare the transformed dashboard data
After removing all
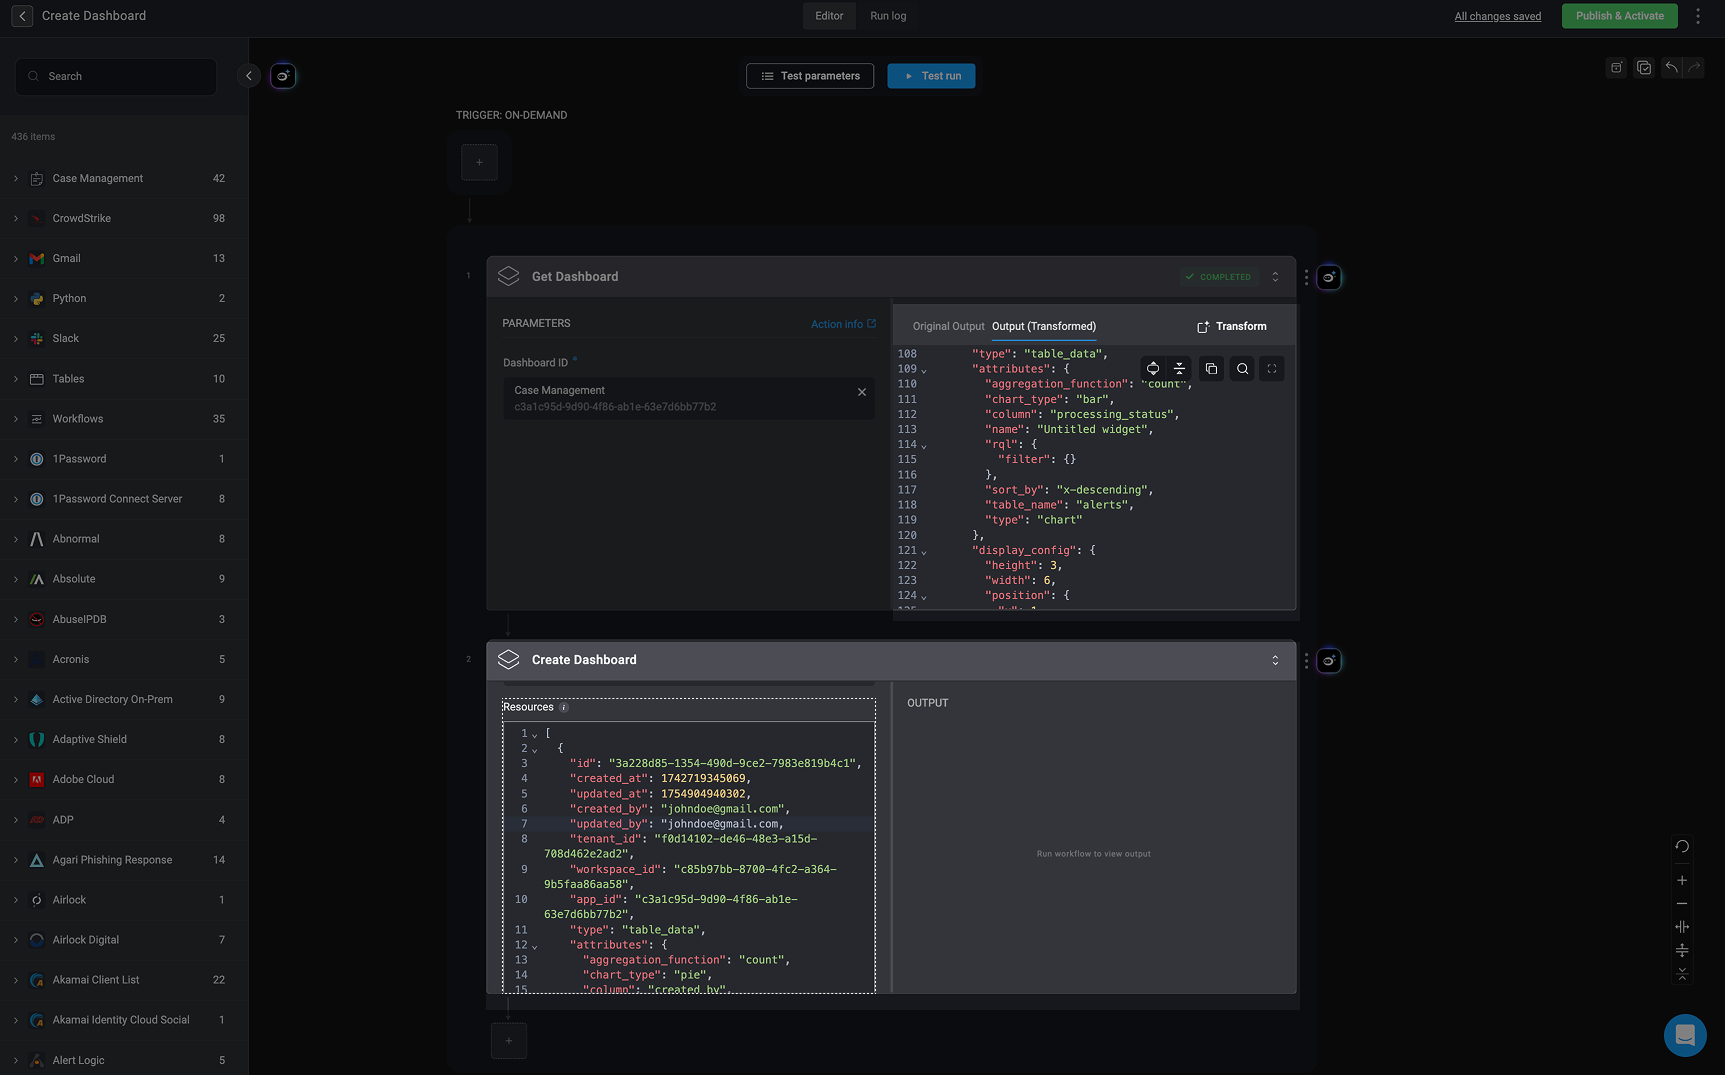
table_id fields, copy the contents of the .resources key from the transformed JSON output and paste it in the resource field of the ‘Create Dashboard’ action. These values represent the dashboard widgets and configurations that will be used in the Create Dashboard action.Resource Field Syntax Example
Resource Field Syntax Example
4
Execute the Create Dashboard Action
Once your JSON data has been pasted in the resource field, fill in the remaining parameters and you can successfully execute the Create Dashboard action. This will generate a new dashboard using the defined configuration, without errors related to table references or invalid widget mappings.