case_management:admin permissions. For more information about Case Management Permissions, navigate here. General Settings
System Settings
System Settings
System Settings

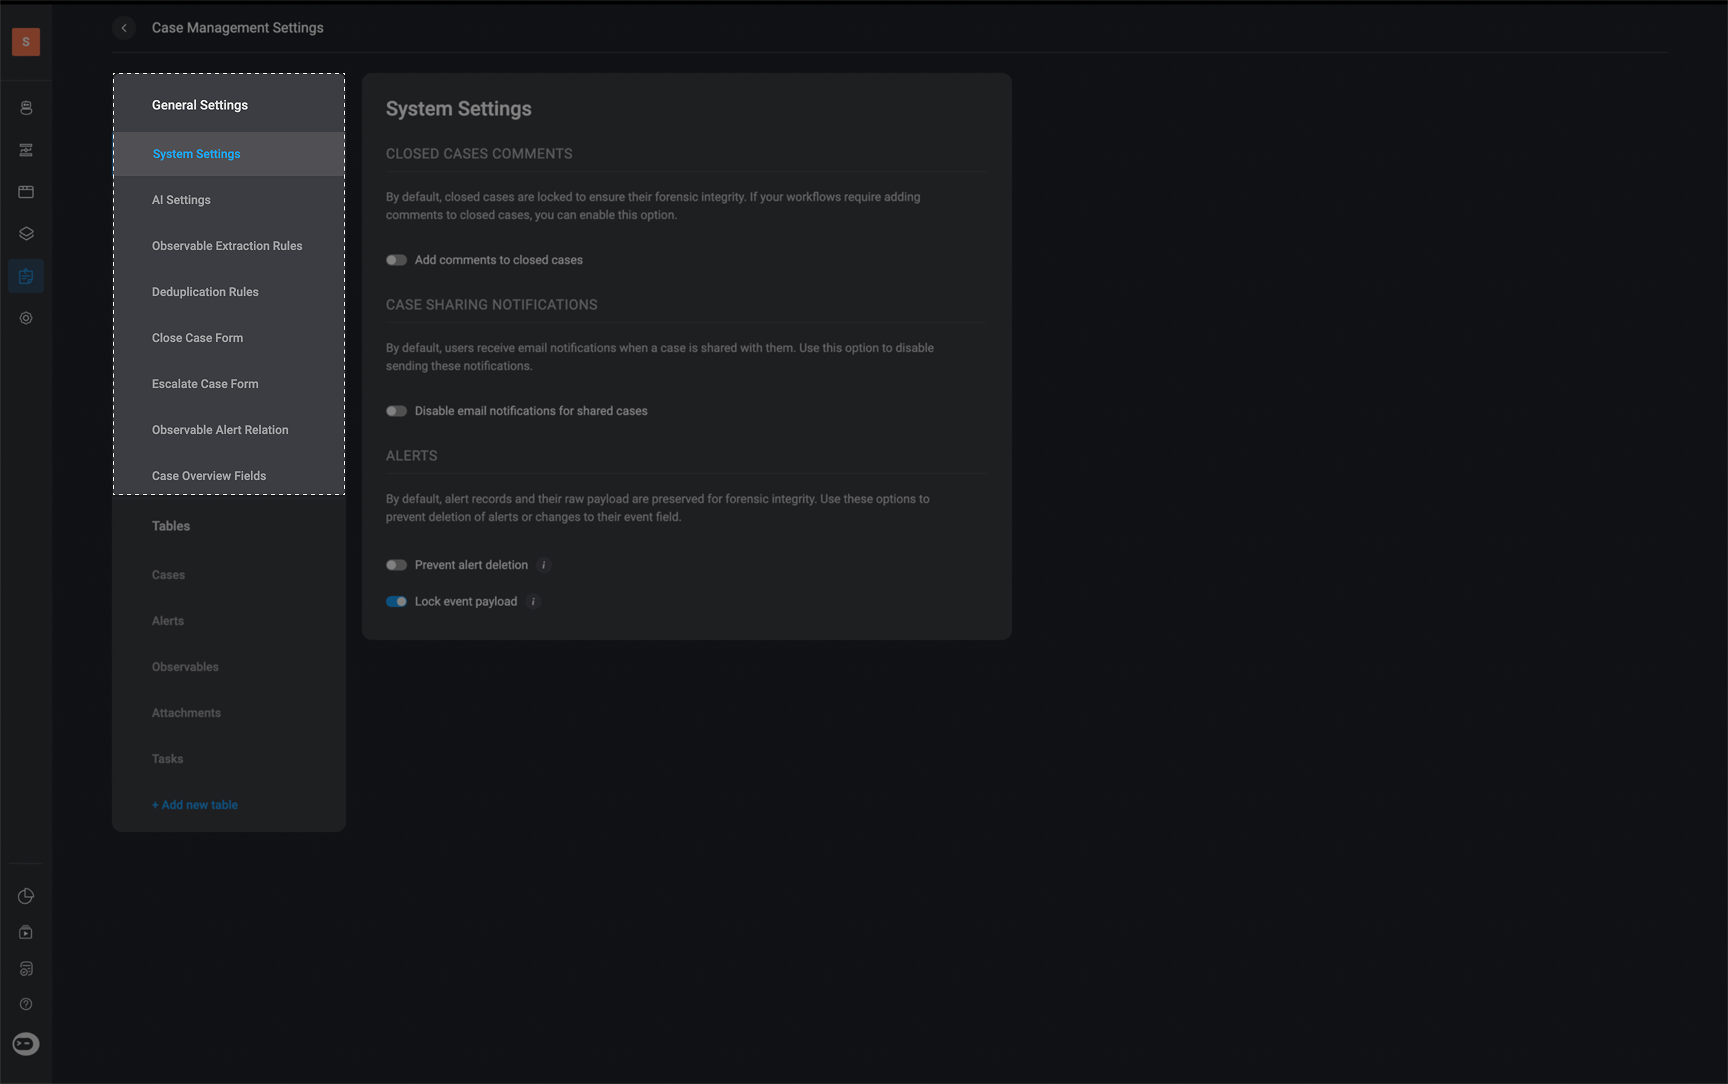
Closed Cases Comments
By default, closed cases are locked to ensure their forensic integrity. However, if you would like to add comments to closed cases, toggle the button to enable this setting.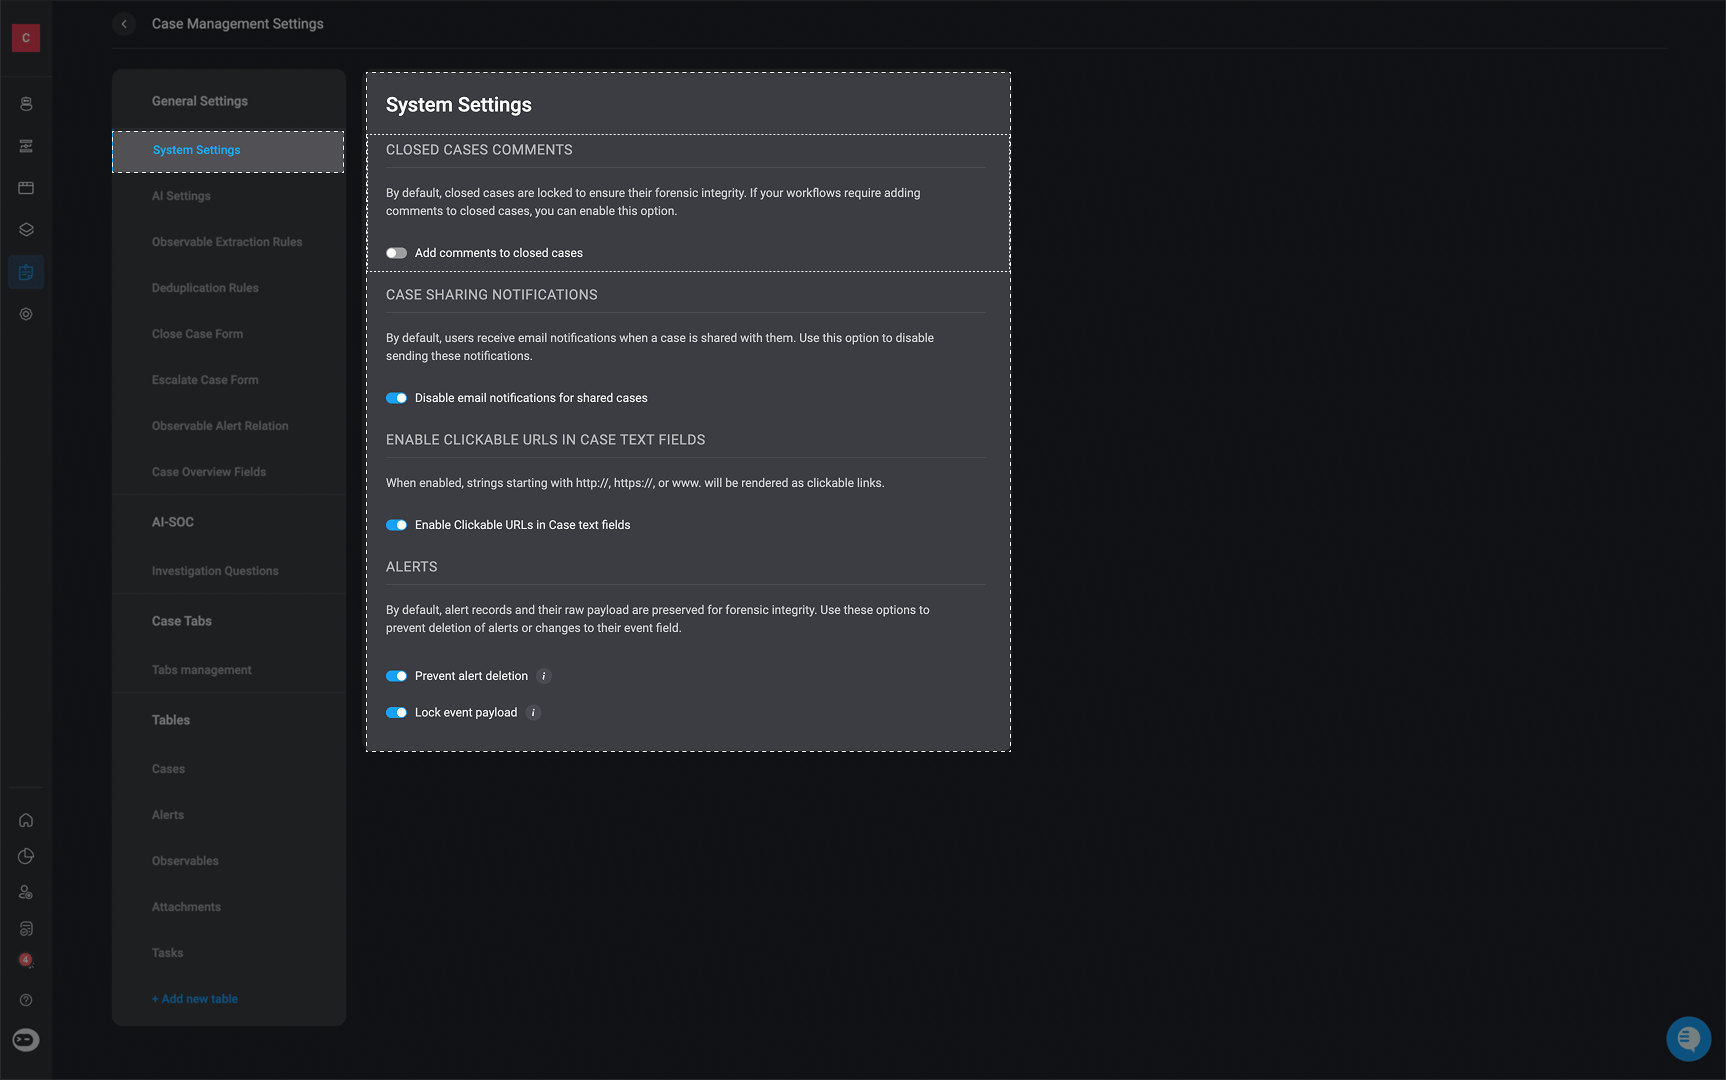
Case Sharing Notifications
By default, users receive email notifications when a case is shared with them. Use this option to disable sending these notifications.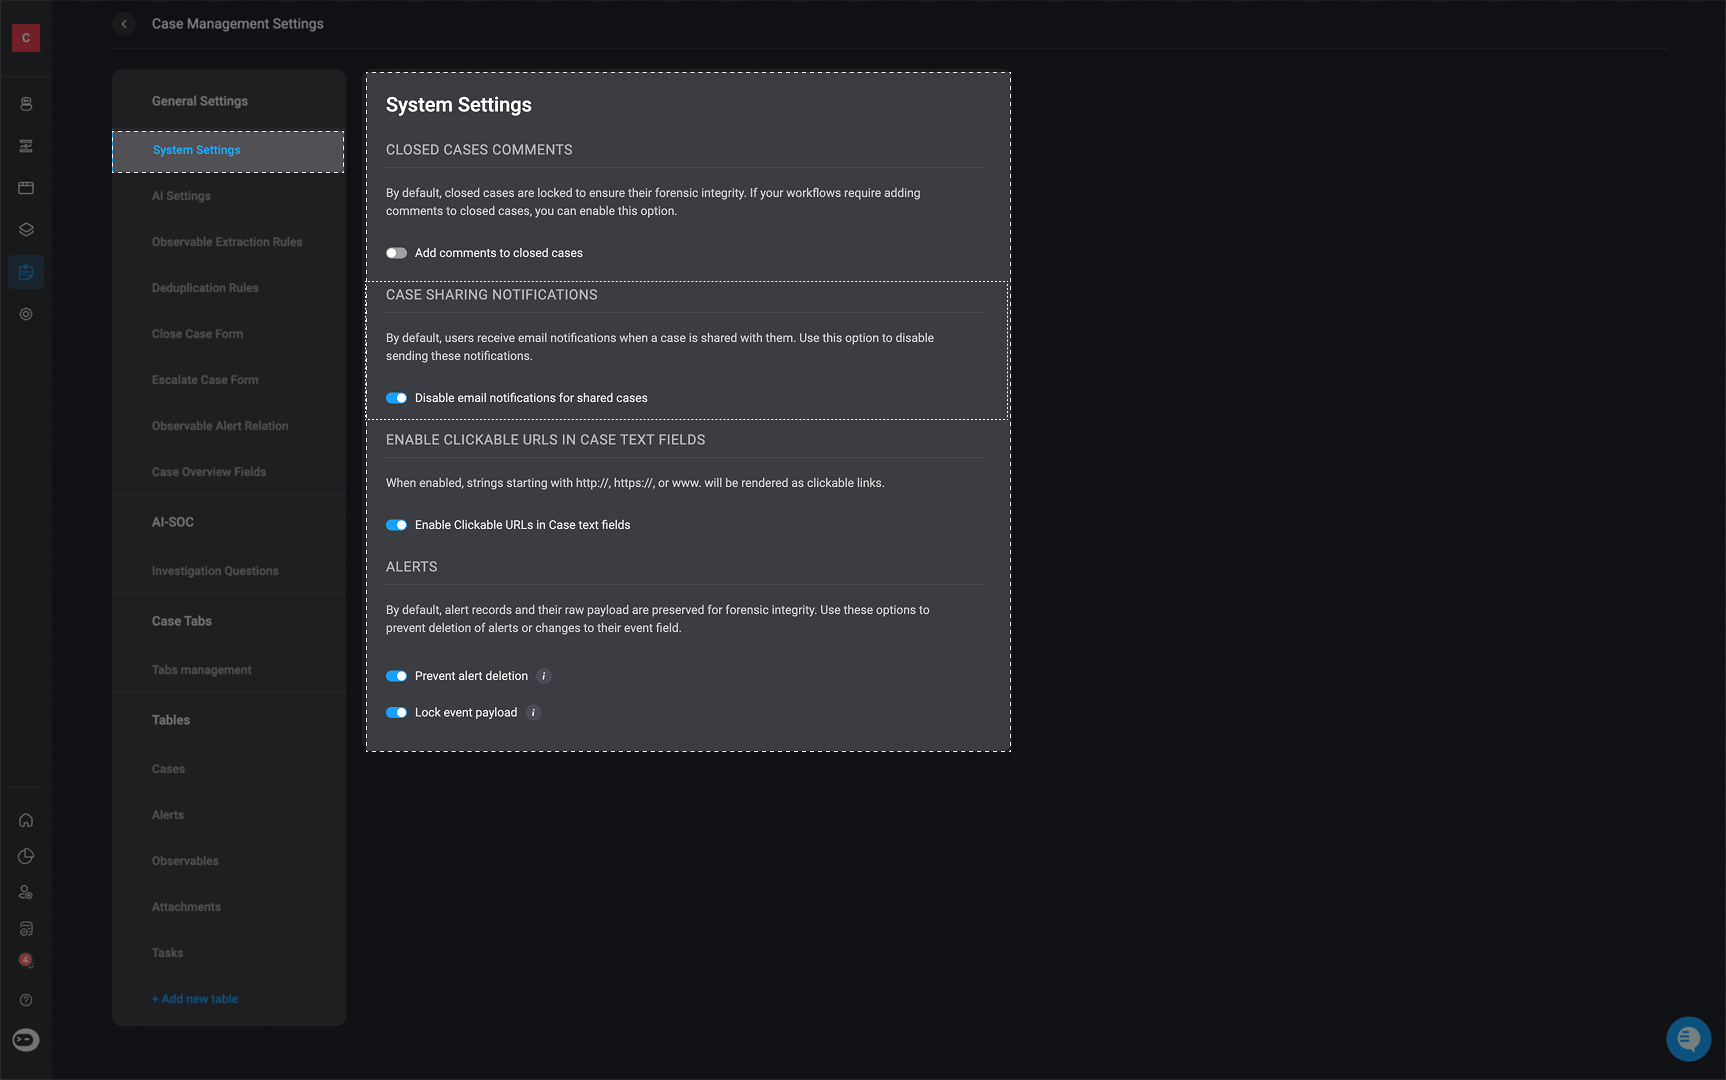
Enable Clickable URLs in Case Text Fields
When enabled, strings starting with http://, https://, or www. will be rendered as clickable links.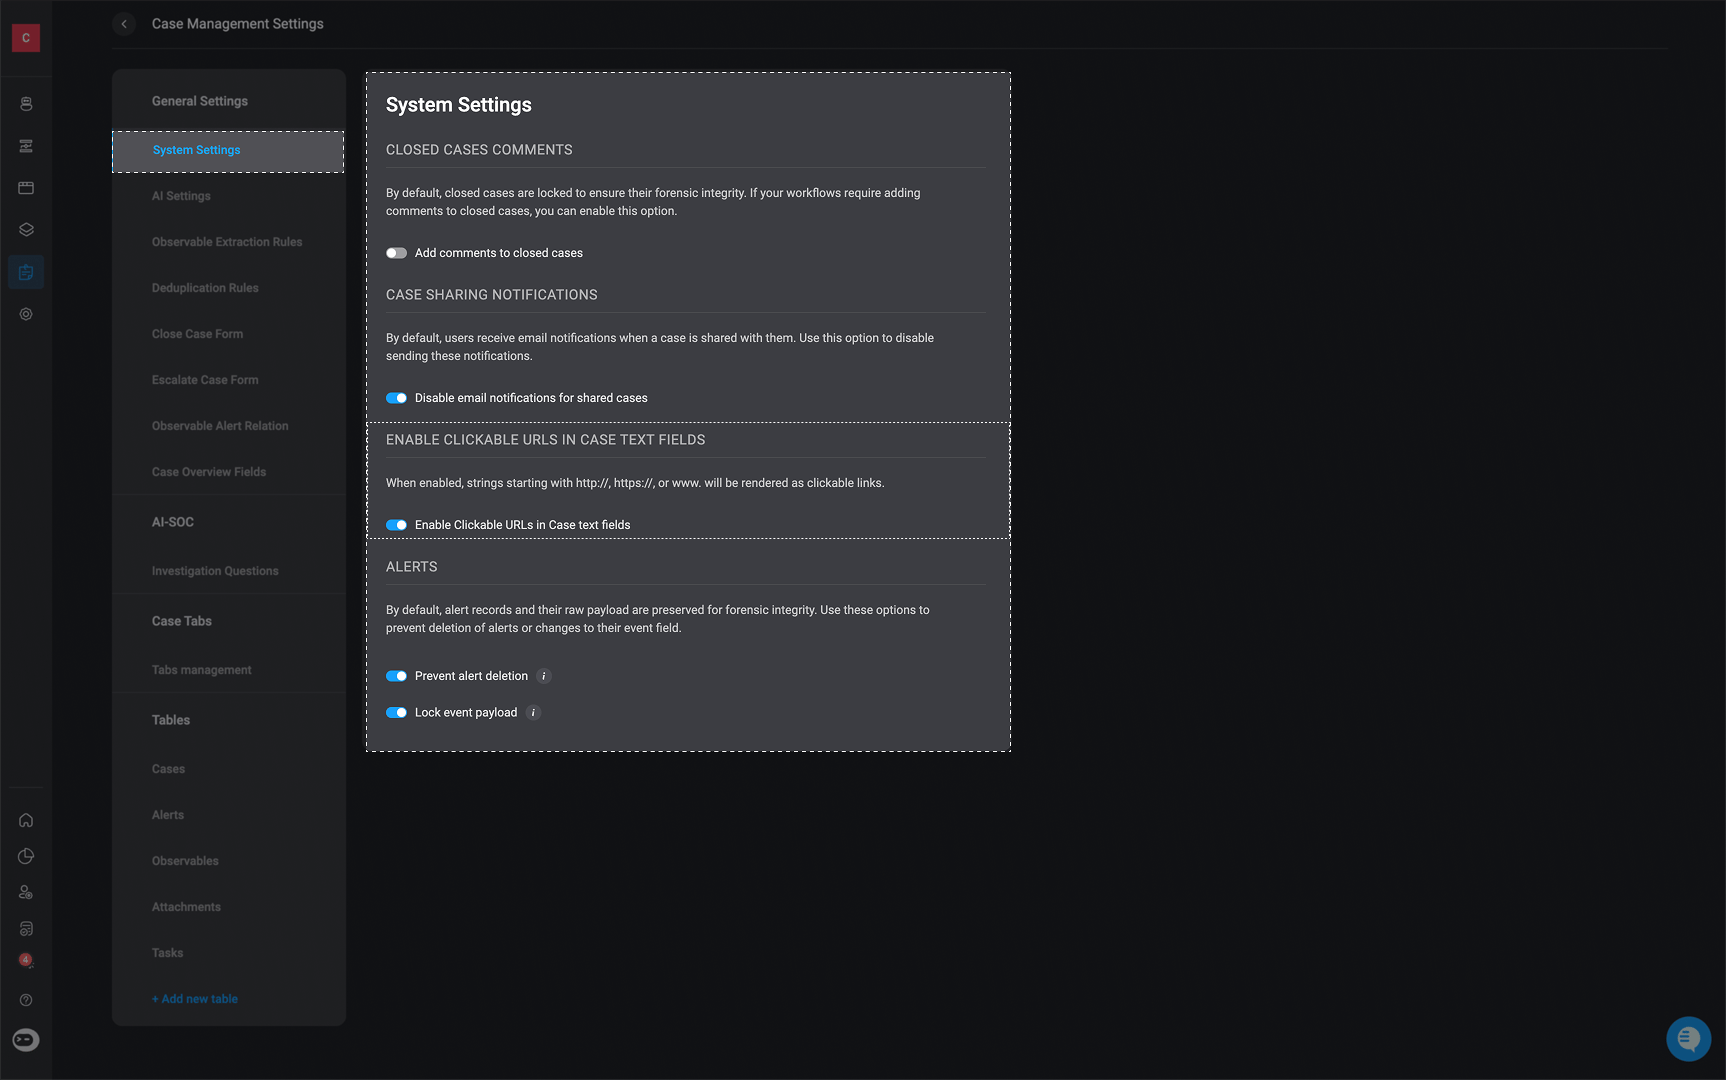
Alerts
Prevent Alert Deletion
When enabled, alert records become permanent and cannot be deleted, ensuring complete audit trails for compliance and forensic purposes.Alert Event Lock
By default, this setting is enabled to maintain data integrity and audibility. It locks the event field on all alert records, making itread-only so that the field cannot be modified. You can disable this behavior by toggling the setting off.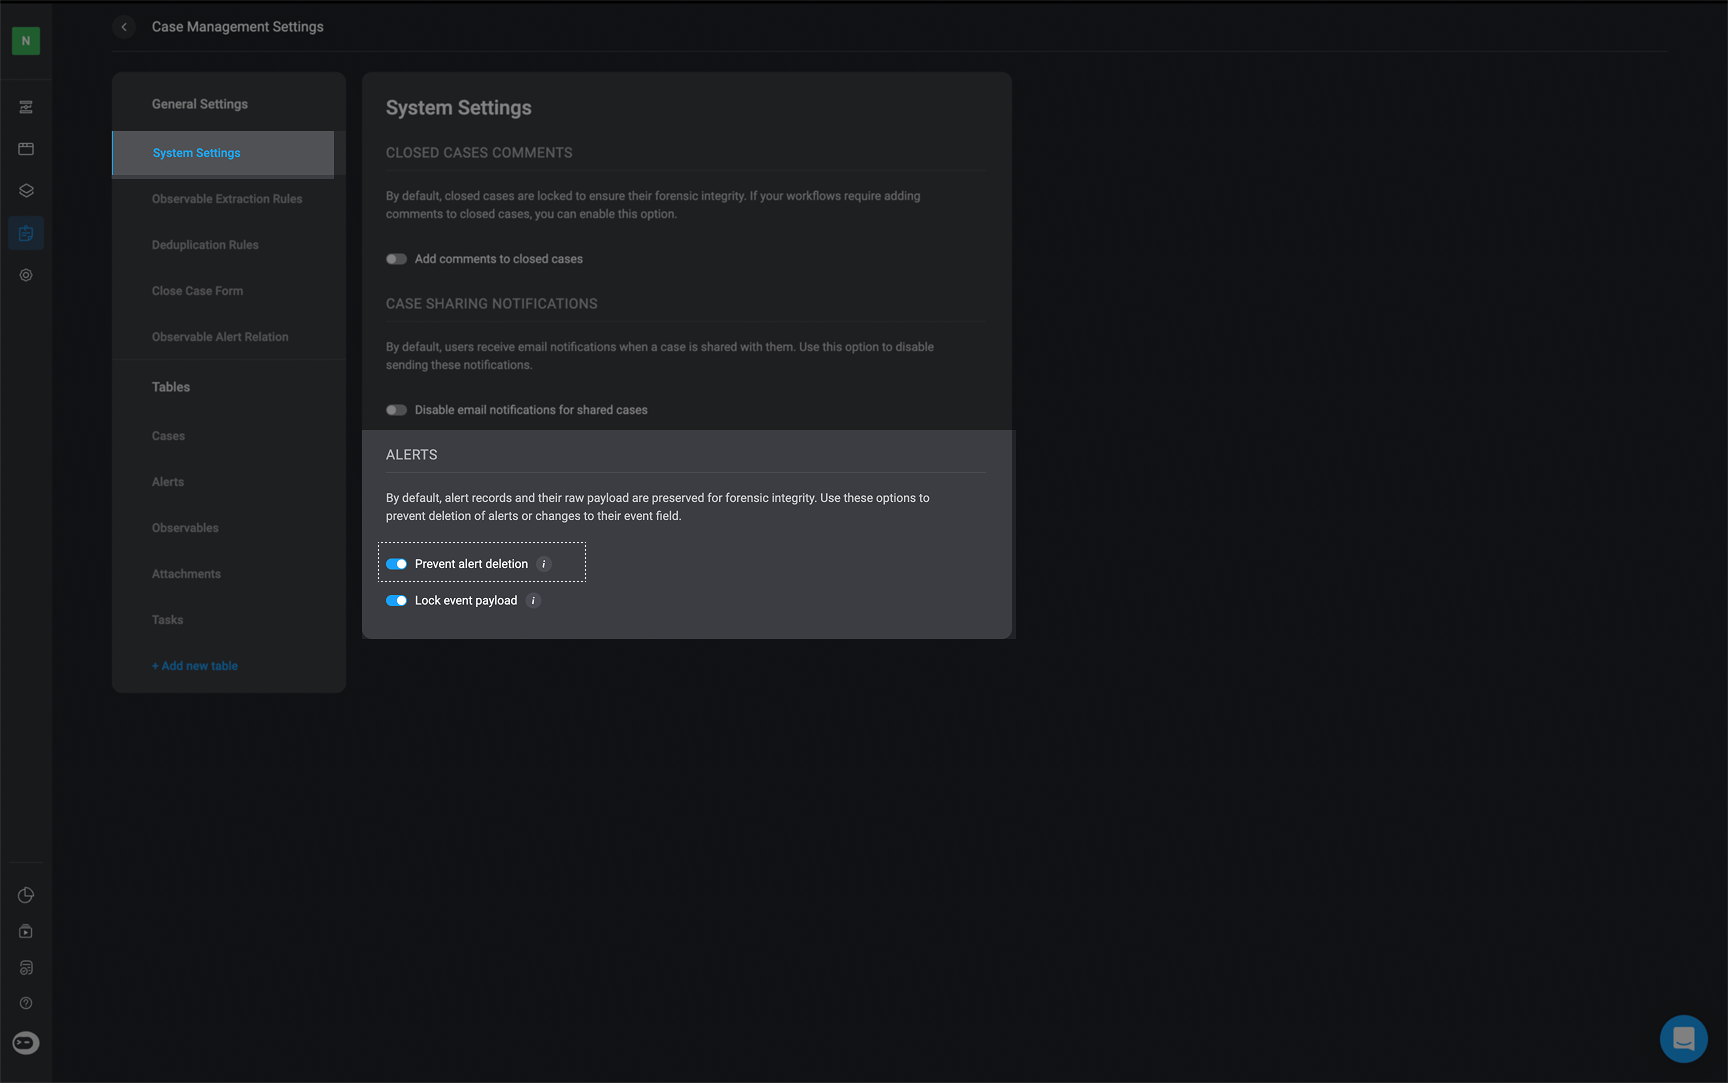
AI Settings
AI Settings
AI Settings
By default, AI features are turned off. You can enable them to harness AI capabilities to expedite case investigation and remediation.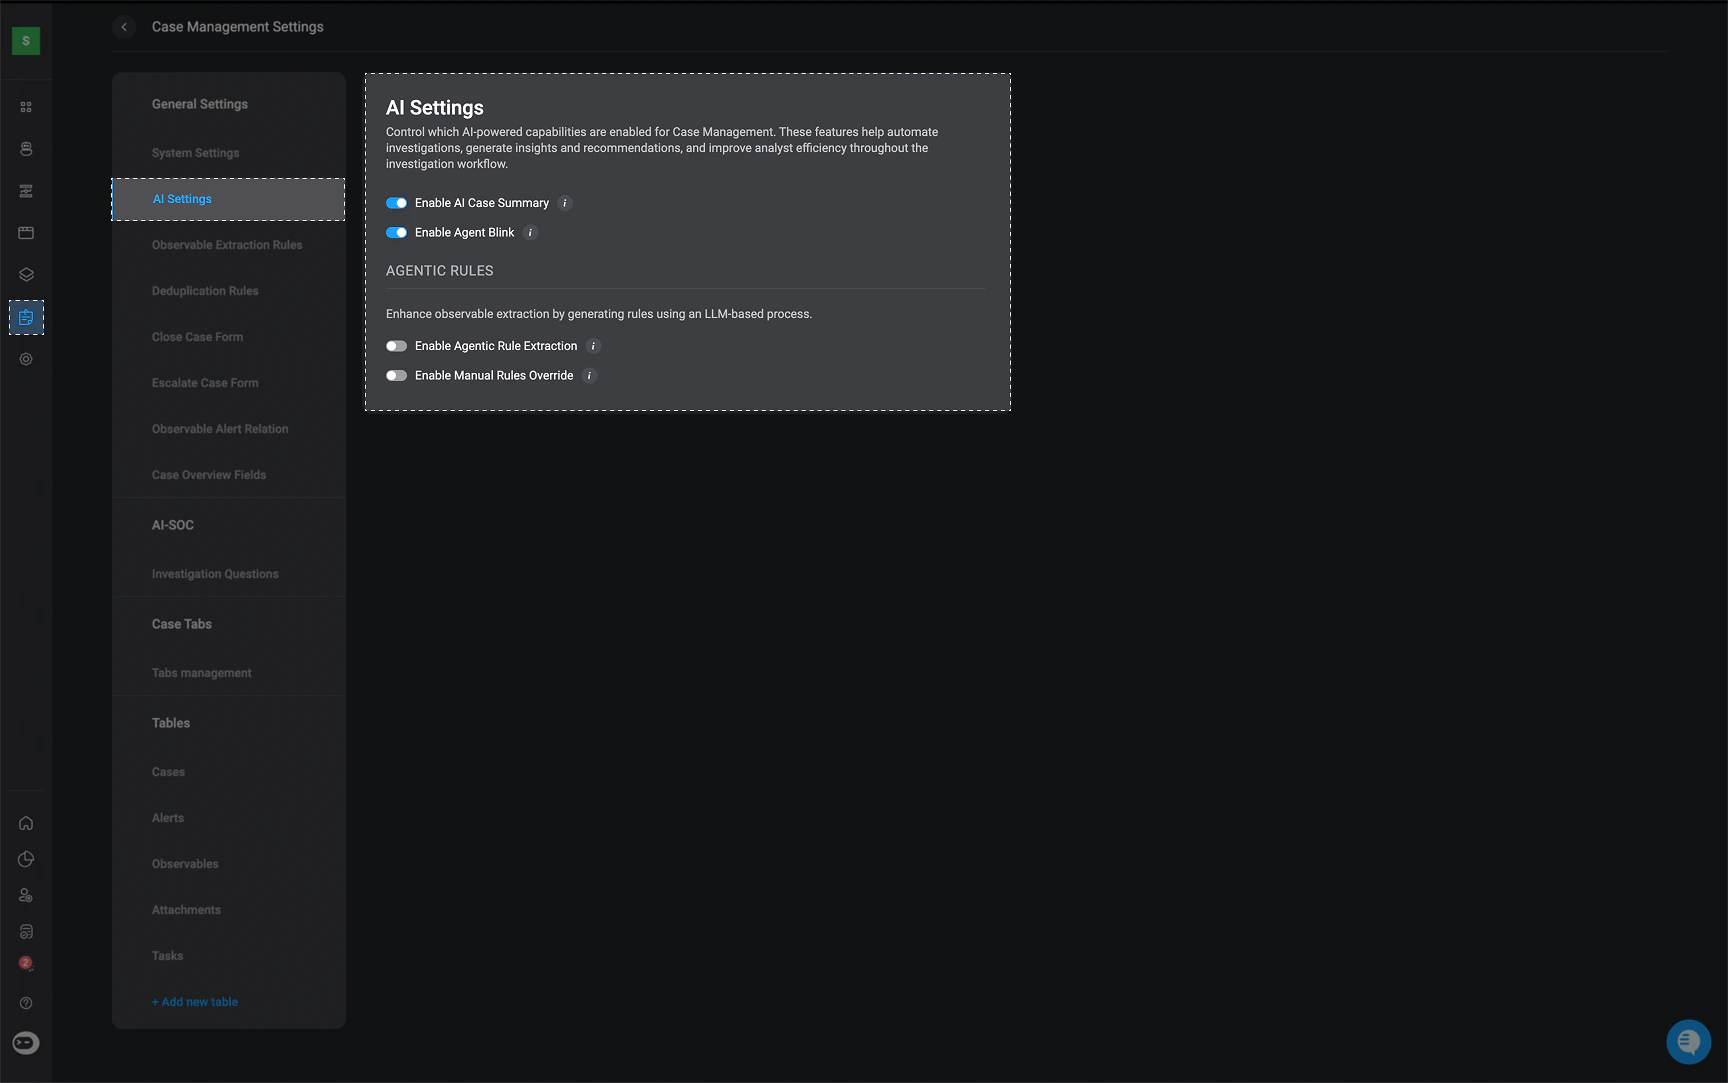
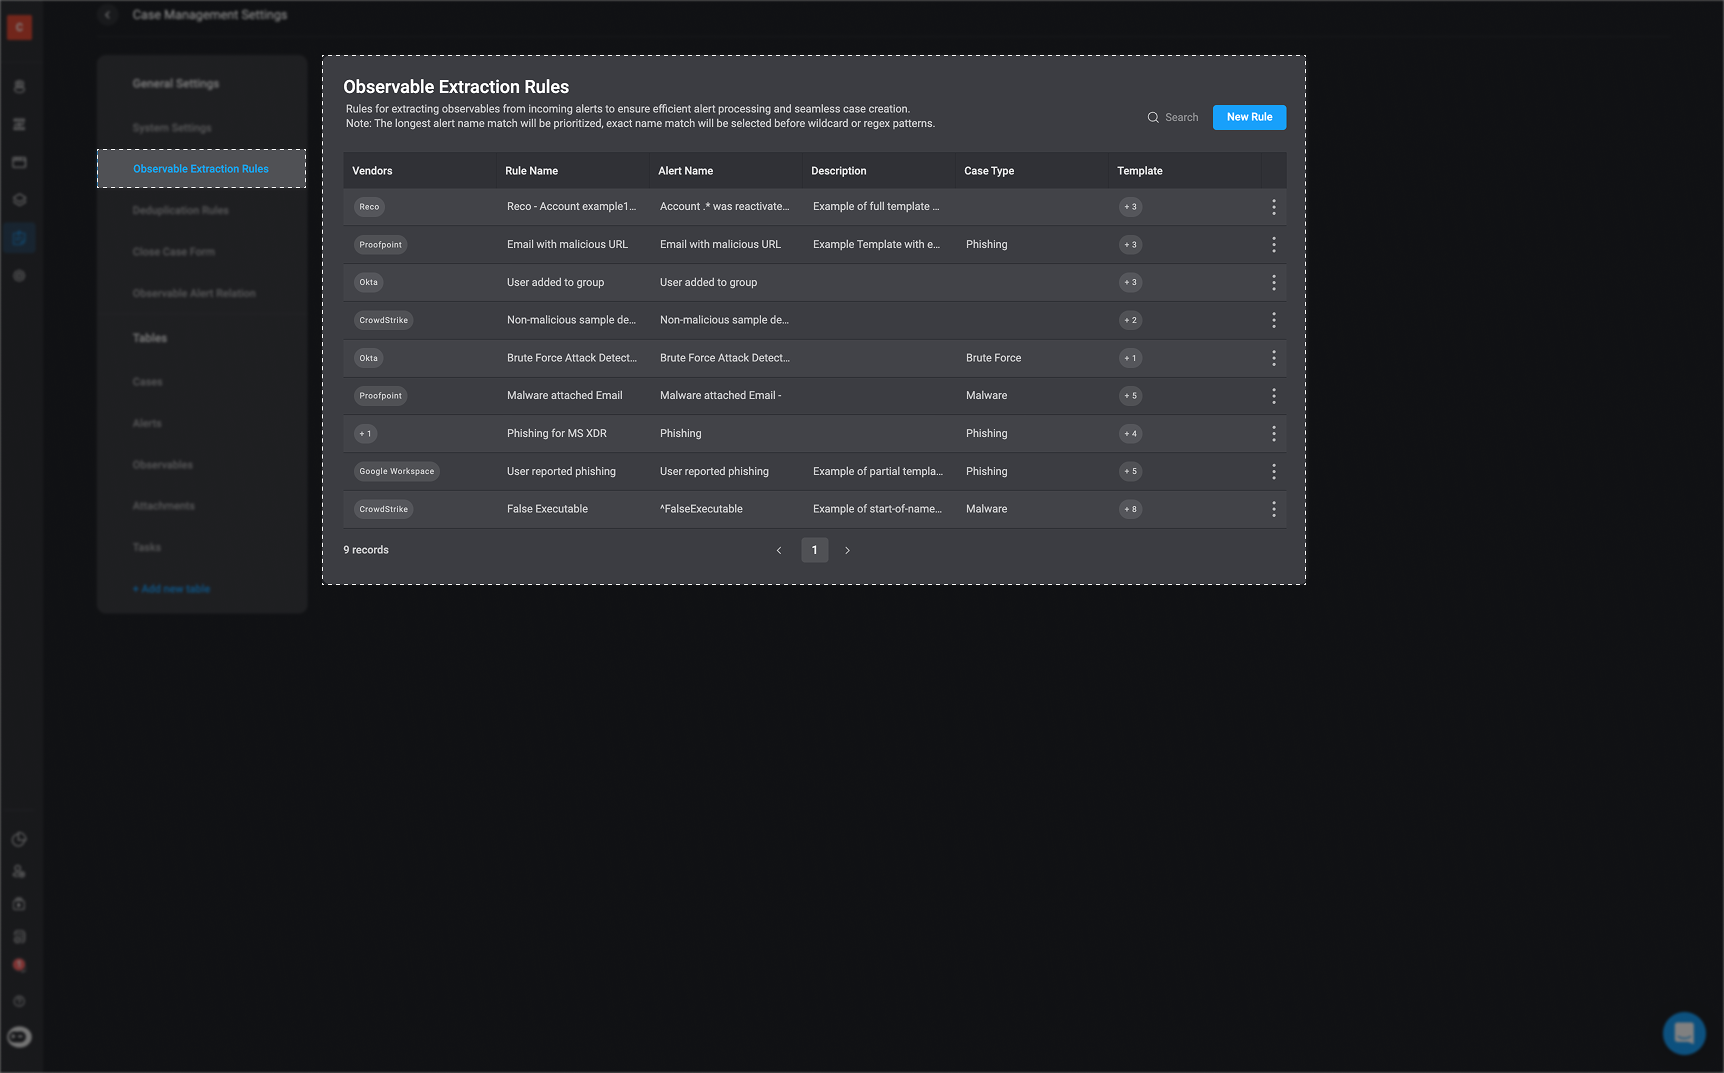
Observable Extraction Rules
Observable Extraction Rules
Observable Extraction Rules
‘Observable Extraction Rules’ define how the system processes incoming alert payloads to identify and extract key observables and their relations. These observables, such asIP addresses, URLs, usernames, file hashes, and hostnames, are critical for understanding the context and potential impact of an alert. Extracted observables enable further enrichment, triage, and automated response actions.For detailed instructions on creating and using ‘Observable Extraction Rules’, see the Observable Extraction Rules documentation.
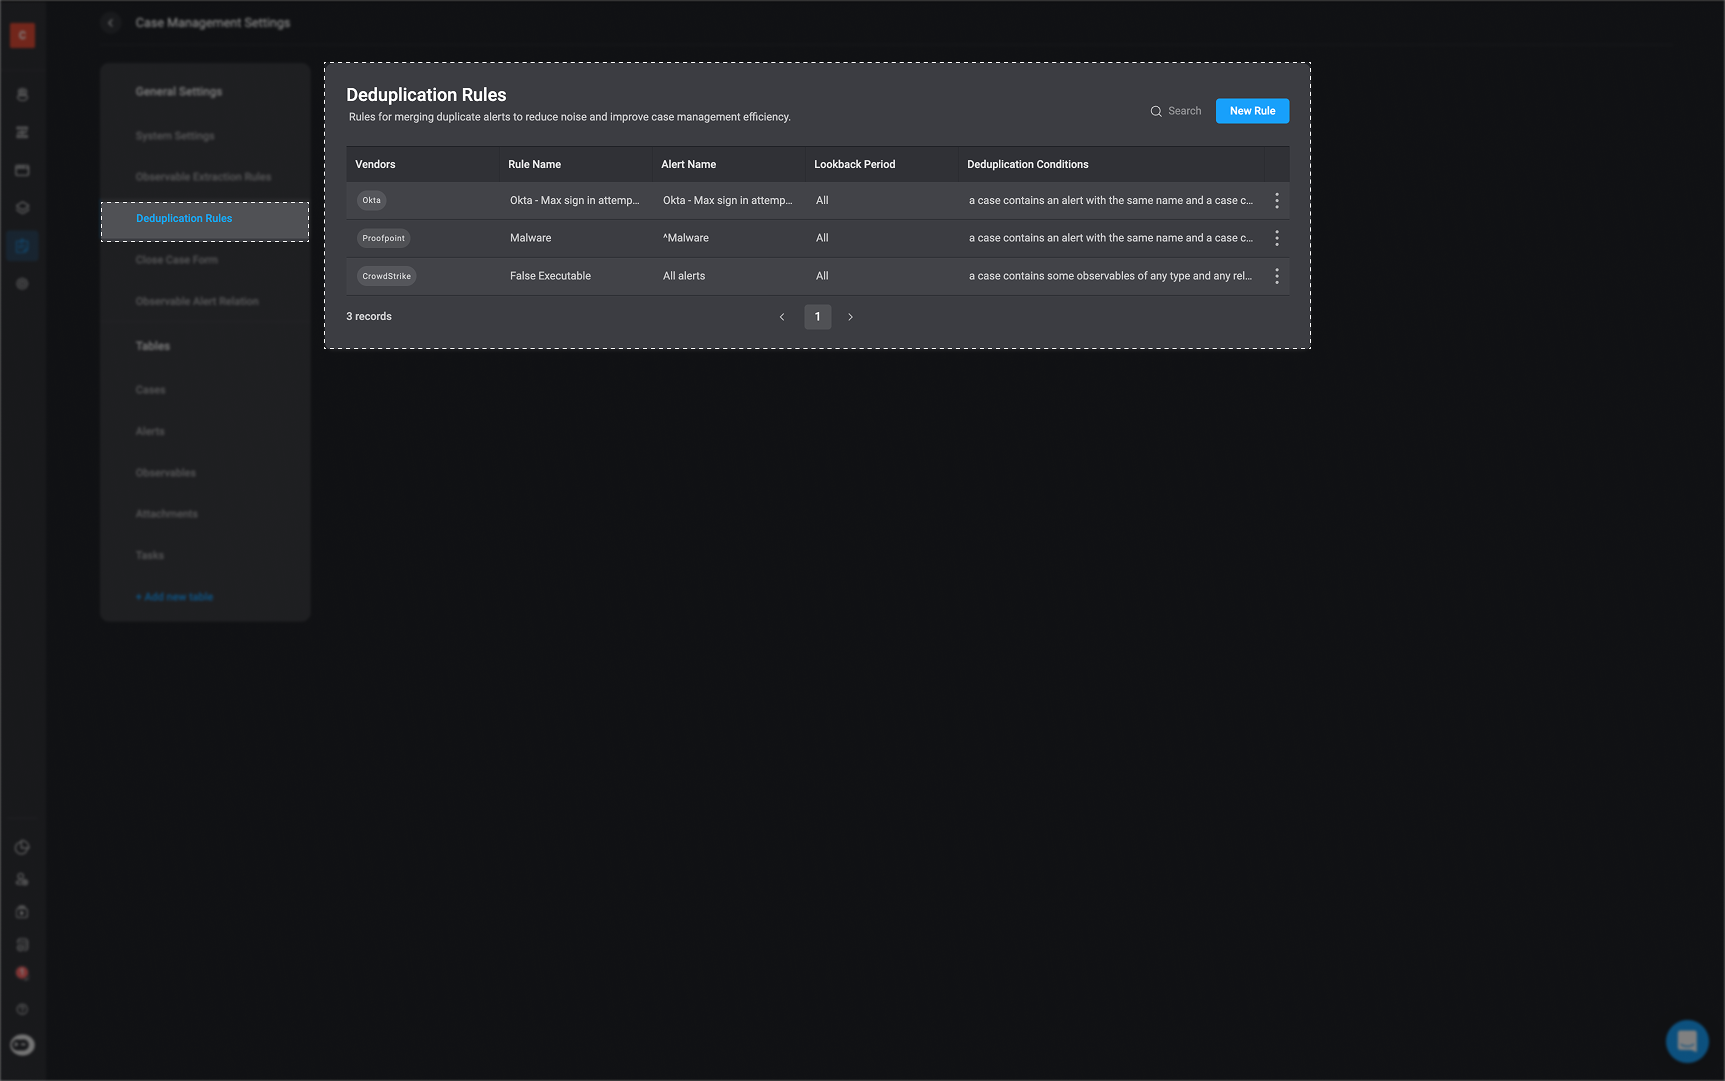
Deduplication Rules
Deduplication Rules
Deduplication Rules
‘Deduplication Rules’ determine how the system identifies and groups incoming alerts that relate to the same underlying issue. Rather than opening a new case for every alert, the system evaluates each alert against these rules to decide whether it should be added to an existing case. This helps reduce case duplication and keeps investigations organized.For detailed instructions on creating and using Deduplication Rules, see the Deduplication Rules documentation.
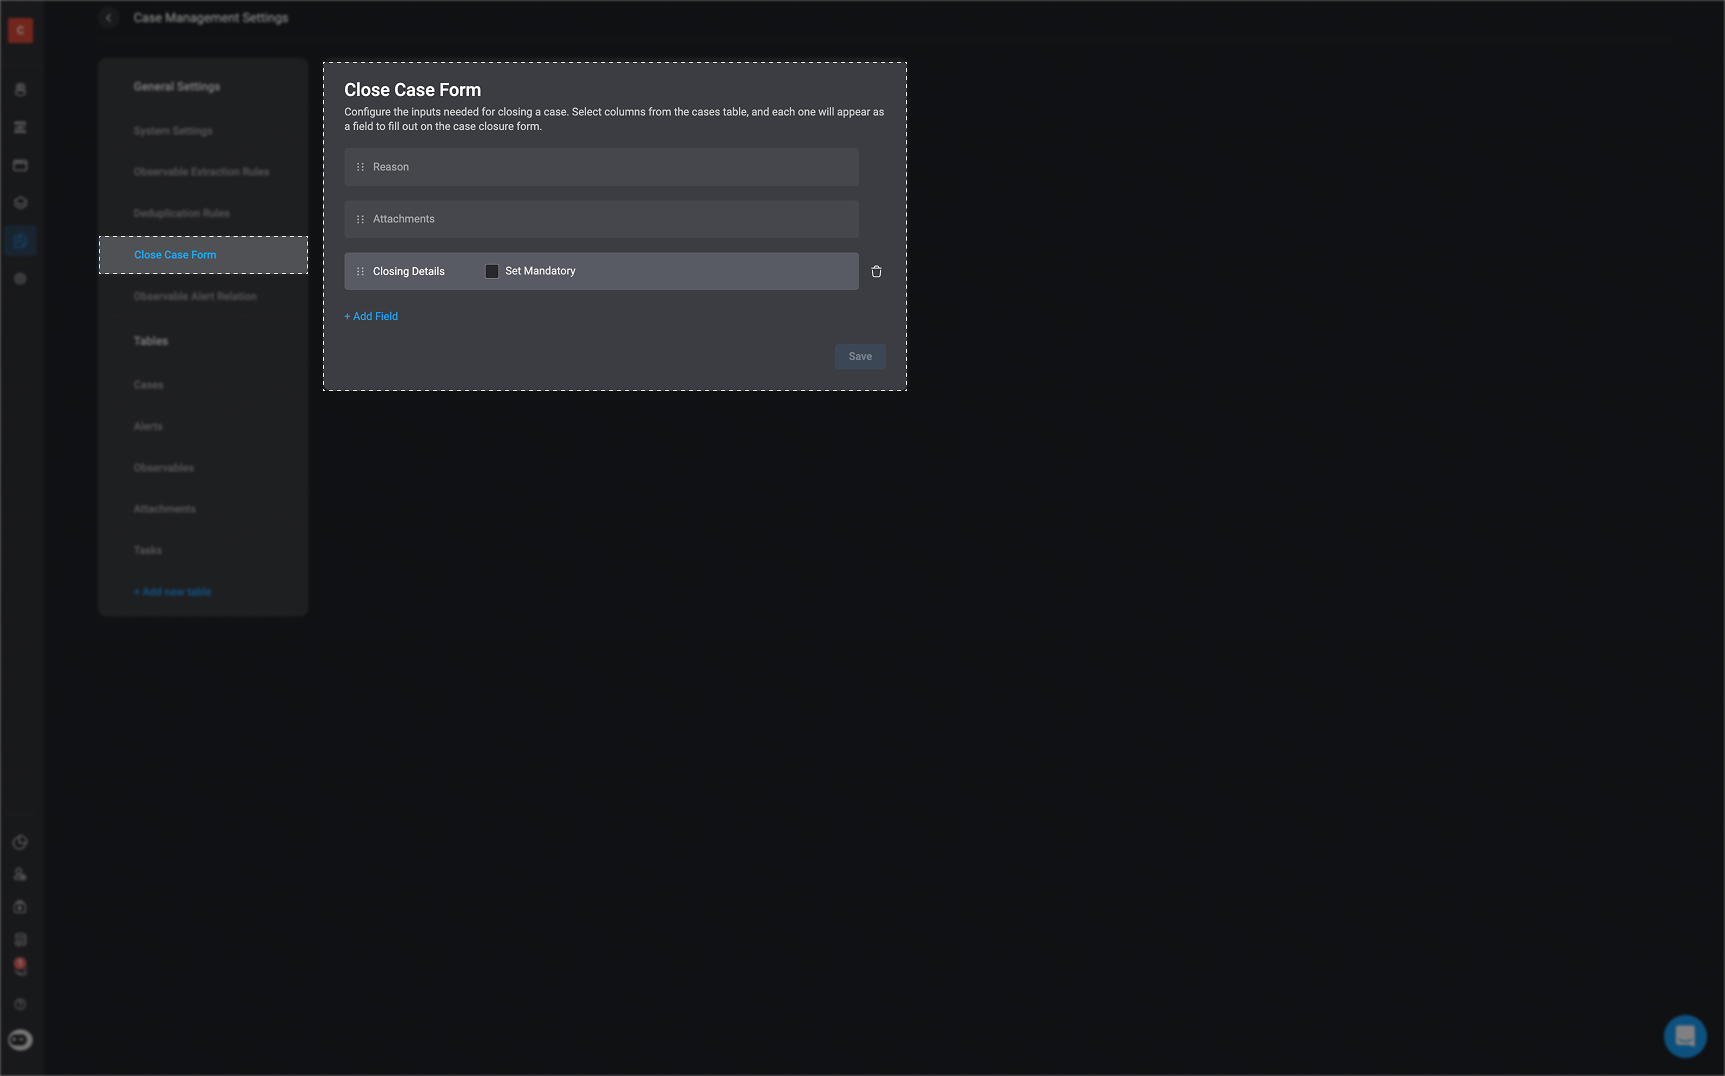
Close Case Reason Form
Close Case Reason Form
- In the Close Case Reason tab, you can customize the case closure process by configuring the required inputs. Click the “Select Field” button and select an input field from the dropdown menu. You can make the selected field mandatory by checking the corresponding box.
- The input fields available in the Select Field dropdown menu correspond to the columns in the Cases Table. To add new fields to the “Close Case Reason Form,” you must first create and add a new column to the Cases Table.
Escalate Case Form
Escalate Case Form
Escalate Case Form
Configure the inputs required for escalating a case by selecting relevant fields. Each selected column will appear as a field on the ‘Escalate Case Form’ for users to complete during the case escalation process.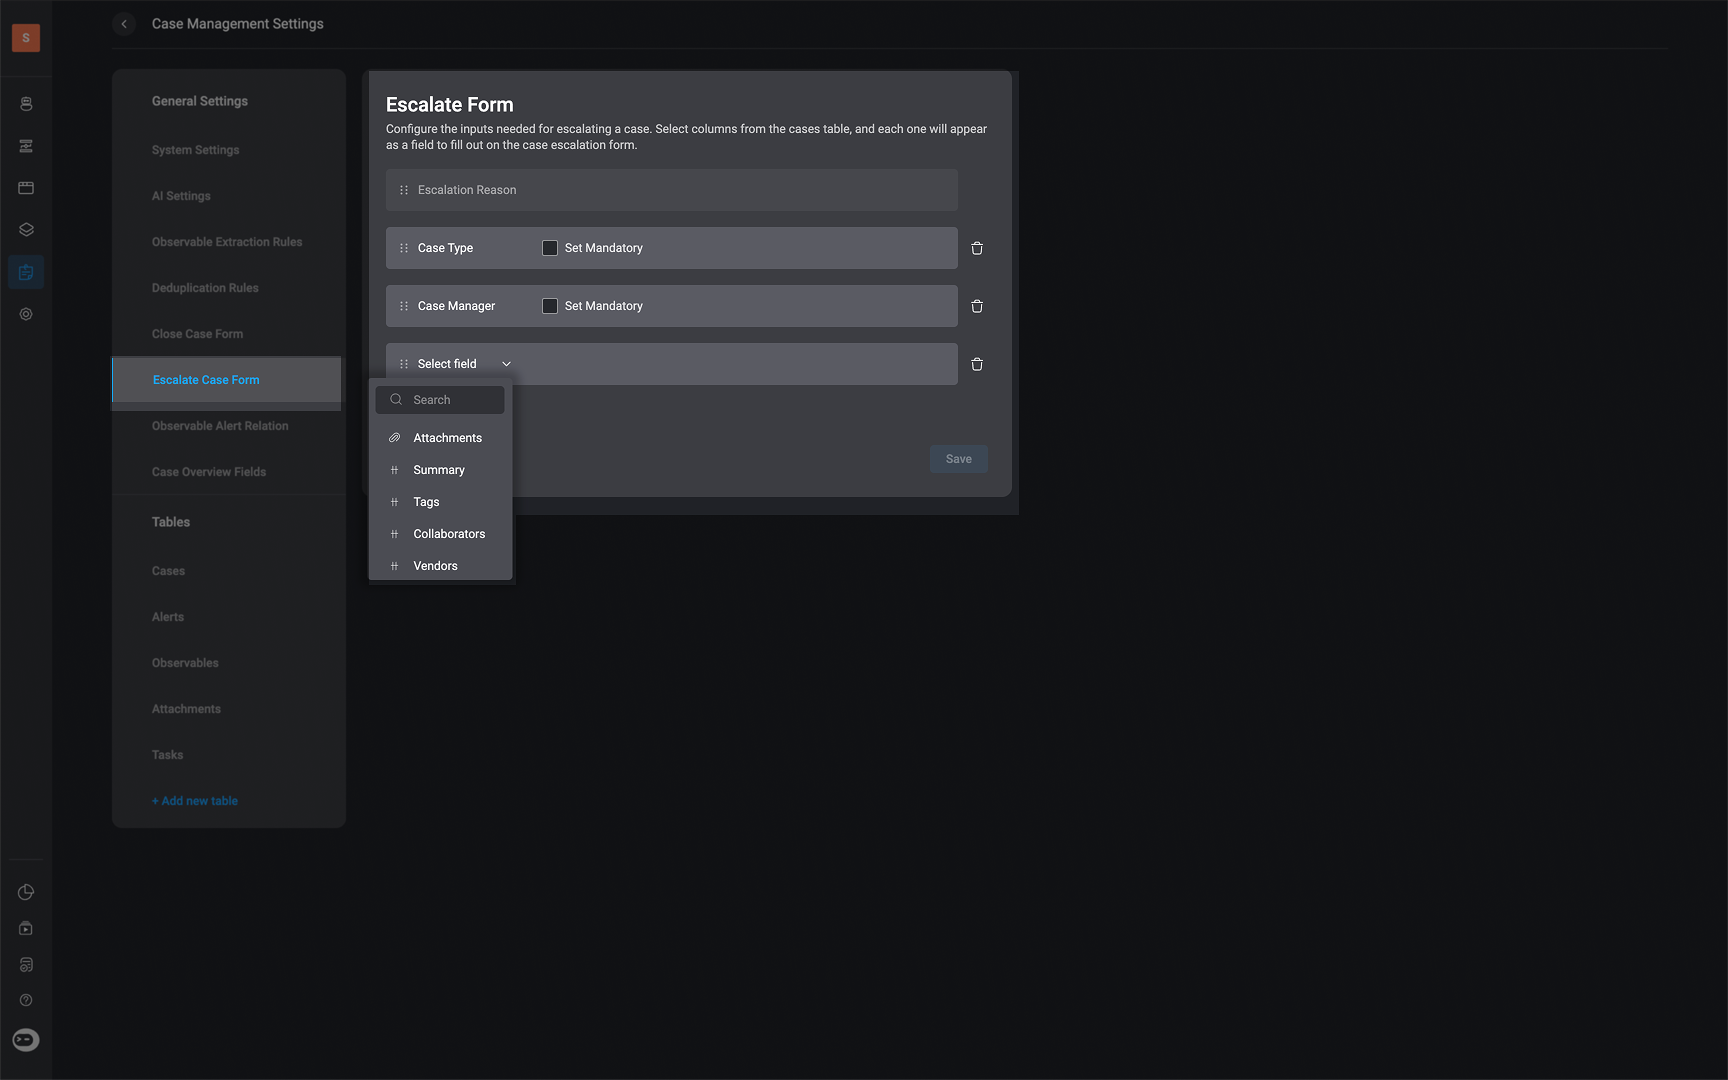
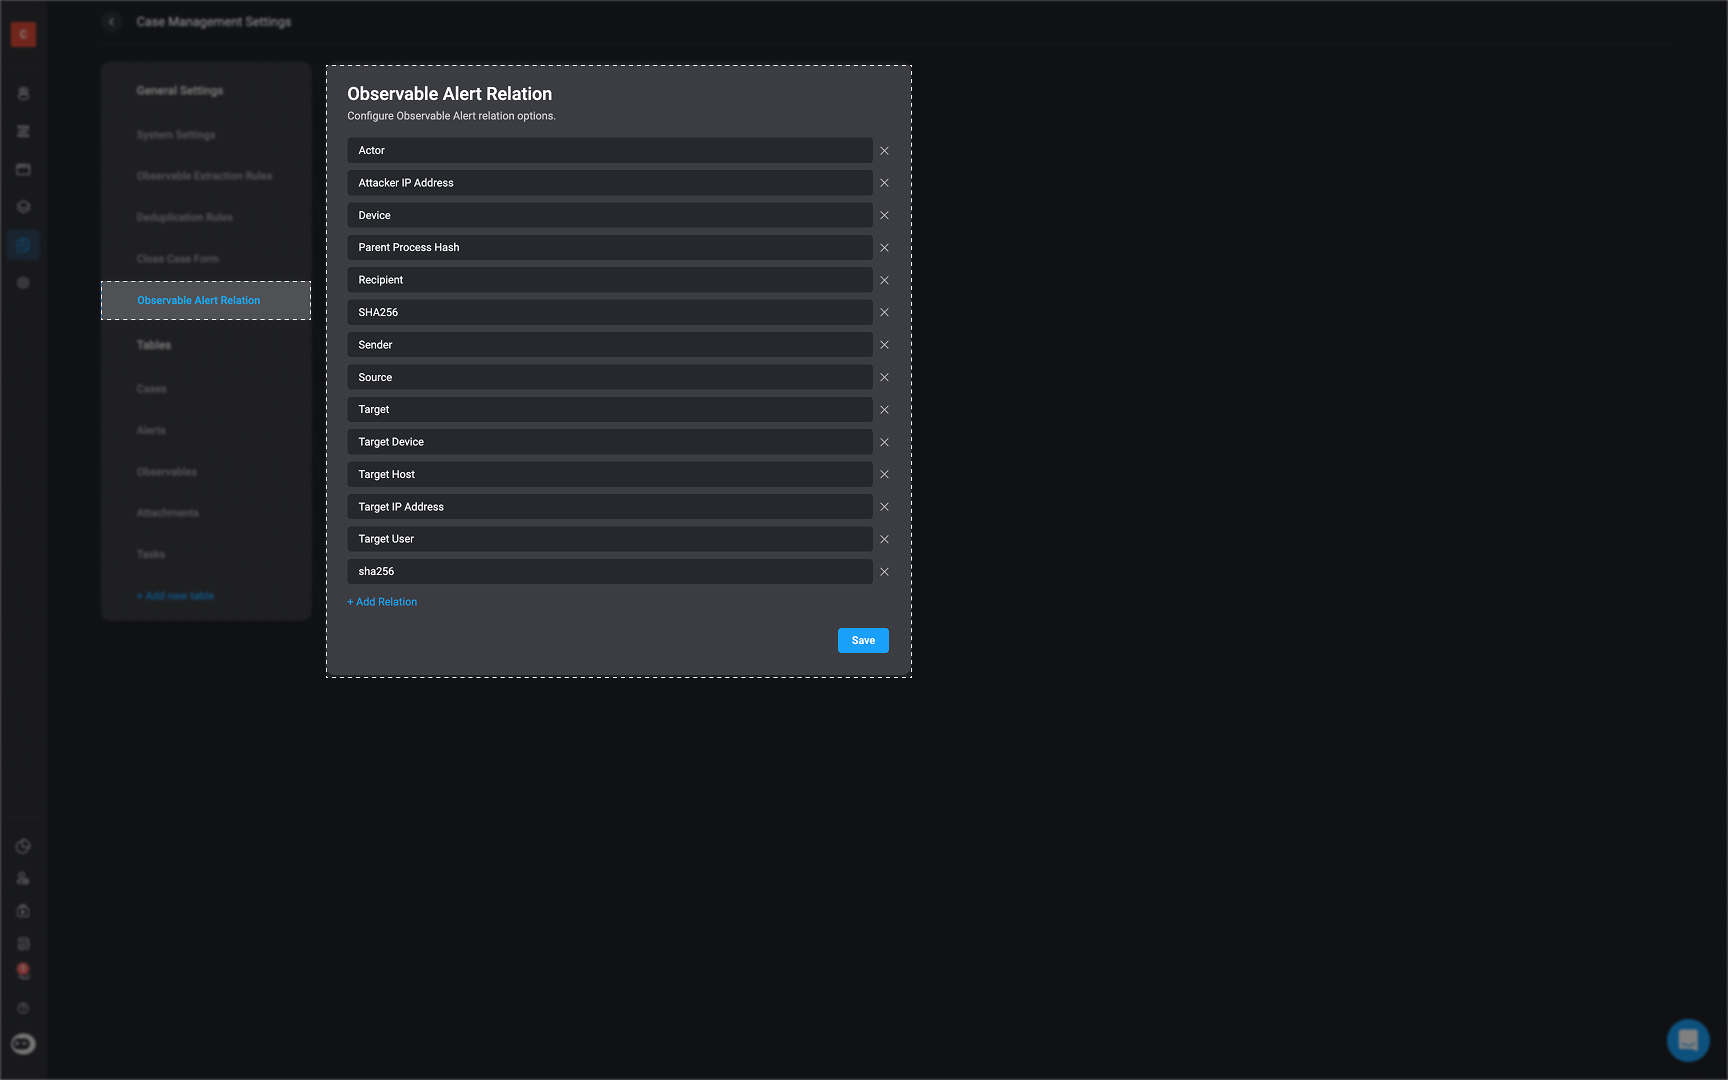
Observable Alert Relation
Observable Alert Relation
- In the Observable Alert Relation tab, you can edit the already existing relations, delete relations or add new relations.
- Any changes made to a relation are automatically applied to all associated records. This includes updates to Deduplication Rules Settings and Extract Observable Rules that reference the relation, ensuring consistency across your case management configuration.
- When a relation is deleted, any rules that reference that relation will have their relation scope reset, but the rules themselves will not be deleted. The rule will then apply to alerts regardless of relation.
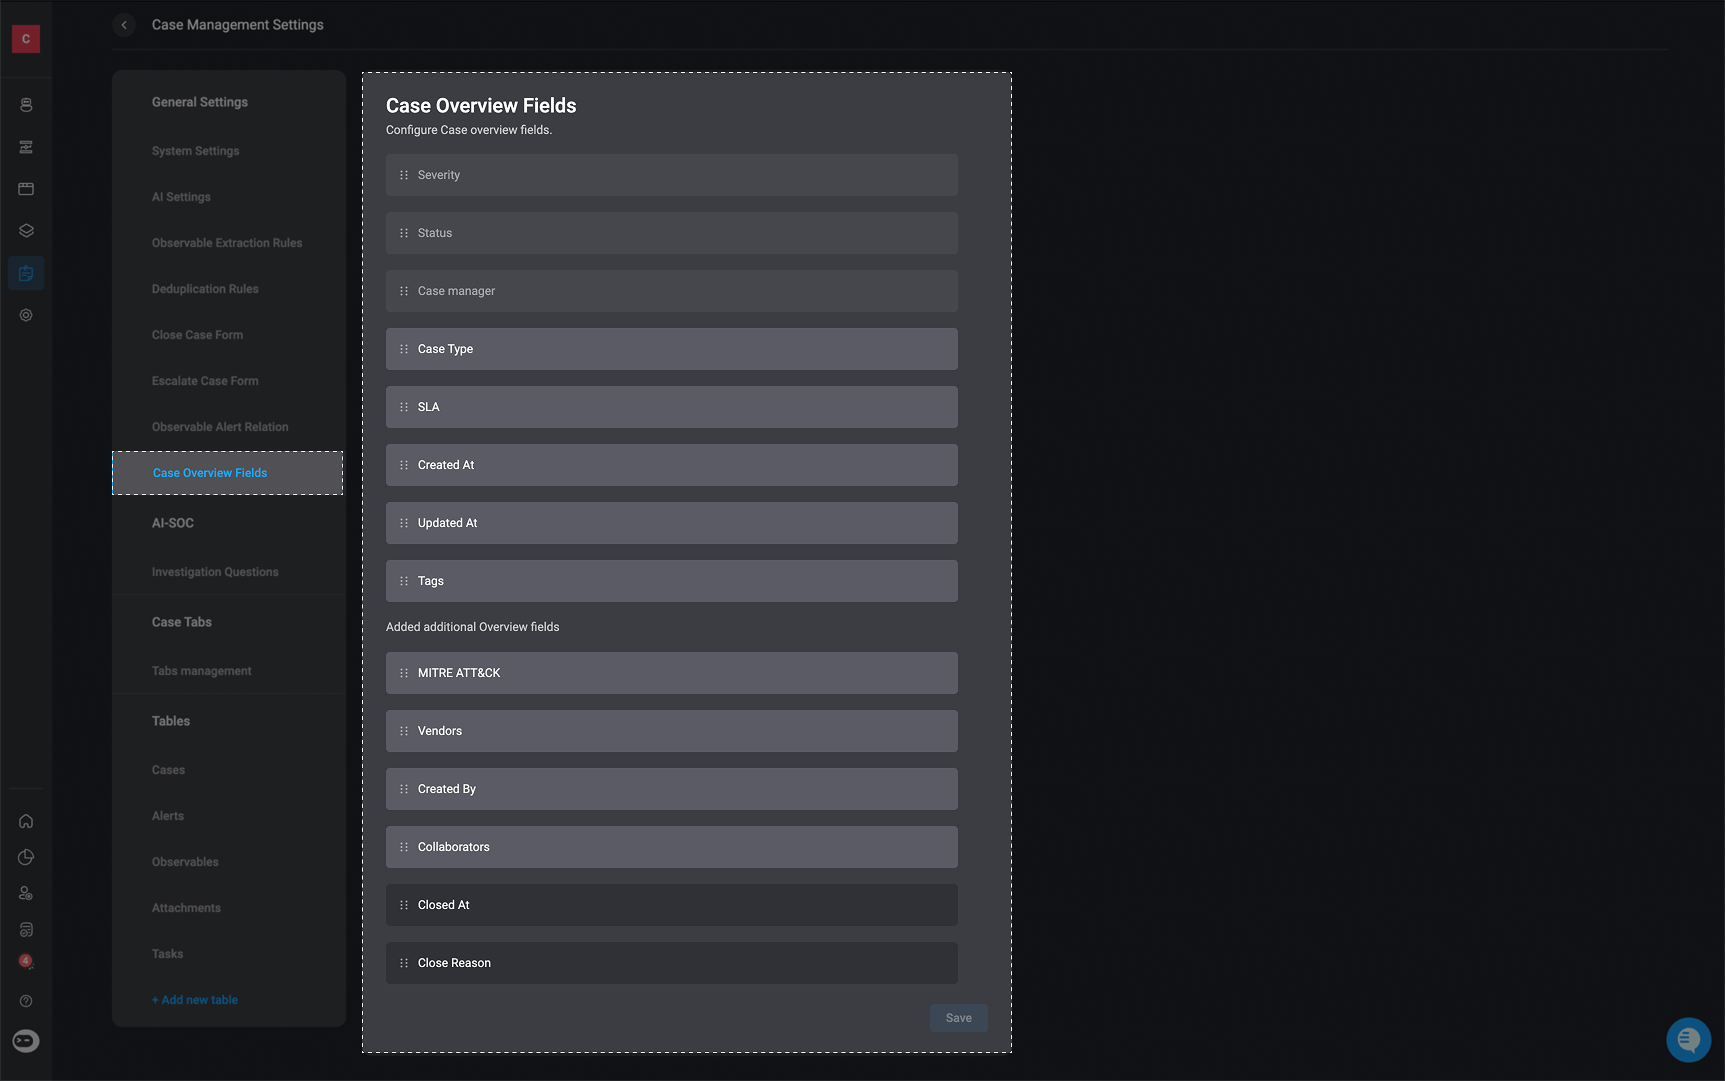
Case Overview Fields
Case Overview Fields
- In the Case Overview Fields tab, you can show or hide specific case field properties according to your preference.
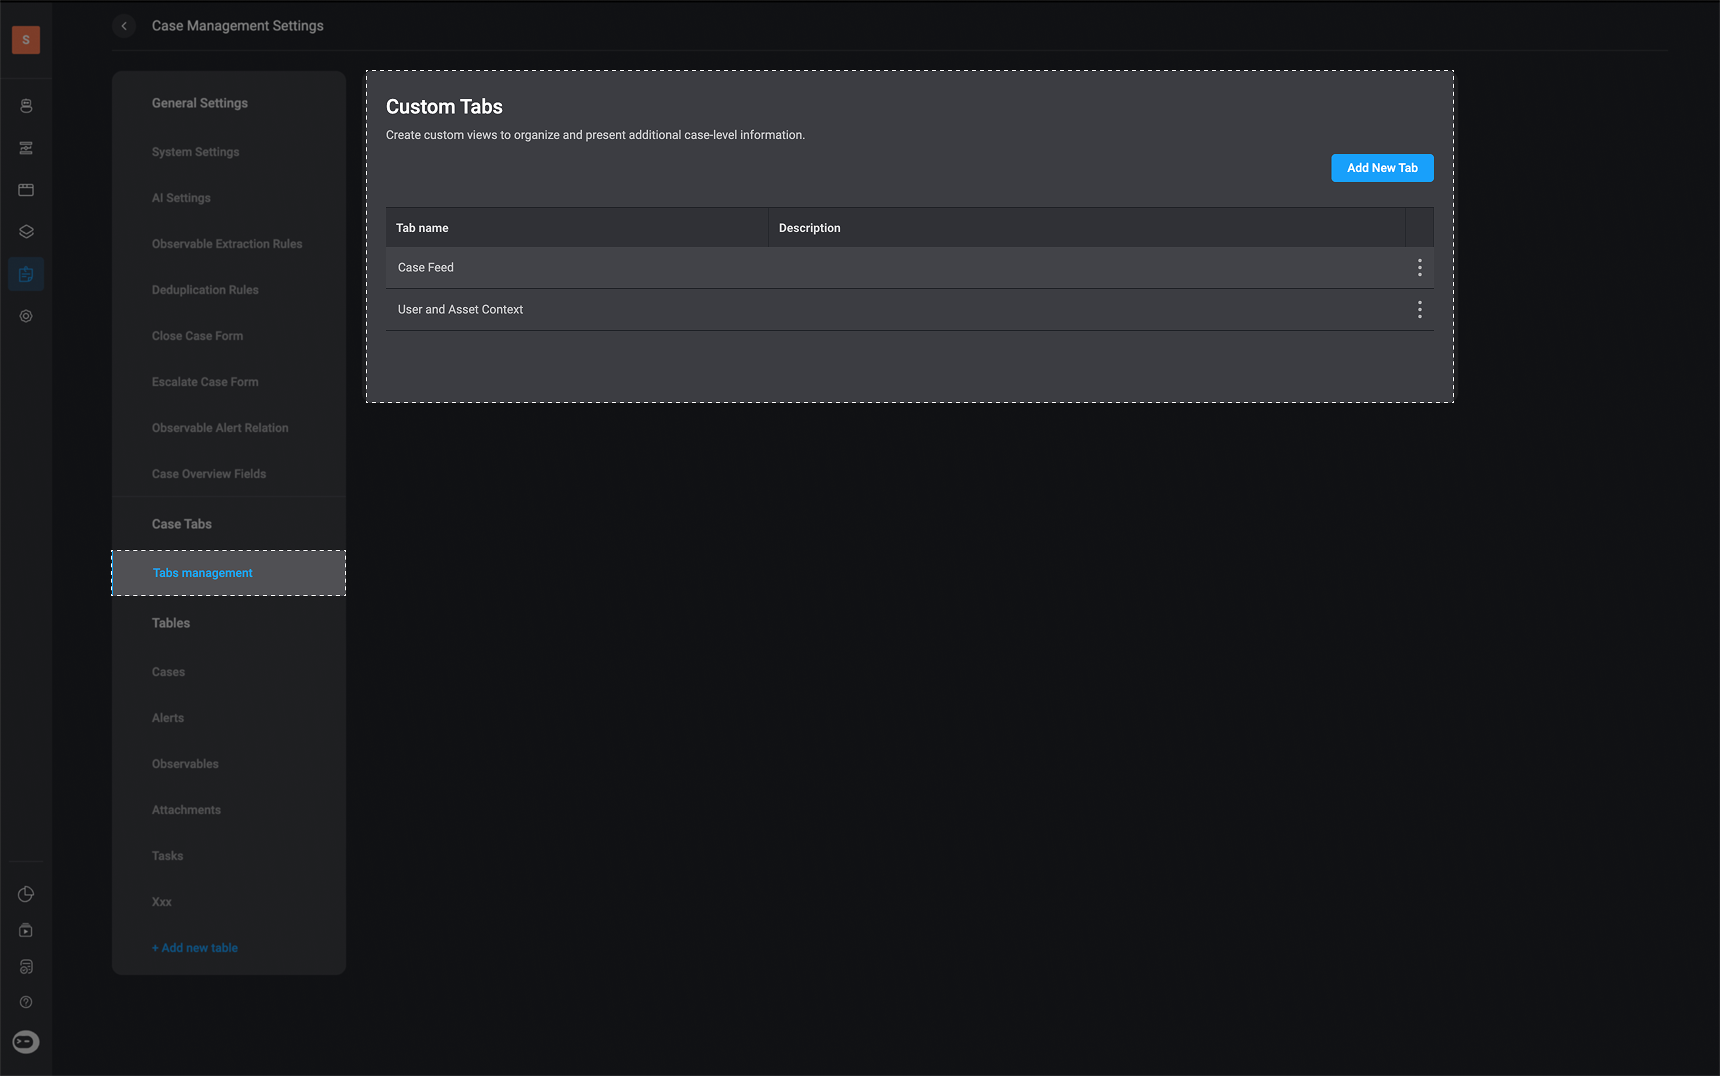
Case Tabs
Tabs Management
The Case’s Tab feature allows users to organize case information more effectively by creating and managing multiple tabs within a single Case. Each tab can hold one or more cards, giving users the flexibility to categorize and view information in a structured way.-
Only users with
case_management: adminpermissions can create, edit and delete custom tabs. -
Cards within tabs are
read-only. - To create, edit, or delete a card or modify its content—you must use card actions.
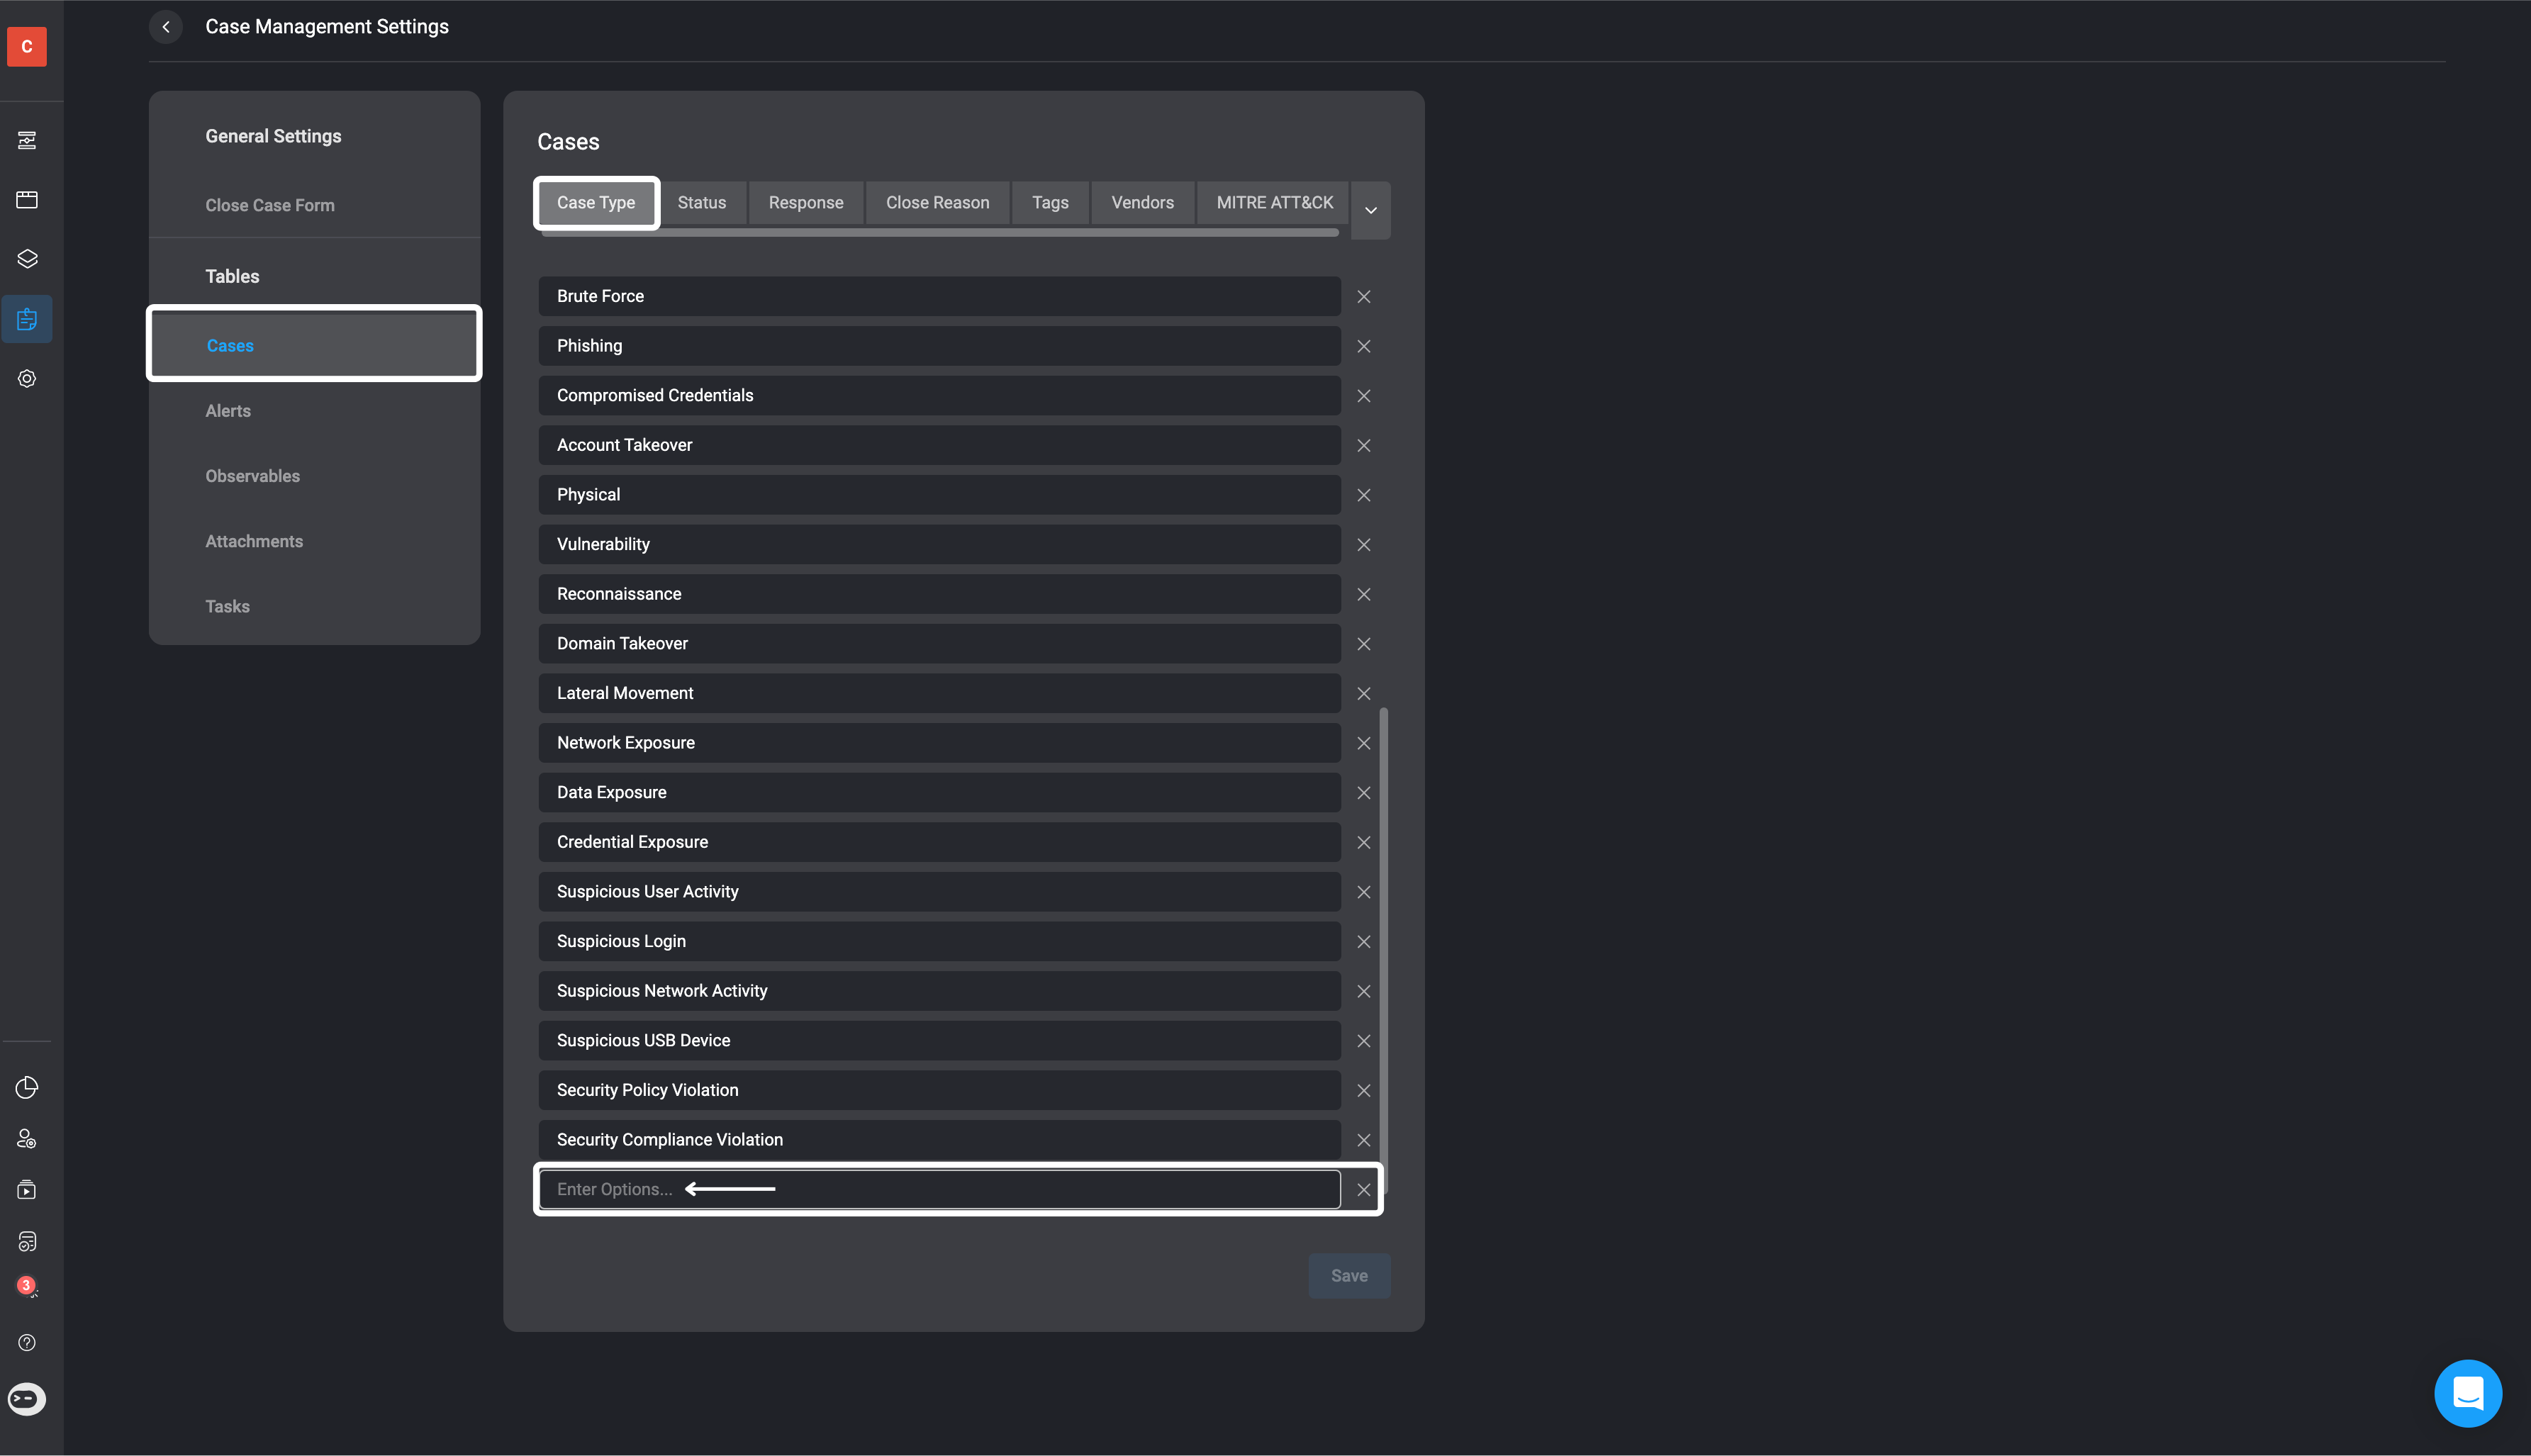
Tables
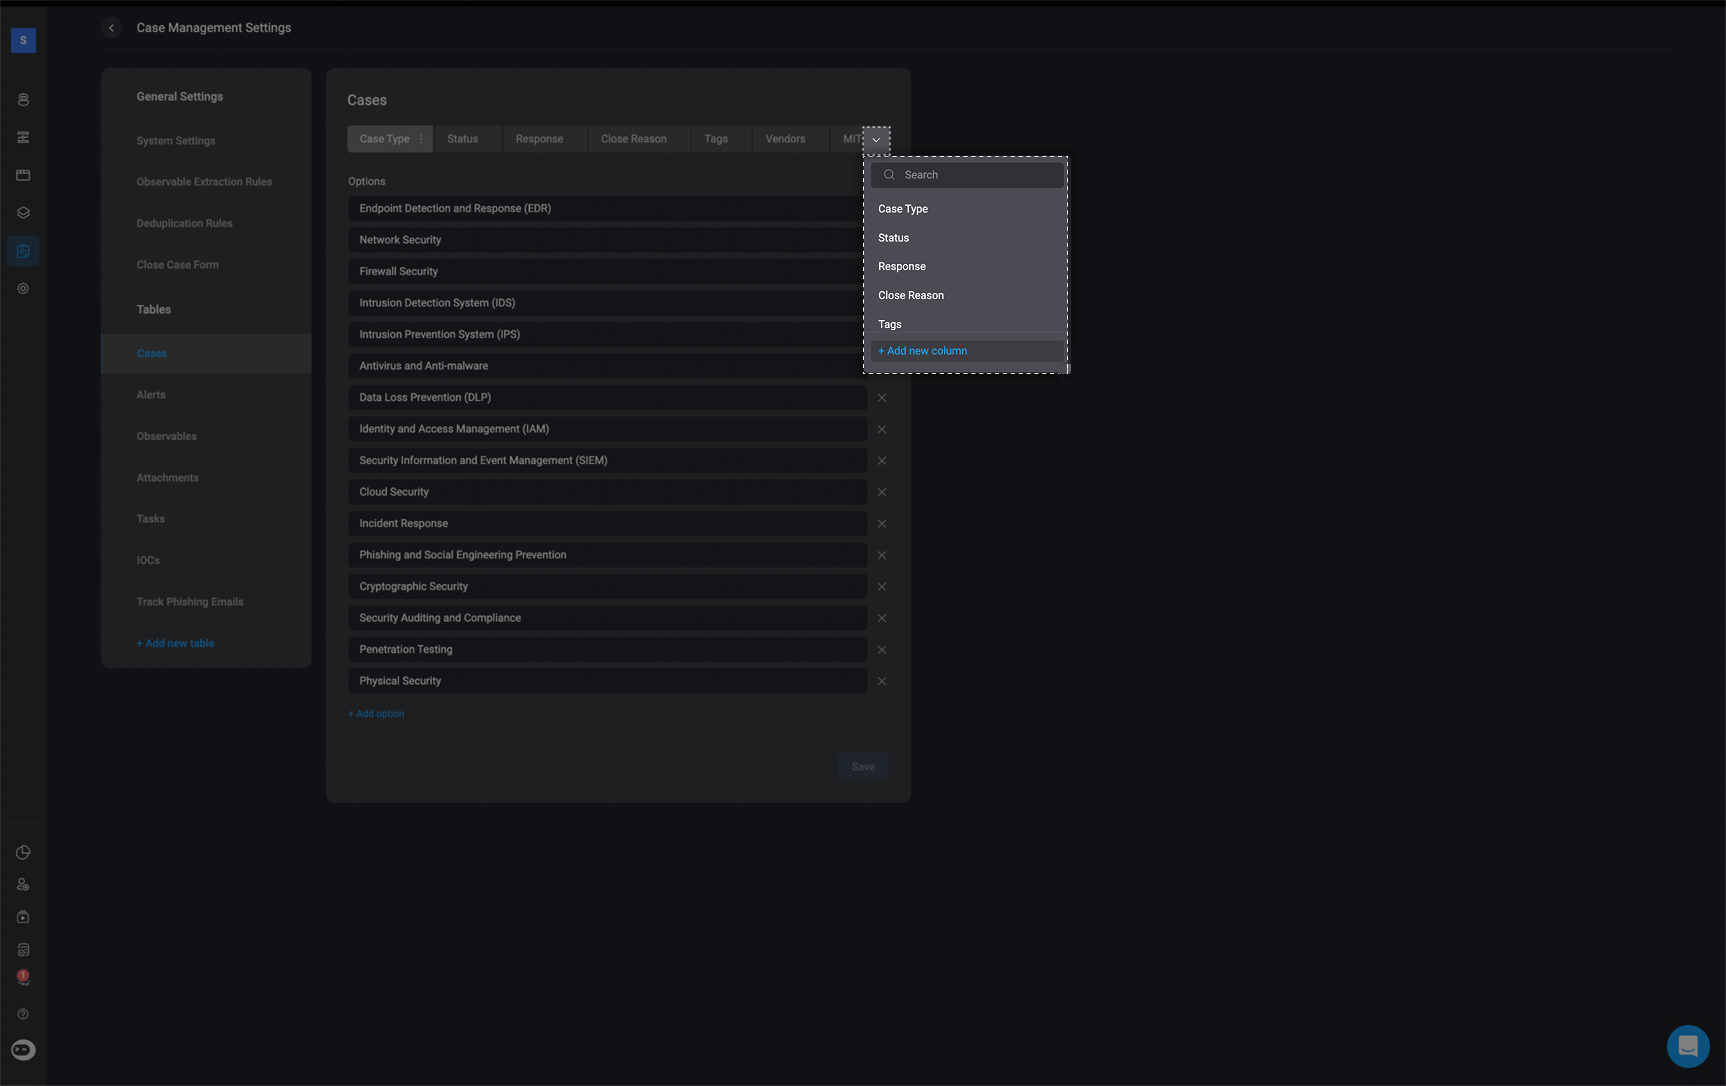
Cases
In the Cases section of the Case Management Settings, you can manage various aspects of your Cases details:Case Type
Case Type
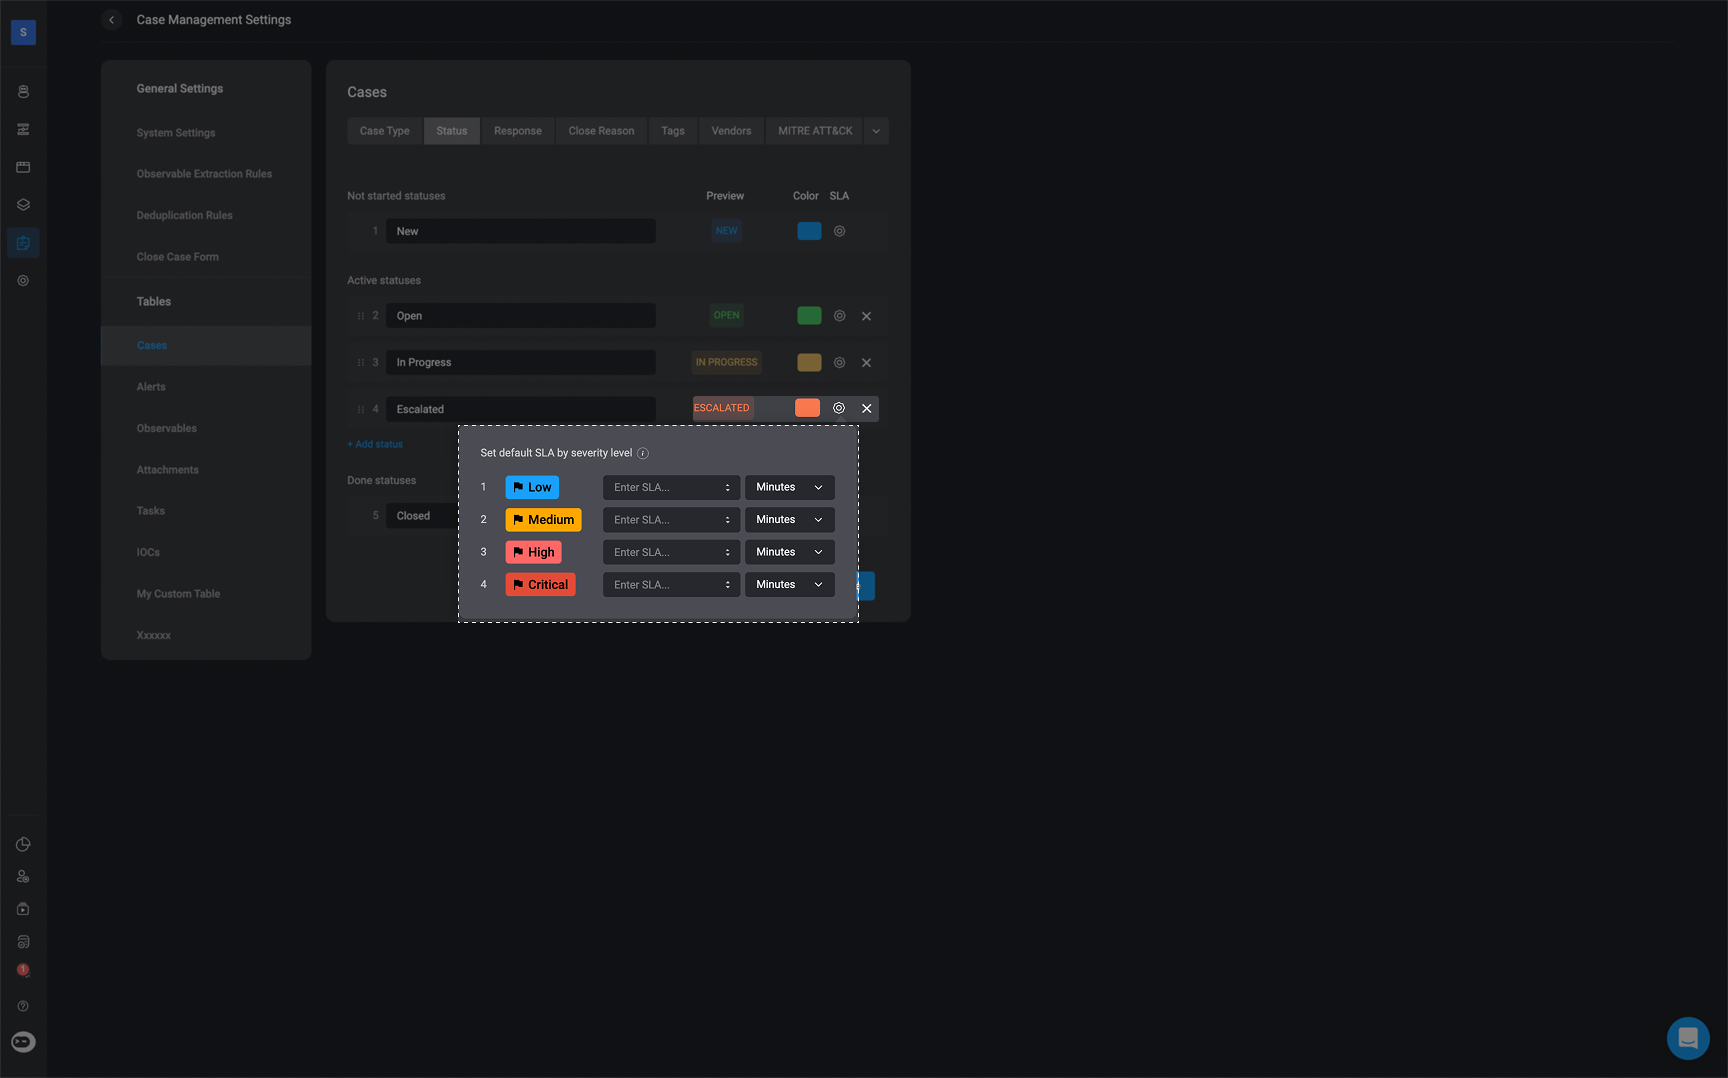
Status
Status
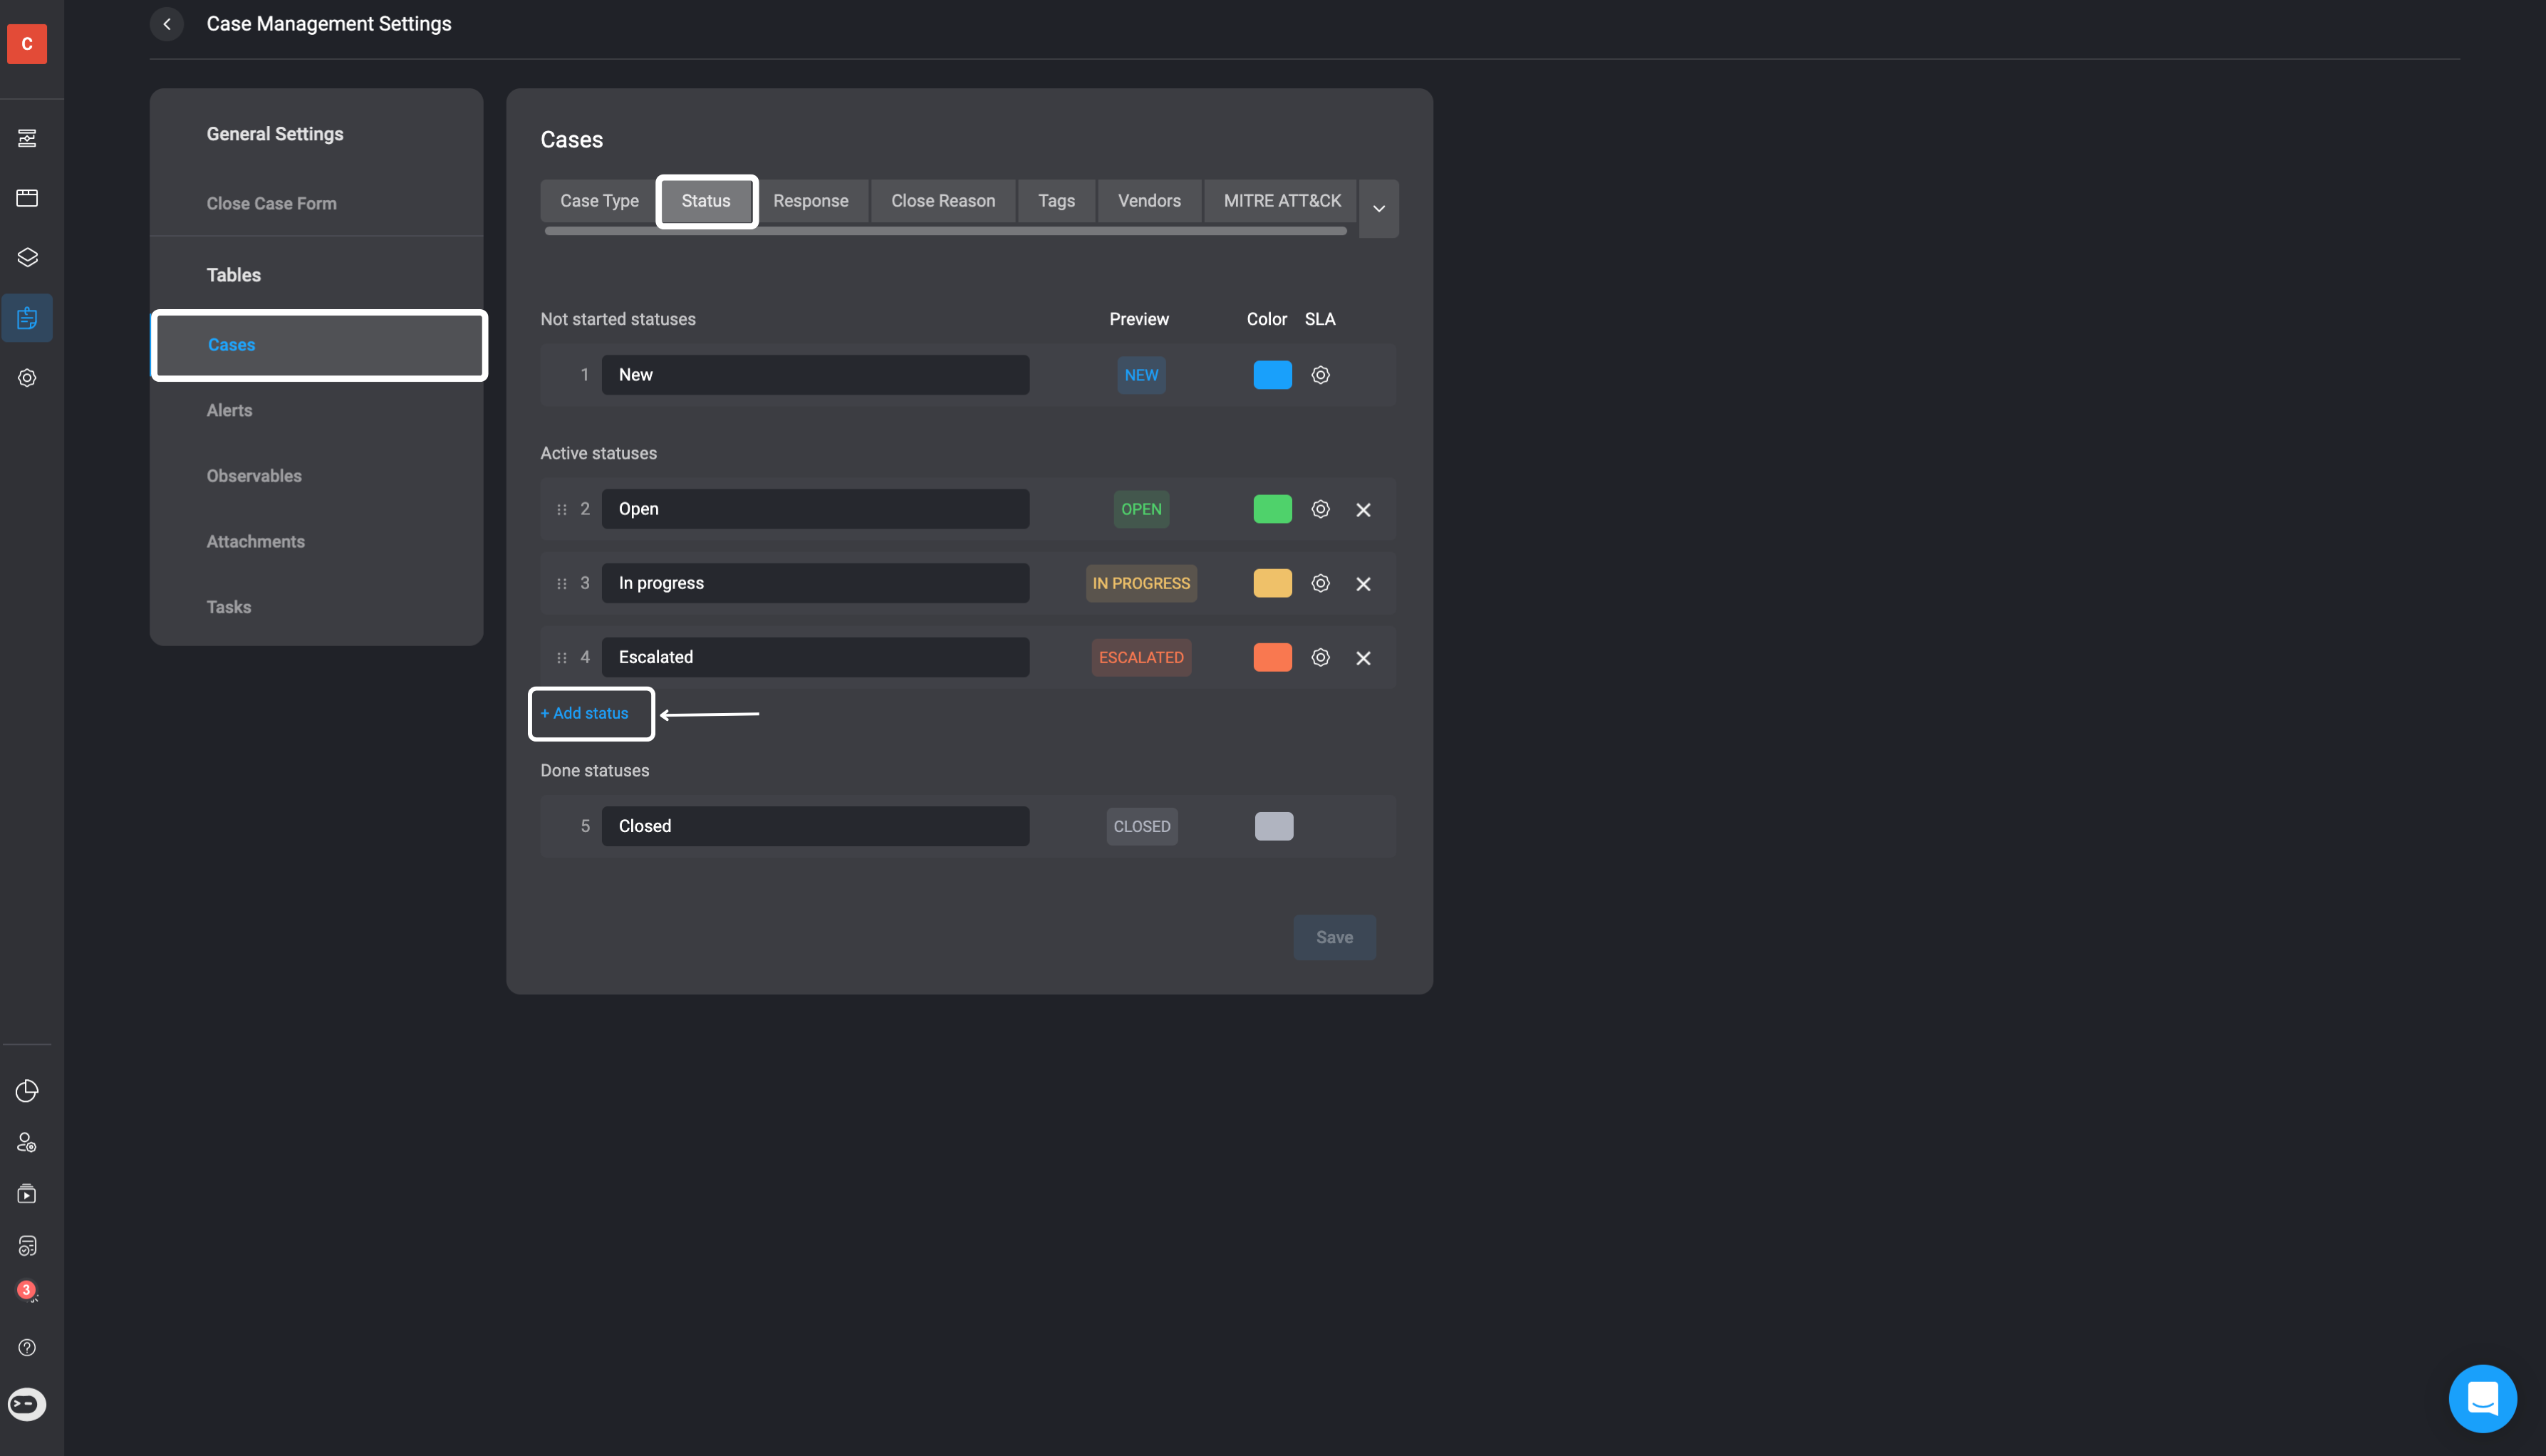
You can customize the Case Status SLA by clicking the icon next to the colored block, then entering your preferred time period in minutes, hours or days
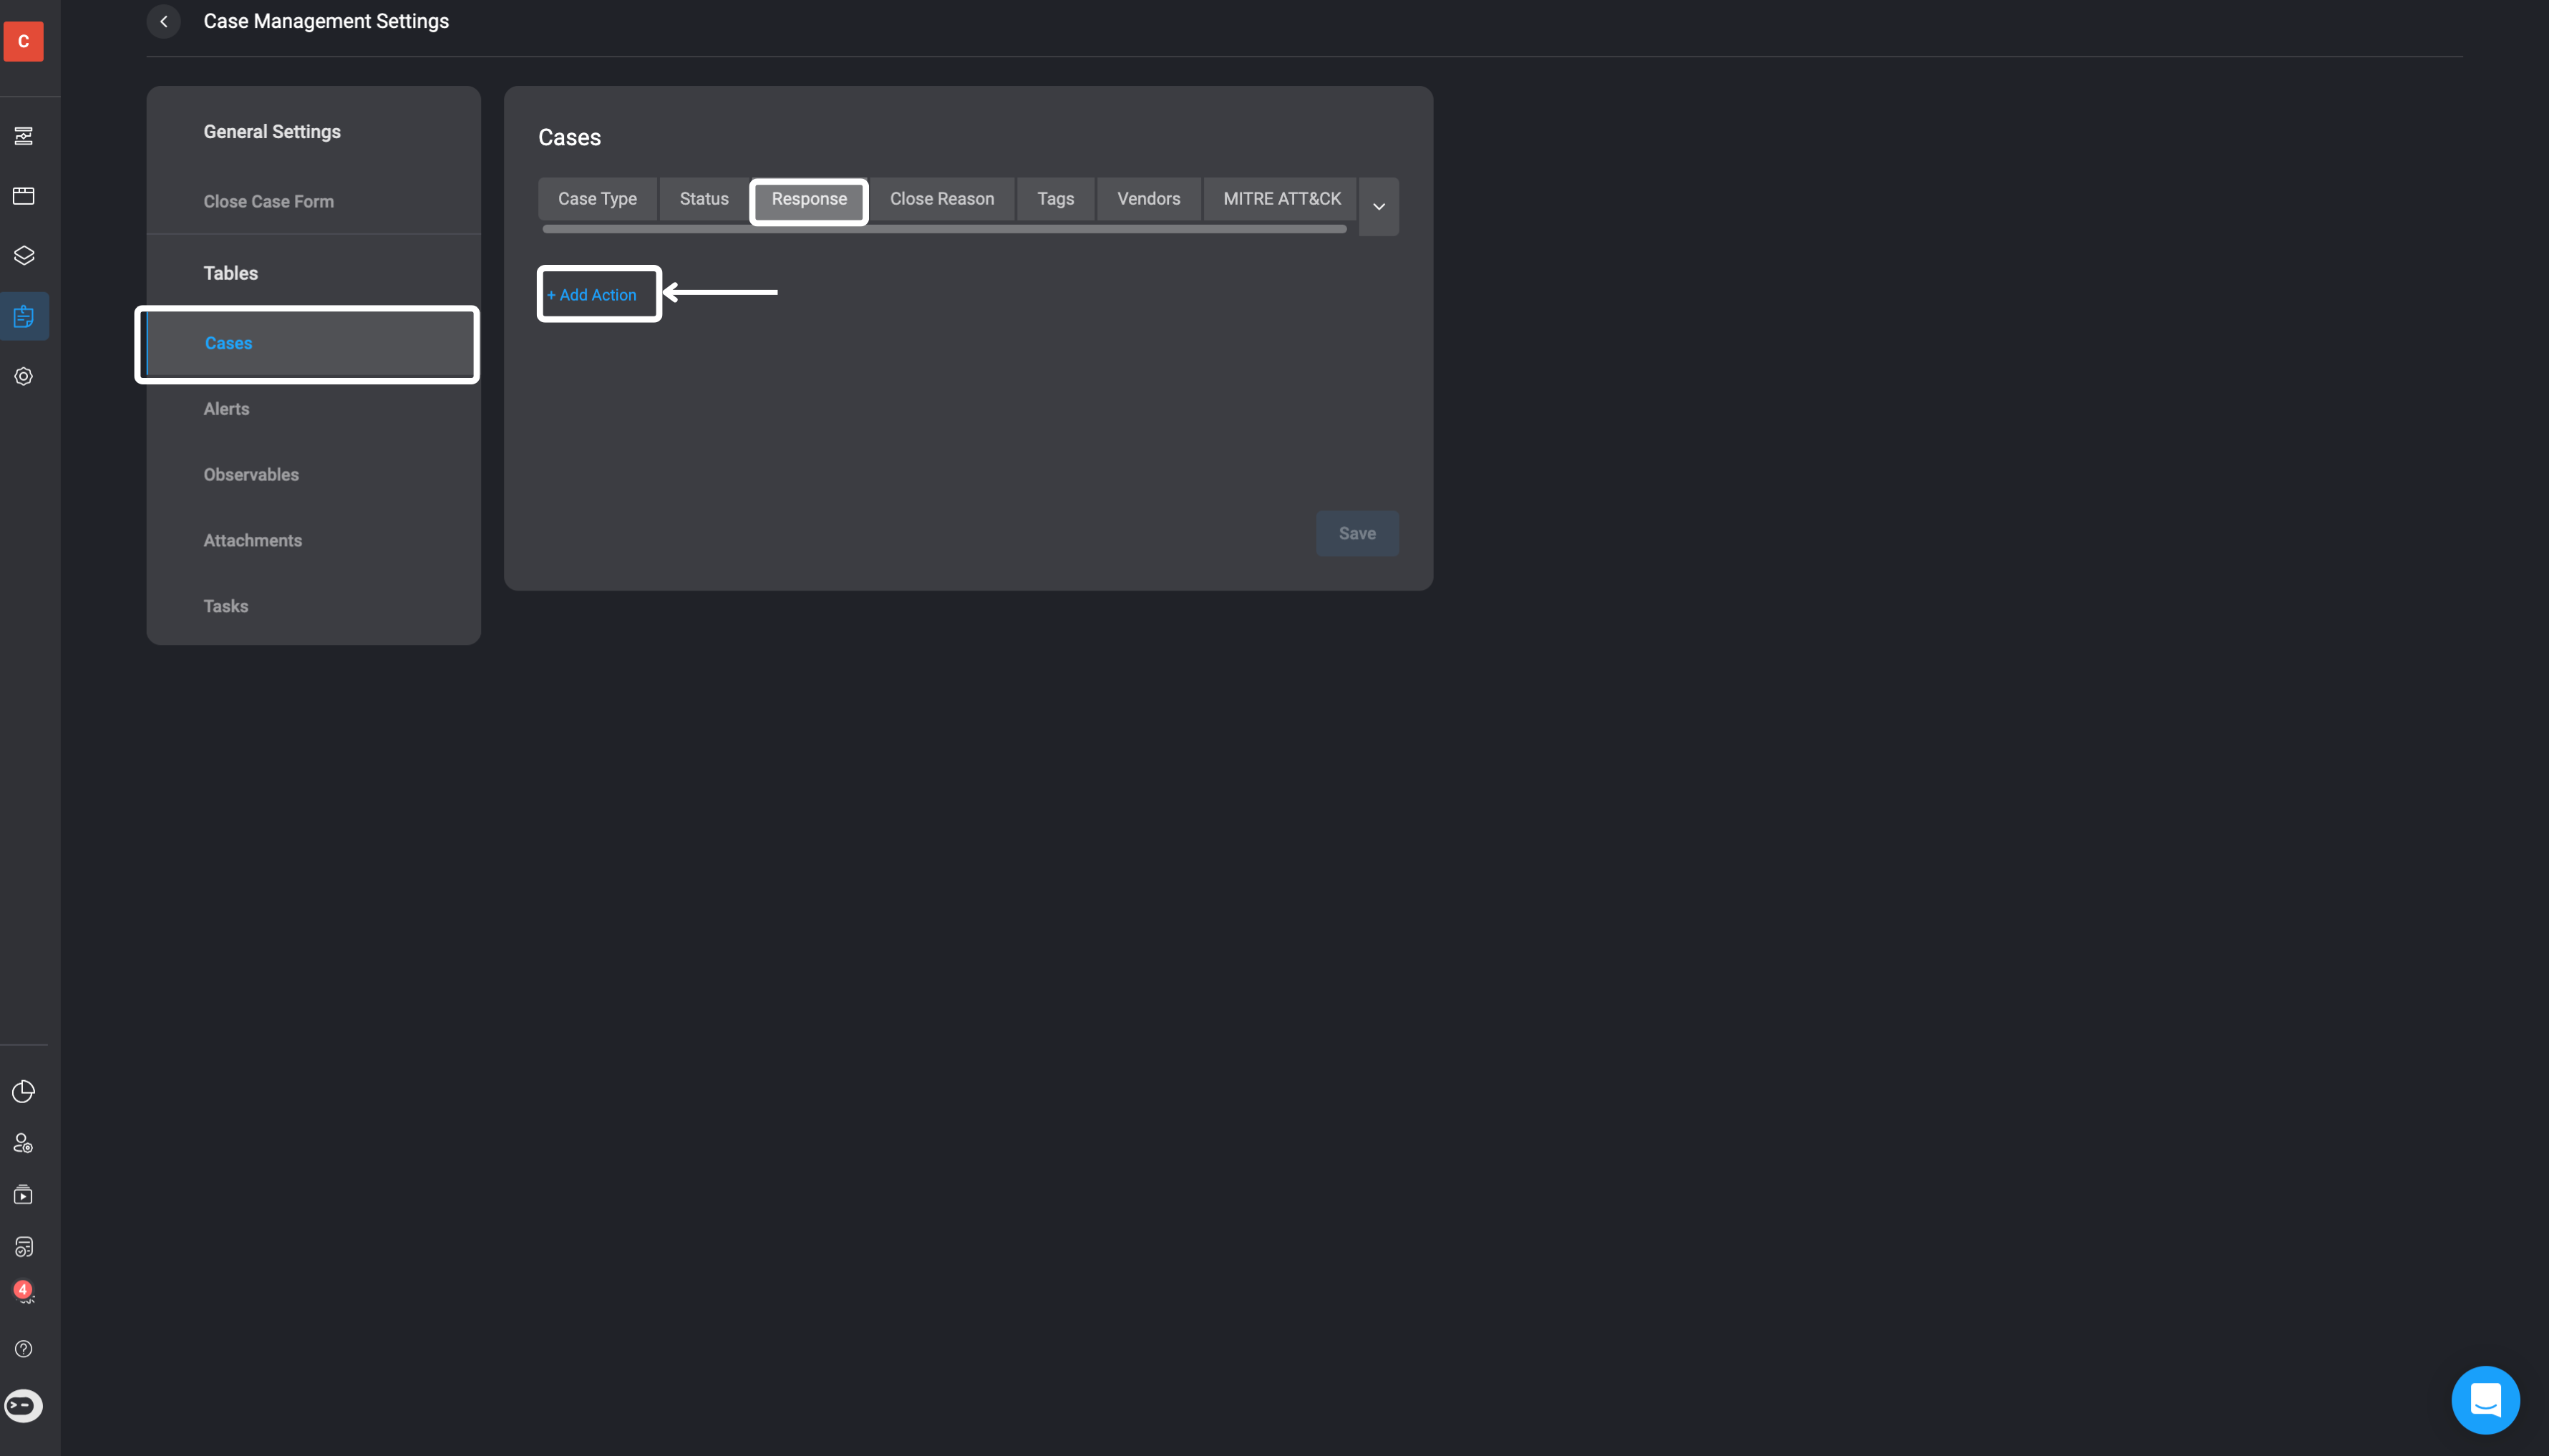
Response
Response
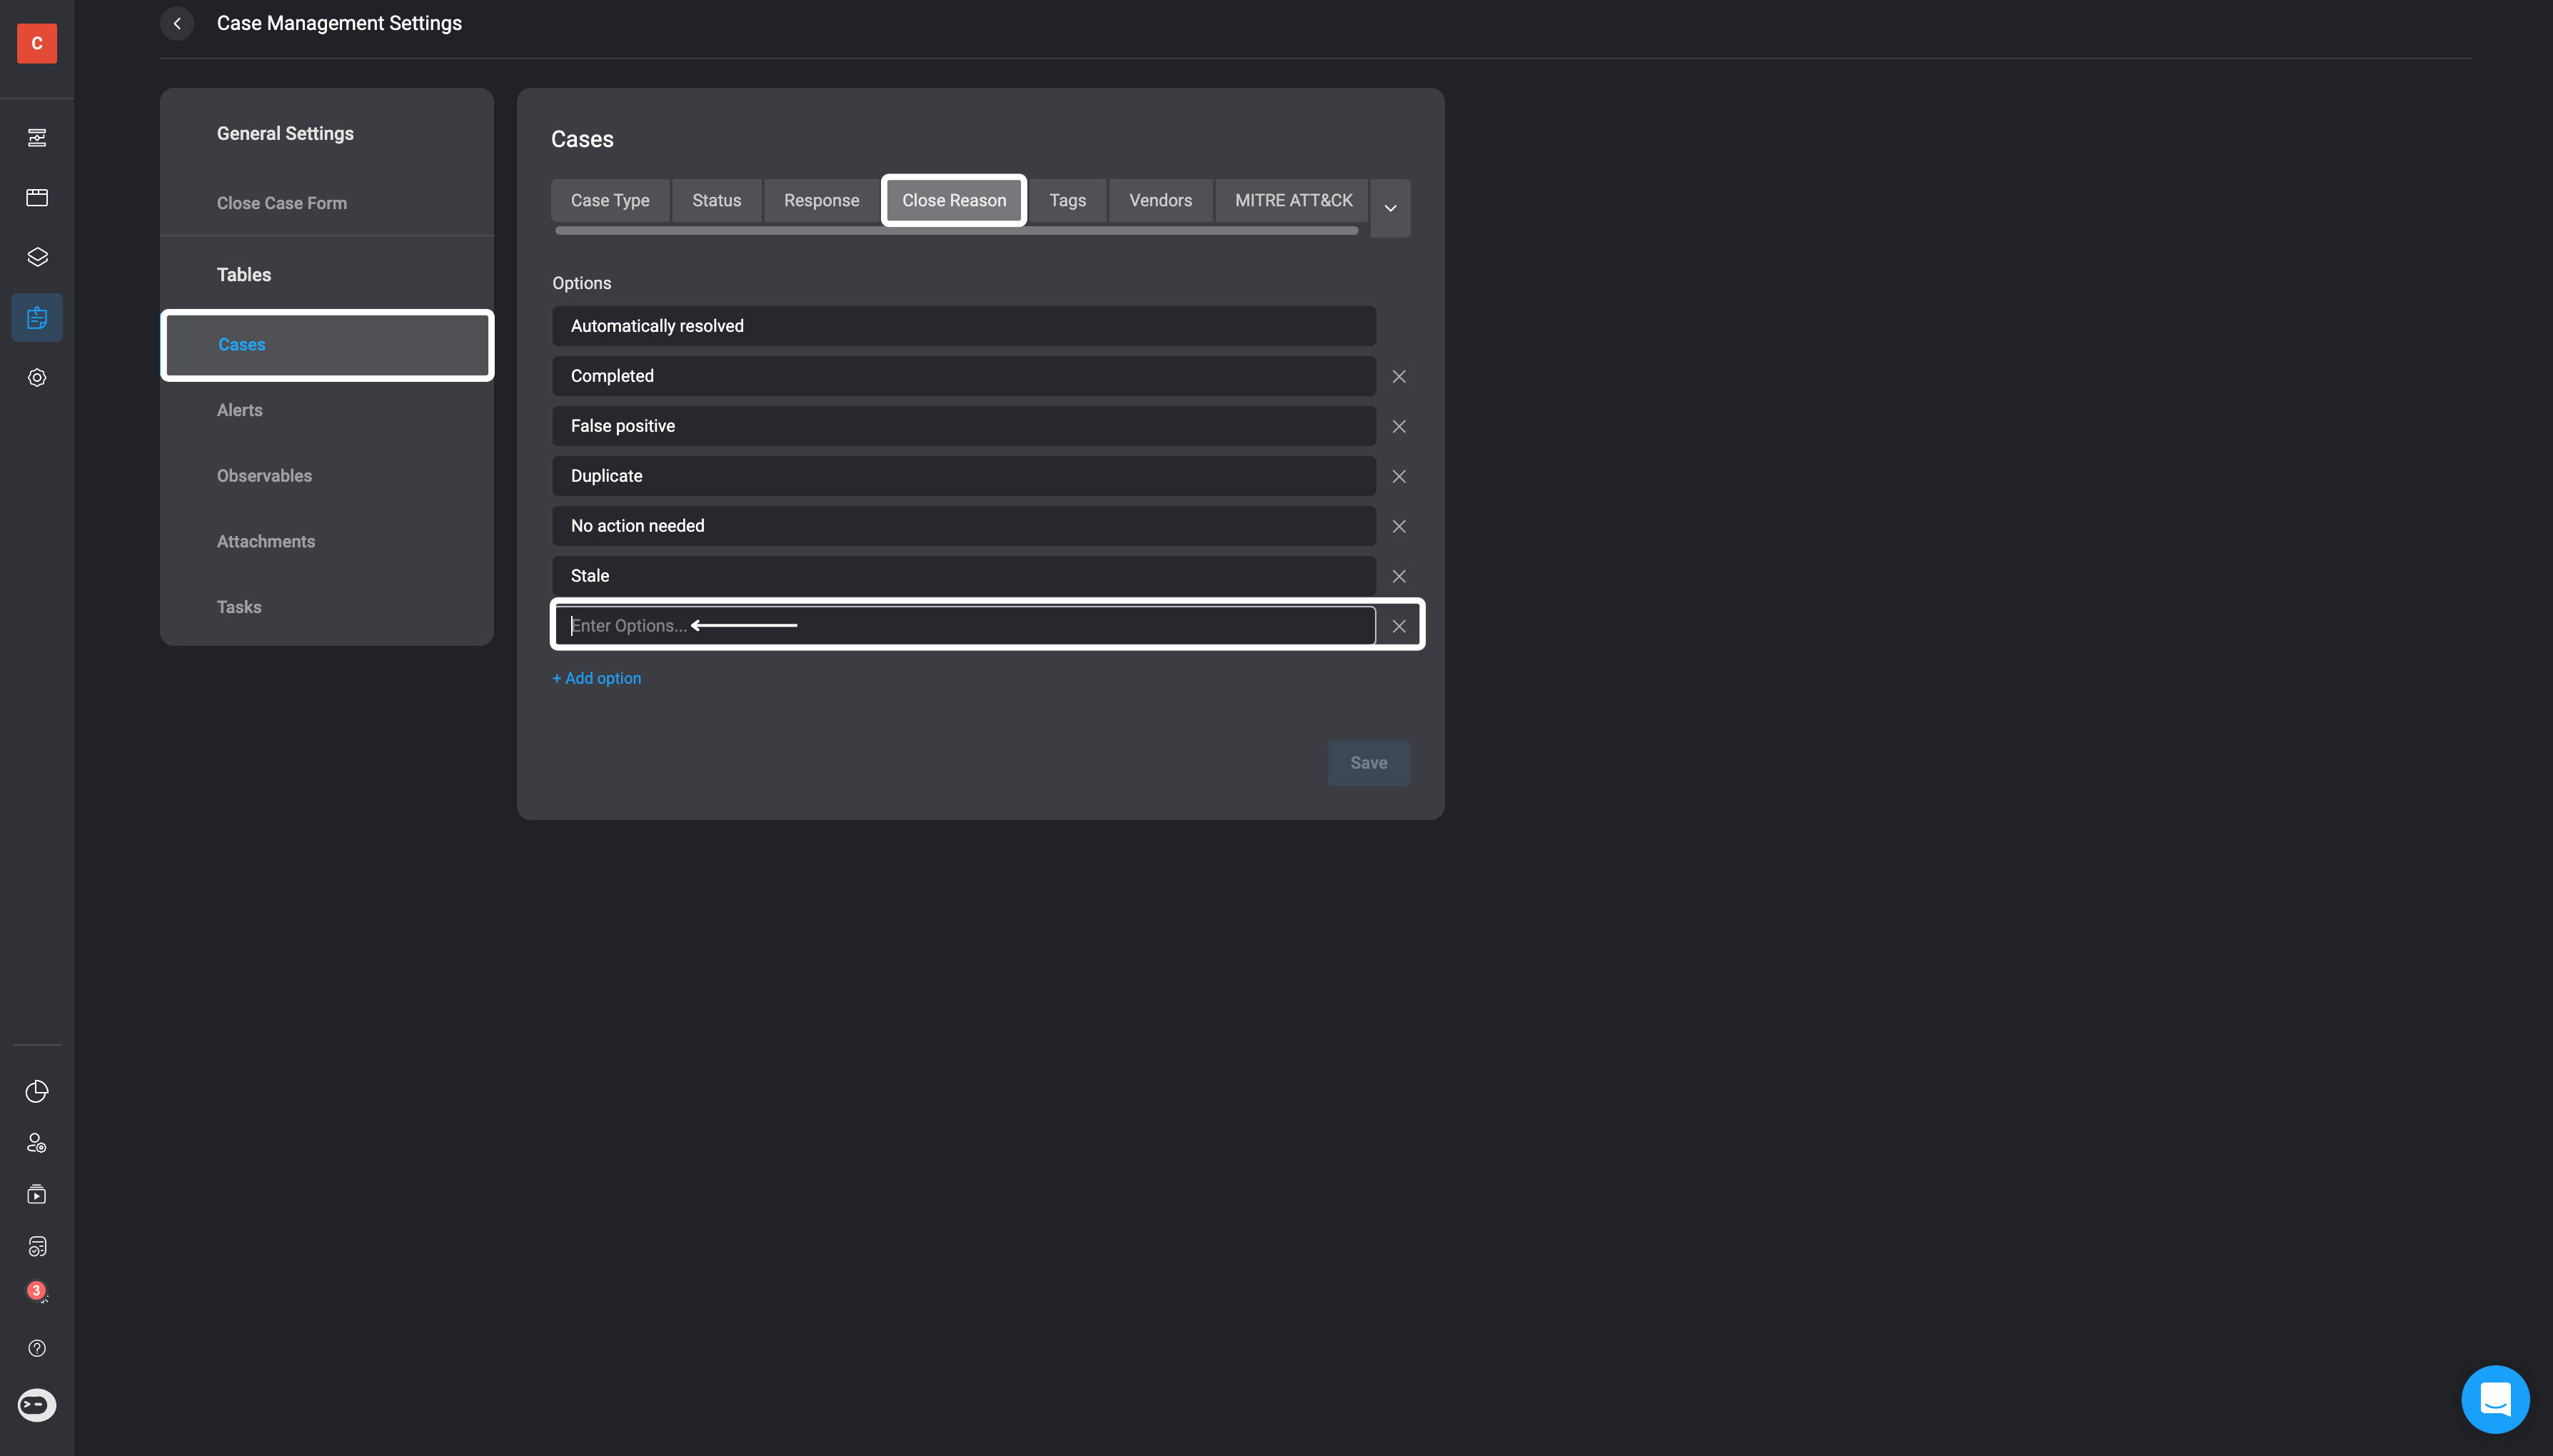
Close Reason
Close Reason
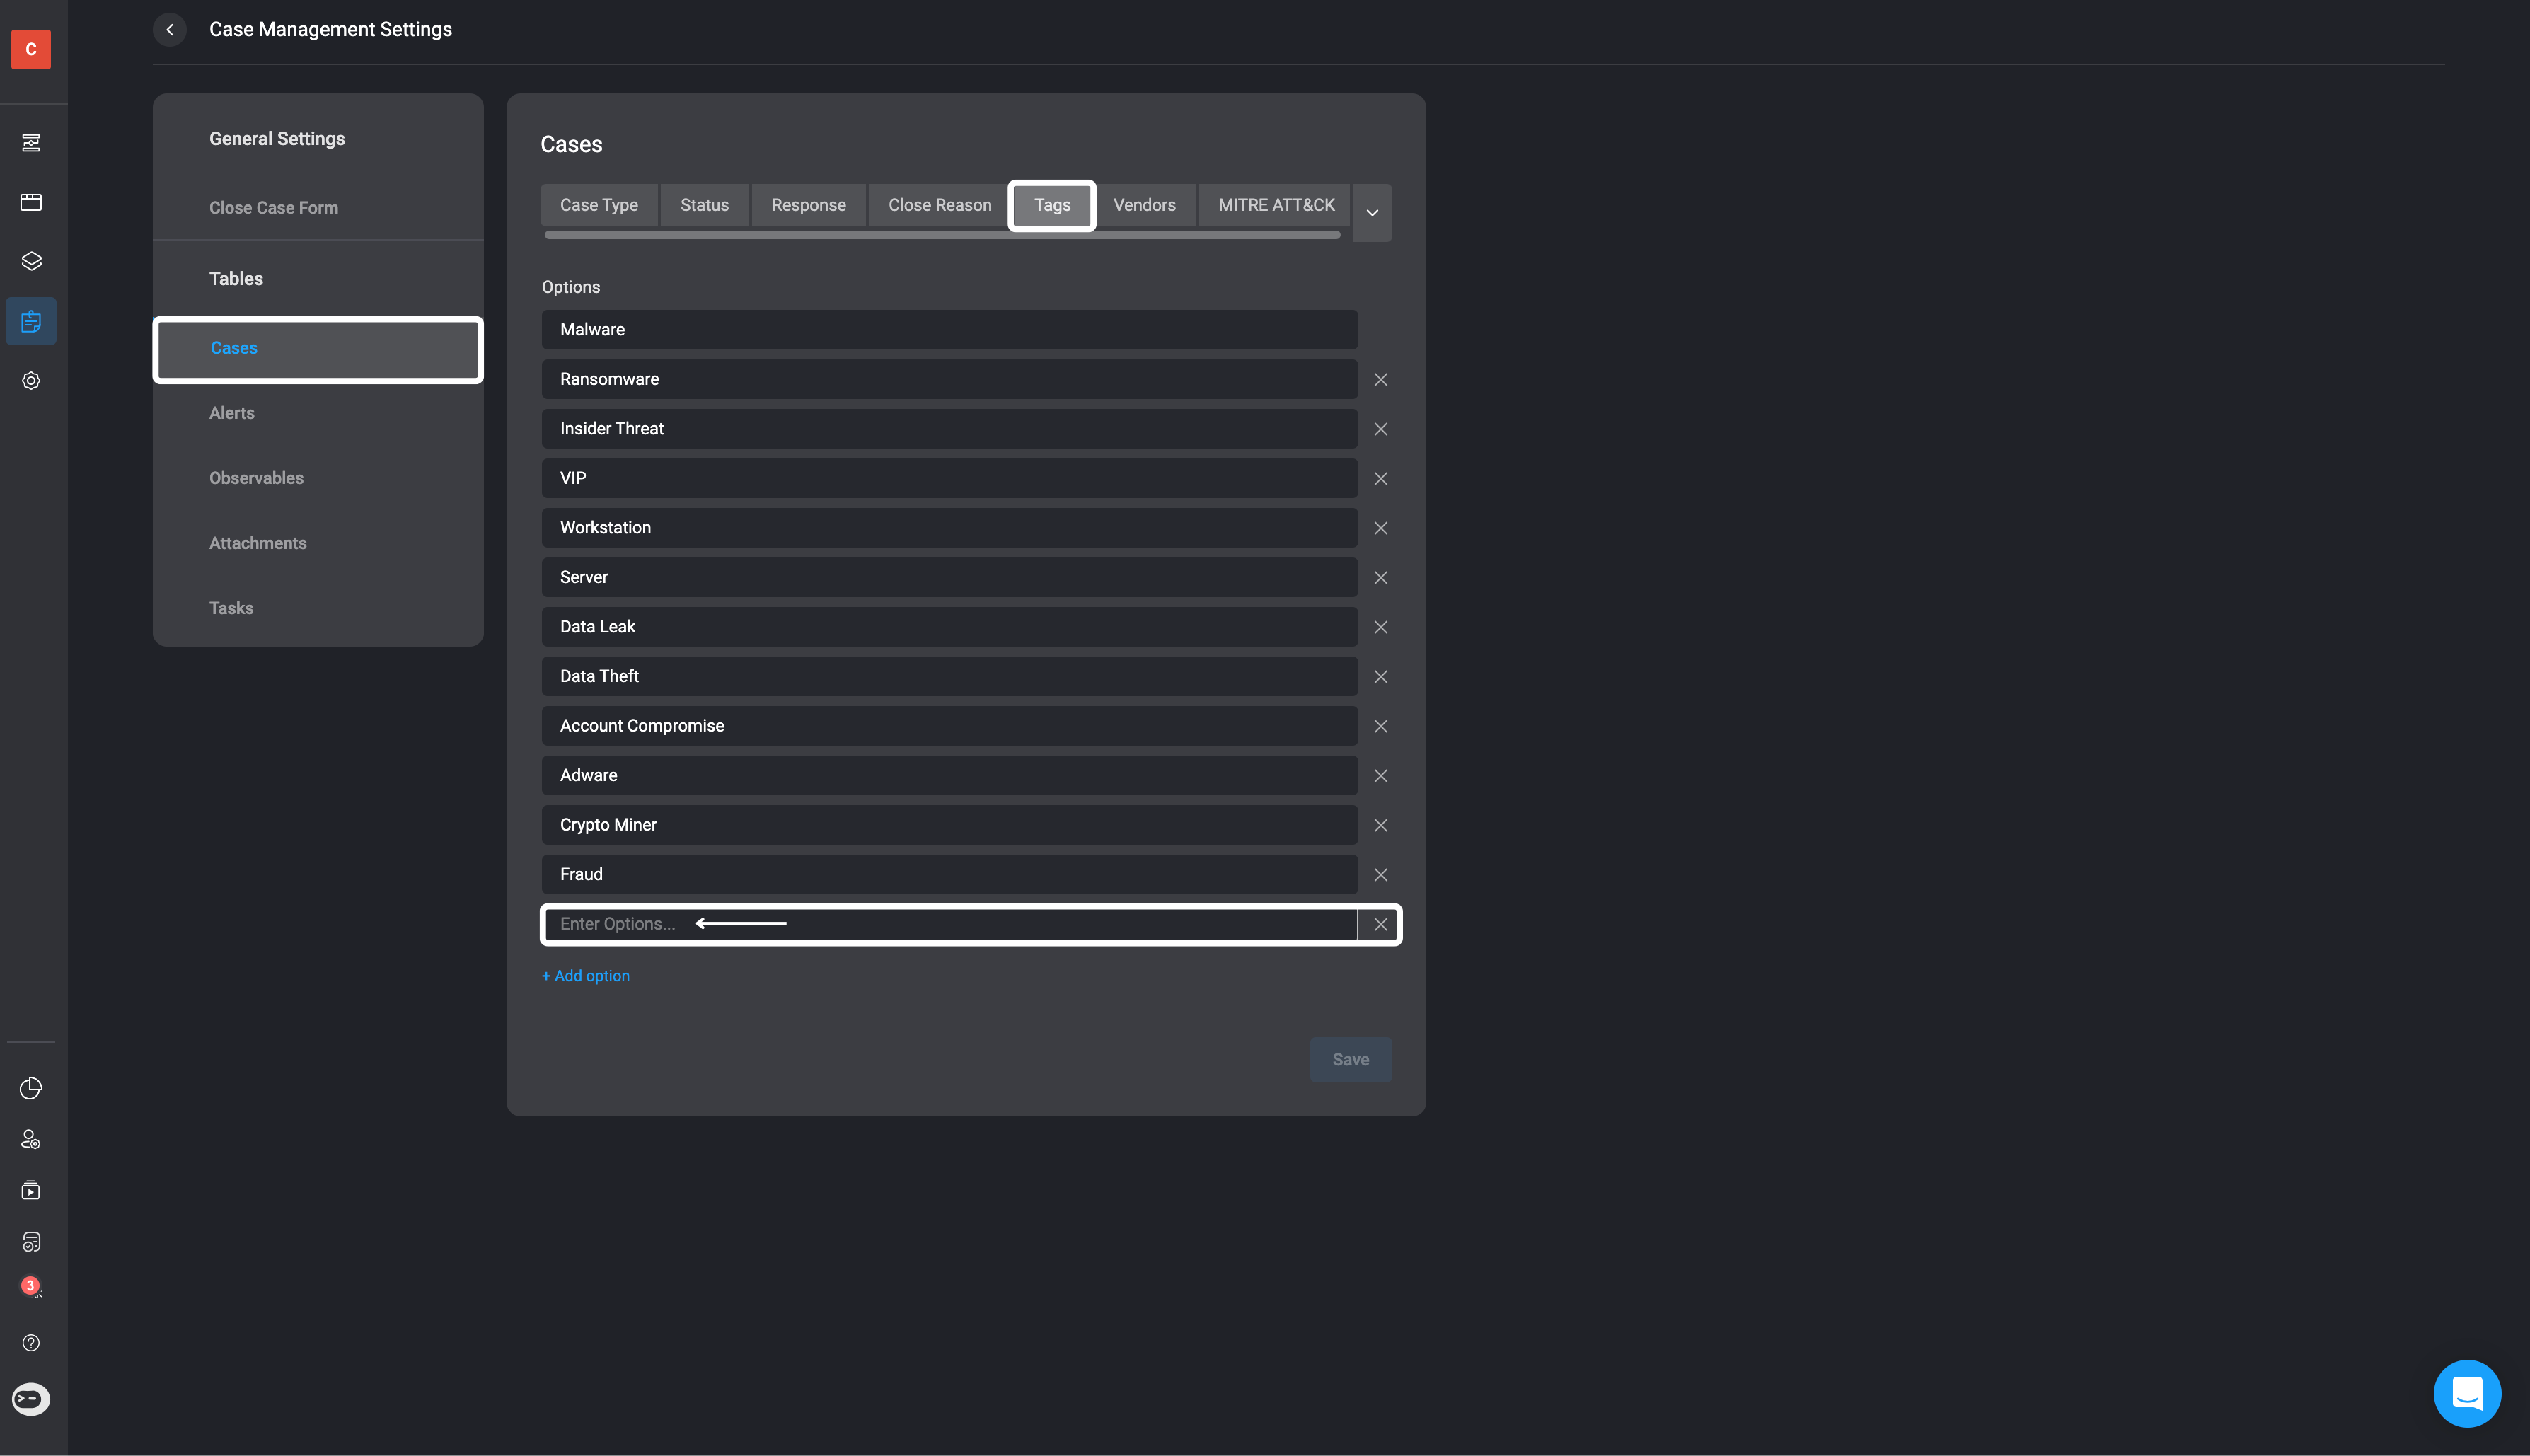
- In the Tags Tab, you can edit the already existing tags, delete tags or create new tags.
Vendors
Vendors
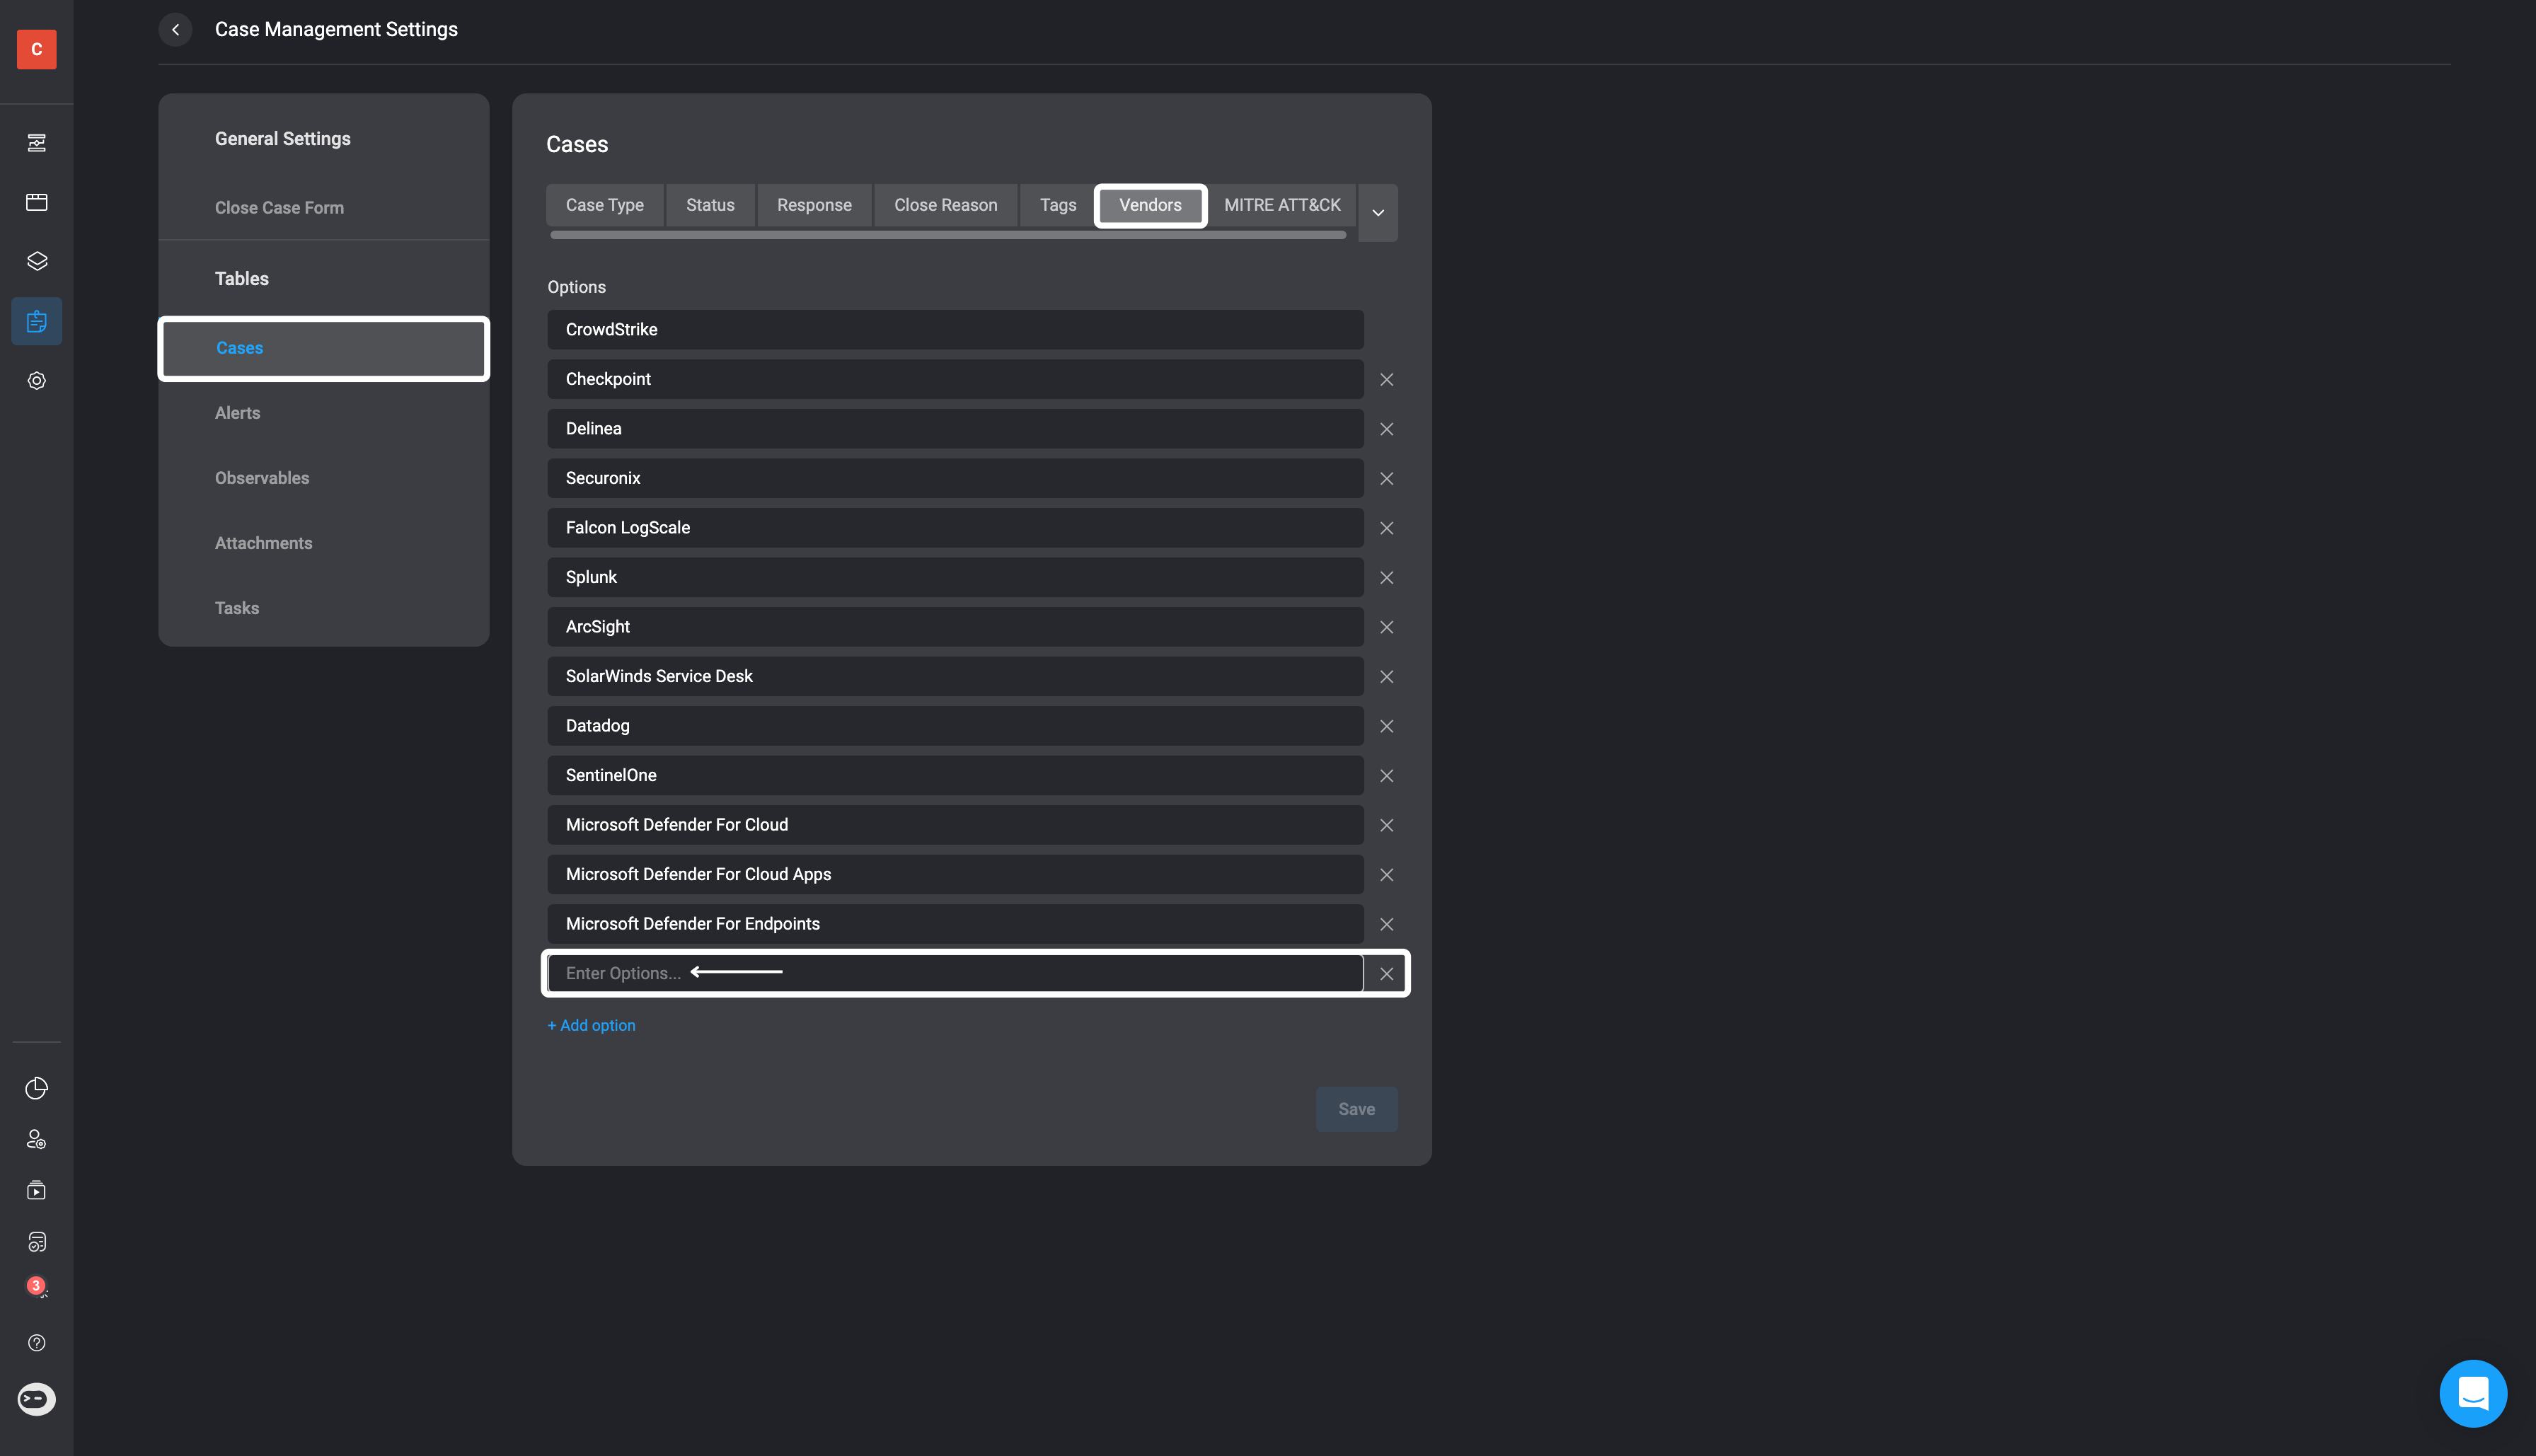
- In the Vendors Tab, you can edit the already existing vendors, delete vendors or add new vendors.
MITRE ATT&CK
MITRE ATT&CK
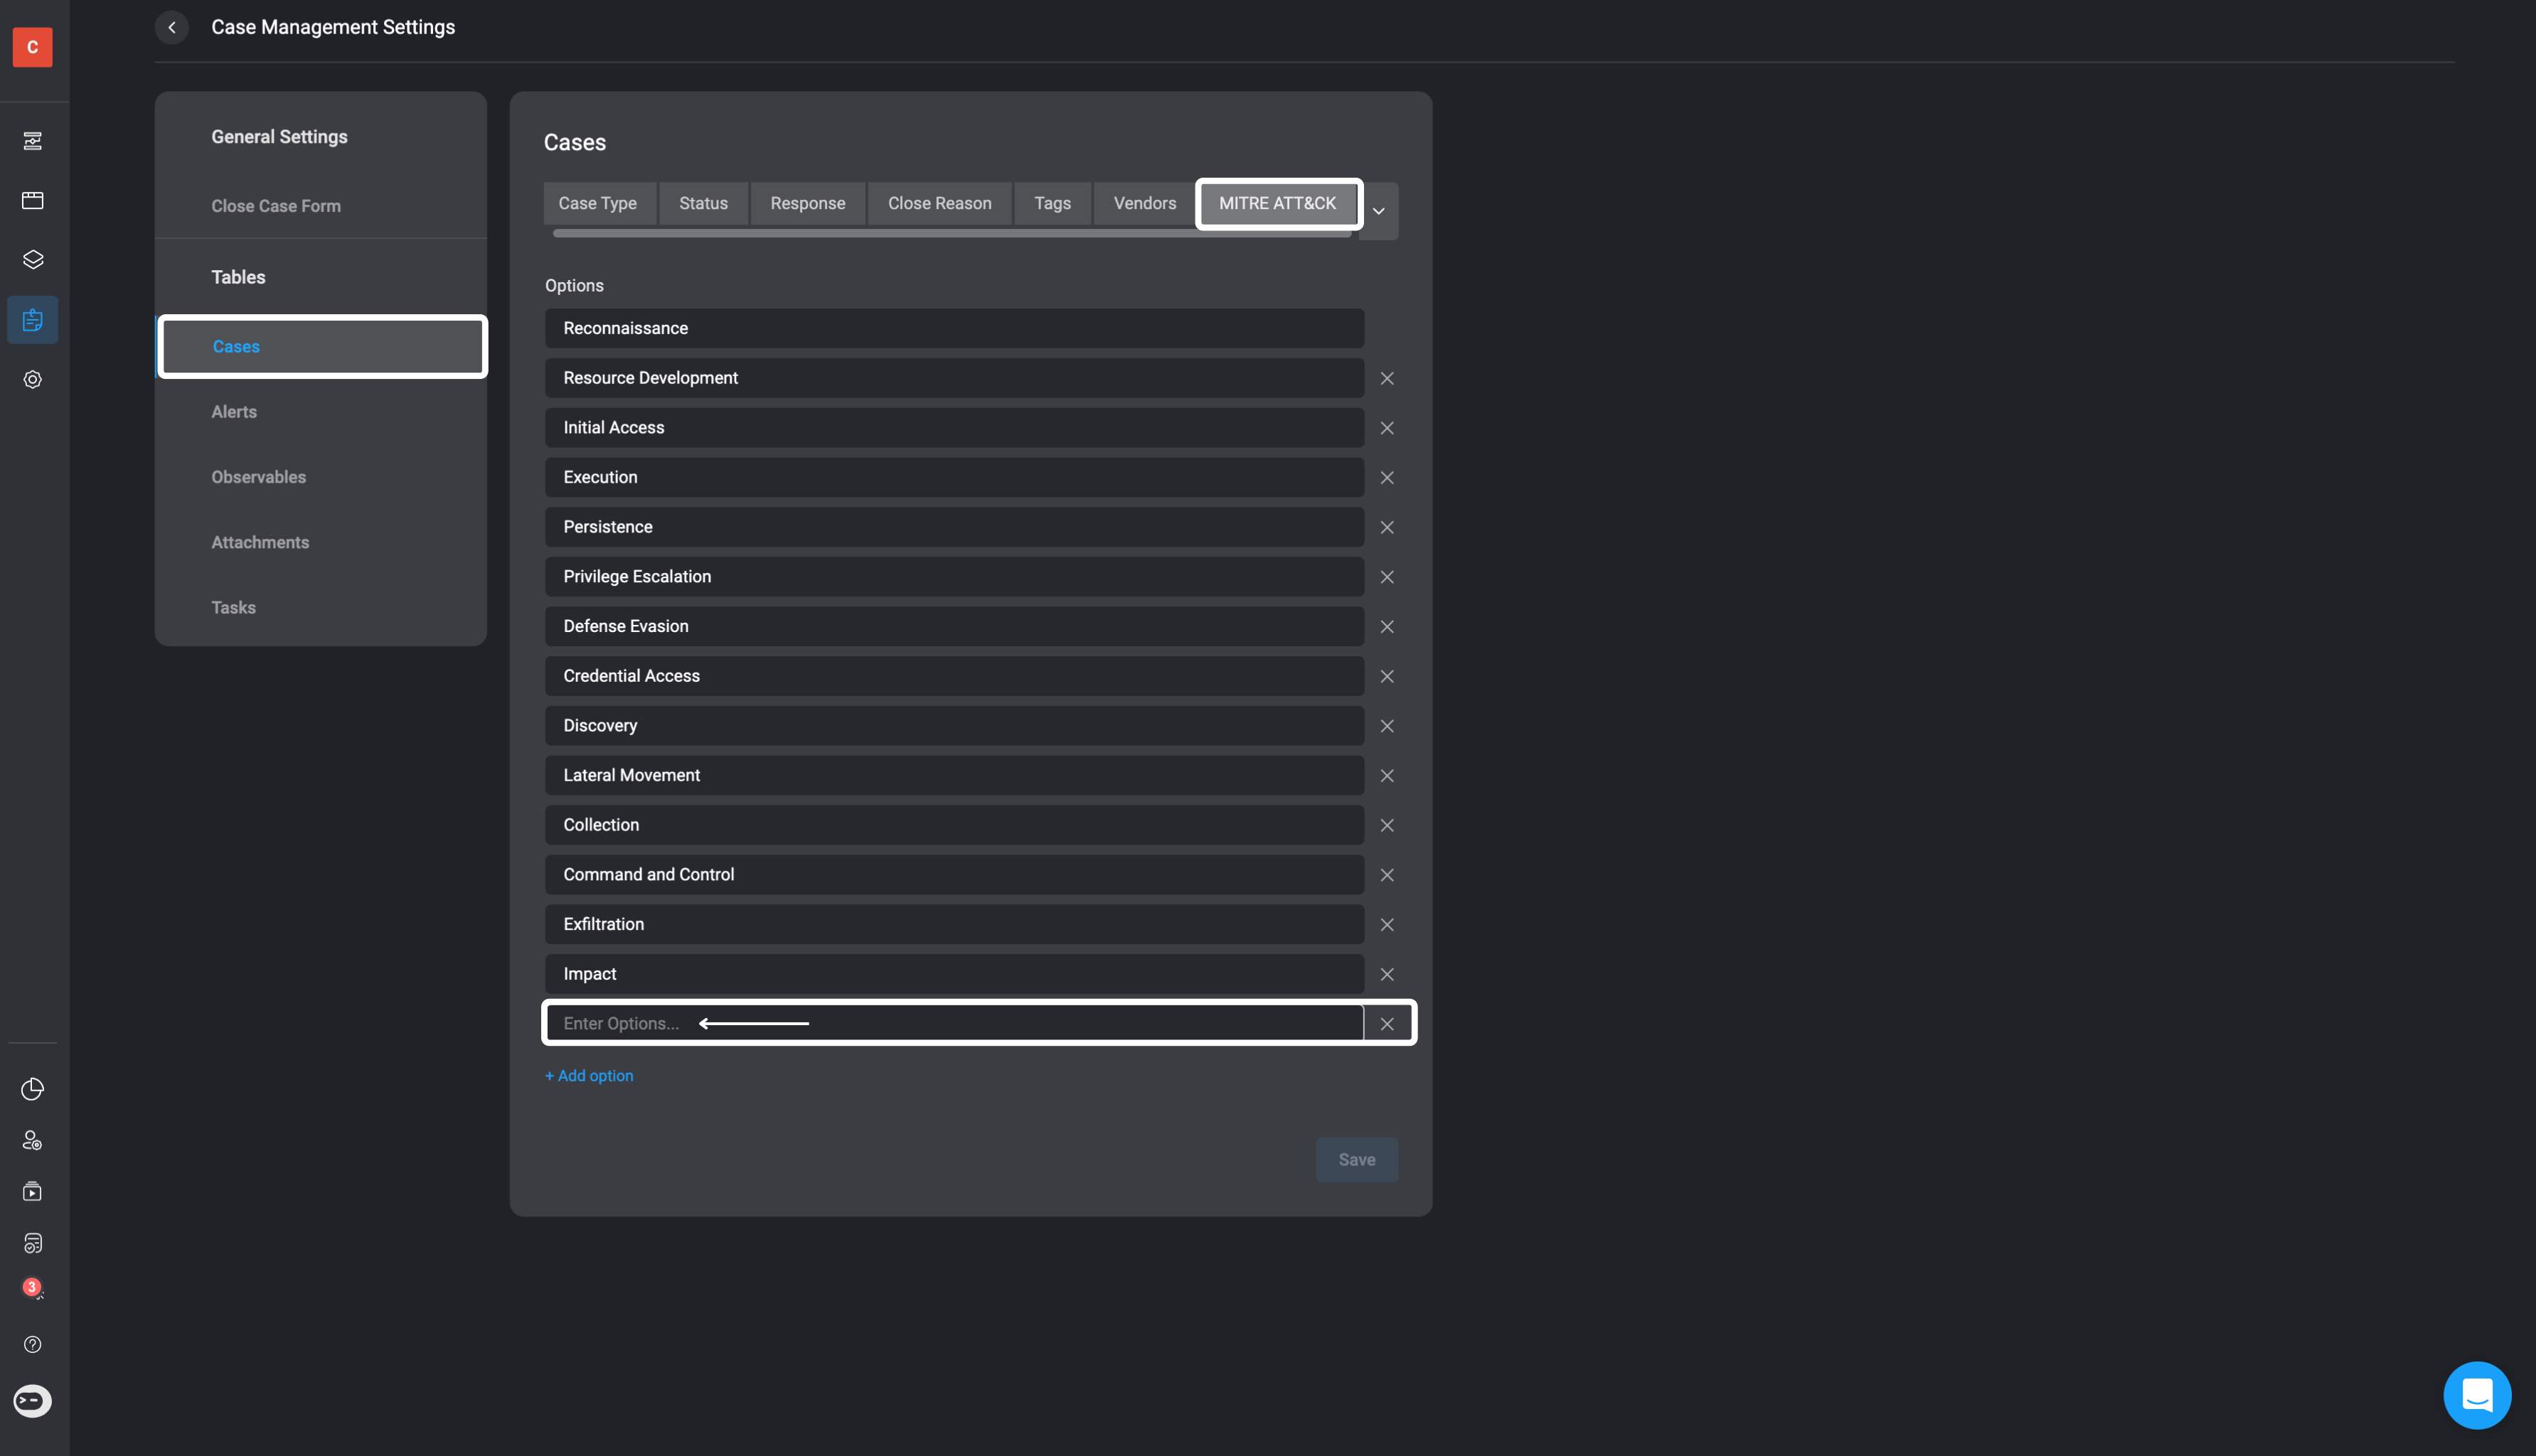
- In the MITRE ATT&CK tab, you can edit the already existing MITRE ATT&CK types, delete or add your own custom MITRE ATT&CK types.
Default values include
Default values include
- Reconnaissance
- Resource Development
- Initial Access
- Execution
- Persistence
- Privilege Escalation
- Defense Evasion
- Credential Access
- Discovery
- Lateral Movement
- Collection
- Command and Control
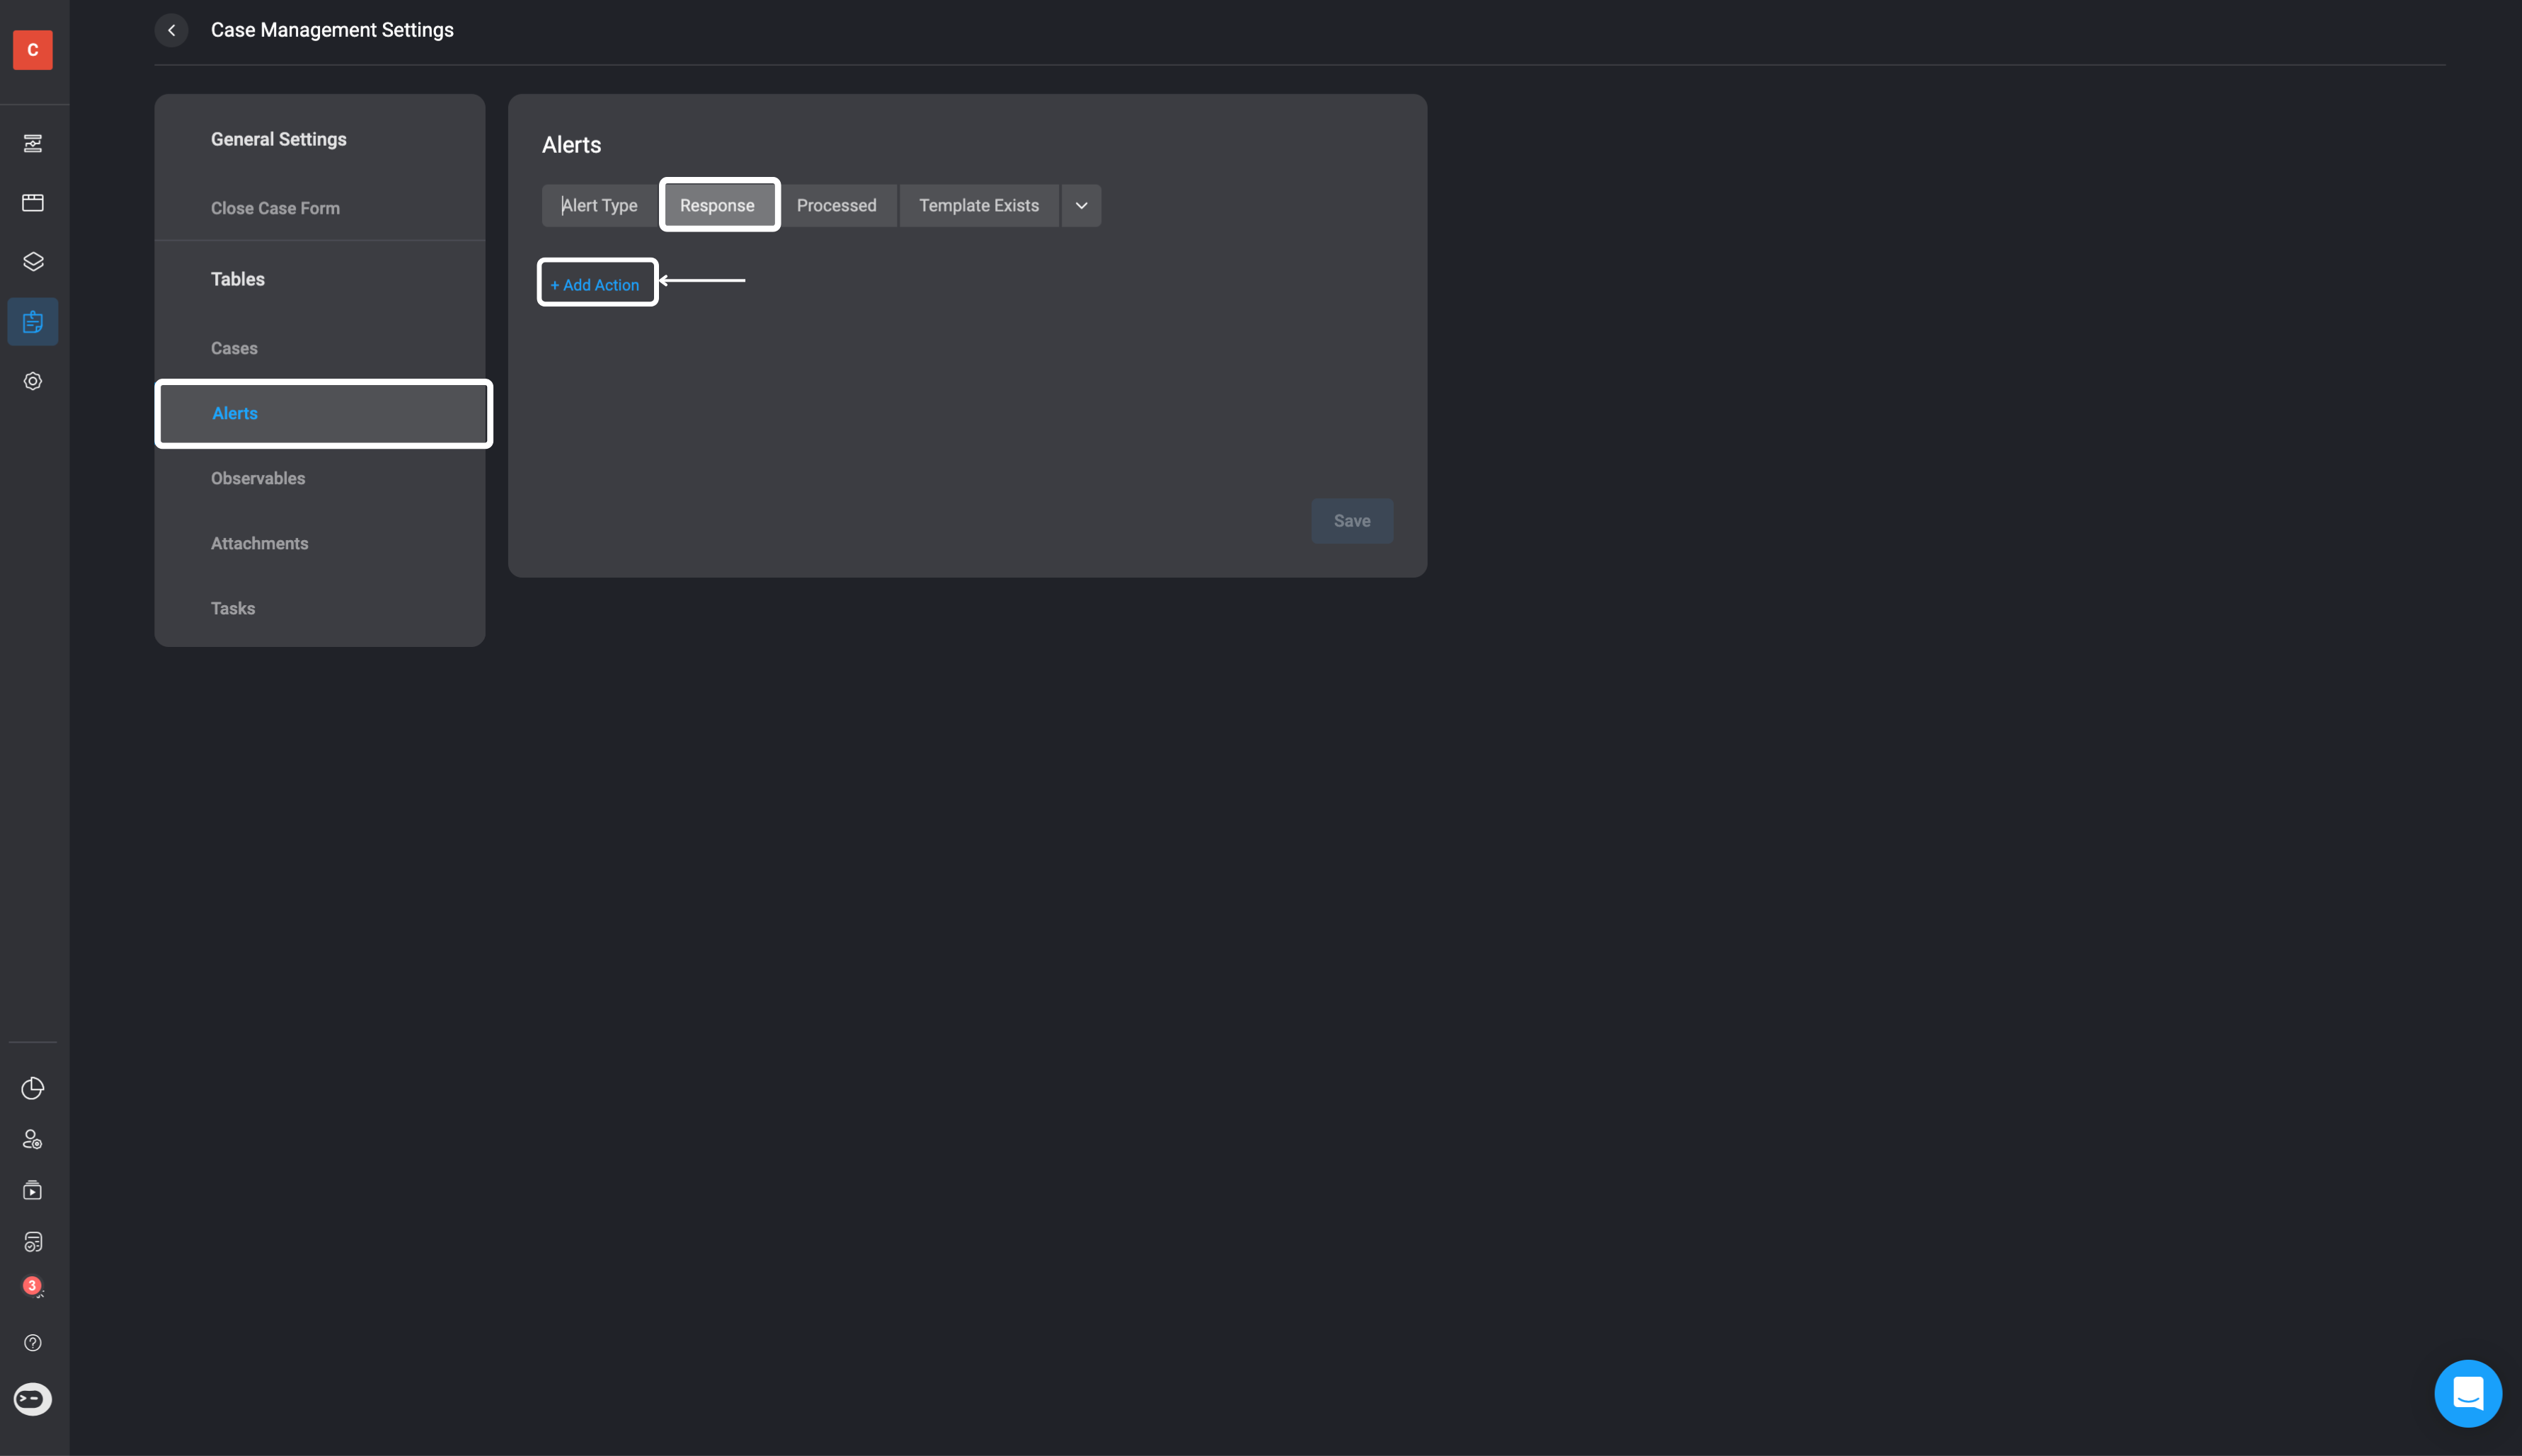
Alerts
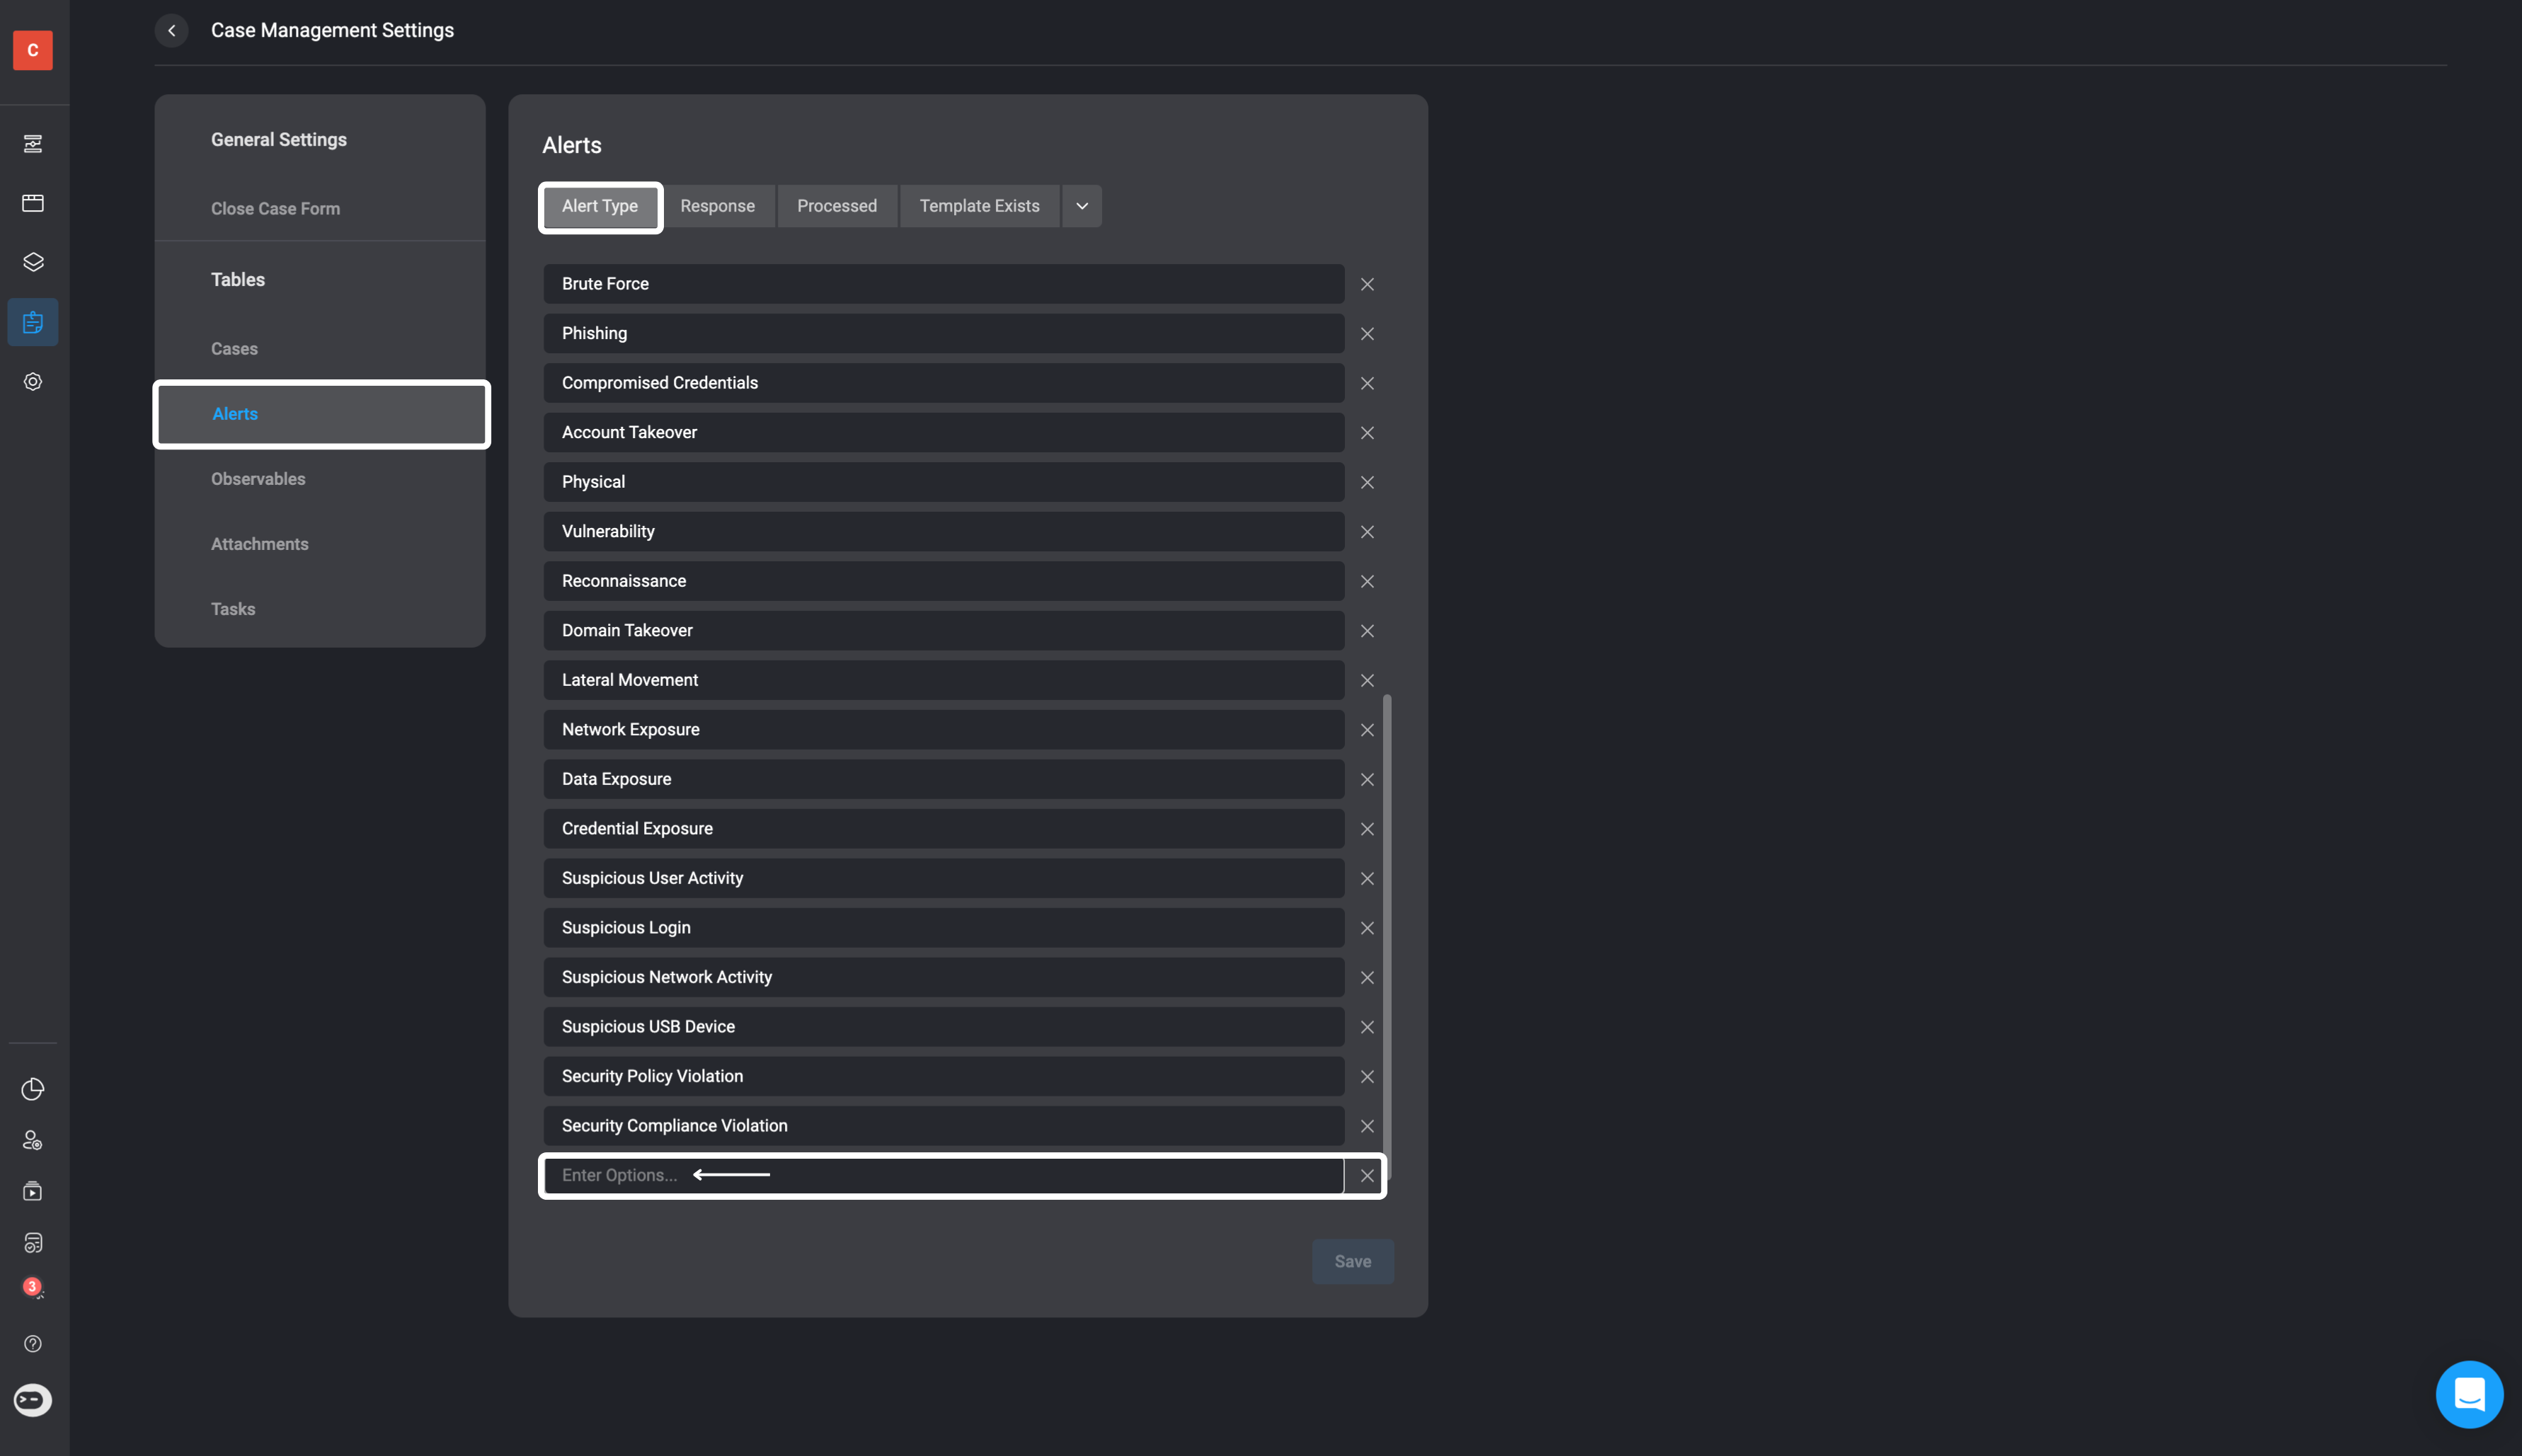
In the Alerts section of your Case Management Settings you can:Alert Type
Alert Type
- In the Alert Type tab, you can edit existing Alerts, delete them, or add custom Alerts.
Response
Response
Processed
Processed
Template Exists
Template Exists
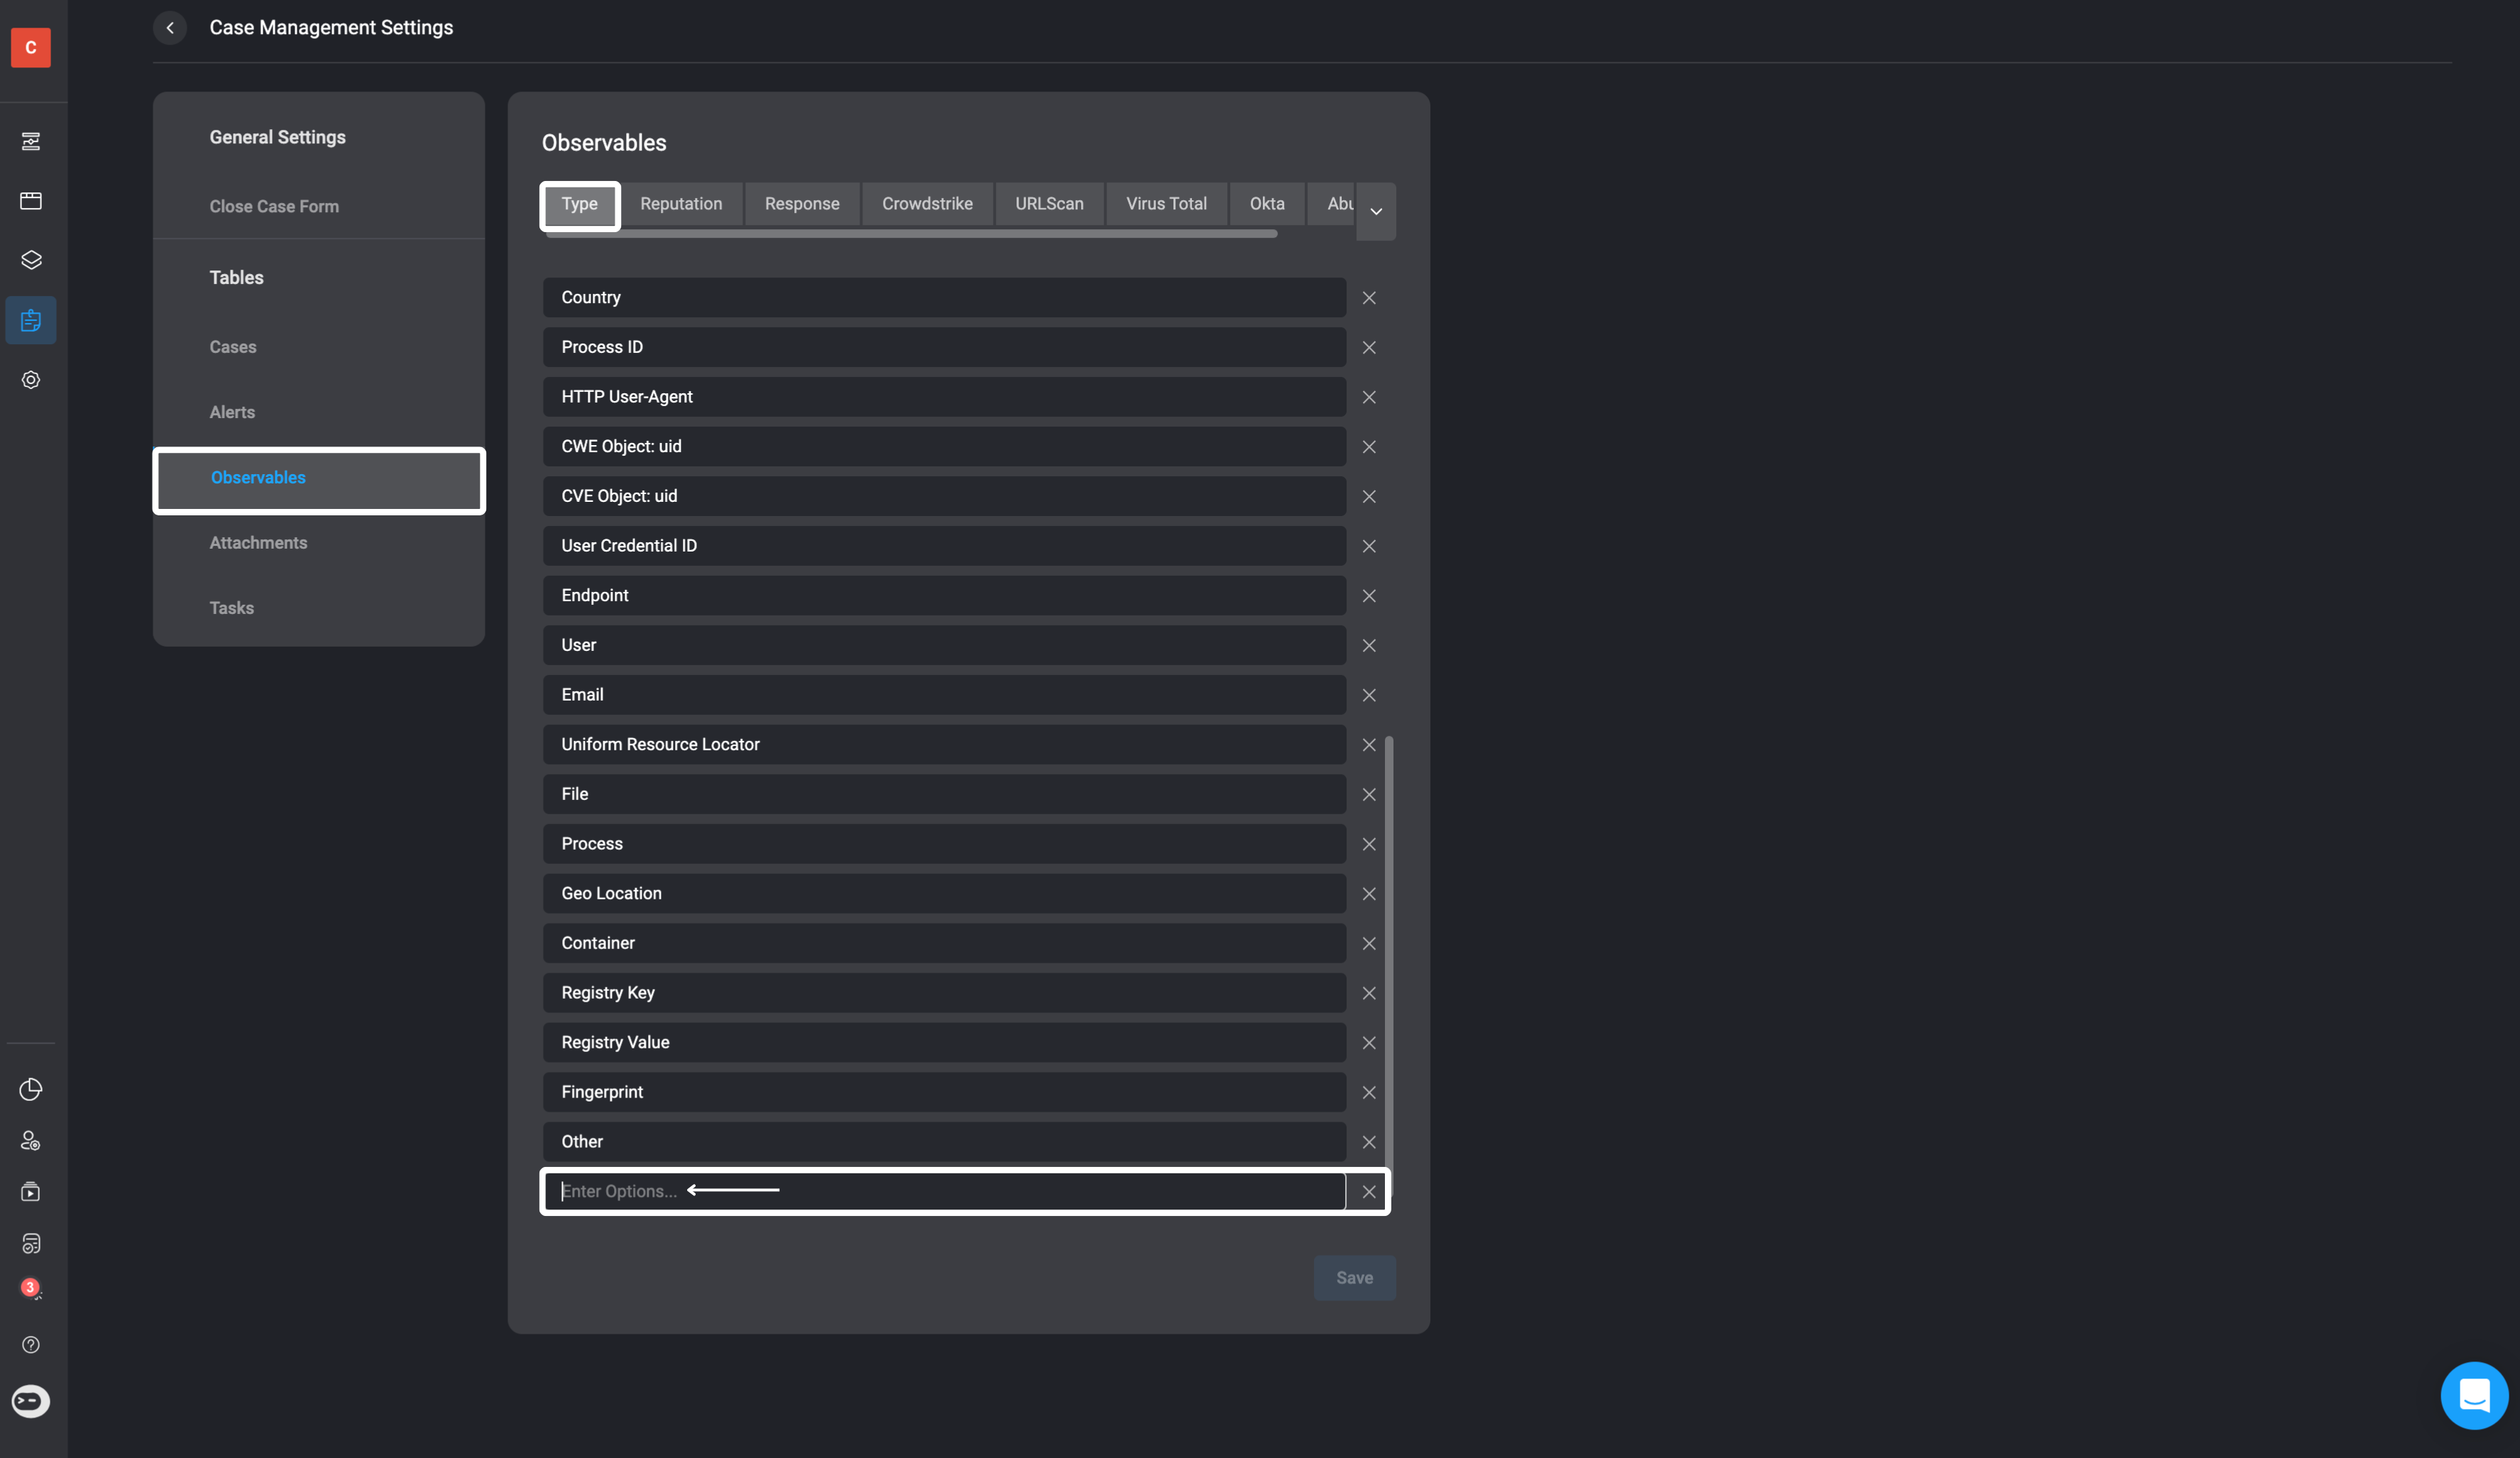
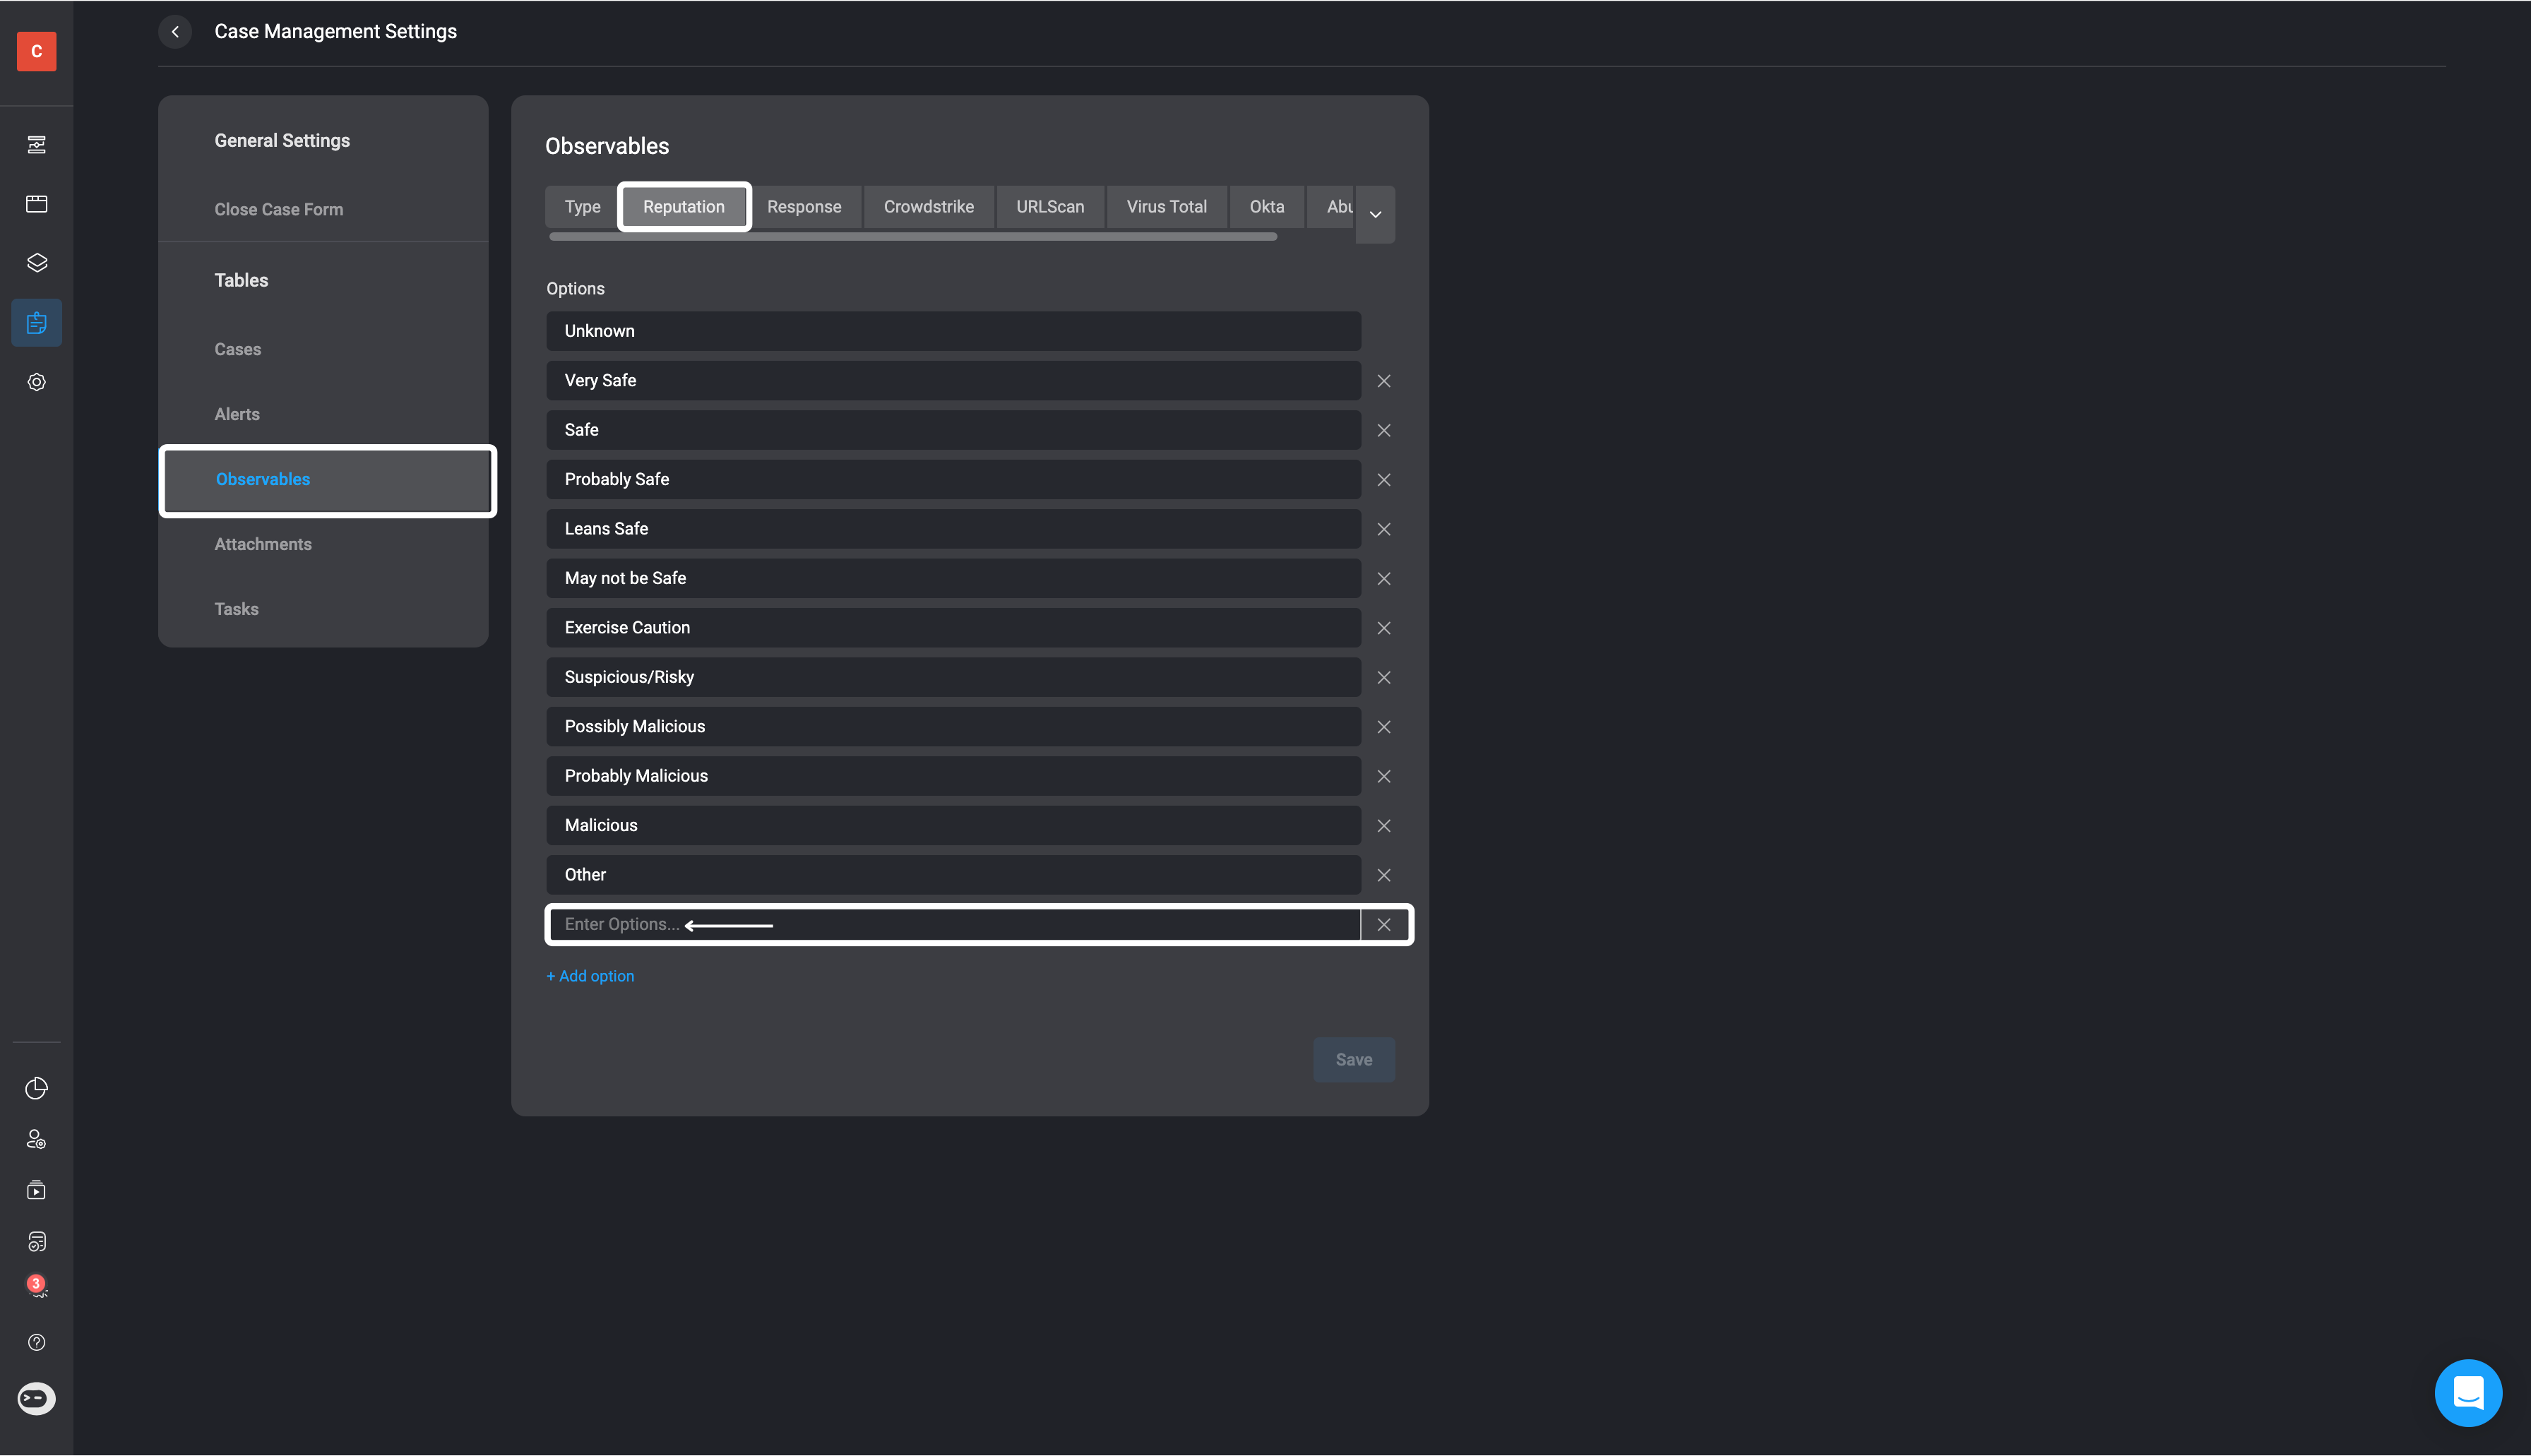
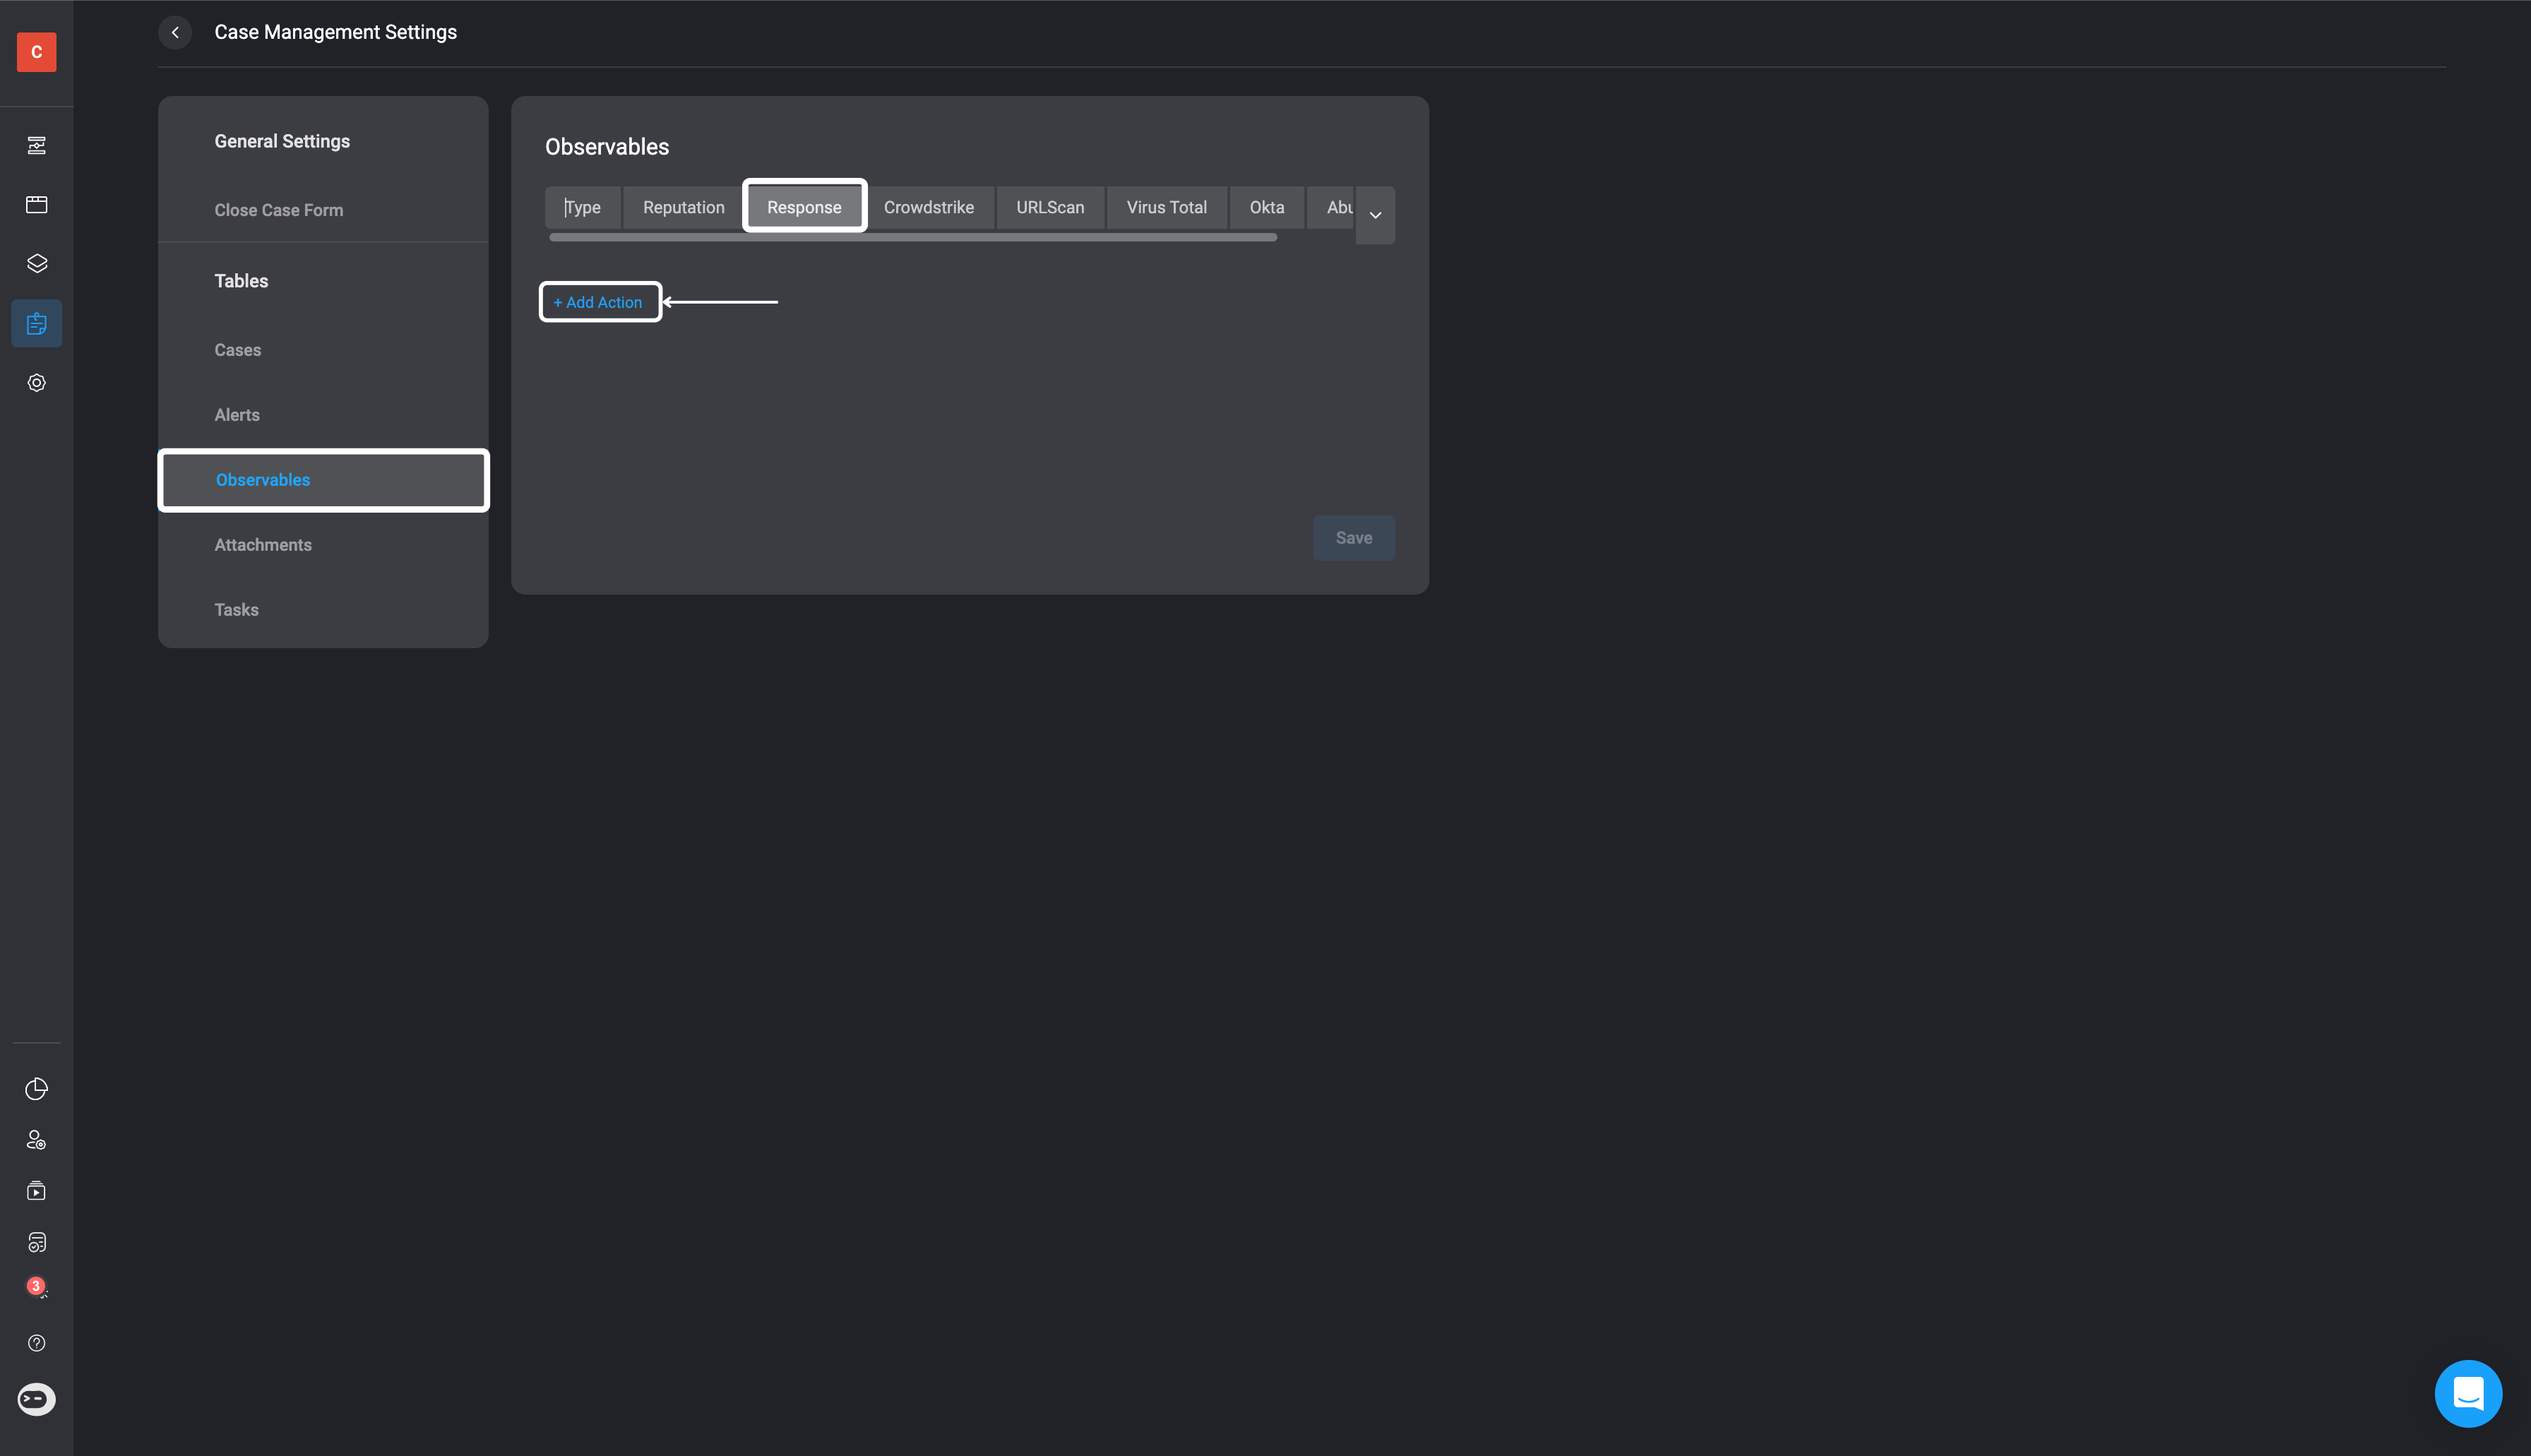
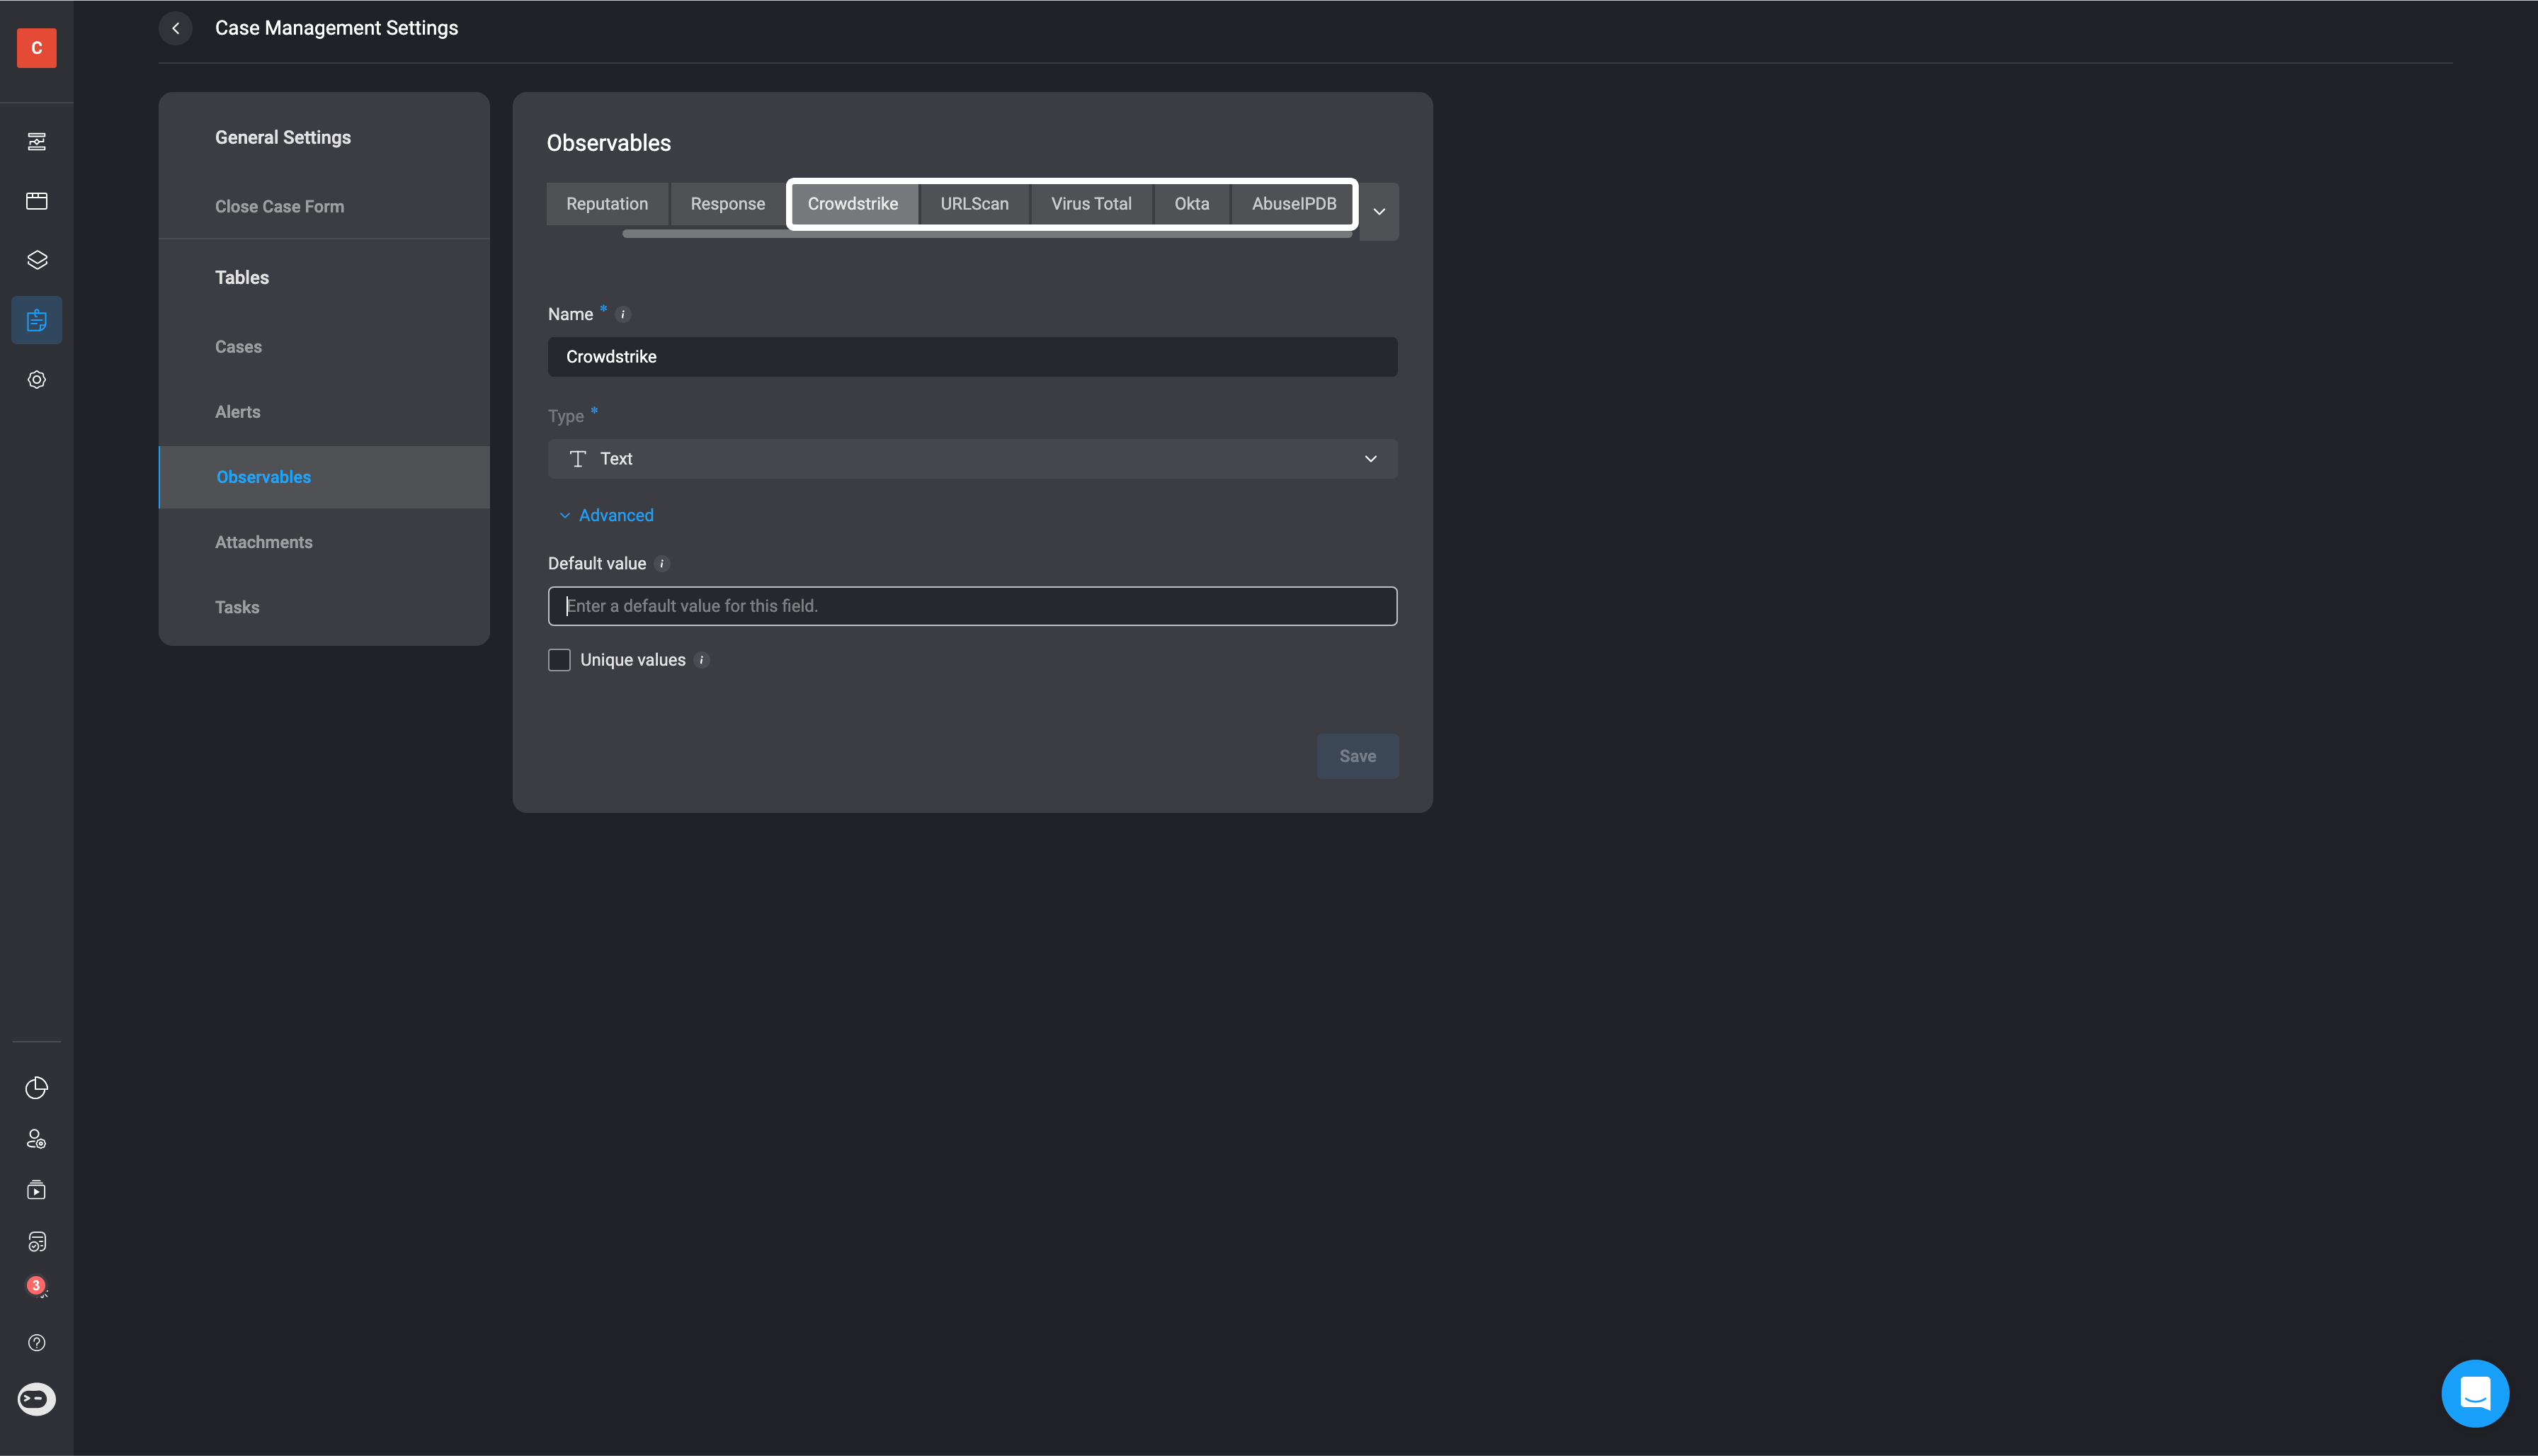
Observable Settings
In the Observables section of your Case Management Settings you can:Observable Type
Observable Type
- In the Observables Type tab, you can edit existing Observables, delete them, or add custom Observables.
Reputation
Reputation
- In the Reputation tab, you can edit existing Reputation types, delete them, or add your own custom Reputation Type.
Response
Response
Observables
Observables
- You can rename an observable, add or update its default value, and mark the column as unique. Marking it as unique prevents duplicate values from being added to this column in the table.
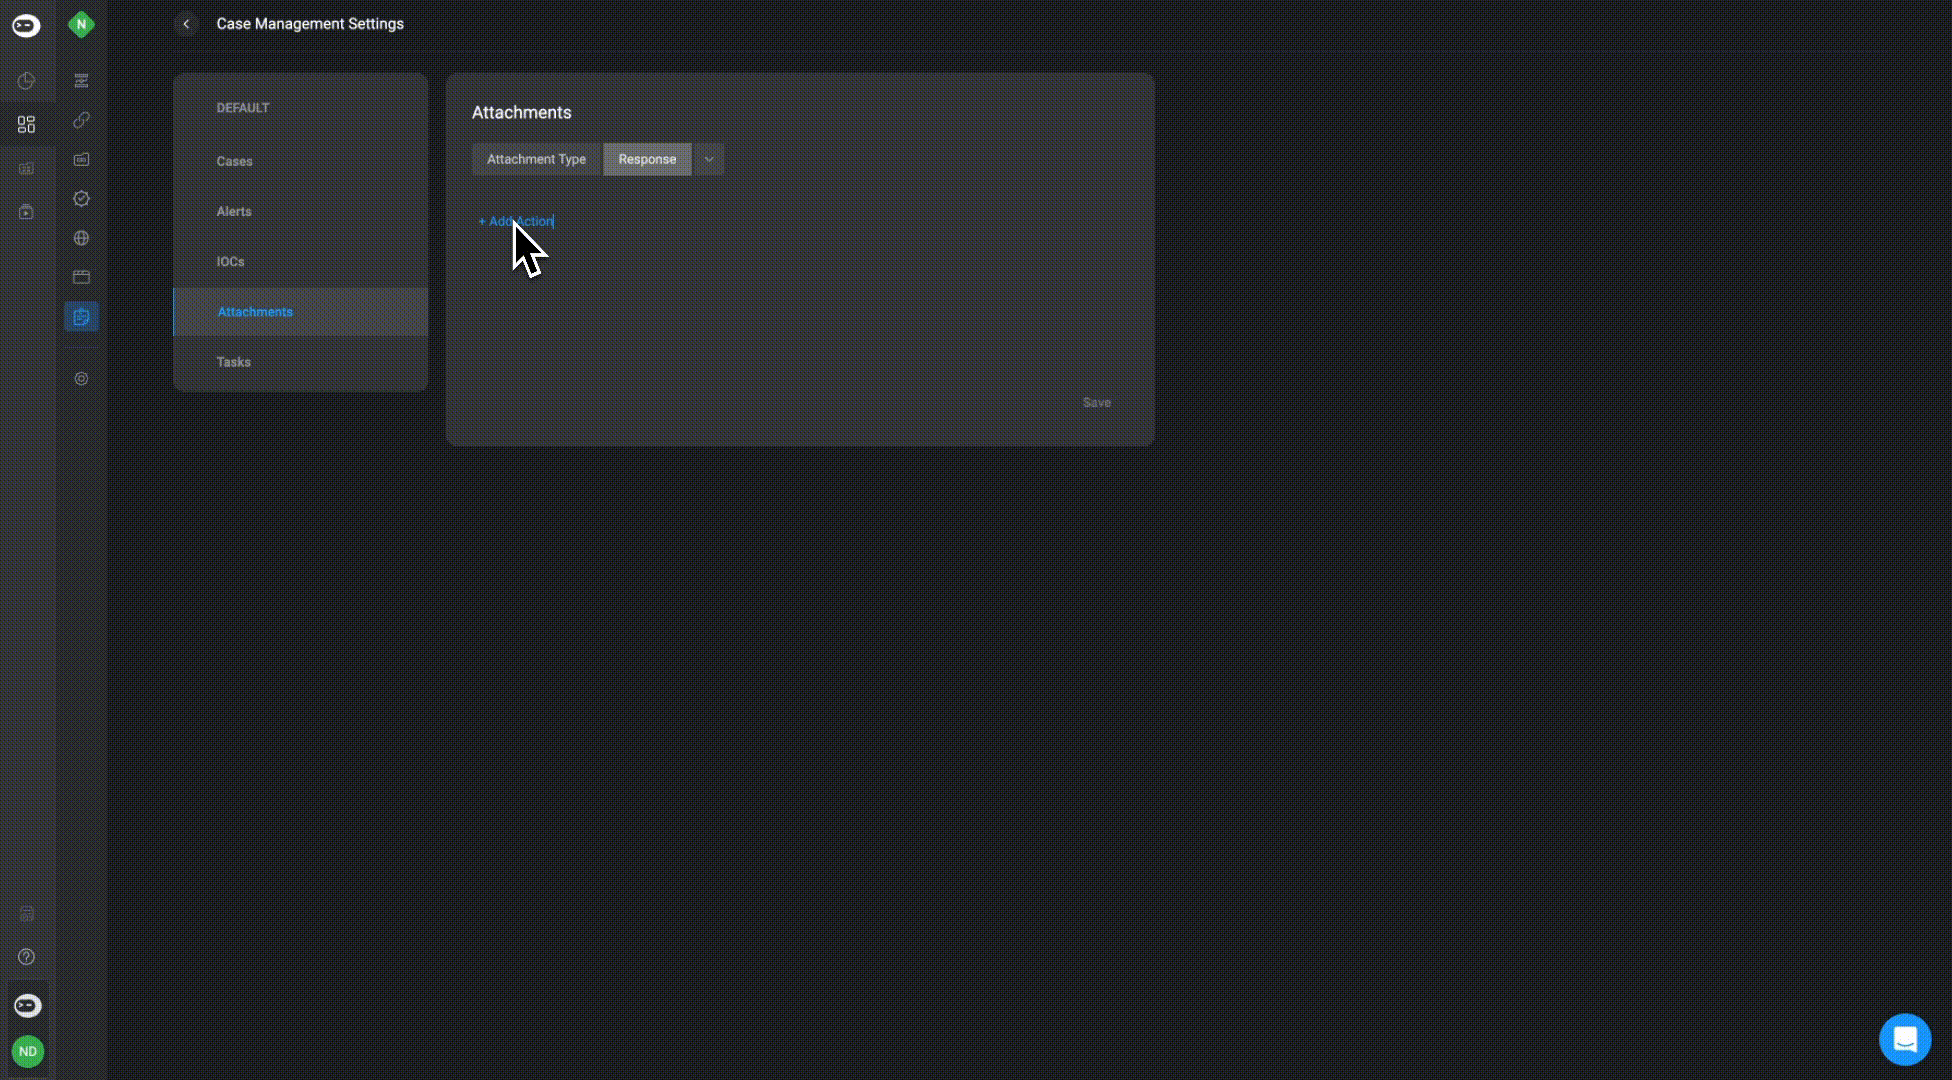
Attachments Settings
In the Attachments section of your Case Management Settings you can:Attachment Type
Attachment Type
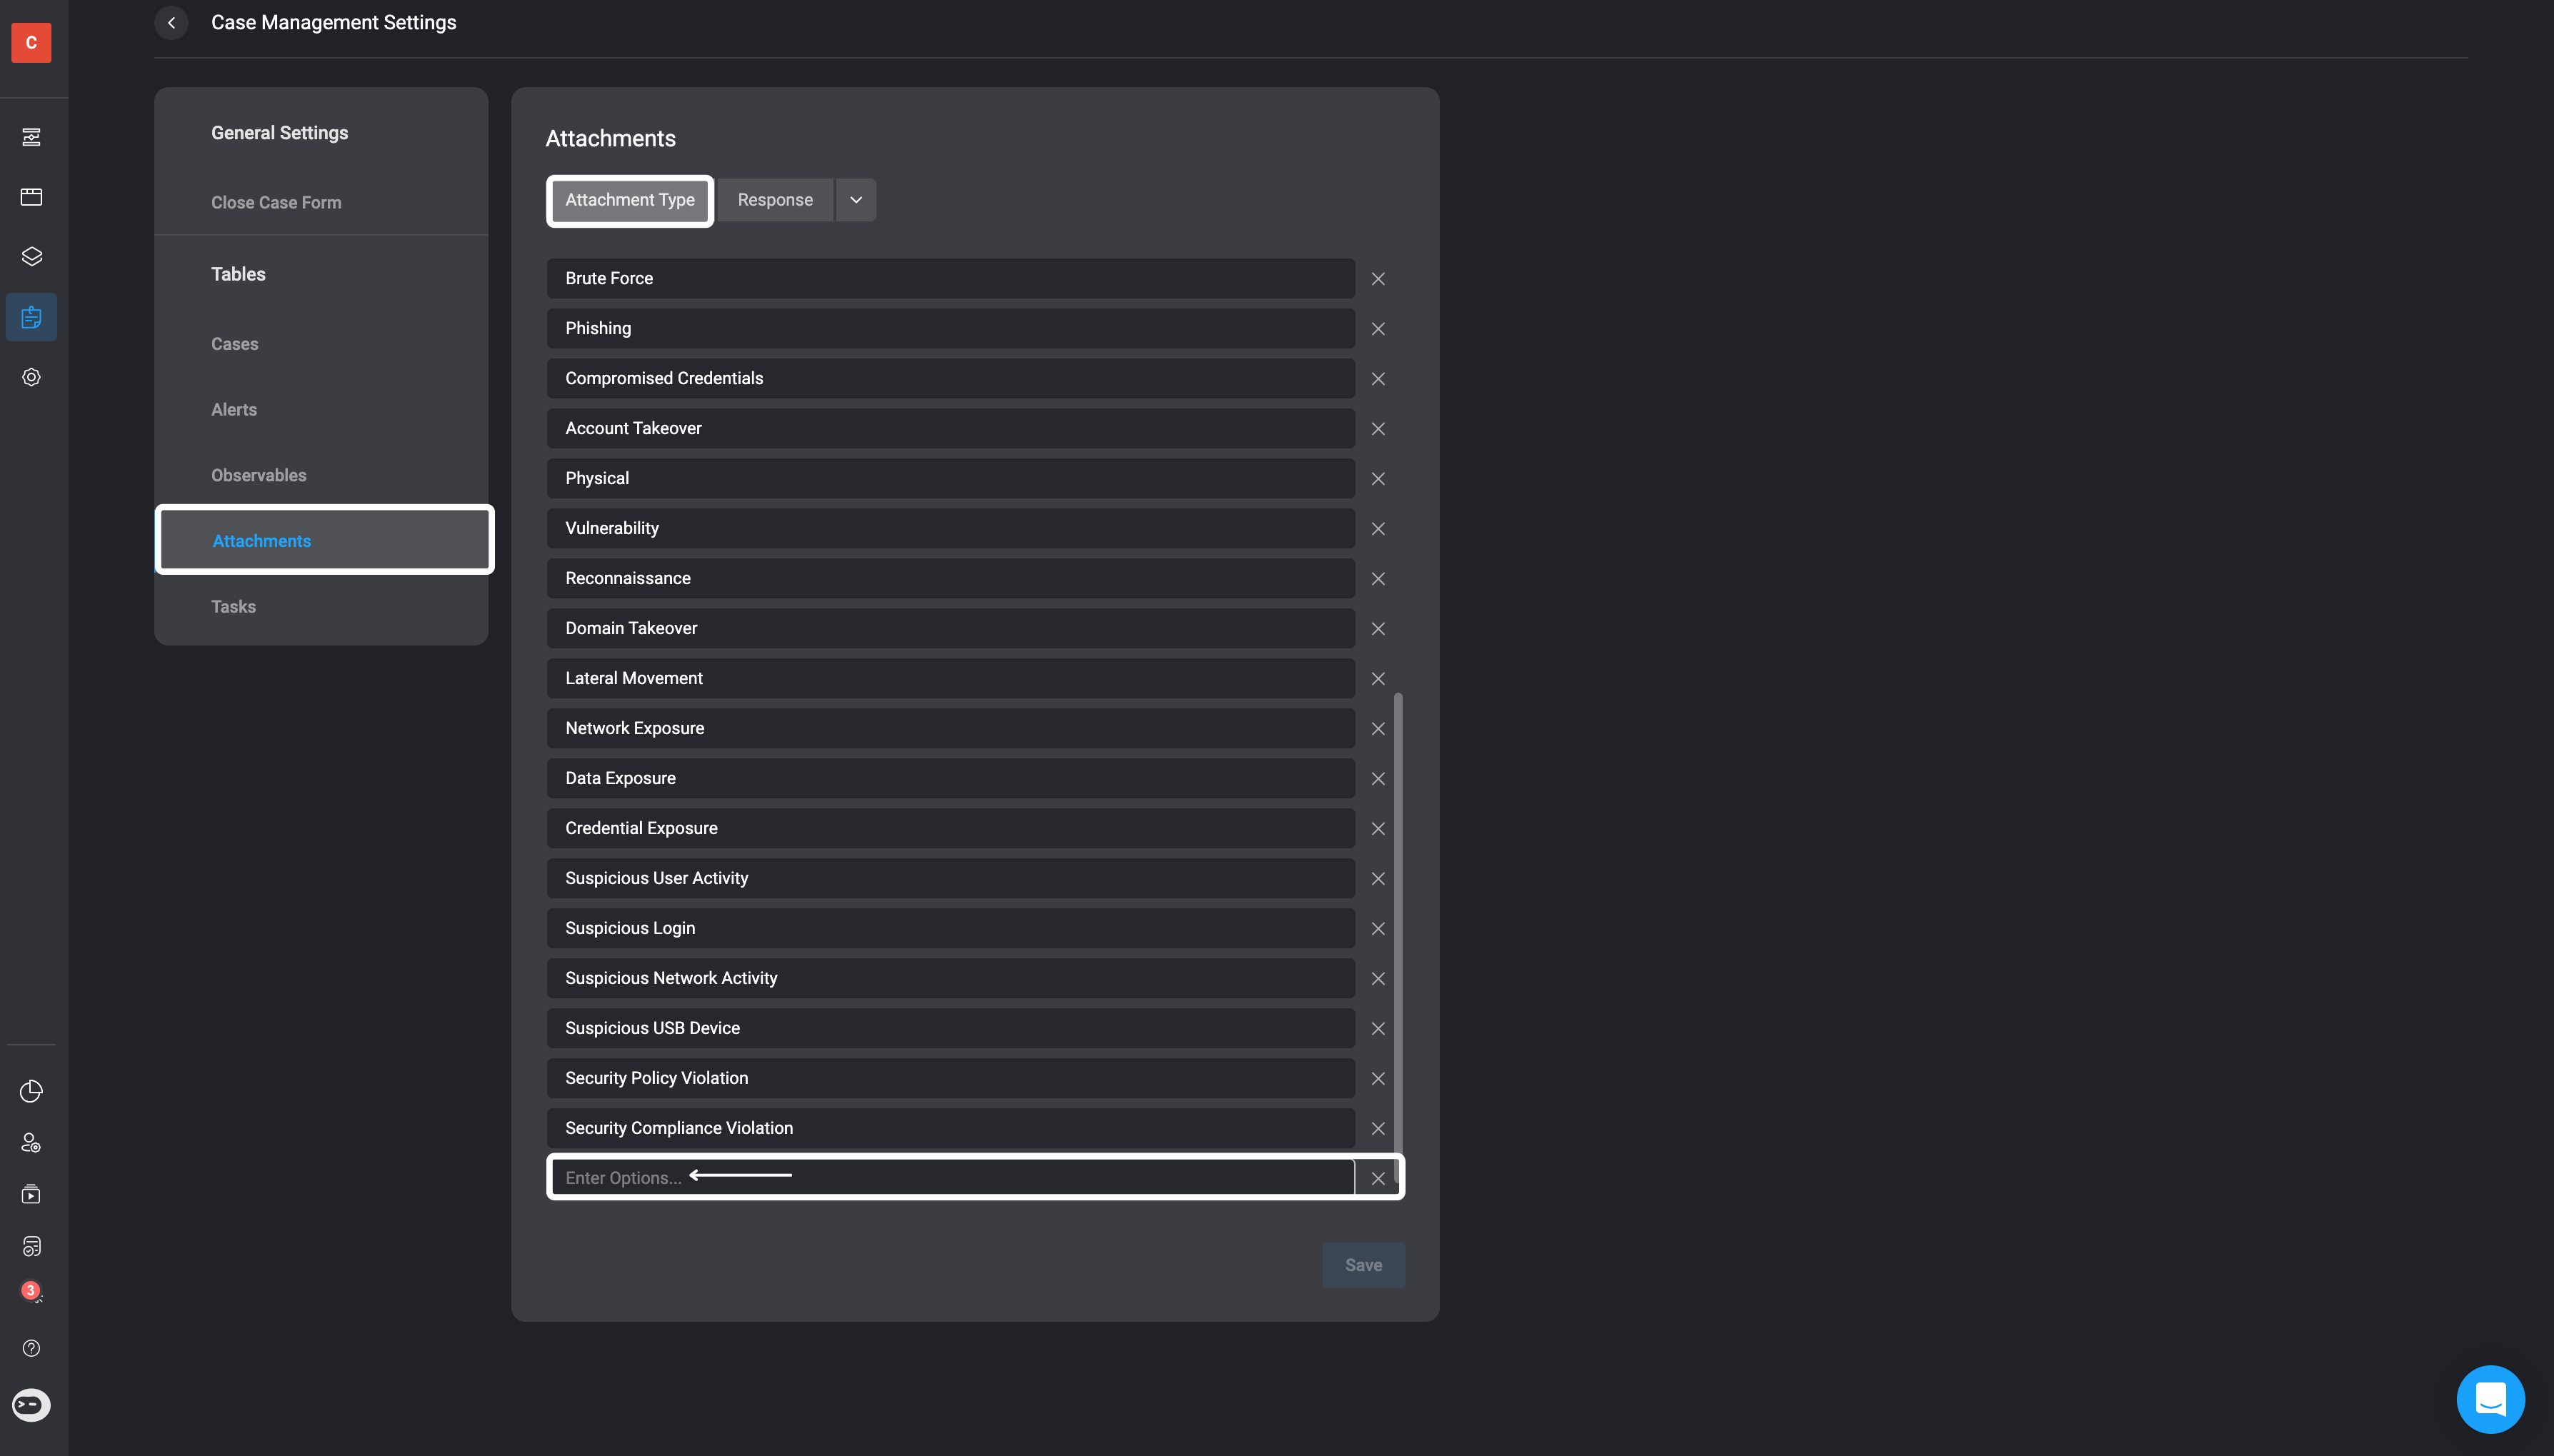
Response
Response
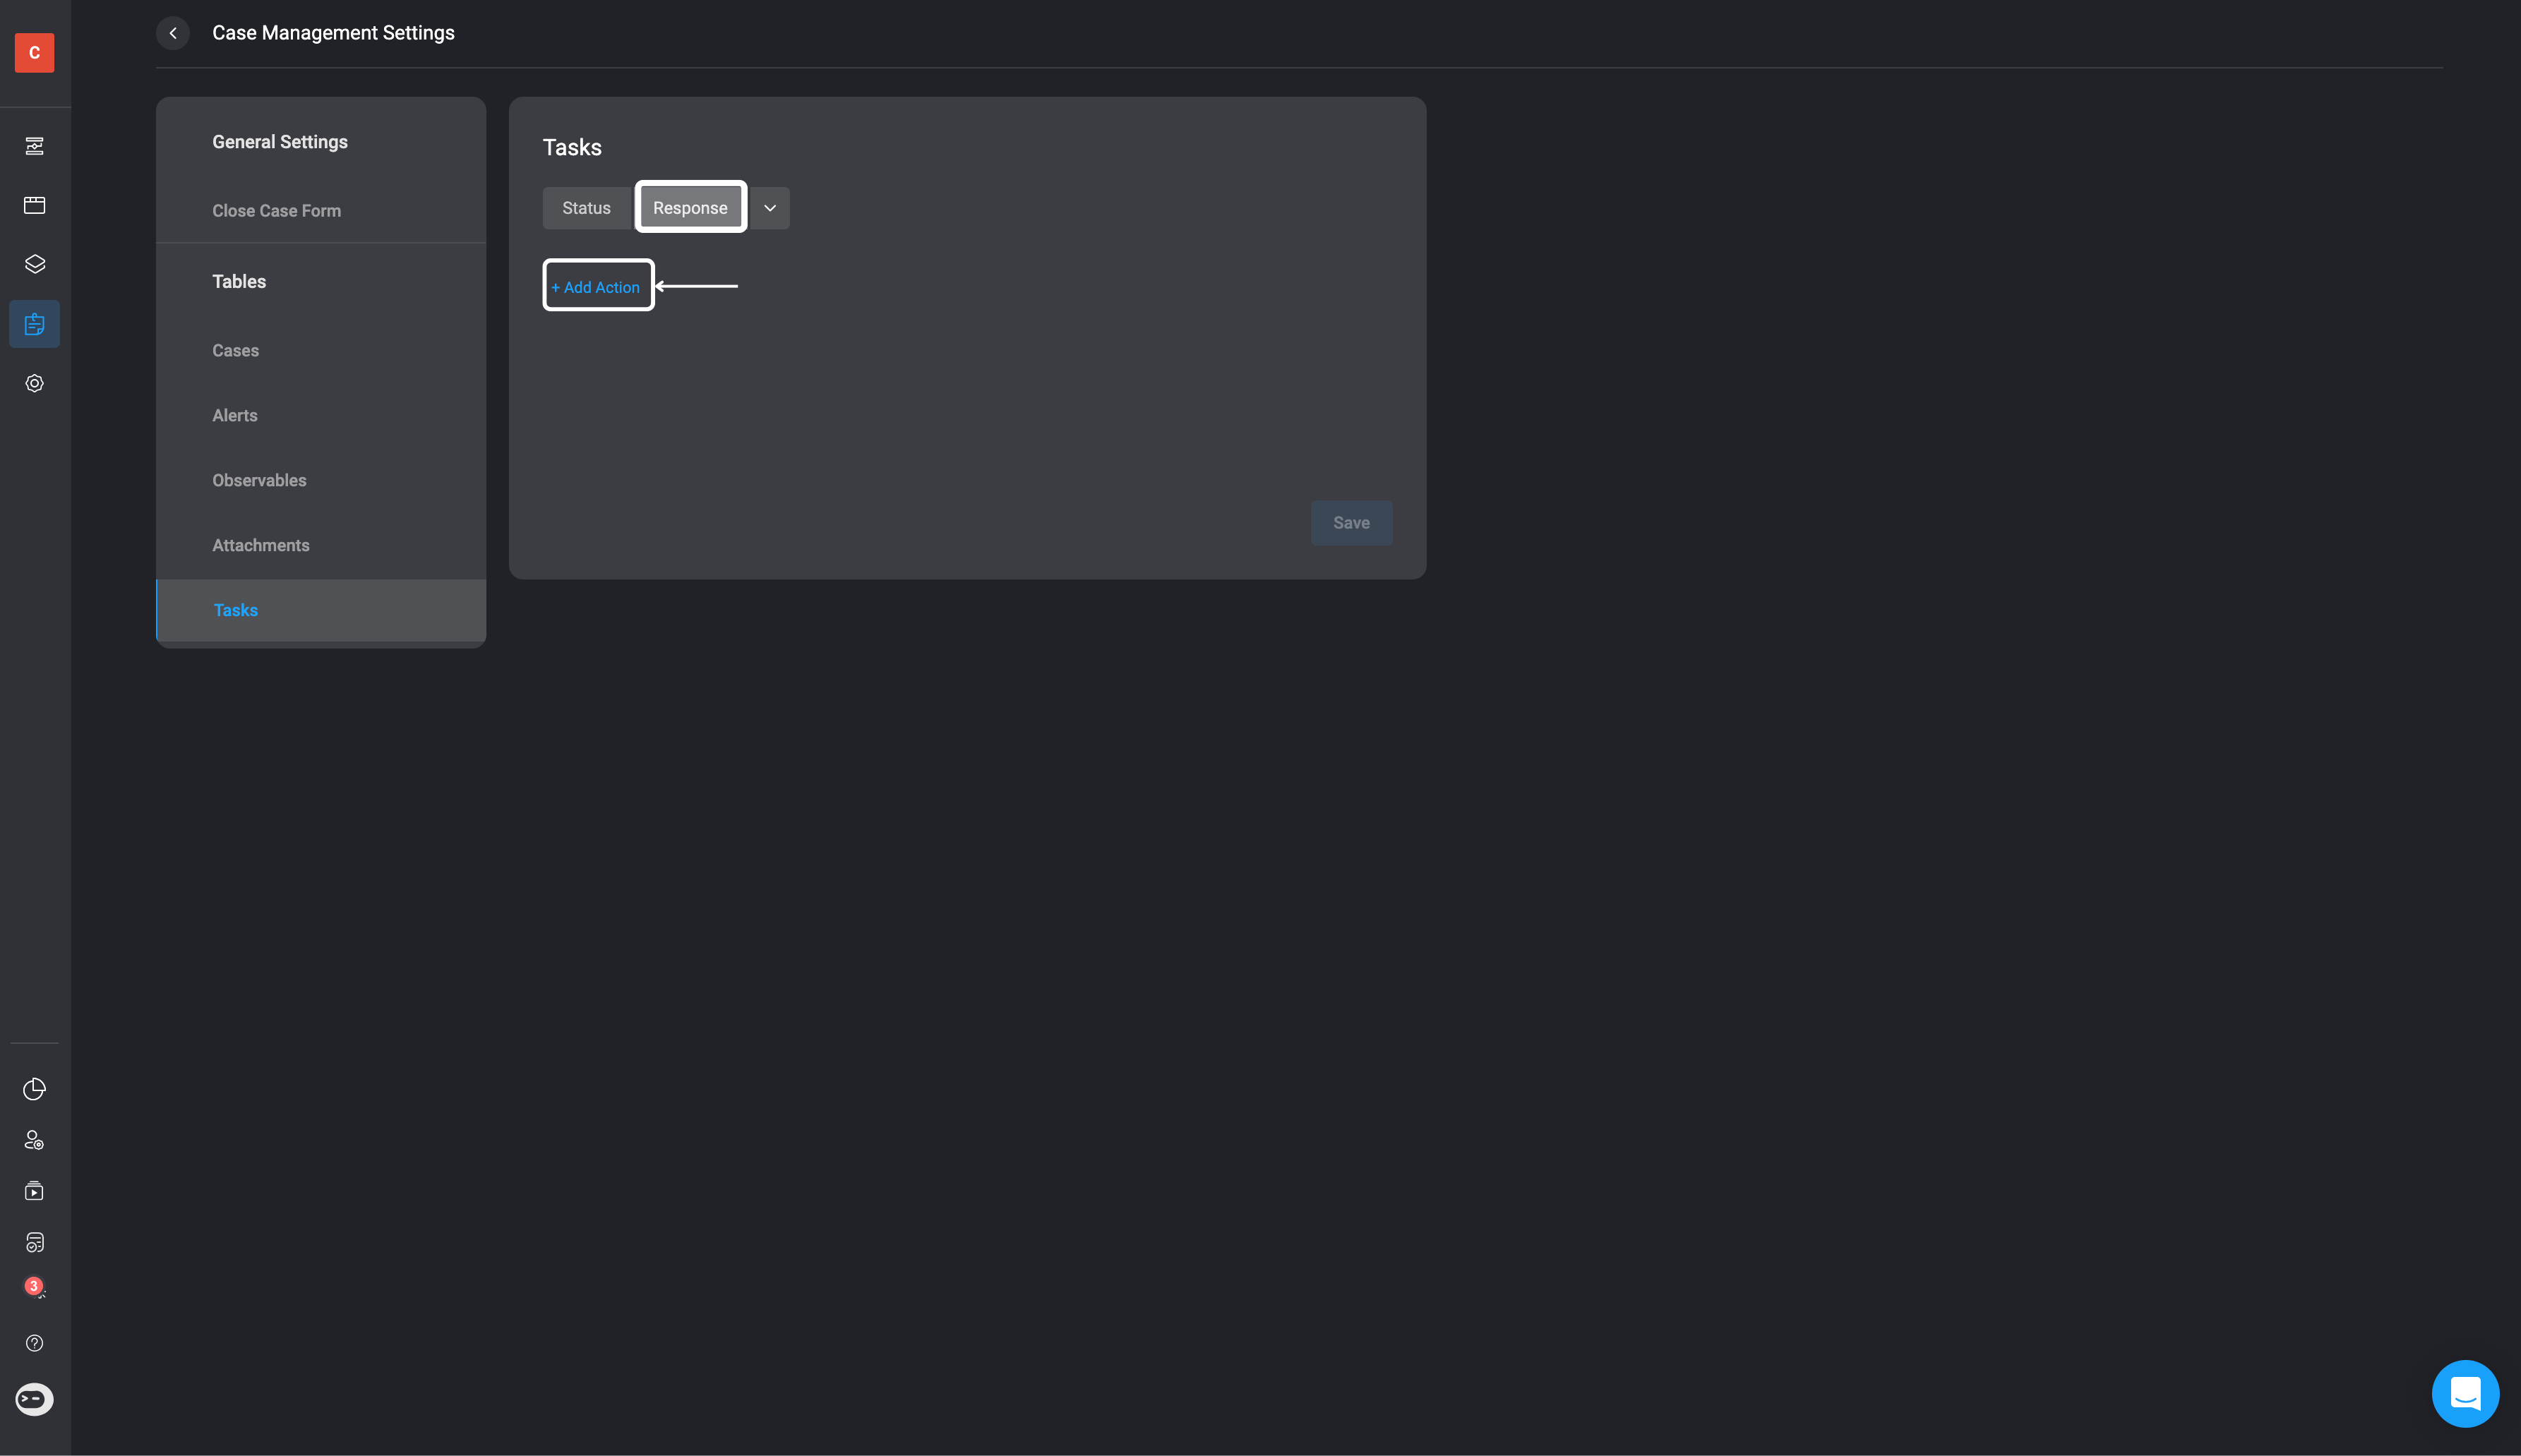
Task Settings
In the Tasks section of your Case Management Settings you can:Status
Status
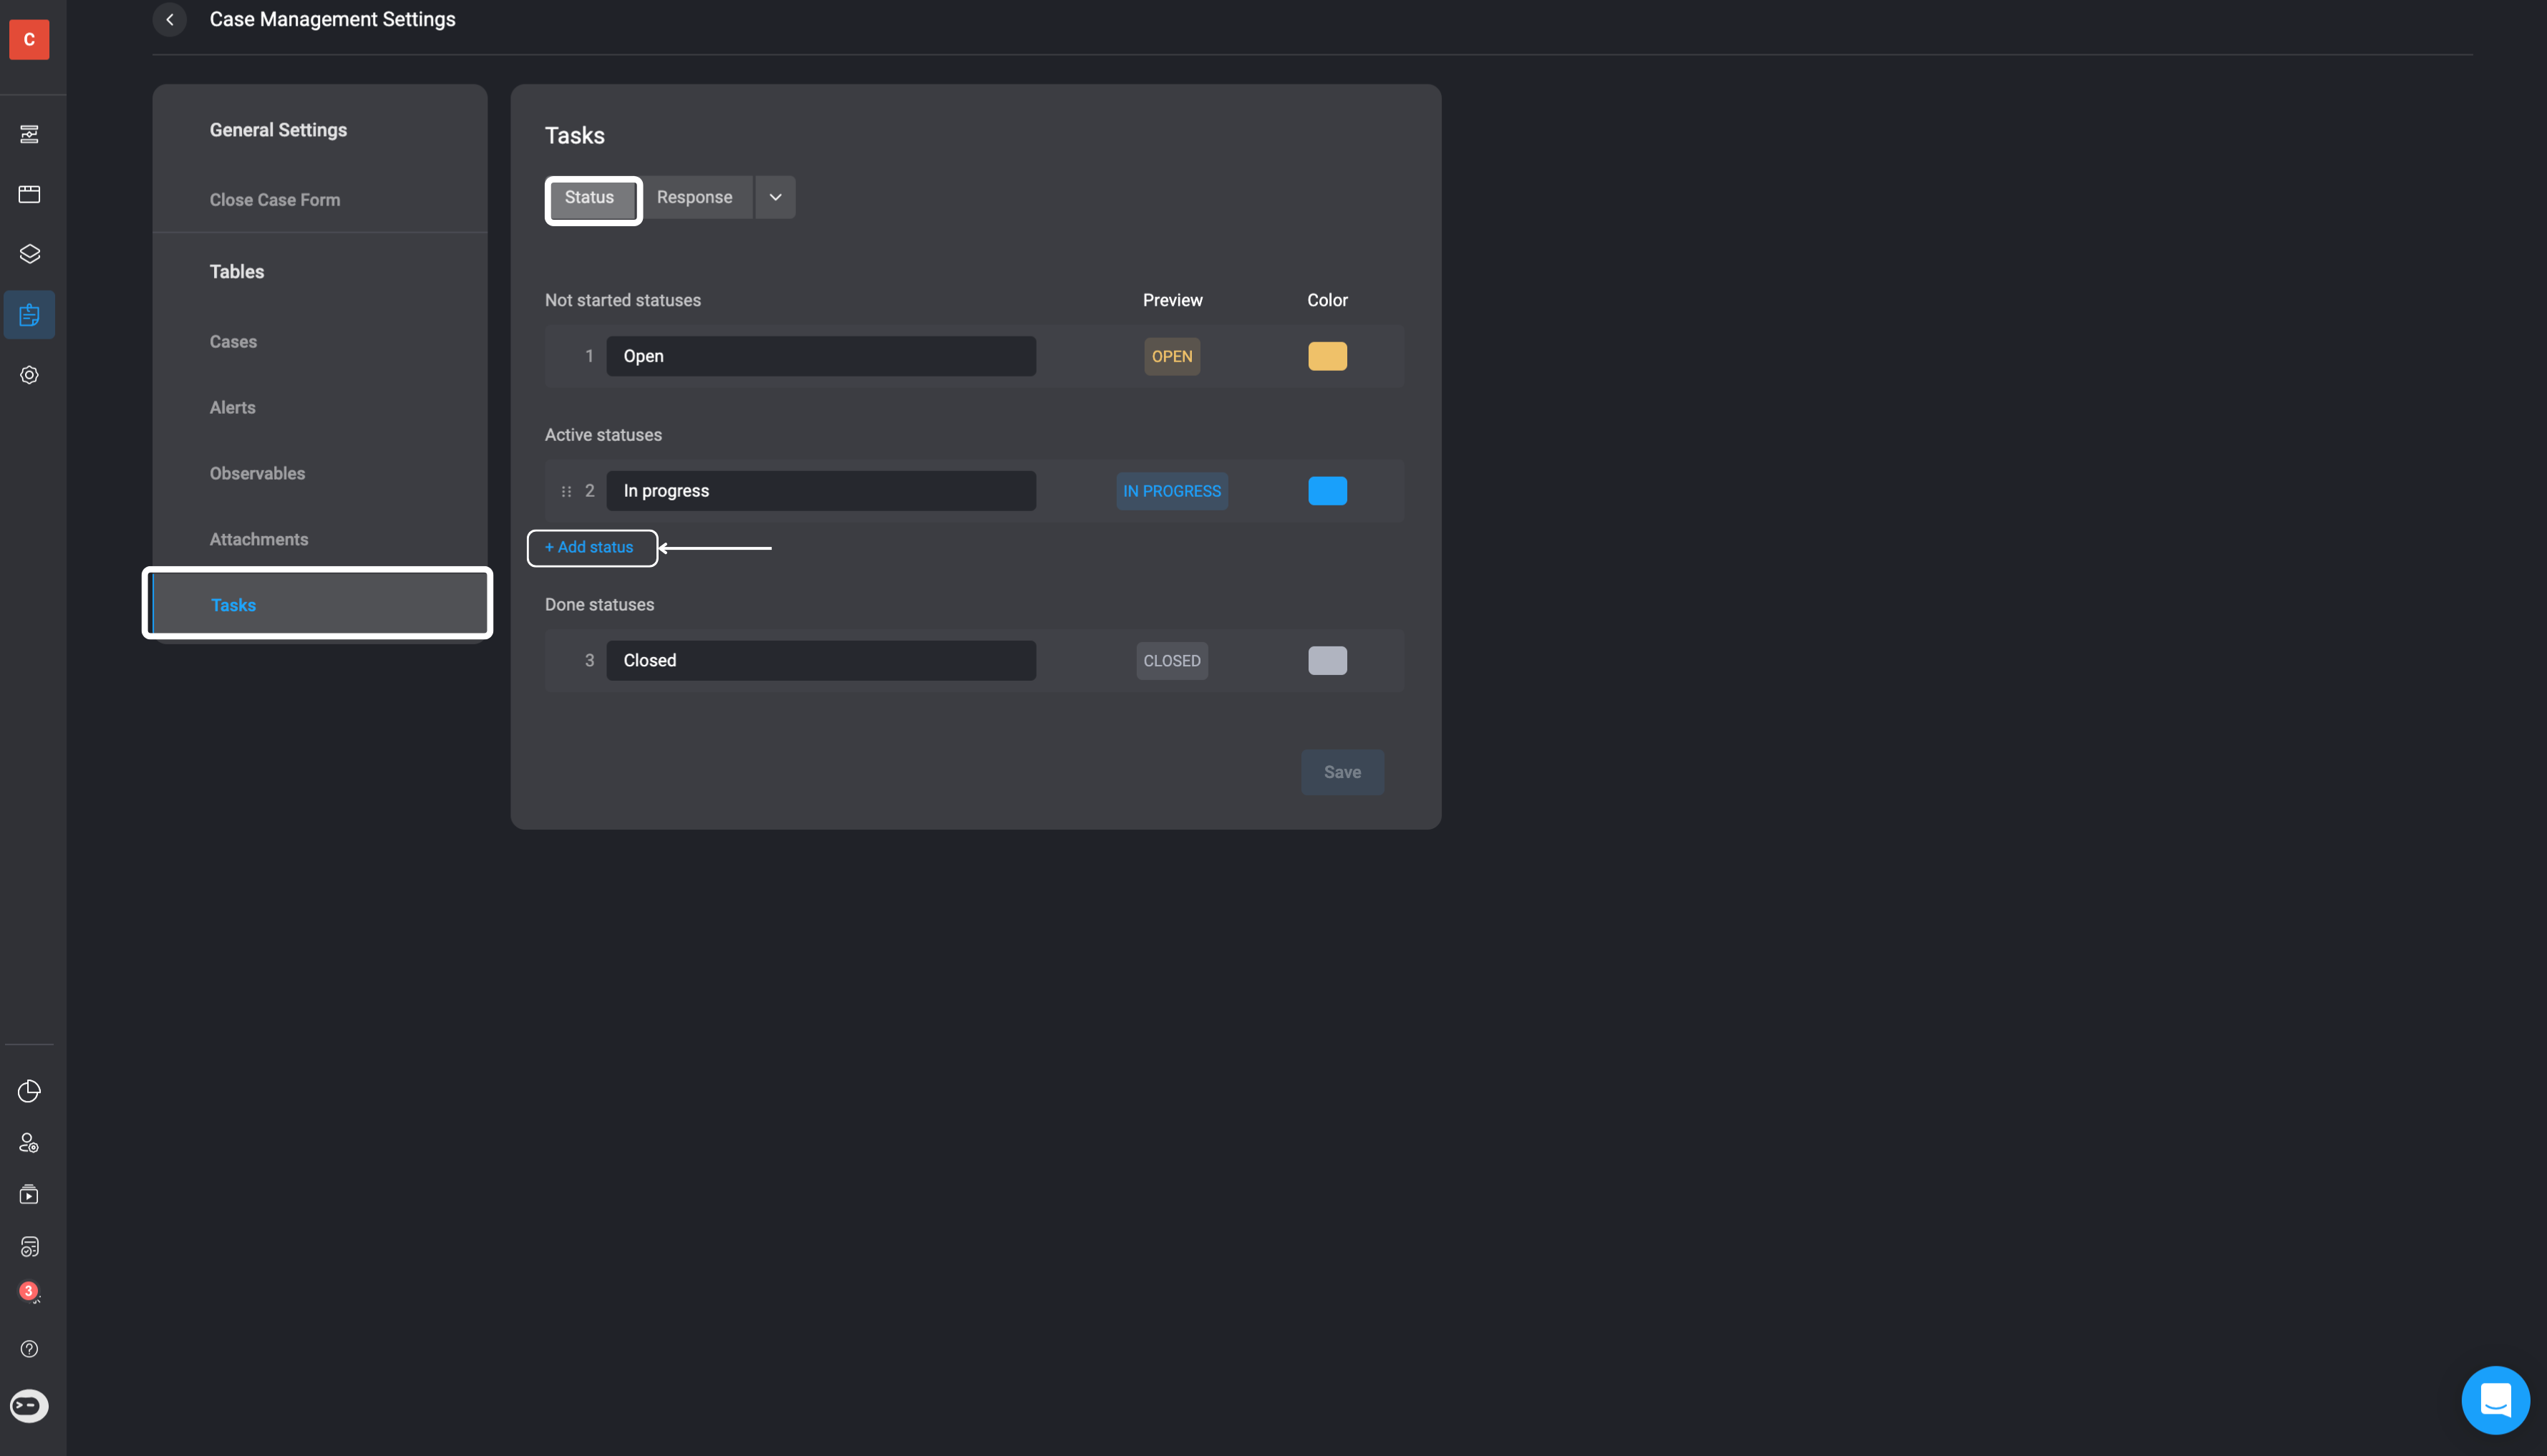
Response
Response
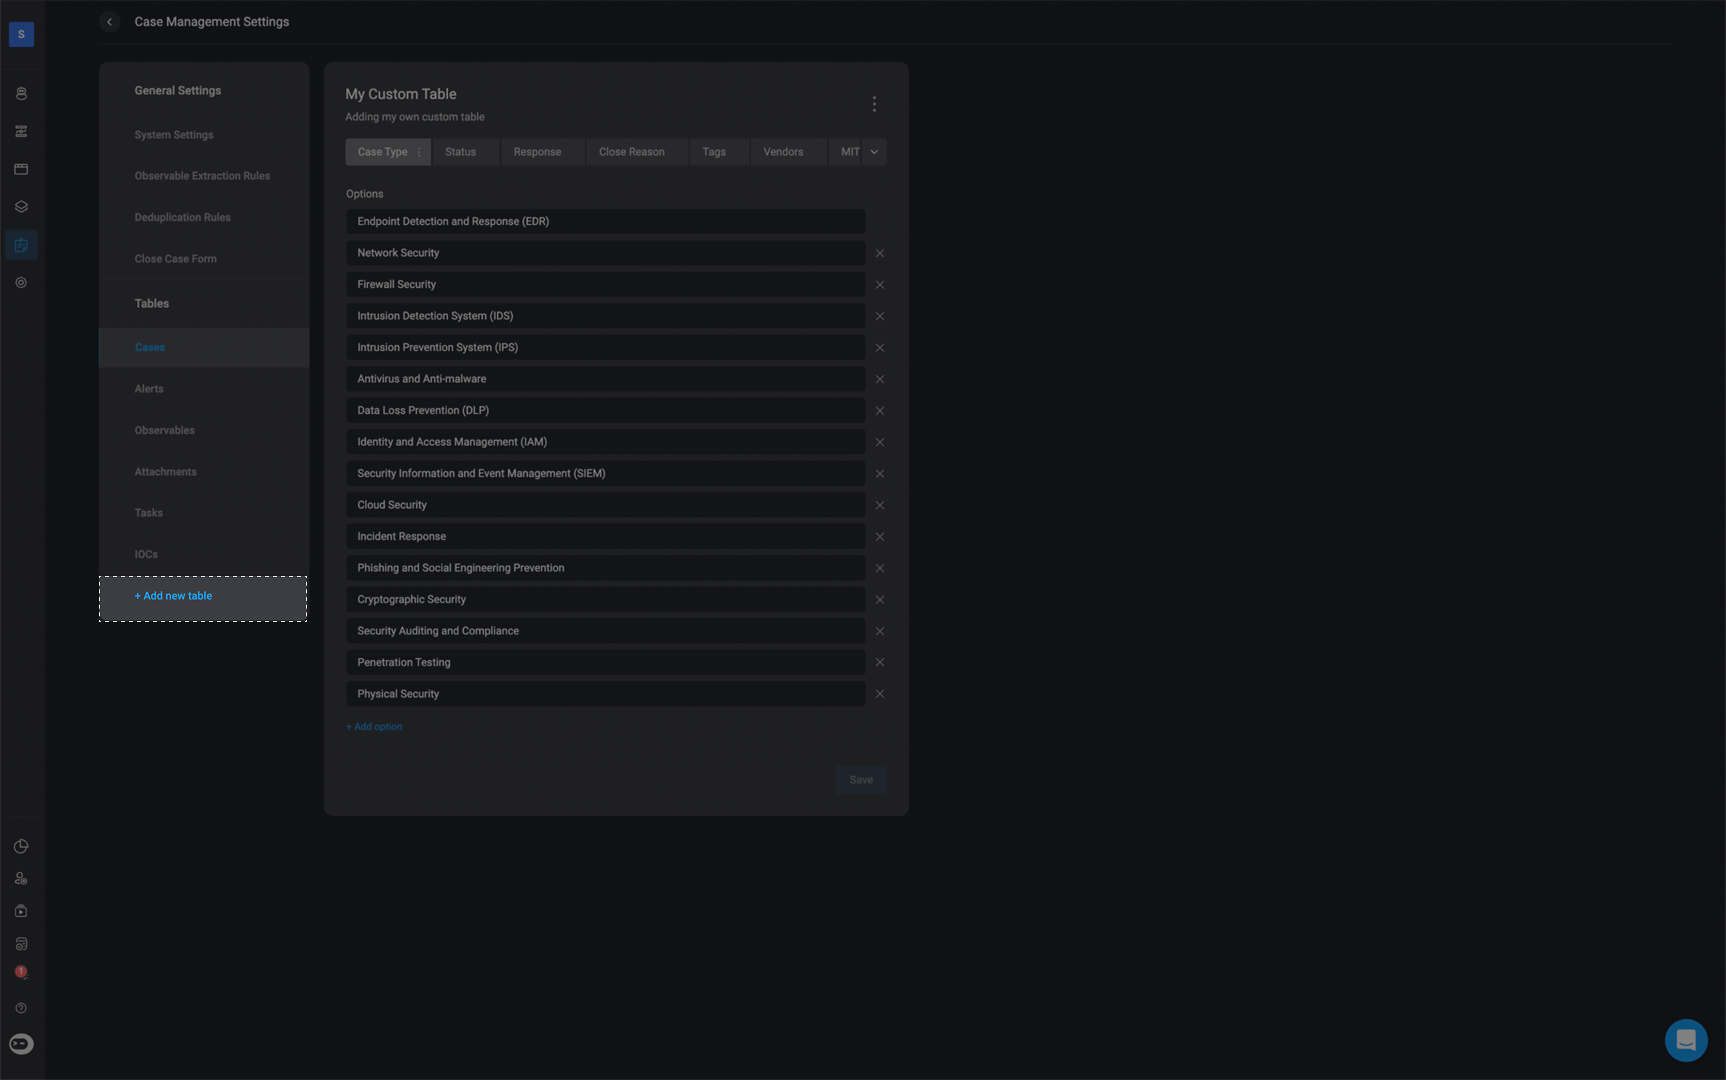
Custom Table Settings
Custom Tables let you create flexible, user-defined tables within a case—tailored entirely to your specific needs. You can design the table structure, choose the fields you want, and control how and when the table appears, making it easy to manage case-related data in a way that fits your workflow.Create a Custom Table
Navigate to Case Management Settings
In the Case Management Settings, click the ’ Add new table’ button.
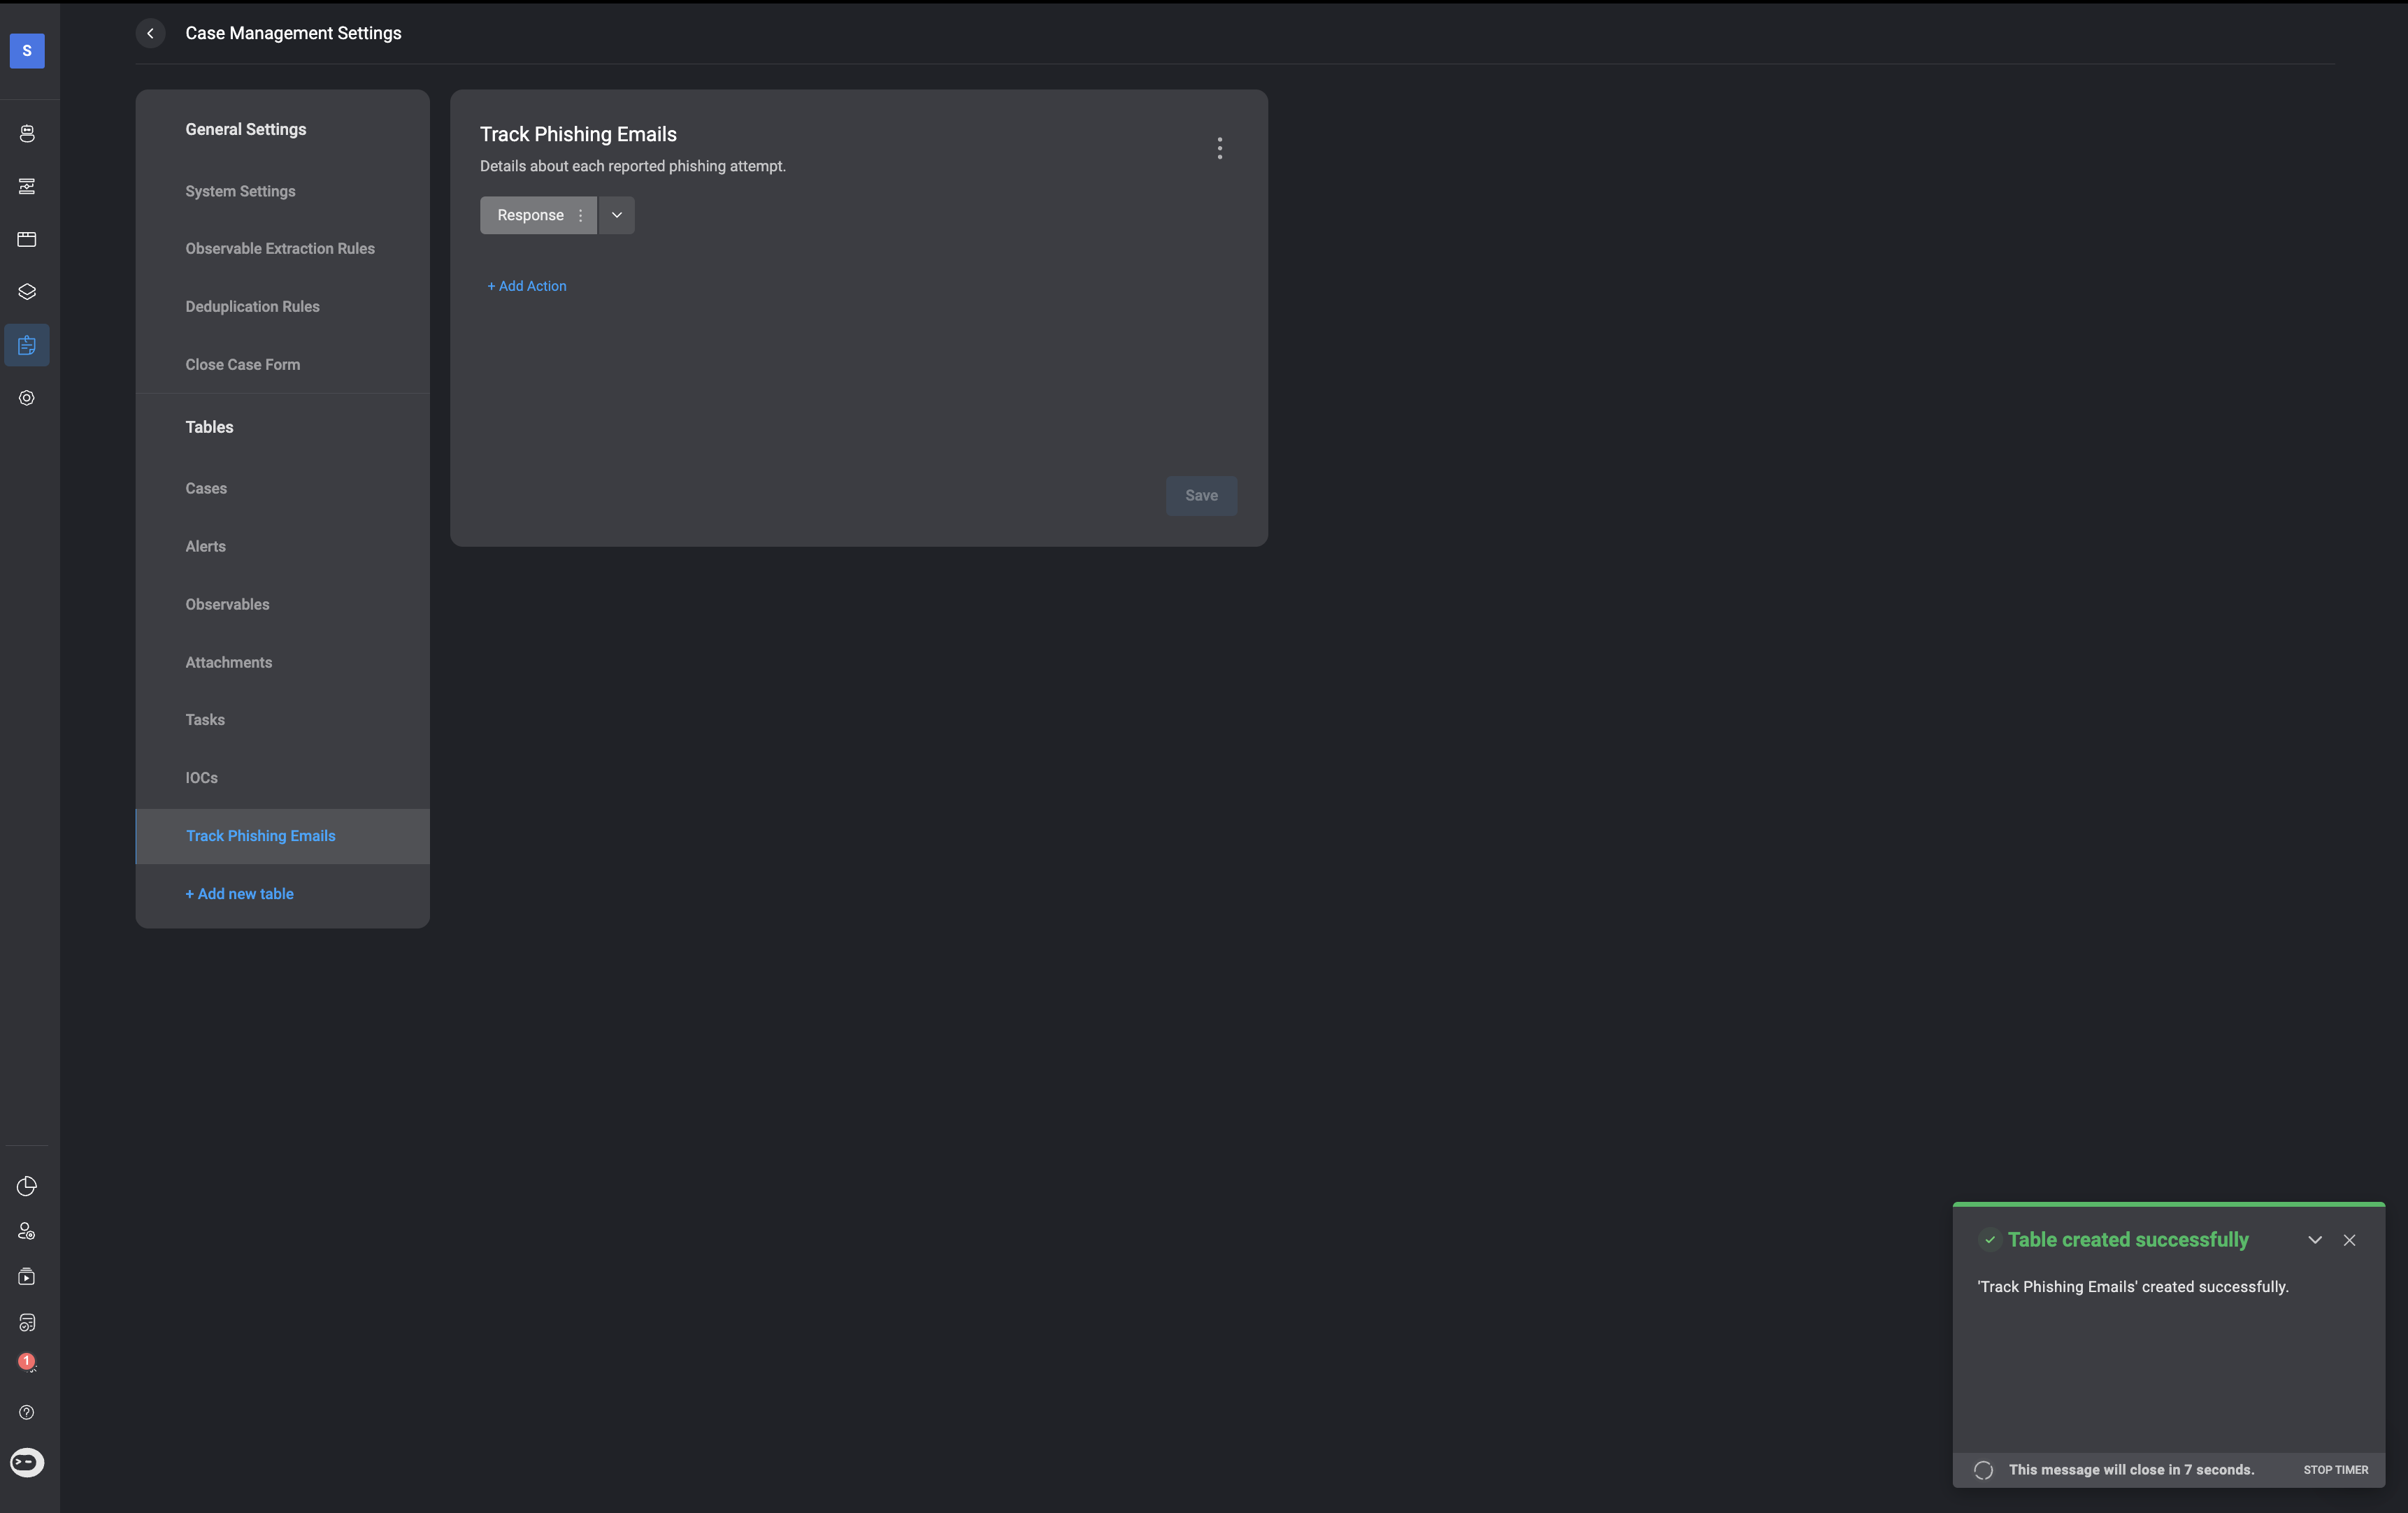
Name and Describe Your Table

Confirmation of Table Creation
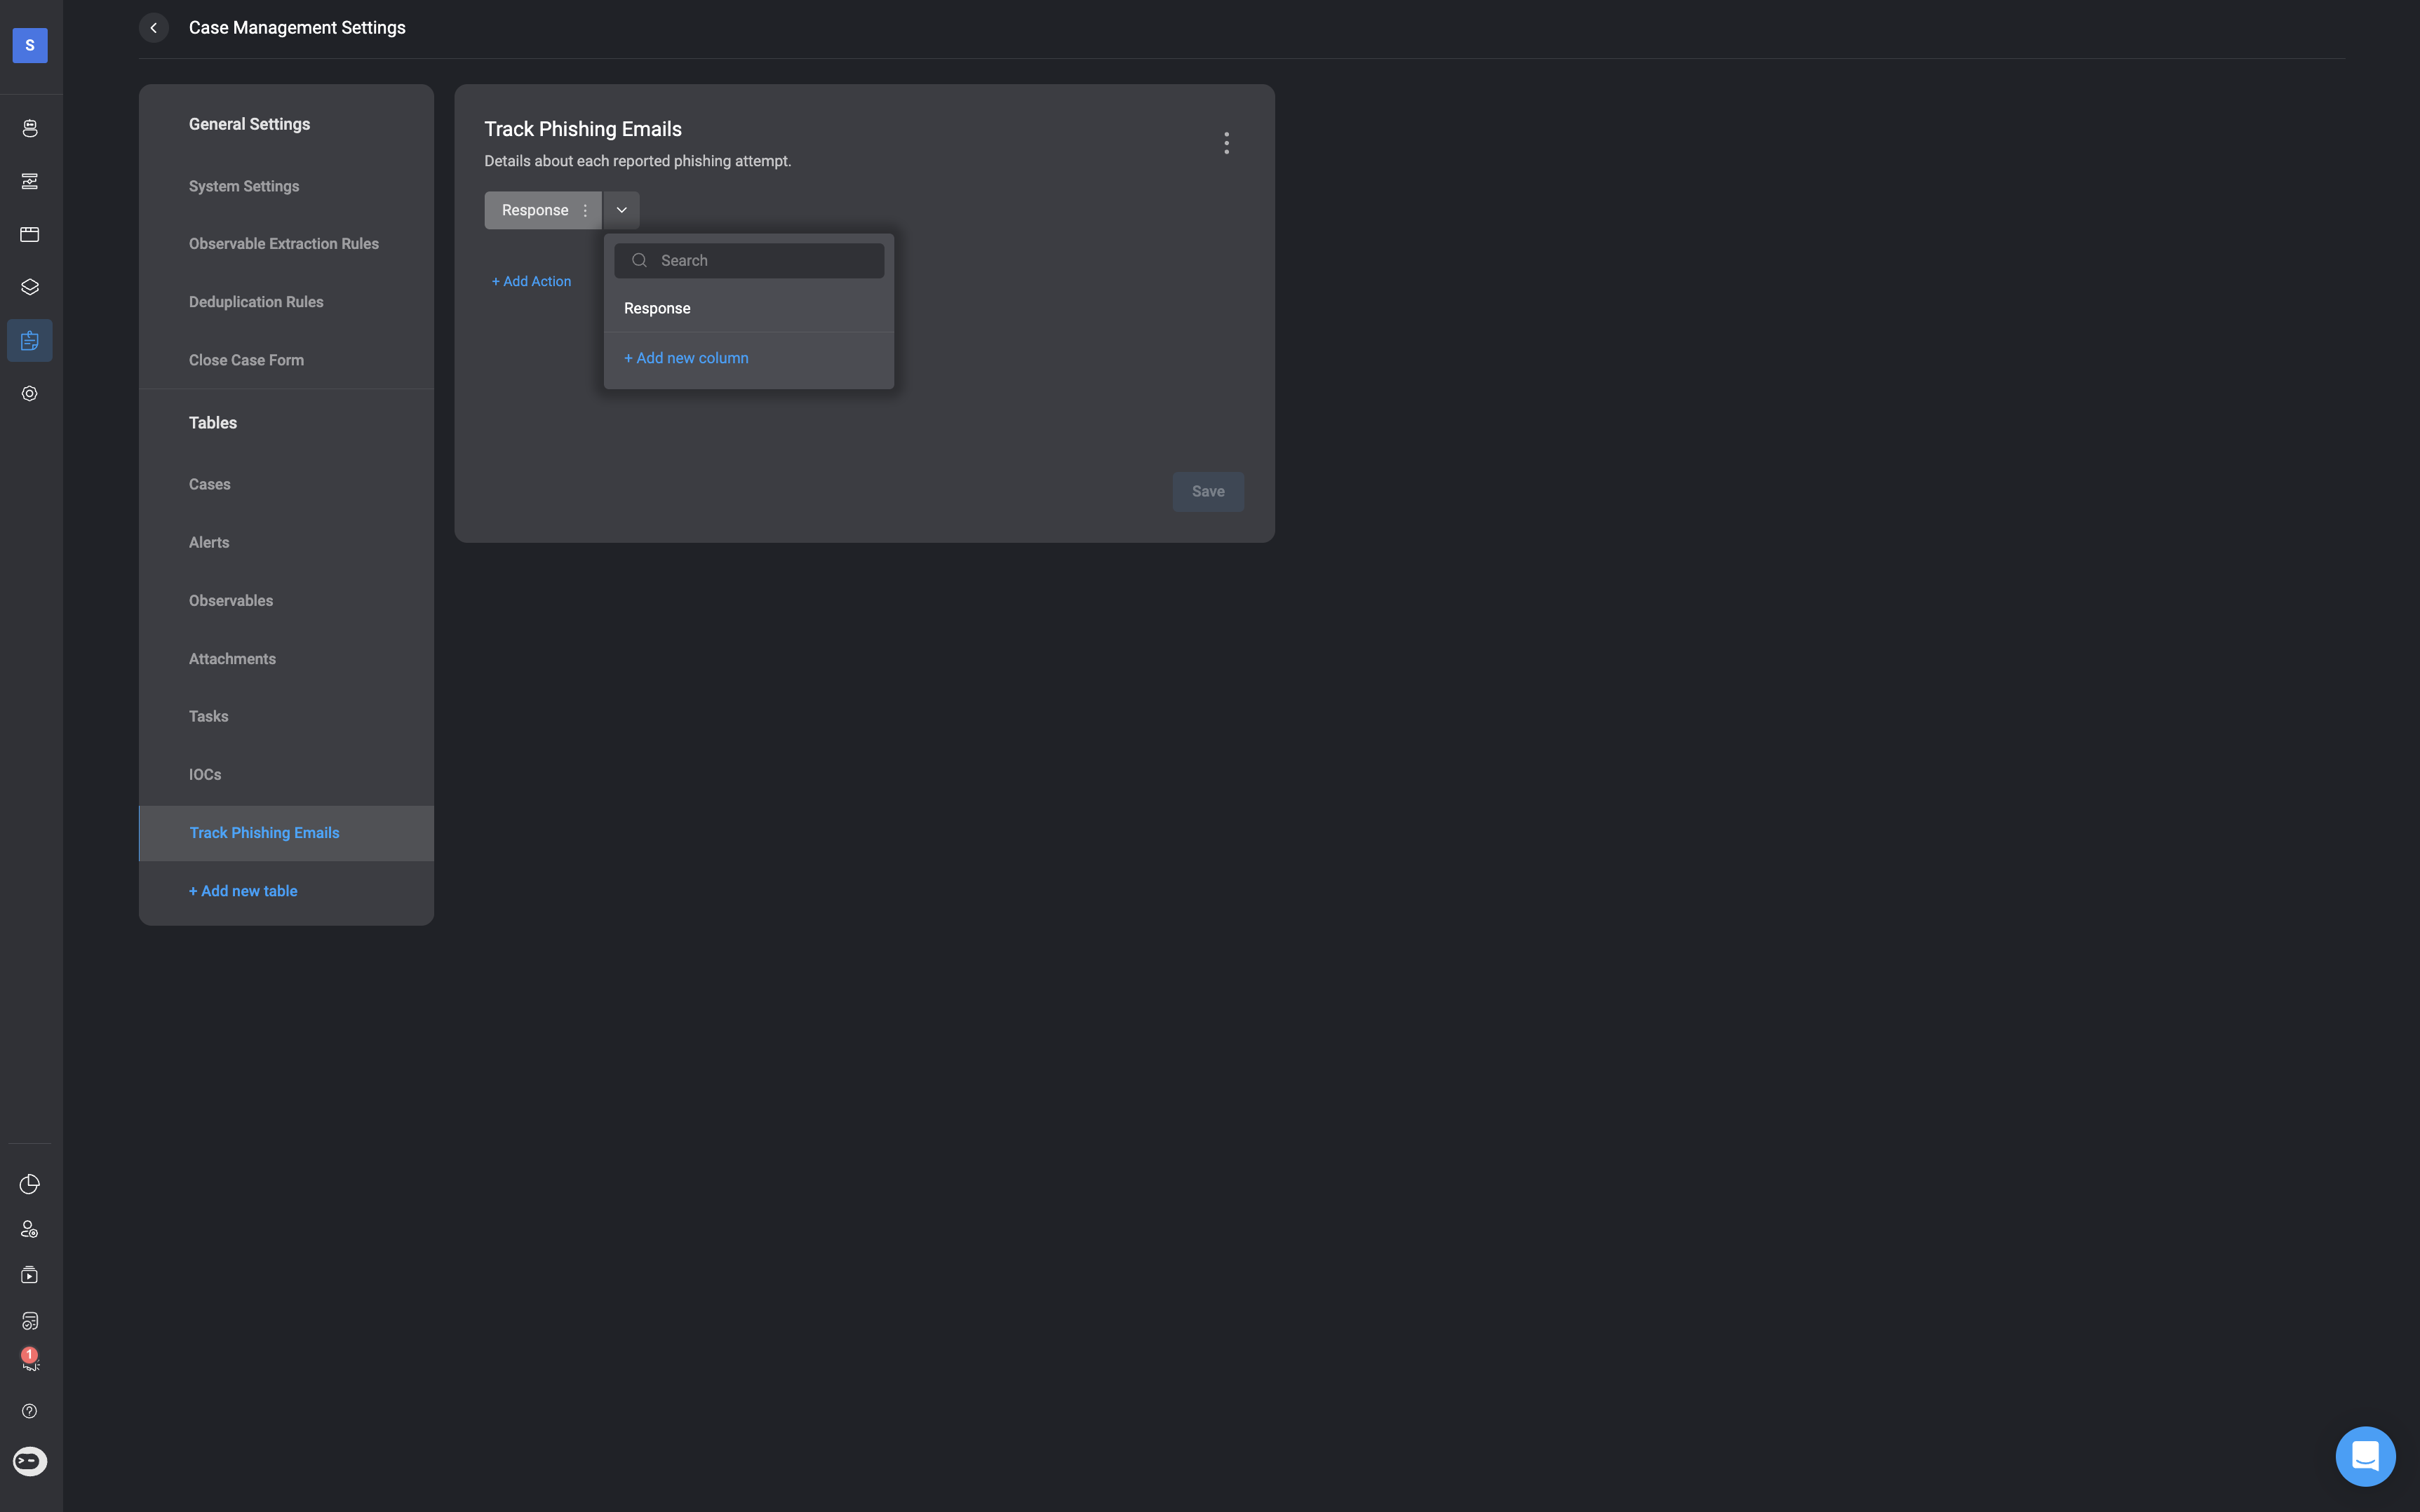
Add Custom Columns
Click the next to the response tab and click the ’ Add new column’ button.
Fill Out the Field Details
- Field Name – Enter a name for the field.
- Input Type – Select the type of input this field will accept (e.g., Text, Number, Time, etc.).
- Advanced Settings: Default Value – Optionally set a default value to be used when no value is provided by the user. Leave it blank if you don’t want a default.
- Advanced Settings: Unique Value – Enable this to ensure that all entries in this column are unique within the table. This prevents duplicates for the selected field.

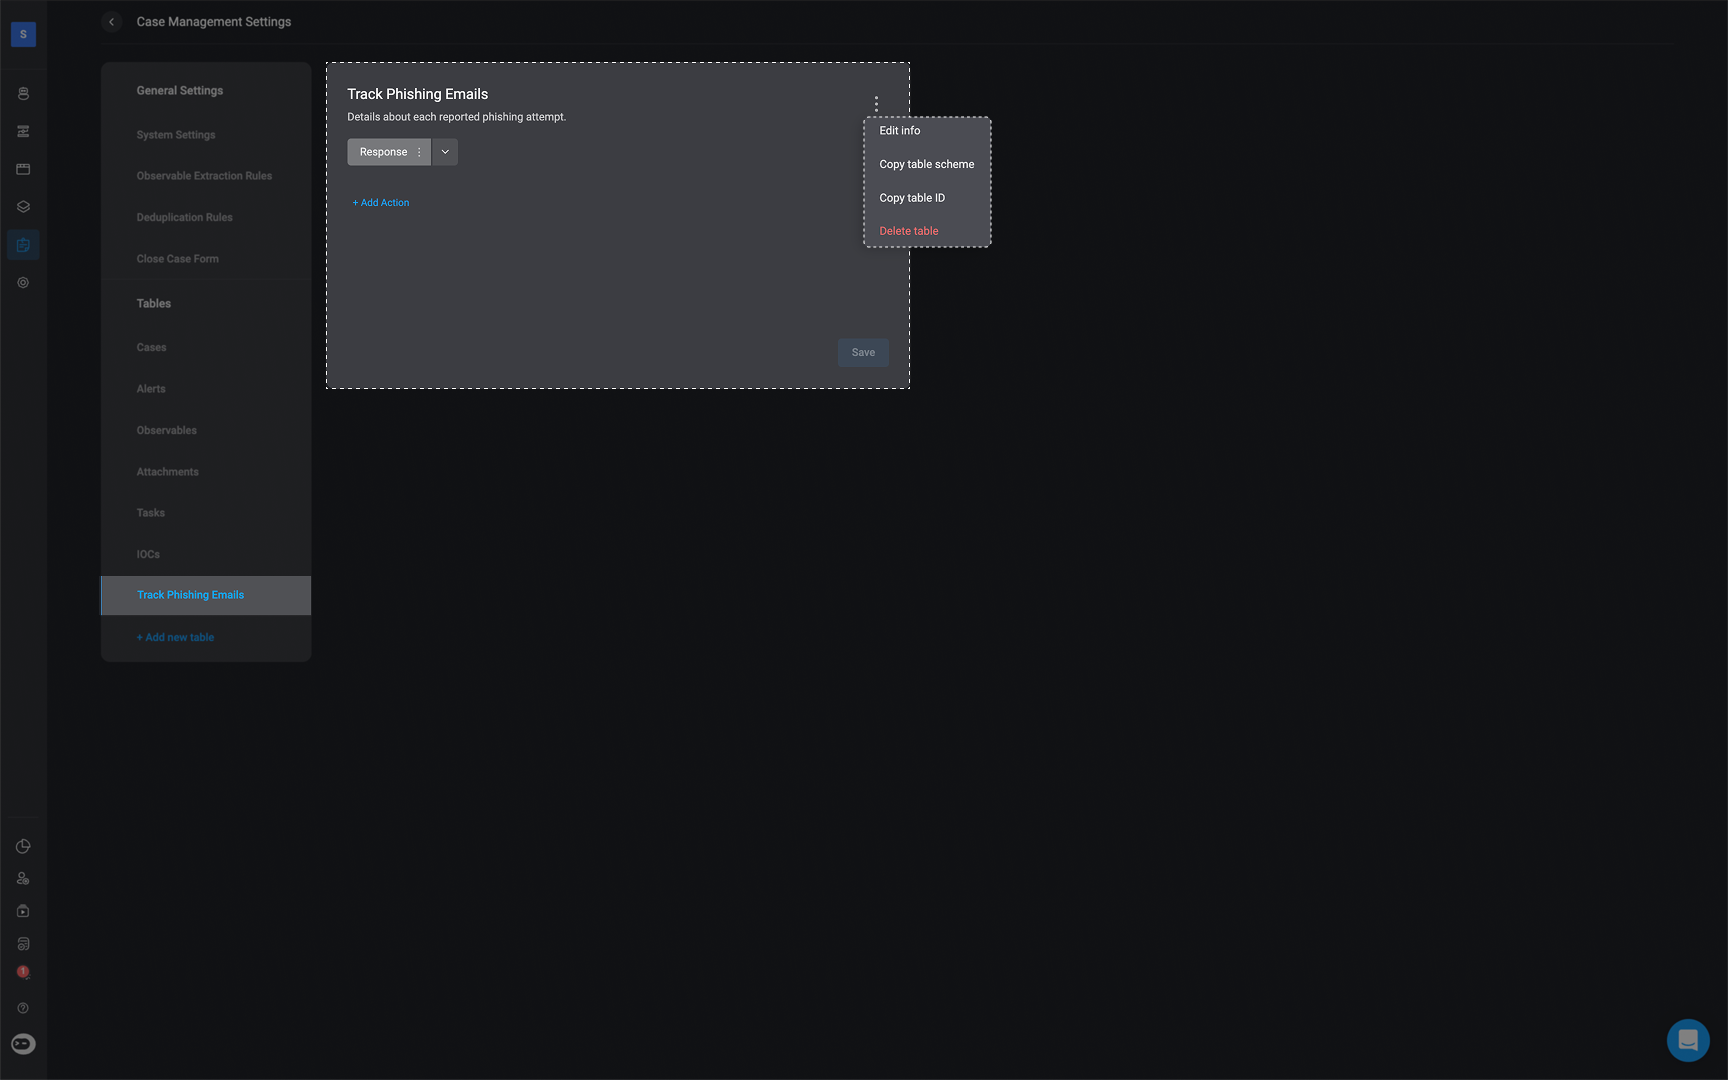
Manage Custom Tables
To manage a custom table, click the menu next to the table’s name. From this menu, you can:
- Edit the table’s name, fields, or configuration
- Copy Schema to duplicate the structure for use elsewhere
- Copy Table ID for referencing the table programmatically
- Delete the table if it’s no longer needed