Case Details
Case Details provides a comprehensive view of all key information related to the selected case. For a deeper dive into the case information, see here.
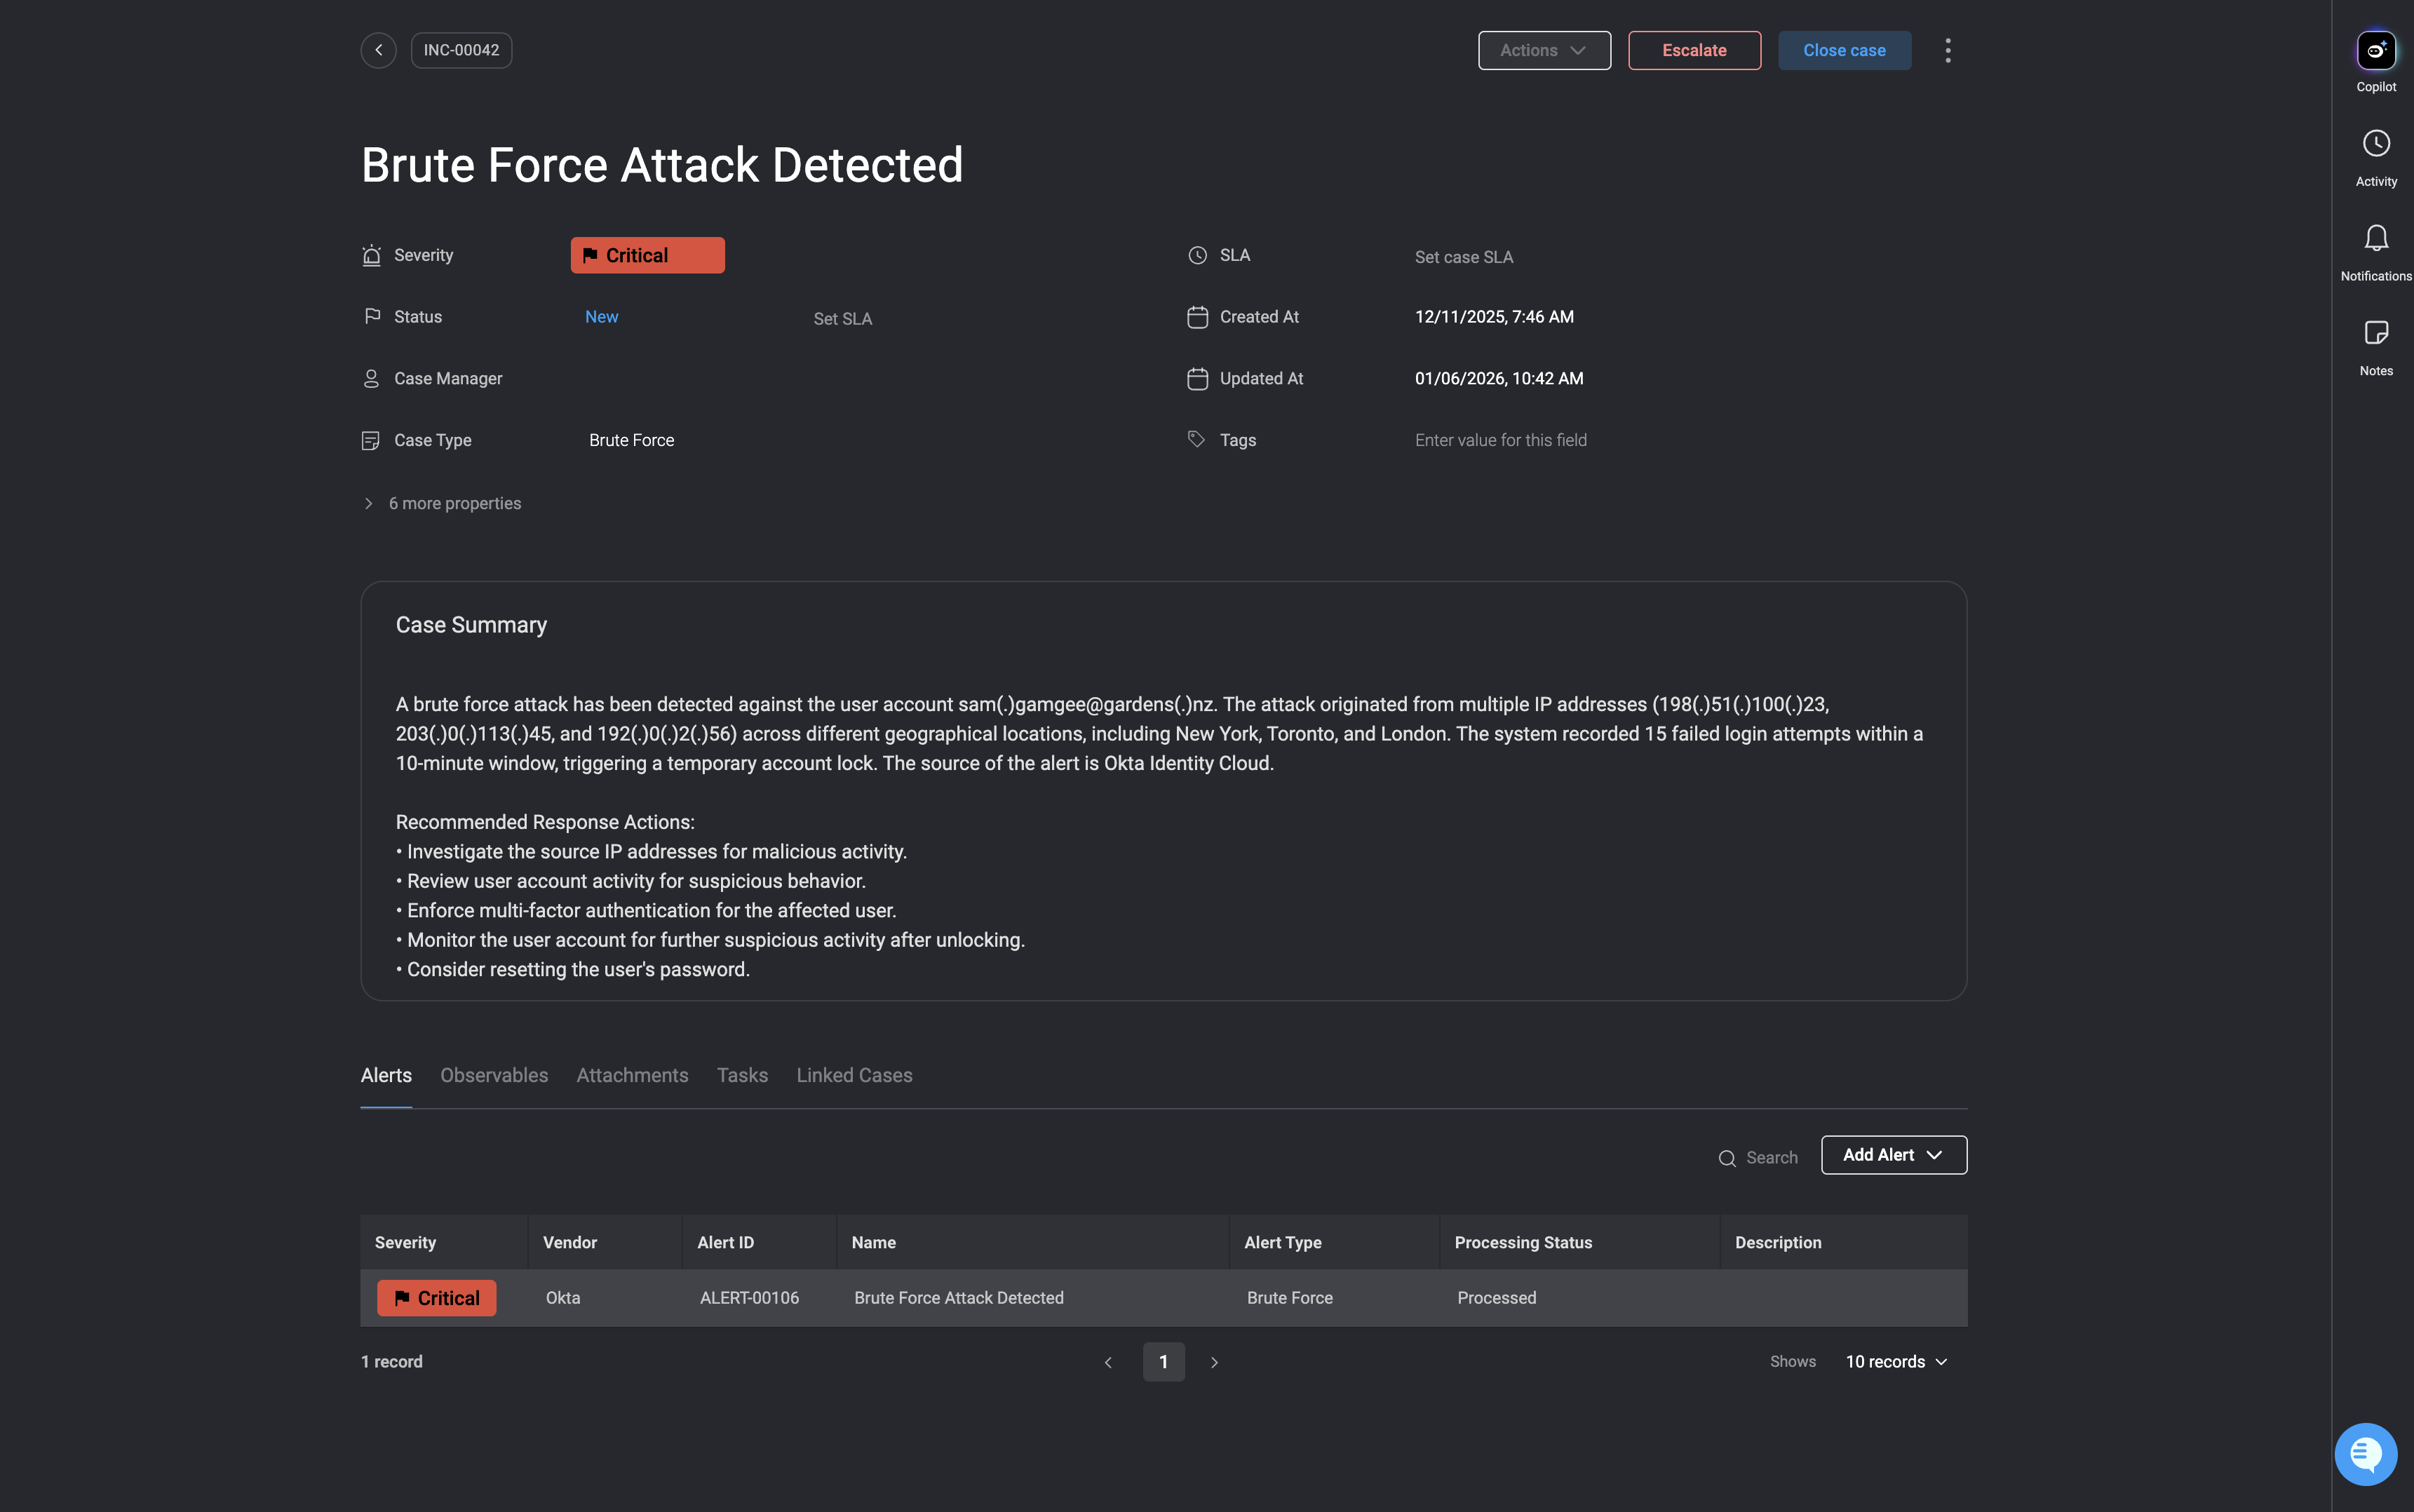
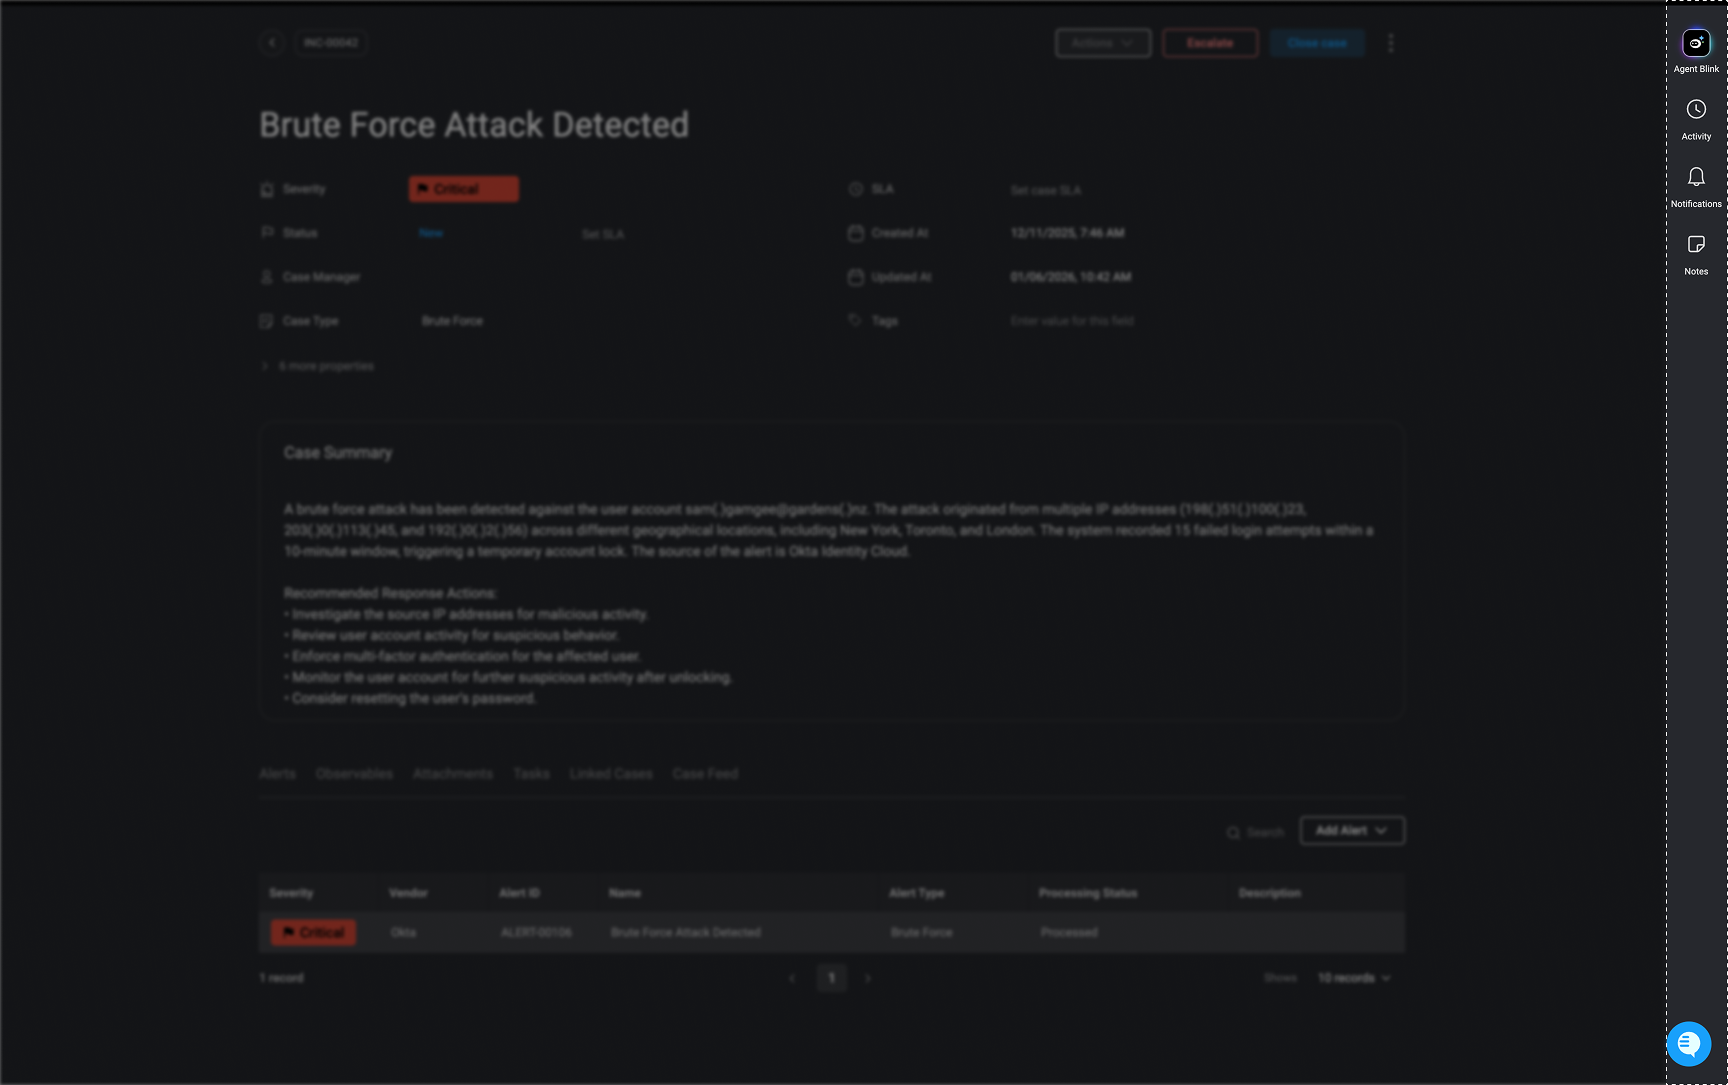
Case Summary
The Case Summary section delivers an AI-generated overview of the case, allowing you to quickly grasp the most important details in a structured format.- To add a custom case summary, click the icon. Alternatively, click the Copilot icon to automatically generate a summary, using AI, for the selected case.
- After generating an AI-summary with the Copilot, you can use the icon to edit or refine it to better suit your needs.
- Use the icon to edit or refine the summary as needed.
- Click the icon to view the summary in full size. By default, it appears in a compact view to save space, providing a cleaner interface and a better overall user experience.
Note:Only users with
case_management: admin permissions can enable or disable the case summary feature in case management settingsFor more information on enabling or disabling the case summary feature, navigate here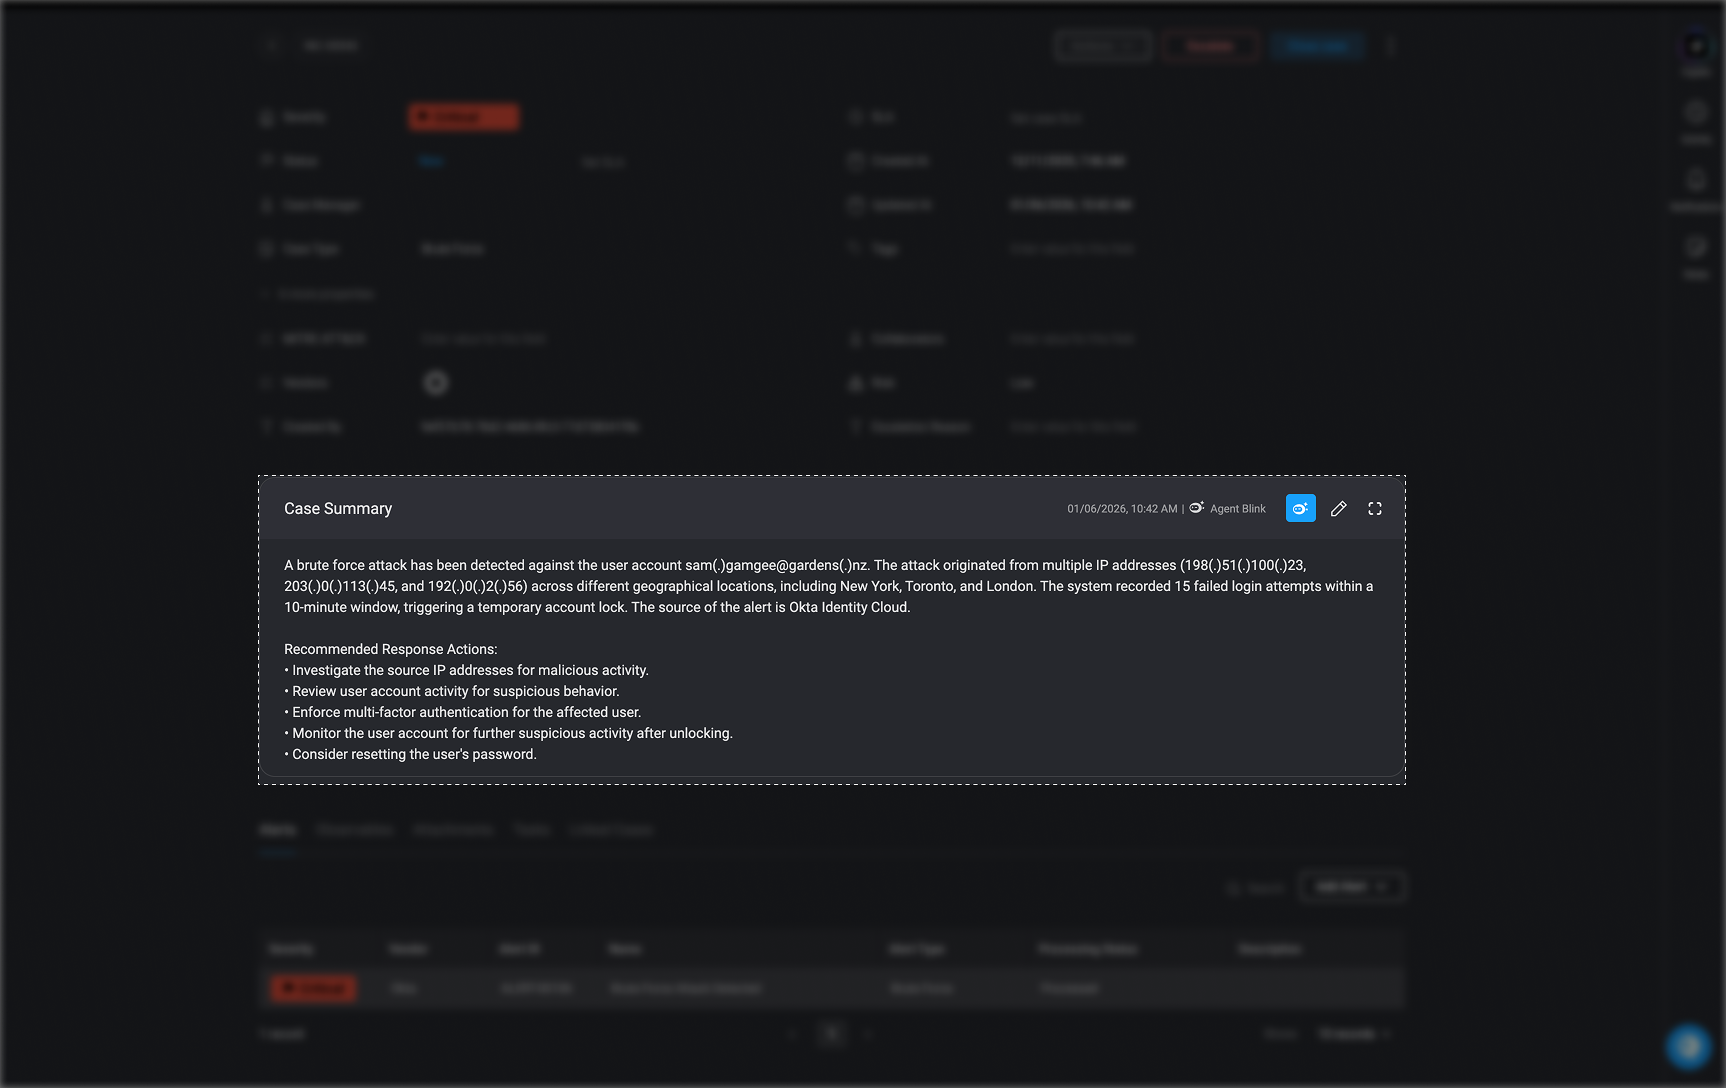
Safe Use of AI
- Case data for all customers is securely stored within the Blink platform, following the same protocols as other operational data, like tables. This process is uniformly applied to all hybrid customers. To create case summaries, we leverage Google’s Vertex AI model, with Google’s assurance, as outlined in their terms of service, that any data used in the prompt will not be saved or used.
- It is important to note that Blink does not use customer data for AI training. We adhere to industry standards to ensure your data remains secure, never stored or utilized for these purposes
Tables
The Tables Section provides structured access to various case-related data, including observables, attachments, tasks, and linked cases. To edit any item, double-click on the row, make changes, and click anywhere on the screen to save.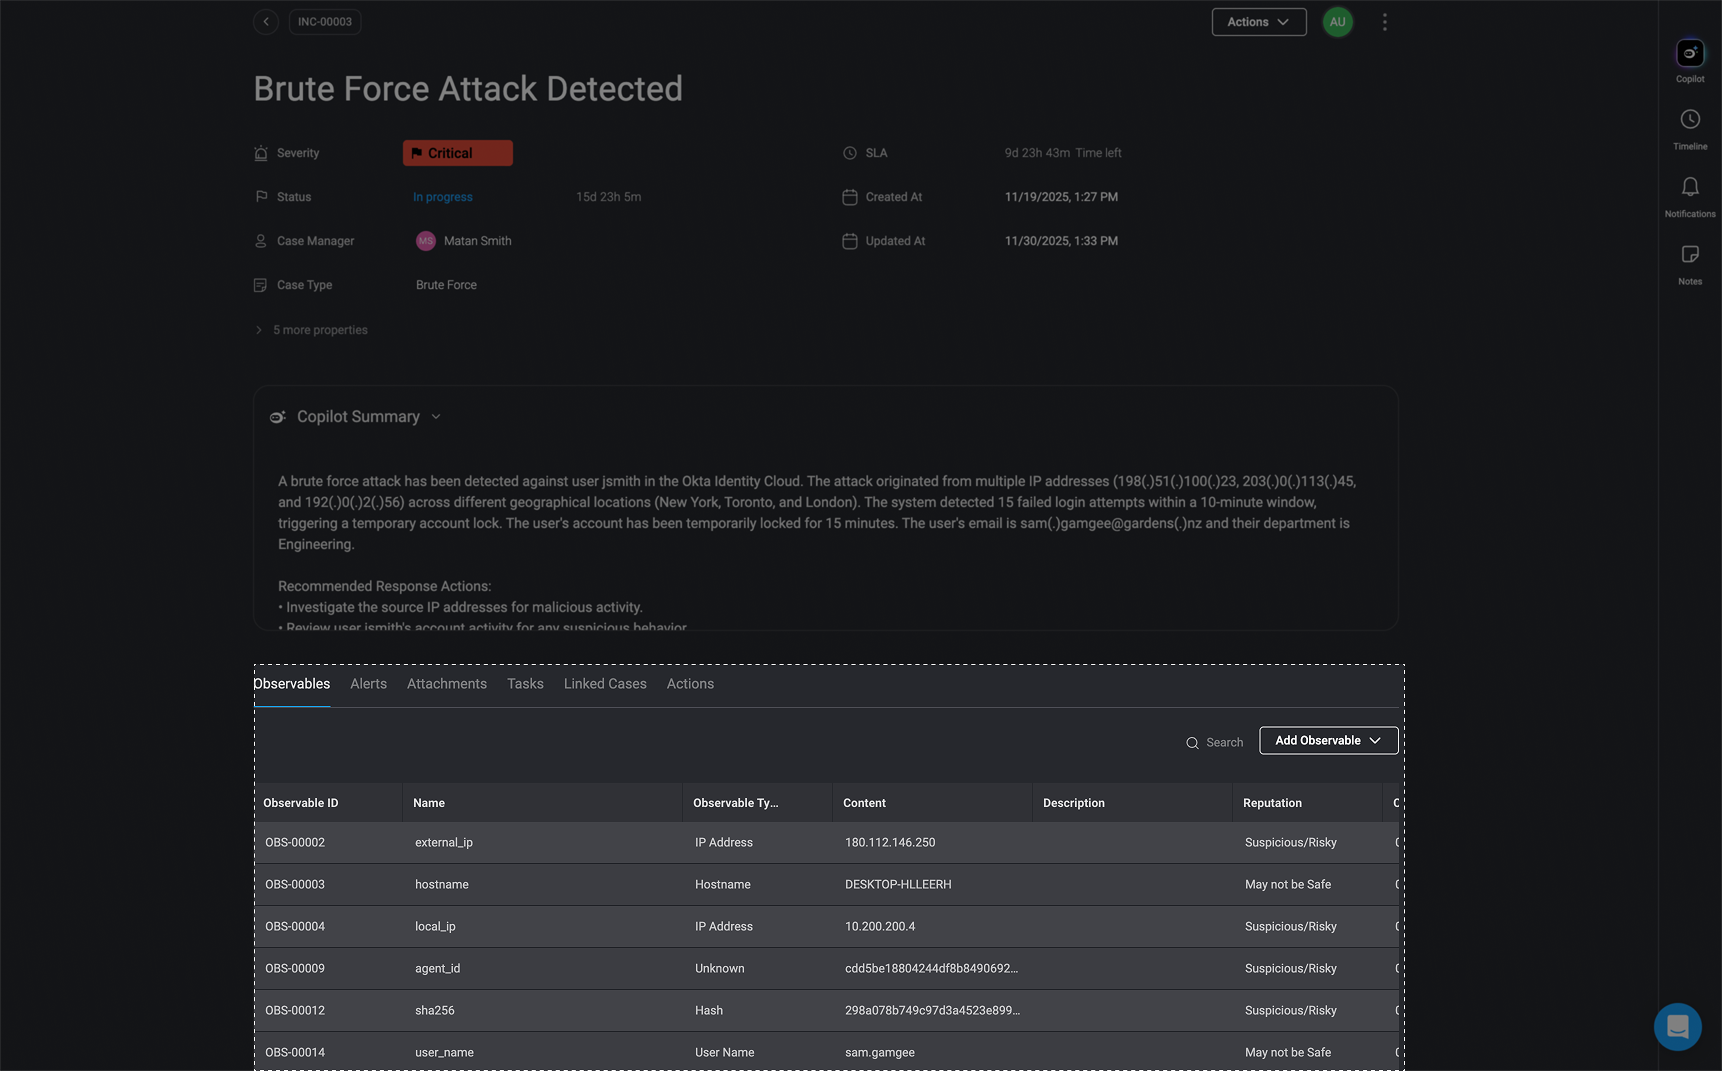
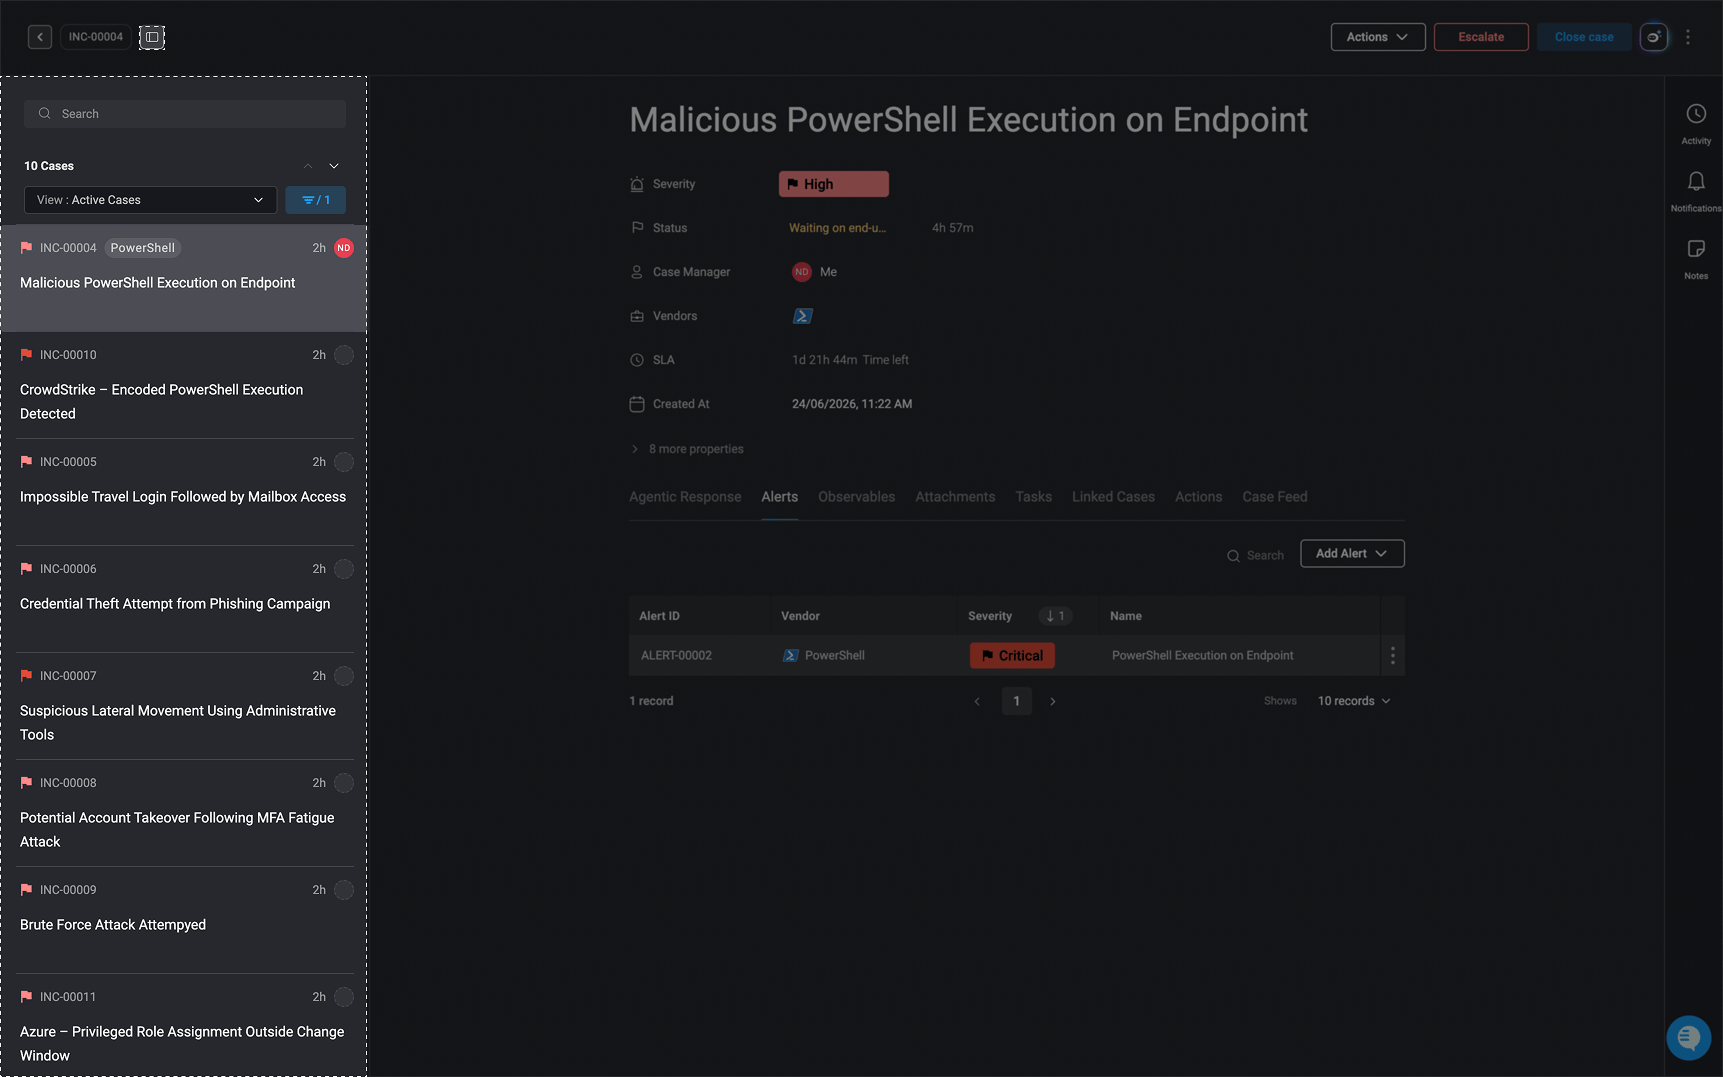
Alerts
Underneath the Case Summary section, you can find all the alerts linked to the selected Case.- Use the Search Bar to quickly locate a specific alert linked to the case.
- To add a new alert or link an existing one to the case, click the “Add Alert” button.
Observables
- Beneath the Case Summary section, all observables associated with the selected case are displayed.
- To add a new observable or link an existing observable to the case, click the “Add Observable” button.
- Observable View Layout
- Select the icon to display the selected case’s linked observables in a card layout.
- Select the icon to display the selected case’s linked observables in a list layout.
-
More Info — Displays additional details and metadata associated with the observable.
-
Linked Entities — Displays all cases, alerts, tasks, attachments or other observables linked to the selected observable. Each entity type appears in its respective tab, along with its relevant information.
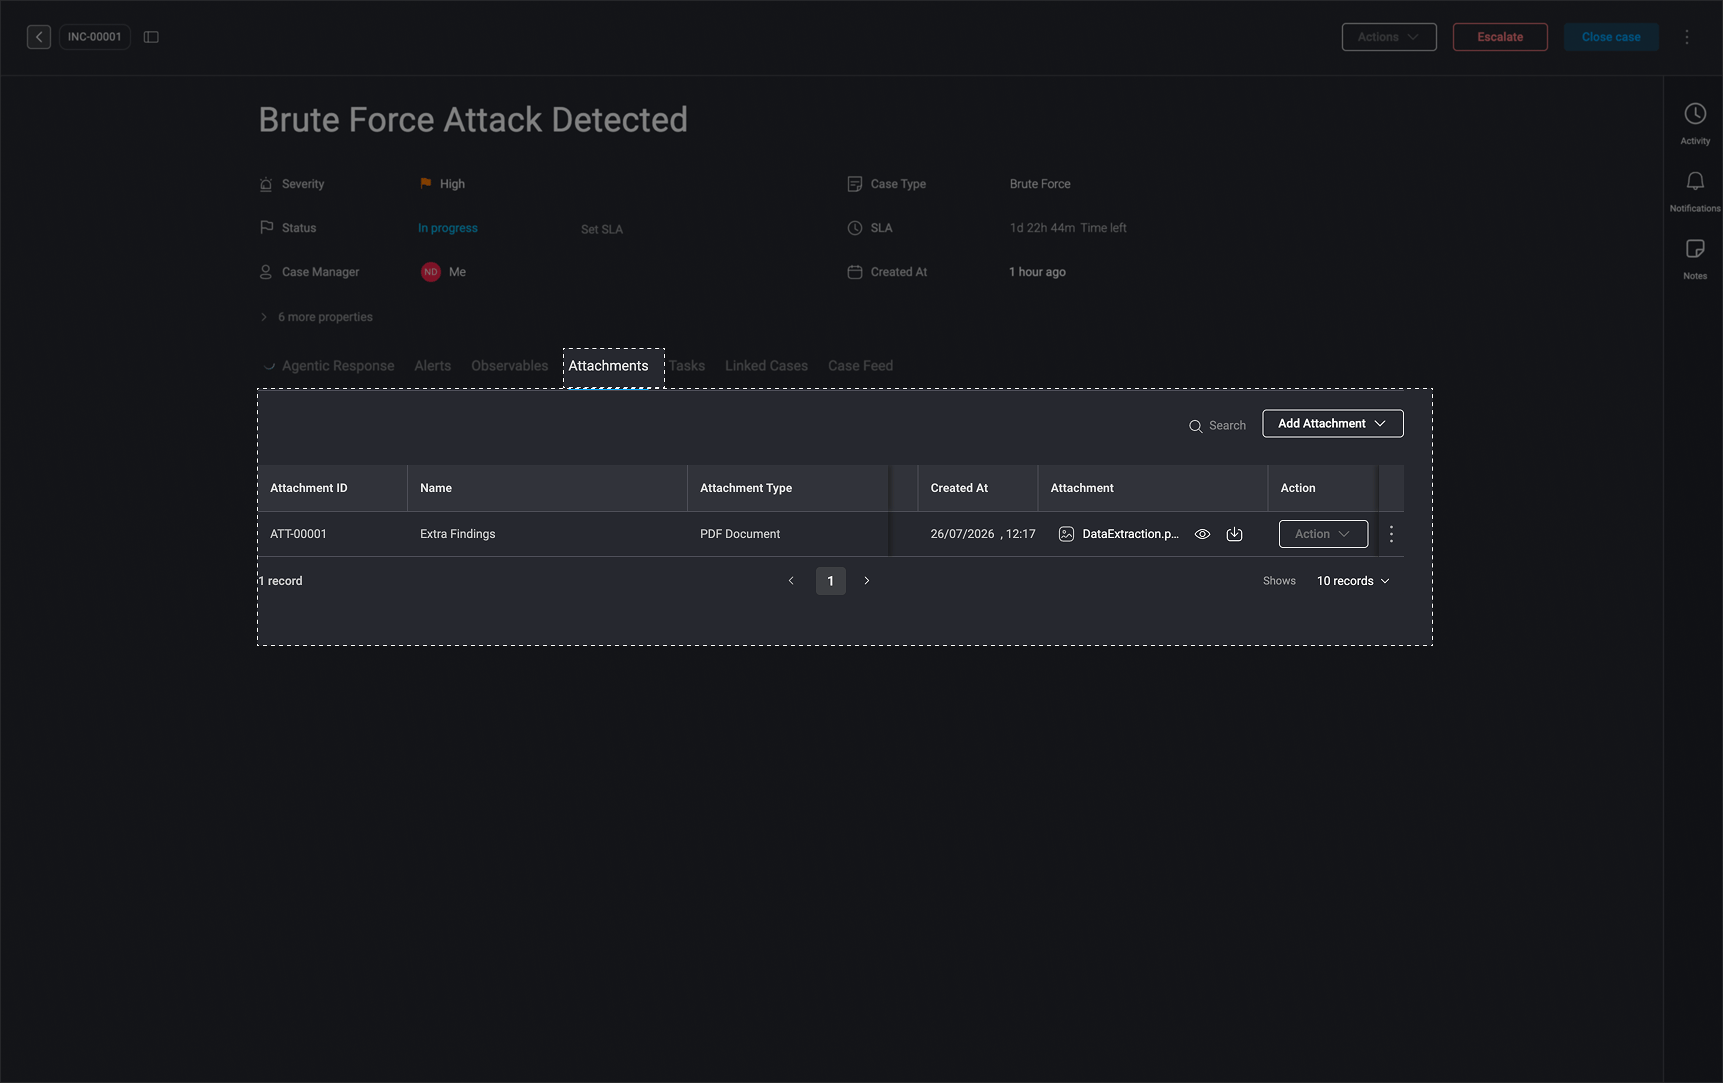
Attachments
- Underneath the Case Summary section, you can find all the attachments linked to the selected Case.
- To add a new attachment or link an existing one to the case, click the “Add Attachments” button.
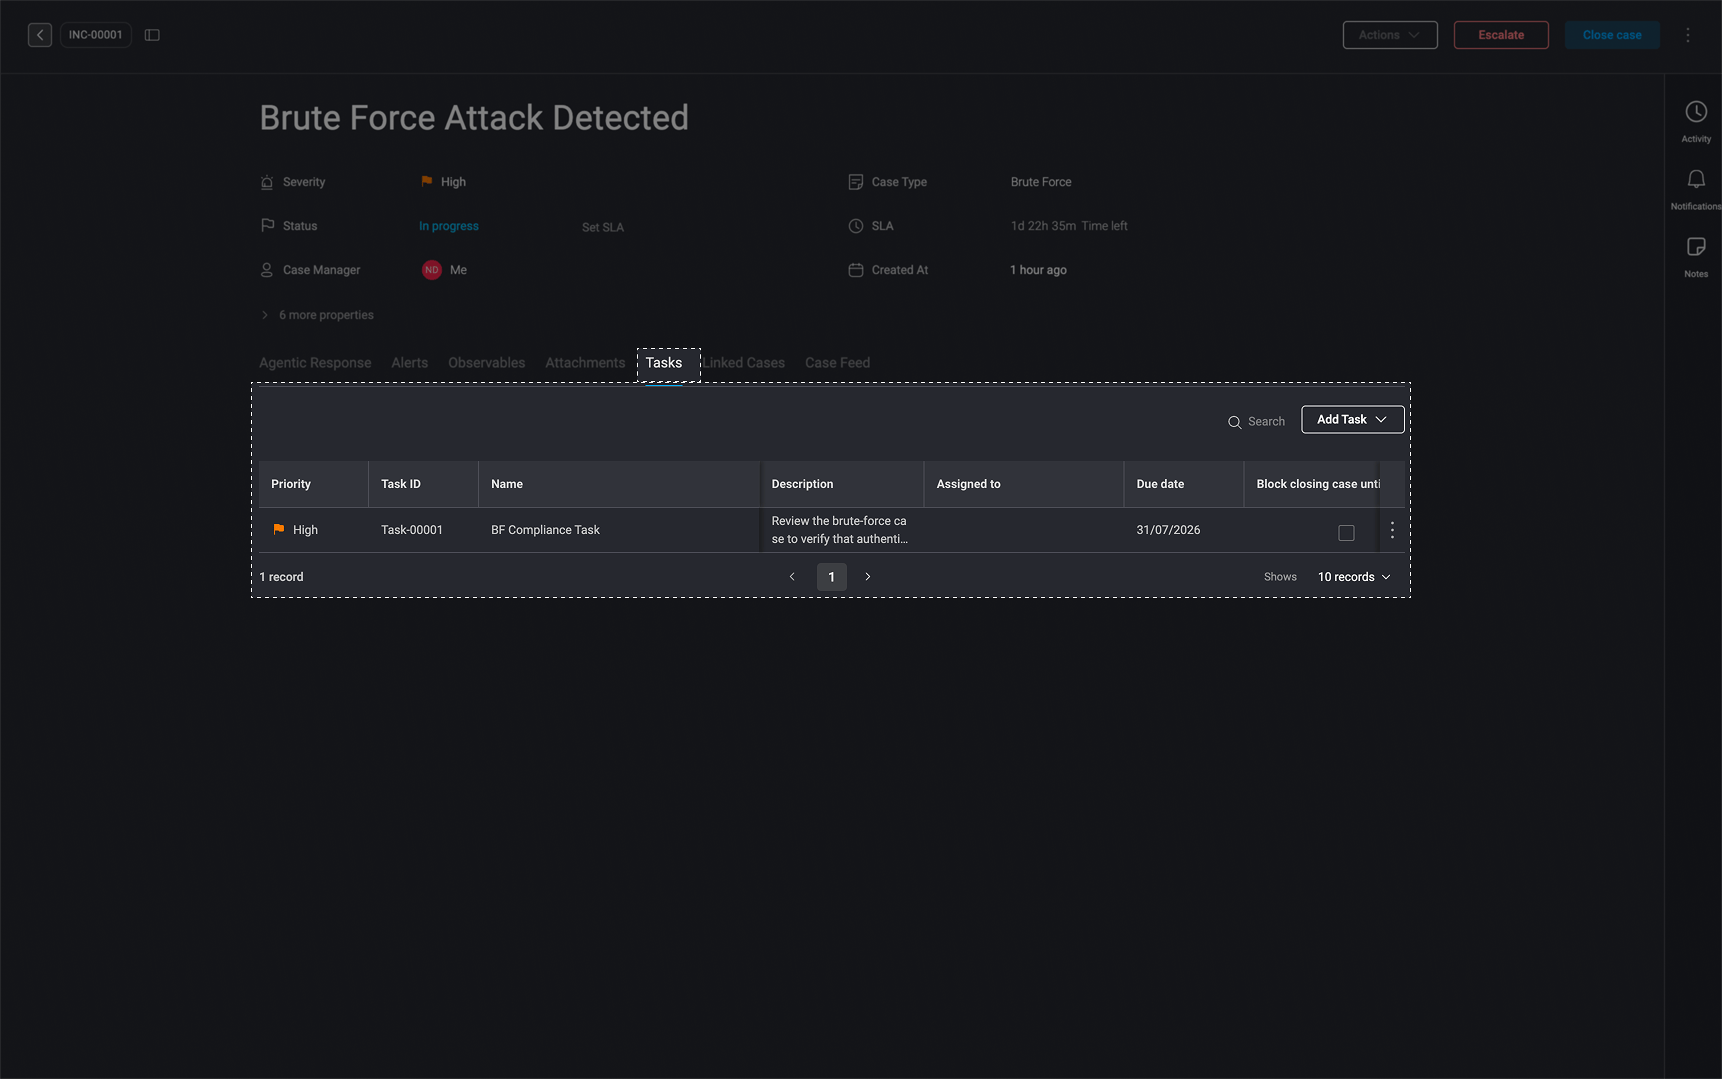
Tasks
- Underneath the Case Summary section, you can find all the tasks linked to the selected Case.
- To add a new task or link an existing one to the case, click the “Add Task” button.
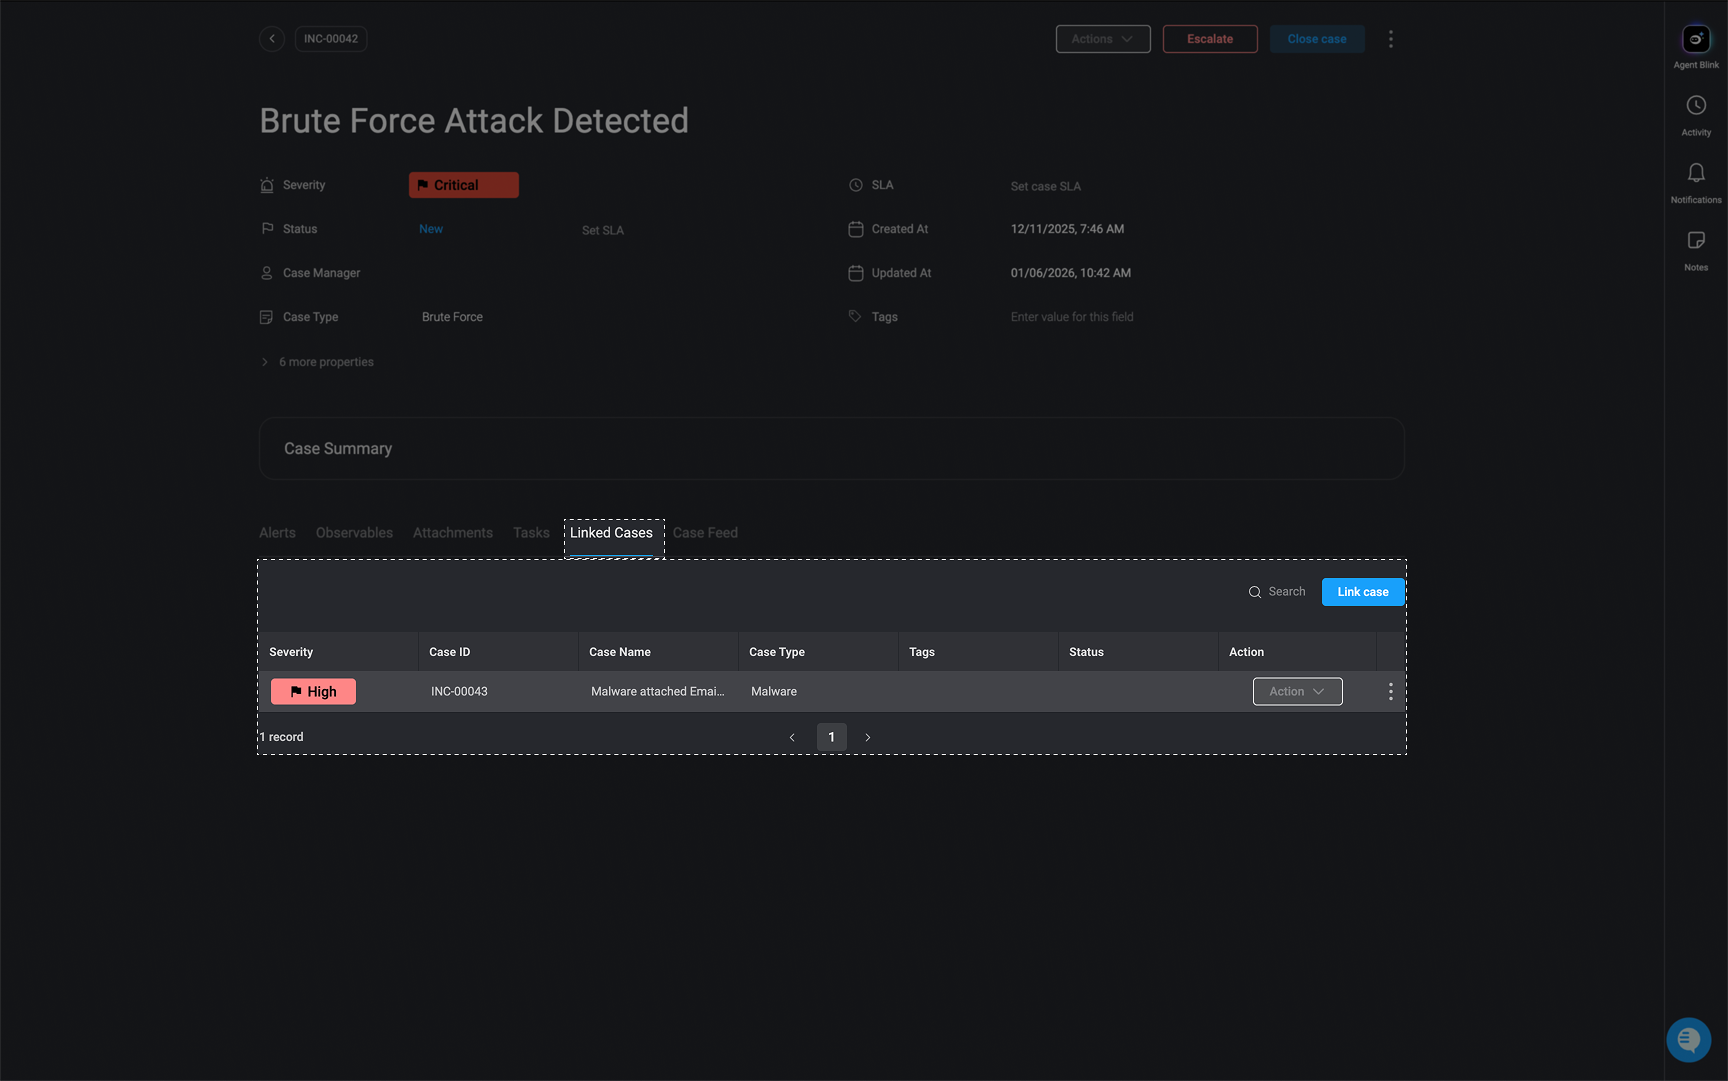
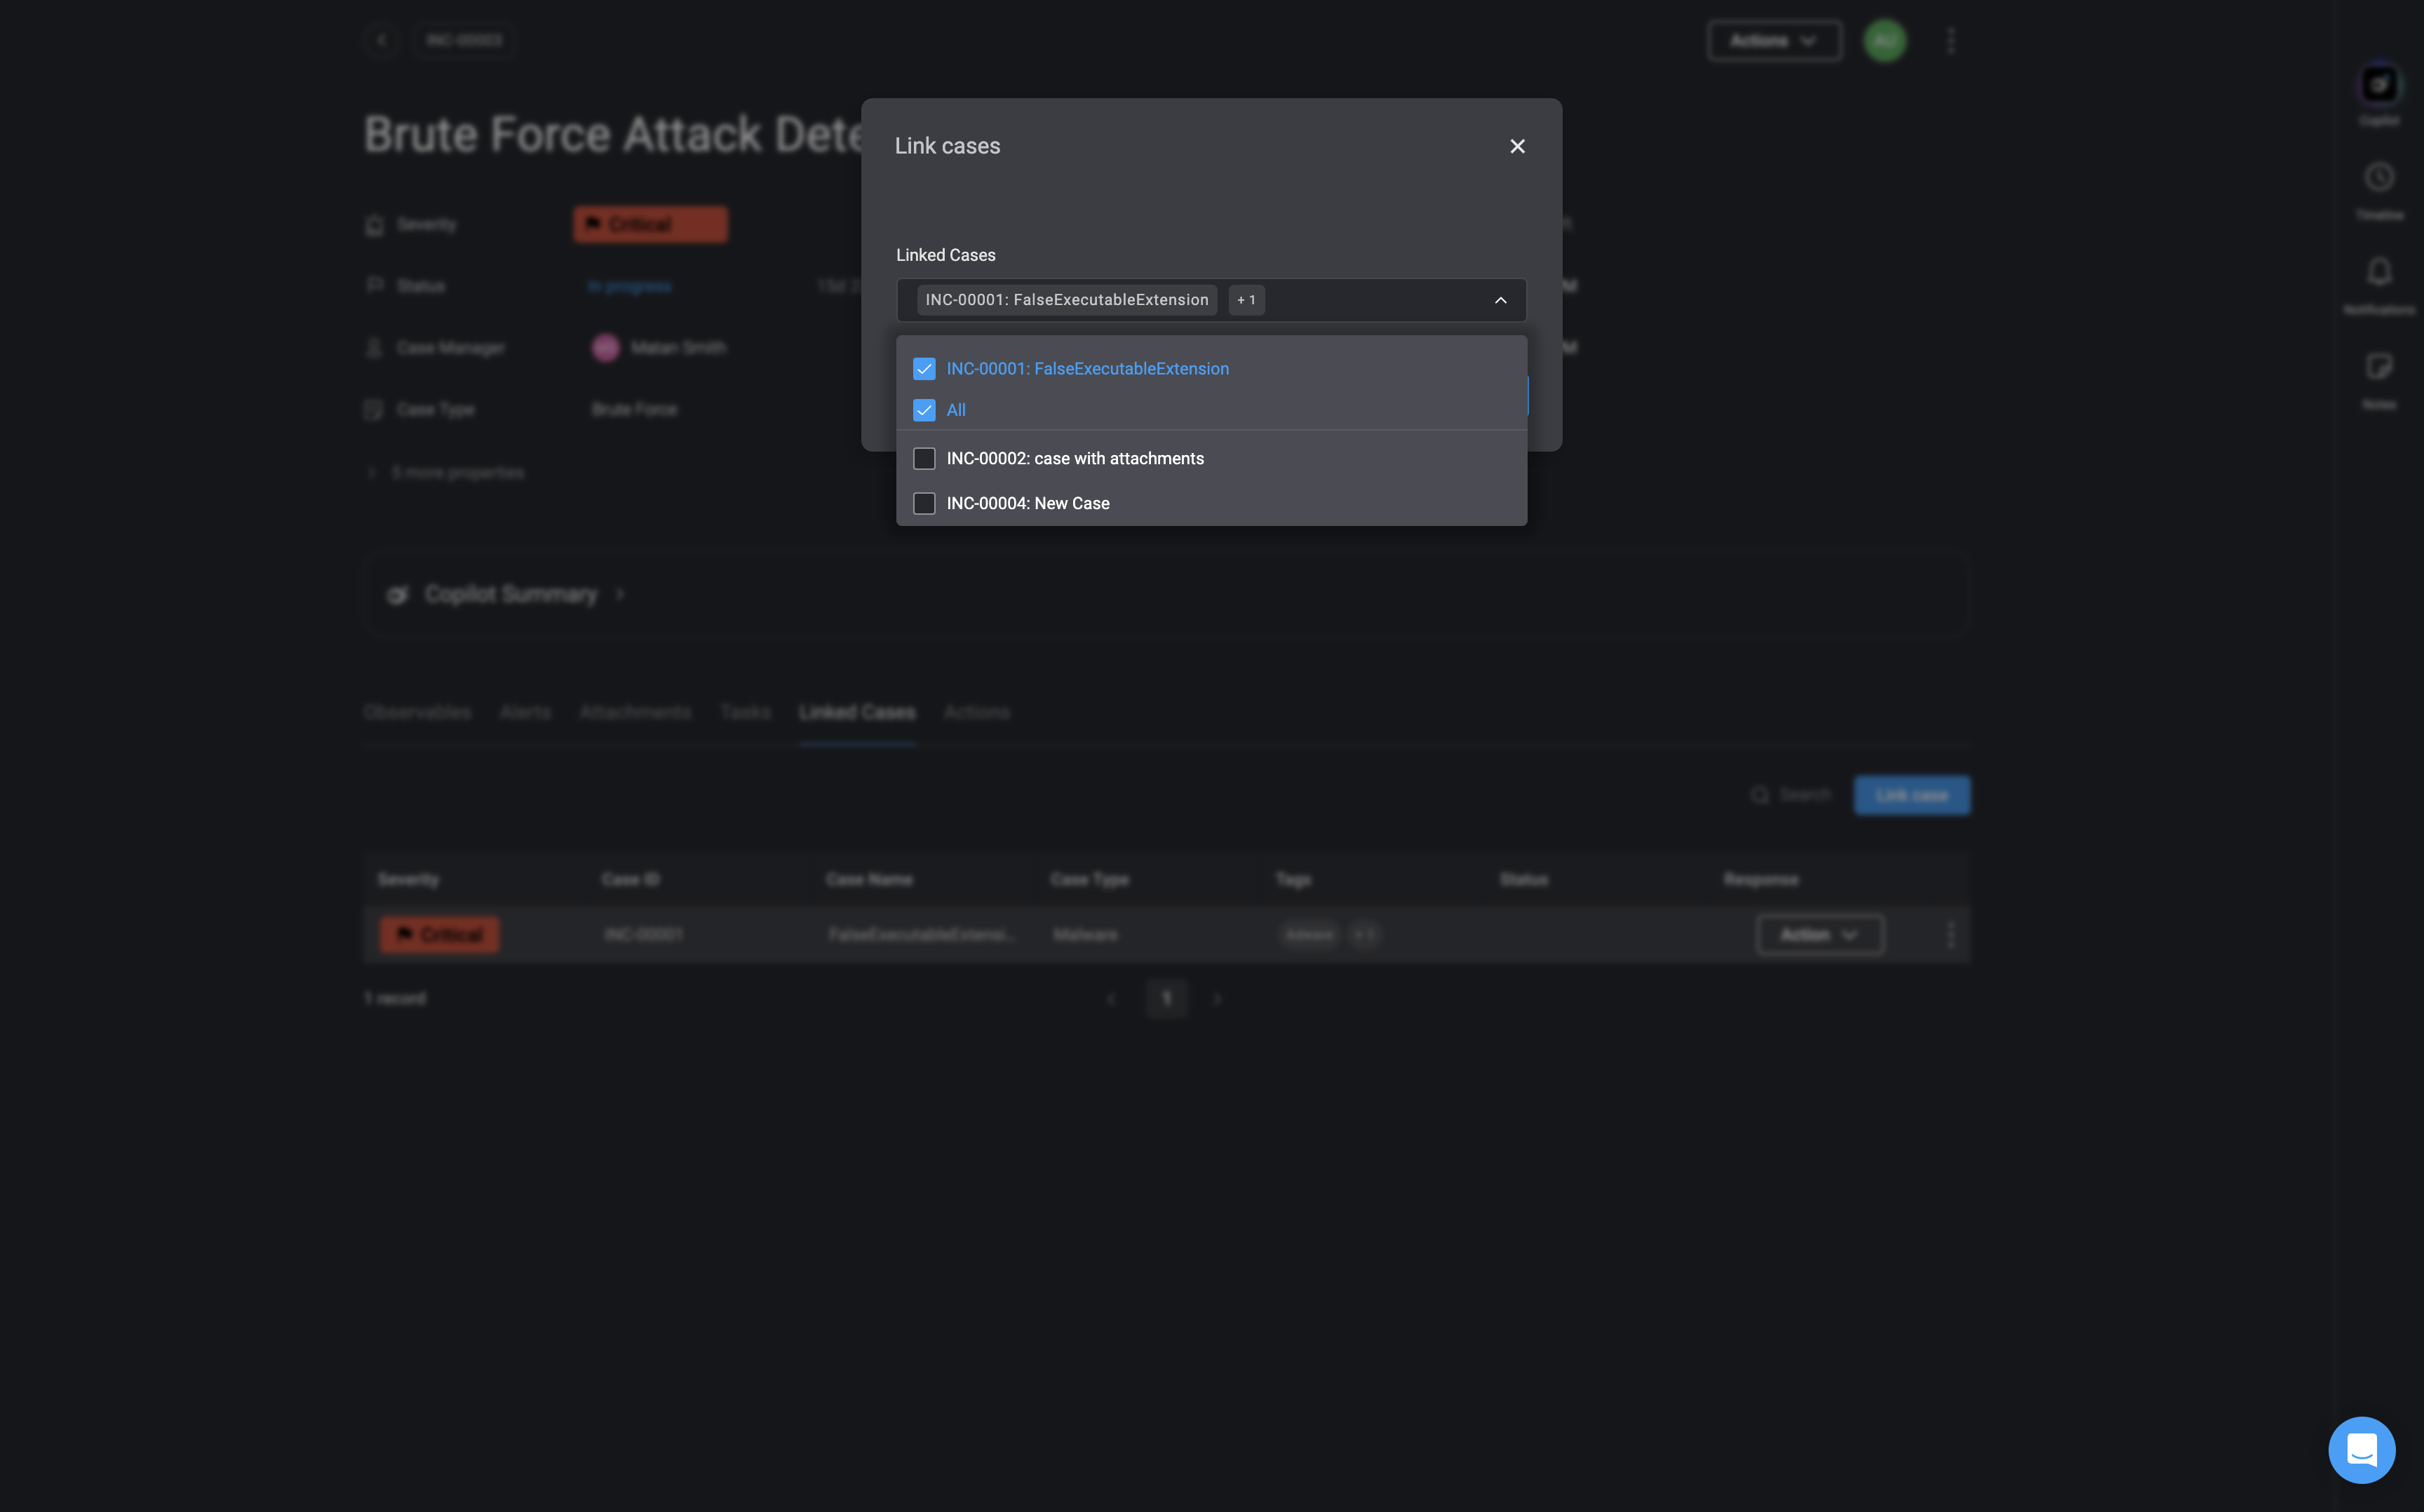
Linked Cases
- Underneath the Case Summary section, you can find the linked cases section, which contains all the details of the cases that have already been linked to this Case.
Case Feed- Custom Tabs
The Case’s Tab feature allows users to organize case information more effectively by creating and managing multiple tabs within a single Case. Each tab can hold one or more cards, giving users the flexibility to categorize and view information in a structure.Note:Only users with
case_management: admin permissions can create, edit and delete custom tabs.For more information on how to create custom tabs and cards, navigate here
The Tool Bar
The Tool Bar Panel provides analysts with a centralized set of tools designed to maximize efficiency and effectiveness when managing a case. Each tool offers specific functionality to streamline investigation, documentation, and collaboration throughout the incident lifecycle. Note: A blue activity indicator () appears on the tab of any tool that has had any activity- created, modified, or updated- since you last opened that tool.
The Tools
- Activity: A chronological view of everything that has happened in the case, giving analysts a clear picture of its history and progression.
- Notes: A space for analysts to record observations, findings, and investigative details throughout the lifecycle of the case.
- Notifications: A centralized panel for all case-related updates and questions, including items submitted through the Ask a Question on a Case action.
Learn more about the Case Overview’s Tools here.
Case Navigation Panel
A persistent navigation panel is available on the left side of the Case View, allowing analysts to seamlessly browse, filter, and switch between cases without returning to the main cases table. To open the panel, click the icon located in the top-left corner next to the currently selectedCase ID.
Once open, the panel displays a case list based on the analyst’s active view from the main cases table.
For Example:
- Close Cases
- Active Cases
- Critical and High Severity
- My Cases
- You also have the option to filer cases using the condition builder.
Actions, Close Case, and Escalation Buttons

Response Actions
Located in the top-right corner, the Response Actions menu shows all actions linked to this case. You can quickly review or execute them as needed.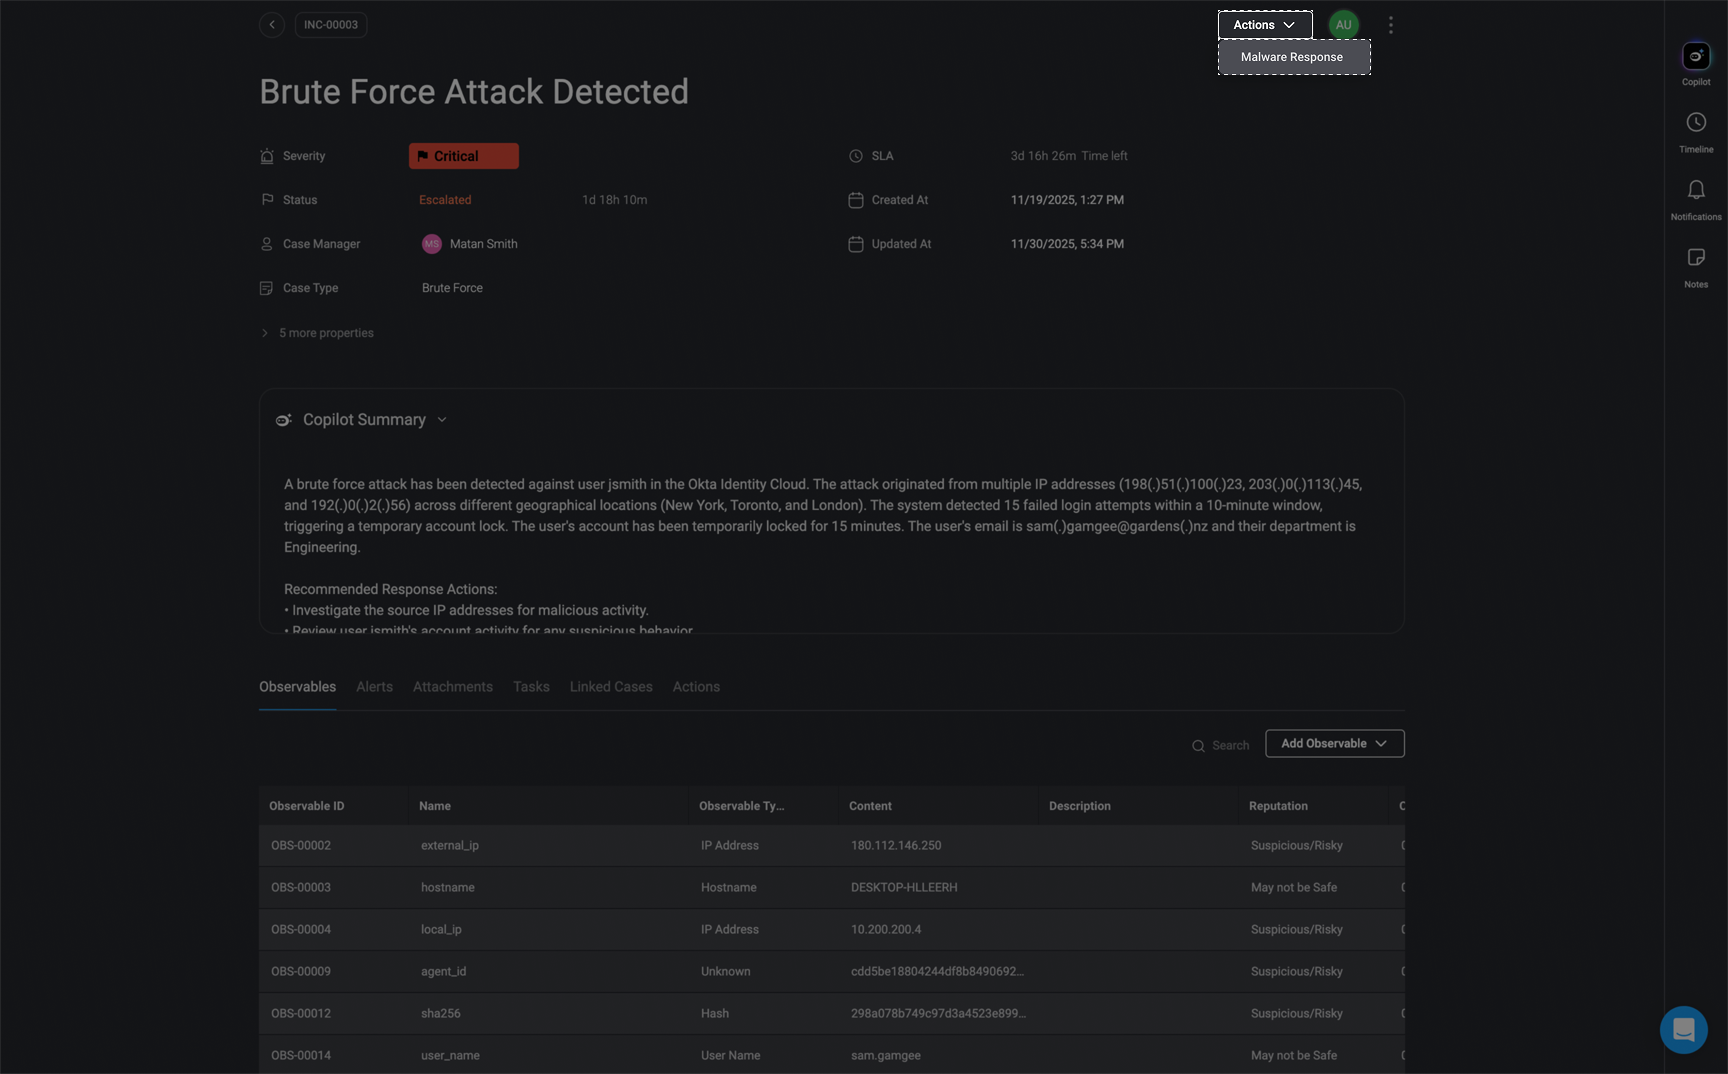
Close Case
The Close Case button, also in the top-right corner, opens the close case form. Here you can easily select and submit the reason for closing the case, as configured in your case management settings.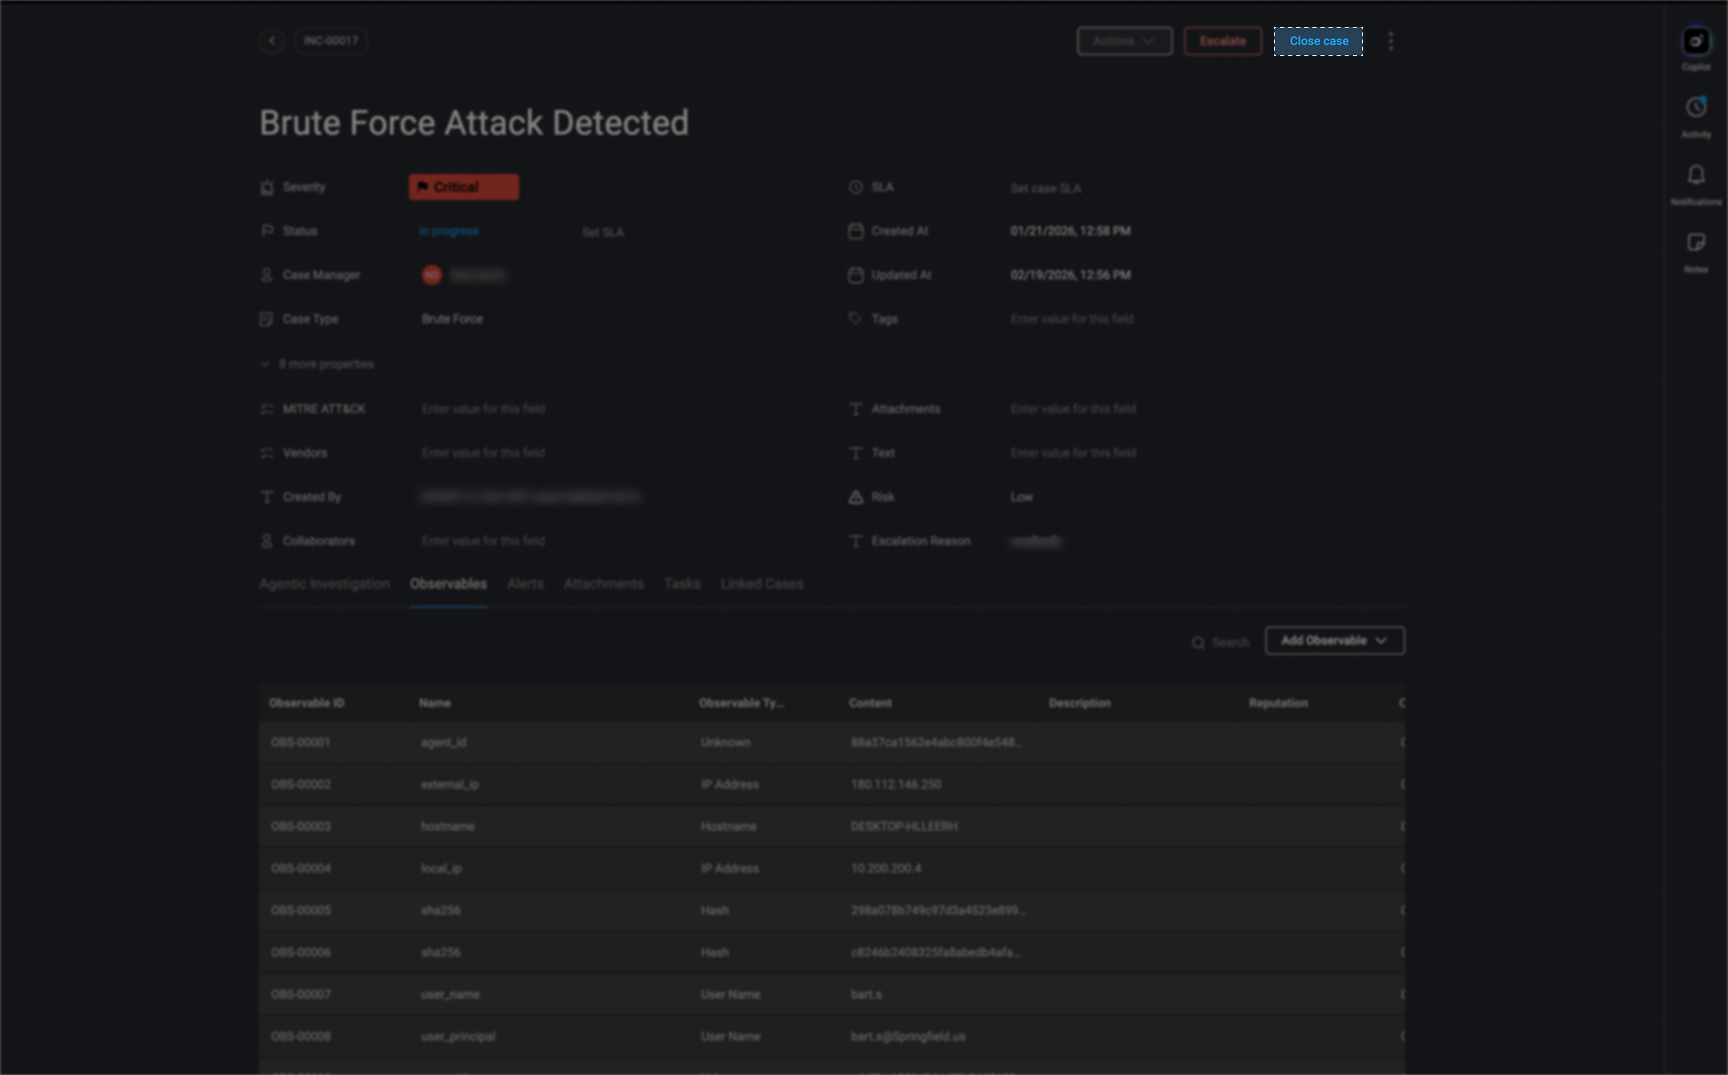
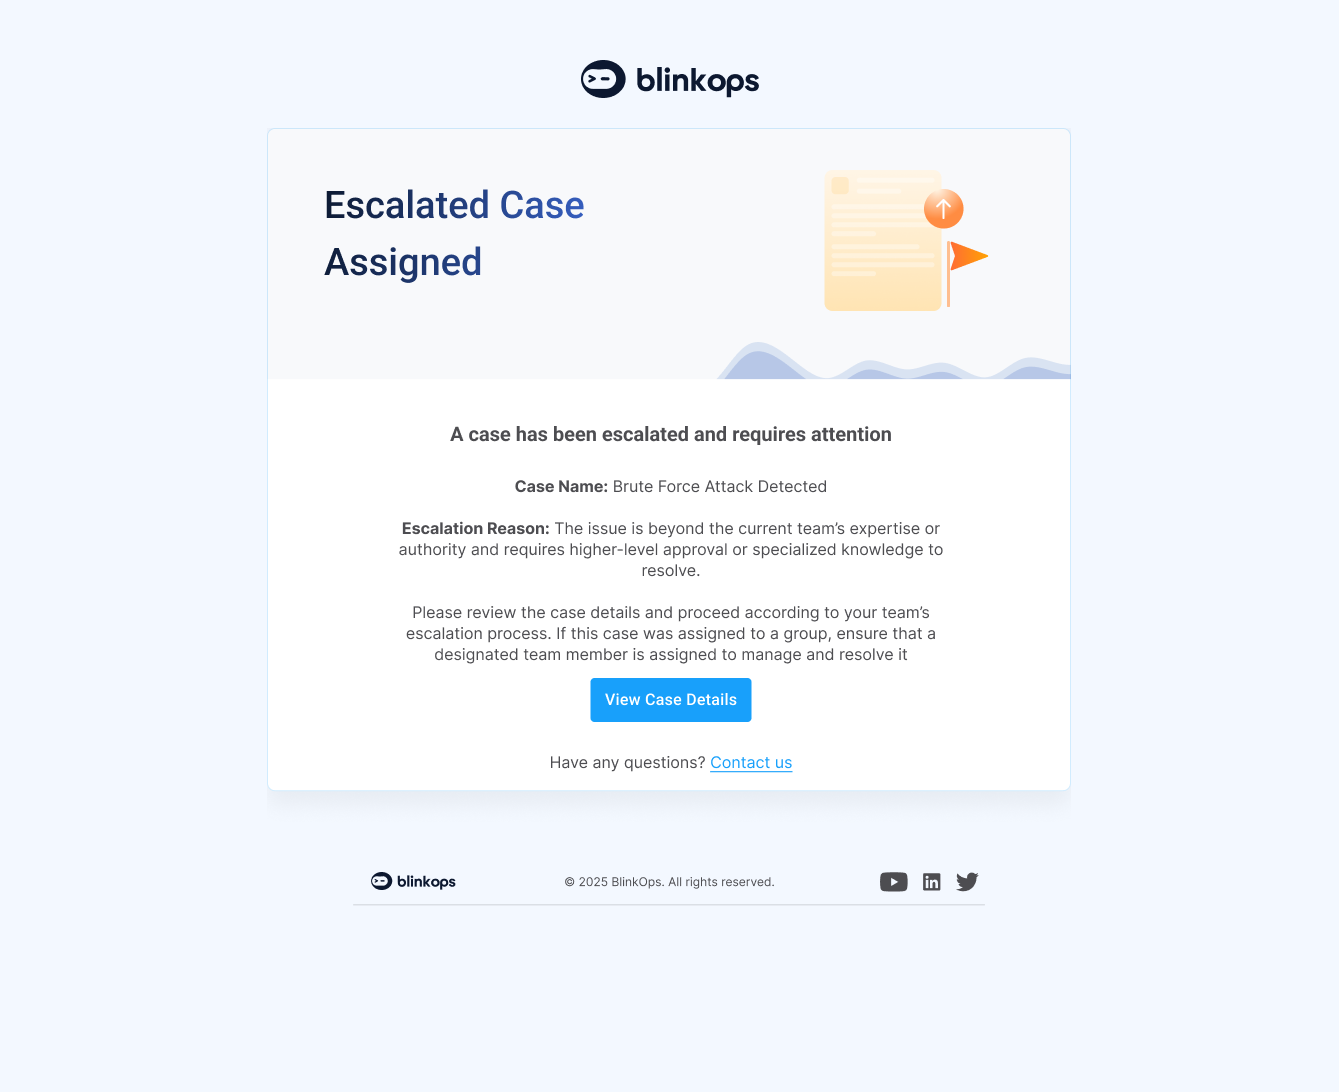
Escalate Case
The Escalate button, found in the top-right corner, opens the escalate case form. This allows you to quickly provide the reason for escalation, following the configuration in your case management settings.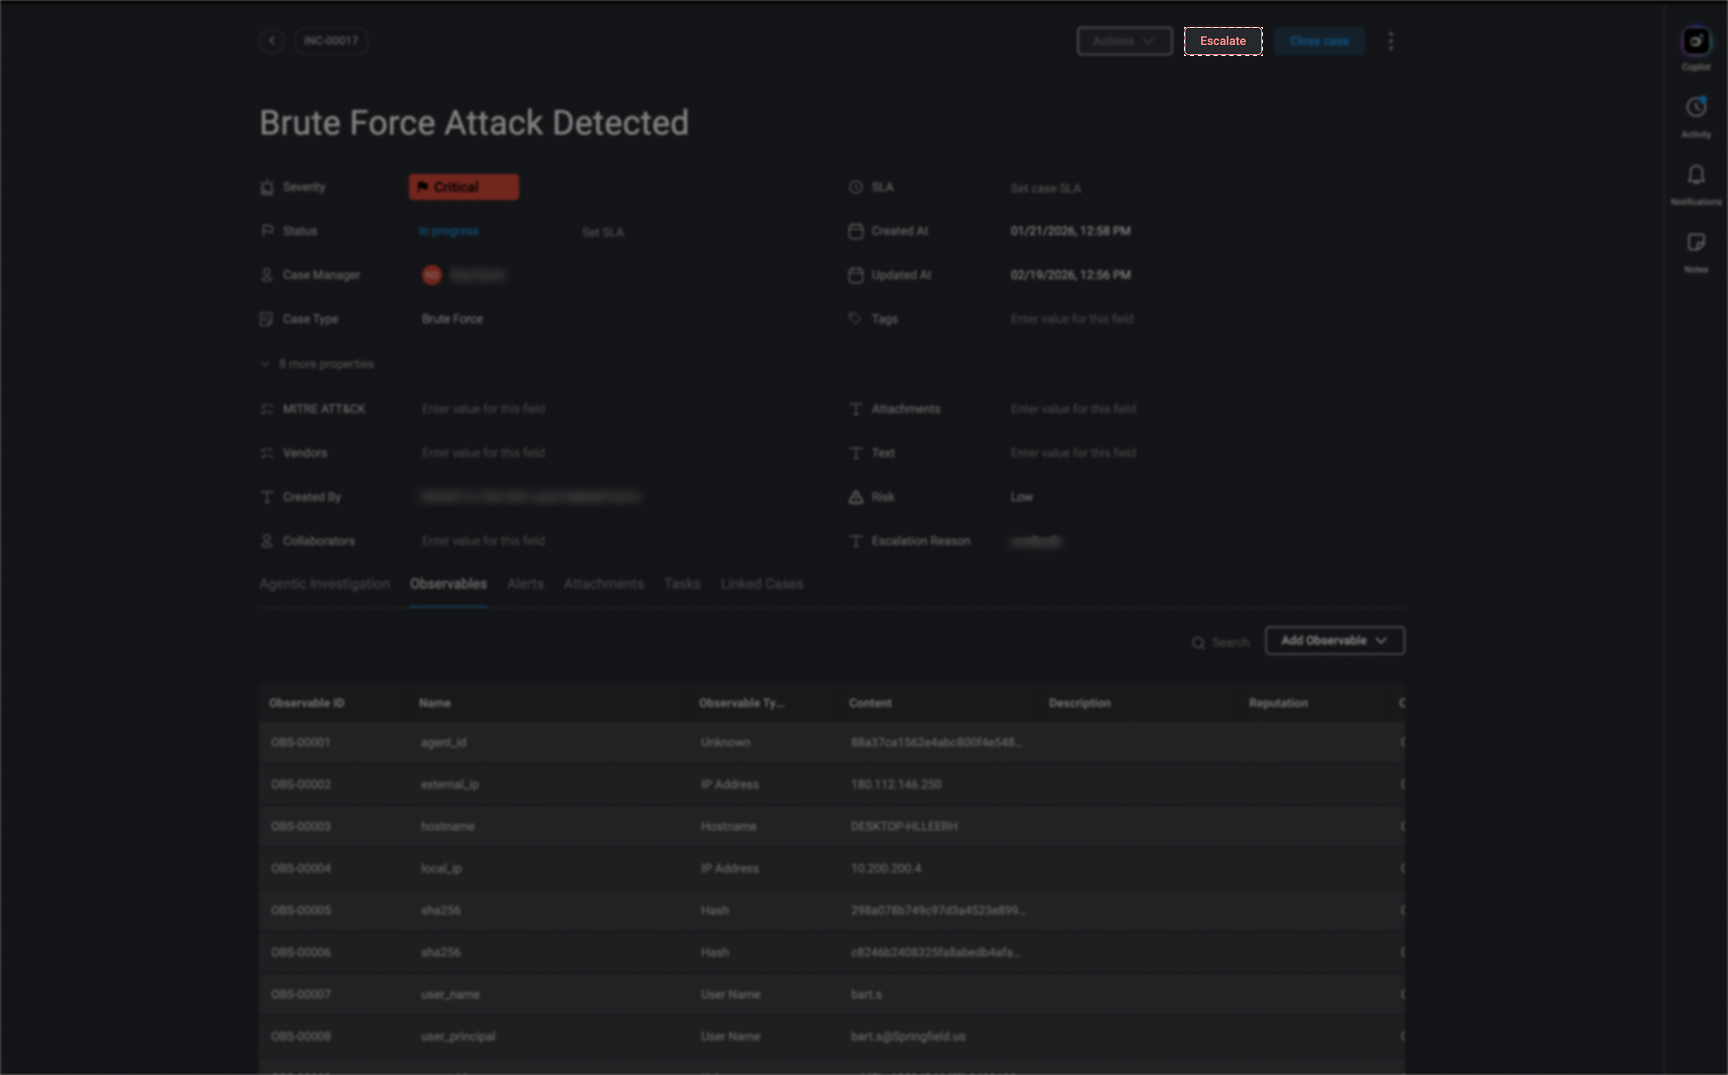
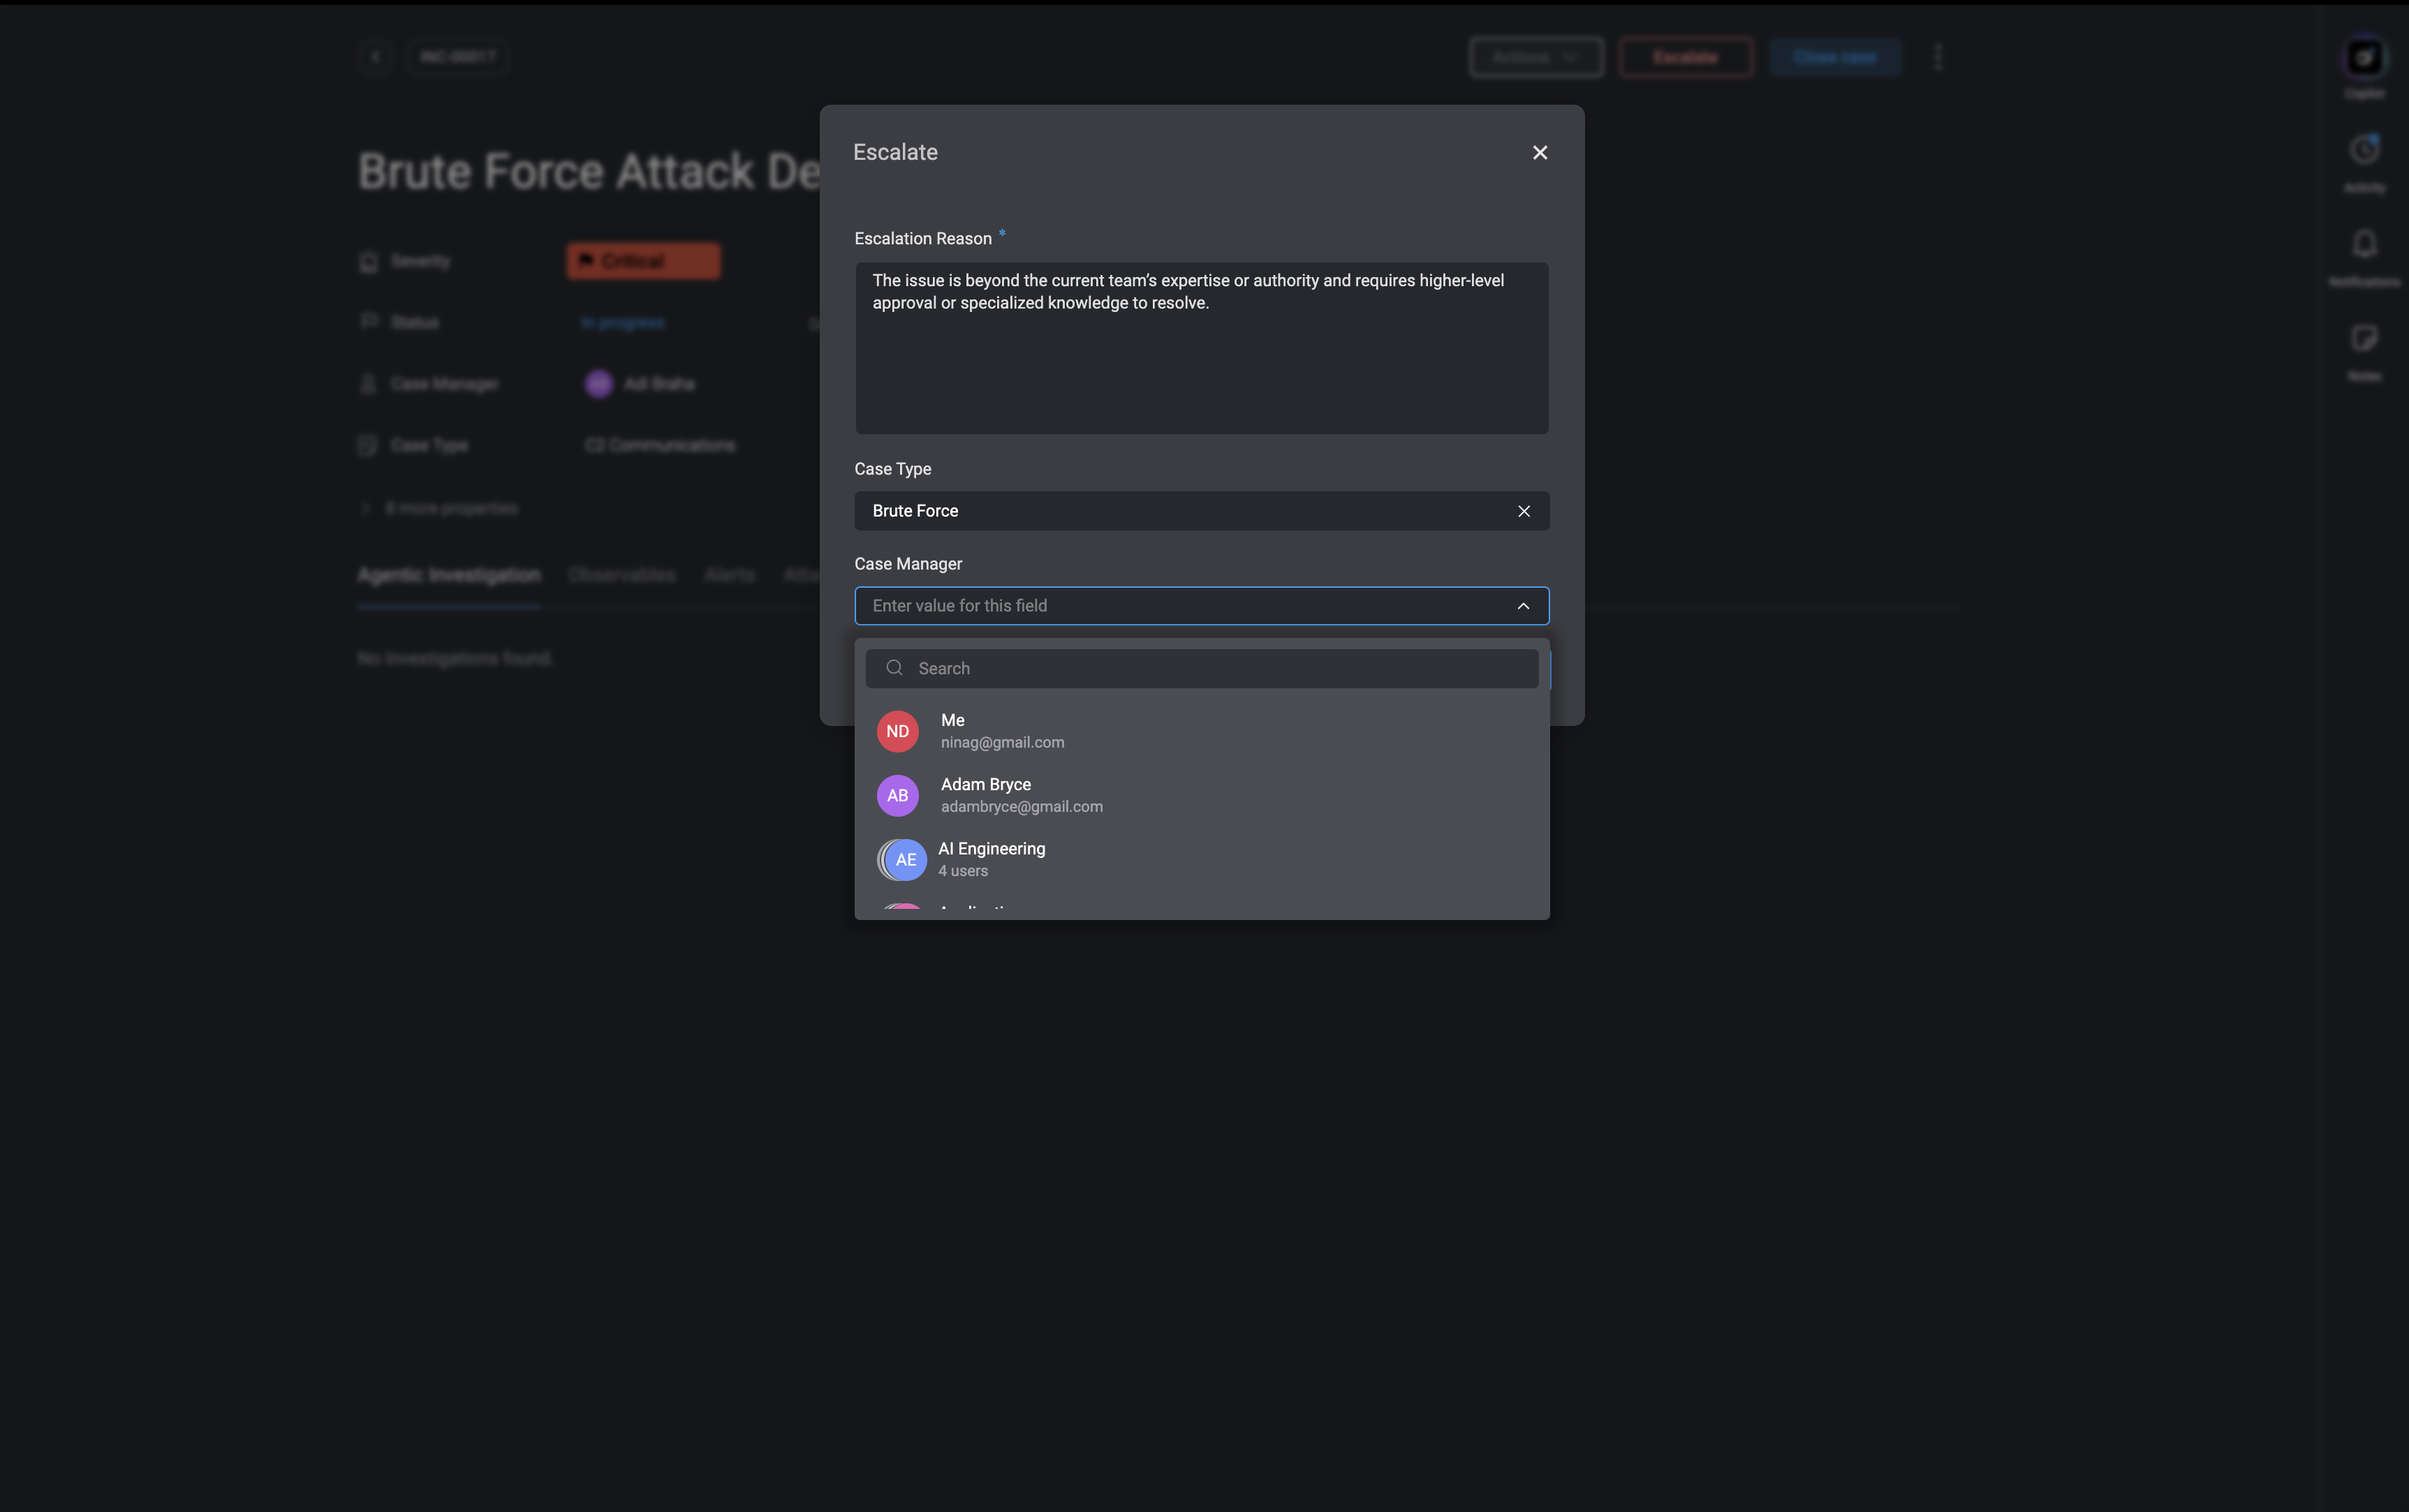
- If the ‘Case Manager’ field is configured in the Escalate Case Form section of Case Management Settings and assigned to a specific user or group, an email containing all escalation details will automatically be sent to them.
Case Overview Settings
The case overview’s settings provides additional options for managing a case, including sharing the case, exporting case details, closing a case, and deleting it. Once a case is closed, it becomes locked and cannot be edited unless reopened (moved back to an active status).
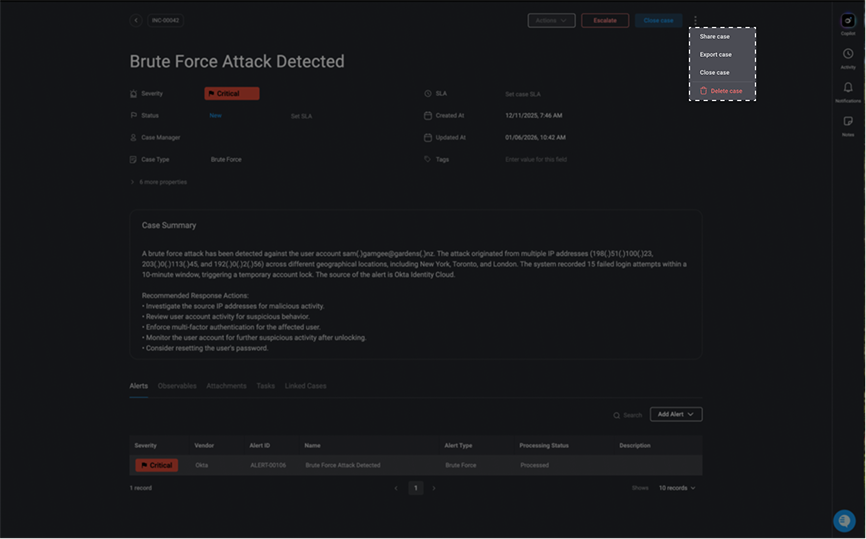
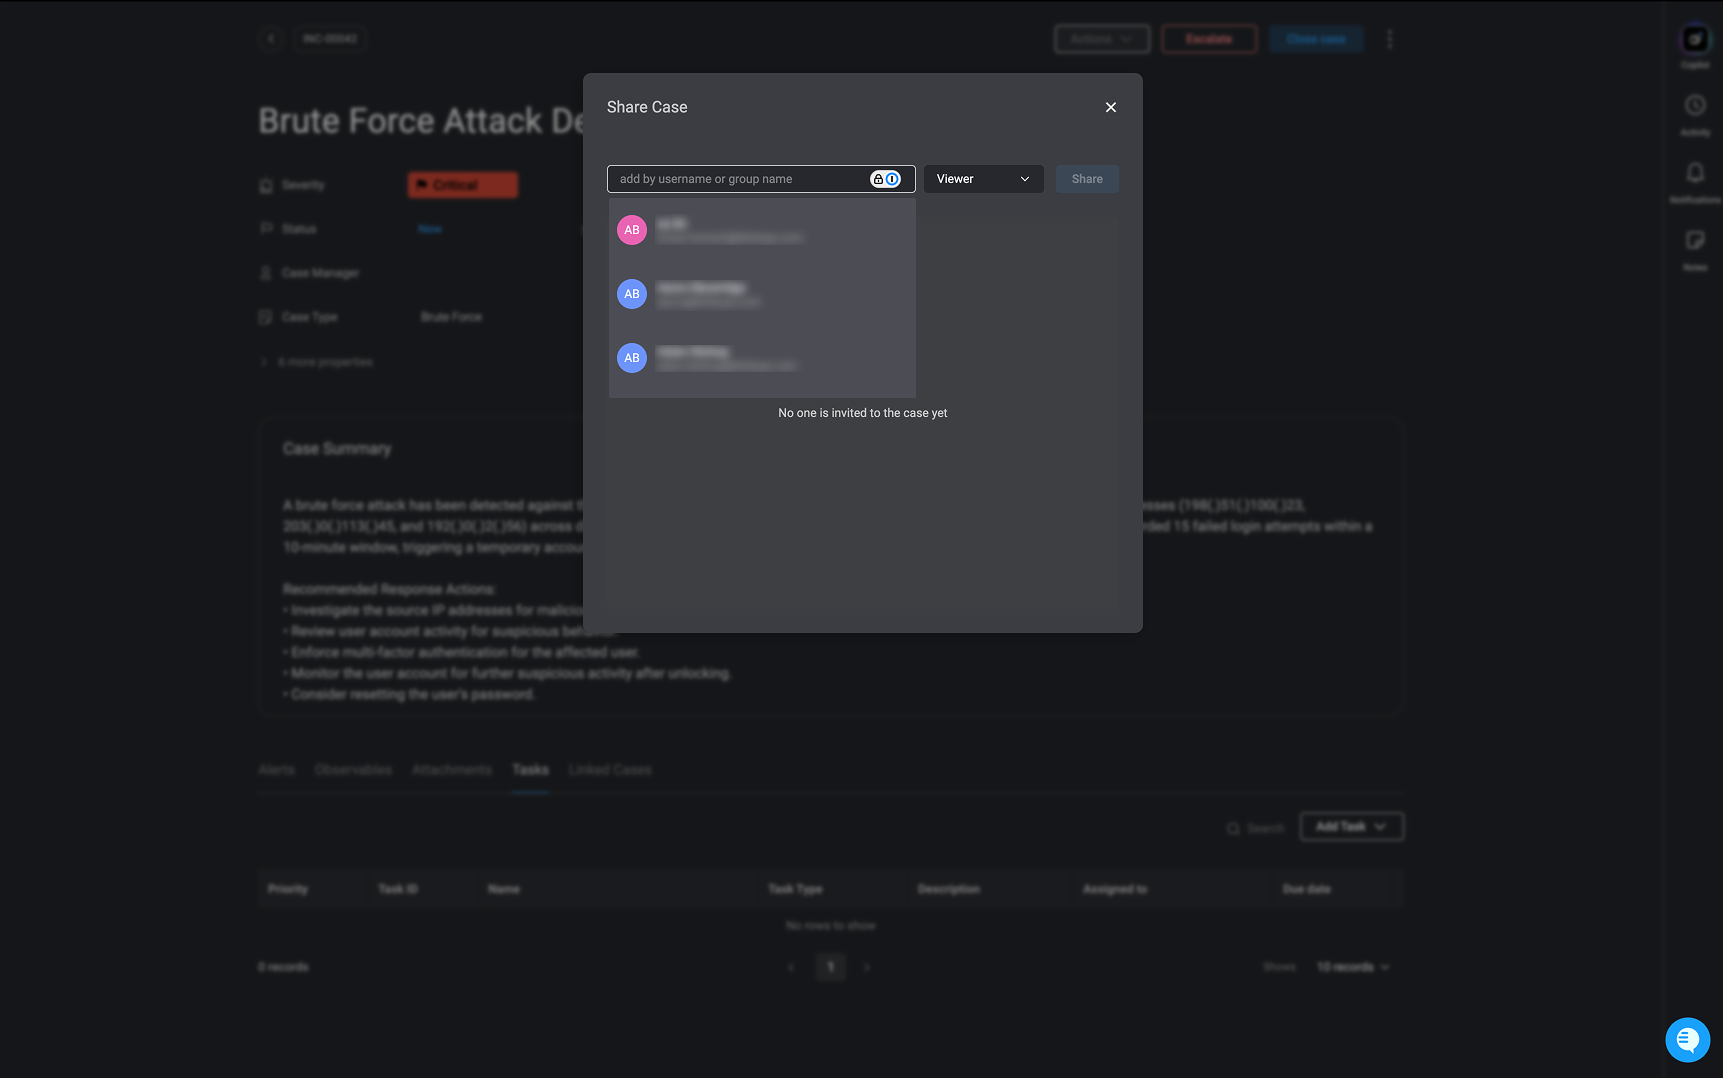
Share Case
After selecting the users or groups you want to share the case with, you must assign the appropriate permission level before clicking “Send.”- Viewer – Allows read-only access to the case. However, if the user’s global role grants broader permissions (for example, an Owner with full Case Management access), those higher-level permissions will take precedence, allowing them to edit the case even if they were invited as a Viewer.
- Editor – Allows the user to update and modify the case, but they cannot close or delete it.
- Editor + Close – Allows the user to edit the case and close it, but they still cannot delete the case.
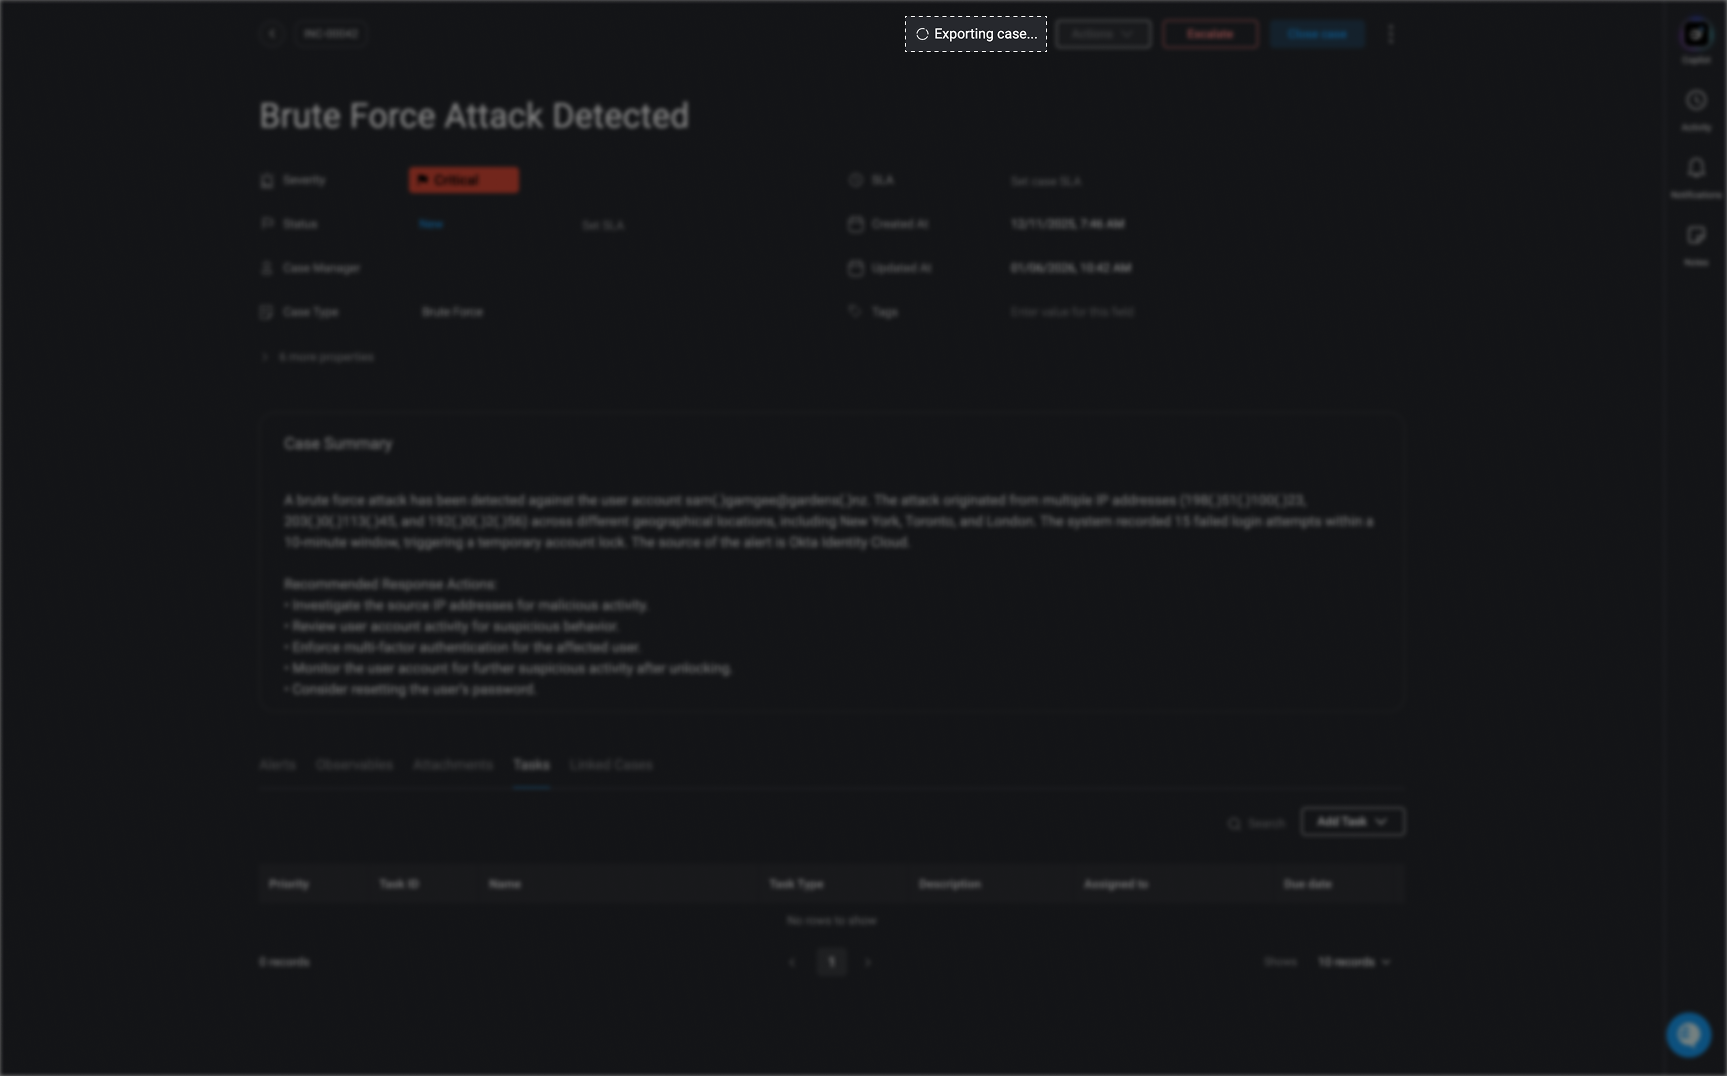
Export Case
The ‘Export Case’ setting allows users to download a structured dataset of the case, making it easy to share or archive case details.- Clicking ‘Export Case’ will generate a
ZIPfile containing:- PDF reports summarizing case details.
- CSV files with structured case data for further analysis.
- The exported files can be used for auditing, compliance, or reporting purposes.
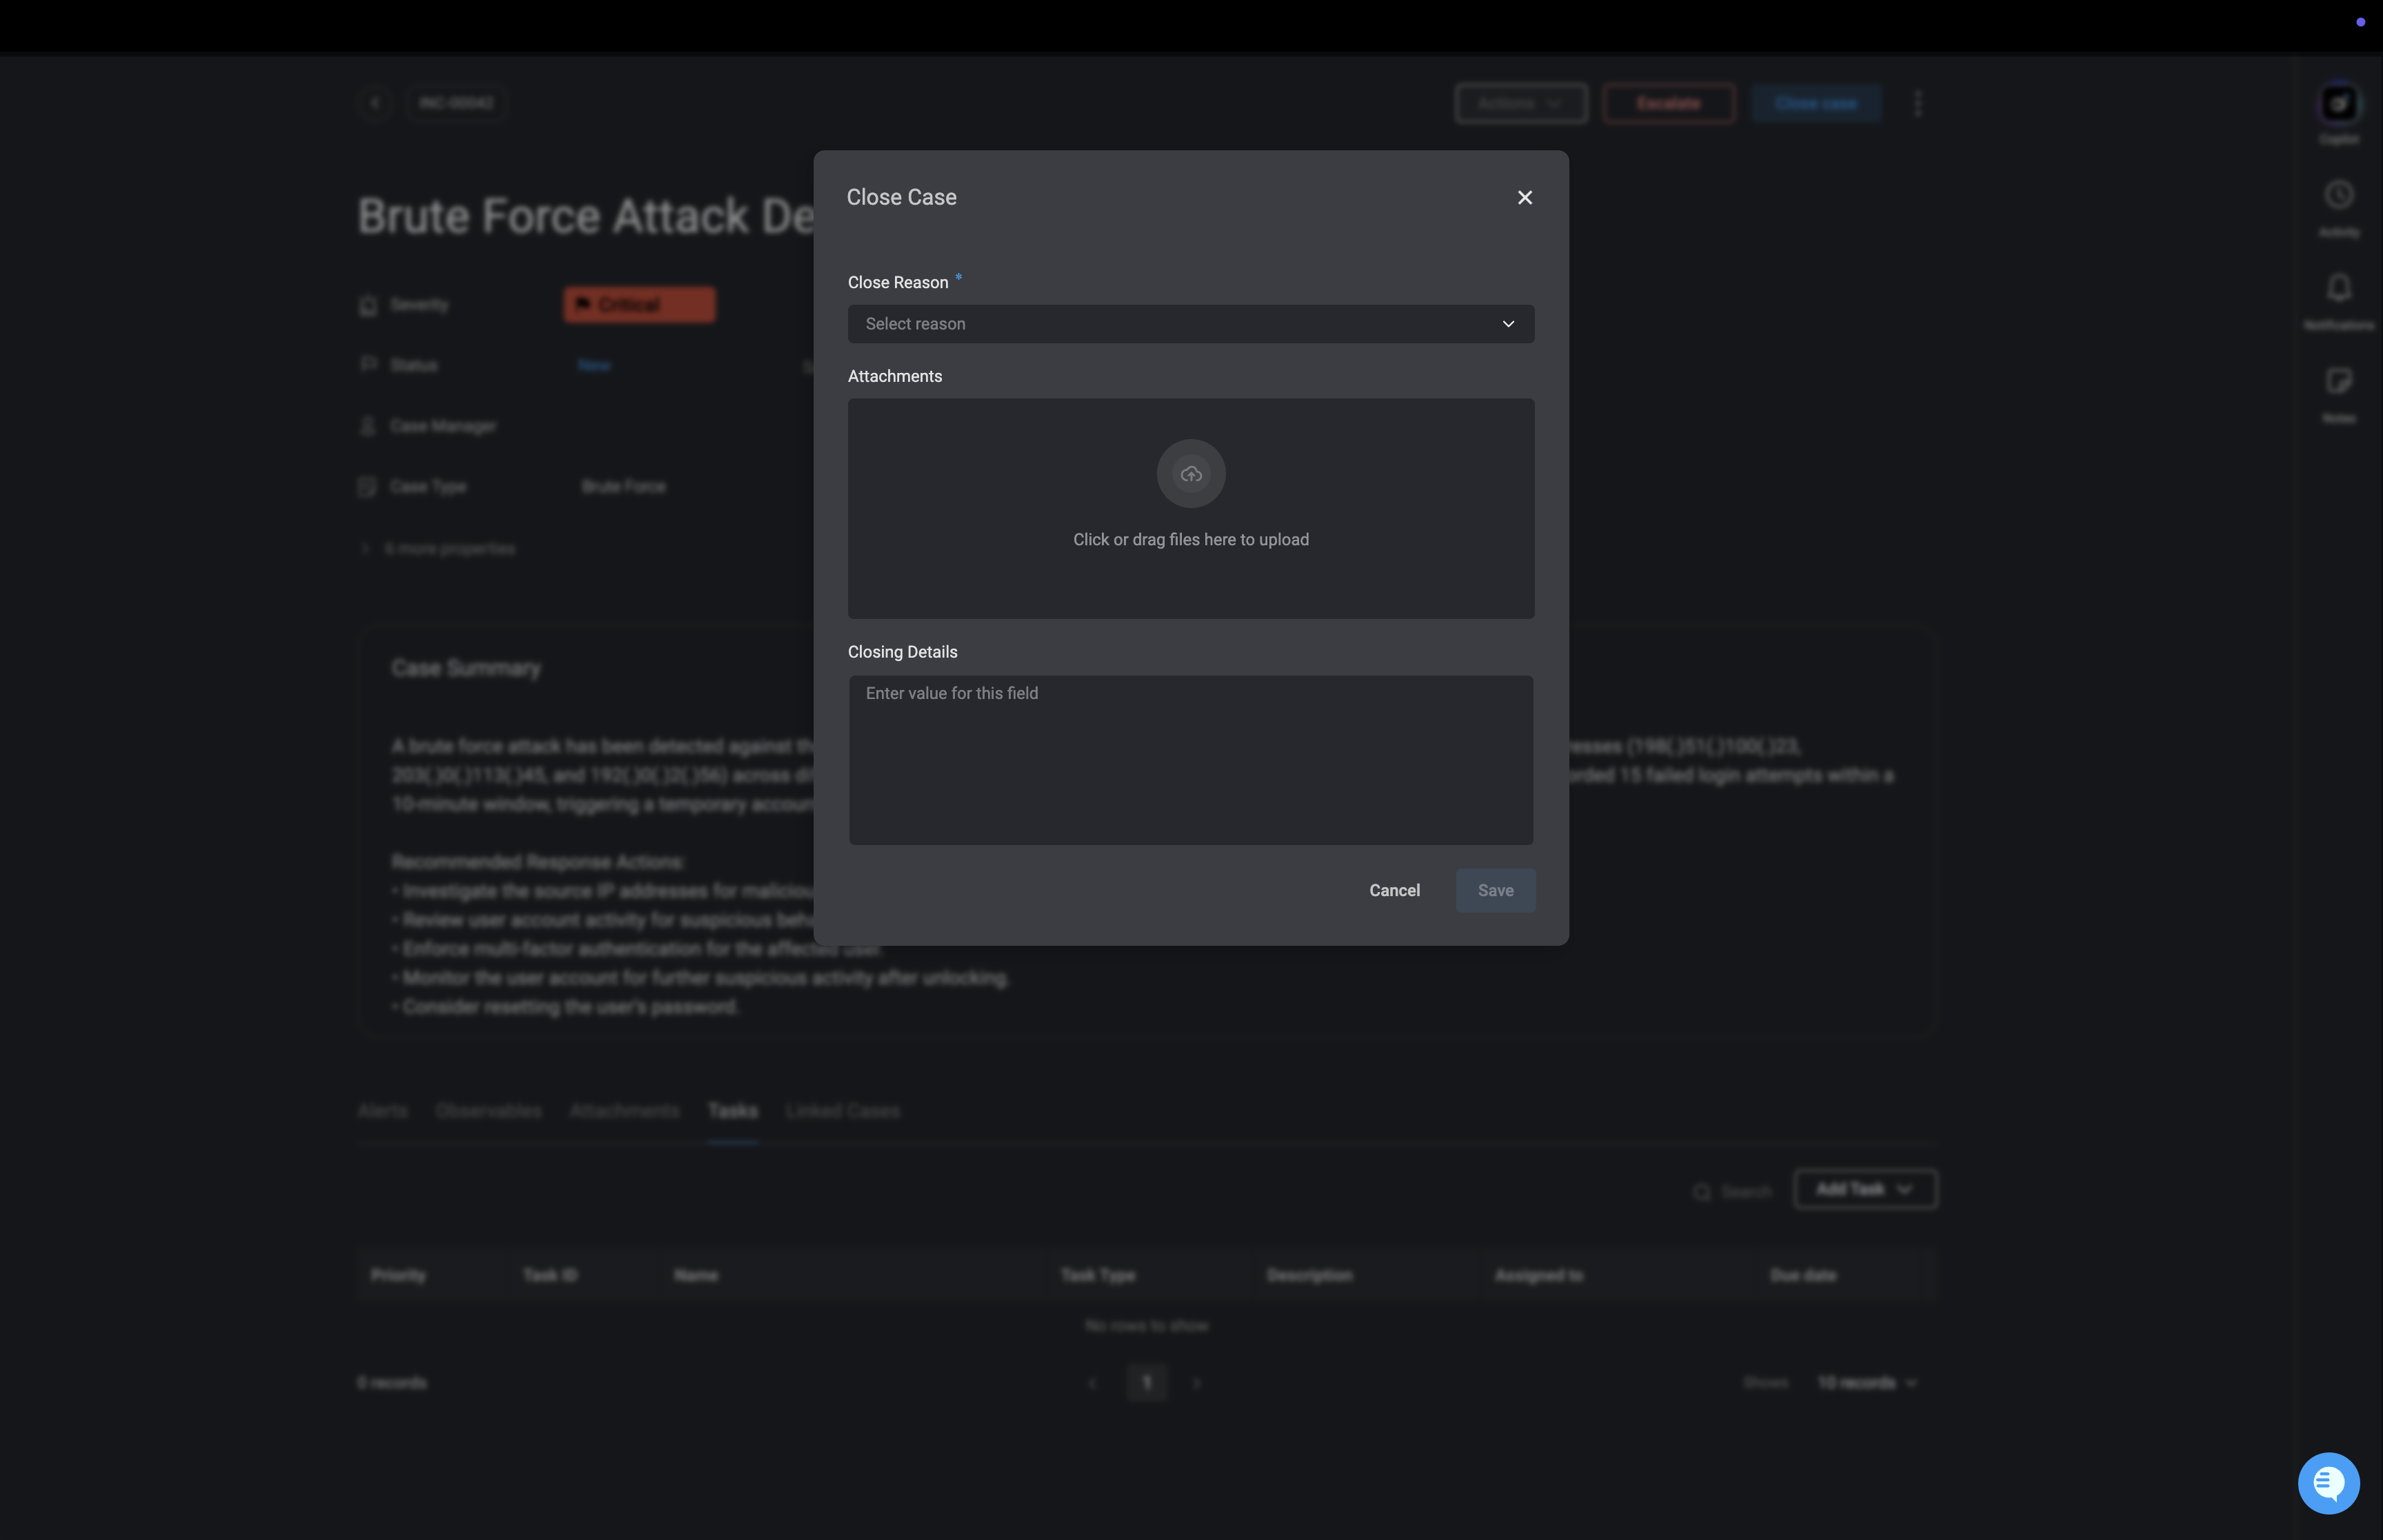
Close Case
The Close Case setting allows users to finalize and archive a case while preserving relevant details.- When closing a case, a pop-up appears, allowing users to:
- Modify the reason for closing the case.
- Attach additional files (up to 500MB) related to the case resolution.
- Update or add closing notes with further context.
- Clicking ‘Save’ finalizes the case closure.
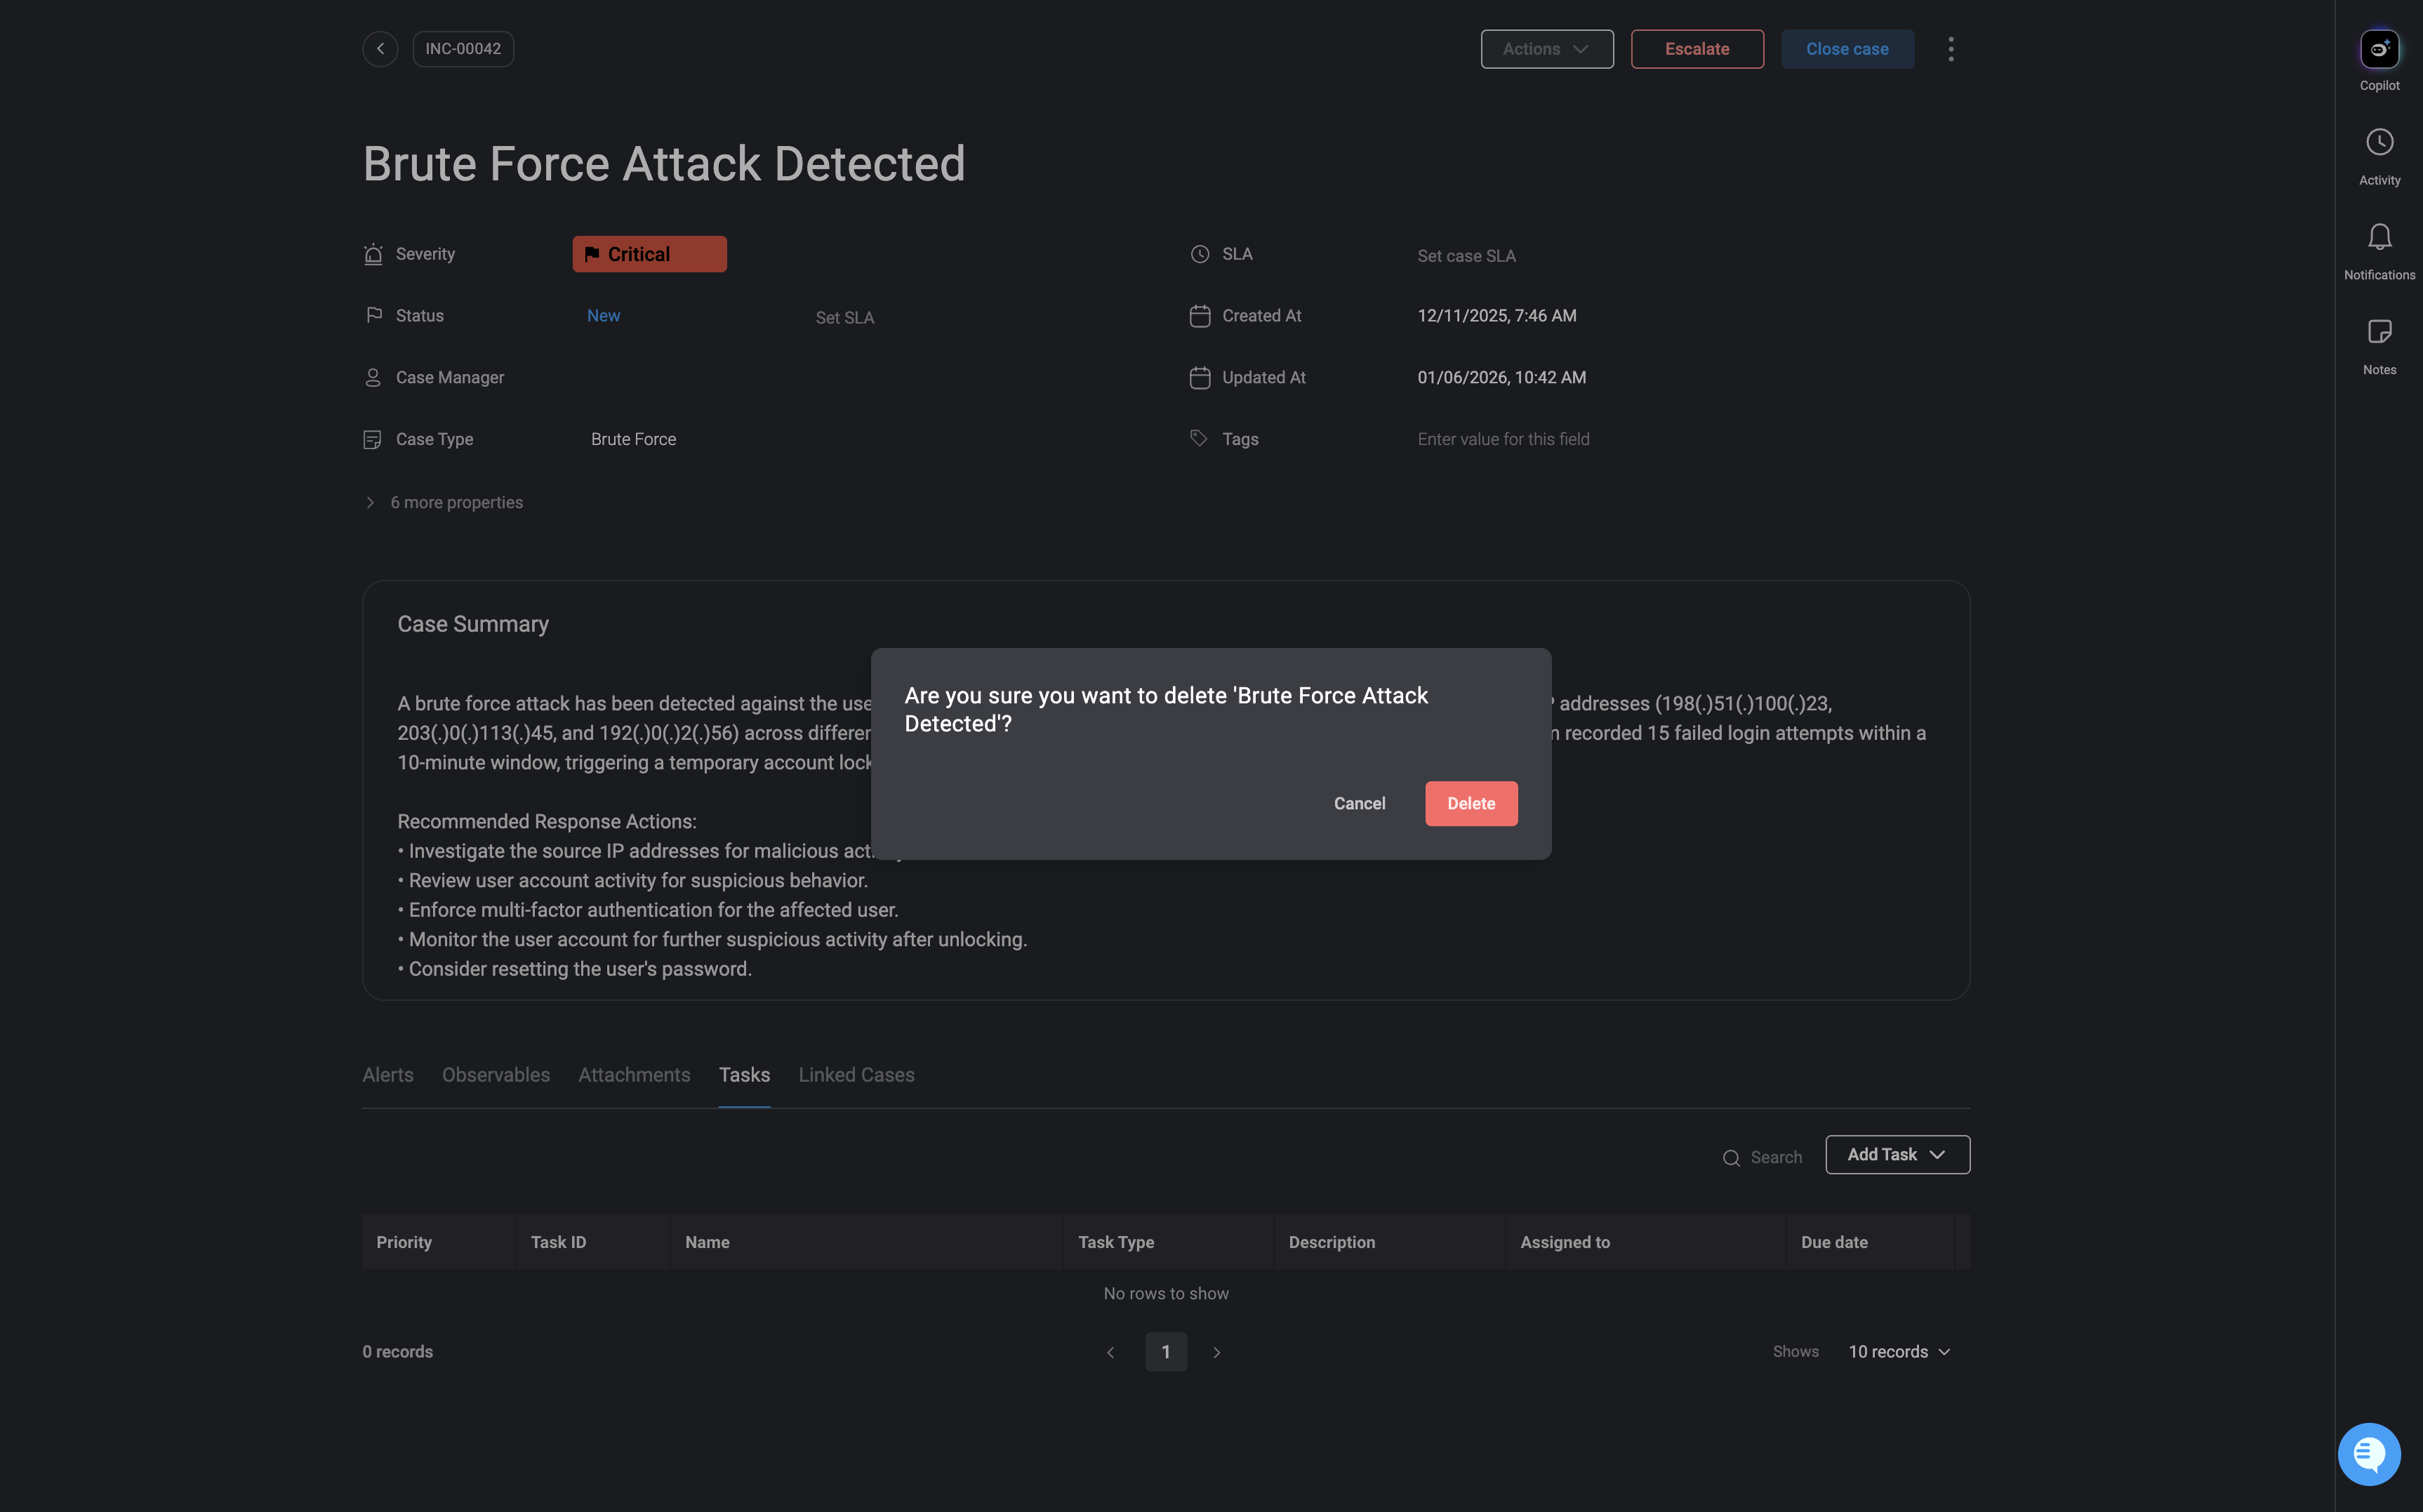
Delete Case
The Delete Case will remove the case and all its related metadata entirely from Case Management