Overview
The ‘Slack Interactivity’ action integrates the Blink Bot for Slack into your workspace, allowing you to perform common Slack actions within your workflows. Messages from Blink to Slack are sent through the Blink bot This action allows you to send a personalized message to a user or channel. The message can include a variety of interactive components, such as date pickers, checkboxes, text inputs, multiple choice selections, and more. Use this action to gather all the necessary information in a single interaction, formatted to best suit the type of data you are collecting. The Slack Interactivity action is made up of three distinct actions:- The Send a Message action.
- The Update an Existing Message action.
- The Send an Ephemeral Message action.
Slack Interactivity Action
To use the Slack Interactivity action, it is essential to use the Slack Block Kit Builder for building and previewing your messages before executing the step.The Slack Block Syntax
Slack Block Syntax- Examples
Slack Block Syntax- Examples
Creating a Send a Message Step
Add Blink Bot For Slack
1
Open General Settings in Blink
Set up the Blink Slack Bot by clicking your username in the bottom left corner and go to “General” settings.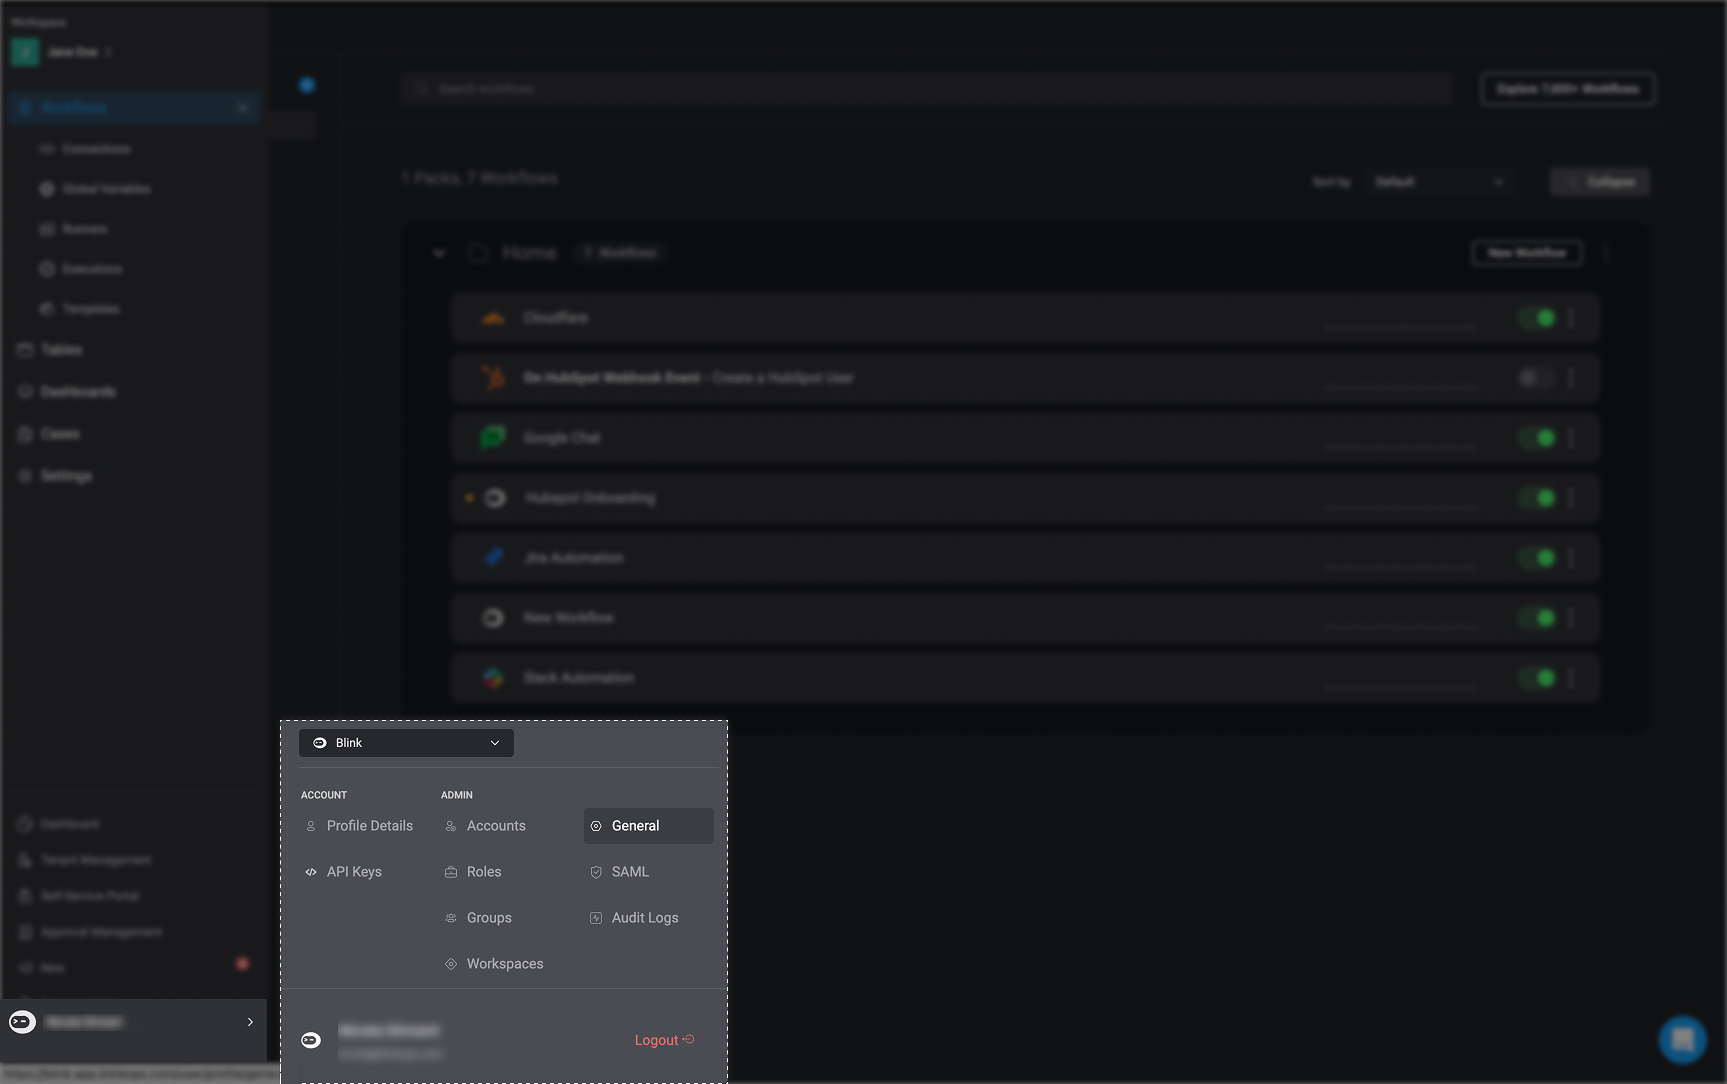
2
Connect Blink to Slack
In the General Settings, click the “Connect to Slack” button.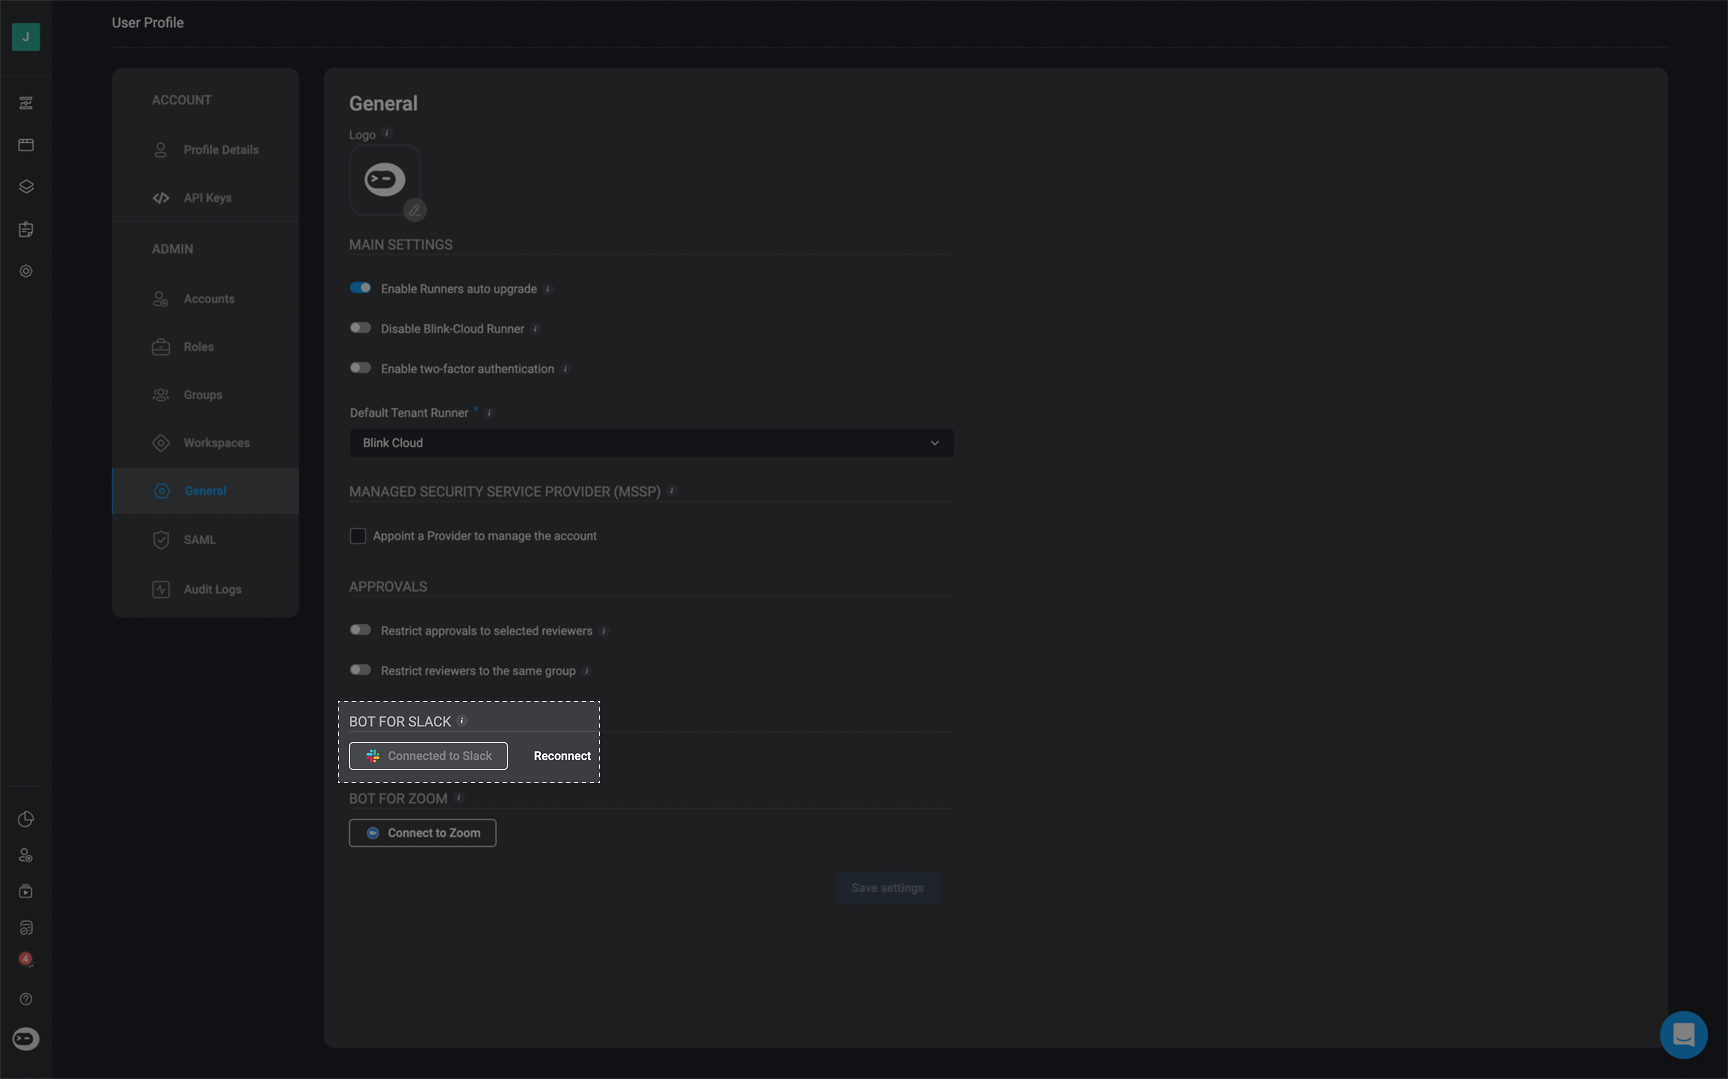
3
Grant Slack Permissions to Blink
A dialog window will open, asking for access permissions: “Blink is requesting permission to access the Blink Ops Slack workspace”.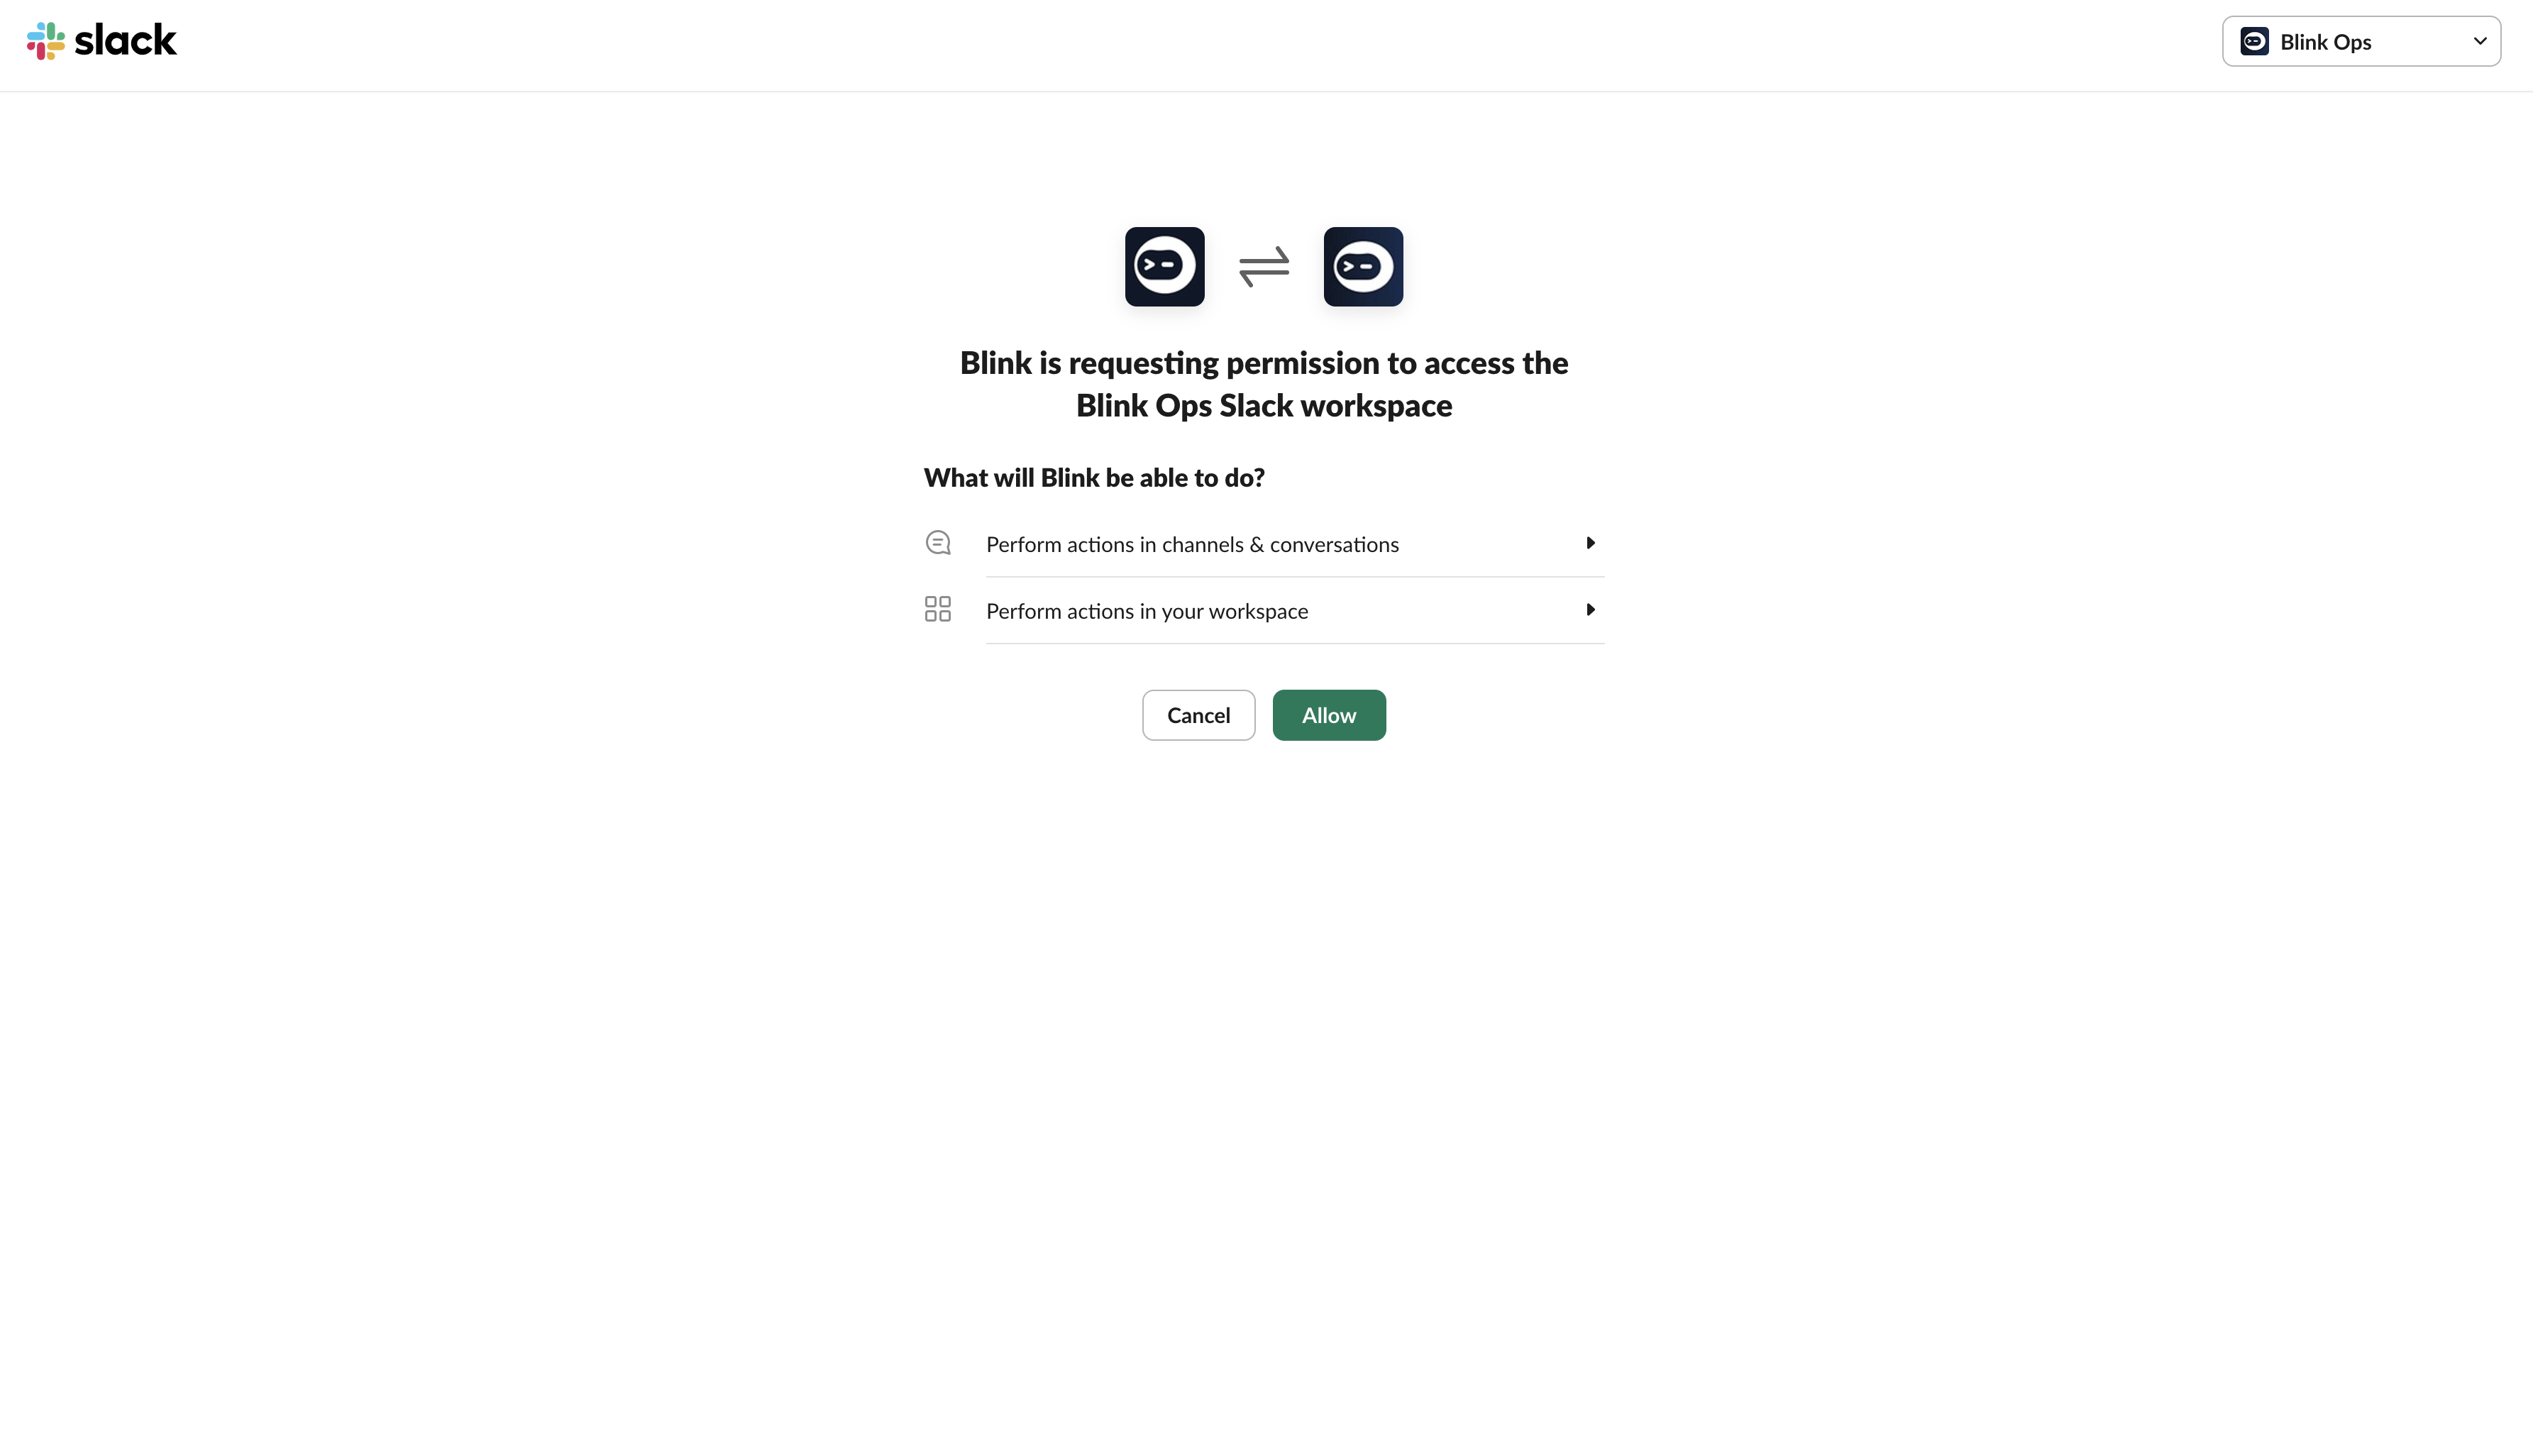
4
Confirm Connection to Slack
Click ‘Allow’. It will then display that your account is “Connected to Slack”.
Build Your Workflow
1
Add Slack Interactivity Action to Workflow
In the Workflow Editor, click to open the Action panel and search for “Slack Interactivity” action. Alternatively, you can drag the action to the step.
2
Choose 'Send Message' as Action Type
In the dropdown menu under “Action Type”, select the “Send Message” option.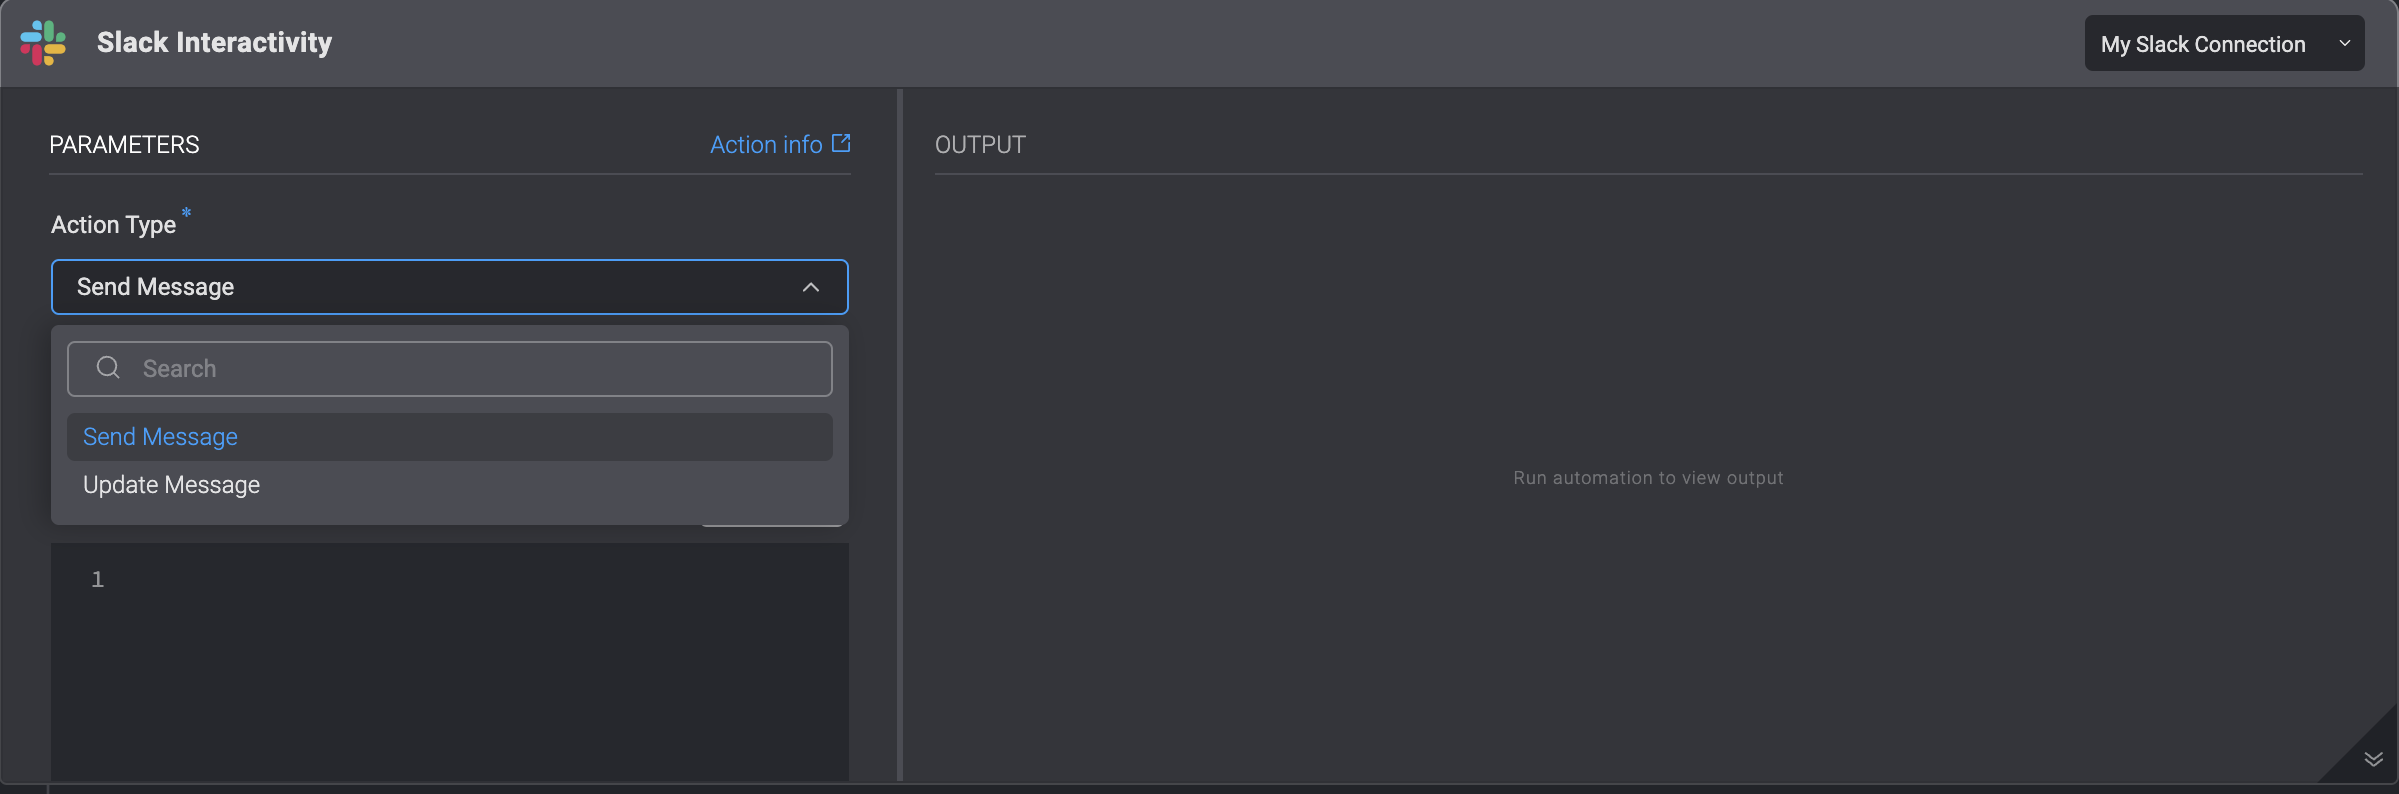
3
Fill in the Parameters
Enter the following parameters:
4
Create or Select Slack Connection
Next, create a Slack connection by navigating to the top-right hand corner of your Step, select Connection required and then select an existing connection or create a new connection by selecting Create new connection.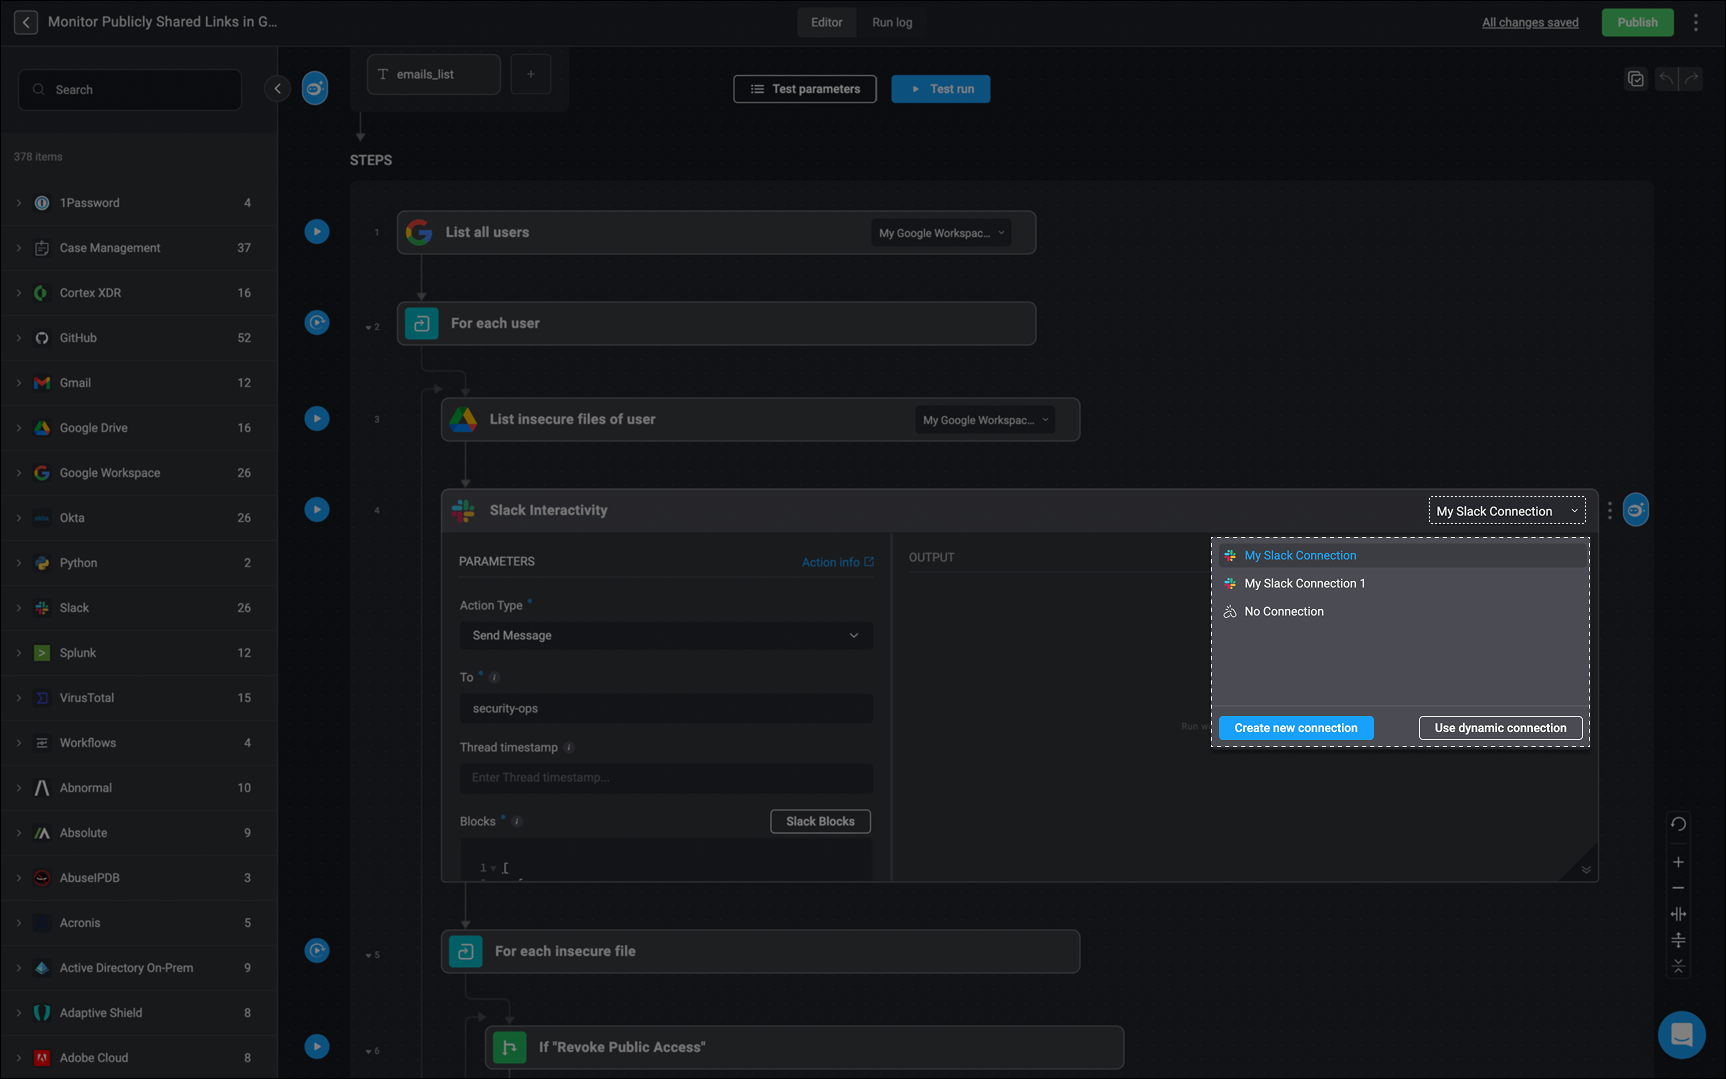
5
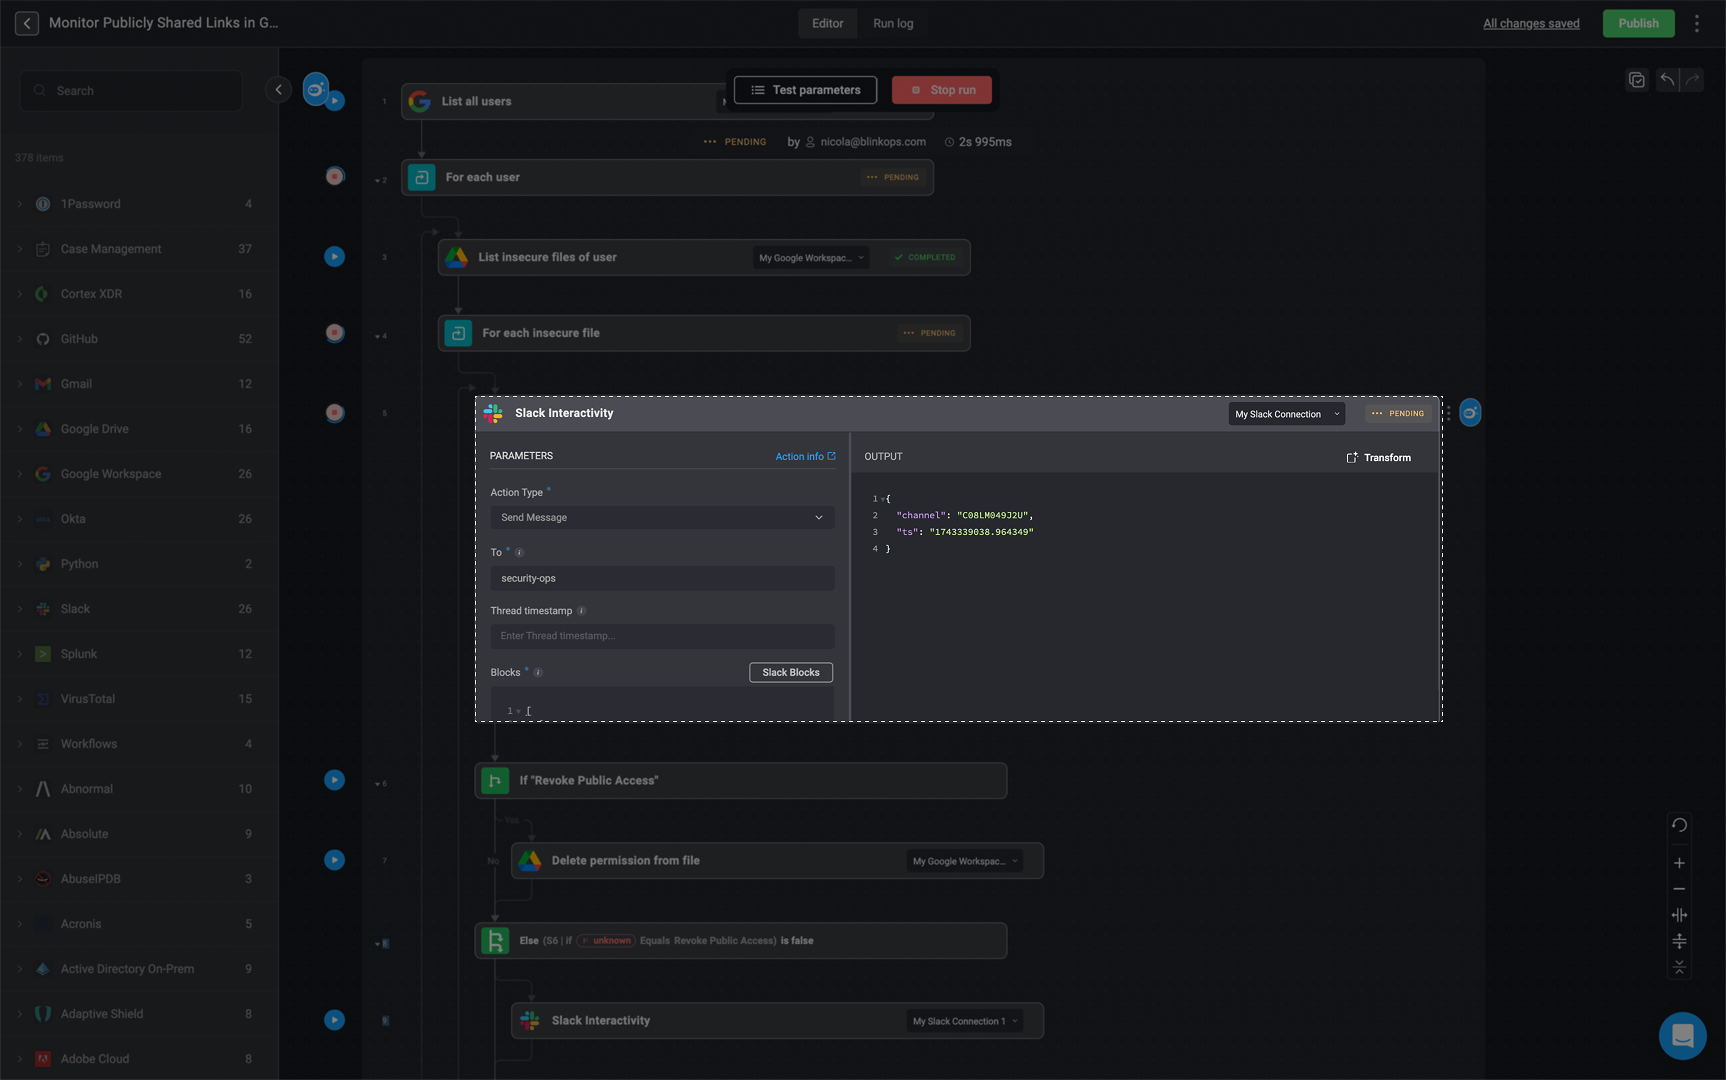
Run a Test Execution of the Step
Once these steps are completed, you can select the button to execute a trial run of the step or the test run button to execute a test run of your Workflow.
6
Respond to Slack Message in Channel
When this Workflow is executed, the designated Slack channel you have entered in the text field, will receive the message. Subsequently, you will have the option to engage with the message by writing a response and then pressing the submit button.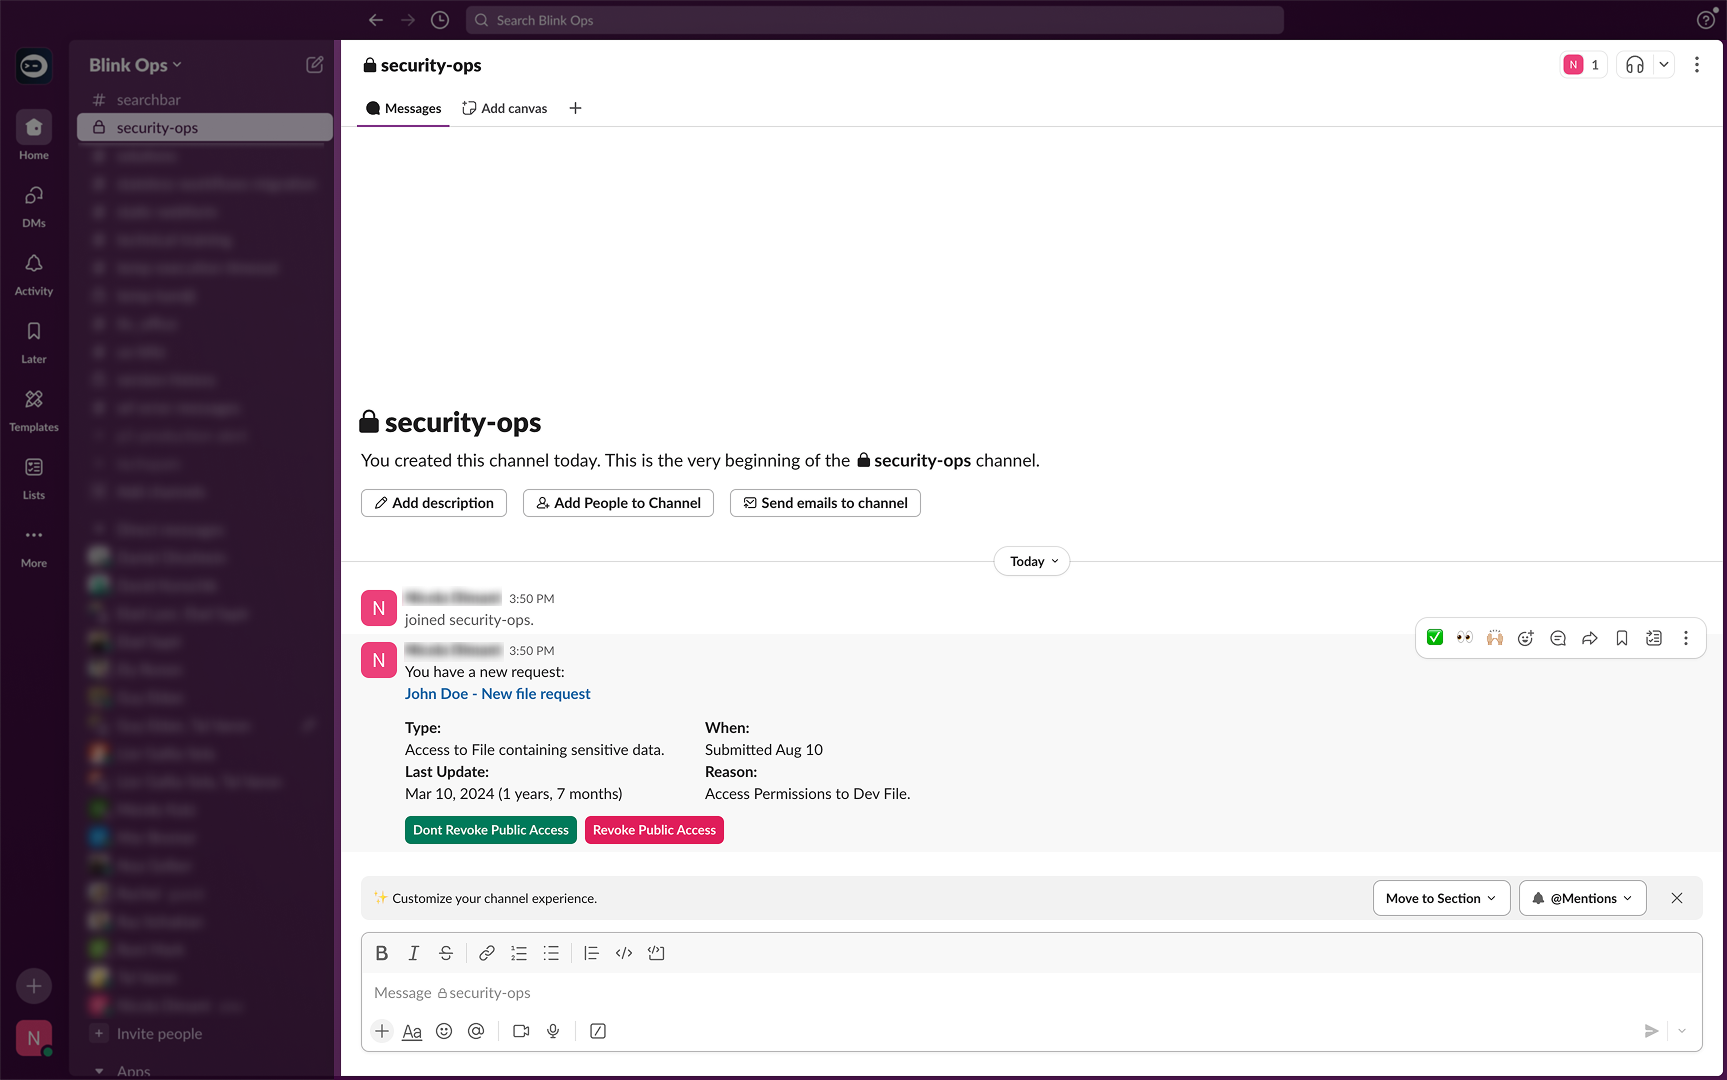
Upon recipient interaction (triggered by action button clicks), the system collects values from all input blocks, allowing the Workflow to resume from the paused step.
Once the recipient clicks the submit button, the message will be updated to 
Processing your response.... It is up to the creator of the Workflow to decide what to do with the interaction.7
View Slack Response in Workflow Output
You can then navigate back to your Workflow where you can find your Slack-written response in the output of your Workflow.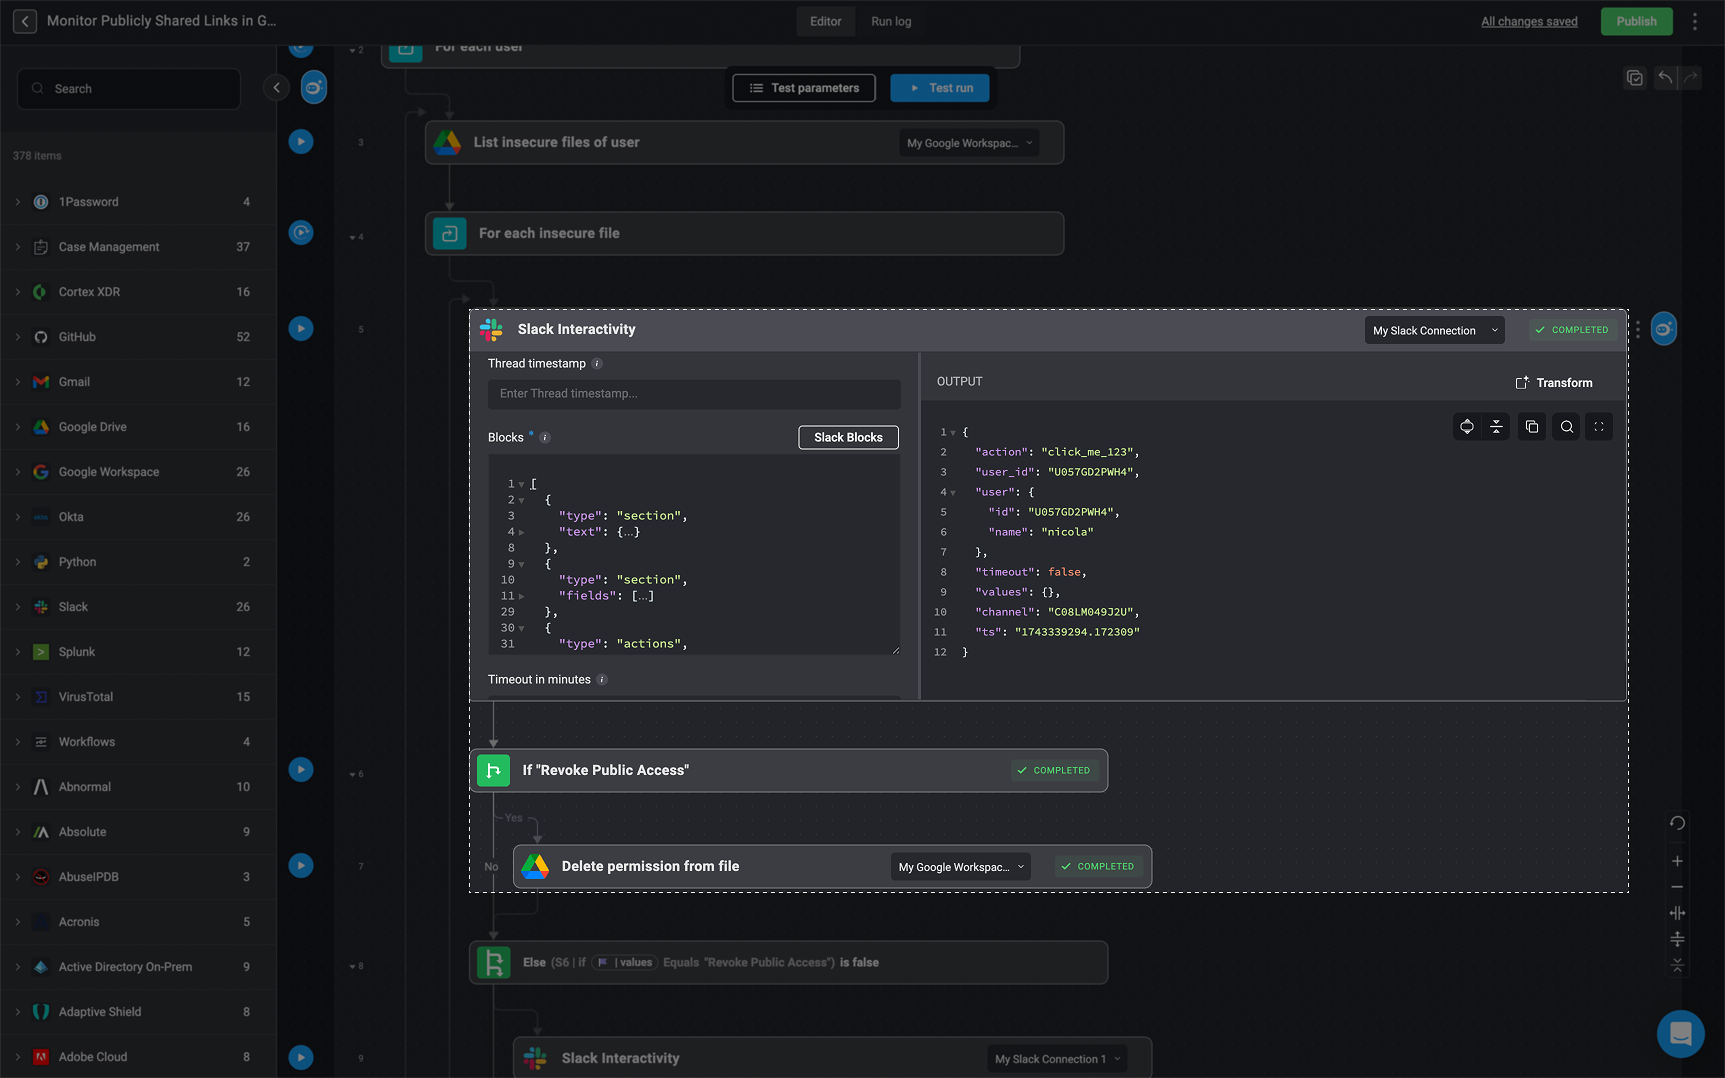
Creating an Update a Message Step
1
Select the 'Update Message' Action Type
To modify a previously sent message, select the Update Message option from the Action Type dropdown.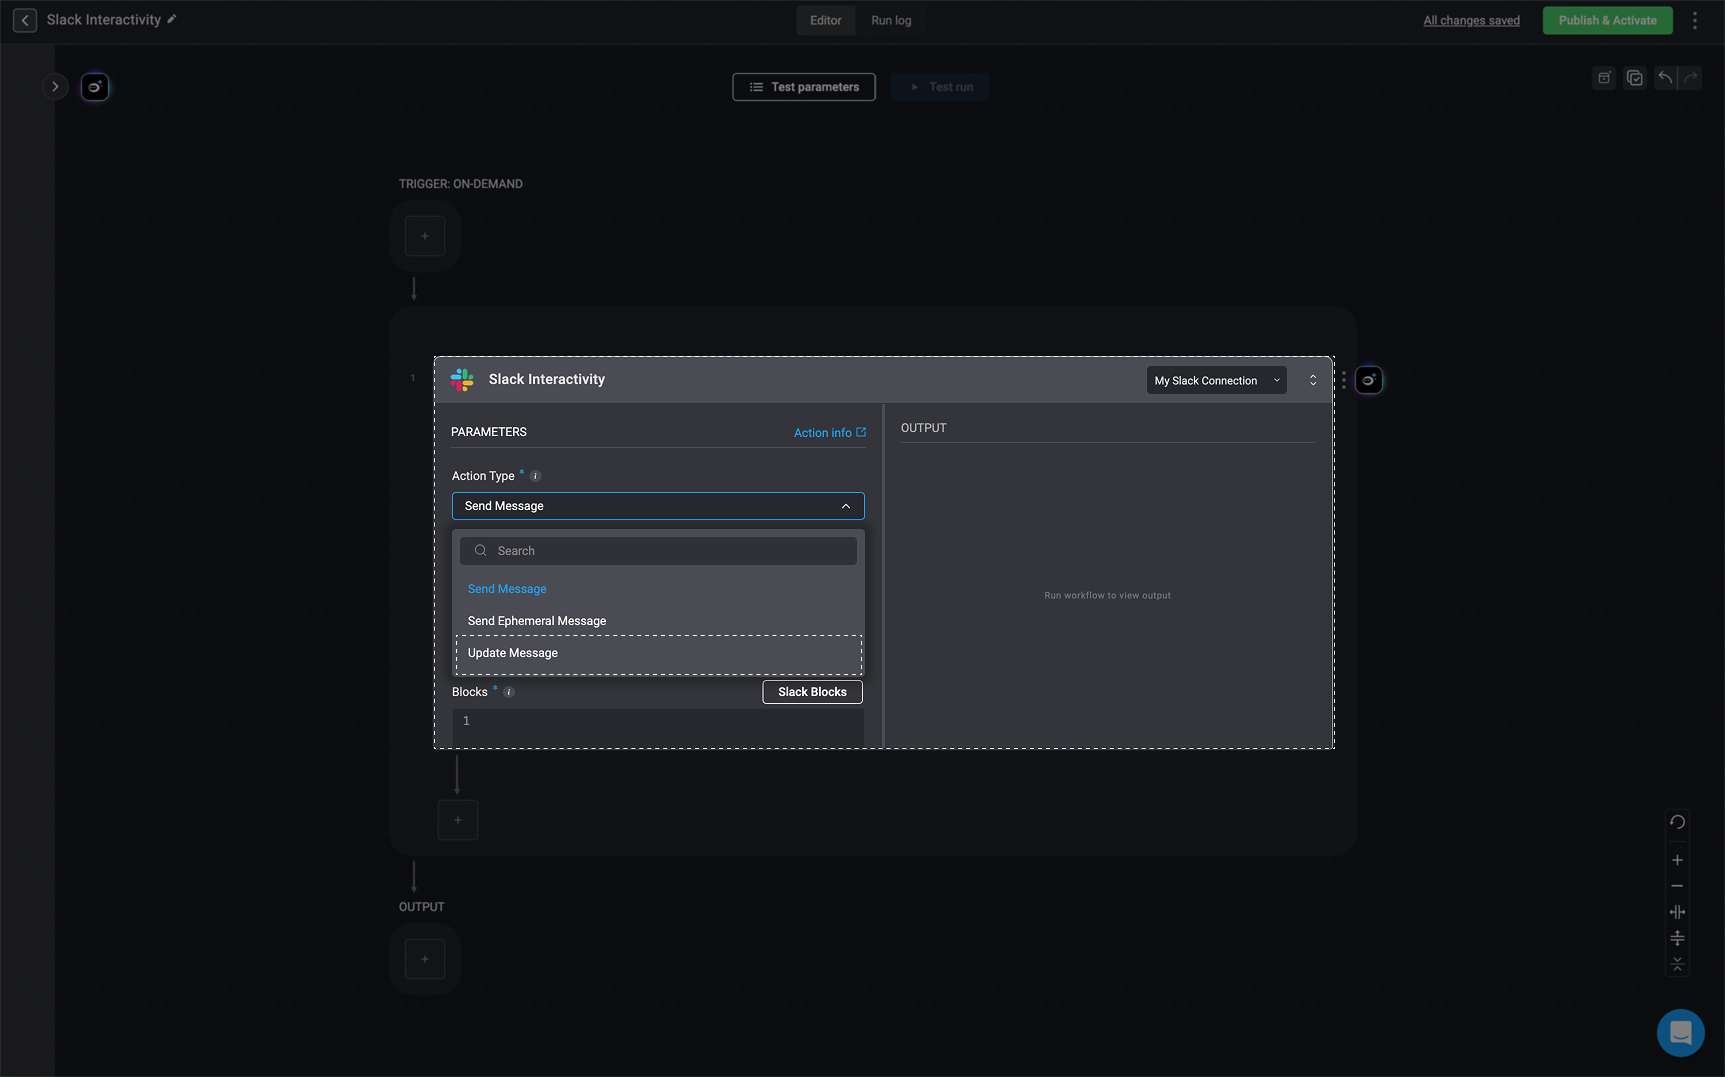
2
Fill in The Required Parameters
Please note, when using the Update Message action, you must use the 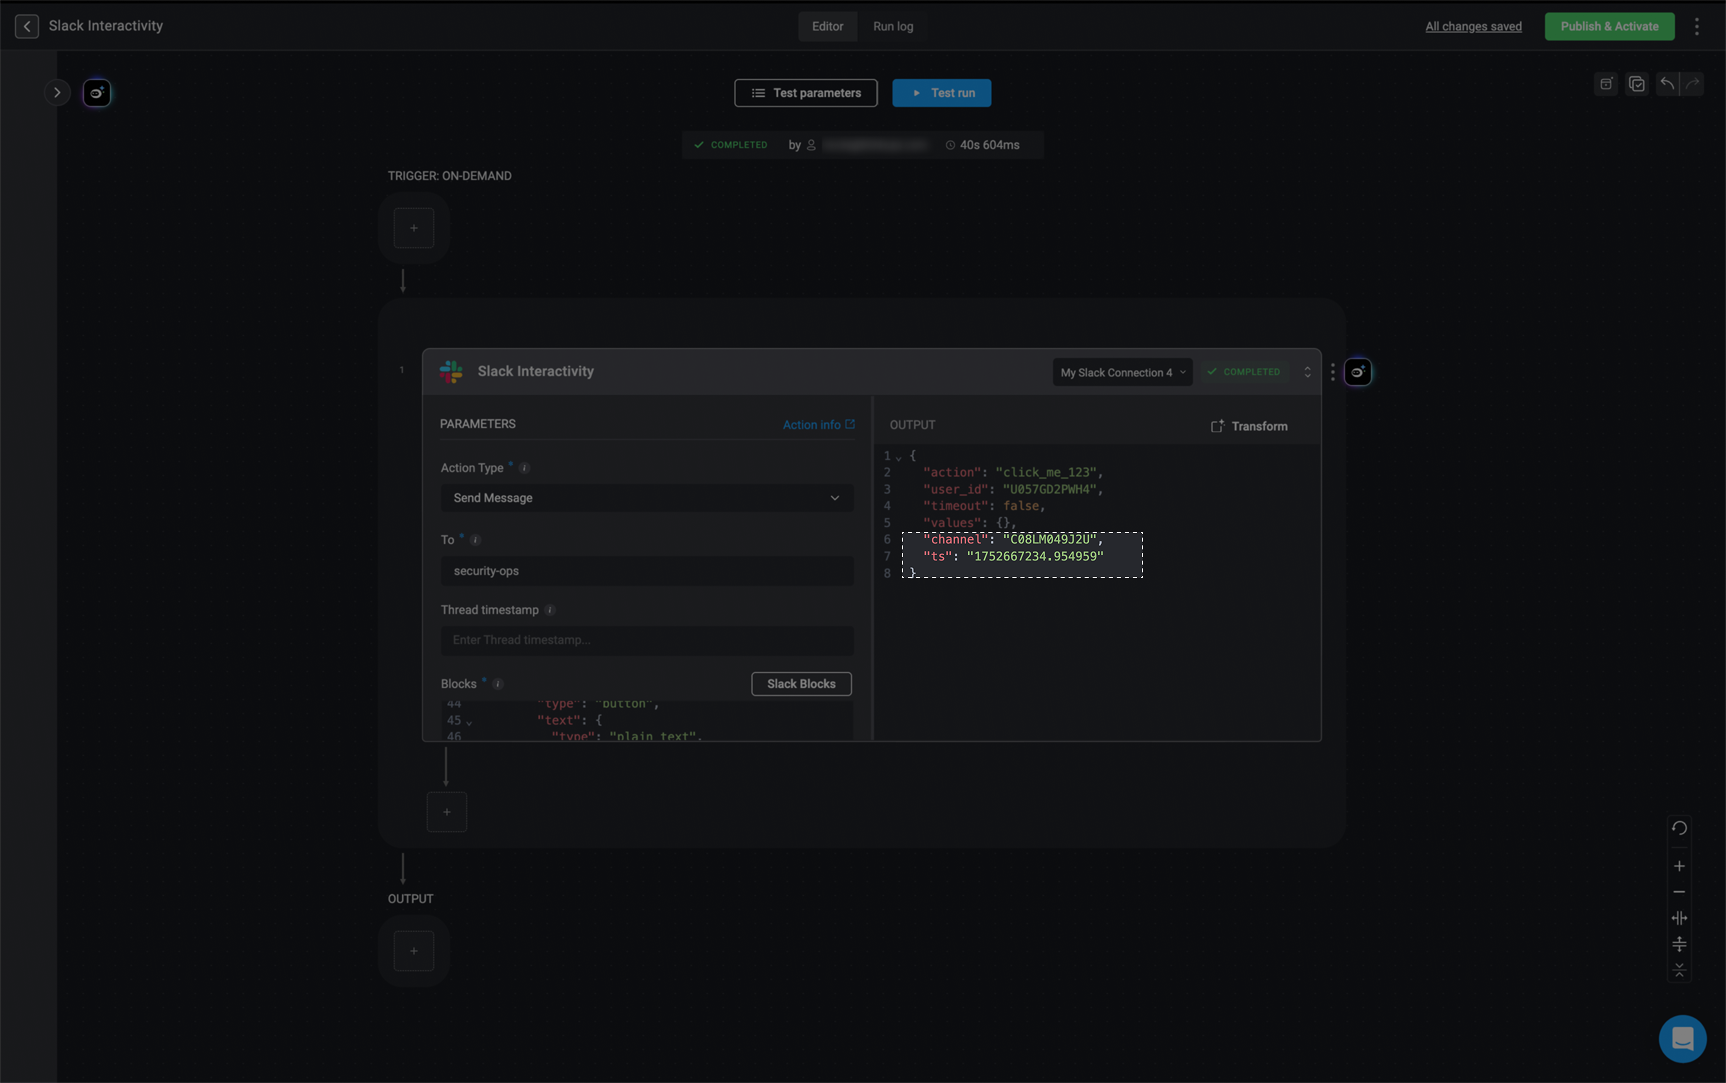
channel and ts(TimeStamp) values above from the output of the response message created in your Slack channel.3
View Updated Message in Slack
Upon revisiting your Slack channel, you will notice that the message reflects the most recent adjustments you made to the message within the 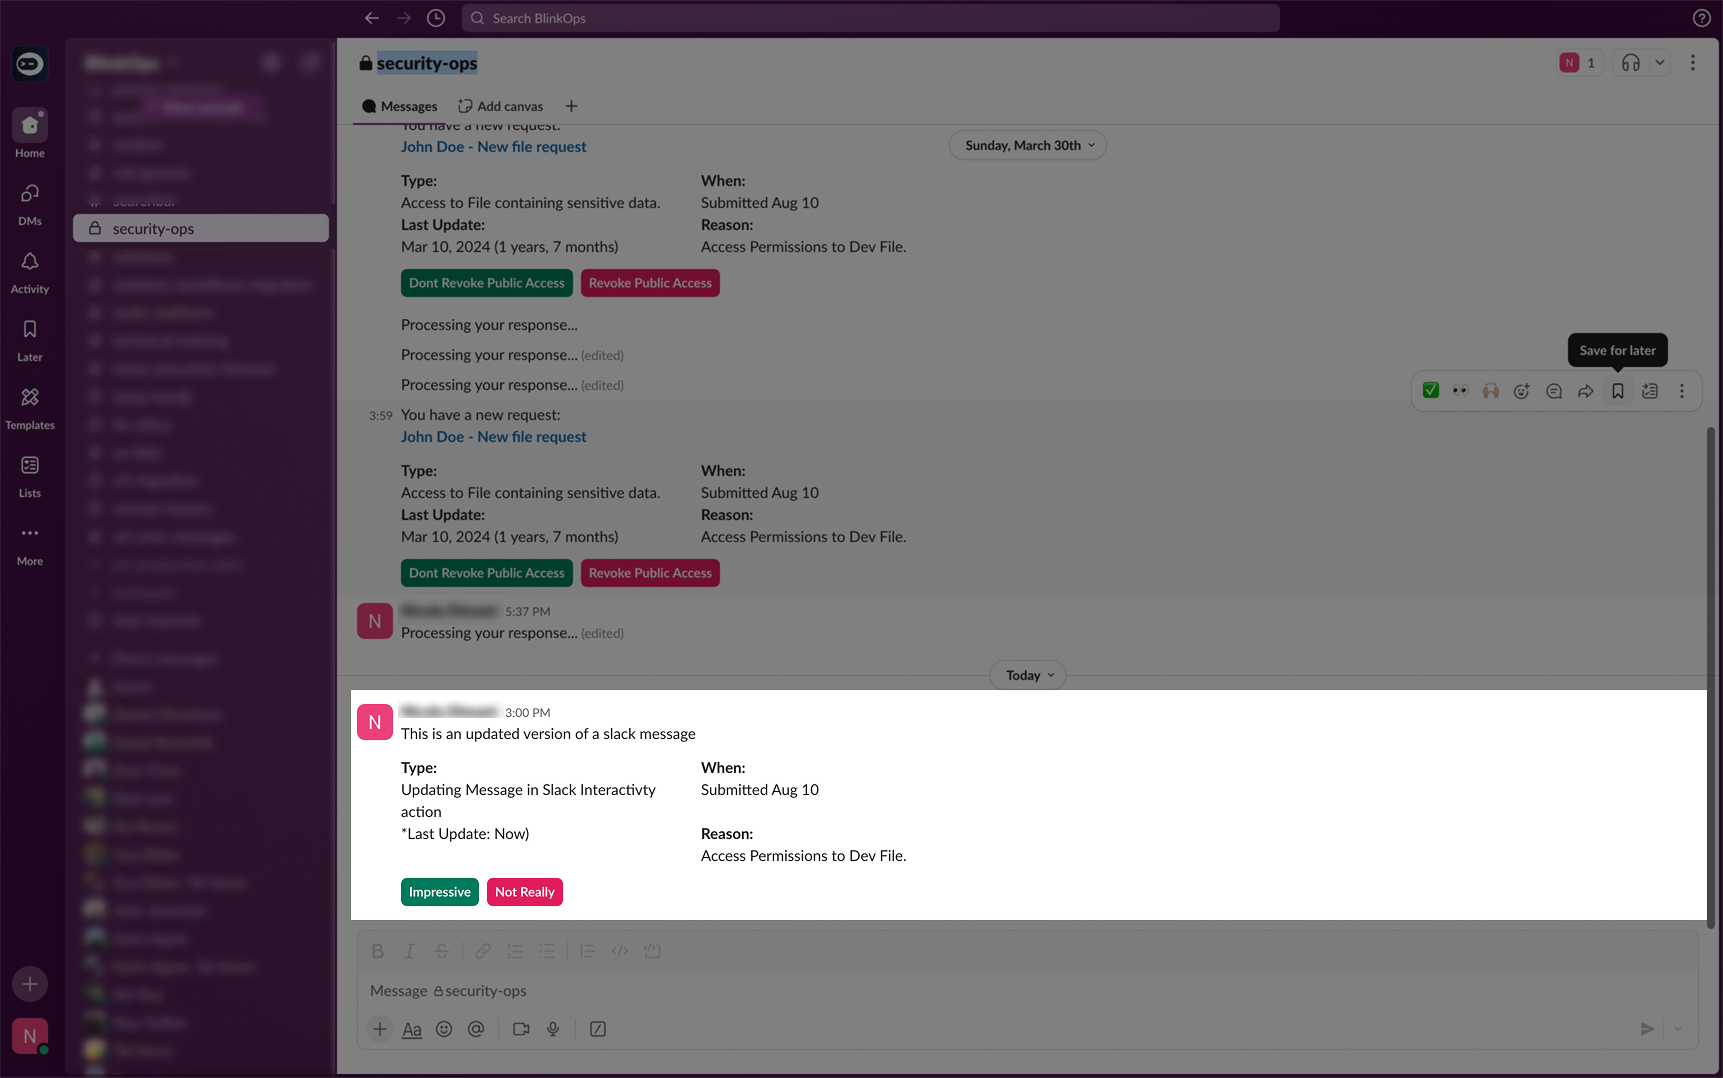
blocks section of your Workflow: