Creating a New Agent
1
Open the Agent Builder
Navigate to the ‘Agents’ page in your workspace, then click the New Agent button located in the top-right corner of the page.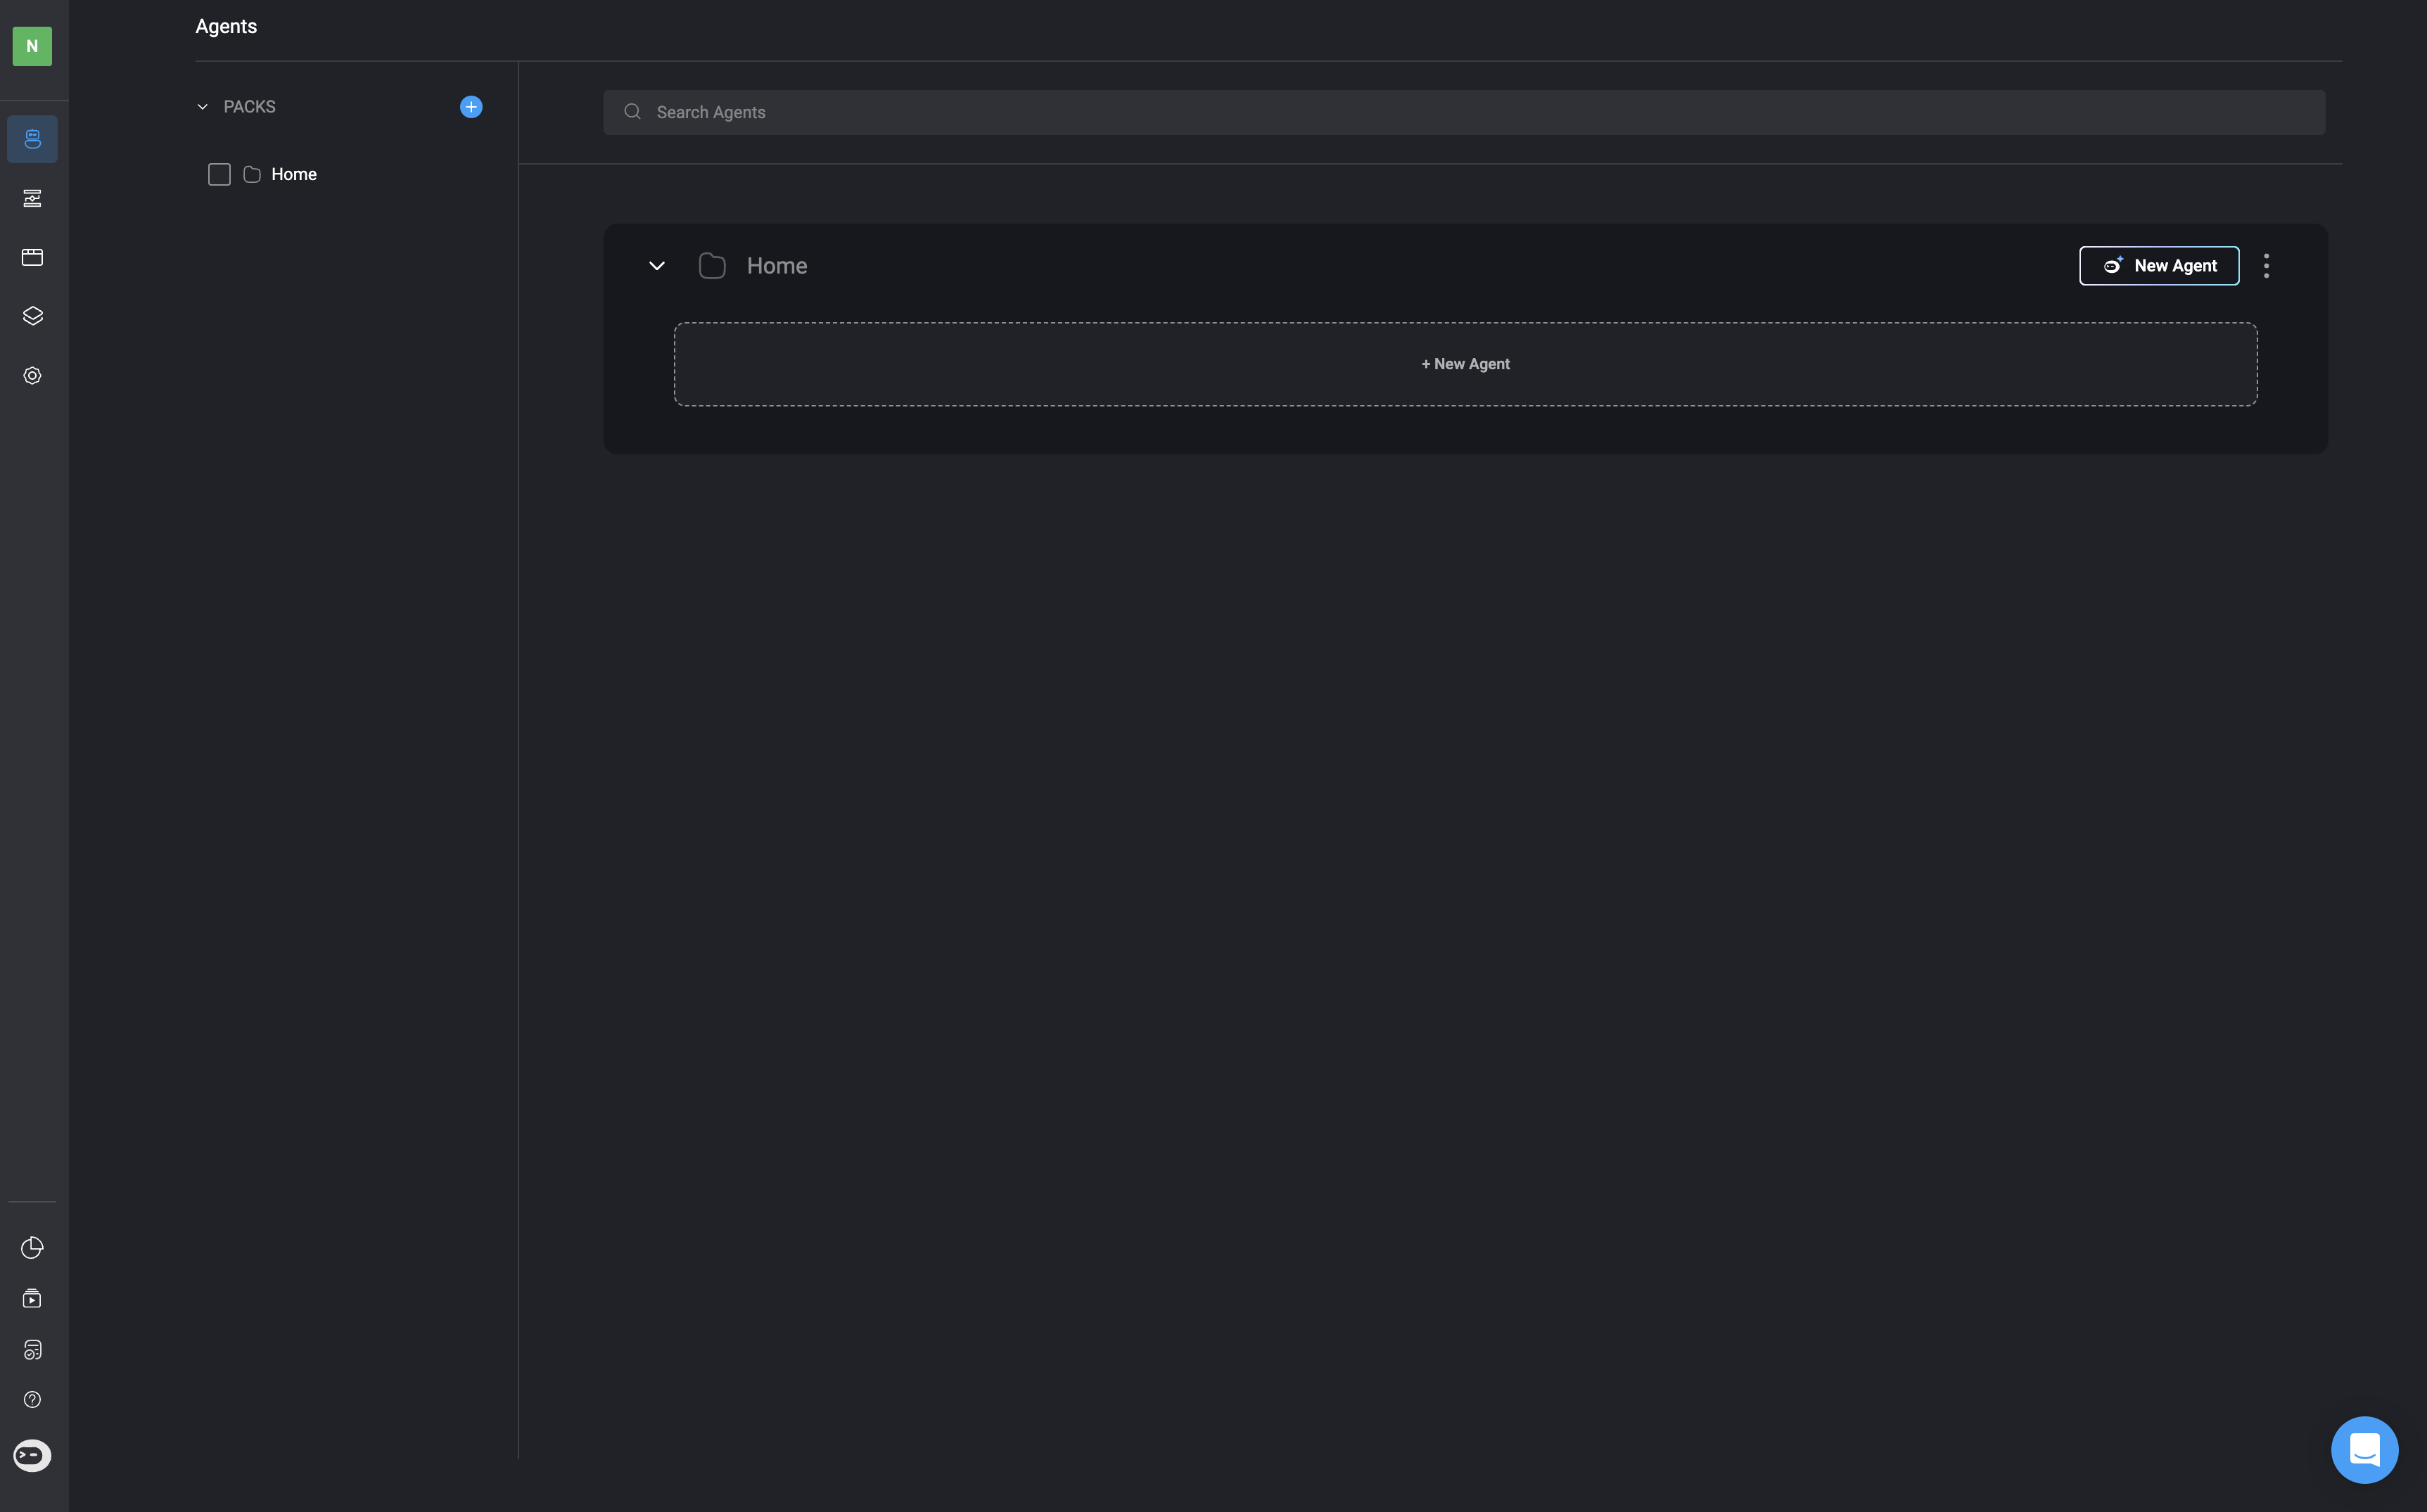
2
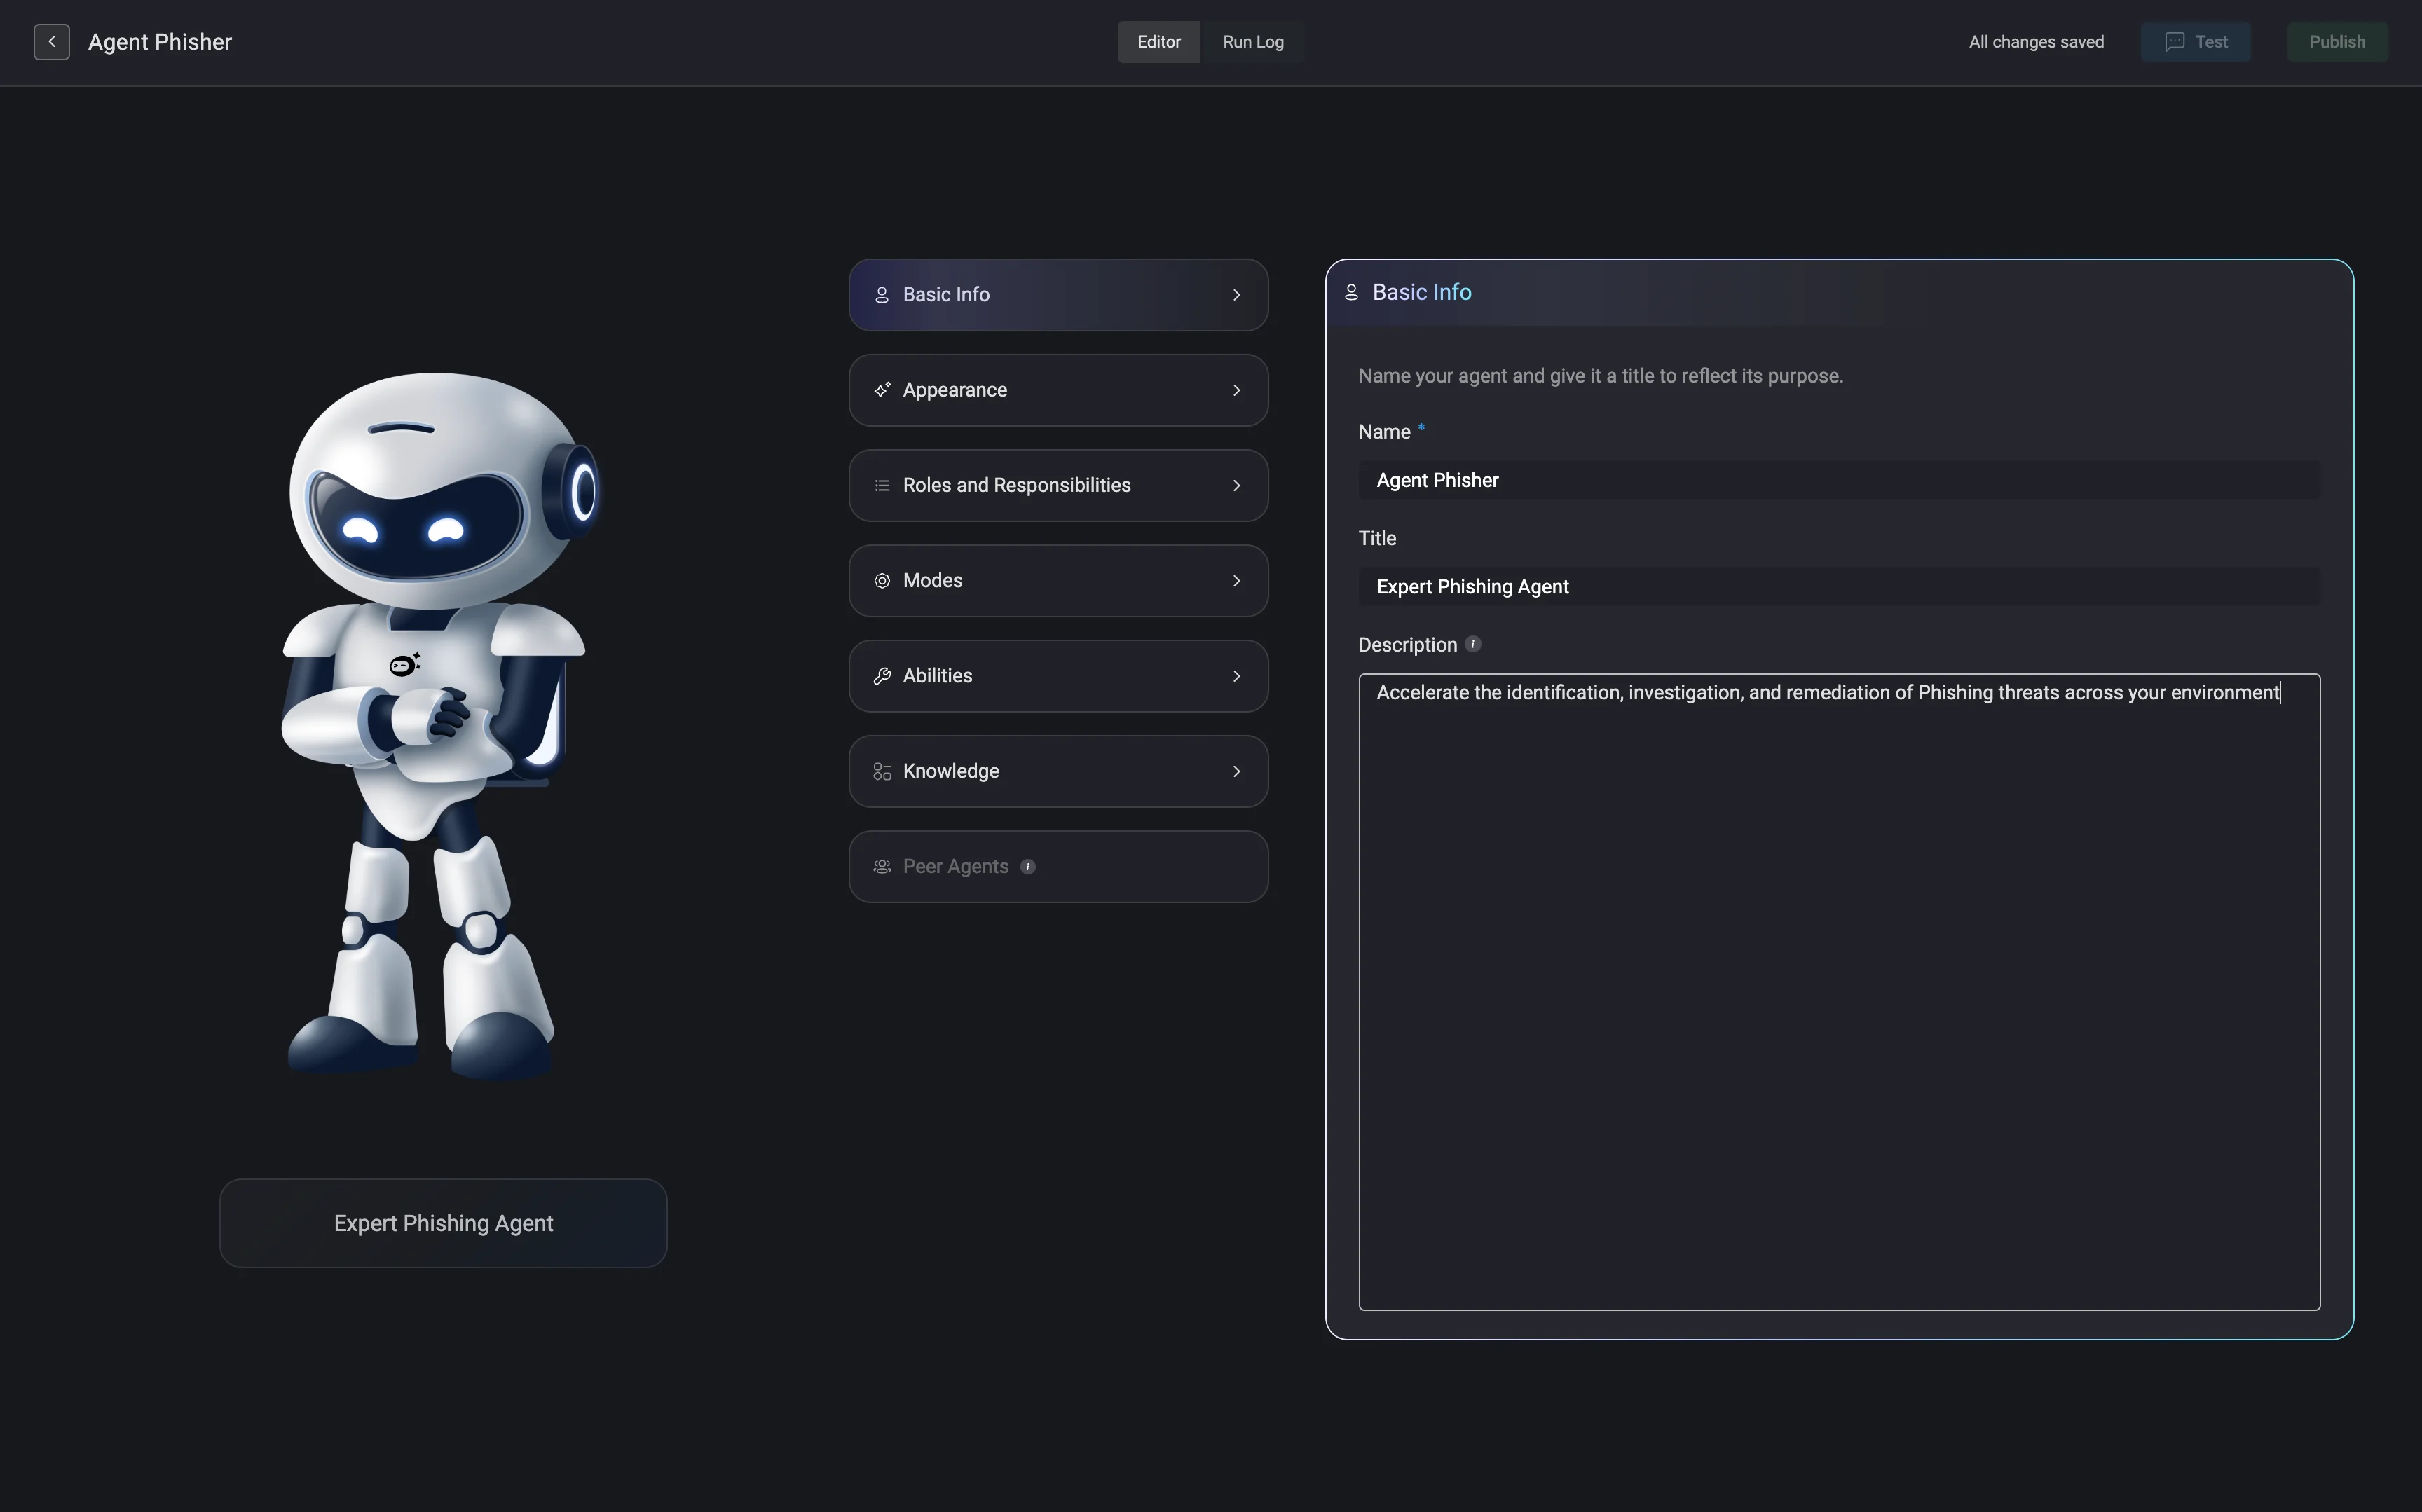
Basic Information
Start by providing a name and title for your agent. You can also include an optional description.
3
Appearance
Customize your Agent’s appearance by choosing a style, color and upload your custom logo.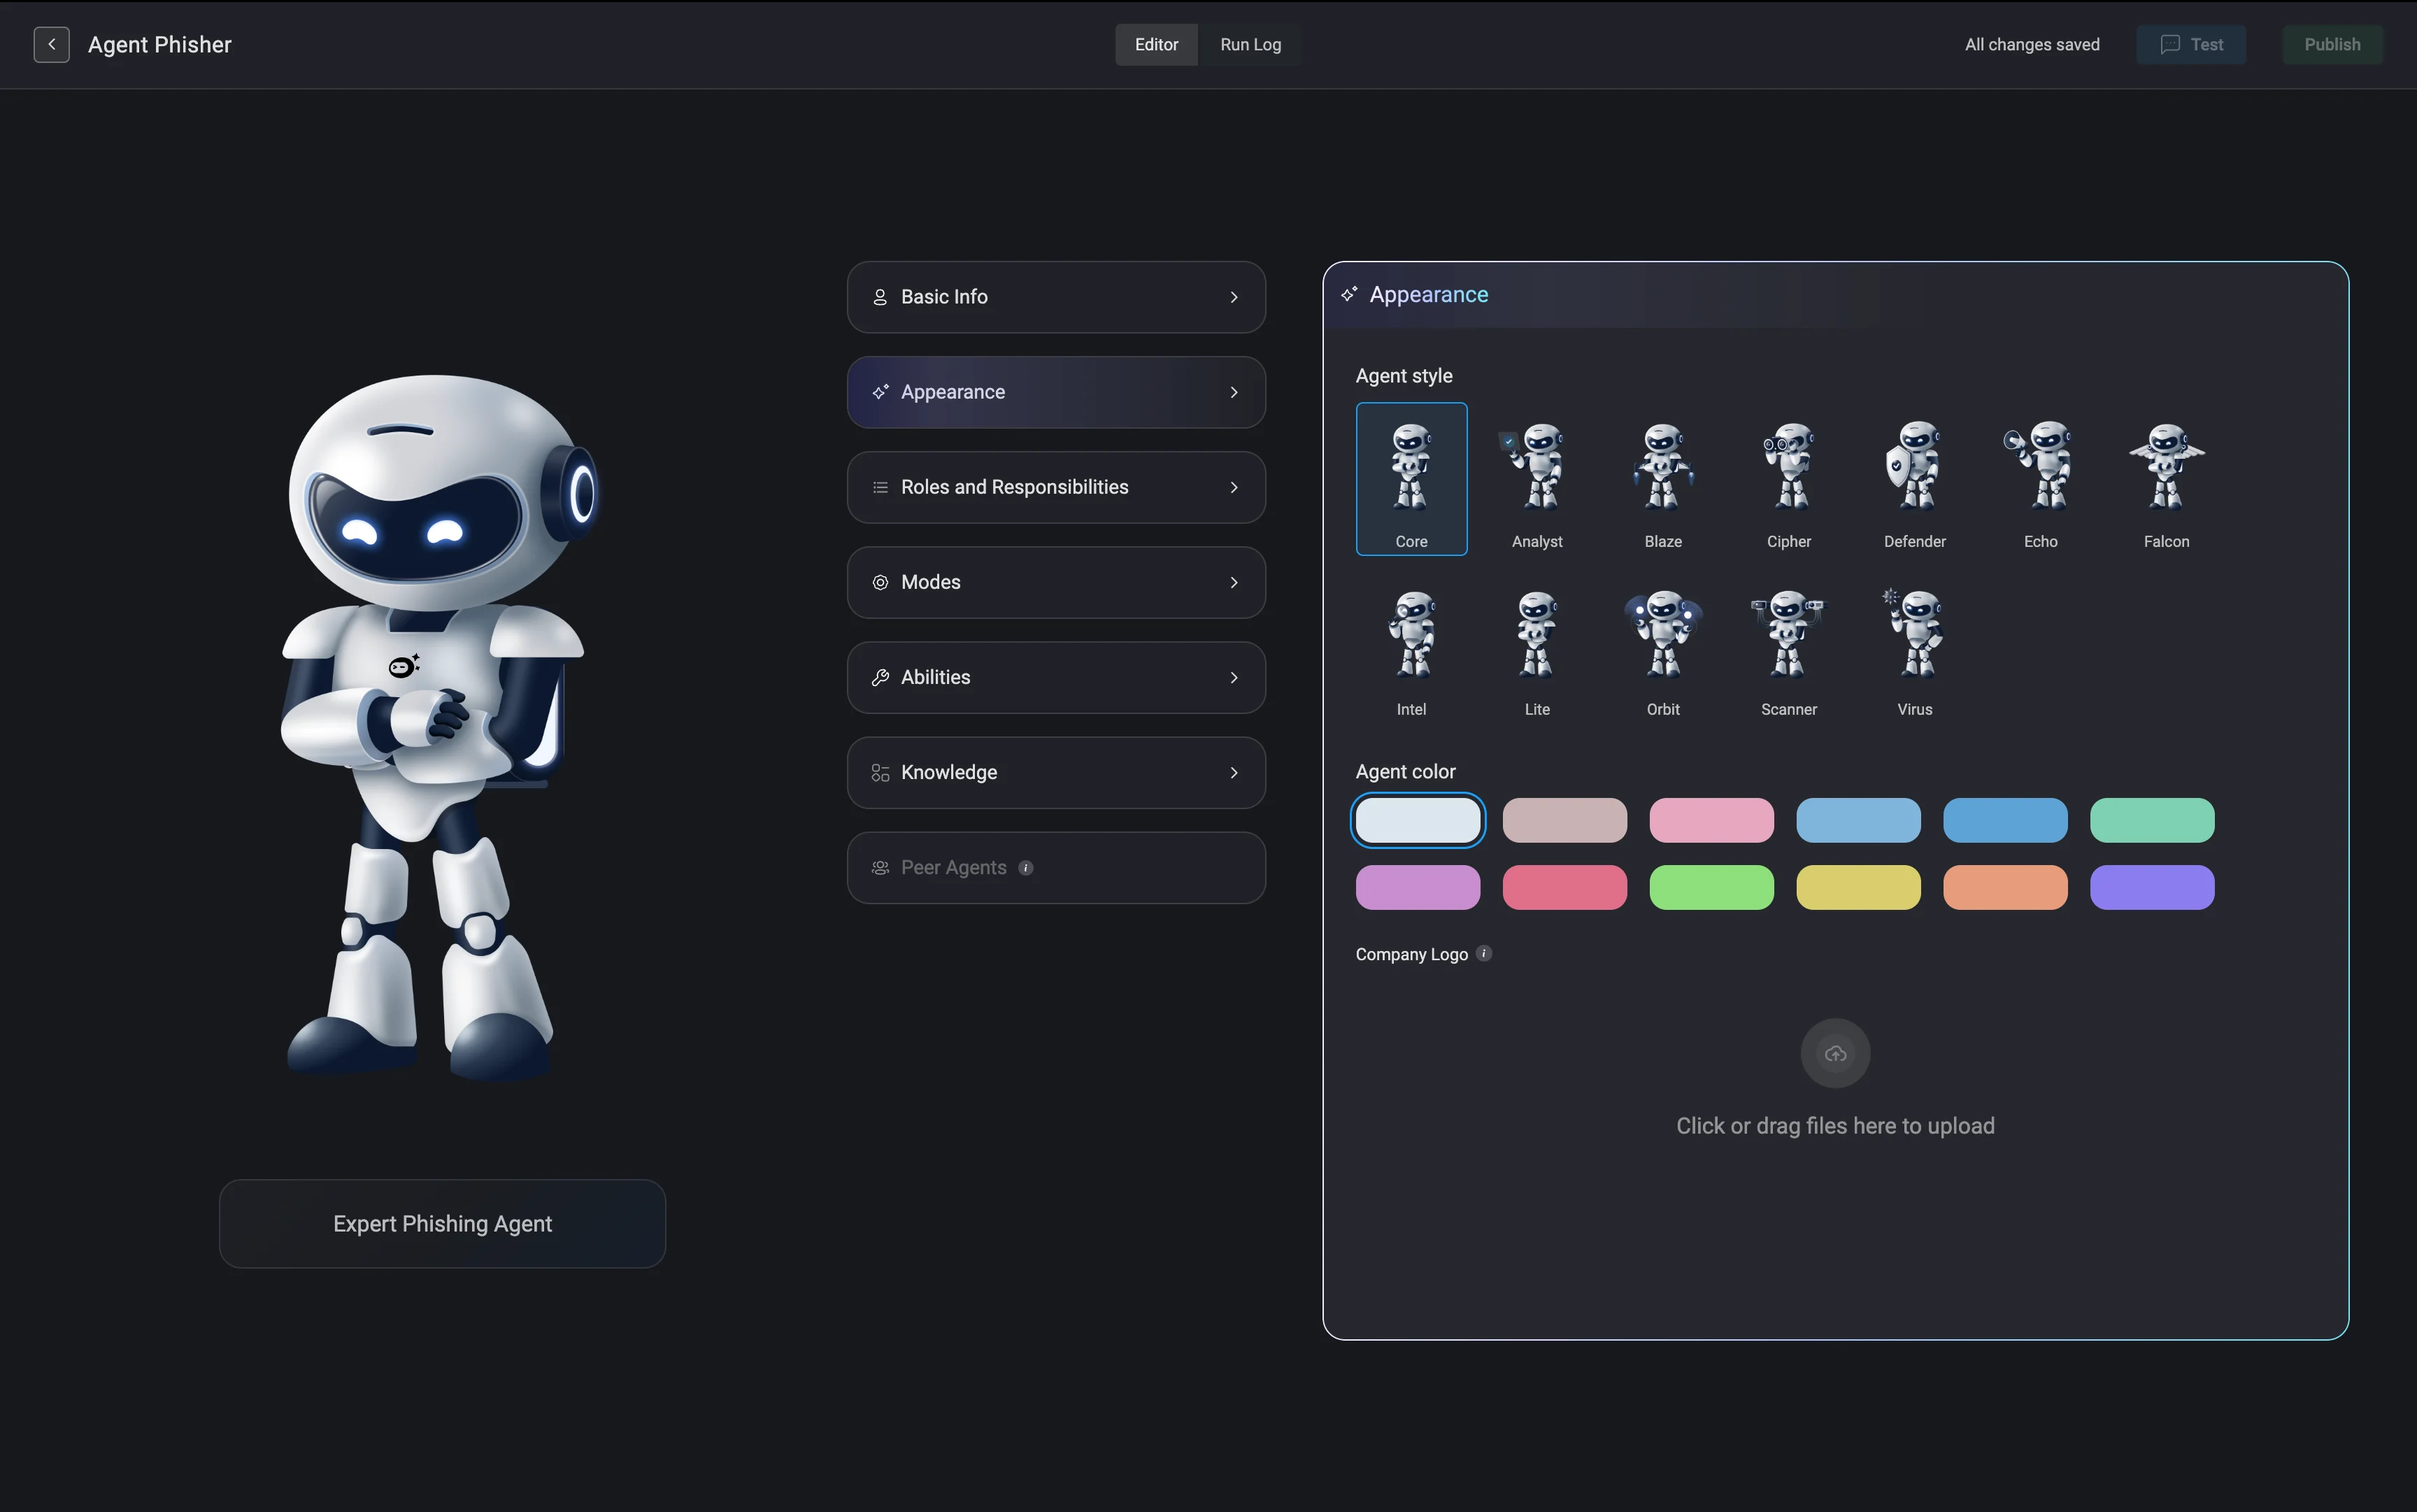
4
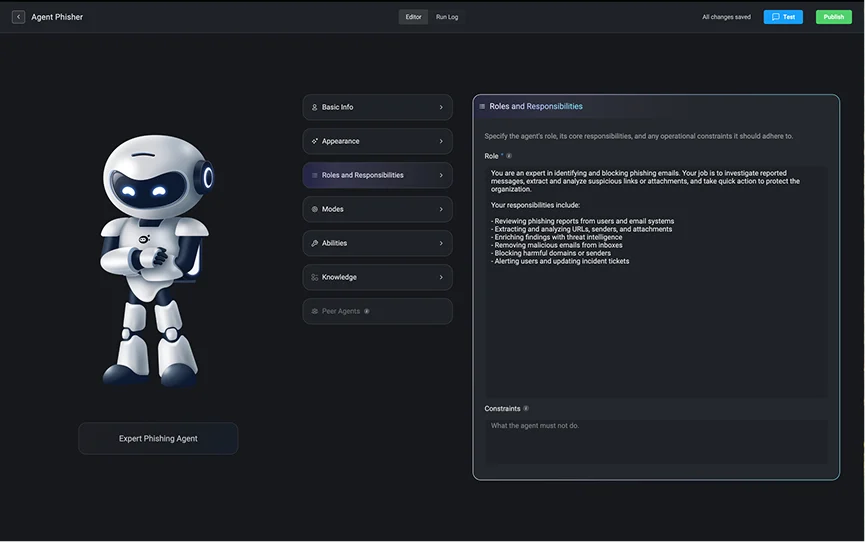
Roles and Responsibilities
Define the agent’s role within your environment, including its primary responsibilities and any operational constraints it should follow. This helps shape how the agent behaves and interacts with your systems.
5
Modes
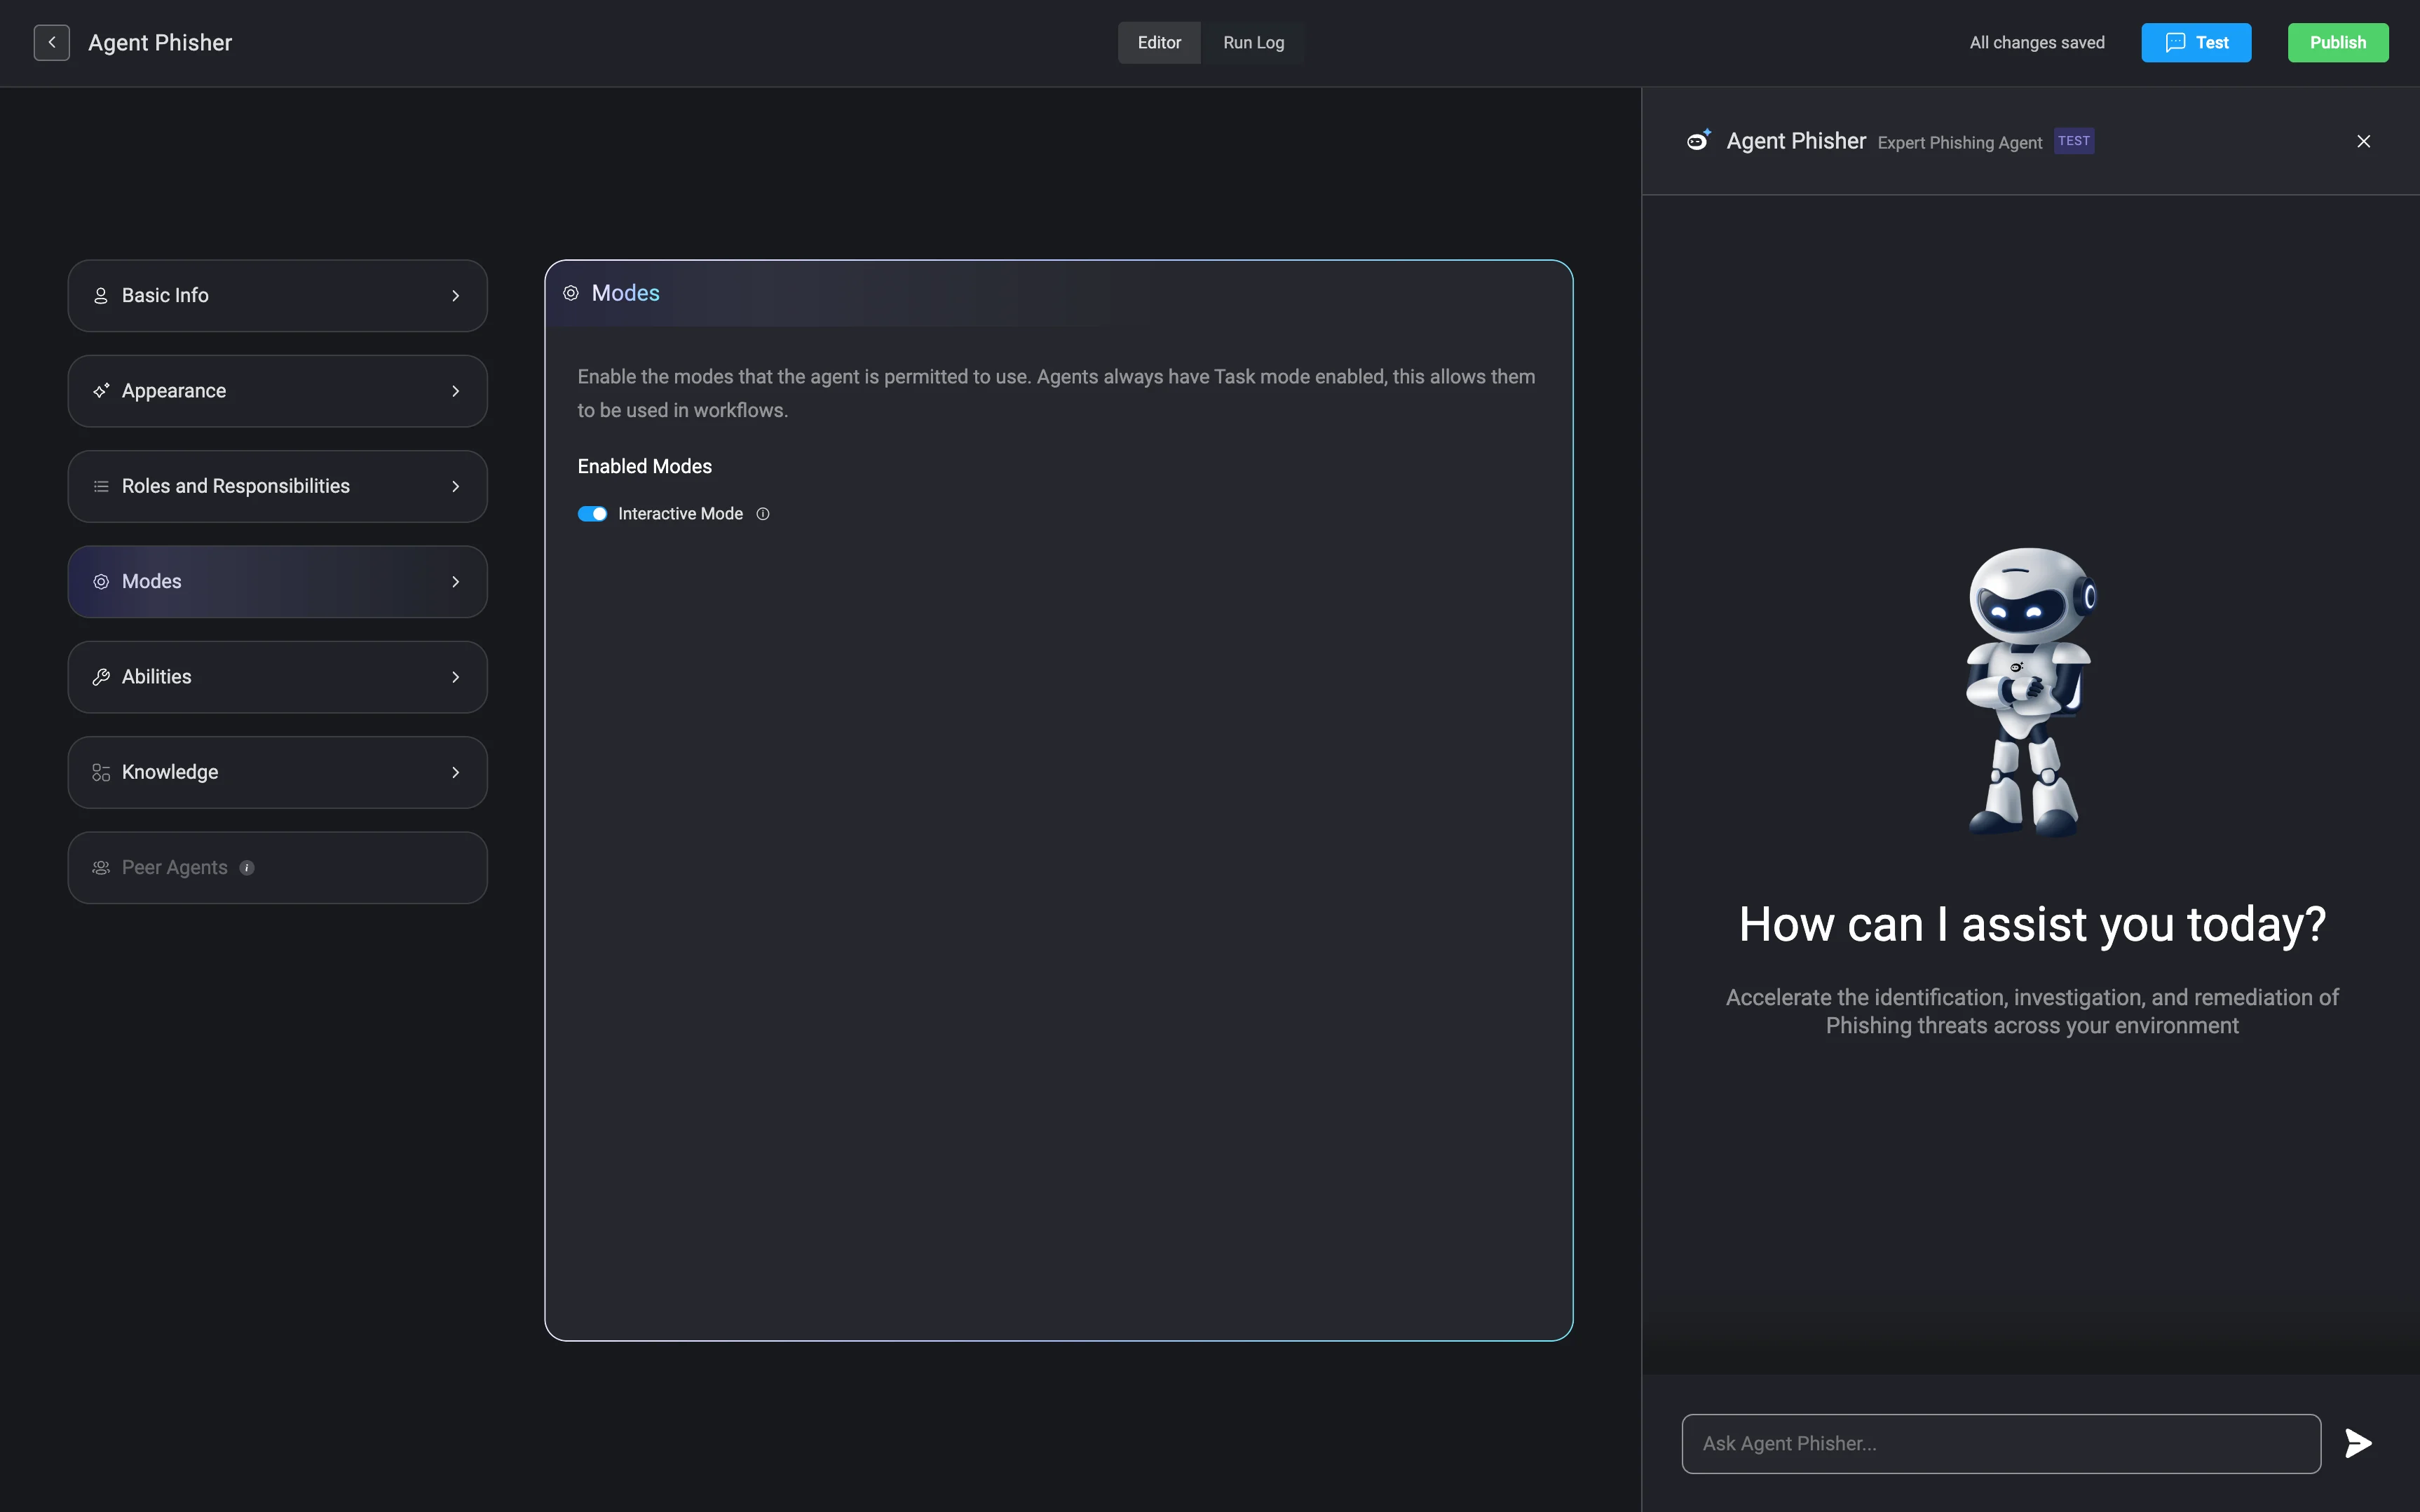
InteractiveBy default, each agent has the ‘Task Mode’ enabled. Optionally, users can enable ‘Interactive Mode’, which allows real-time conversations with the agent.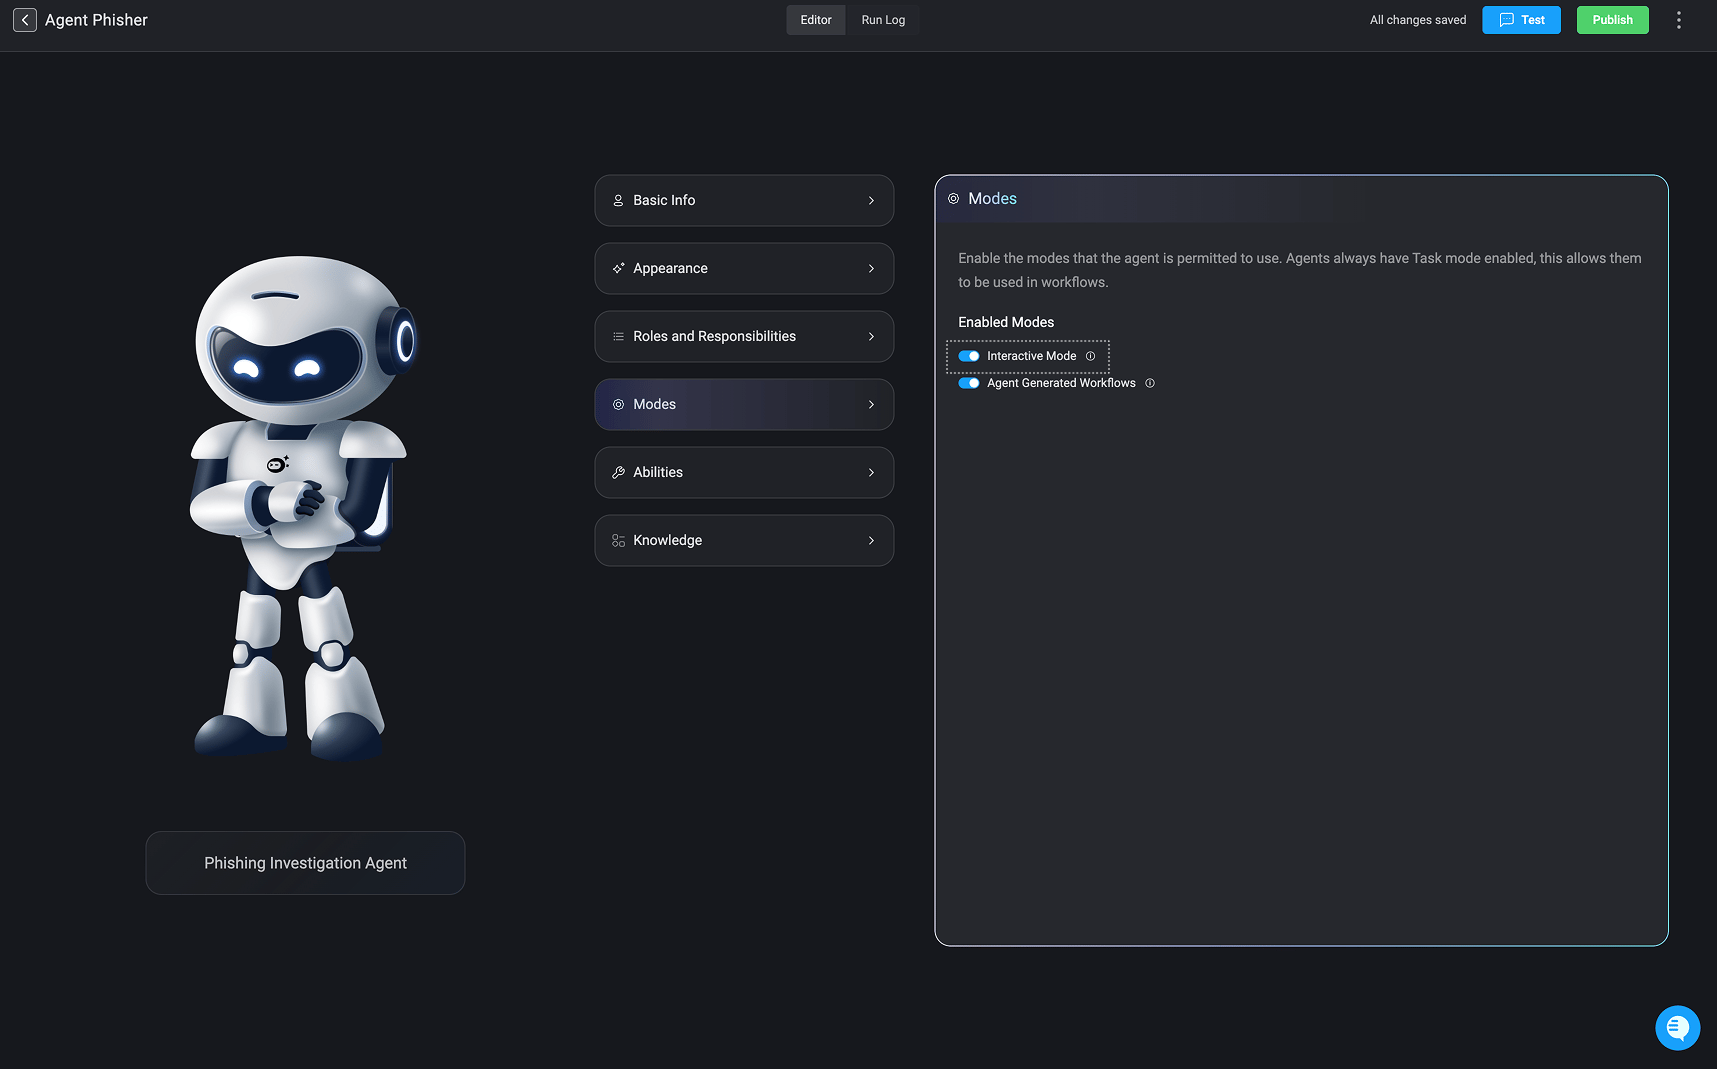
Agent Generated WorkflowAgent-Generated Workflows enable agents to dynamically create and execute Blink workflows at runtime, extending their capabilities beyond their predefined set of abilities.During task execution, the agent continuously evaluates the work required to fulfill a request. For straightforward operations, it invokes its existing abilities directly. When the task requires complex data transformation, iterative processing, custom logic, or handling large datasets, the agent can determine that generating a dedicated workflow is a more efficient execution strategy.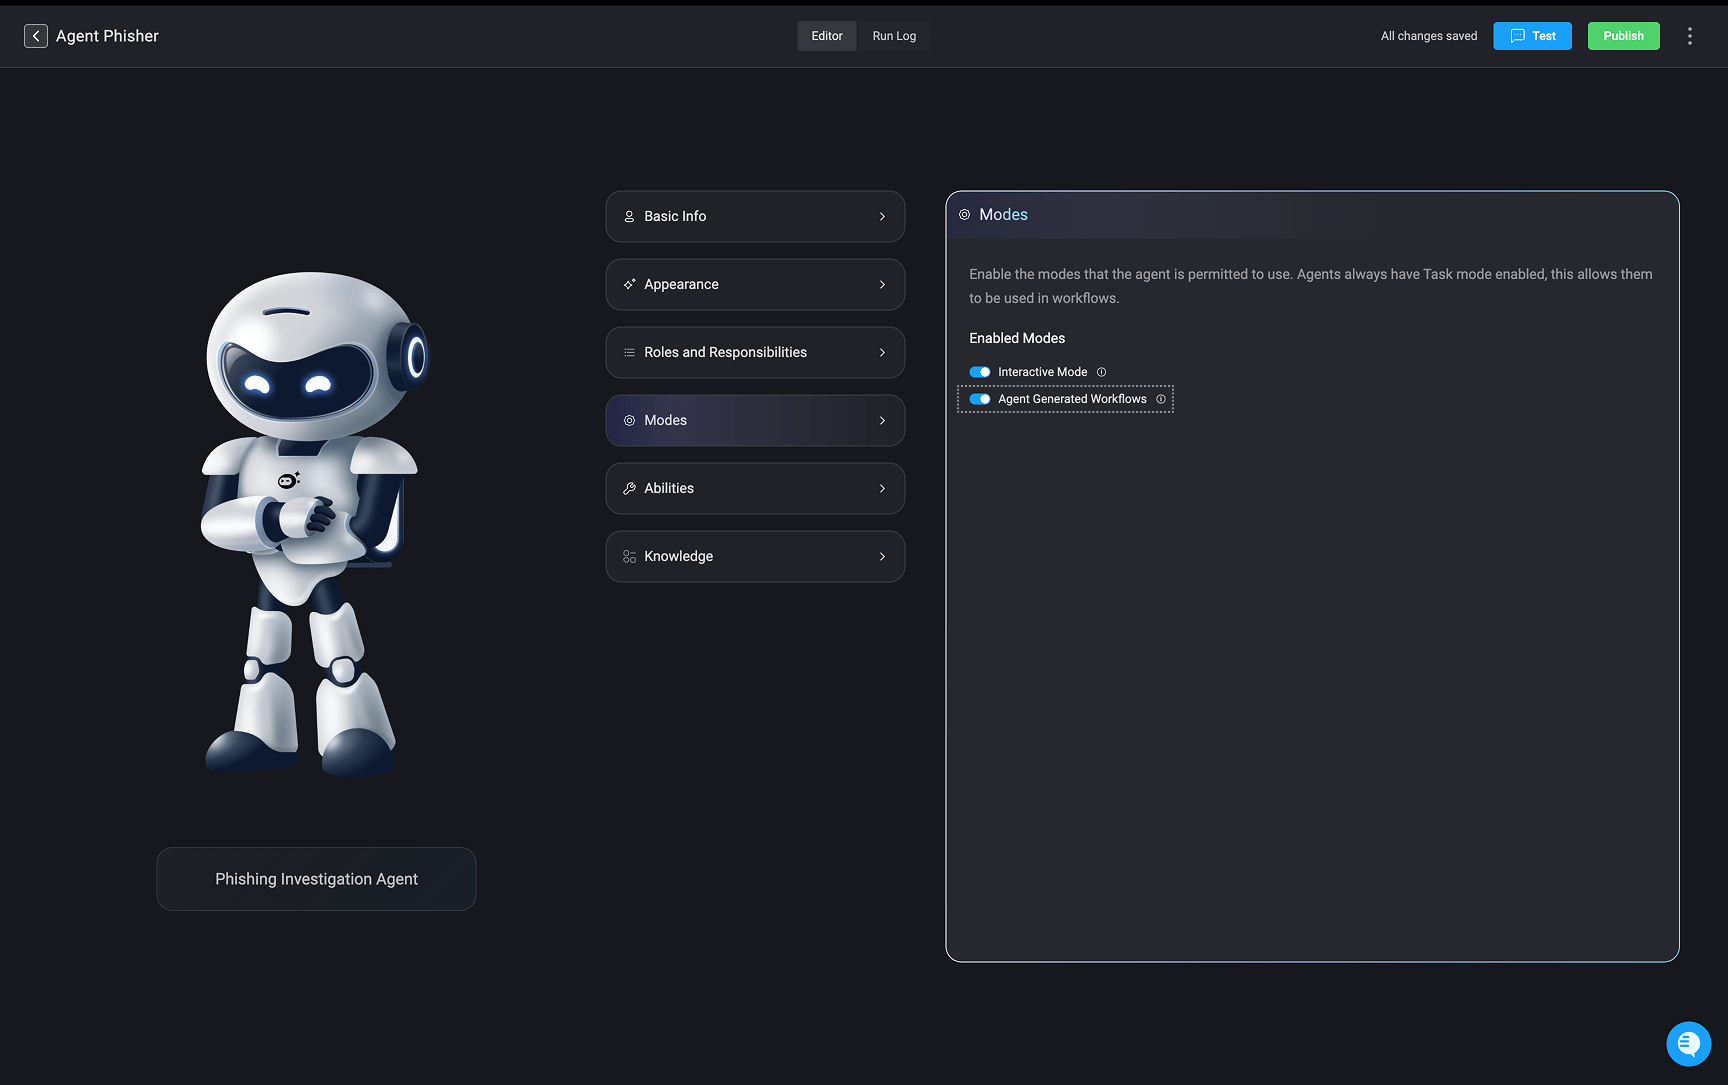
For more information about ‘Task Mode’ visit Step 3 of Using the Agent in Workflows.
- Test – Interact with and test the draft version of the agent while building it, allowing you to validate responses in real time.
- Start – Interact with the agent’s published version through the chat interface.
For more information, visit the Interactive Mode section of the documentation.
Agent Generated WorkflowAgent-Generated Workflows enable agents to dynamically create and execute Blink workflows at runtime, extending their capabilities beyond their predefined set of abilities.During task execution, the agent continuously evaluates the work required to fulfill a request. For straightforward operations, it invokes its existing abilities directly. When the task requires complex data transformation, iterative processing, custom logic, or handling large datasets, the agent can determine that generating a dedicated workflow is a more efficient execution strategy.
Note: For more information, visit the Agent Generated Workflows section of the documentation.
6
Abilities
Search and select which workflows the agent is allowed to access and execute. These workflows control the specific tasks the agent can perform and automate on your behalf. By assigning pre-built, secure workflows, you ensure agents can carry out necessary actions without needing direct access to your systems or credentials.
- Workflows can also include optional “human in the loop” approval steps, allowing sensitive actions to be reviewed before they are executed.
- Interactive Agents support parallel ability execution, enabling multiple abilities to run concurrently. This reduces overall task completion time and can lower token consumption by minimizing the number of agent reasoning iterations.
- The agent automatically determines which abilities can execute in parallel based on their defined dependencies, inputs, and outputs. Parallel execution behavior can also be explicitly controlled through agent instructions to enforce concurrent execution for specific abilities. Agent reasoning proceeds only after all required parallel ability executions have completed.
- For Interactive Agents, ability execution may include a combination of automatically executed abilities and abilities requiring user approval. If a user submits a new message instead of approving a pending action, only the pending abilities are marked as stale. Previously completed abilities and their execution results remain preserved and available to the agent.
- Active
- Library
In the Active tab, you’ll find all ability workflows that are currently assigned to the agent.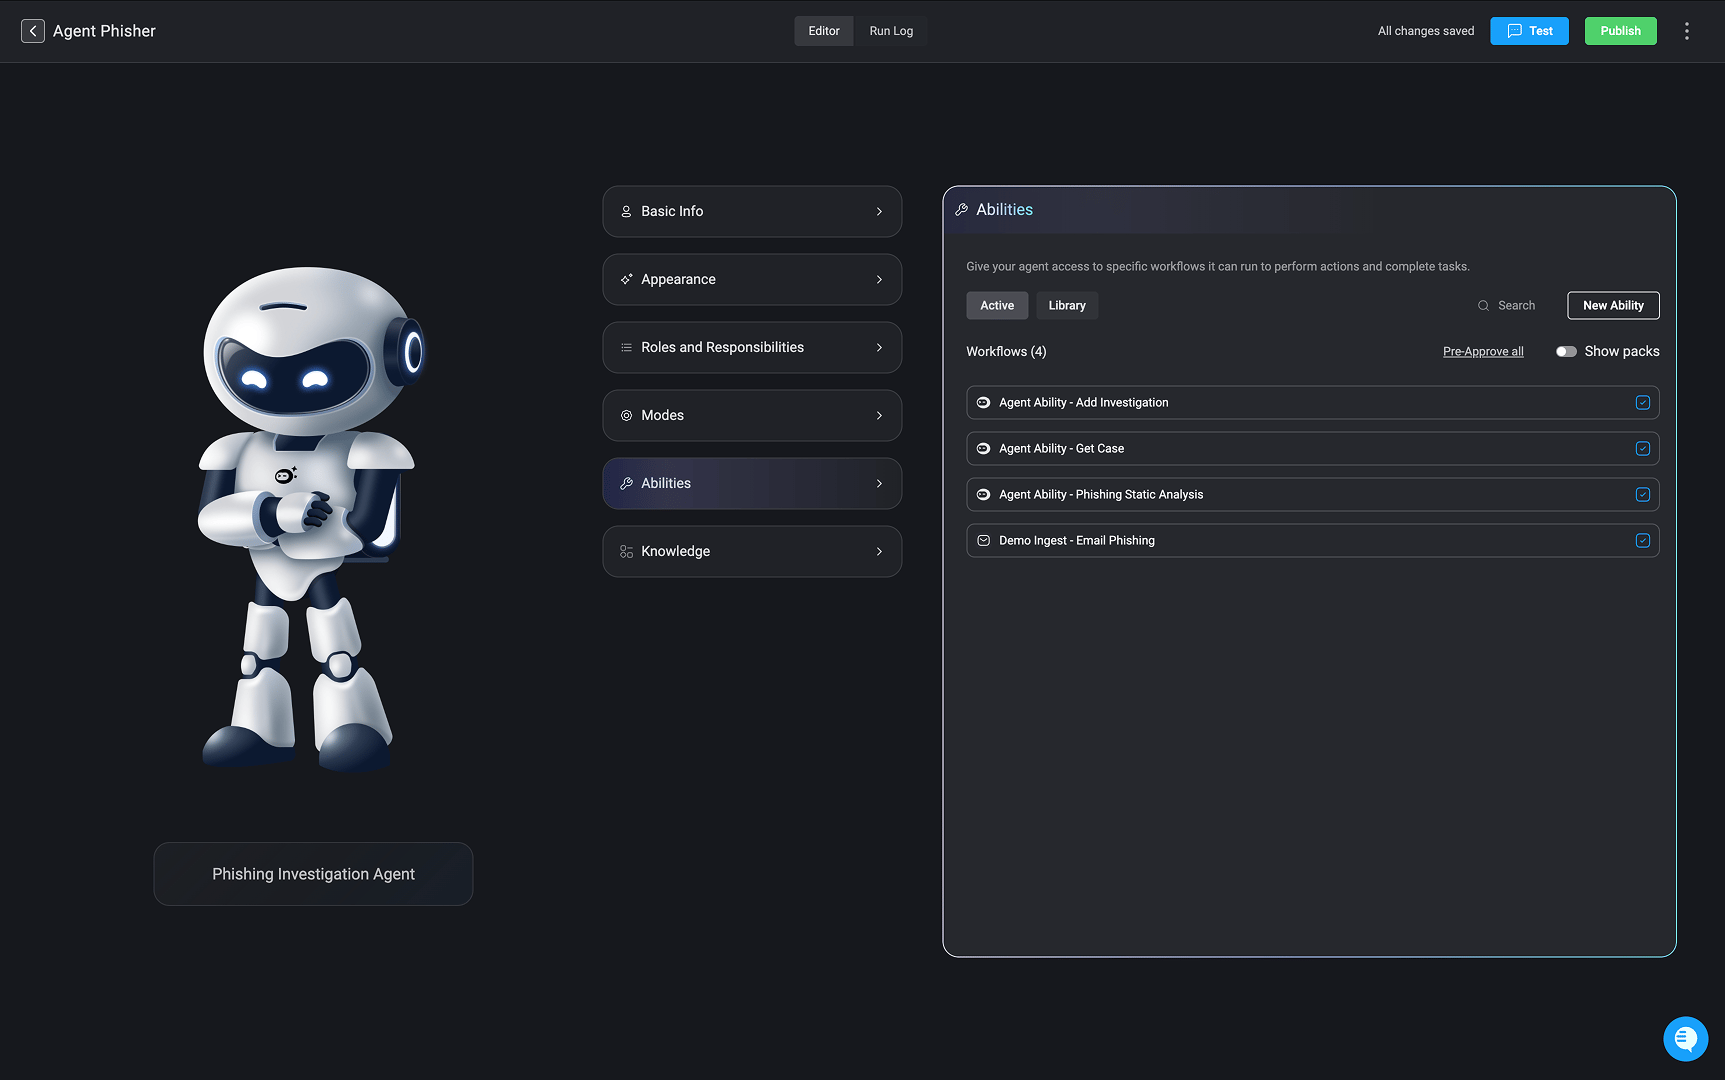
- Show Packs: Enable the Show Packs option to display the pack associated with each ability workflow, making it easier to identify where each workflow belongs.
- New Ability: Create a new ability workflow by clicking New Ability, entering a name, and selecting the pack where the workflow will be created.
- Pre-approval: Mark all active ability workflows as pre-approved in a single action. A confirmation prompt is displayed before the change is applied to help prevent accidental updates.
- A icon will appear next to all pre-approved ability workflows.
Note:The Pre-approval setting is only available when interactive mode is enabled.
- A icon will appear next to all pre-approved ability workflows.
- Search and Filter: Quickly find a specific ability workflow by searching for its name.

4.1
Access the Active Ability Workflow's Settings
Hover over an active ability workflow and:
- Click the icon to open the selected ability workflow in the editor.
- Click the icon to remove it from the list of active ability workflows.
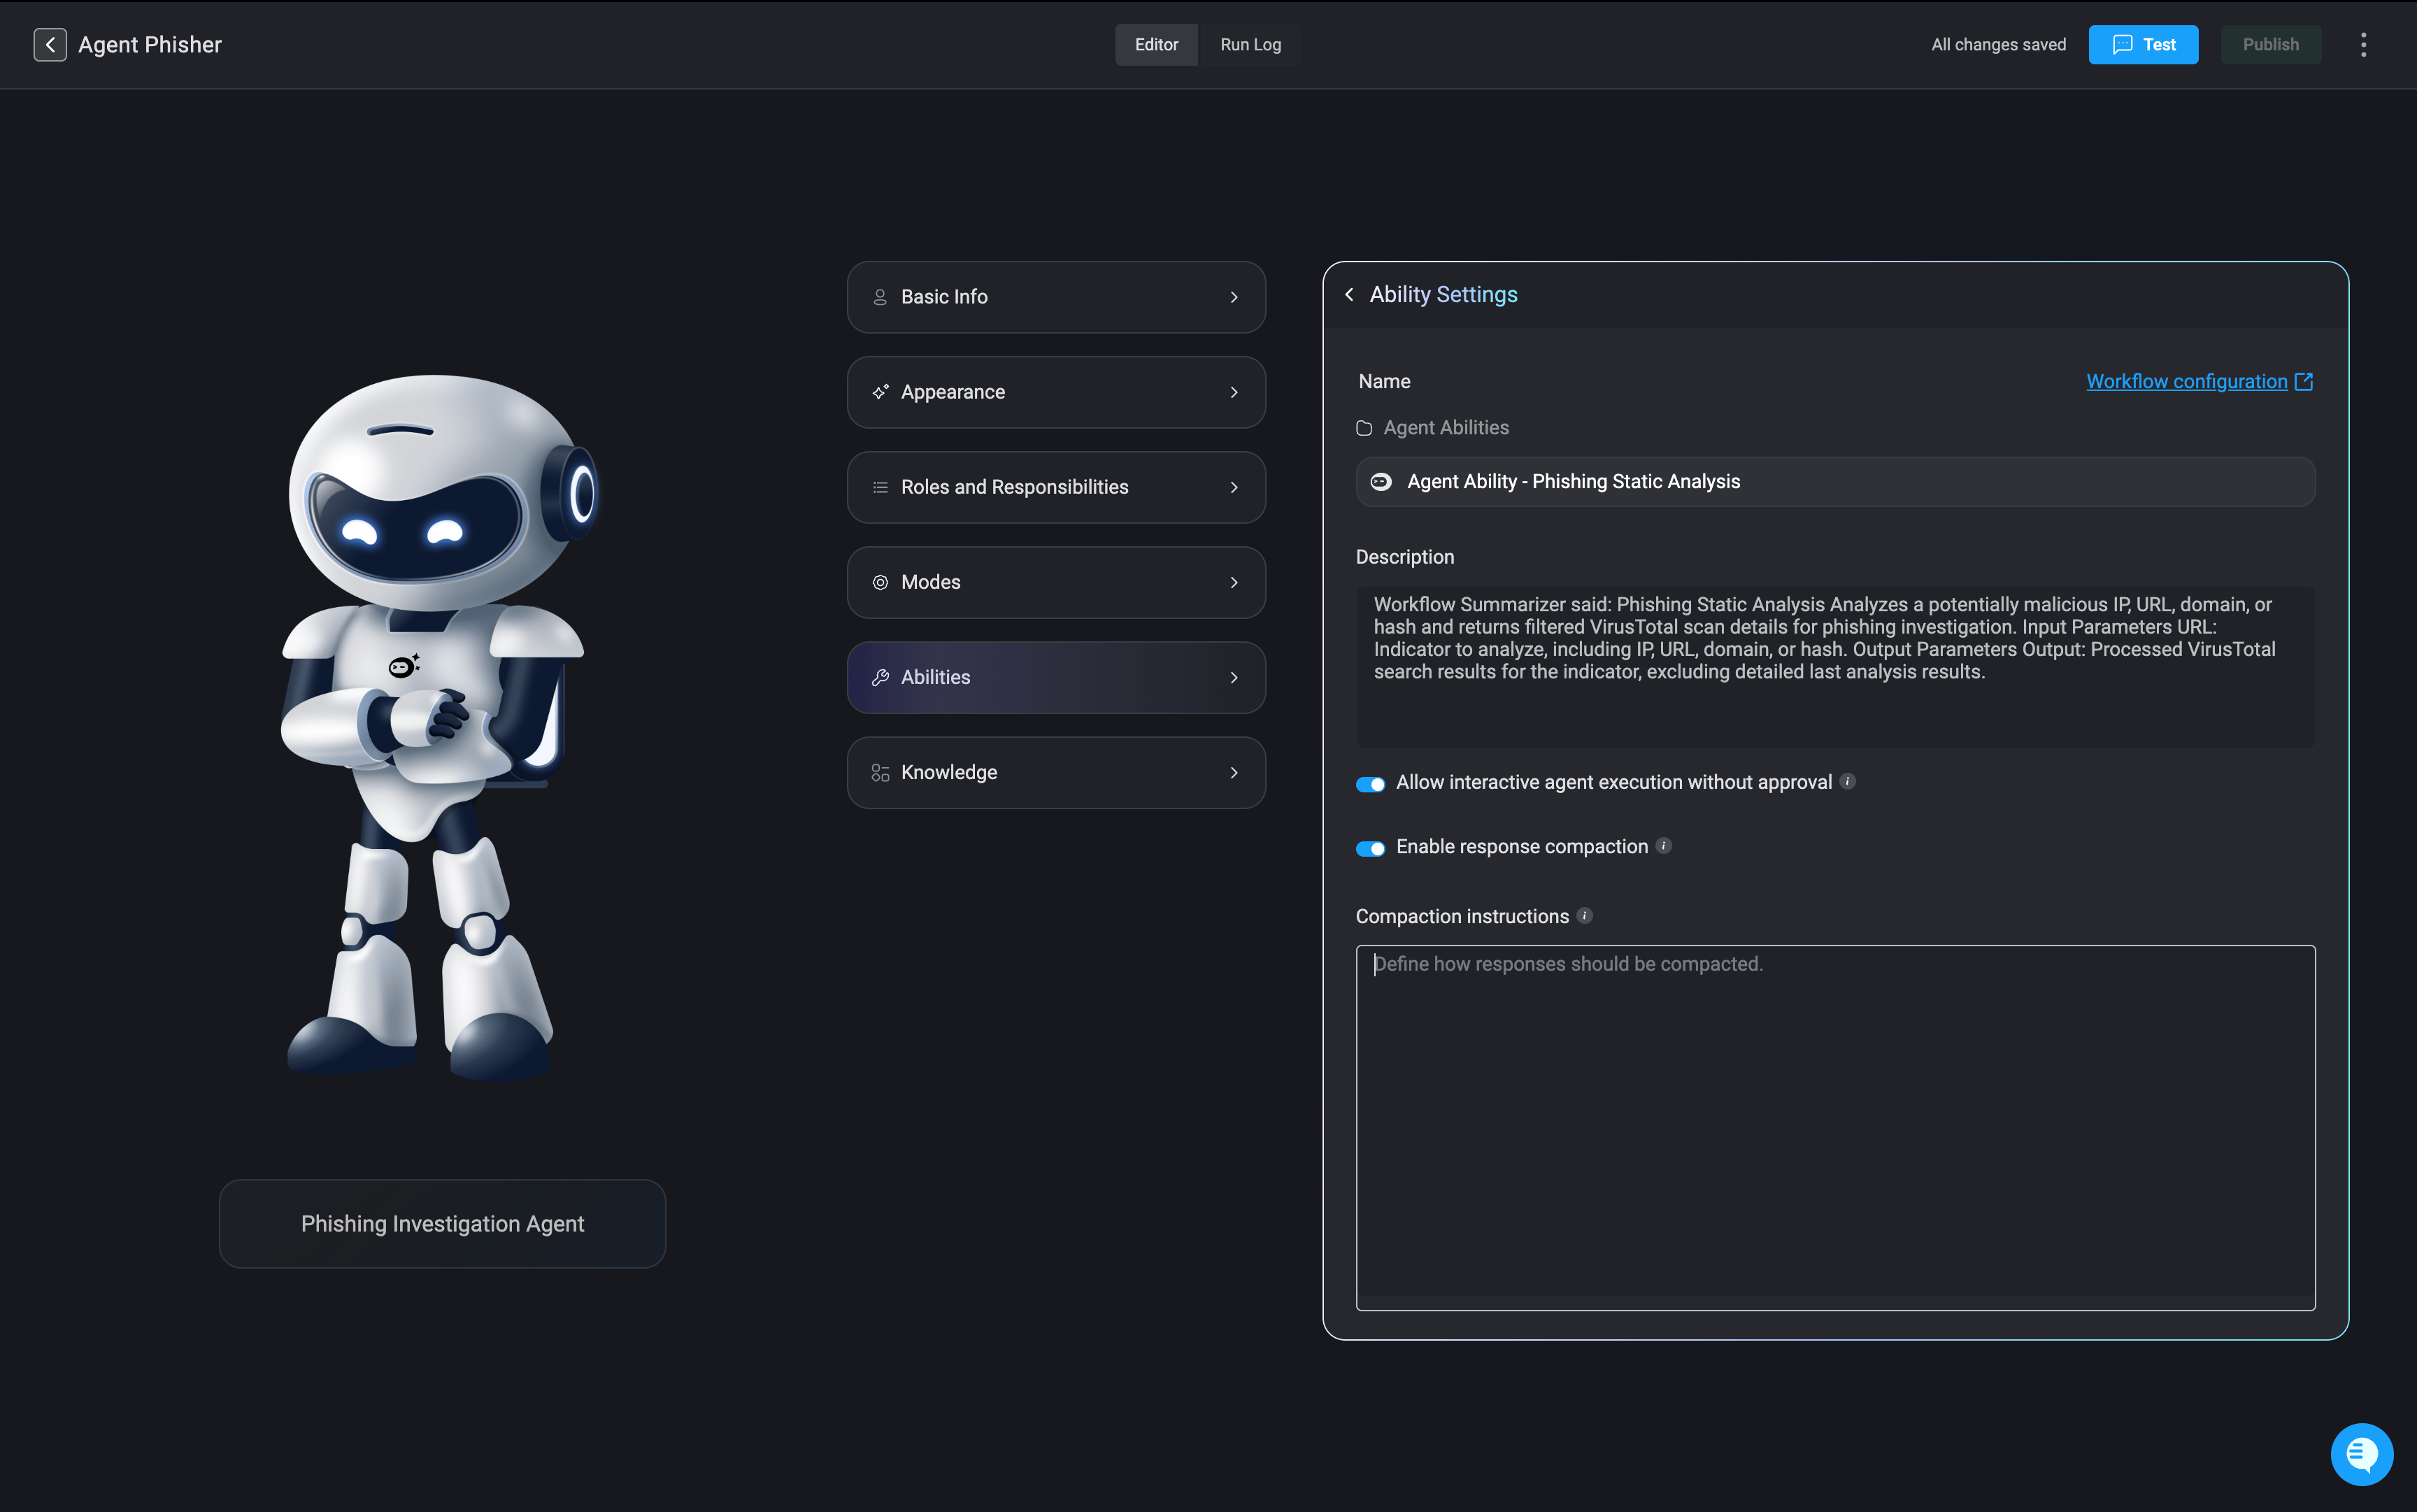
- Select an active ability workflow, then click the icon to open its settings. Here, you’ll find key information about the selected ability workflow, including:
- Name – The name of the ability workflow
- Pack – The name of the pack it belongs to.
- Description – A description of the ability workflow’s purpose.
- Allow interactive agent execution without approval- When enabled, This ability will run without asking for confirmation. Applies only to agents that have ‘Interactive Mode’ enabled.
- Enable response compaction – A toggle that, when enabled, simplifies lengthy or detailed results from this ability, allowing the agent to focus on the most important information. Enable this if the workflow often returns large amounts of data.
-
Compaction Instructions- Optional notes to help the agent decide what’s important in this ability’s results. It is recommended to provide such instructions, but you can leave this empty if you are not sure.
7
Knowledge
Upload documents for the agent to reference. These materials help the agent better understand your environment, respond more accurately, and make context-aware decisions. See all supported document formats by visiting this section.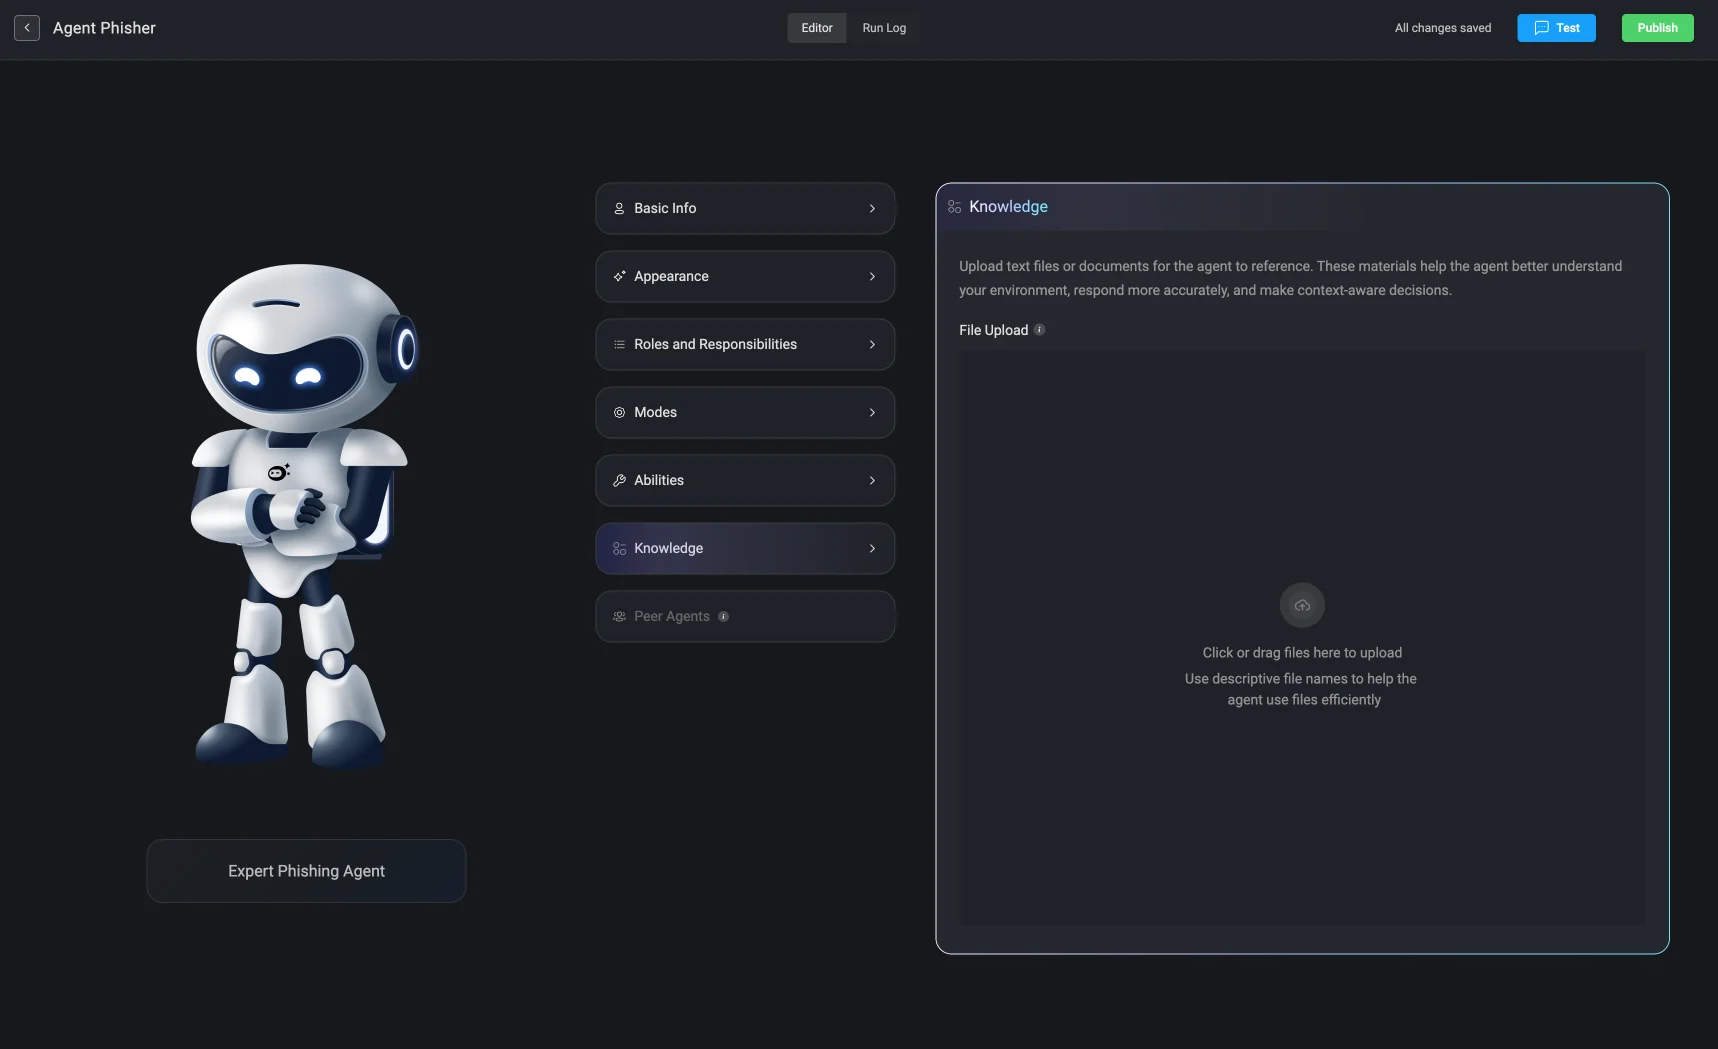
Note: All files are securely uploaded to Amazon database. If a file is removed from the knowledge base or the agent is deleted, all associated data is permanently deleted.
Note: Knowledge sources are not currently supported when using Amazon Bedrock as the AI provider. Knowledge functionality is available only when using Blink as the AI provider.
8
Publish your Agent
Once all required sections are completed, click the ‘Publish’ button in the top-right corner to deploy your agent. A confirmation popup will indicate that your agent was successfully published and is now active within your workspace.
Using the Agent in Workflows
Once your agent has been created, you can add it to automated workflows to perform specific tasks, respond to triggers, and interact with other systems. This section explains how to integrate your custom agent into a workflow using Blink’s visual workflow editor. Each step outlined below ensures that your agent is properly configured to operate within the defined workflow and fulfill its assigned responsibilities.1
Navigate to Workflow Page
Navigate to the Workflows tab in your workspace, then either create a new workflow or open an existing workflow where you want to use the agent.
2
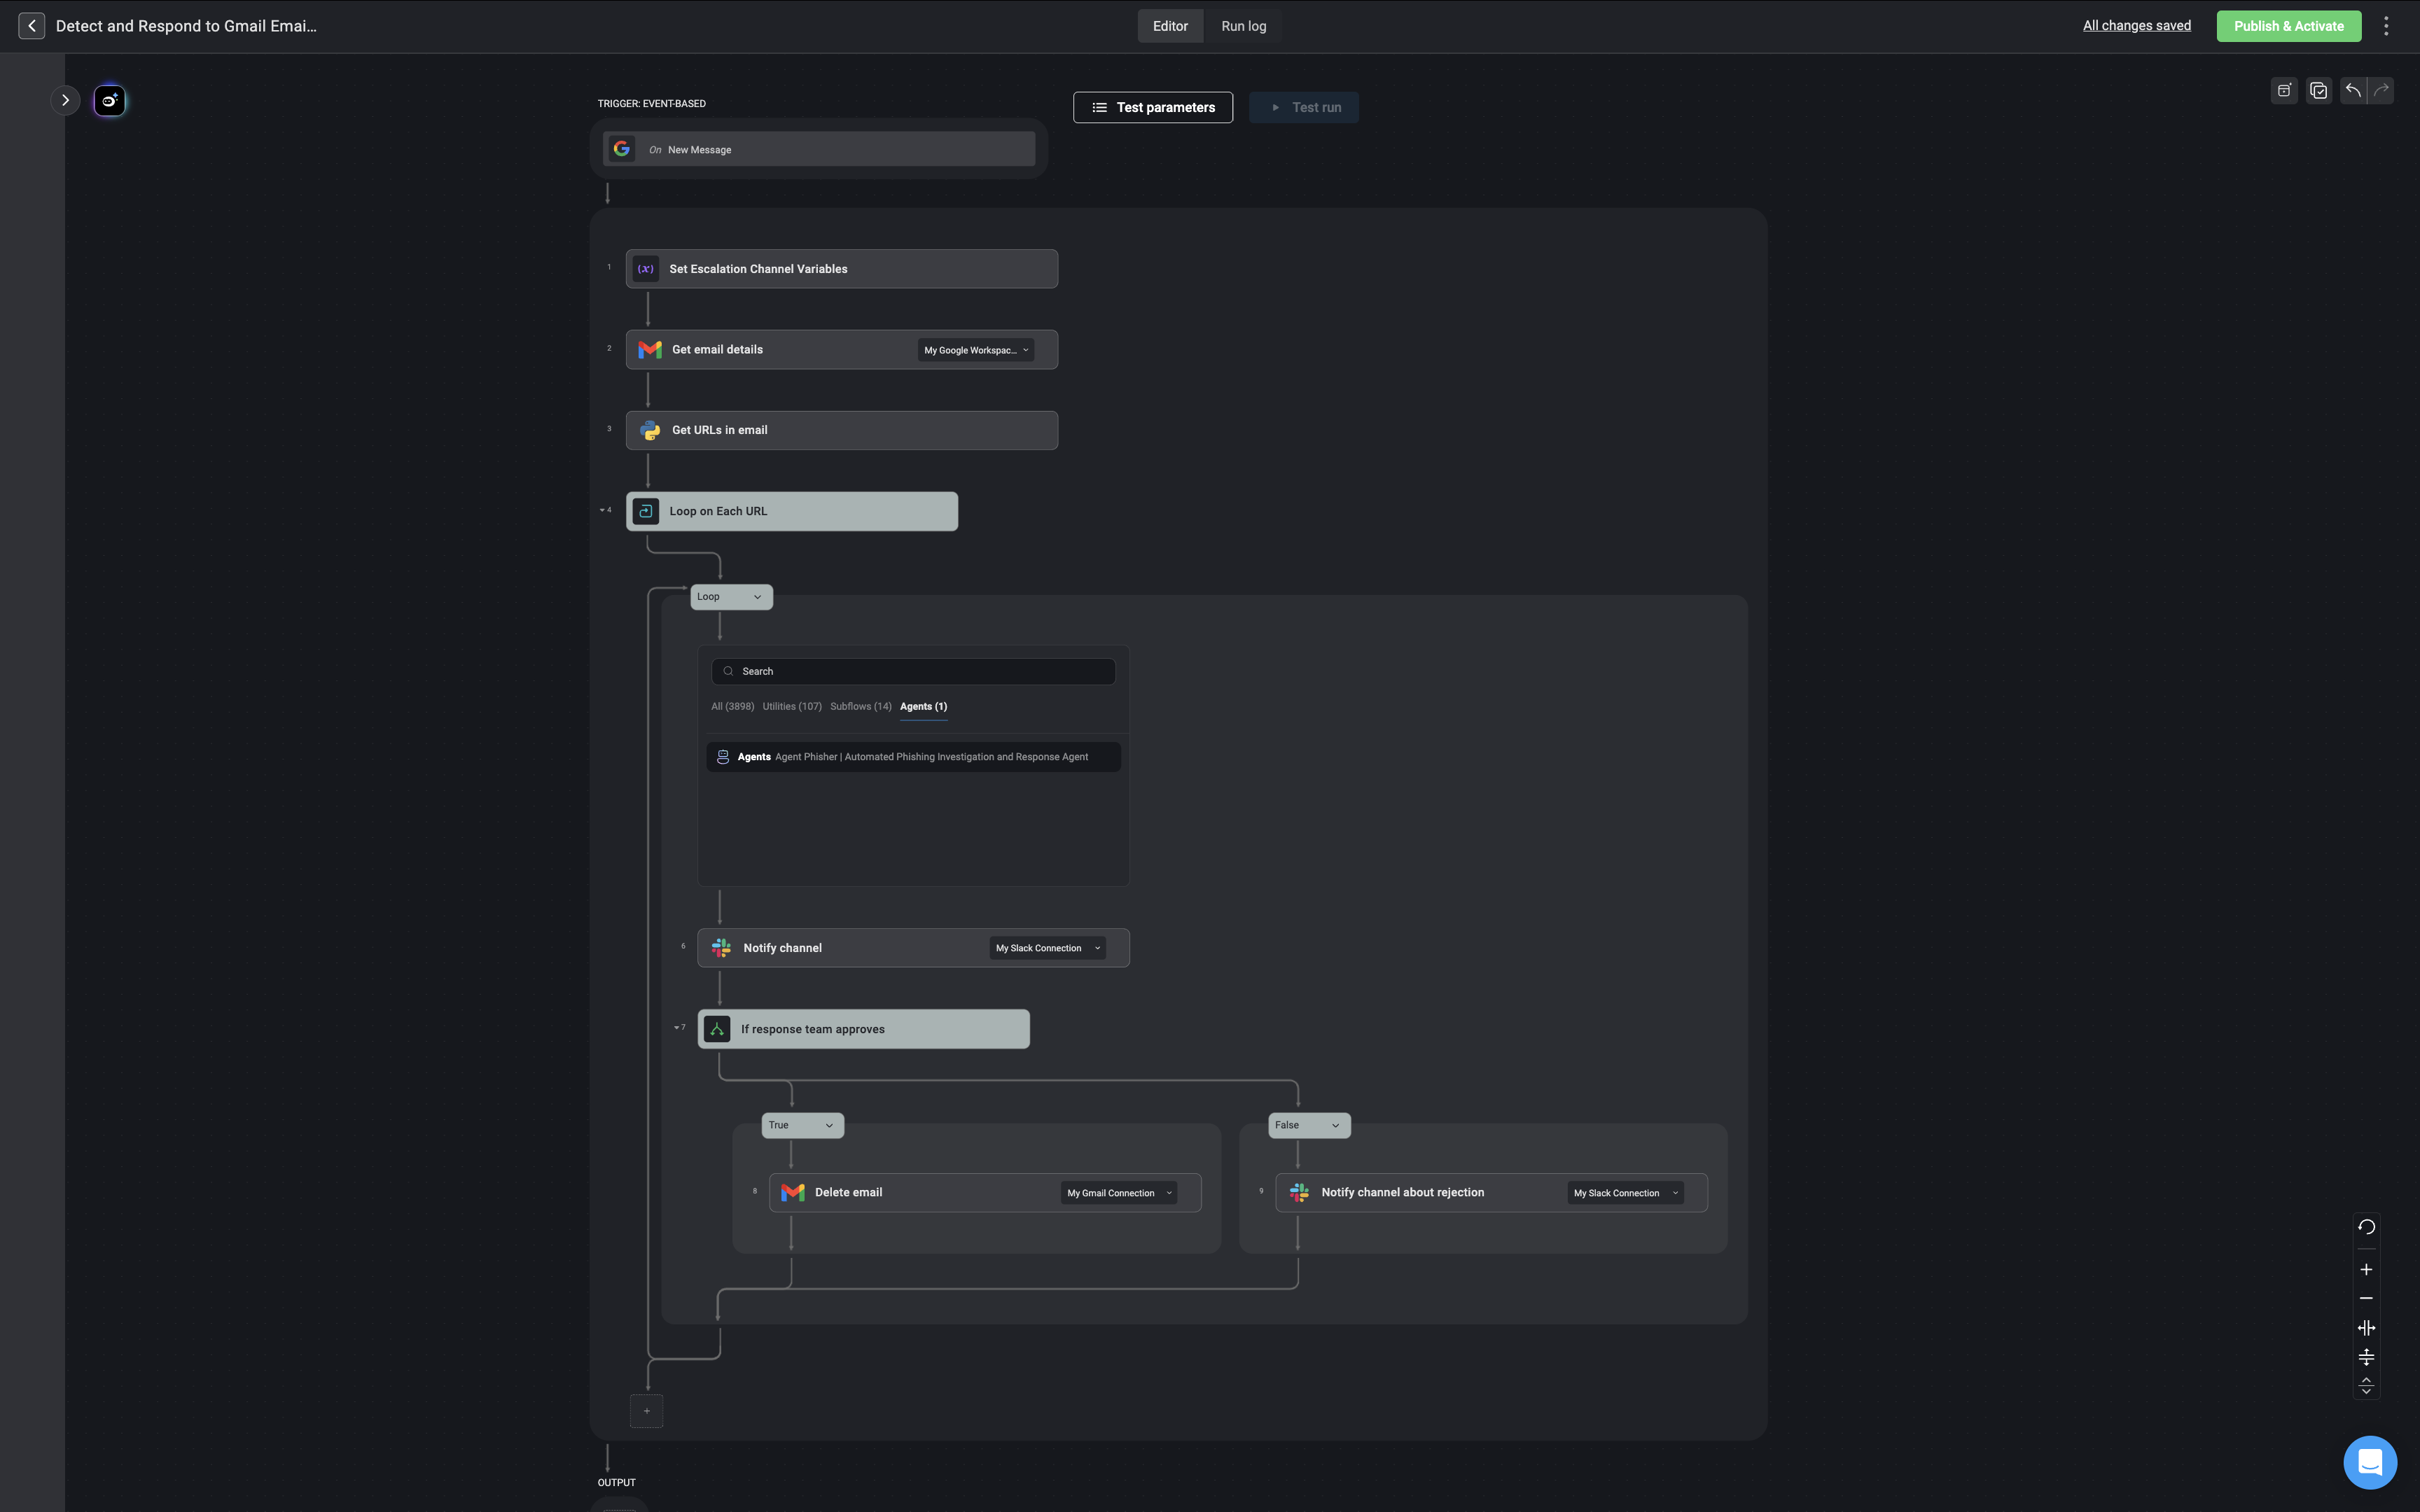
Add the Agent to the Workflow
Search for the agent you want to include in the workflow. Once located, add it as a step in your workflow.
3
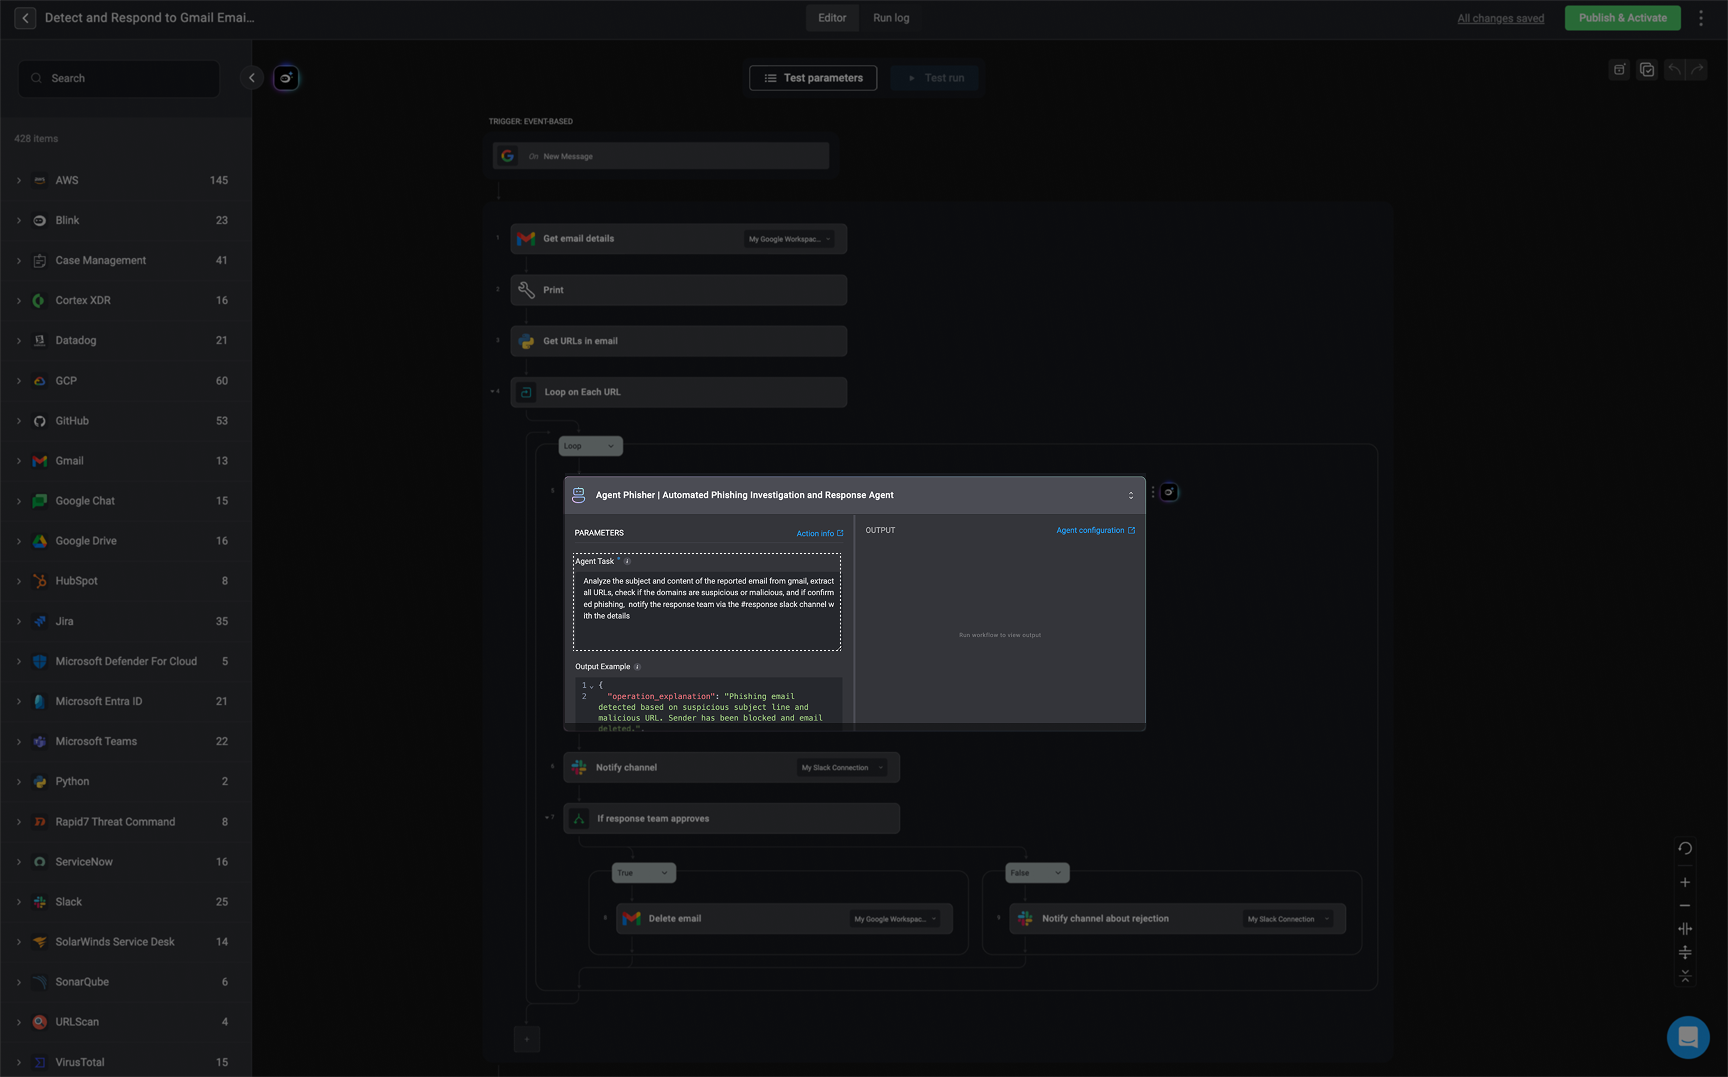
Define the Agent's Task
Clearly define the agent’s primary task in this step. This sets the context for what the agent is expected to achieve during its execution.
4
Output Example
You can provide a sample
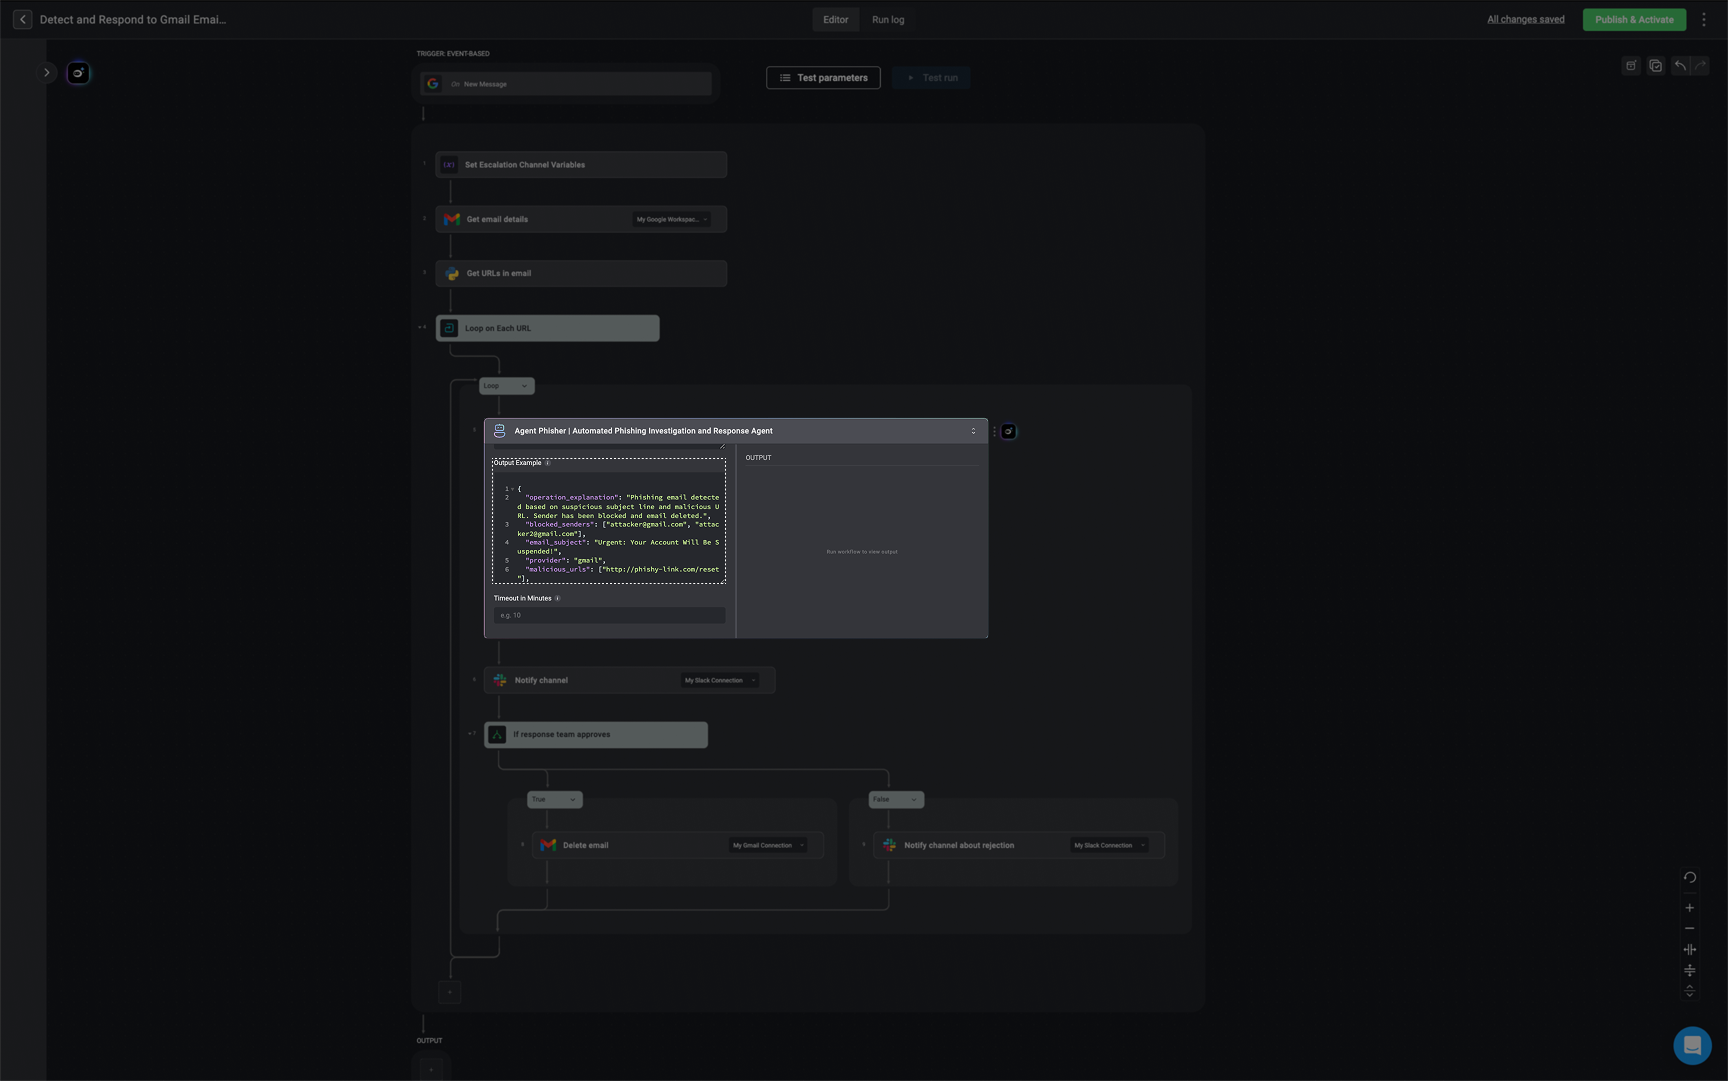
JSON output to illustrate the expected structure the response of the agent’s output. This helps with downstream step configuration and validation. If you prefer the response to be plain text, simply leave this section blank.
Only one
JSON output example should be provided. The JSON output can support up to 10 levels of nesting, meaning it can include objects or arrays nested inside each other, but only up to three layers deep.JSON Output Format- Phishing Email Example
JSON Output Format- Phishing Email Example
Phishing Email
JSON Output Format- Security Alert Summary Example
JSON Output Format- Security Alert Summary Example
Security Alert Summary
ThisJSON output example provides a structured, human-readable summary of a security alert. It captures what occurred (alert_summary), who was involved (user_summary), the behavior of the device (device_summary), and any suspicious indicators like external IPs, file hashes, and URLs. It concludes with recommended_actions—specific steps an analyst should take to investigate or remediate the incident. This format is typically used to enrich alerts and support triage decisions.JSON Output Format- Alert Mapping to MITRE ATT&CK Example
JSON Output Format- Alert Mapping to MITRE ATT&CK Example
Alert Mapping to MITRE ATT&CK
ThisJSON output example maps alert details to the MITRE ATT&CK framework, offering standardized fields like alert_name, alert_title, source, and severity. Most importantly, it includes a mitre_mapping field that ties observed behavior to known adversary tactics and techniques. This format helps analysts quickly understand the nature of the threat and align it with industry-recognized classifications for faster, more informed response.5
Advanced-Additional Constraints
Define any additional constraints you want the agent to follow for this specific workflow context.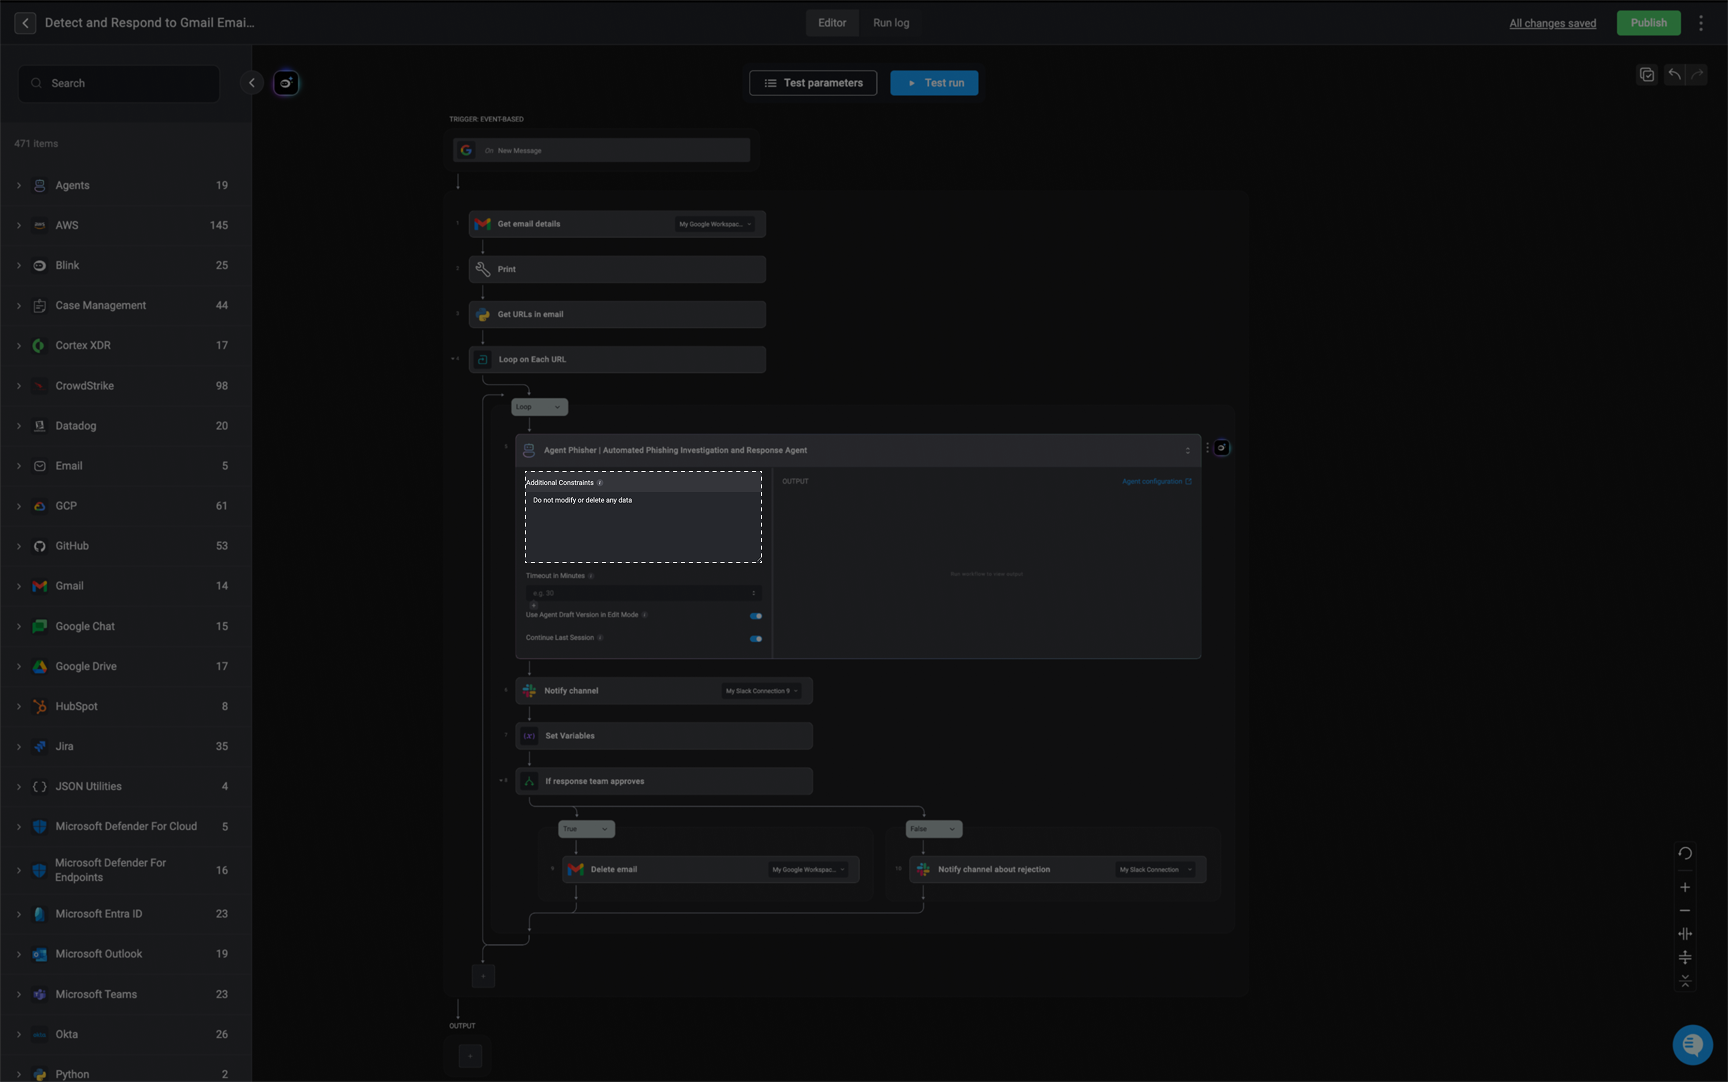
6
Advanced-Timeout in Minutes
Define the maximum duration (in minutes), the agent is allowed to run before timing out. If the time is exceeded, any running abilities and subflows will stop.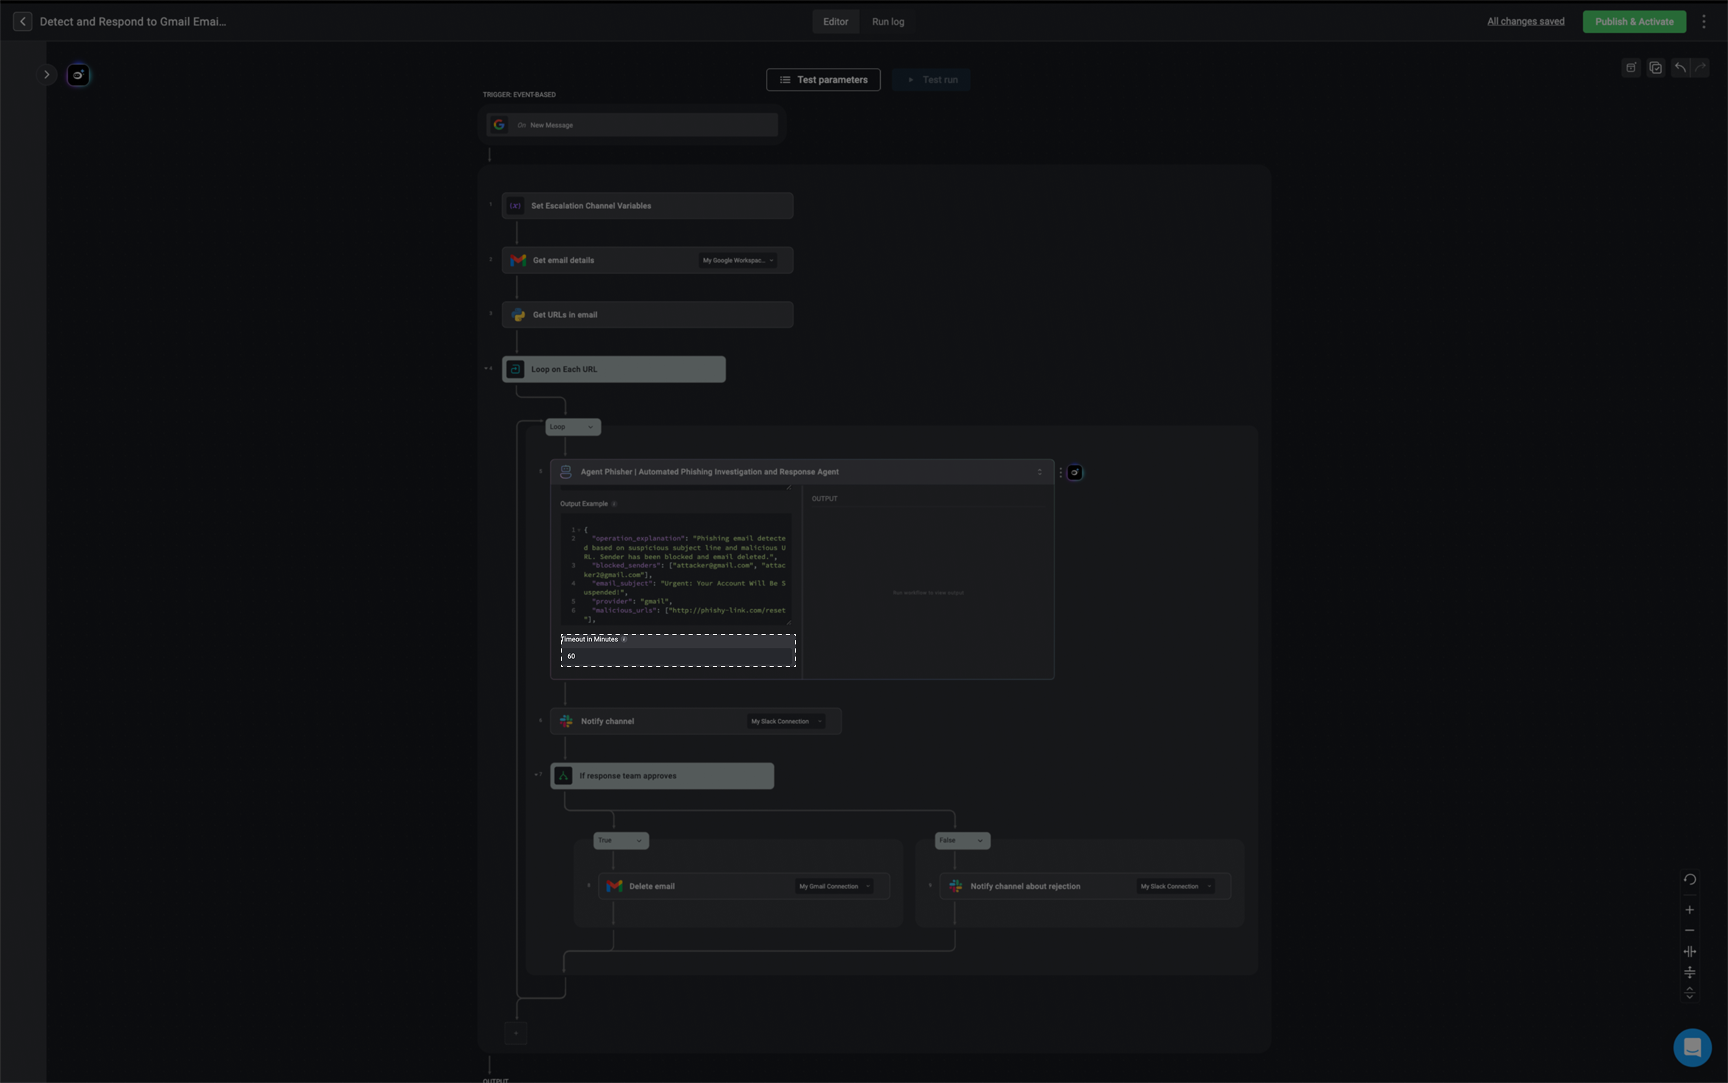
7
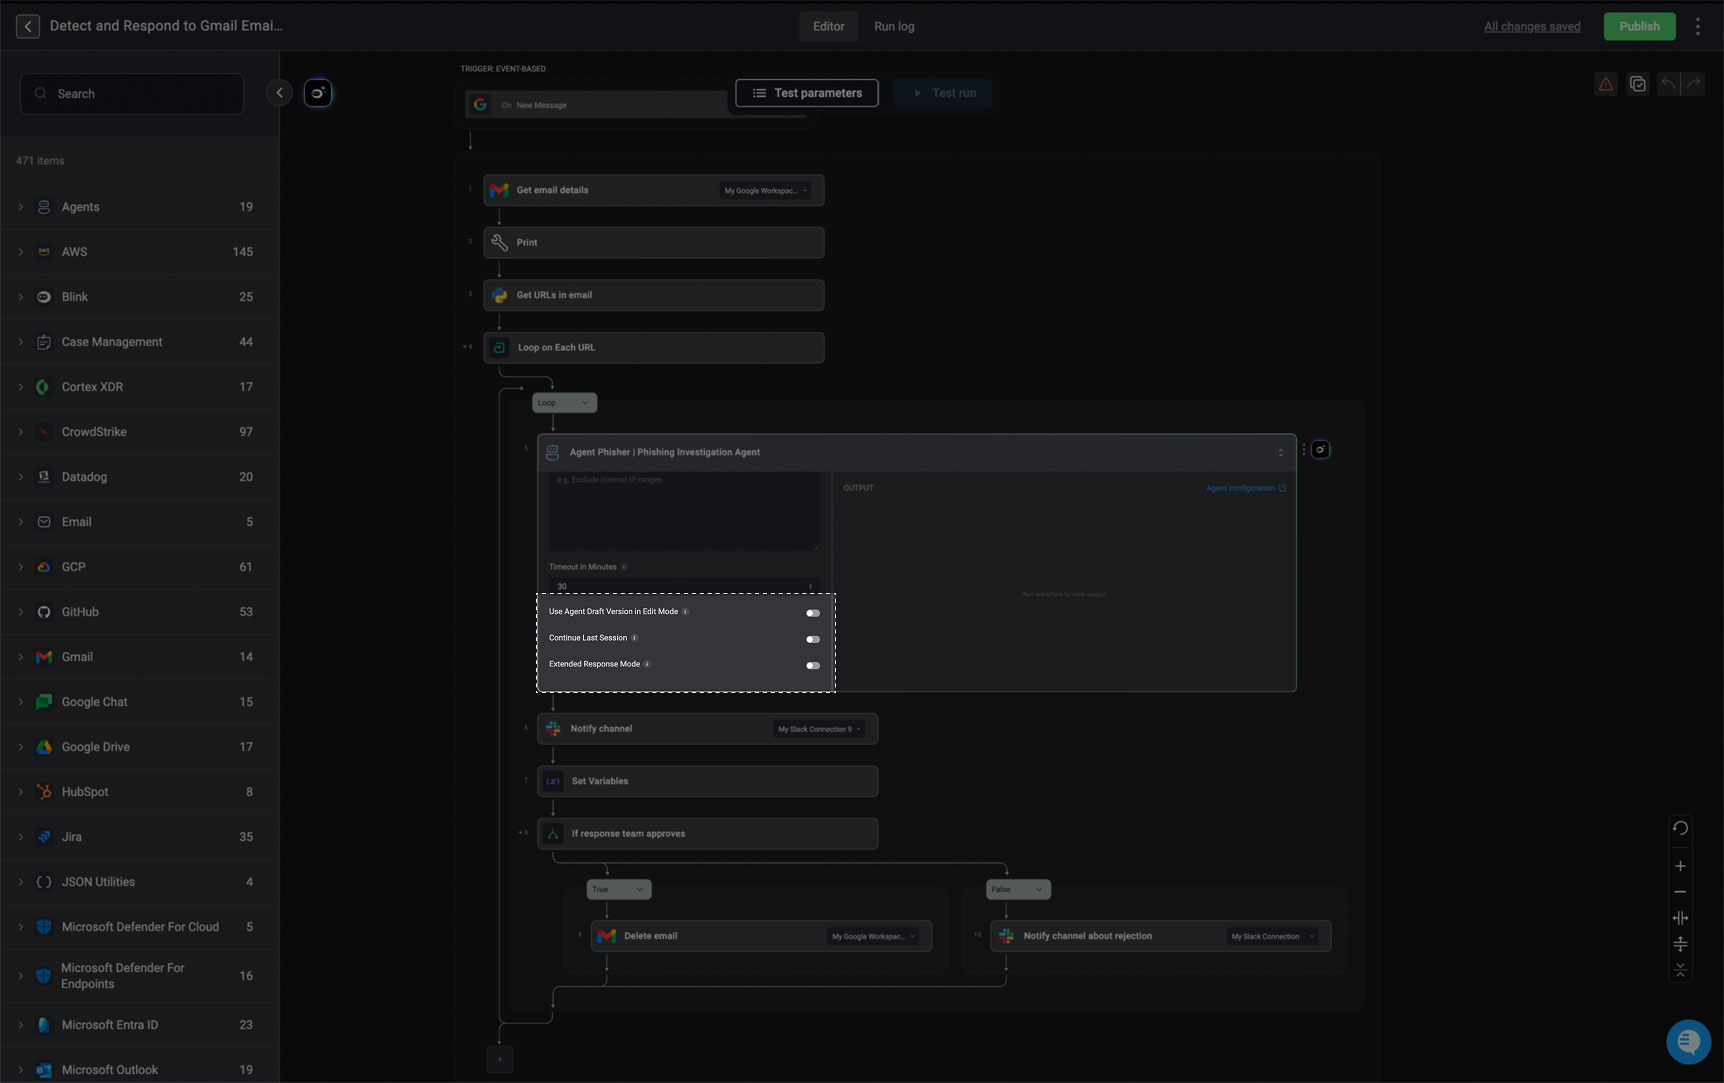
Advanced- Enable Settings
- Use Agent Draft Version in Edit Mode: When enabled, the workflow will run the draft version of the agent while in edit mode and during test runs. This lets you test the workflow using the most recent, unpublished changes made to the agent, so you can validate updates before officially publishing them.
- Continue Last Session: When enabled, the agent will continue its previous session within this workflow run. This allows the agent to use context from earlier tasks instead of starting a fresh session.
-
Extend Response Mode - When enabled, the agent can generate longer responses in a single run.
Note: It may sometimes lead to more verbose responses.
8
Publish your Workflow
Once all steps are configured, click the ‘Publish’ button to activate your workflow. Your agent is now live and will execute as defined when the workflow runs.
Manage Portal Settings
In the Agents feature, select a specific agent, click the menu, and choose “Manage Portal Access”. Then, enter the email address of one or more users or groups within your tenant to share the selected agent in the Blink Portal.
Related Articles
Agents - How it Works
Explore a more in-depth explanation of how the Agents work.
Best Practices
Follow these best practices to design reliable, safe, and effective security agents using the Agents. Learn more about what to do—and what to avoid.
Limitations
Understand the execution limits, performance constraints, and supported capabilities when building agents. Learn more about what agents can and can’t do.
Builder Copilot
Builder Copilot uses generative AI to help you design custom workflows faster, directly within the Workflow Editor. Learn more about how to use it.