Configuring a ServiceNow Webhook
This guide explains how Admins can create a business rule. Non-admin users must be assigned the 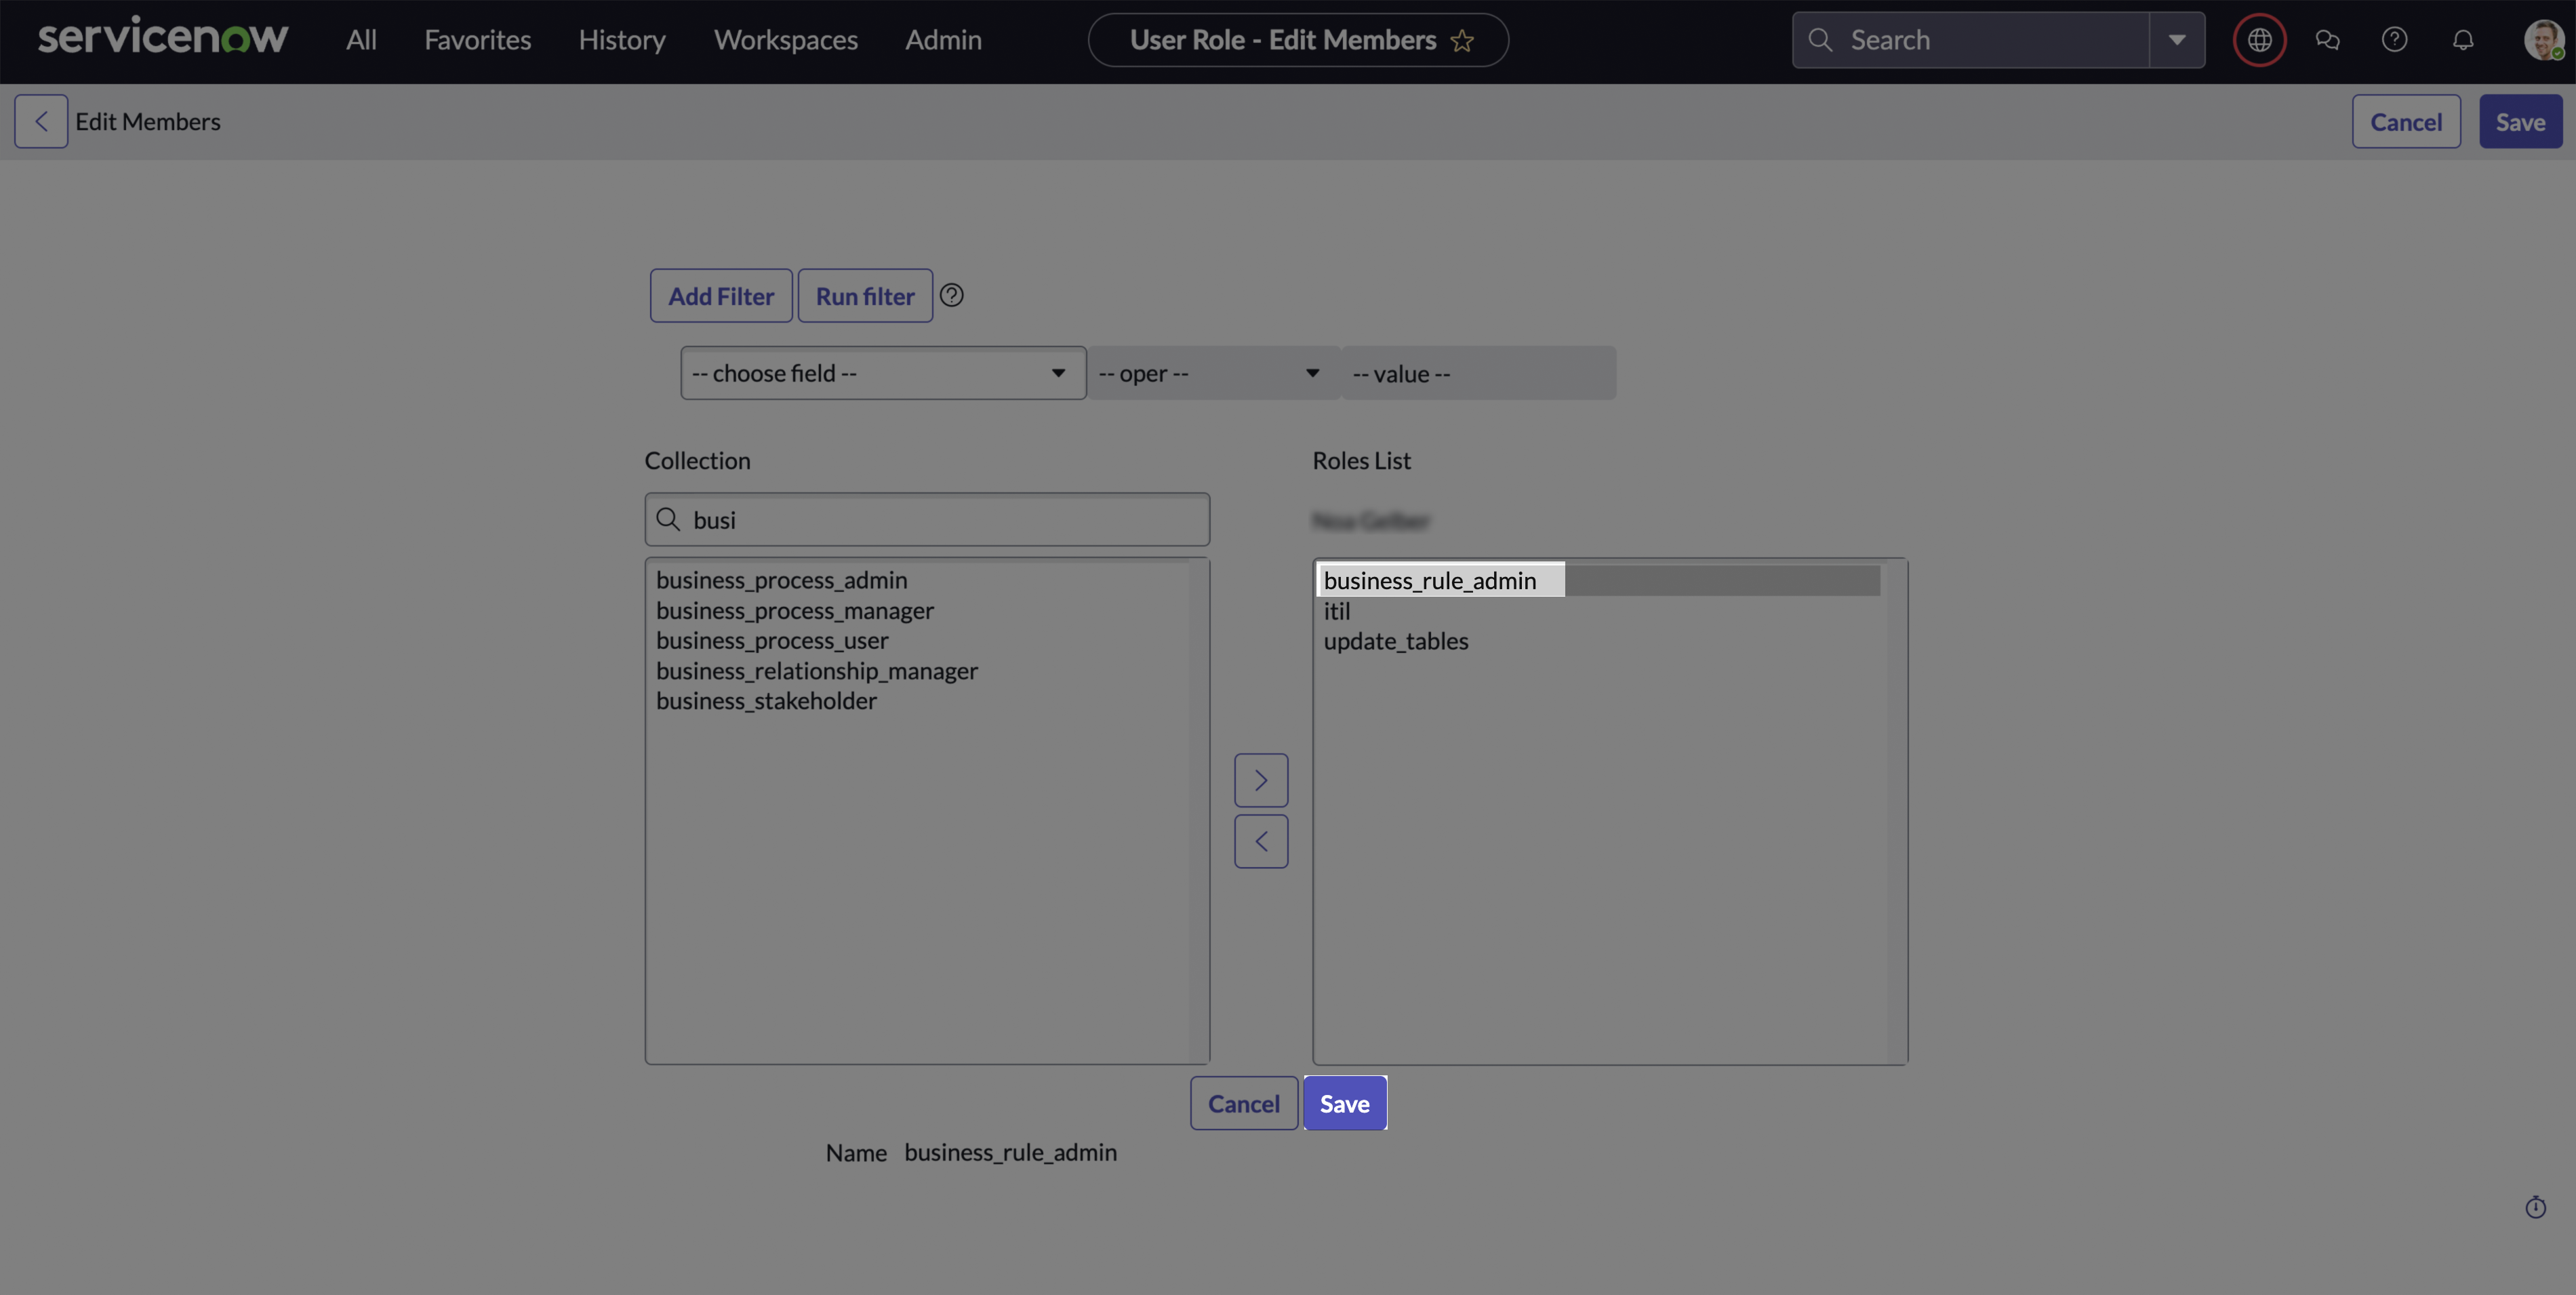
business_rule_admin role to create business rules.Creating the Business Rule
-
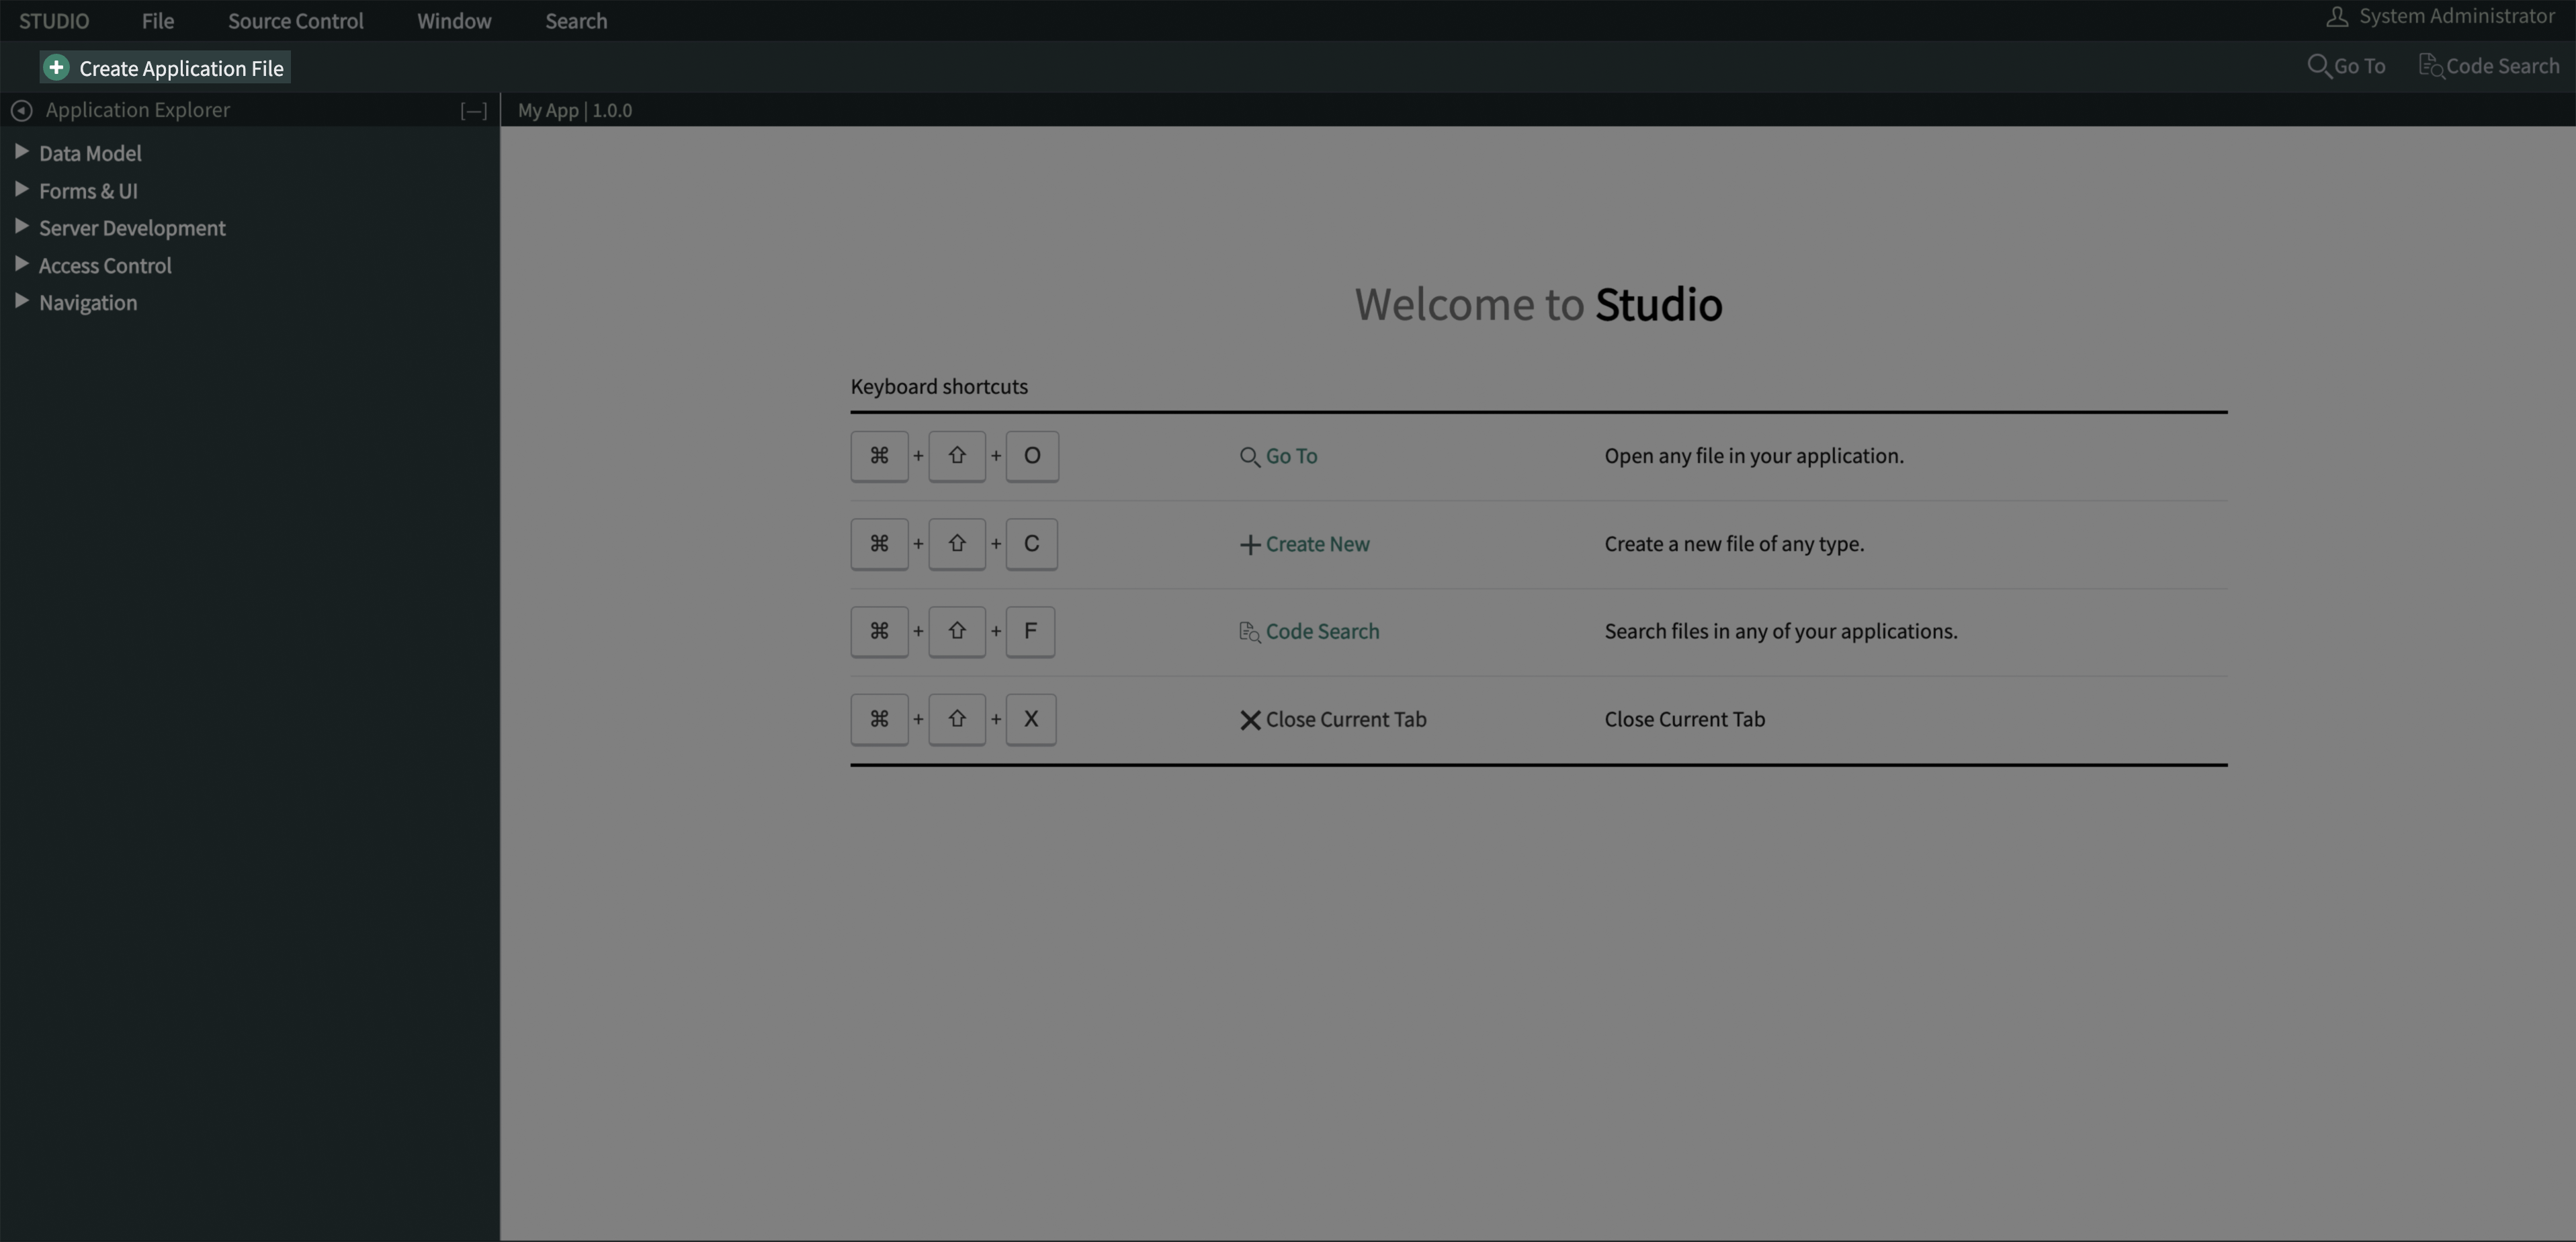
In the navigation filter (under the
Alltab), search for studio and click Studio under System Applications.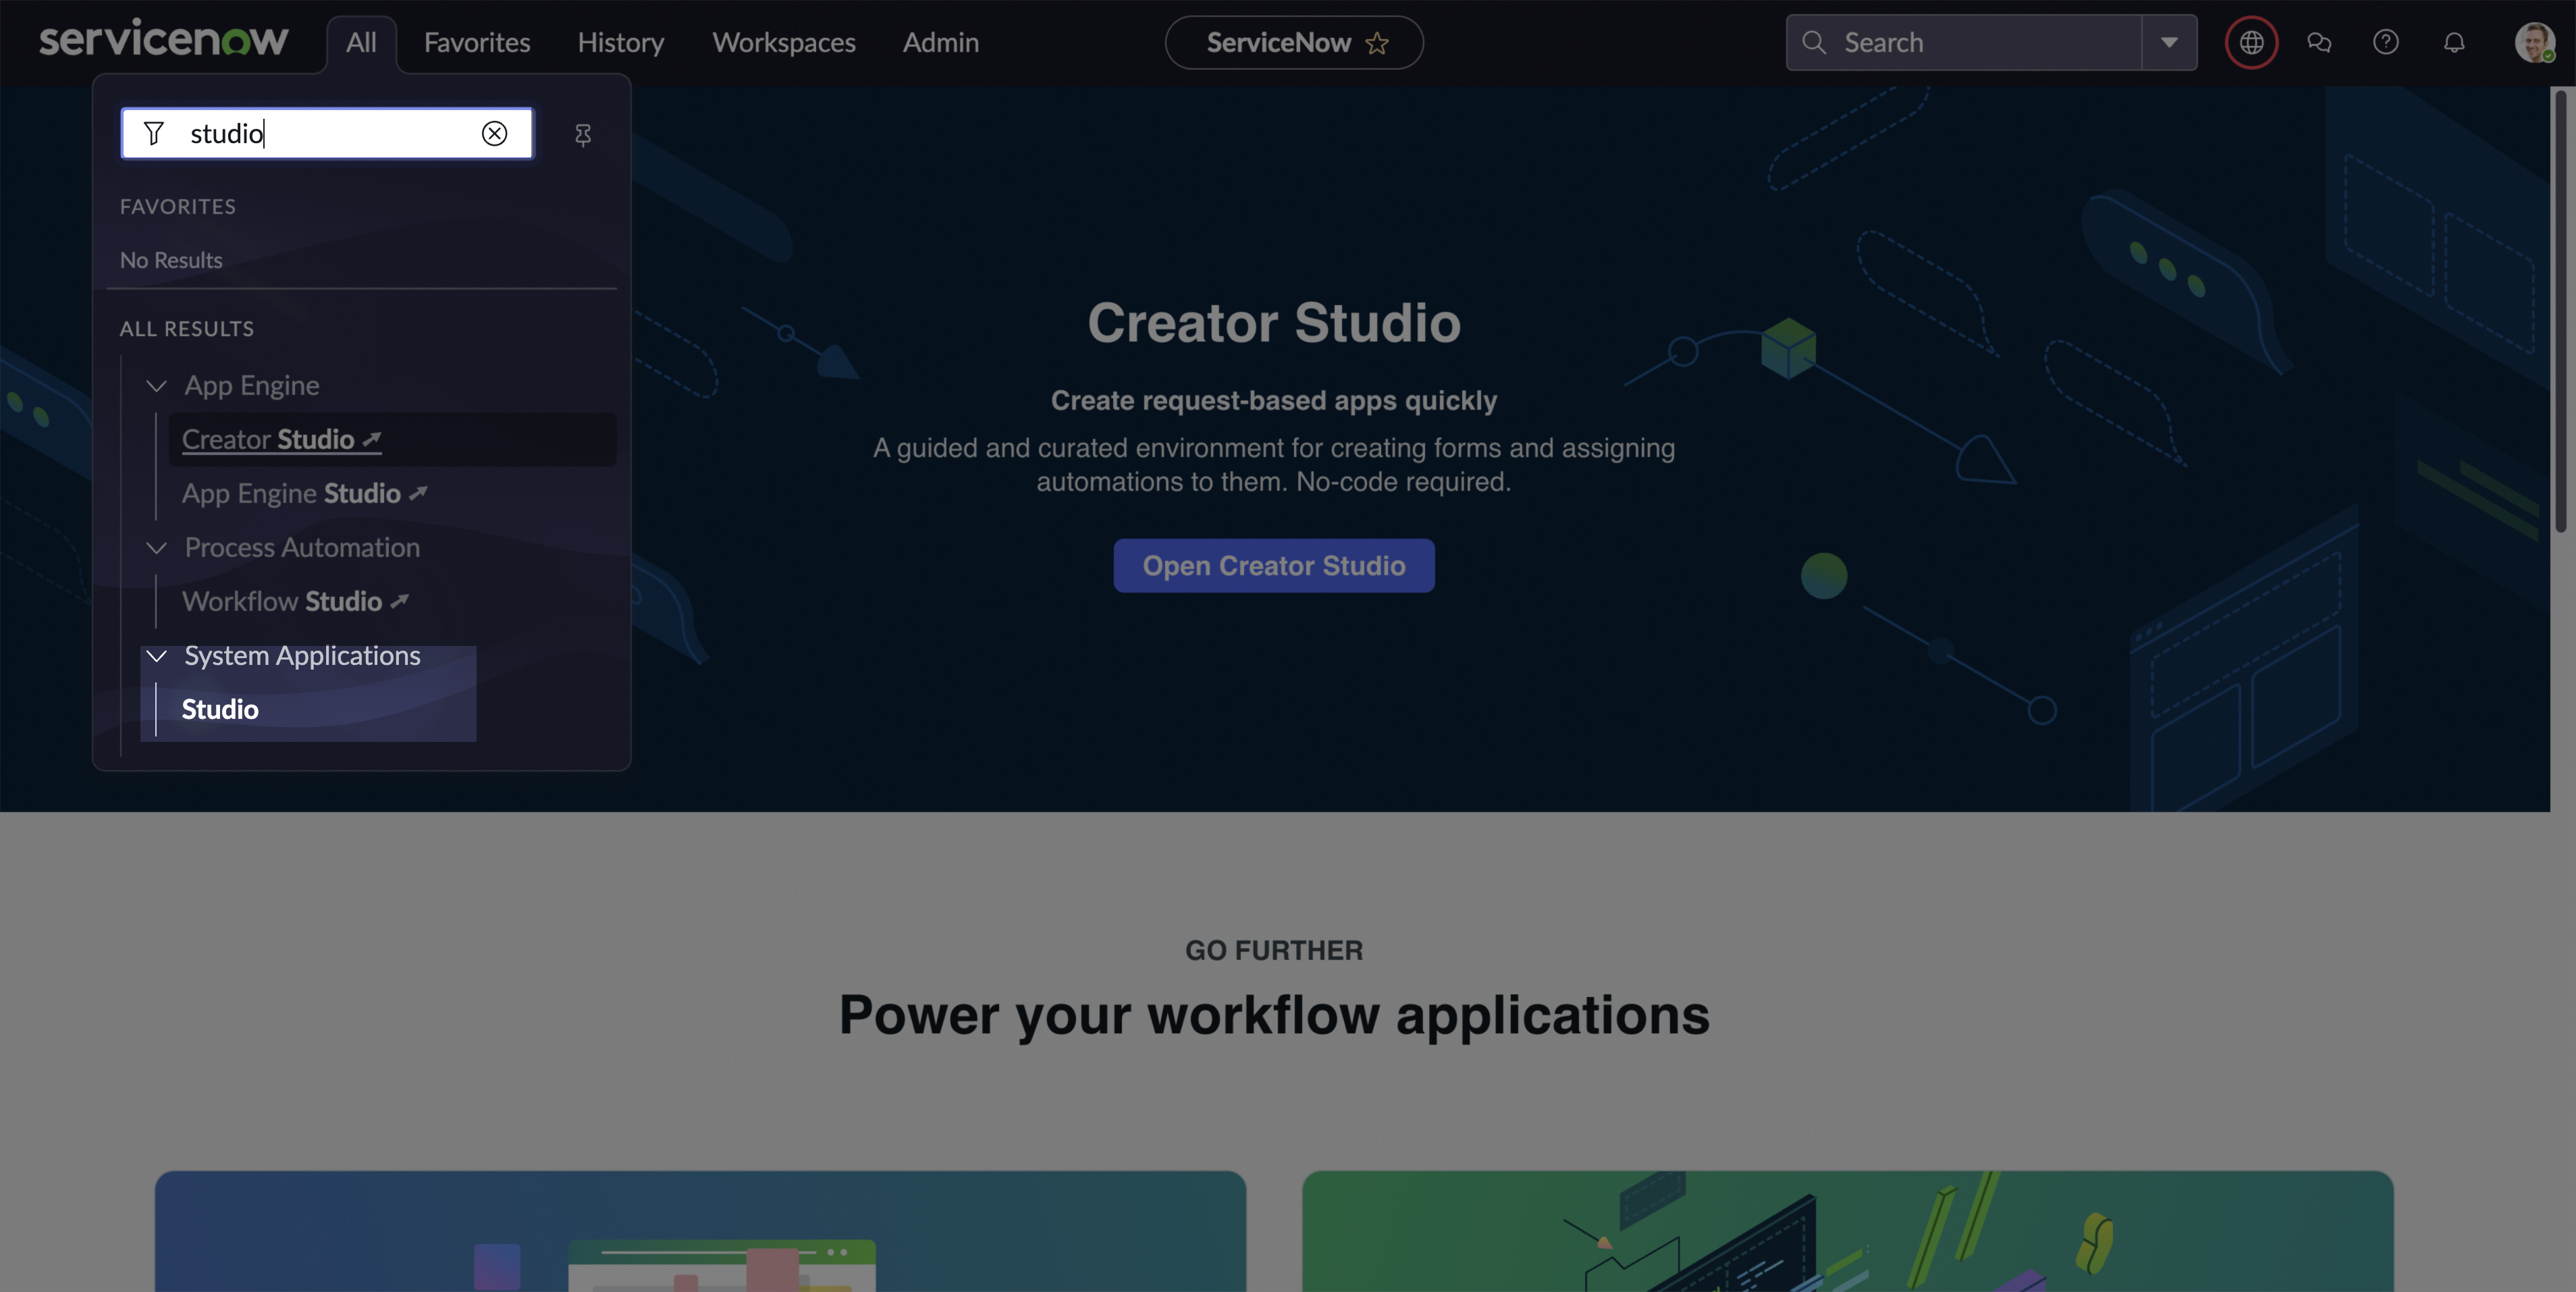
-
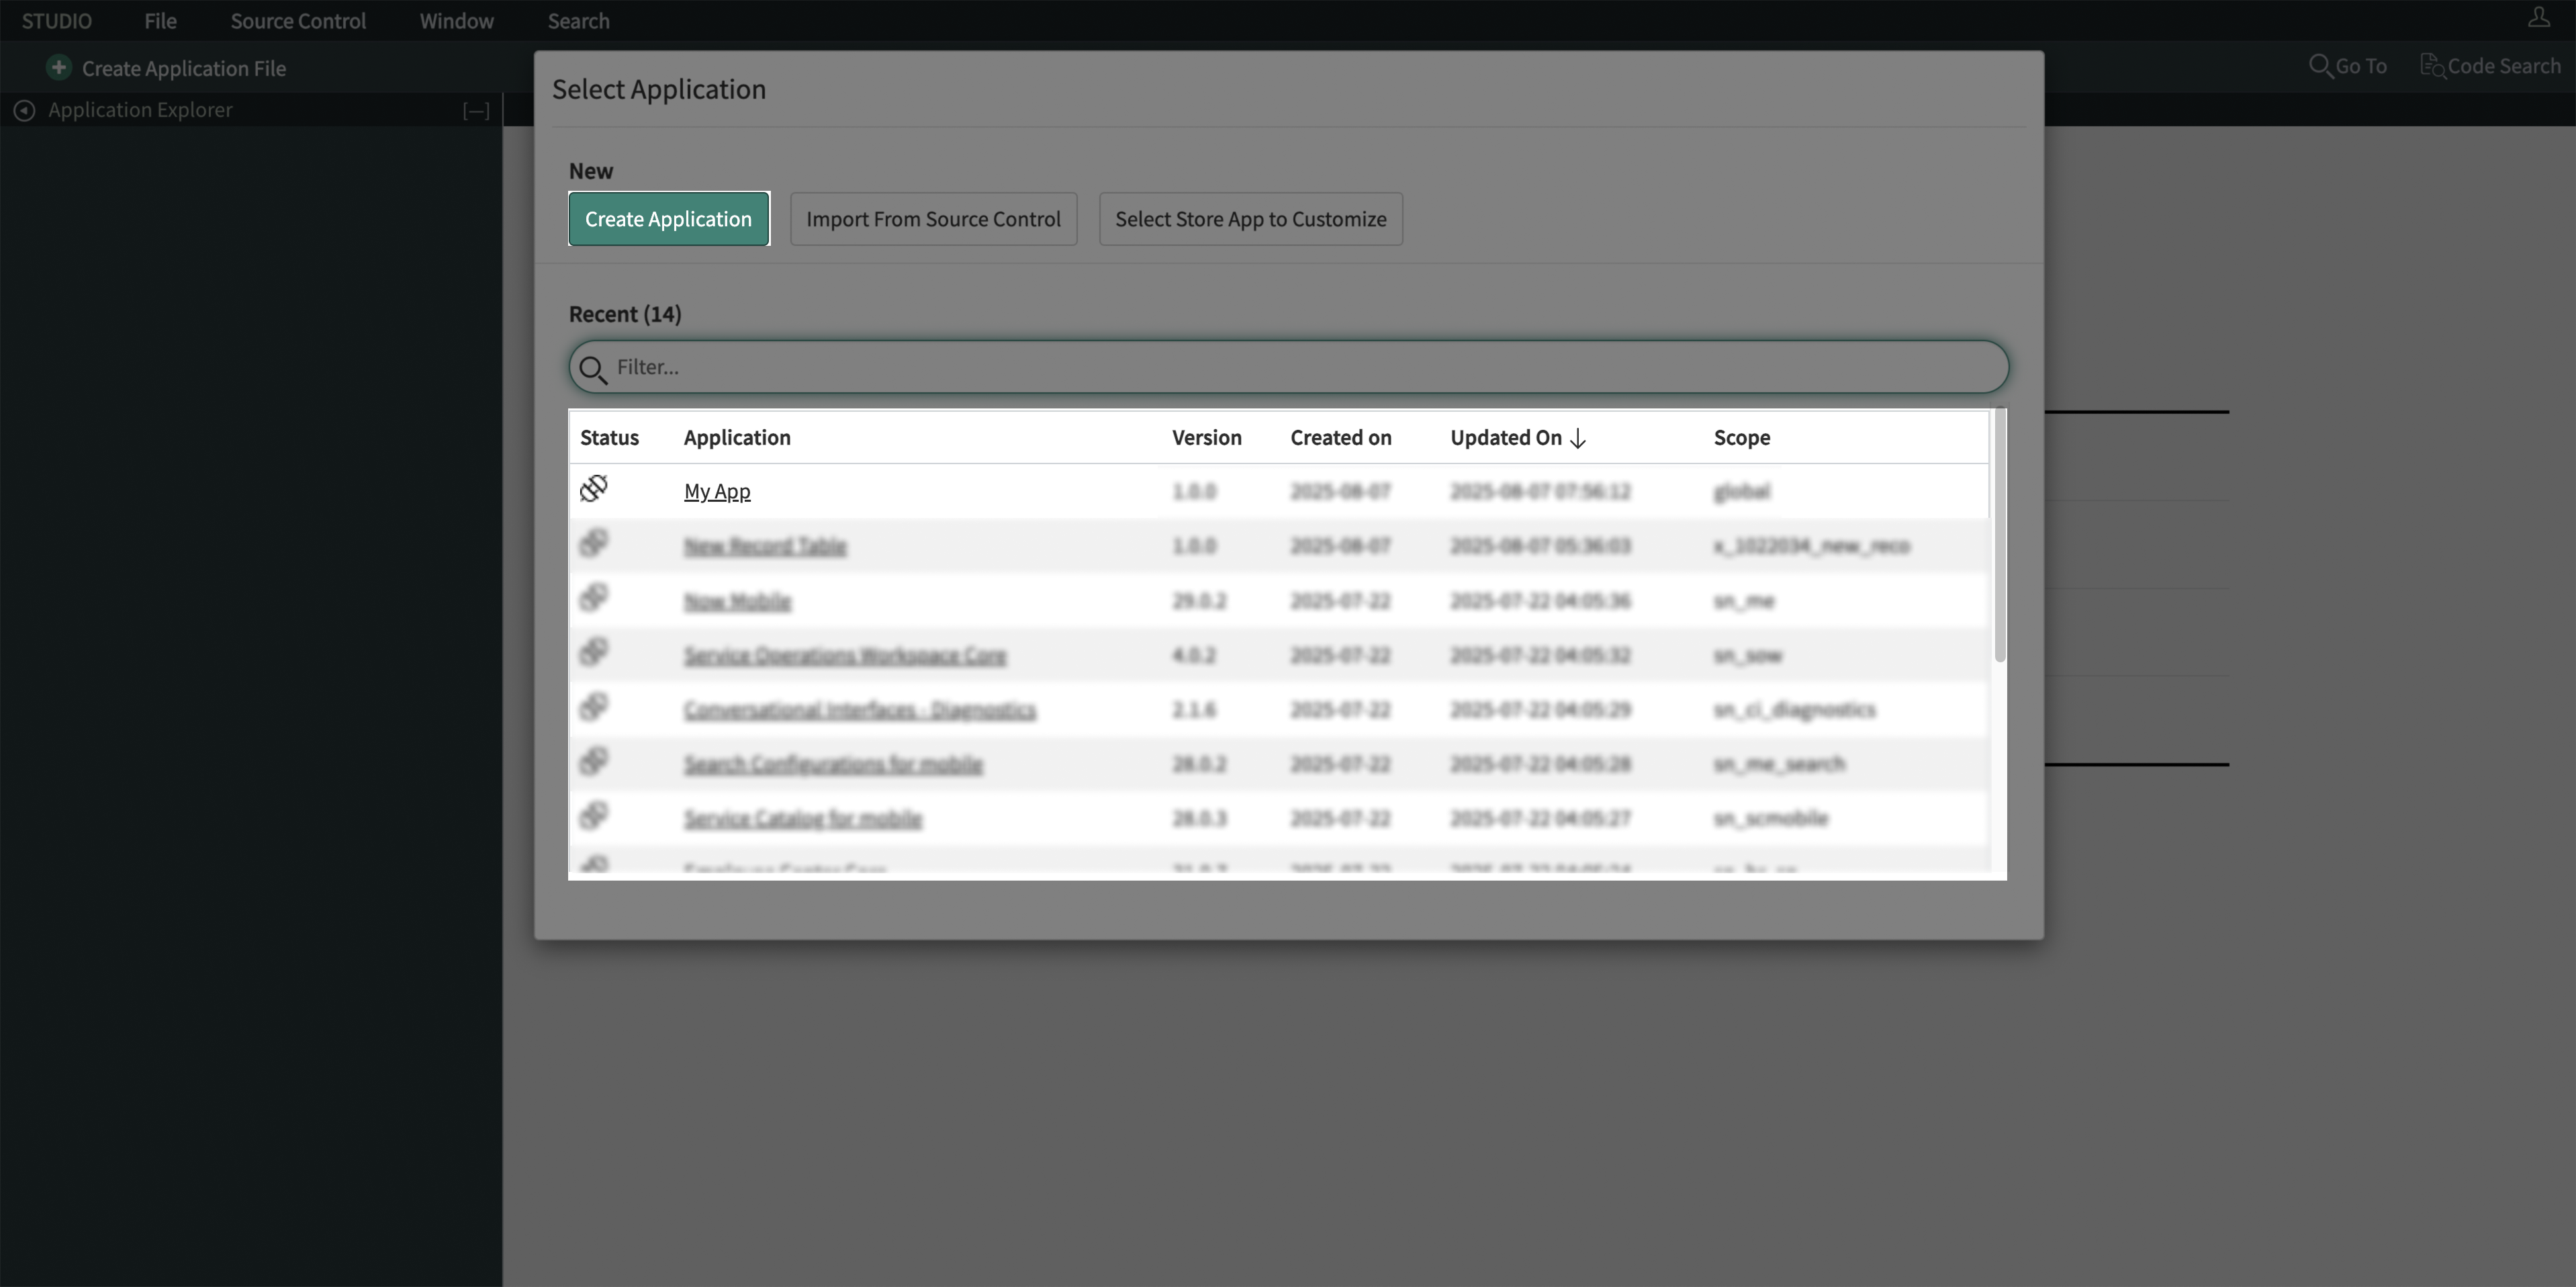
Select an application (or create a new one) to associate the Business Rule with. For more information on creating new applications, please visit ServiceNow’s Documentation.
-
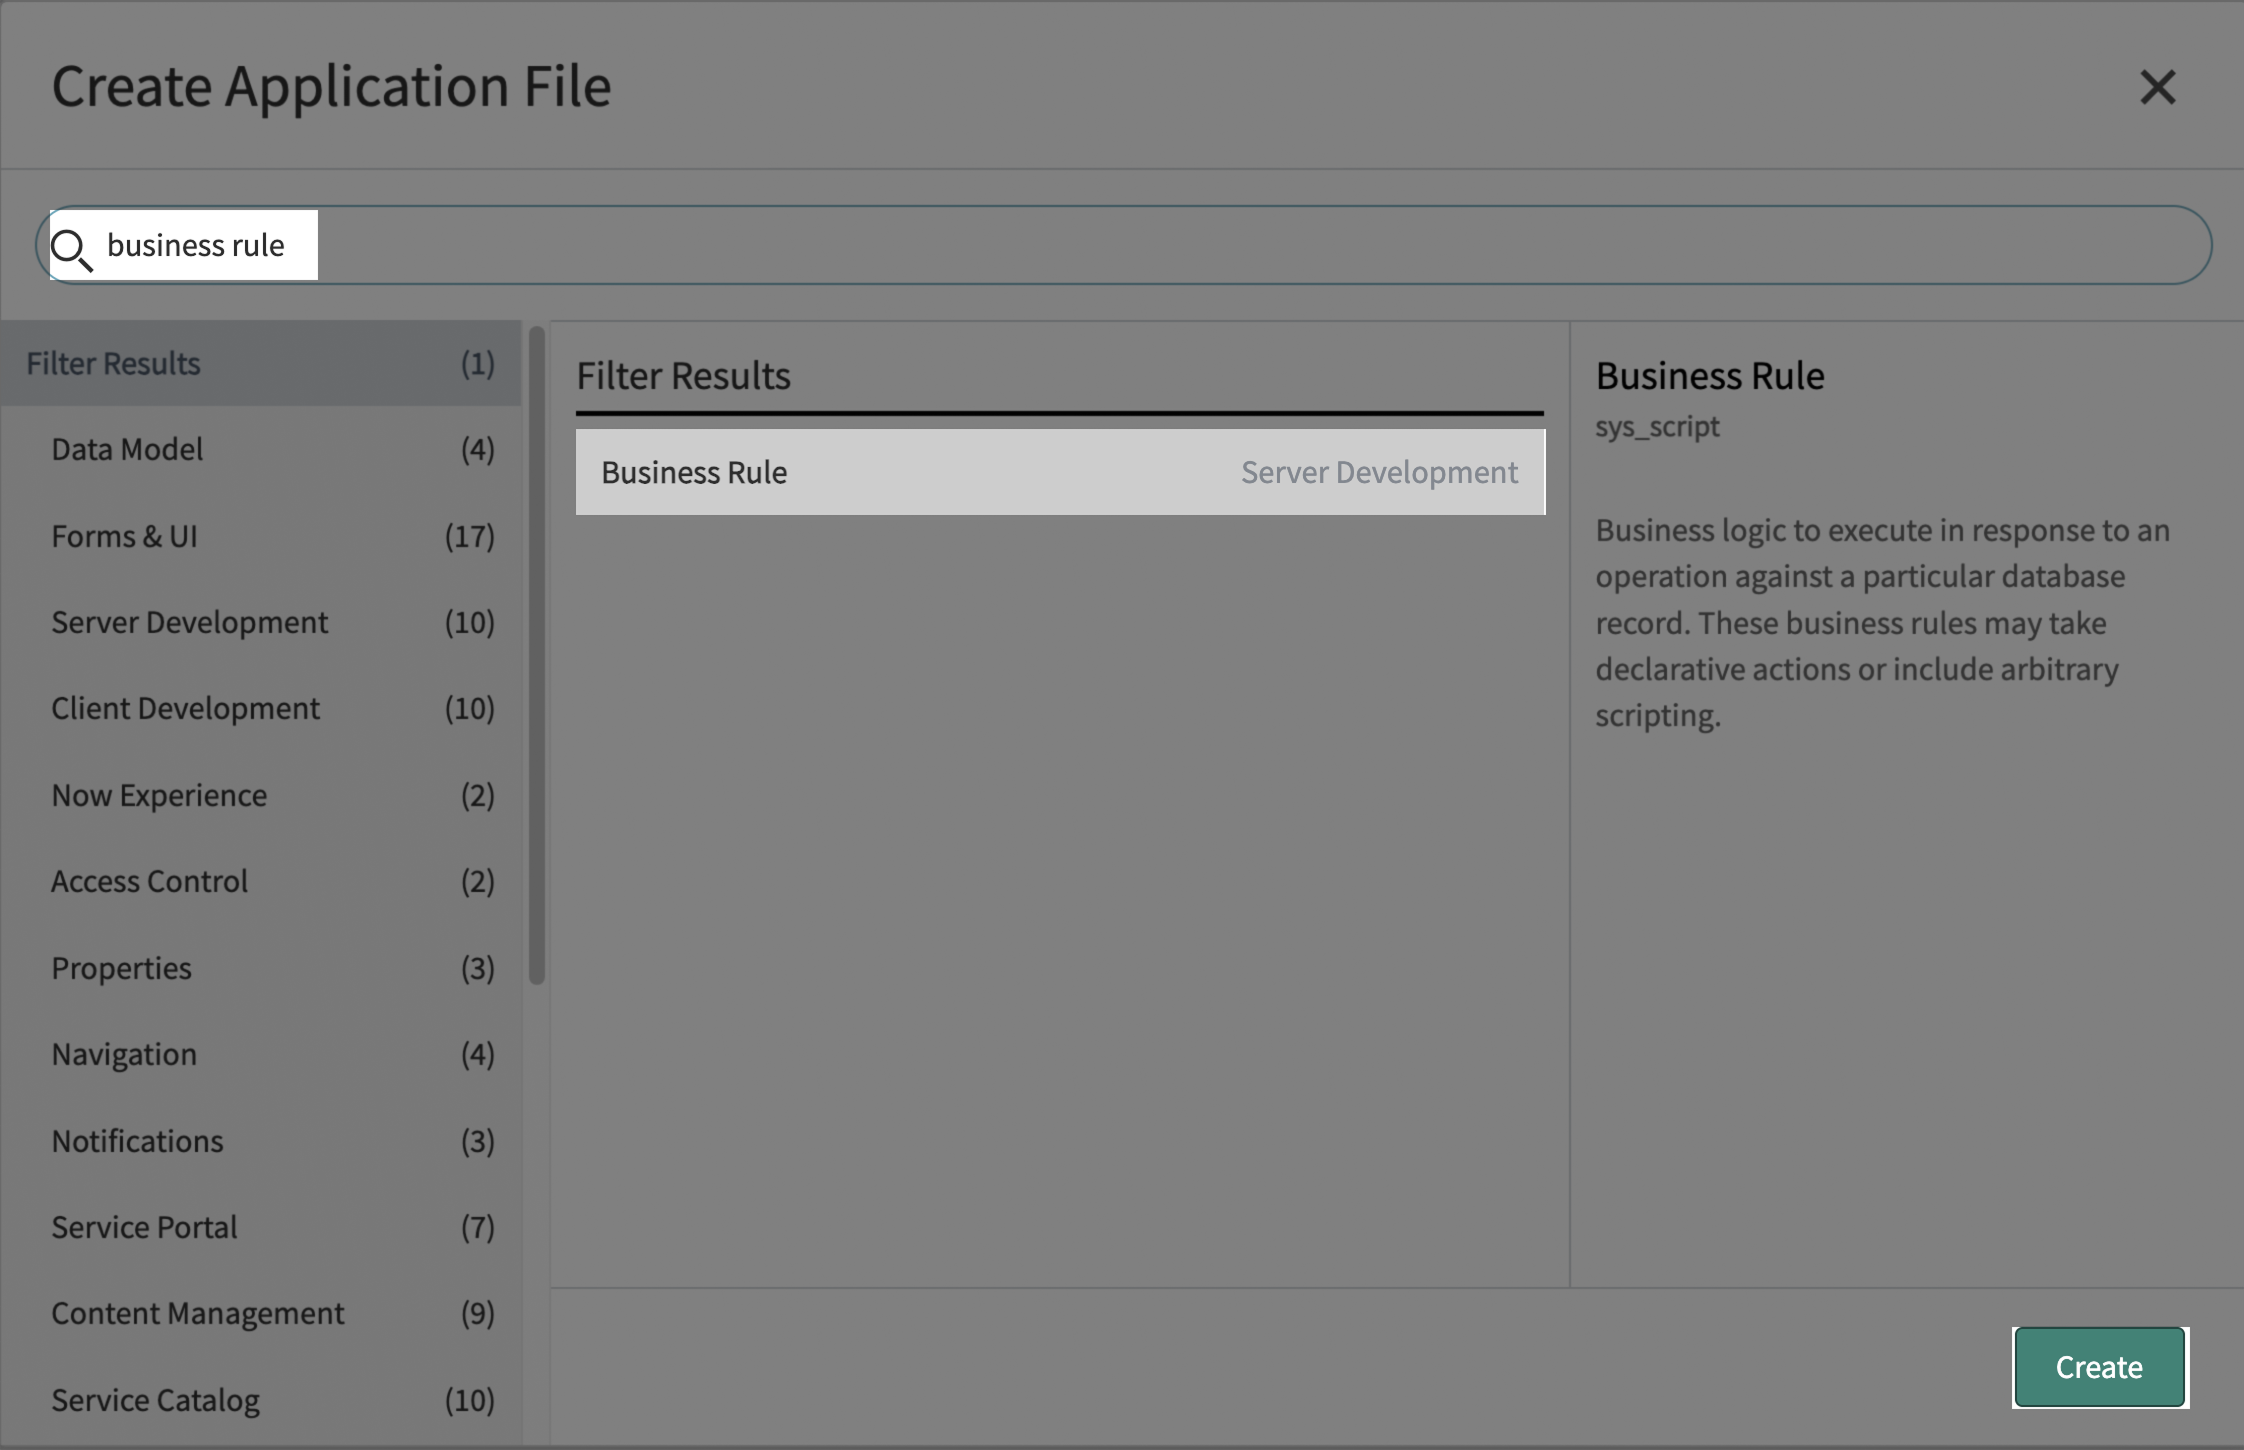
On the next page, click Create Application File.
-
In the new file form, search for Business Rule and click Create.
-
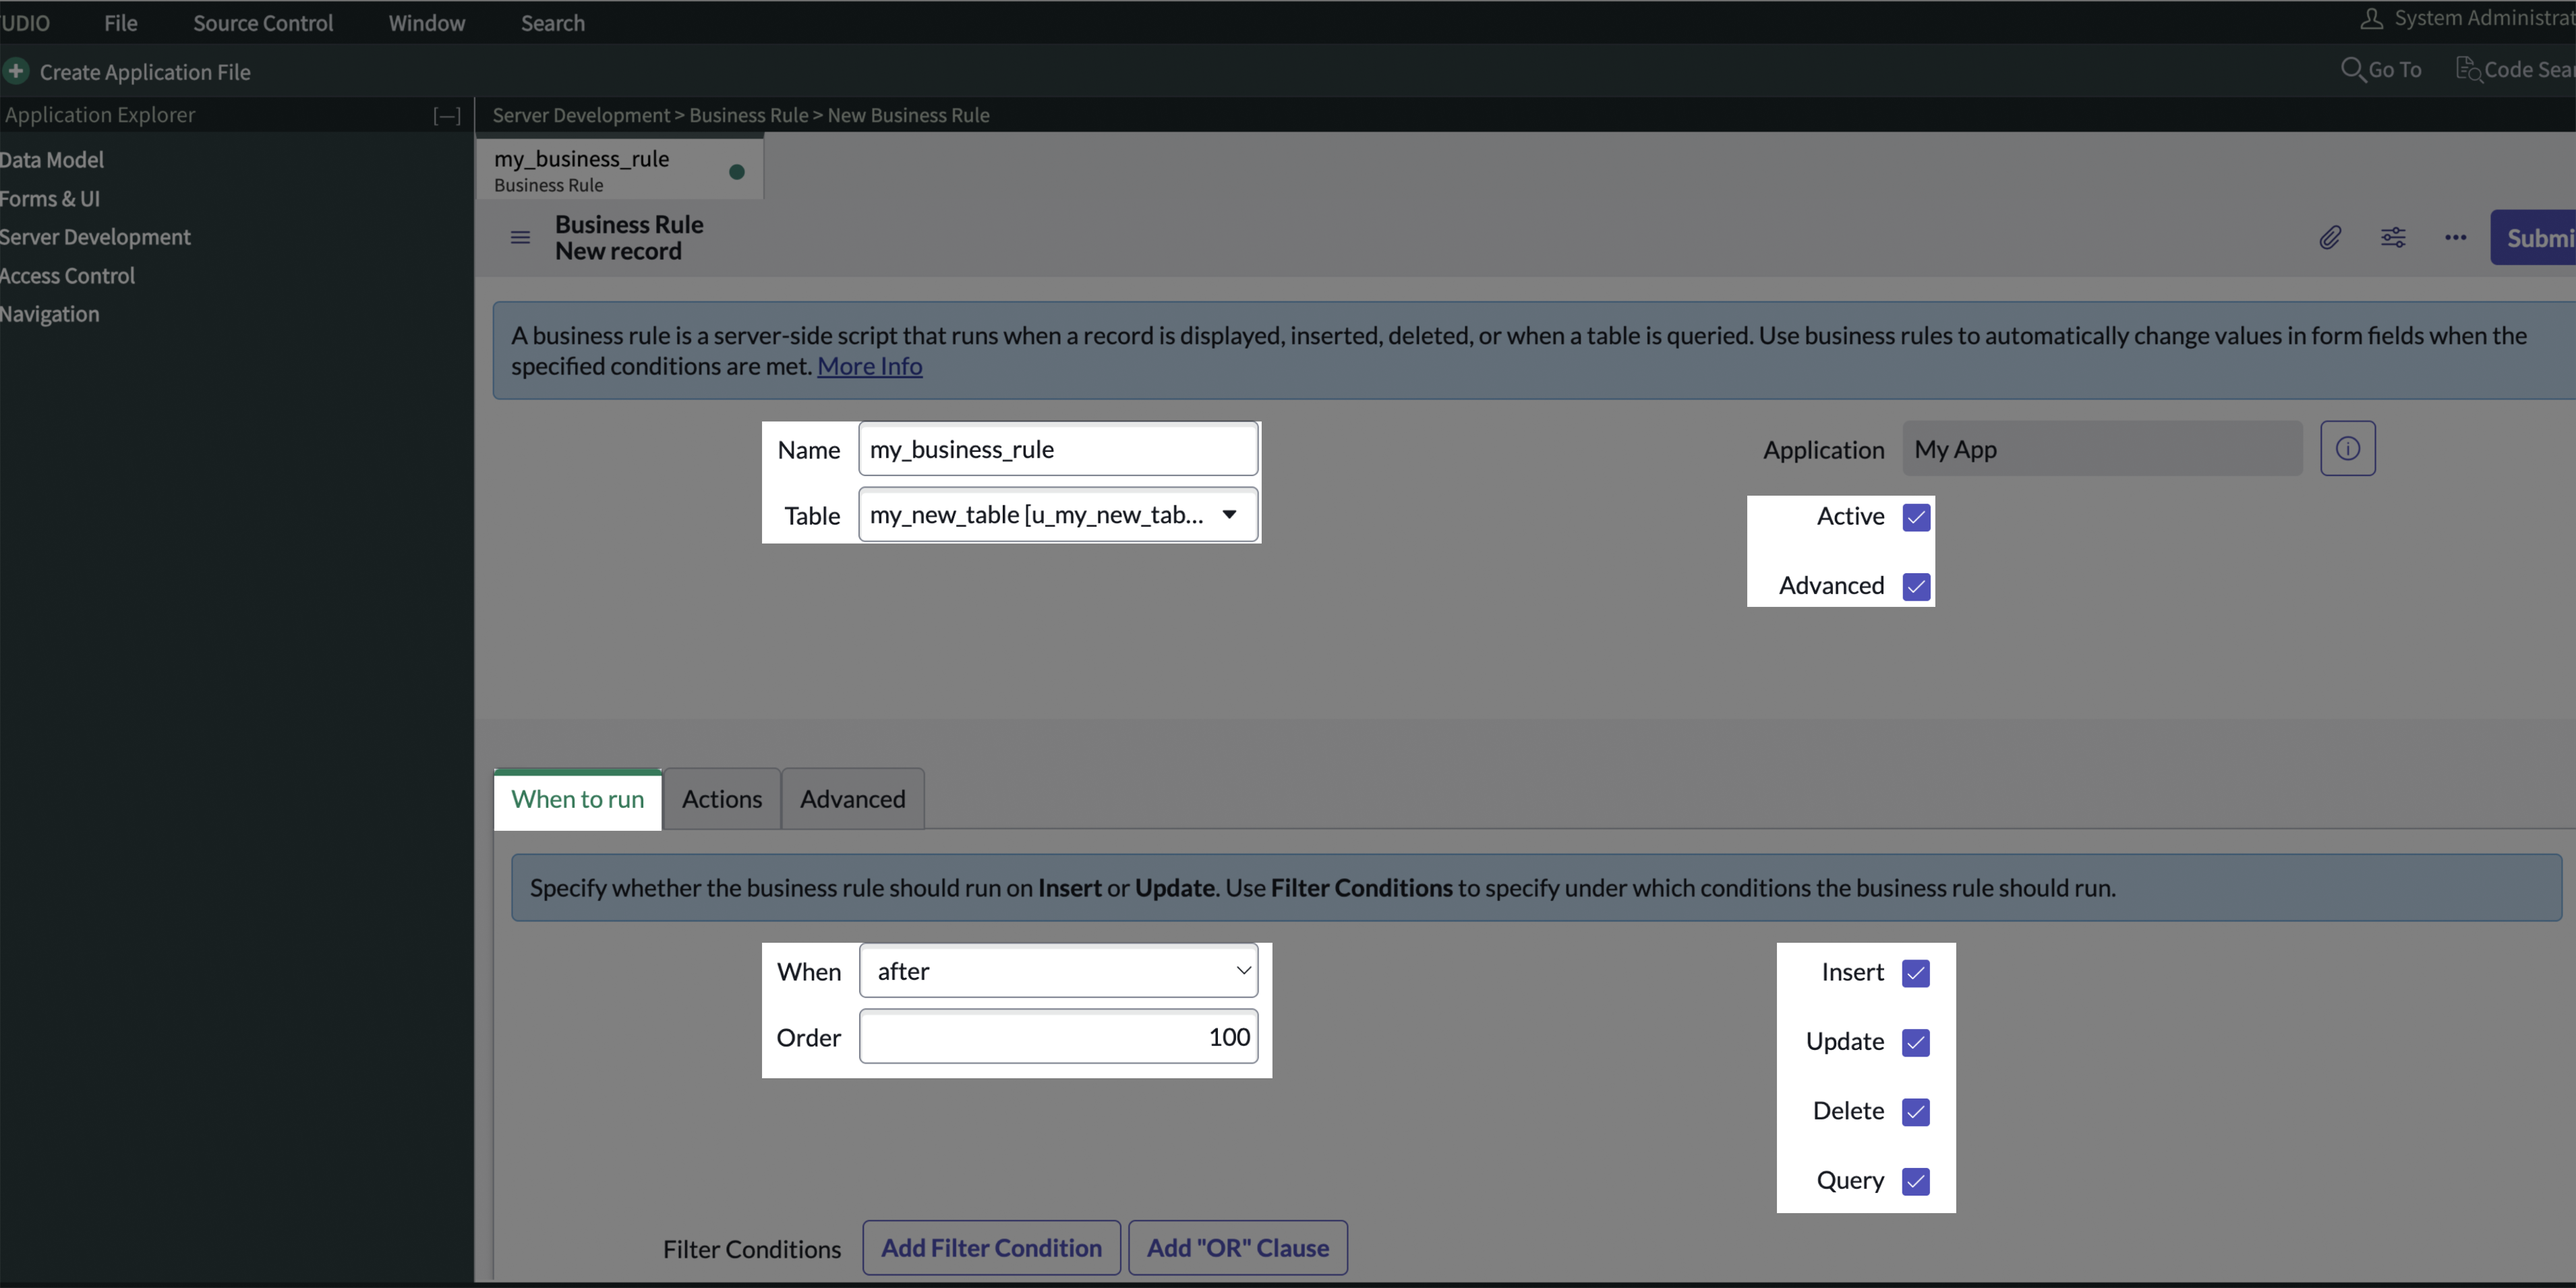
Configure the new rule’s references settings:
- Name the Rule: Enter a descriptive name that reflects the rule’s purpose.
- Select the Target Table: Choose the table the rule will apply to.
- Enable the Rule: Check both Active and Advanced.
-
Set When to Run:
- Choose After to run the rule once the record changes are saved.
- Enter the Order value (leave at
100unless you need a custom sequence). - Select the operations (Insert, Update, Delete, Query) that should trigger the rule.
-
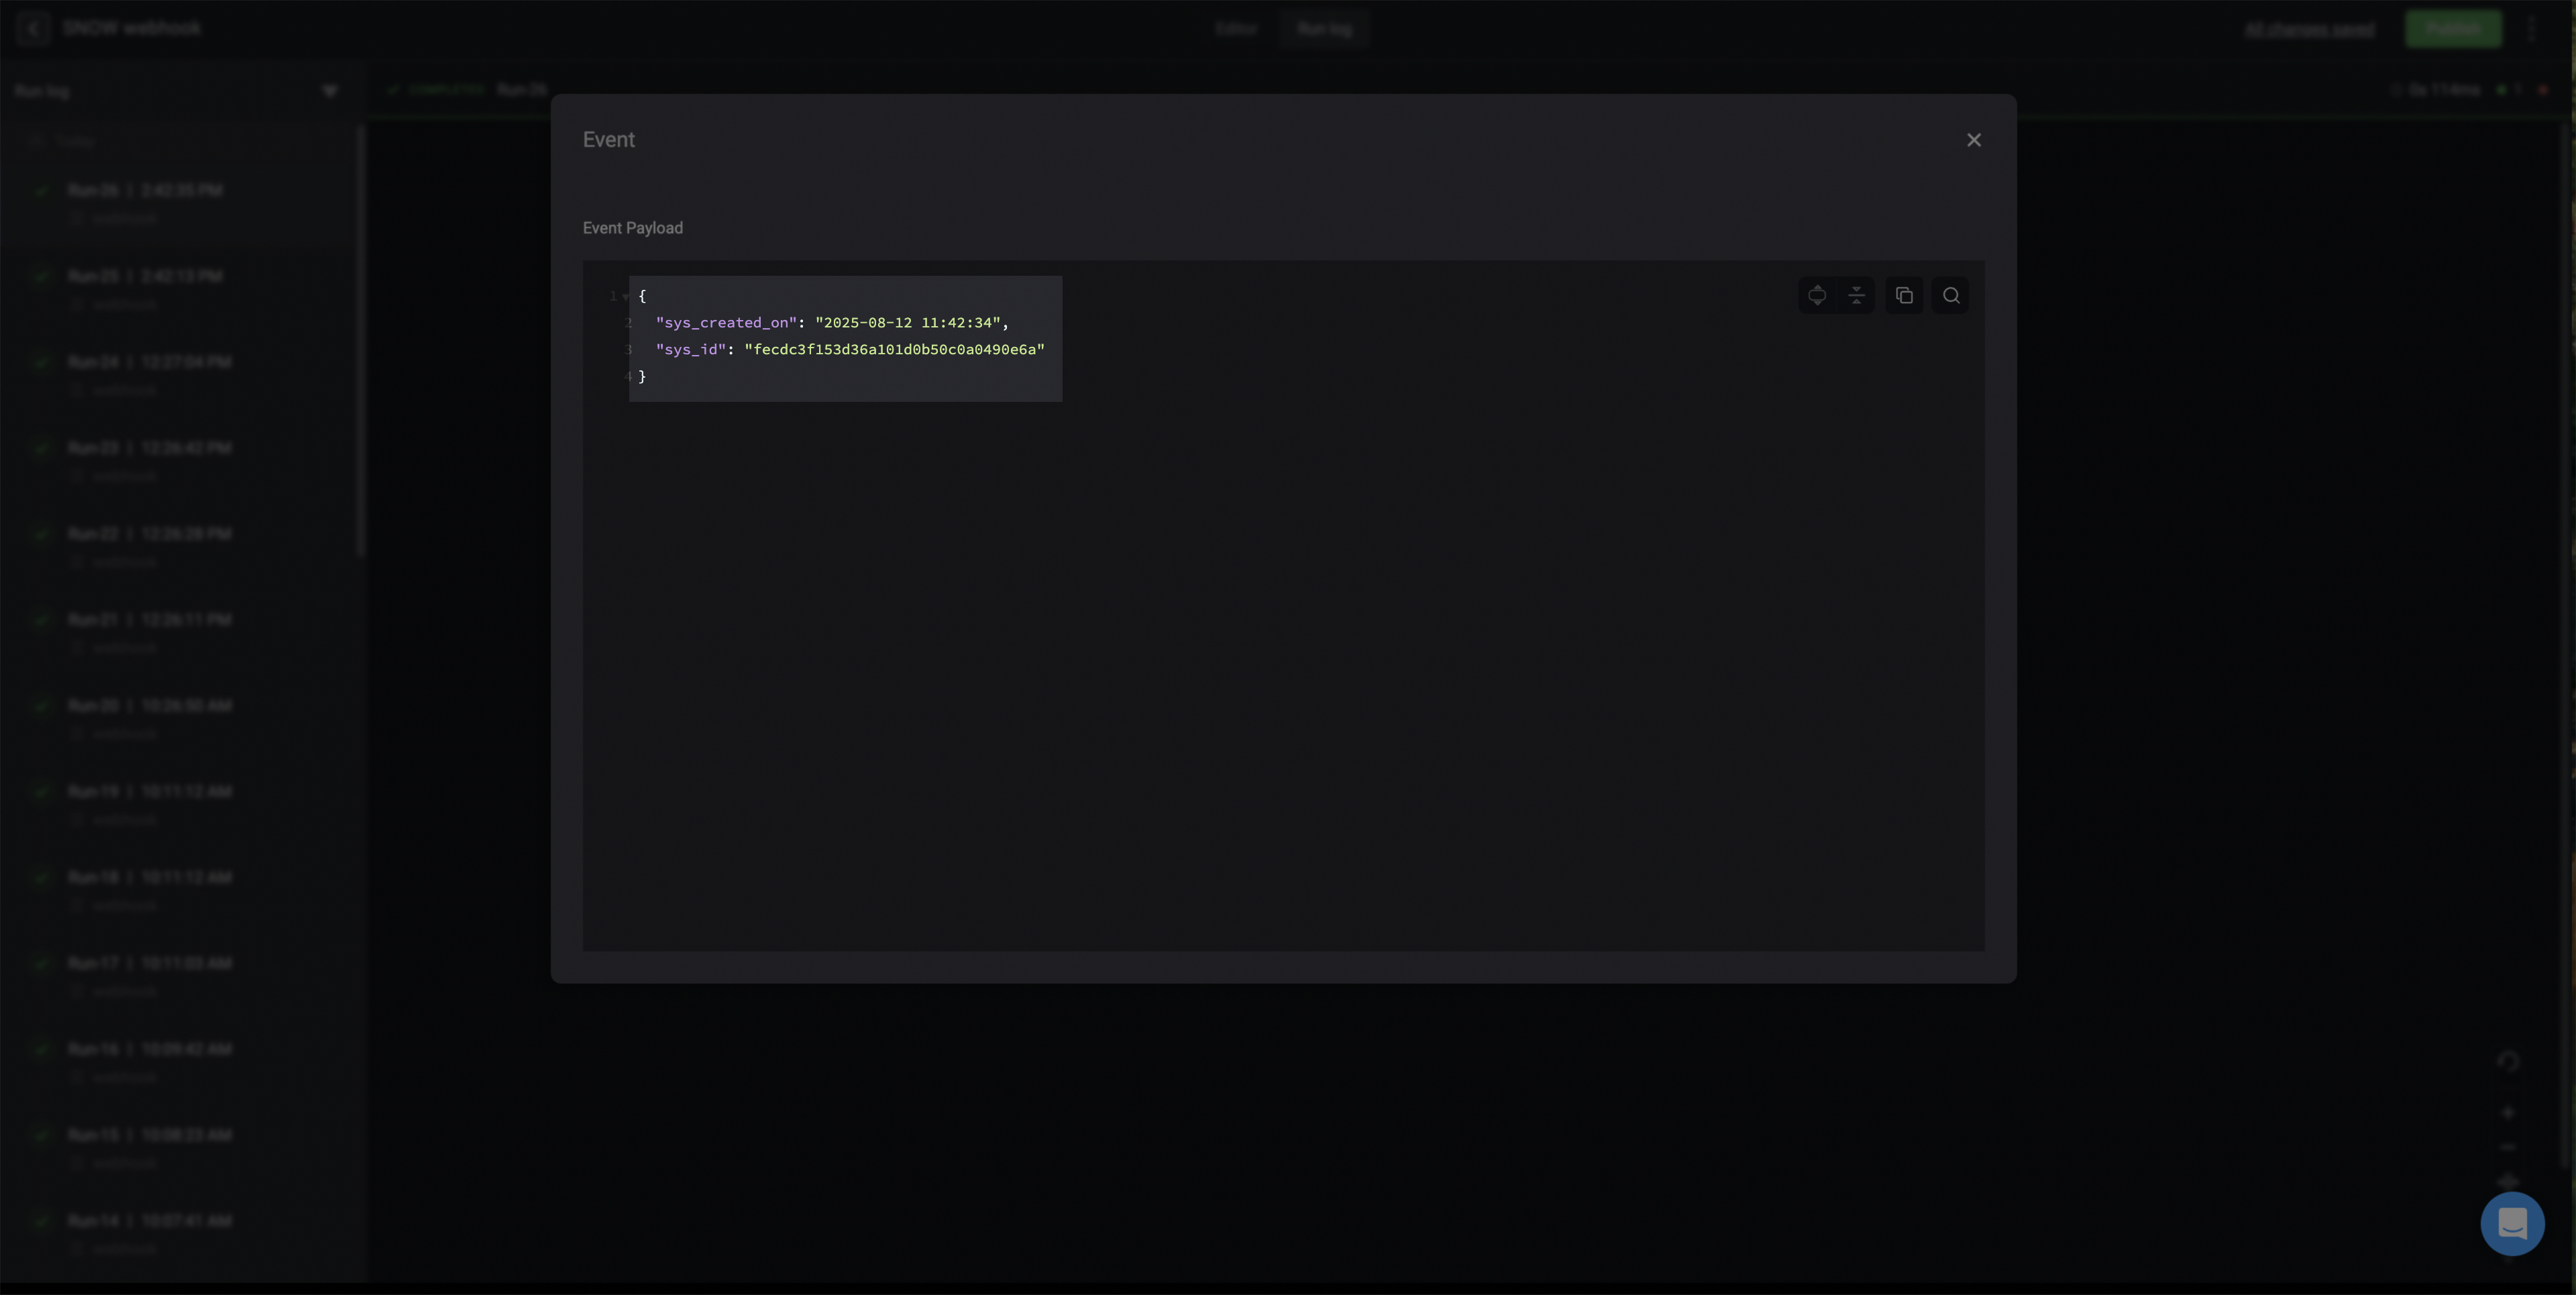
Under the Advanced section, insert a JavaScript script that will trigger Blink’s workflow. Click on the Save icon and then Submit.
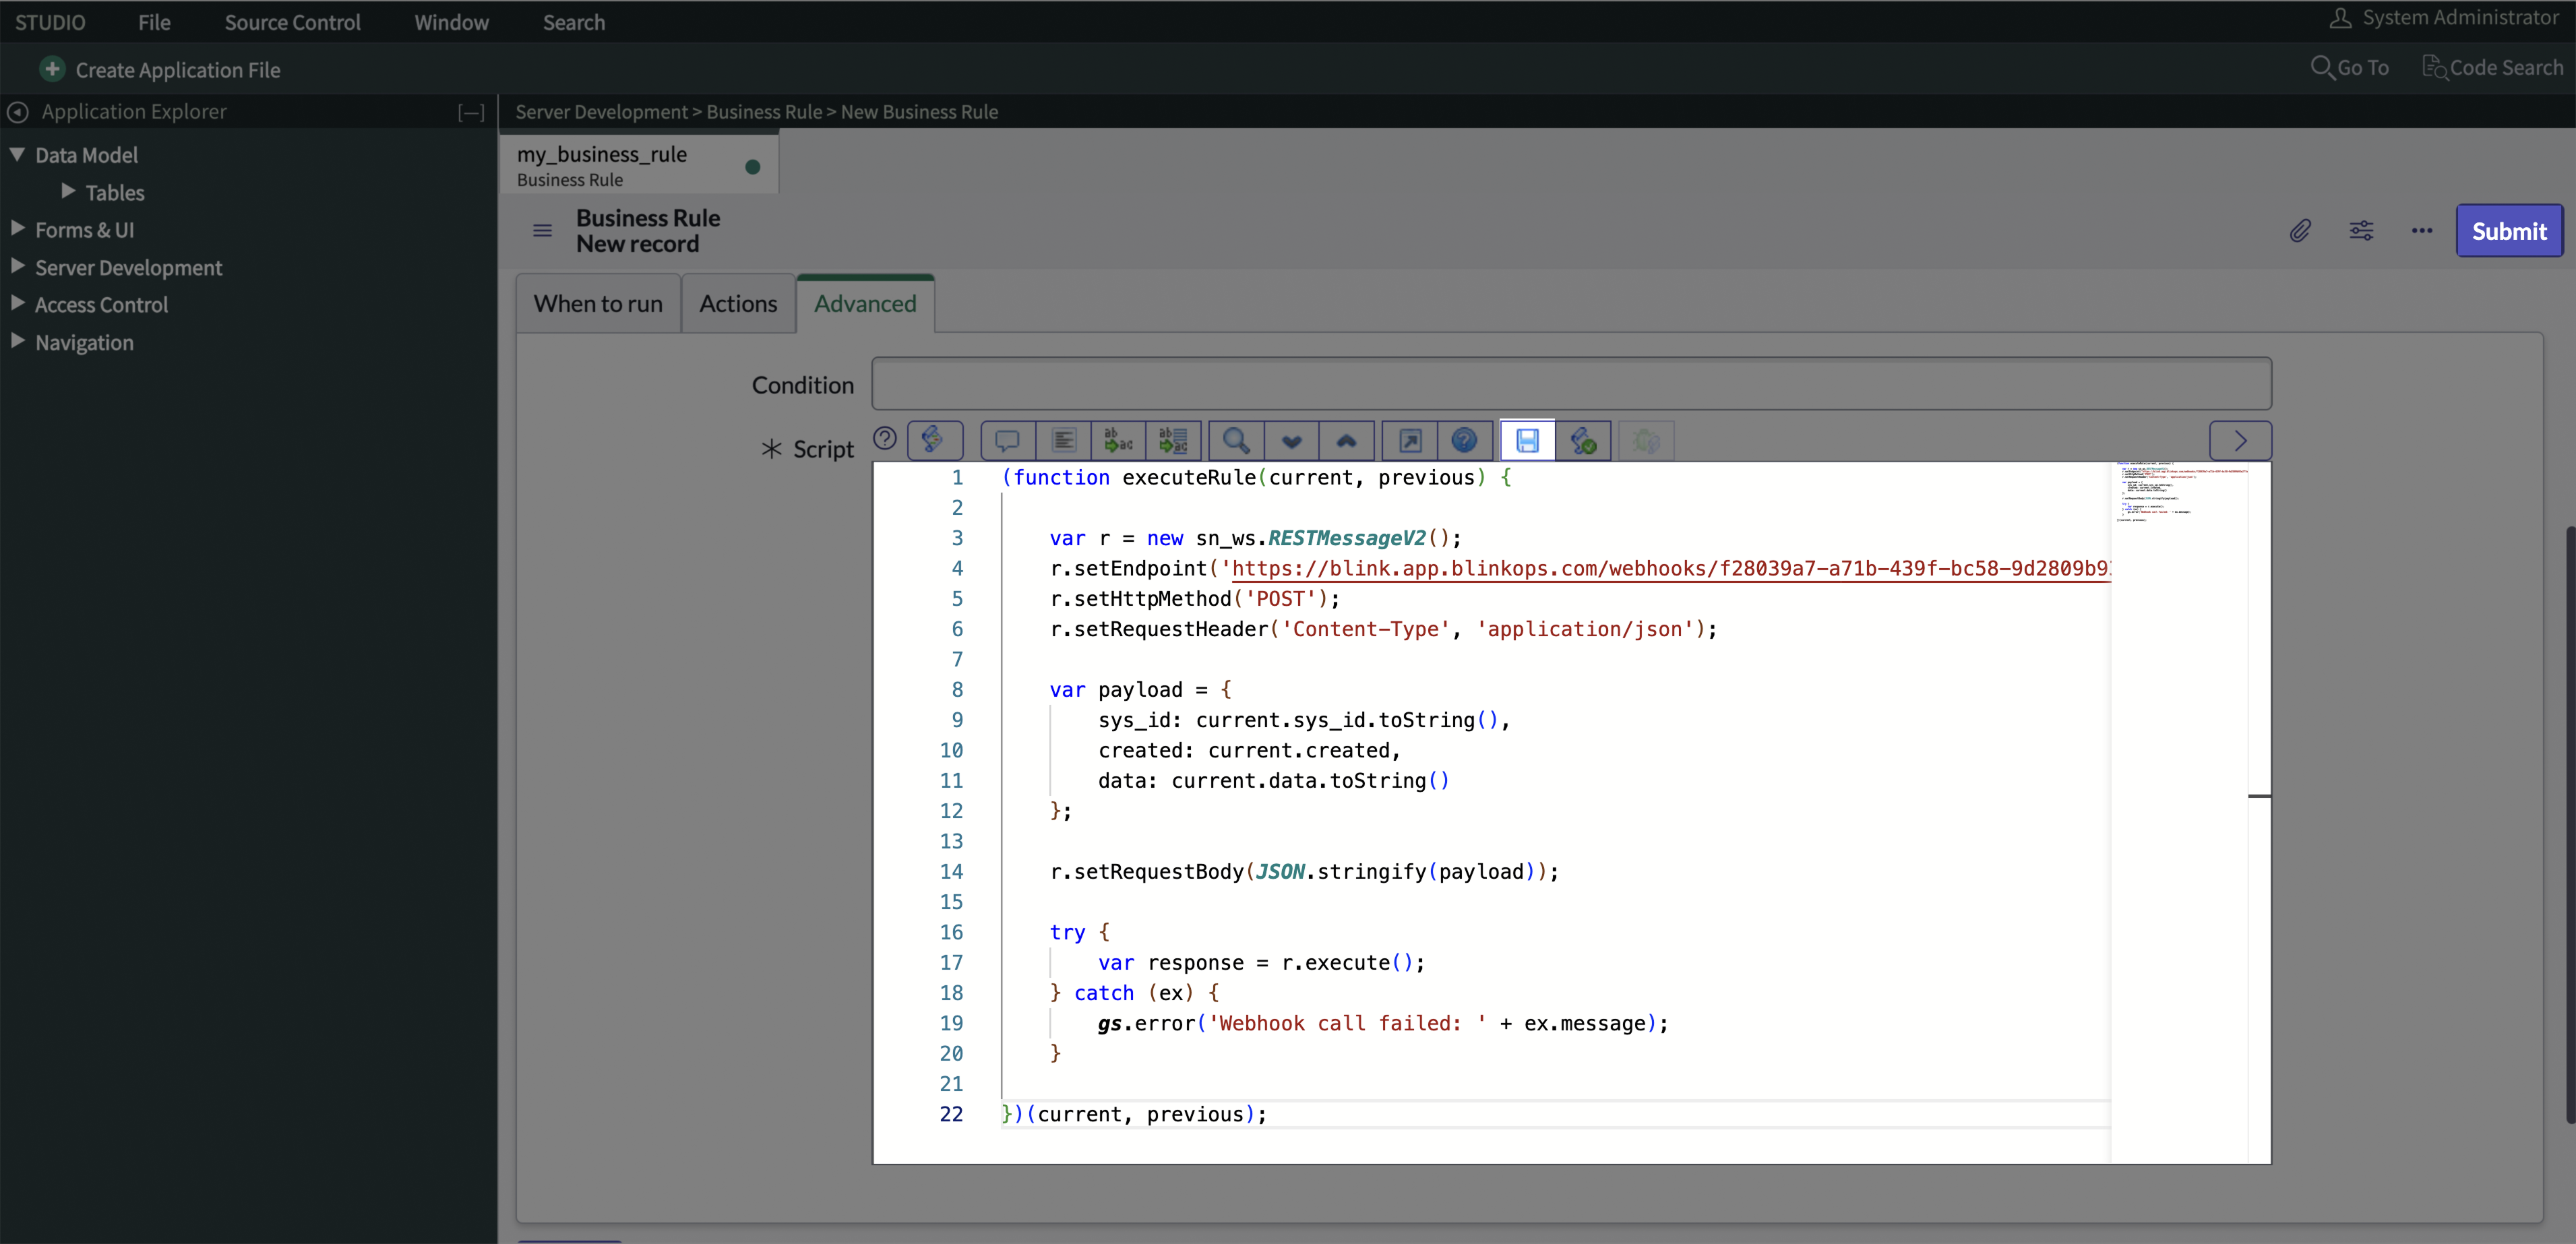
Here’s an example of a rule script that triggers a workflow in Blink:Important to Note:-
Make sure to copy the full Webhook URL of the workflow you want to trigger in Blink.
-
Replace the
https://your-real-webhook-urlplaceholder in the script with the copied URL. -
In the
payloadvariable, add the table columns you want to send when the webhook is triggered, in the following format:col_name: current.getValue('col_name').
-
Make sure to copy the full Webhook URL of the workflow you want to trigger in Blink.