Prerequisites
- A Blink account. Sign up here.
- A Slack connection or a Slack token to create a Slack connection.
Overview
Before we begin:- Creating a new Pack.
- Creating a new Workflow.
- Using an
ifStep to check if there is one or less tags assigned to the new EC2 instance. - Asking permission via Slack.
Before we begin
Creating a new Pack
A Pack is a collection of Workflows. If you already have a Pack you can open it and skip ahead to creating a new Workflow . If you don’t have an existing pack, follow these steps:- On your Workflow screen, click Create new Pack.
- Enter Pack name: My first Pack
- Click Create. The new Pack is displayed on your Workflow screen.
Creating a new Workflow
- Click Create Workflow.
- Enter the parameters: Workflow name: Tag control on a new EC2 instance Description: This Workflow will be triggered when a new EC2 instance is created and will check the tags.
- Select a type of trigger: Event-based Workflow.
- Select AWS > AWS EC2 new instances > Continue.
- In Trigger setup select or create an AWS connection (awsconnection).
- Enter Region: eu-west-1.
- Click Apply > Create Workflow. You are redirected to the Editor page of the Workflow.
Creating the Workflow Steps
Proceed to create the Steps of your Workflow as described in the following section.Step 1: Using an if Step to check if there is one or less tags assigned to the new EC2 instance
- Click to open the Action panel. Alternatively, you can drag Actions to your flow, from the menu on the left side of your Edit screen.
- Select
ifStep by clicking .
. - Click on Action #1 to change the name of the action to Checking number of tags.
- Enter the condition using expression language into the condition editor.
{{len(event_payload.tags)}} Less or equal to 1If one tag or less is found, Step 2 occurs. If more than one tag is found, Workflow stops.
Step 2: Asking permission via Slack
- Click to open the Action panel. Alternatively, you can drag Actions to your flow, from the menu on the left side of your Edit screen.
- Search and select the Slack > Send message to channel Action.
- For the Step to work, a connection to Slack is required. On the right-hand corner of your Step, select Select Connection > slack_connection. If you do not have a Slack connection, click Create new connection.
-
Enter the following parameters in your Step.
- Click on Action #7 to change the name of the action to Notify via Slack.
Testing the Workflow
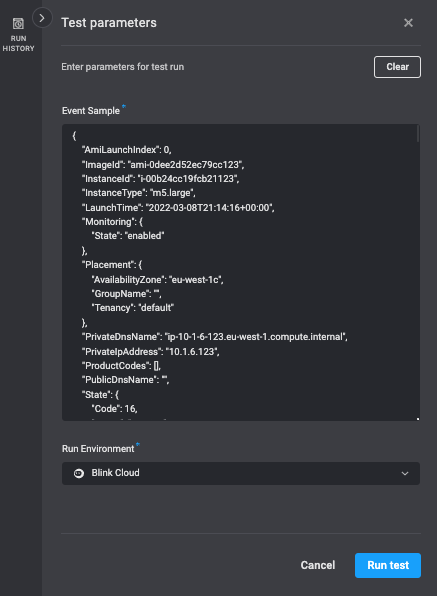
You can test your Workflow before you publish it. An event-based Workflow can be tested using a JSON sample of a potential incoming event. To run a test, use the following instructions:- From the Edit mode, save your draft and do a Test run of your Workflow.
- Click Test run. A sample event is displayed in the Event sample text area and the sample can be edited.
- You can change the runner to run the Workflow with a runner that is not the default. The default runner is Blink Cloud.
- Click Apply.
- Click Run test.
- When your Workflow is successful, you can Publish it. This will override any previous versions created and published.