Creating an Exchange Online connection
Create the connection by using one of the following methods:Using OAuth
Creating your connection
- In the Blink platform, navigate to the Connections page > Add connection. A New Connection dialog box opens displaying icons of external service providers available.
- Select the Exchange Online icon. A dialog box with name of the connection and connection methods appear.
- (Optional) Edit the name of the connection. At a later stage you cannot edit the name.
- Click Exchange Online to authenticate using OAuth.
- Sign in using your credentials.
Some actions require specific roles and permissions that are only available to user accounts.For example, the Start Compliance Search requires the
eDiscovery Manager role in Microsoft Compliance.For these cases, the action can be run using an Exchange Online OAuth connection by authenticating via a user instead of an application.Using Application Credentials
Obtaining the credentials
To connect to Exchange Online, Blink uses Certificate Based Authentication (CBA).-
Follow the instructions in the following link to set up app only authentication.
- Make sure that the application has the Exchange Administrator role.
- Save the certificate that you uploaded to Azure. It cannot be downloaded again!
-
Once your application is authorized, you should have a certificate stored as a
.pfxand.cerfile. -
Extract the public and private key of the certificate in a Base64 encoding:
-
In a bash terminal, install the
opensslpackage if it is not installed already. -
Public key:
openssl pkcs12 -in <your certificate file>.pfx -nokeys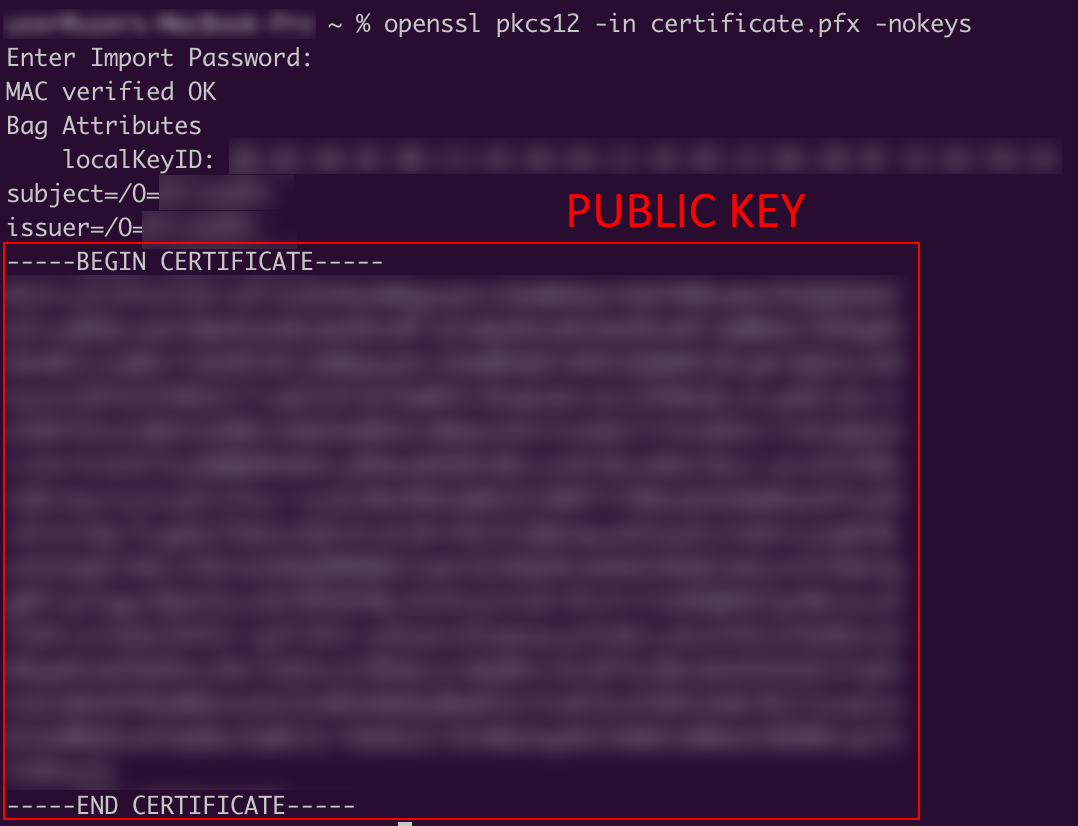
-
Private key:
openssl pkcs12 -in <your certificate file>.pfx -nodes -nocerts | openssl rsa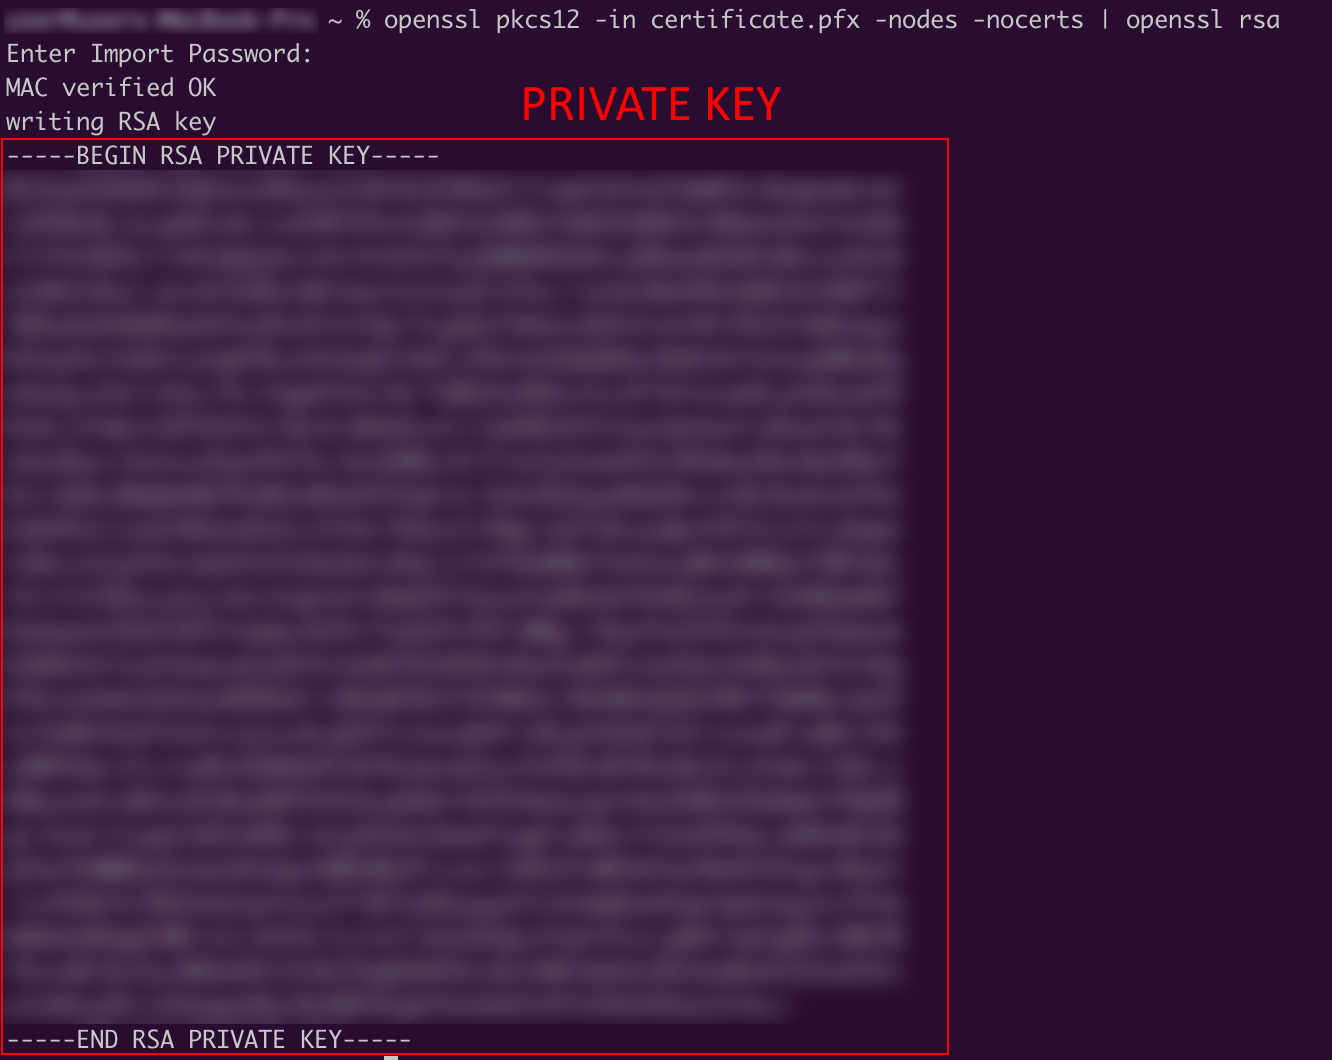
-
Both commands will have a Base64 encoded key, surrounded by
=====<TEXT>=====tags. These are the values that need to be used for the Blink connection.
-
In a bash terminal, install the
Setting API Permissions
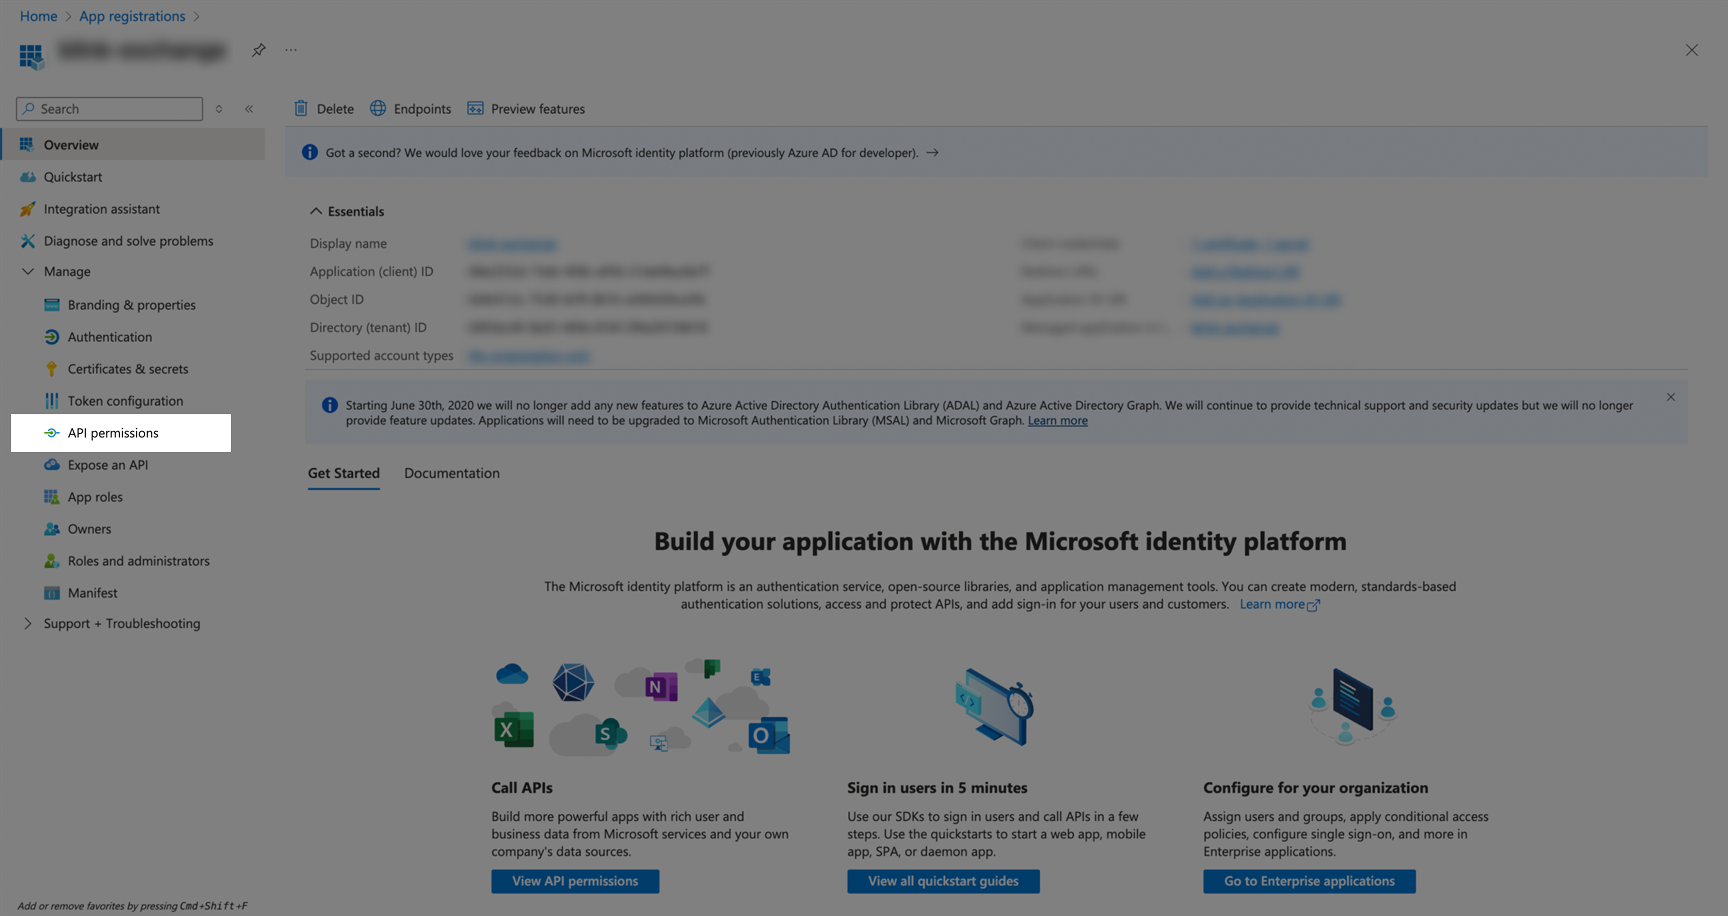
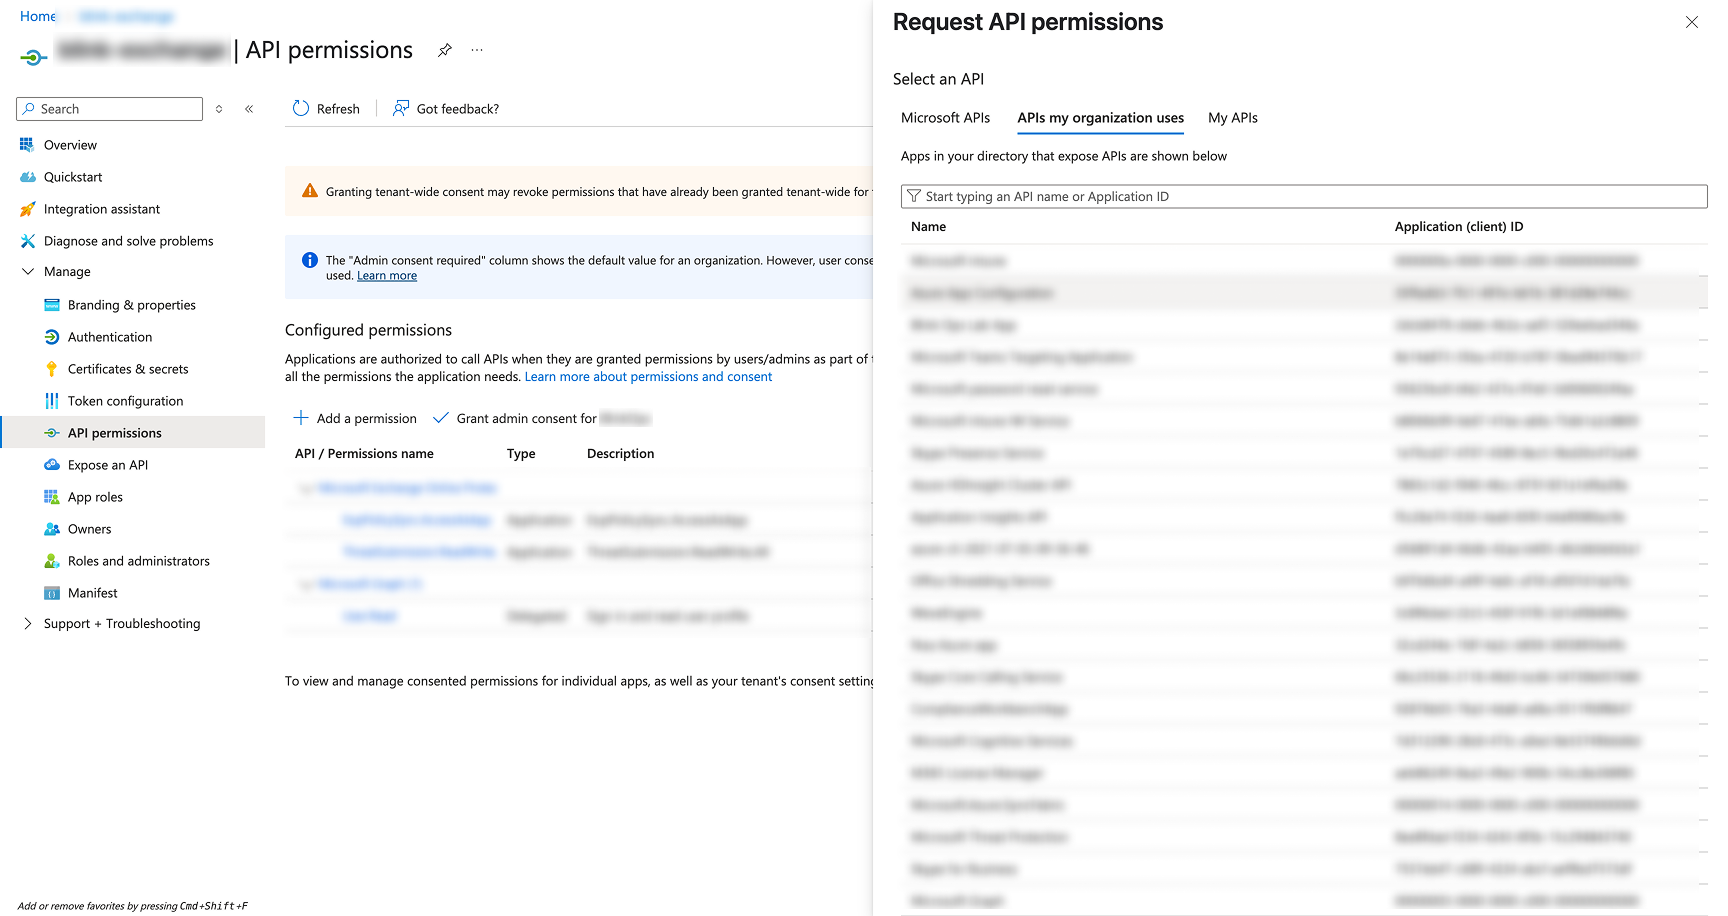
- Navigate to Azure Portal and select your app registration.
-
Configure API Permissions:
-
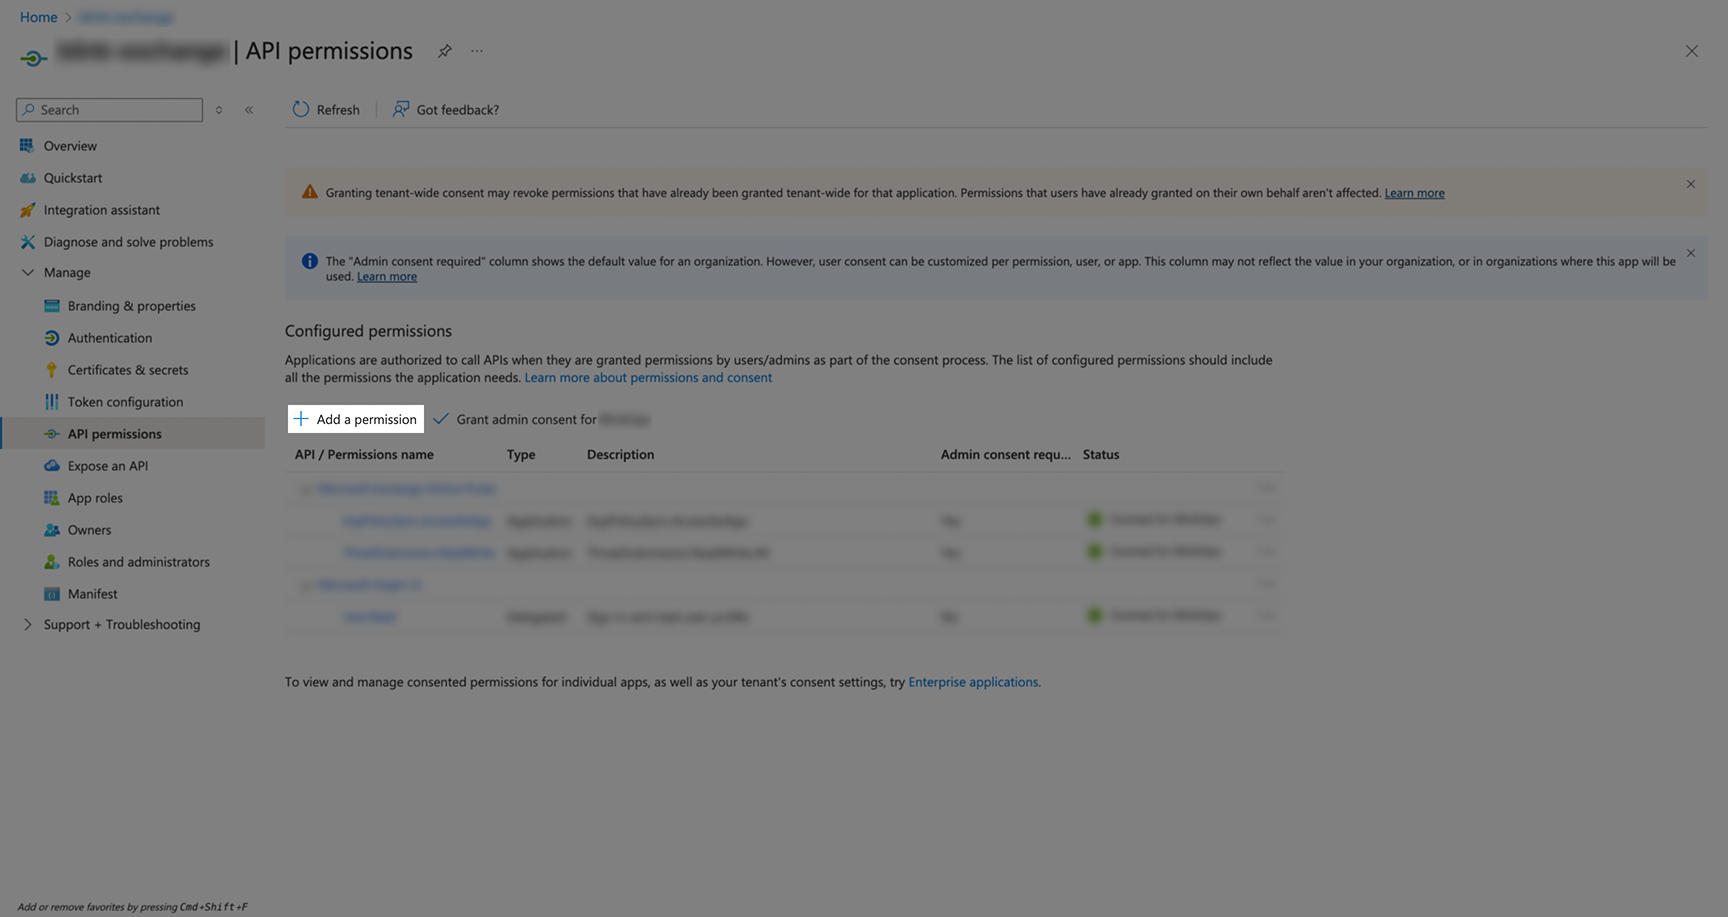
Go to API permissions in your app registration.
-
Click Add a permission to open the API permissions dialog.
-
Select APIs my organization uses tab, then search for and select your Office 365 Exchange Online application.
-
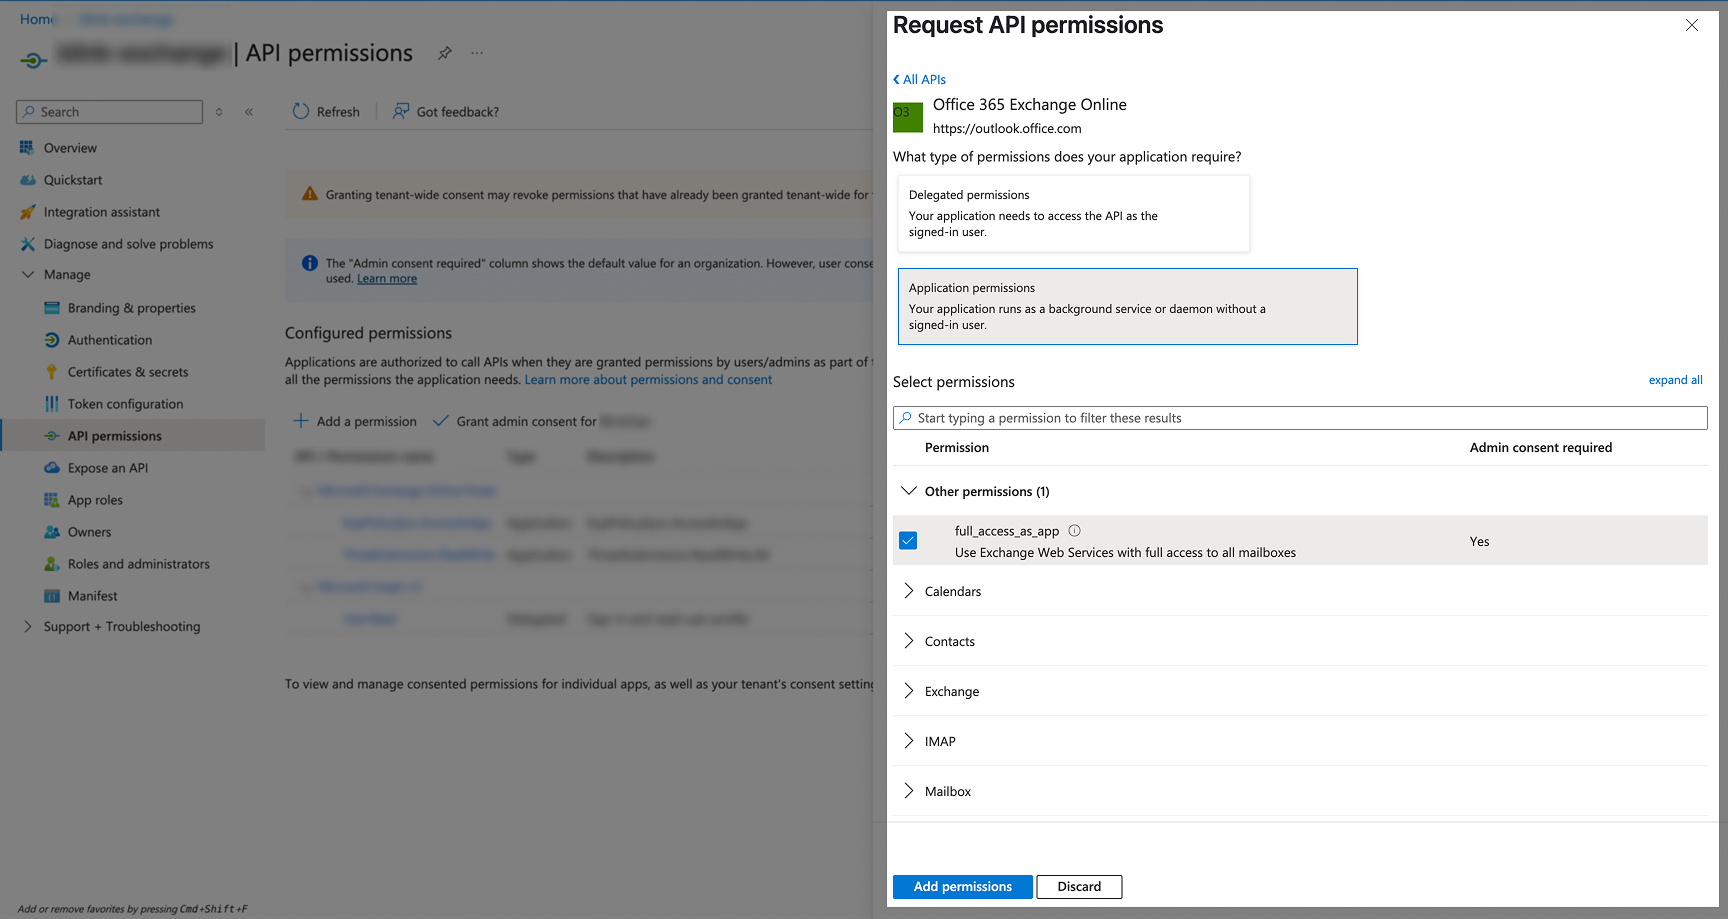
Choose Application permissions (not Delegated permissions).
-
Add the following permissions:
-
Go to API permissions in your app registration.
-
Grant Admin Consent for all configured permissions:
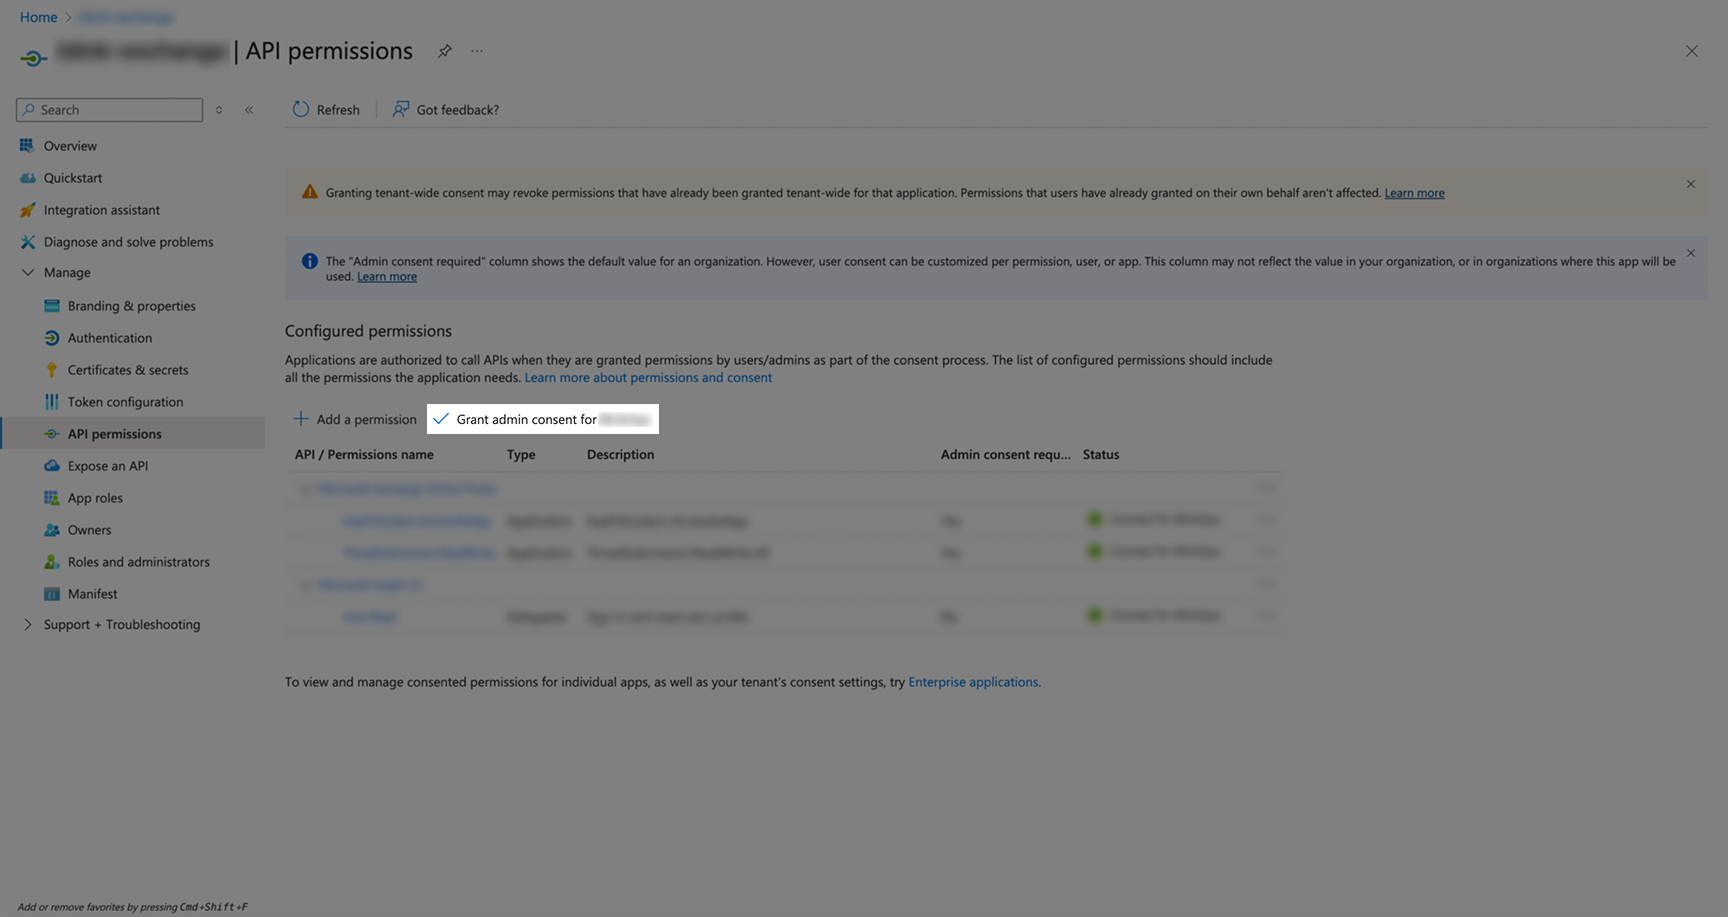
- Confirm the admin consent when prompted.
- After granting consent, the status should show green checkmarks indicating “Granted for [Your Organization]”.
Setting Roles
Step 1: Create a Security Group
-
Navigate to Microsoft Entra admin center.
-
Create a new security group:
- Go to Groups > Overview.
- Click New group.
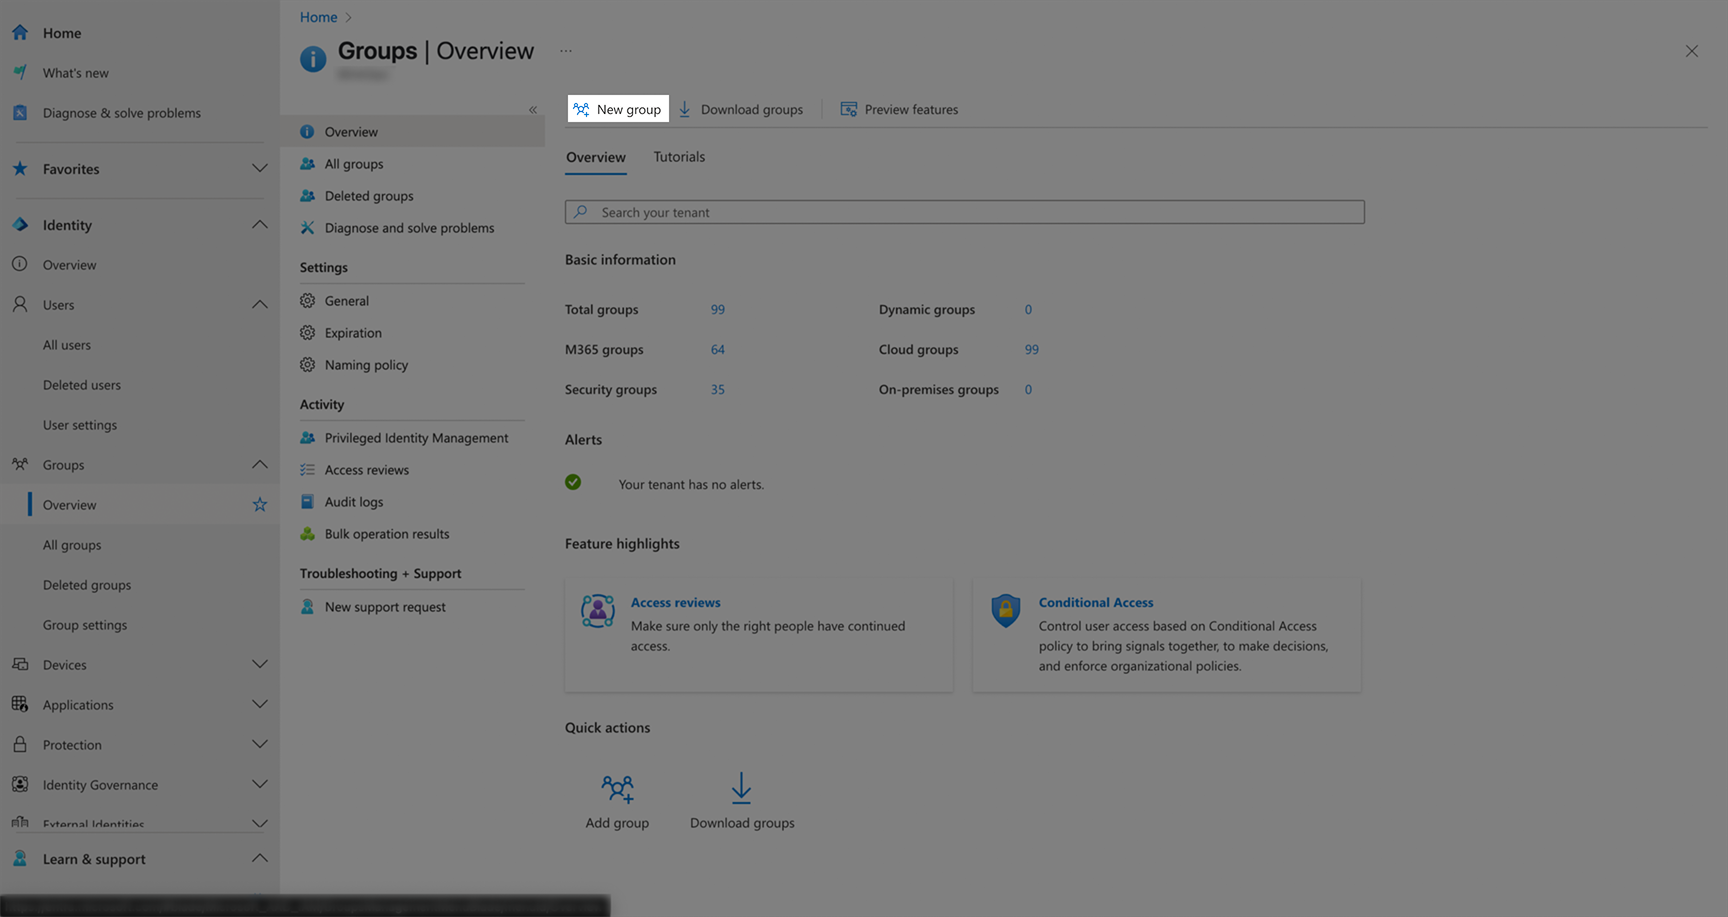
- Fill the form with the following details:
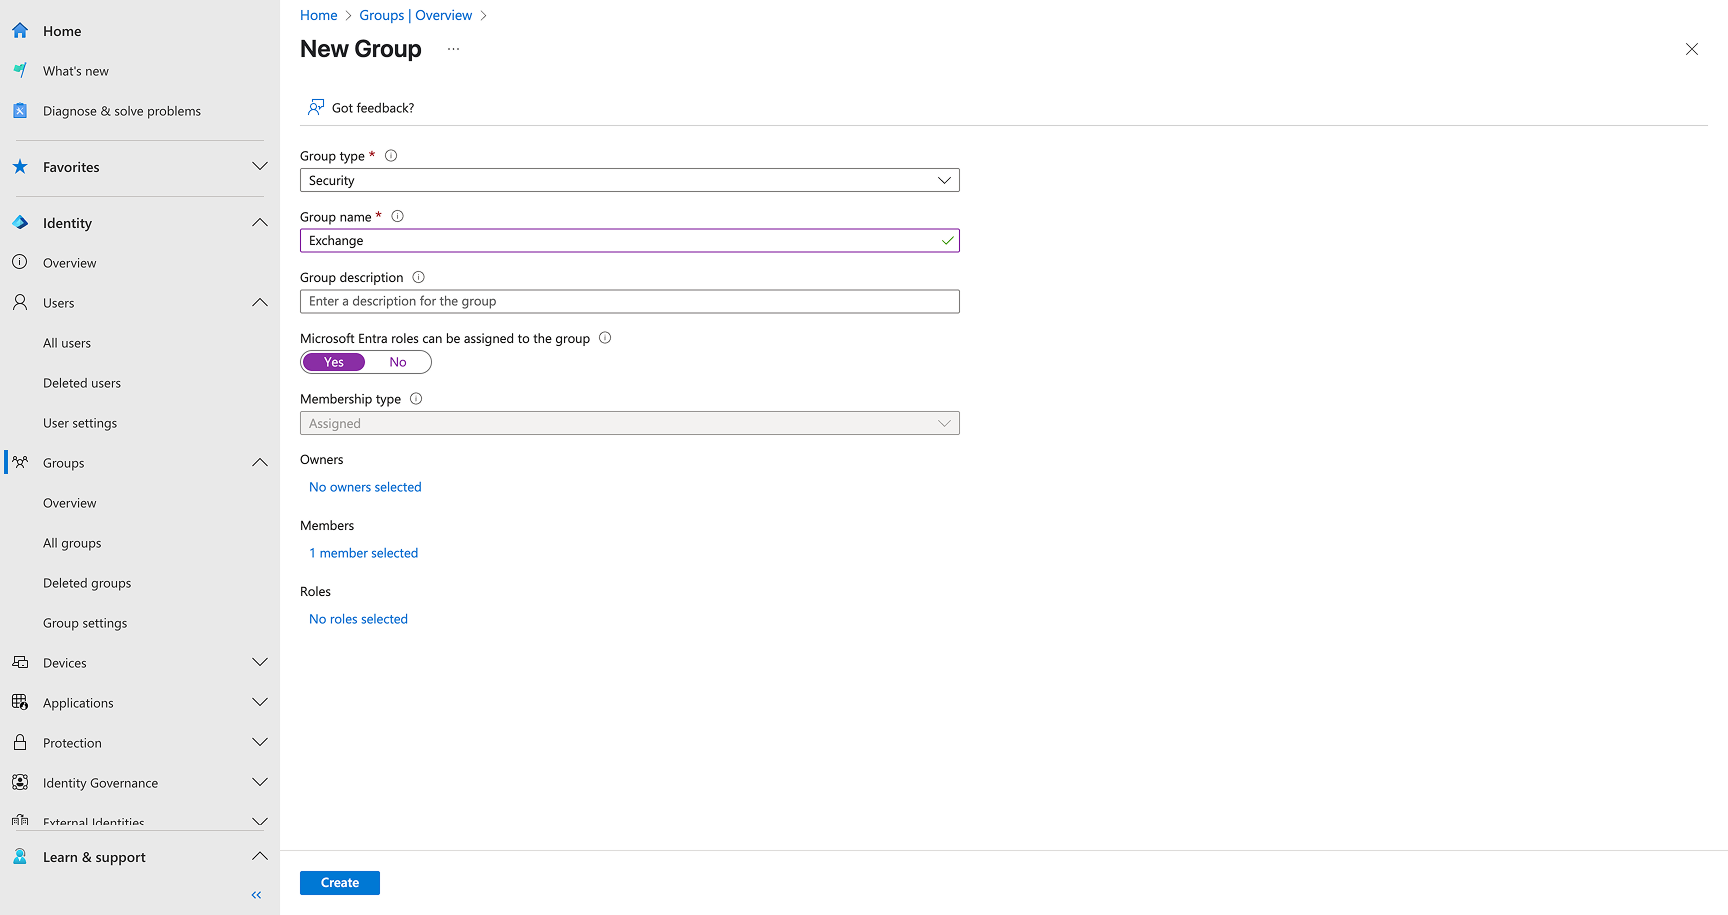
- Set Group type to
Security. - Enter a Group name (e.g.,
Exchange). - Add a Group description.
- Set Microsoft Entra roles can be assigned to the group to
Yes. - Add the required users as Members.
- Set Group type to
- Click Create.
- Go to Groups > Overview.
Step 2: Assign Compliance Administrator Role
-
Navigate to the created group.
- Go to Groups > All groups > Select your group.
-
Add role assignment:
- Click Assigned roles in the left menu.
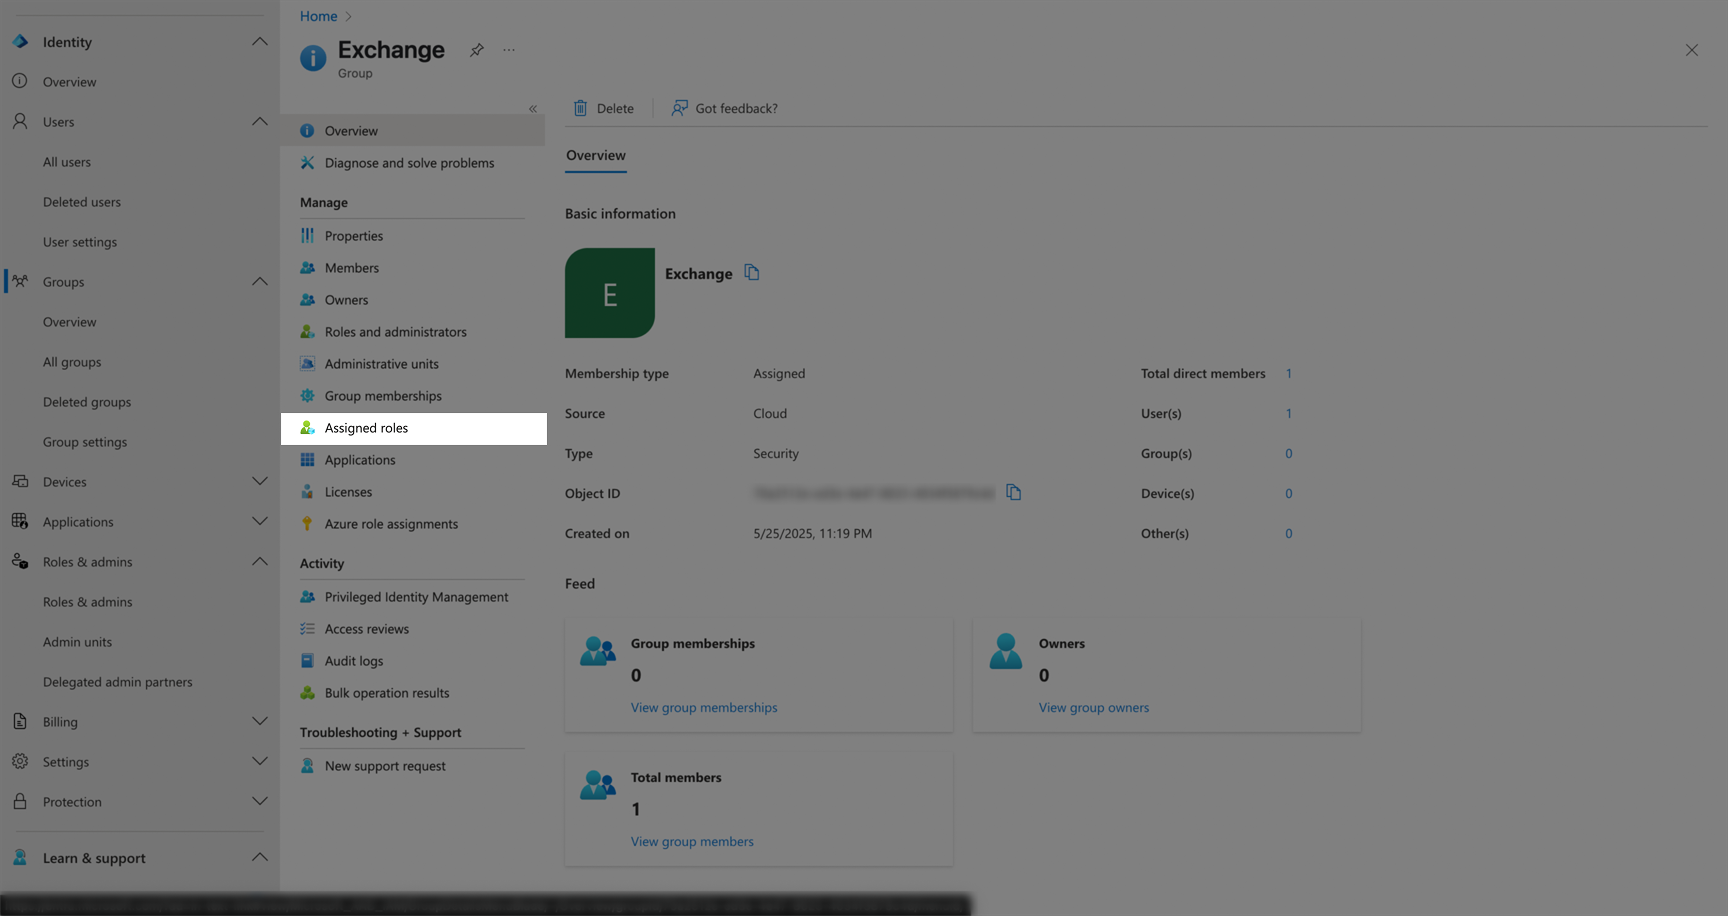
- Click Add assignments.
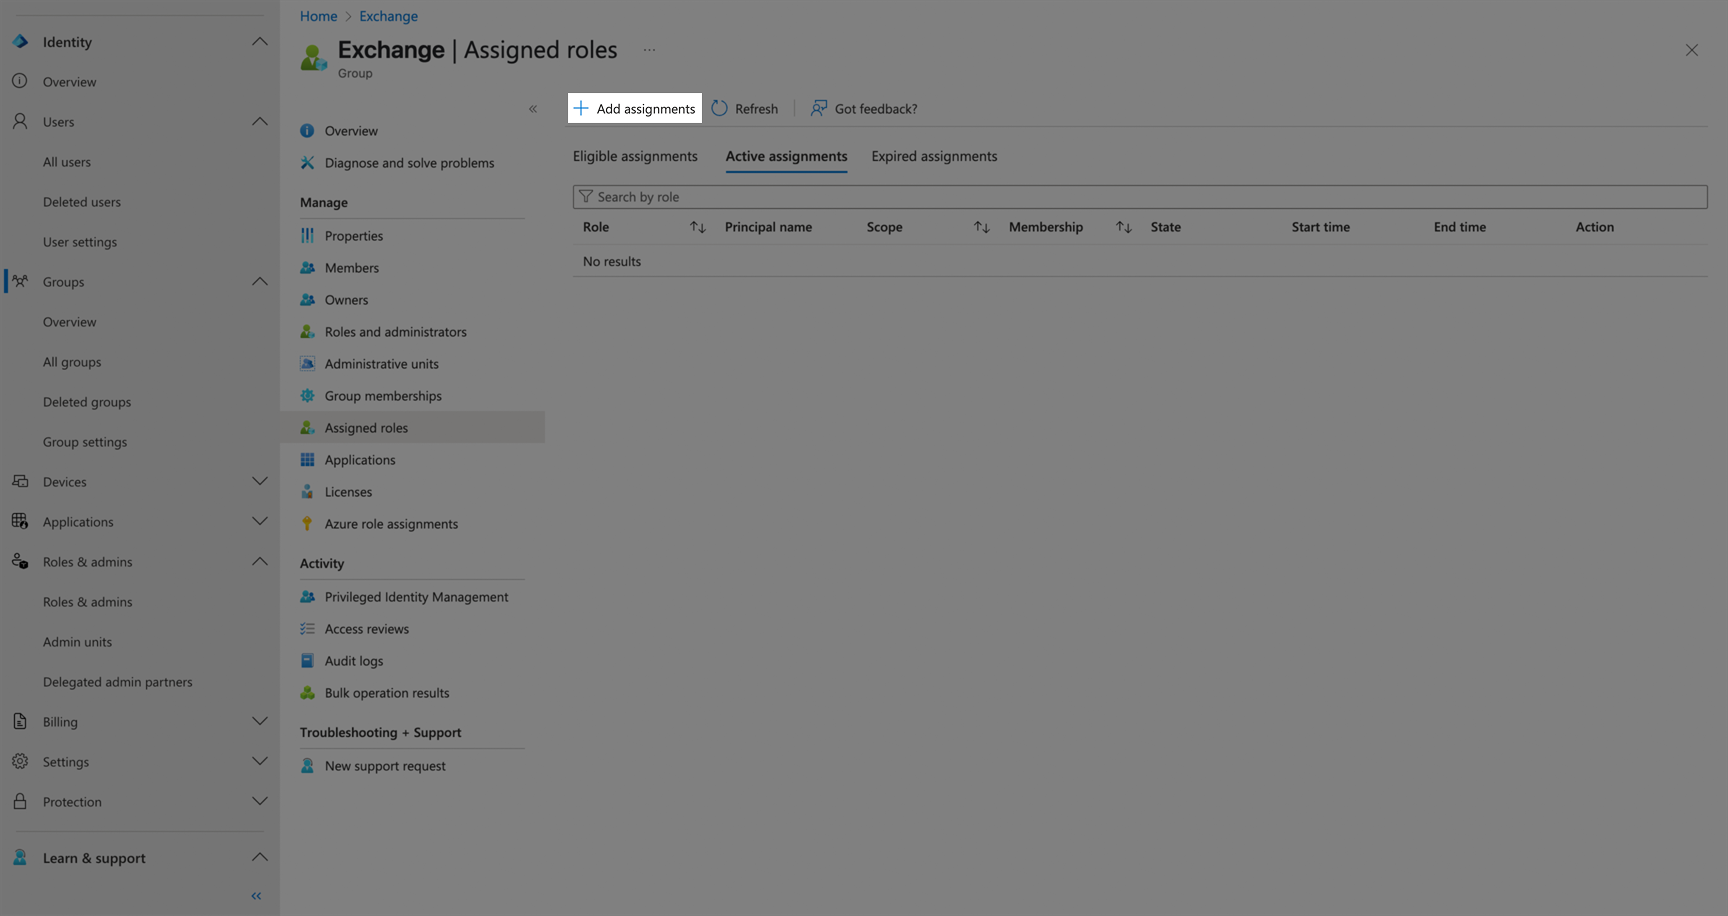
- Fill the form with the following details:
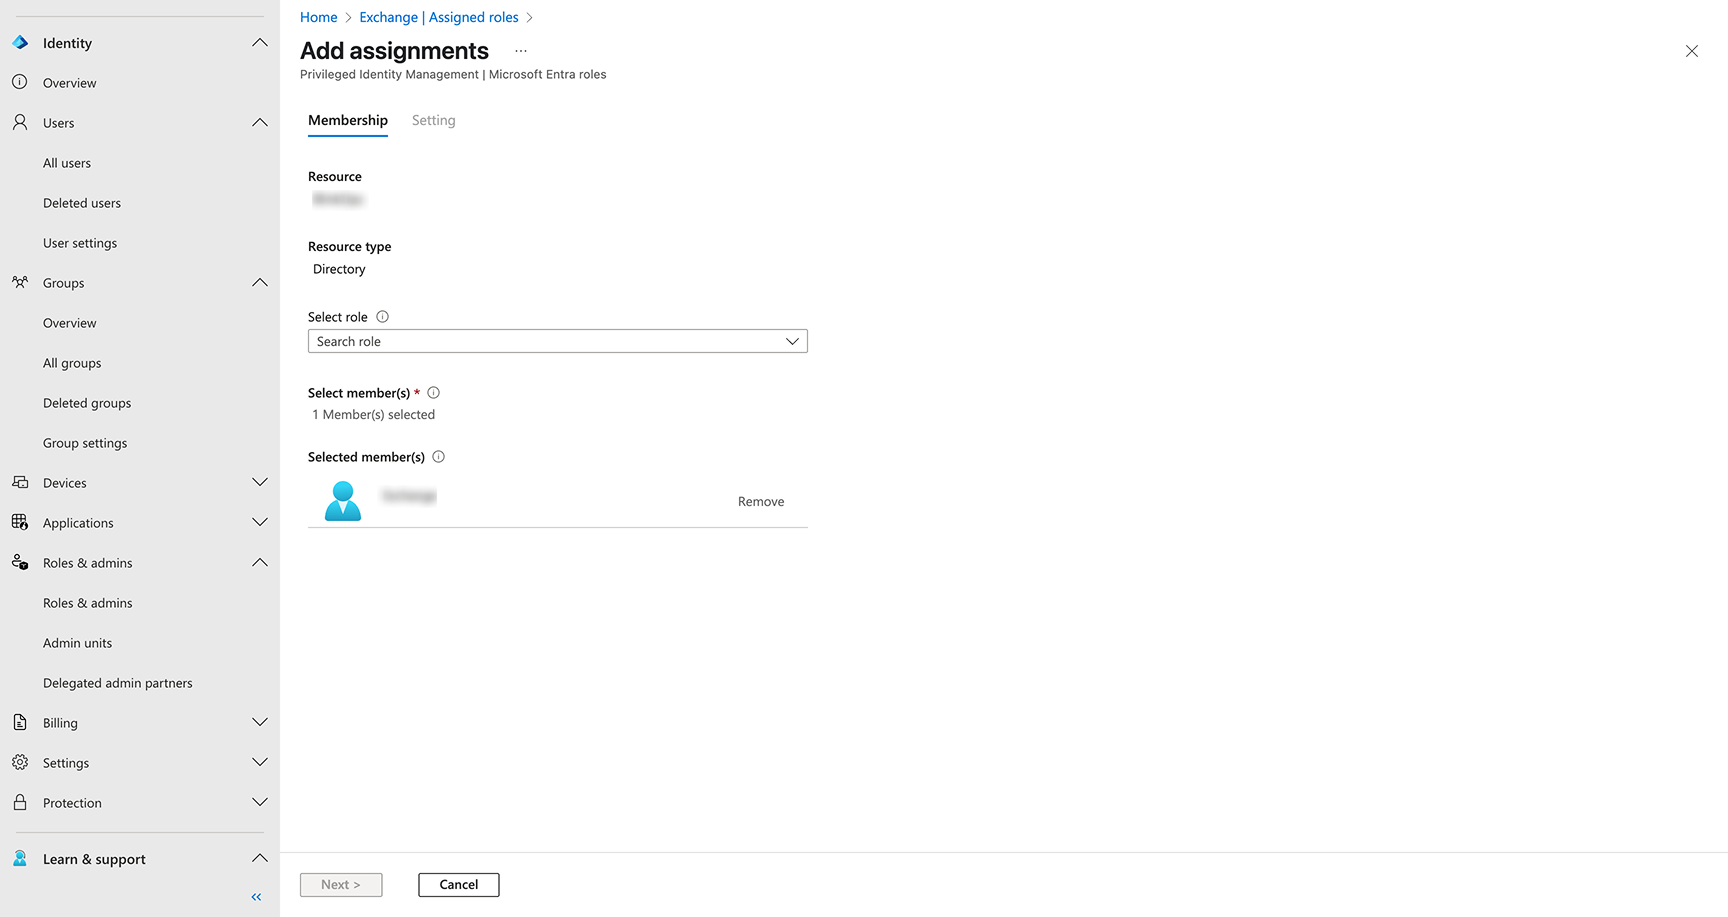
- Select Compliance Administrator role.
- Set Assignment type to
Eligible(for permanent access, choose “Active”). - Configure the assignment duration:
- Assignment starts: Set current date and time.
- Assignment ends: Set end date (can be set to permanent by checking “Permanently eligible”).
- Click Assign.
- Click Assigned roles in the left menu.
Step 3: Verify Role Assignment
- Navigate back to Groups > All groups > Your group.
- Go to Assigned roles.
- Verify that “Compliance Administrator” appears with status “Granted for [Your App Name]”.
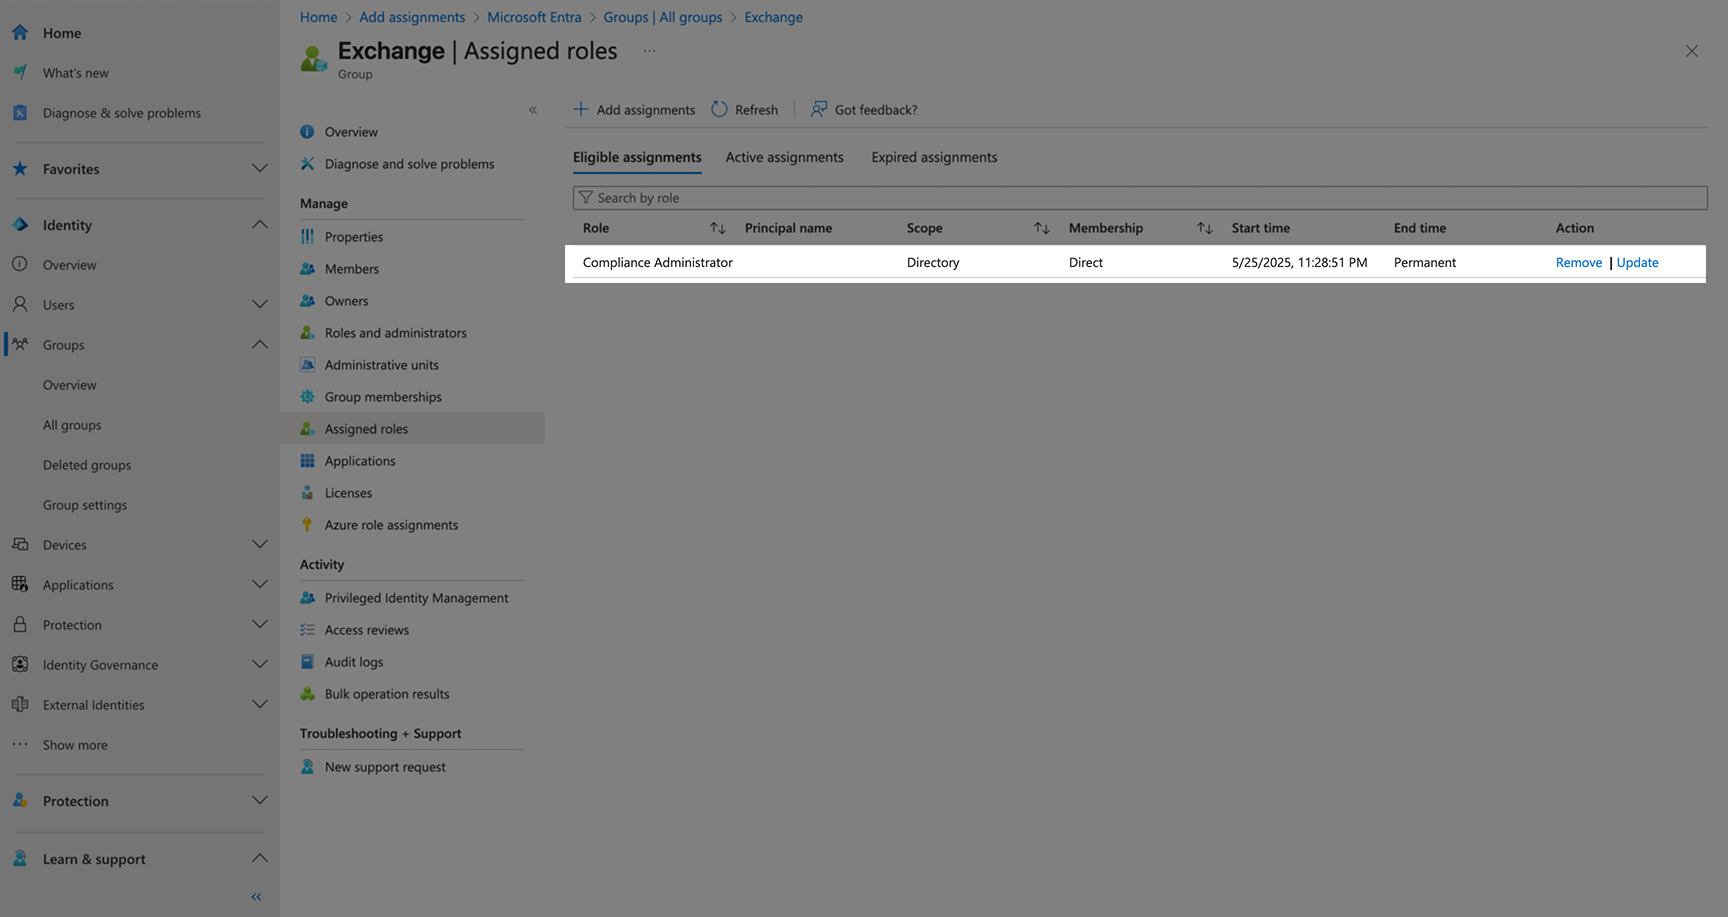
The role assignment may take a few minutes to propagate across the system.
Creating your connection
- In the Blink platform, navigate to the Connections page > Add connection. A New Connection dialog box opens displaying icons of external service providers available.
- Select the Exchange Online icon. A dialog box with name of the connection and connection methods appear.
- (Optional) Edit the name of the connection. At a later stage you cannot edit the name.
- Select Certificate as the method to create the connection.
-
Fill in the parameters:
- The App ID that has Exchange Administrator permissions.
- The
.onmicrosoft.comURL of the Organization - Public key of the X.509 certificate that is authorized to act on behalf of the application, in a PEM format
- Private key of the X.509 certificate that is authorized to act on behalf of the application, in a PEM format
- (Optional) Click Test Connection to test it.
- Click Create connection. The new connection appears on the Connections page.