Creating an AWS connection
Method 1: AWS Assume Role
- In your AWS account, create a new AWS role.
-
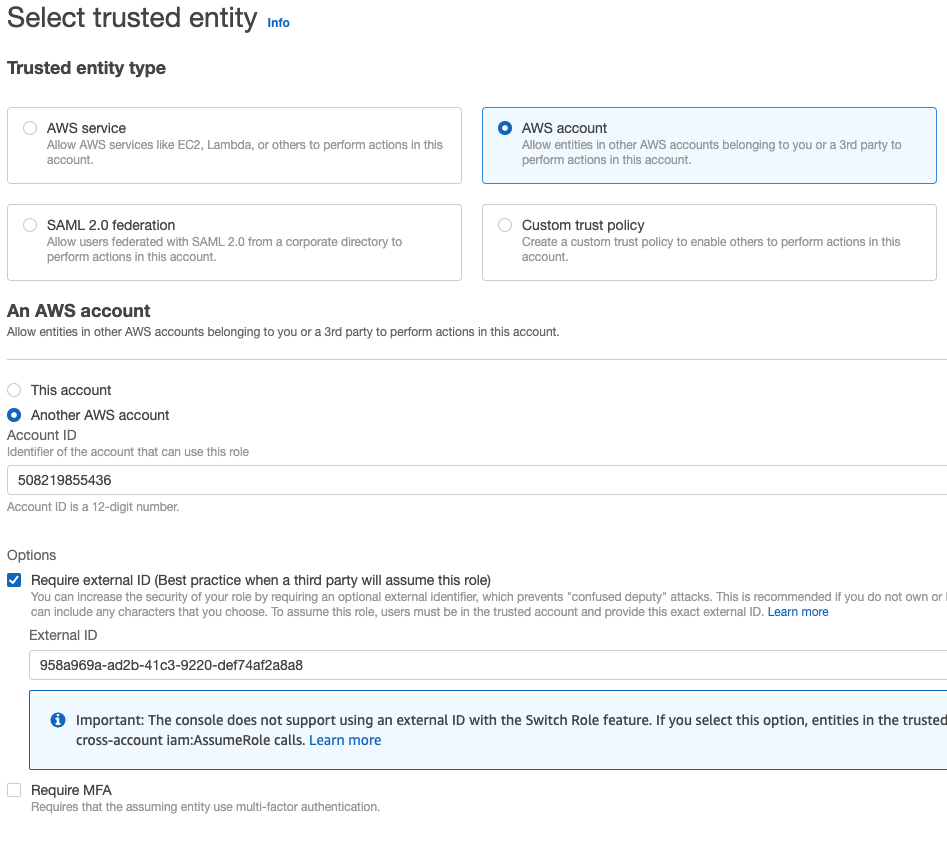
Set up your trusted identity to allow Blink AWS account permission to assume your role, using Blink’s account ID:
508219855436. Select the Require external ID checkbox > Fill in the External ID provided in the connection creation in step 1.Configuration in AWS screenshot
 The External ID is ignored on self-hosted runners unless it is explicitly configured in the runner’s trust policy.
 - In the Blink platform, add the permissions required for your AWS actions.
-
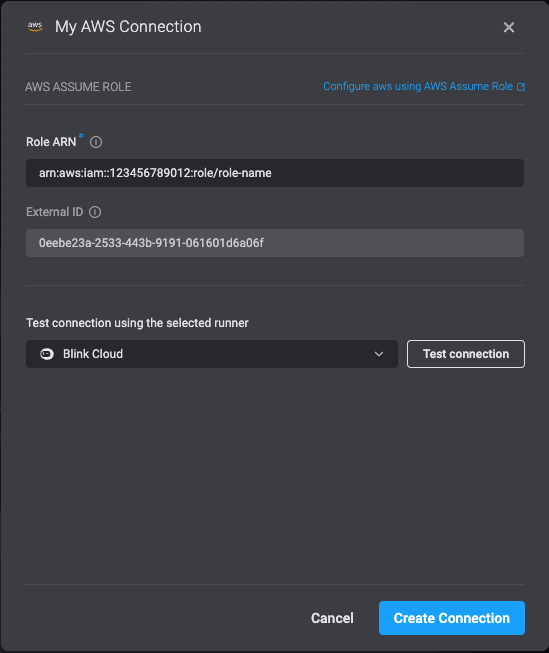
Create the connection by completing the My Connection form, filling in the created Role’s ARN.
Method 2: AWS Assume Role + Key

- You prefer to connect Blink to your account using an access key (similar to method #3).
- Unlike method #3, the permissions you want to grant in Blink are not assigned directly to the access key’s identity, but instead to an AWS role.
Advanced connection options
Method 3: AWS Access Key
To create an access key and secret access key, follow these instructions.Method 4: Connection by Runner’s Identity
This method is only available for self-hosted Runner installations, and
not for the Blink Cloud Runner.

When using this method, you can assume a role without an External ID. See the note in Method 1 above for more details.
- If you haven’t already, install a self-hosted Blink runner within your AWS environment.
-
Assign an AWS role to your Runner, using one of these methods:
- For an EC2 Based Runner, assign a role to the EC2 instance.
- For a K8S Based Runner, assign the role to the pod’s service account.
- In a Blink workflow, use AWS steps without specifying a particular connection (leave the connection dropdown unselected) to leverage identity-based authentication.
Security Best Practices
- We advise you to periodically rotate your AWS Access Keys if you are choosing it as a method to establish a connection.
- We recommend scoping the associated IAM Policies tightly and grant access only to required actions and resources.