Creating an Okta connection
To create the connection you need:- An API token
- An API address
Obtaining the credentials
- Sign in to your Okta organization as a user with administrator privileges. API tokens have the same permissions as the user who creates them, and if the user permissions change, the API token permissions also change.
-
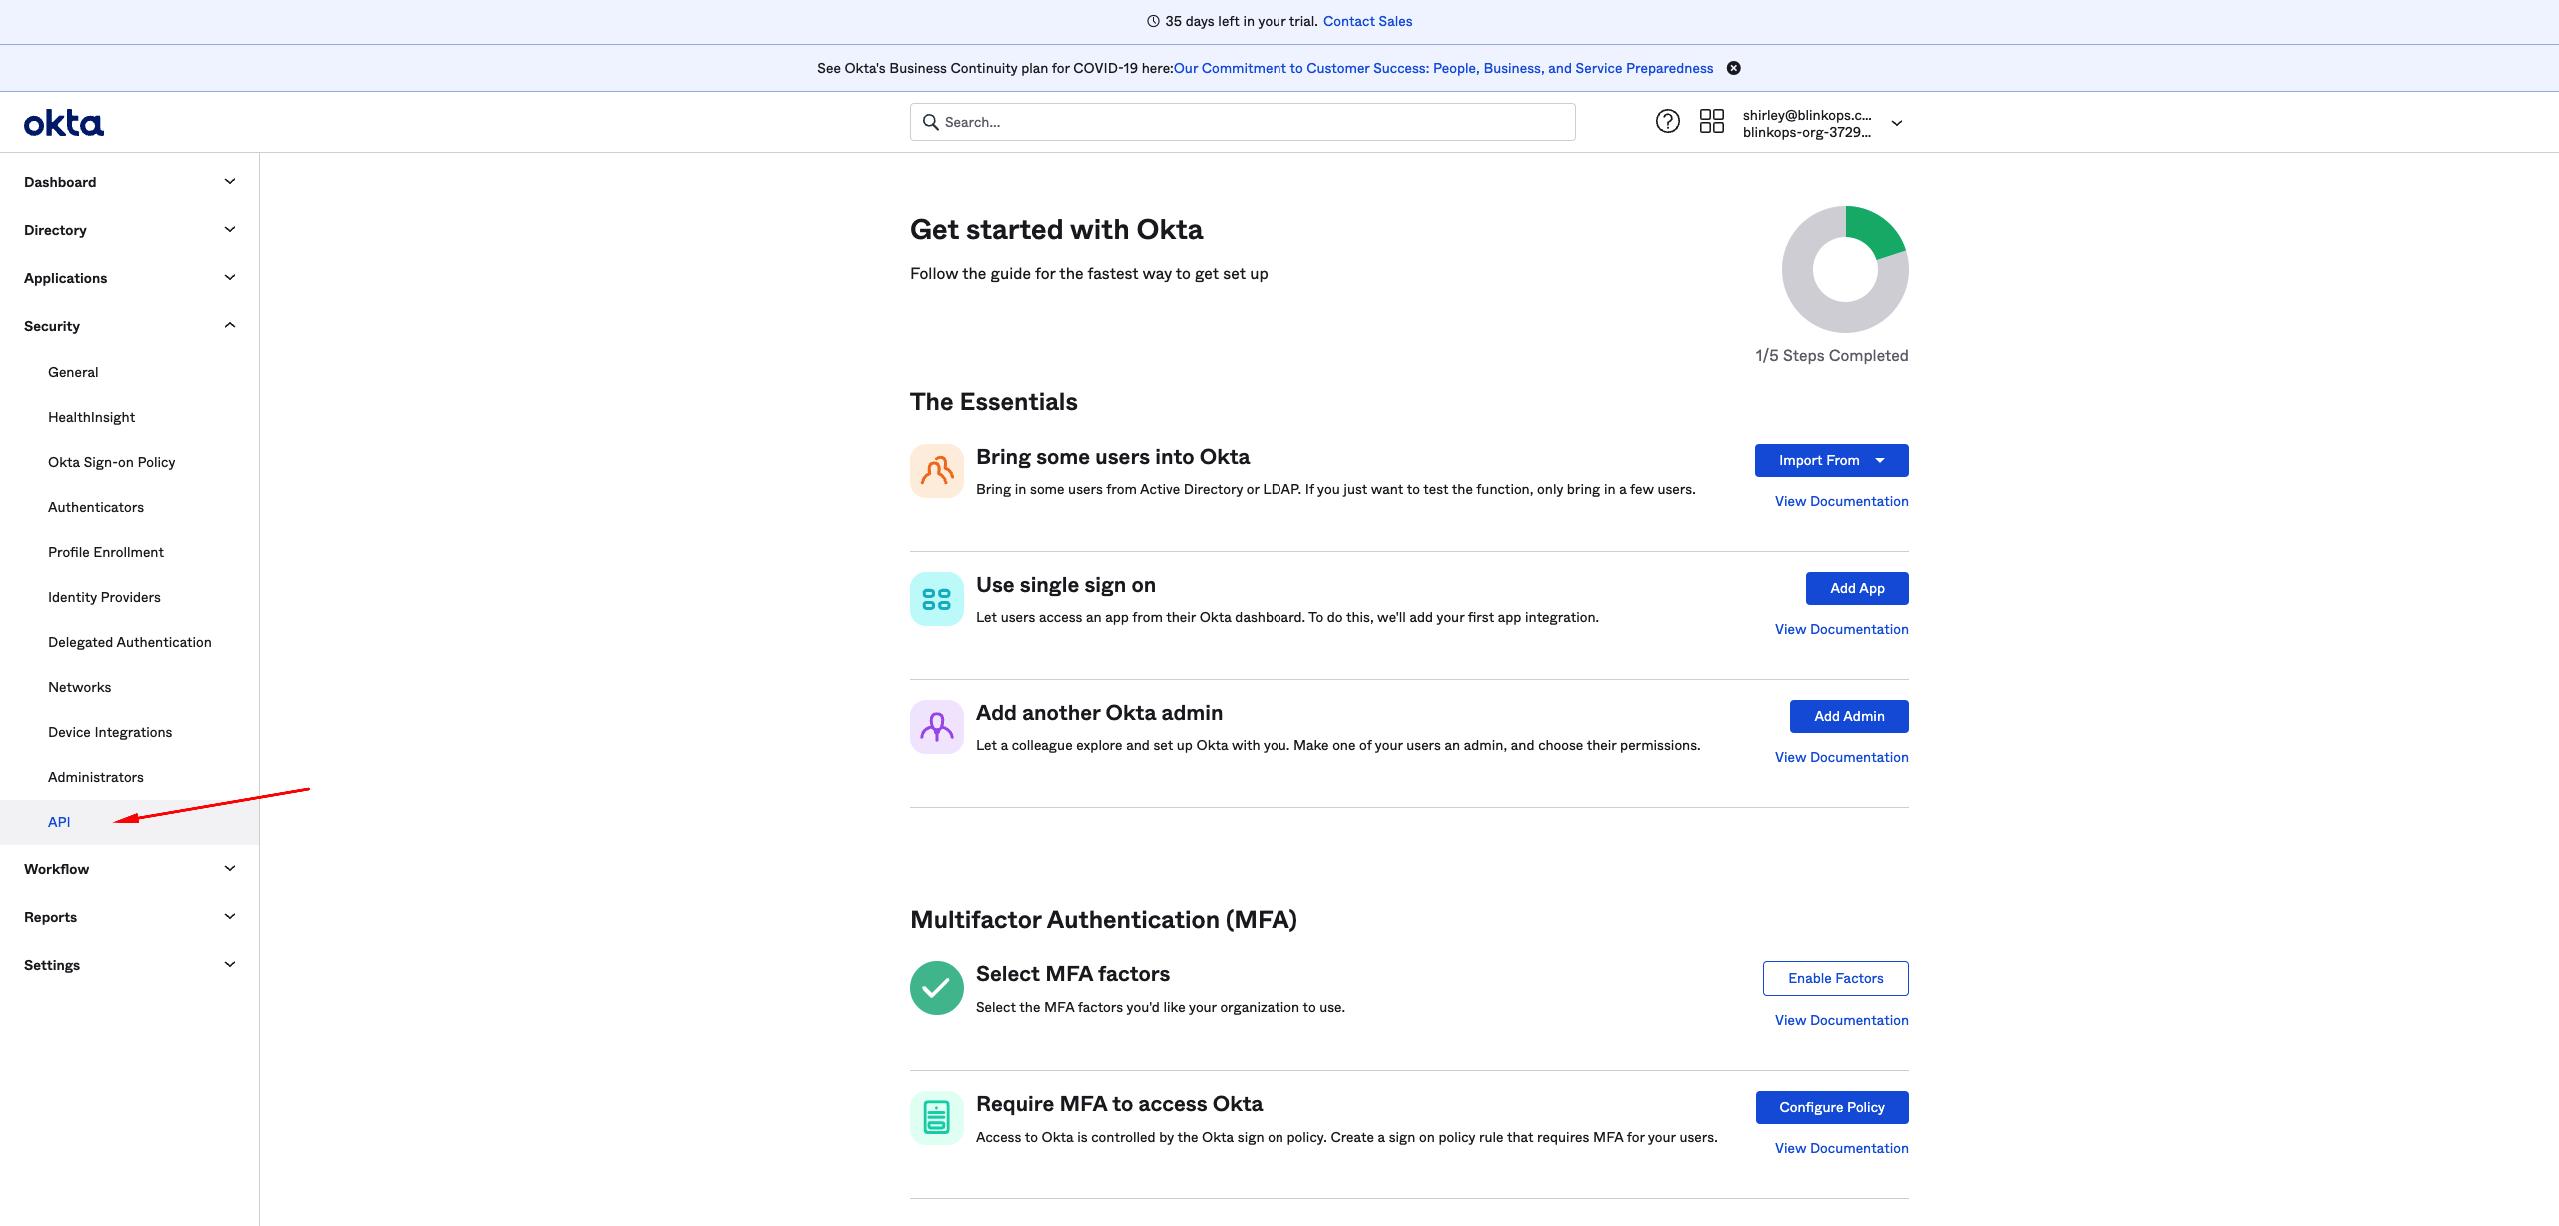
Click Admin in the top right corner to go to the Admin Console.

-
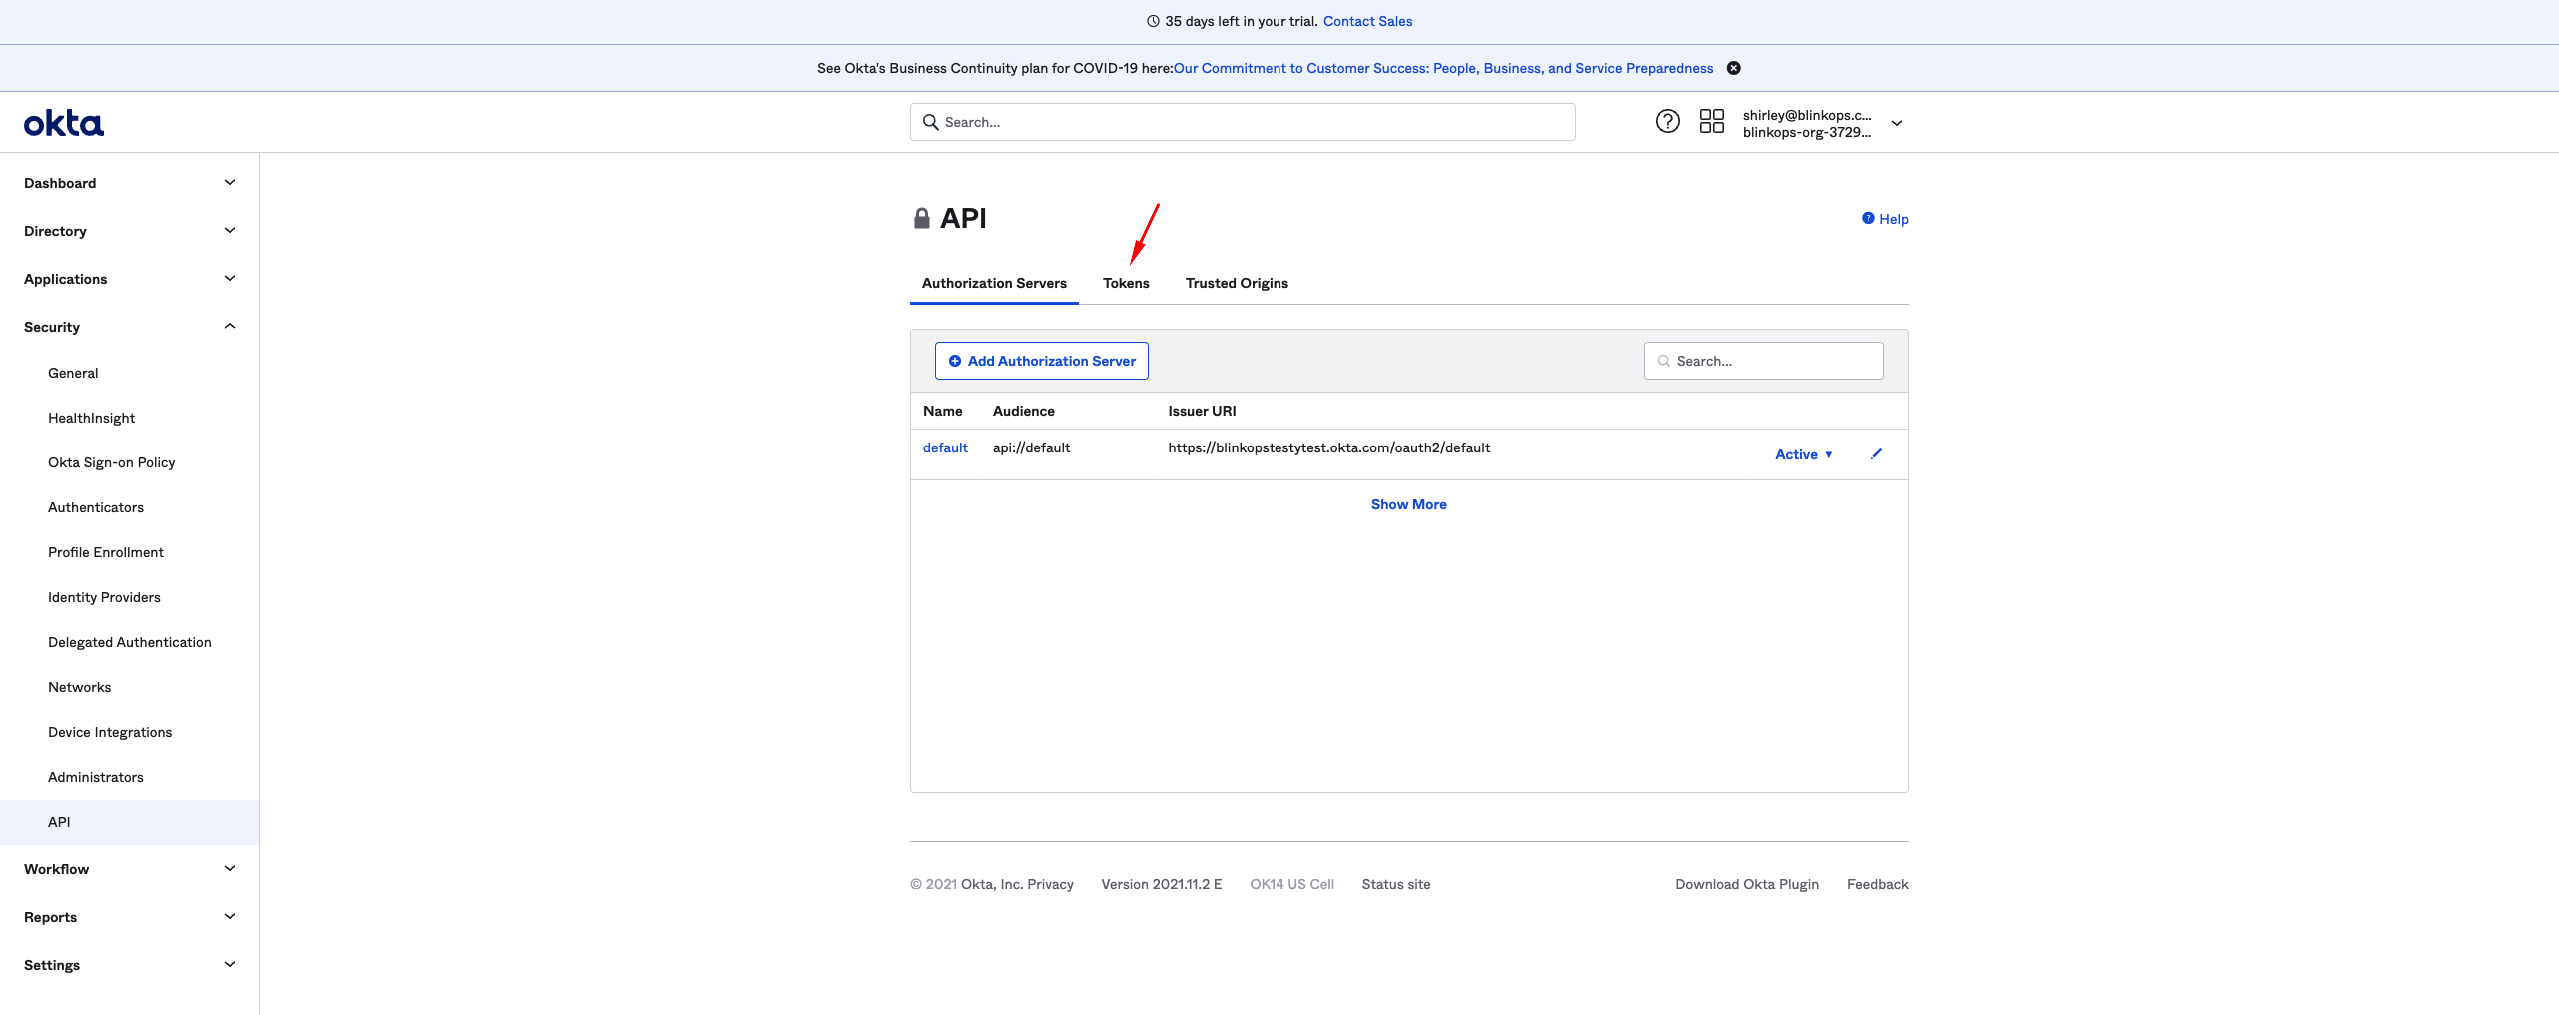
In the Admin Console, select Security > API > Tokens.
-
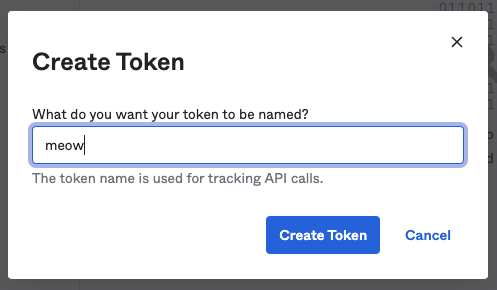
Click Create Token.

-
Name your token and click Create Token.
- Copy and save the token. This is the only opportunity to see it and save it.
Creating your connection
- In the Blink platform, navigate to the Connections page > Add connection. A New Connection dialog box opens displaying icons of external service providers available.
- Select the Okta icon. A dialog box with name of the connection and connection methods appears.
- (Optional) Edit the name of the connection. At a later stage you cannot edit the name.
- Select API Token as the method to make the connection.
-
Fill in the parameters:
- The API token
- The API address
- (Optional) Click Test Connection to test it.
- Click Create connection. The new connection appears on the Connections page.
Token expiration and deactivation:Tokens expire automatically after a certain period and can also be deactivated at any time.
- Token expiration: Tokens are valid for 30 days from creation or last use, so that the 30-day expiration automatically refreshes with each API call. Tokens that are not used for 30 days expire. The 30-day period is currently fixed and cannot be changed for your organization.
- Token deactivation: If a user account is deactivated in Okta, any API token created by that user account is deprovisioned at the same time.