

Creating a Microsoft Sentinel Data Lake connection
Using App Registration
To create the connection you need:- A Client ID
- A Client Secret
- A Tenant ID
Obtaining the credentials
Creating the App
- Log into the Azure Portal.
-
Go to the Microsoft Entra ID resource.
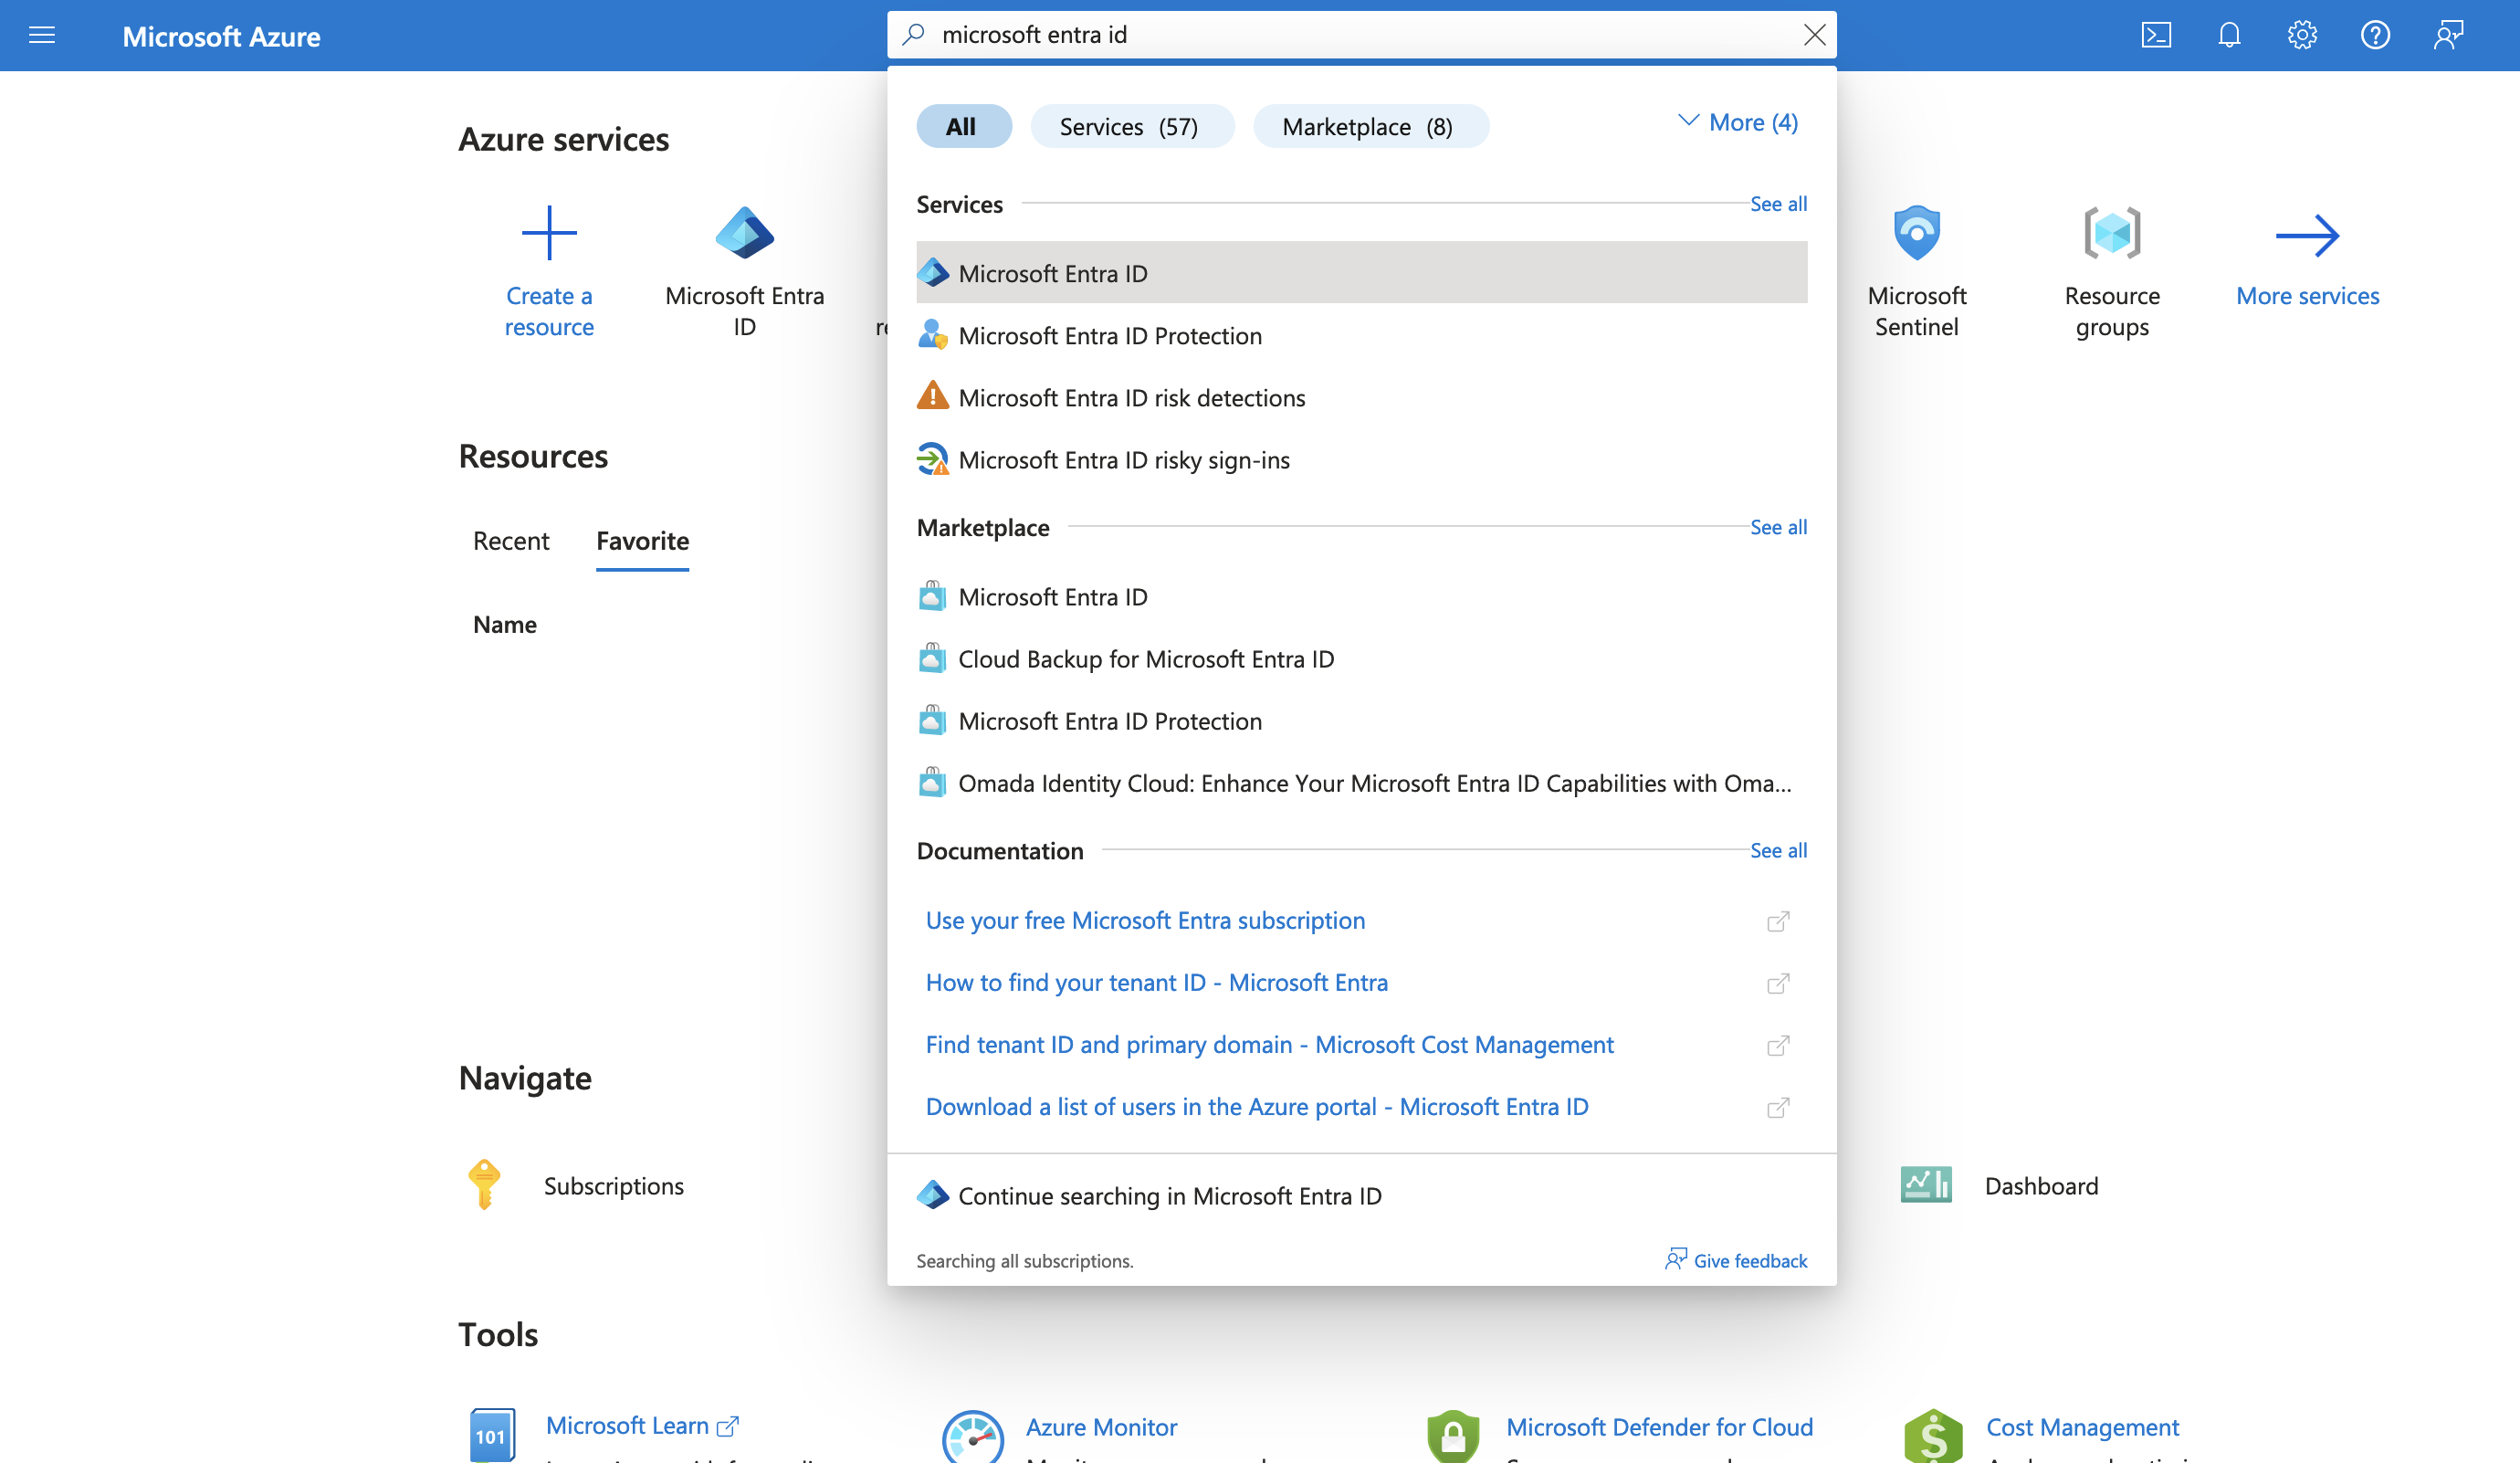
-
In the left-hand menu, click App registrations.
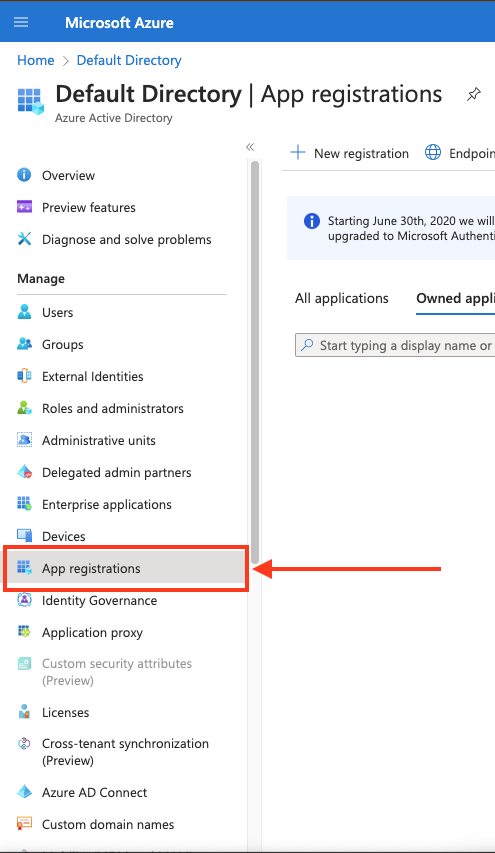
-
Create a new application registration or click on one of your existing applications.
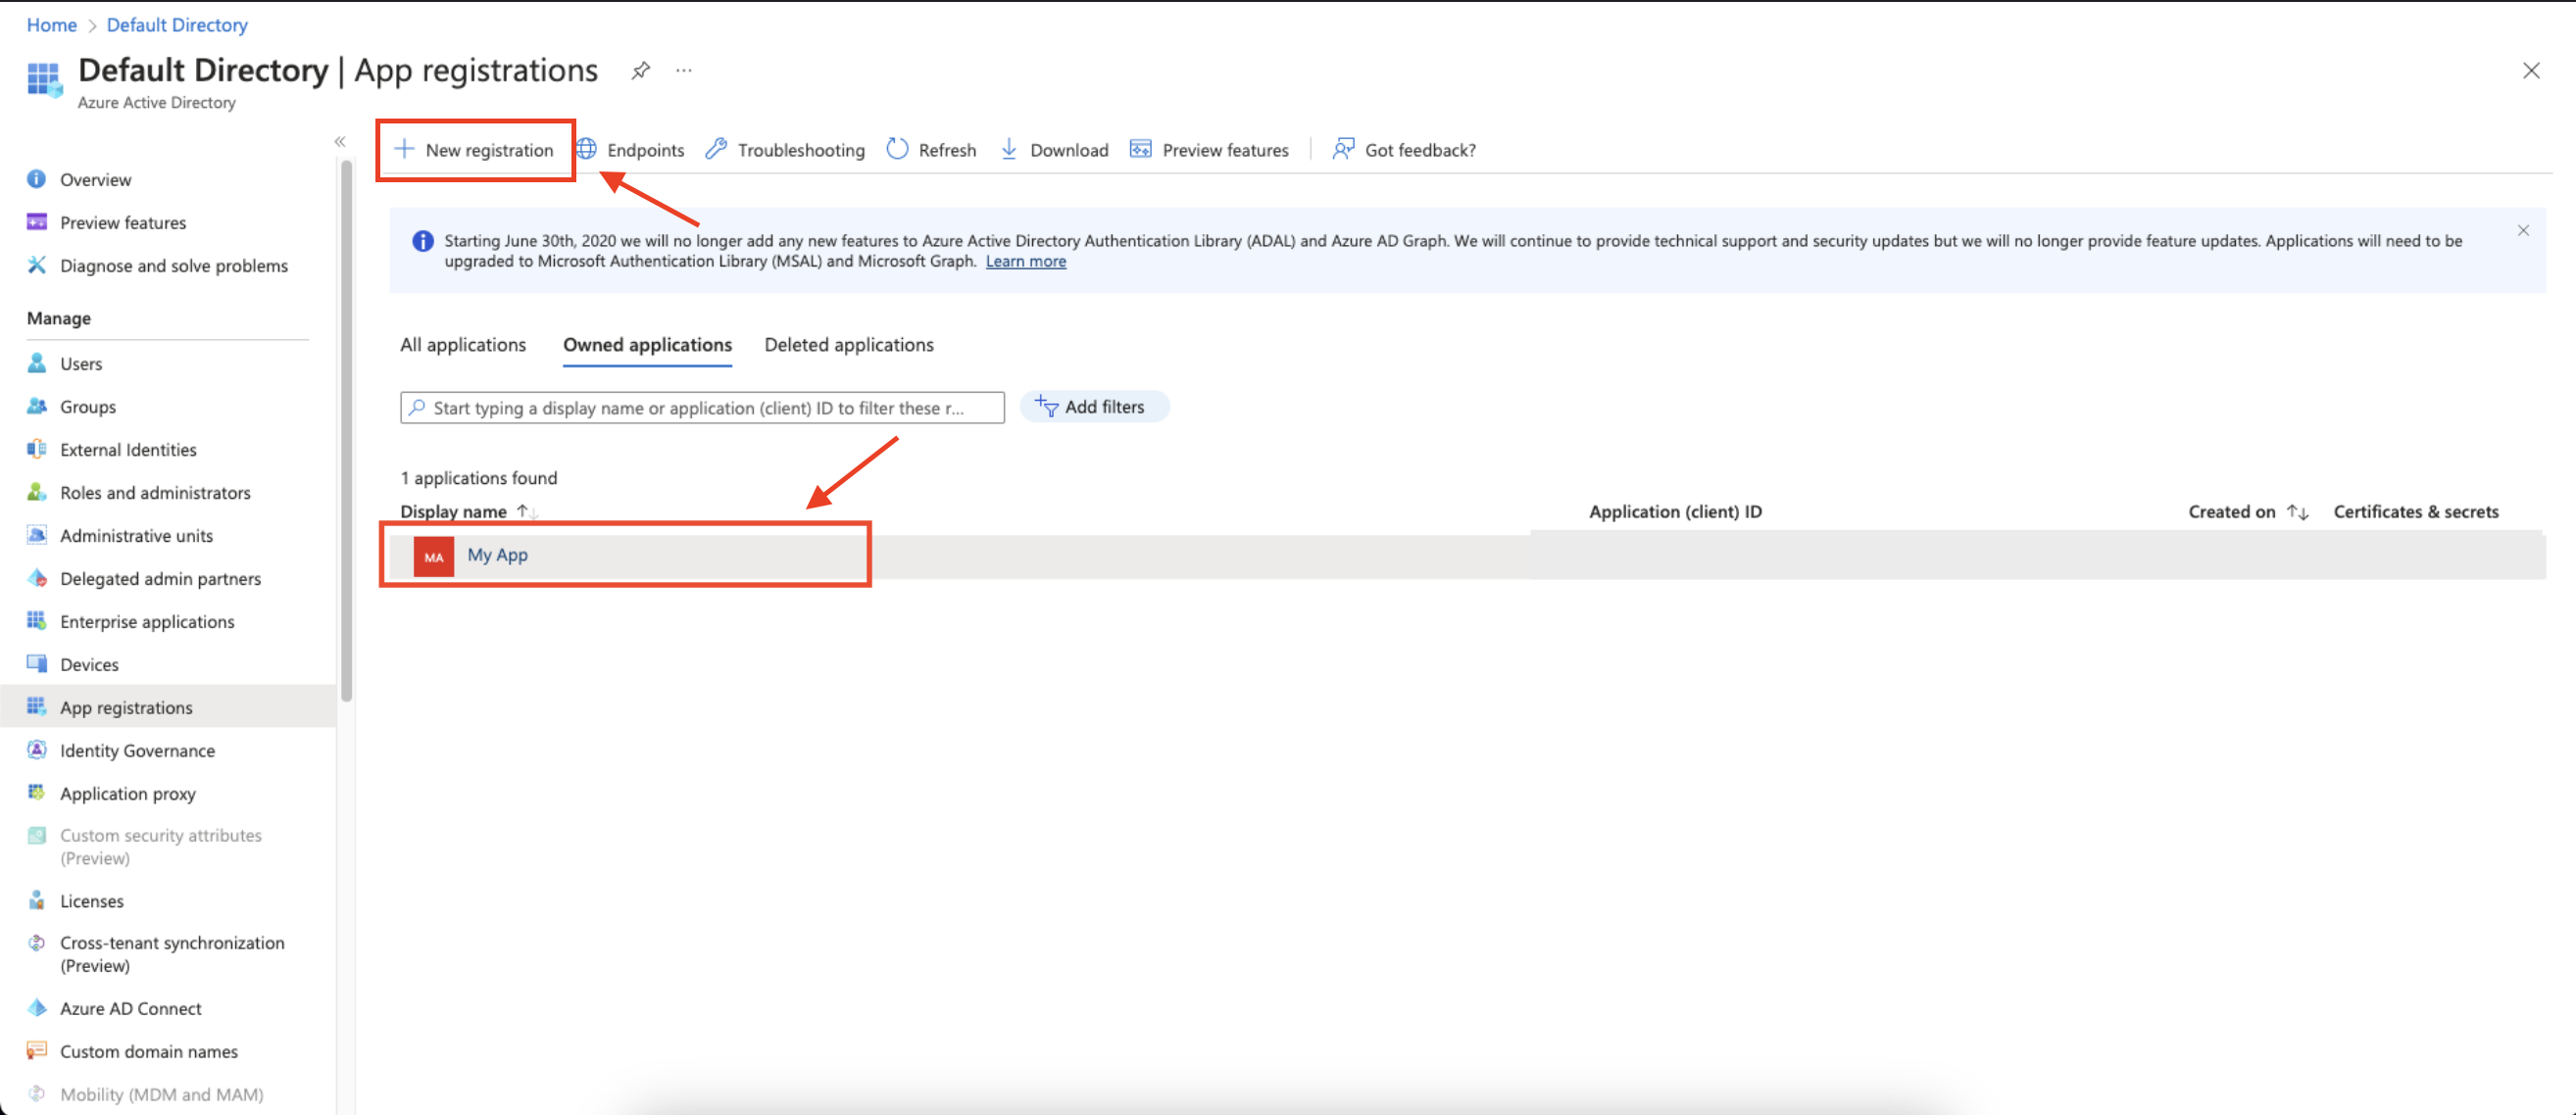
-
In the left-hand menu, click API permissions.
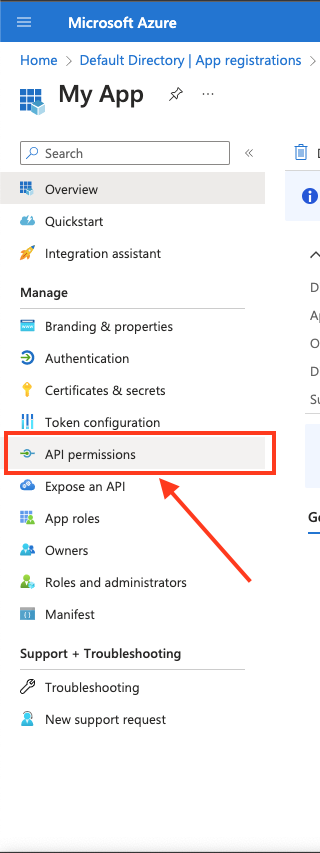
-
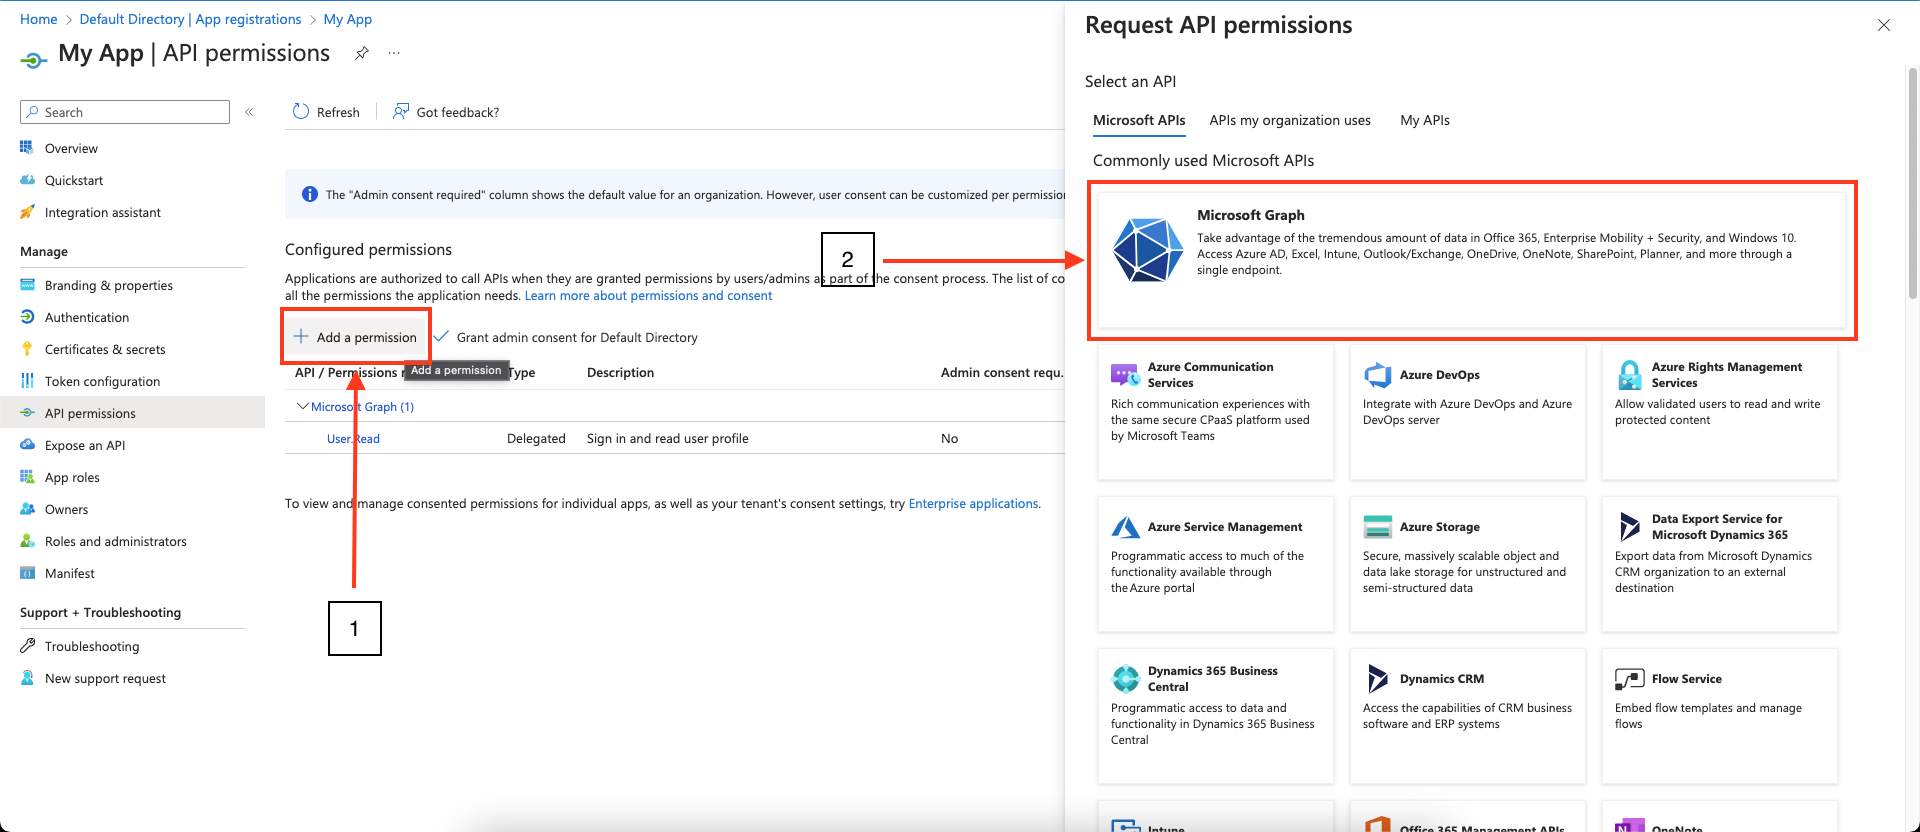
Click Add a permission and select Microsoft Graph.
-
Choose Application permissions and mark the permissions you wish to add.
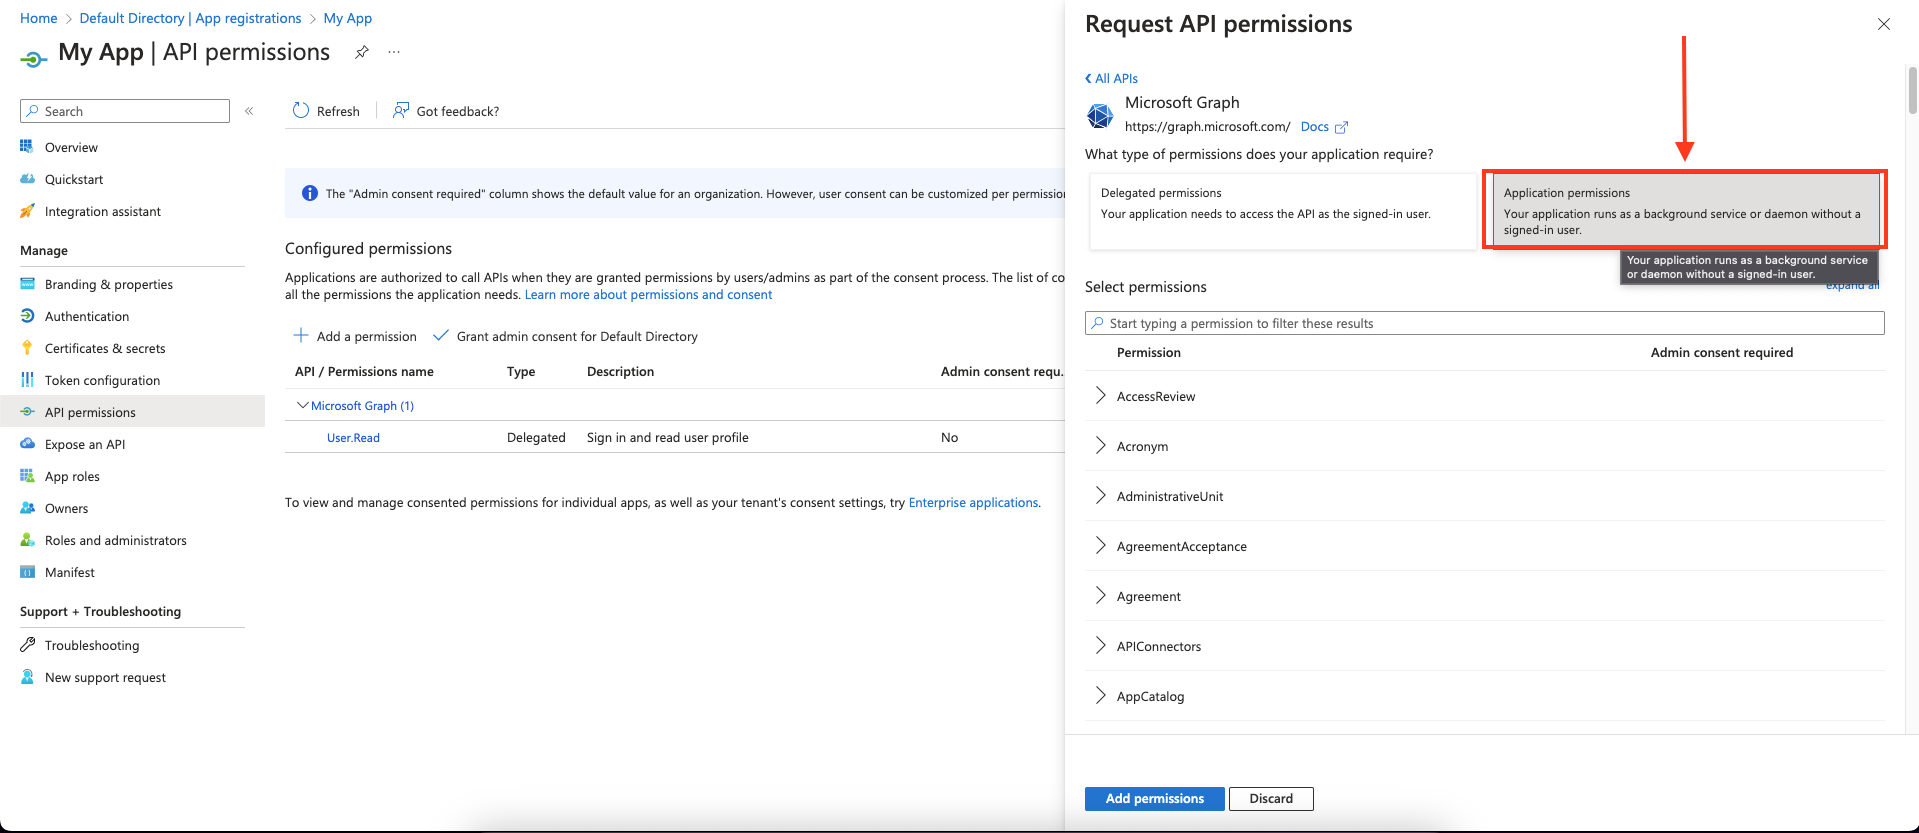
- Click Add permissions to save the changes.
-
Click Grant admin consent for
<your tenant>on the API permissions page. Only admins can grant consent.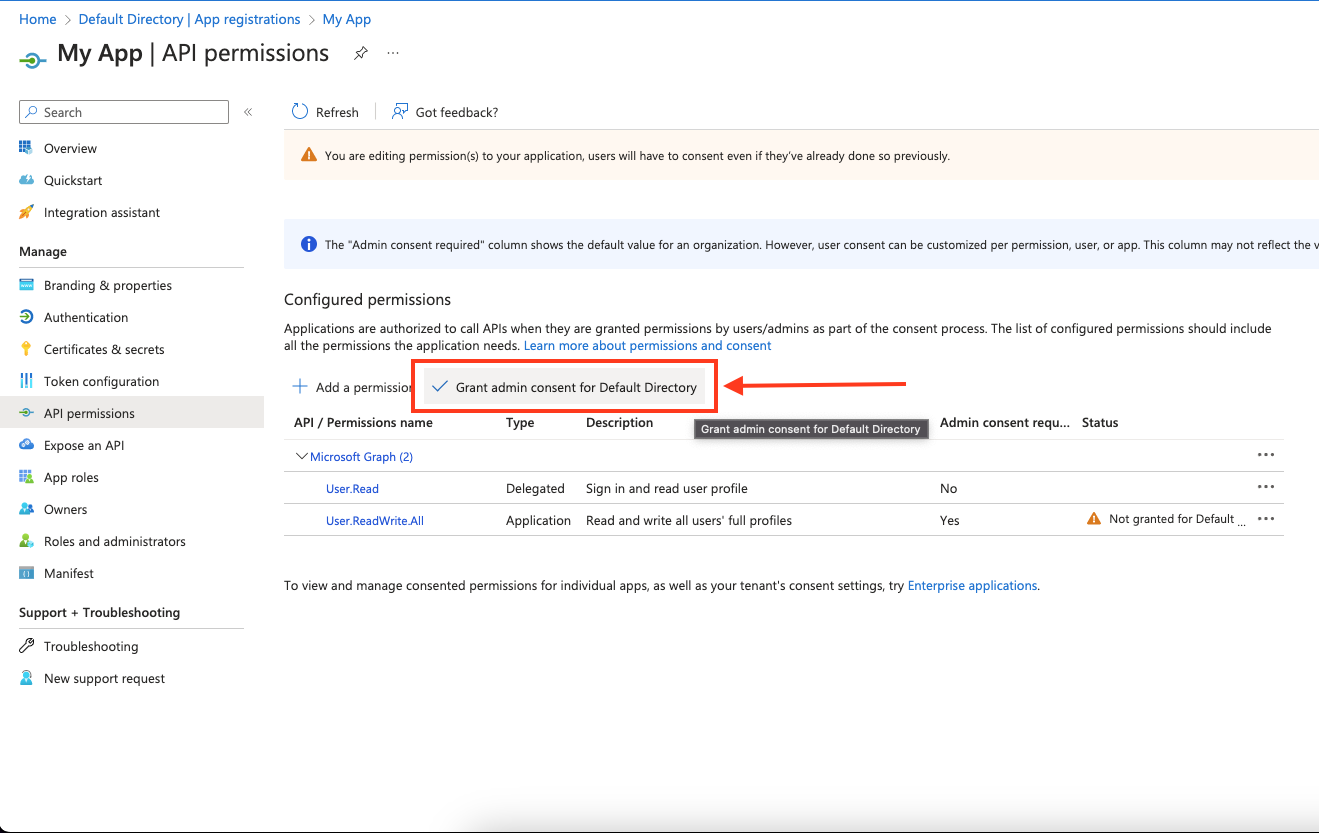
-
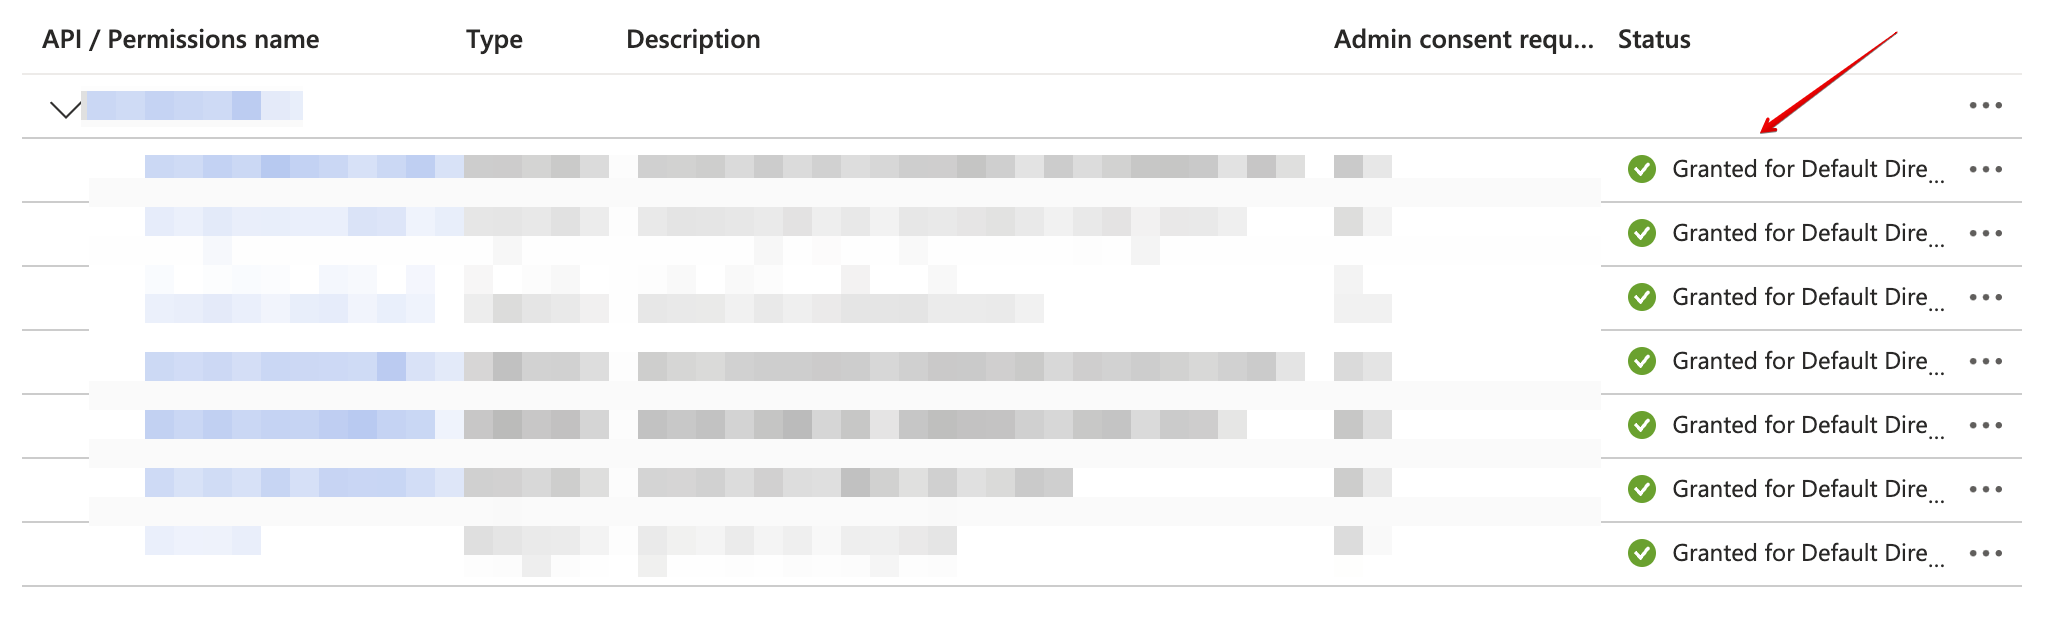
Confirm that the added permissions are now verified.
-
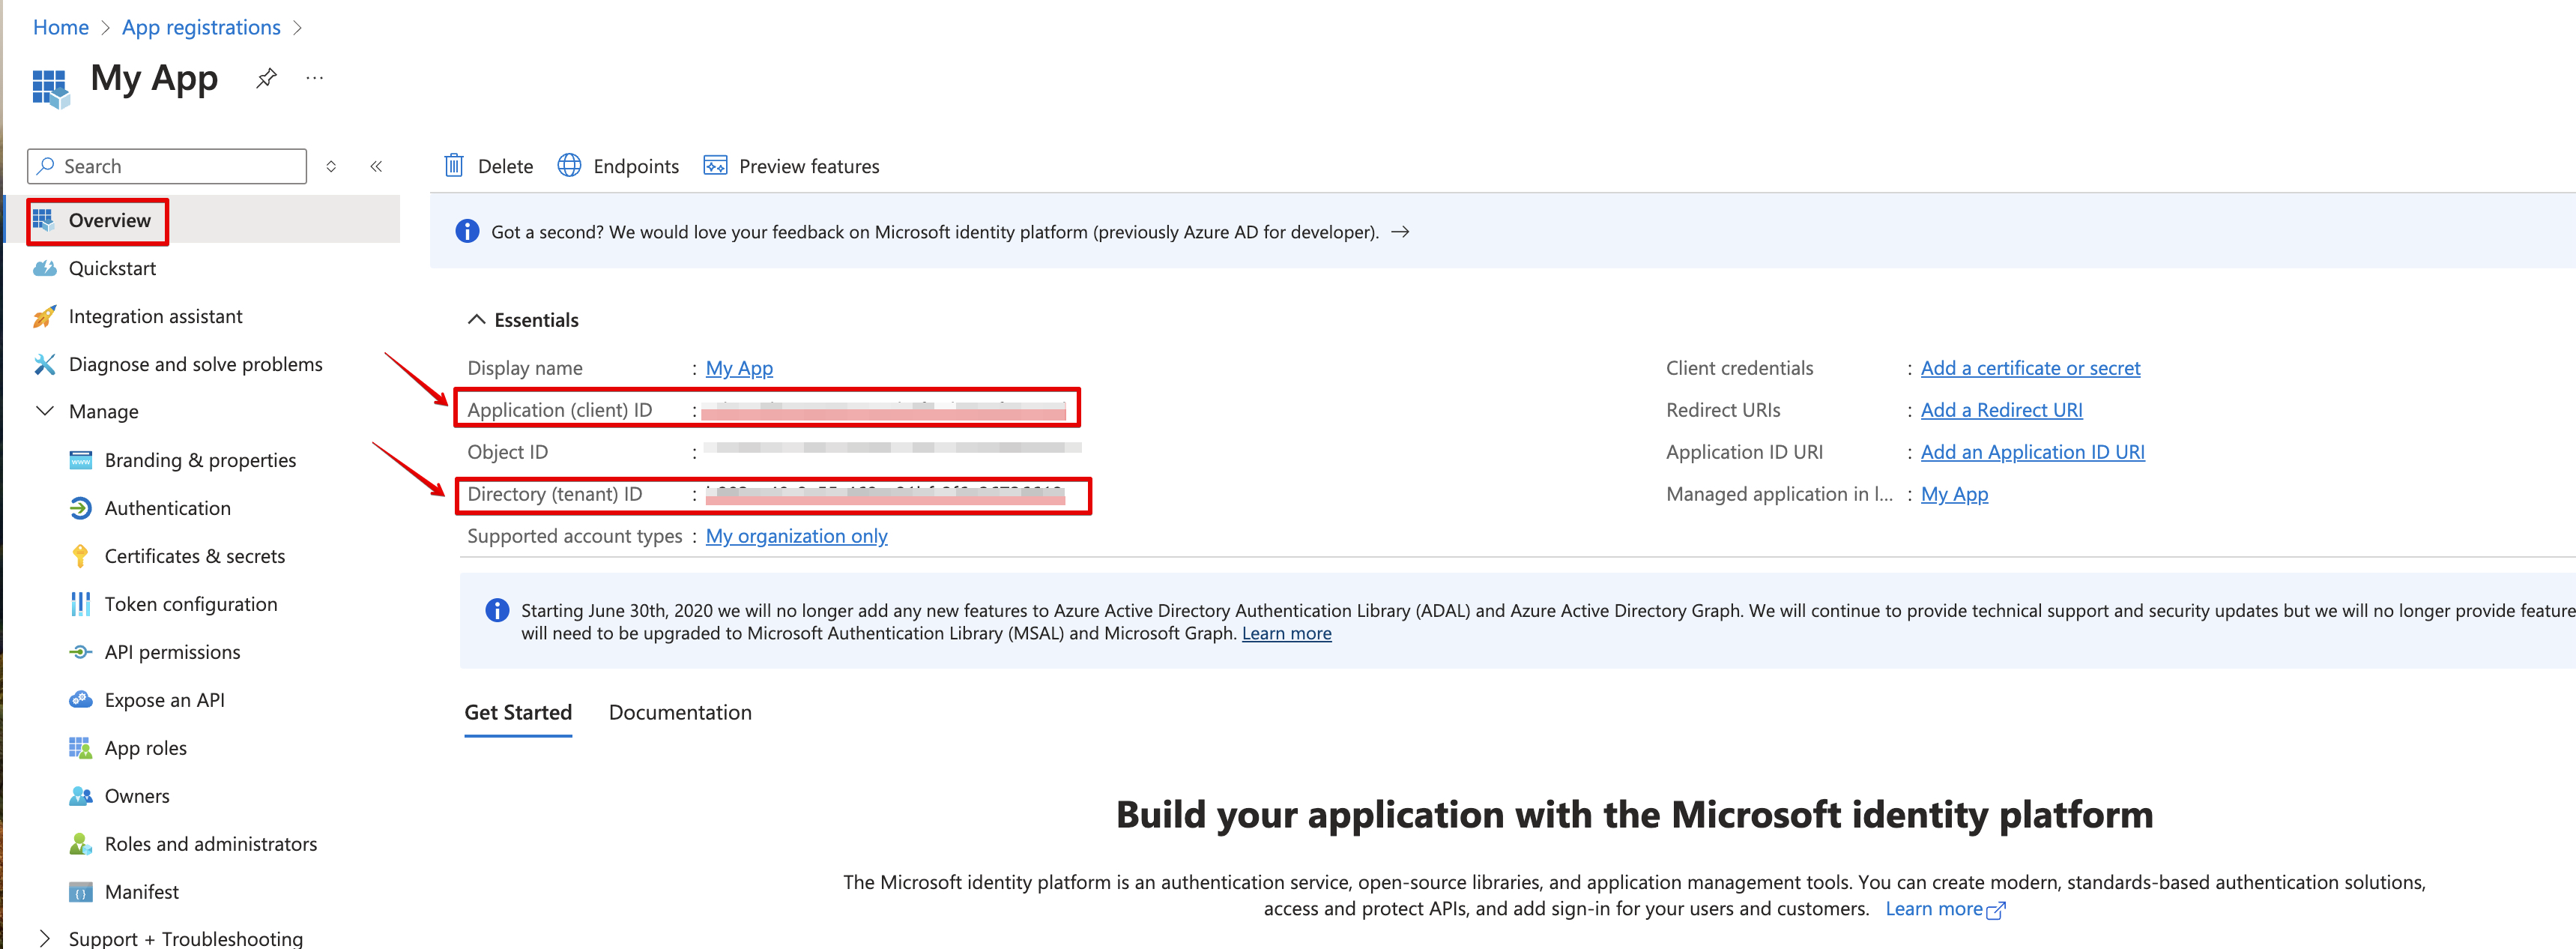
Navigate to Overview and Copy your client ID and tenant ID.
Assign role to App
-
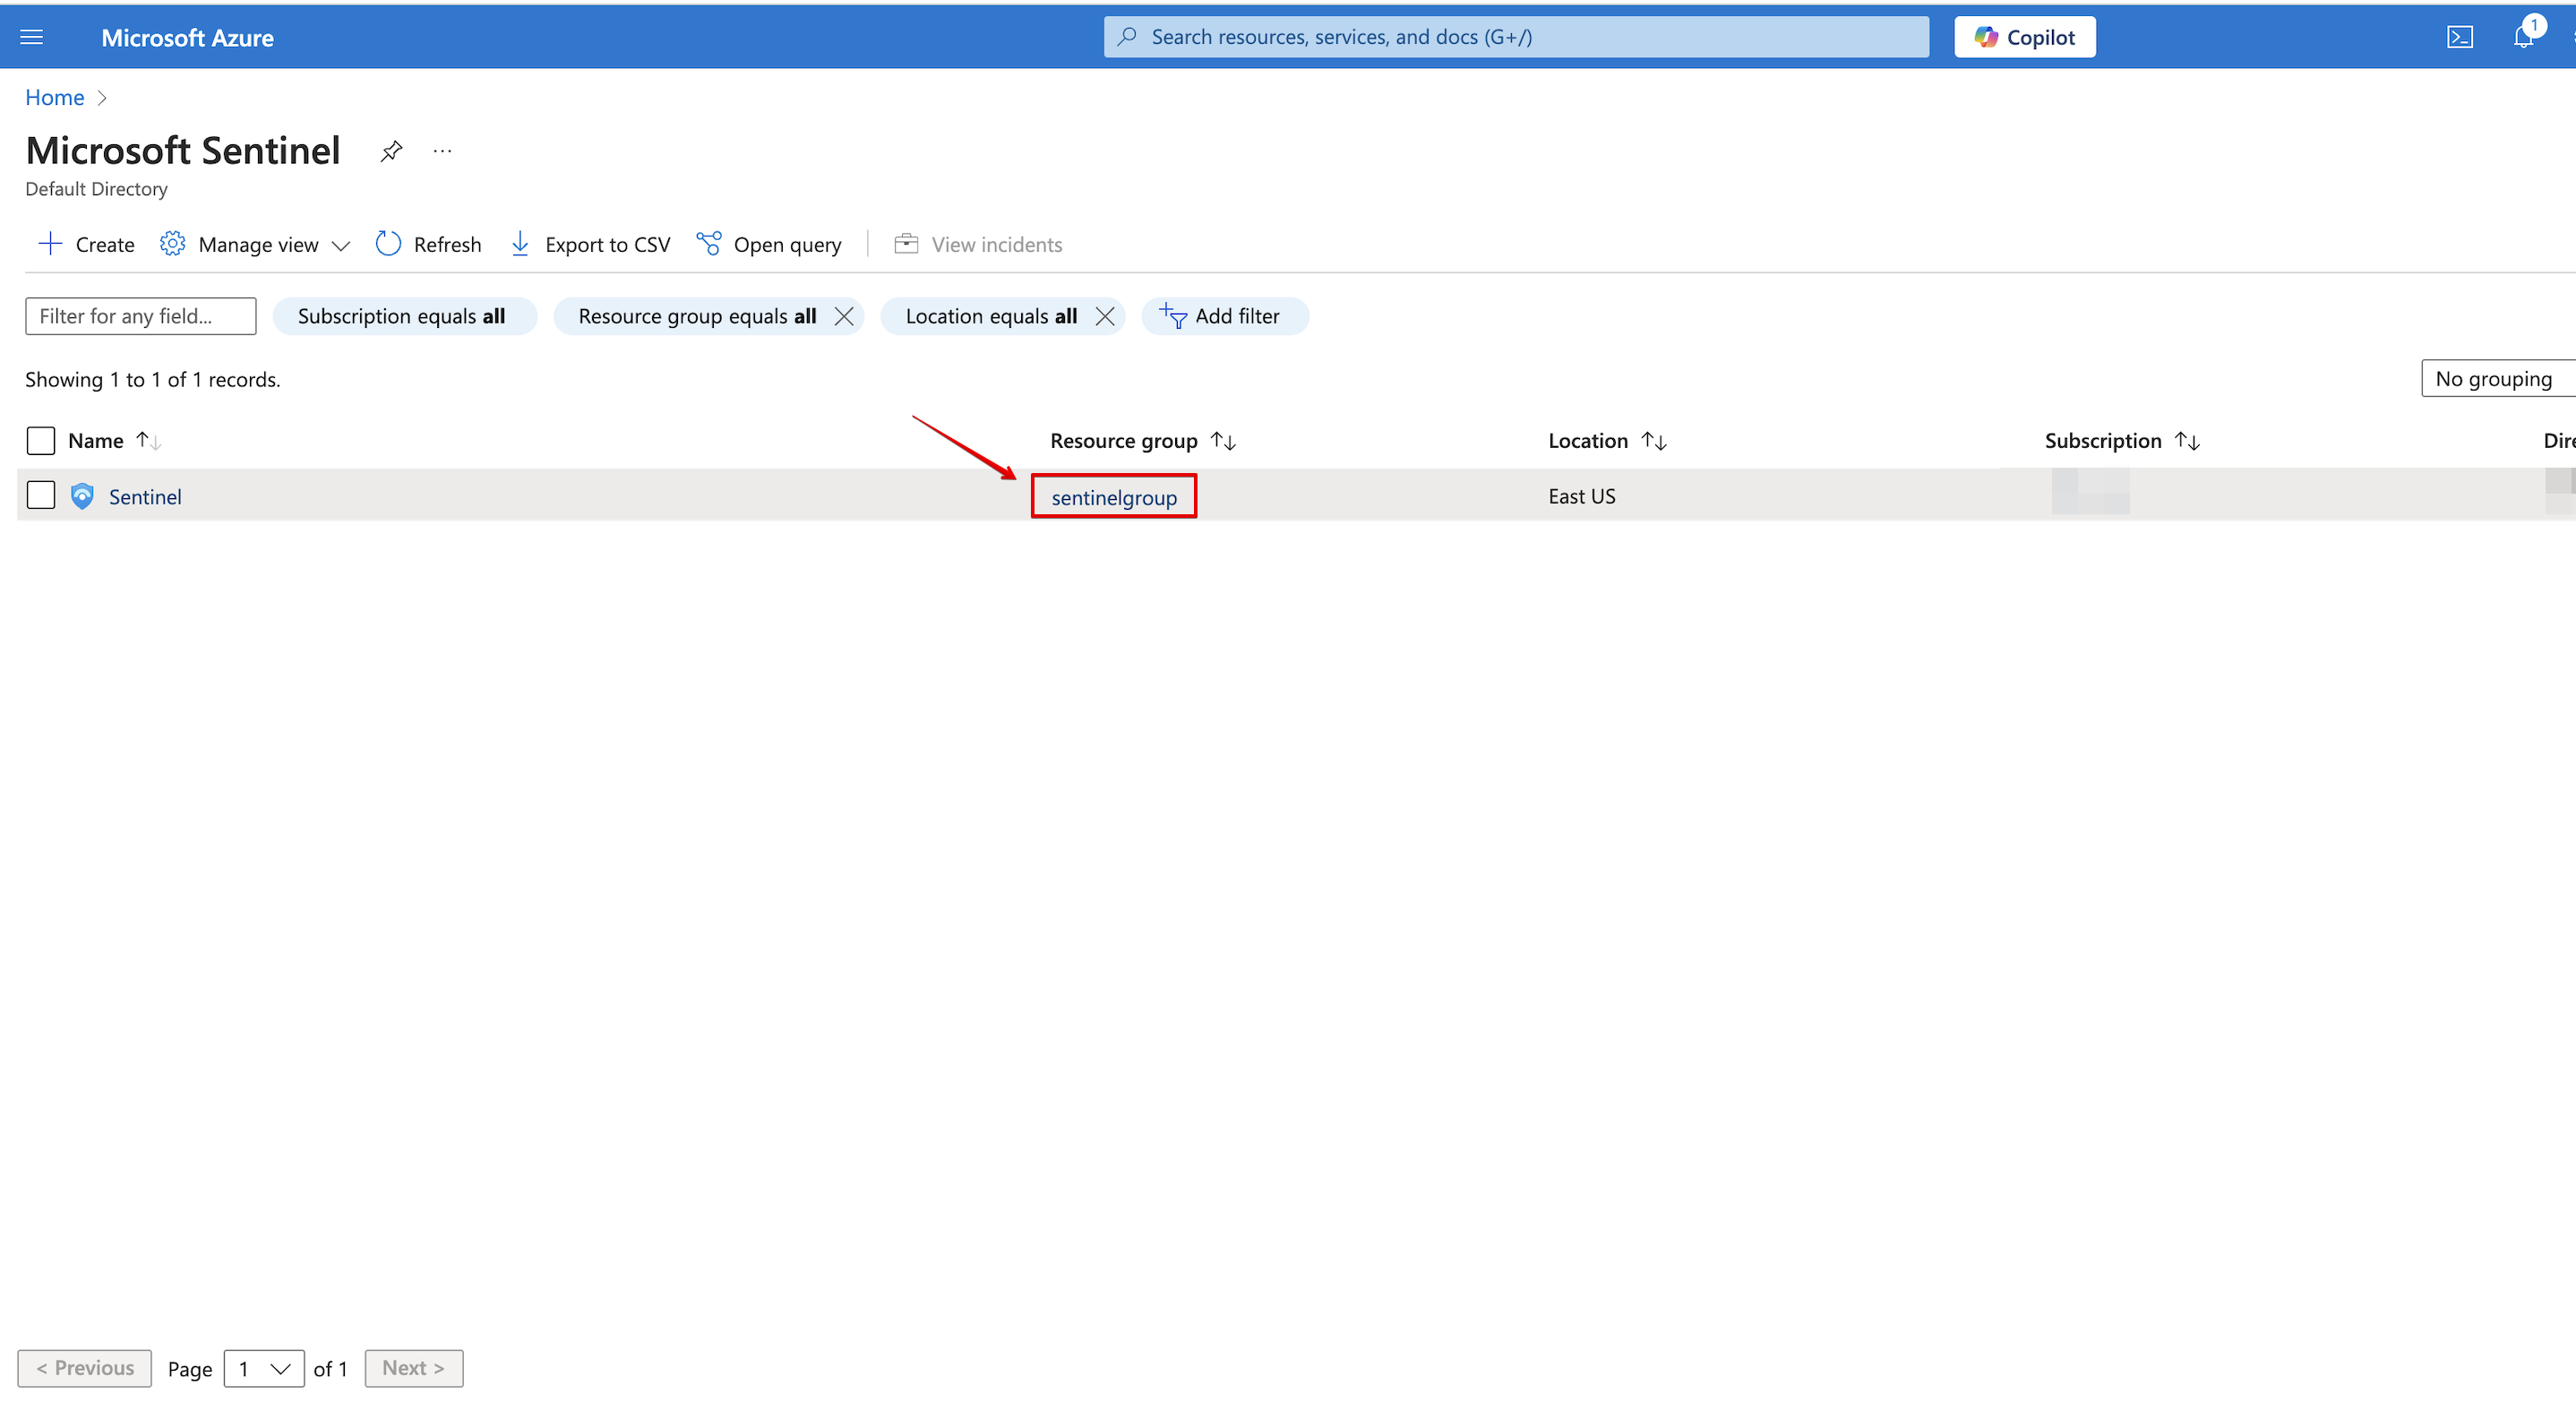
In Azure portal, search and click on Microsoft Sentinel.

-
Select your account and click on Resource Group.
-
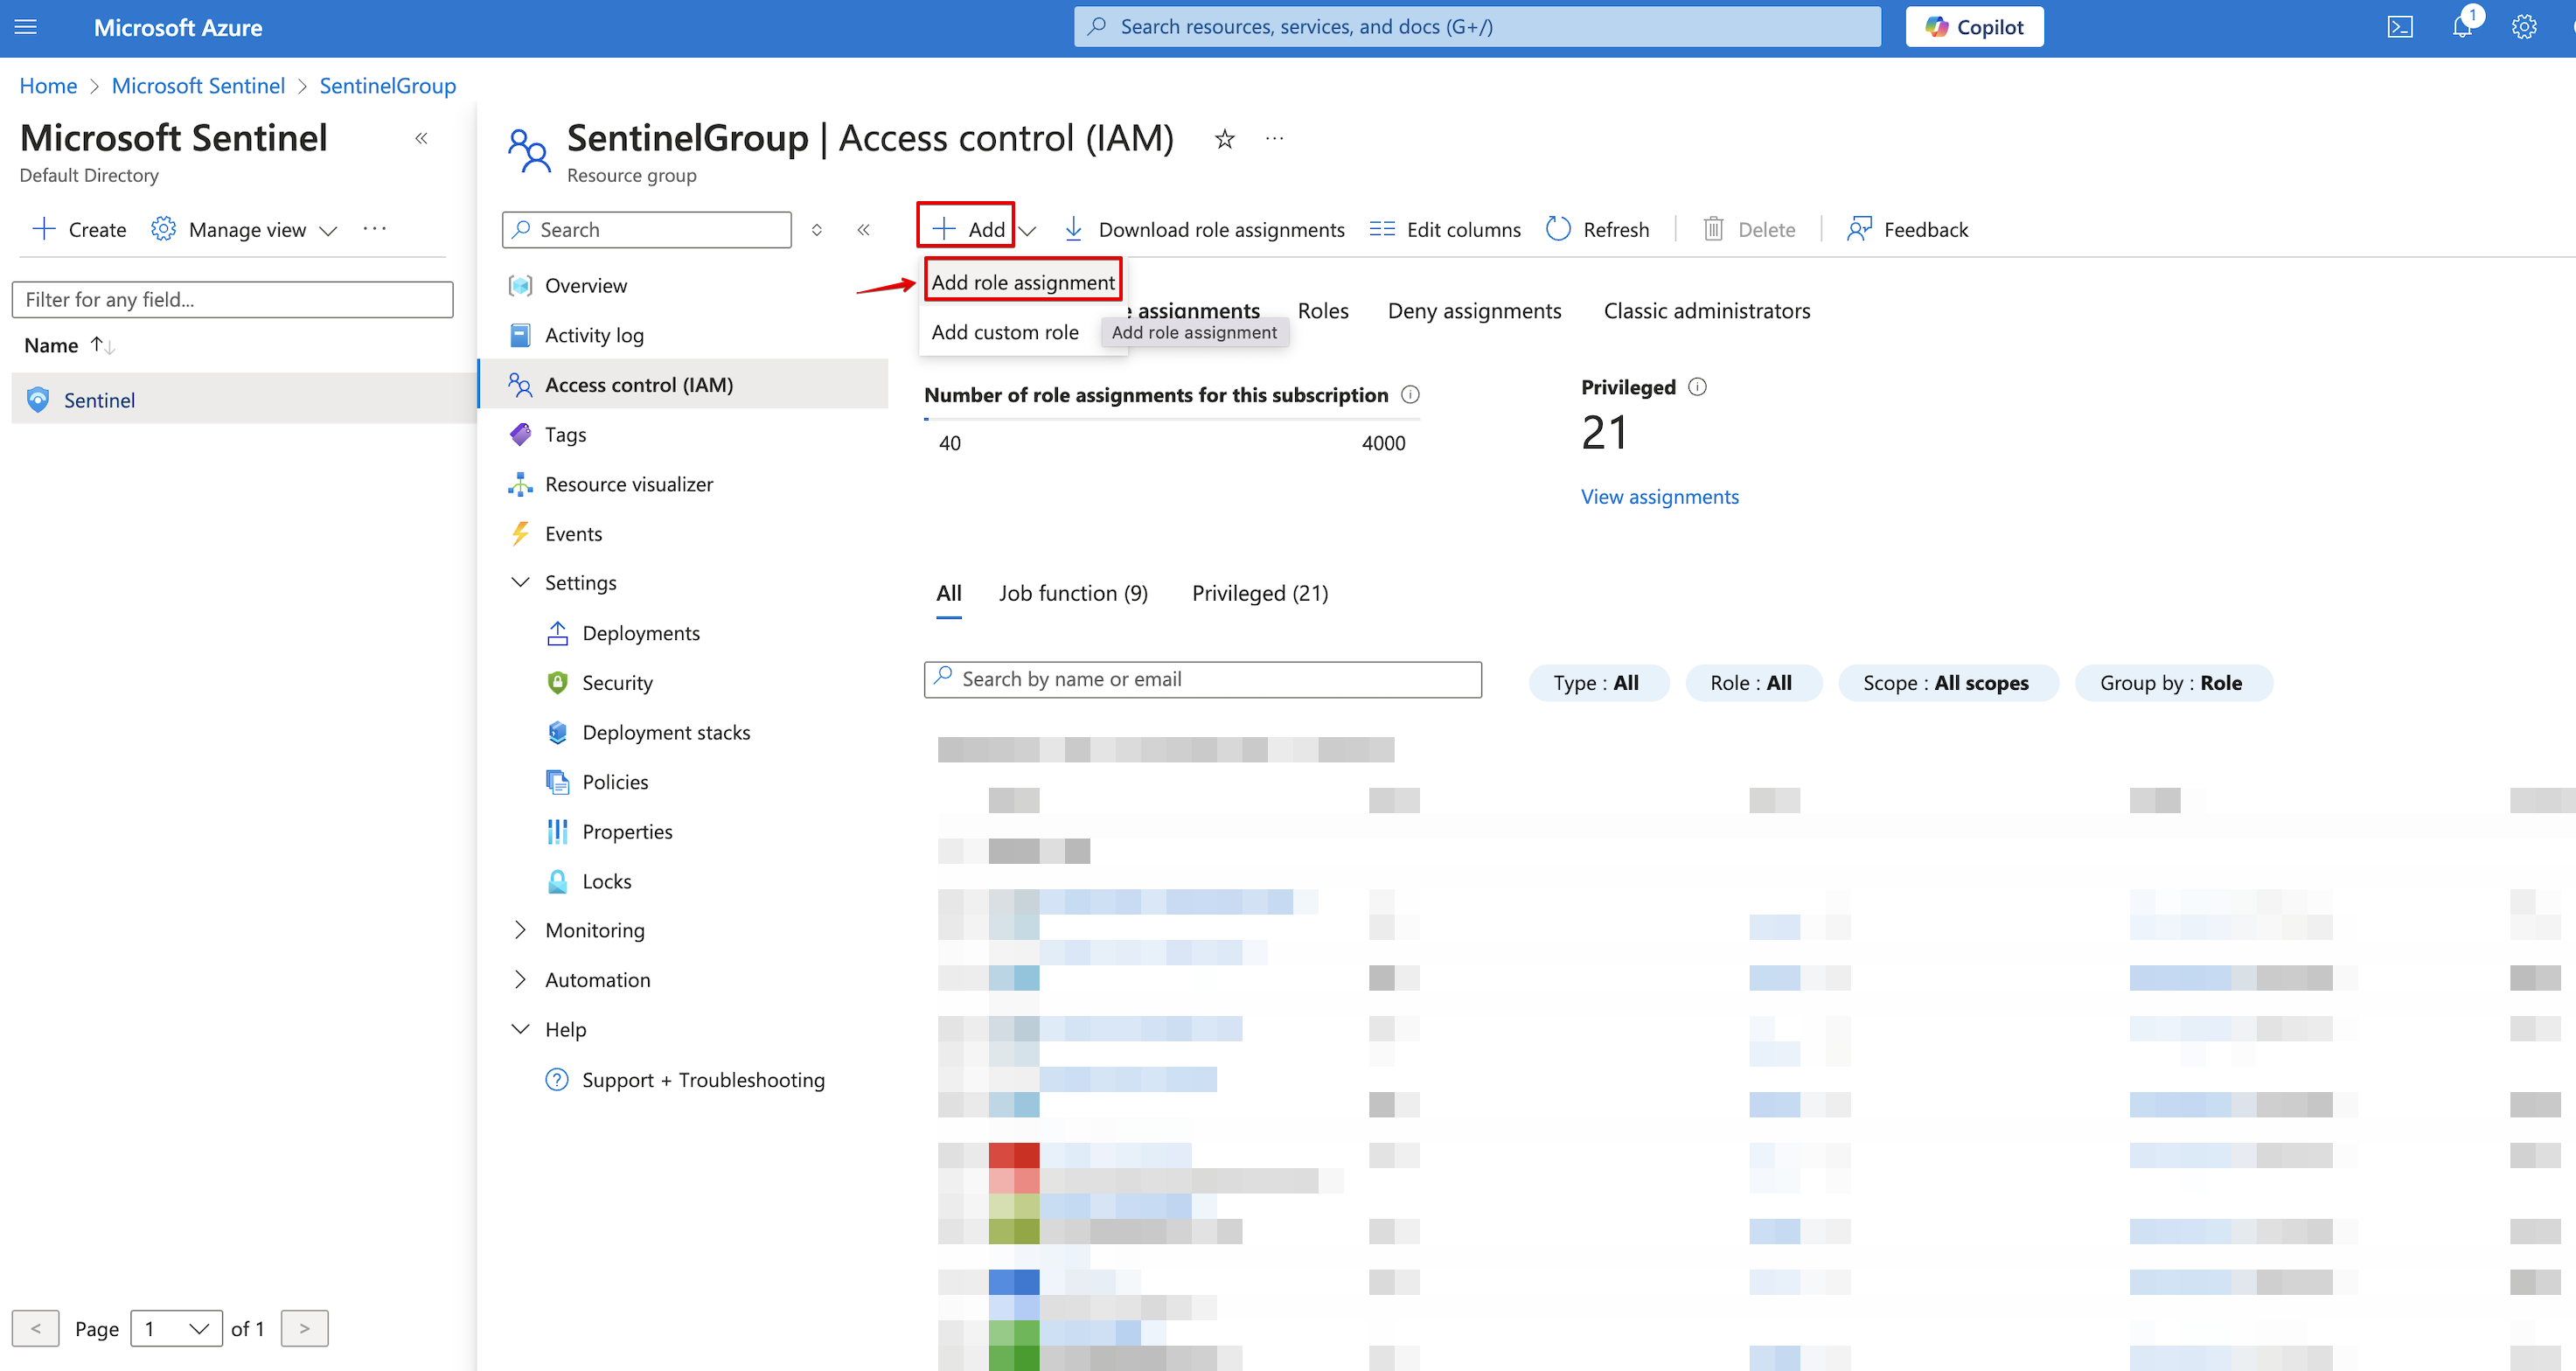
Under the resource group, navigate to Access control (IAM).

-
Navigate to Role Assignments > Click Add > Add role assignment.
-
Under the Role tab, search for sentinel roles and select the
Microsoft Sentinel Contributorrole.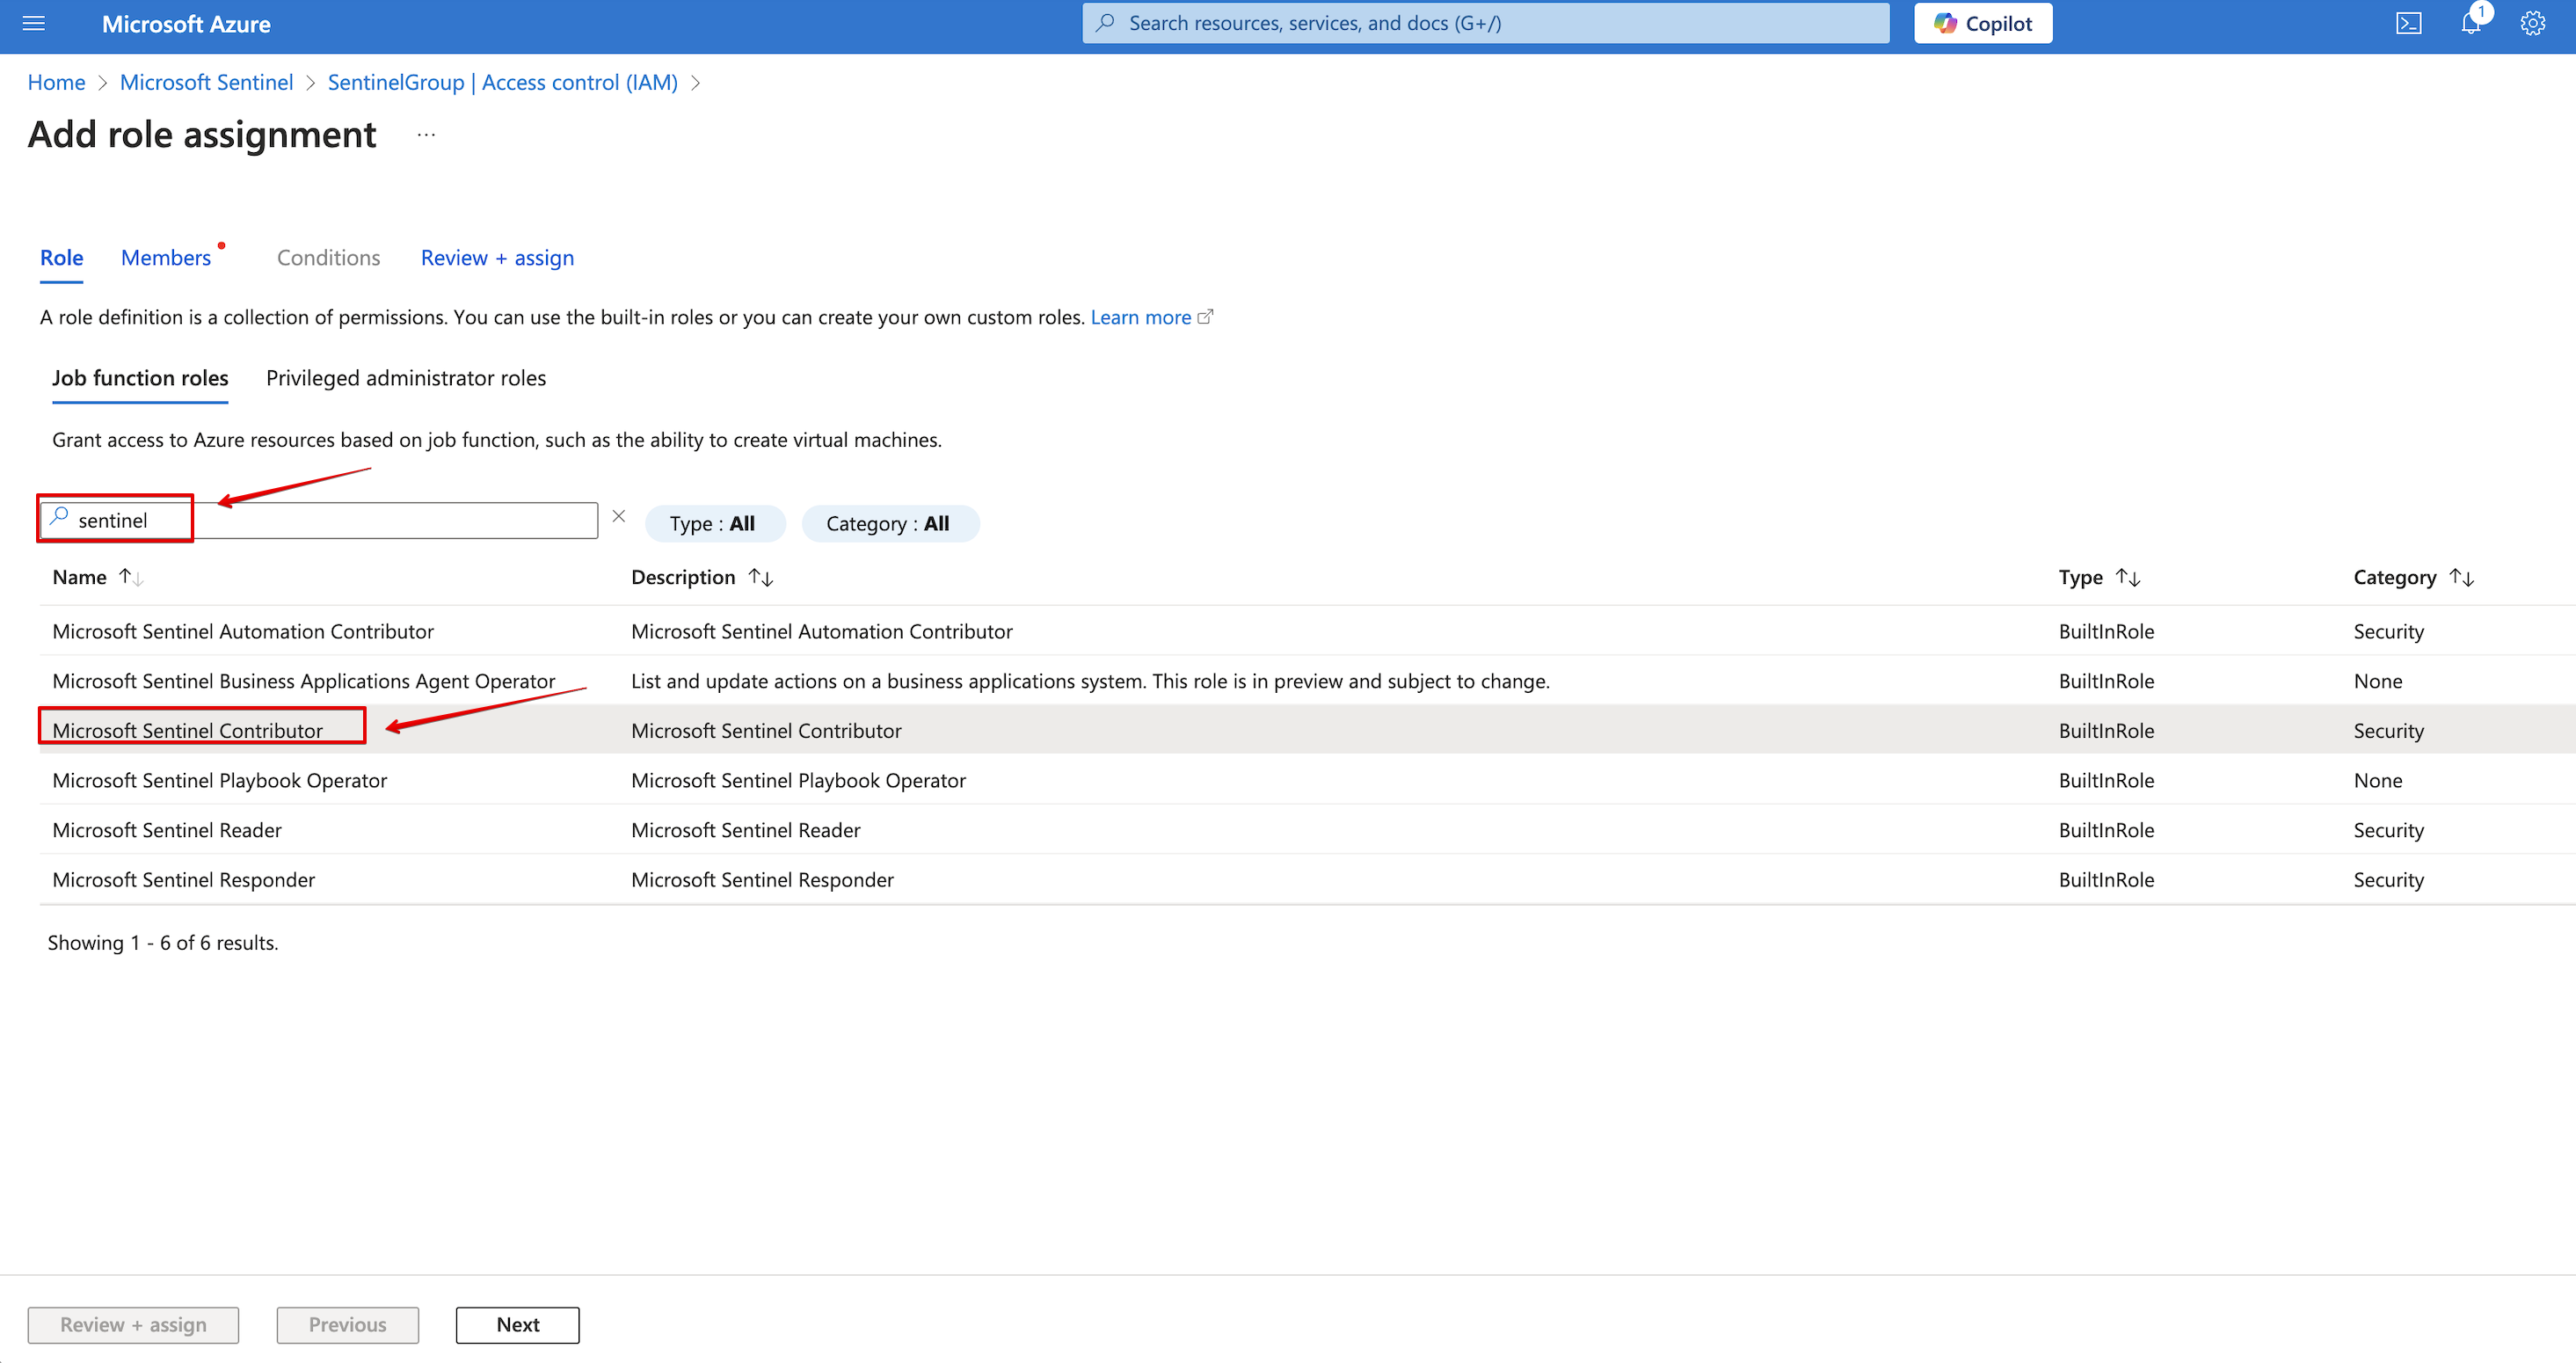
-
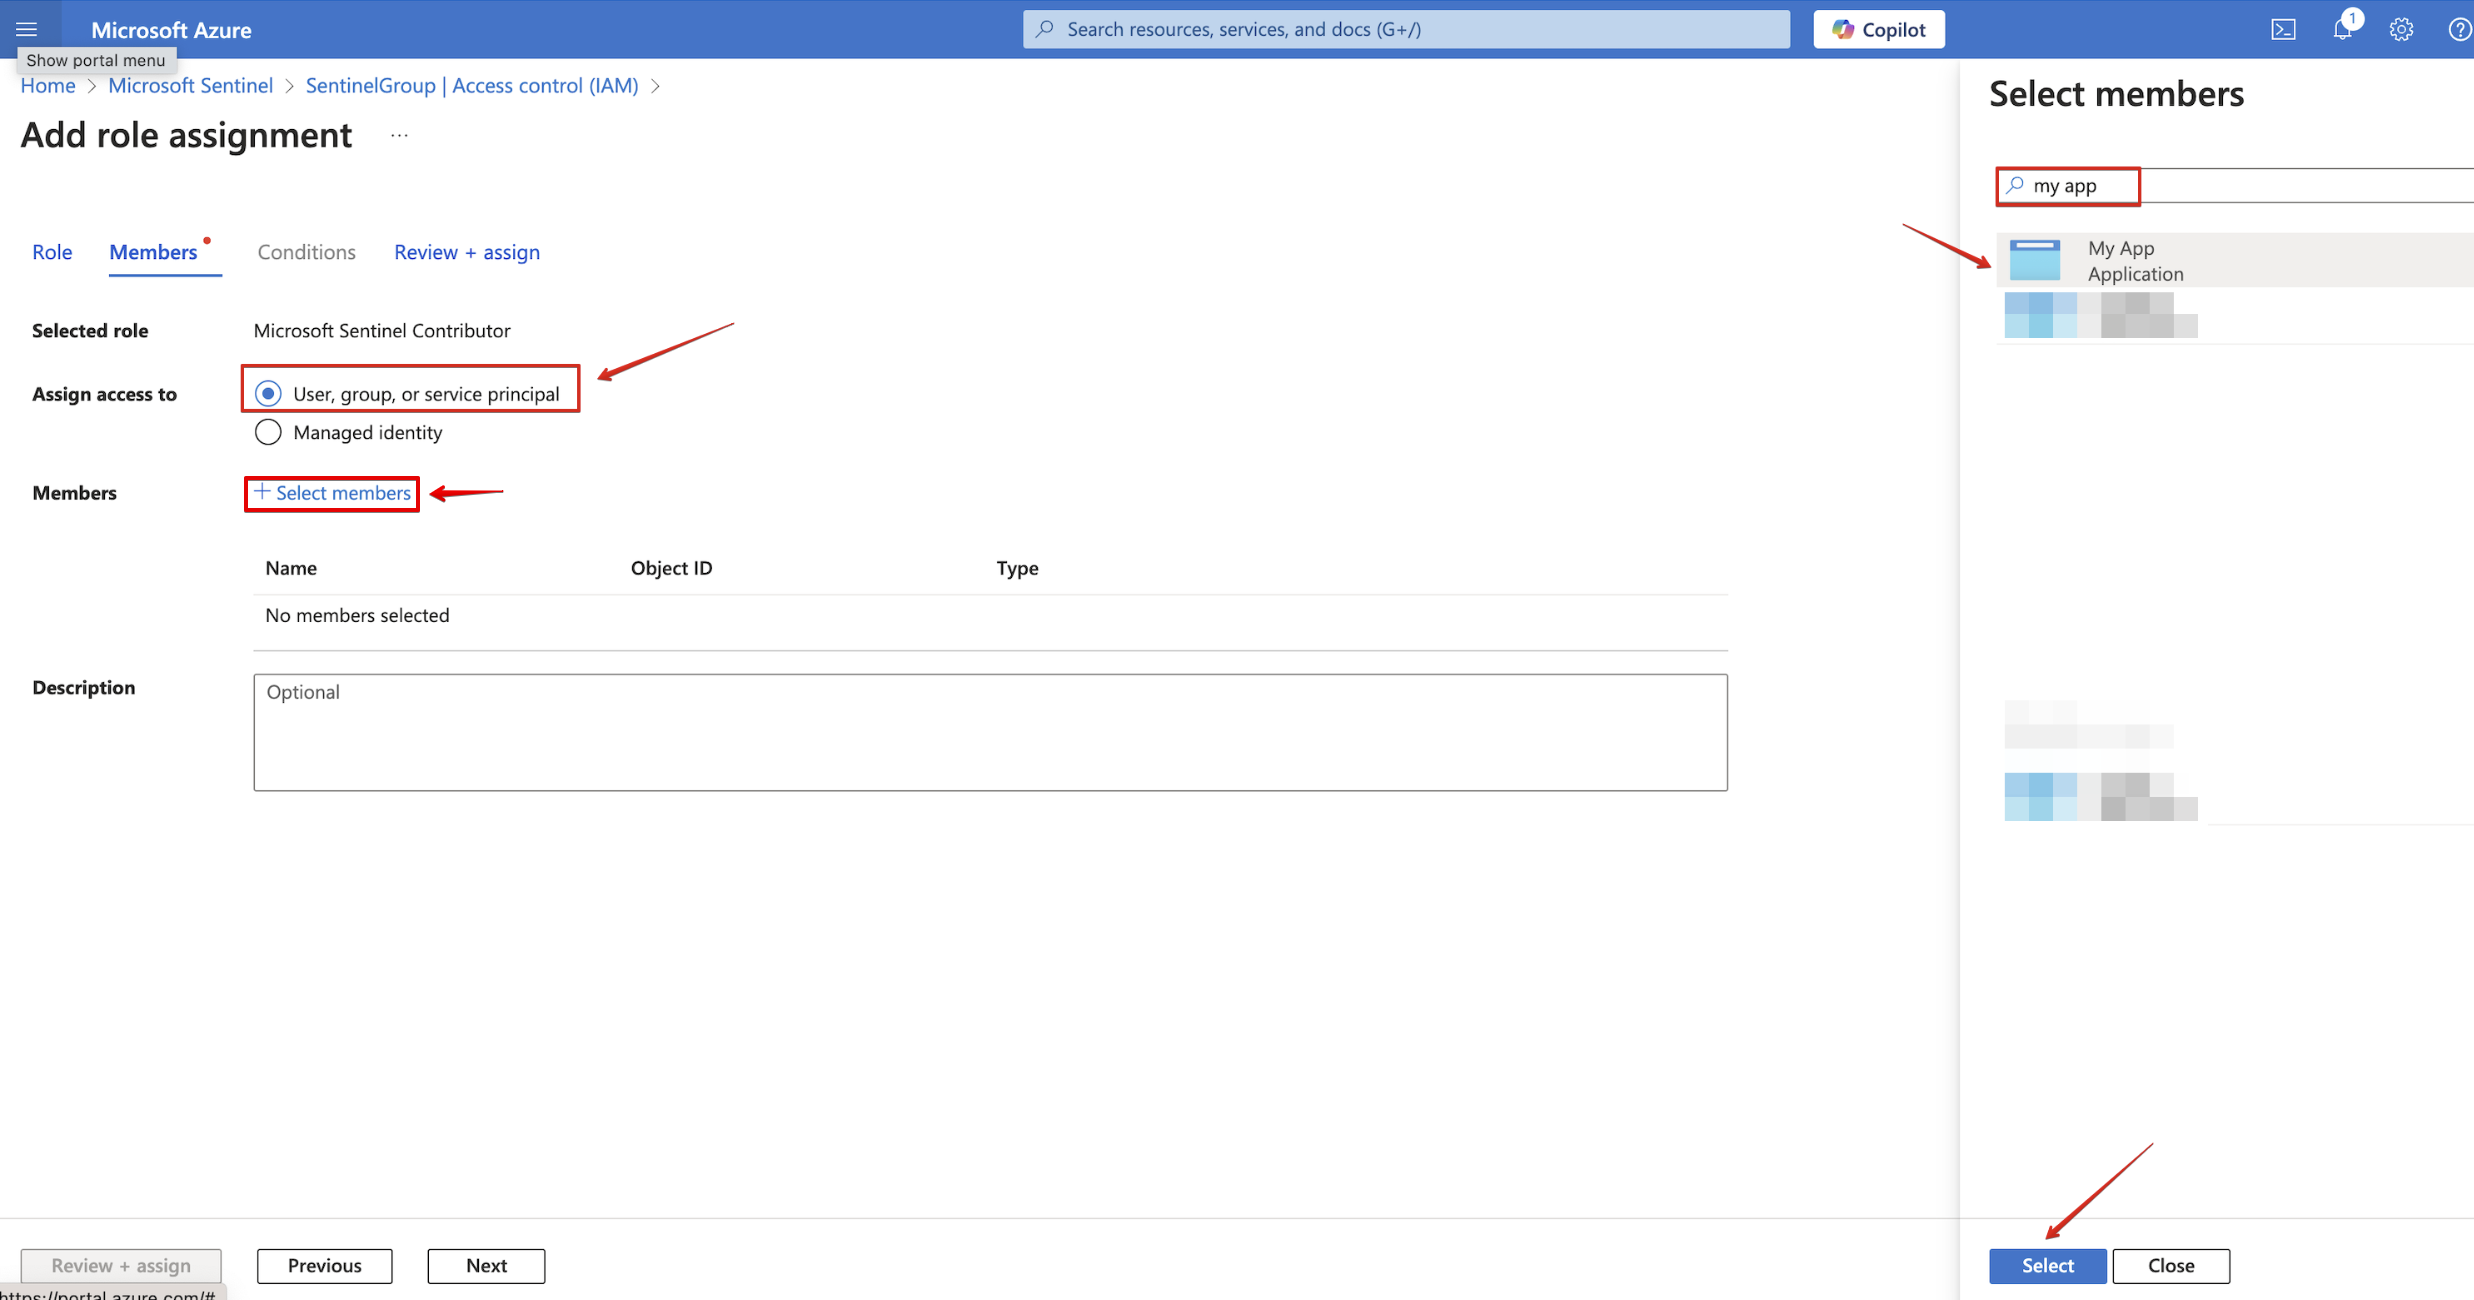
Navigate to the Members tab, under Assign access to select User, group, or service principal. Click + Select members and on the right side menu, select your app.
-
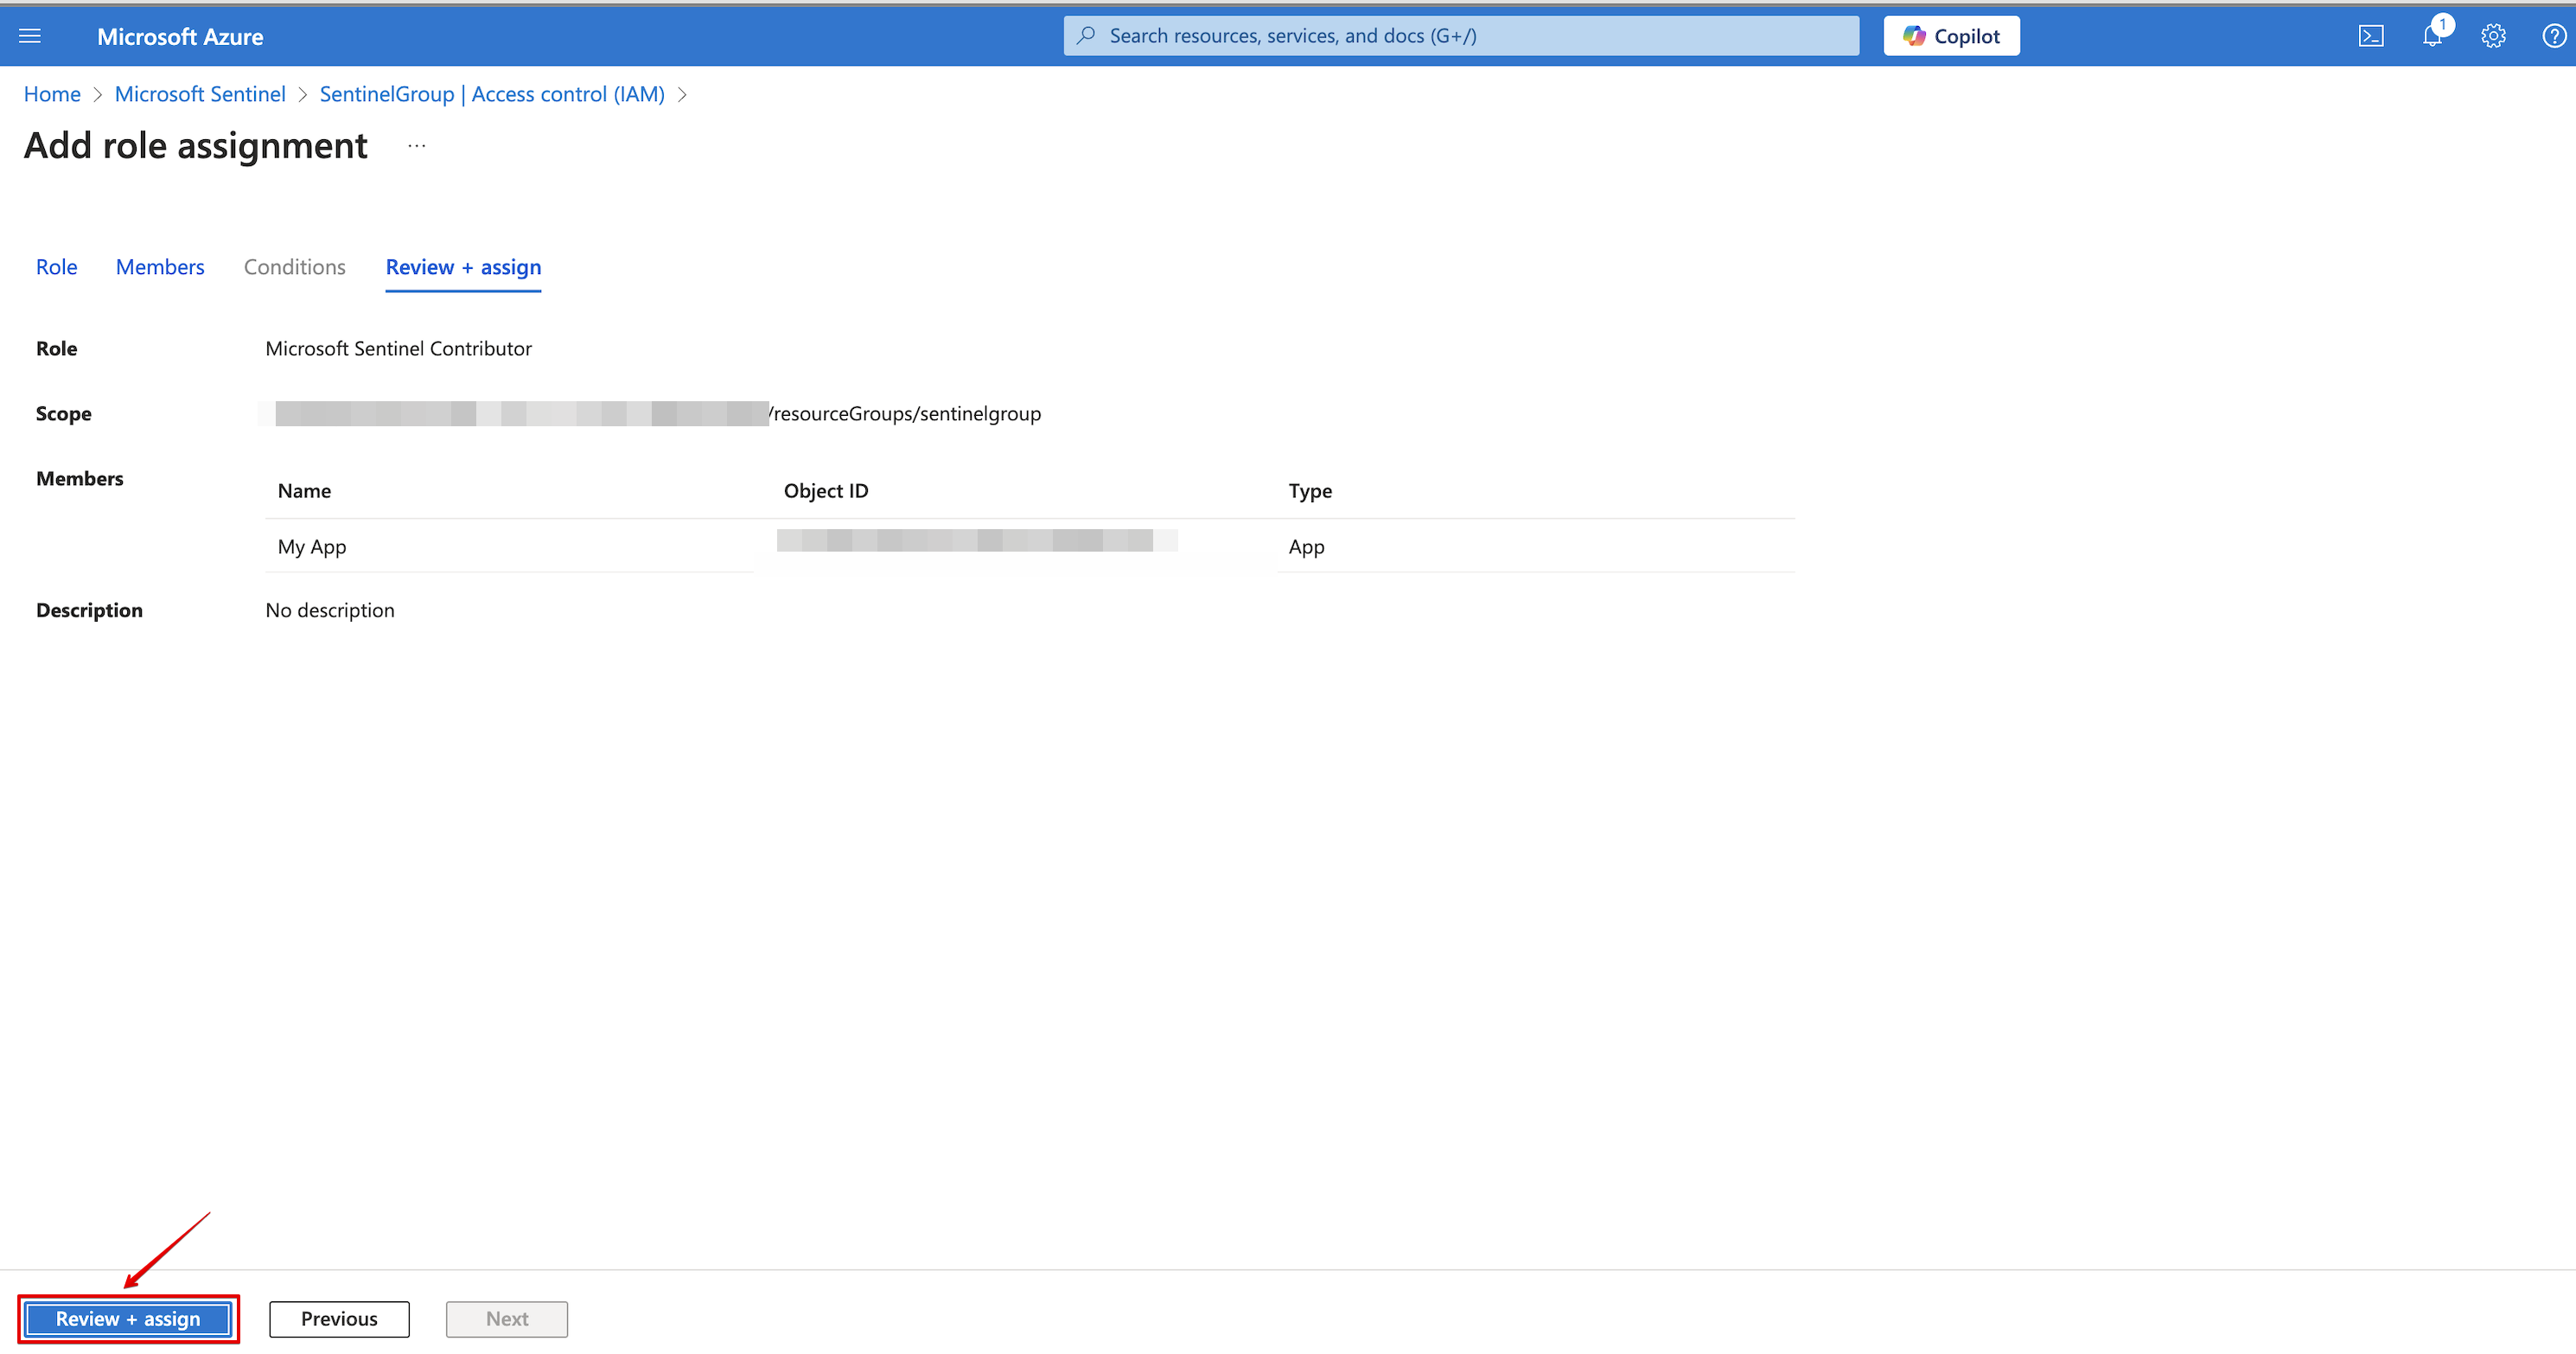
Under Review + assign, see your app and click on Review + assign.
-
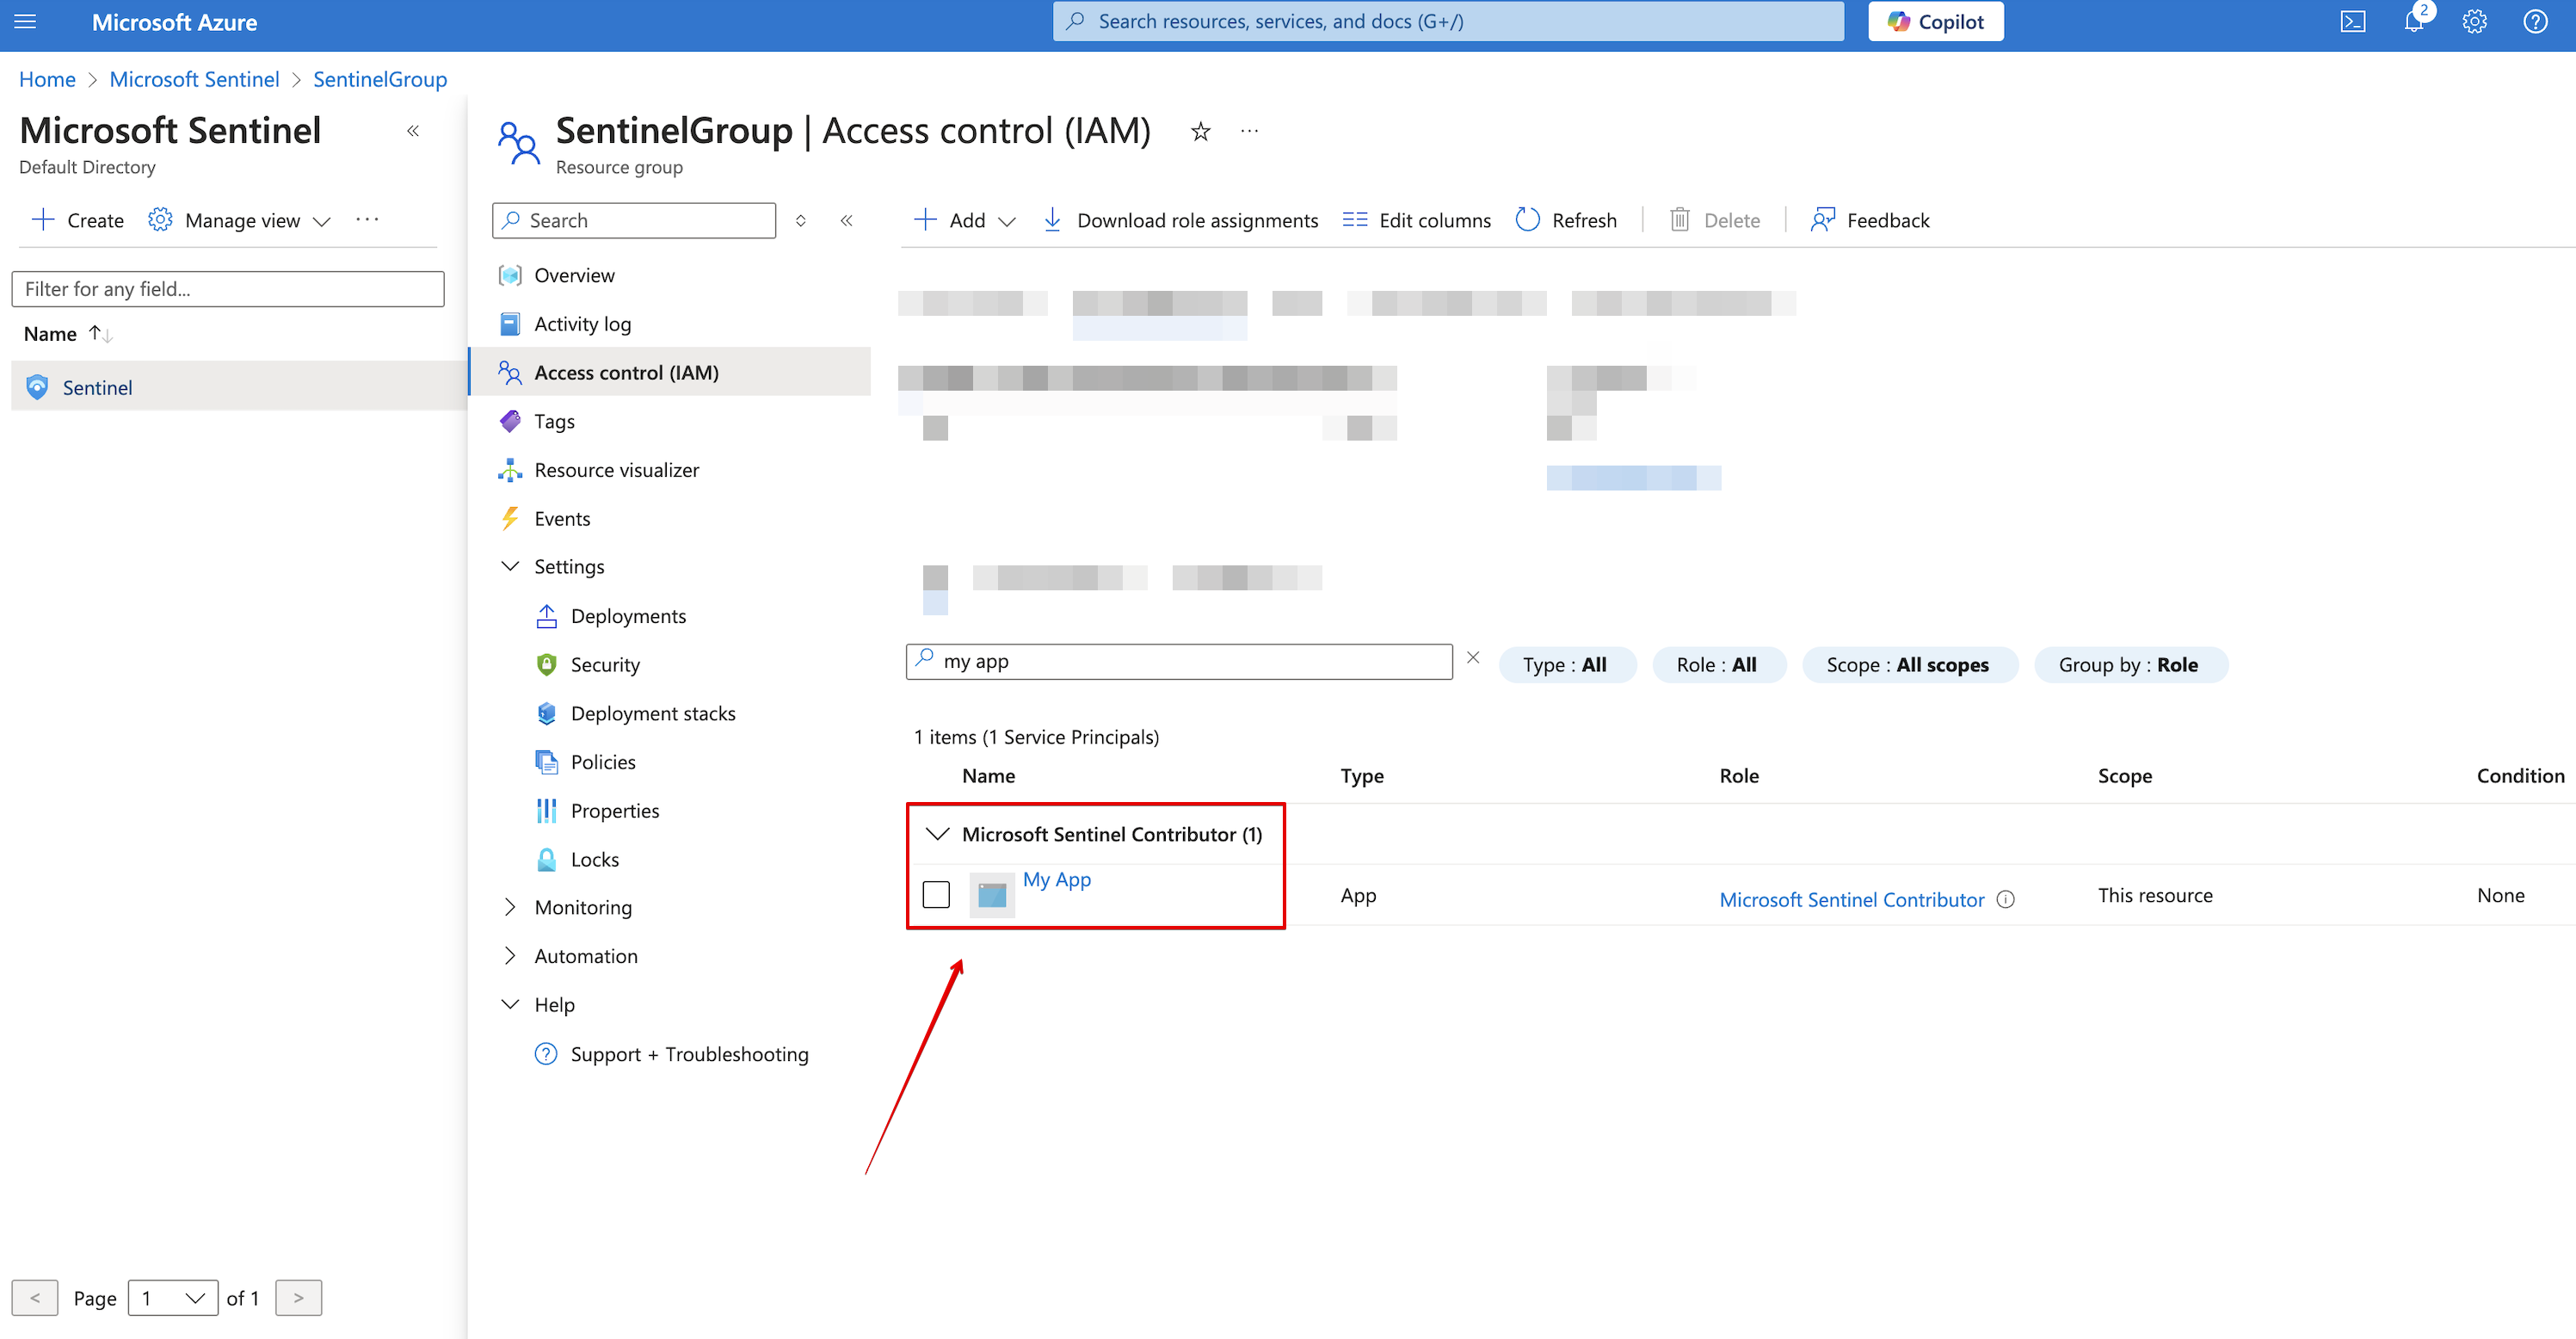
Go back to Access control (IAM) and verify that your app has been assigned with the required role.
Create and copy a secret
-
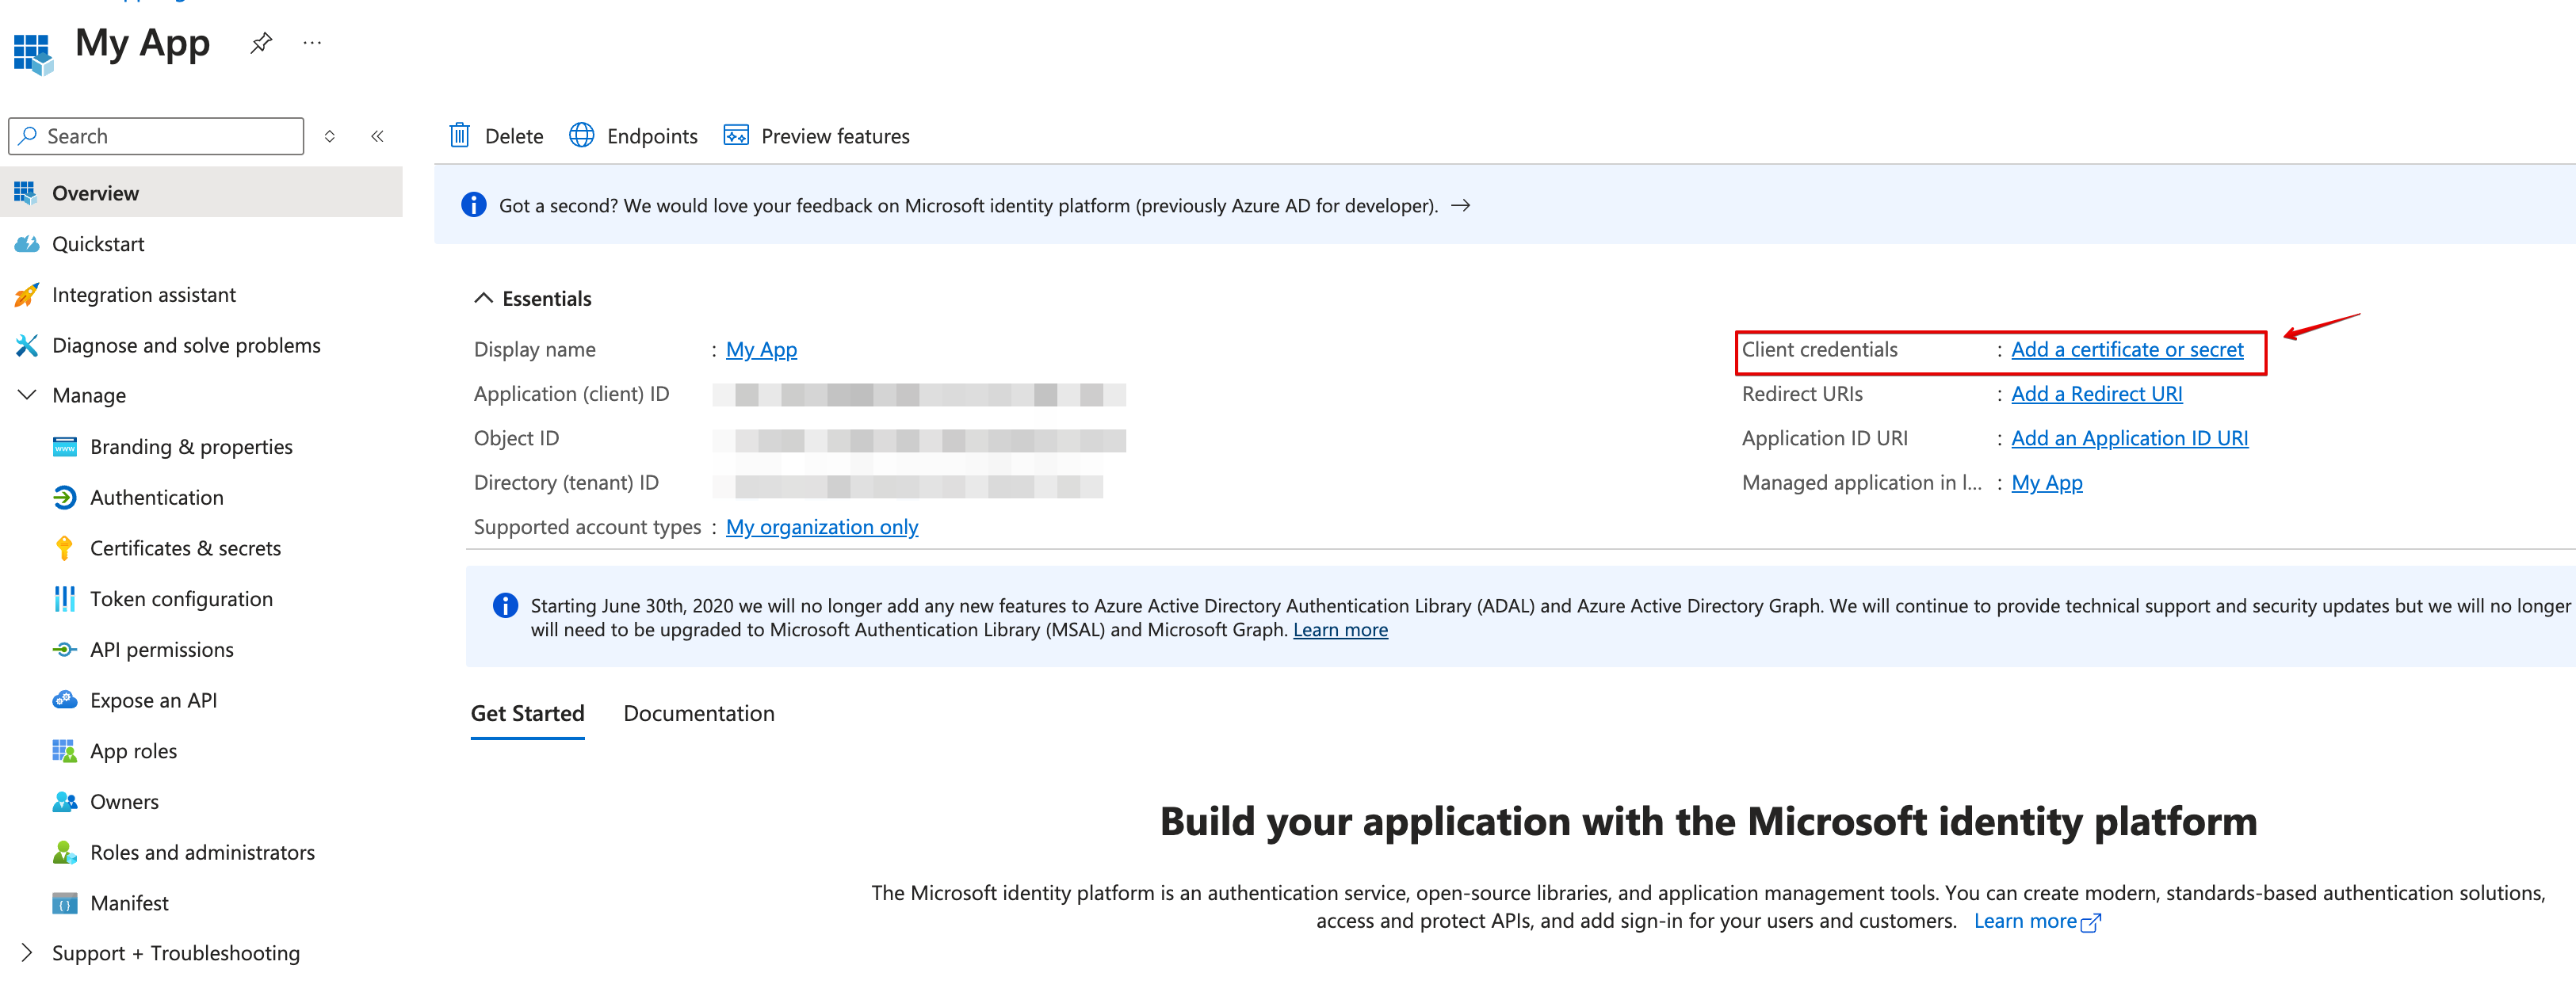
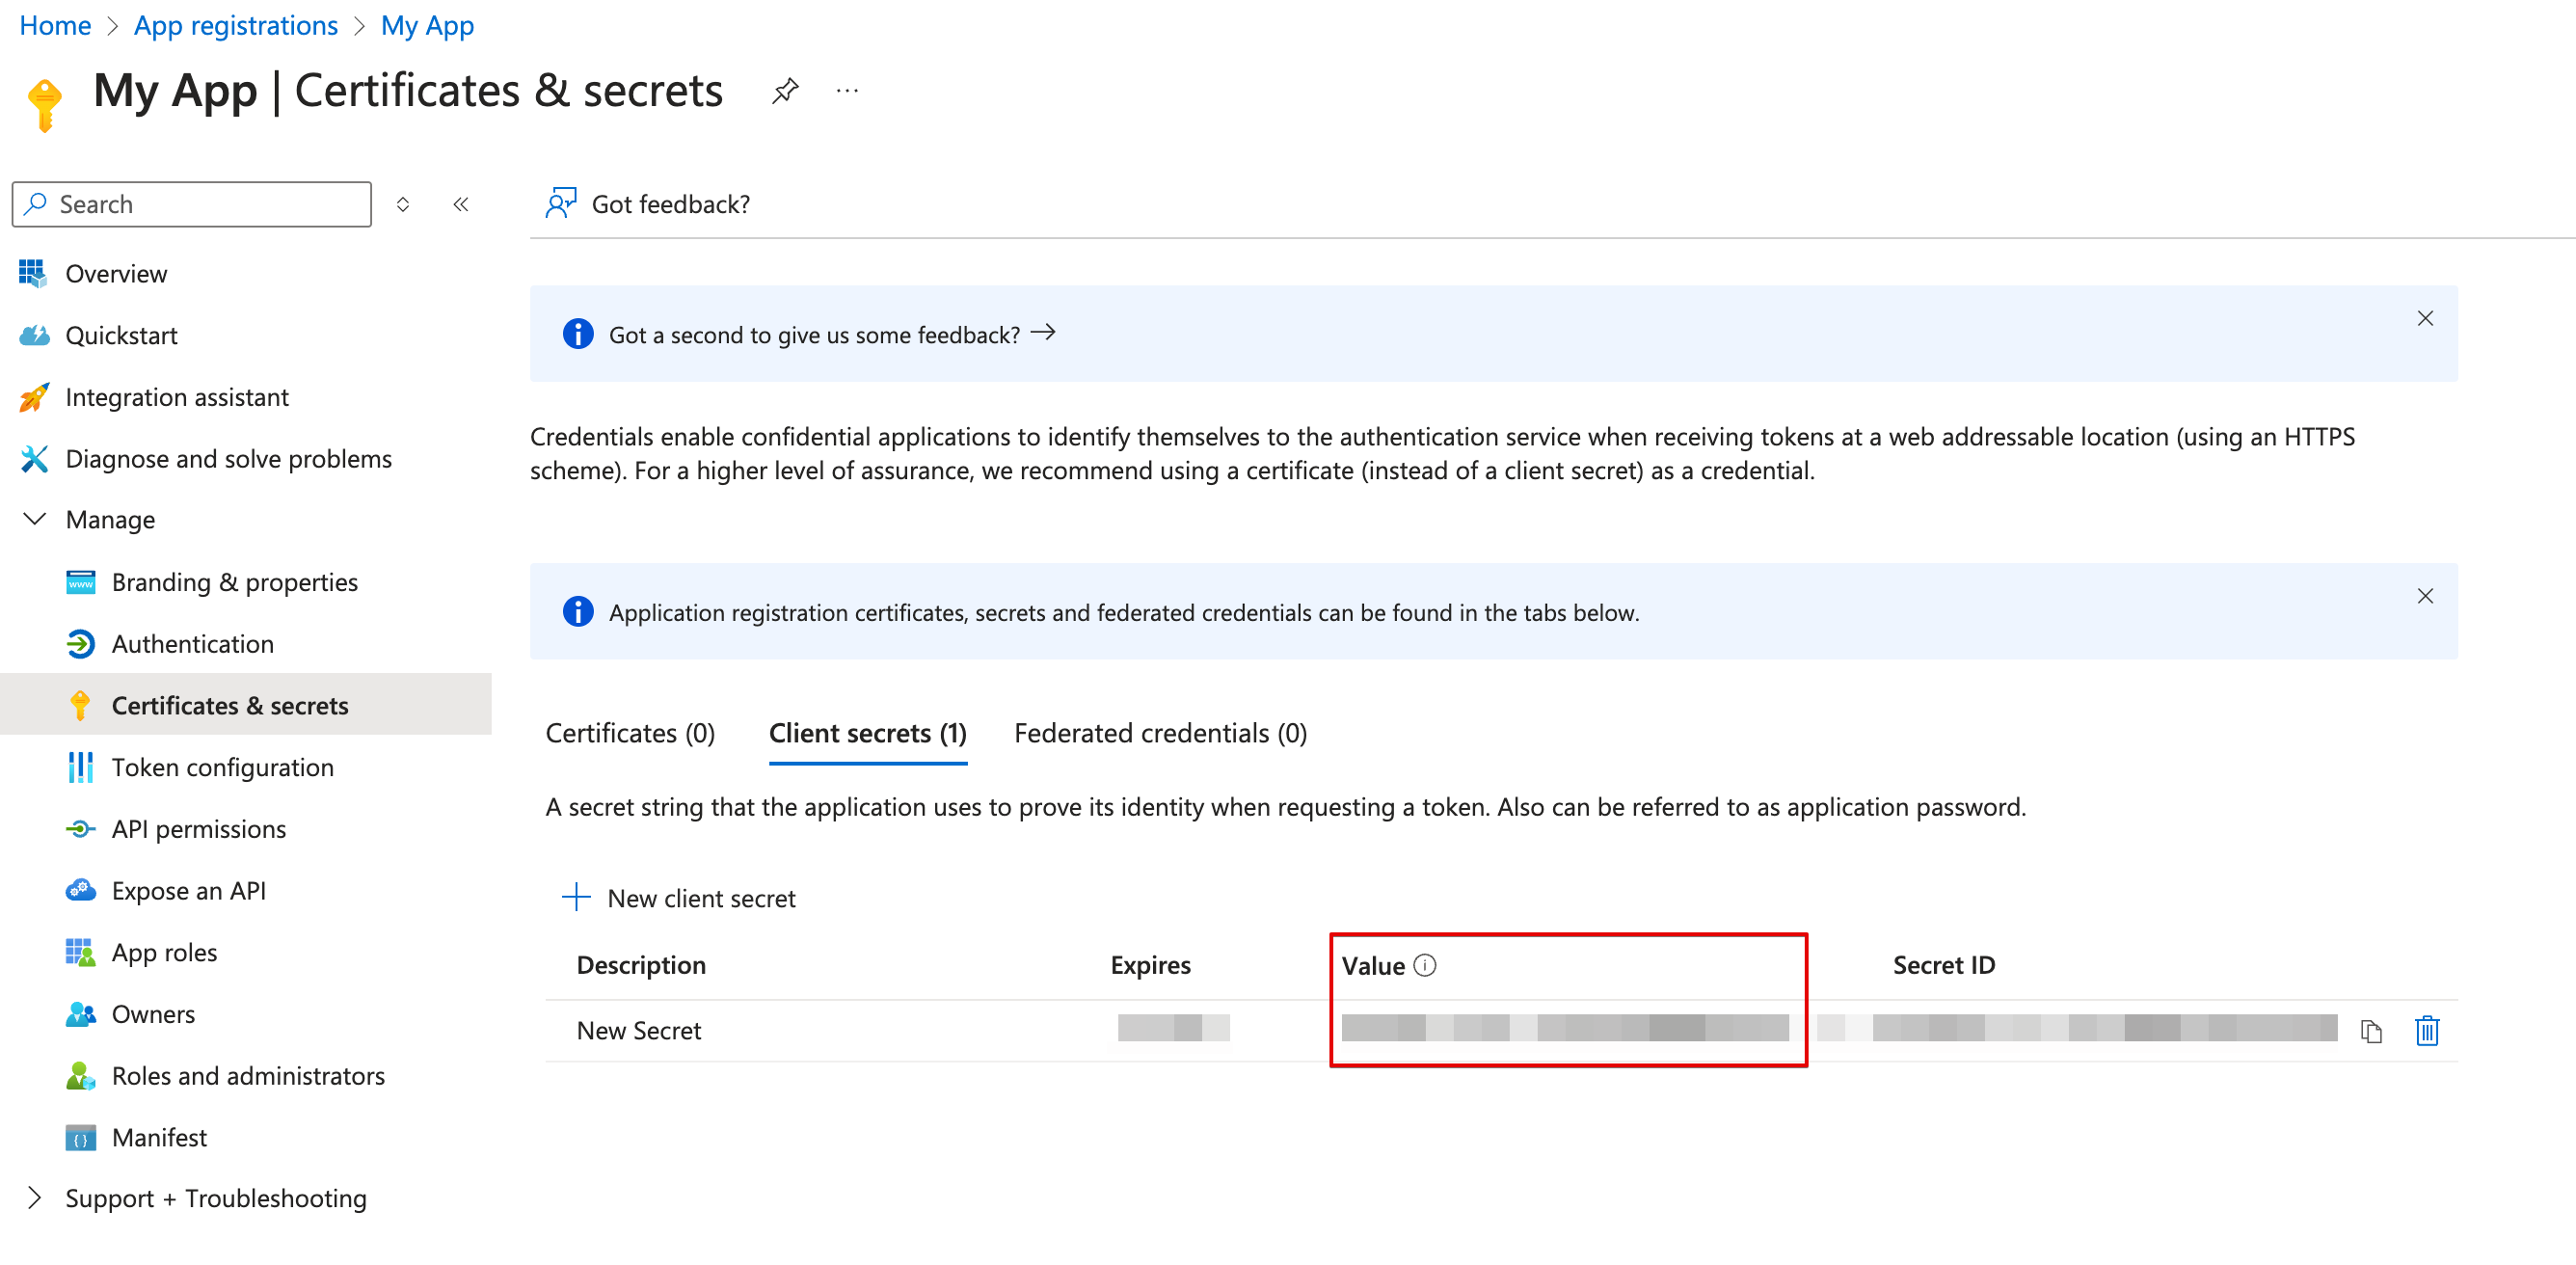
Go back to your app’s Overview page, create a new client secret.
-
Copy the secret value.
Creating your connection
- In the Blink platform, navigate to the Connections page > Add connection. A New Connection dialog box opens displaying icons of external service providers available.
- Select the Microsoft Sentinel Data Lake icon. A dialog box with name of the connection and connection methods appear.
- (Optional) Edit the name of the connection. At a later stage you cannot edit the name.
- Select App Registration as the method to create the connection.
-
Fill in the parameters:
- The client ID
- The client secret
- The tenant ID
- (Optional) Click Test Connection to test it.
- Click Create connection. The new connection appears on the Connections page.