Microsoft Defender XDR alerts are generated by many sources
Solutions that are part of Microsoft Defender XDR:
- Microsoft Defender for Endpoint
- Microsoft Defender for Office 365
- Microsoft Defender for Identity
- Microsoft Defender for Cloud Apps
- The app governance add-on for Microsoft Defender for Cloud Apps
- Microsoft Entra ID Protection
- Microsoft Data Loss Prevention
Other services that have integrations with the Microsoft Defender security portal:
- Microsoft Sentinel
- Non-Microsoft security solutions that pass their alerts to Microsoft Sentinel
- Microsoft Defender for Cloud
Creating a Microsoft Defender XDR connection
Create the connection by using one of the following methods:Using OAuth
Creating your connection
- In the Blink platform, navigate to the Connections page > Add connection. A New Connection dialog box opens displaying icons of external service providers available.
- Select the Microsoft Defender XDR icon. A dialog box with name of the connection and connection methods appear.
- (Optional) Edit the name of the connection. At a later stage you cannot edit the name.
- Click Microsoft Defender XDR to authenticate using OAuth.
- Sign in using your credentials.
Using App Registration
To create the connection you need:- A Client ID
- A Client Secret
- A Tenant ID
Obtaining the credentials
- Log into the Azure Portal.
-
Go to the Microsoft Entra ID resource.
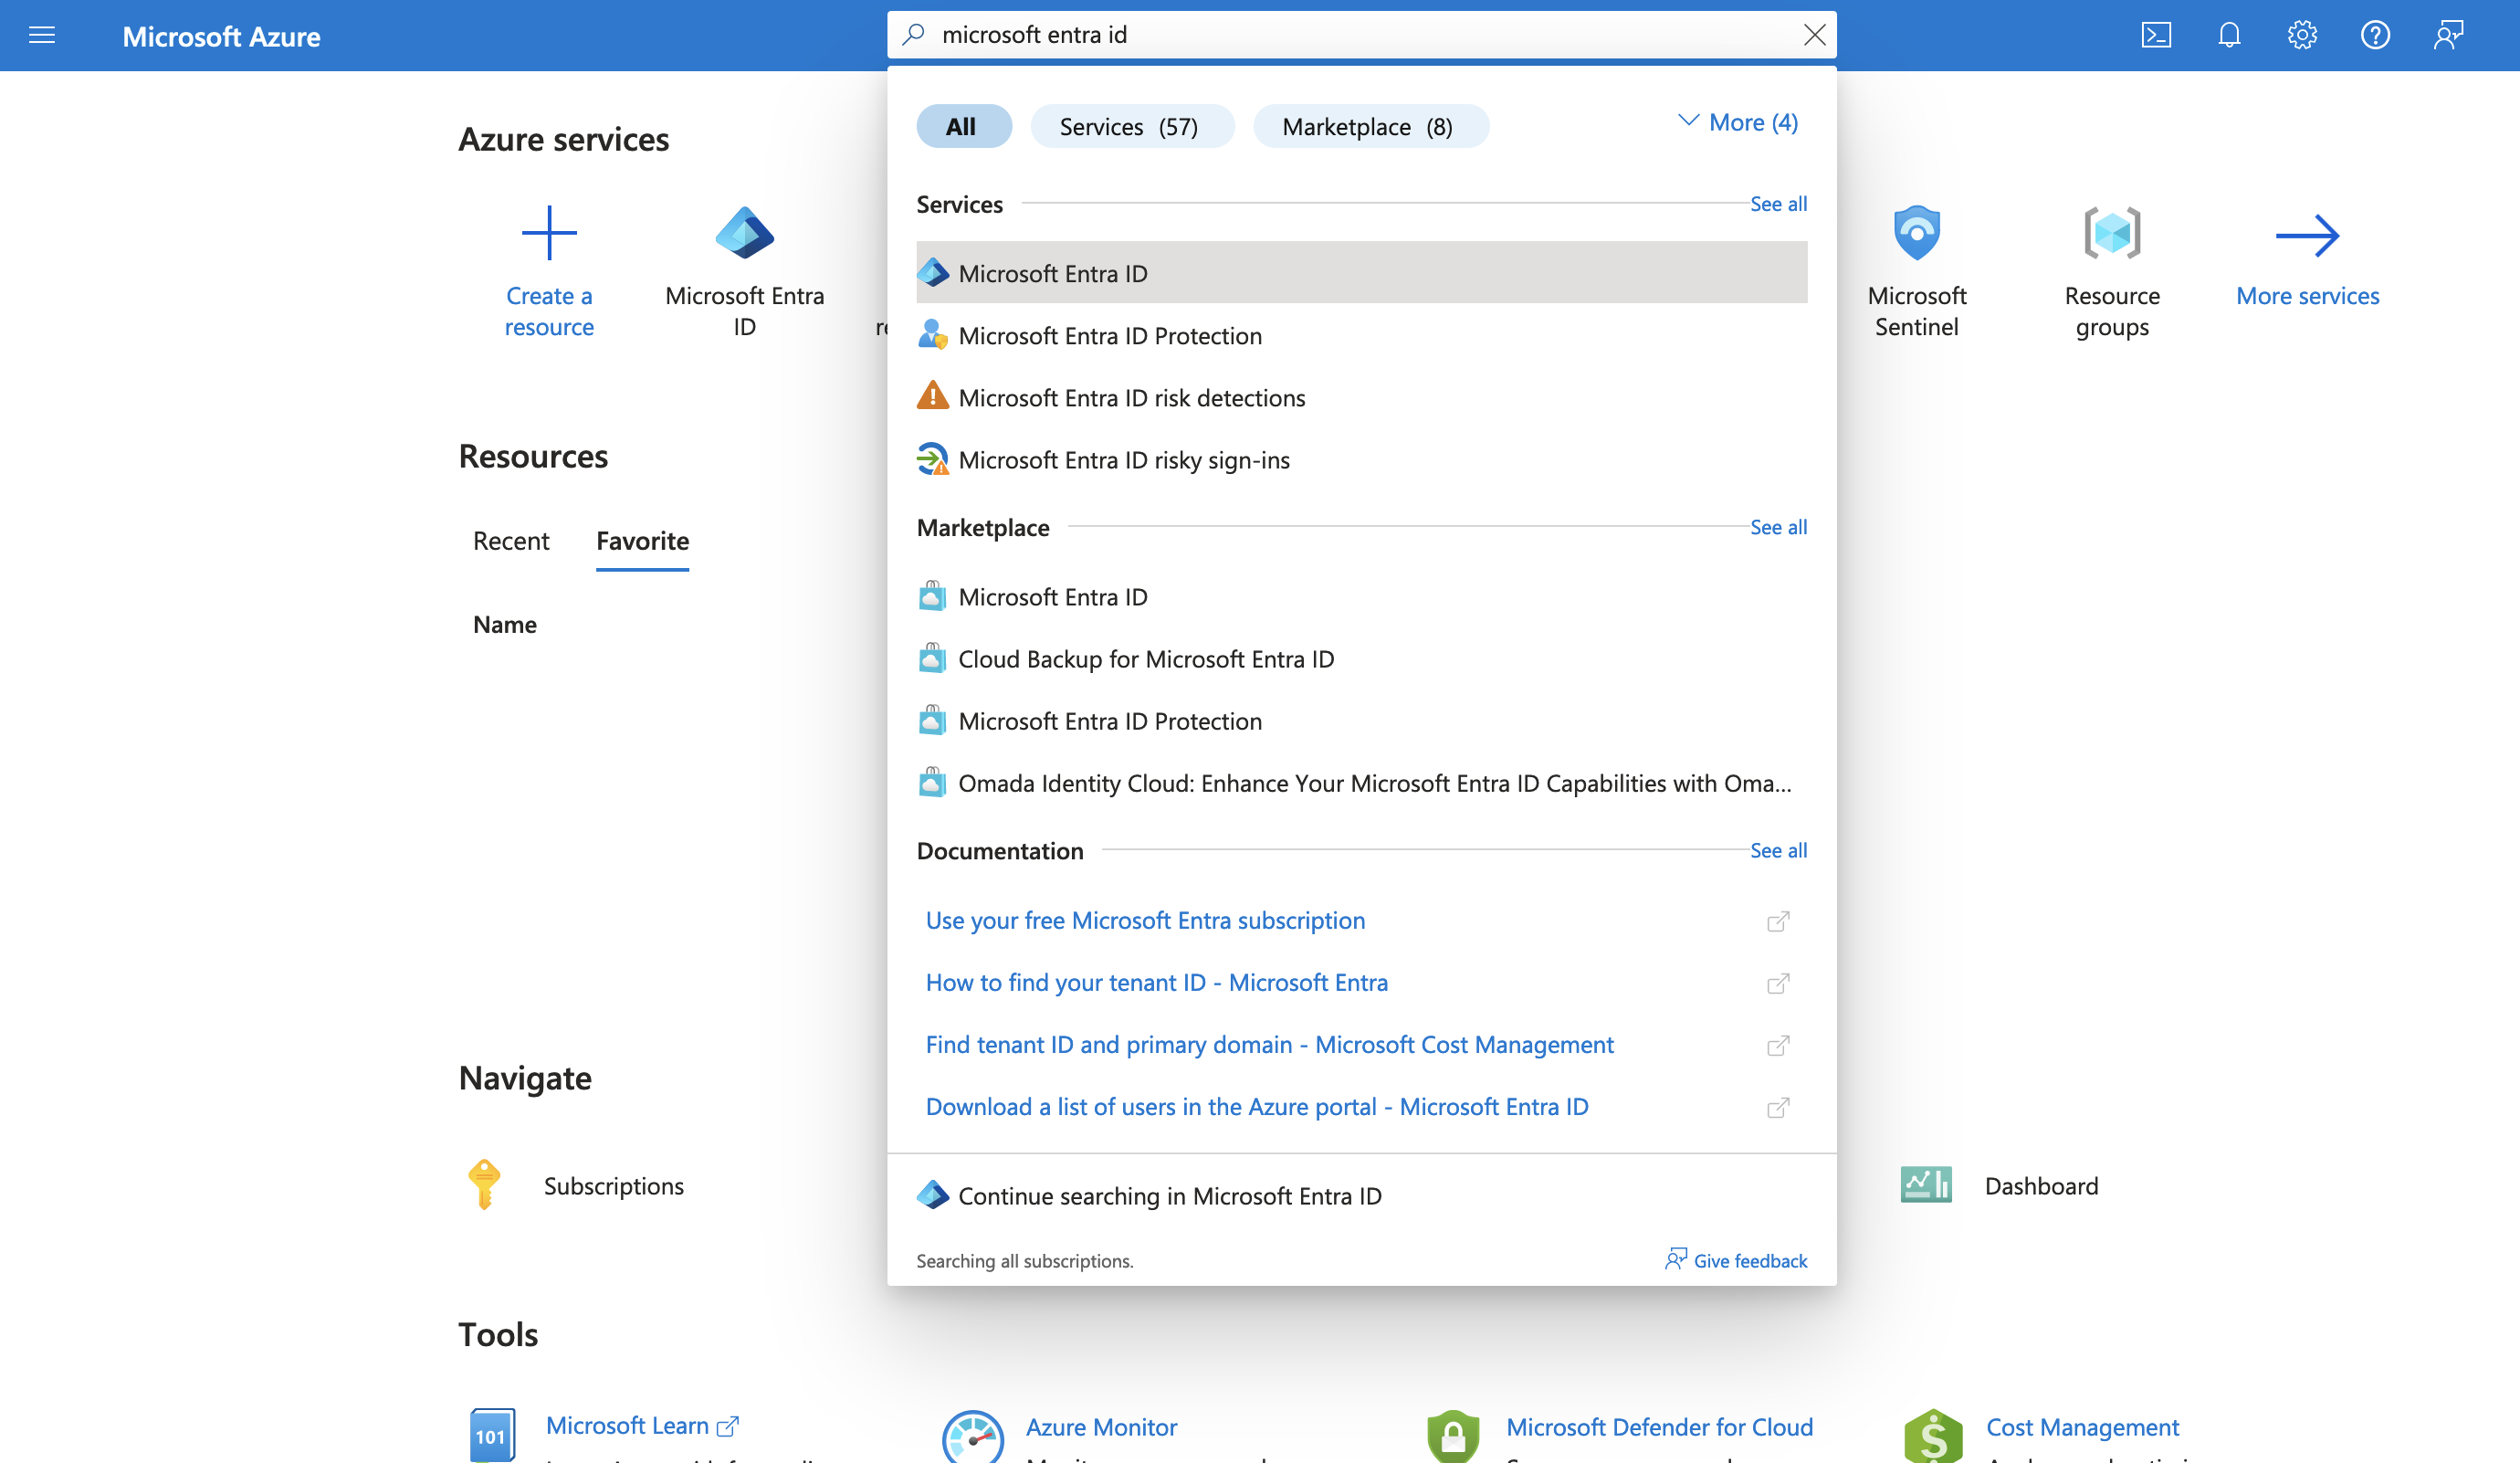
-
In the left-hand menu, click App registrations.
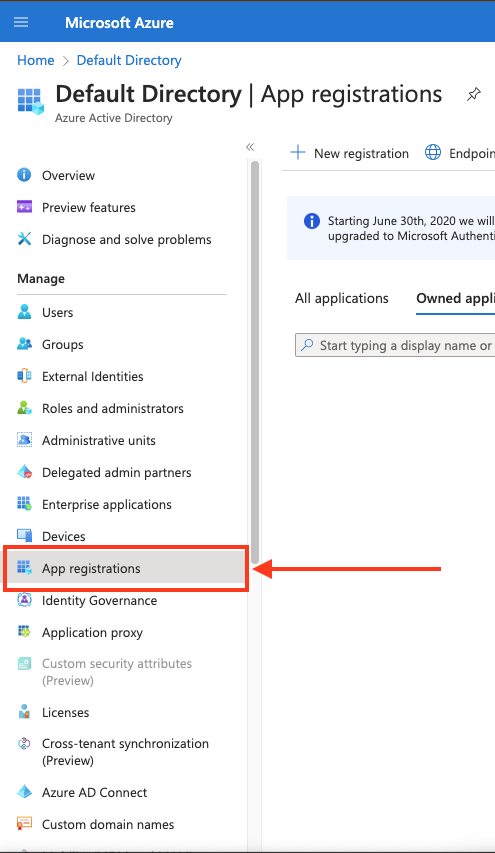
-
Create a new application registration or click on one of your existing applications.
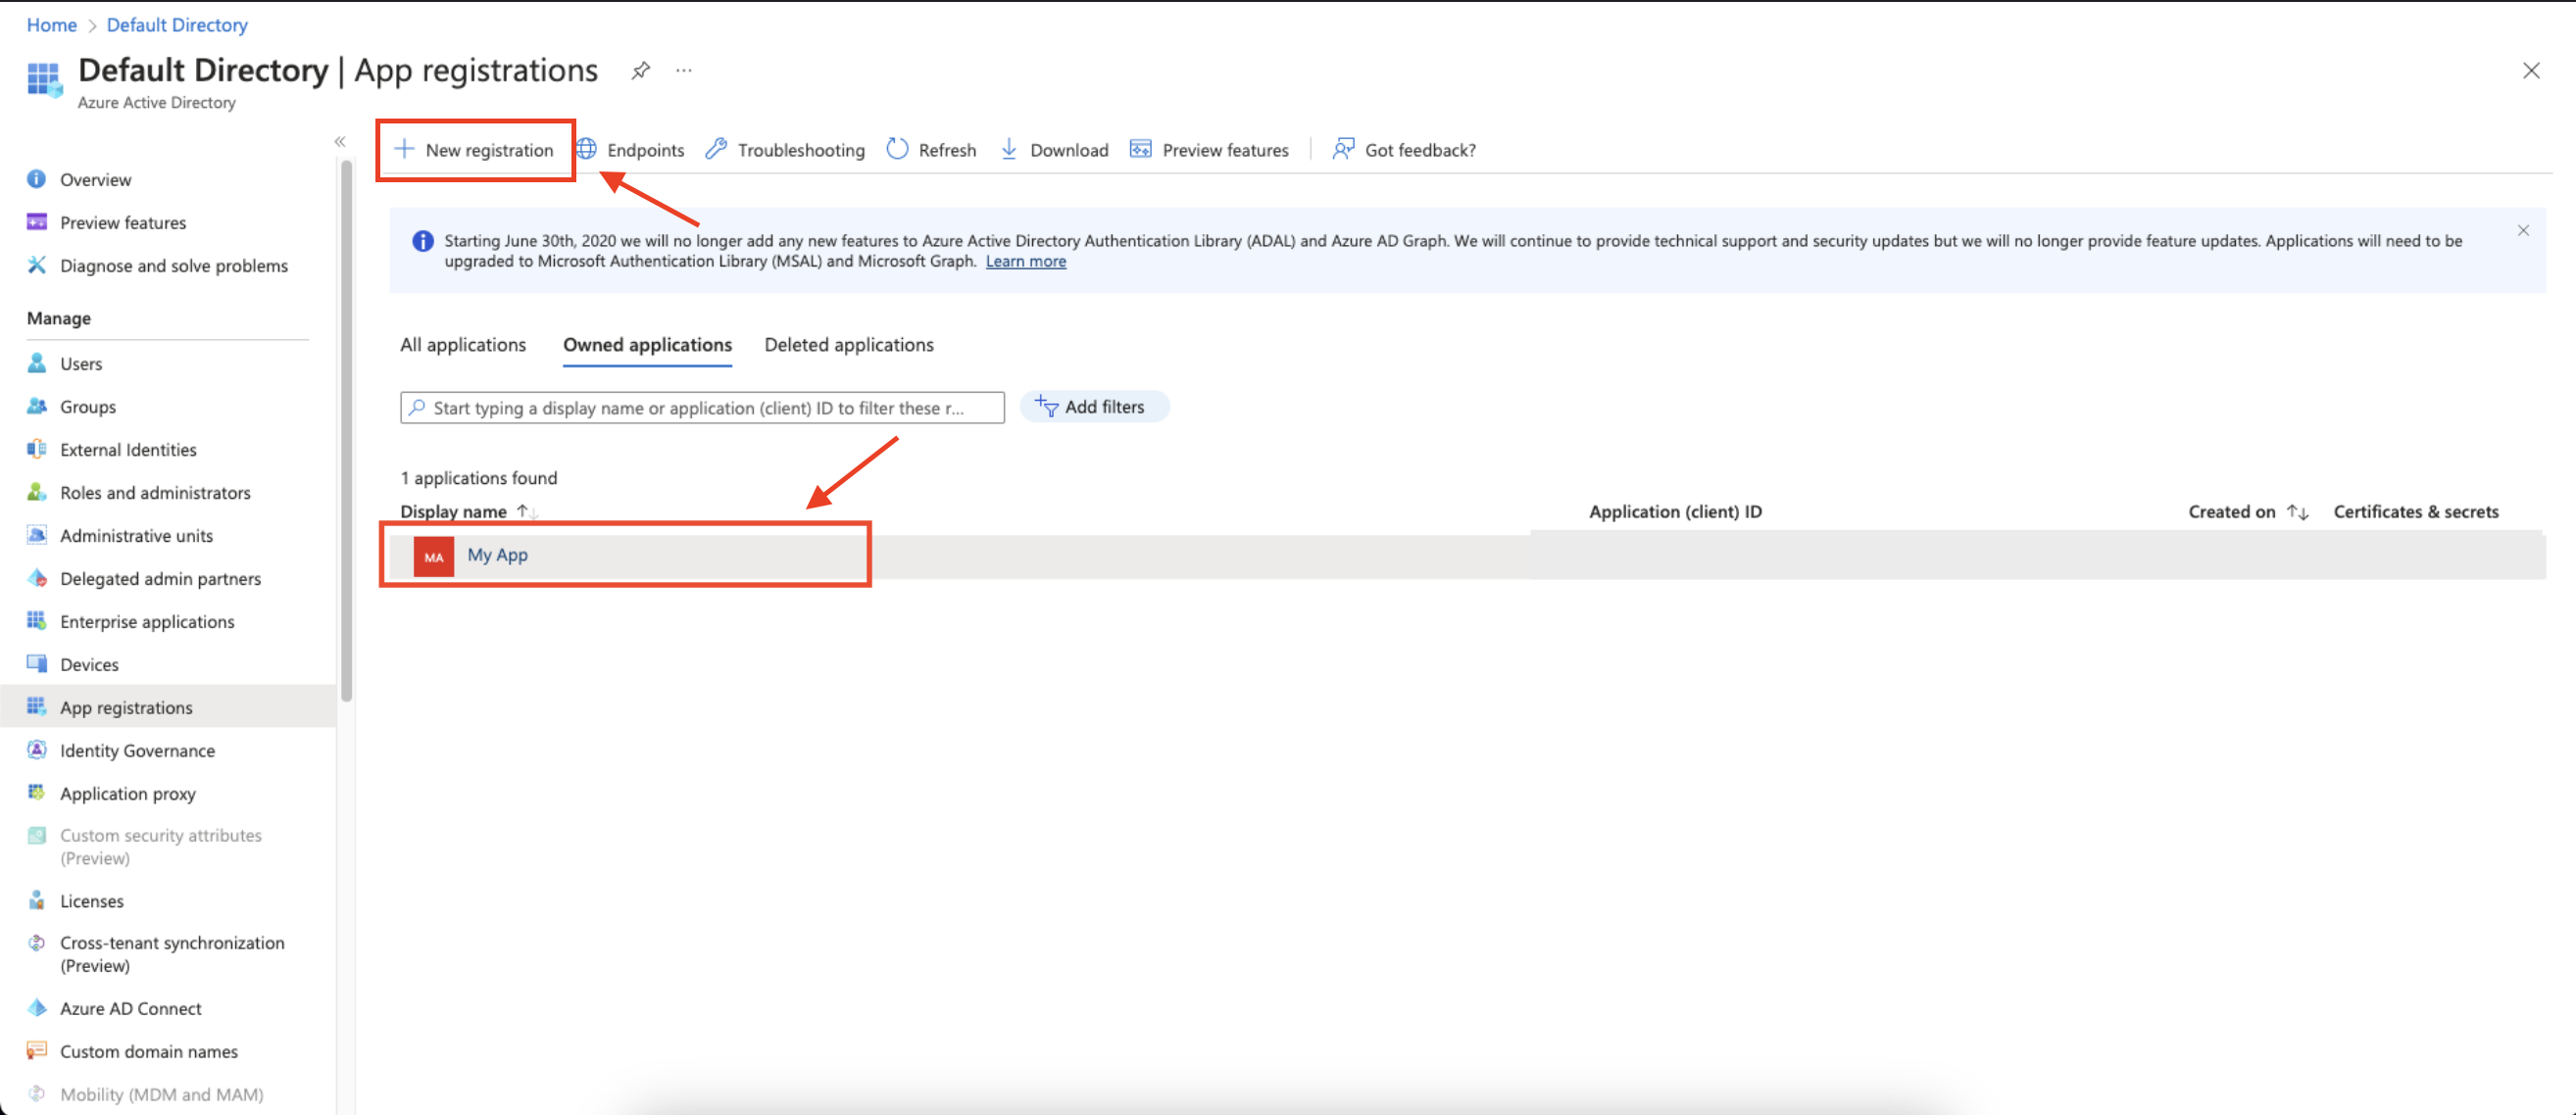
-
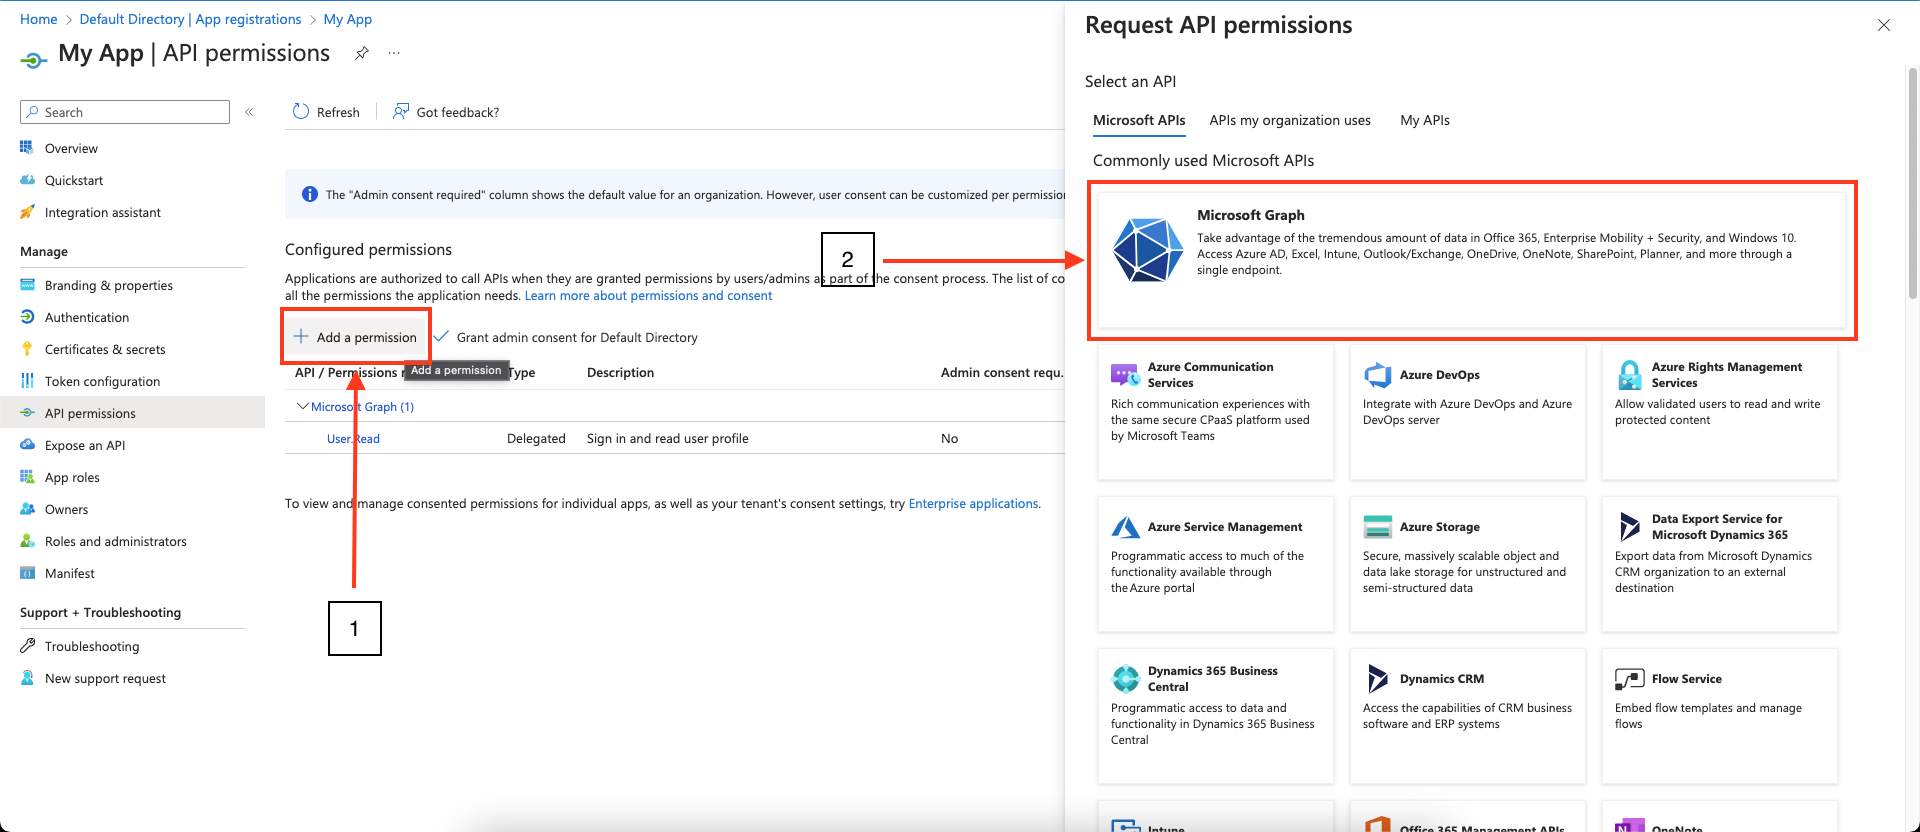
In the left-hand menu, click API permissions.
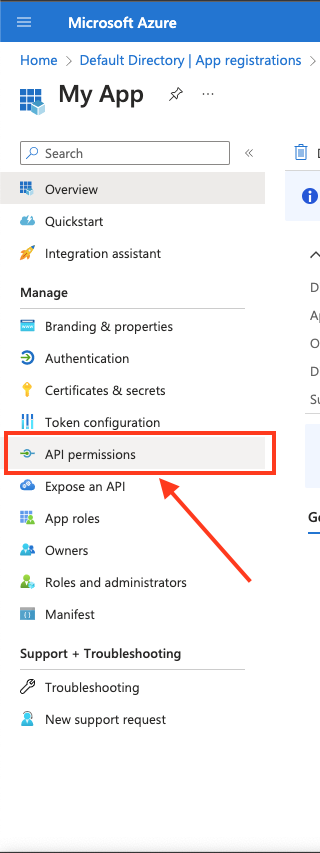
-
Click Add a permission and select Microsoft Graph.
-
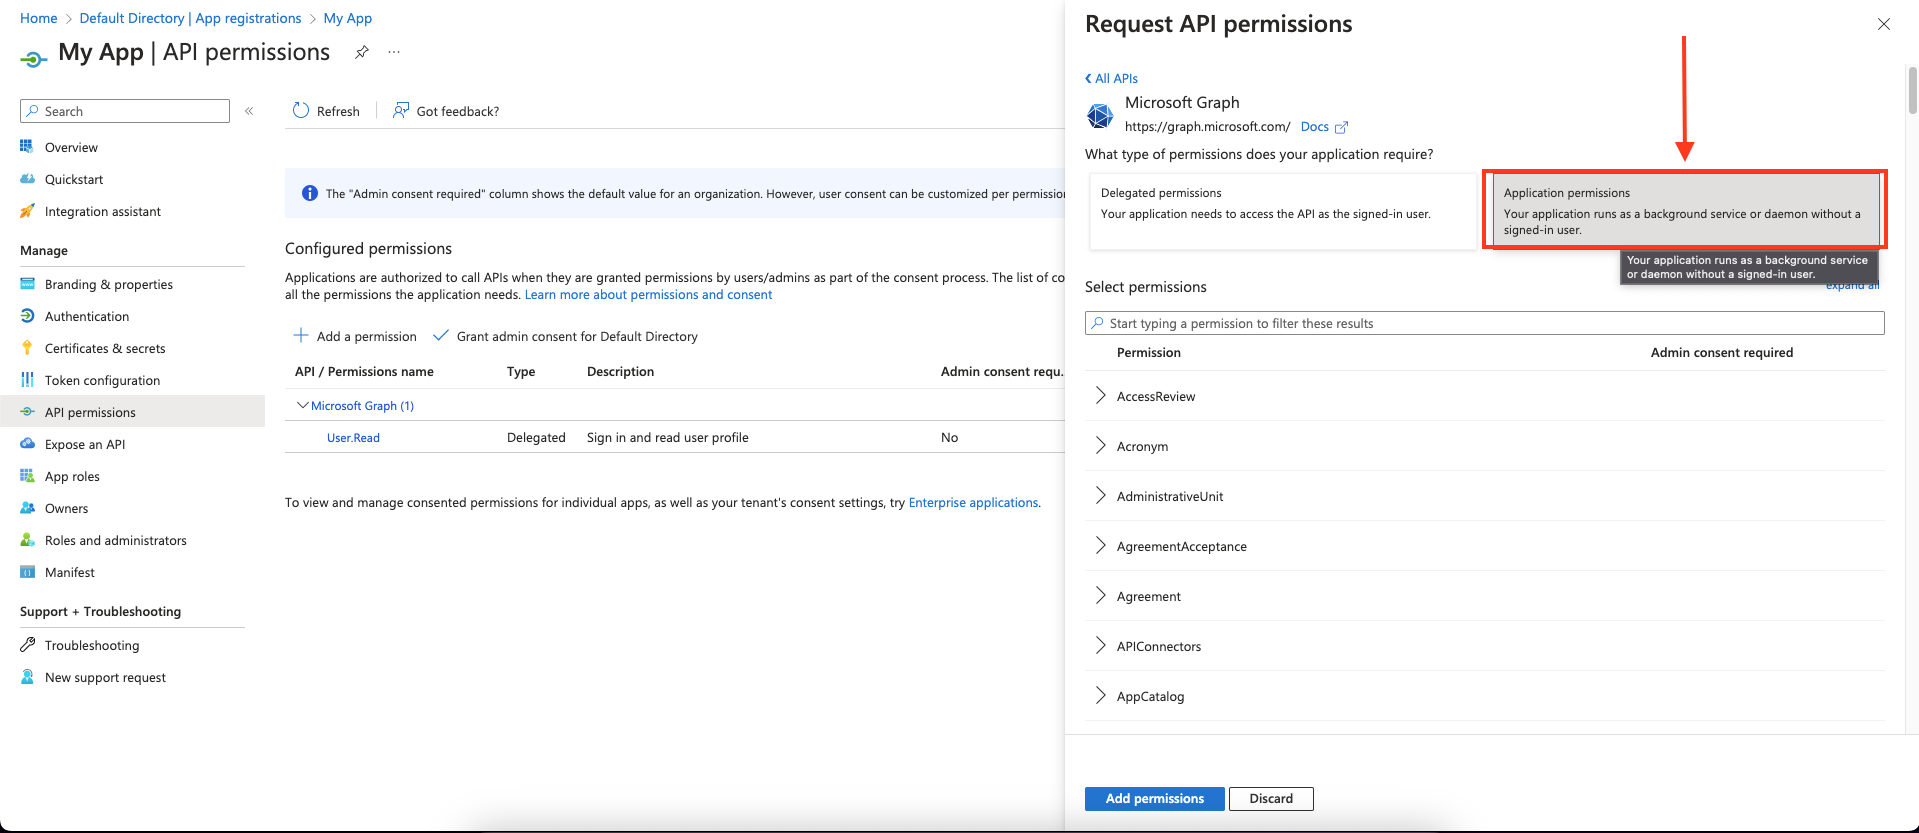
Choose Application permissions and mark the permissions you wish to add.
As a best practice, request the least privileged permissions that your app
needs in order to access data and function correctly. Requesting permissions
with more than the necessary privileges is poor security practice, which may
cause users to refrain from consenting and affect your app’s usage. For
additional information, refer to Microsoft Graph
permissions.
| Least privileged permissions | Higher privileged permissions |
|---|---|
| SecurityAlert.Read.All | SecurityAlert.ReadWrite.All |
| SecurityIncident.Read.All | SecurityIncident.ReadWrite.All |
| SecurityAlert.ReadWrite.All | |
| SecurityIncident.ReadWrite.All |
- Click Add permissions to save the changes.
-
Click Grant admin consent for
<your tenant>on the API permissions page. Only admins can grant consent.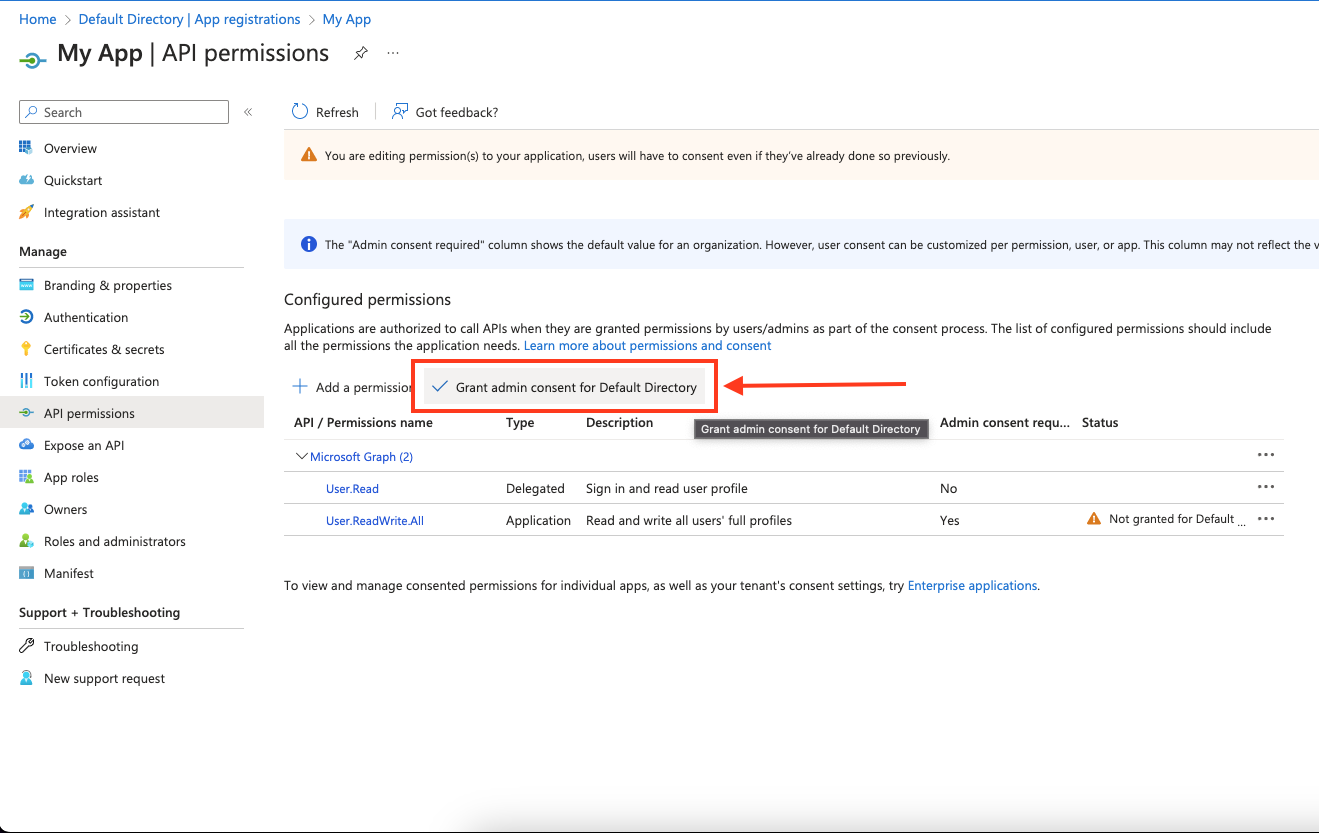
-
Confirm that the added permissions are now verified.

-
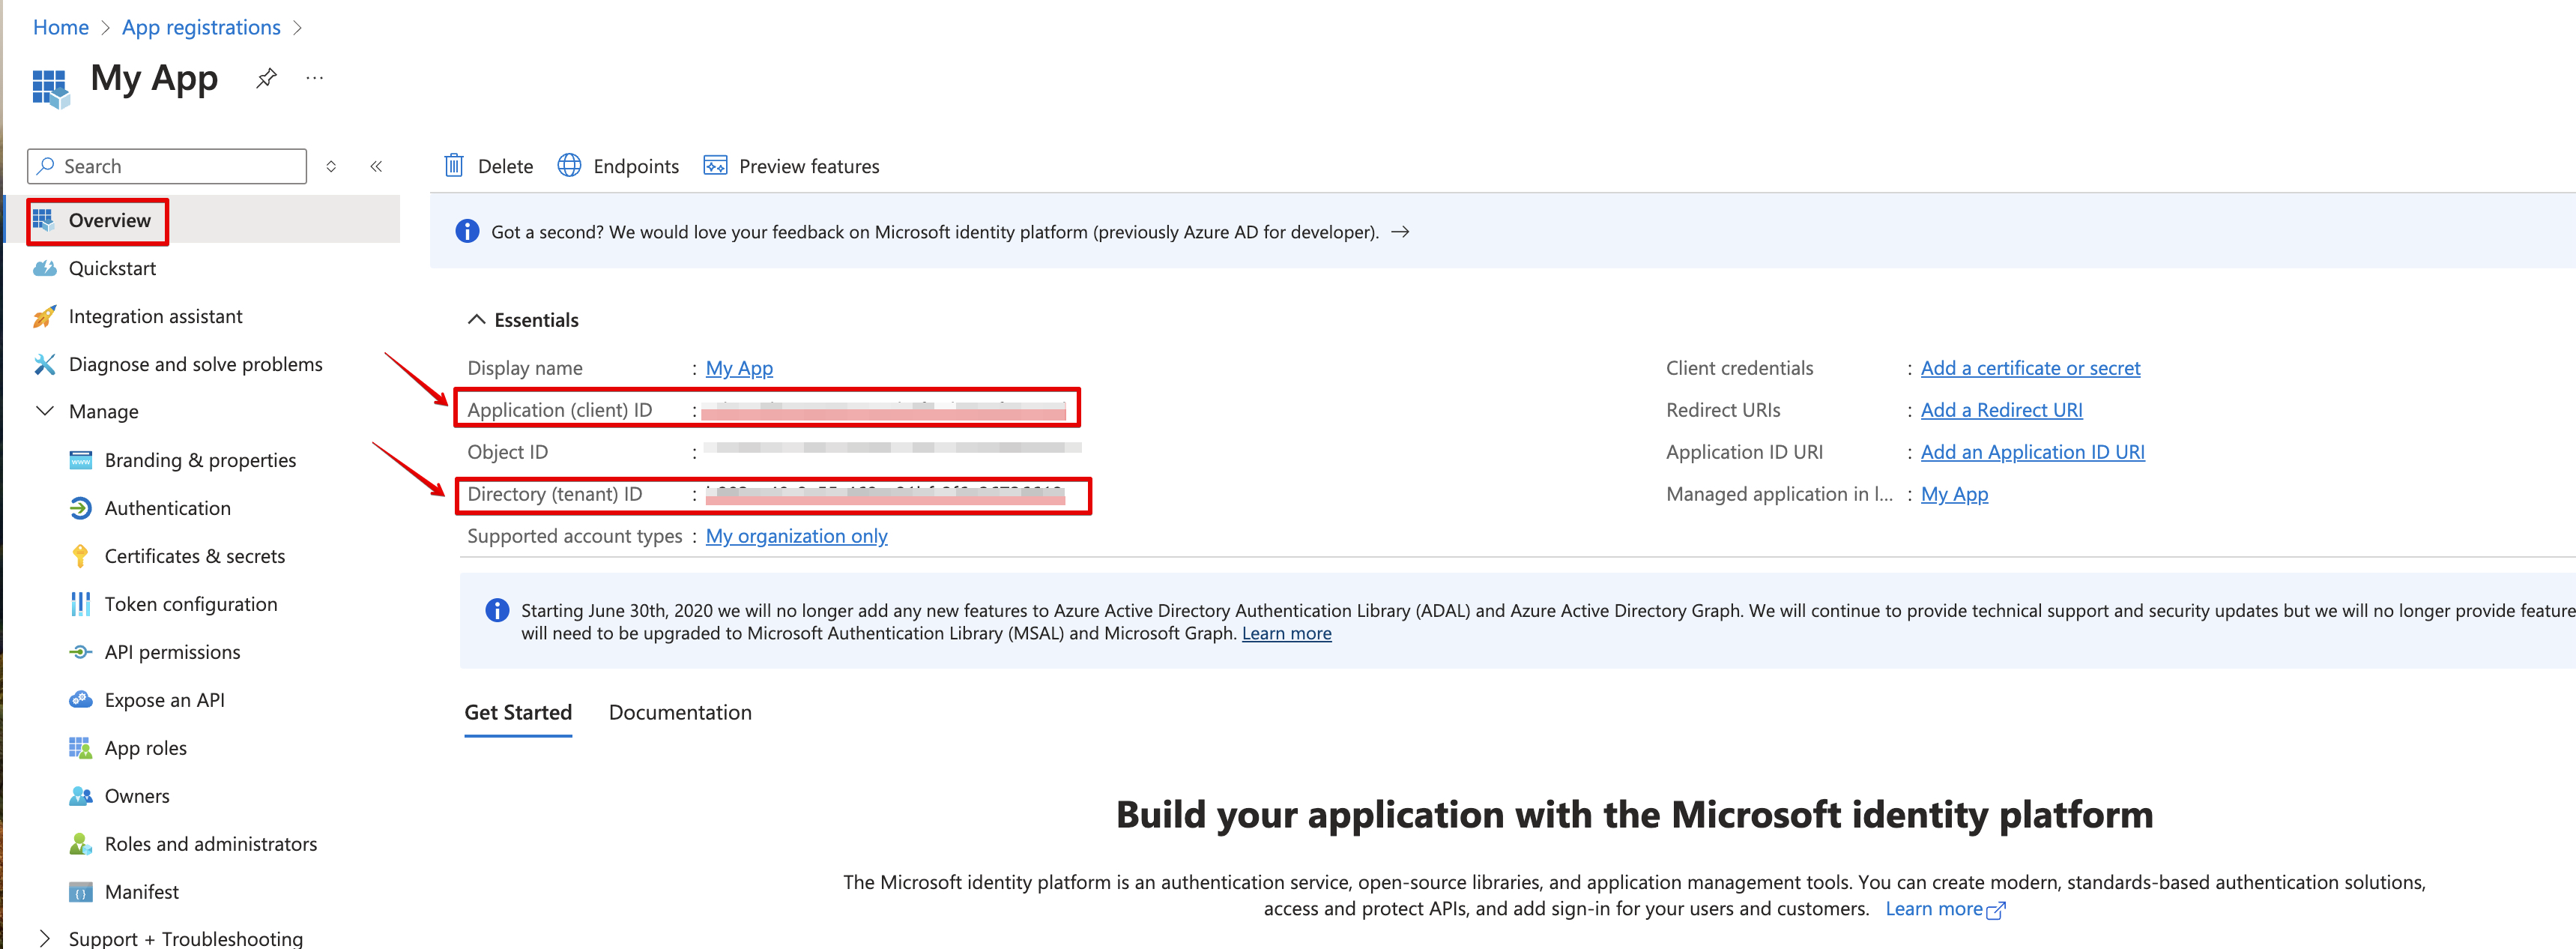
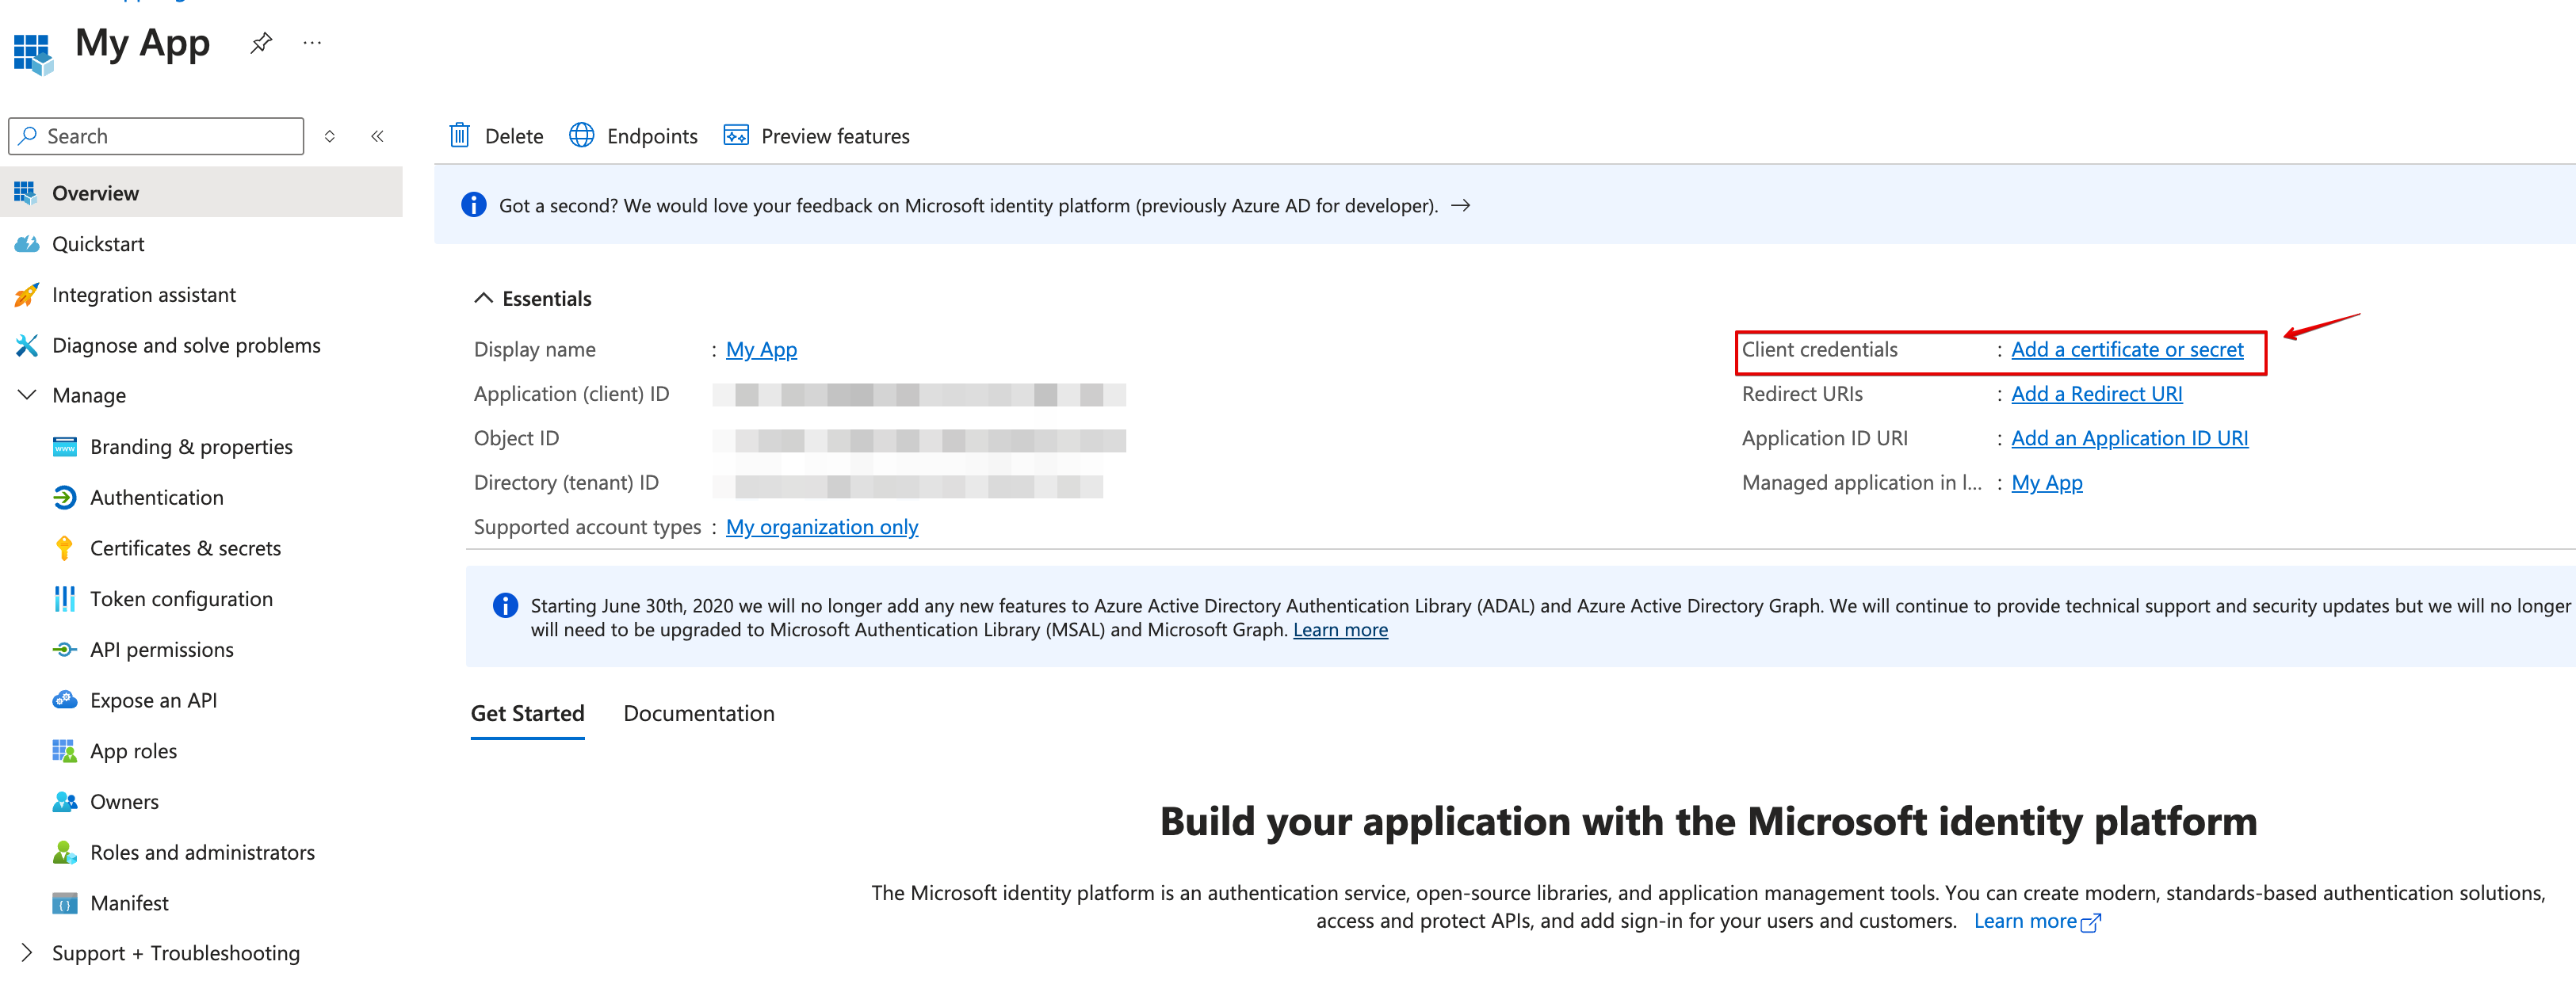
Navigate to Overview and Copy your client ID and tenant ID.
-
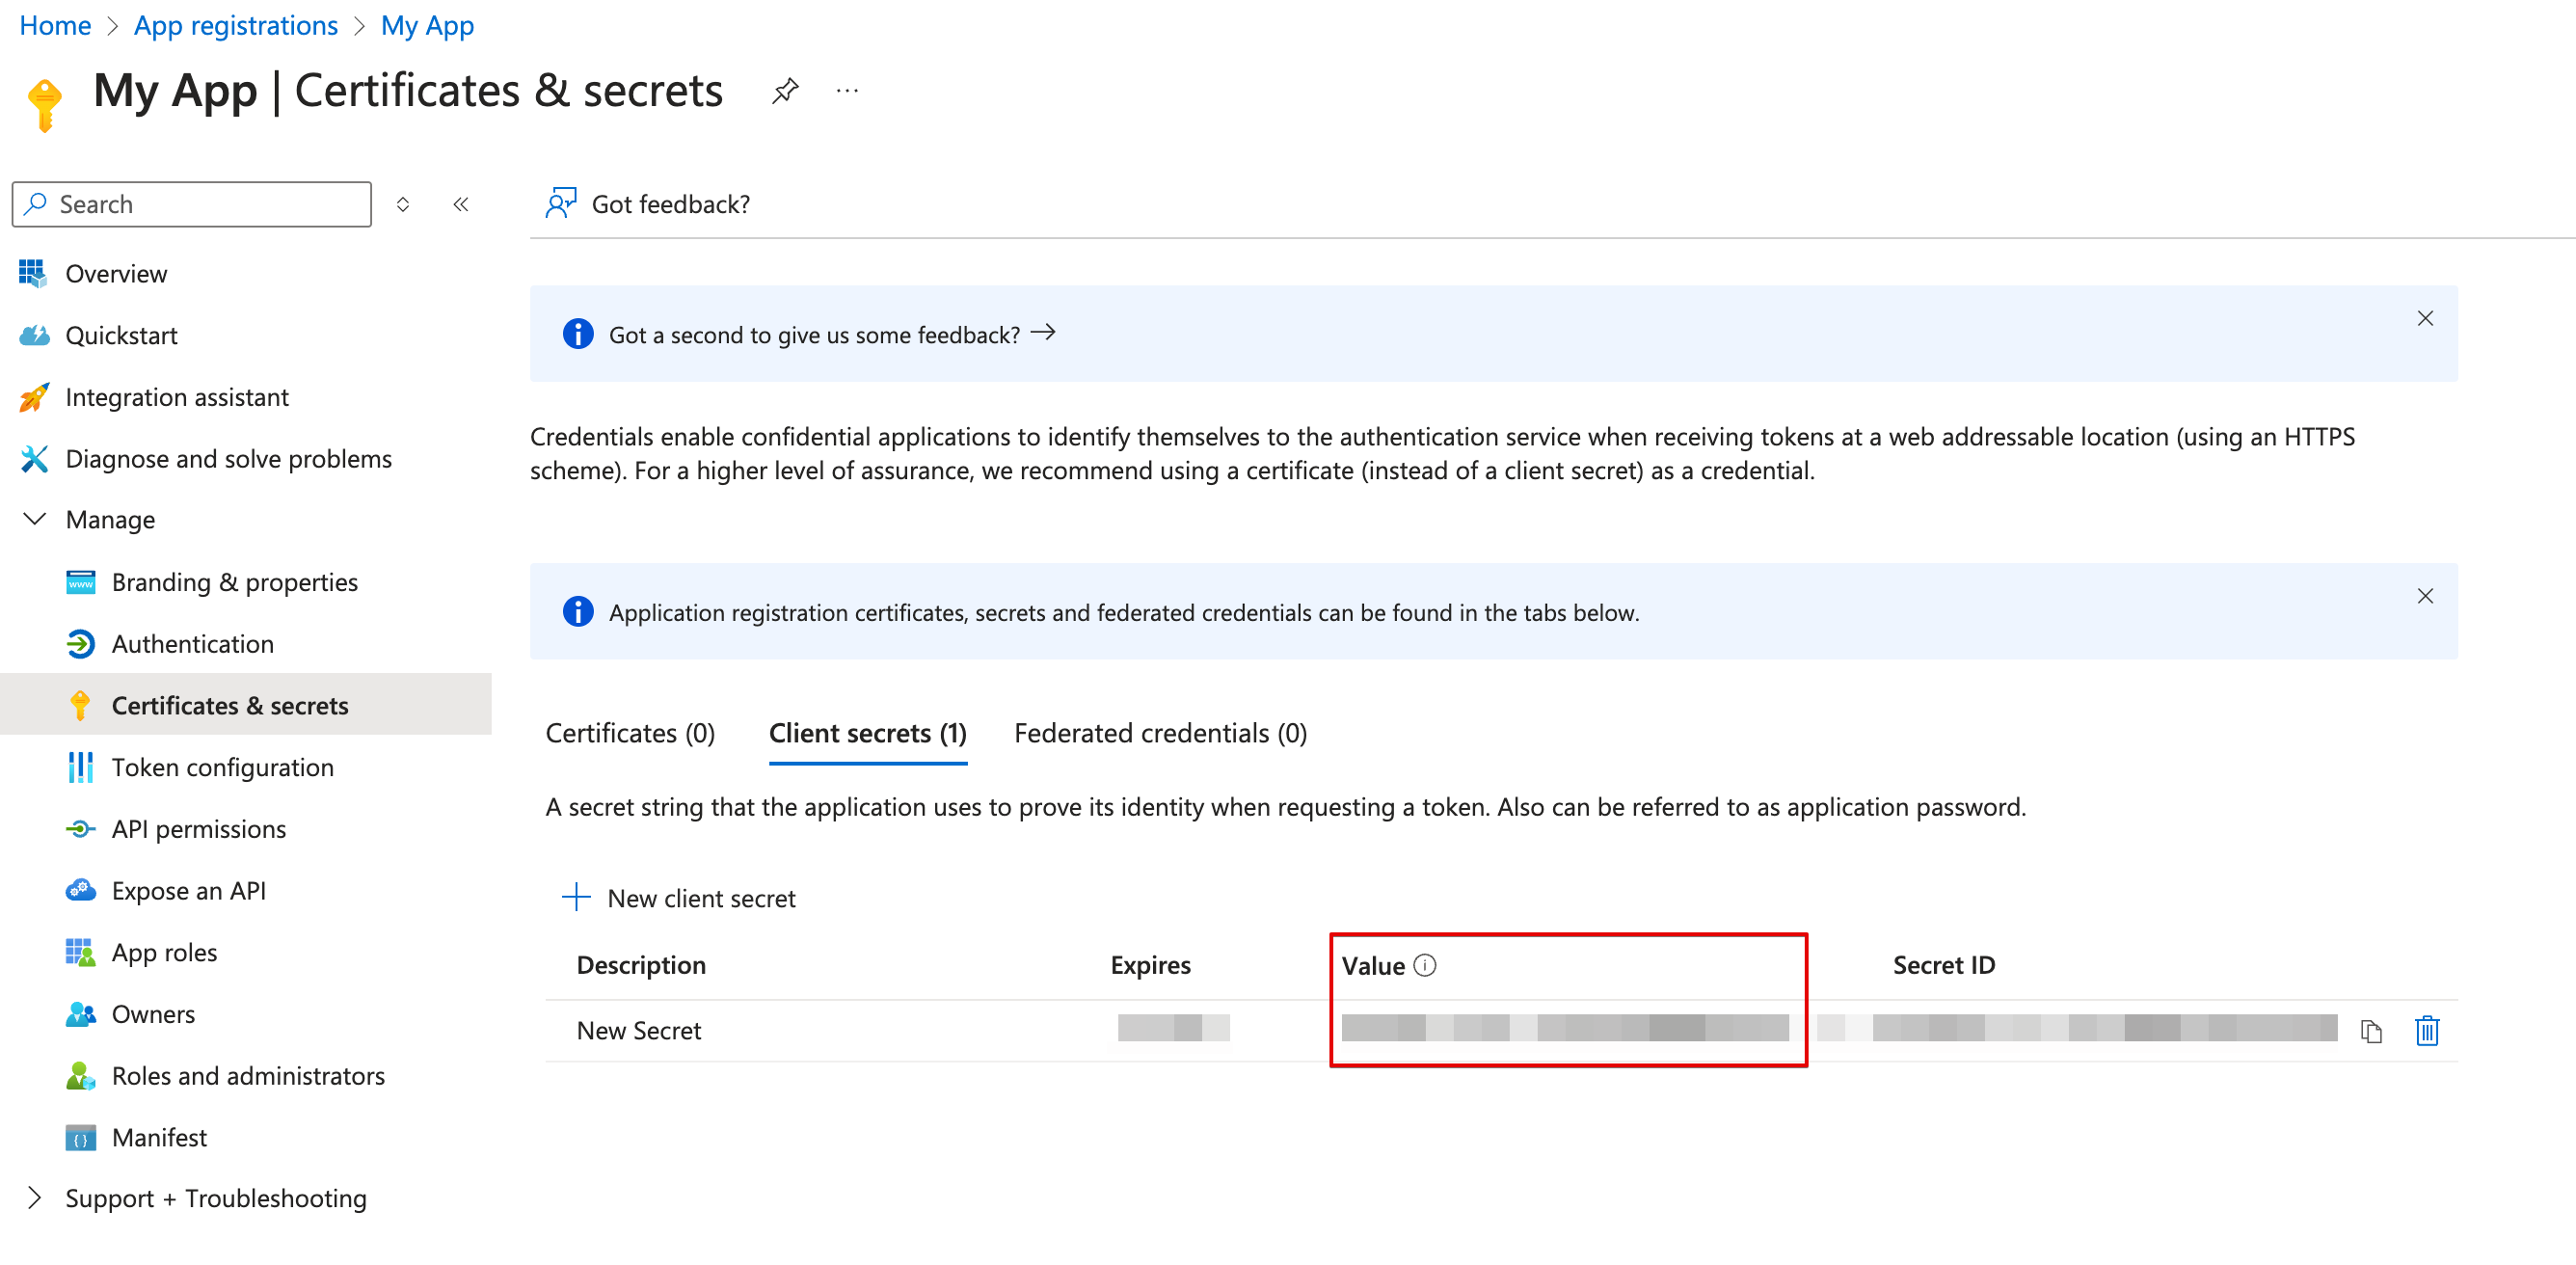
Create a new client secret.
-
Copy the secret value.
Creating your connection
- In the Blink platform, navigate to the Connections page > Add connection. A New Connection dialog box opens displaying icons of external service providers available.
- Select the Microsoft Defender XDR icon. A dialog box with name of the connection and connection methods appear.
- (Optional) Edit the name of the connection. At a later stage you cannot edit the name.
- Select App Registration as the method to create the connection.
-
Fill in the parameters:
- The Client ID
- The Client Secret
- The Tenant ID
- (Optional) Click Test Connection to test it.
- Click Create connection. The new connection appears on the Connections page.