Creating a Jamf connection
Create the connection by using one of the following methods:Using Client ID and Secret
To create the connection you need:- An API Address
- A Client ID
- A Client Secret
Obtaining the credentials
-
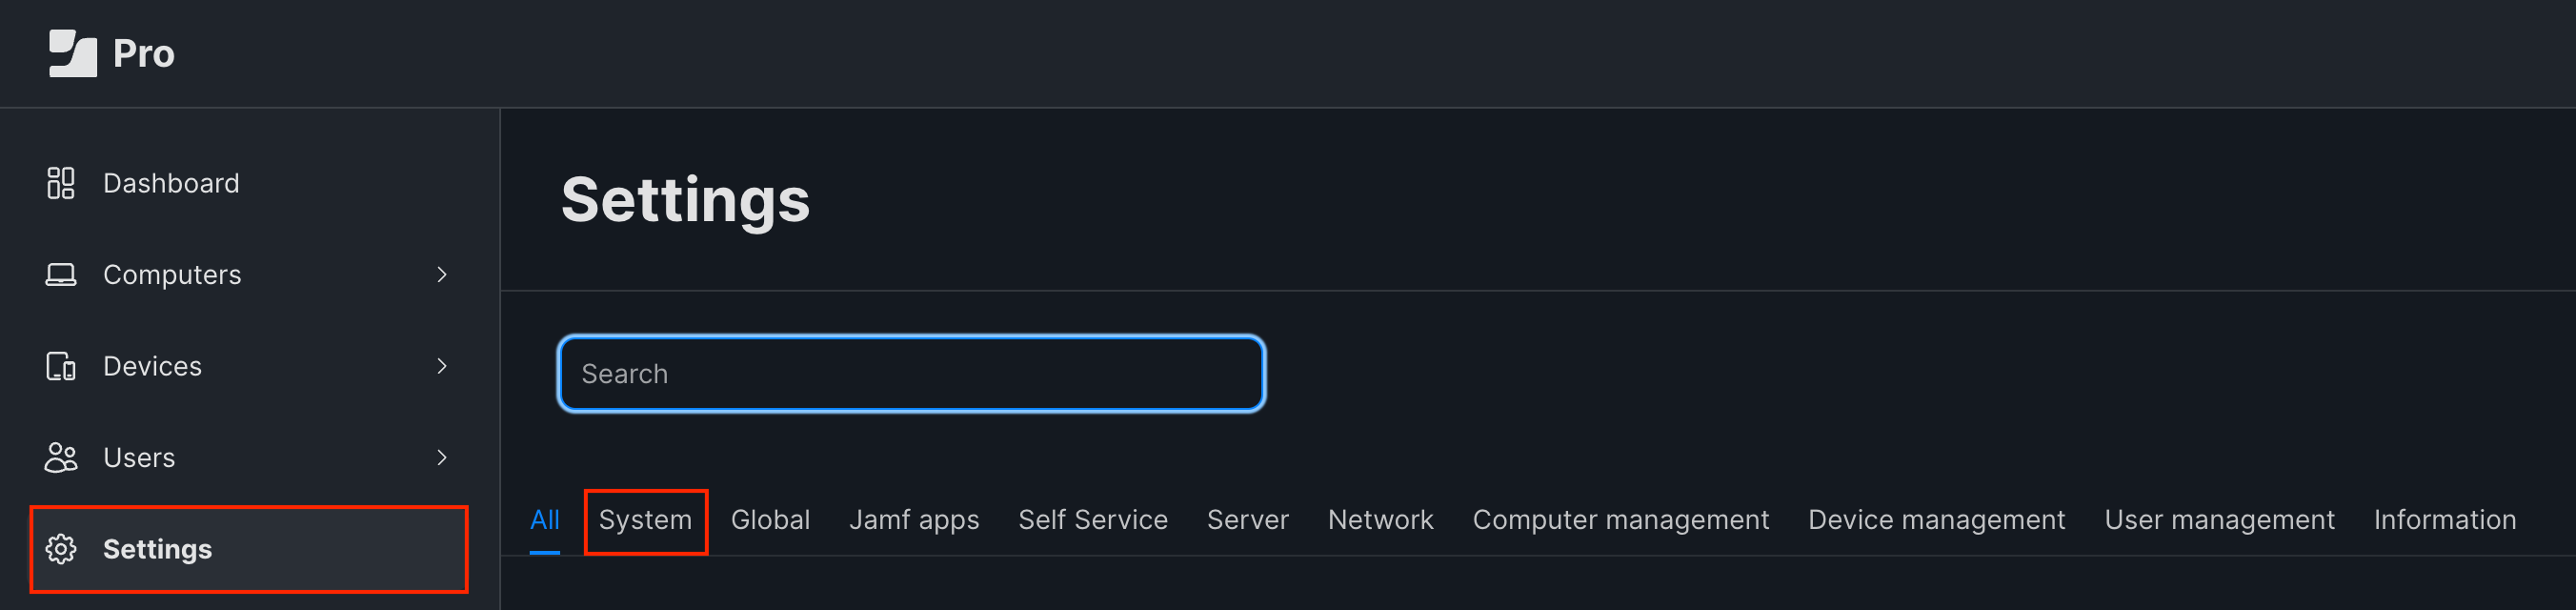
In your Jamf Pro dashboard, click on Settings in the left hand menu and select the System tab.
-
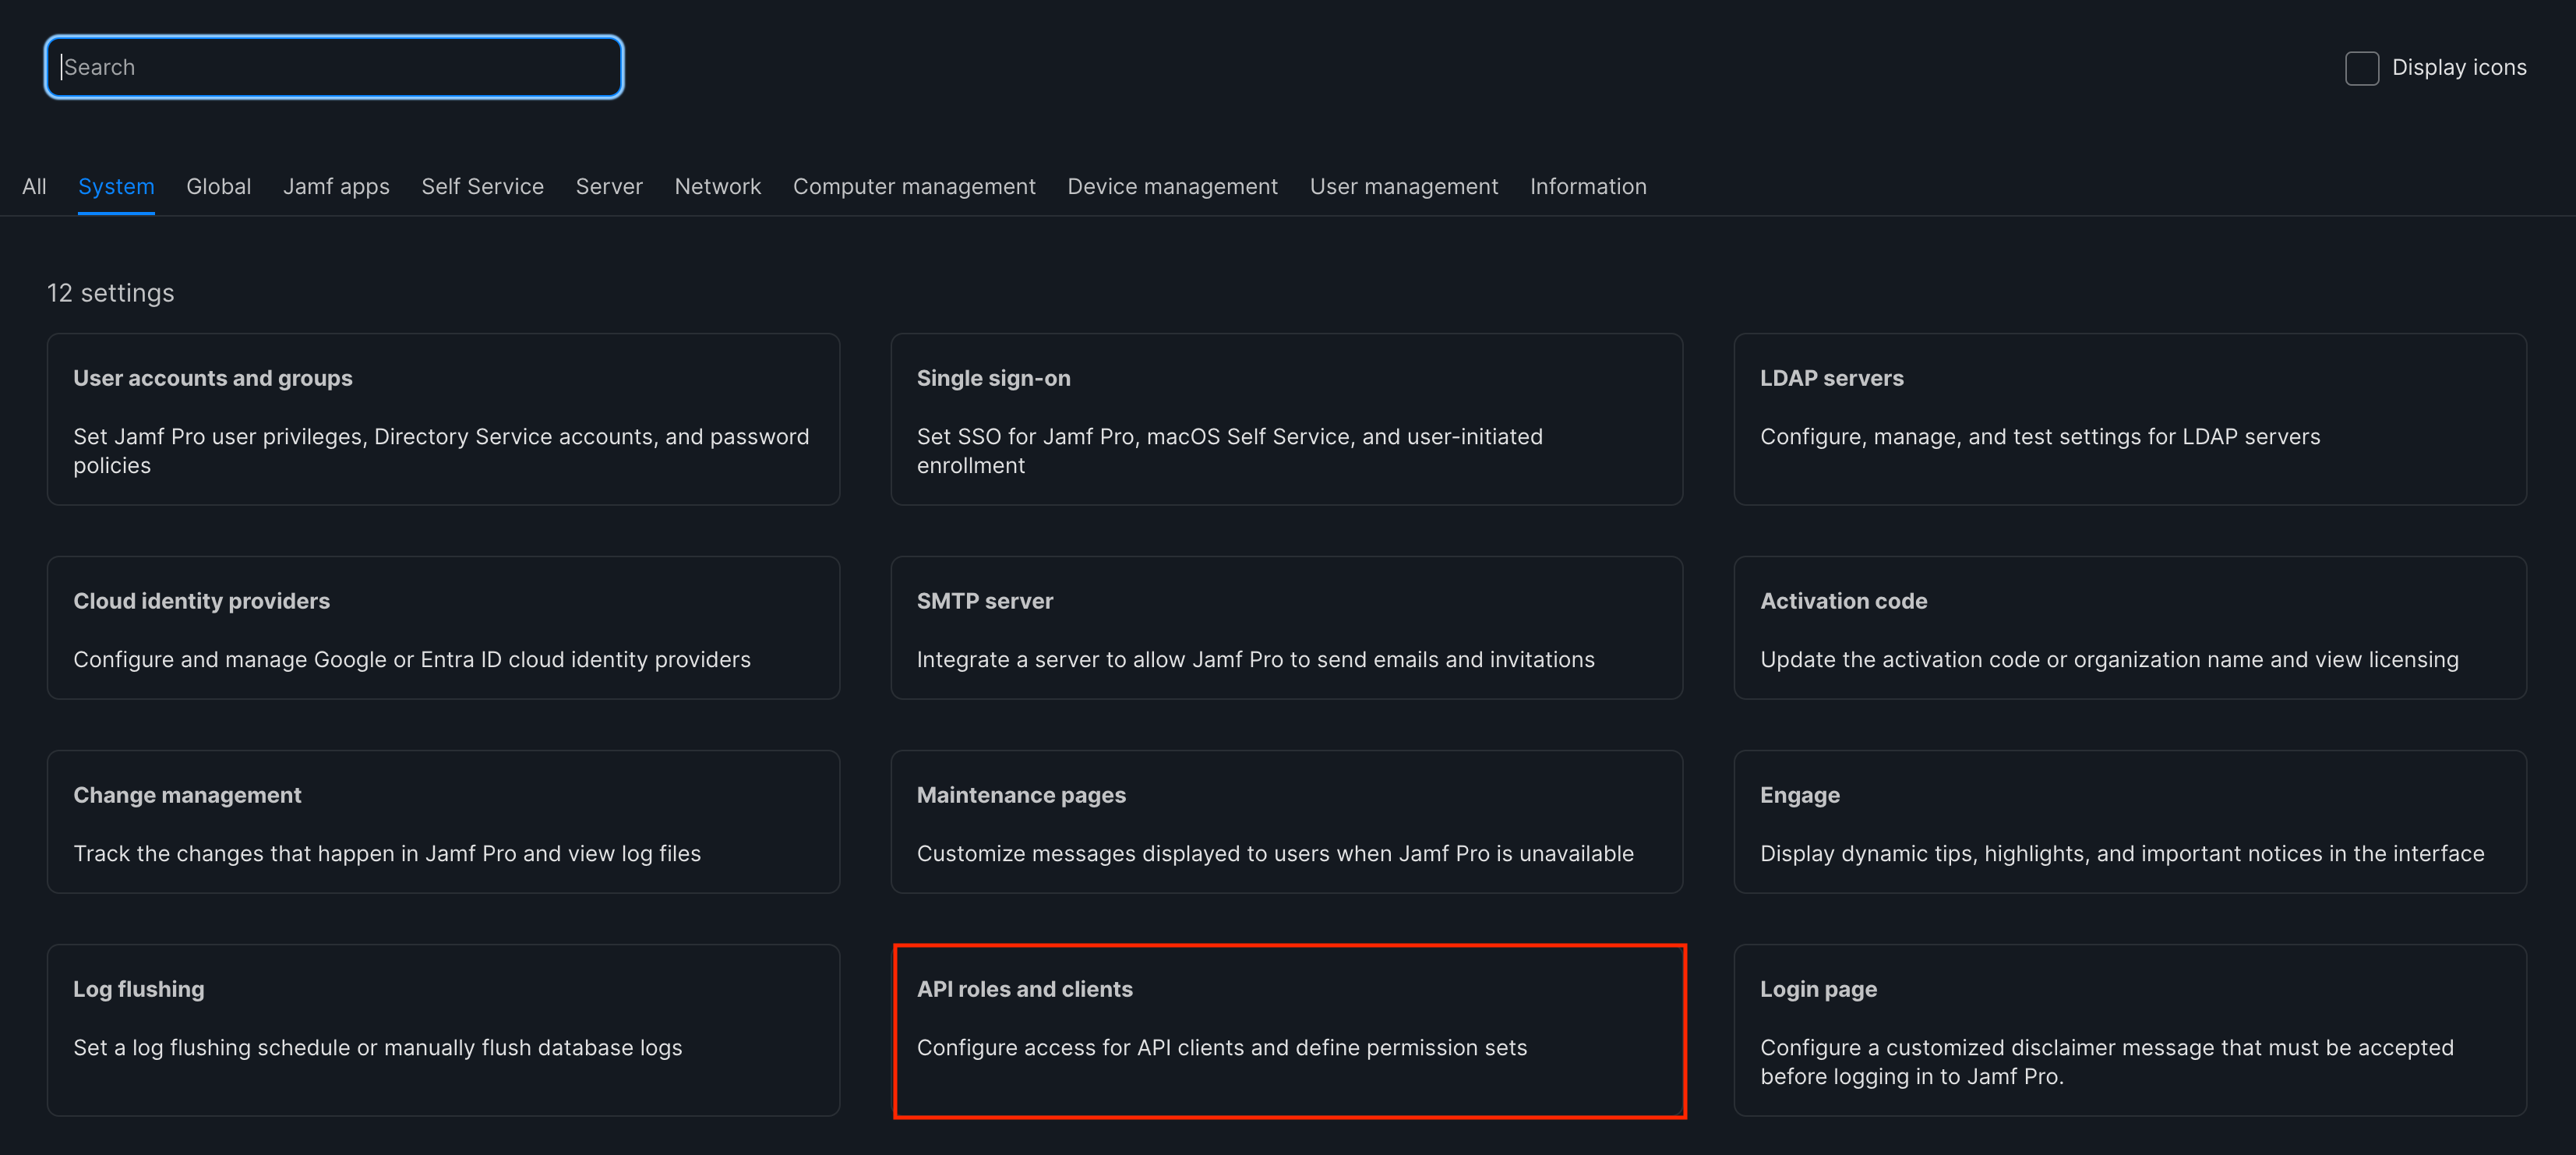
Click on API roles and clients.
-
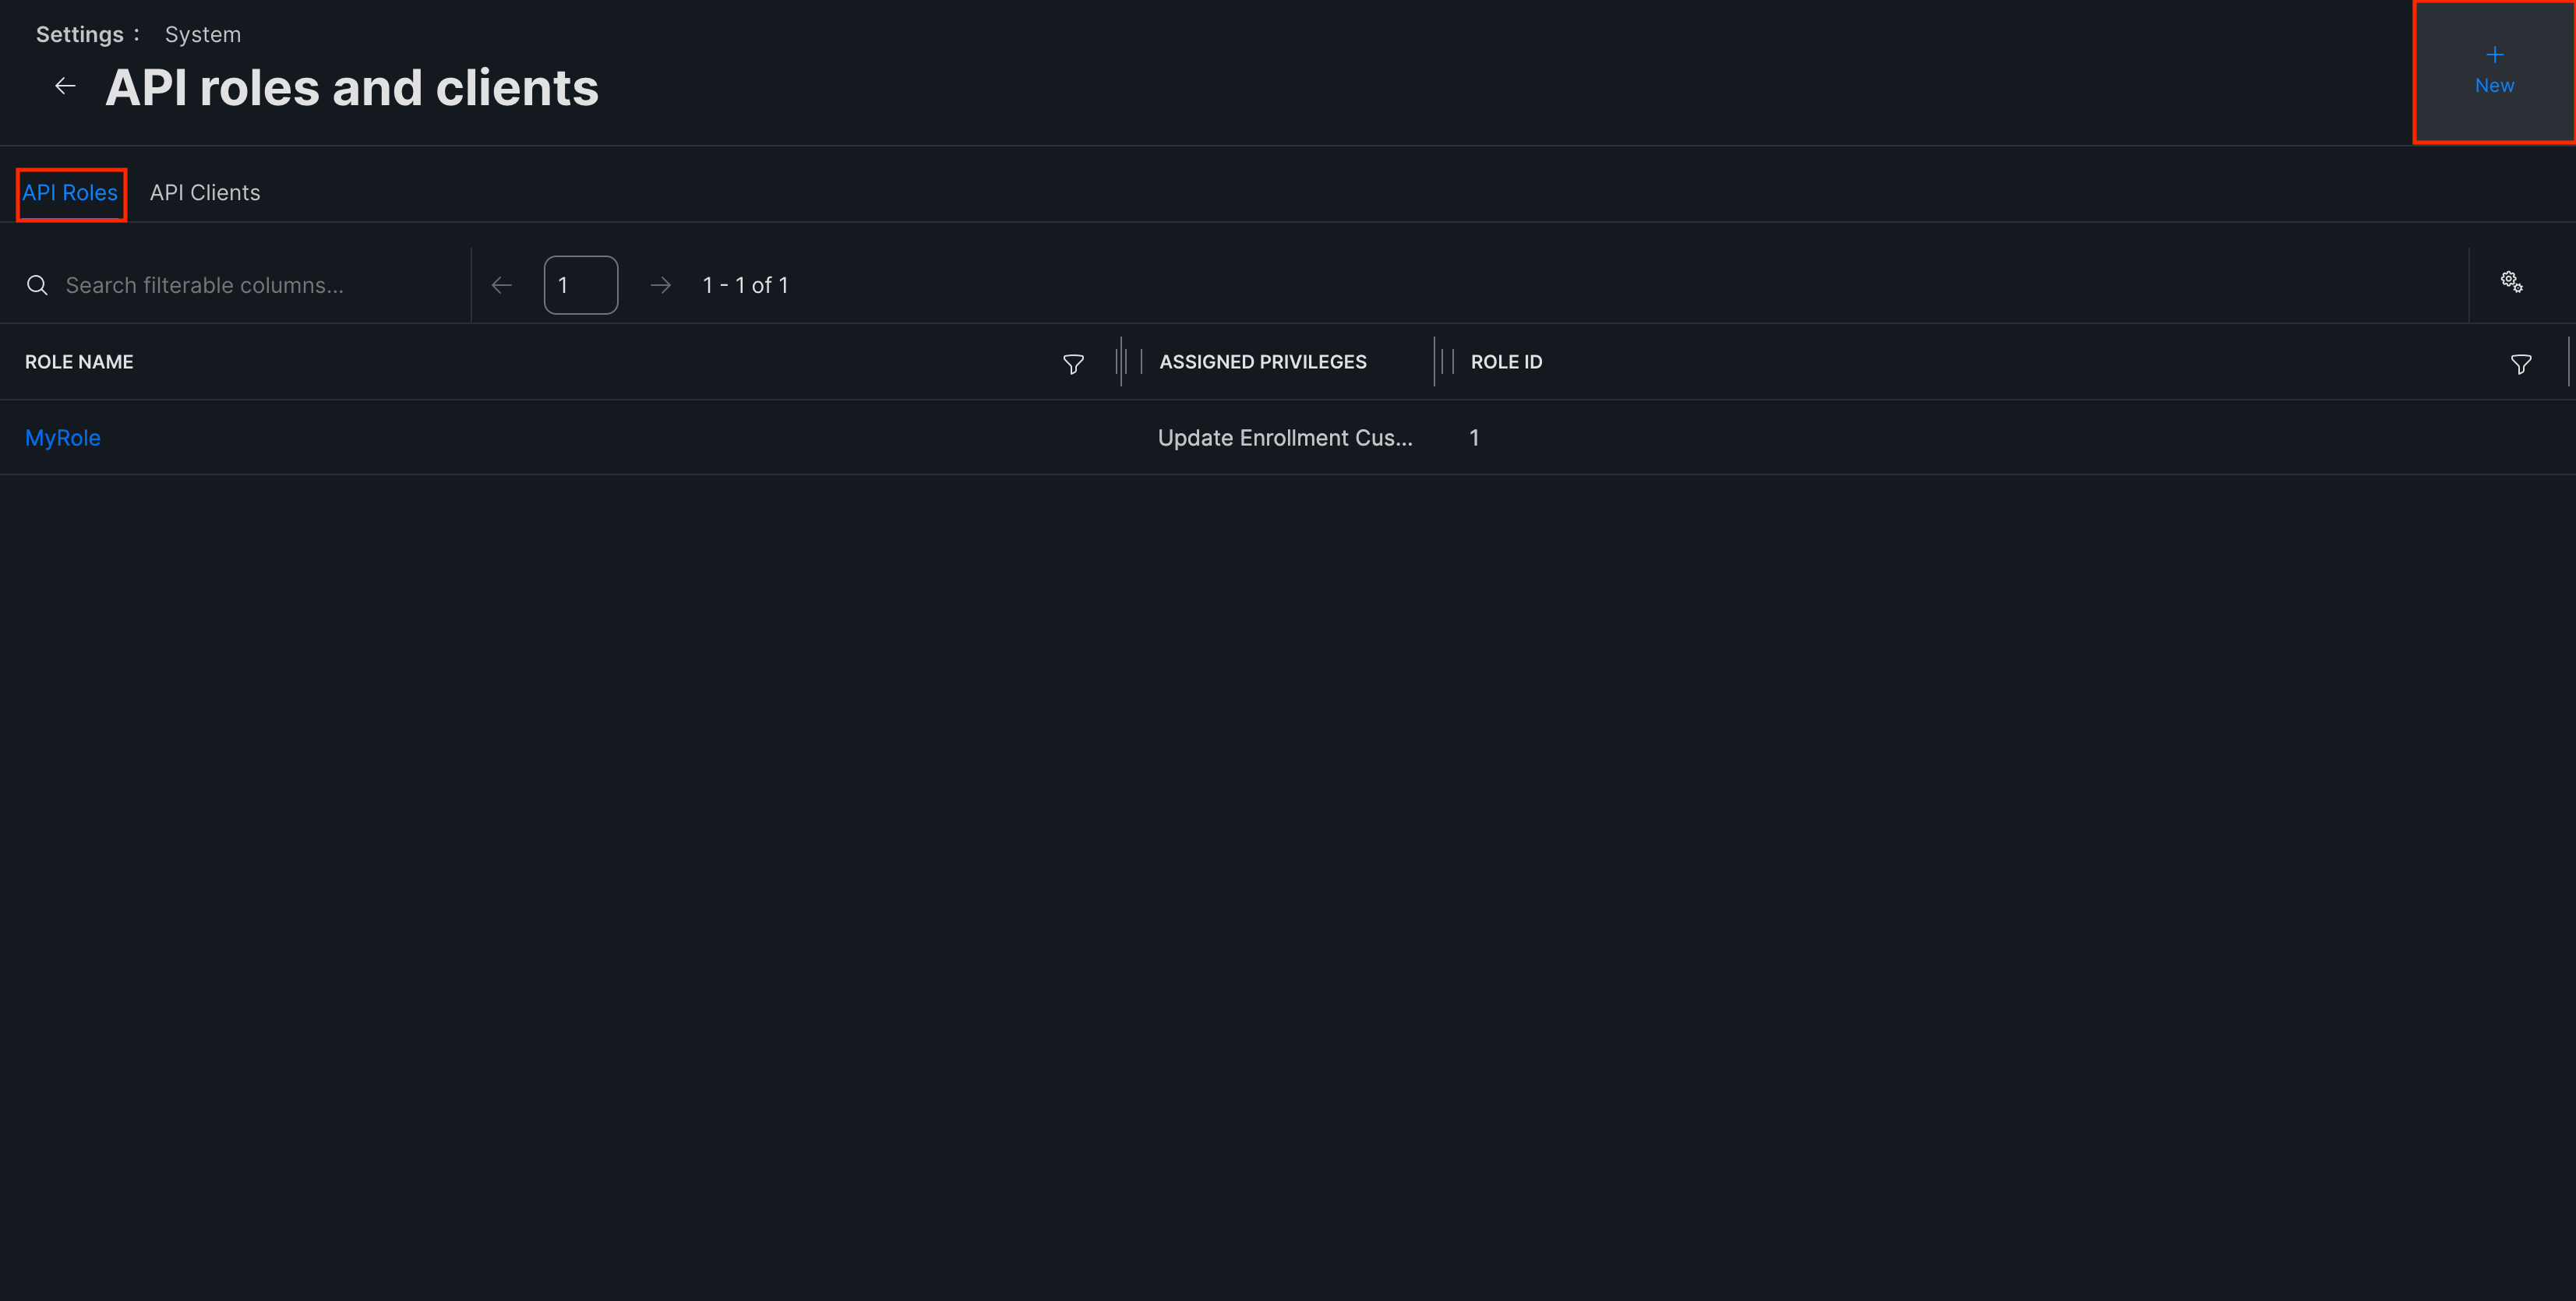
Select the API Roles tab and click on New in the top-right corner. Select all the roles you want the API client to have and create the new role.
-
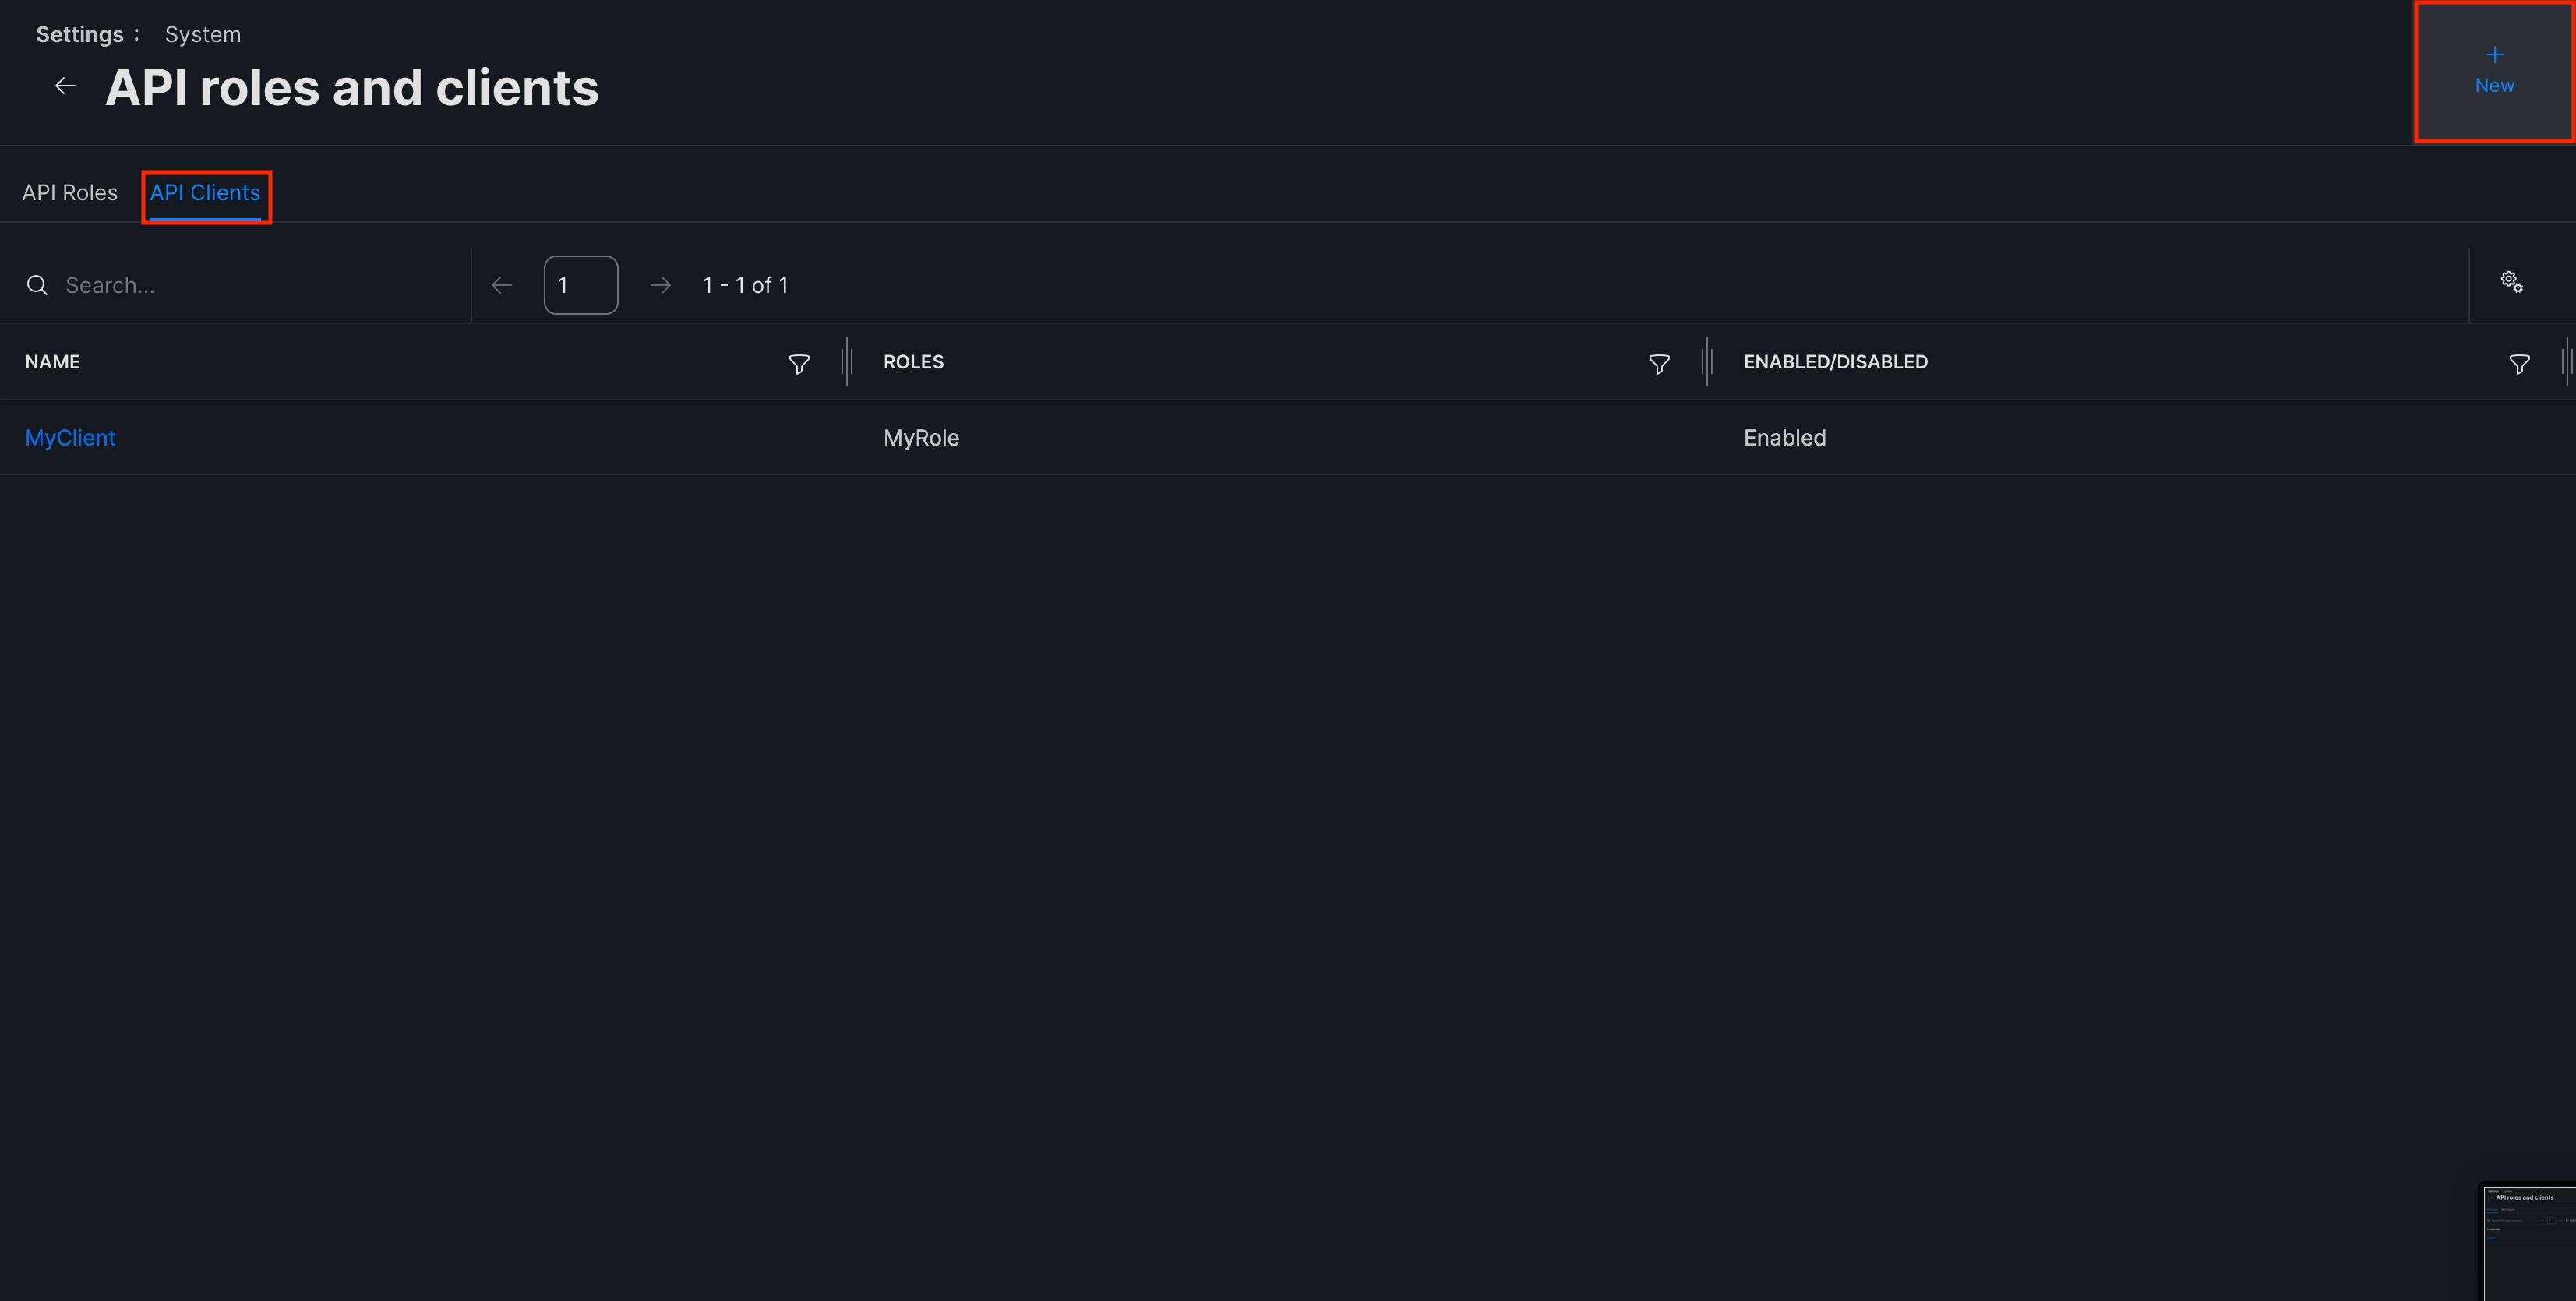
Switch over to the API Clients tab and click on New in the top-right corner. Select the role you created for the client and create the new client.
Creating your connection
- In the Blink platform, navigate to the Connections page > Add connection. A New Connection dialog box opens displaying icons of external service providers available.
- Select the Jamf icon. A dialog box with name of the connection and connection methods appear.
- (Optional) Edit the name of the connection. At a later stage you cannot edit the name.
- Select Client ID & Secret as the method to create the connection.
-
Fill in the parameters:
- The API Address
- The Client ID
- The Client Secret
- (Optional) Click Test Connection to test it.
- Click Create connection. The new connection appears on the Connections page.
Using Username and Password
To create the connection you need:- A Jamf Pro user account to be used with the Blink integration
-
An API address
- If your instance is hosted in Jamf’s cloud:
https://<your-instance-name>.jamfcloud.com - If your instance is hosted on-premises:
https://jamf.<your-instance-name>.com:8443
- If your instance is hosted in Jamf’s cloud:
Obtaining the credentials
A guide on how to create a Jamf Pro user account can be found here. It is highly recommended that this user will be created with a custom privilege set and only have the necessary permissions that Blink needs:- Mobile Devices: Read
- Accounts: Read
- Computers: Read
Creating your connection
- In the Blink platform, navigate to the Connections page > Add connection. A New Connection dialog box opens displaying icons of external service providers available.
- Select the Jamf icon. A dialog box with name of the connection and connection methods appear.
- (Optional) Edit the name of the connection. At a later stage you cannot edit the name.
- Select Username & Password as the method to create the connection.
-
Fill in the parameters:
- The API Address
- The Username
- The Password
- (Optional) Click Test Connection to test it.
- Click Create connection. The new connection appears on the Connections page.