Creating a Domo connection
Using Access Token
To create the connection you need:- A Client ID
- A Client Secret
Obtaining the credentials
- Log in to your Domo domain
-
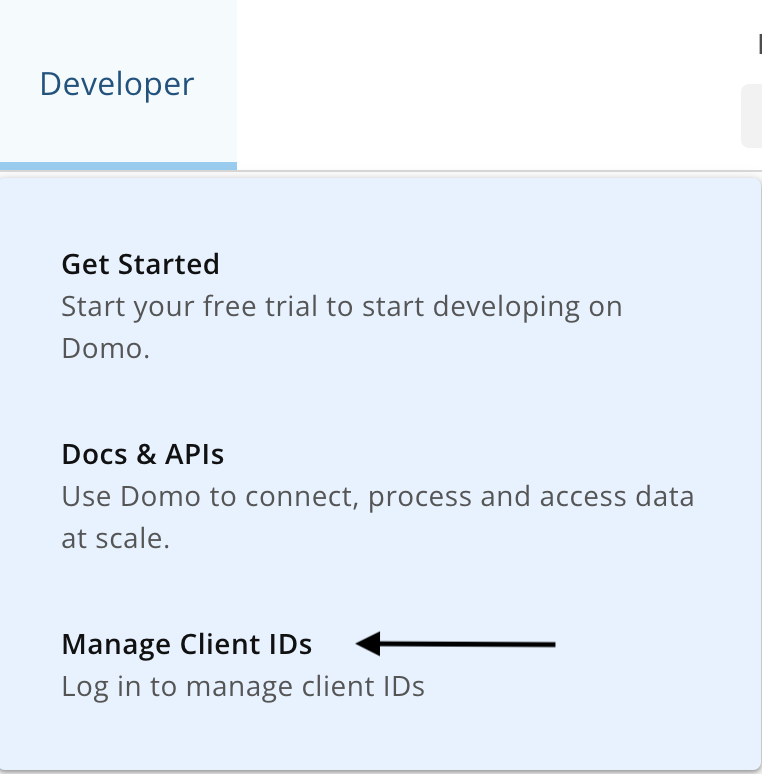
On the top navigation bar click on Developer -> Manage Client IDs

-
Click Create a Client

-
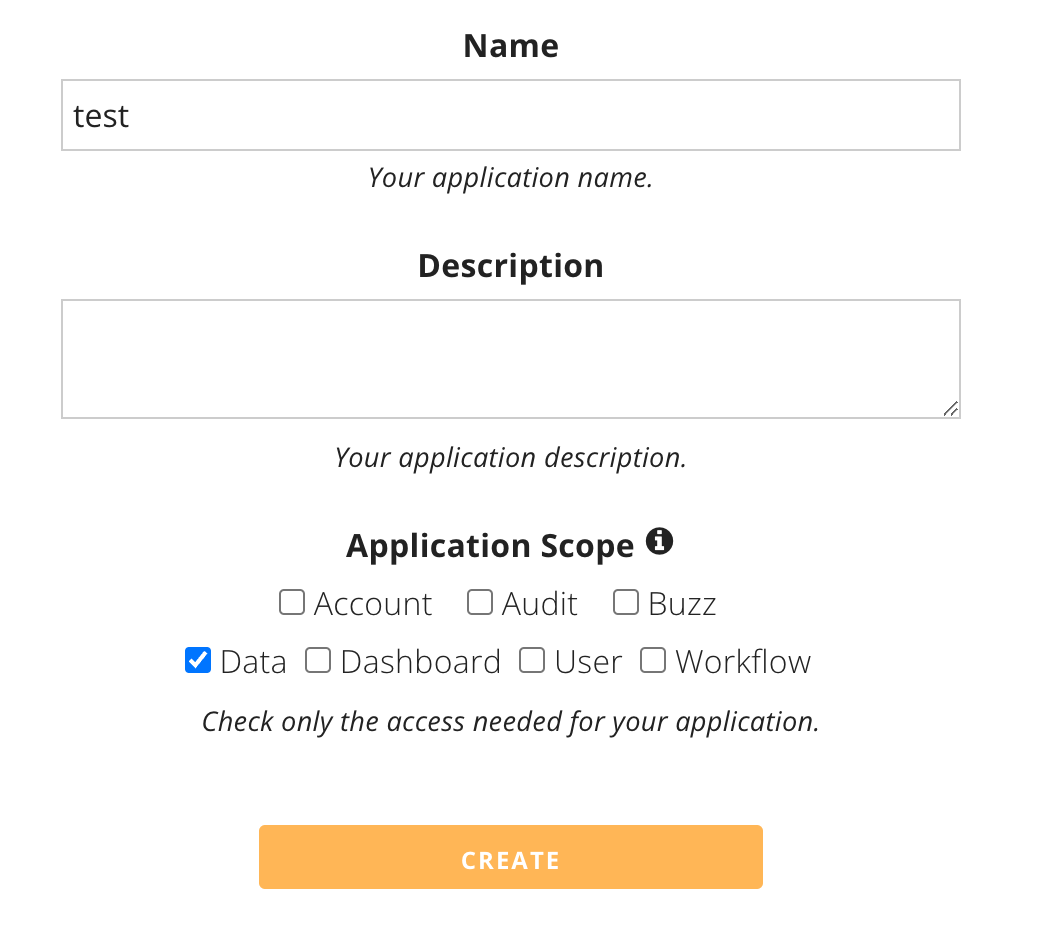
Fill in the parameters:
- Name the client credentials.
- (Optional) Add a description to the client credentials.
- Select the scopes you wish to grant the new client. We recommend assigning the scopes which will suffice for all of the out-of-the-box Blink actions:
- Data

-
Copy your client ID and secret

Creating your connection
- In the Blink platform, navigate to the Connections page > Add connection. A New Connection dialog box opens displaying icons of external service providers available.
- Select the Domo icon. A dialog box with name of the connection and connection methods appear.
- (Optional) Edit the name of the connection. At a later stage you cannot edit the name.
- Select Access Token as the method to create the connection.
-
Fill in the parameters:
- The Client ID
- The Client Secret
- (Optional) Click Test Connection to test it.
- Click Create connection. The new connection appears on the Connections page.