Creating an Adobe Cloud connection
Using Server-to-Server
To create the connection you need:- A Client ID
- A Client Secret
- A Scope
- An Organization ID
Obtaining the credentials
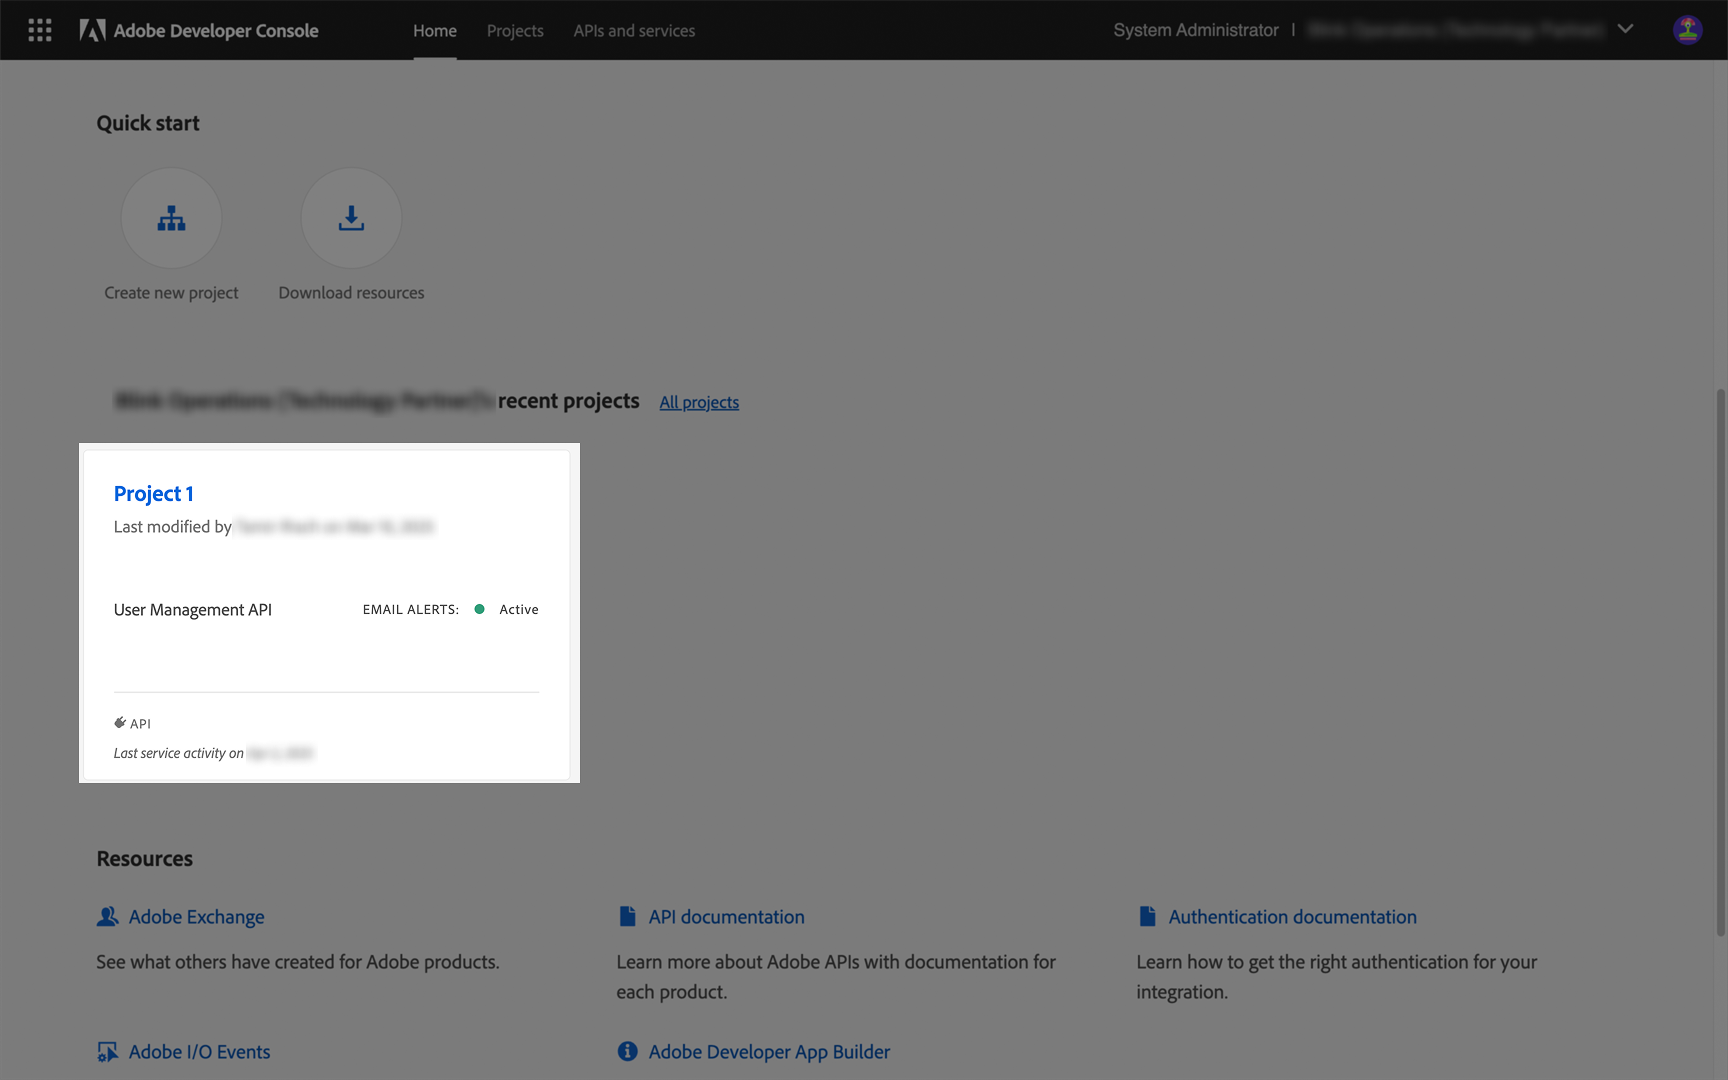
- Access the Adobe Developer Console
- Log in to the Adobe Developer Console.
- Navigate to your existing project (e.g., “Project 1”).
- Access OAuth Server-to-Server credentials
- In your project, locate the “OAuth Server-to-Server” credential under the Credentials section.
- This page contains all the required connection information.
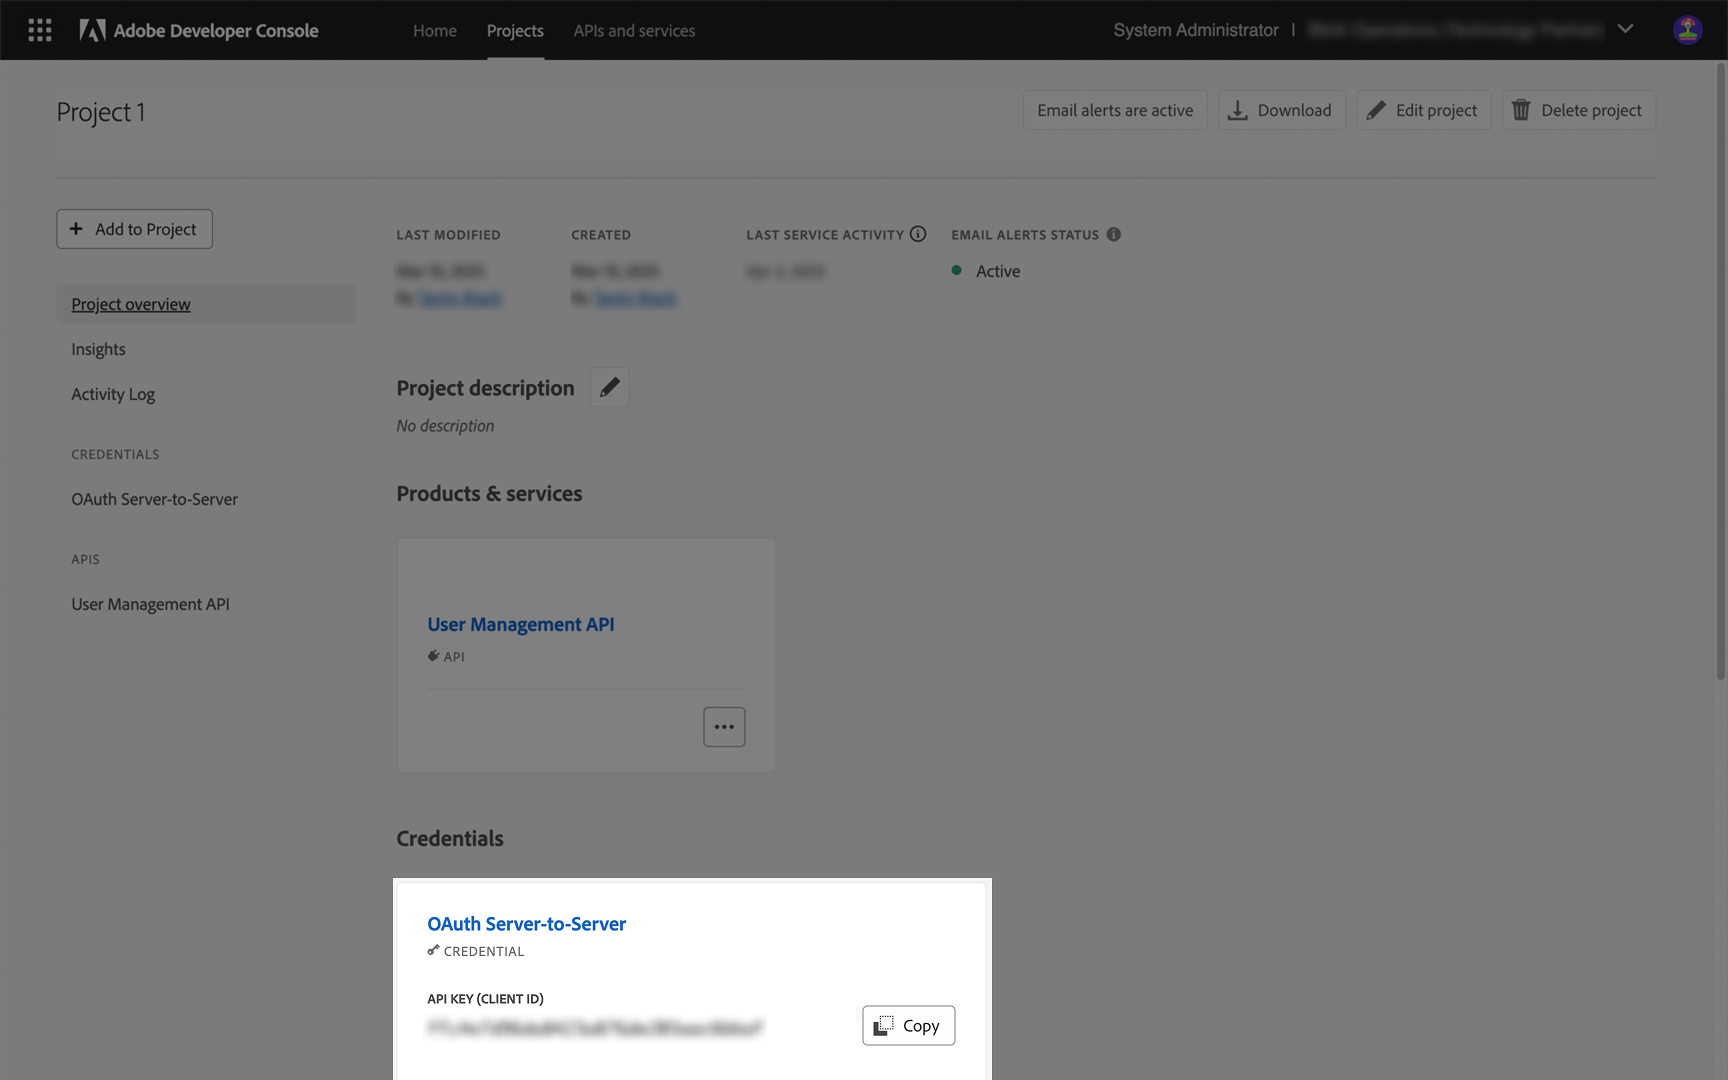
- Gather the required credentials
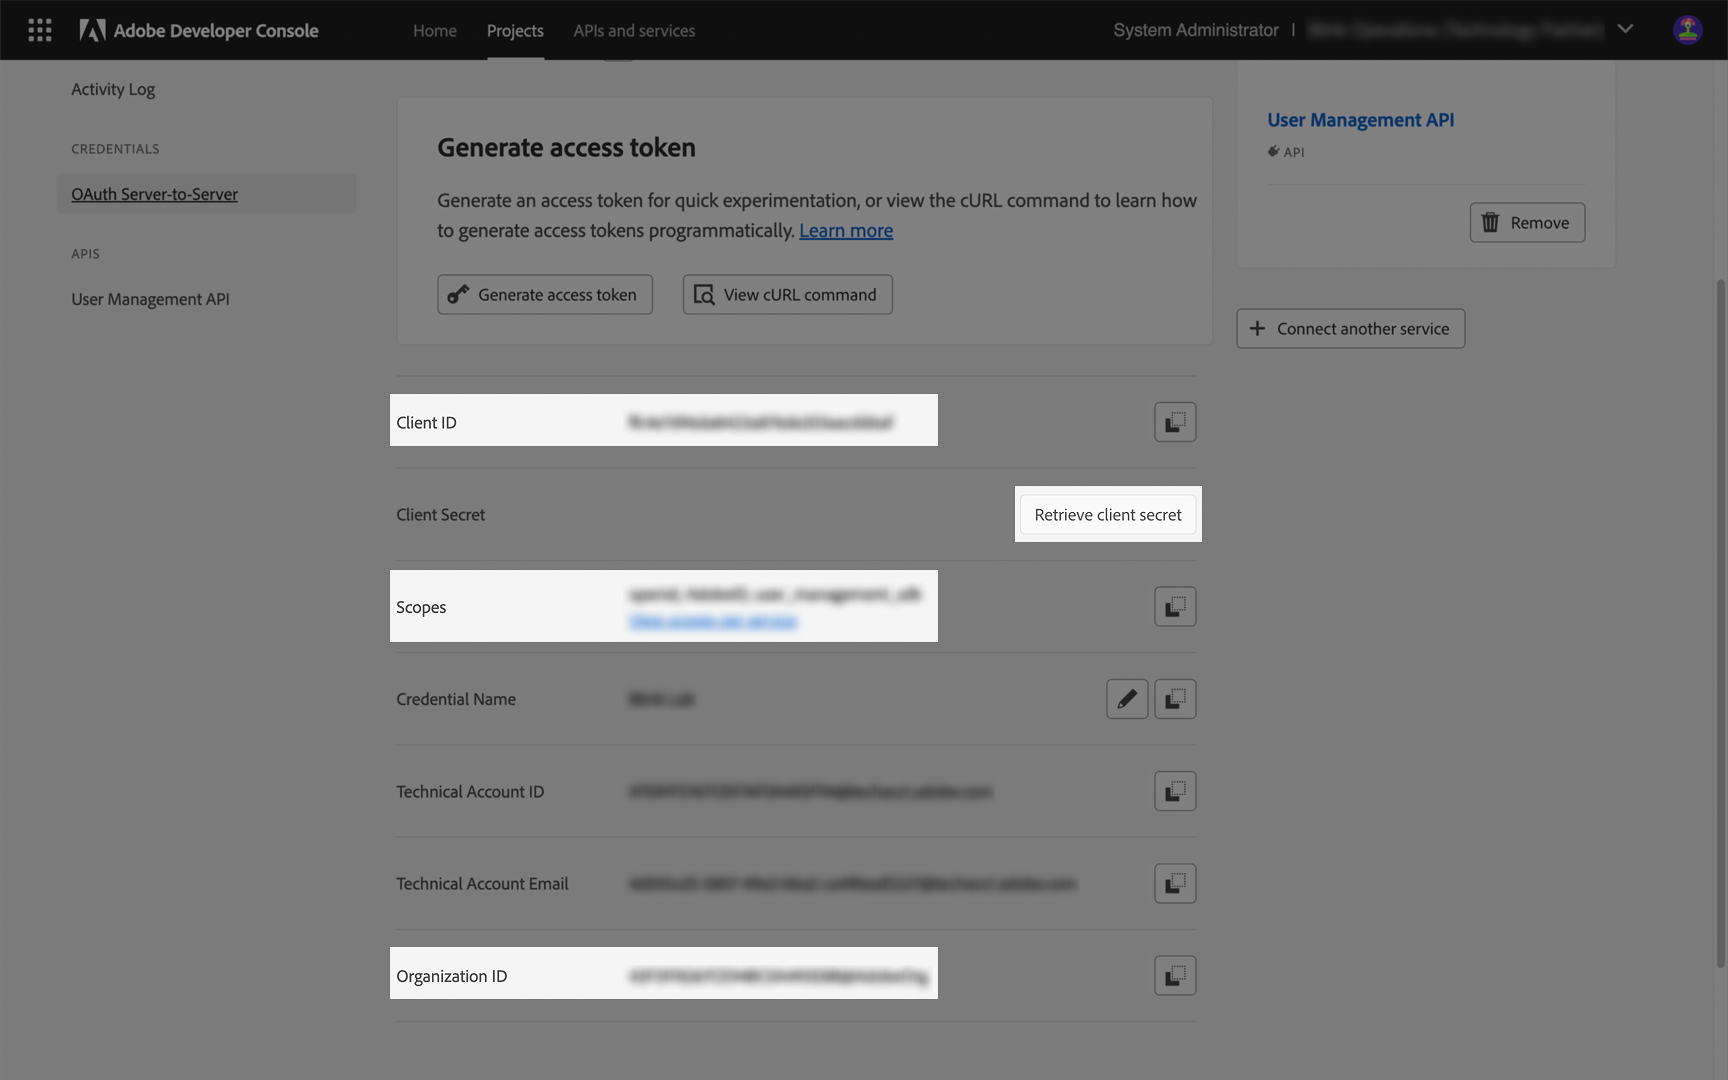
- Client ID: Located at the top of the credentials page.
- Client Secret: Click “Retrieve client secret” if not visible, then use the copy button.
- Scopes: Listed in the Scopes section.
- Organization ID: Found in the Organization ID field on the same page.
Creating your connection
- In the Blink platform, navigate to the Connections page > Add connection. A New Connection dialog box opens displaying icons of external service providers available.
- Select the Adobe Cloud icon. A dialog box with name of the connection and connection methods appear.
- (Optional) Edit the name of the connection. At a later stage you cannot edit the name.
- Select Server-to-Server as the method to create the connection.
- Fill in the parameters:
- The Client ID
- The Client Secret
- The Scope
- The Organization ID
- (Optional) Click Test Connection to test it.
- Click Create connection. The new connection appears on the Connections page.