> ## Documentation Index
> Fetch the complete documentation index at: https://docs.blinkops.com/llms.txt
> Use this file to discover all available pages before exploring further.
# Using On-Demand Triggers
> Learn how to build on-demand workflows to execute from the Self Service Portal.
On-demand workflows are useful for running tasks that need to be executed immediately or at the user's discretion. They provide flexibility and control over when specific workflows are triggered, making them ideal for scenarios where timing is critical or user input is required.
An on-demand workflow runs when triggered via one of the following avenues:
| Interface | Description |
| --------------------------- | --------------------------------------------------------------------------------------------------------------------------------------------------------------- |
| **Manual Trigger** | Users with access to the Blink platform can also trigger workflows manually. |
| **Blink Portal** | Allows authorized users to trigger workflows through a dedicated UI. |
| **Slack & Microsoft Teams** | Enables workflow execution directly from messaging platforms. |
| **Subflows** | Workflows that can be used when triggered by a parent workflow, typically useful when the subflow is an action that is needed by more than one parent workflow. |
When relevant, the user who triggers the workflow enters the required parameters.
The *file* [input parameter](/docs/workflows/building-workflows/triggers/on-demand-triggers/input-parameters) is not supported in triggered [subflows](/docs/workflows/building-workflows/actions/basic-actions/subflow-actions).
Need help finding the right trigger type for your use case? See [About Triggers](/docs/workflows/building-workflows/triggers/triggers).
## Create an On-Demand Workflow
1. [Create a new workflow](/docs/workflows/creating-a-workflow), and select **On-Demand** when prompted.
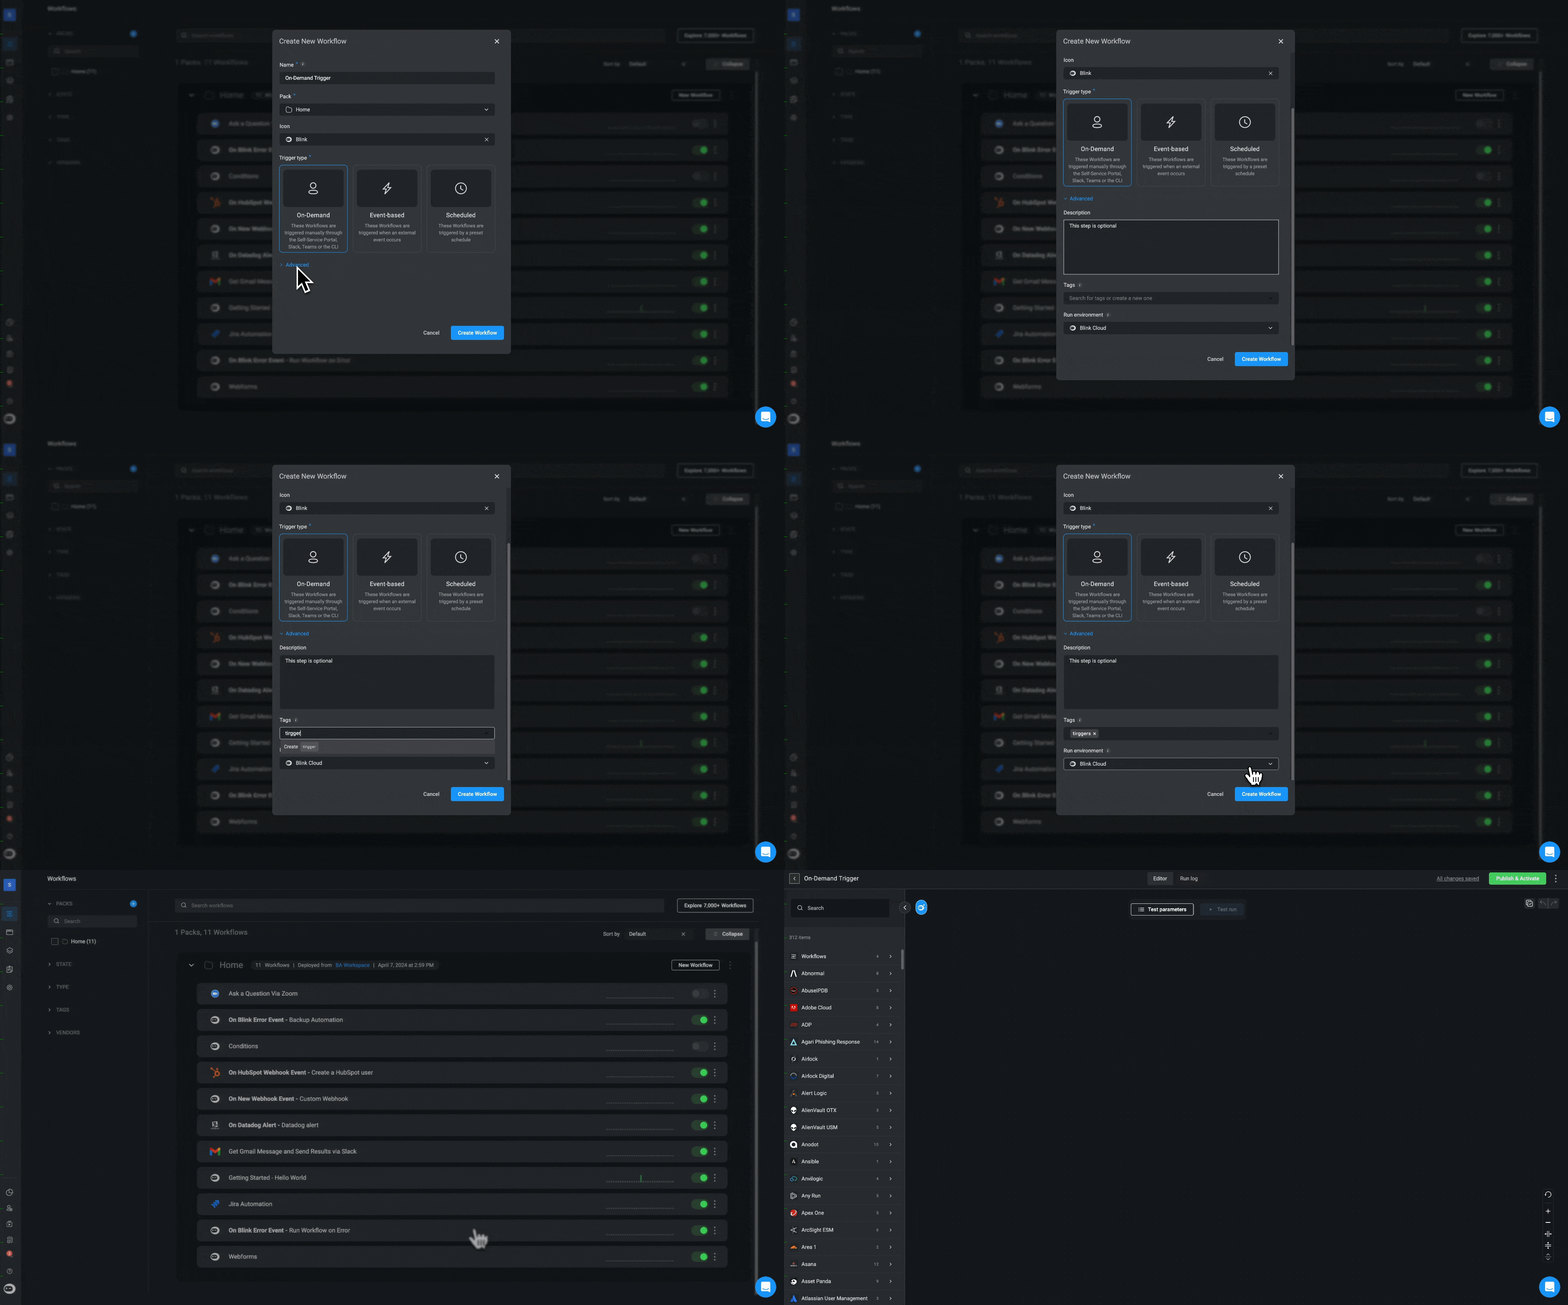 Once you click **Create Workflow**, the canvas loads with your initial configurations. The first part of the workflow appears as **Trigger: On-Demand**.
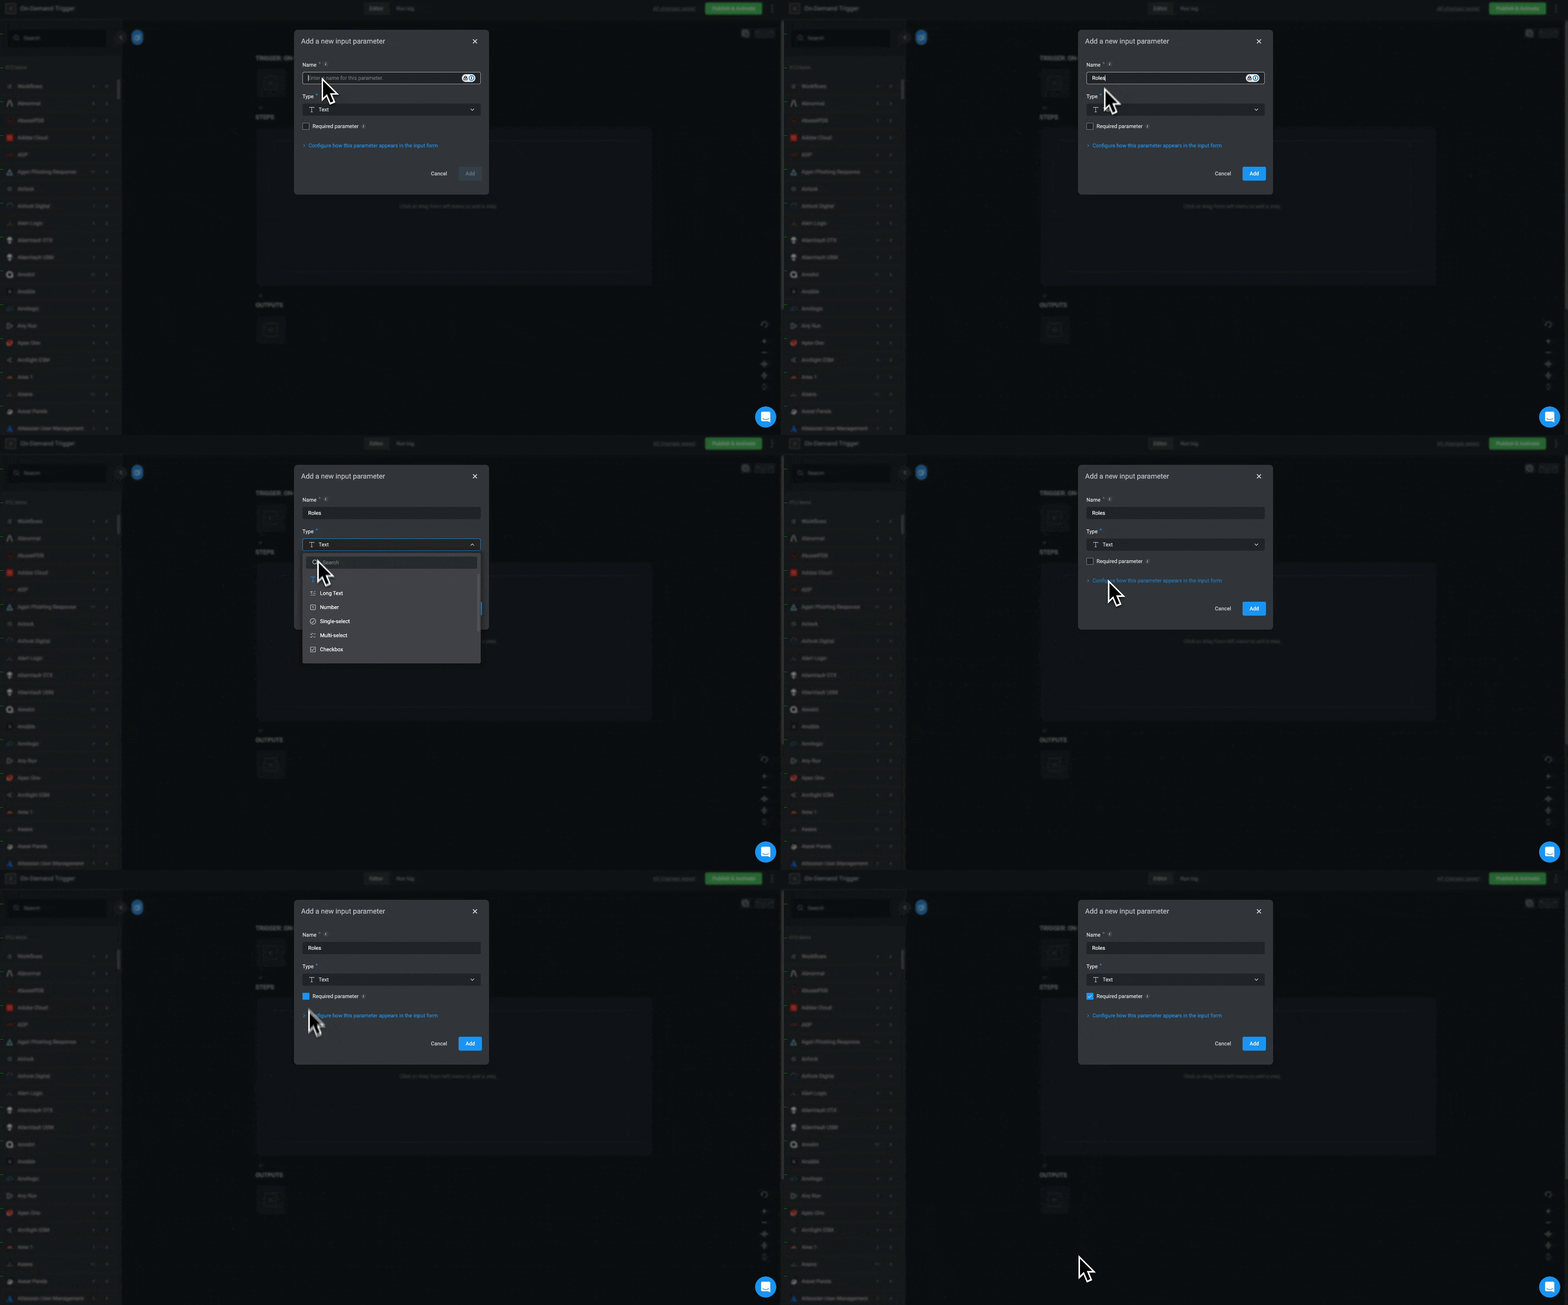
2. In the **Workflow Editor**, locate the **Trigger: On-Demand** section and click **+** to configure [the parameters that the user should define](/docs/workflows/building-workflows/triggers/on-demand-triggers/input-parameters) when triggering the workflow.
3. Enter a memorable name for the trigger and enter the type. *Optionally*, mark the **Required parameter** checkbox.
Once you click **Create Workflow**, the canvas loads with your initial configurations. The first part of the workflow appears as **Trigger: On-Demand**.
2. In the **Workflow Editor**, locate the **Trigger: On-Demand** section and click **+** to configure [the parameters that the user should define](/docs/workflows/building-workflows/triggers/on-demand-triggers/input-parameters) when triggering the workflow.
3. Enter a memorable name for the trigger and enter the type. *Optionally*, mark the **Required parameter** checkbox.
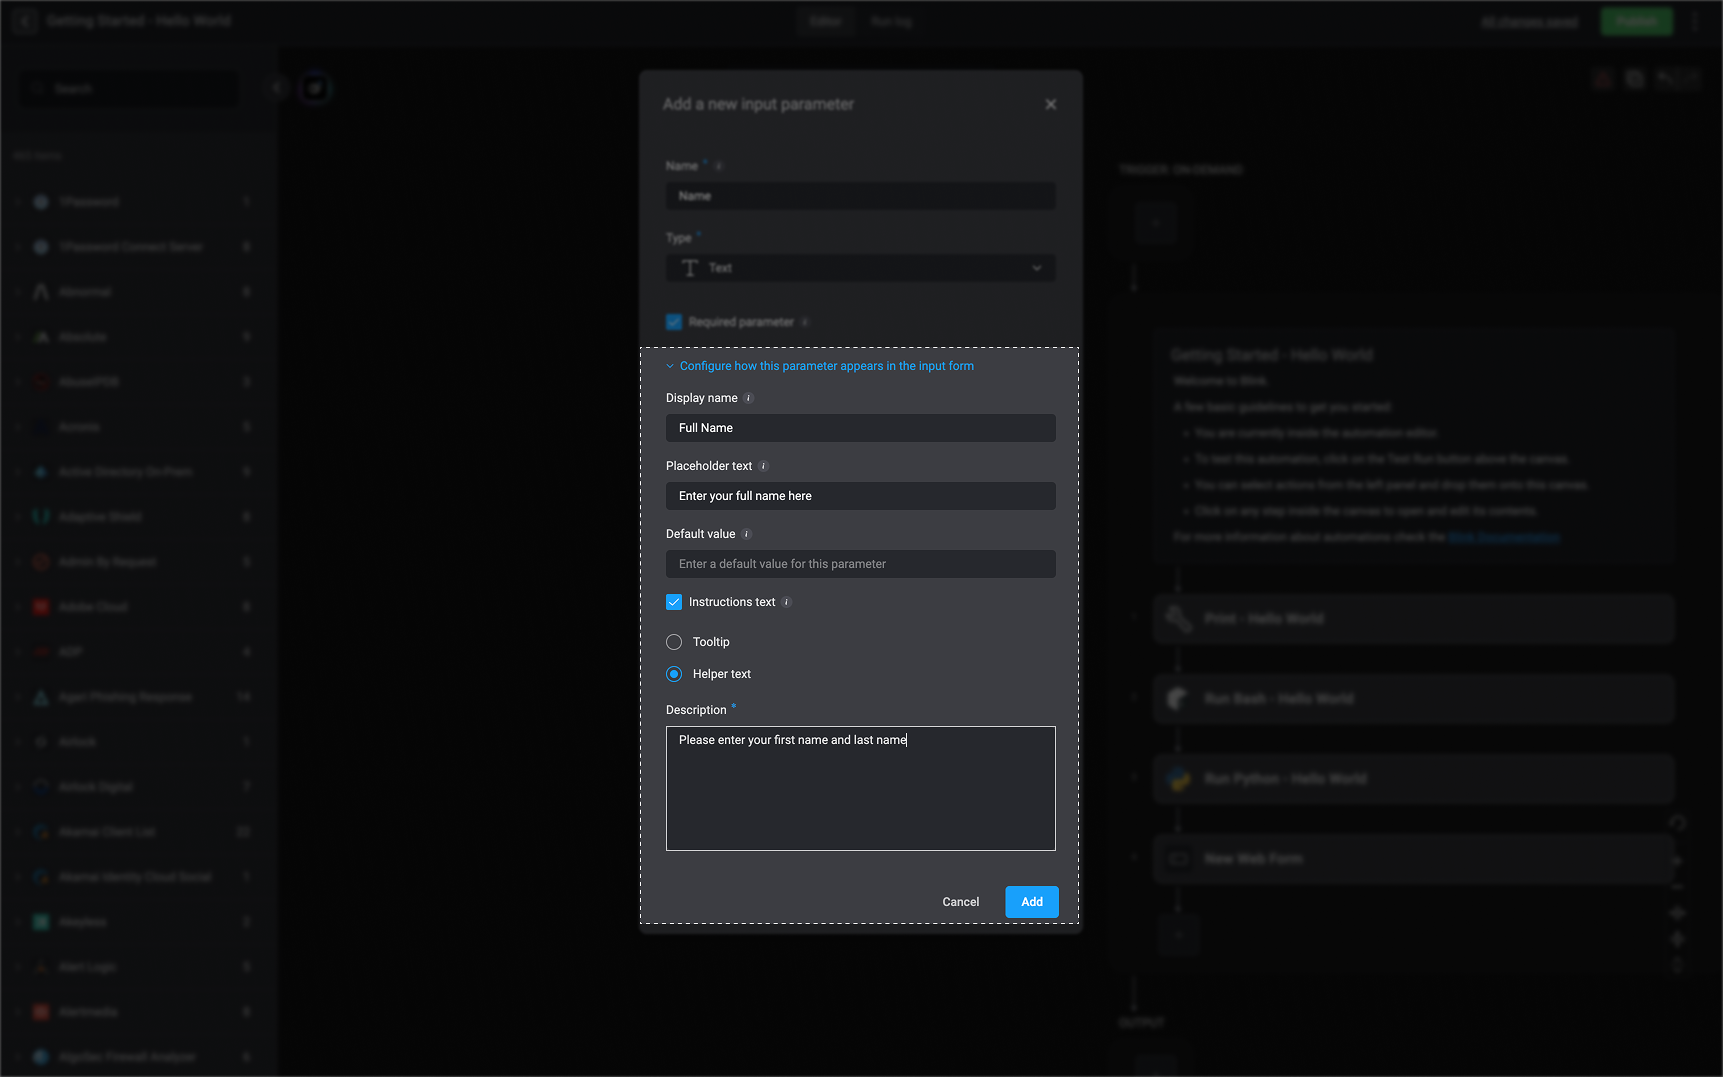
 4. To customize how the input appears in the form, click **Configure how this parameter appears** in the input form and modify the:
* **Display Name**: The label shown to users for this input parameter.
* **Placeholder** *(available for relevant types)*: Optional sample text displayed inside the input field to guide users on the expected format (for example, a sample username or email address).
* **Default Value**: The value automatically used if the user does not provide an input.
* **Instructions Text**
* **Tooltip**: Contextual text that appears on hover, offering additional explanation or clarification for the parameter.
* **Helper Text**: Supporting text shown below the input field to guide the user on how to complete it correctly.
* **Description**: The text shown to the user, either as a tooltip or as helper text, depending on the selected option.
4. To customize how the input appears in the form, click **Configure how this parameter appears** in the input form and modify the:
* **Display Name**: The label shown to users for this input parameter.
* **Placeholder** *(available for relevant types)*: Optional sample text displayed inside the input field to guide users on the expected format (for example, a sample username or email address).
* **Default Value**: The value automatically used if the user does not provide an input.
* **Instructions Text**
* **Tooltip**: Contextual text that appears on hover, offering additional explanation or clarification for the parameter.
* **Helper Text**: Supporting text shown below the input field to guide the user on how to complete it correctly.
* **Description**: The text shown to the user, either as a tooltip or as helper text, depending on the selected option.
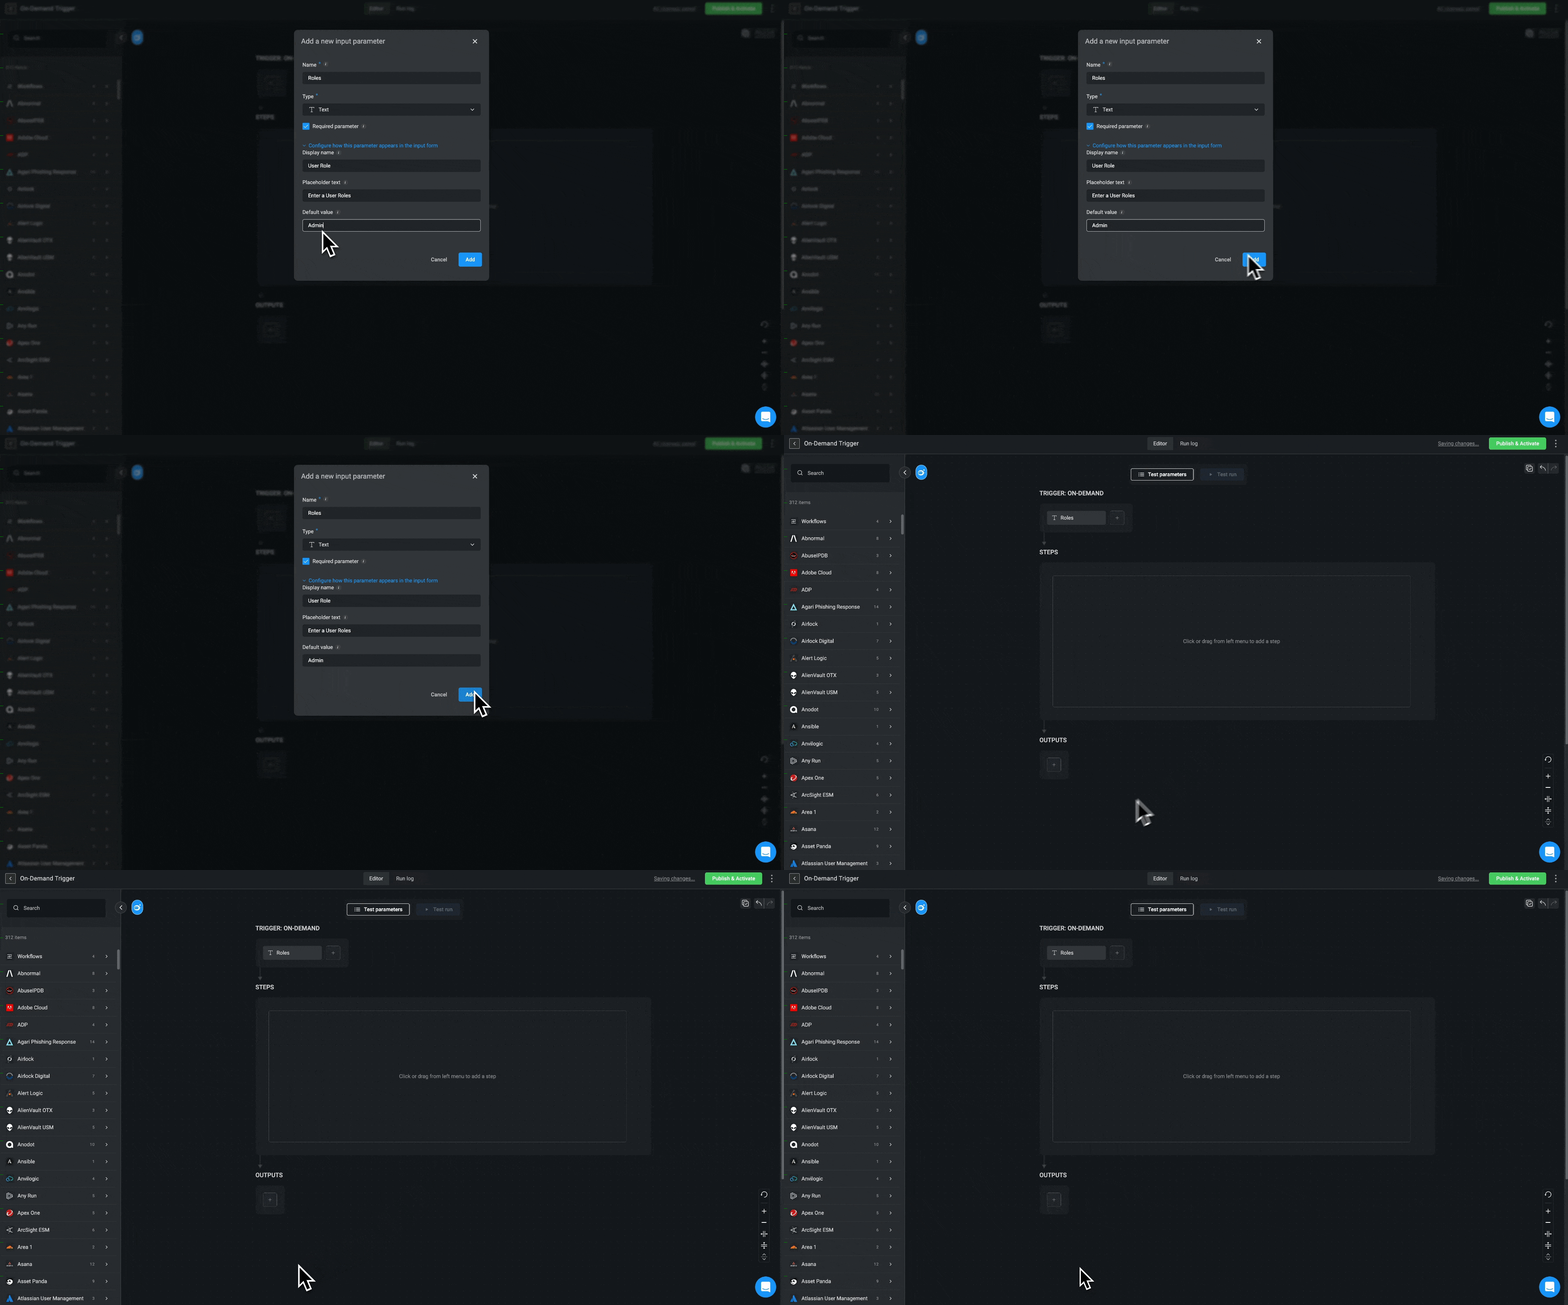
 5. Click **Add** to save the input parameter and close the window.
 ***
## See It In Action
## What Next?
Once you've finished configuring the workflow, it's time to test it. Once you're satisfied with the results, you can publish the workflow to make it available in the Self-Service Portal.
All of the steps following the trigger will run when a user activates the workflow from the **Self Service Portal** based on the parameters they enter and any other conditions you've configured.
## Related Articles
Validate workflows to ensure they run as expected.
Control user access and execution rights.
Pass dynamic data into workflows with input parameters.
***
## See It In Action
## What Next?
Once you've finished configuring the workflow, it's time to test it. Once you're satisfied with the results, you can publish the workflow to make it available in the Self-Service Portal.
All of the steps following the trigger will run when a user activates the workflow from the **Self Service Portal** based on the parameters they enter and any other conditions you've configured.
## Related Articles
Validate workflows to ensure they run as expected.
Control user access and execution rights.
Pass dynamic data into workflows with input parameters.