> ## Documentation Index
> Fetch the complete documentation index at: https://docs.blinkops.com/llms.txt
> Use this file to discover all available pages before exploring further.
# Custom Actions
> Create and manage custom actions to extend Blink's built-in capabilities with your own logic.
Custom Actions allow you to create reusable actions tailored to your specific needs by combining existing actions into a single unit. This simplifies workflow creation and promotes consistency across workflows.
***
## Creating a New Custom Action
**Note:** The 'If', 'If else', 'For Each', 'Variable', 'Wait', 'Note', and 'End Run' actions cannot be customized.
On the right-hand side of the step, click the **Save as new custom action** option.
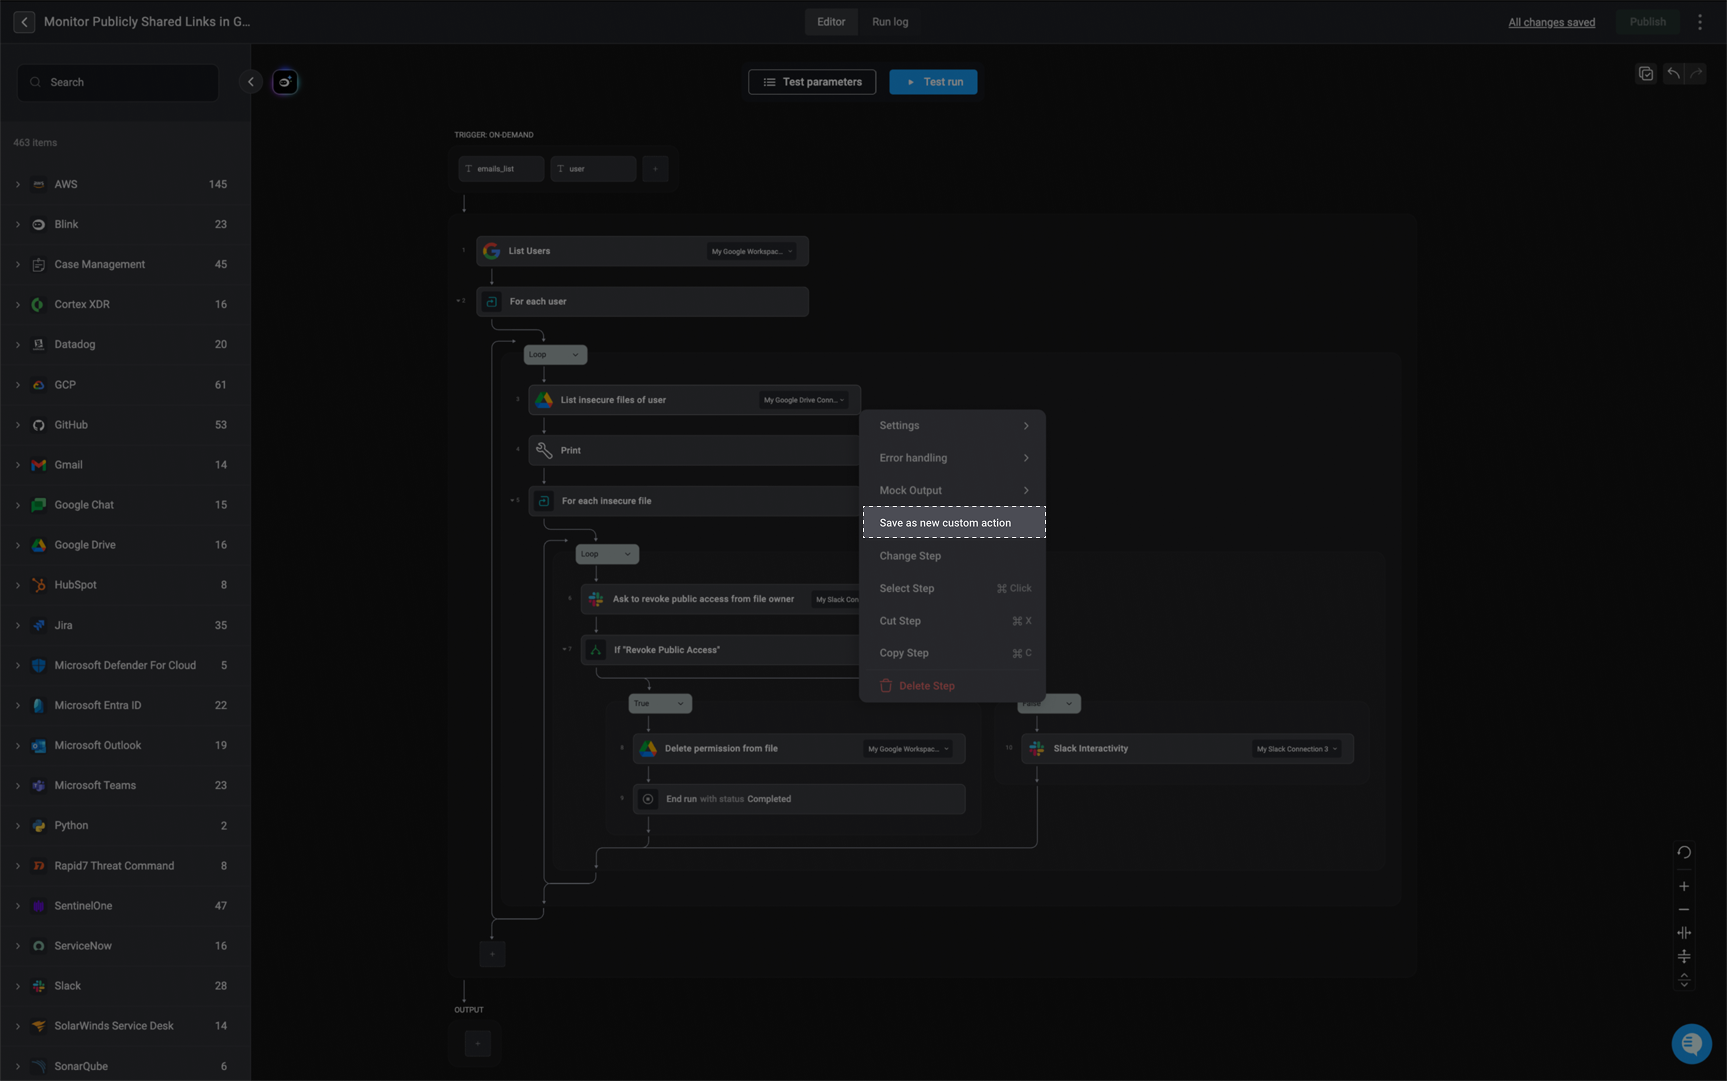 Enter the following parameters:
1. A *Custom Action name*
2. Select a *Vendor* or create a new one
3. Enter a description
4. In *Advanced Settings*, you can edit the `YAML` format
Enter the following parameters:
1. A *Custom Action name*
2. Select a *Vendor* or create a new one
3. Enter a description
4. In *Advanced Settings*, you can edit the `YAML` format
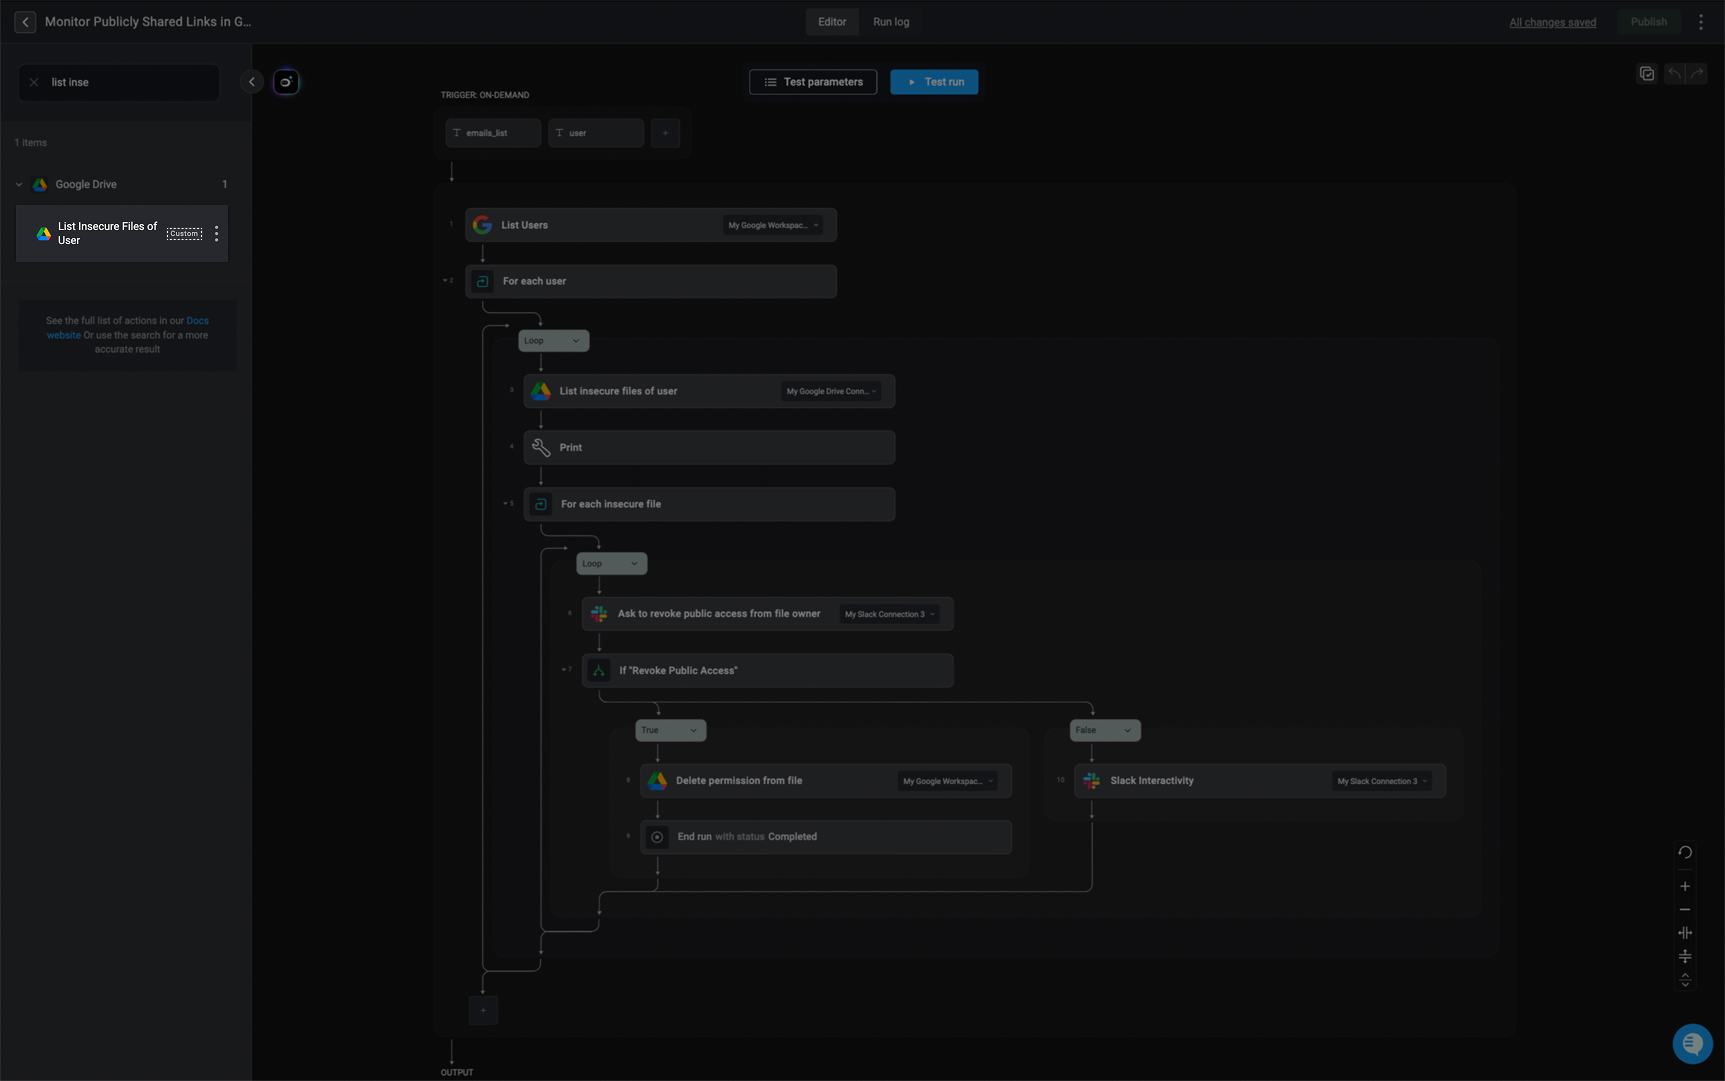
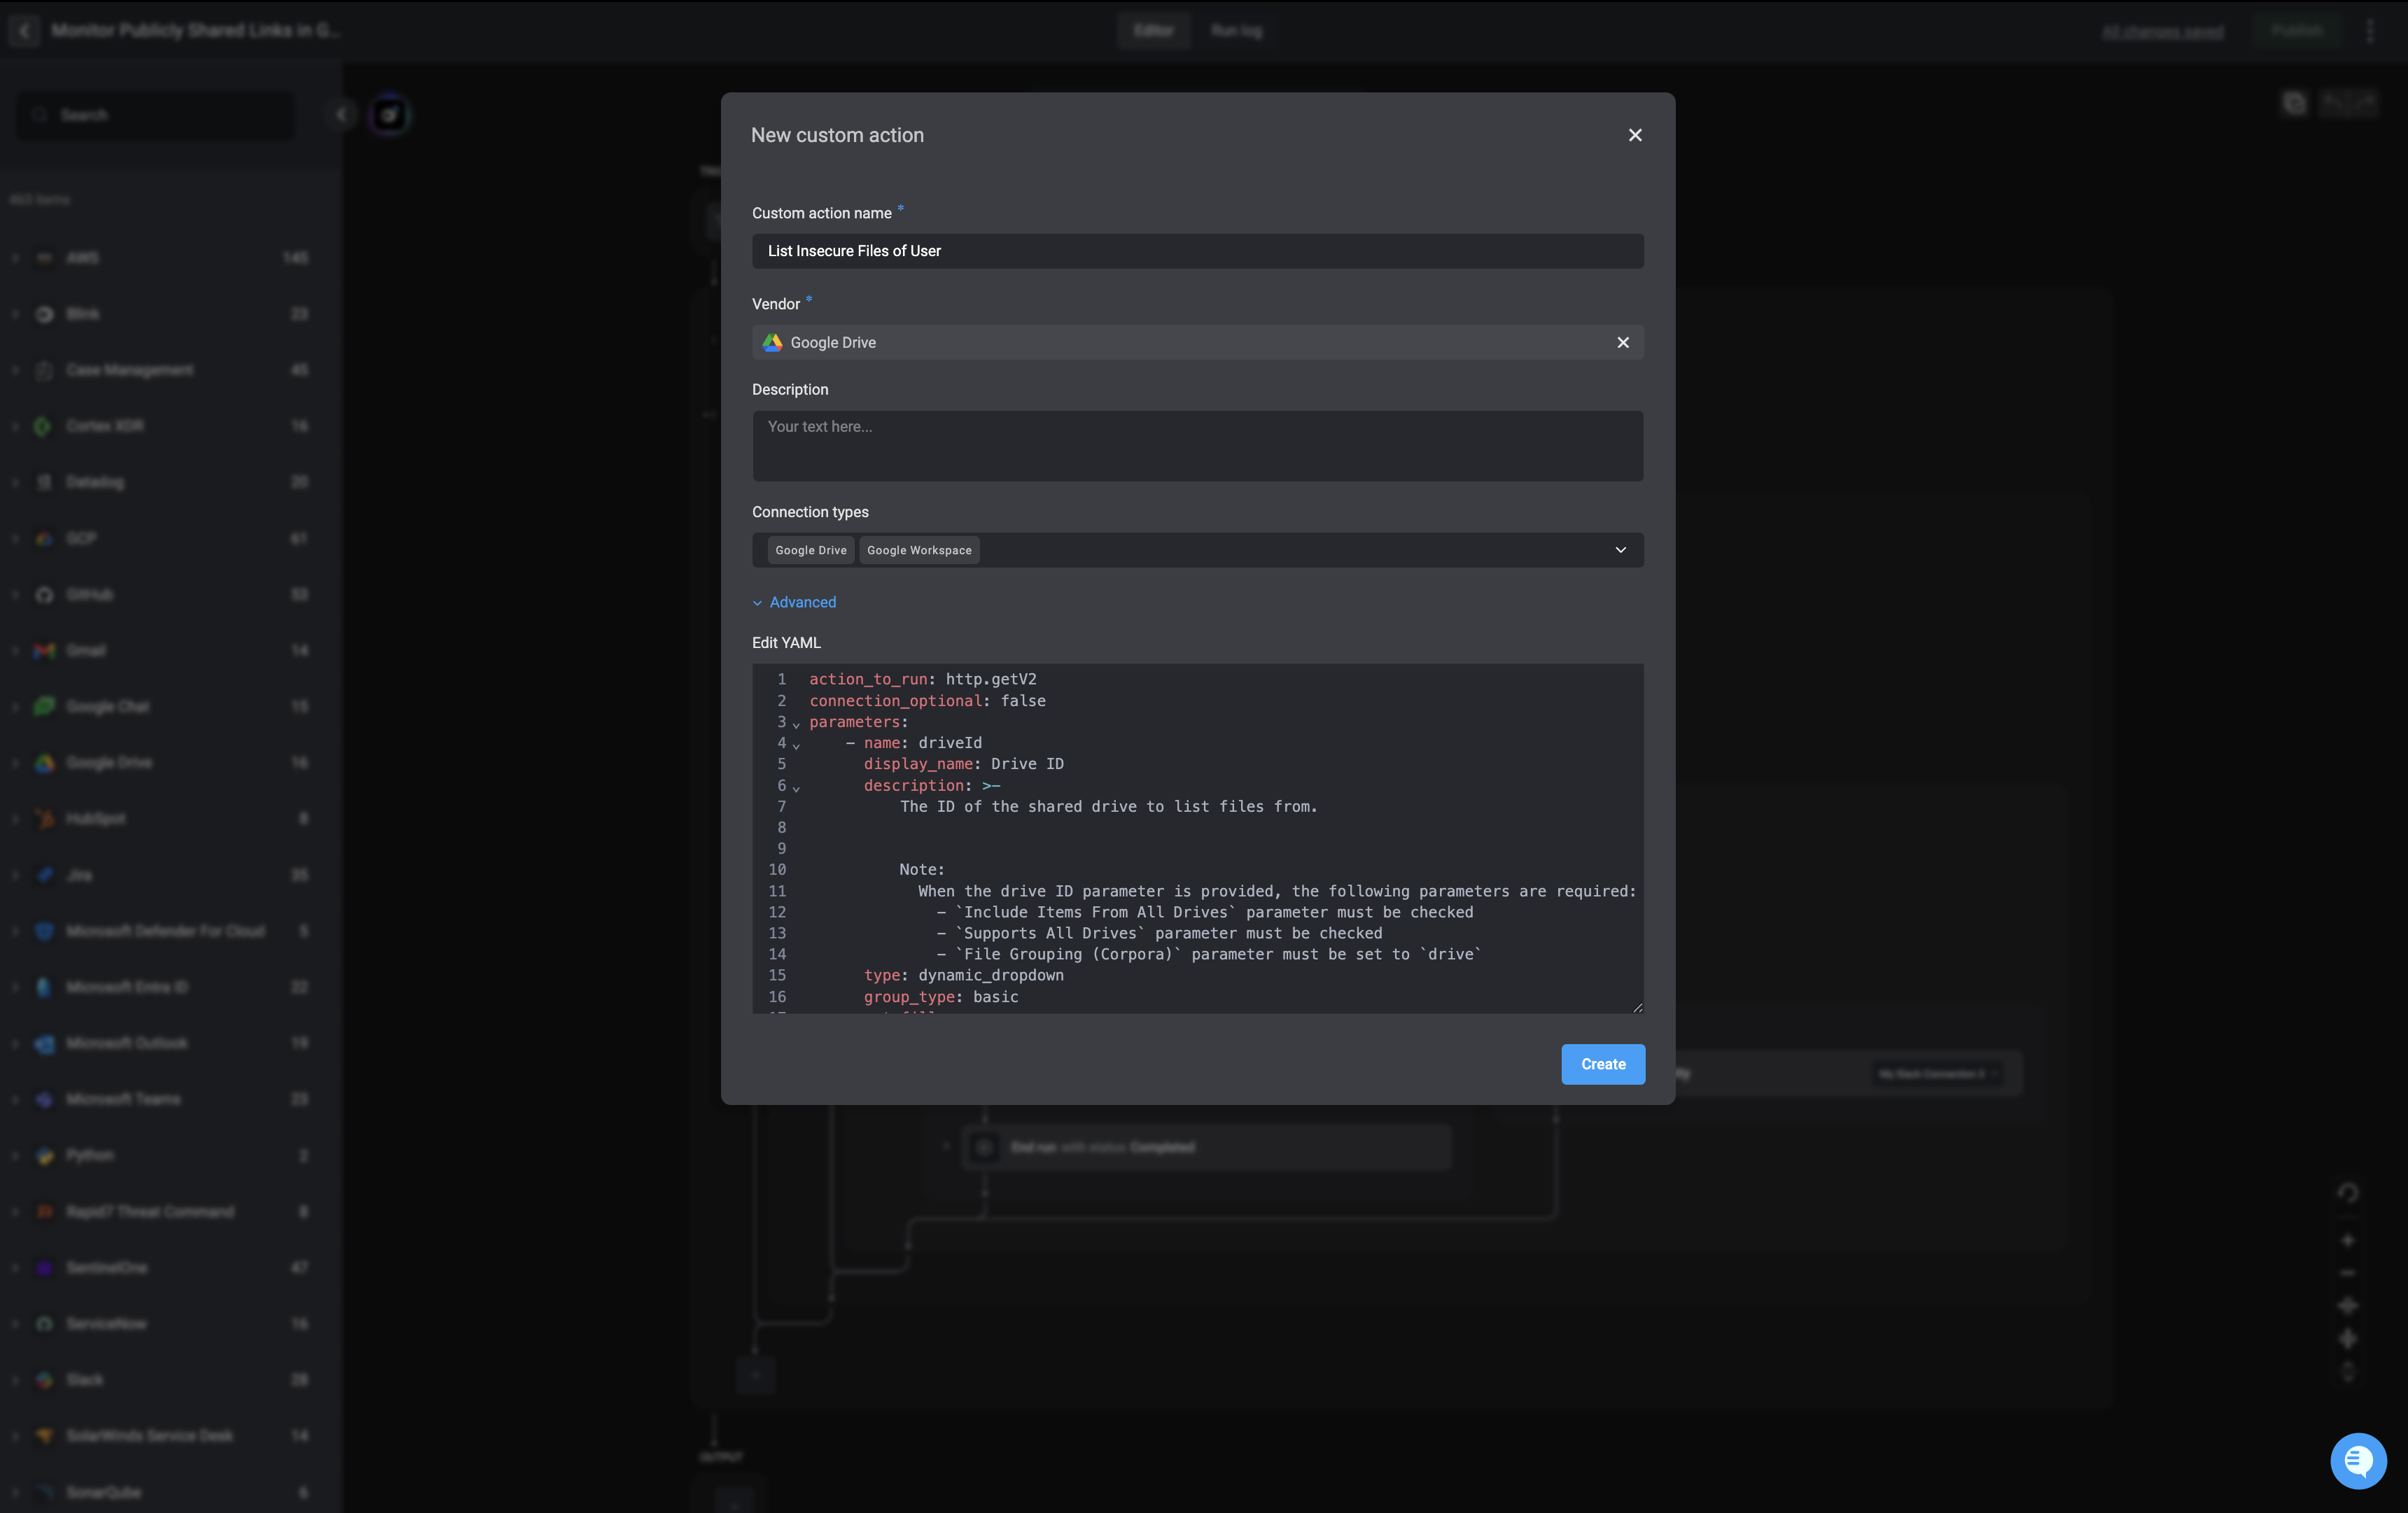 **Note:** A `custom action` label will appear next to it, indicating that it is a custom action.
Click 'Create' to save your custom action. It will now appear under the selected vendor in the action library and will be available to all users in your workspace.
**Note:** A `custom action` label will appear next to it, indicating that it is a custom action.
Click 'Create' to save your custom action. It will now appear under the selected vendor in the action library and will be available to all users in your workspace.
 ***
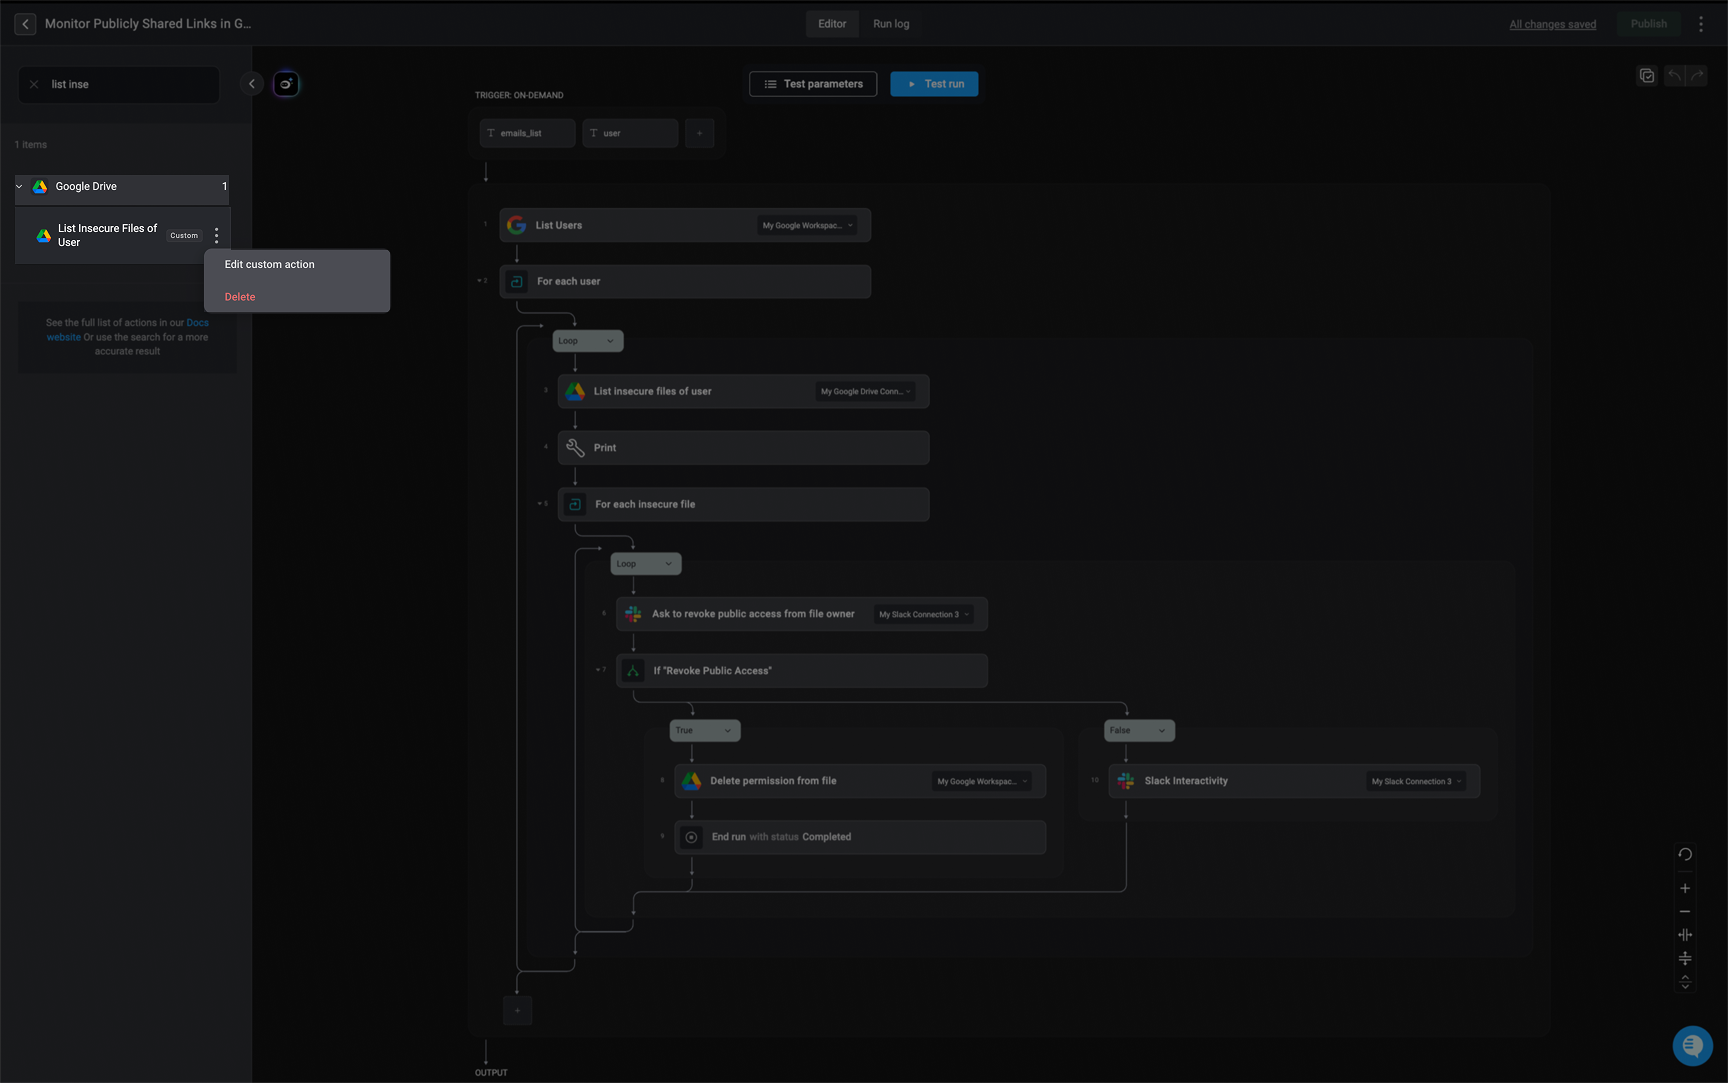
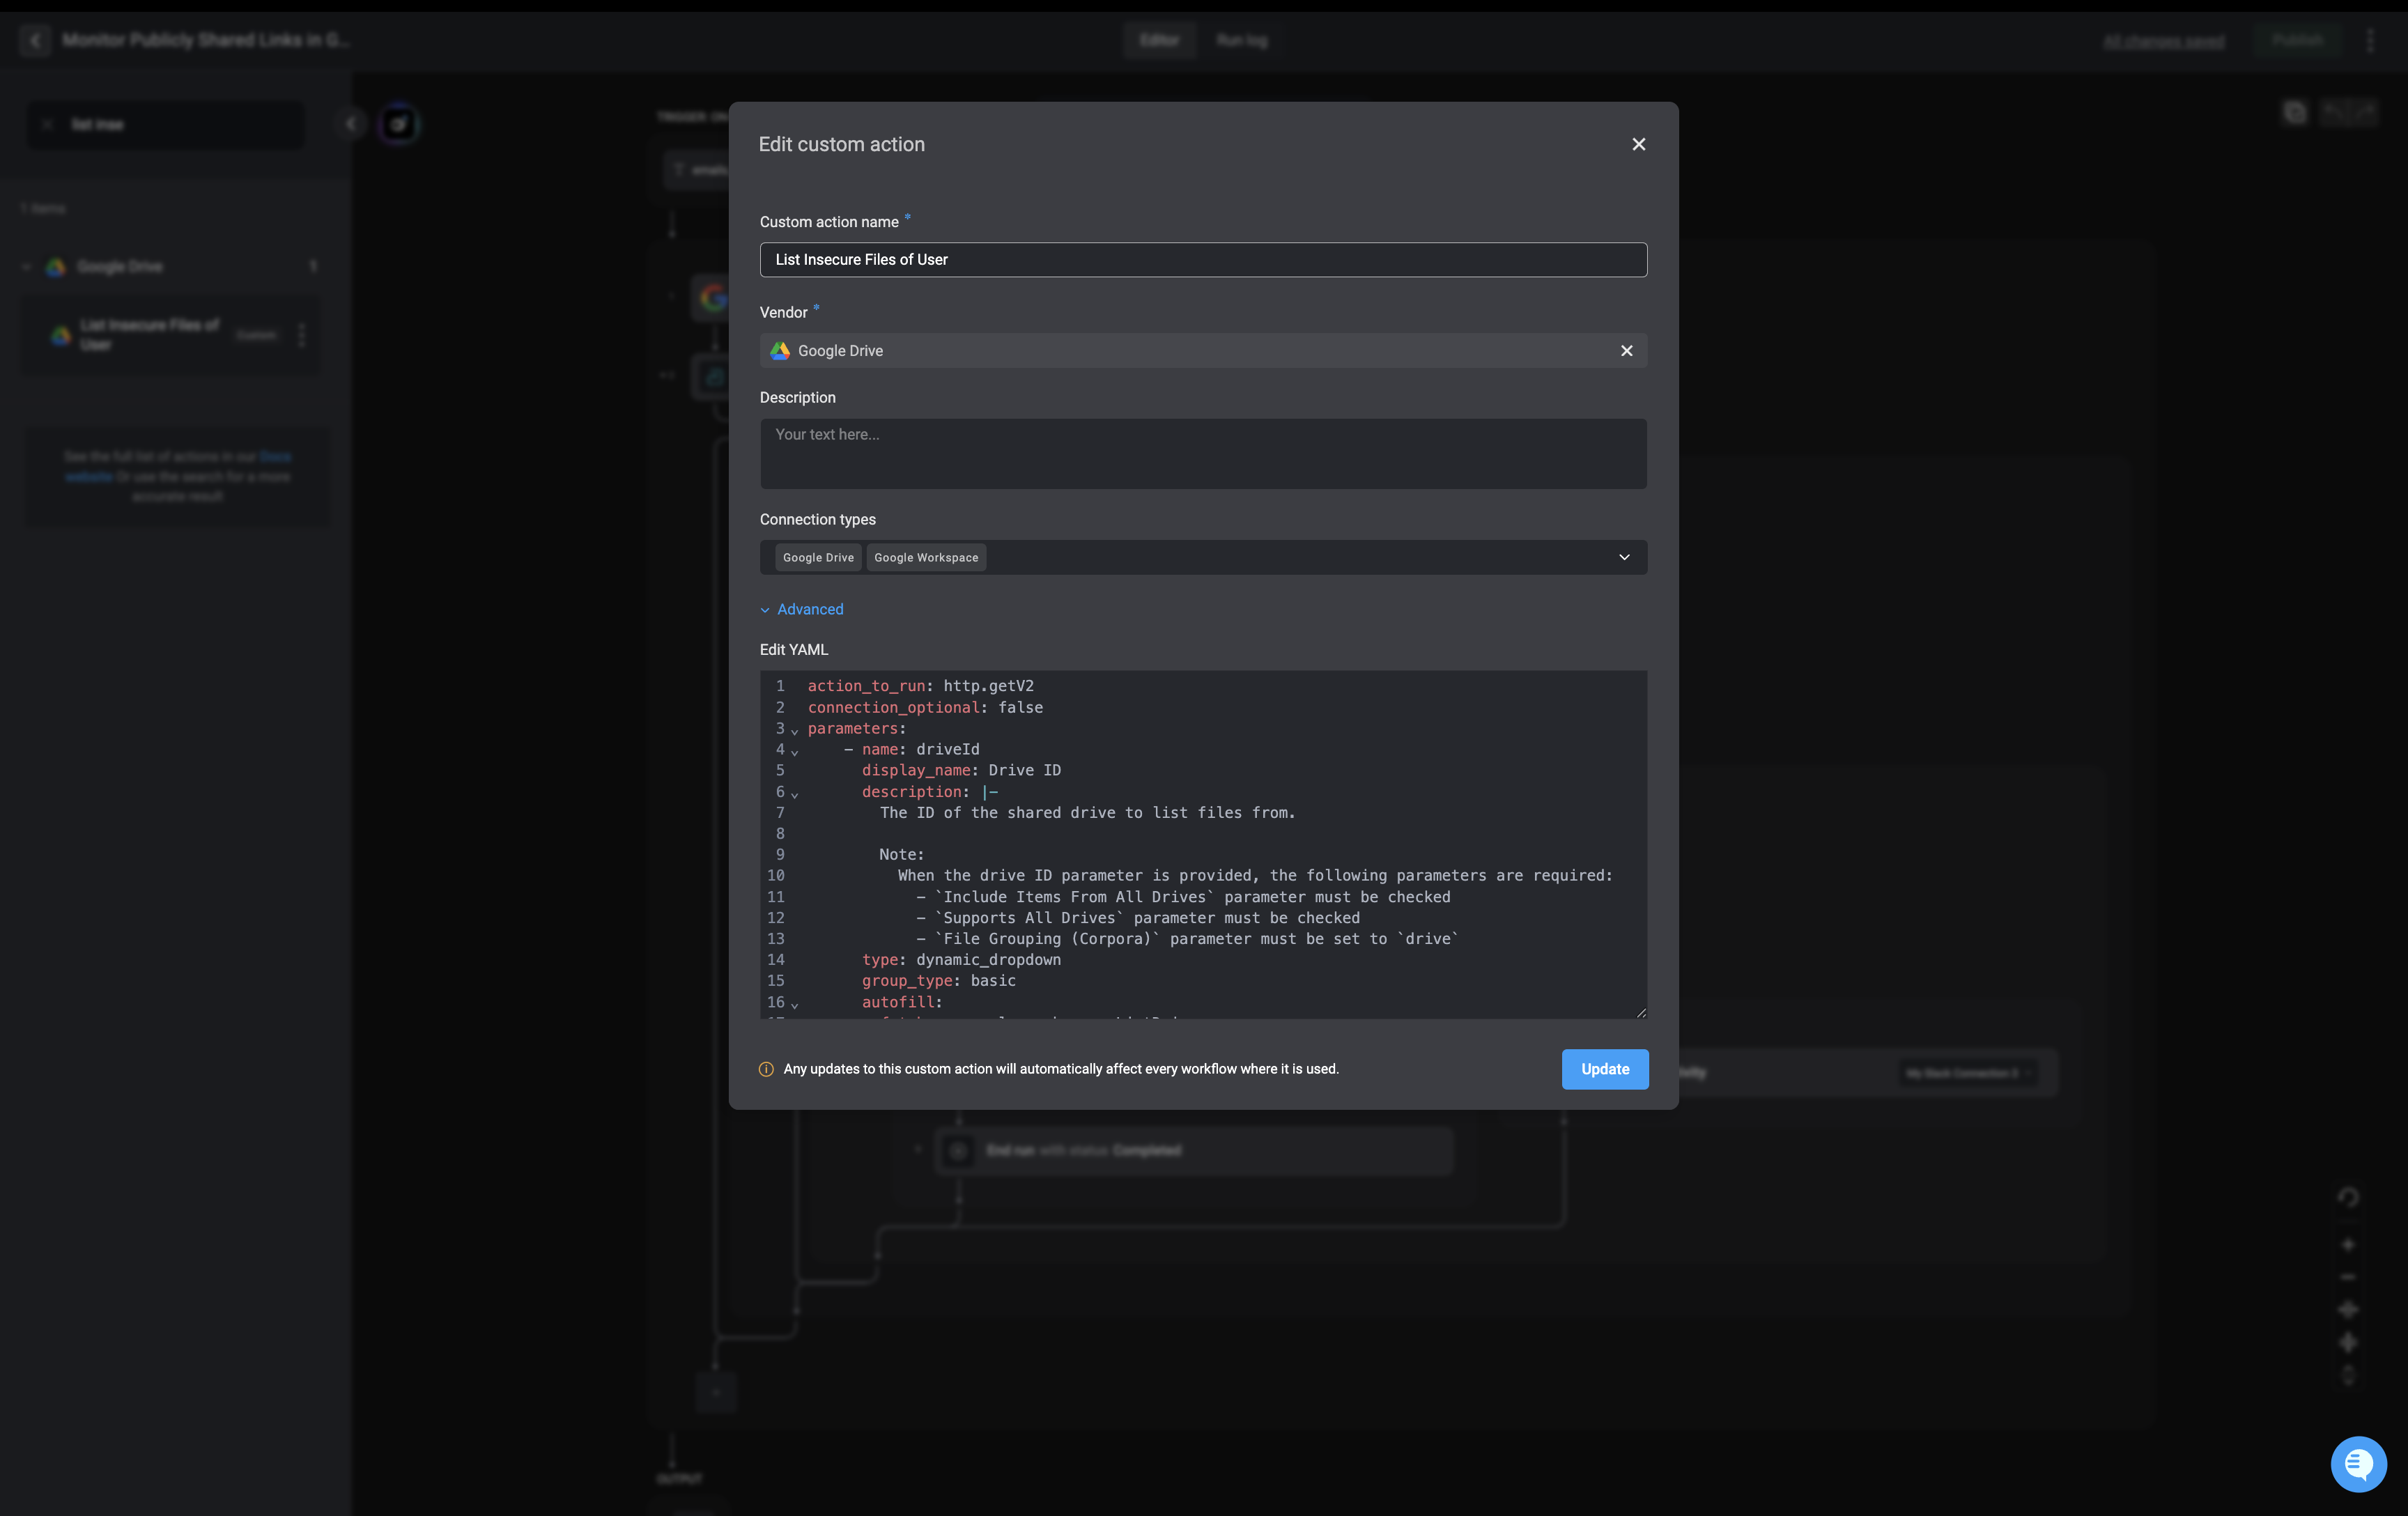
## Editing a Custom Action
Any updates to this custom action will automatically affect every workflow where it is used.
In the left-hand side action panel, click the and select the 'Edit custom action'.
***
## Editing a Custom Action
Any updates to this custom action will automatically affect every workflow where it is used.
In the left-hand side action panel, click the and select the 'Edit custom action'.
 Make the necessary changes and click the 'Update' button to apply the changes.
 ***
## Using Custom Actions
Add a custom action to a step the same way as creating a regular step:
* **Drag and drop**: To use a custom action, drag and drop the Action onto the canvas from the Action panel. At the top of the panel you can see the flow control actions and beneath them a list of external service providers. To see the available Actions, open a service.
* **Inline adding**: Click on the box in the middle of the canvas. Search for the custom action in the search bar and select it.
***
***
## Using Custom Actions
Add a custom action to a step the same way as creating a regular step:
* **Drag and drop**: To use a custom action, drag and drop the Action onto the canvas from the Action panel. At the top of the panel you can see the flow control actions and beneath them a list of external service providers. To see the available Actions, open a service.
* **Inline adding**: Click on the box in the middle of the canvas. Search for the custom action in the search bar and select it.
***