> ## Documentation Index
> Fetch the complete documentation index at: https://docs.blinkops.com/llms.txt
> Use this file to discover all available pages before exploring further.
# WhatsApp
> WhatsApp is an internationally available freeware, cross-platform, centralized instant messaging and voice-over-IP service owned by American company Meta Platforms. It allows users to send text and voice messages, make voice and video calls, and share images, documents, user locations, and other content.
## Creating a WhatsApp connection[](#creating-a-whatsapp-connection "Direct link to Creating a WhatsApp connection")
To use the WhatsApp API, you must use a WhatsApp Business account. For more information, go to [Meta for developers](https://developers.facebook.com/docs/whatsapp/cloud-api/get-started) and follow the provided steps.
To create the connection you need:
* A WhatsApp Business app. Refer to [Meta's Create an App Page](https://developers.facebook.com/docs/development/create-an-app/) for details
* An API token using one of the two methods below
### Obtaining the credentials[](#obtaining-the-credentials "Direct link to Obtaining the credentials")
#### Using a temporary 24-Hour token[](#using-a-temporary-24-hour-token "Direct link to Using a temporary 24-Hour token")
1. Copy the token from **WhatsApp** > **Getting Started** (or Setup) panel.
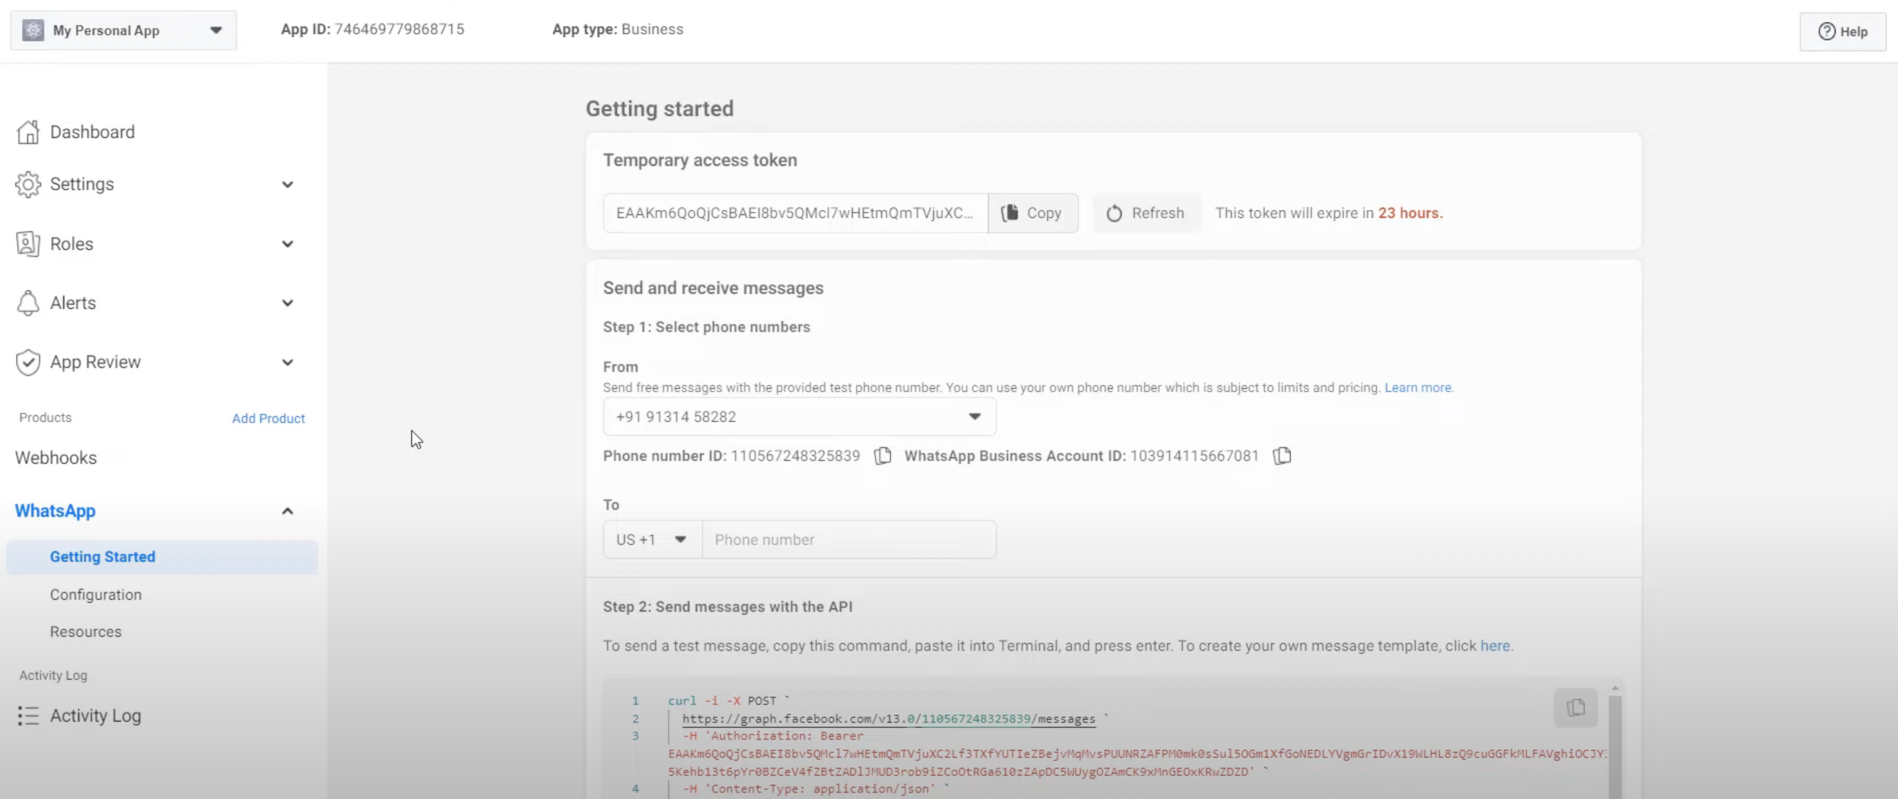 This is where the Phone number ID used in the **Send Text Message** action,
and the **WhatsApp Business Account ID** used in the **List Phone Numbers**
action can be found.
#### Using a permanent token[](#using-a-permanent-token "Direct link to Using a permanent token")
1. Go to [Facebook Developers Apps Panel](https://developers.facebook.com/apps).
2. Click on the Business name of your corresponding WhatsApp application:
This is where the Phone number ID used in the **Send Text Message** action,
and the **WhatsApp Business Account ID** used in the **List Phone Numbers**
action can be found.
#### Using a permanent token[](#using-a-permanent-token "Direct link to Using a permanent token")
1. Go to [Facebook Developers Apps Panel](https://developers.facebook.com/apps).
2. Click on the Business name of your corresponding WhatsApp application:
 3. Under the **System Users** tab, click **Add**.
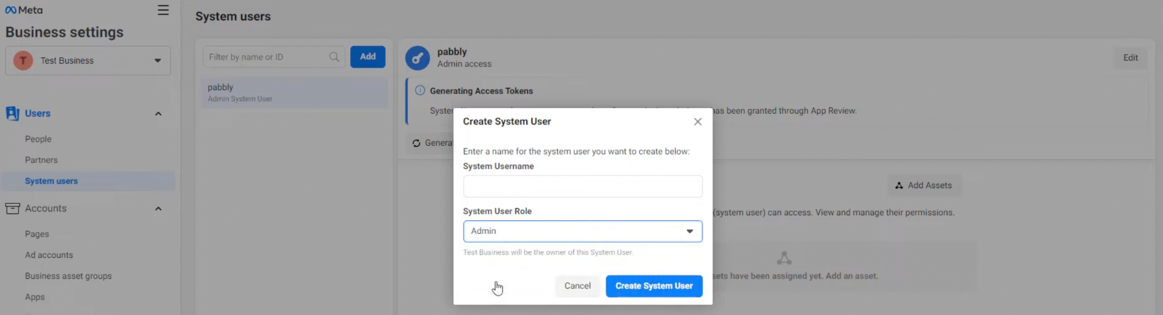
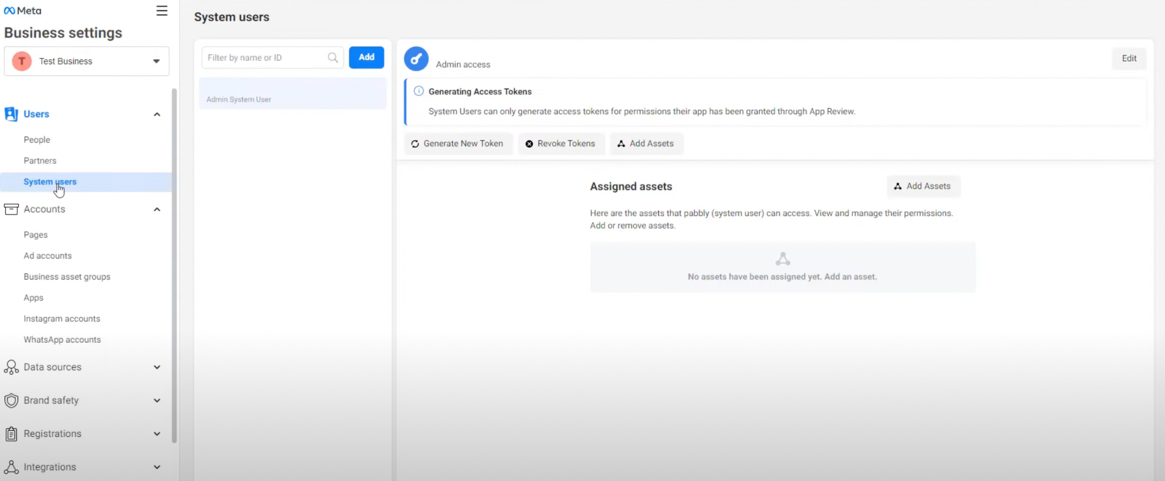 4. Enter the details for the system user with an admin user role and click **Create System User**.You may have a limited amount of possible system users, depending on the WhatsApp business licensing.
 5. Click **Add Assets** > select your WhatsApp app > Give the new user full app management control and save changes.
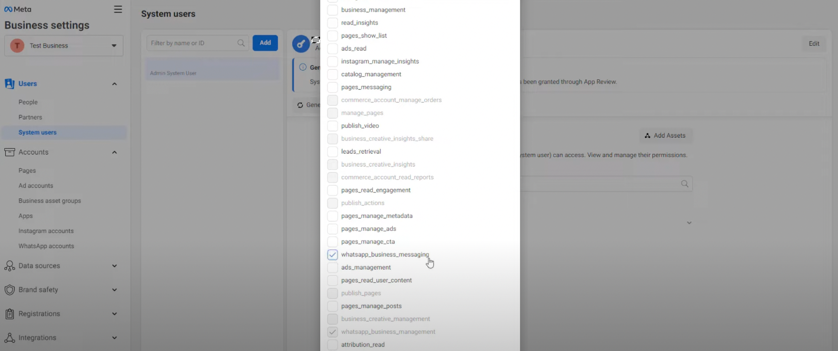
 6. Click **Generate New Token** > select your app and give the token `whatsapp_business_messaging` and `whatsapp_business_management` permissions.
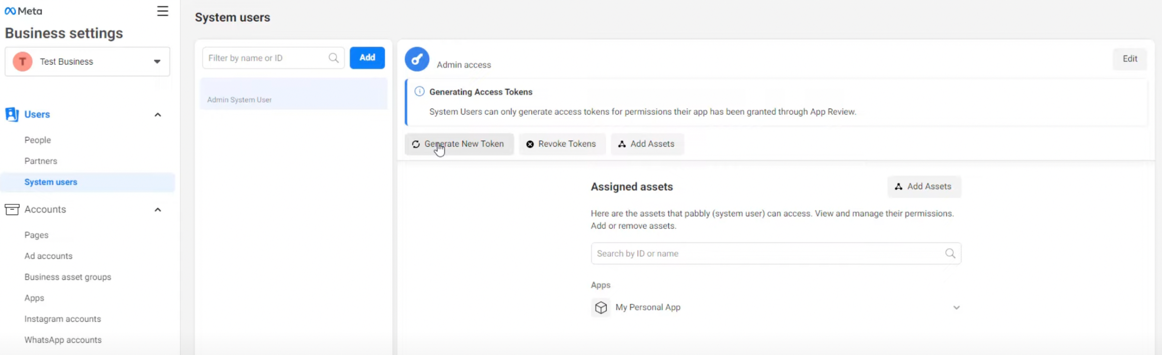
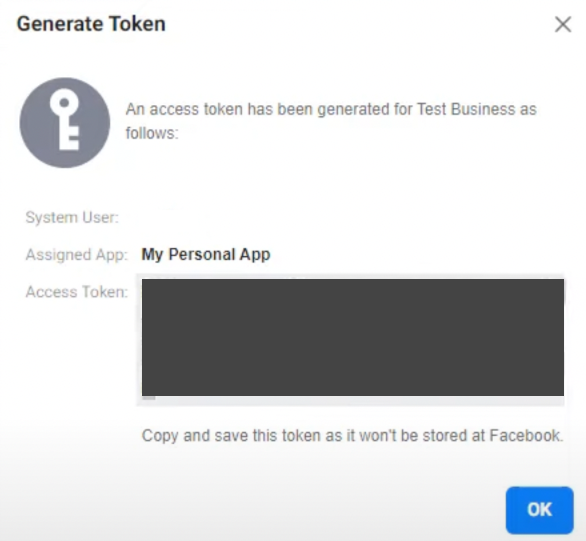
 7. Copy the generated Access Token.
 ### Creating your connection[](#creating-your-connection "Direct link to Creating your connection")
1. In the Blink platform, navigate to the **Connections** page > **Add connection**. A New Connection dialog box opens displaying icons of external service providers available.
2. Select the **WhatsApp** icon. A dialog box with name of the connection and connection methods appears.
3. (Optional) Edit the name of the connection. At a later stage you cannot edit the name.
4. Select **Access Token** as the method to create the connection.
5. Fill in the parameters:
* The user access token
6. (Optional) Click **Test Connection** to test it.
7. Click **Create connection**. The new connection appears on the **Connections** page.
### Creating your connection[](#creating-your-connection "Direct link to Creating your connection")
1. In the Blink platform, navigate to the **Connections** page > **Add connection**. A New Connection dialog box opens displaying icons of external service providers available.
2. Select the **WhatsApp** icon. A dialog box with name of the connection and connection methods appears.
3. (Optional) Edit the name of the connection. At a later stage you cannot edit the name.
4. Select **Access Token** as the method to create the connection.
5. Fill in the parameters:
* The user access token
6. (Optional) Click **Test Connection** to test it.
7. Click **Create connection**. The new connection appears on the **Connections** page.