> ## Documentation Index
> Fetch the complete documentation index at: https://docs.blinkops.com/llms.txt
> Use this file to discover all available pages before exploring further.
# Splunk
> Splunk enables you to search, analyze, and visualize the data gathered from the components of your IT infrastructure or business. Splunk takes in data from websites, applications, sensors, devices, and so on.
## Creating a Splunk connection
Create the connection by using one of the following methods:
* [API Token](#using-api-token)
* [Username & Password](#using-username-and-password)
* [HTTP Event Token](#using-http-event-token)
**Splunk Cloud users**:
Your `Splunk Domain` is the deployment name associated with your generated token. It can be found in the URL on the **Generate Token** page and is not necessarily the same as your Splunk instance name.
The correct format is: `https://{deployment-name}.splunkcloud.com`.
You must be logged into the Splunk domain before any external API connections
can function.
Each action on our platform supports different authentication methods based on
Splunk's requirements. Most actions support the **API Token** and **Username &
Password** methods, while some actions require an HTTP Event Collector Token
and therefore only support the **HTTP Event Token** method.
Before you can access your instance via Splunk's API, you **must** add Blink's public IP addresses to the Search Head API Access and IDM API allow lists. Please refer to [Splunk's Guide](https://docs.splunk.com/Documentation/SplunkCloud/9.2.2403/RESTTUT/RESTandCloud#:~:text=Accessing%20the%20Splunk%20Cloud%20Platform%20REST%20API\&text=Use%20the%20Admin%20Config%20Service,lists%20for%20Splunk%20Cloud%20Platform) for more details. If you prefer configuring the IP's via Splunk Web, please see [Configure IP allow lists using Splunk Web](https://docs.splunk.com/Documentation/SplunkCloud/9.2.2406/Admin/ConfigureIPAllowList).
IPs to add to the allow lists:
| IP |
| -------------- |
| 44.194.139.218 |
| 3.217.19.166 |
| 54.81.101.61 |
| 107.20.97.38 |
### Using API Token
To create the connection you need:
* A Splunk Domain
* A Deployment API Port
* An API Token
### Obtaining the API token
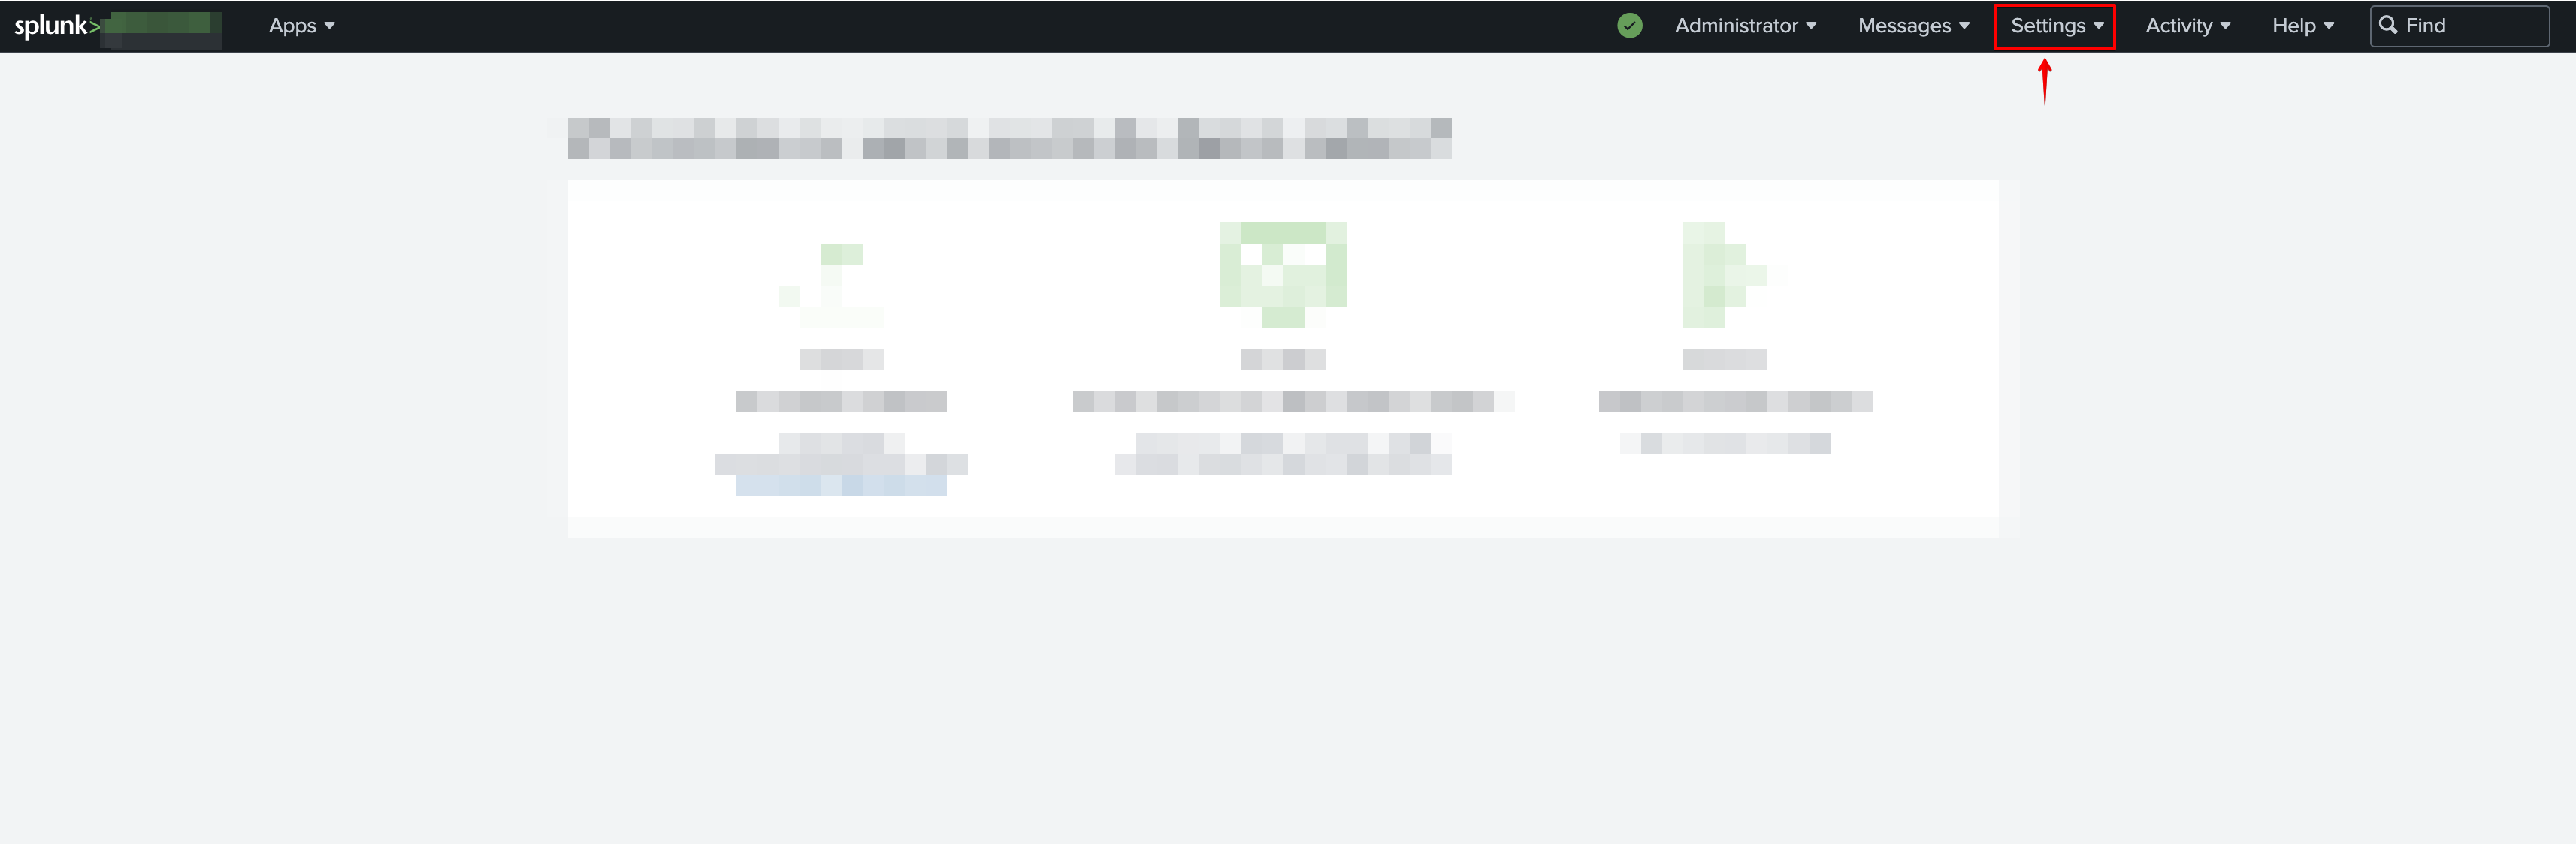
1. In the system bar, click **Settings**.
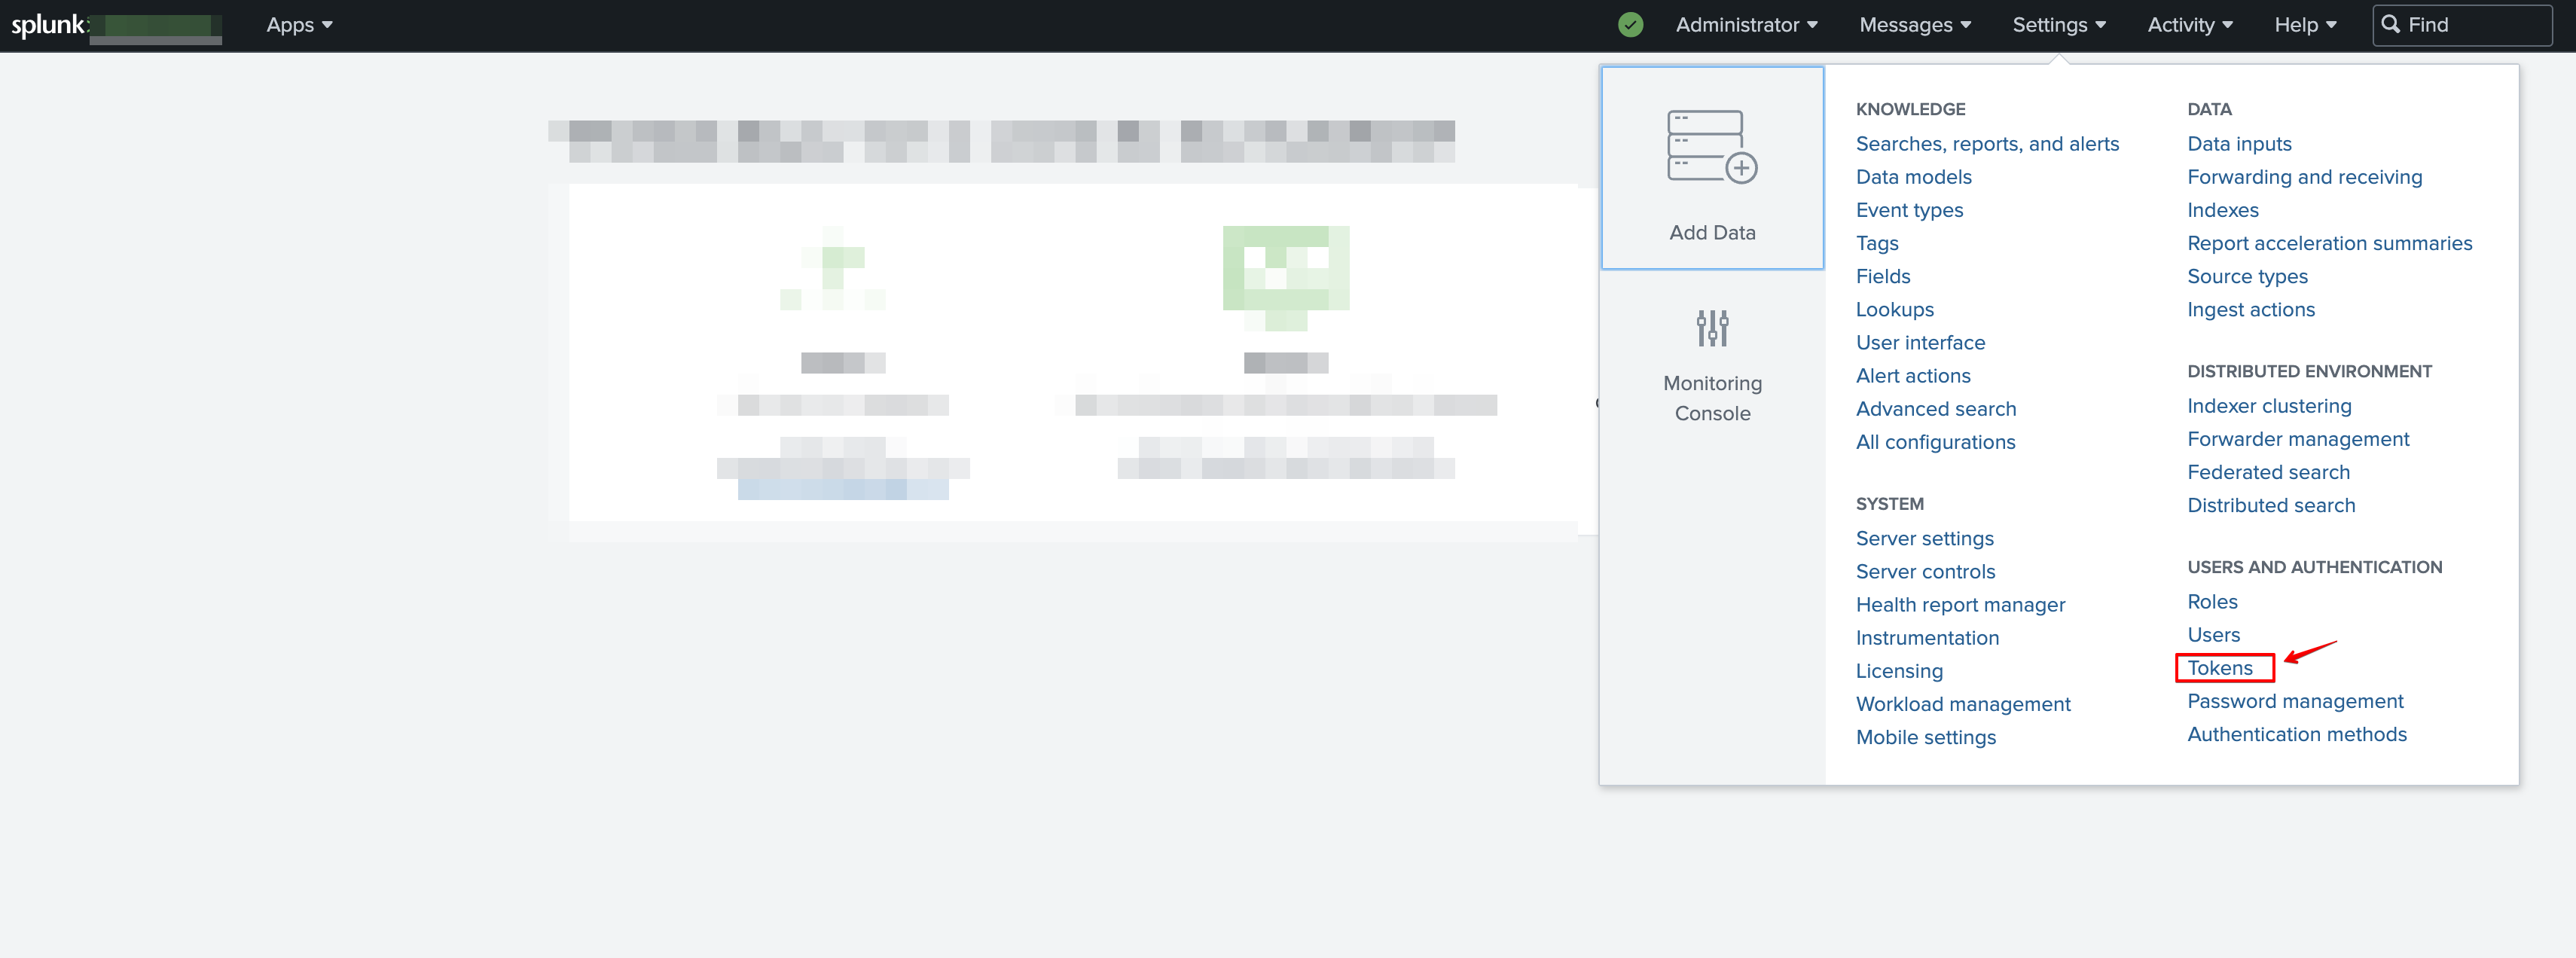
 2. Click **Tokens**.
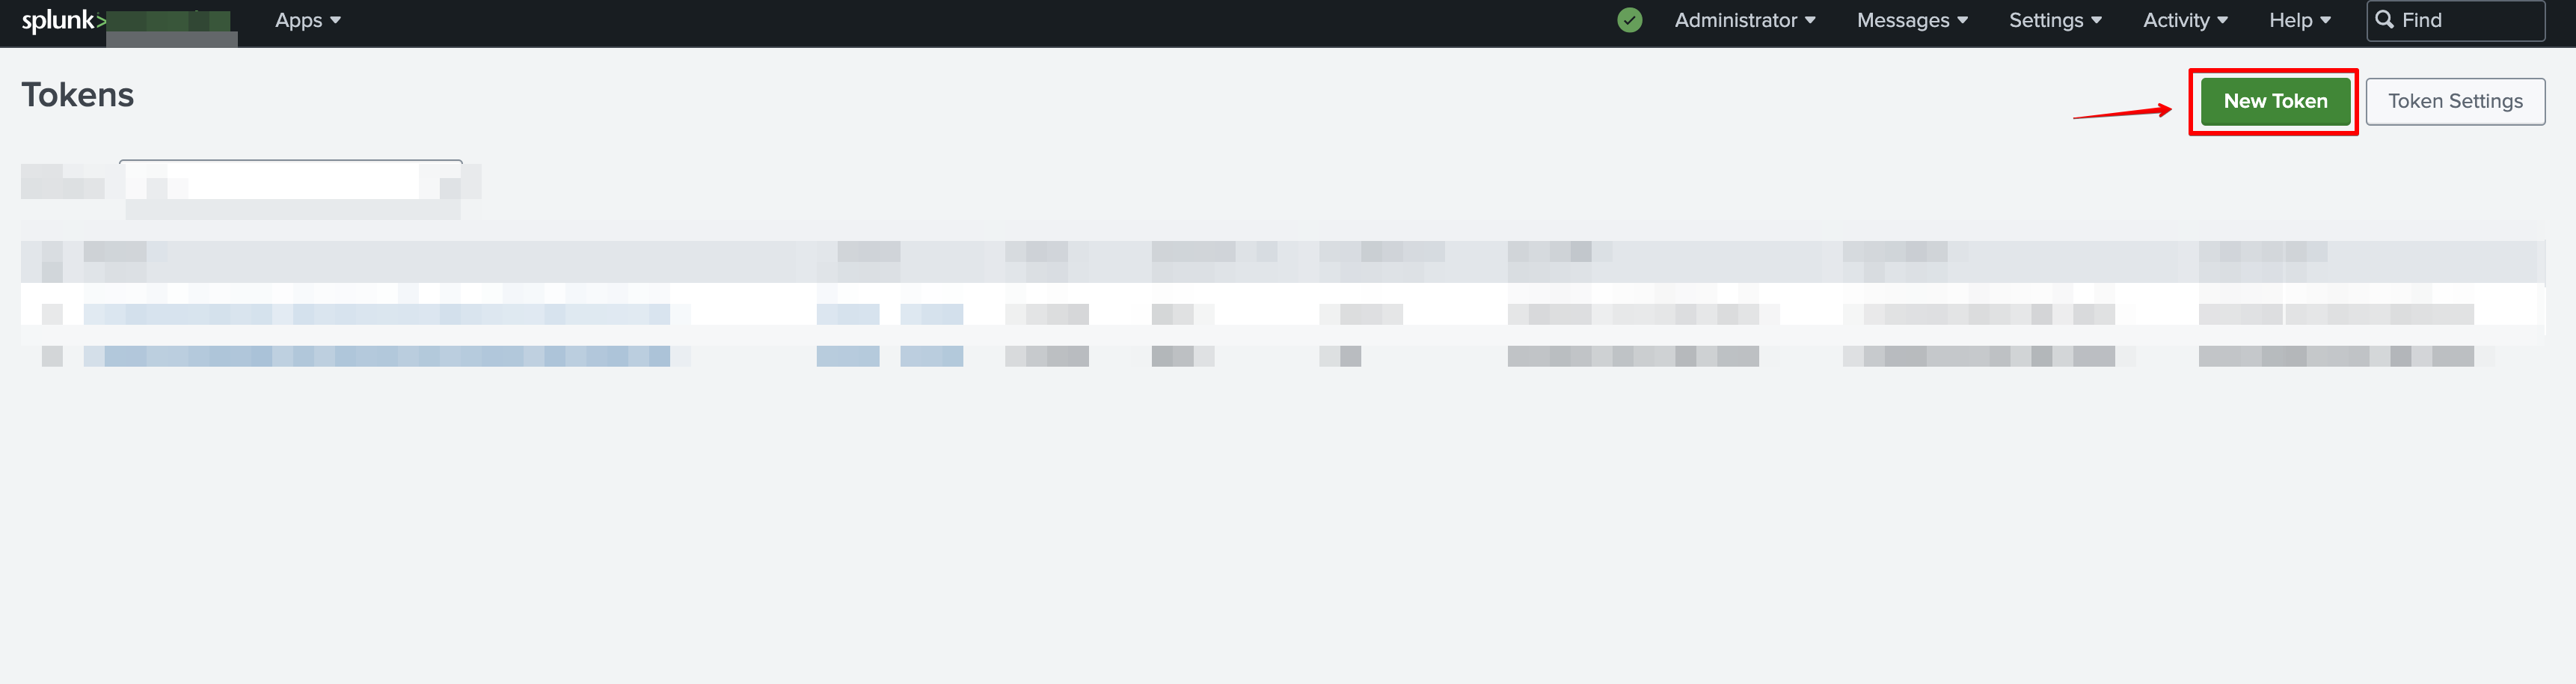
 3. Click **New Token**.
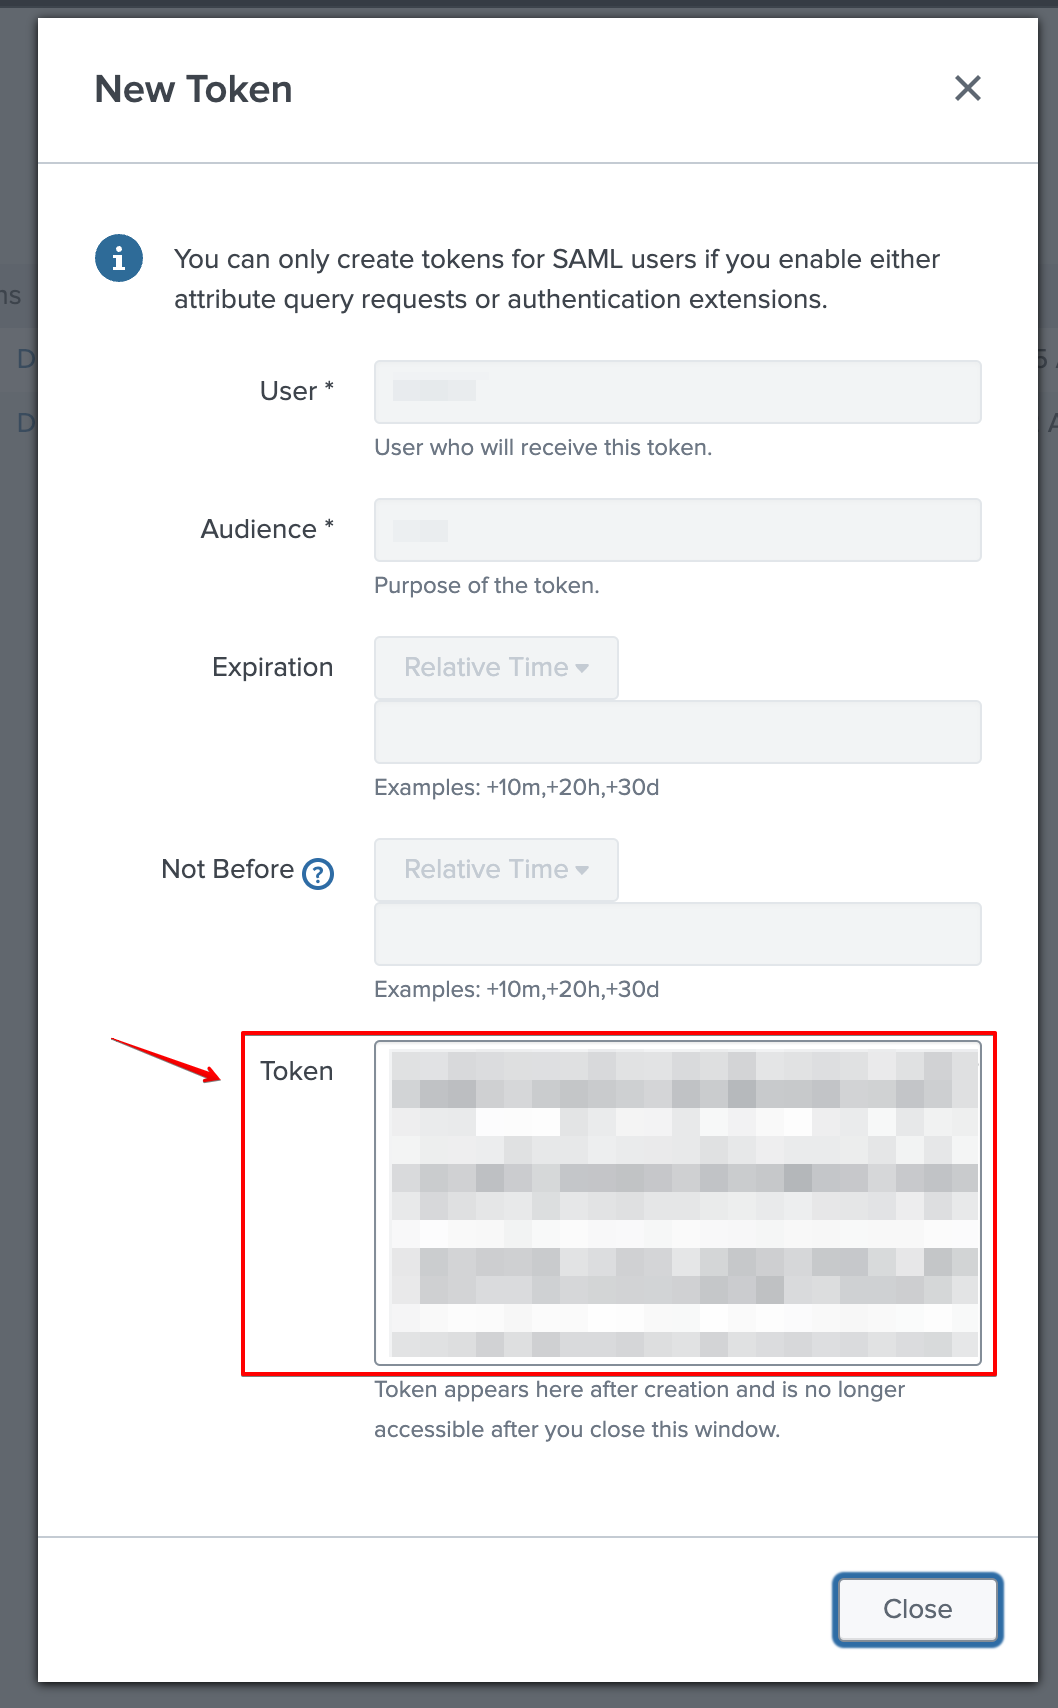
 4. In the **New Token** dialog, fill the required details. Pay attention to the `Expiration` field, if you won't specify it, the token will expire within a month. When finished, click **Create**.
 5. A new section with the token now appears in the dialog.
 #### Creating your connection
1. In the Blink platform, navigate to the **Connections** page > **Add connection**. A New Connection dialog box opens displaying icons of external service providers available.
2. Select the **Splunk** icon. A dialog box with name of the connection and connection methods appear.
3. (Optional) Edit the name of the connection. At a later stage you cannot edit the name.
4. Select **API Token** as the method to create the connection.
5. Fill in the parameters:
* The Splunk Domain
* The Deployment API Port
* The API Token
6. (Optional) Click **Test Connection** to test it.
7. Click **Create connection**. The new connection appears on the **Connections** page.
### Using Username and Password
To create the connection you need:
* A Splunk Domain
* A Deployment API Port
* A Splunk Username
* A Splunk Password
### Obtaining the credentials
1. The username and password are the same as those with which you log on to your Splunk deployment.
For authentication, the username should be the portion of the email address
preceding the "@" symbol, rather than the full email address.
#### Creating your connection
1. In the Blink platform, navigate to the **Connections** page > **Add connection**. A New Connection dialog box opens displaying icons of external service providers available.
2. Select the **Splunk** icon. A dialog box with name of the connection and connection methods appear.
3. (Optional) Edit the name of the connection. At a later stage you cannot edit the name.
4. Select **Username & Password** as the method to create the connection.
5. Fill in the parameters:
* The Splunk Domain
* The Deployment API Port
* The Splunk Username
* The Splunk Password
6. (Optional) Click **Test Connection** to test it.
7. Click **Create connection**. The new connection appears on the **Connections** page.
### Using HTTP Event Token
To create the connection you need:
* A Splunk Domain
* An Event Collector API Port
* An HTTP Event Collector Token
### Obtaining the HTTP Event Collector Token
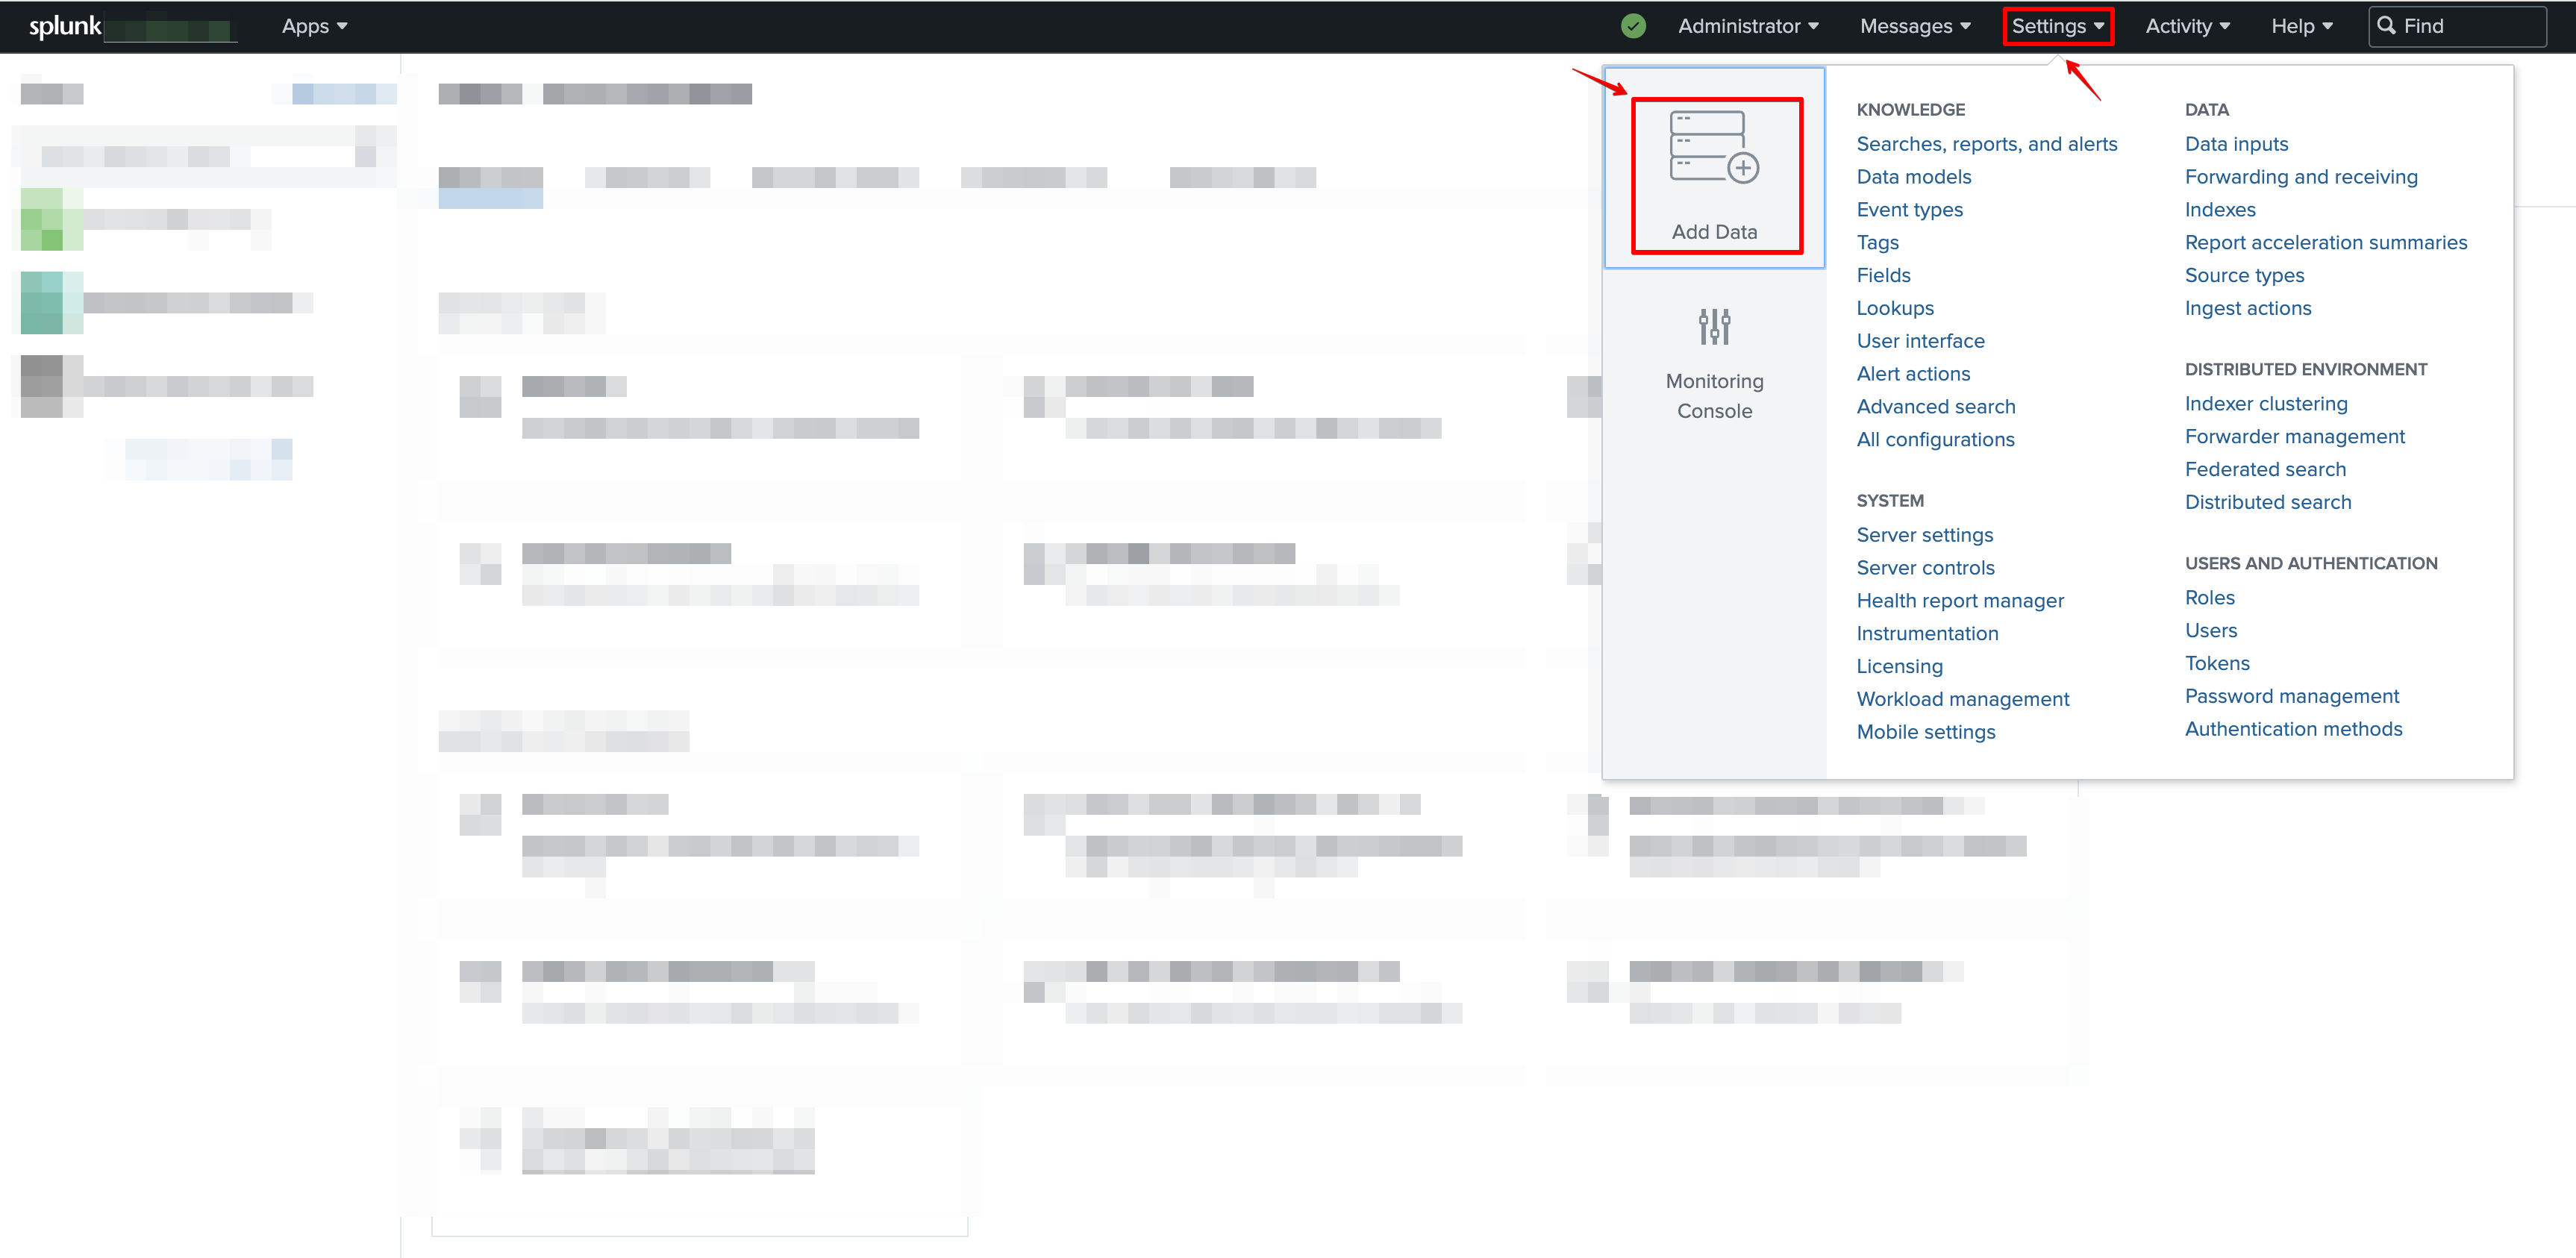
1. In the system bar, click **Settings** > **Add Data**.
#### Creating your connection
1. In the Blink platform, navigate to the **Connections** page > **Add connection**. A New Connection dialog box opens displaying icons of external service providers available.
2. Select the **Splunk** icon. A dialog box with name of the connection and connection methods appear.
3. (Optional) Edit the name of the connection. At a later stage you cannot edit the name.
4. Select **API Token** as the method to create the connection.
5. Fill in the parameters:
* The Splunk Domain
* The Deployment API Port
* The API Token
6. (Optional) Click **Test Connection** to test it.
7. Click **Create connection**. The new connection appears on the **Connections** page.
### Using Username and Password
To create the connection you need:
* A Splunk Domain
* A Deployment API Port
* A Splunk Username
* A Splunk Password
### Obtaining the credentials
1. The username and password are the same as those with which you log on to your Splunk deployment.
For authentication, the username should be the portion of the email address
preceding the "@" symbol, rather than the full email address.
#### Creating your connection
1. In the Blink platform, navigate to the **Connections** page > **Add connection**. A New Connection dialog box opens displaying icons of external service providers available.
2. Select the **Splunk** icon. A dialog box with name of the connection and connection methods appear.
3. (Optional) Edit the name of the connection. At a later stage you cannot edit the name.
4. Select **Username & Password** as the method to create the connection.
5. Fill in the parameters:
* The Splunk Domain
* The Deployment API Port
* The Splunk Username
* The Splunk Password
6. (Optional) Click **Test Connection** to test it.
7. Click **Create connection**. The new connection appears on the **Connections** page.
### Using HTTP Event Token
To create the connection you need:
* A Splunk Domain
* An Event Collector API Port
* An HTTP Event Collector Token
### Obtaining the HTTP Event Collector Token
1. In the system bar, click **Settings** > **Add Data**.
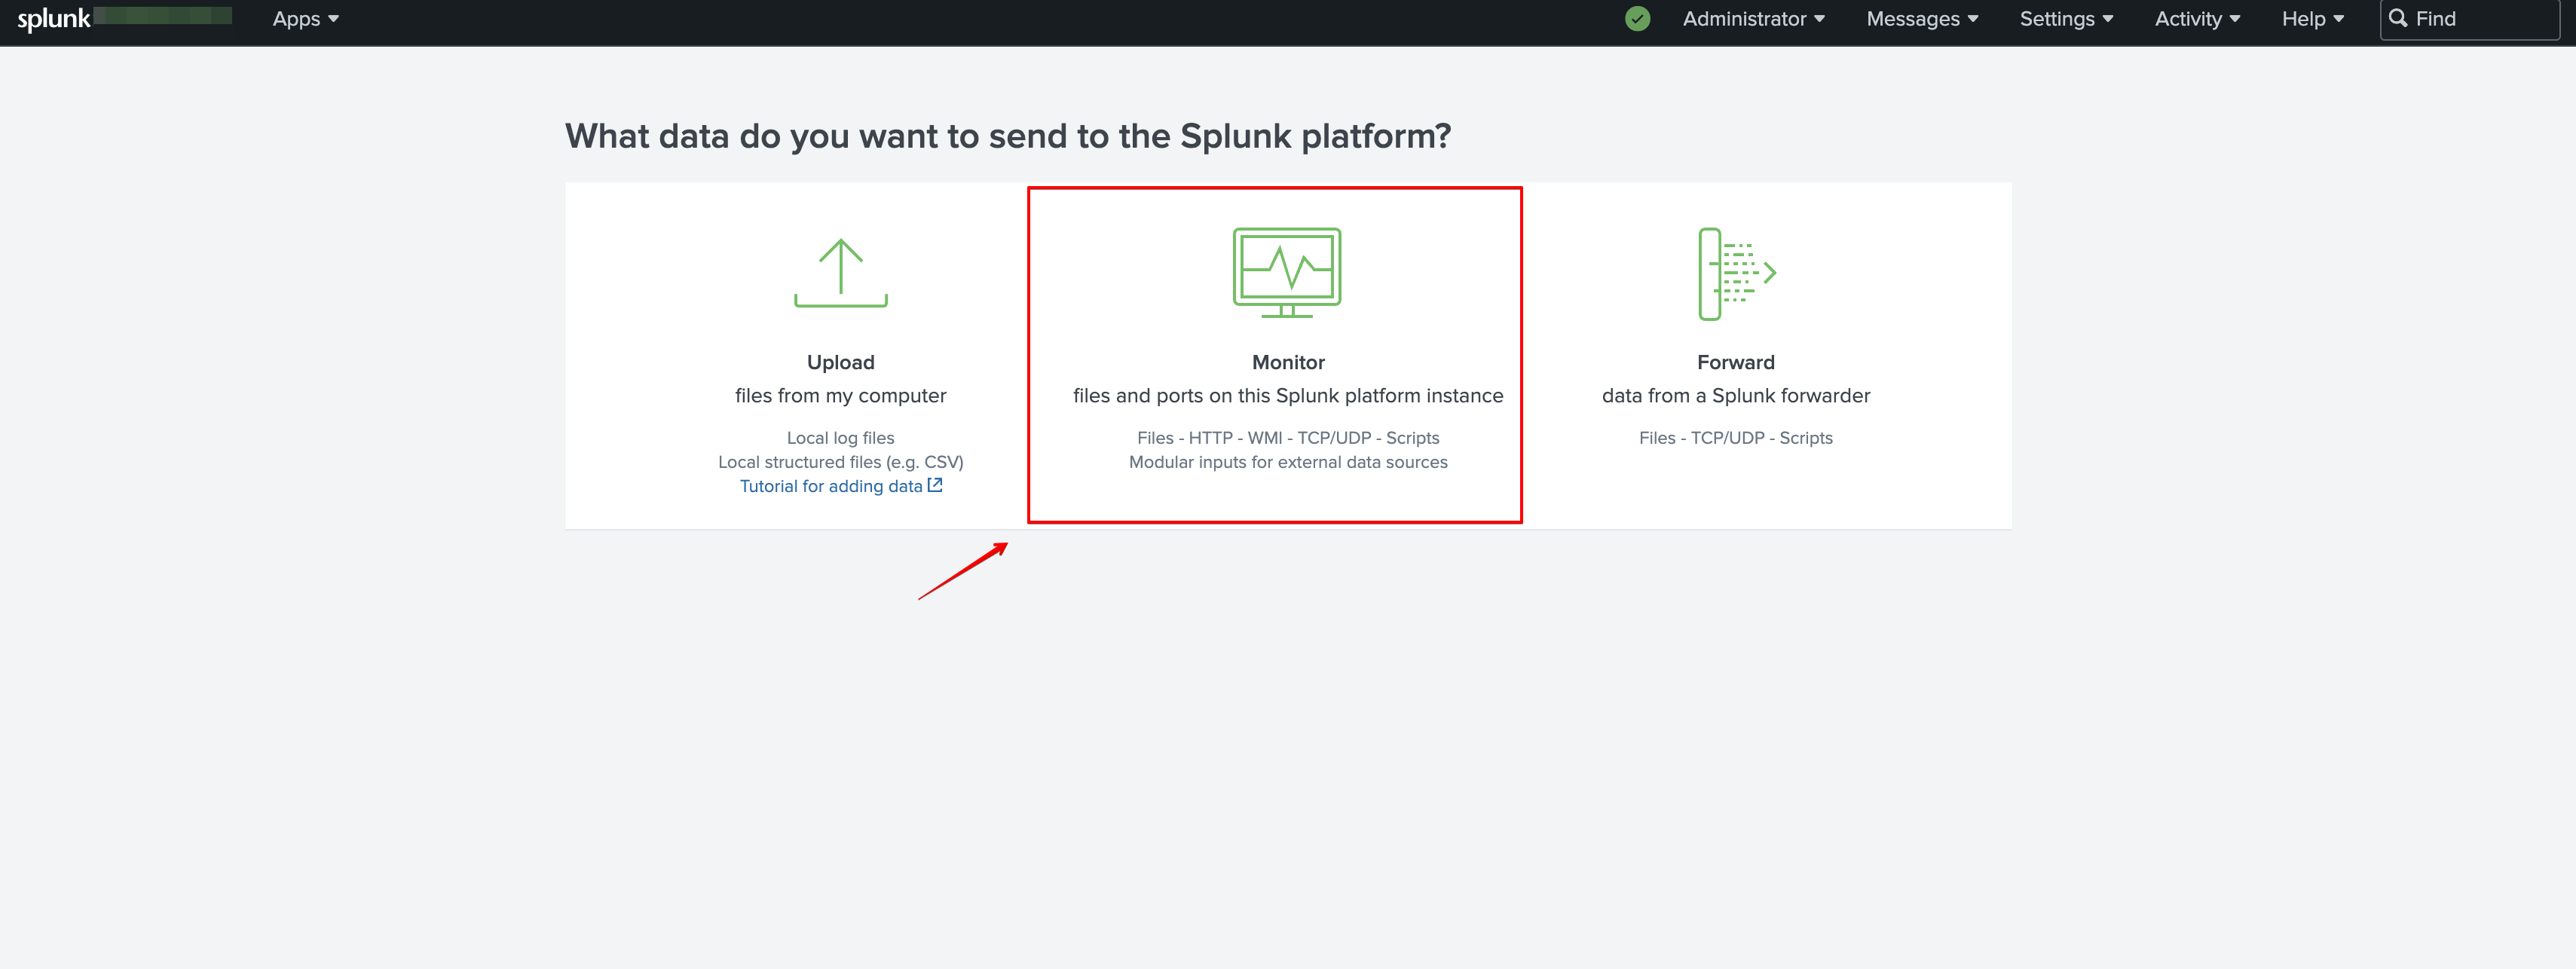
 2. Click **Monitor**.
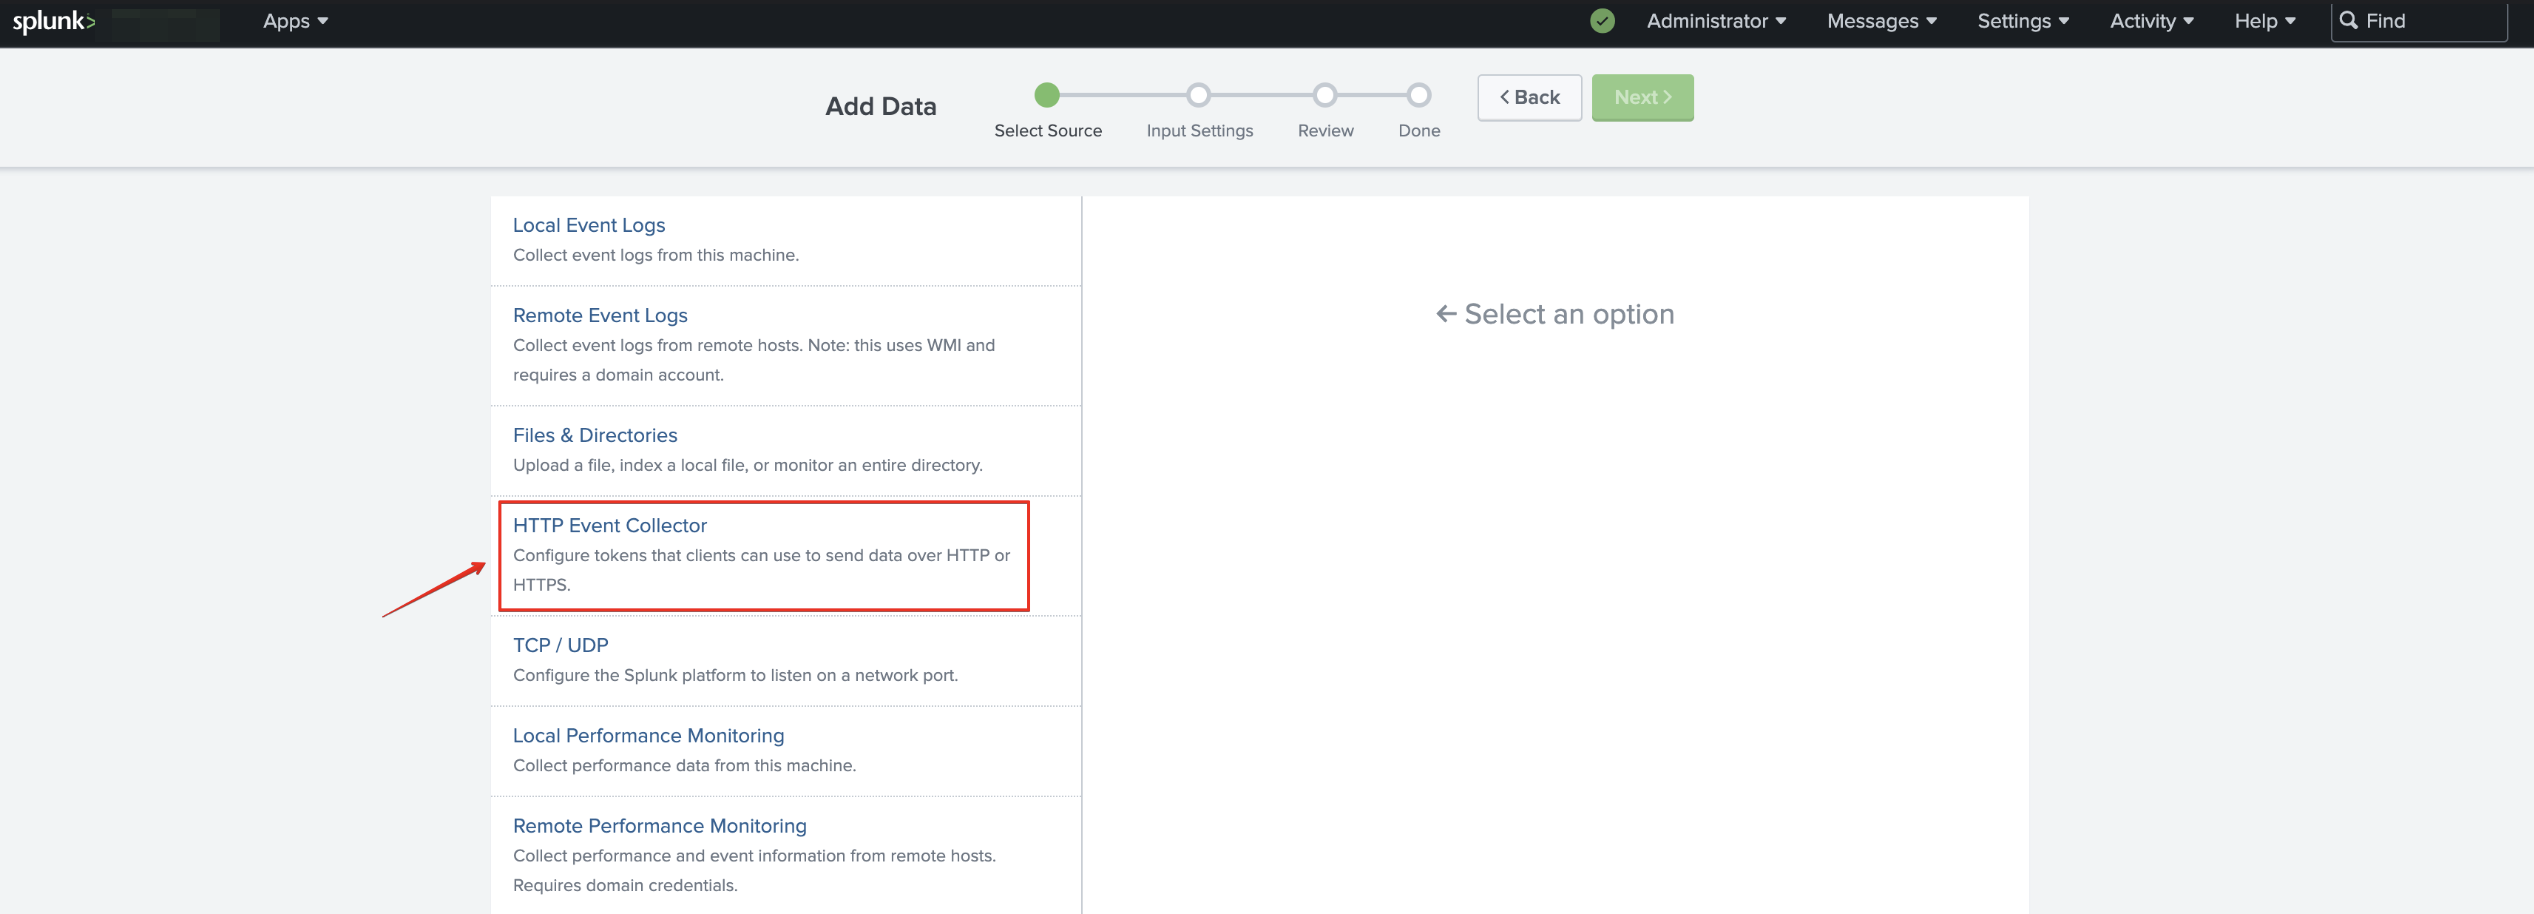
 3. Click **HTTP Event Collector**.
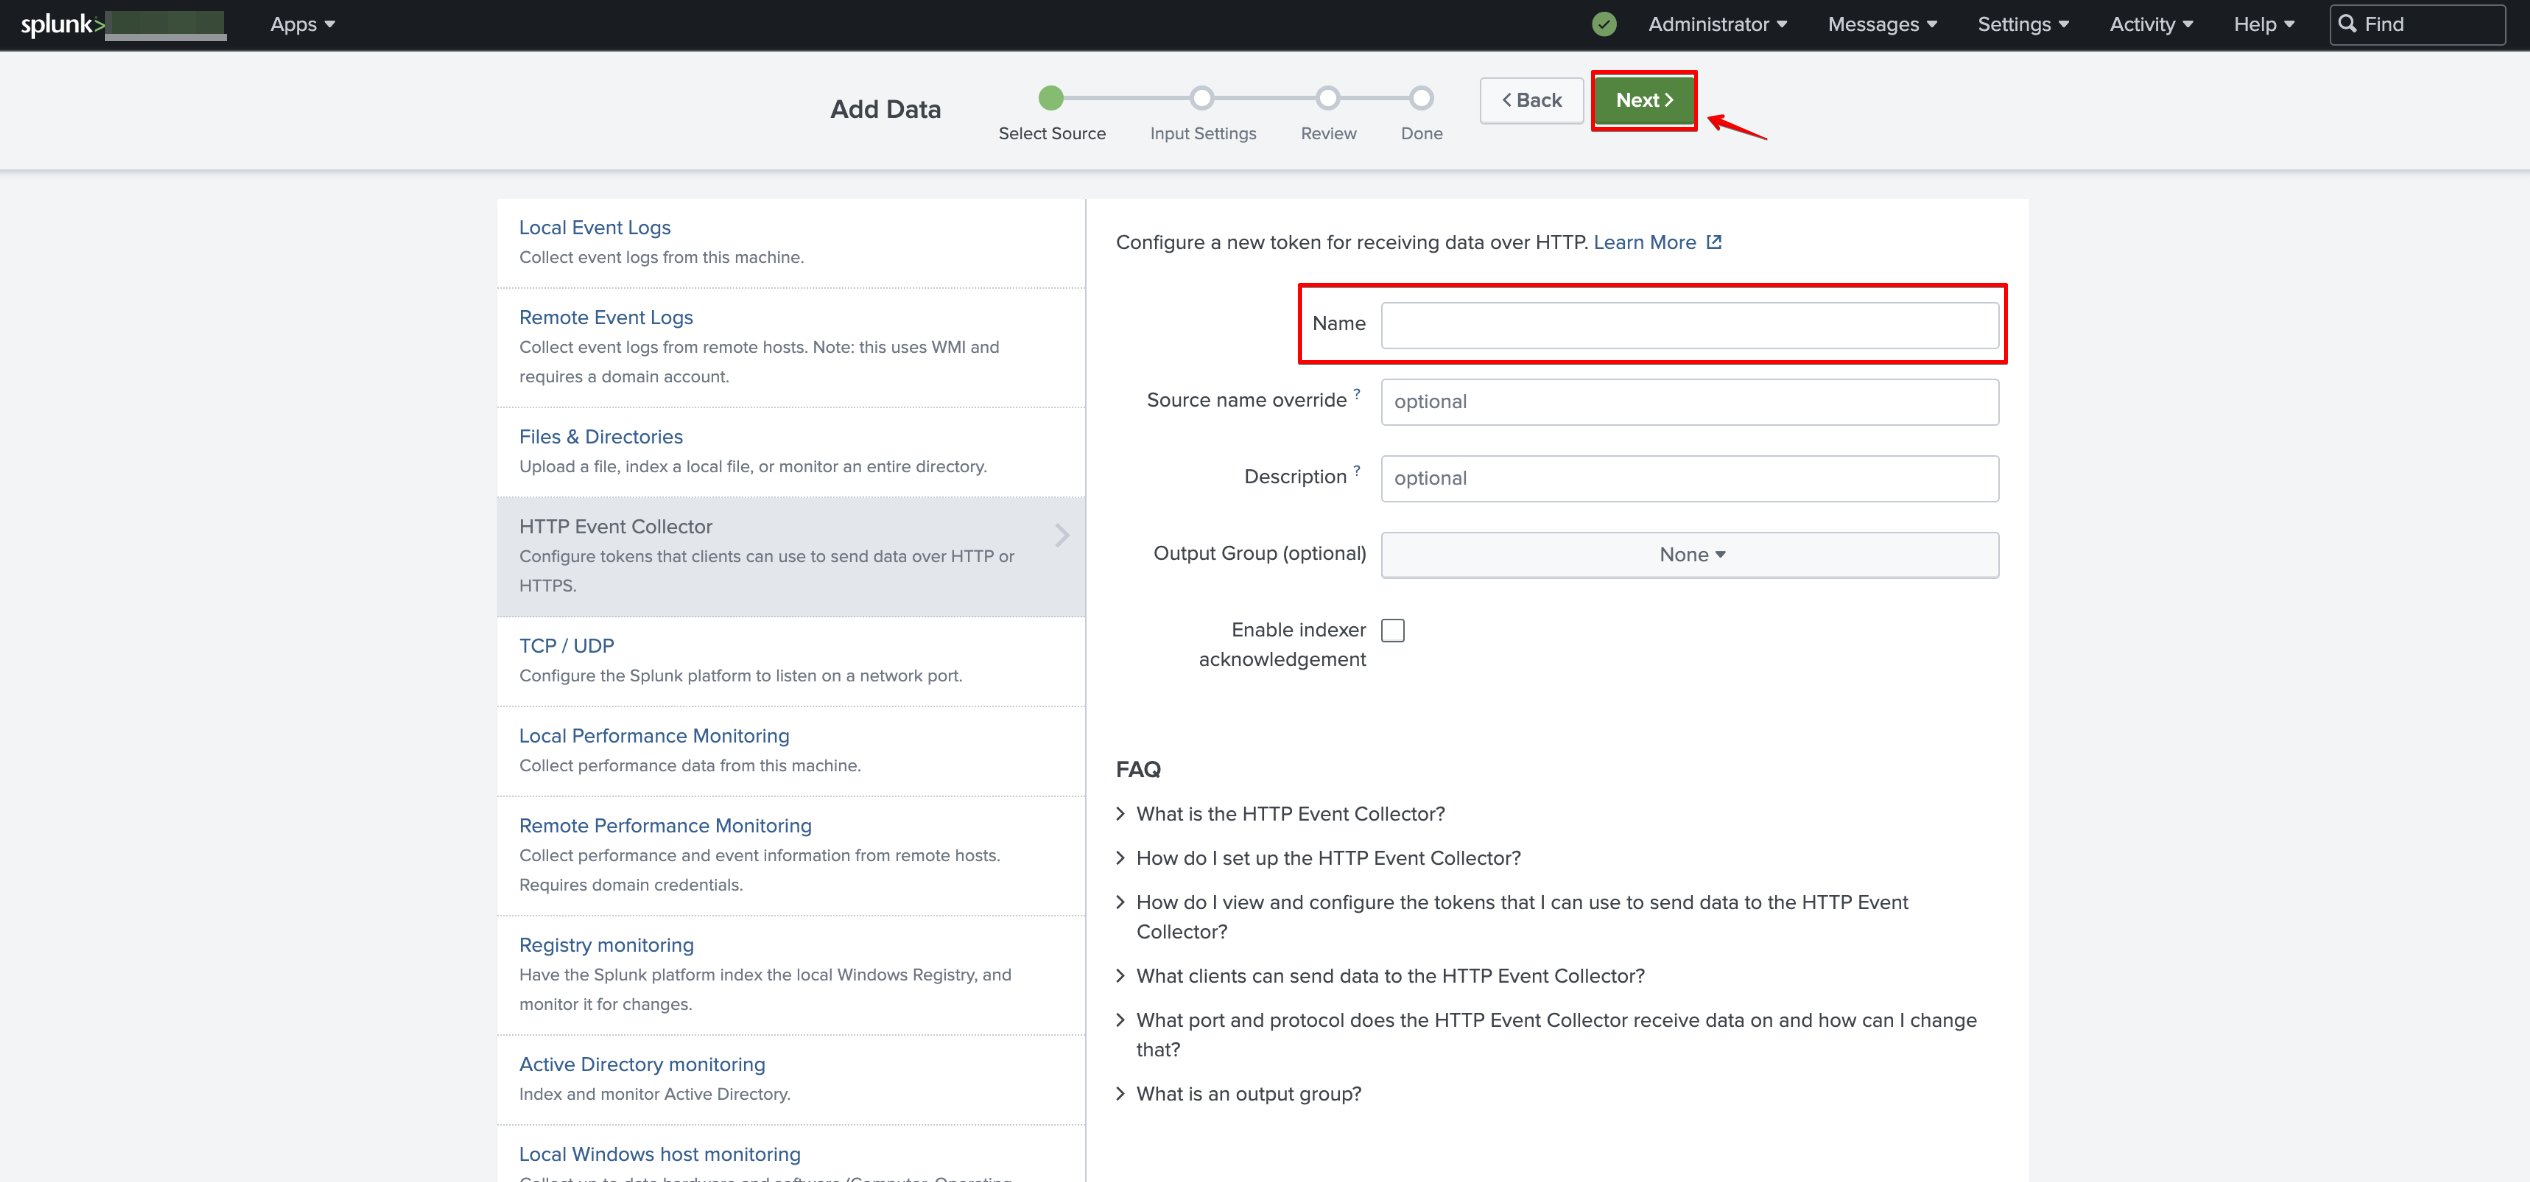
 4. In the **Name** field, enter a name for the token (The remaining attributes are optional) > click **Next**.
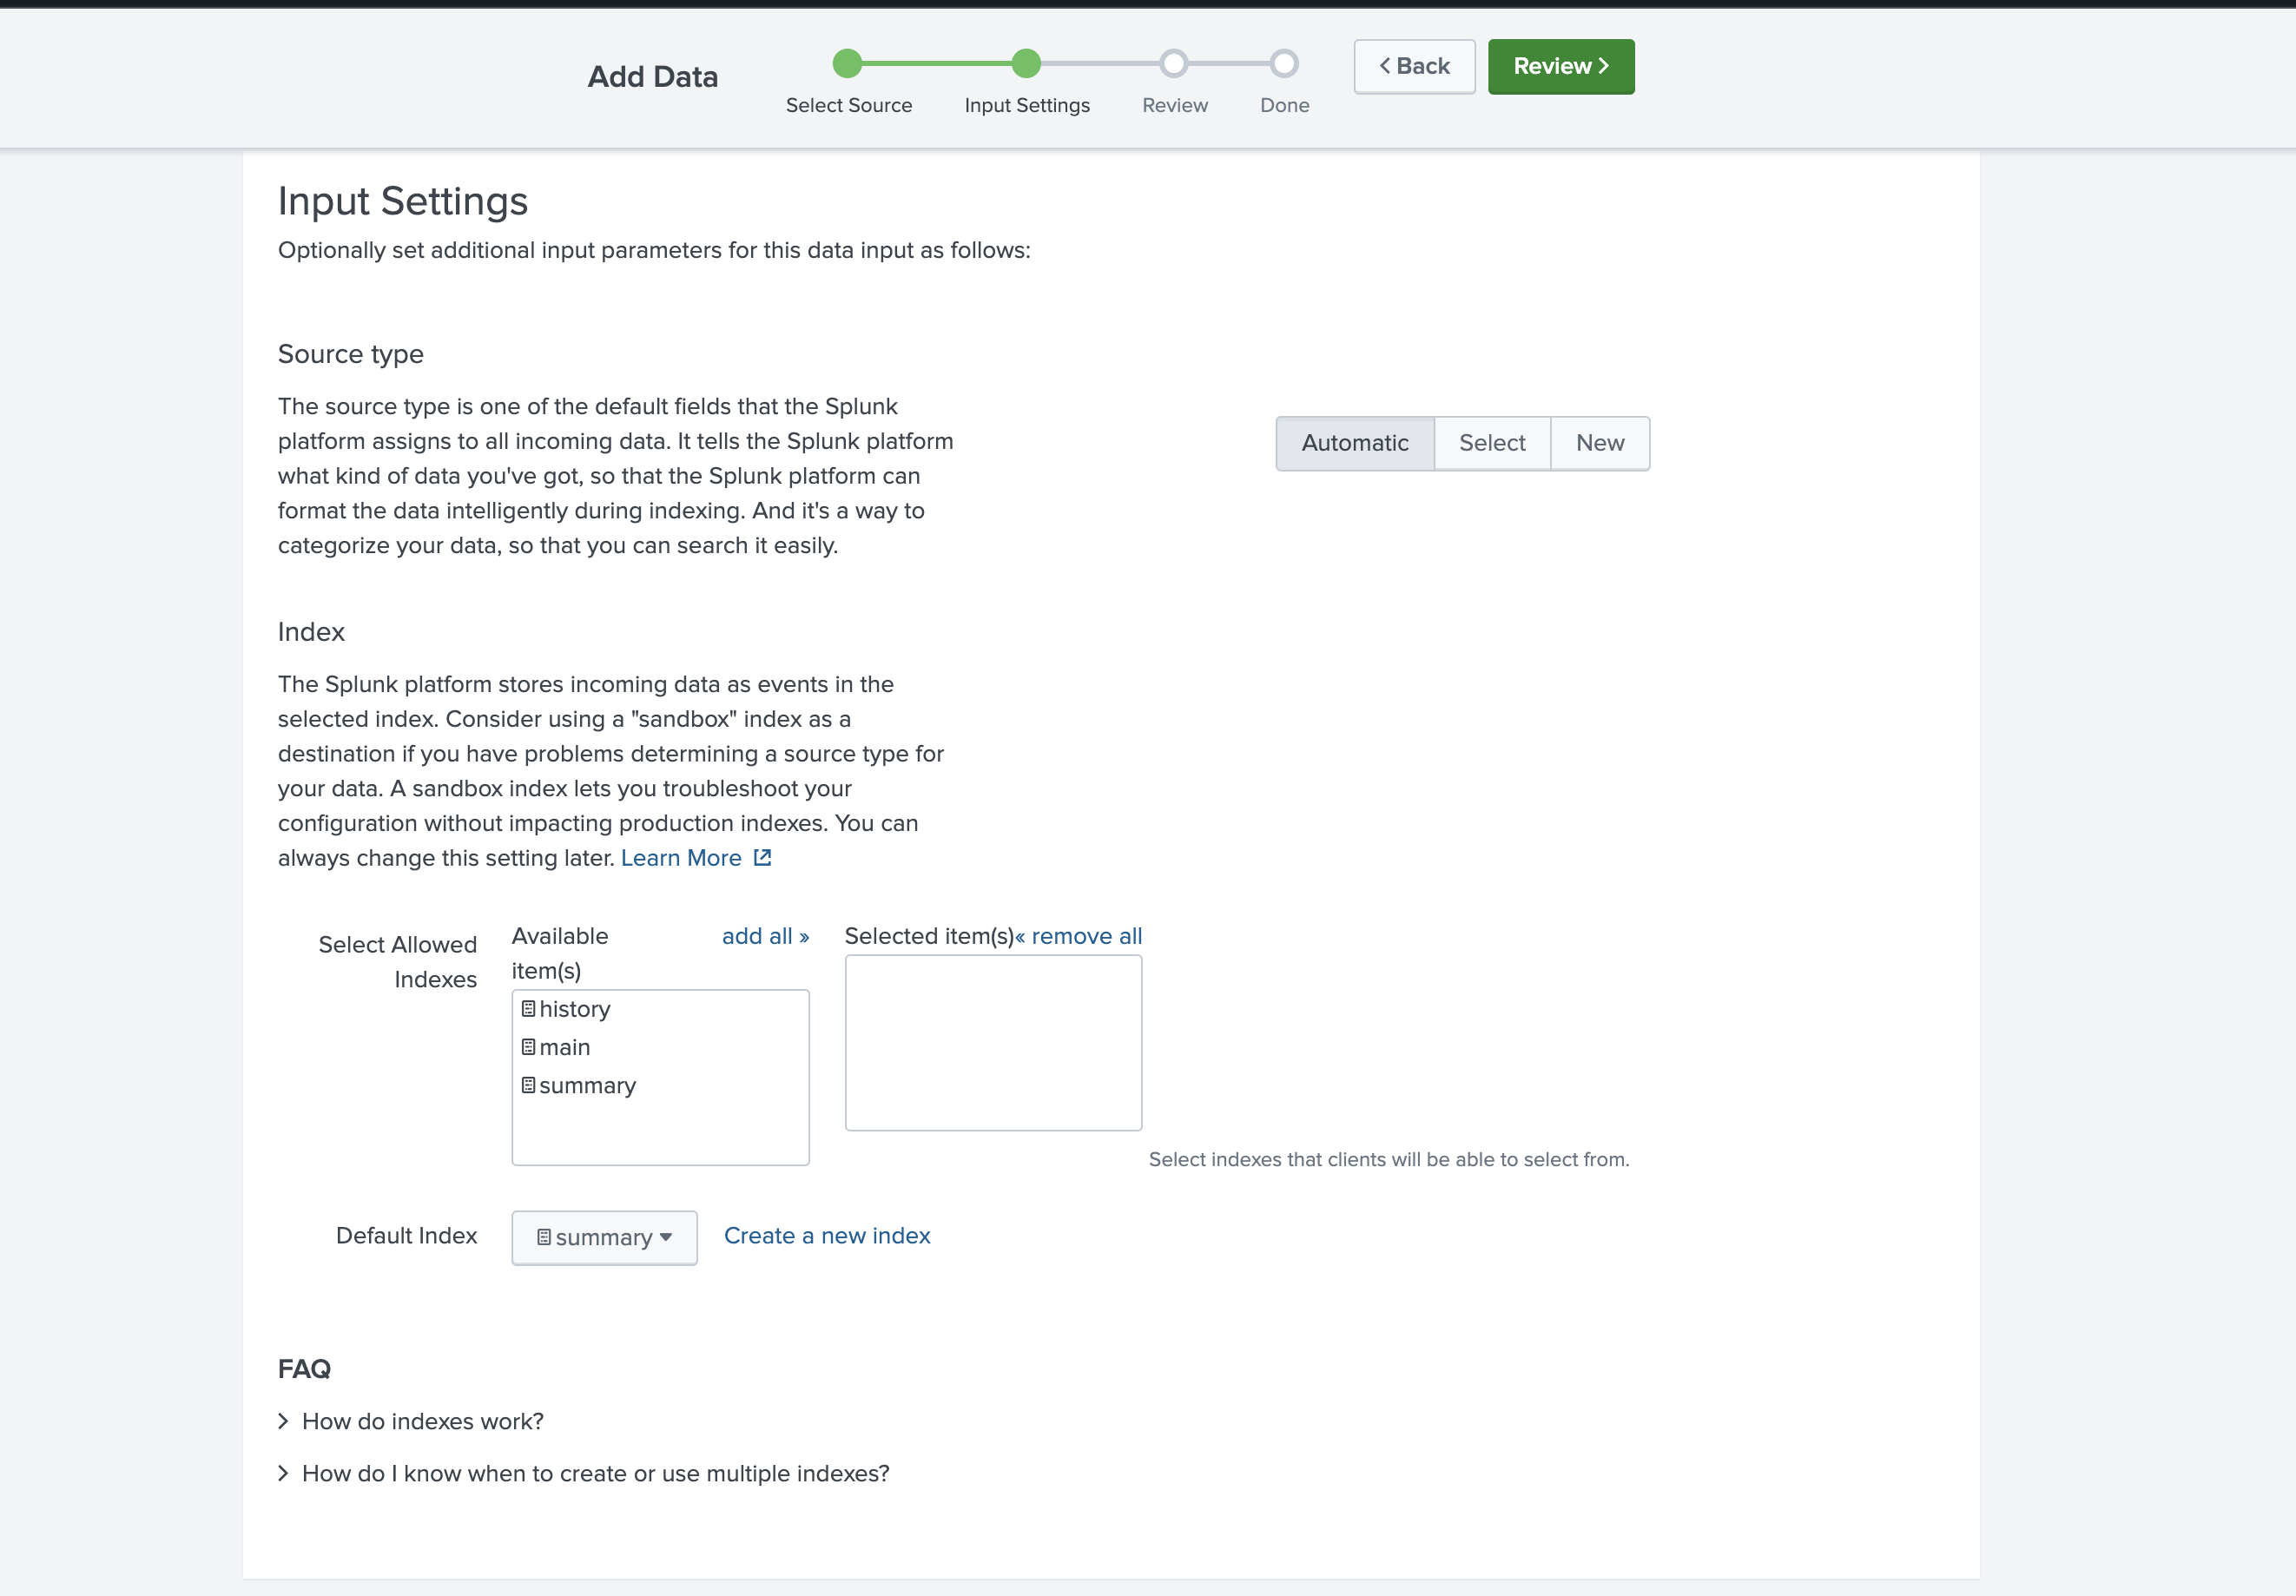
 5. \[Optional] Make edits to source type and confirm the index where you want HEC events to be stored. For more information, please refer to the [Splunk documentation](https://docs.splunk.com/Documentation/SplunkCloud/9.0.2209/Data/Modifyinputsettings). Click **Review**.
 6. Confirm your settings selections > click **Submit**.
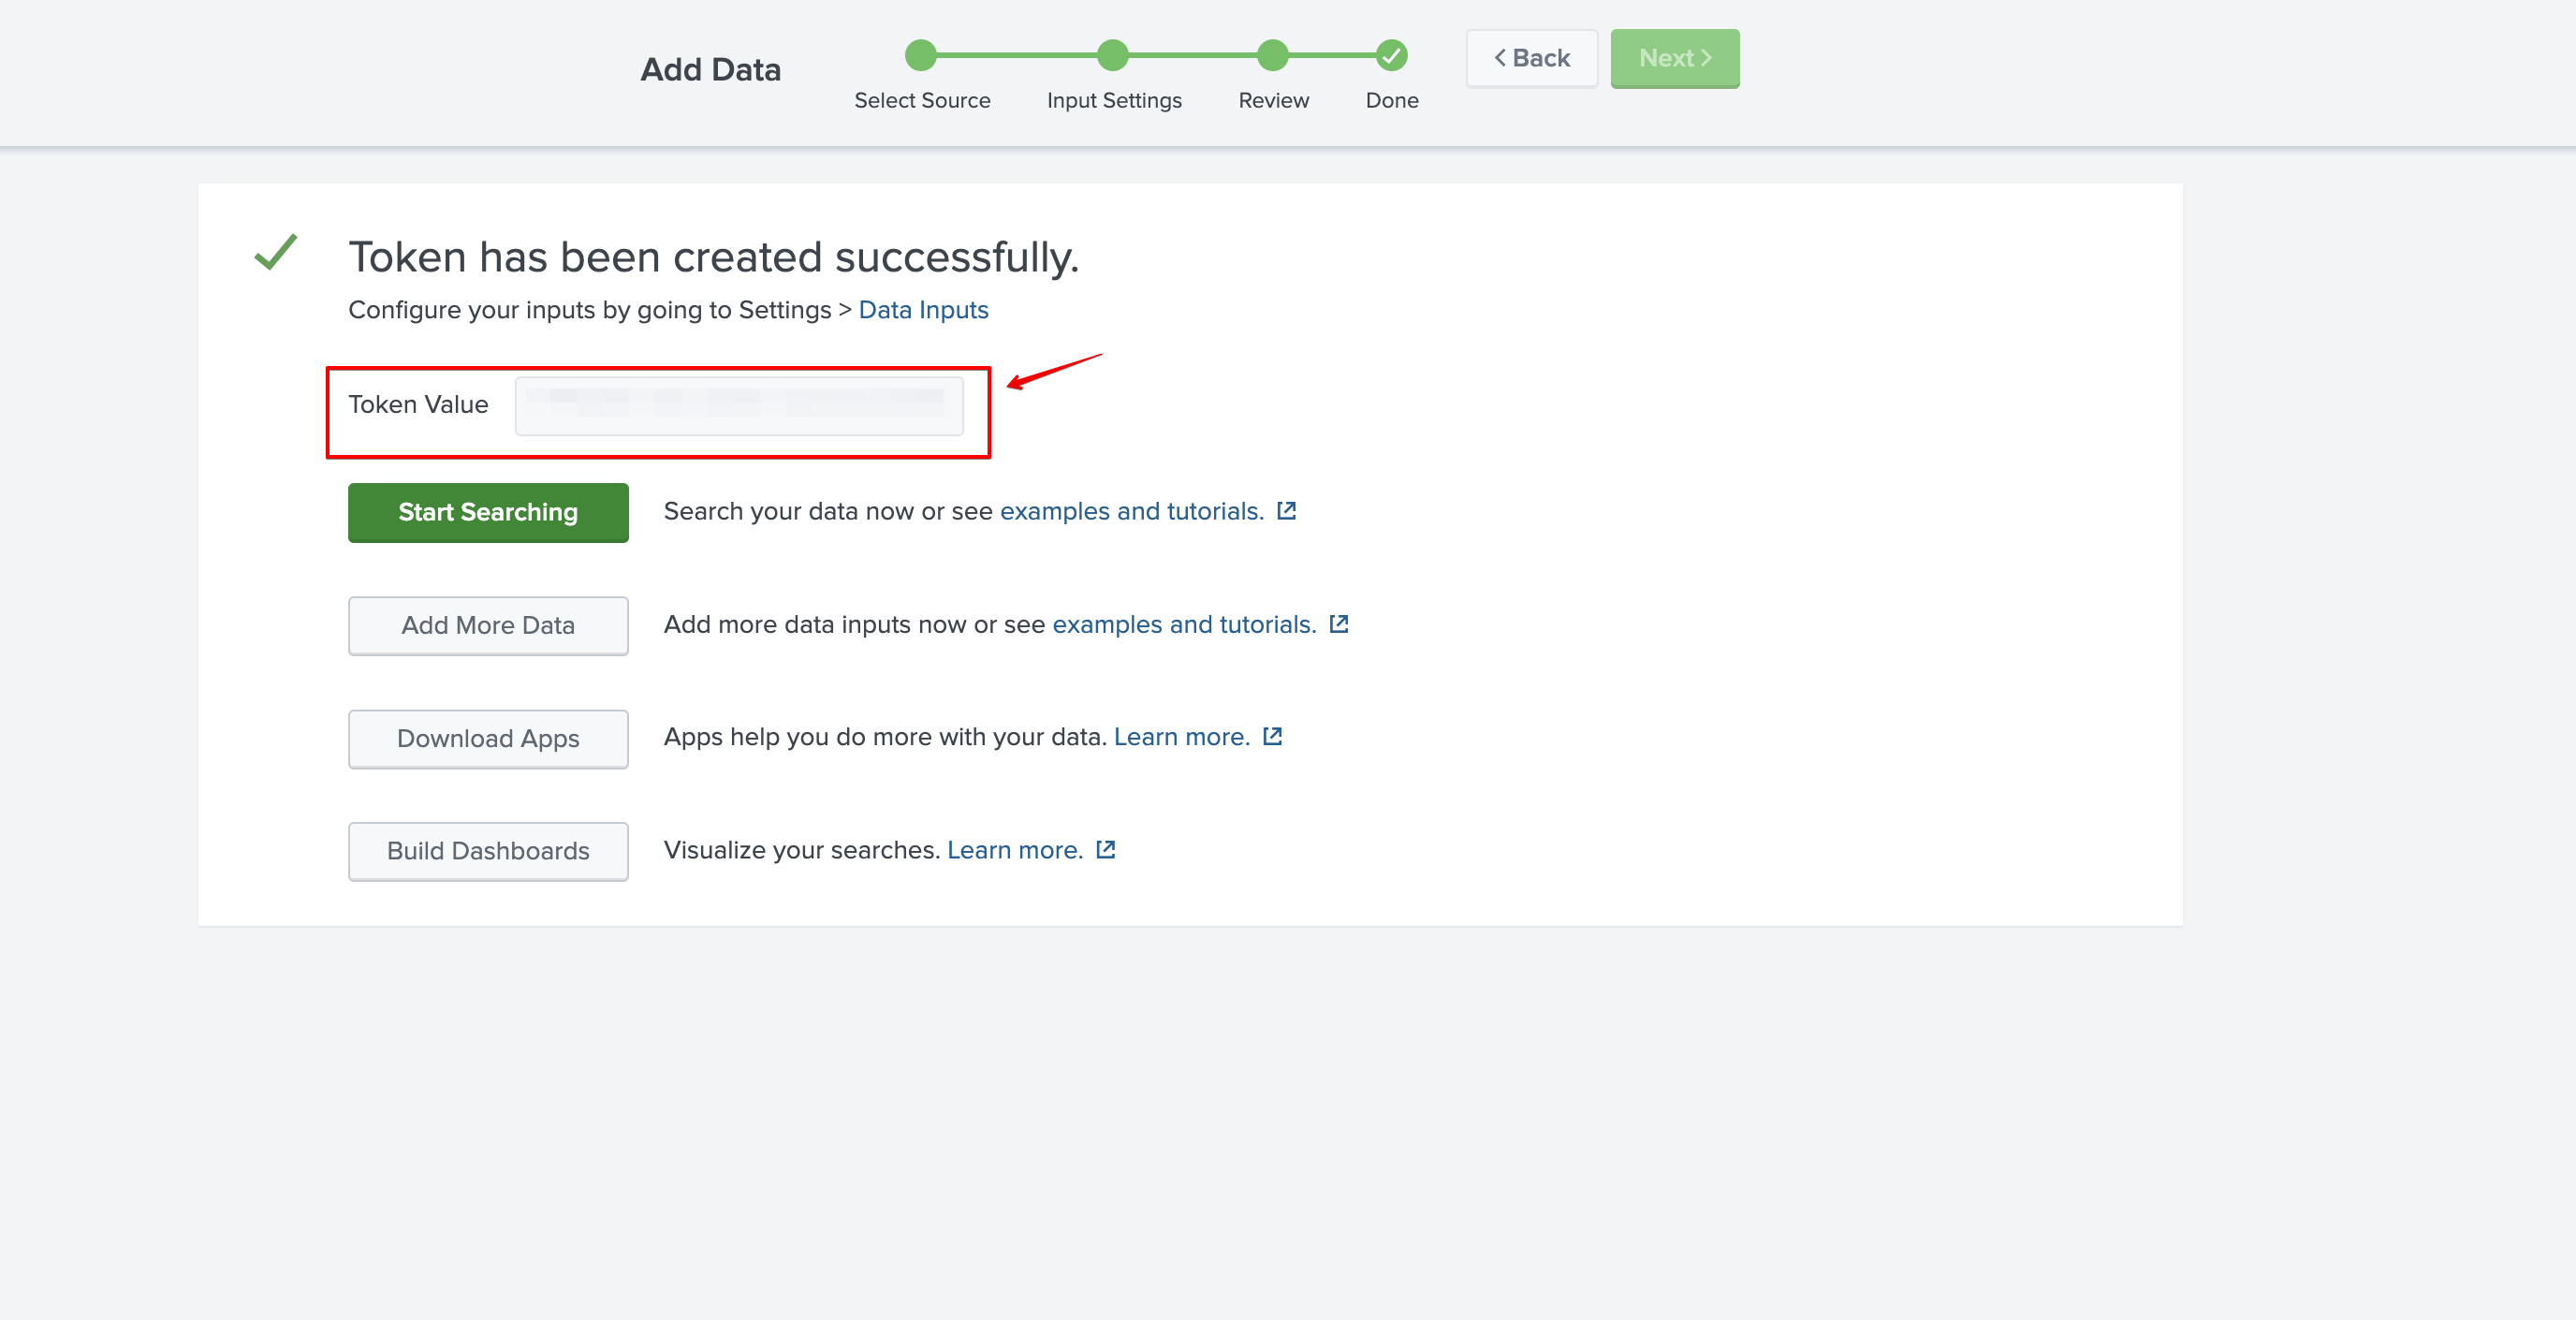
 7. An **HTTP Event Collector Token** has been created.
 ### Enable the HTTP Event Collector Token
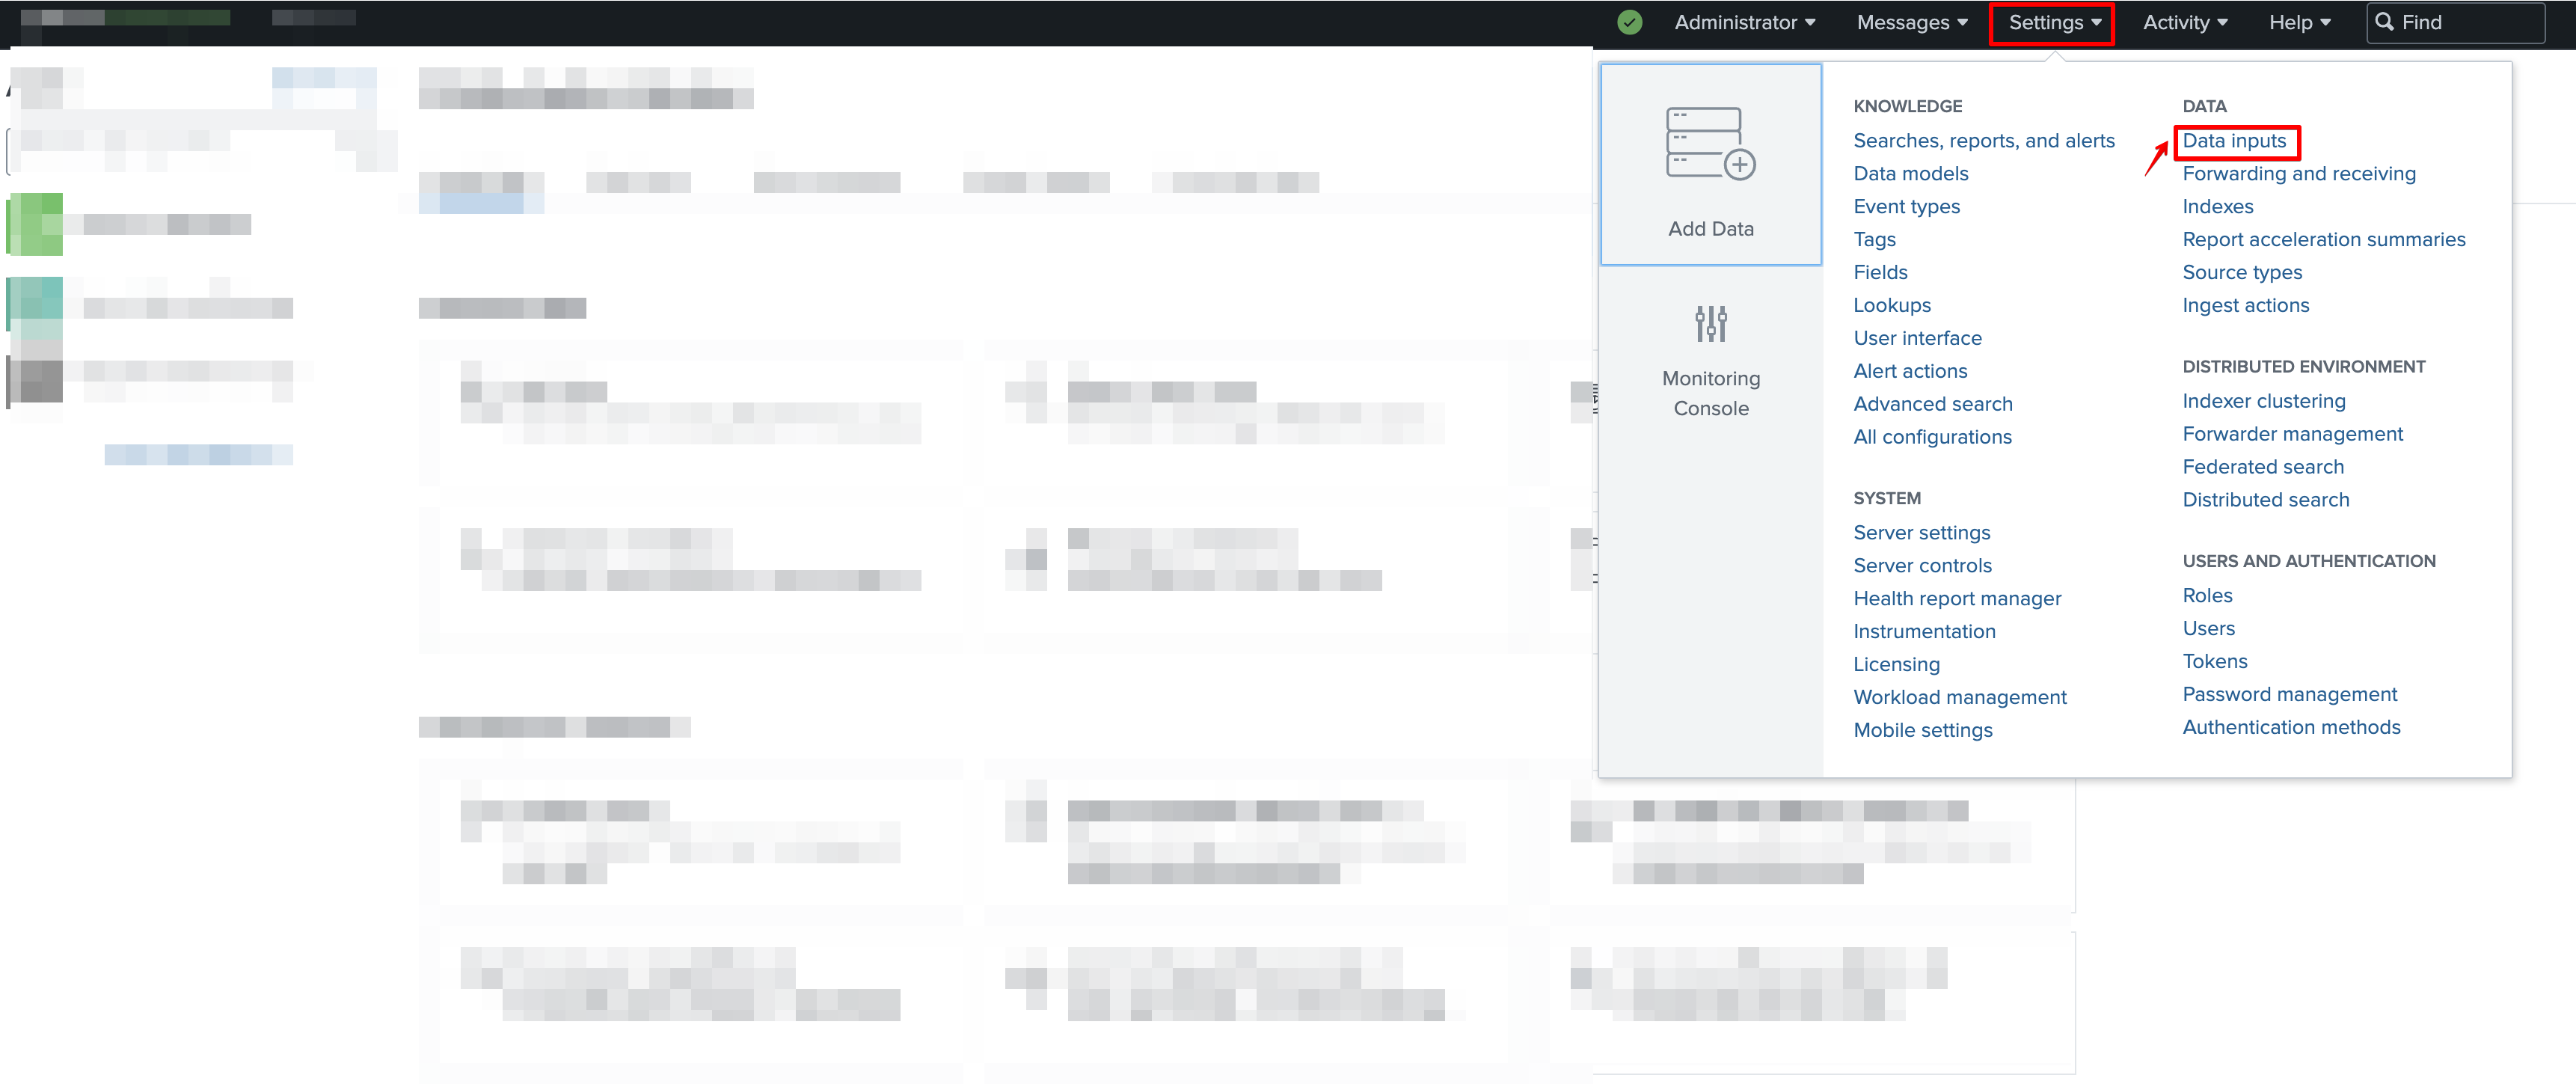
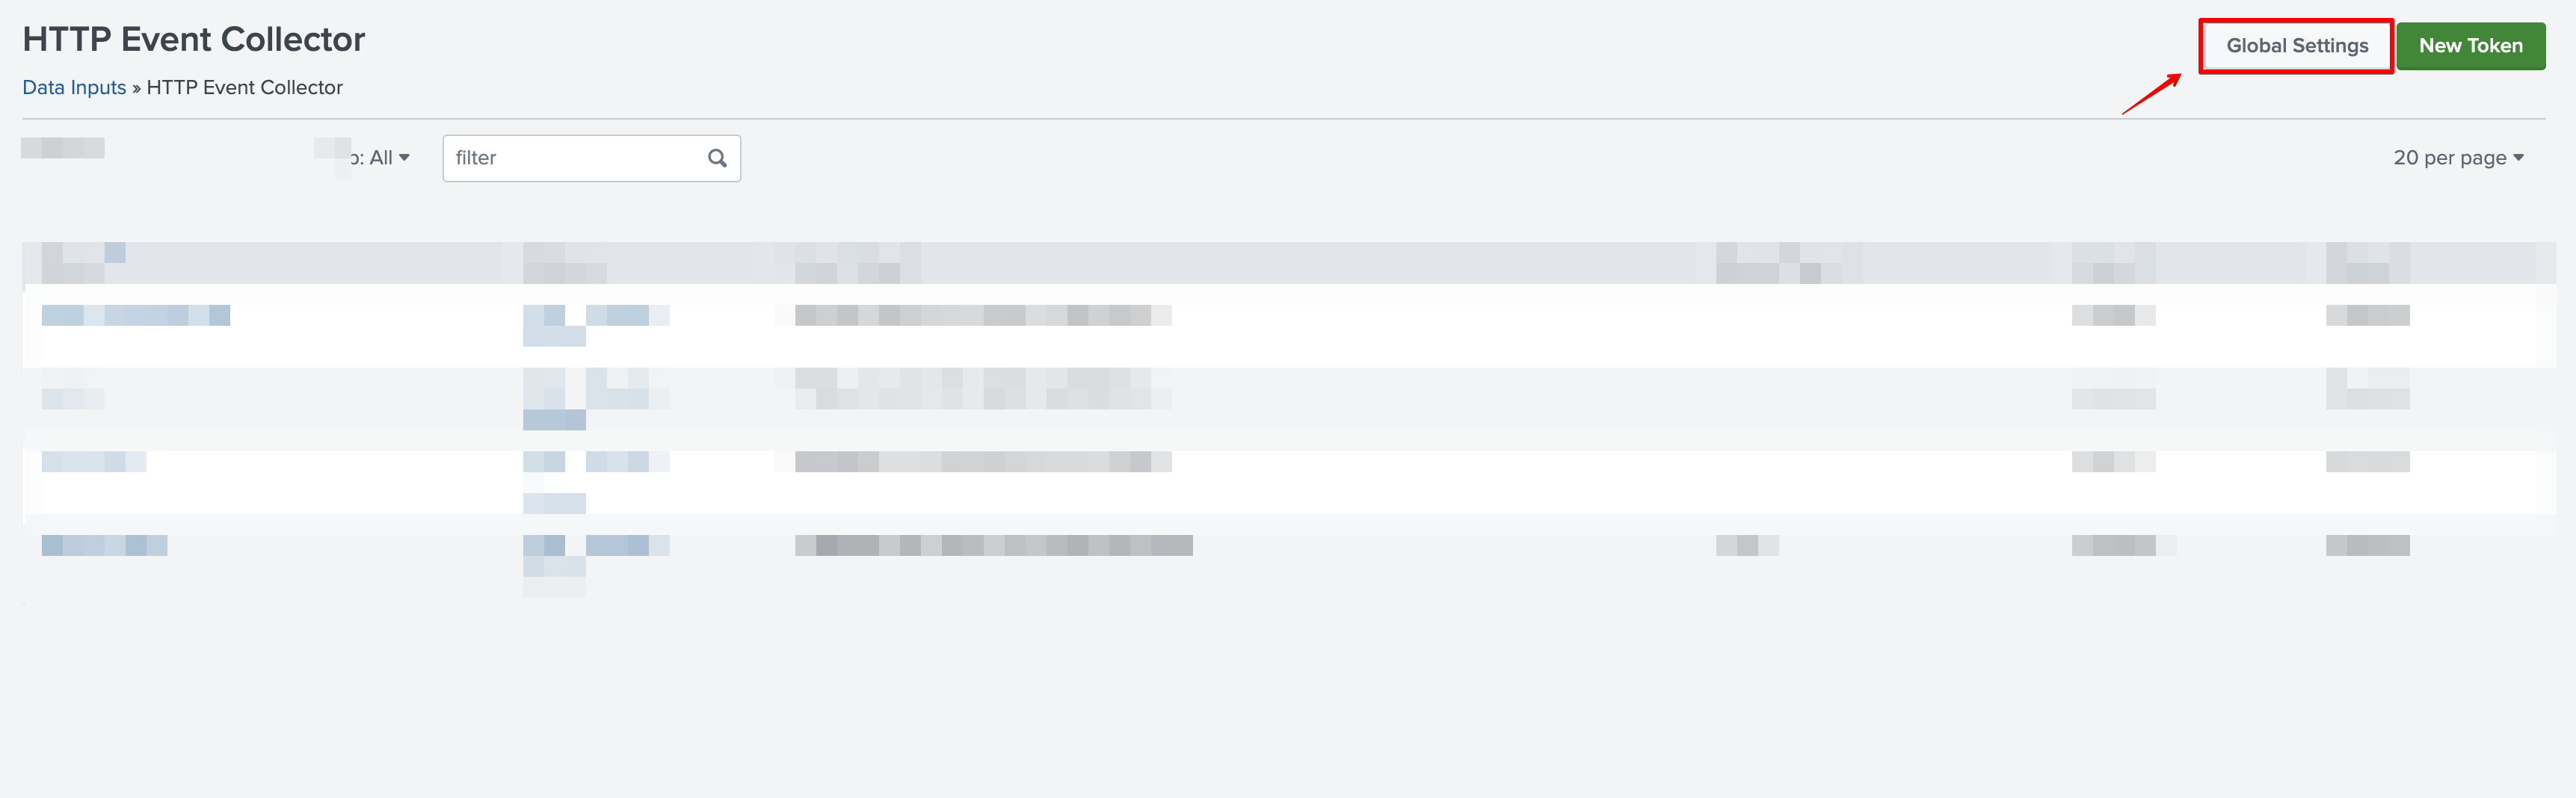
1. Click **Settings** > **Data Inputs**.
### Enable the HTTP Event Collector Token
1. Click **Settings** > **Data Inputs**.
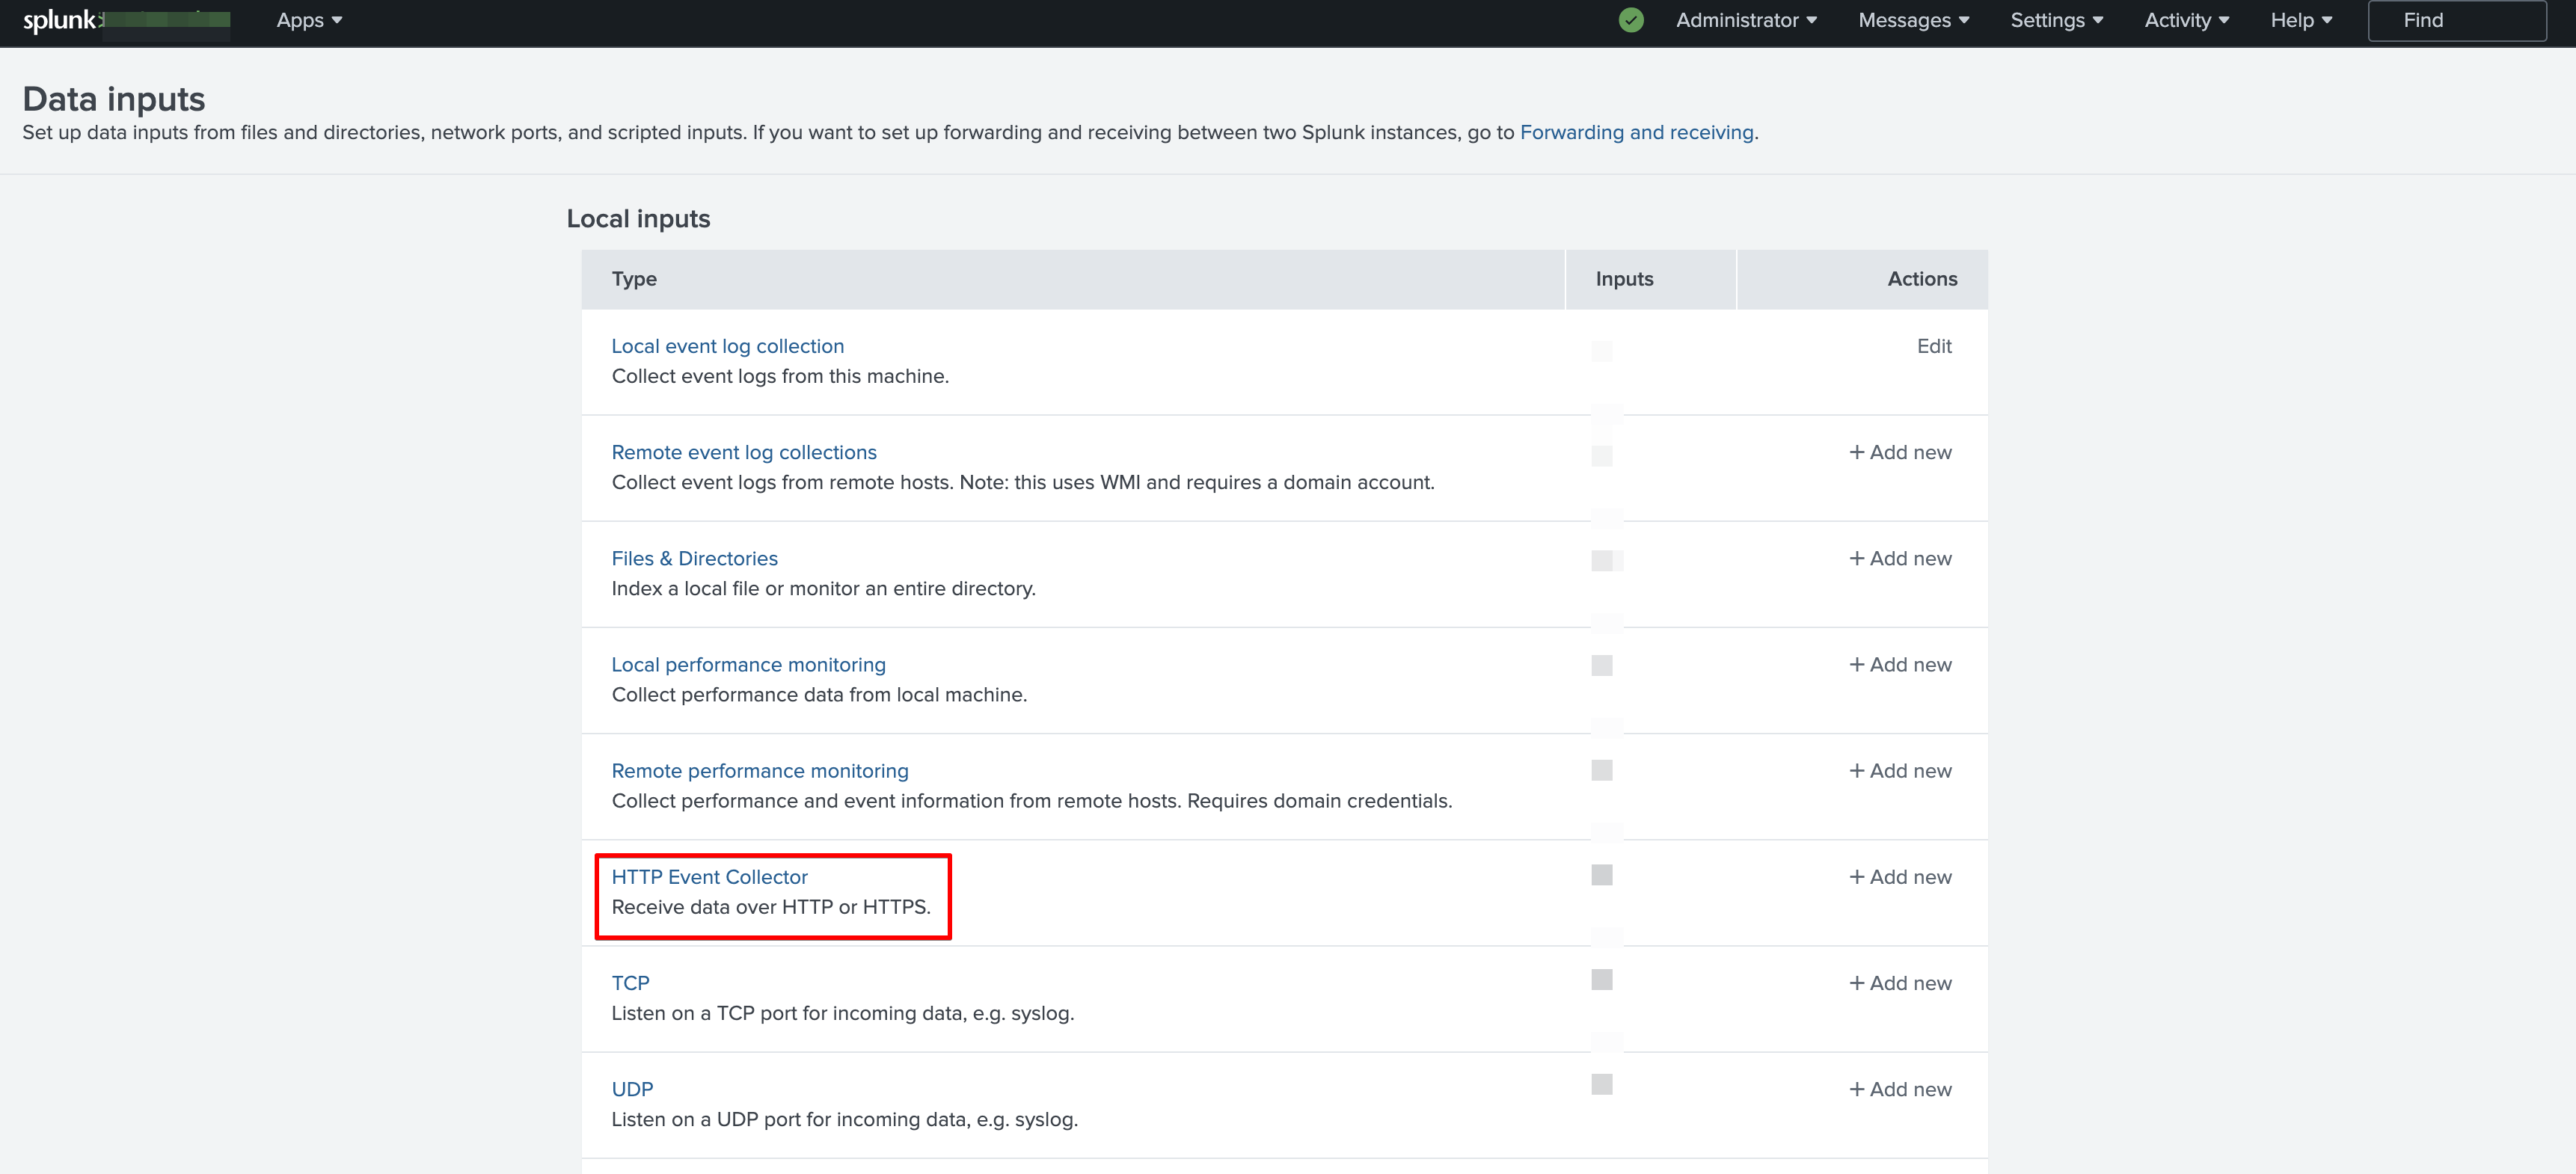
 2. Click **HTTP Event Collector**.
 3. For Splunk Cloud: In the Actions column for that token, click the Enable link. The token status toggles immediately and the link changes to Enable.
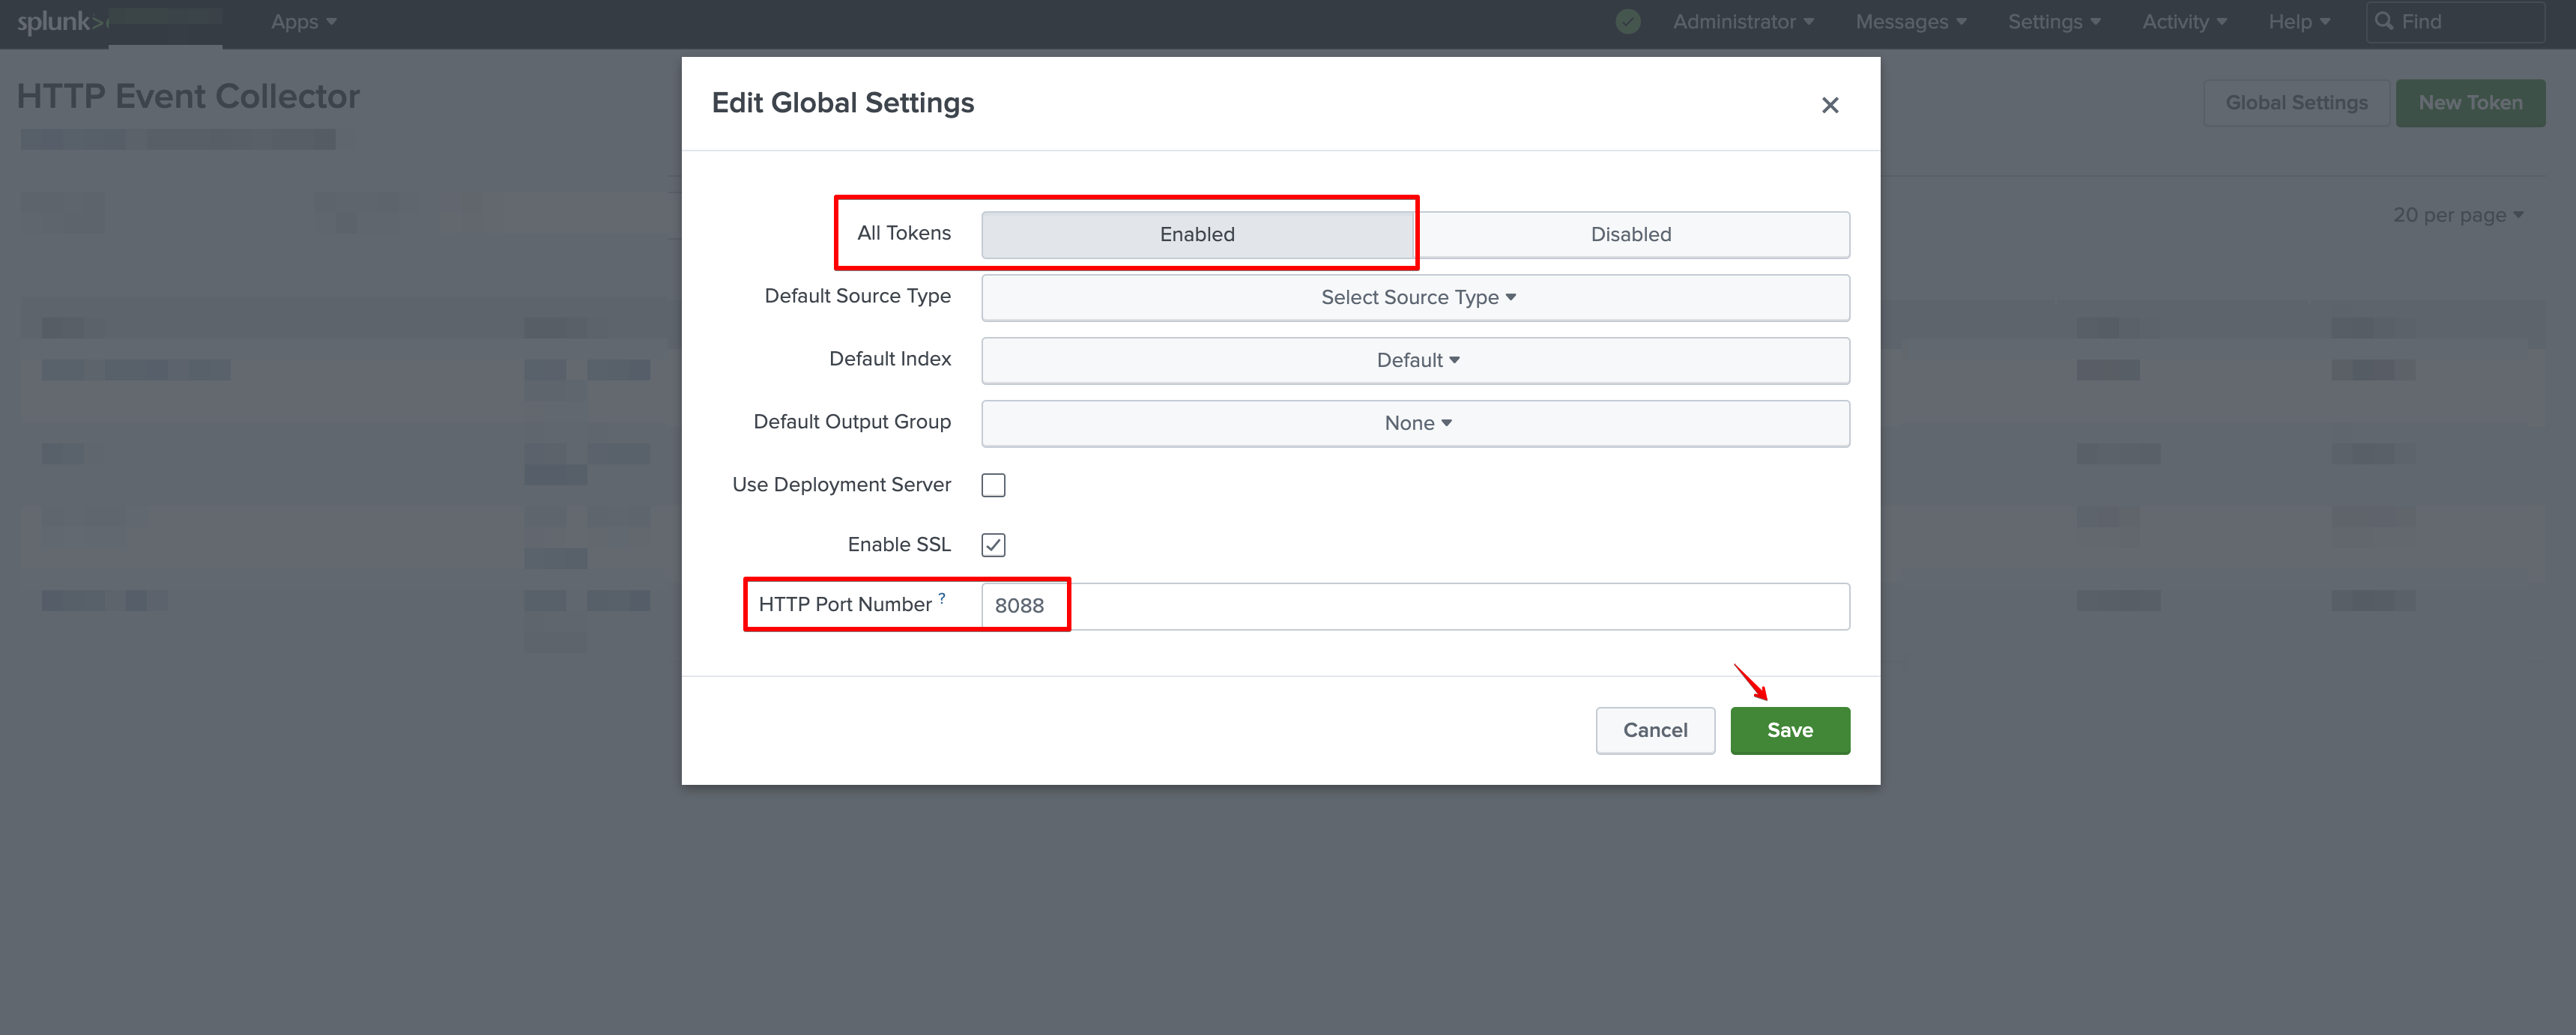
4. For Splunk Enterprise:
a. Click **Global Settings**.
3. For Splunk Cloud: In the Actions column for that token, click the Enable link. The token status toggles immediately and the link changes to Enable.
4. For Splunk Enterprise:
a. Click **Global Settings**.
 b. Toggle the switch to **Enabled** and adjust the **HTTP Port Number** (default is 8088) > click **Save**.
 #### Creating your connection
1. In the Blink platform, navigate to the **Connections** page > **Add connection**. A New Connection dialog box opens displaying icons of external service providers available.
2. Select the **Splunk** icon. A dialog box with name of the connection and connection methods appear.
3. (Optional) Edit the name of the connection. At a later stage you cannot edit the name.
4. Select **HTTP Event Token** as the method to create the connection.
5. Fill in the parameters:
* The Splunk Domain
* The Event Collector API Port
* The HTTP Event Collector Token
6. (Optional) Click **Test Connection** to test it.
7. Click **Create connection**. The new connection appears on the **Connections** page.
#### Creating your connection
1. In the Blink platform, navigate to the **Connections** page > **Add connection**. A New Connection dialog box opens displaying icons of external service providers available.
2. Select the **Splunk** icon. A dialog box with name of the connection and connection methods appear.
3. (Optional) Edit the name of the connection. At a later stage you cannot edit the name.
4. Select **HTTP Event Token** as the method to create the connection.
5. Fill in the parameters:
* The Splunk Domain
* The Event Collector API Port
* The HTTP Event Collector Token
6. (Optional) Click **Test Connection** to test it.
7. Click **Create connection**. The new connection appears on the **Connections** page.