> ## Documentation Index
> Fetch the complete documentation index at: https://docs.blinkops.com/llms.txt
> Use this file to discover all available pages before exploring further.
# Microsoft Office 365 Management Activity
> Microsoft Office 365 Management Activity provides a comprehensive logging and auditing service for various Office 365 workloads, enabling organizations to monitor user activities, detect security threats, and comply with regulatory requirements.
## Creating a Microsoft Office 365 Management Activity connection
## Using App Registration
To create the connection you need:
* An API Address
* A Client ID
* A Client Secret
* A Tenant ID
### Obtaining the credentials
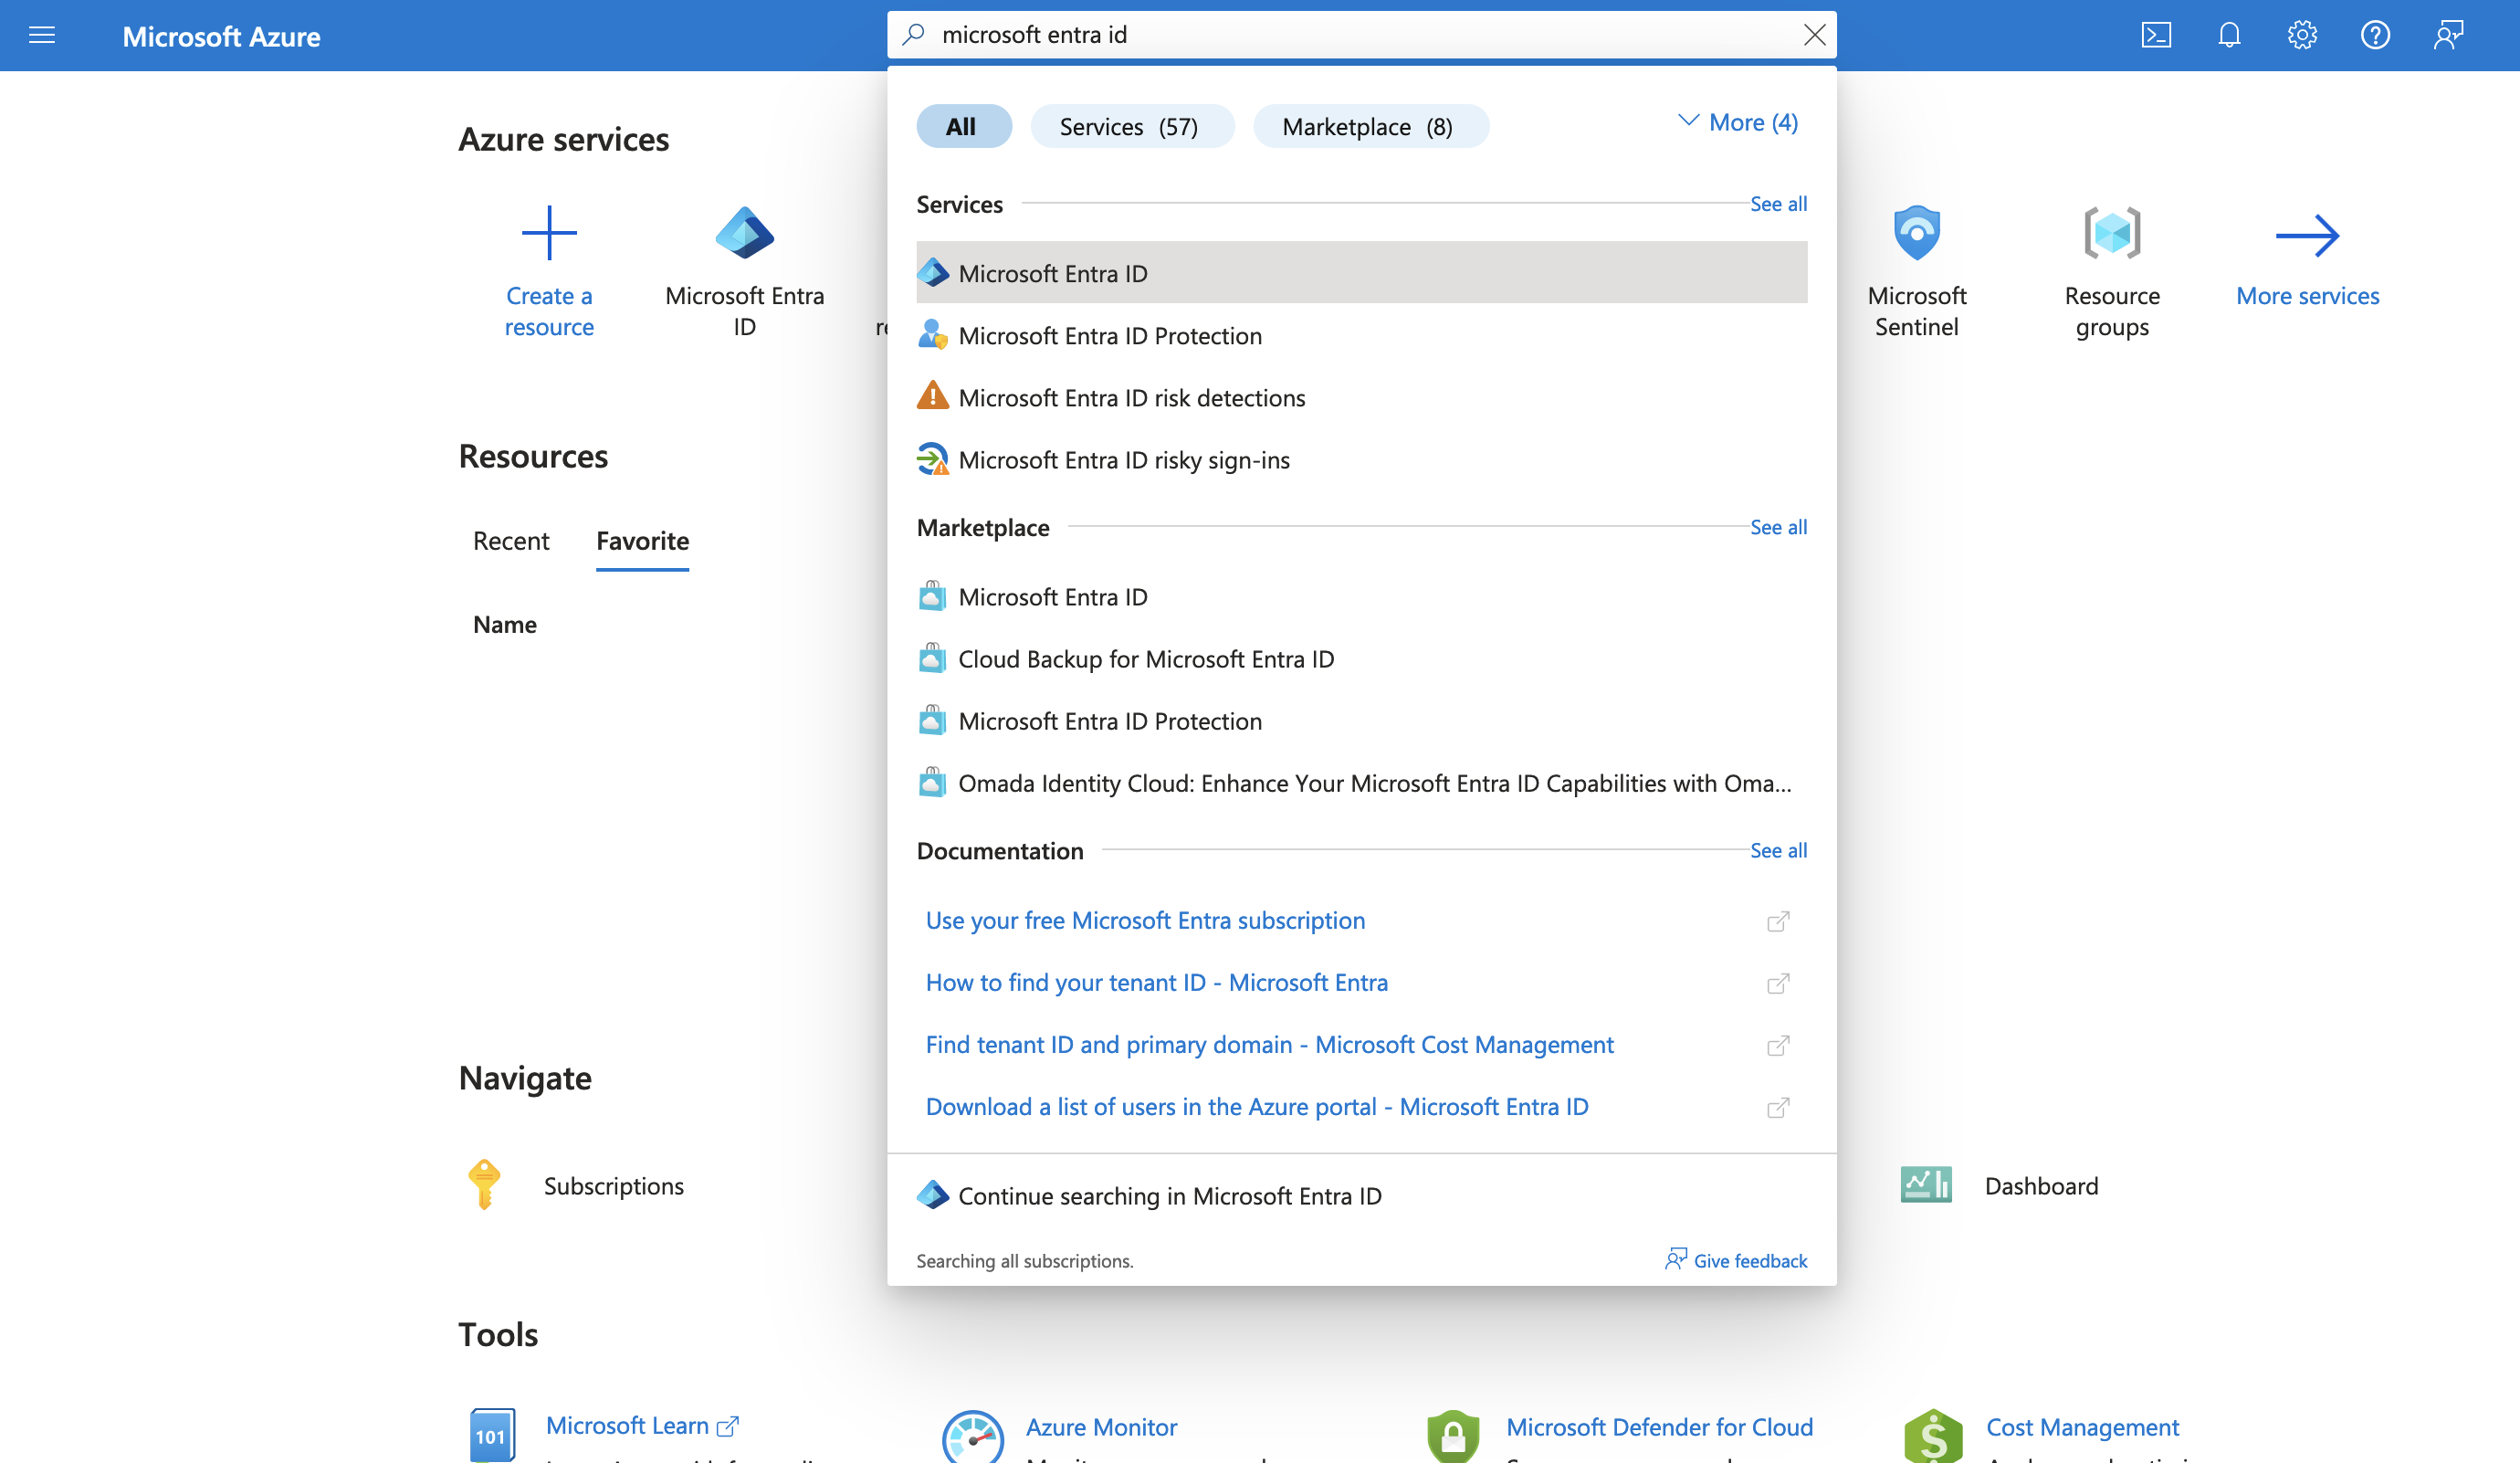
1. Log into the [Azure Portal](https://portal.azure.com/#home).
2. Go to the *Microsoft Entra ID* resource.
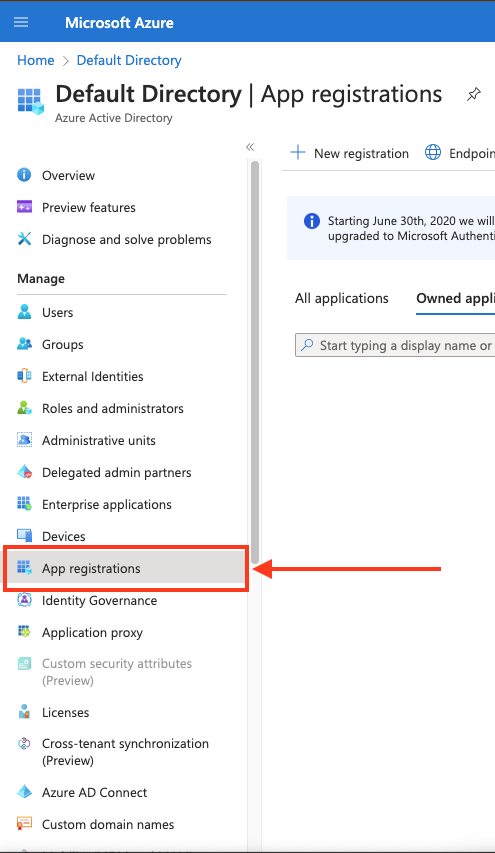
 3. In the left-hand menu, click **App registrations**.
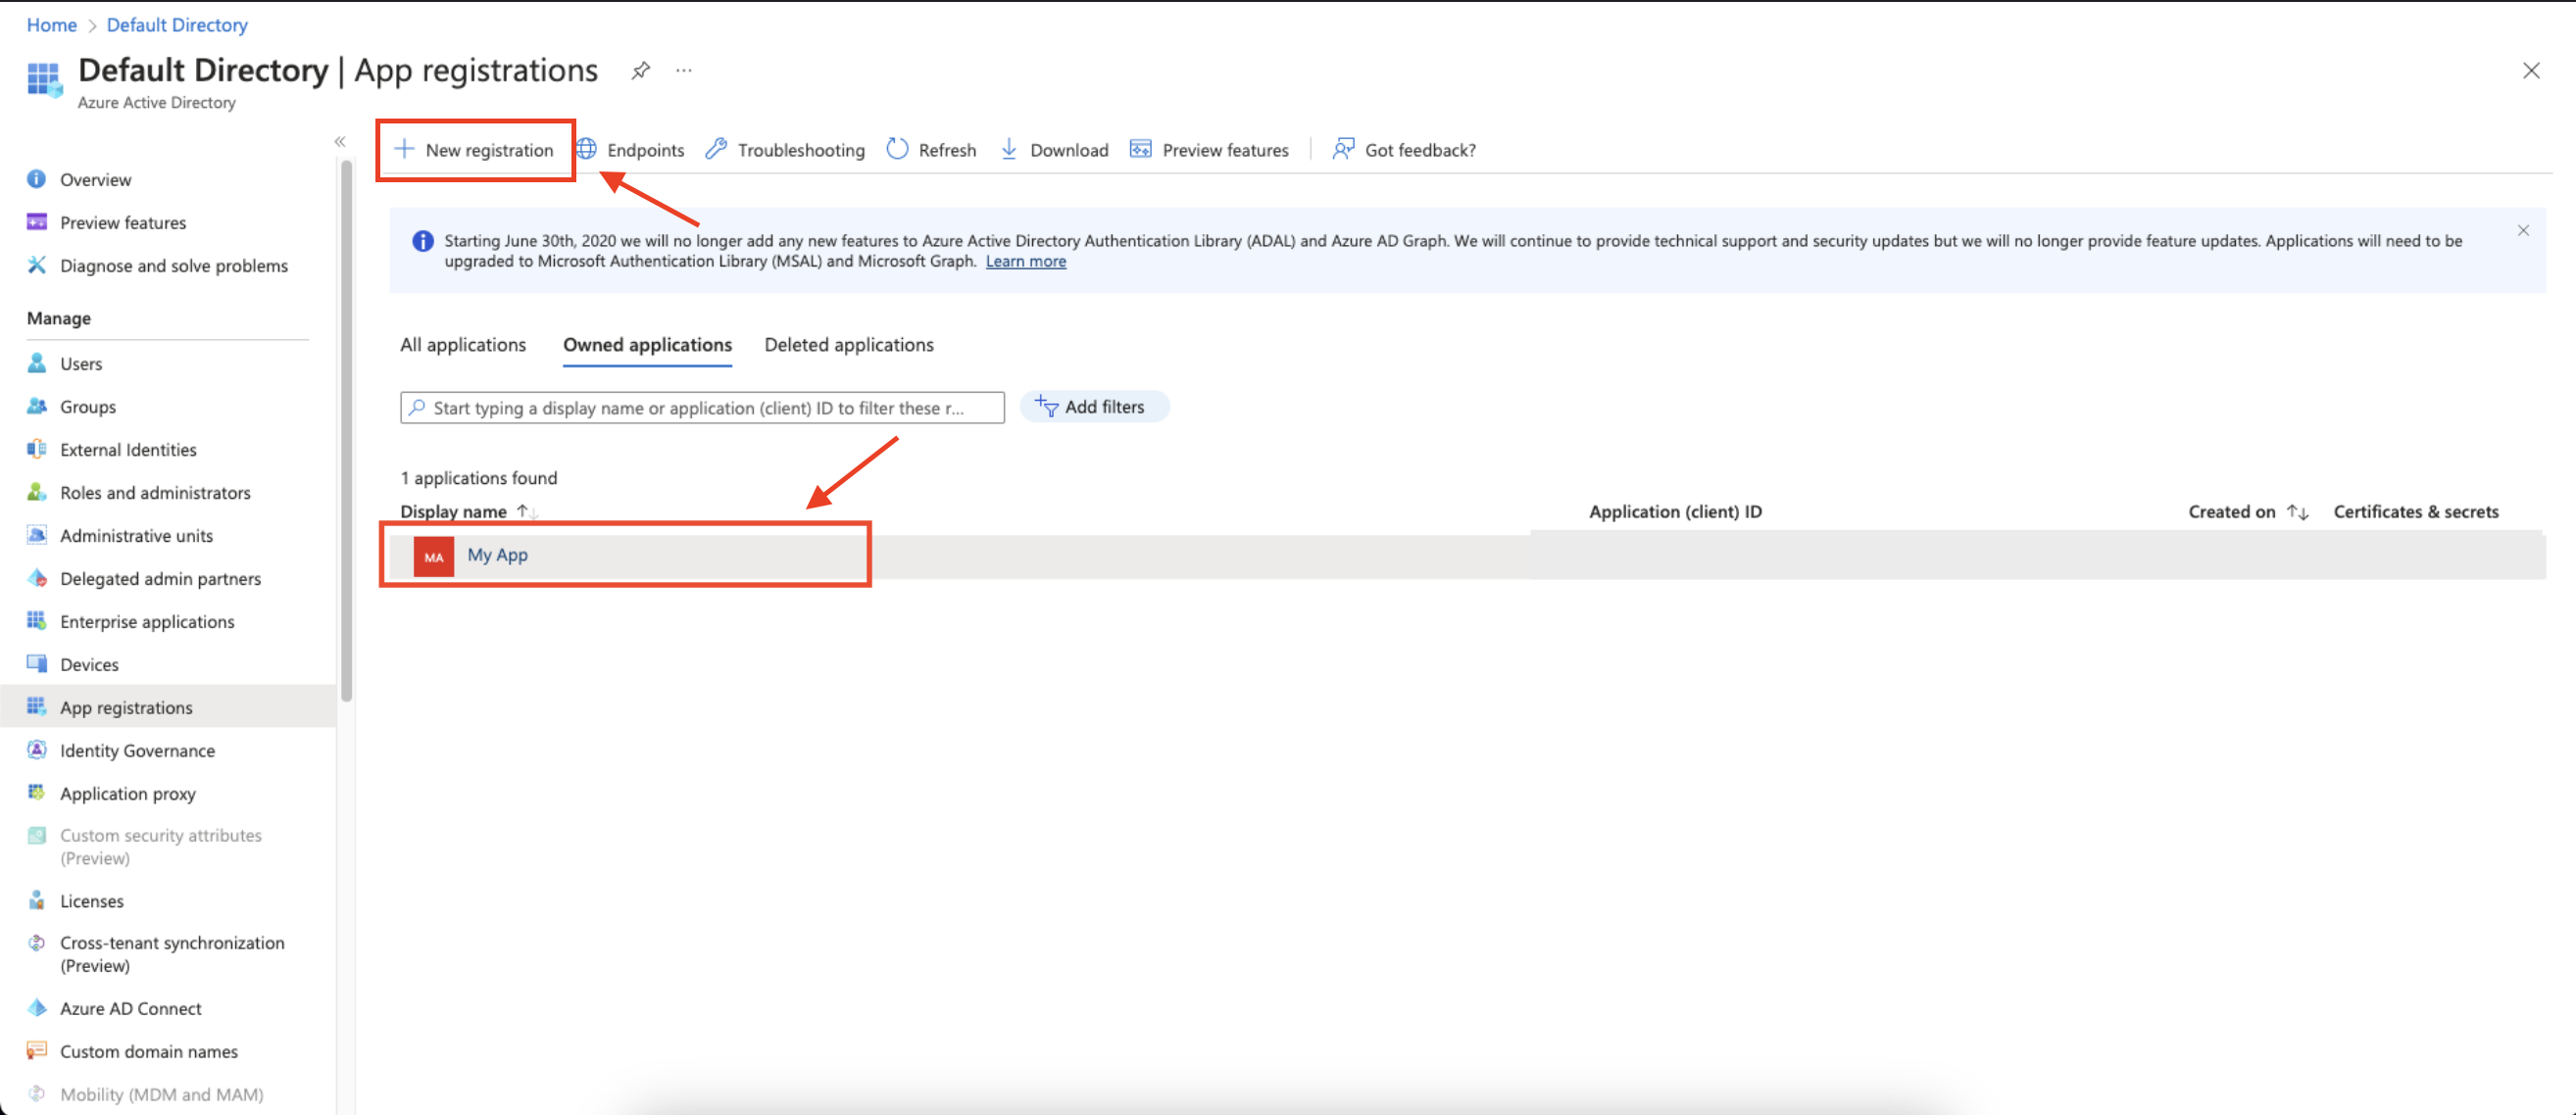
 4. Create a new application registration or click on one of your existing applications.
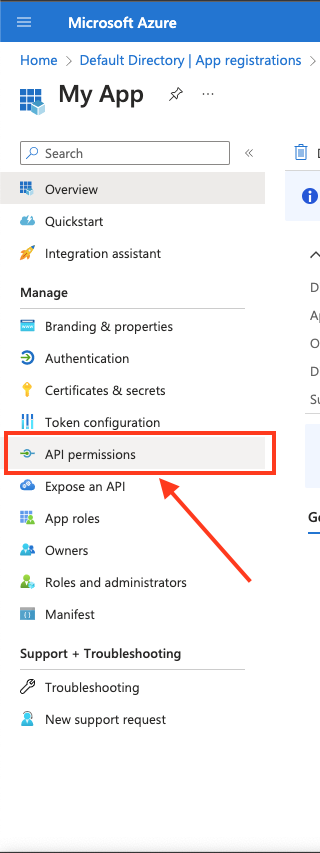
 5. In the left-hand menu, click **API permissions**.
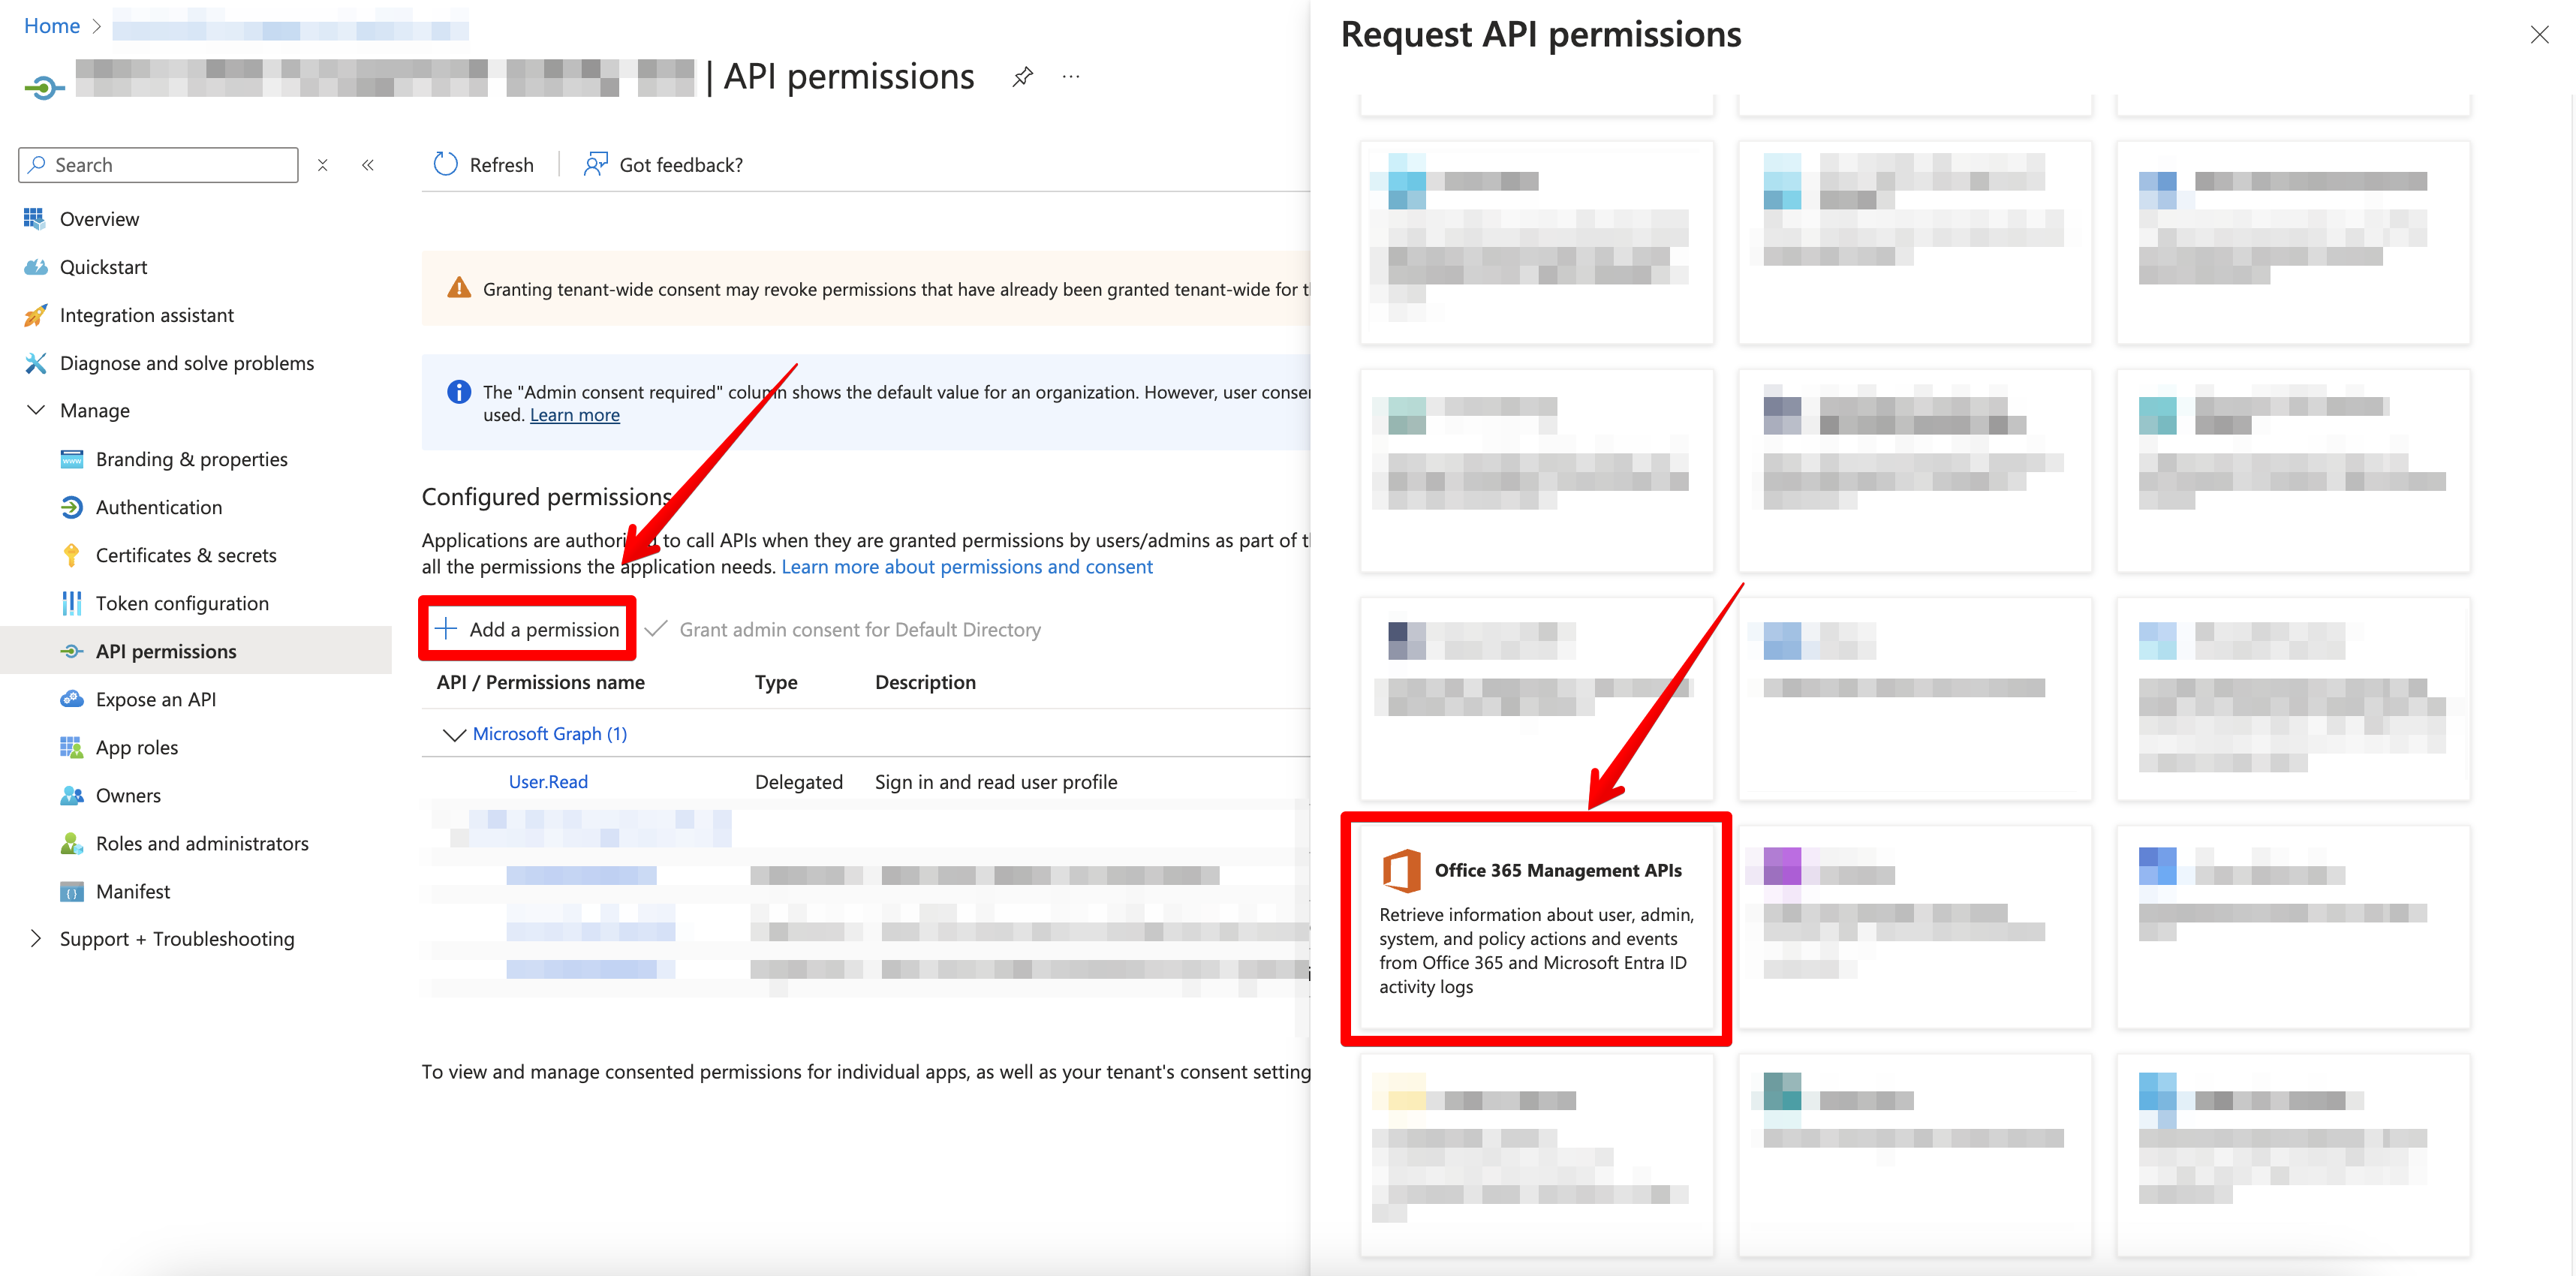
 6. Click **Add a permission** and select **Office 365 Management APIs**.
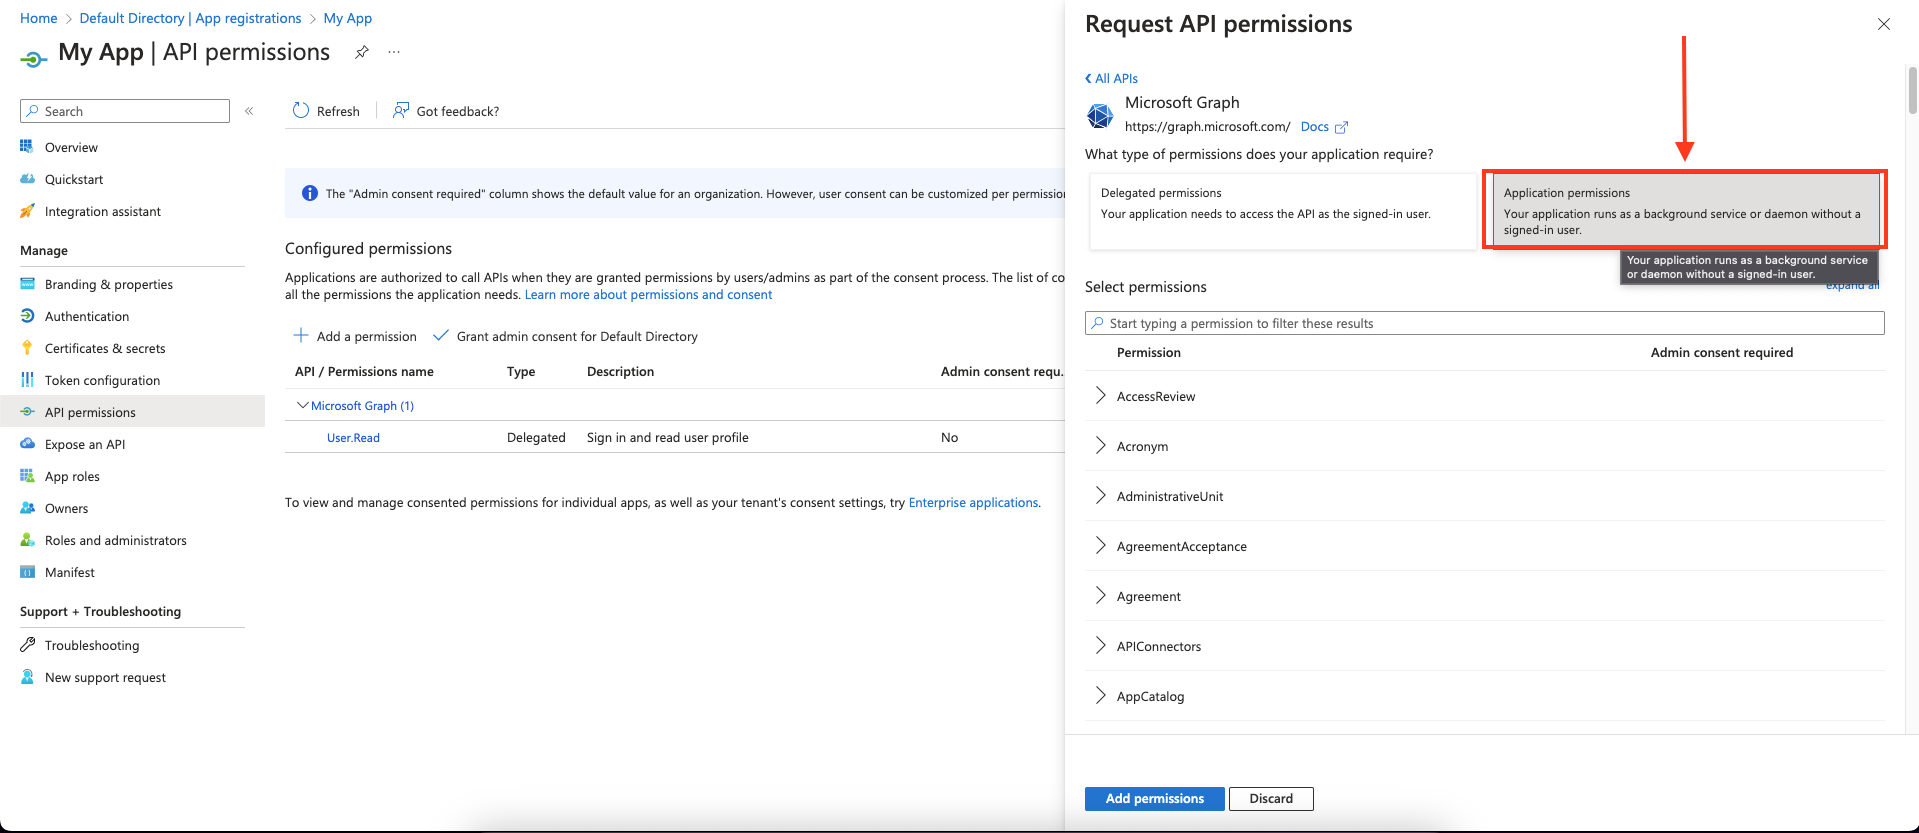
 7. Choose **Application permissions** and mark the permissions you wish to add.
 To support all Blink actions, these are the required **application** permissions:
| Least privileged permissions | Higher privileged permissions |
| ---------------------------- | ----------------------------- |
| ActivityFeed.Read | ActivityFeed.Read |
| ServiceHealth.Read | ServiceHealth.Read |
| | ActivityFeed.ReadDlp |
Read DLP policy events permission (`ActivityFeed.ReadDlp`) will only be
necessary if you are interested in the DLP workloads.
As a best practice, request the **least privileged permissions** that your app
needs in order to access data and function correctly. Requesting permissions
with more than the necessary privileges is poor security practice, which may
cause users to refrain from consenting and affect your app's usage. For
additional information, refer to [Microsoft Graph
permissions](https://learn.microsoft.com/en-us/graph/permissions-reference).
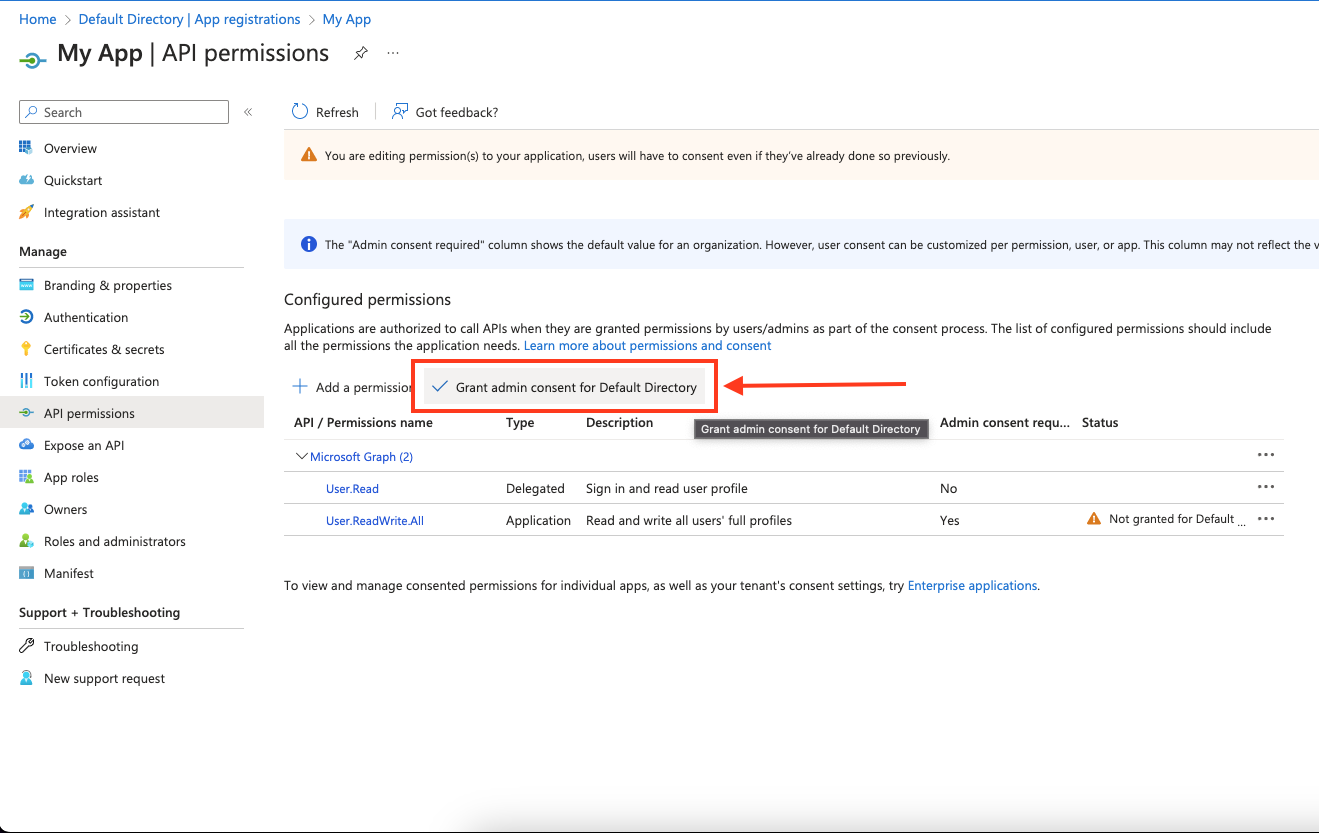
8. Click **Add permissions** to save the changes.
9. Click **Grant admin consent for ``** on the API permissions page. **Only admins can grant consent**.
To support all Blink actions, these are the required **application** permissions:
| Least privileged permissions | Higher privileged permissions |
| ---------------------------- | ----------------------------- |
| ActivityFeed.Read | ActivityFeed.Read |
| ServiceHealth.Read | ServiceHealth.Read |
| | ActivityFeed.ReadDlp |
Read DLP policy events permission (`ActivityFeed.ReadDlp`) will only be
necessary if you are interested in the DLP workloads.
As a best practice, request the **least privileged permissions** that your app
needs in order to access data and function correctly. Requesting permissions
with more than the necessary privileges is poor security practice, which may
cause users to refrain from consenting and affect your app's usage. For
additional information, refer to [Microsoft Graph
permissions](https://learn.microsoft.com/en-us/graph/permissions-reference).
8. Click **Add permissions** to save the changes.
9. Click **Grant admin consent for ``** on the API permissions page. **Only admins can grant consent**.
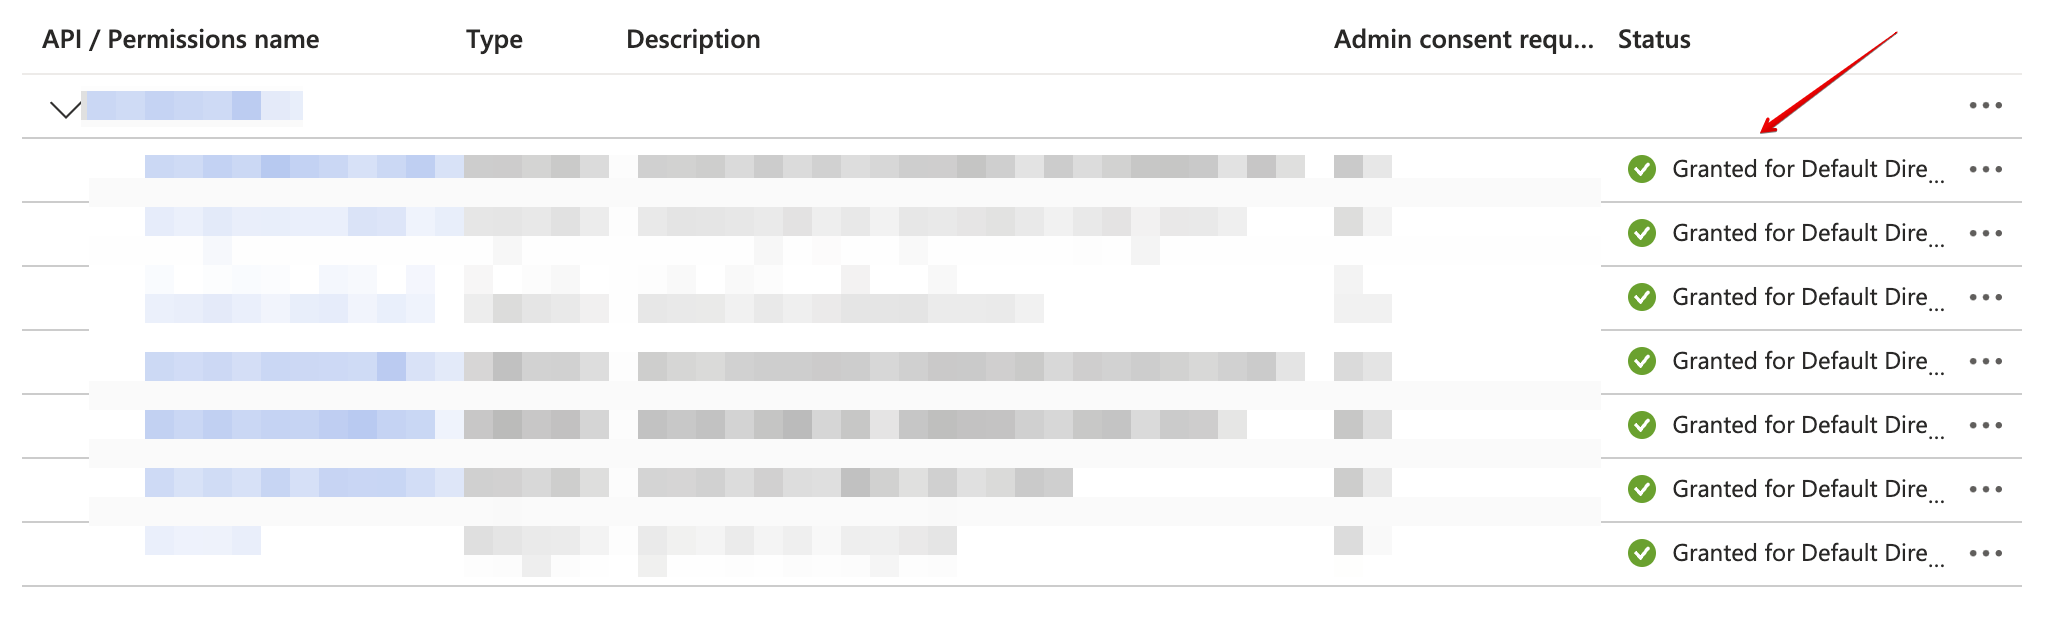
 10. Confirm that the added permissions are now verified.
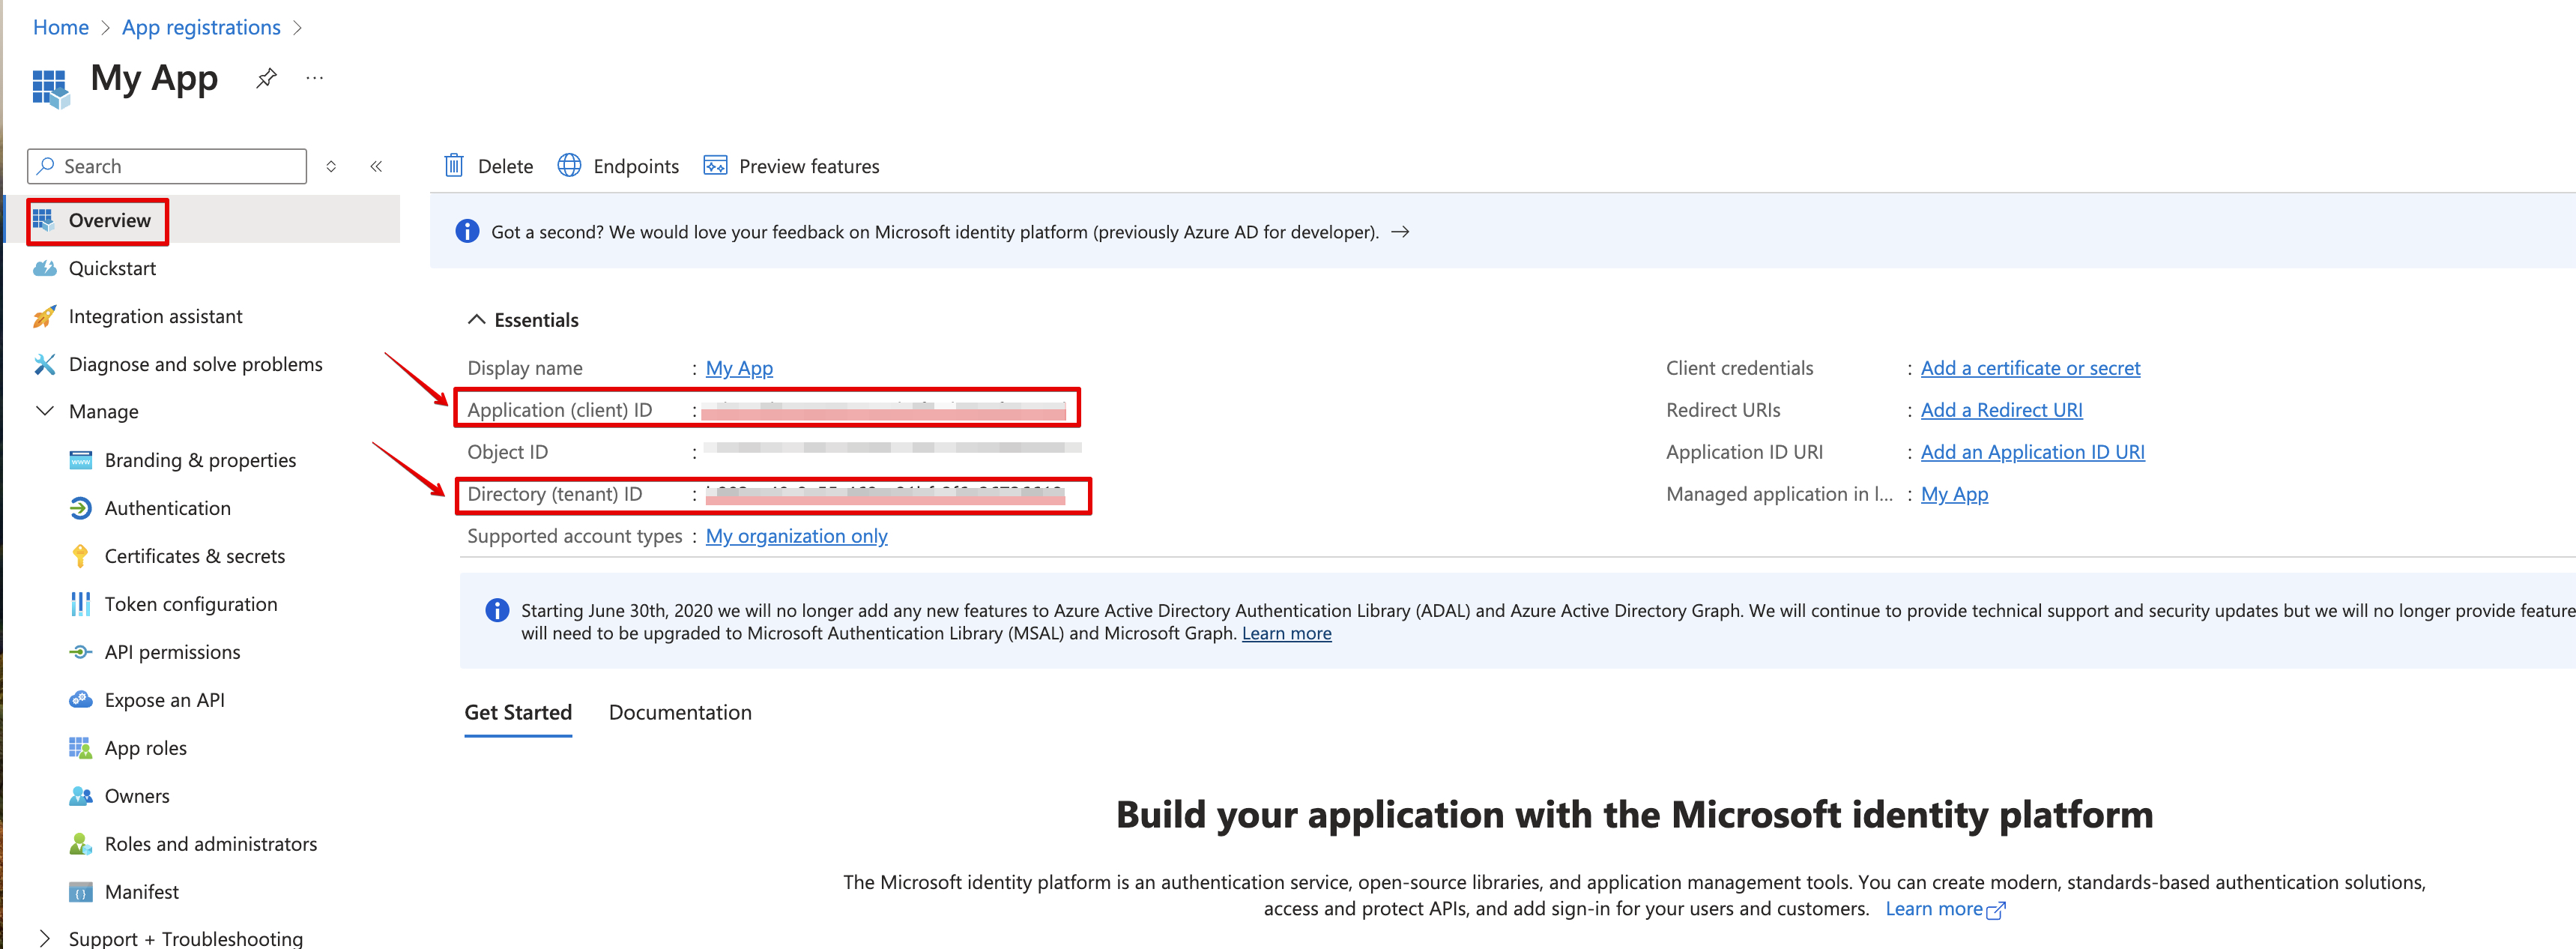
 11. Navigate to **Overview** and Copy your **client ID** and **tenant ID**.
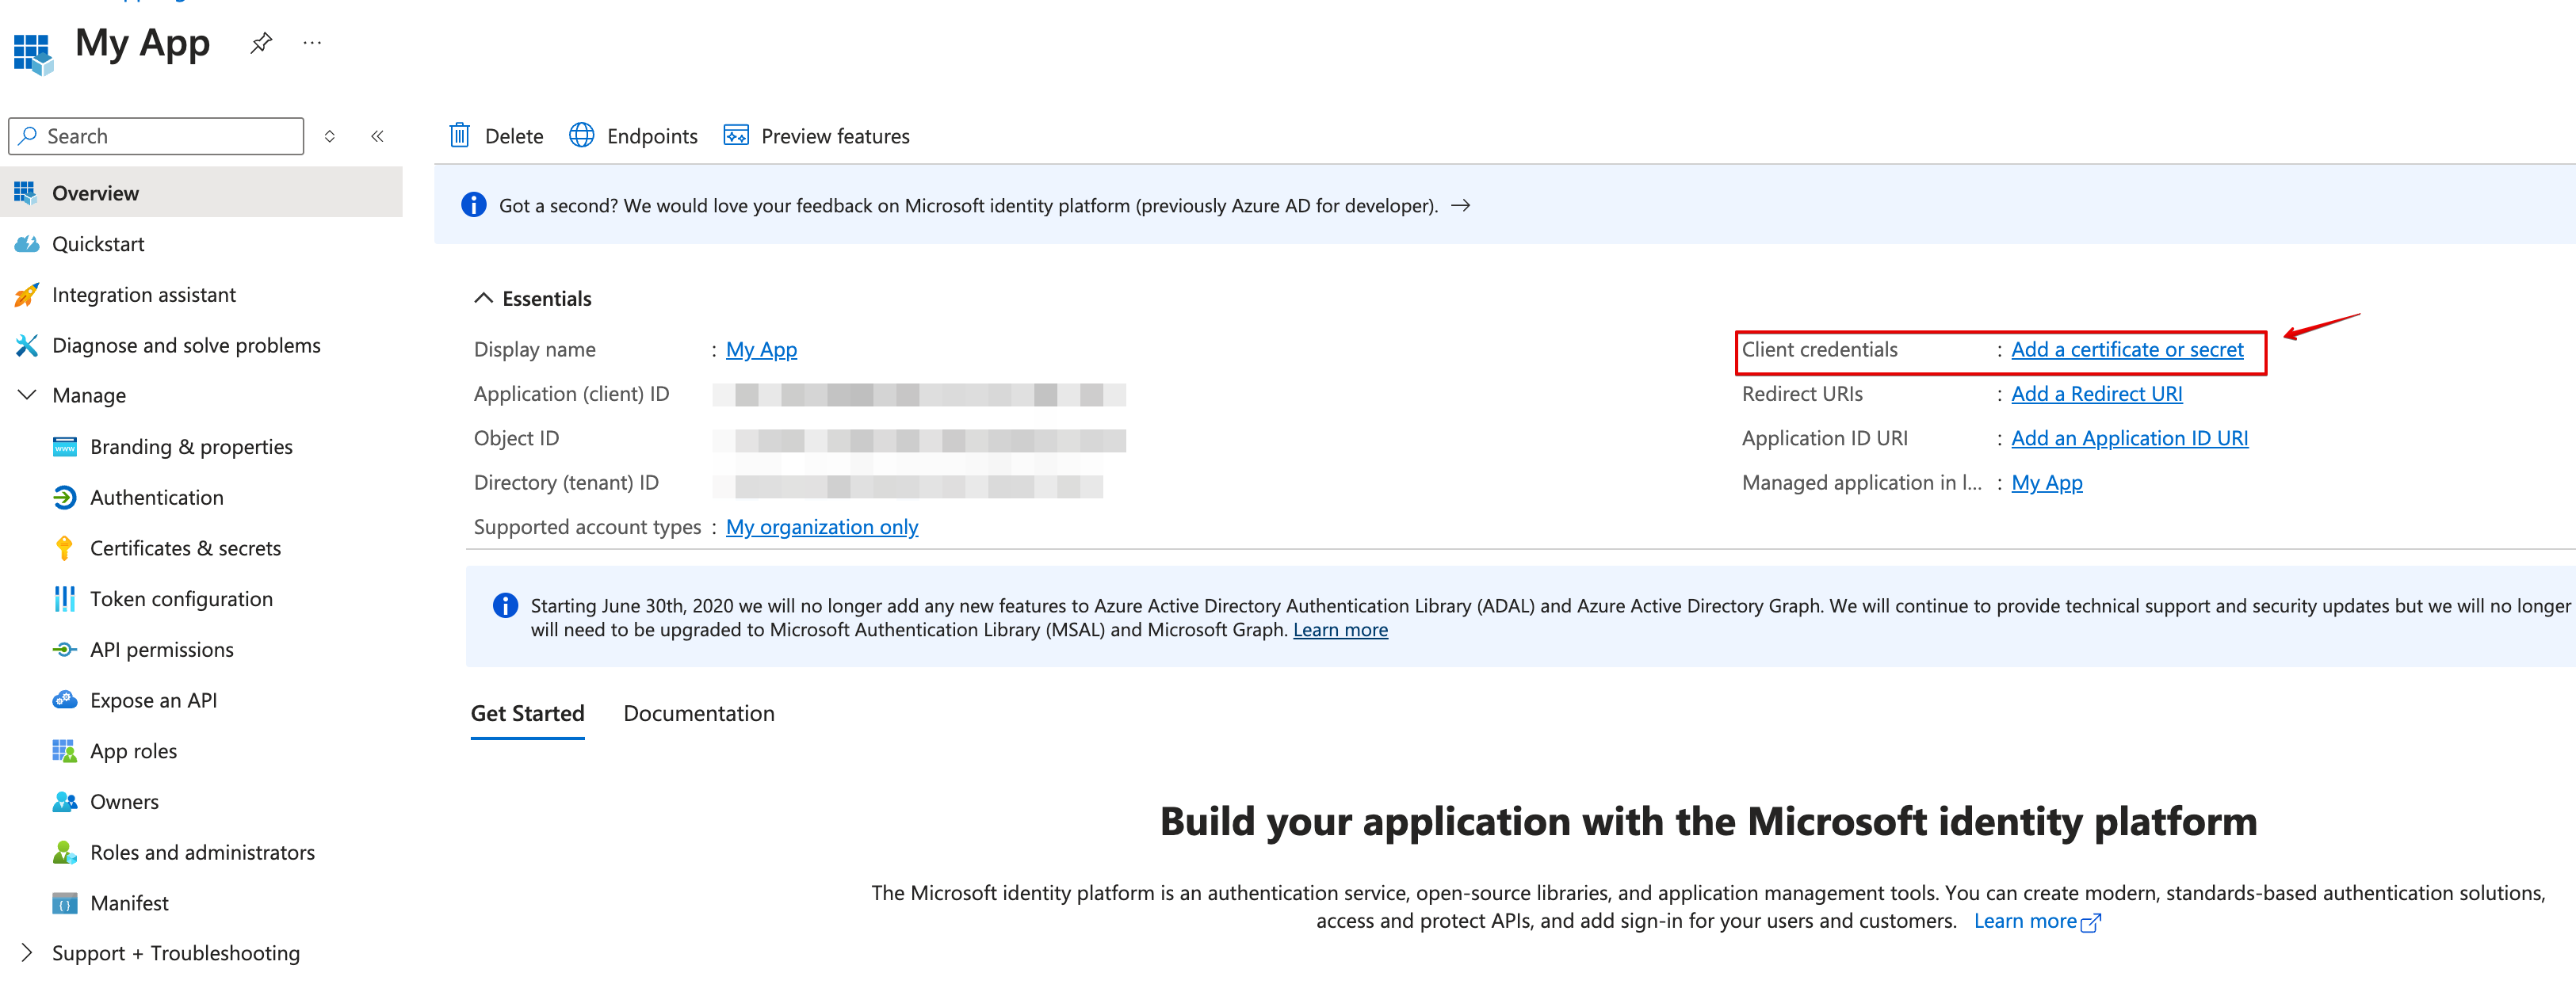
 12. Create a new **client secret**.
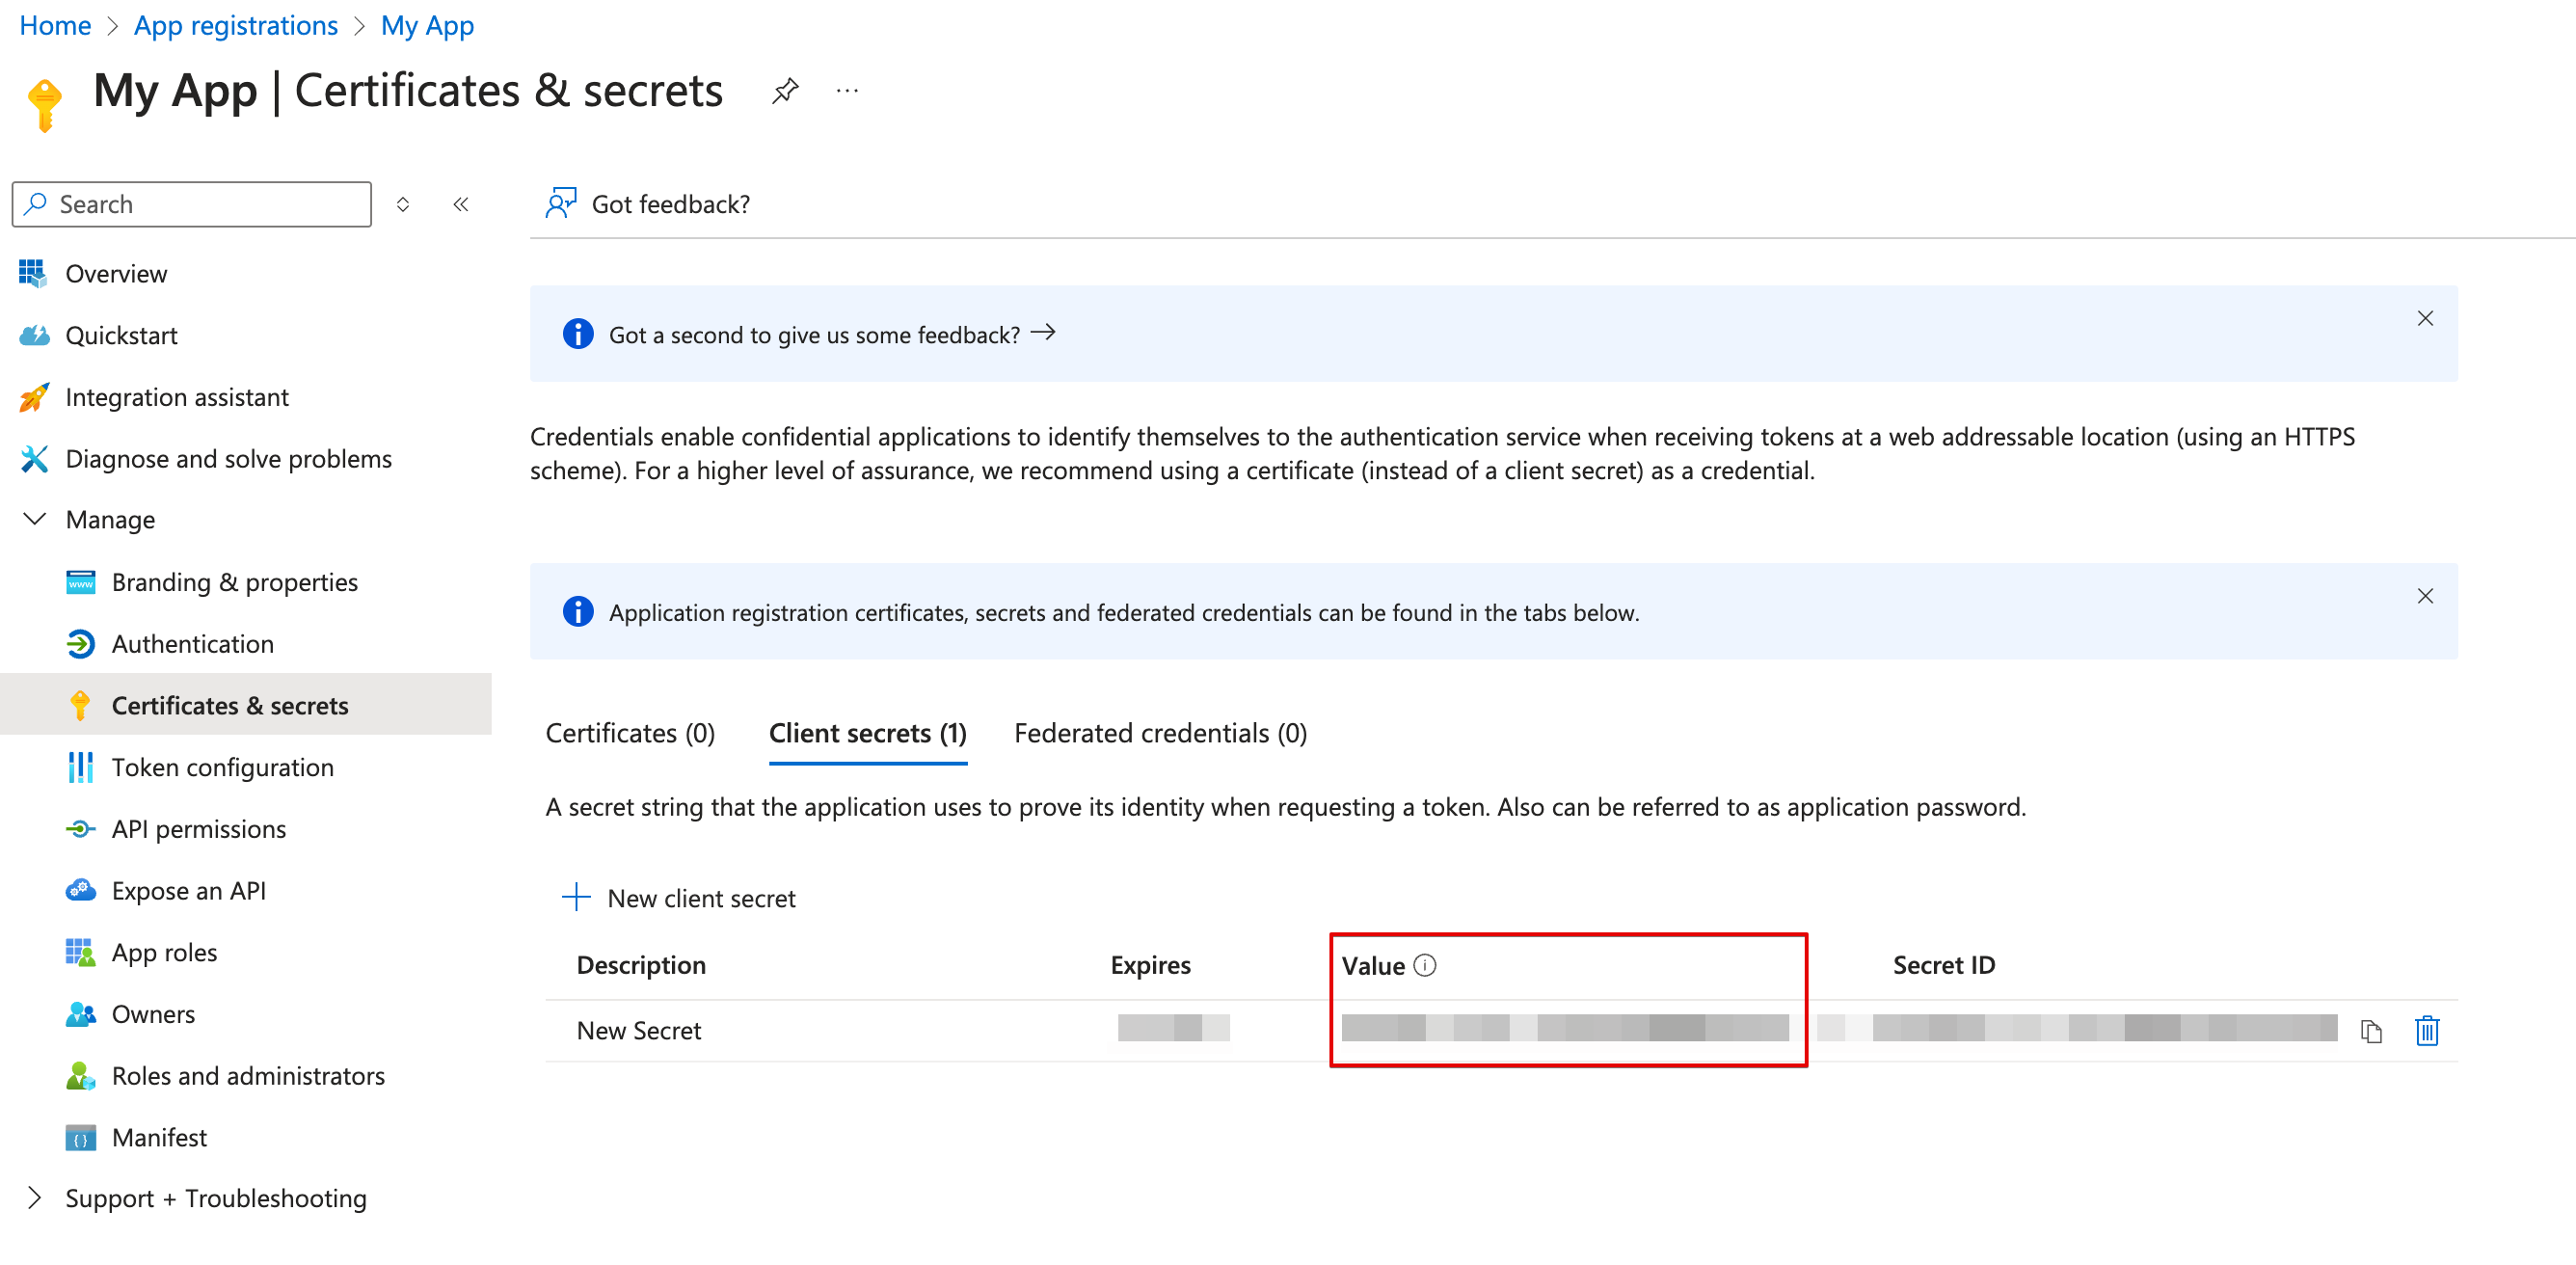
 13. Copy the **secret value**.
 ### Creating your connection
1. In the Blink platform, navigate to the **Connections** page > **Add connection**. A New Connection dialog box opens displaying icons of external service providers available.
2. Select the **Microsoft Office 365 Management Activity** icon. A dialog box with name of the connection and connection methods appear.
3. (Optional) Edit the name of the connection. At a later stage you cannot edit the name.
4. Select **App Registration** as the method to create the connection.
5. Fill in the parameters:
* The API Address
* The Client ID
* The Client Secret
* The Tenant ID
6. (Optional) Click **Test Connection** to test it.
7. Click **Create connection**. The new connection appears on the **Connections** page.
### Creating your connection
1. In the Blink platform, navigate to the **Connections** page > **Add connection**. A New Connection dialog box opens displaying icons of external service providers available.
2. Select the **Microsoft Office 365 Management Activity** icon. A dialog box with name of the connection and connection methods appear.
3. (Optional) Edit the name of the connection. At a later stage you cannot edit the name.
4. Select **App Registration** as the method to create the connection.
5. Fill in the parameters:
* The API Address
* The Client ID
* The Client Secret
* The Tenant ID
6. (Optional) Click **Test Connection** to test it.
7. Click **Create connection**. The new connection appears on the **Connections** page.