> ## Documentation Index
> Fetch the complete documentation index at: https://docs.blinkops.com/llms.txt
> Use this file to discover all available pages before exploring further.
# Microsoft Graph
> Microsoft Graph is a unified API for accessing Microsoft 365 services and data, like users, emails, and files.
Microsoft Graph does not support any actions itself. It serves only as a general connection that can be used across all Microsoft Graph integrations for extra convenience.
## Creating a Microsoft Graph connection
To reduce the number of scopes, we recommend using separate connections for each of the following integrations rather than the general Microsoft Graph connection.
1. [Microsoft Entra ID](/docs/integrations/microsoft-entra-id)
2. [Microsoft Defender XDR](/docs/integrations/microsoft-defender-xdr)
3. [Microsoft Teams](/docs/integrations/microsoft-teams)
4. [SharePoint](/docs/integrations/sharepoint)
5. [OneDrive](/docs/integrations/onedrive)
6. [Microsoft Outlook](/docs/integrations/microsoft-outlook)
7. [Microsoft Intune](/docs/integrations/microsoft-intune)
8. [Microsoft Excel](/docs/integrations/microsoft-excel)
9. [Microsoft E-Discovery](/docs/integrations/microsoft-e-discovery)
10. [Microsoft OneNote](/docs/integrations/microsoft-onenote)
You can continue to use the general connection if desired.
Create the connection by using one of the following methods:
* [OAuth](#using-oauth)
* [App Registration](#using-app-registration)
### Using OAuth
#### Creating your connection
1. In the Blink platform, navigate to the **Connections** page > **Add connection**. A New Connection dialog box opens displaying icons of external service providers available.
2. Select the **Microsoft Graph** icon. A dialog box with name of the connection and connection methods appear.
3. (Optional) Edit the name of the connection. At a later stage you cannot edit the name.
4. Click **Microsoft Graph** to authenticate using OAuth.
5. Sign in using your credentials.
Need admin approval? please refer to the [Need Admin
Approval](/docs/integrations/microsoft-graph/admin-approval) guide.
### Using App Registration
To create the connection you need:
* A client ID
* A client secret
* A tenant ID
#### Obtaining the credentials
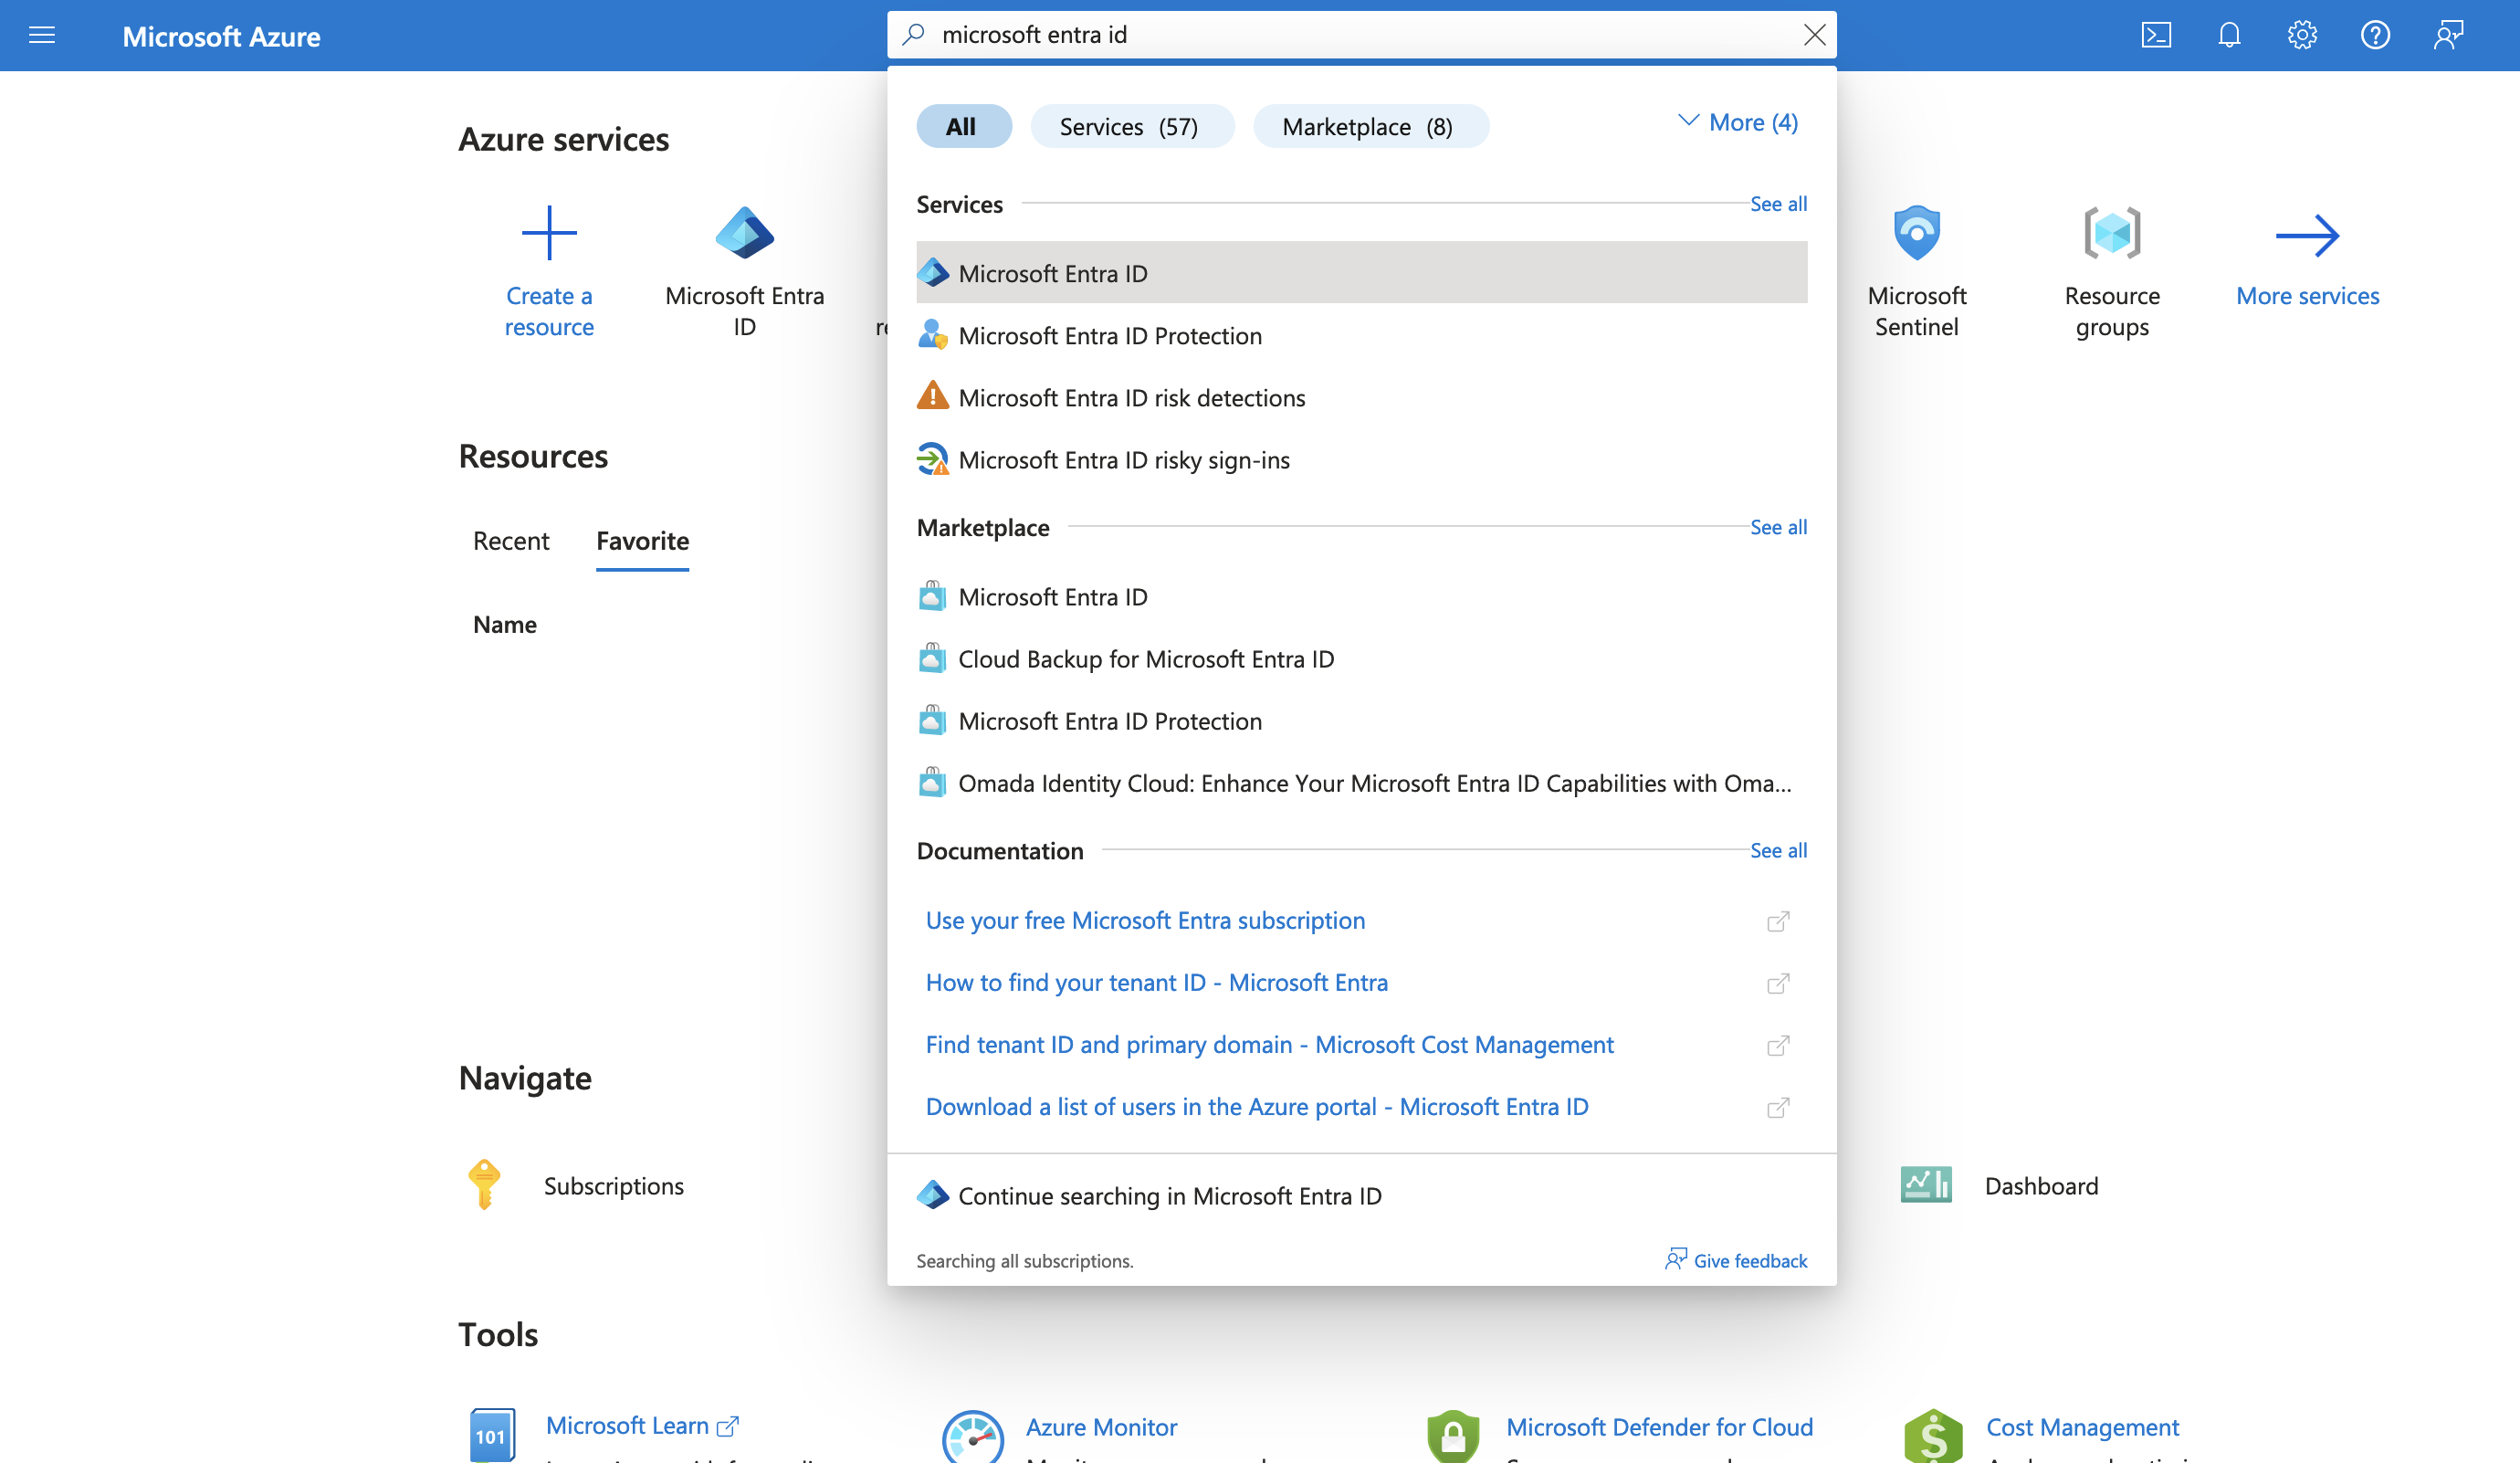
1. Log into the [Azure Portal](https://portal.azure.com/#home).
2. Go to the *Microsoft Entra ID* resource.
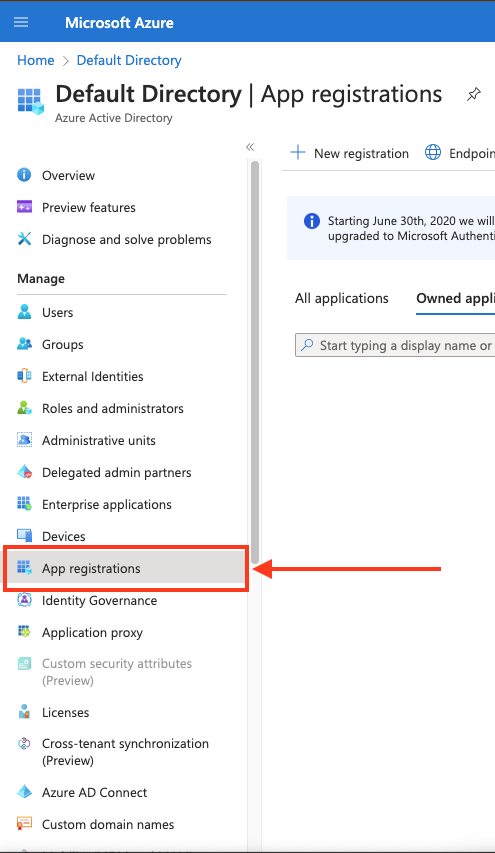
 3. In the left-hand menu, click **App registrations**.
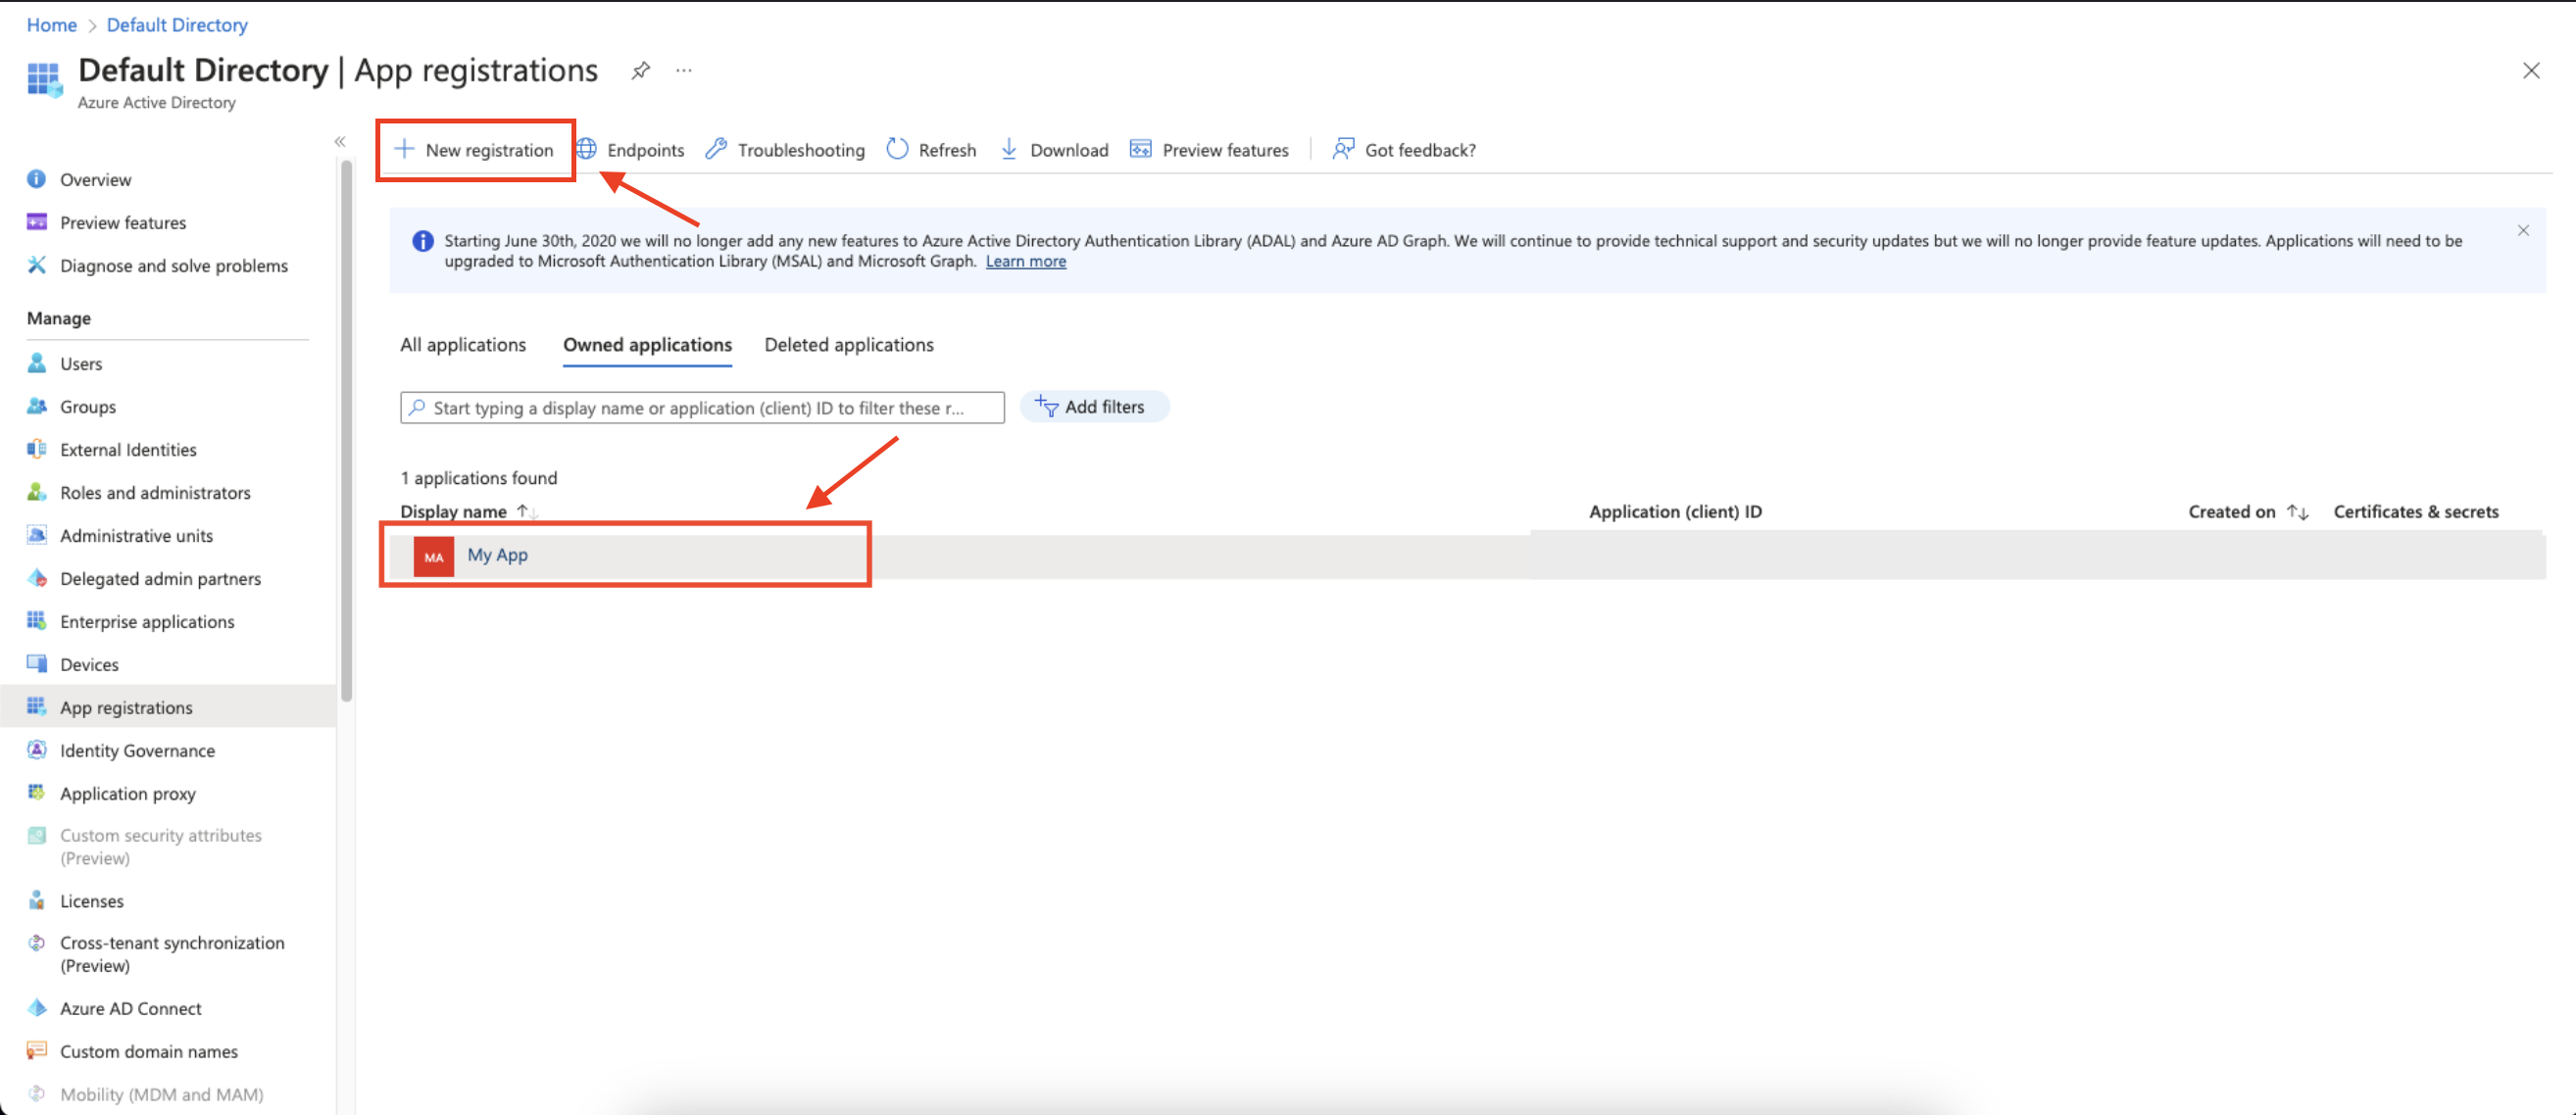
 4. Create a new application registration or click on one of your existing applications.
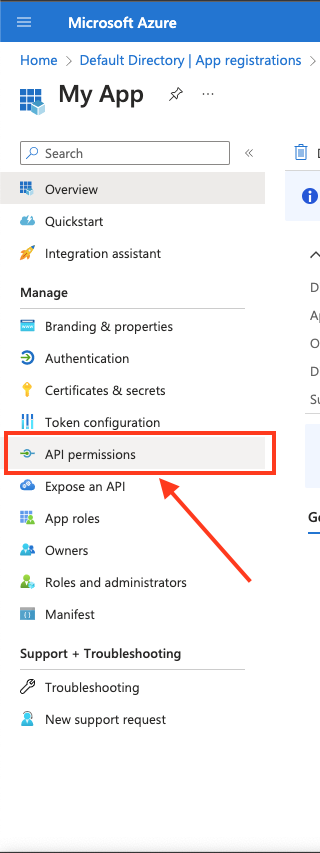
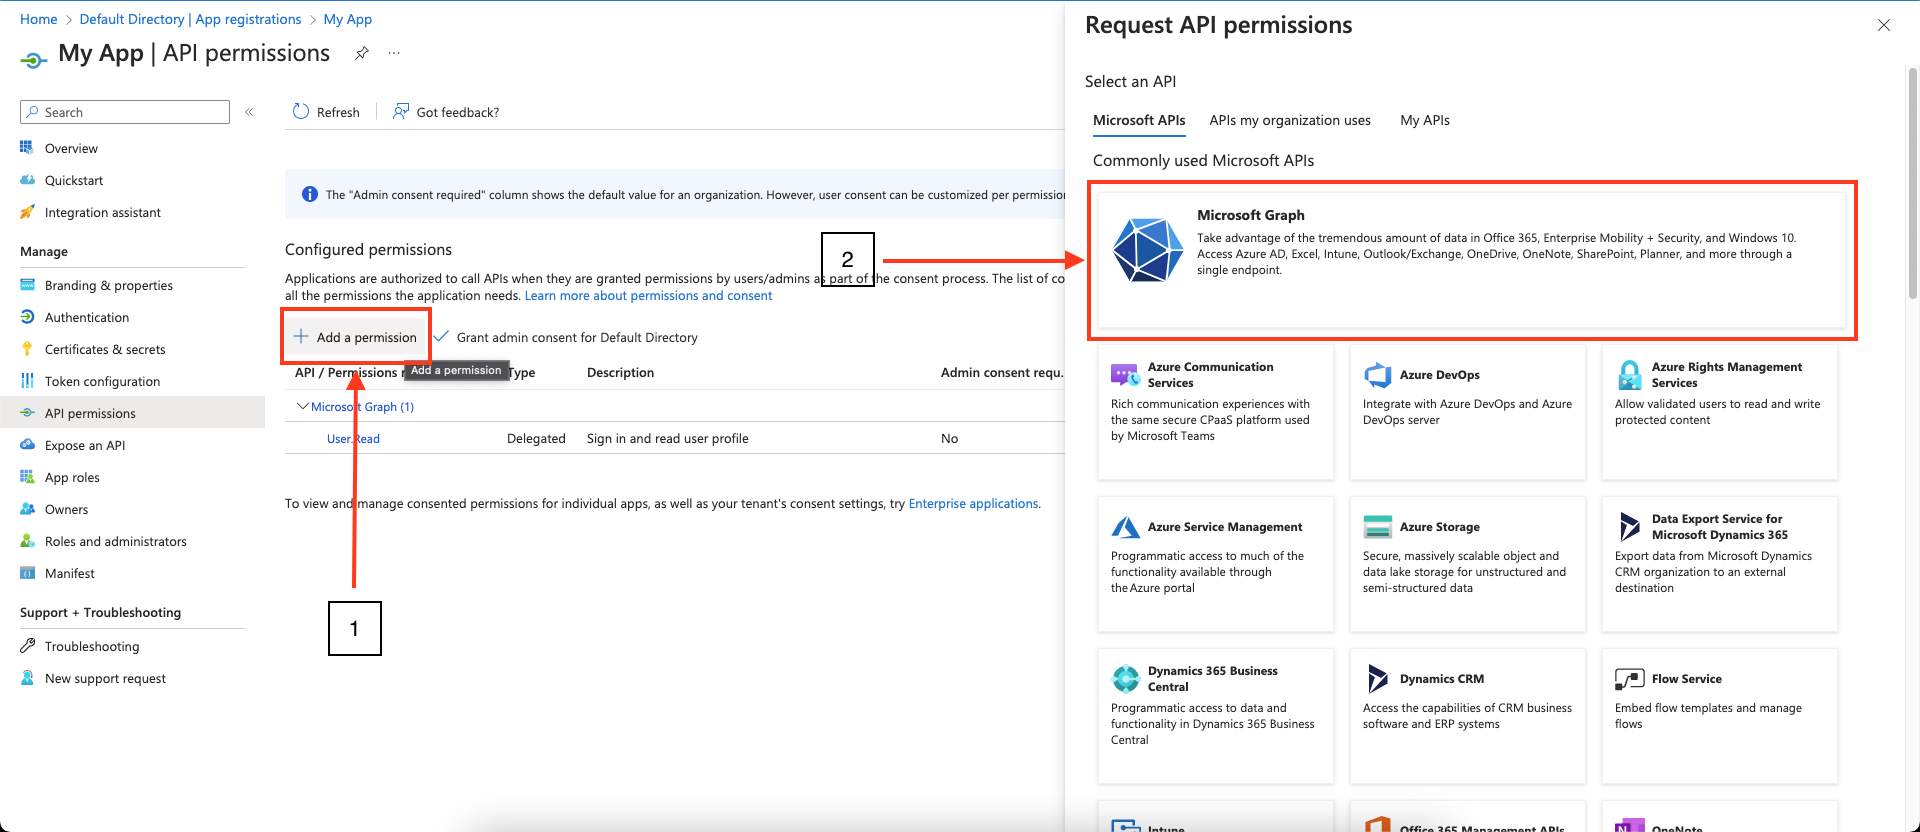
 5. In the left-hand menu, click **API permissions**.
 6. Click **Add a permission** and select **Microsoft Graph**.
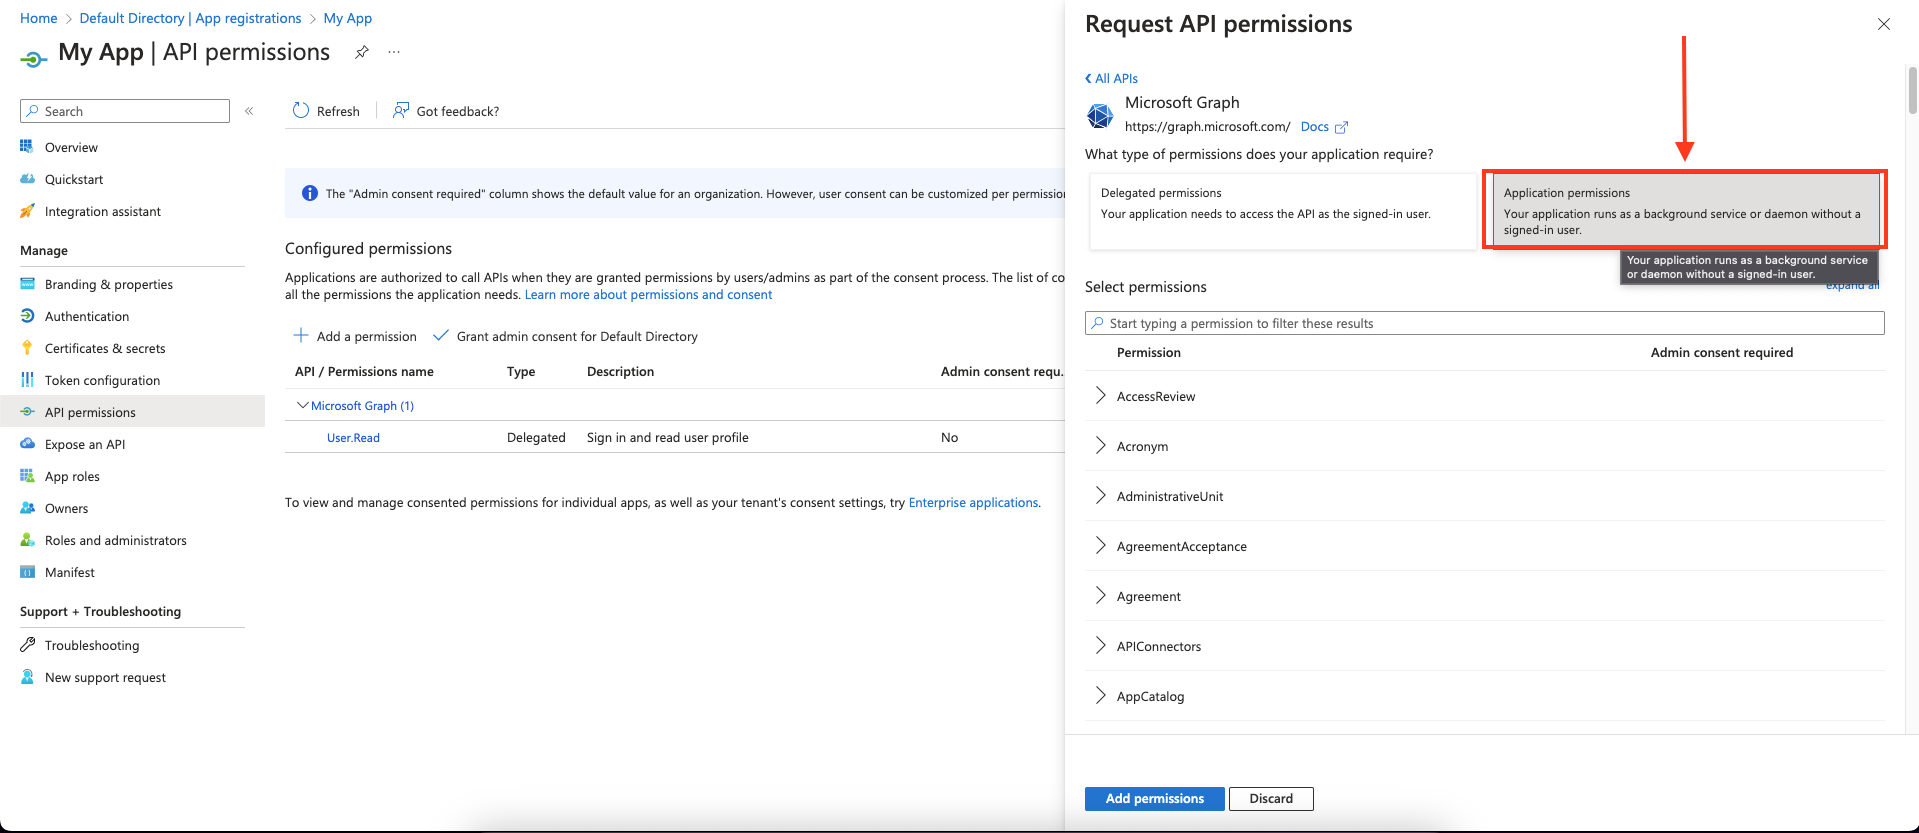
 7. Choose **Application permissions** and mark the permissions you wish to add.
 To allow all actions in Blink to run, add the following permissions used by Blink to access your Microsoft Graph APIs:
```
AuditLog.Read.All
Calendars.ReadBasic
Calendars.ReadWrite
Calendars.ReadWrite.Shared
Channel.Create
ChannelMember.ReadWrite.All
ChannelMessage.ReadWrite
ChannelMessage.Send
ChannelSettings.ReadWrite.All
Chat.Create
Chat.ReadWrite
Chat.ReadWrite.All
ChatMember.ReadWrite
Device.Command
Device.Read.All
DeviceManagementApps.ReadWrite.All
DeviceManagementManagedDevices.PrivilegedOperations.All
DeviceManagementManagedDevices.ReadWrite.All
Directory.AccessAsUser.All
Directory.ReadWrite.All
eDiscovery.ReadWrite.All
Files.ReadWrite
Files.ReadWrite.All
Group.ReadWrite.All
GroupMember.ReadWrite.All
IdentityRiskyUser.Read.All
IdentityRiskyUser.ReadWrite.All
Mail.Read
Mail.ReadBasic
Mail.ReadWrite
Mail.ReadWrite.Shared
Mail.Send
MailboxSettings.ReadWrite
Notes.ReadWrite.All
OnlineMeetings.ReadWrite
SecurityAlert.Read.All
SecurityAlert.ReadWrite.All
SecurityIncident.ReadWrite.All
Sites.Manage.All
Sites.ReadWrite.All
TeamMember.ReadWrite.All
ThreatHunting.Read.All
User.EnableDisableAccount.All
User.ManageIdentities.All
User.Read
User.ReadWrite.All
User.RevokeSessions.All
```
You can adjust the permissions according to your requirements.
Ensure that the permissions configured in your app registration align with those required by the actions you wish to perform with Blink. Remember, having a high-level permission does not automatically grant access to its subordinate permissions.
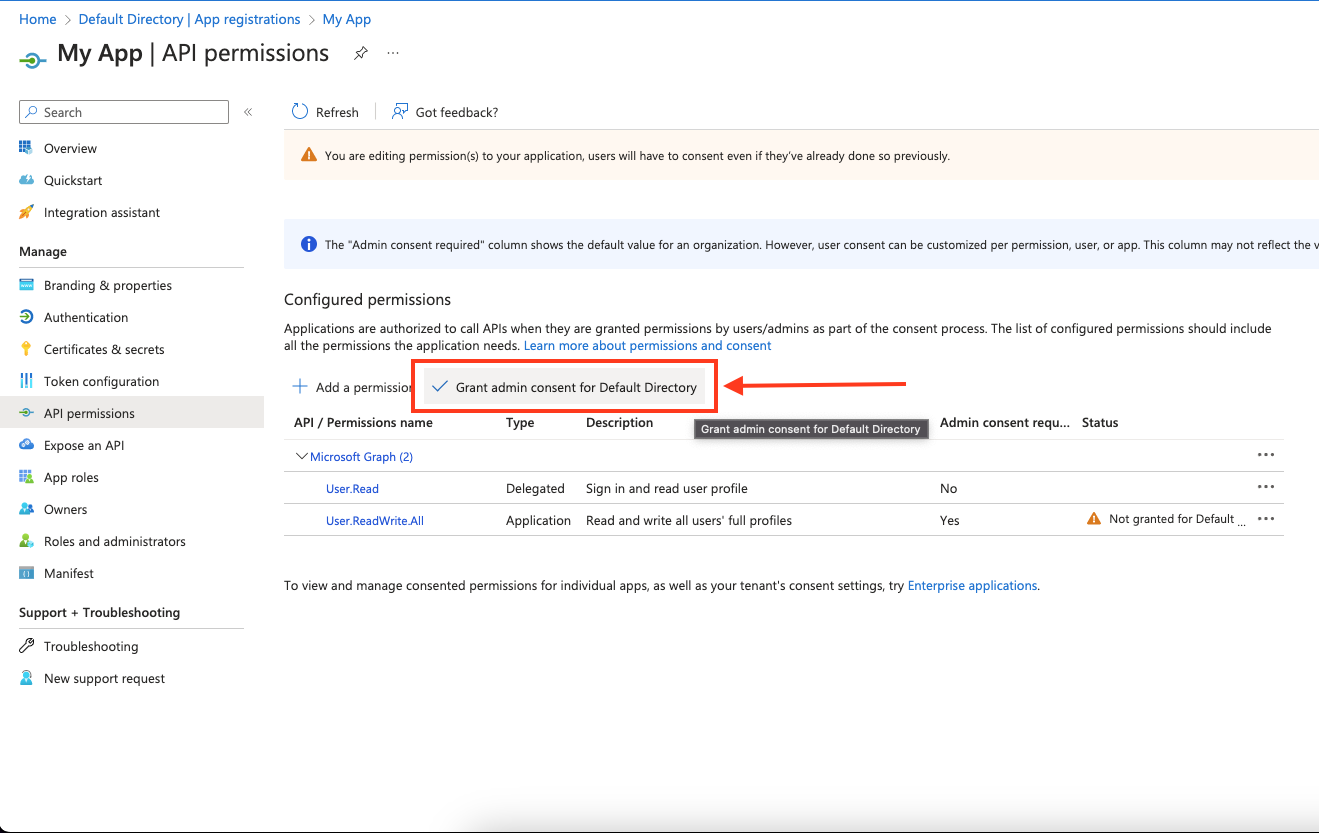
8. Click **Add permissions** to save the changes.
9. Click **Grant admin consent for ``** on the API permissions page. **Only admins can grant consent**.
To allow all actions in Blink to run, add the following permissions used by Blink to access your Microsoft Graph APIs:
```
AuditLog.Read.All
Calendars.ReadBasic
Calendars.ReadWrite
Calendars.ReadWrite.Shared
Channel.Create
ChannelMember.ReadWrite.All
ChannelMessage.ReadWrite
ChannelMessage.Send
ChannelSettings.ReadWrite.All
Chat.Create
Chat.ReadWrite
Chat.ReadWrite.All
ChatMember.ReadWrite
Device.Command
Device.Read.All
DeviceManagementApps.ReadWrite.All
DeviceManagementManagedDevices.PrivilegedOperations.All
DeviceManagementManagedDevices.ReadWrite.All
Directory.AccessAsUser.All
Directory.ReadWrite.All
eDiscovery.ReadWrite.All
Files.ReadWrite
Files.ReadWrite.All
Group.ReadWrite.All
GroupMember.ReadWrite.All
IdentityRiskyUser.Read.All
IdentityRiskyUser.ReadWrite.All
Mail.Read
Mail.ReadBasic
Mail.ReadWrite
Mail.ReadWrite.Shared
Mail.Send
MailboxSettings.ReadWrite
Notes.ReadWrite.All
OnlineMeetings.ReadWrite
SecurityAlert.Read.All
SecurityAlert.ReadWrite.All
SecurityIncident.ReadWrite.All
Sites.Manage.All
Sites.ReadWrite.All
TeamMember.ReadWrite.All
ThreatHunting.Read.All
User.EnableDisableAccount.All
User.ManageIdentities.All
User.Read
User.ReadWrite.All
User.RevokeSessions.All
```
You can adjust the permissions according to your requirements.
Ensure that the permissions configured in your app registration align with those required by the actions you wish to perform with Blink. Remember, having a high-level permission does not automatically grant access to its subordinate permissions.
8. Click **Add permissions** to save the changes.
9. Click **Grant admin consent for ``** on the API permissions page. **Only admins can grant consent**.
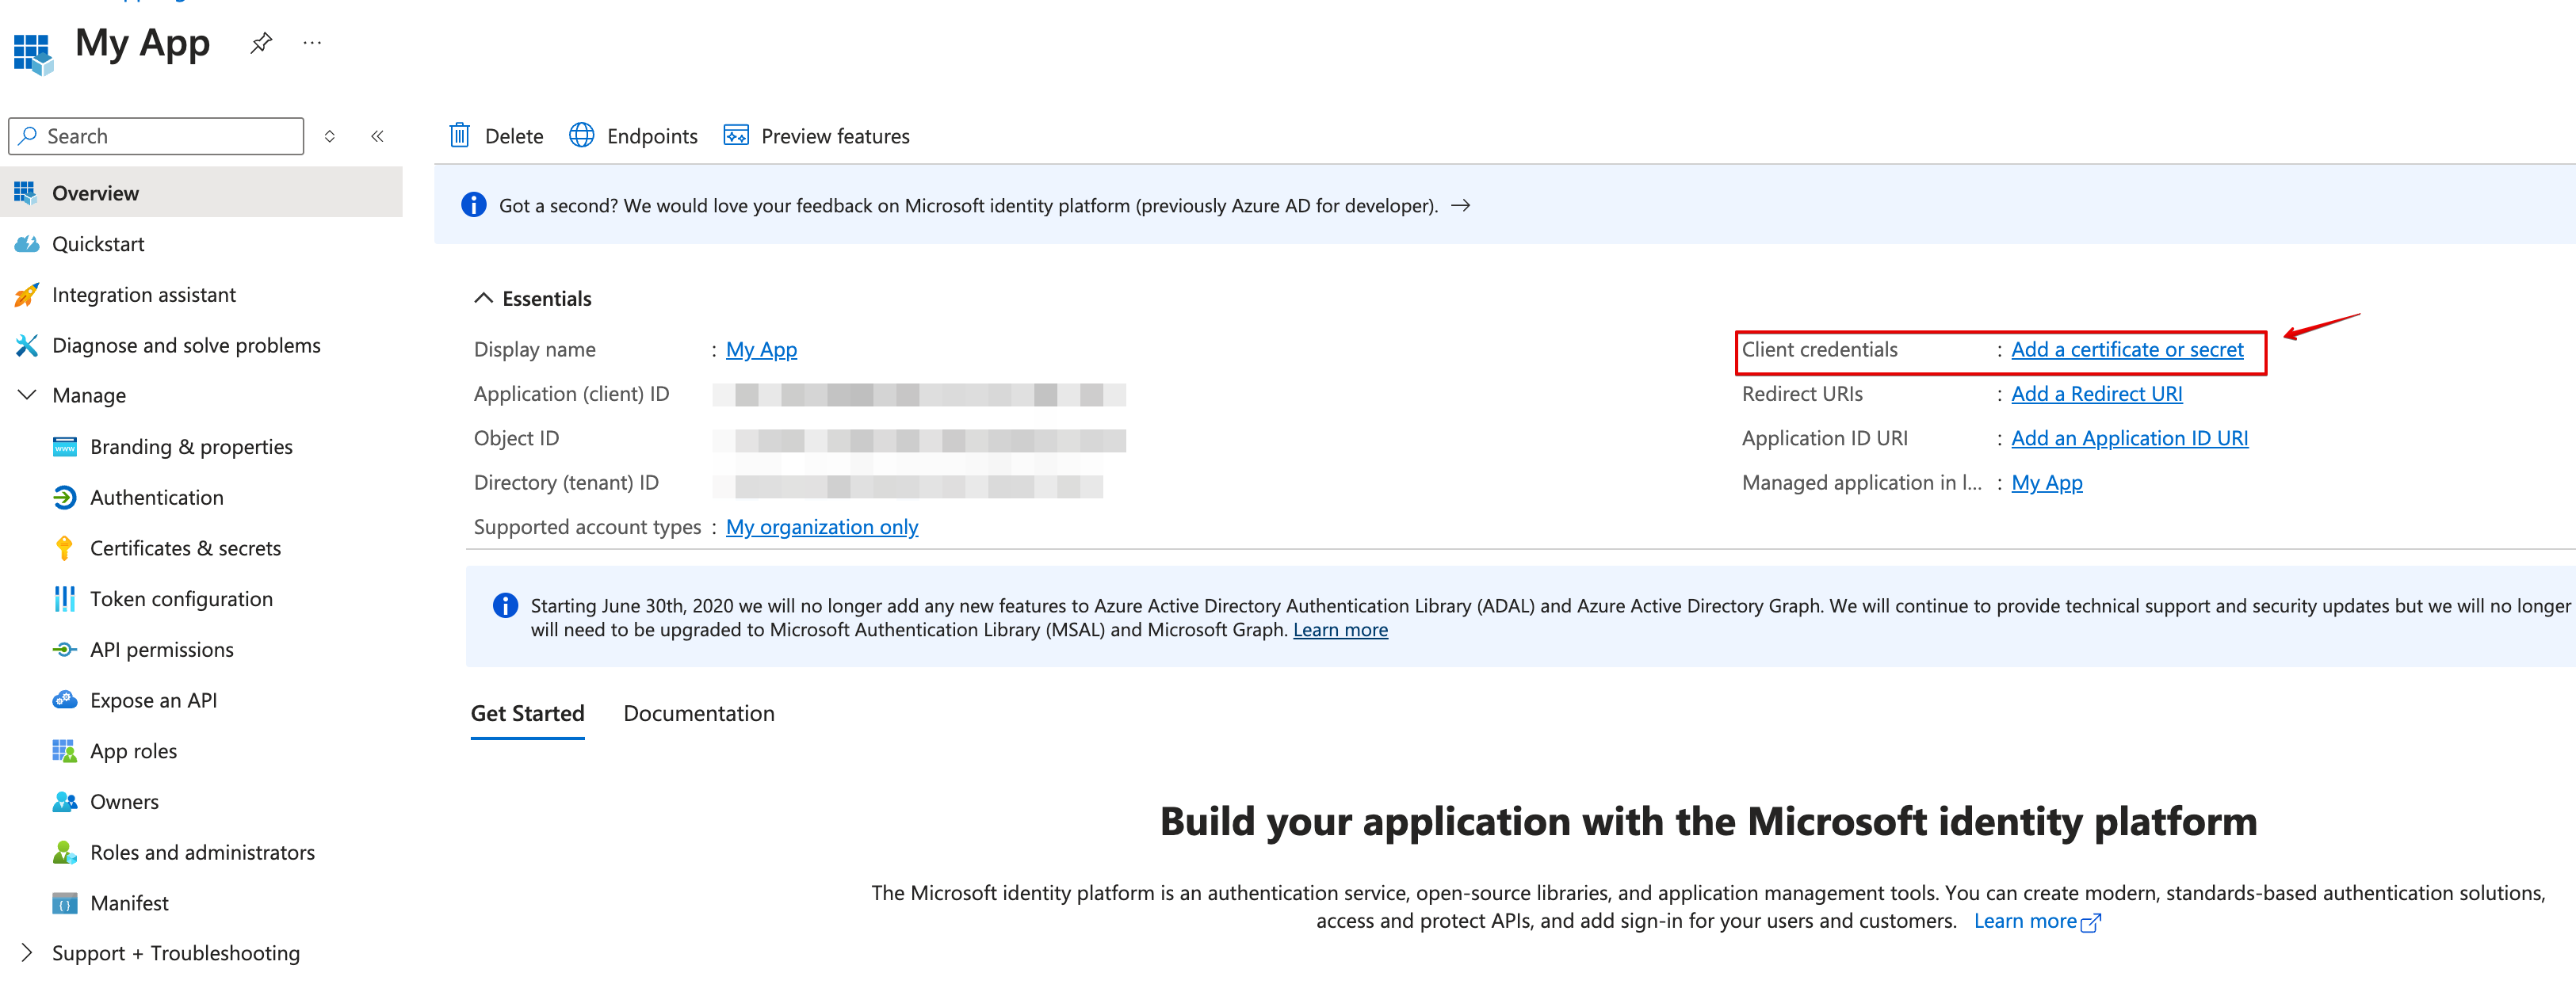
 10. Navigate to **Overview** and Copy your **client ID** and **tenant ID**.
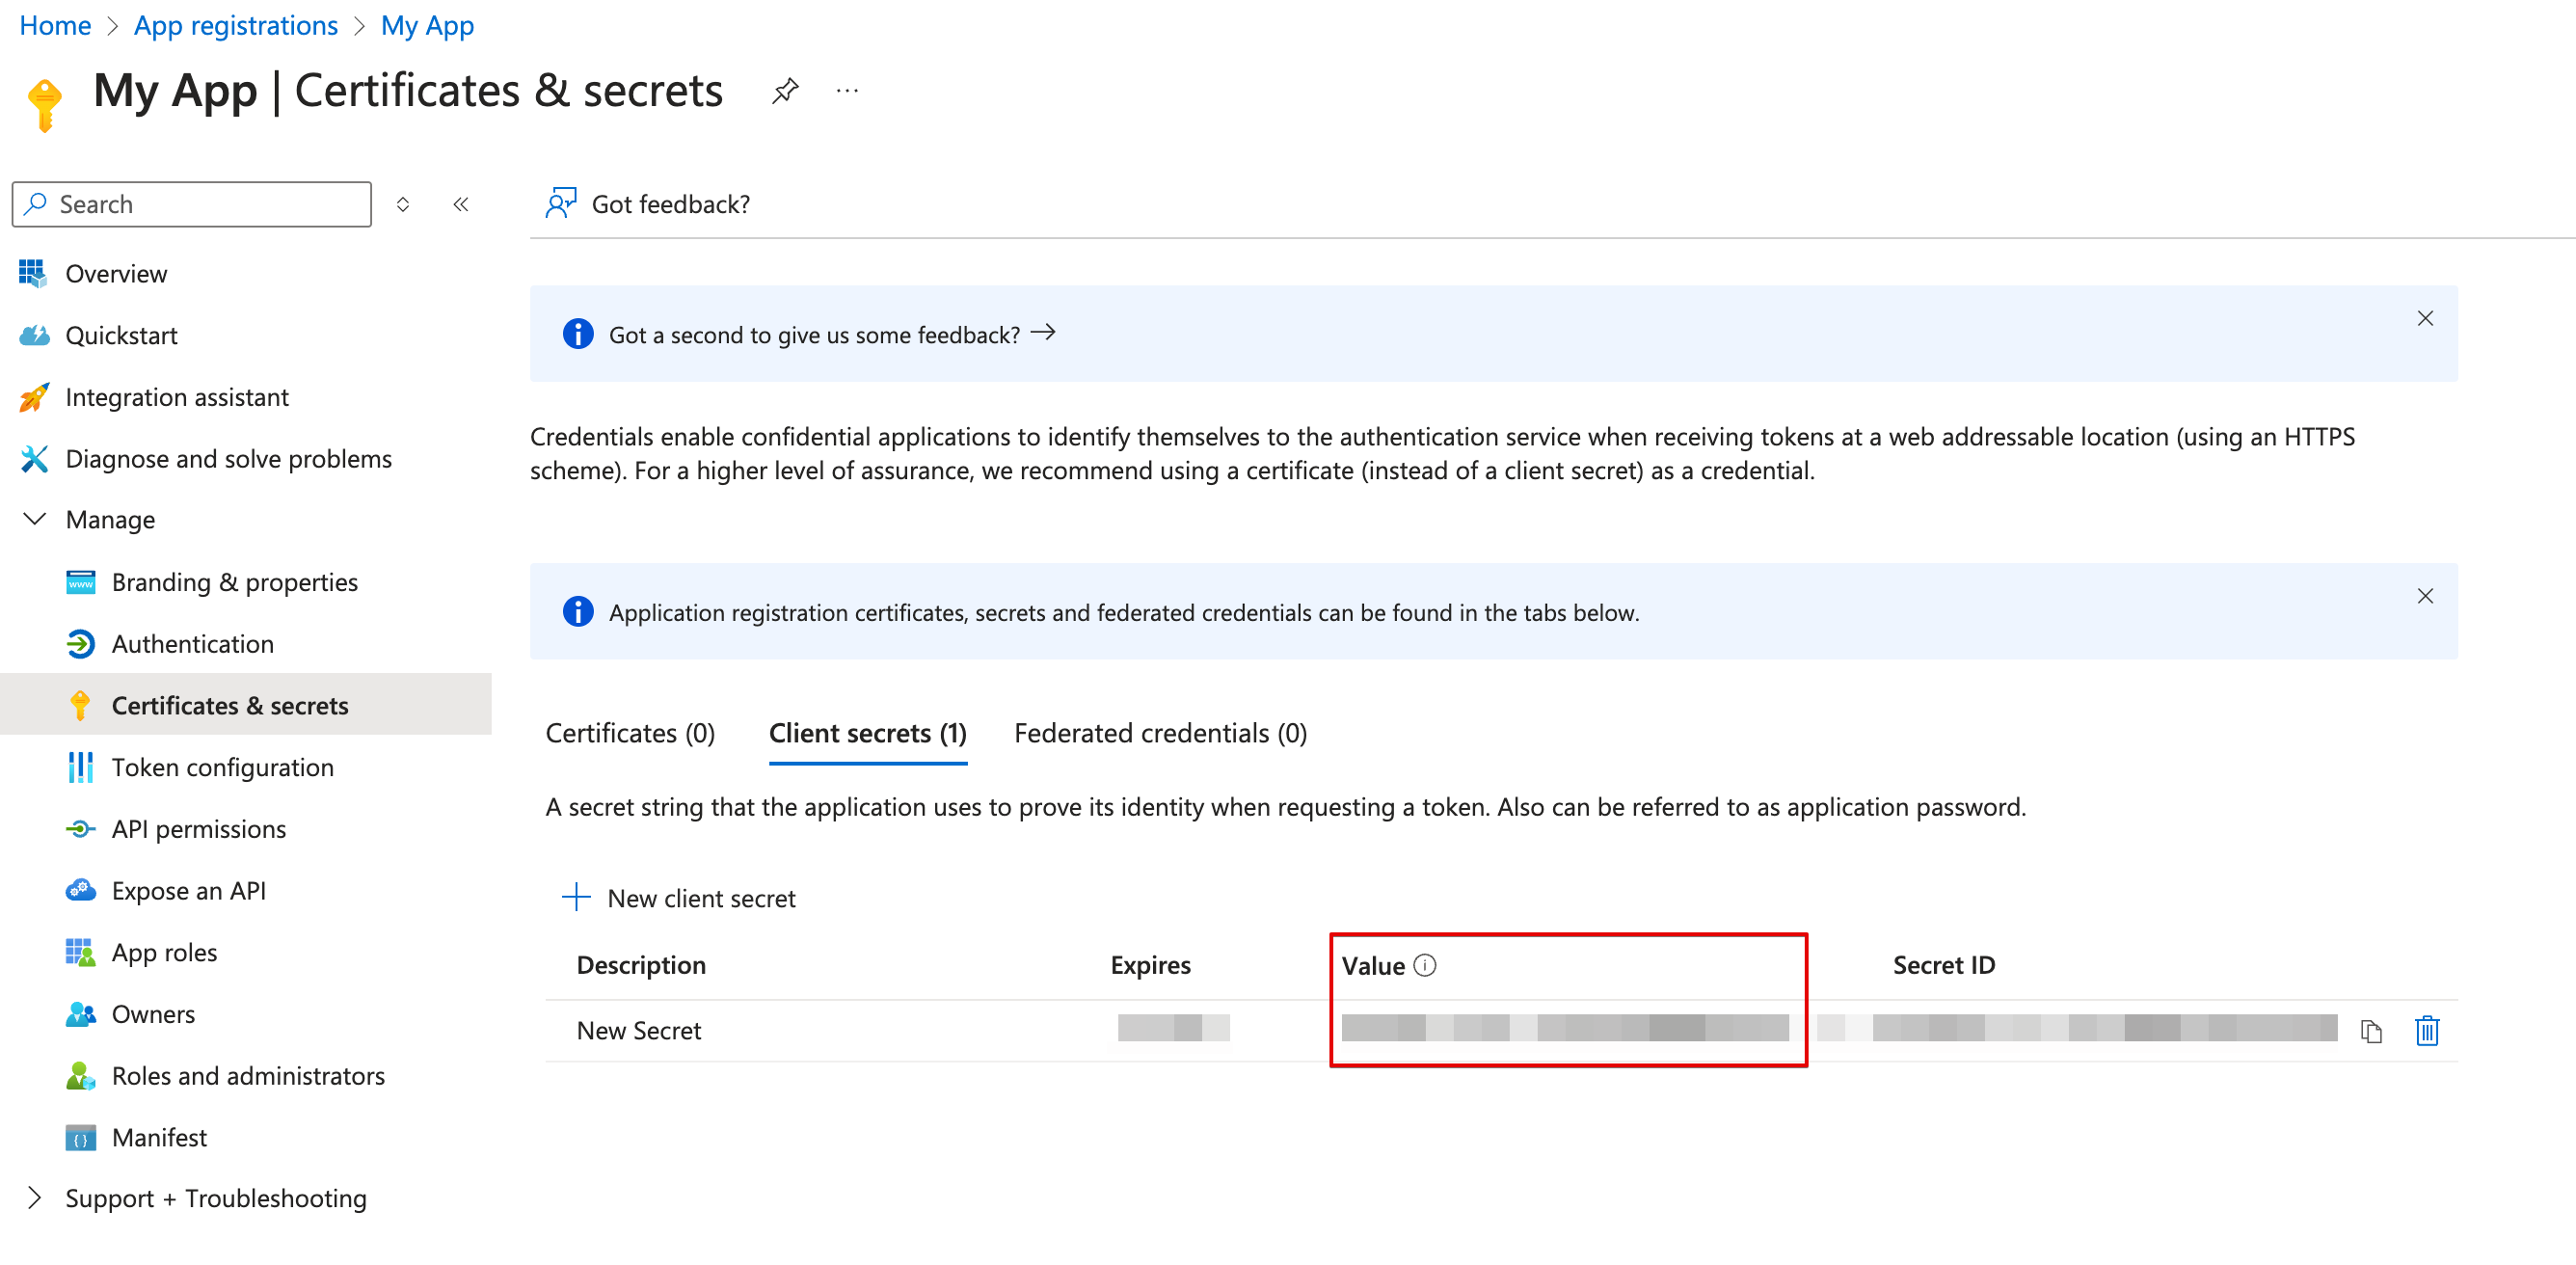
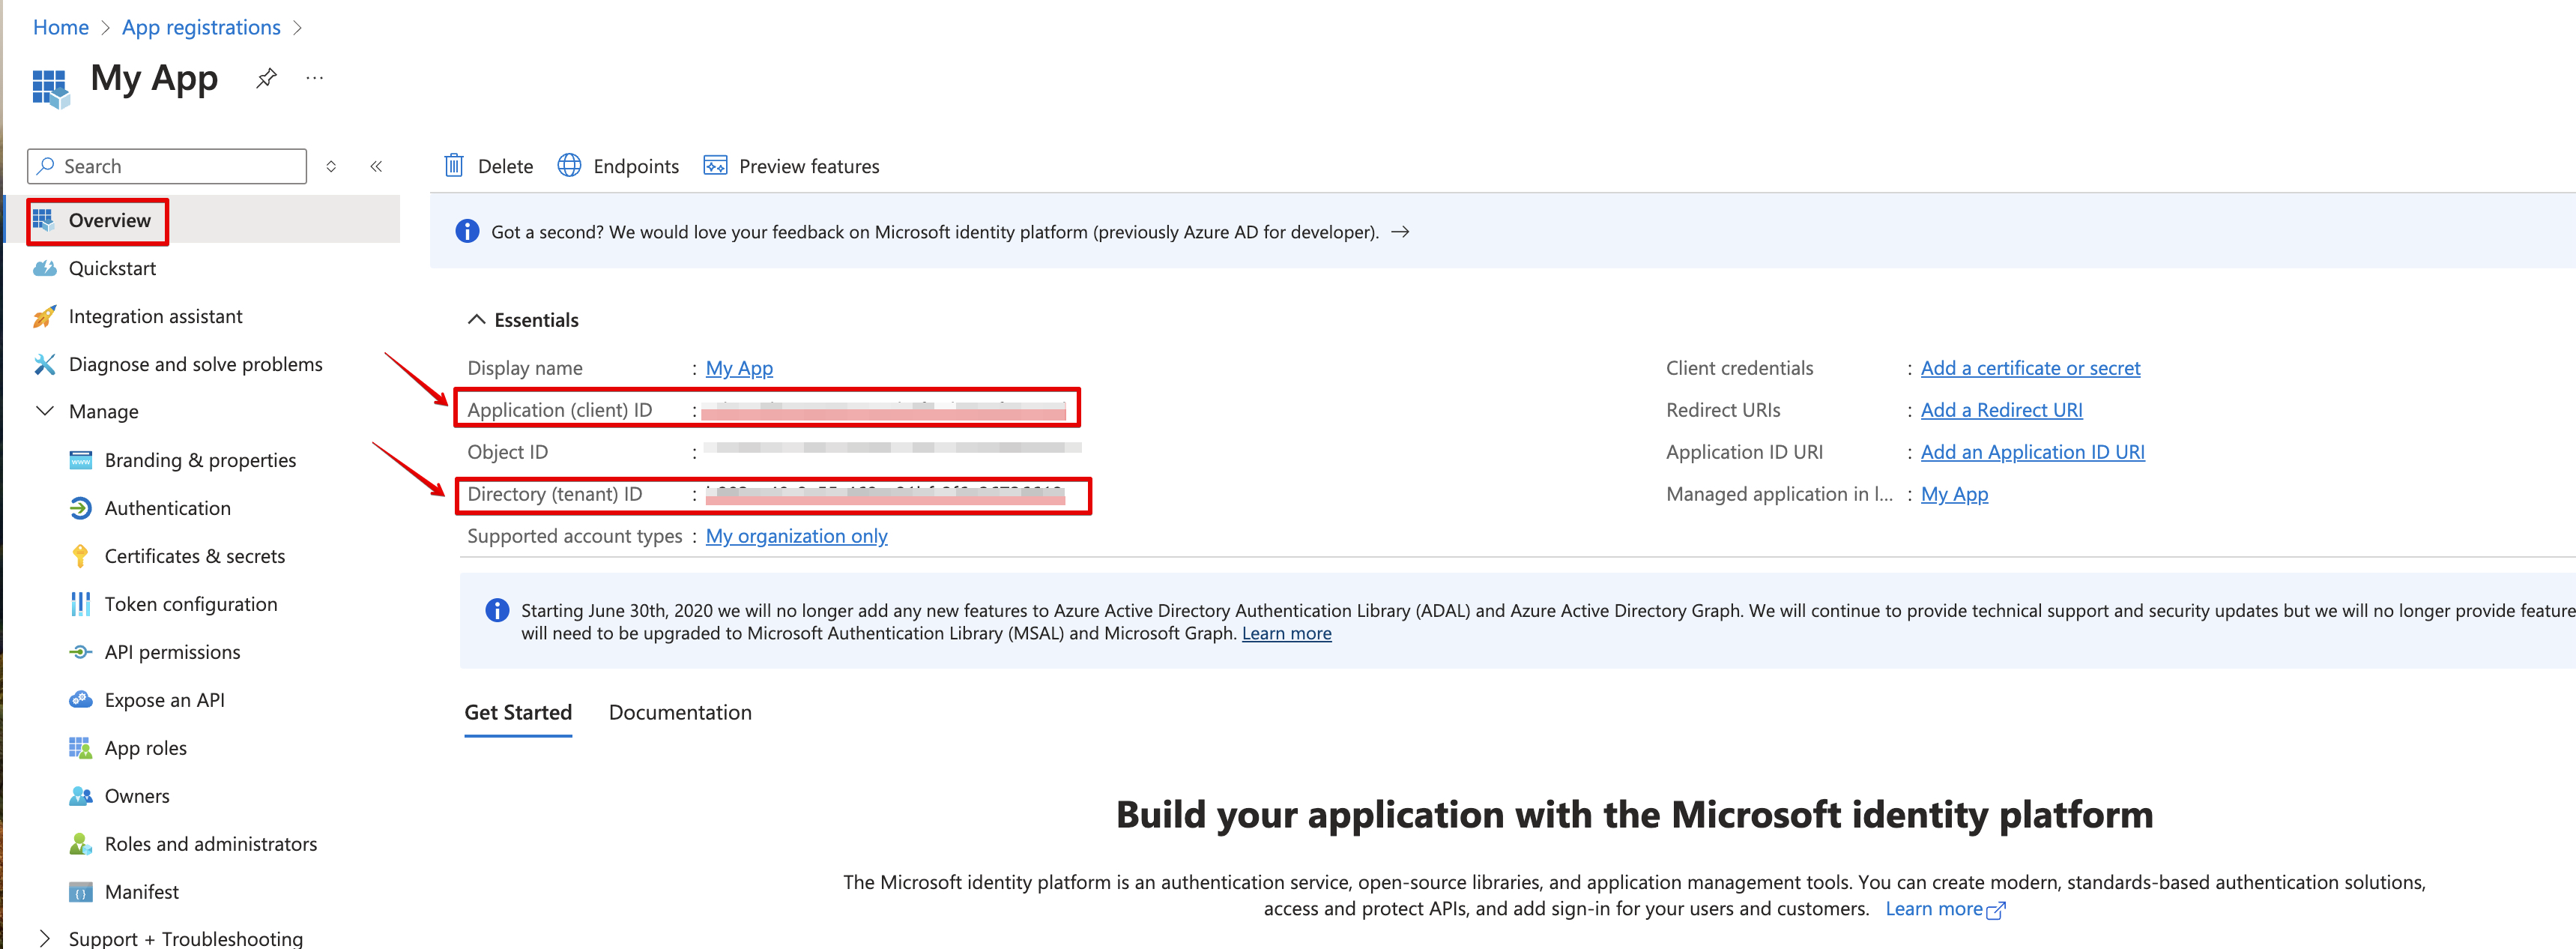 11. Create a new **client secret**.
 12. Copy the **secret value**.
 #### Creating your connection
1. In the Blink platform, navigate to the **Connections** page > **Add connection**. A New Connection dialog box opens displaying icons of external service providers available.
2. Select the **Microsoft Graph** icon. A dialog box with name of the connection and connection methods appear.
3. (Optional) Edit the name of the connection. At a later stage you cannot edit the name.
4. Select **App Registration** as the method to create the connection.
5. Fill in the parameters:
* The Client ID
* The Client Secret
* The Tenant ID
6. (Optional) Click **Test Connection** to test it.
7. Click **Create connection**. The new connection appears on the **Connections** page.
#### Creating your connection
1. In the Blink platform, navigate to the **Connections** page > **Add connection**. A New Connection dialog box opens displaying icons of external service providers available.
2. Select the **Microsoft Graph** icon. A dialog box with name of the connection and connection methods appear.
3. (Optional) Edit the name of the connection. At a later stage you cannot edit the name.
4. Select **App Registration** as the method to create the connection.
5. Fill in the parameters:
* The Client ID
* The Client Secret
* The Tenant ID
6. (Optional) Click **Test Connection** to test it.
7. Click **Create connection**. The new connection appears on the **Connections** page.