> ## Documentation Index
> Fetch the complete documentation index at: https://docs.blinkops.com/llms.txt
> Use this file to discover all available pages before exploring further.
# LaunchDarkly
> LaunchDarkly is a SaaS platform for developers to manage feature flags. By decoupling feature rollout and code deployment, LaunchDarkly enables developers to test their code live in production, gradually release features to groups of users, and manage flags throughout their entire lifecycle.
## Creating a LaunchDarkly connection[](#creating-a-launchdarkly-connection "Direct link to Creating a LaunchDarkly connection")
To create the connection you need:
* A LaunchDarkly access token
### Obtaining the credentials[](#obtaining-the-credentials "Direct link to Obtaining the credentials")
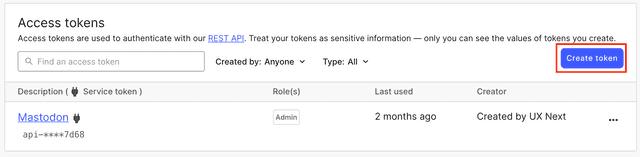
Create an API access token from the **Account settings** page, on the **Authorization** tab. By default, the tokens you create on the **Account settings** page are personal tokens. You can choose to create a service token instead during the token creation workflow.
Your API access token is visible one time, immediately after you create it. If you leave or refresh the page where the token is displayed, it will be obscured and no longer visible. You must copy and store new access tokens somewhere secure before you leave the creation page, or you will lose access to the token.
#### Creating an access token[](#creating-an-access-token "Direct link to Creating an access token")
1. Navigate to the **Account settings** page.
2. Click **Authorization**.
3. Click **Create token**. The **Create an access token** panel appears.
 4. Give your token a human-readable **Name**.
5. Assign a **Role** to the token by choosing one from the menu.
6. Select the **API version** to assign to your token. By default, API requests you send using this token will use this API version. To learn more, read [Versioning](https://apidocs.launchdarkly.com/#section/Overview/Versioning).
7. (Optional) Select the **This is a service token** checkbox if you wish to create a service token. This feature is only available to customers on Enterprise plans.
4. Give your token a human-readable **Name**.
5. Assign a **Role** to the token by choosing one from the menu.
6. Select the **API version** to assign to your token. By default, API requests you send using this token will use this API version. To learn more, read [Versioning](https://apidocs.launchdarkly.com/#section/Overview/Versioning).
7. (Optional) Select the **This is a service token** checkbox if you wish to create a service token. This feature is only available to customers on Enterprise plans.
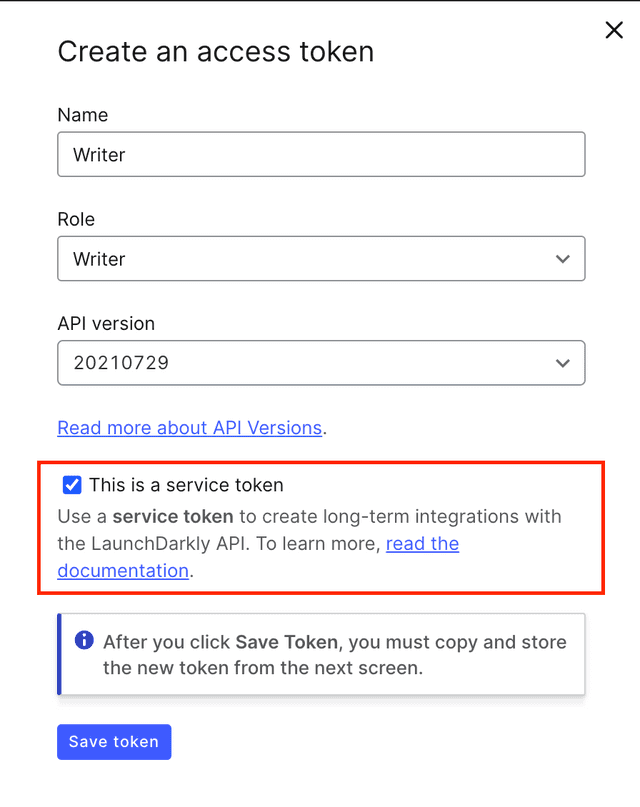 8. Click **Save token**. The new token appears in the **Authorization** page.
9. Copy and save the token somewhere secure. After you leave this page, the token is obscured.
### Creating your connection[](#creating-your-connection "Direct link to Creating your connection")
1. In the Blink platform, navigate to the **Connections** page > **Add connection**. A New Connection dialog box opens displaying icons of external service providers available.
2. Select the **LaunchDarkly** icon. A dialog box with name of the connection and connection methods appears.
3. (Optional) Edit the name of the connection. At a later stage you cannot edit the name.
4. Select **Access Token** as the method to make the connection.
5. Fill in the parameters:
* The access token
6. (Optional) Click **Test Connection** to test it.
7. Click **Create connection**. The new connection appears on the **Connections** page.
8. Click **Save token**. The new token appears in the **Authorization** page.
9. Copy and save the token somewhere secure. After you leave this page, the token is obscured.
### Creating your connection[](#creating-your-connection "Direct link to Creating your connection")
1. In the Blink platform, navigate to the **Connections** page > **Add connection**. A New Connection dialog box opens displaying icons of external service providers available.
2. Select the **LaunchDarkly** icon. A dialog box with name of the connection and connection methods appears.
3. (Optional) Edit the name of the connection. At a later stage you cannot edit the name.
4. Select **Access Token** as the method to make the connection.
5. Fill in the parameters:
* The access token
6. (Optional) Click **Test Connection** to test it.
7. Click **Create connection**. The new connection appears on the **Connections** page.