> ## Documentation Index
> Fetch the complete documentation index at: https://docs.blinkops.com/llms.txt
> Use this file to discover all available pages before exploring further.
# Google Forms
> Google Forms is a web-based forms application provided by Google that allows users to create and modify forms and quizzes, retrieve form responses and quiz grades, set up quiz answer keys with automatic feedback, and receive push notifications.
## Creating a Google Forms connection
Create the connection by using one of the following methods:
* [OAuth](#using-oauth)
- [Service Account](#using-service-account)
**Ensure the relevant APIs from the following list are enabled:**
* [Google Forms API](https://console.cloud.google.com/apis/api/forms.googleapis.com)
* [Google Drive API](https://console.cloud.google.com/apis/api/drive.googleapis.com)
## Using OAuth
### Creating your connection
1. In the Blink platform, navigate to the **Connections** page > **Add connection**. A New Connection dialog box opens displaying icons of external service providers available.
2. Select the **Google Forms** icon. A dialog box with name of the connection and connection methods appear.
3. (Optional) Edit the name of the connection. At a later stage you cannot edit the name.
4. Click **Google Forms** to authenticate using OAuth.
5. Sign in using your credentials.
### Using service account
#### Creating a service account
This step is only necessary if you don't already have a service account.
1. In the Google Cloud console, go to the [Create service account page](https://console.cloud.google.com/iam-admin/serviceaccounts/create).
2. Enter a name in the **Service account name** field.
* (optional) Edit the service account ID.
* (optional) If you want to grant the service account access to the project, or to grant users access to this service account, click on **Create and continue**. This is not required for the integration with Blink.
3. Click **Done** to finish creating the service account.
#### Create a service account key
1. In the Google Cloud console, go to the [service account page](https://console.cloud.google.com/iam-admin/serviceaccounts).
2. Select the service account that you want to create a key for.
3. Click the **Keys** tab.
4. From the dropdown menu, select **Add key** > **Create new key**.
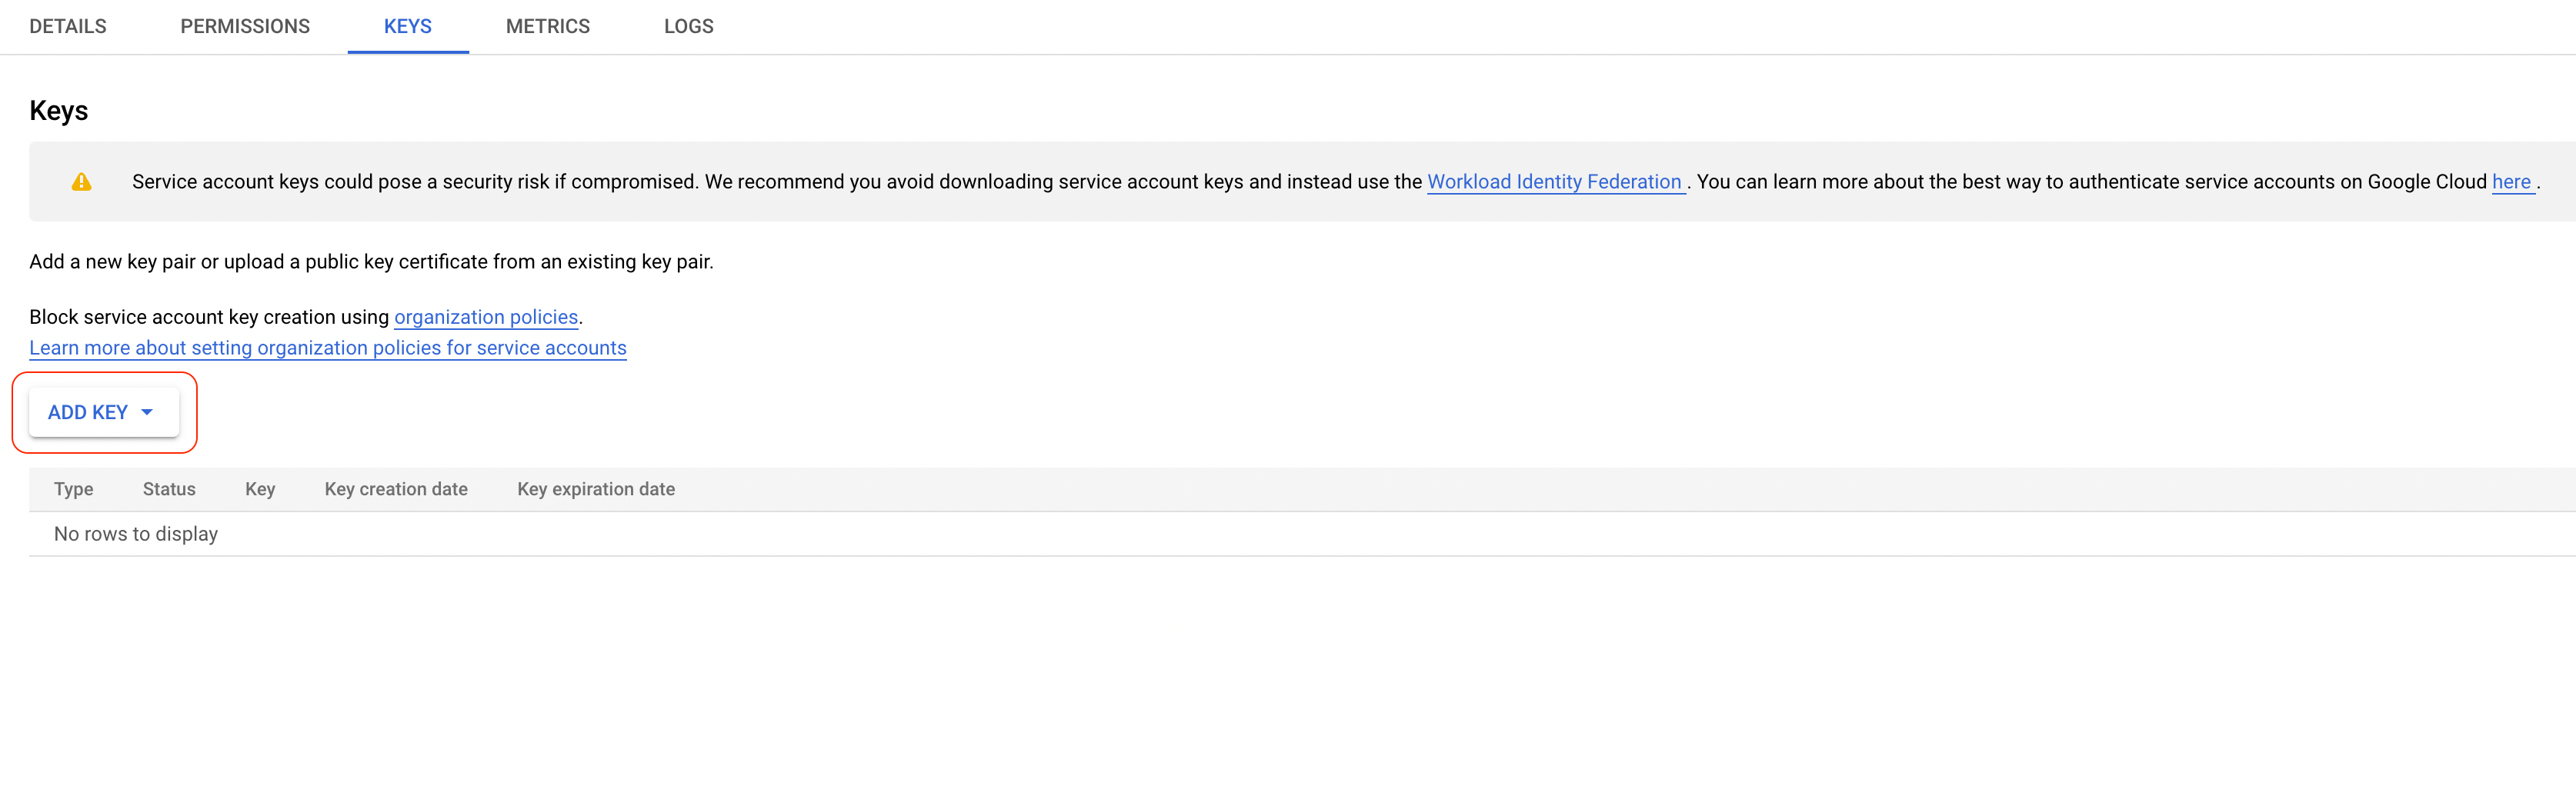 5. Select *JSON* as the key type and click **Create**.
6. Copy the key.
#### Enable service account delegation in your Google Workspace
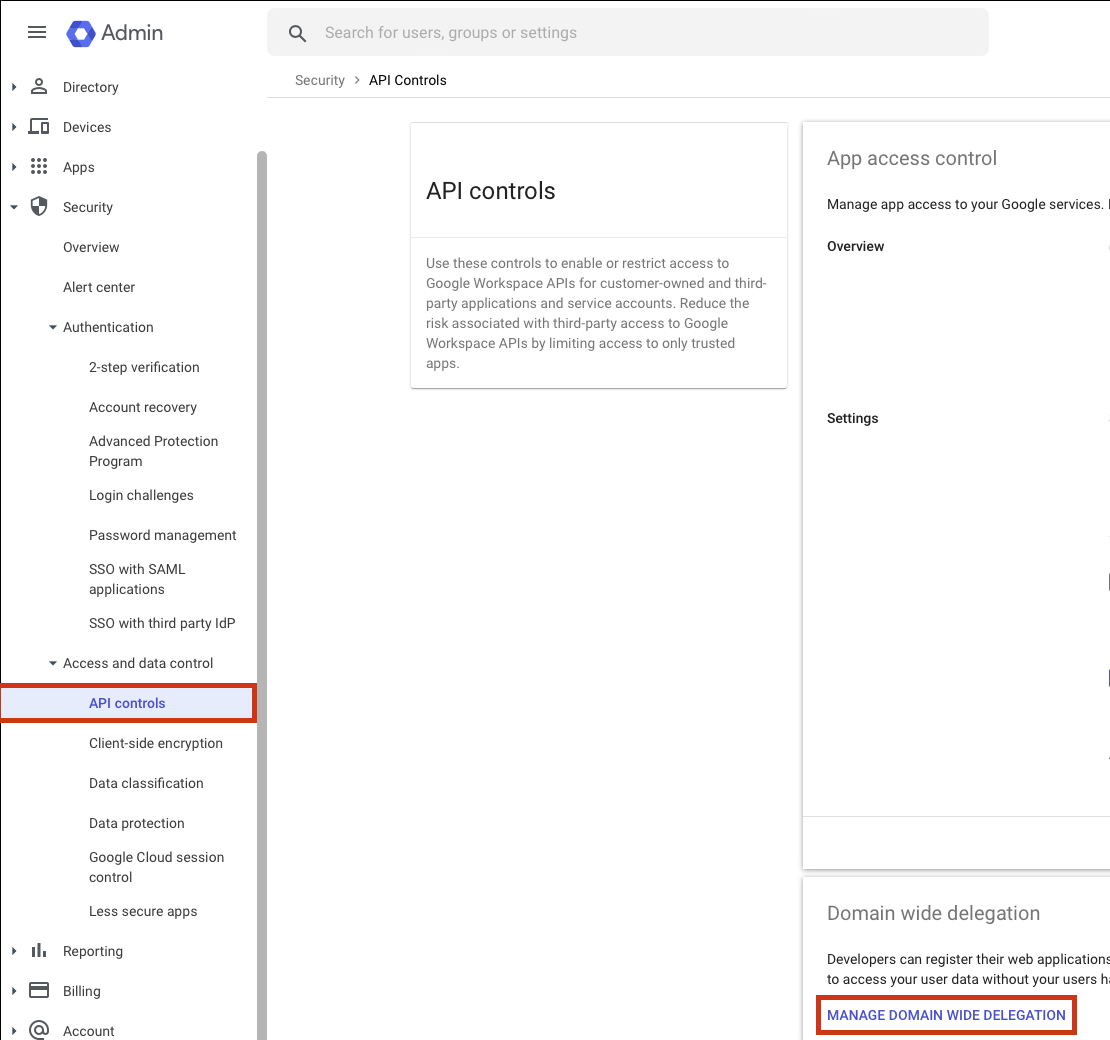
1. In the Google Admin console, go to the [API controls page](https://admin.google.com/u/3/ac/owl) and then click on **Manage domain wide delegation**.
5. Select *JSON* as the key type and click **Create**.
6. Copy the key.
#### Enable service account delegation in your Google Workspace
1. In the Google Admin console, go to the [API controls page](https://admin.google.com/u/3/ac/owl) and then click on **Manage domain wide delegation**.
 2. Add a new client to your workspace. In **Client ID**, use the client ID from the downloaded JSON service account from the previous step.
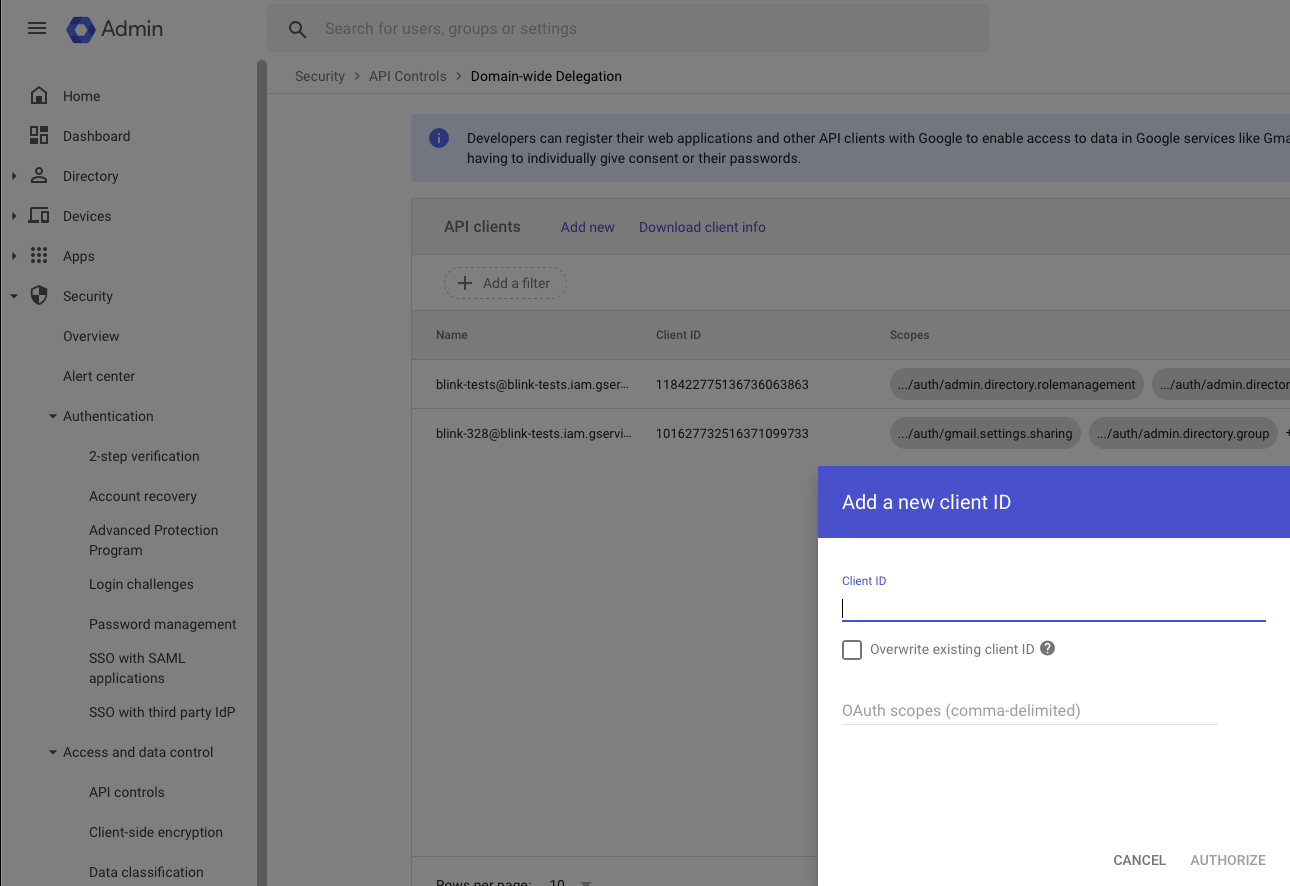 3. Add the following scopes:
```
https://www.googleapis.com/auth/forms.body
https://www.googleapis.com/auth/forms.responses.readonly
```
You can adjust the scopes according to your requirements.
It usually takes a few minutes for impersonation access to be granted after
the client ID was added.
#### Creating your connection
1. In the Blink platform, navigate to the **Connections** page > **Add connection**.
2. Select the **Google Forms** icon. A dialog box with name of the connection and connection methods appear.
3. (Optional) Edit the name of the connection. At a later stage you cannot edit the name.
4. Select **Service Account** as the method to create the connection.
5. Fill in the parameters:
* Paste the JSON key into the *Credentials* field.
* Specify the email address of the *Delegated User* for which Blink will use for access. Many actions contain a `Delegated User Override` parameter which lets you perform specific operations on behalf of a different user. When this parameter is not specified, it will default to the one provided in the connection.
The delegated user has to be a user in the same domain. For the list of
the available users, navigate to the [users
tab](https://admin.google.com/u/3/ac/users).
* A comma-separatedlist of *Scopes* you want this connection to request. This list should not exceed the scopes you added in your domain-wide delegation.
6. (Optional) Click **Test Connection** to test it.
7. Click **Create connection**. The new connection appears on the **Connections** page.
3. Add the following scopes:
```
https://www.googleapis.com/auth/forms.body
https://www.googleapis.com/auth/forms.responses.readonly
```
You can adjust the scopes according to your requirements.
It usually takes a few minutes for impersonation access to be granted after
the client ID was added.
#### Creating your connection
1. In the Blink platform, navigate to the **Connections** page > **Add connection**.
2. Select the **Google Forms** icon. A dialog box with name of the connection and connection methods appear.
3. (Optional) Edit the name of the connection. At a later stage you cannot edit the name.
4. Select **Service Account** as the method to create the connection.
5. Fill in the parameters:
* Paste the JSON key into the *Credentials* field.
* Specify the email address of the *Delegated User* for which Blink will use for access. Many actions contain a `Delegated User Override` parameter which lets you perform specific operations on behalf of a different user. When this parameter is not specified, it will default to the one provided in the connection.
The delegated user has to be a user in the same domain. For the list of
the available users, navigate to the [users
tab](https://admin.google.com/u/3/ac/users).
* A comma-separatedlist of *Scopes* you want this connection to request. This list should not exceed the scopes you added in your domain-wide delegation.
6. (Optional) Click **Test Connection** to test it.
7. Click **Create connection**. The new connection appears on the **Connections** page.