> ## Documentation Index
> Fetch the complete documentation index at: https://docs.blinkops.com/llms.txt
> Use this file to discover all available pages before exploring further.
# Google Chat
> Google Chat is a communication platform developed by Google. It's designed to facilitate messaging and collaboration among individuals and teams within an organization. Google Chat provides features such as direct messaging, group conversations, file sharing, etc.
## Creating a Google Chat connection
Create the connection by using one of the following methods:
* [OAuth](#using-oauth)
* [Service Account](#using-service-account)
**Ensure the relevant APIs from the following list are enabled:**
* [Google Chat API](https://console.cloud.google.com/apis/api/chat.googleapis.com)
### Using OAuth
1. In the Blink platform, navigate to the **Connections** page > **Add connection**. A New Connection dialog box opens displaying icons of external service providers available.
2. Select the **Google Chat** icon. A dialog box with name of the connection and connection methods appear.
3. (Optional) Edit the name of the connection. At a later stage you cannot edit the name.
4. Click **Google Chat** to authenticate using OAuth.
5. Sign in using your credentials.
### Using service account
#### Creating a service account
This step is only necessary if you don't already have a service account.
1. In the Google Cloud console, go to the [Create service account page](https://console.cloud.google.com/iam-admin/serviceaccounts/create).
2. Enter a name in the **Service account name** field.
* (optional) Edit the service account ID.
* (optional) If you want to grant the service account access to the project, or to grant users access to this service account, click on **Create and continue**. This is not required for the integration with Blink.
3. Click **Done** to finish creating the service account.
#### Create a service account key
1. In the Google Cloud console, go to the [service account page](https://console.cloud.google.com/iam-admin/serviceaccounts).
2. Select the service account that you want to create a key for.
3. Click the **Keys** tab.
4. From the dropdown menu, select **Add key** > **Create new key**.
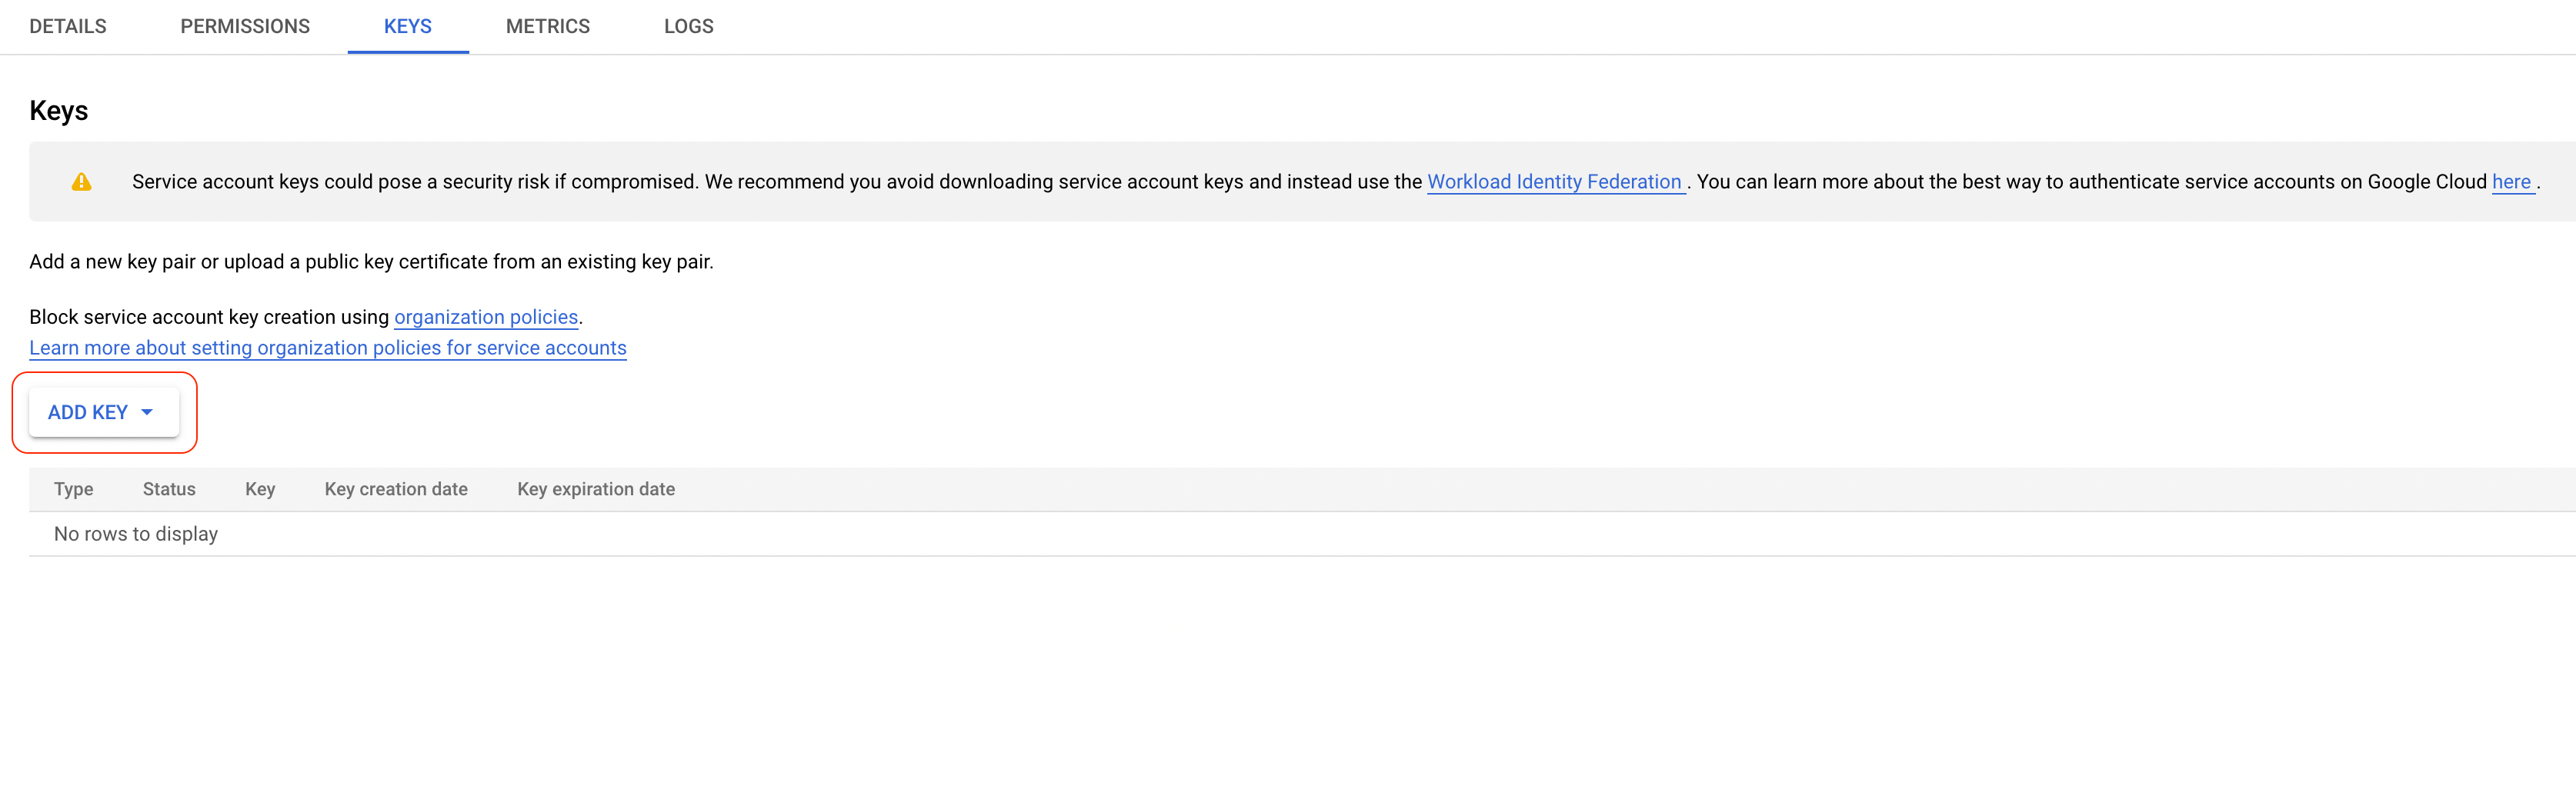 5. Select *JSON* as the key type and click **Create**.
6. Copy the key.
#### Enable service account delegation in your Google Workspace
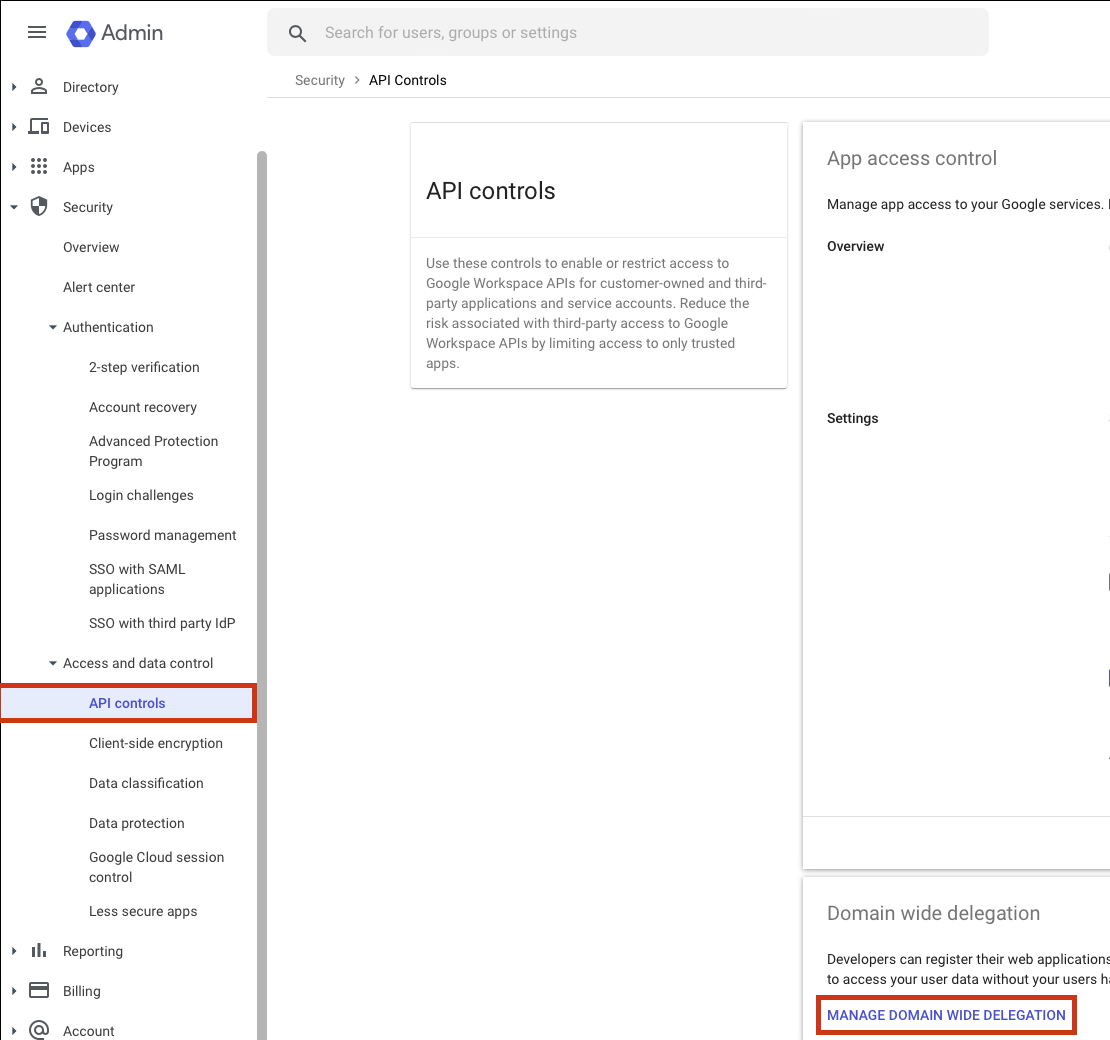
1. In the Google Admin console, go to the [API controls page](https://admin.google.com/u/3/ac/owl) and then click on **Manage domain wide delegation**.
5. Select *JSON* as the key type and click **Create**.
6. Copy the key.
#### Enable service account delegation in your Google Workspace
1. In the Google Admin console, go to the [API controls page](https://admin.google.com/u/3/ac/owl) and then click on **Manage domain wide delegation**.
 2. Add a new client to your workspace. In **Client ID**, use the client ID from the downloaded JSON service account from the previous step.
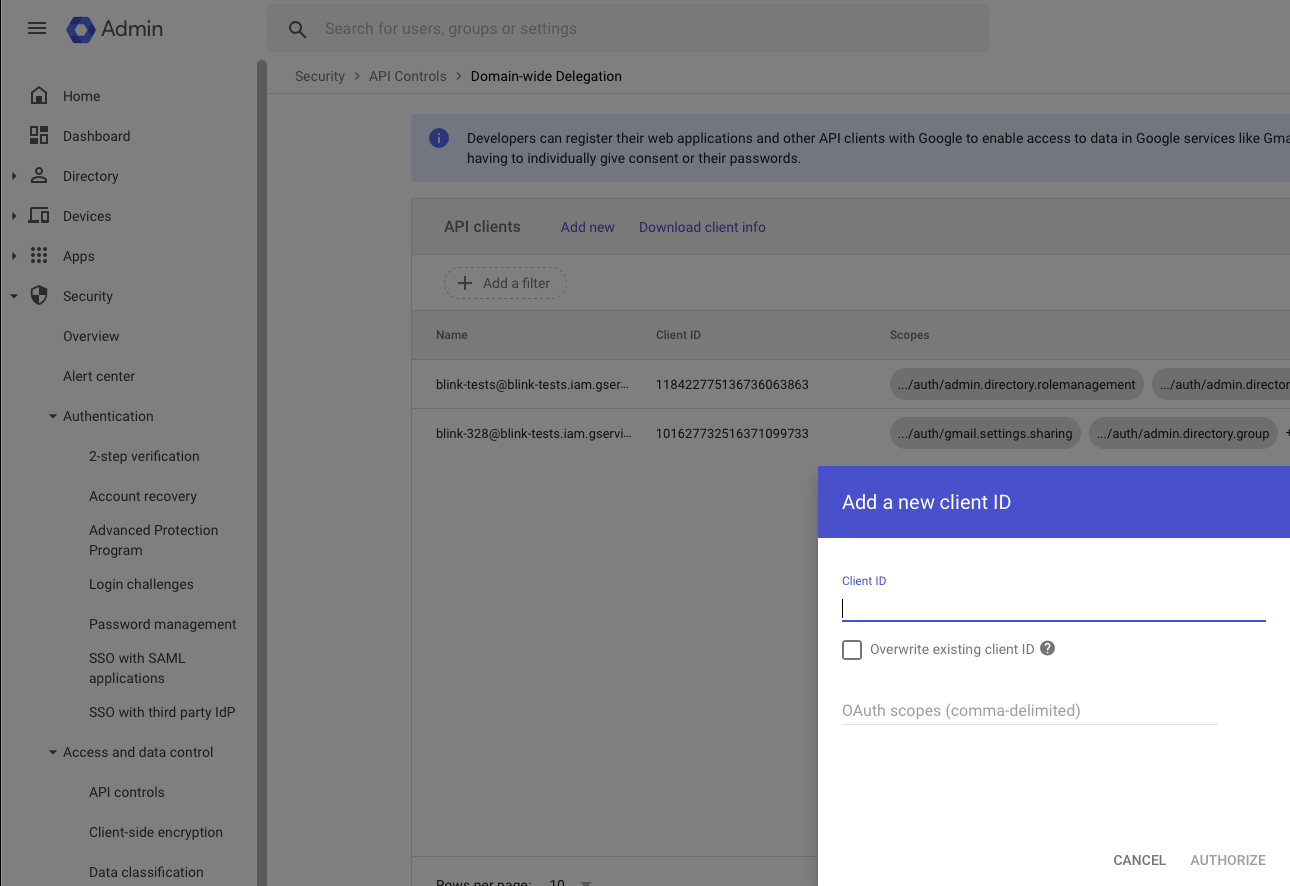 3. Add the following scopes:
```
https://www.googleapis.com/auth/chat.spaces
https://www.googleapis.com/auth/chat.memberships
https://www.googleapis.com/auth/chat.delete
https://www.googleapis.com/auth/chat.messages
```
### Interactive Tutorial Guides
You can also refer to the following tutorial guides for a more in-depth understanding of how to create a Google Chat connection.
[Creating a Google Chat Connection](https://demo.arcade.software/i3K6UfVMcnoBTDyhSI8U?embed\&show_copy_link=true)
[Creating a Google Chat Connection in Blink Ops](https://demo.arcade.software/i5gNtJTpue2WkYju3prc?embed\&show_copy_link=true)
3. Add the following scopes:
```
https://www.googleapis.com/auth/chat.spaces
https://www.googleapis.com/auth/chat.memberships
https://www.googleapis.com/auth/chat.delete
https://www.googleapis.com/auth/chat.messages
```
### Interactive Tutorial Guides
You can also refer to the following tutorial guides for a more in-depth understanding of how to create a Google Chat connection.
[Creating a Google Chat Connection](https://demo.arcade.software/i3K6UfVMcnoBTDyhSI8U?embed\&show_copy_link=true)
[Creating a Google Chat Connection in Blink Ops](https://demo.arcade.software/i5gNtJTpue2WkYju3prc?embed\&show_copy_link=true)