> ## Documentation Index
> Fetch the complete documentation index at: https://docs.blinkops.com/llms.txt
> Use this file to discover all available pages before exploring further.
# Exchange Online
> Exchange Online is an enterprise-class collaboration product by Microsoft that primarily focuses on sending, receiving and storing email messages.
## Creating an Exchange Online connection
Create the connection by using one of the following methods:
* [OAuth](#using-oauth)
* [Application Credentials](#using-application-credentials)
### Using OAuth
#### Creating your connection
1. In the Blink platform, navigate to the **Connections** page > **Add connection**. A New Connection dialog box opens displaying icons of external service providers available.
2. Select the **Exchange Online** icon. A dialog box with name of the connection and connection methods appear.
3. (Optional) Edit the name of the connection. At a later stage you cannot edit the name.
4. Click **Exchange Online** to authenticate using OAuth.
5. Sign in using your credentials.
Some actions require specific roles and permissions that are only available to user accounts.
For example, the [Start Compliance Search](/docs/integrations/exchange-online/actions/start-compliance-search) requires the `eDiscovery Manager` role in Microsoft Compliance.
For these cases, the action can be run using an Exchange Online OAuth connection by authenticating via a user instead of an application.
### Using Application Credentials
#### Obtaining the credentials
To connect to Exchange Online, Blink uses Certificate Based Authentication (CBA).
1. Follow the instructions in the following [link](https://learn.microsoft.com/en-us/powershell/exchange/app-only-auth-powershell-v2?view=exchange-ps#set-up-app-only-authentication) to set up app only authentication.
* Make sure that the application has the *Exchange Administrator* role.
* Save the certificate that you uploaded to Azure. **It cannot be downloaded again!**
2. Once your application is authorized, you should have a certificate stored as a `.pfx` and `.cer` file.
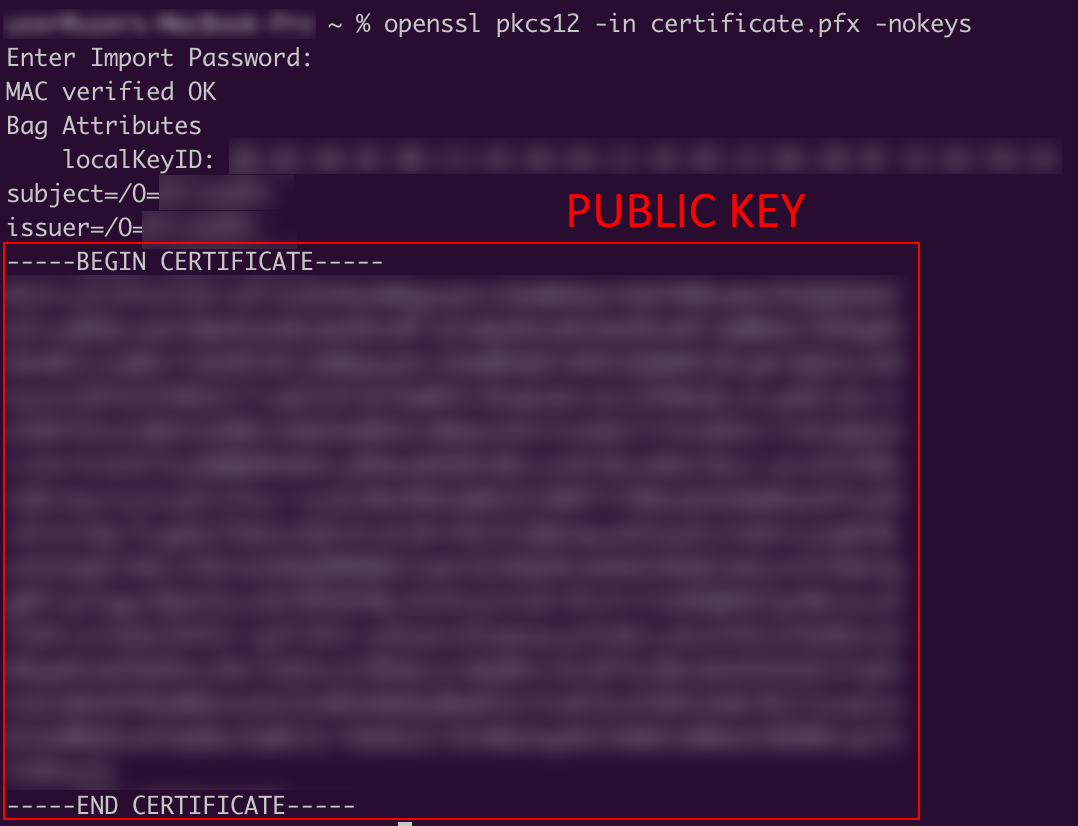
3. Extract the public and private key of the certificate in a Base64 encoding:
1. In a bash terminal, install the `openssl` package if it is not installed already.
2. Public key: `openssl pkcs12 -in .pfx -nokeys`
 3. Private key: `openssl pkcs12 -in .pfx -nodes -nocerts | openssl rsa`
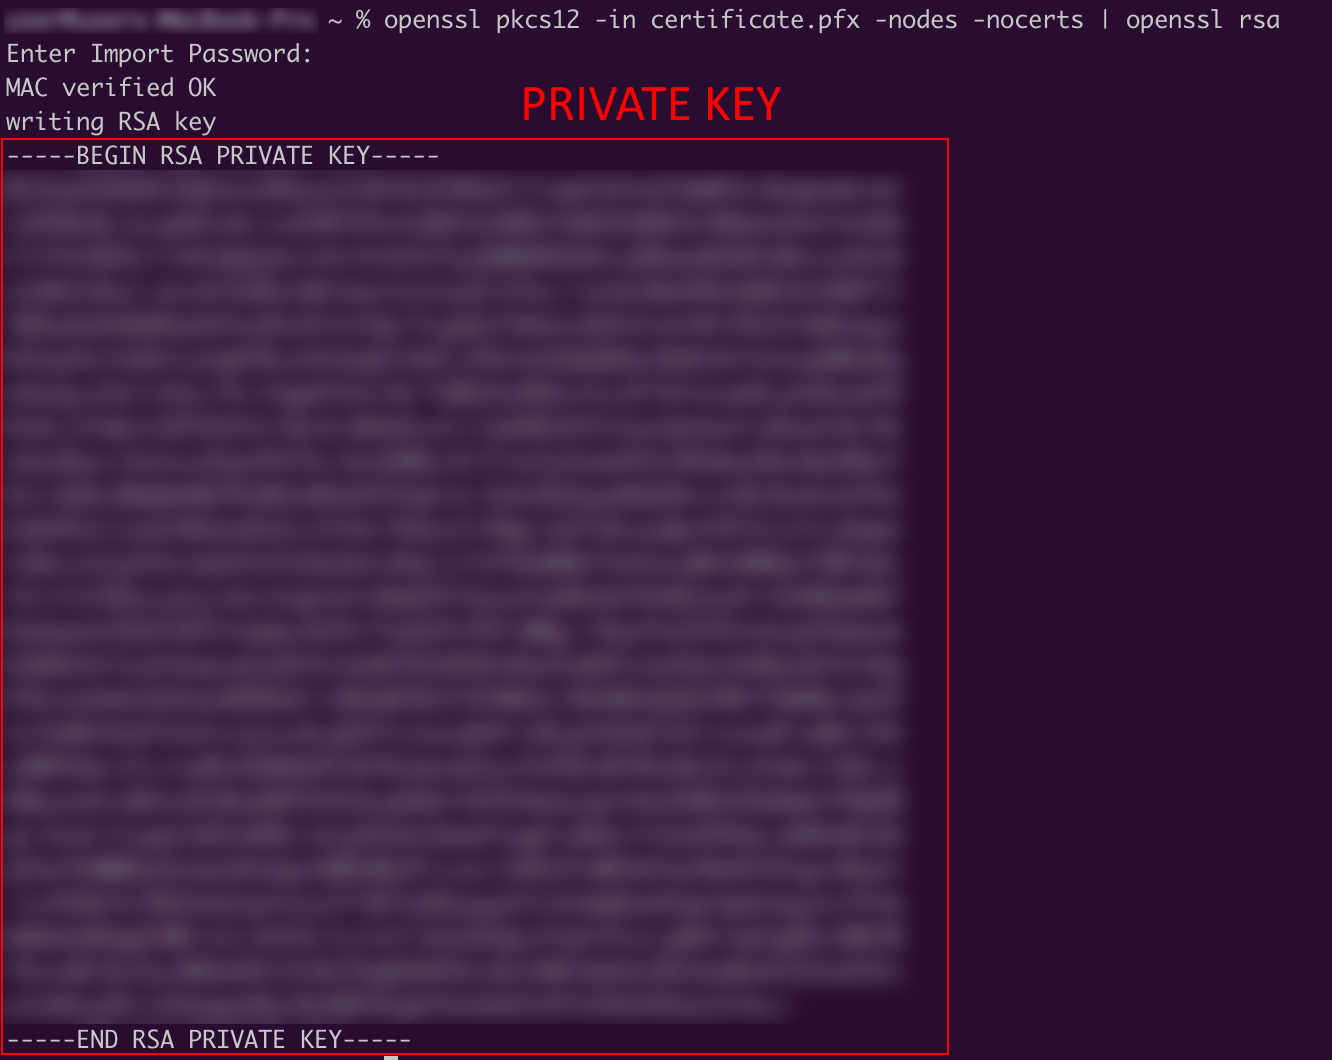 4. Both commands will have a Base64 encoded key, surrounded by `==========` tags. These are the values that need to be used for the Blink connection.
#### Setting API Permissions
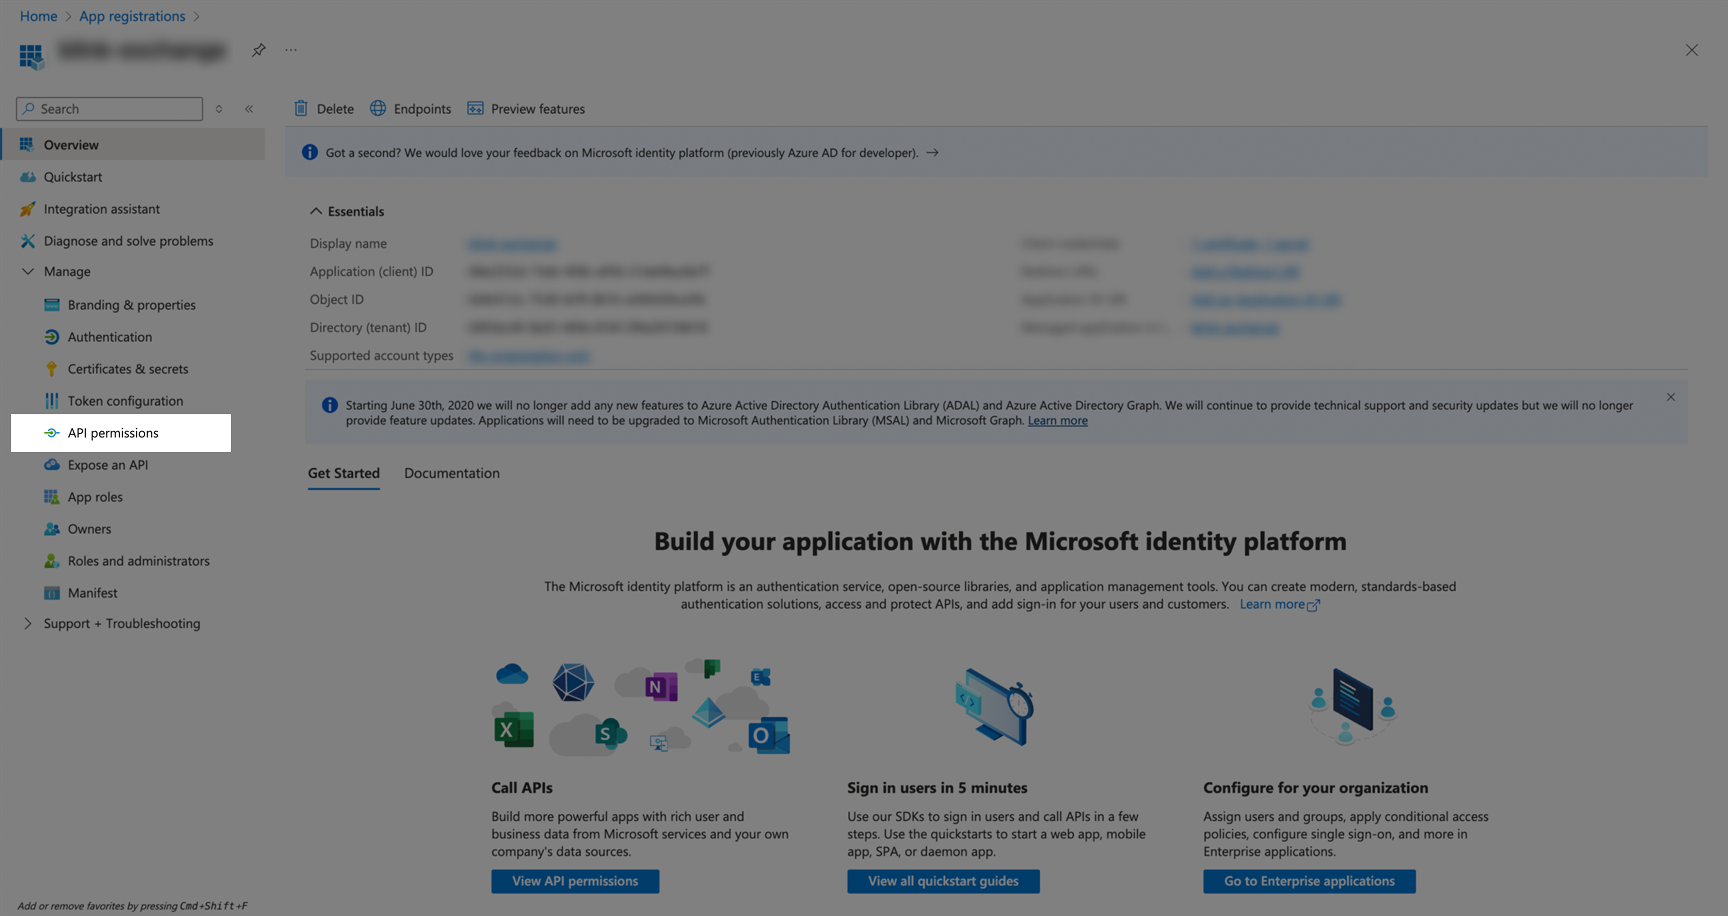
1. **Navigate to [Azure Portal](https://portal.azure.com)** and select your app registration.
2. **Configure API Permissions**:
* Go to **API permissions** in your app registration.
4. Both commands will have a Base64 encoded key, surrounded by `==========` tags. These are the values that need to be used for the Blink connection.
#### Setting API Permissions
1. **Navigate to [Azure Portal](https://portal.azure.com)** and select your app registration.
2. **Configure API Permissions**:
* Go to **API permissions** in your app registration.
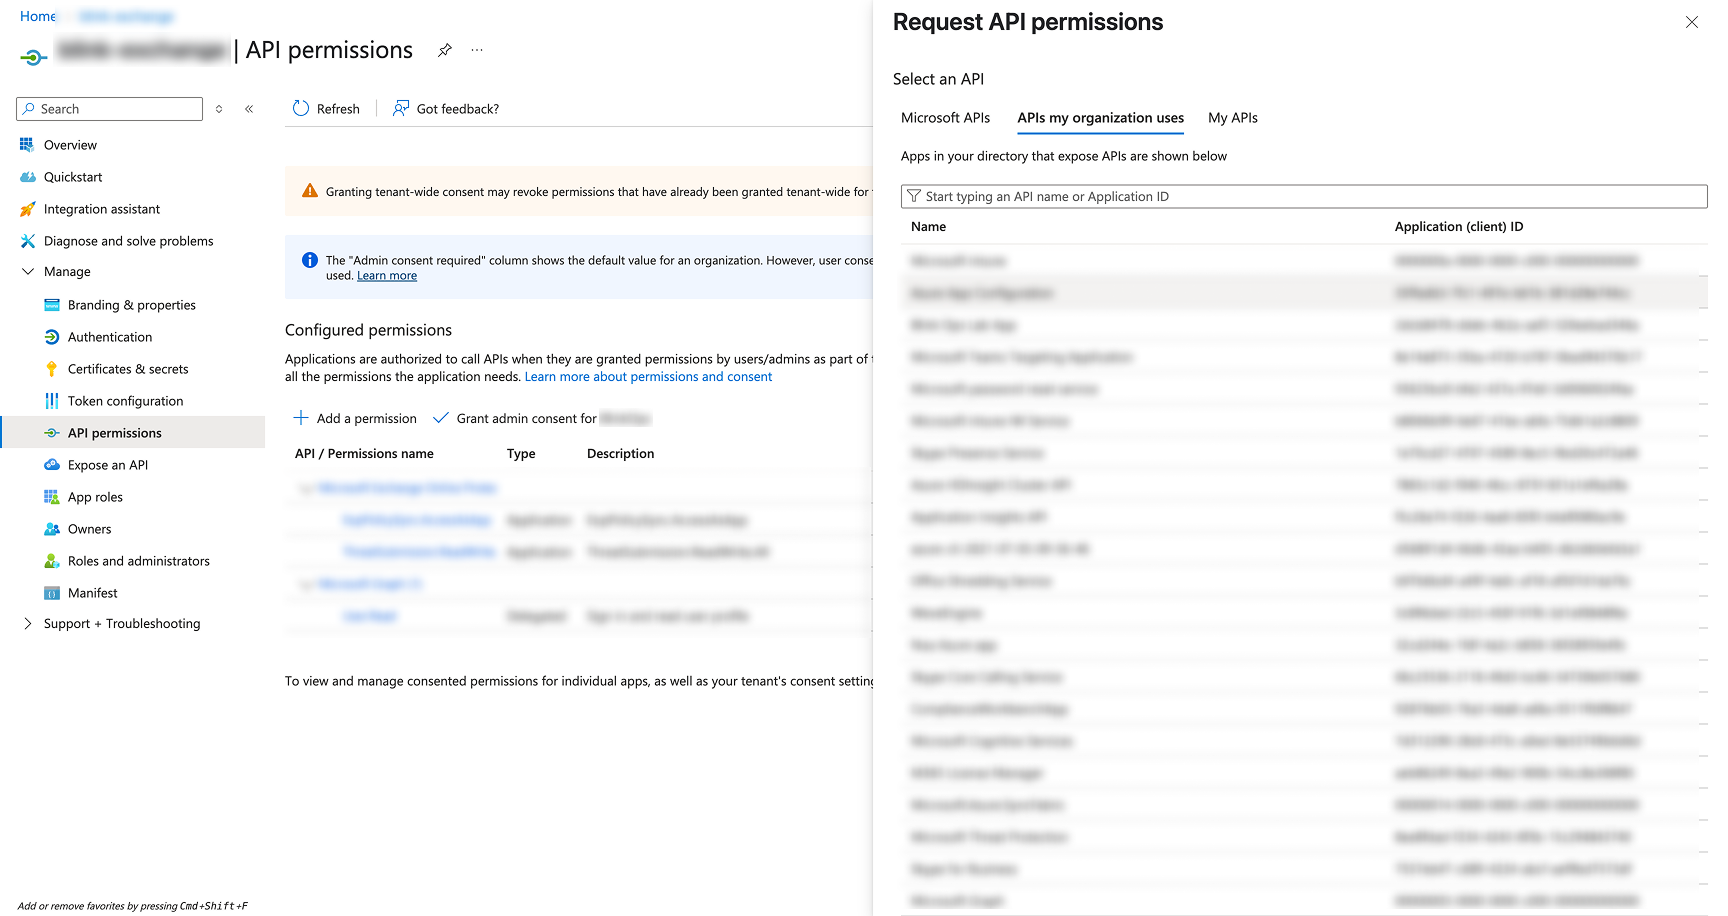
 * Click **Add a permission** to open the API permissions dialog.
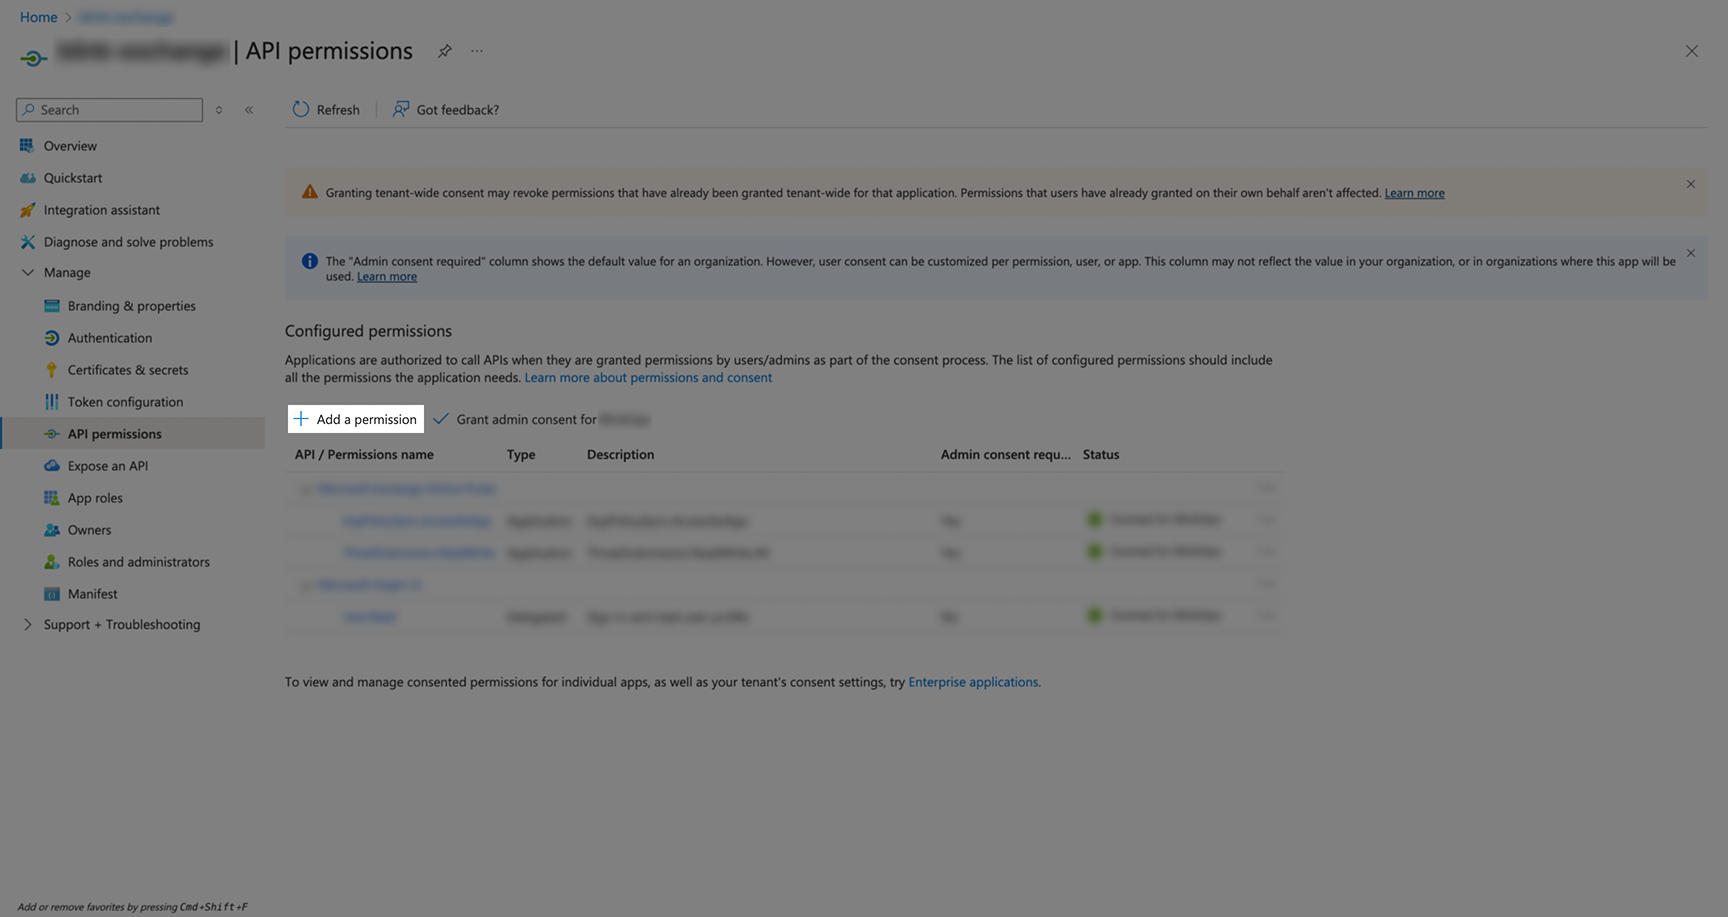 * Select **APIs my organization uses** tab, then search for and select your Office 365 Exchange Online application.
 * Choose **Application permissions** (not Delegated permissions).
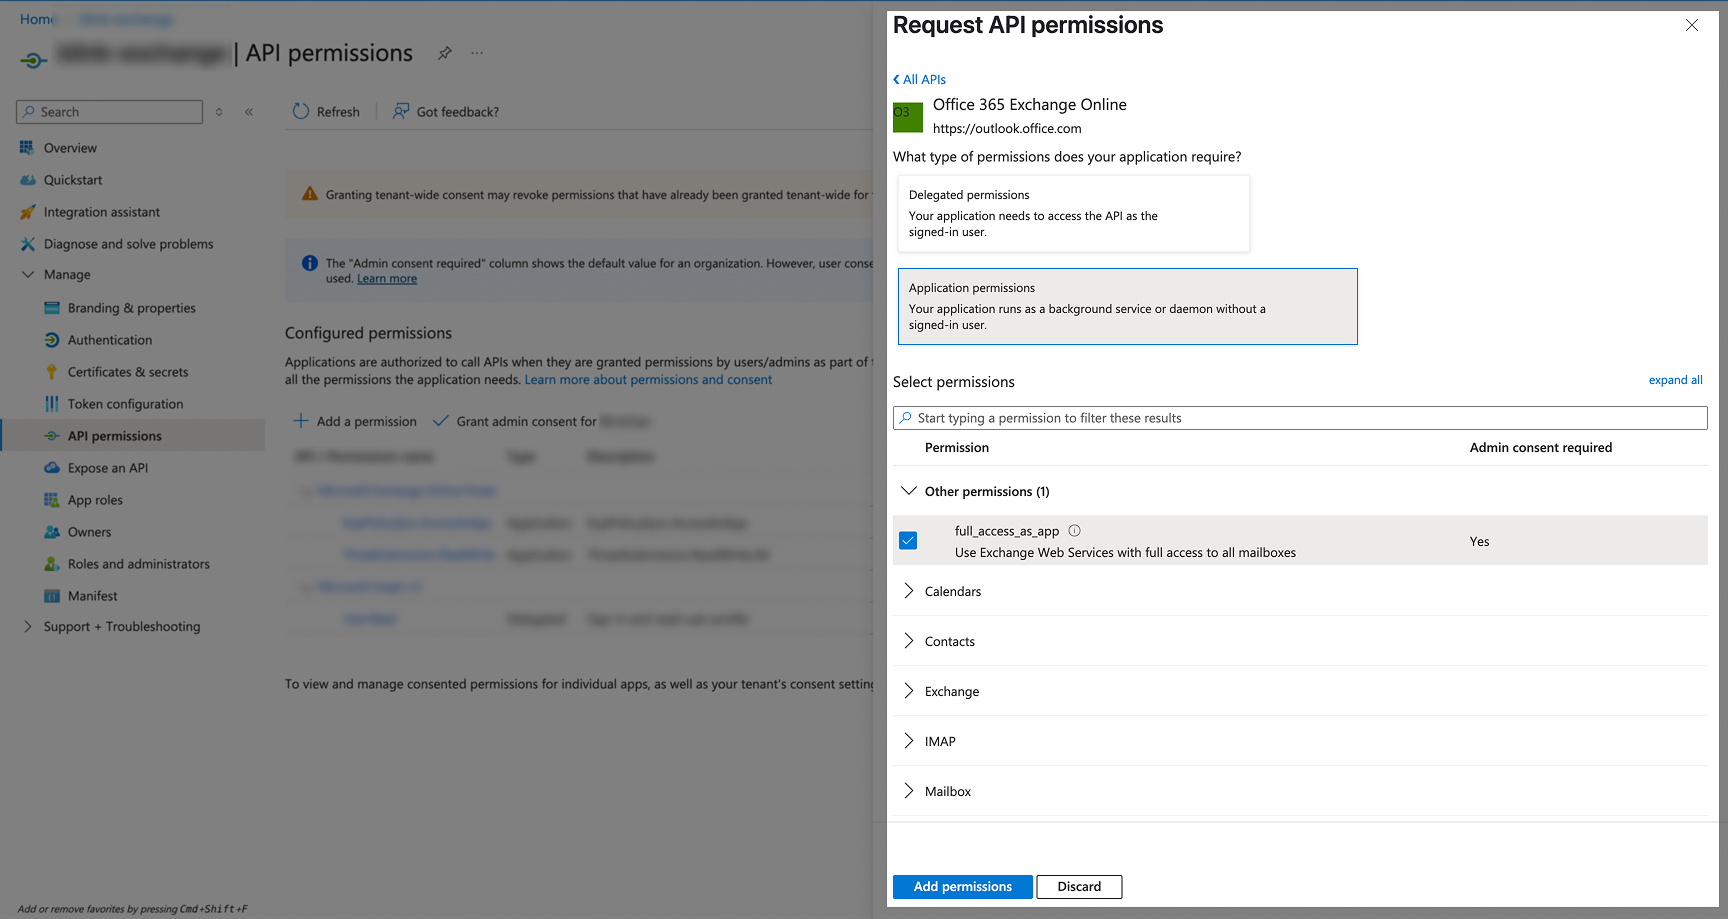 * Add the following permissions:
| API | Permissions name | Type |
| ----------------- | ---------------------- | ---------------------- |
| Exchange | `Exchange.ManageAsApp` | Application permission |
| Other permissions | `full_access_as_app` | Application permission |
3. **Grant Admin Consent** for all configured permissions:
* Add the following permissions:
| API | Permissions name | Type |
| ----------------- | ---------------------- | ---------------------- |
| Exchange | `Exchange.ManageAsApp` | Application permission |
| Other permissions | `full_access_as_app` | Application permission |
3. **Grant Admin Consent** for all configured permissions:
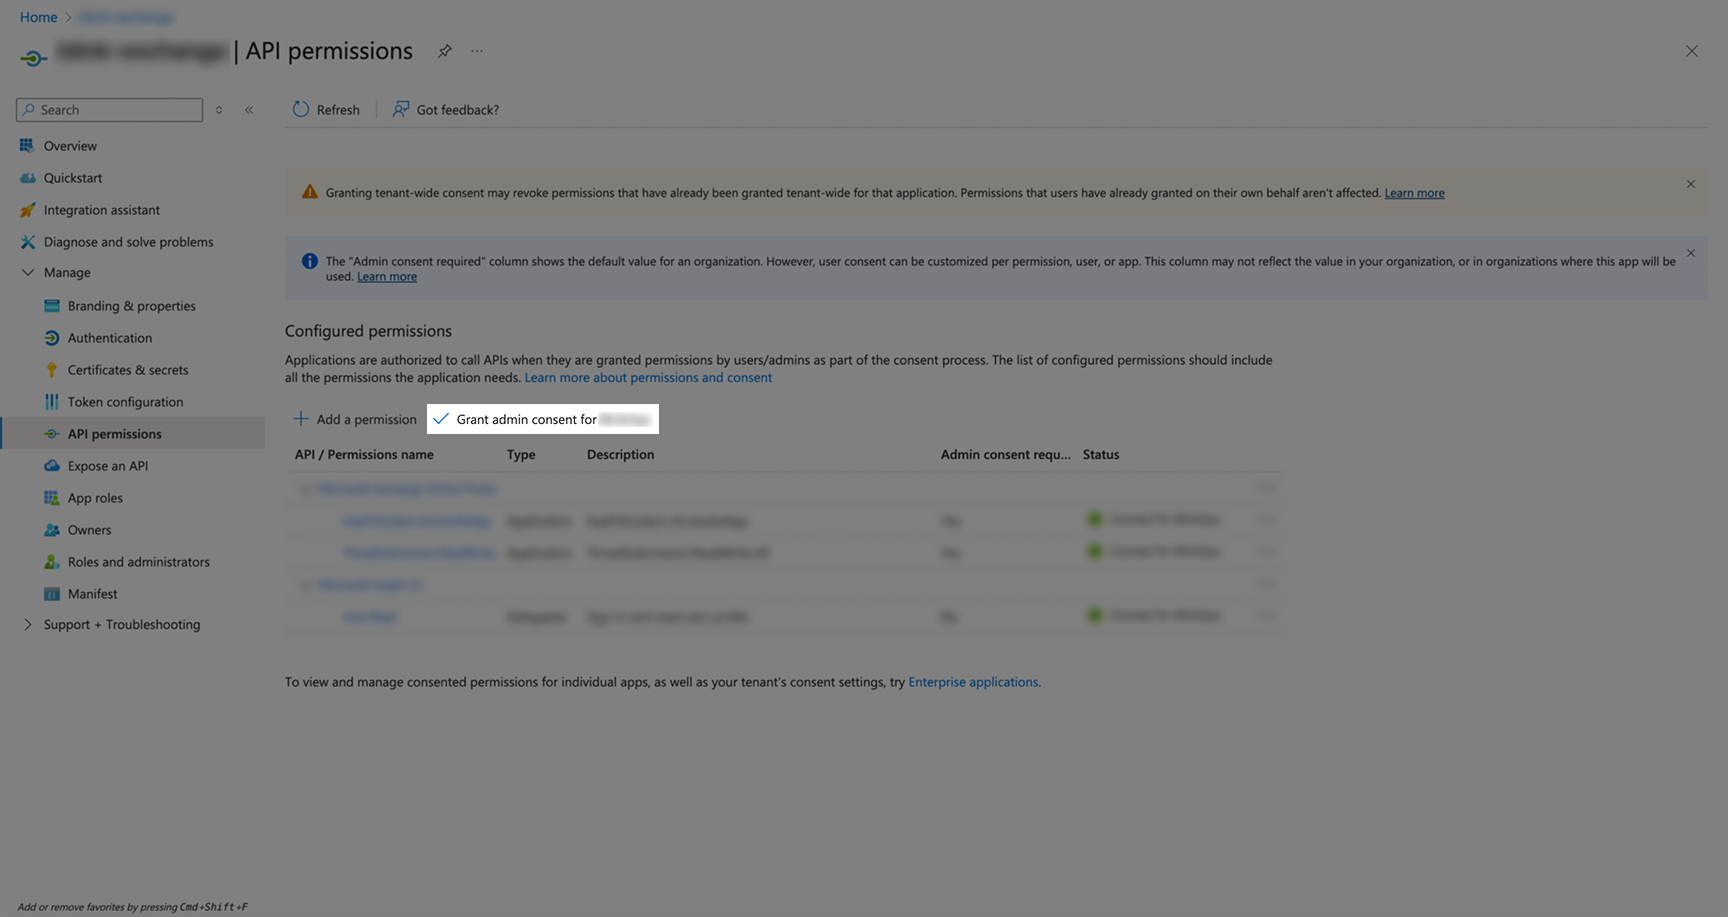 * Confirm the admin consent when prompted.
* After granting consent, the status should show green checkmarks indicating "Granted for \[Your Organization]".
#### Setting Roles
##### Step 1: Create a Security Group
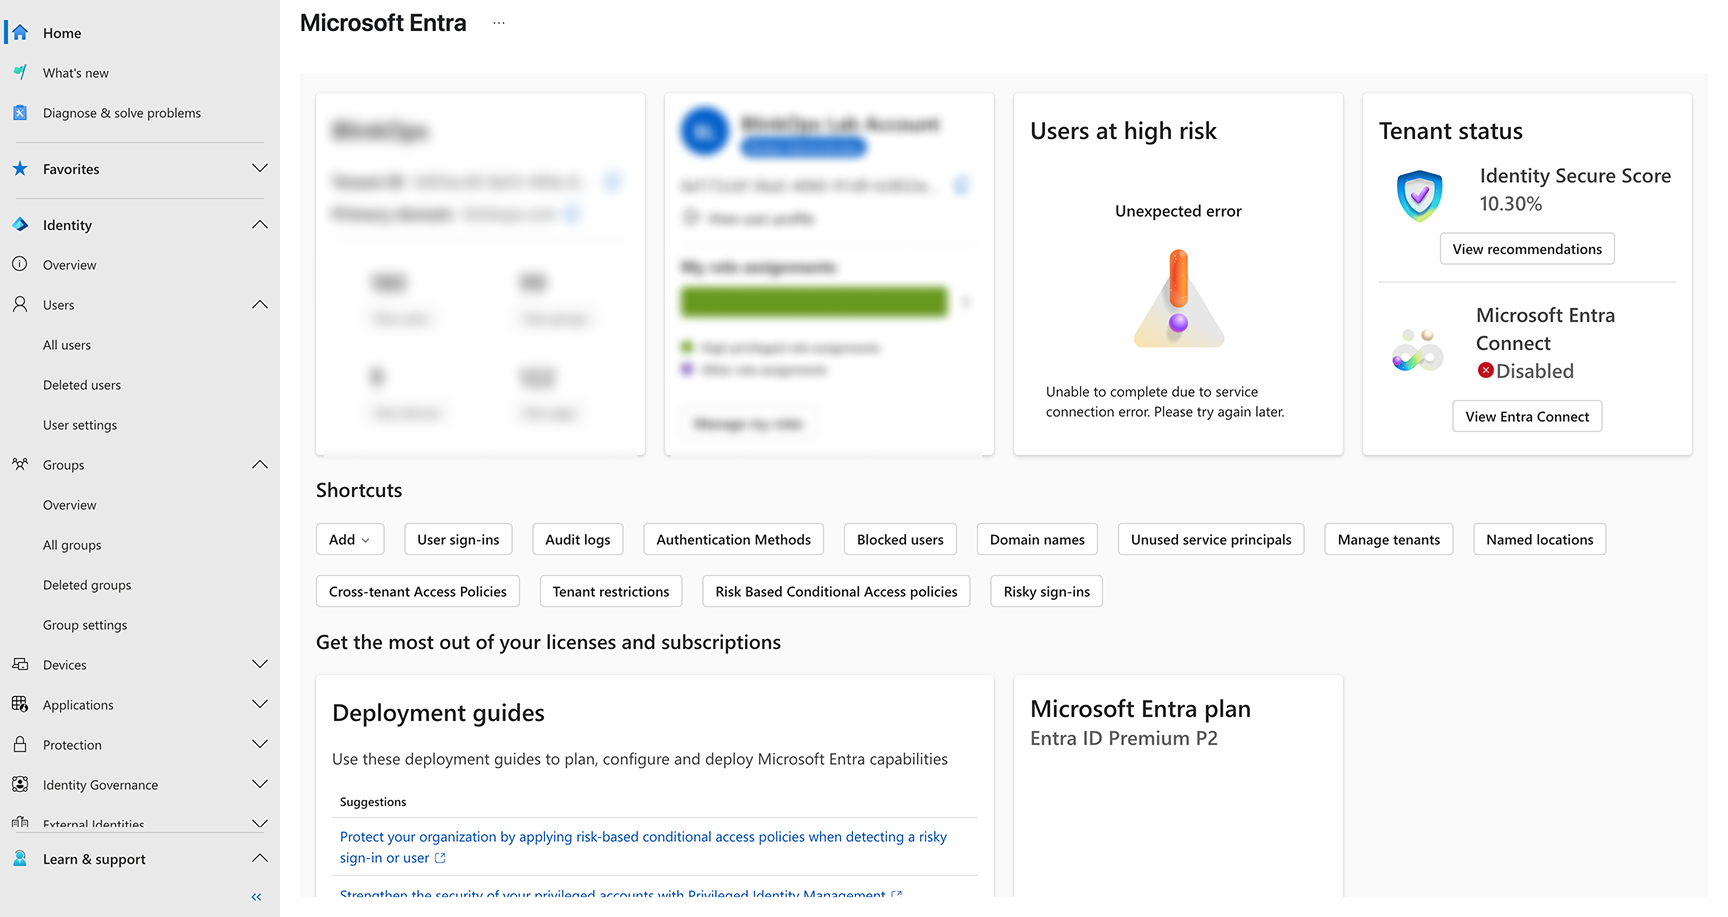
1. **Navigate to [Microsoft Entra admin center](https://entra.microsoft.com)**.
* Confirm the admin consent when prompted.
* After granting consent, the status should show green checkmarks indicating "Granted for \[Your Organization]".
#### Setting Roles
##### Step 1: Create a Security Group
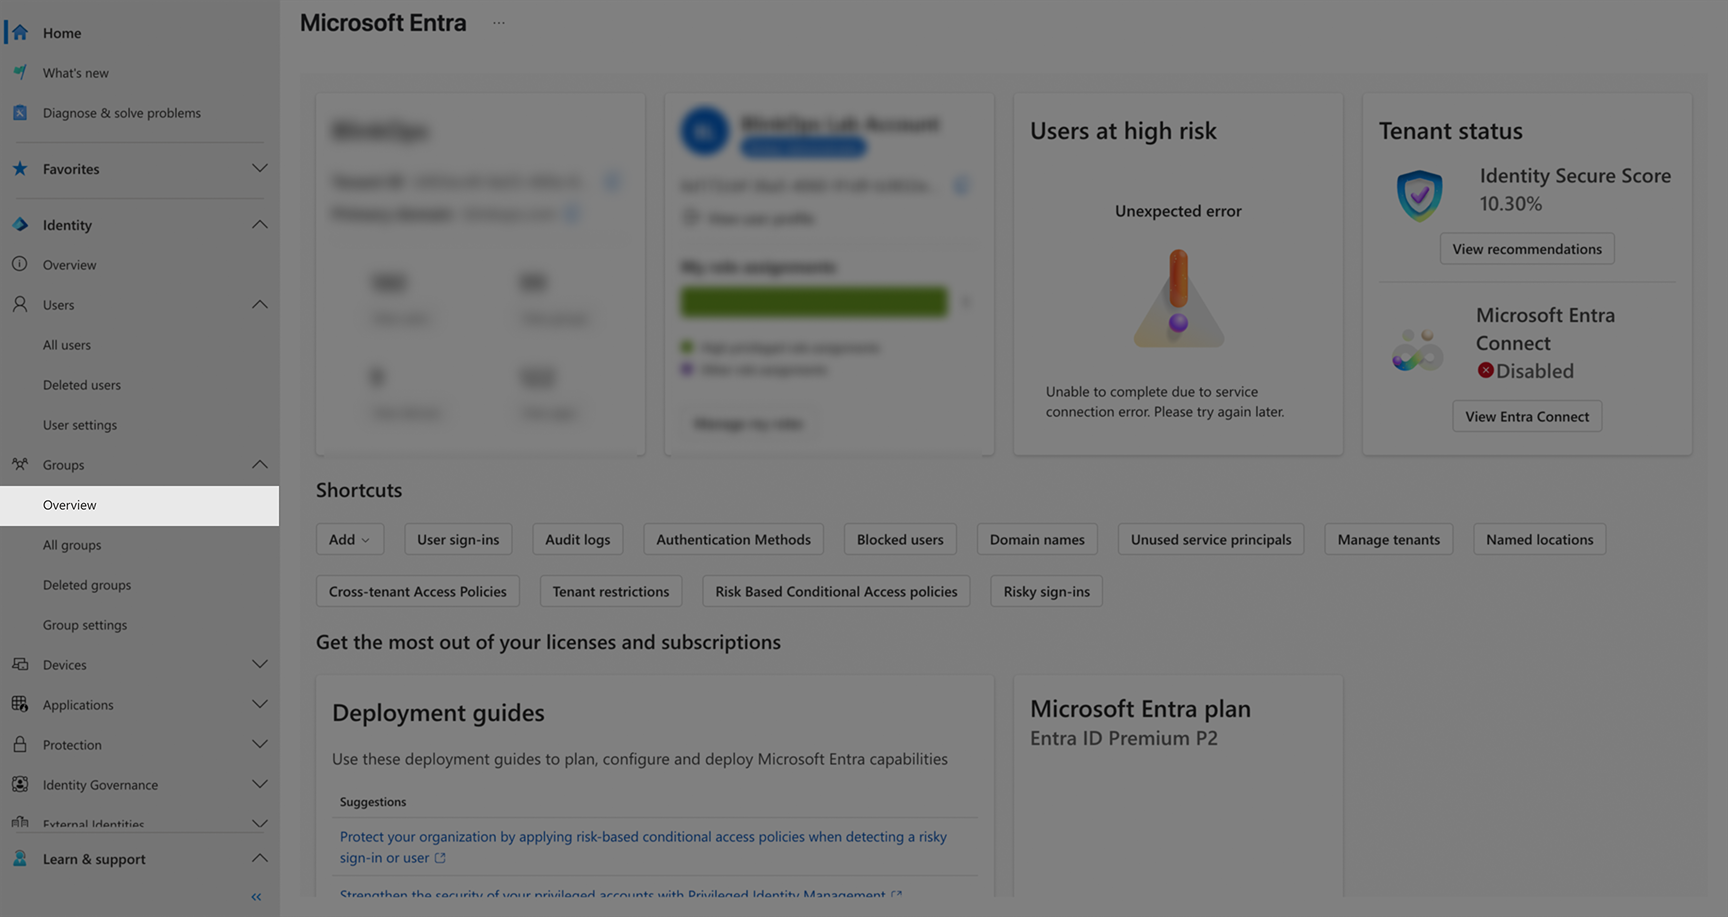
1. **Navigate to [Microsoft Entra admin center](https://entra.microsoft.com)**.
 2. **Create a new security group**:
* Go to **Groups** > **Overview**.
2. **Create a new security group**:
* Go to **Groups** > **Overview**.
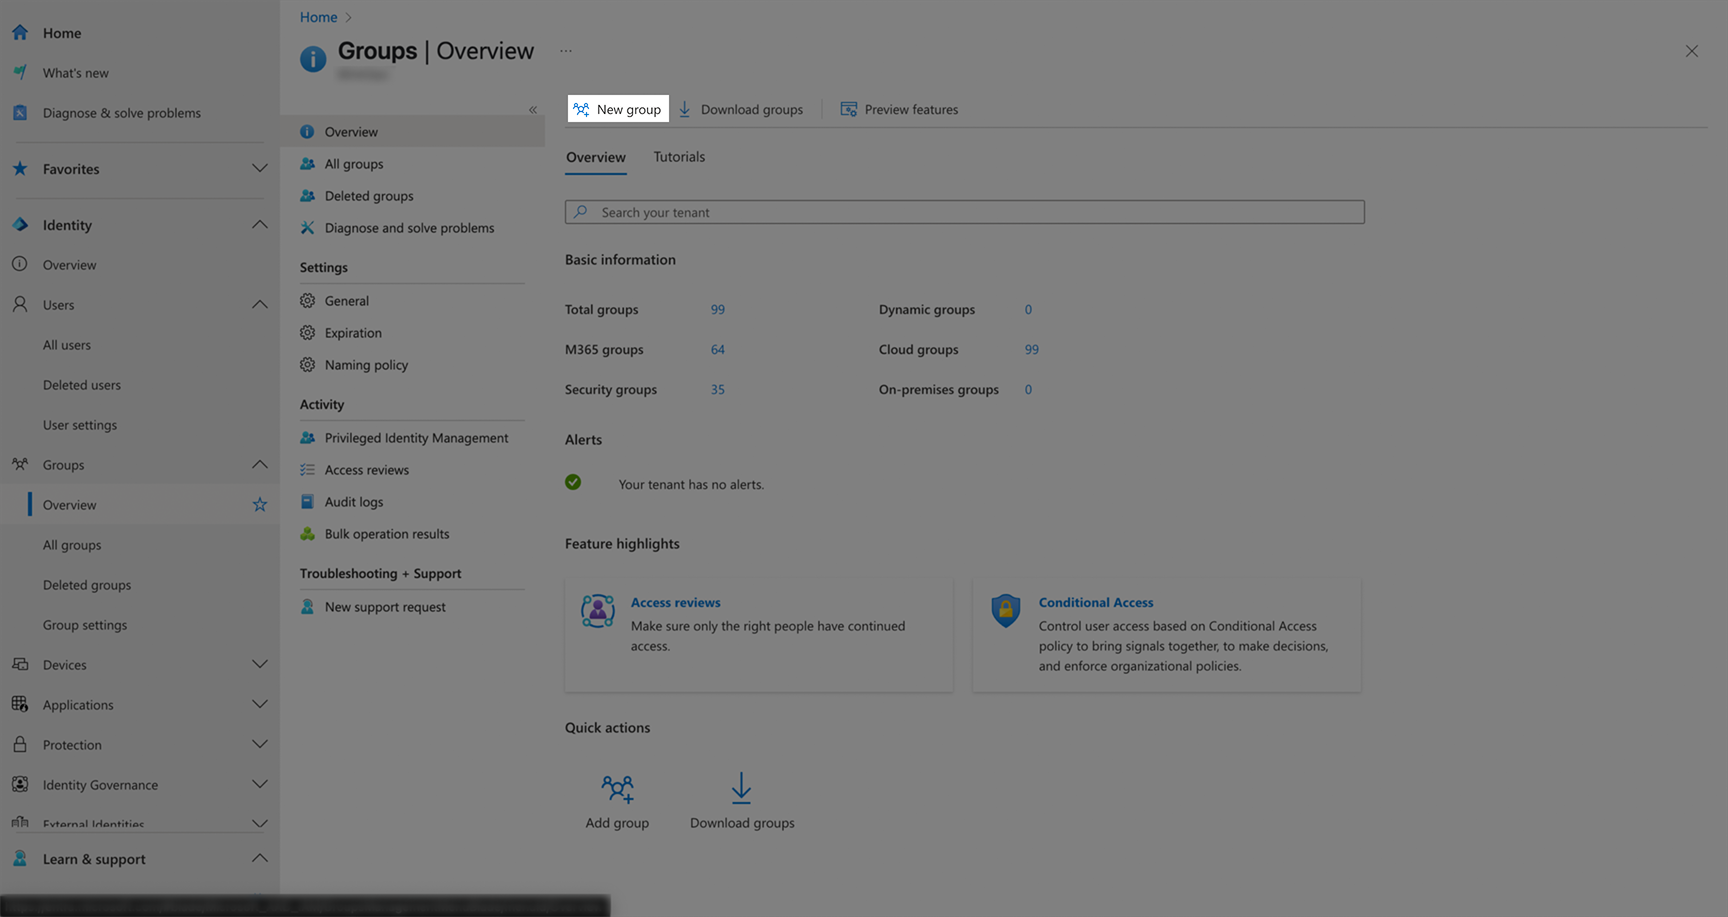
 * Click **New group**.
 * Fill the form with the following details:
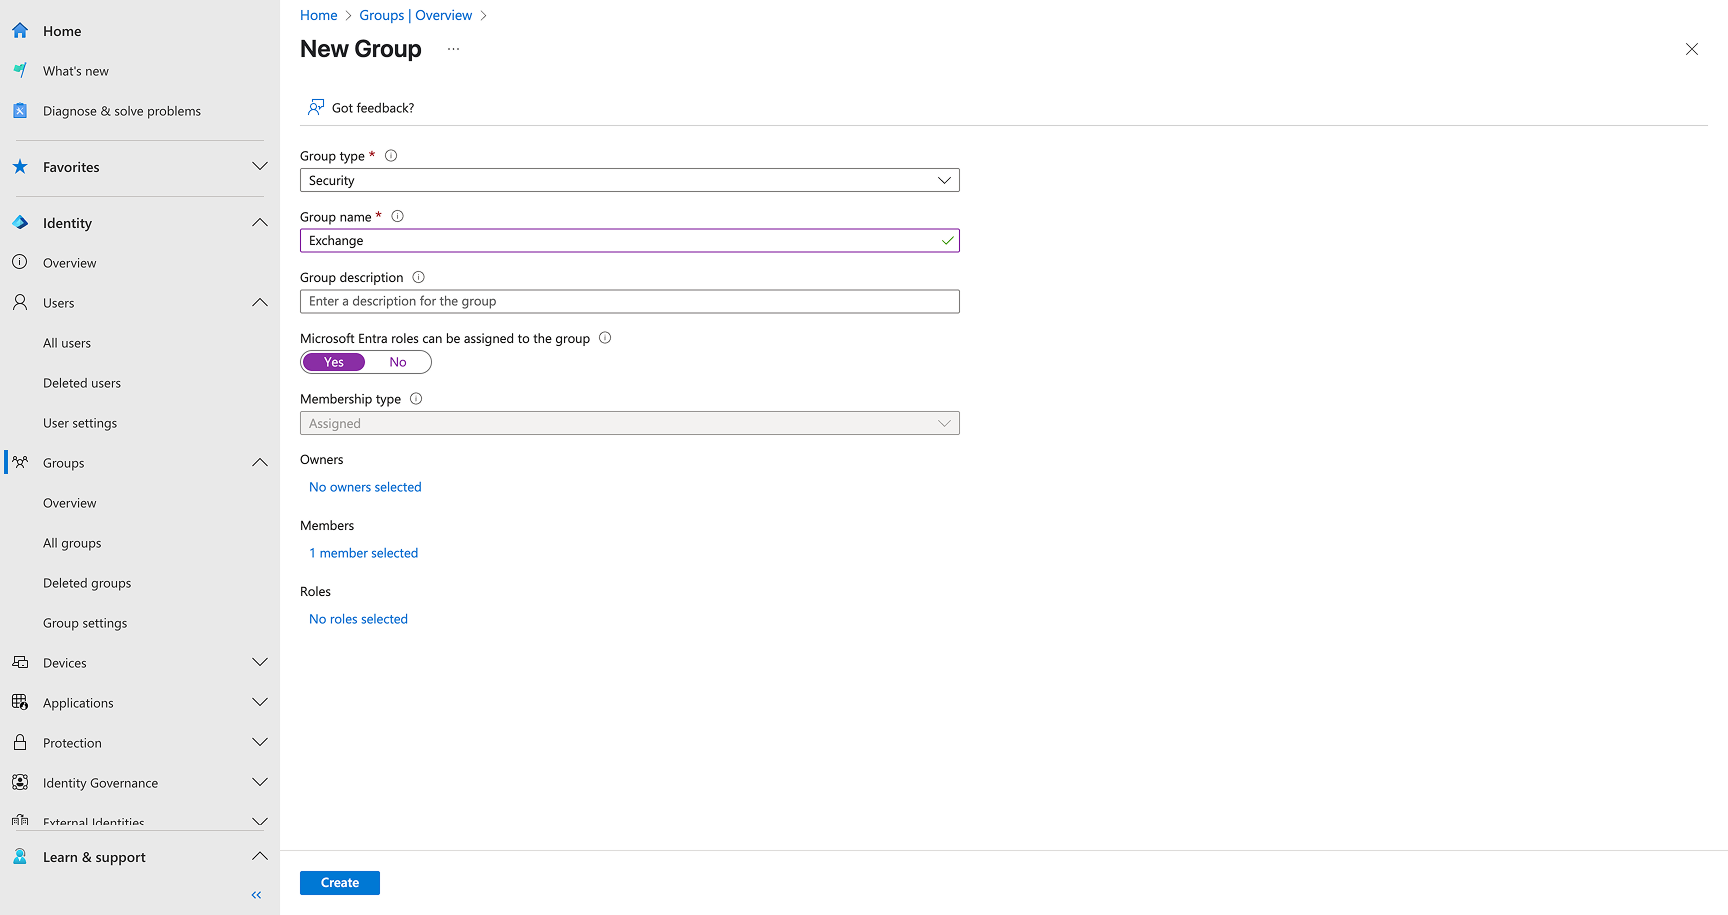 * Set **Group type** to `Security`.
* Enter a **Group name** (e.g., `Exchange`).
* Add a **Group description**.
* Set **Microsoft Entra roles can be assigned to the group** to `Yes`.
* Add the required users as **Members**.
* Click **Create**.
##### Step 2: Assign Compliance Administrator Role
1. **Navigate to the created group**.
* Go to **Groups** > **All groups** > Select your group.
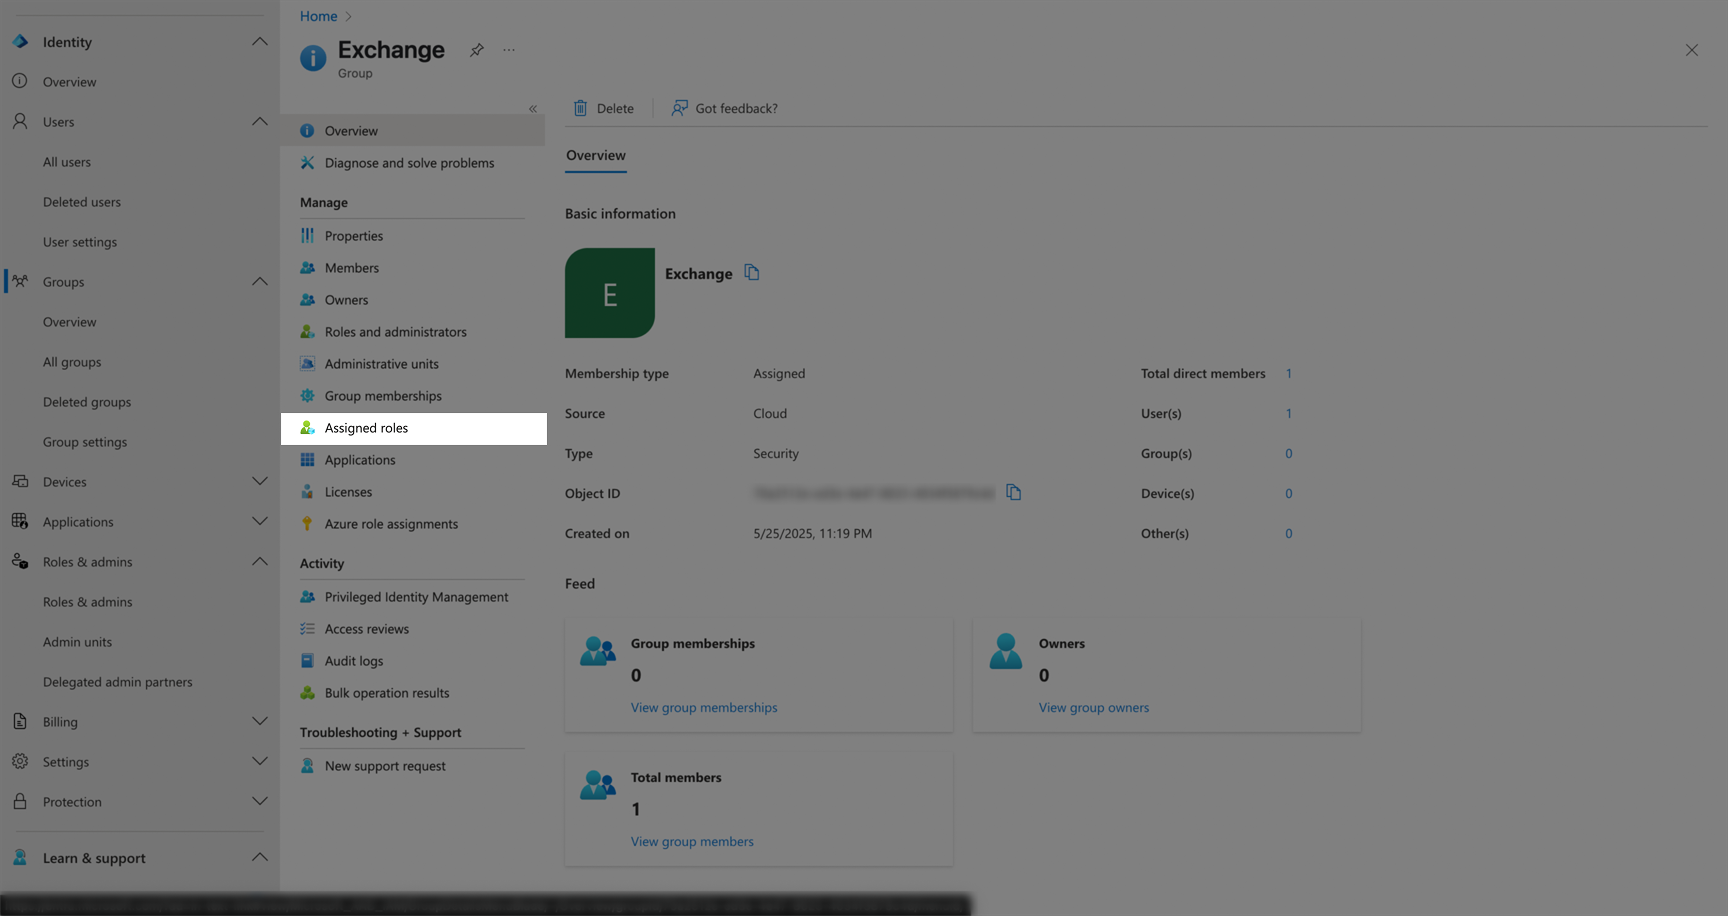
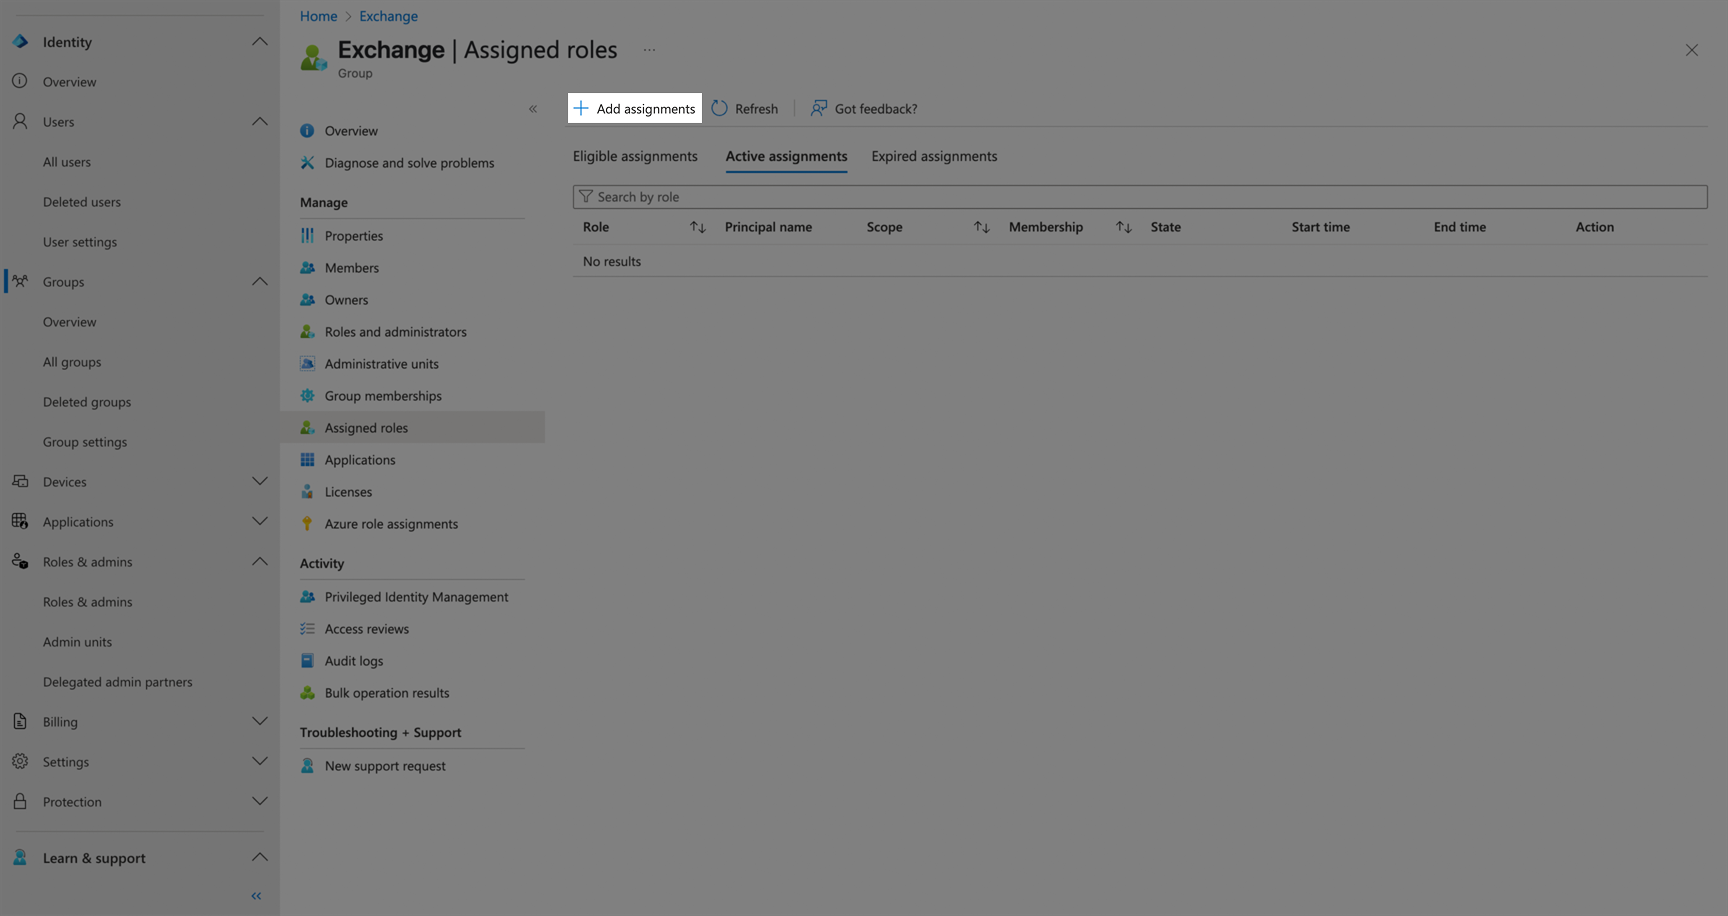
2. **Add role assignment**:
* Click **Assigned roles** in the left menu.
* Set **Group type** to `Security`.
* Enter a **Group name** (e.g., `Exchange`).
* Add a **Group description**.
* Set **Microsoft Entra roles can be assigned to the group** to `Yes`.
* Add the required users as **Members**.
* Click **Create**.
##### Step 2: Assign Compliance Administrator Role
1. **Navigate to the created group**.
* Go to **Groups** > **All groups** > Select your group.
2. **Add role assignment**:
* Click **Assigned roles** in the left menu.
 * Click **Add assignments**.
 * Fill the form with the following details:
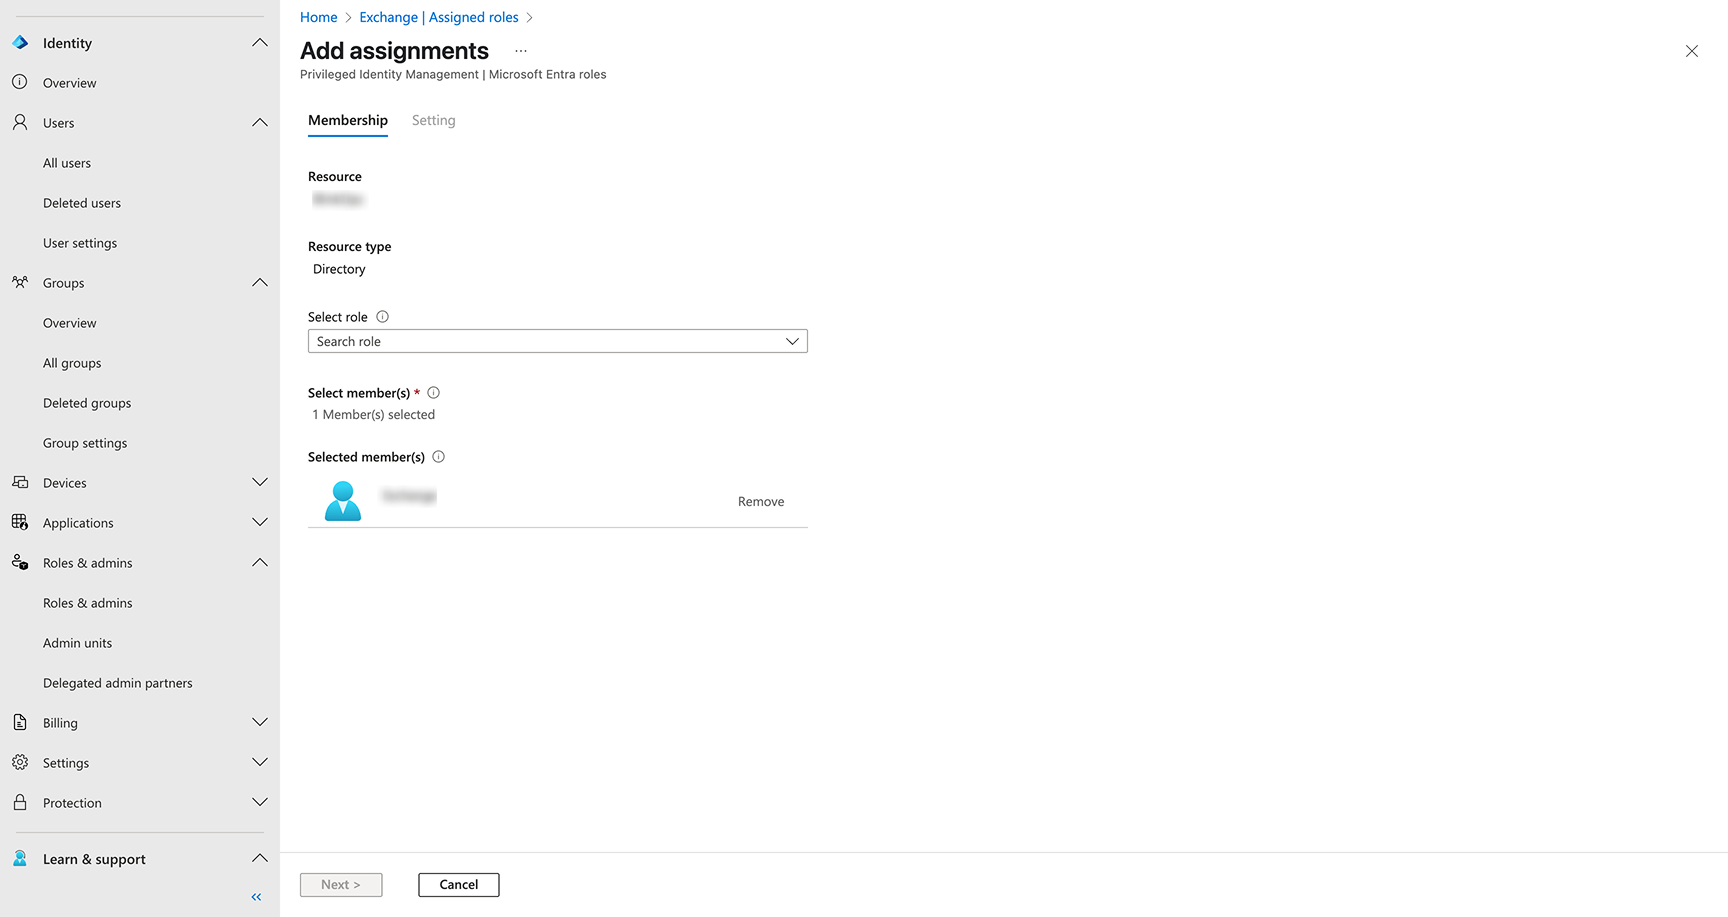 * Select **Compliance Administrator** role.
* Set **Assignment type** to `Eligible` (for permanent access, choose "Active").
* Configure the assignment duration:
* **Assignment starts**: Set current date and time.
* **Assignment ends**: Set end date (can be set to permanent by checking "Permanently eligible").
* Click **Assign**.
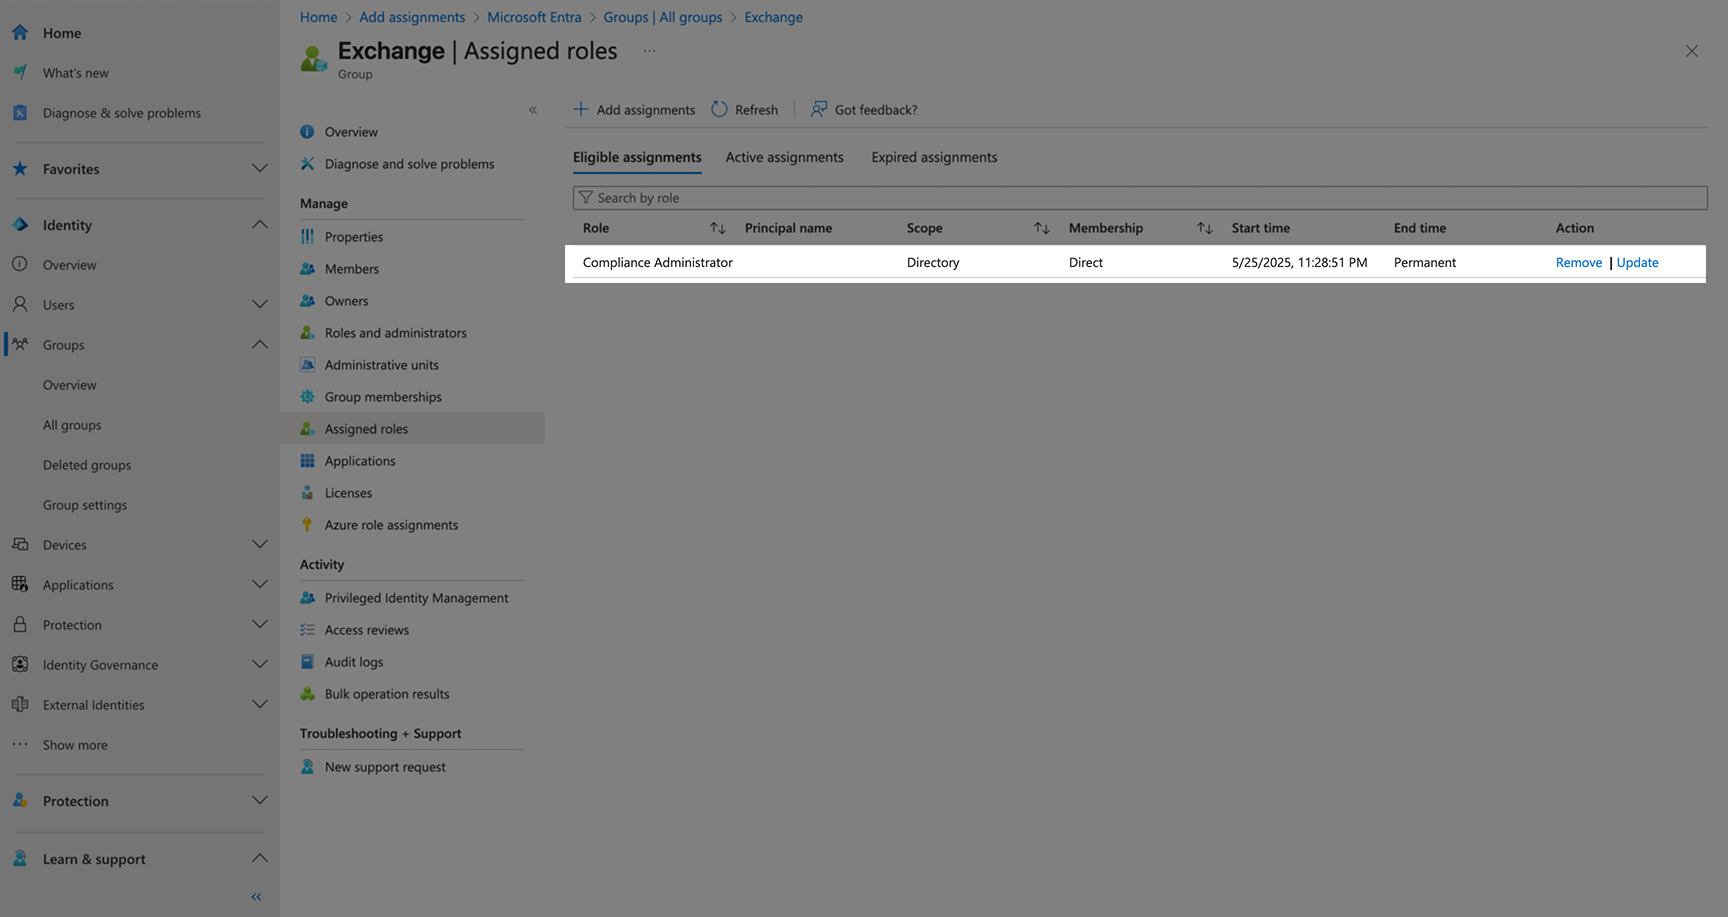
##### Step 3: Verify Role Assignment
1. Navigate back to **Groups** > **All groups** > Your group.
2. Go to **Assigned roles**.
3. Verify that "Compliance Administrator" appears with status "Granted for \[Your App Name]".
* Select **Compliance Administrator** role.
* Set **Assignment type** to `Eligible` (for permanent access, choose "Active").
* Configure the assignment duration:
* **Assignment starts**: Set current date and time.
* **Assignment ends**: Set end date (can be set to permanent by checking "Permanently eligible").
* Click **Assign**.
##### Step 3: Verify Role Assignment
1. Navigate back to **Groups** > **All groups** > Your group.
2. Go to **Assigned roles**.
3. Verify that "Compliance Administrator" appears with status "Granted for \[Your App Name]".
 The role assignment may take a few minutes to propagate across the system.
#### Creating your connection
1. In the Blink platform, navigate to the **Connections** page > **Add connection**. A New Connection dialog box opens displaying icons of external service providers available.
2. Select the **Exchange Online** icon. A dialog box with name of the connection and connection methods appear.
3. (Optional) Edit the name of the connection. At a later stage you cannot edit the name.
4. Select **Certificate** as the method to create the connection.
5. Fill in the parameters:
* The *App ID* that has Exchange Administrator permissions.
* The `.onmicrosoft.com` URL of the *Organization*
* *Public key* of the X.509 certificate that is authorized to act on behalf of the application, in a PEM format
* *Private key* of the X.509 certificate that is authorized to act on behalf of the application, in a PEM format
6. (Optional) Click **Test Connection** to test it.
7. Click **Create connection**. The new connection appears on the **Connections** page.
The role assignment may take a few minutes to propagate across the system.
#### Creating your connection
1. In the Blink platform, navigate to the **Connections** page > **Add connection**. A New Connection dialog box opens displaying icons of external service providers available.
2. Select the **Exchange Online** icon. A dialog box with name of the connection and connection methods appear.
3. (Optional) Edit the name of the connection. At a later stage you cannot edit the name.
4. Select **Certificate** as the method to create the connection.
5. Fill in the parameters:
* The *App ID* that has Exchange Administrator permissions.
* The `.onmicrosoft.com` URL of the *Organization*
* *Public key* of the X.509 certificate that is authorized to act on behalf of the application, in a PEM format
* *Private key* of the X.509 certificate that is authorized to act on behalf of the application, in a PEM format
6. (Optional) Click **Test Connection** to test it.
7. Click **Create connection**. The new connection appears on the **Connections** page.