> ## Documentation Index
> Fetch the complete documentation index at: https://docs.blinkops.com/llms.txt
> Use this file to discover all available pages before exploring further.
# Microsoft Azure
> Microsoft Azure, often referred to as Azure, is a cloud computing service operated by Microsoft for application management via Microsoft-managed data centers.
## Creating an Azure connection
Create the connection by using one of the following methods:
* [OAuth](#using-oauth)
* [App Registration](#using-app-registration)
### Using OAuth
This method will not work if your Azure User Type is ***Guest***.
#### Creating your connection
1. In the Blink platform, navigate to the **Connections** page > **Add connection**. A New Connection dialog box opens displaying icons of external service providers available.
2. Select the **Azure** icon. A dialog box with name of the connection and connection methods appear.
3. (Optional) Edit the name of the connection. At a later stage you cannot edit the name.
4. Click **Azure** to authenticate using OAuth.
5. Sign in using your credentials.
Need admin approval? please refer to the [Need Admin
Approval](/docs/integrations/azure/admin-approval) guide.
### Using App Registration
To create the connection you need:
* An API Address
* An APP ID
* A client secret
* A subscription ID
#### Obtaining the credentials
1. Log into the [Azure Portal](https://portal.azure.com/#home).
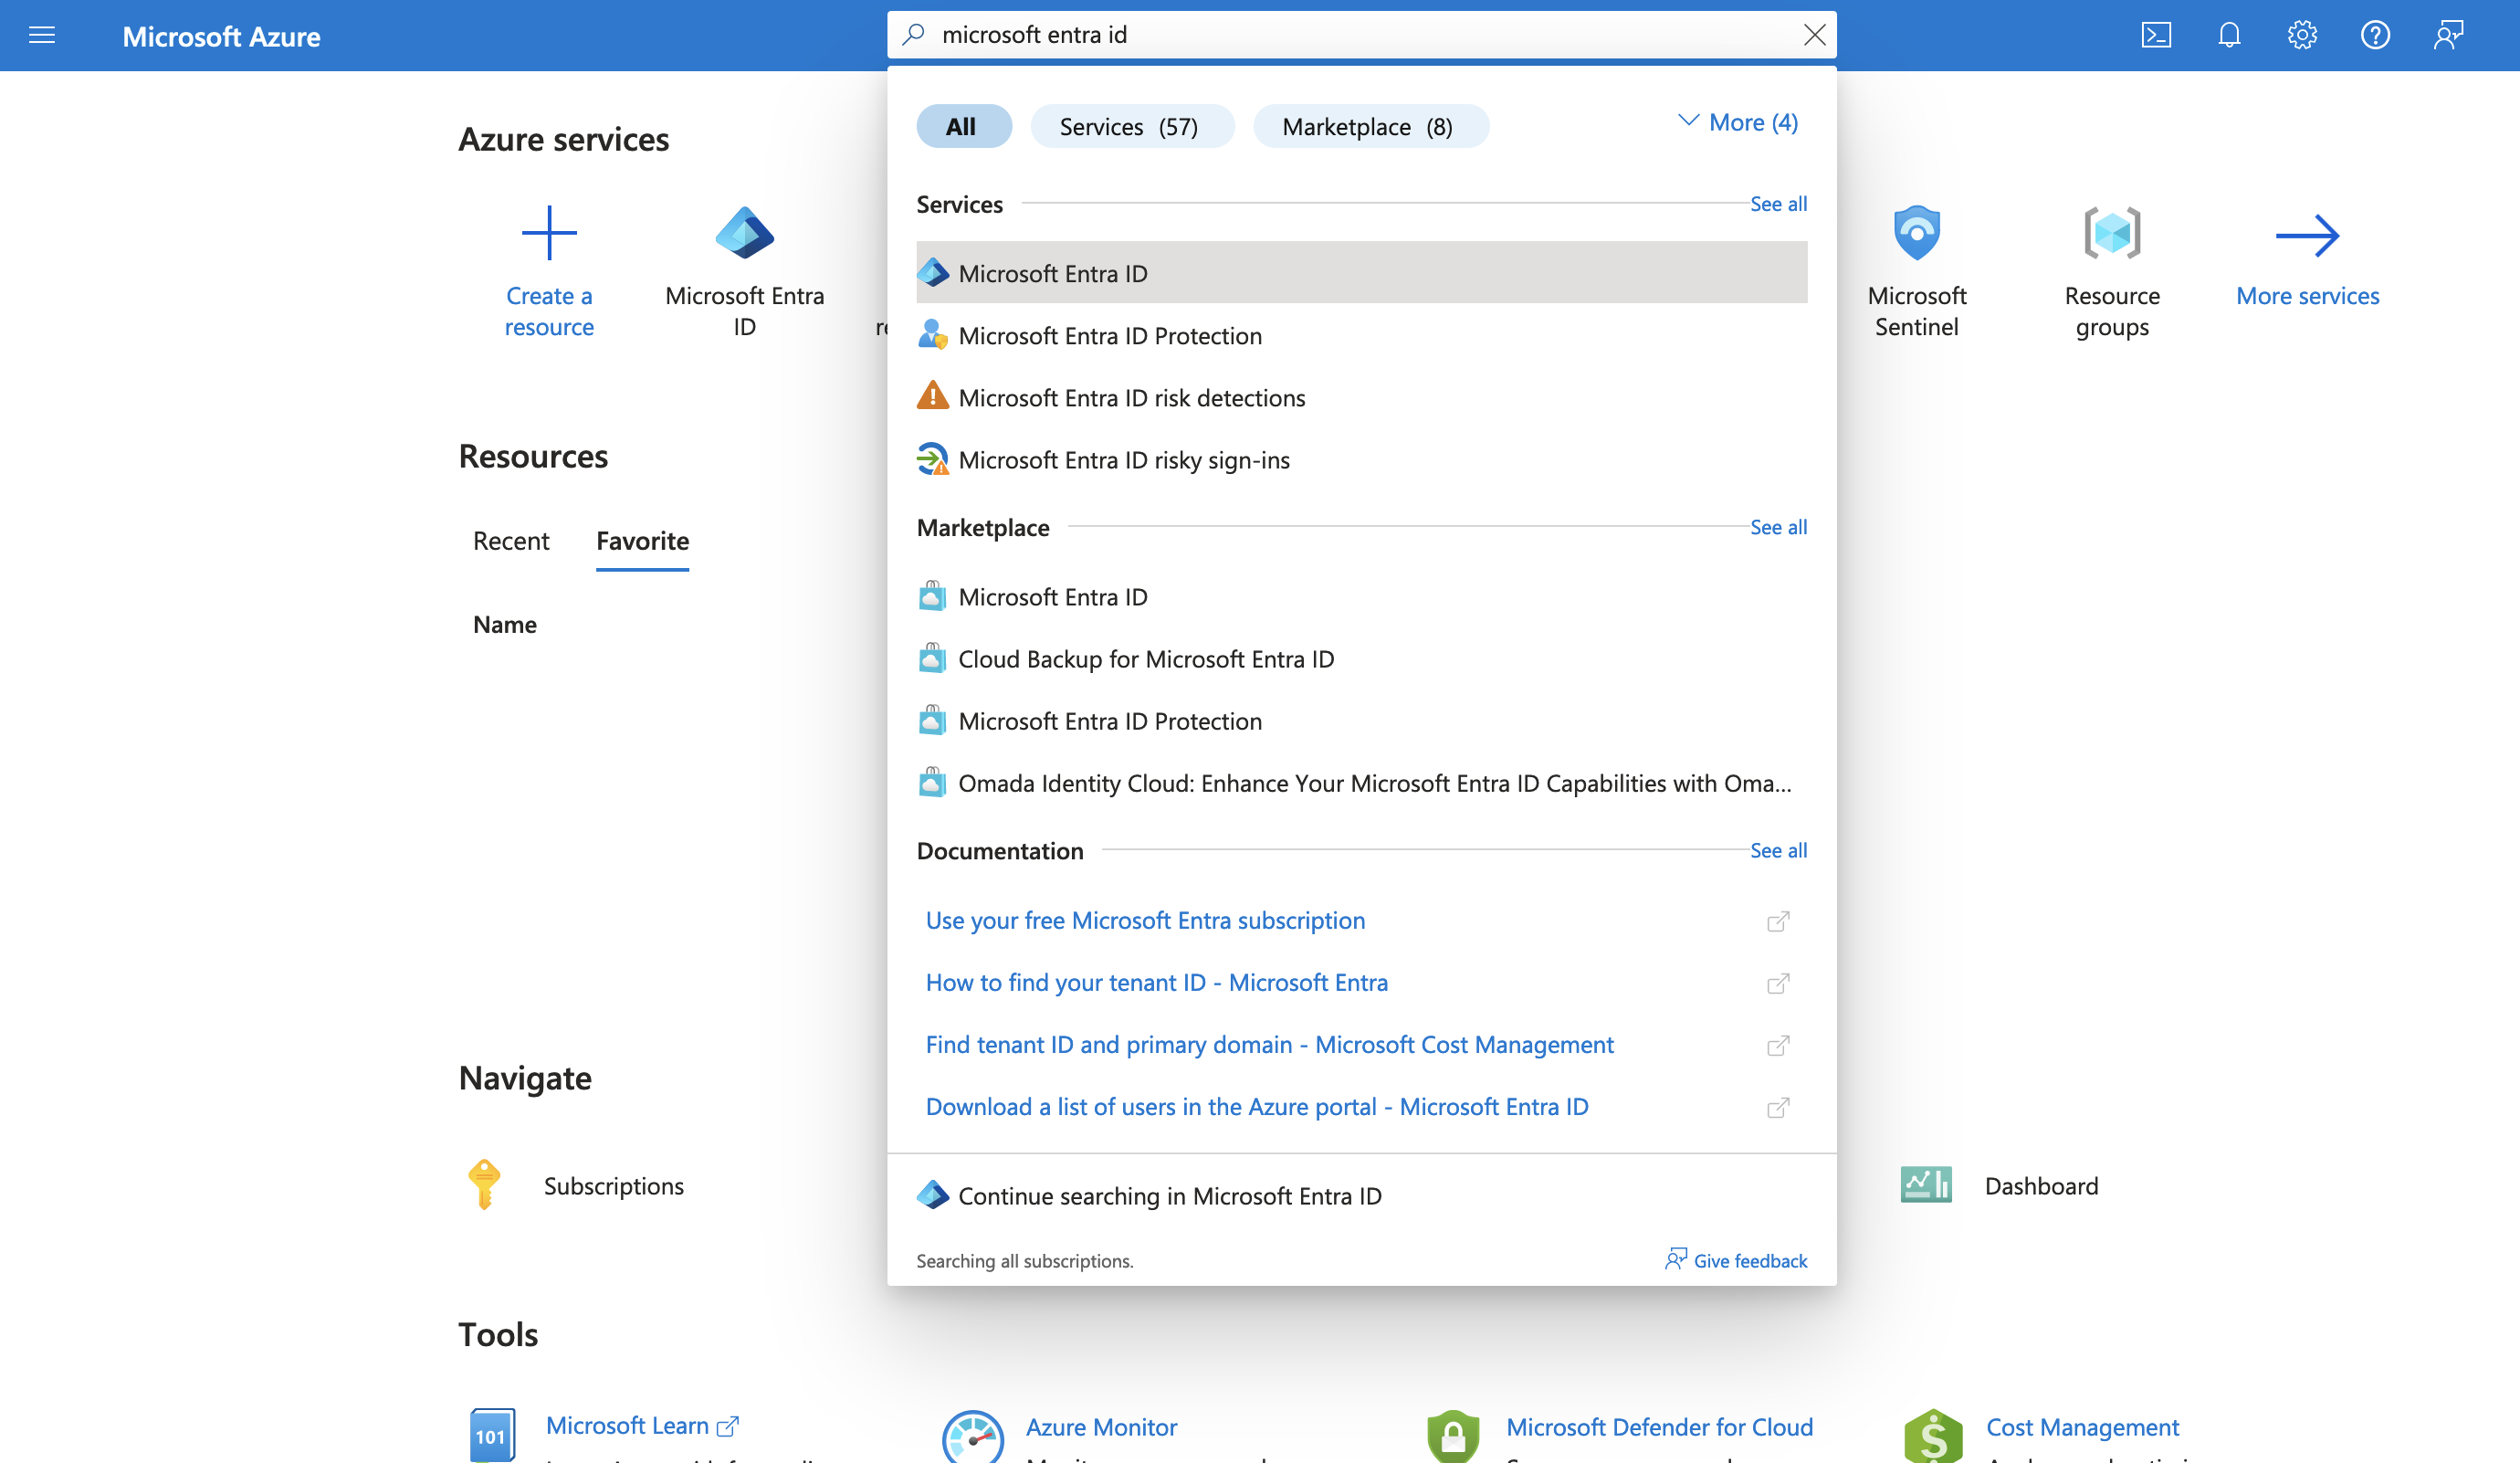
2. Go to the *Microsoft Entra ID* resource.
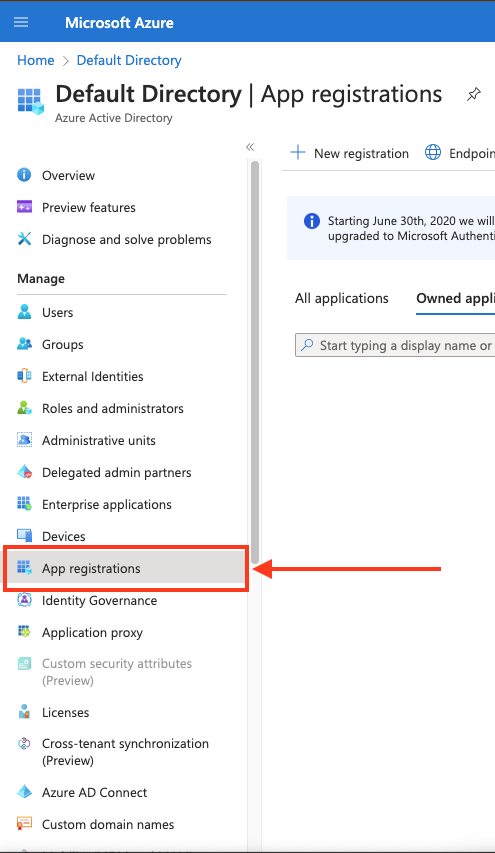
 3. In the left-hand menu, click **App registrations**.
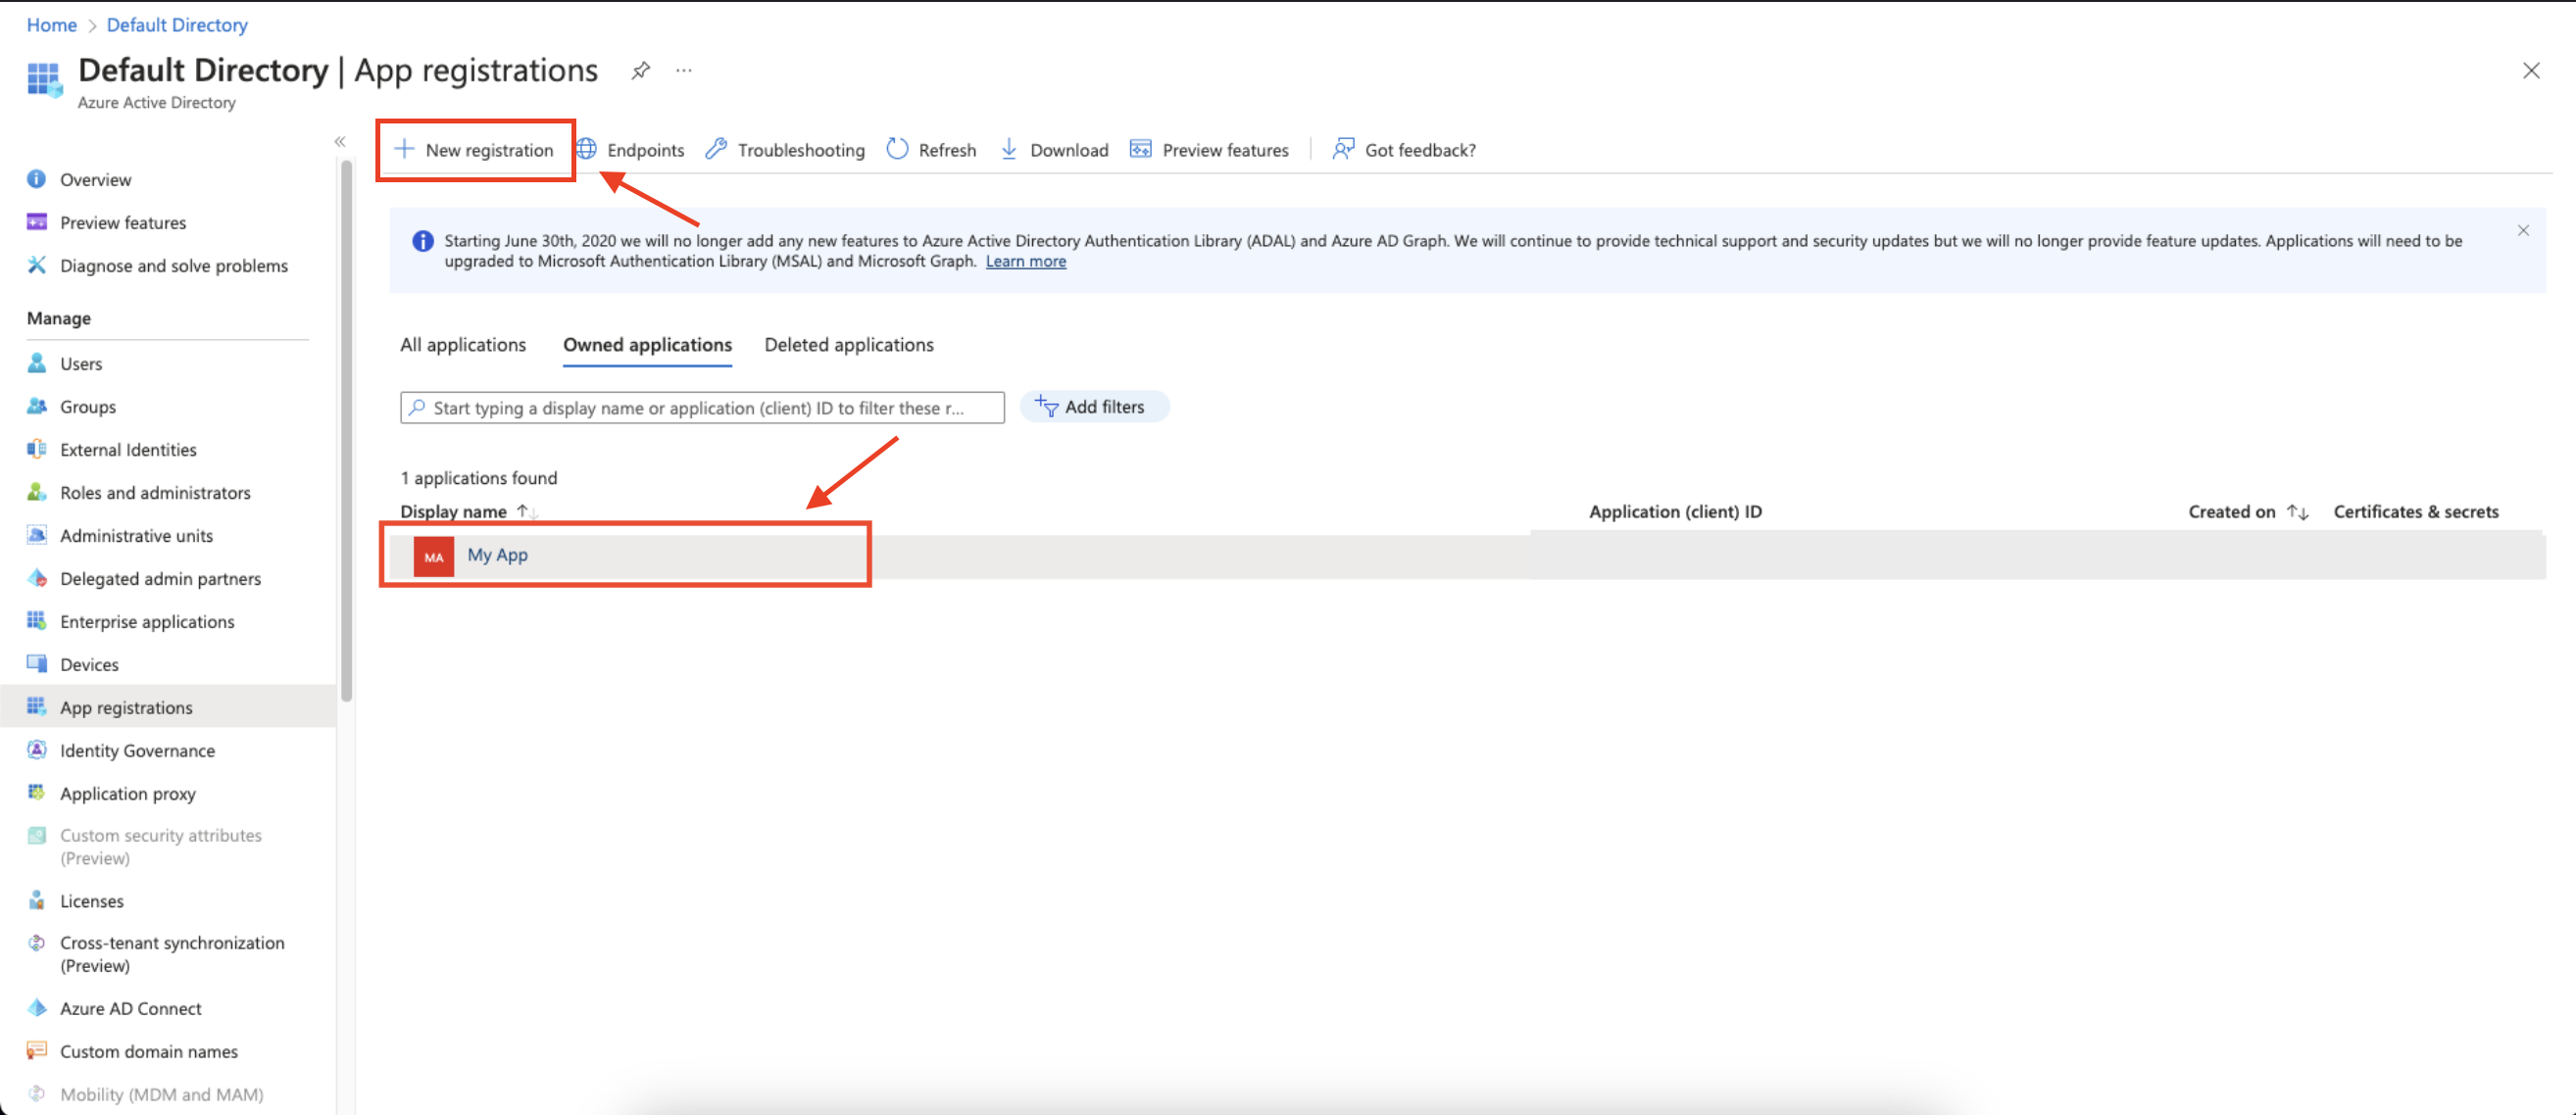
 4. Create a new application registration or click on one of your existing applications.
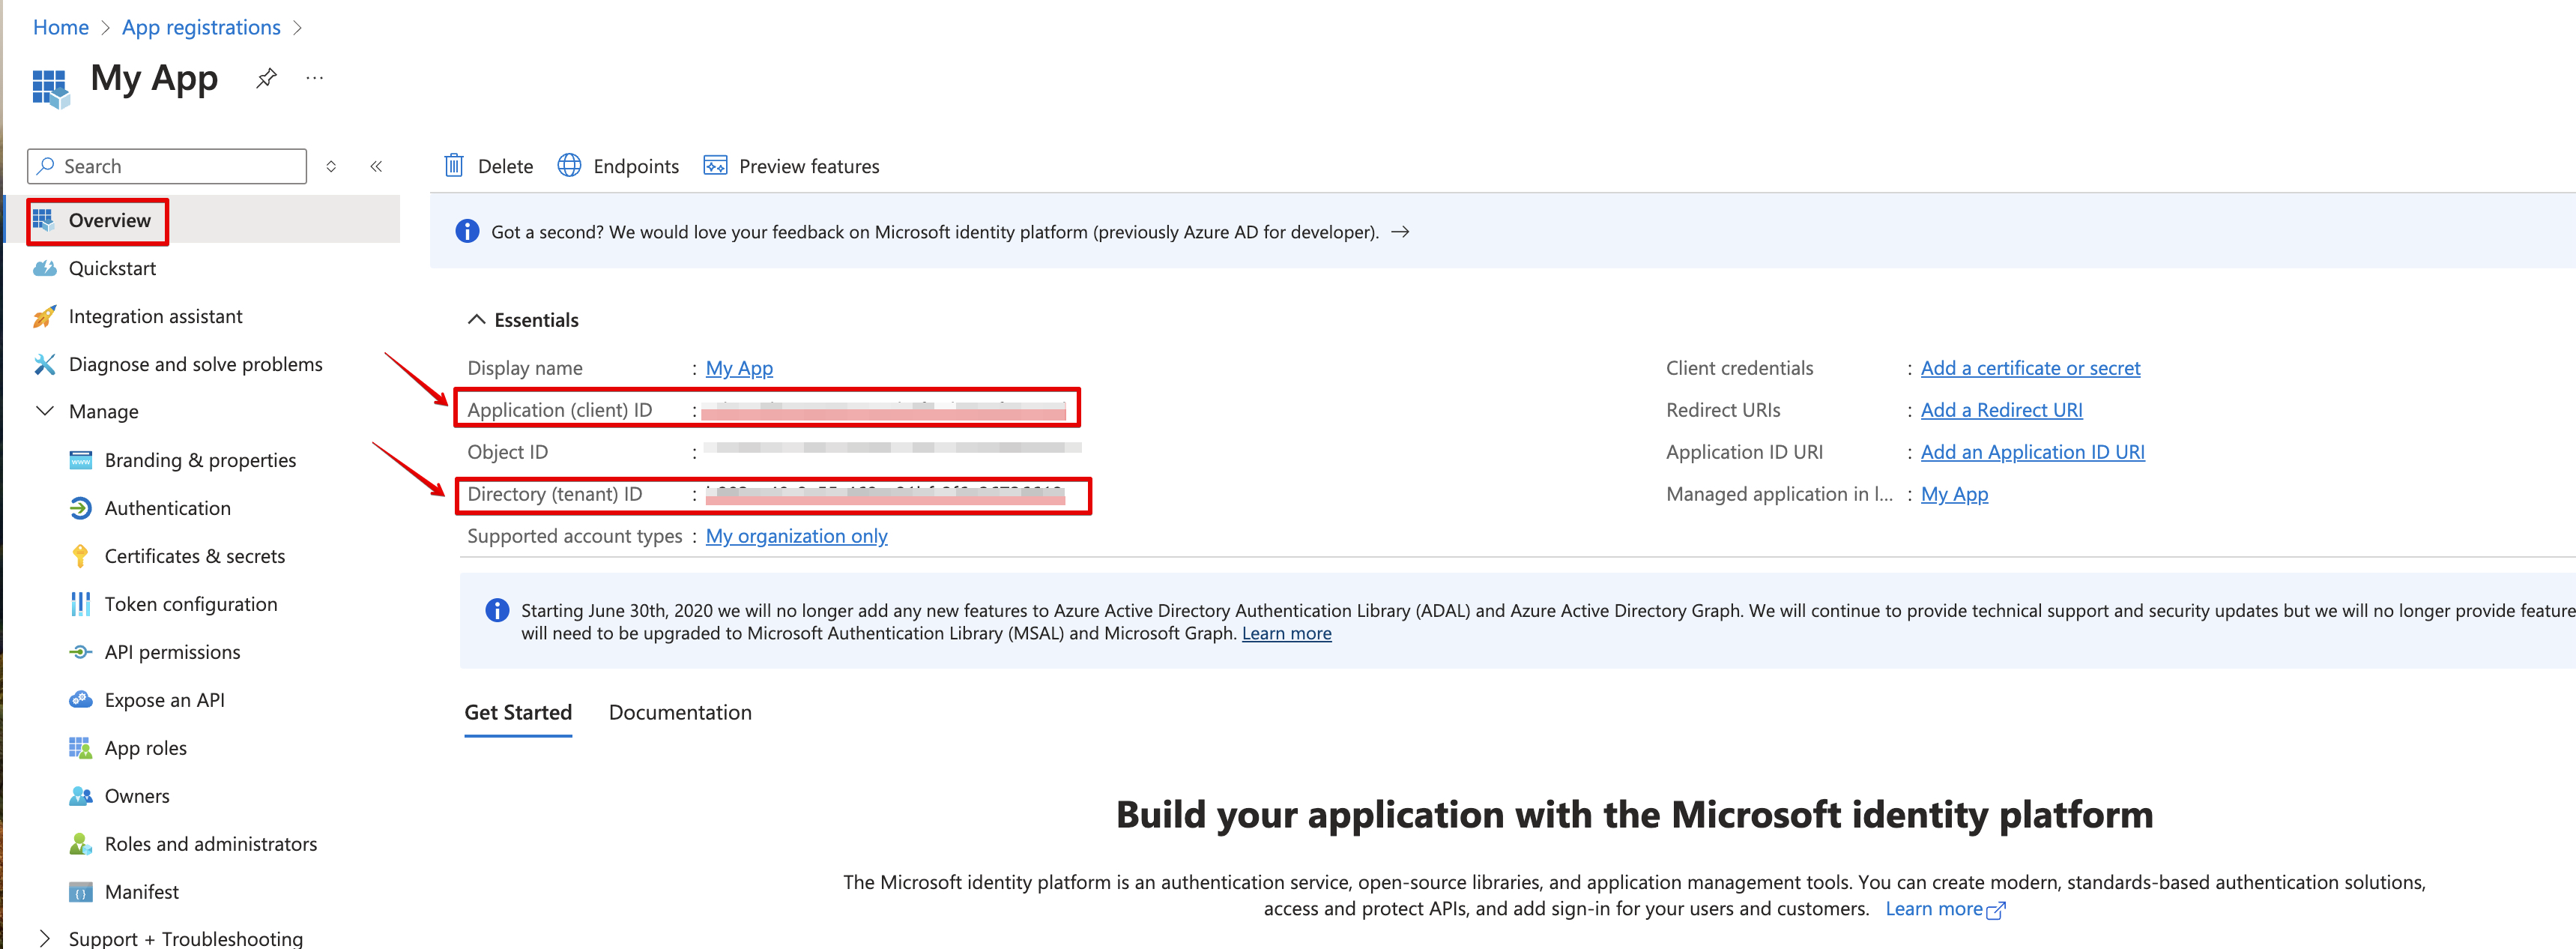
 5. Navigate to **Overview** and Copy your **client ID** and **tenant ID**.
 #### Assign the Reader role to your app registration within your subscription
6. Navigate back to [Microsoft Azure Portal home](https://portal.azure.com/#home).
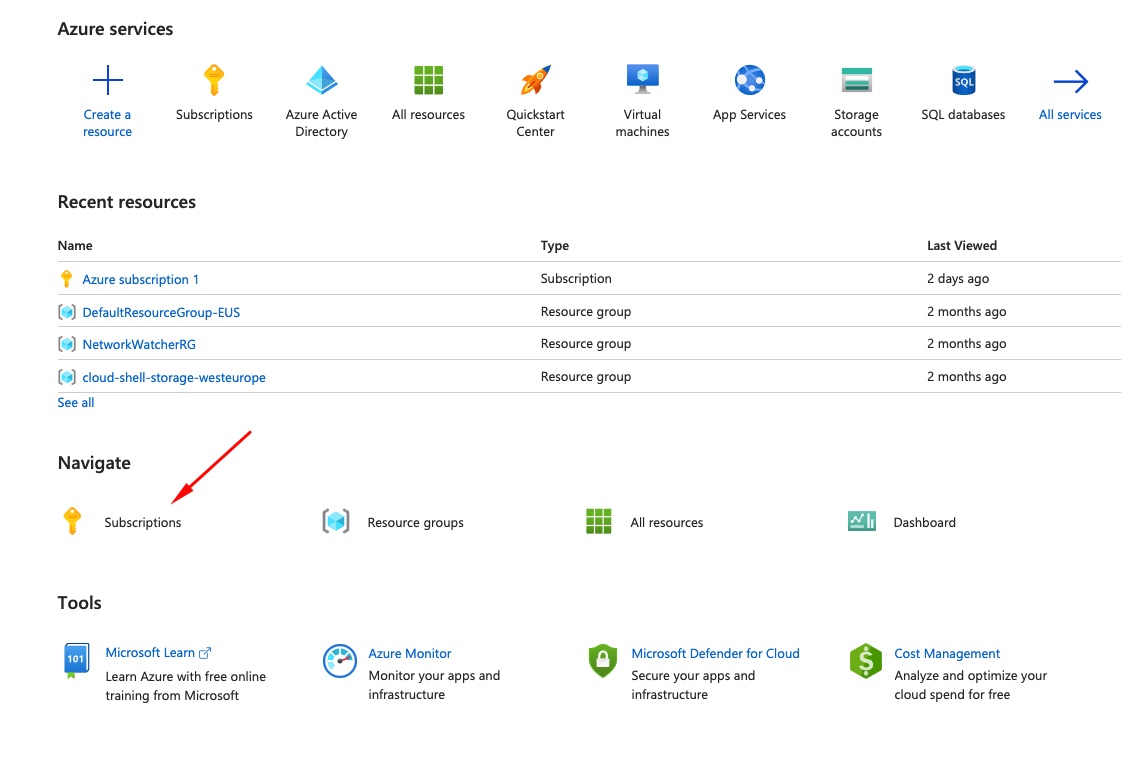
7. Click **Subscriptions**.
#### Assign the Reader role to your app registration within your subscription
6. Navigate back to [Microsoft Azure Portal home](https://portal.azure.com/#home).
7. Click **Subscriptions**.
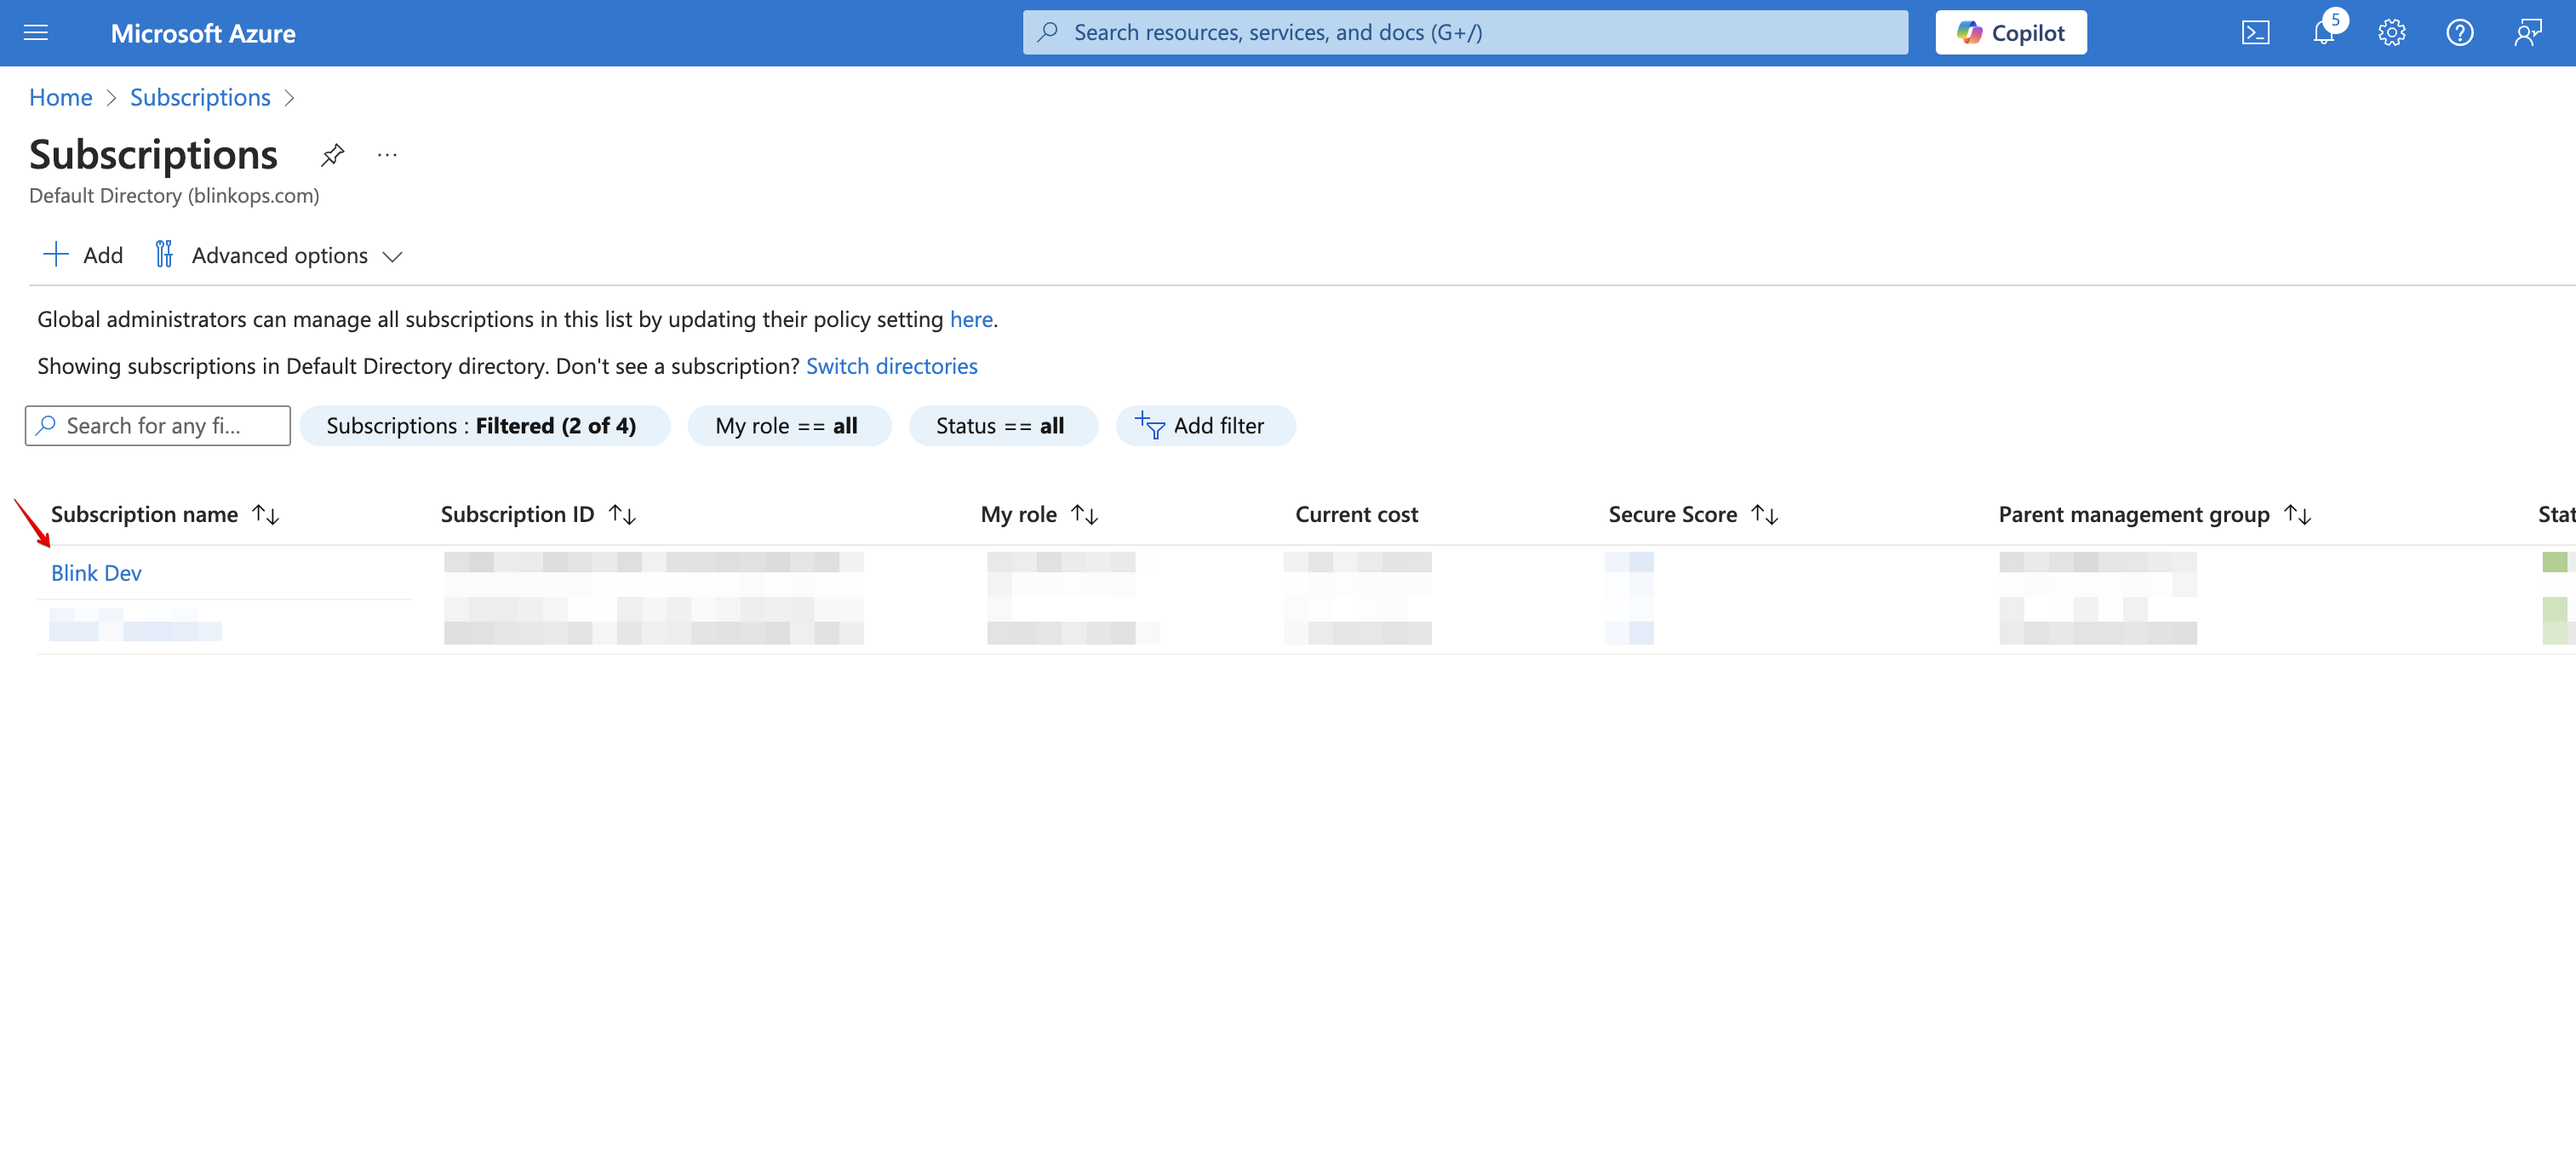
 8. Select a **subscription** to link your app to.
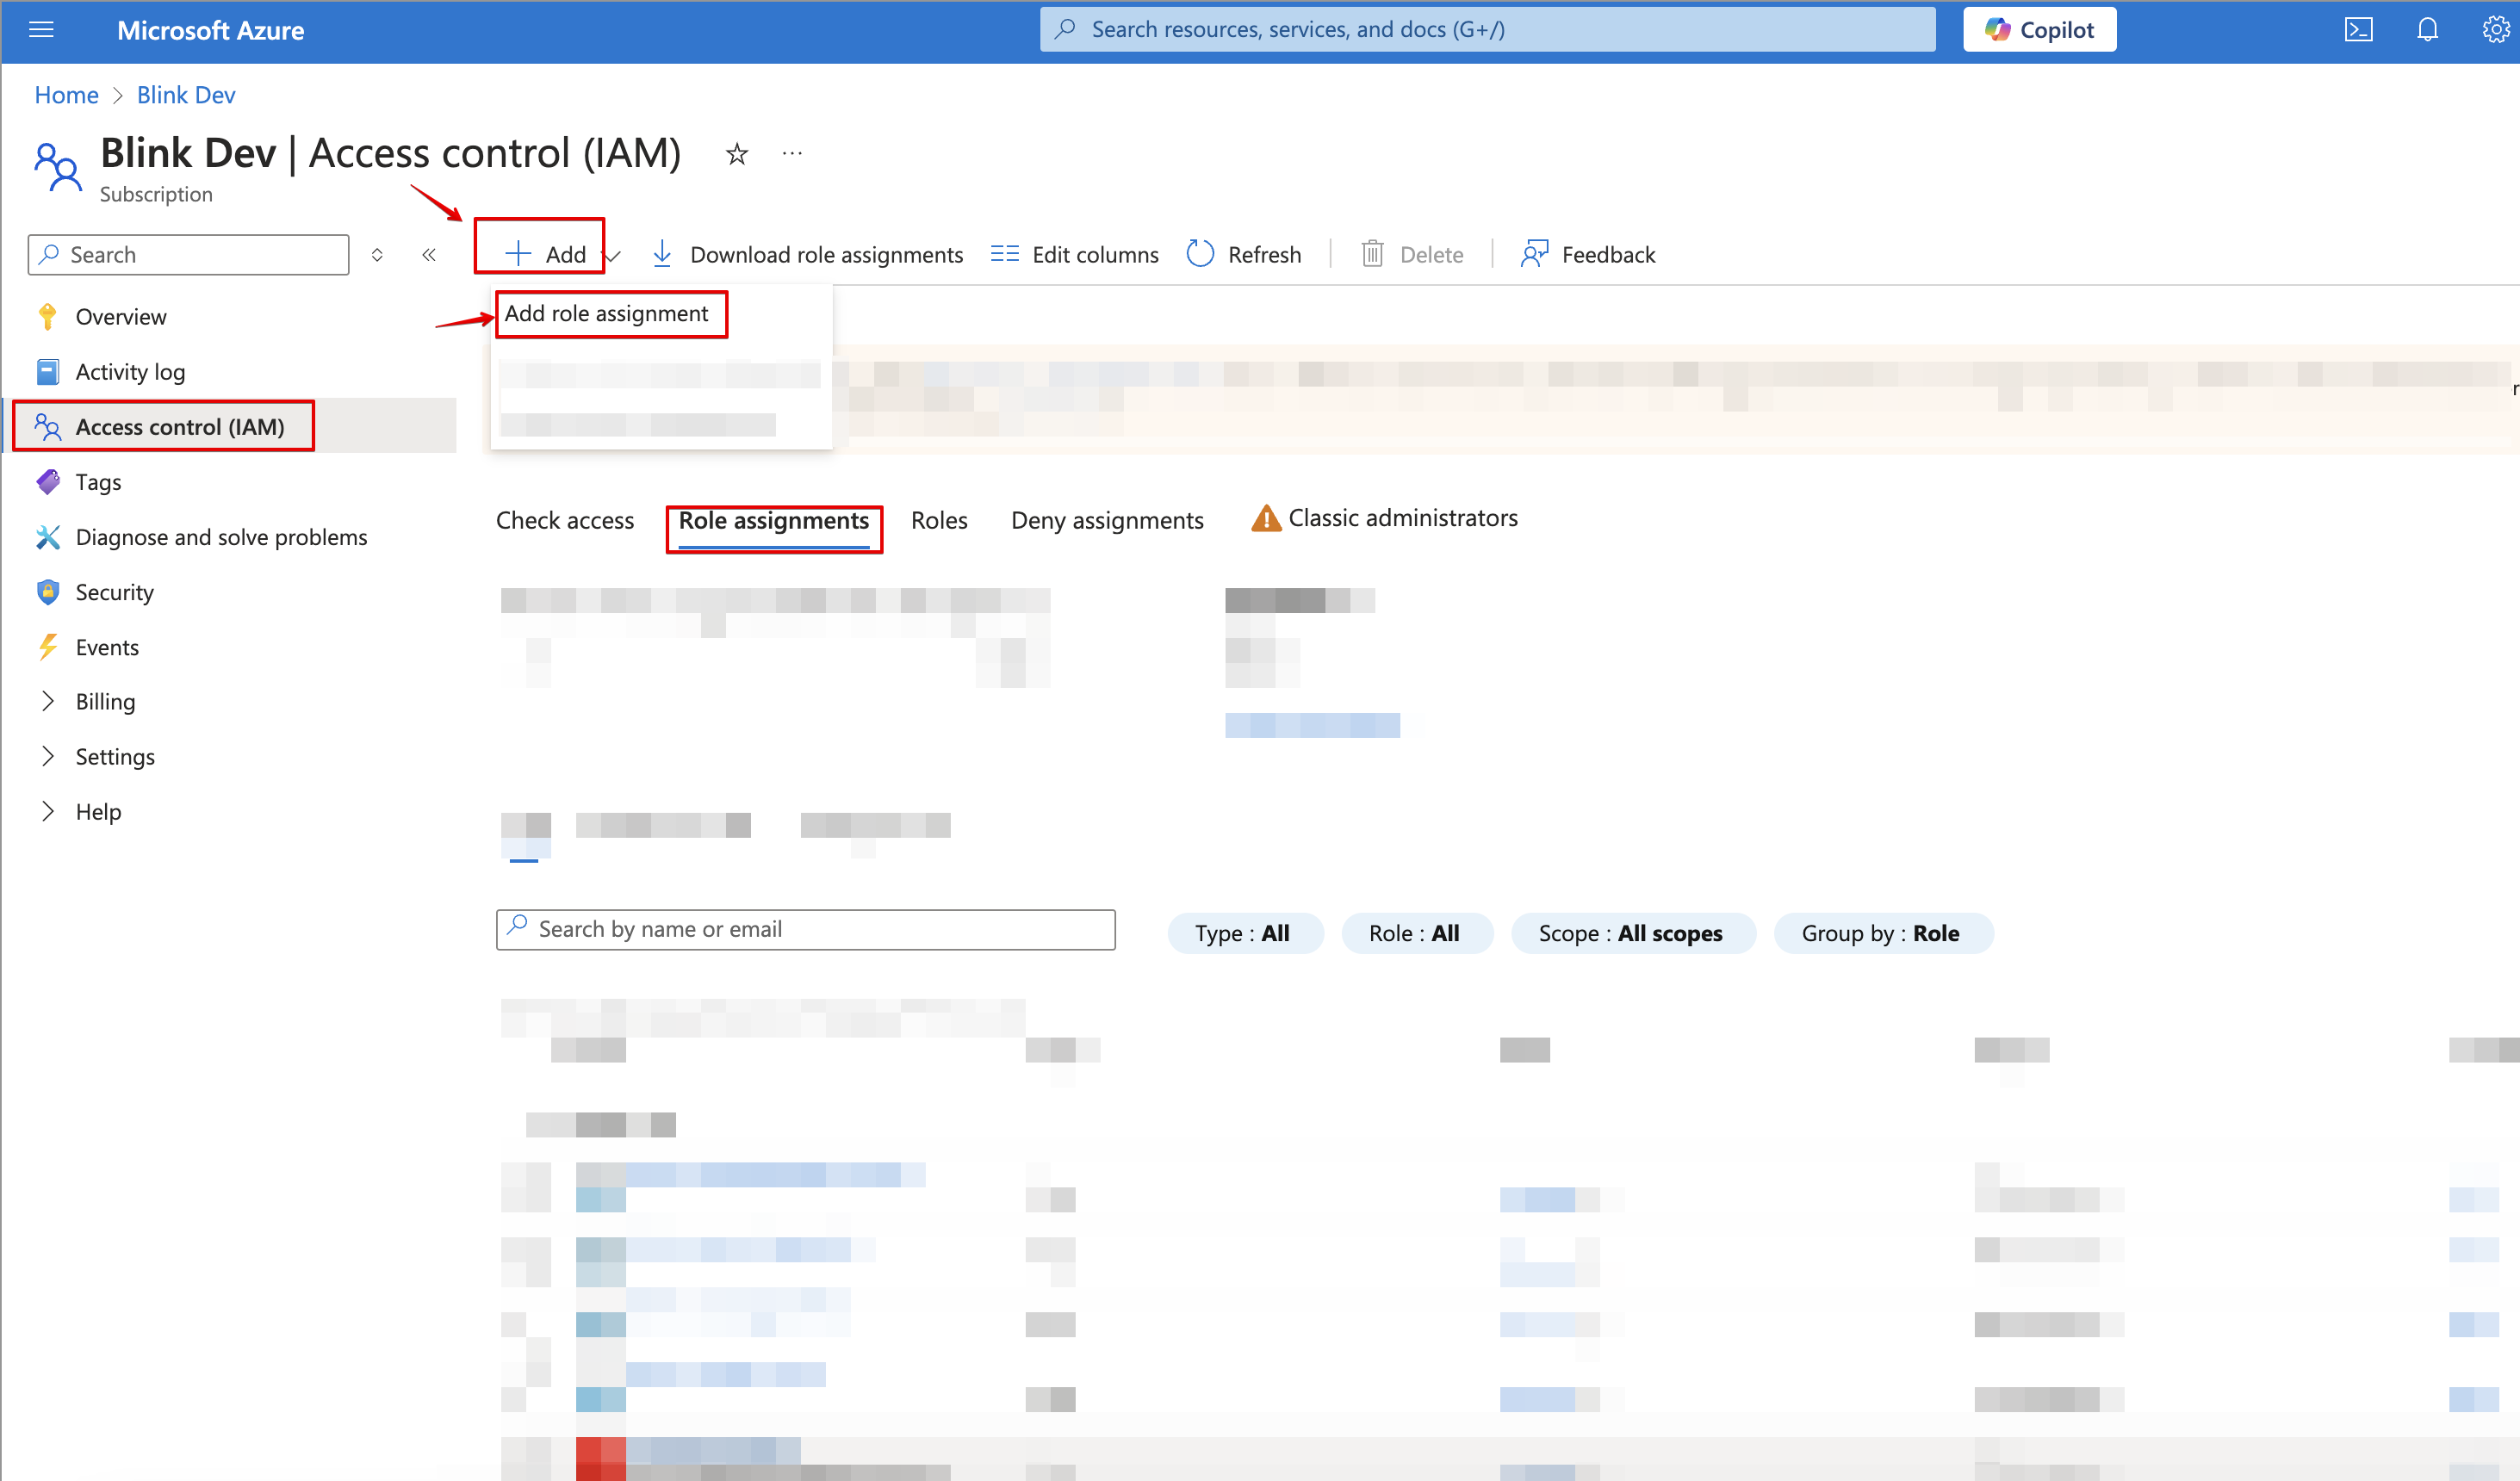
 9. Navigate to **Access control** > **Role assignments** > **Add** > **Add role assignment**.
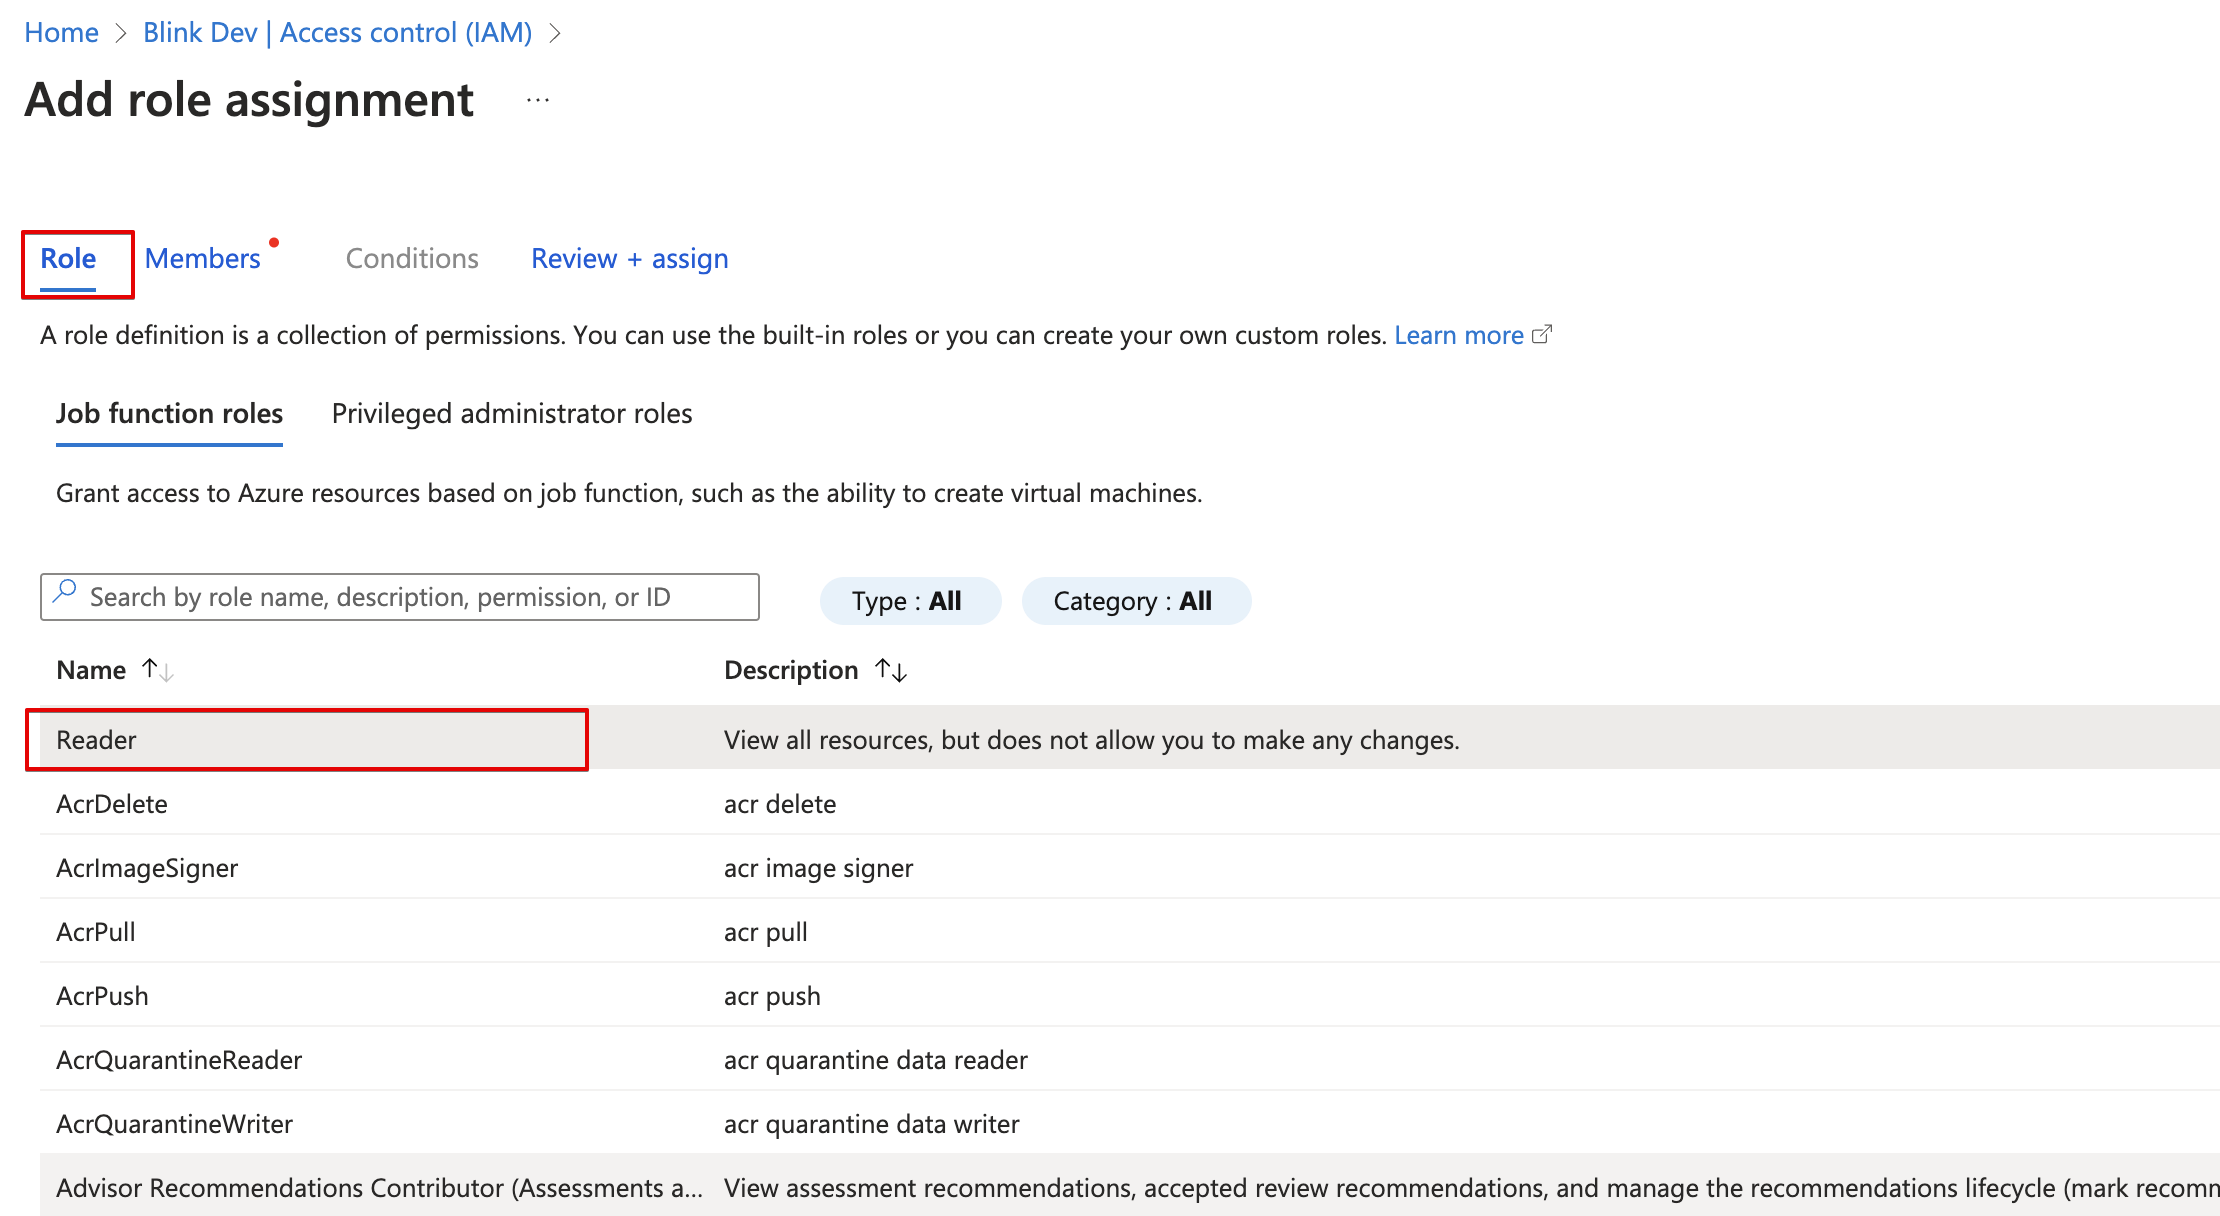
 10. Under the **Role** tab, select the `Reader` role.
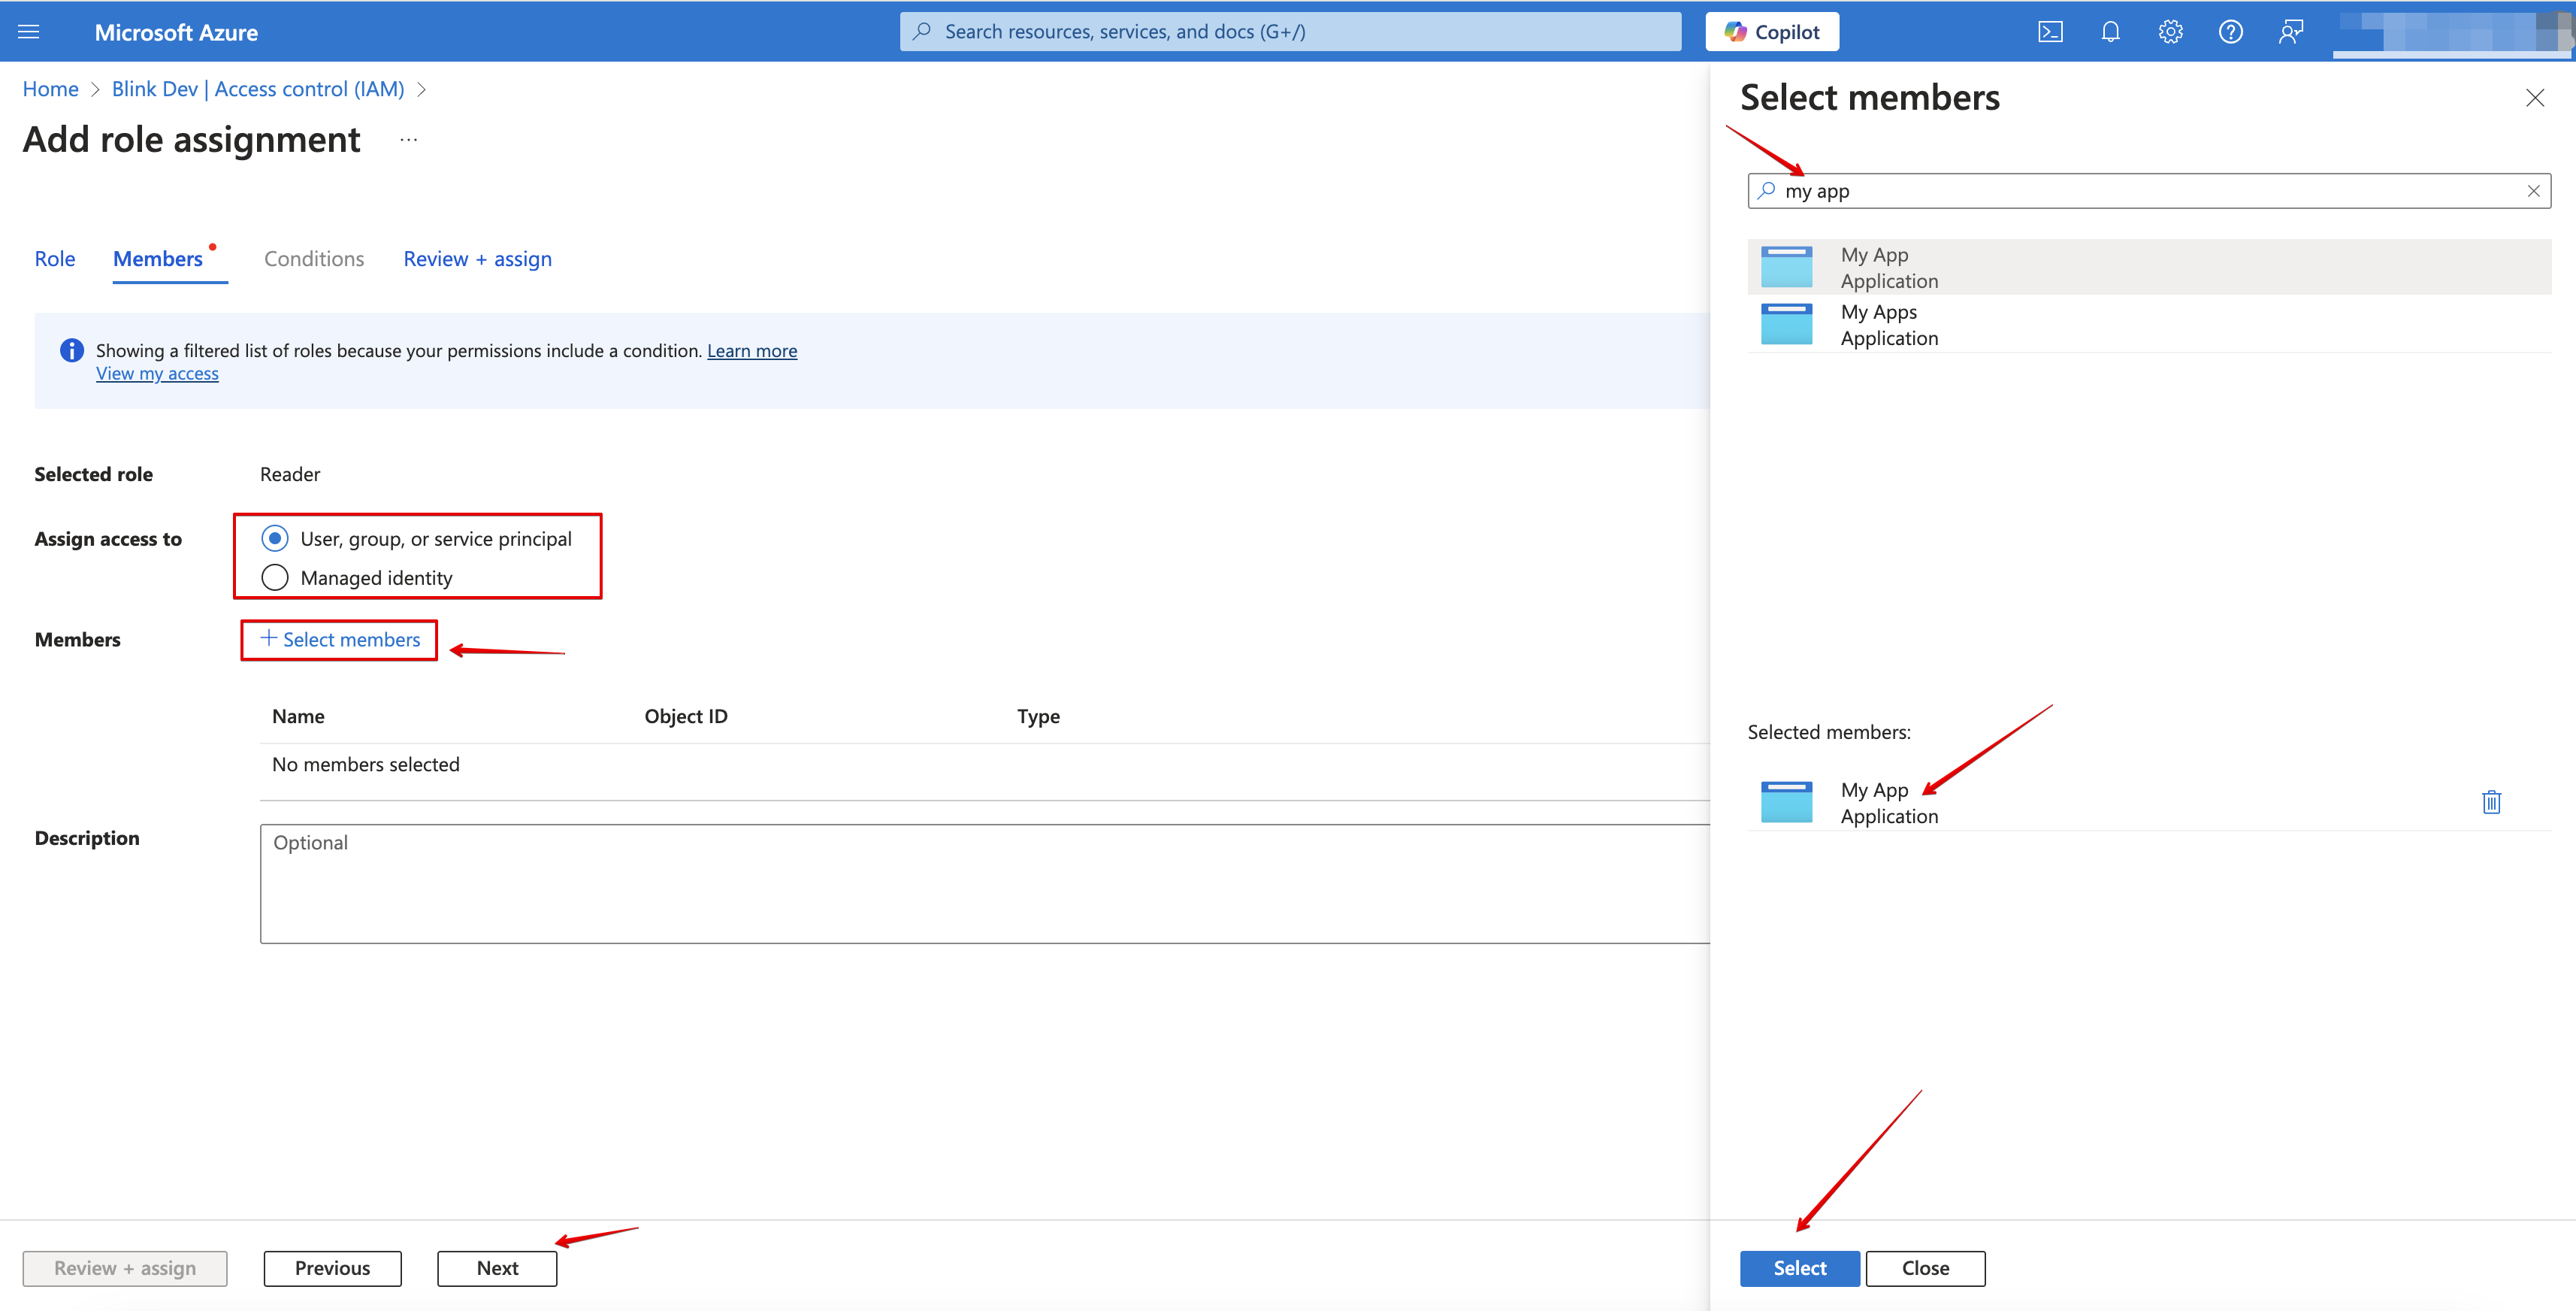
 11. Under the **Members** tab > **Assign access to** > select **User, group, or service principal**. Click on **Select members**, and select your app.
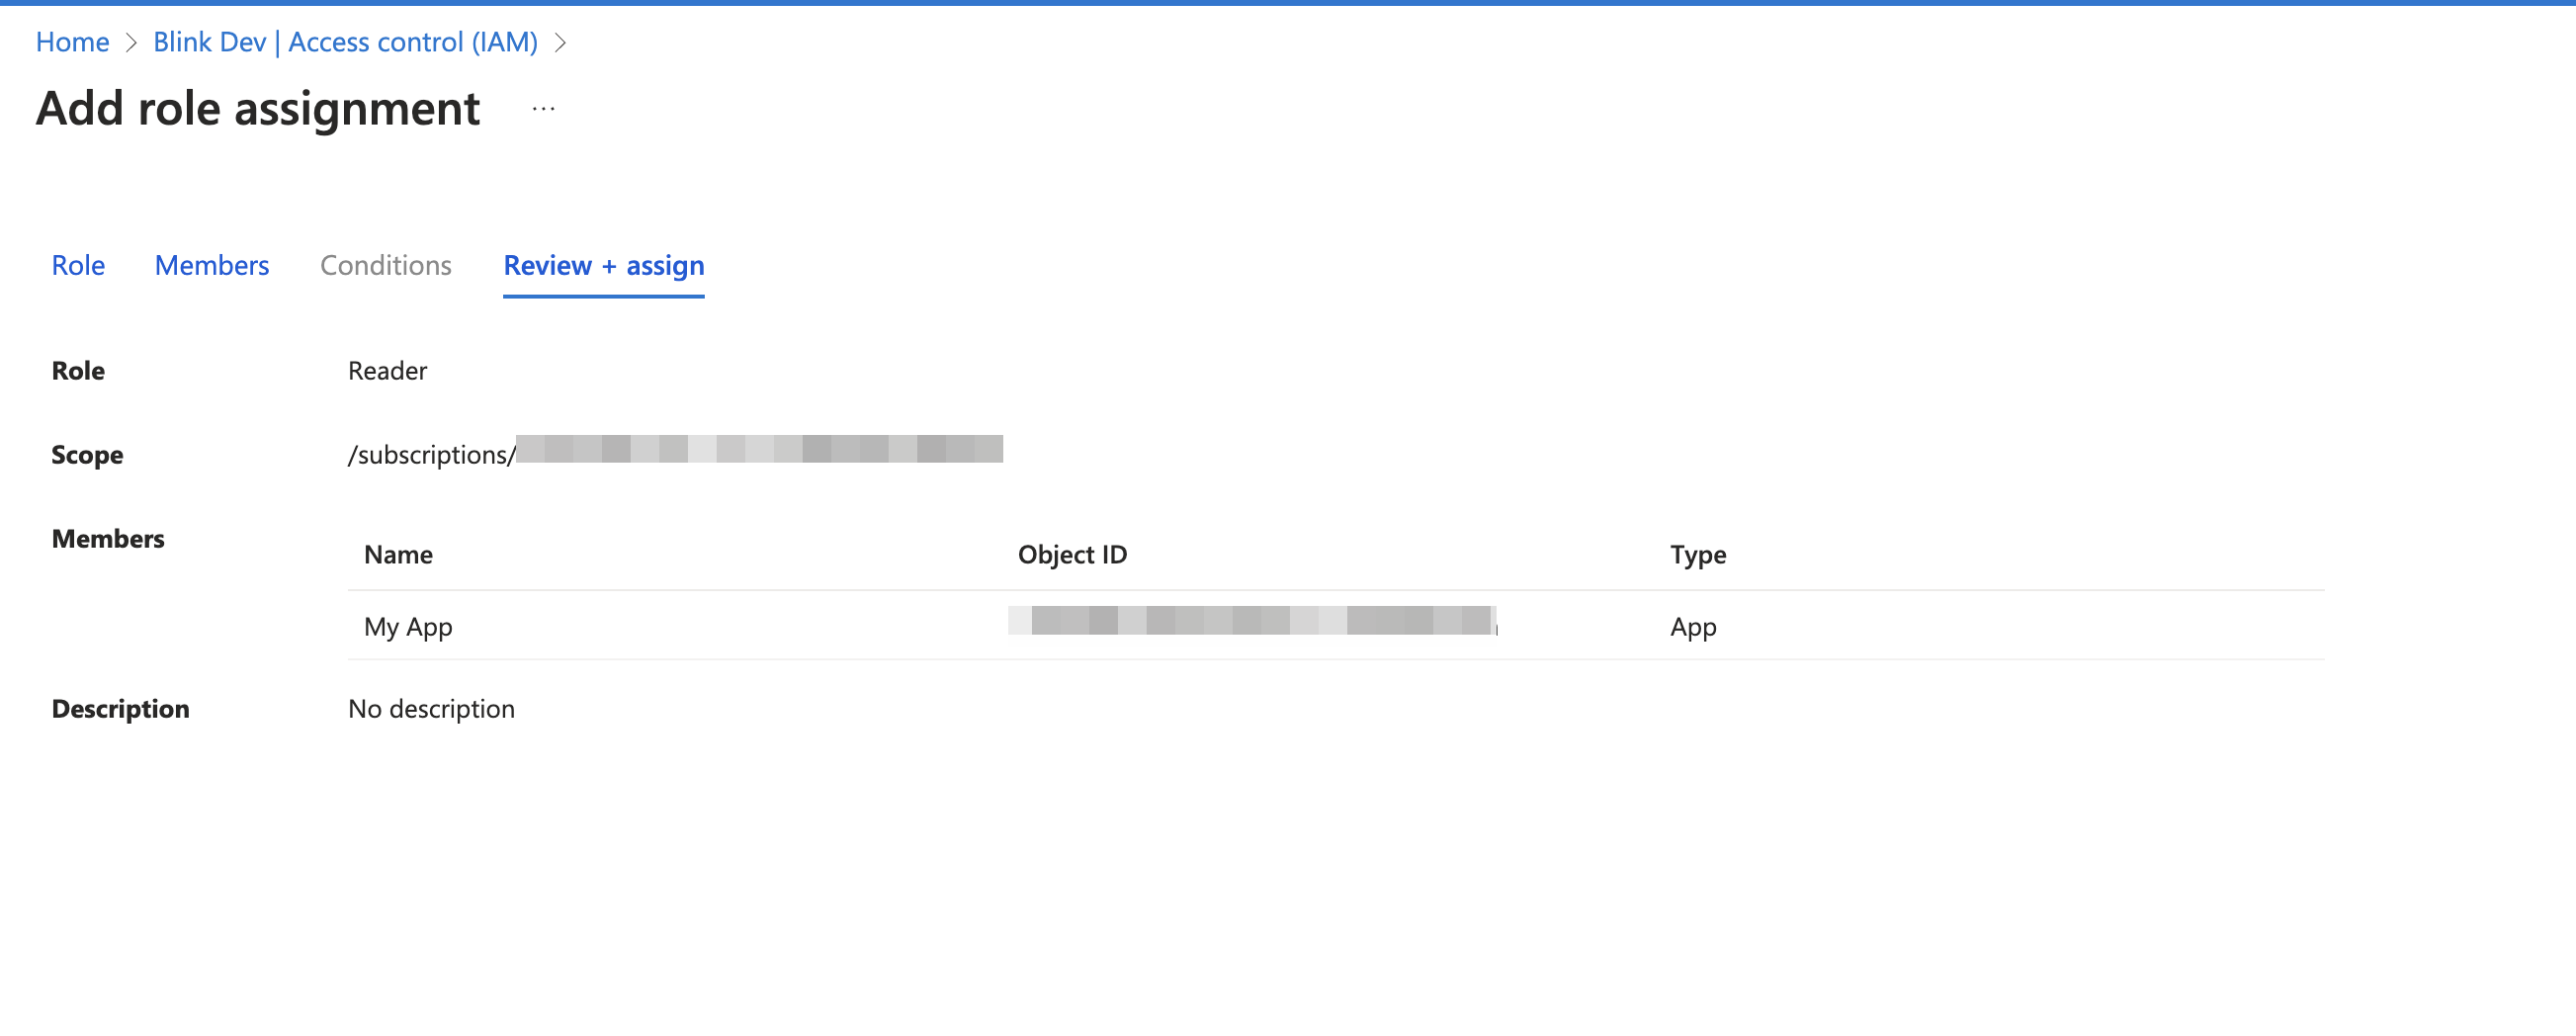
 12. Under **Review + assign** confirm your app has been added and click **Review + assign** on the bottom left edge.
 #### Create and copy a secret
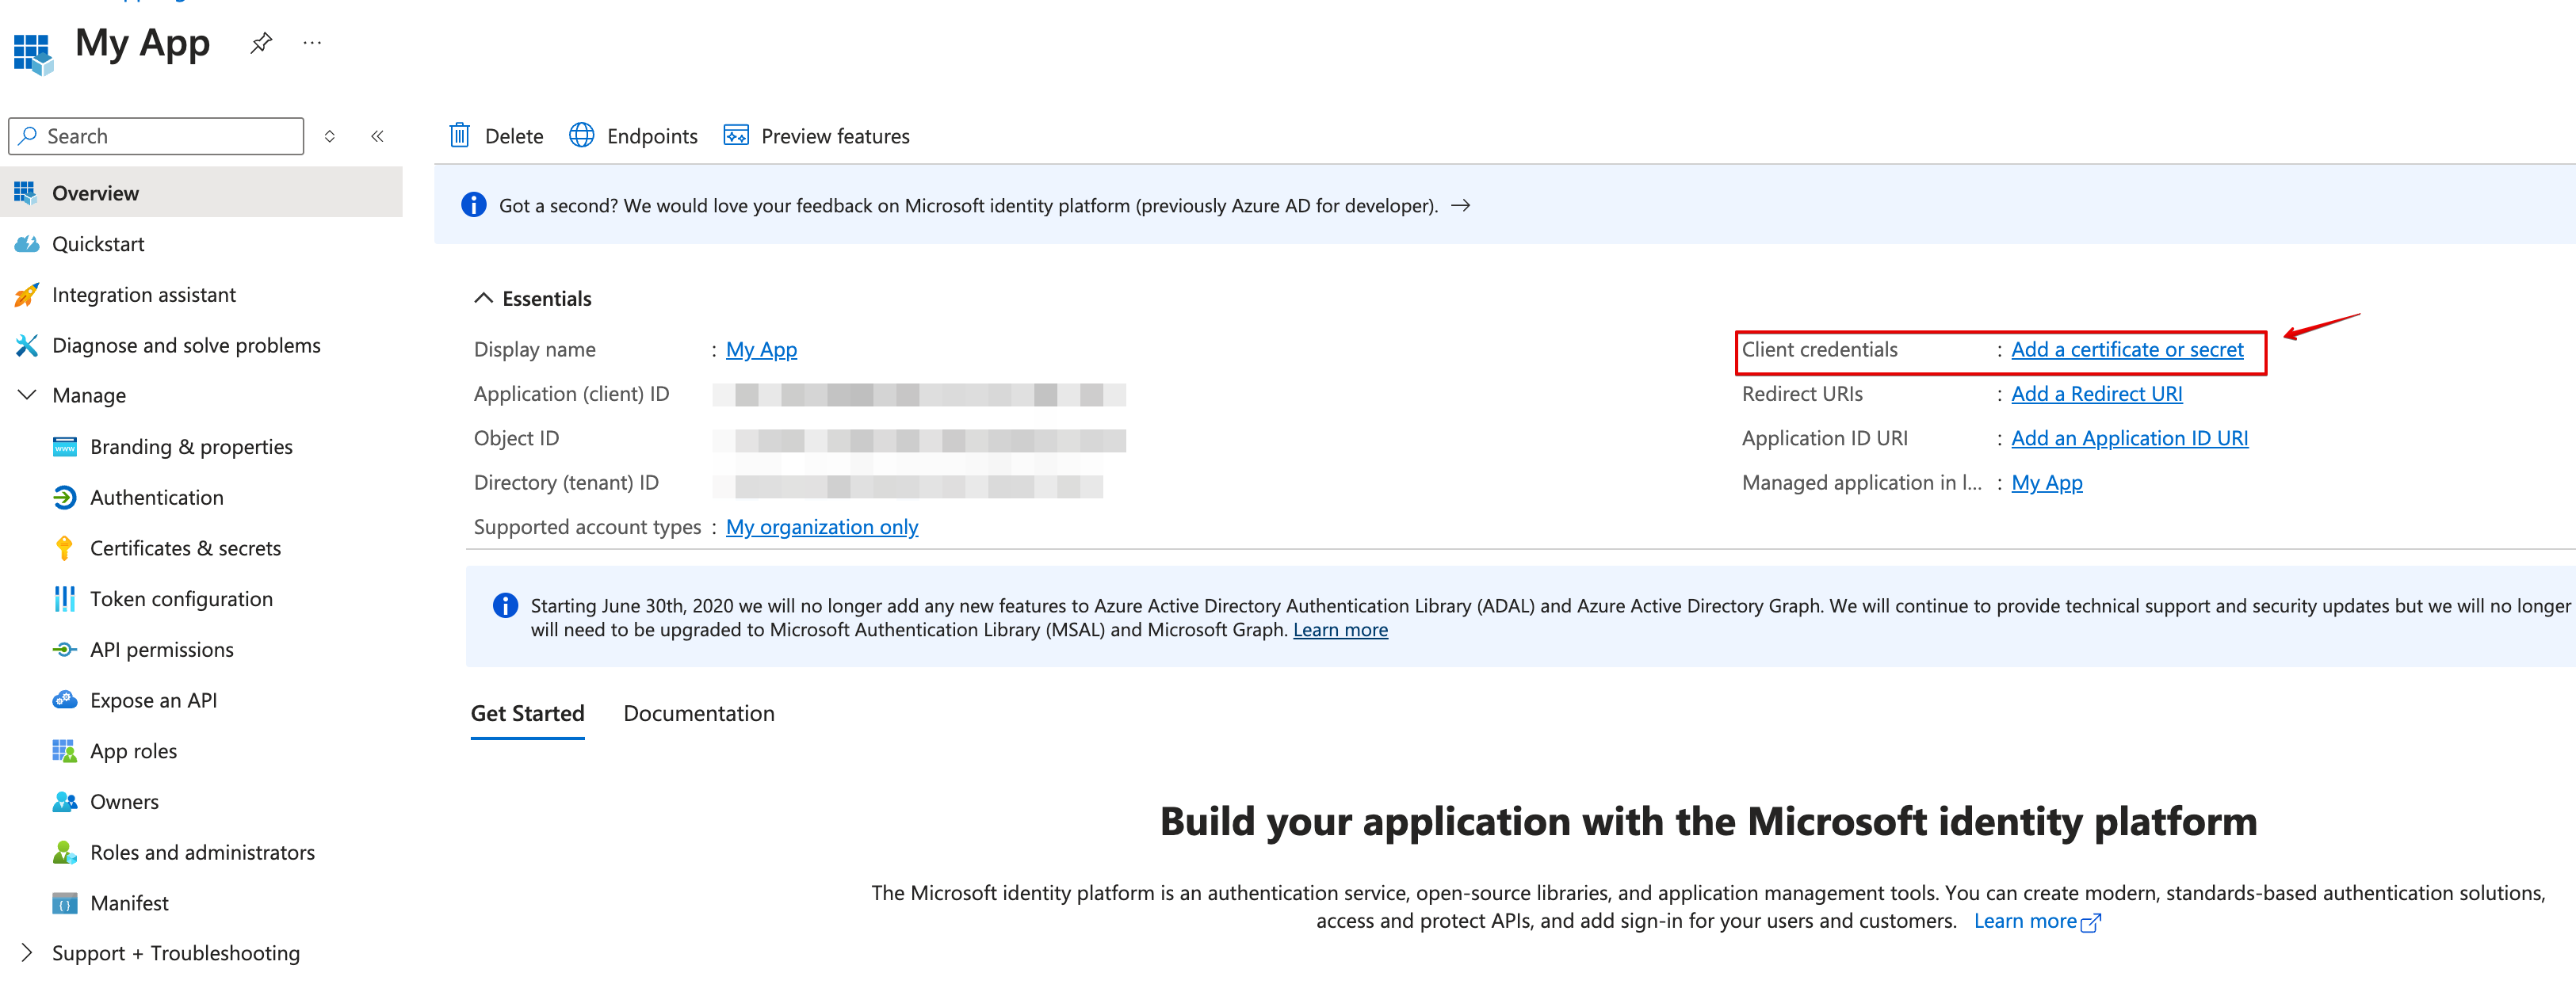
13. Go back to your app's **Overview** page, and create a new **client secret**.
#### Create and copy a secret
13. Go back to your app's **Overview** page, and create a new **client secret**.
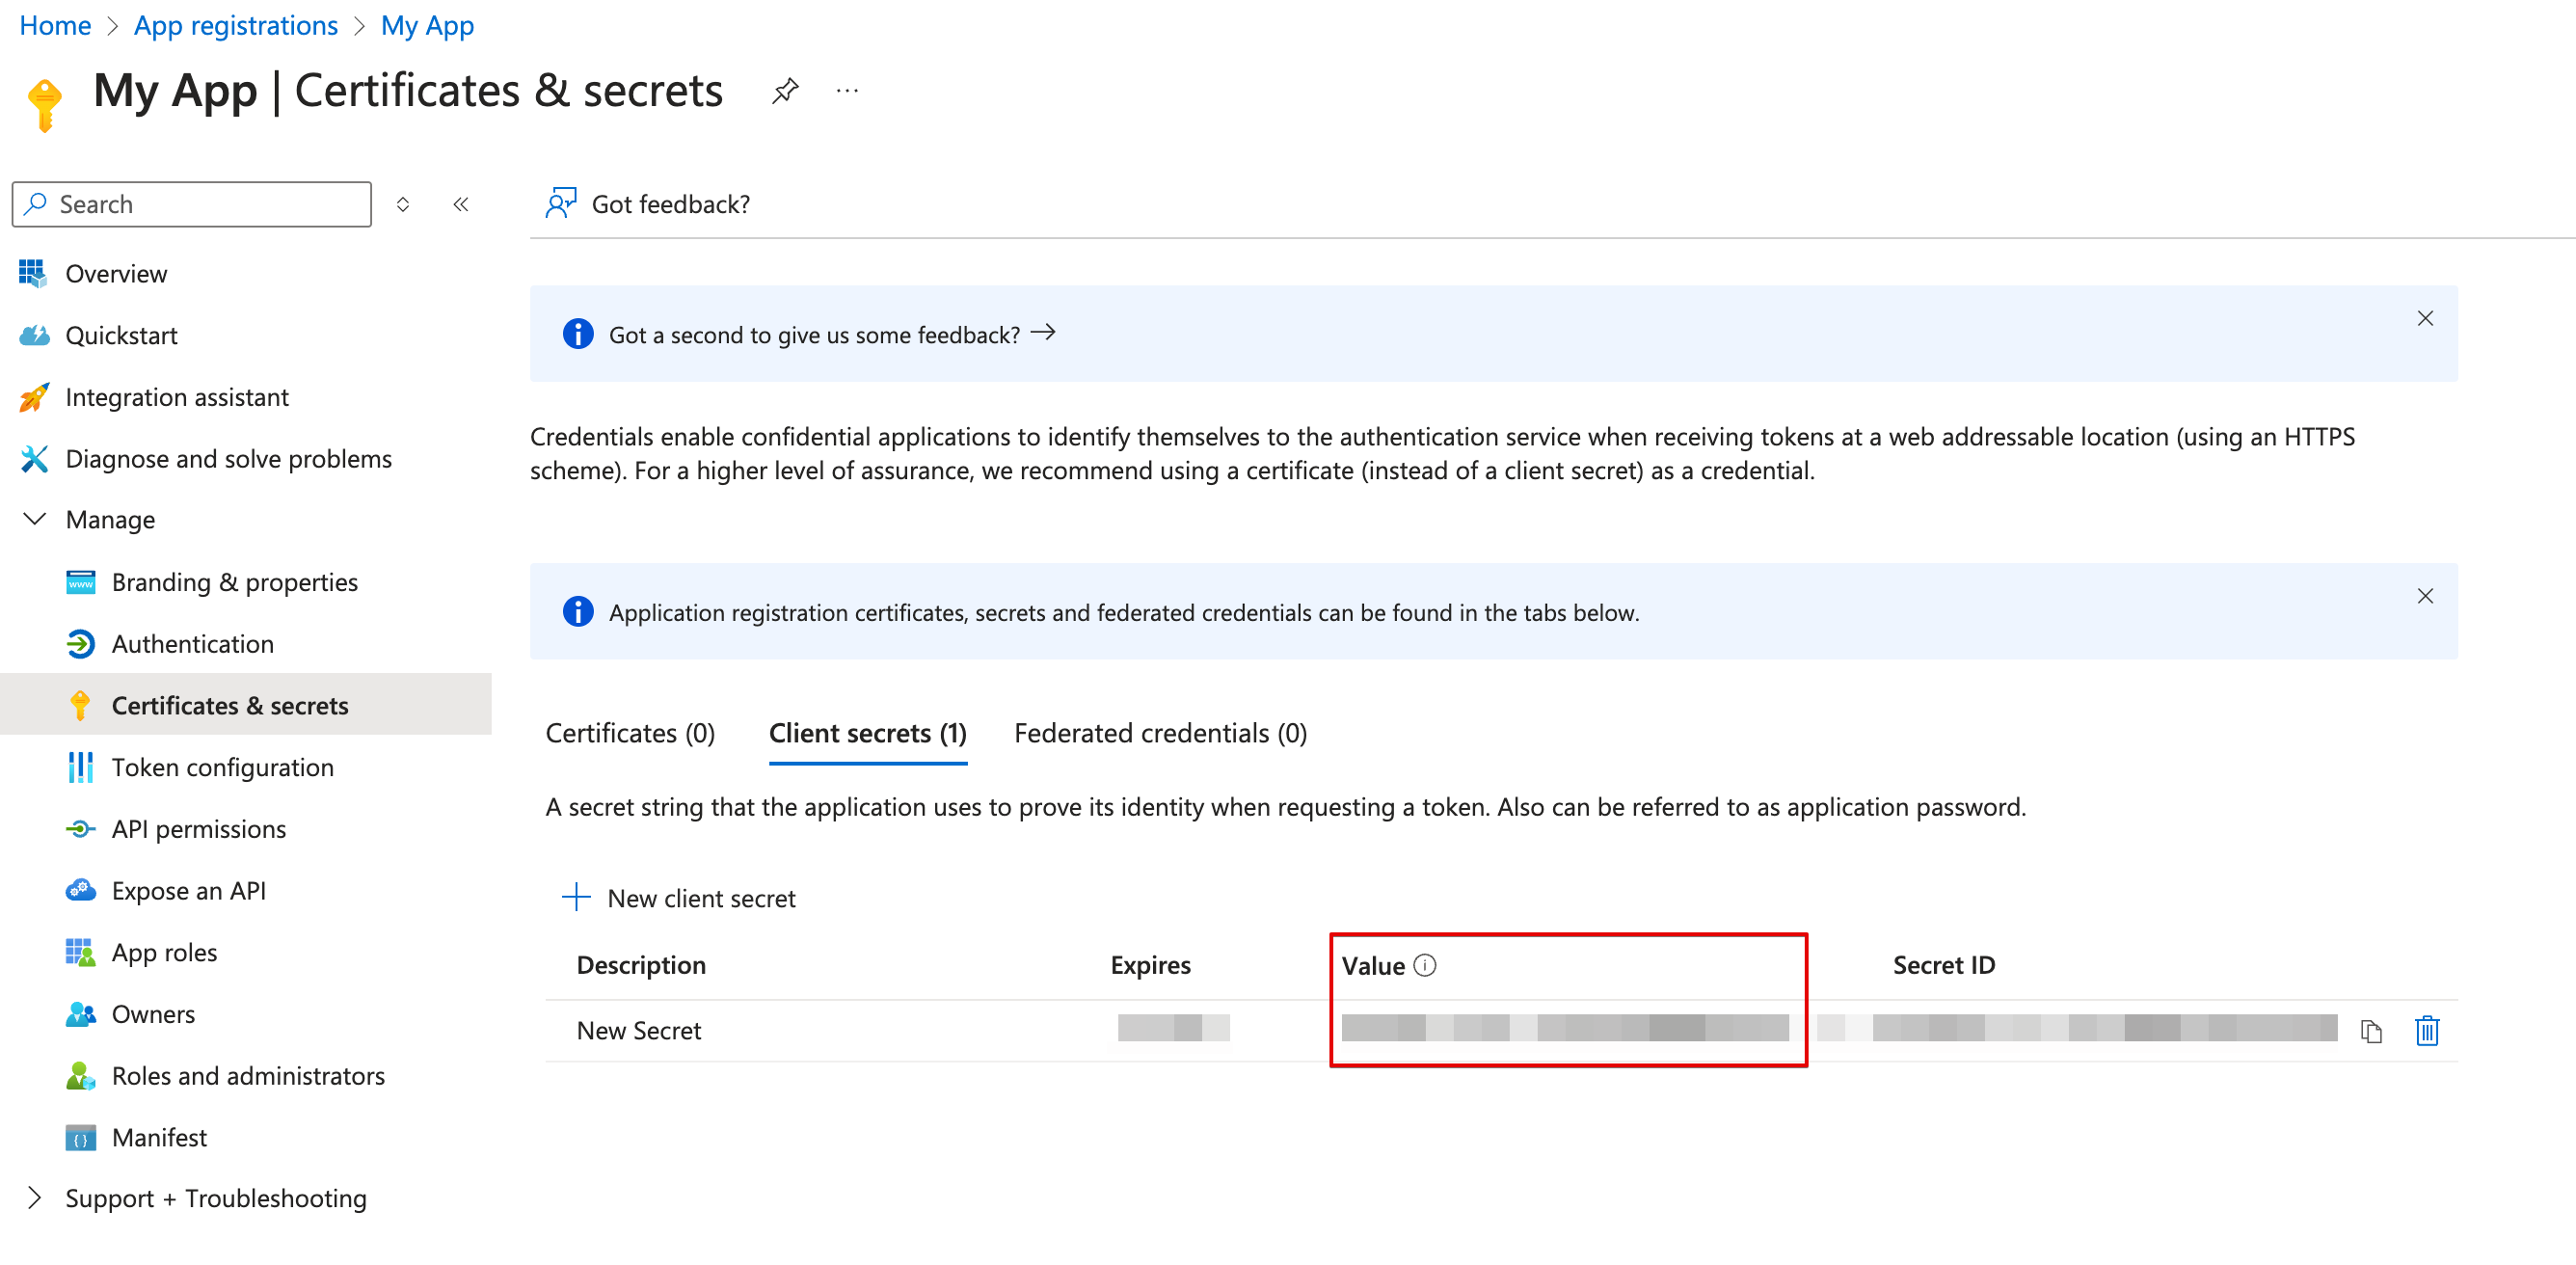
 14. Copy the **secret value**.
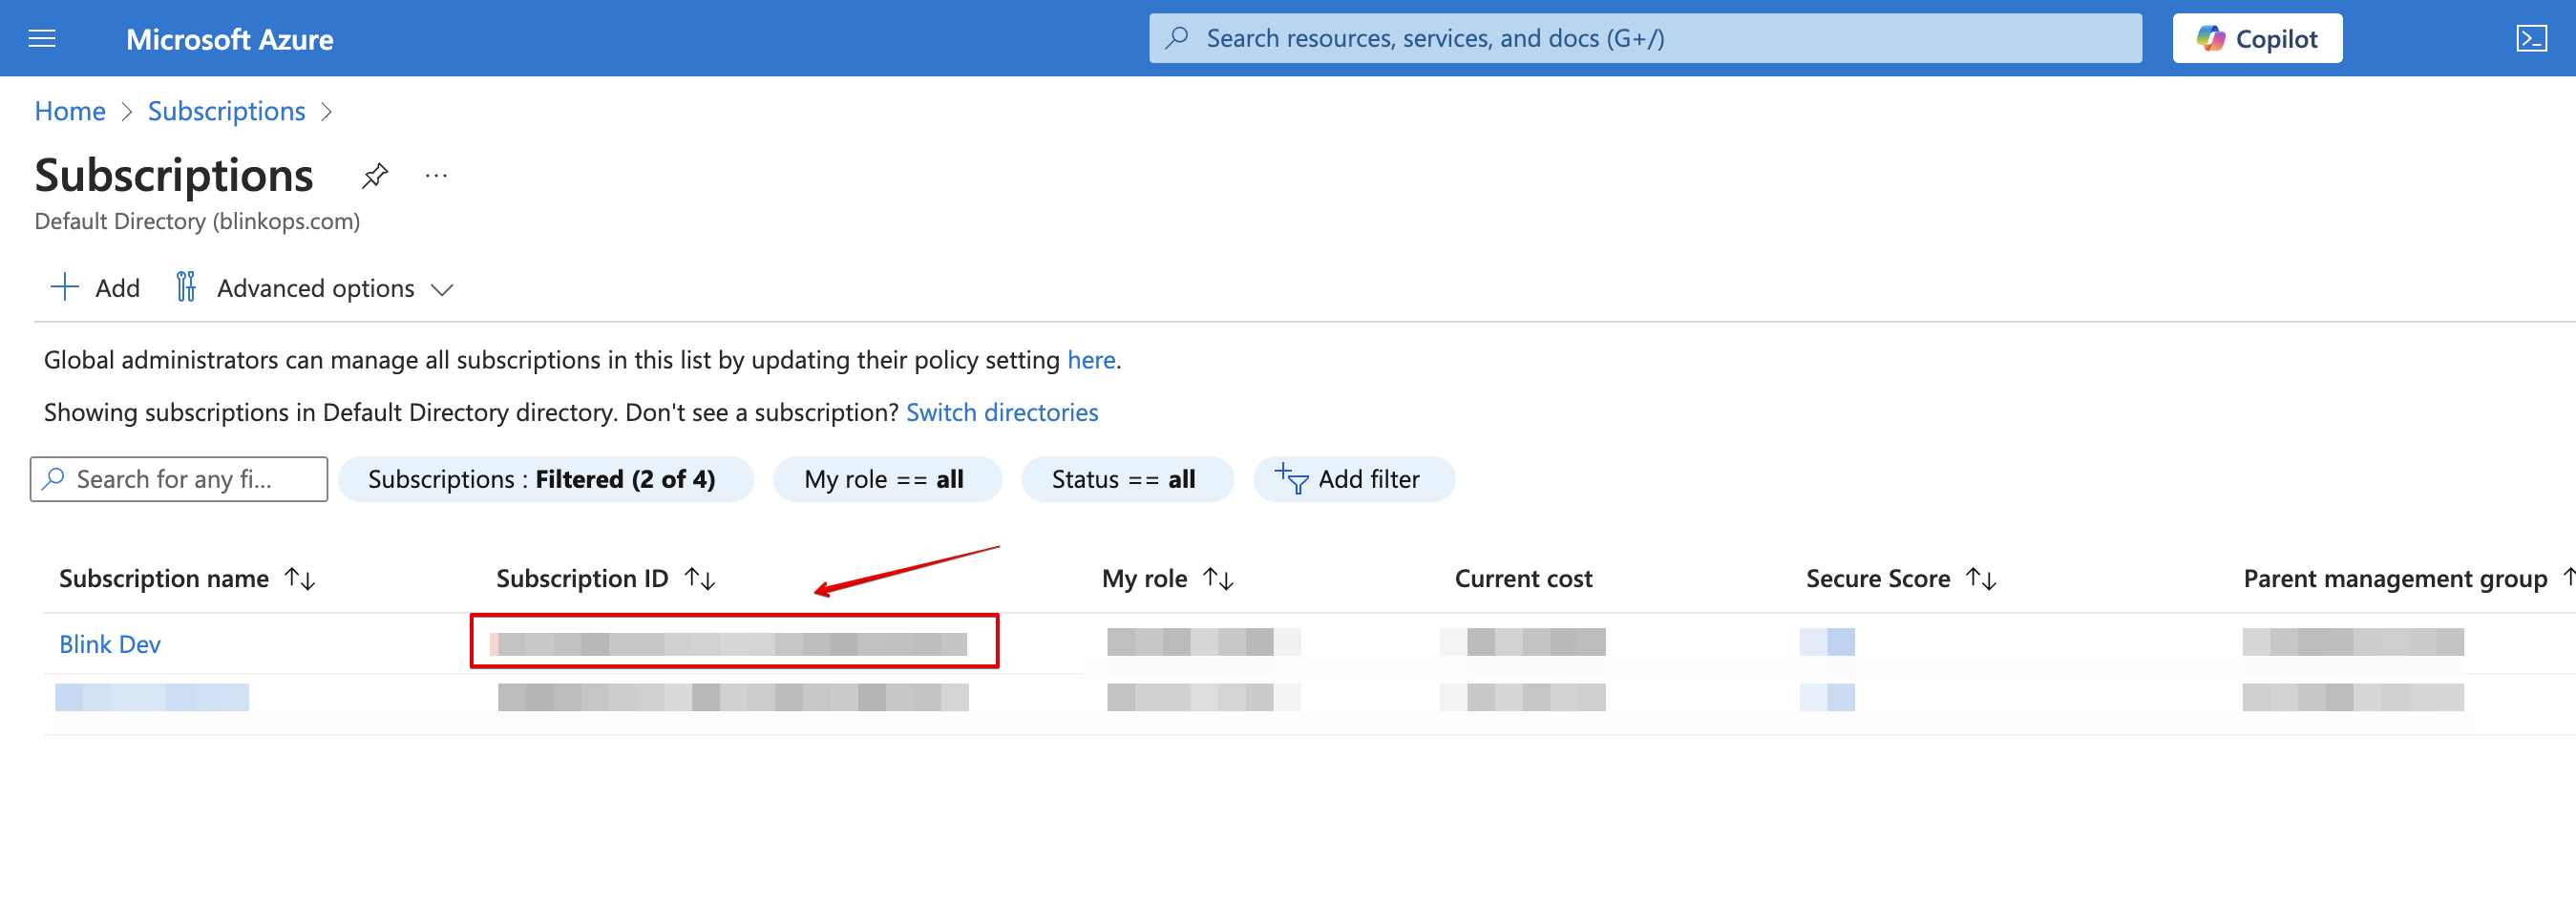
 #### Copy the subscription ID
15. Navigate back to [Microsoft Azure Portal home](https://portal.azure.com/#home).
16. Click **Subscriptions**.
17. Copy the **subscription ID** of the subscription you want to use.
#### Copy the subscription ID
15. Navigate back to [Microsoft Azure Portal home](https://portal.azure.com/#home).
16. Click **Subscriptions**.
17. Copy the **subscription ID** of the subscription you want to use.
 #### Creating your connection
1. In the Blink platform, navigate to the **Connections** page > **Add connection**. A New Connection dialog box opens displaying icons of external service providers available.
2. Select the **Azure** icon. A dialog box with name of the connection and connection methods appear.
3. (Optional) Edit the name of the connection. At a later stage you cannot edit the name.
4. Select **App Registration** as the method to make the connection.
5. Fill in the parameters:
* The API Address
* The APP ID
* The client secret
* The subscription ID
6. (Optional) Click **Test Connection** to test it.
7. Click **Create connection**. The new connection appears on the **Connections** page.
### Interactive Tutorial Guides
You can also refer to the following tutorial guides for a more in-depth understanding of how to create a Azure connection.
[Creating an Azure Connection](https://demo.arcade.software/St4b039Bw4Y7bI631gZF?embed\&show_copy_link=true)
[Creating an Azure Connection in Blink Ops](https://demo.arcade.software/x5NEAEuBsfNmBnkofLGV?embed\&show_copy_link=true)
#### Creating your connection
1. In the Blink platform, navigate to the **Connections** page > **Add connection**. A New Connection dialog box opens displaying icons of external service providers available.
2. Select the **Azure** icon. A dialog box with name of the connection and connection methods appear.
3. (Optional) Edit the name of the connection. At a later stage you cannot edit the name.
4. Select **App Registration** as the method to make the connection.
5. Fill in the parameters:
* The API Address
* The APP ID
* The client secret
* The subscription ID
6. (Optional) Click **Test Connection** to test it.
7. Click **Create connection**. The new connection appears on the **Connections** page.
### Interactive Tutorial Guides
You can also refer to the following tutorial guides for a more in-depth understanding of how to create a Azure connection.
[Creating an Azure Connection](https://demo.arcade.software/St4b039Bw4Y7bI631gZF?embed\&show_copy_link=true)
[Creating an Azure Connection in Blink Ops](https://demo.arcade.software/x5NEAEuBsfNmBnkofLGV?embed\&show_copy_link=true)