> ## Documentation Index
> Fetch the complete documentation index at: https://docs.blinkops.com/llms.txt
> Use this file to discover all available pages before exploring further.
# Azure Data Explorer
> Azure Data Explorer is a fully-managed big data analytics cloud platform and data-exploration service, that ingests structured, semi-structured and unstructured data. The service then stores this data and answers analytic ad hoc queries on it with seconds of latency.
## Creating an Azure Data Explorer connection[](#creating-an-azure-data-explorer-connection "Direct link to Creating an Azure Data Explorer connection")
## Using App Registration[](#using-app-registration "Direct link to Using App Registration")
To create the connection you need:
* A Cluster URI
* A Client ID
* A Client Secret
* A Tenant ID
### Obtaining the credentials[](#obtaining-the-credentials "Direct link to Obtaining the credentials")
1. Log into the [Azure Portal](https://portal.azure.com/#home).
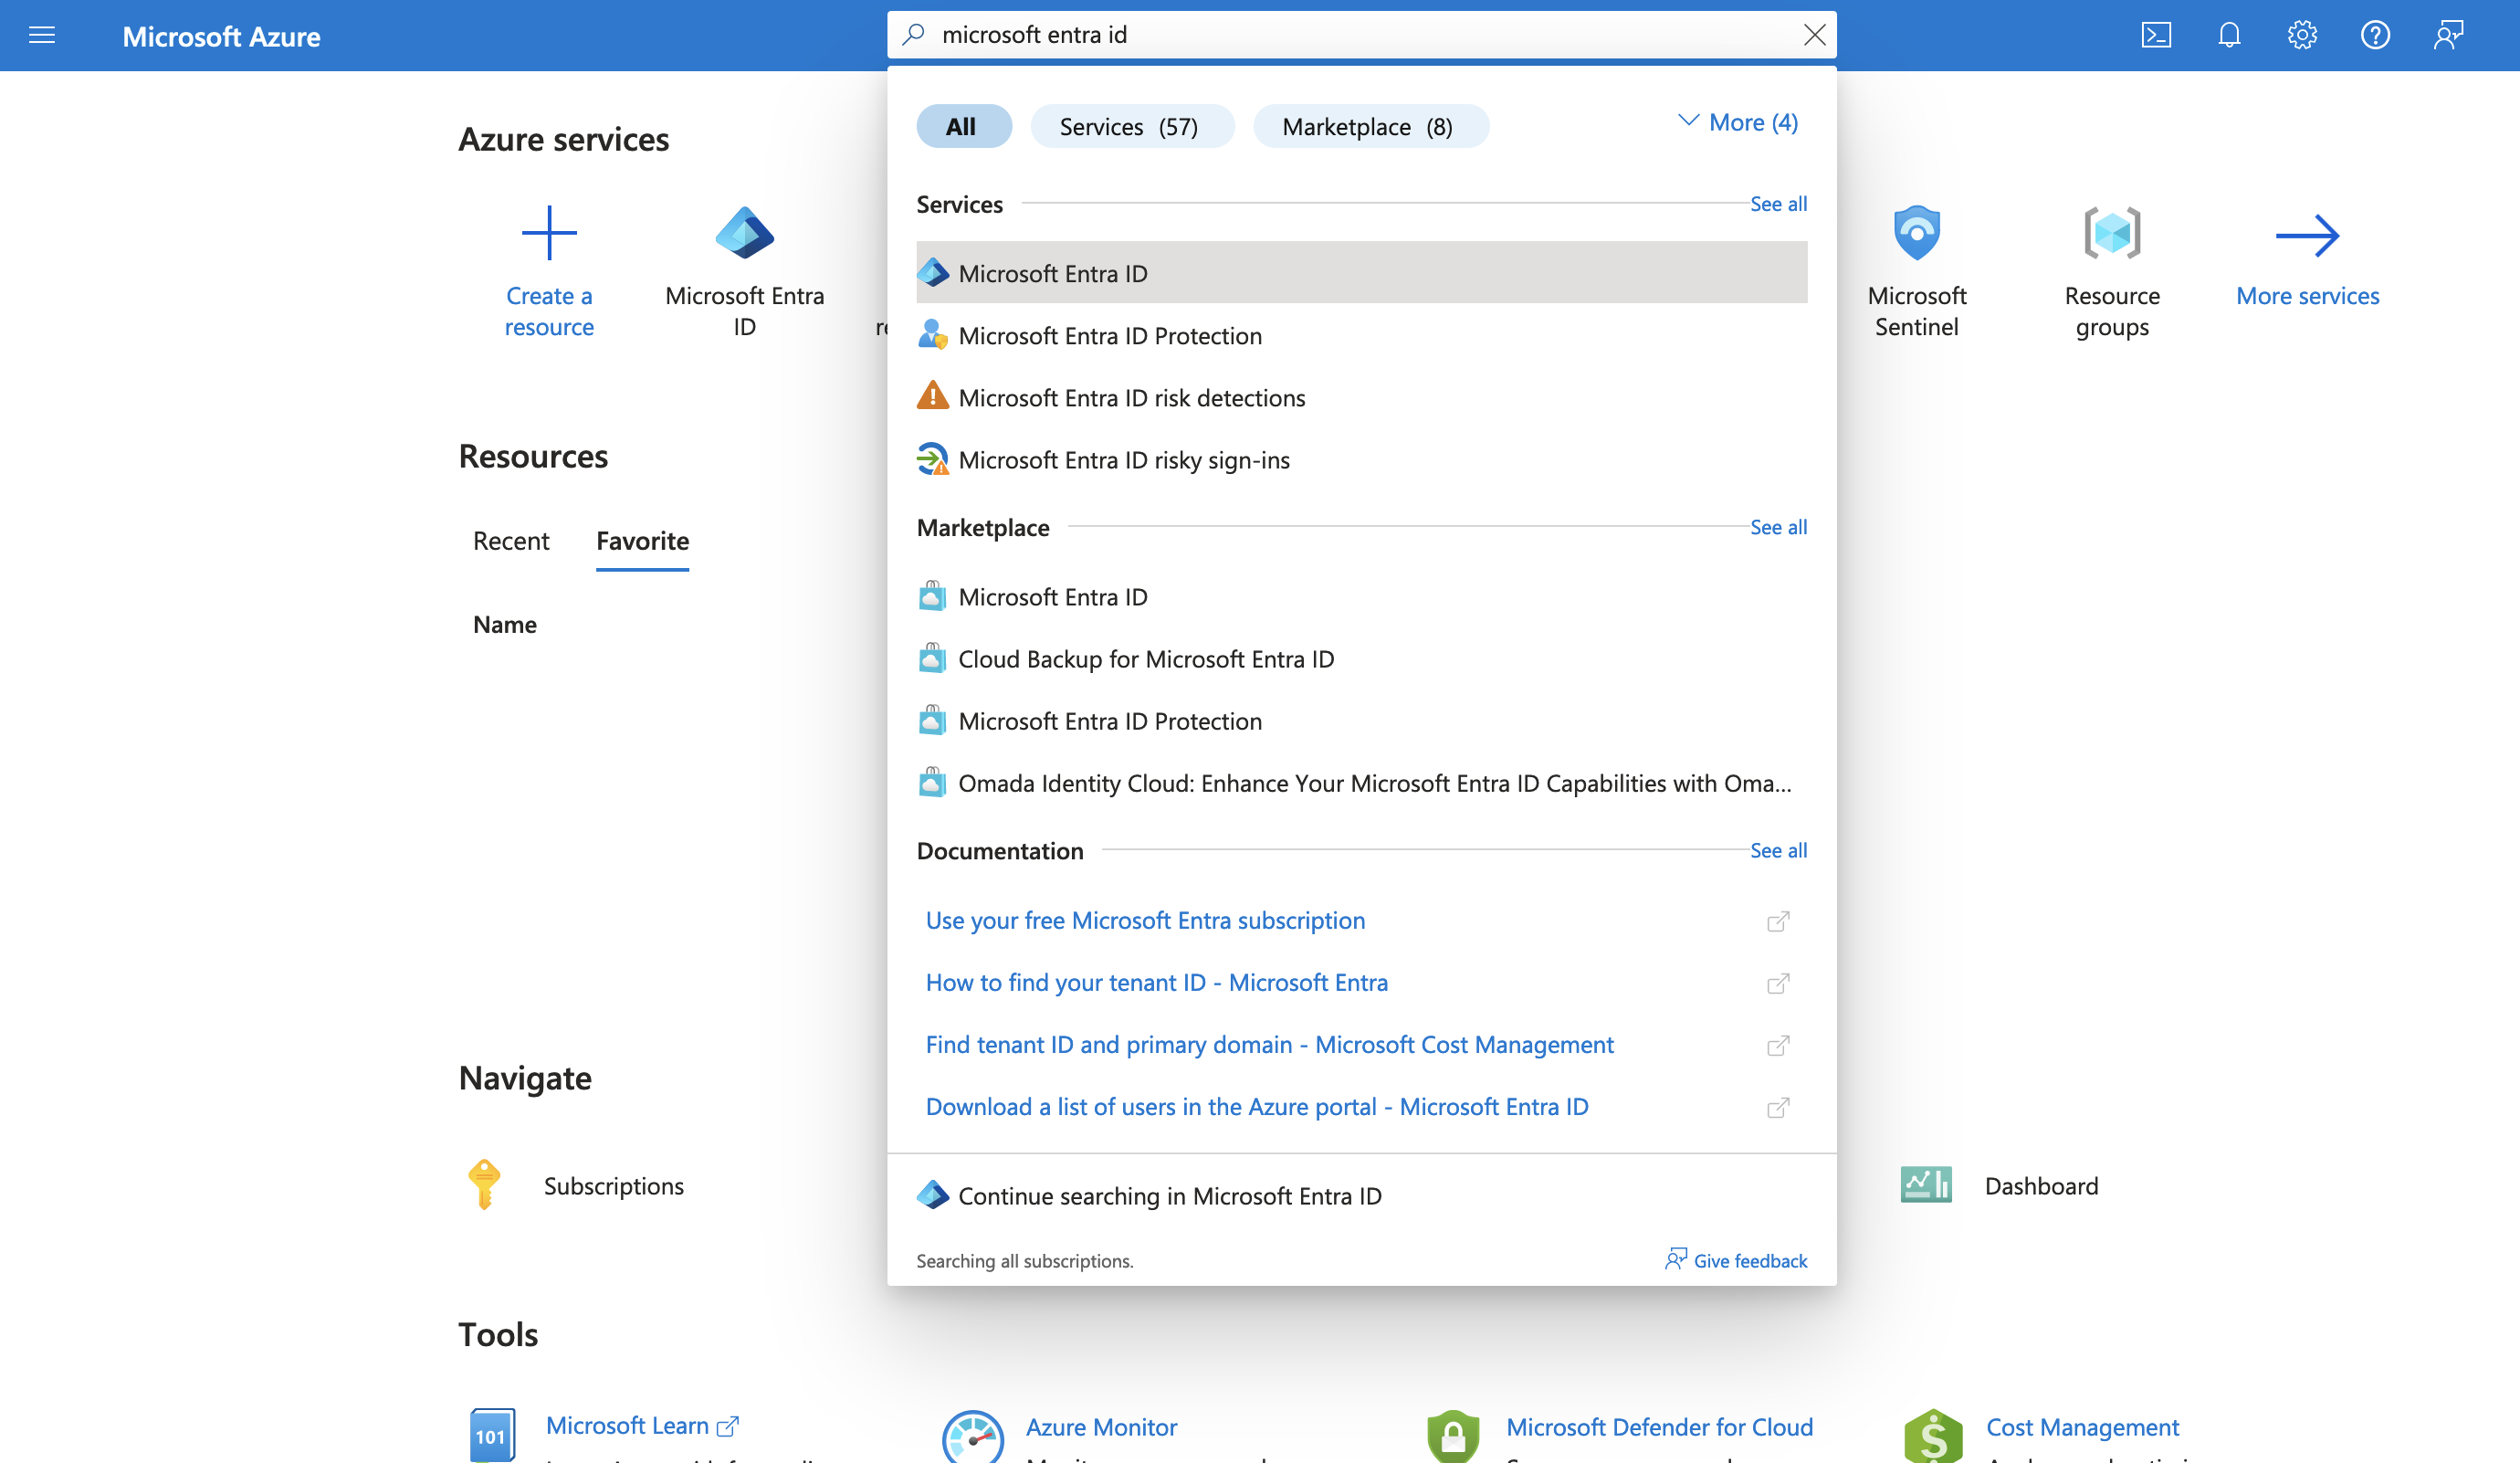
2. Go to the *Microsoft Entra ID* resource.
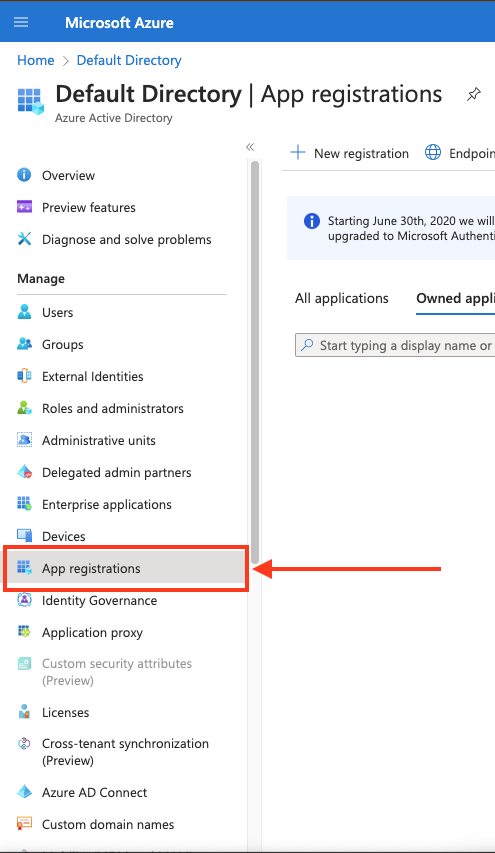
 3. In the left-hand menu, click **App registrations**.
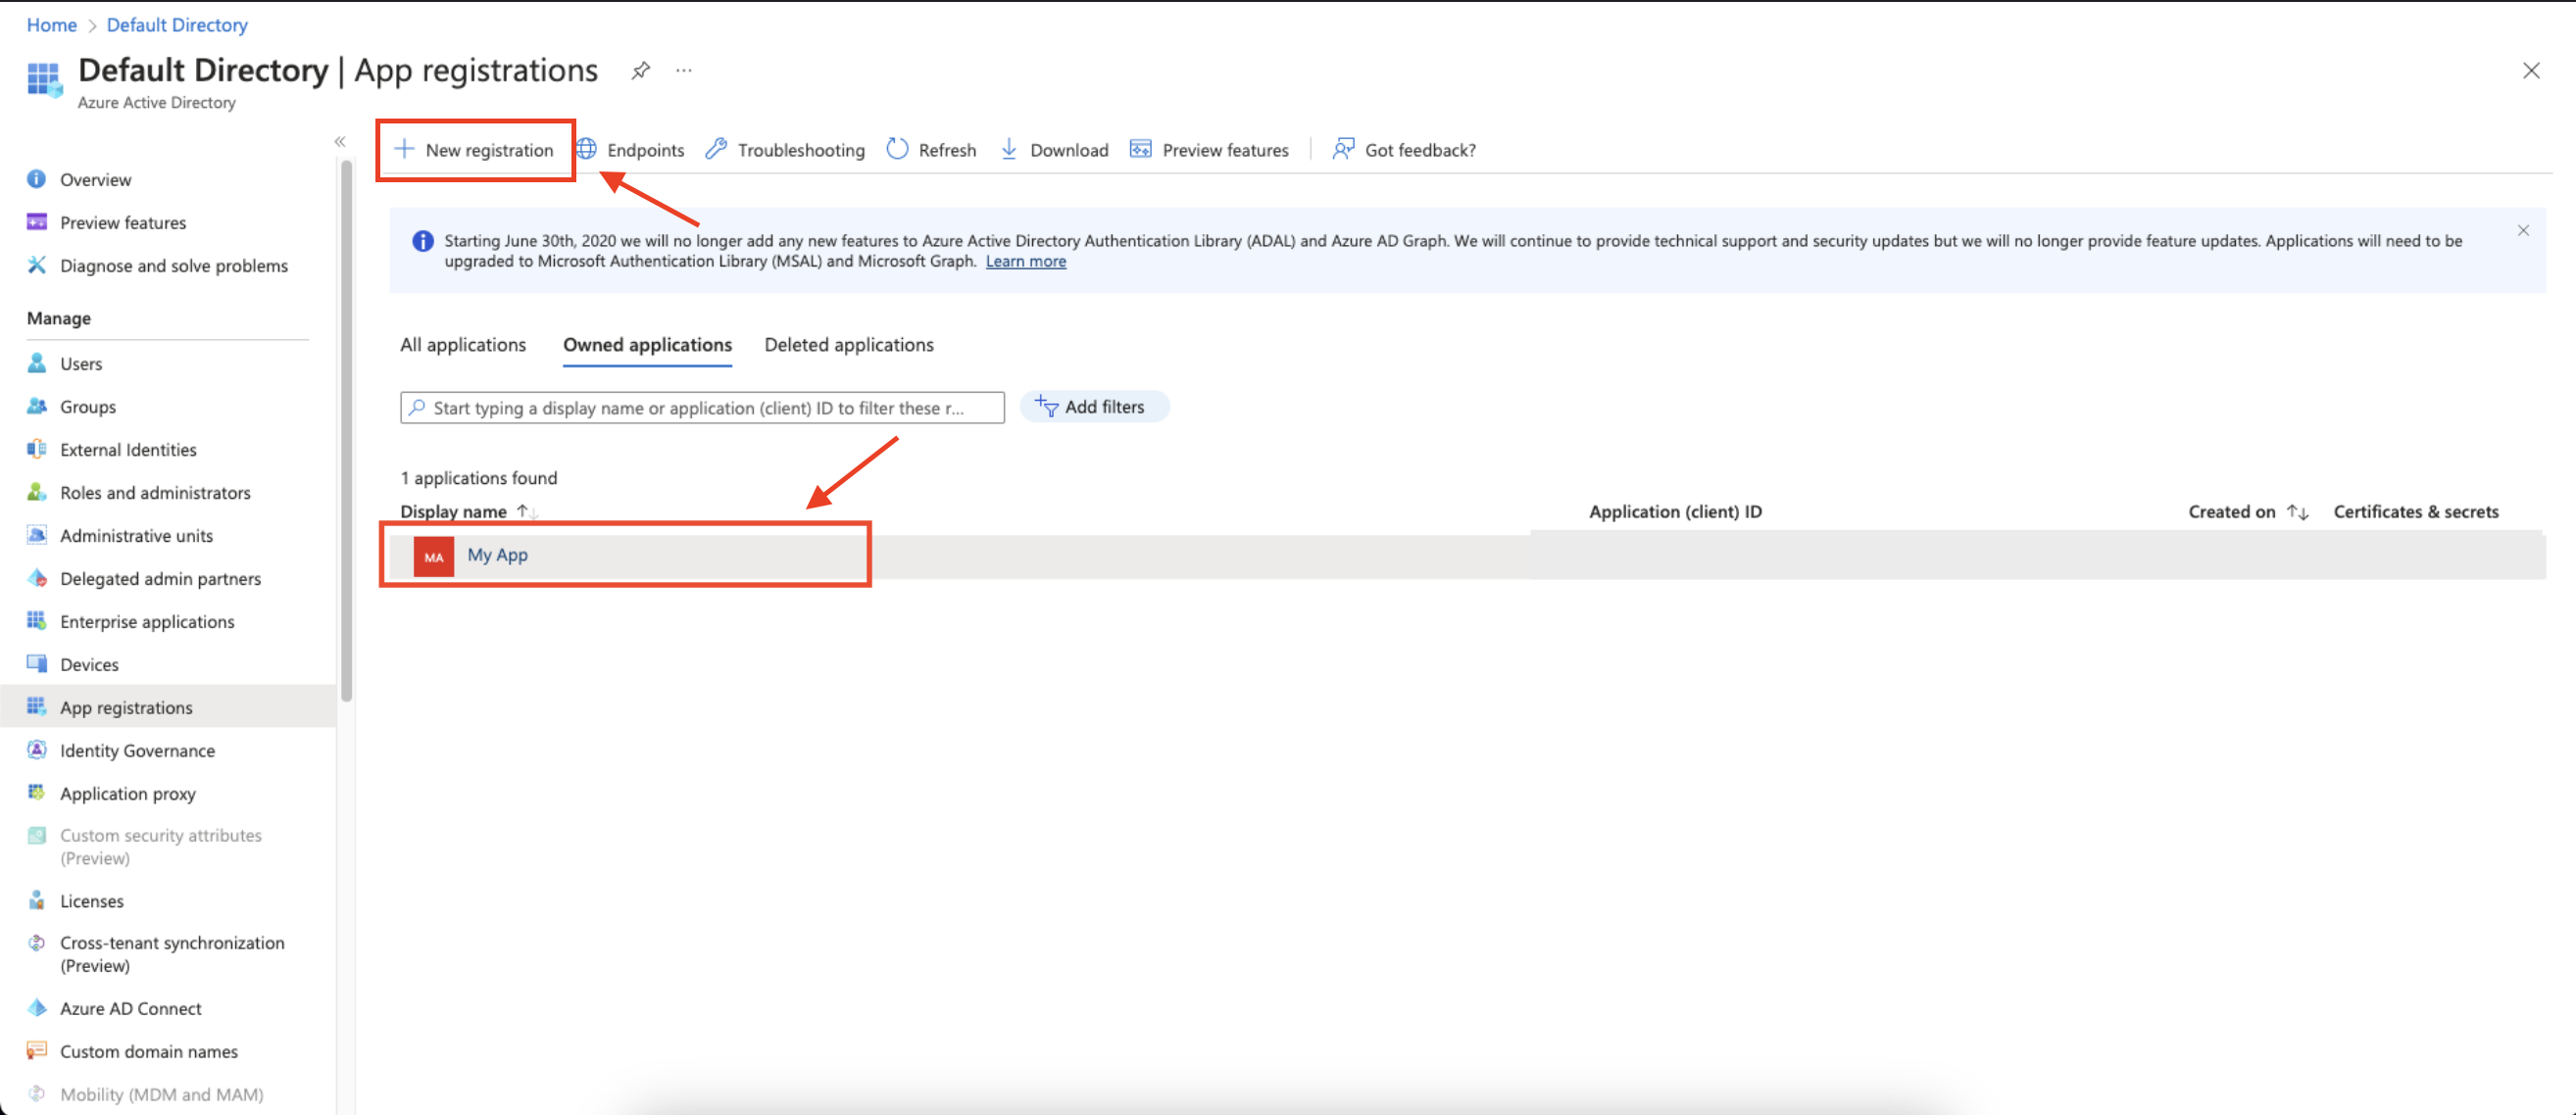
 4. Create a new application registration or click on one of your existing applications.
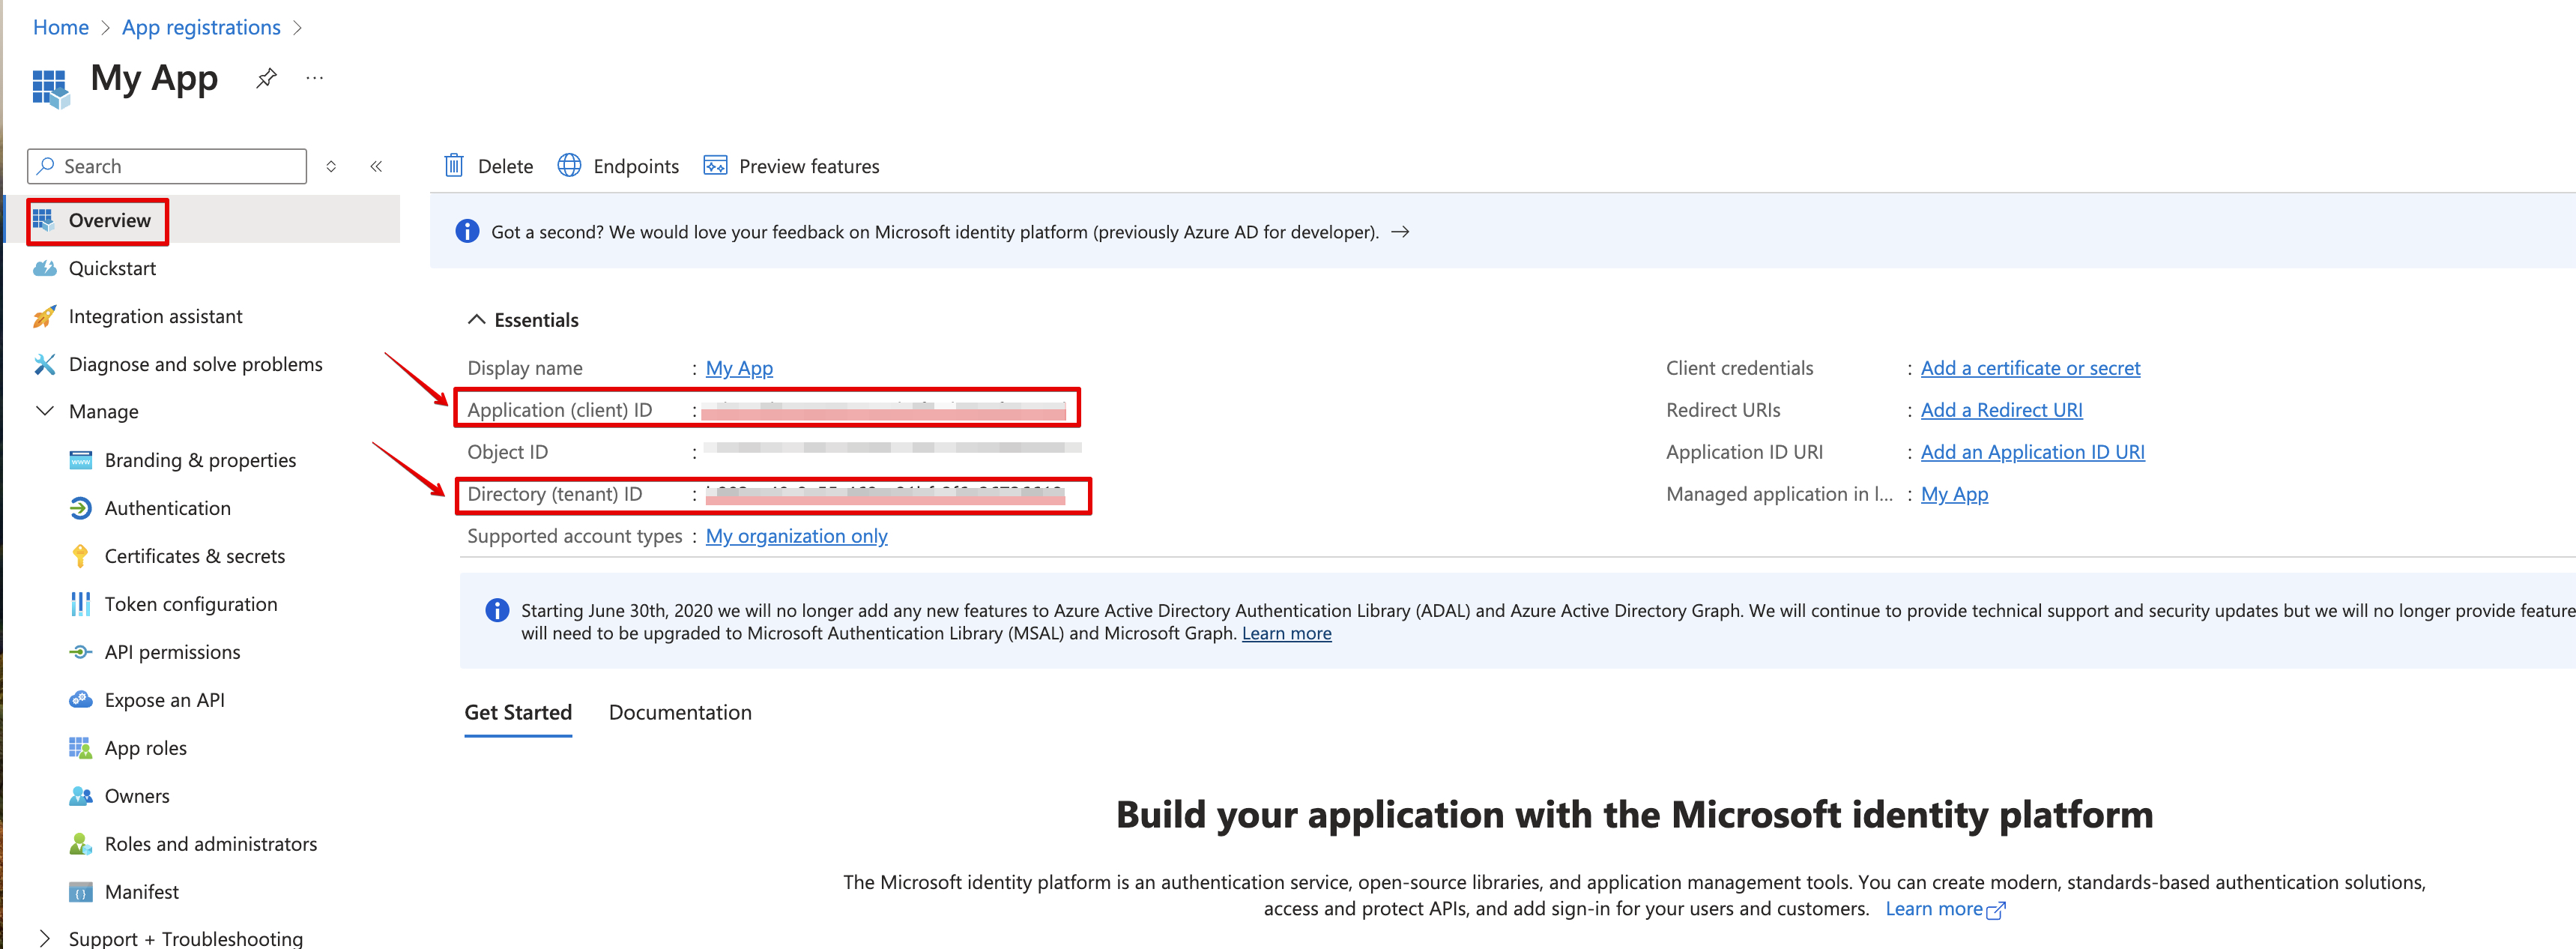
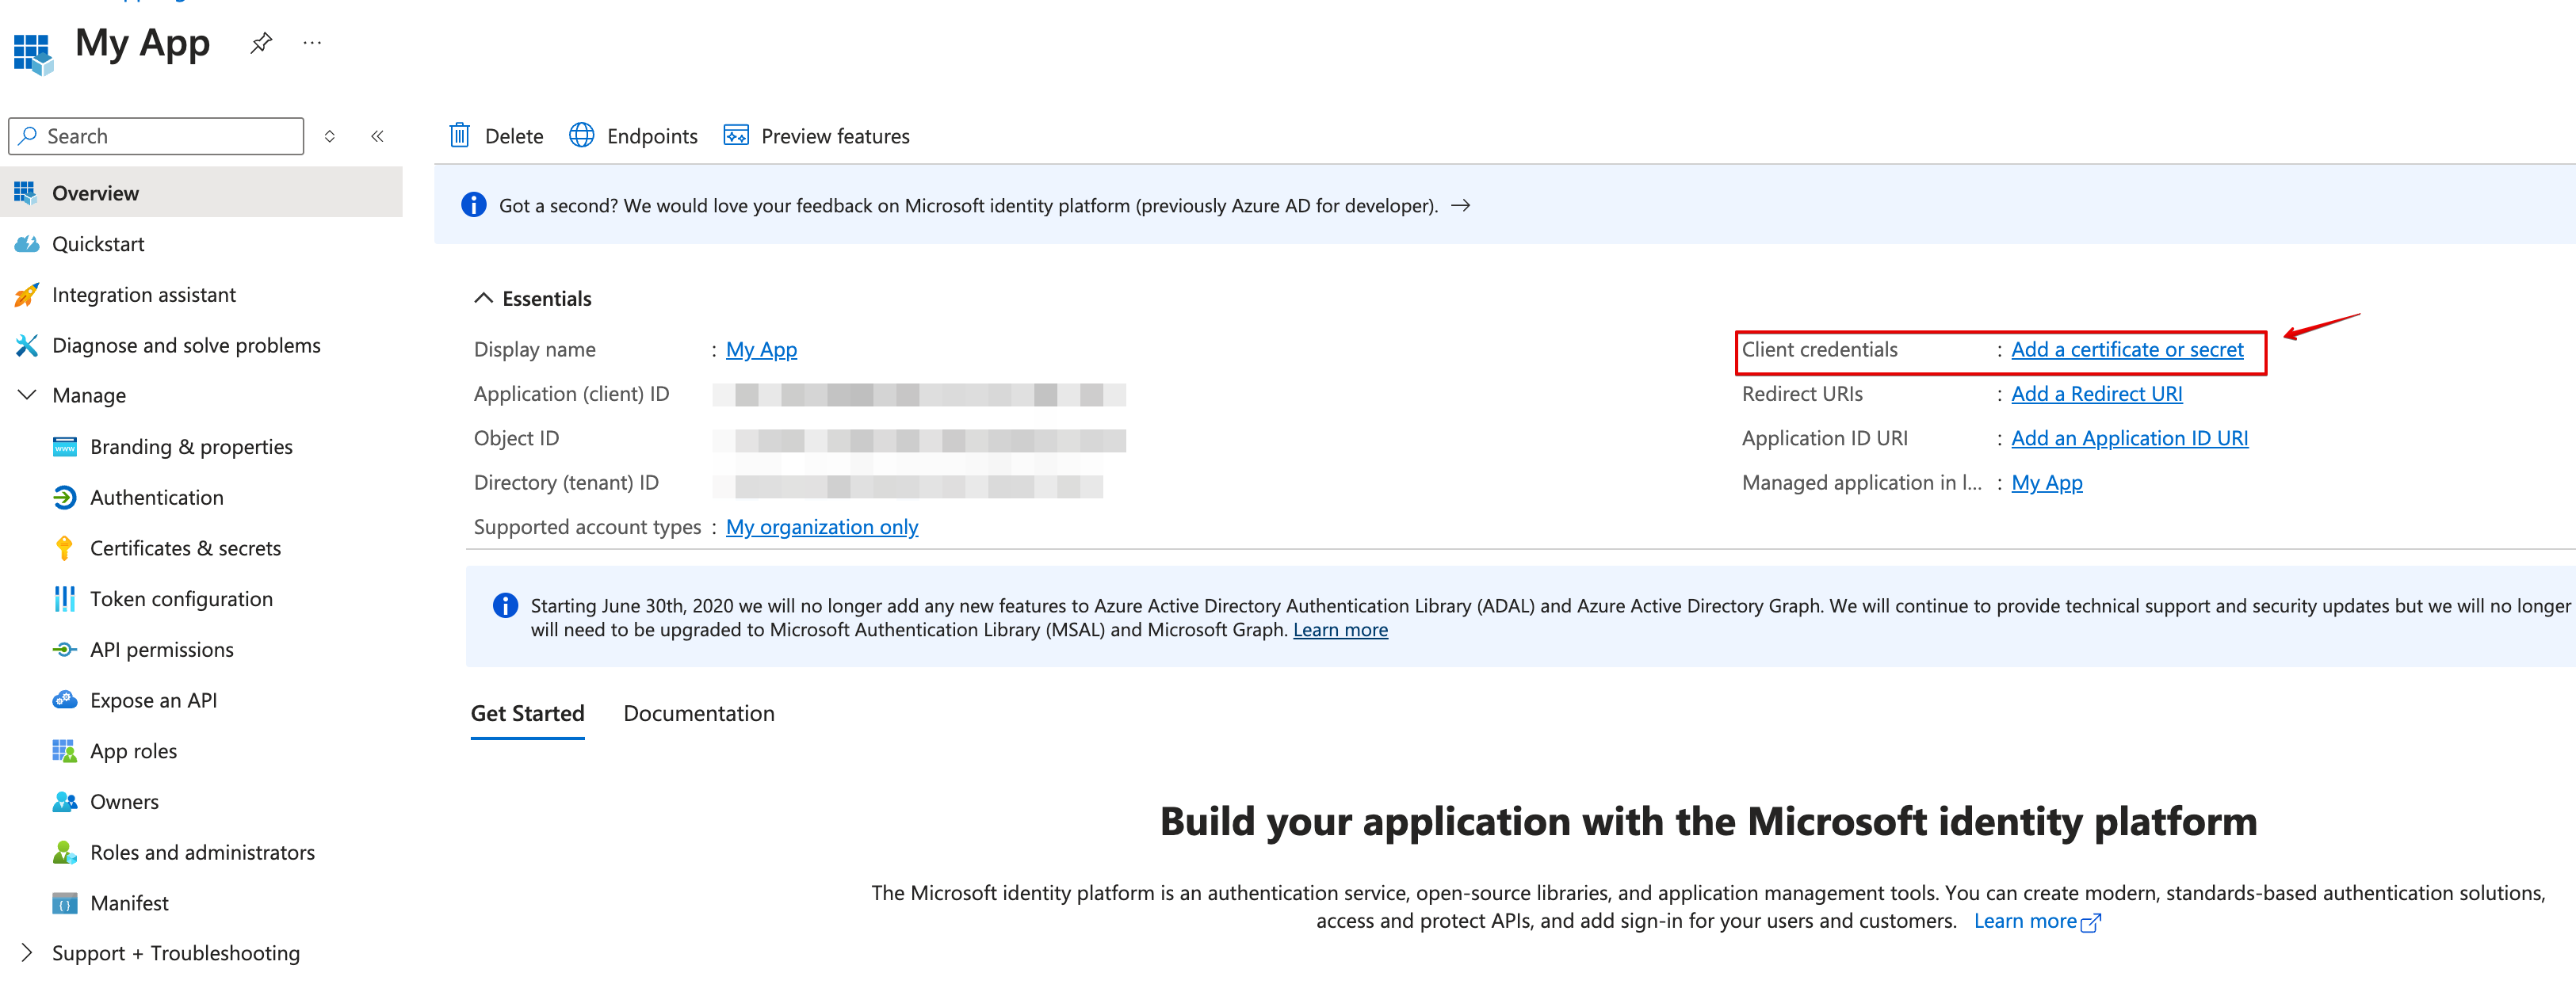
 5. Navigate to **Overview** and Copy your **client ID** and **tenant ID**.
 6. Create a new **client secret**.
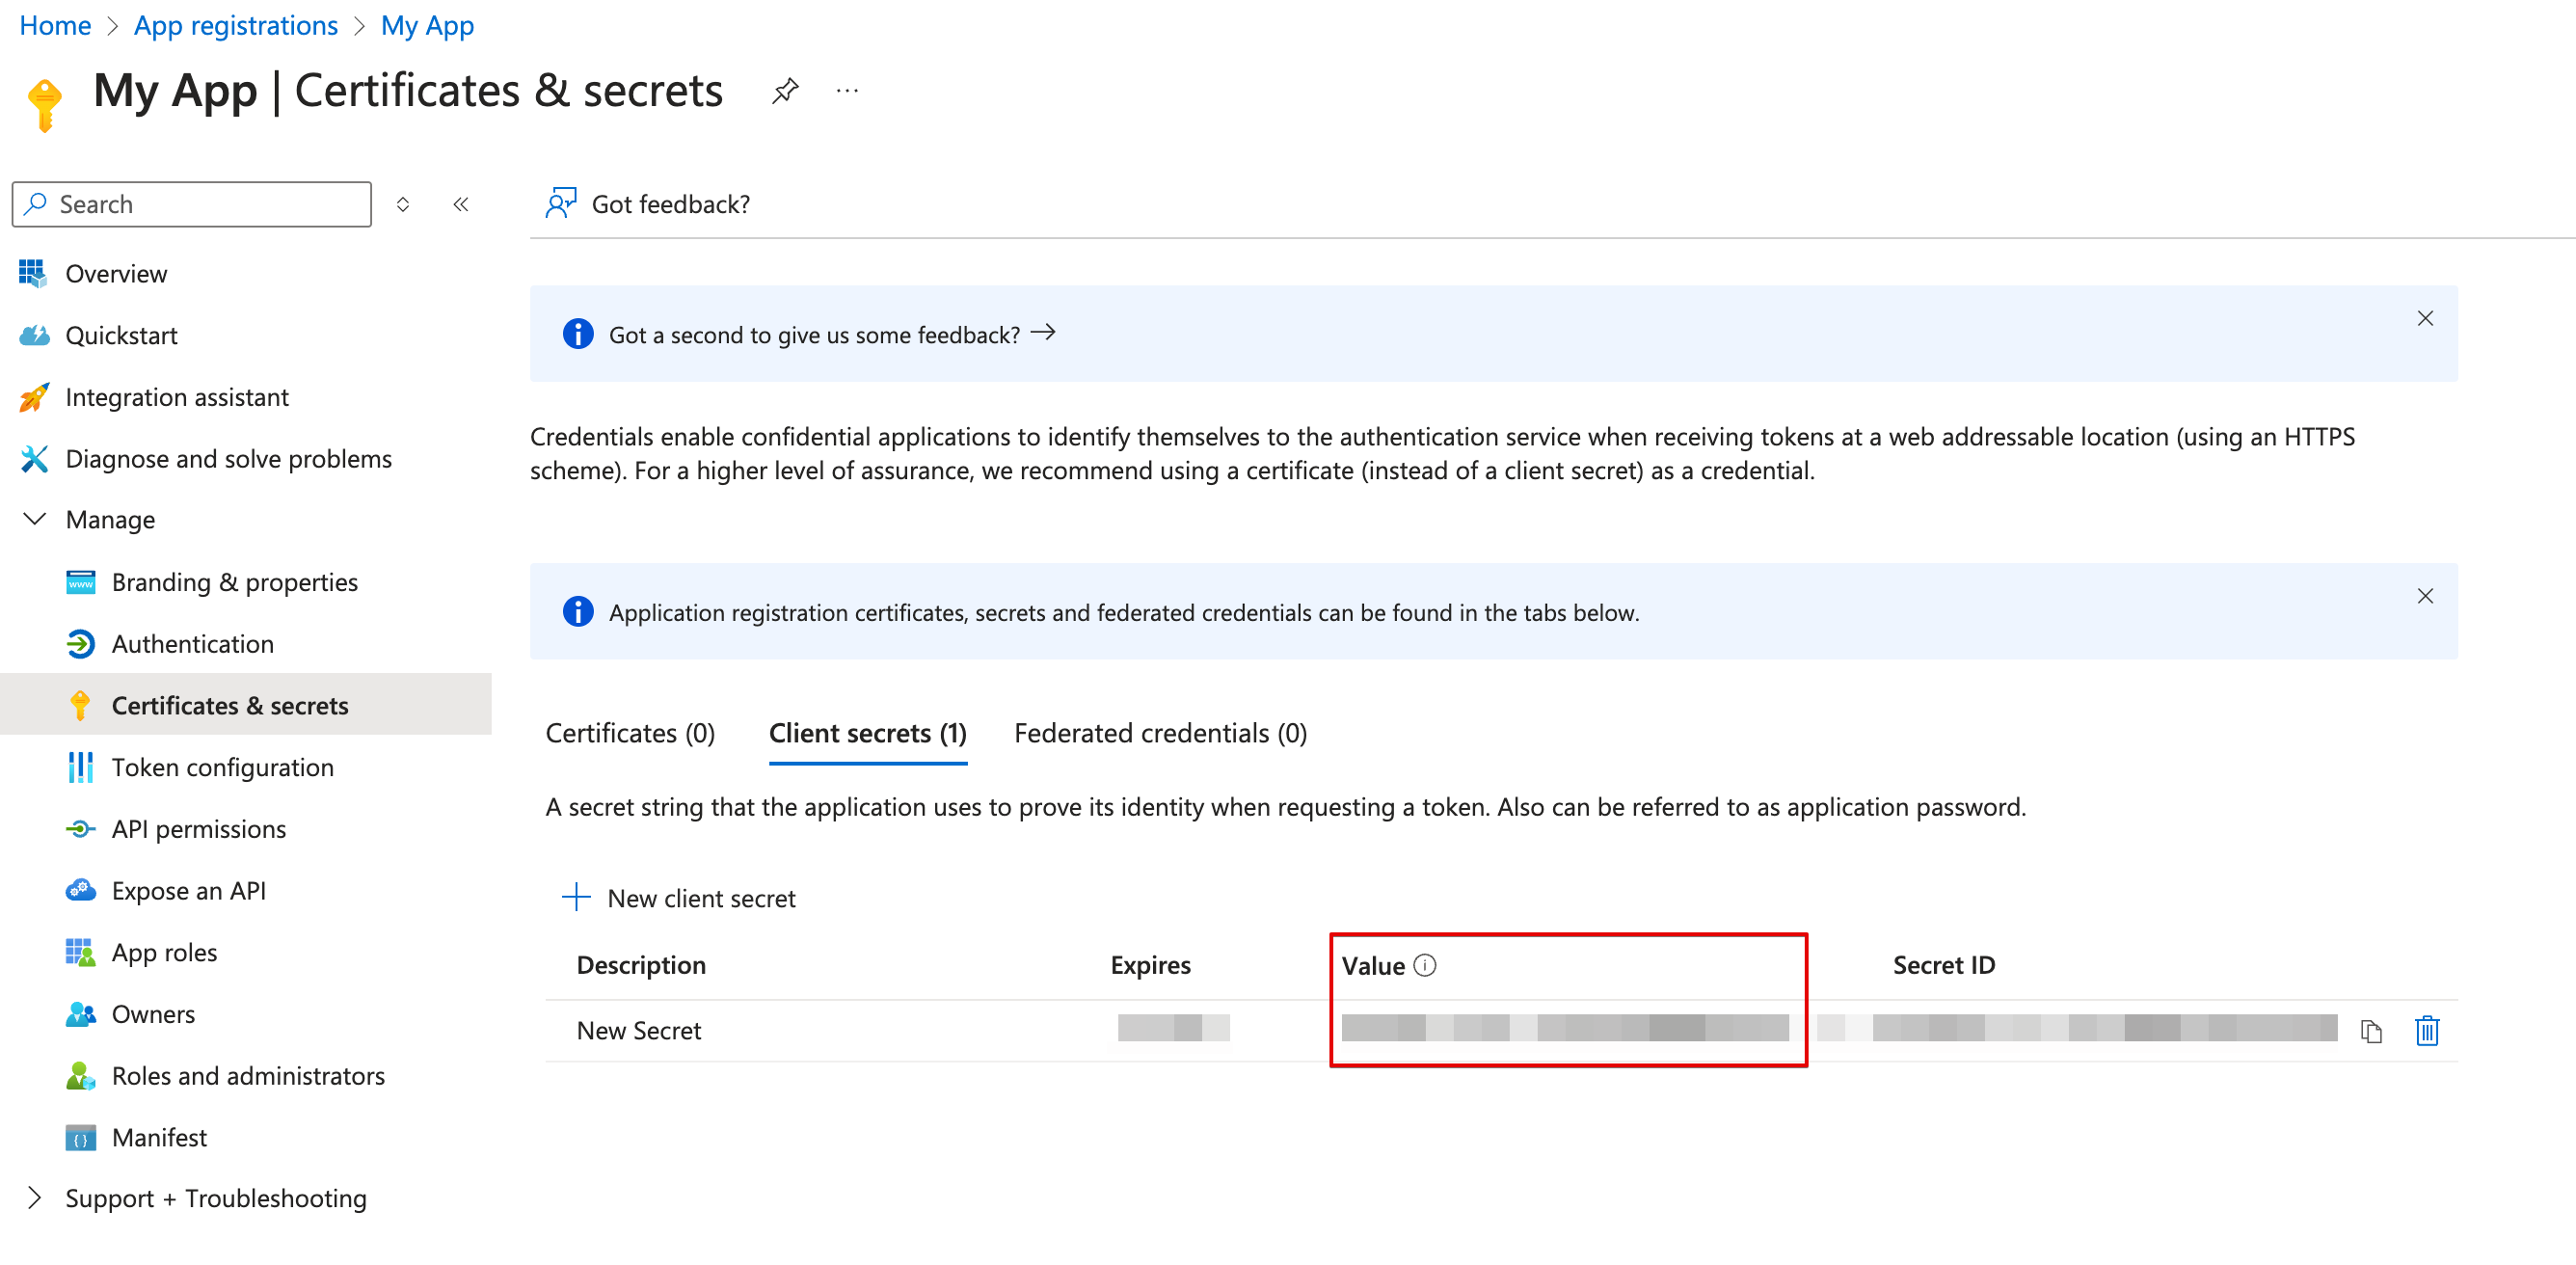
 7. Copy the **secret value**.
 8. Grant contributor access on the Azure Data Explorer cluster for the newly created app. To do so, follow the [Data Explorer cluster permissions documentation](https://learn.microsoft.com/en-us/azure/data-explorer/manage-cluster-permissions).
9. To find the `connection URI`, go to your cluster resource in the [Azure Portal](https://portal.azure.com/#home). The `connection URI` is the URI found in the **Overview**.
### Creating your connection[](#creating-your-connection "Direct link to Creating your connection")
1. In the Blink platform, navigate to the **Connections** page > **Add connection**. A New Connection dialog box opens displaying icons of external service providers available.
2. Select the **Azure Data Explorer** icon. A dialog box with name of the connection and connection methods appear.
3. (Optional) Edit the name of the connection. At a later stage you cannot edit the name.
4. Select **App Registration** as the method to create the connection.
5. Fill in the parameters:
* The Cluster URI
* The Client ID
* The Client Secret
* The Tenant ID
6. (Optional) Click **Test Connection** to test it.
7. Click **Create connection**. The new connection appears on the **Connections** page.
8. Grant contributor access on the Azure Data Explorer cluster for the newly created app. To do so, follow the [Data Explorer cluster permissions documentation](https://learn.microsoft.com/en-us/azure/data-explorer/manage-cluster-permissions).
9. To find the `connection URI`, go to your cluster resource in the [Azure Portal](https://portal.azure.com/#home). The `connection URI` is the URI found in the **Overview**.
### Creating your connection[](#creating-your-connection "Direct link to Creating your connection")
1. In the Blink platform, navigate to the **Connections** page > **Add connection**. A New Connection dialog box opens displaying icons of external service providers available.
2. Select the **Azure Data Explorer** icon. A dialog box with name of the connection and connection methods appear.
3. (Optional) Edit the name of the connection. At a later stage you cannot edit the name.
4. Select **App Registration** as the method to create the connection.
5. Fill in the parameters:
* The Cluster URI
* The Client ID
* The Client Secret
* The Tenant ID
6. (Optional) Click **Test Connection** to test it.
7. Click **Create connection**. The new connection appears on the **Connections** page.