> ## Documentation Index
> Fetch the complete documentation index at: https://docs.blinkops.com/llms.txt
> Use this file to discover all available pages before exploring further.
# 1Password Connect Server
> 1Password is a subscription-based password management service that securely stores and organizes sensitive information, including website credentials, credit card details, and personal notes, in an encrypted vault. 1Password Connect Servers allow you to securely access your 1Password items and vaults in your company's apps and cloud infrastructure using a private REST API.
## Creating a 1Password Connect Server connection
### Using API Token
To create the connection you need:
* An API Address
* An API Token
### Obtaining the credentials
#### Prerequisite
1. [Create a vault](https://support.1password.com/create-share-vaults/?mac) for the **Connect server** to access. Connect servers can't access your built-in Personal, Private, or Employee vault, or your default Shared vault.
2. Make sure you belong to [a group with permission to manage Secrets Automation](https://developer.1password.com/docs/connect/manage-connect/).
3. Make sure you have a deployment environment for **Docker**. You can use a cloud service provider or your local machine.
#### Create a Secrets Automation workflow
For detailed instructions on performing this step with the 1Password CLI, check out the guide [here](https://developer.1password.com/docs/connect/get-started/?method=1password-cli#step-1). If you’d rather not use the CLI, you can follow the steps below.
1. Sign in to your account on 1Password.
2. Open the [Secrets Automation workflow creation wizard](https://start.1password.com/developer-tools/infrastructure-secrets/connect).
3. Follow the onscreen instructions to create a **Secrets Automation environment**:
* Grant your new environment access to the vault you created earlier. Make sure to allow **Read** and **Write** permissions if you want to be able to perform all the available actions in Blink.
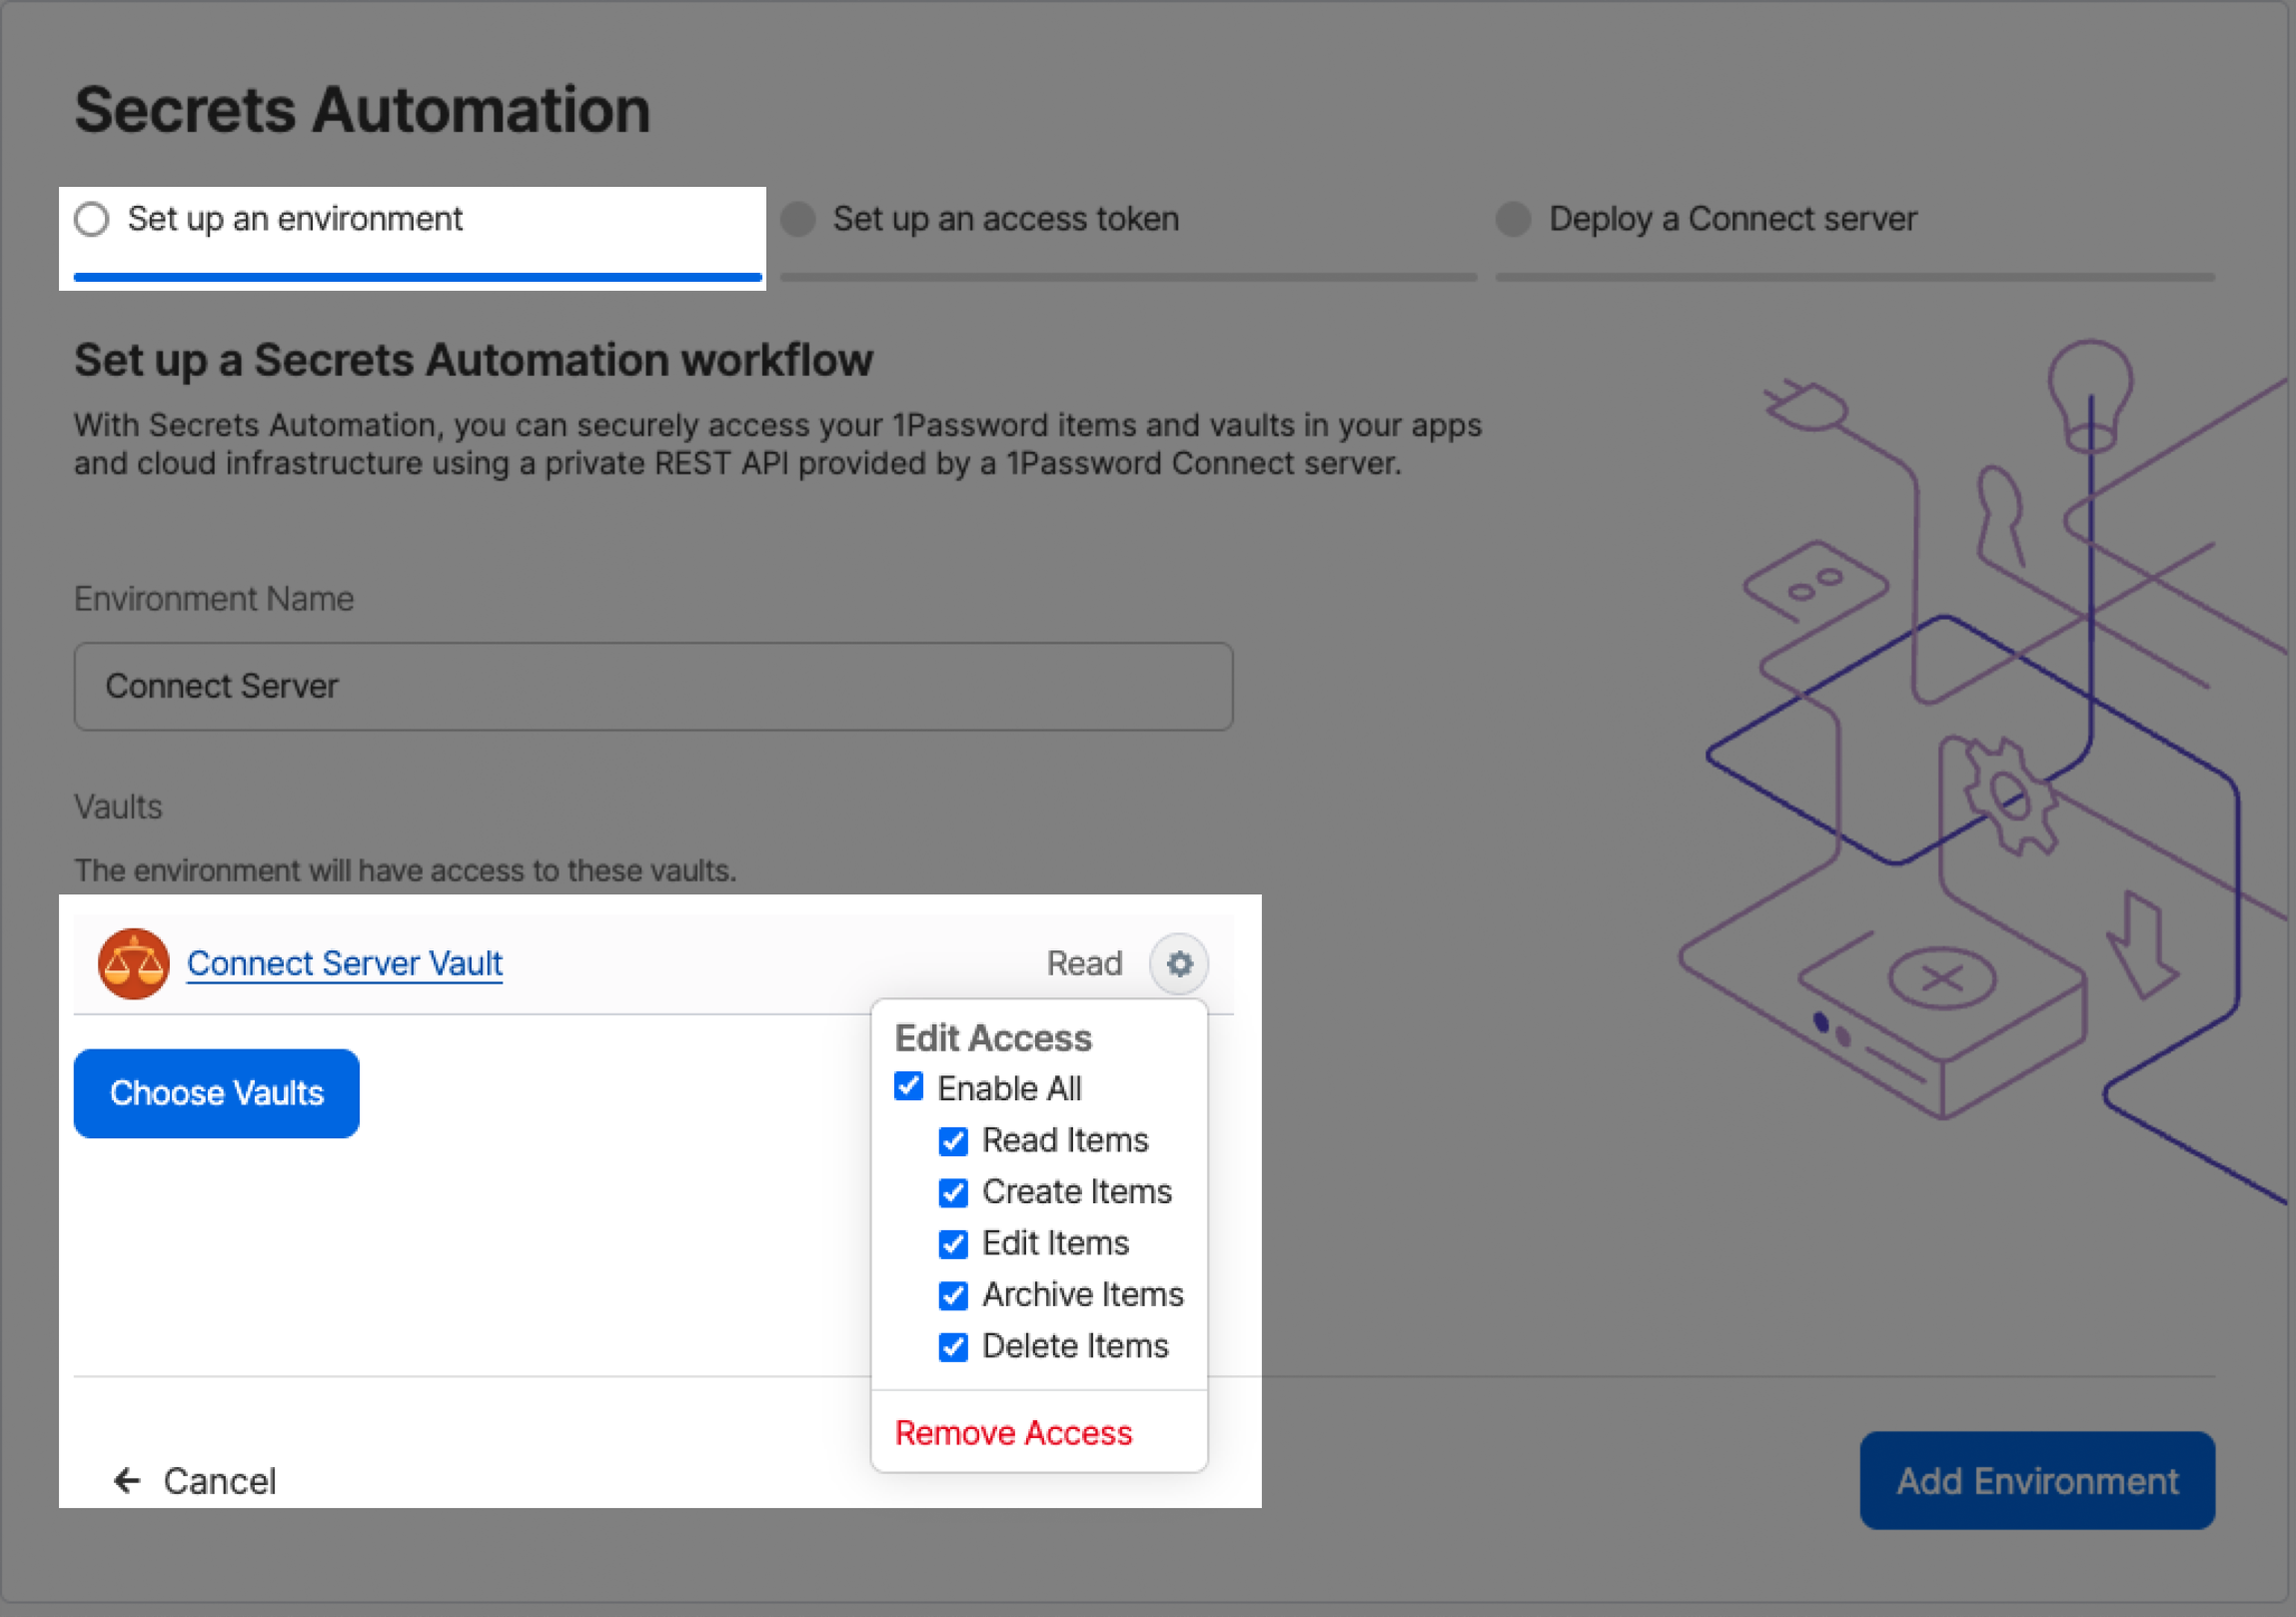 * Set up your first **access token**. **This is the API token used to establish the connection**.
* Deploy a **Connect server**. Make sure to save your **credentials file** and **token** in **1Password**.
You can find your new **Secrets Automation workflow** under **Connect servers** on the Developer page.
#### Deploy a 1Password Connect Server
Follow the steps on [1Password's documentation](https://developer.1password.com/docs/connect/get-started#step-2-deploy-a-1password-connect-server) to deploy your connect server with the credentials you created earlier.
Make sure to add Blink's IP addresses in your instance's allow list:
| IP |
| -------------- |
| 44.194.139.218 |
| 3.217.19.166 |
| 54.81.101.61 |
| 107.20.97.38 |
The **API address** is the **Base URL** of your instance (including the port).
#### Creating your connection
1. In the Blink platform, navigate to the **Connections** page > **Add connection**. A New Connection dialog box opens displaying icons of external service providers available.
2. Select the **1Password Connect Server** icon. A dialog box with name of the connection and connection methods appear.
3. (Optional) Edit the name of the connection. At a later stage you cannot edit the name.
4. Select **API Token** as the method to create the connection.
5. Fill in the parameters:
* The API Address
* The API Token
6. (Optional) Click **Test Connection** to test it.
7. Click **Create connection**. The new connection appears on the **Connections** page.
* Set up your first **access token**. **This is the API token used to establish the connection**.
* Deploy a **Connect server**. Make sure to save your **credentials file** and **token** in **1Password**.
You can find your new **Secrets Automation workflow** under **Connect servers** on the Developer page.
#### Deploy a 1Password Connect Server
Follow the steps on [1Password's documentation](https://developer.1password.com/docs/connect/get-started#step-2-deploy-a-1password-connect-server) to deploy your connect server with the credentials you created earlier.
Make sure to add Blink's IP addresses in your instance's allow list:
| IP |
| -------------- |
| 44.194.139.218 |
| 3.217.19.166 |
| 54.81.101.61 |
| 107.20.97.38 |
The **API address** is the **Base URL** of your instance (including the port).
#### Creating your connection
1. In the Blink platform, navigate to the **Connections** page > **Add connection**. A New Connection dialog box opens displaying icons of external service providers available.
2. Select the **1Password Connect Server** icon. A dialog box with name of the connection and connection methods appear.
3. (Optional) Edit the name of the connection. At a later stage you cannot edit the name.
4. Select **API Token** as the method to create the connection.
5. Fill in the parameters:
* The API Address
* The API Token
6. (Optional) Click **Test Connection** to test it.
7. Click **Create connection**. The new connection appears on the **Connections** page.