> ## Documentation Index
> Fetch the complete documentation index at: https://docs.blinkops.com/llms.txt
> Use this file to discover all available pages before exploring further.
# Managing Cases
> Manage case lifecycle operations including assignment, status changes, and bulk actions in Blink.
**Note**:The images below serve as examples of the general case management table's layout. However, **all** tables interfaces in the 'Case Management' feature include all the below to simplify the management of the Case Management interface.
***
The Case Management interface includes multiple interconnected tables, [Cases](/docs/case-management/cases/cases), [Alerts](/docs/case-management/alerts/alerts), [Attachments](/docs/case-management/attachments/attachments), [Observables](/docs/case-management/observables/observables), and [Tasks](/docs/case-management/tasks/tasks), each designed to help you track and respond to security incidents with precision.
This section of the documentation explains the universal features available across all tables in the Case Management interface. Regardless of which table you are viewing, you can access the same set of management tools to organize, filter, and take action on records efficiently.
All table data is securely stored in an encrypted Amazon RDS instance. Each customer's data is isolated within a dedicated PostgreSQL schema, and all encryption is managed using [AWS Key Management Service (KMS)](https://aws.amazon.com/kms/).
For customers who purchased Blink through the [Azure Marketplace](https://azuremarketplace.microsoft.com/en-us/marketplace/apps?search=blink\&page=1) or have specifically requested Azure services, all table data is securely stored in an encrypted [Azure Database for PostgreSQL](https://azure.microsoft.com/en-us/products/postgresql). Each customer’s data is isolated in a dedicated PostgreSQL schema, with encryption fully managed by Azure to ensure data security and compliance.
***
## Select Multiple Records
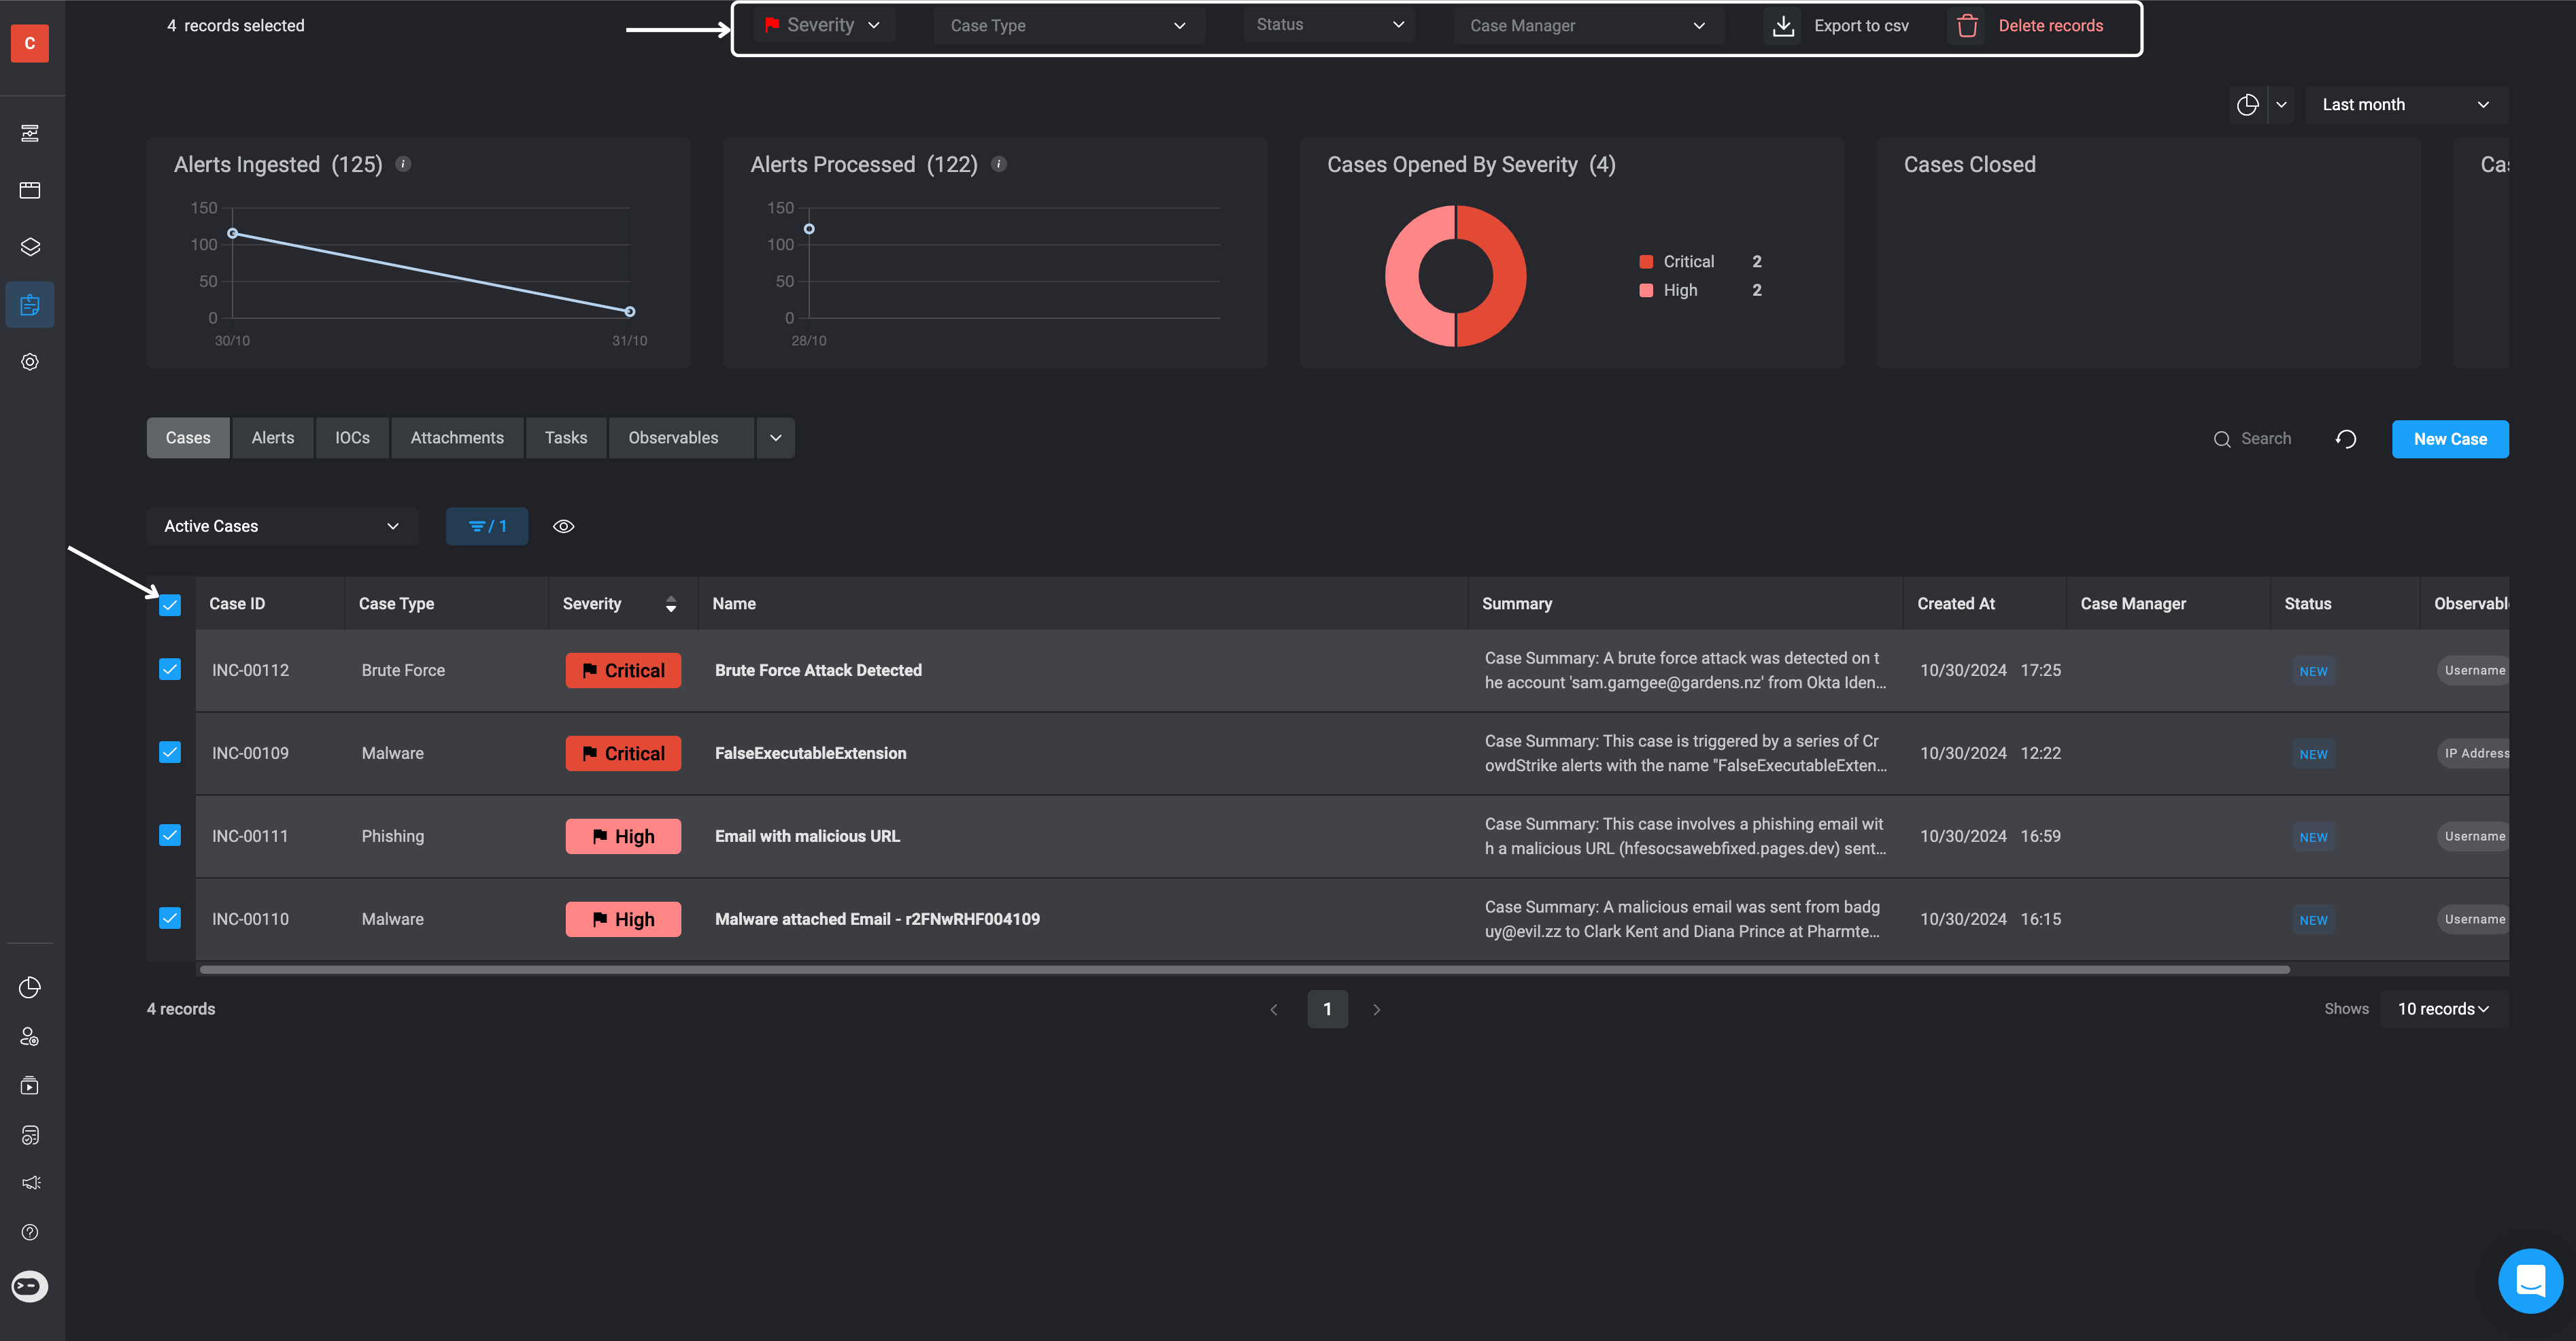
Quickly take action on multiple cases.
You can select multiple cases using the checkboxes next to each row in the table. Once selected, a floating toolbar will appear at the top of the screen, allowing you to:
* Change the status of selected cases
* Export selected cases to CSV
* Delete selected cases
 ***
## Table Records -Sort By
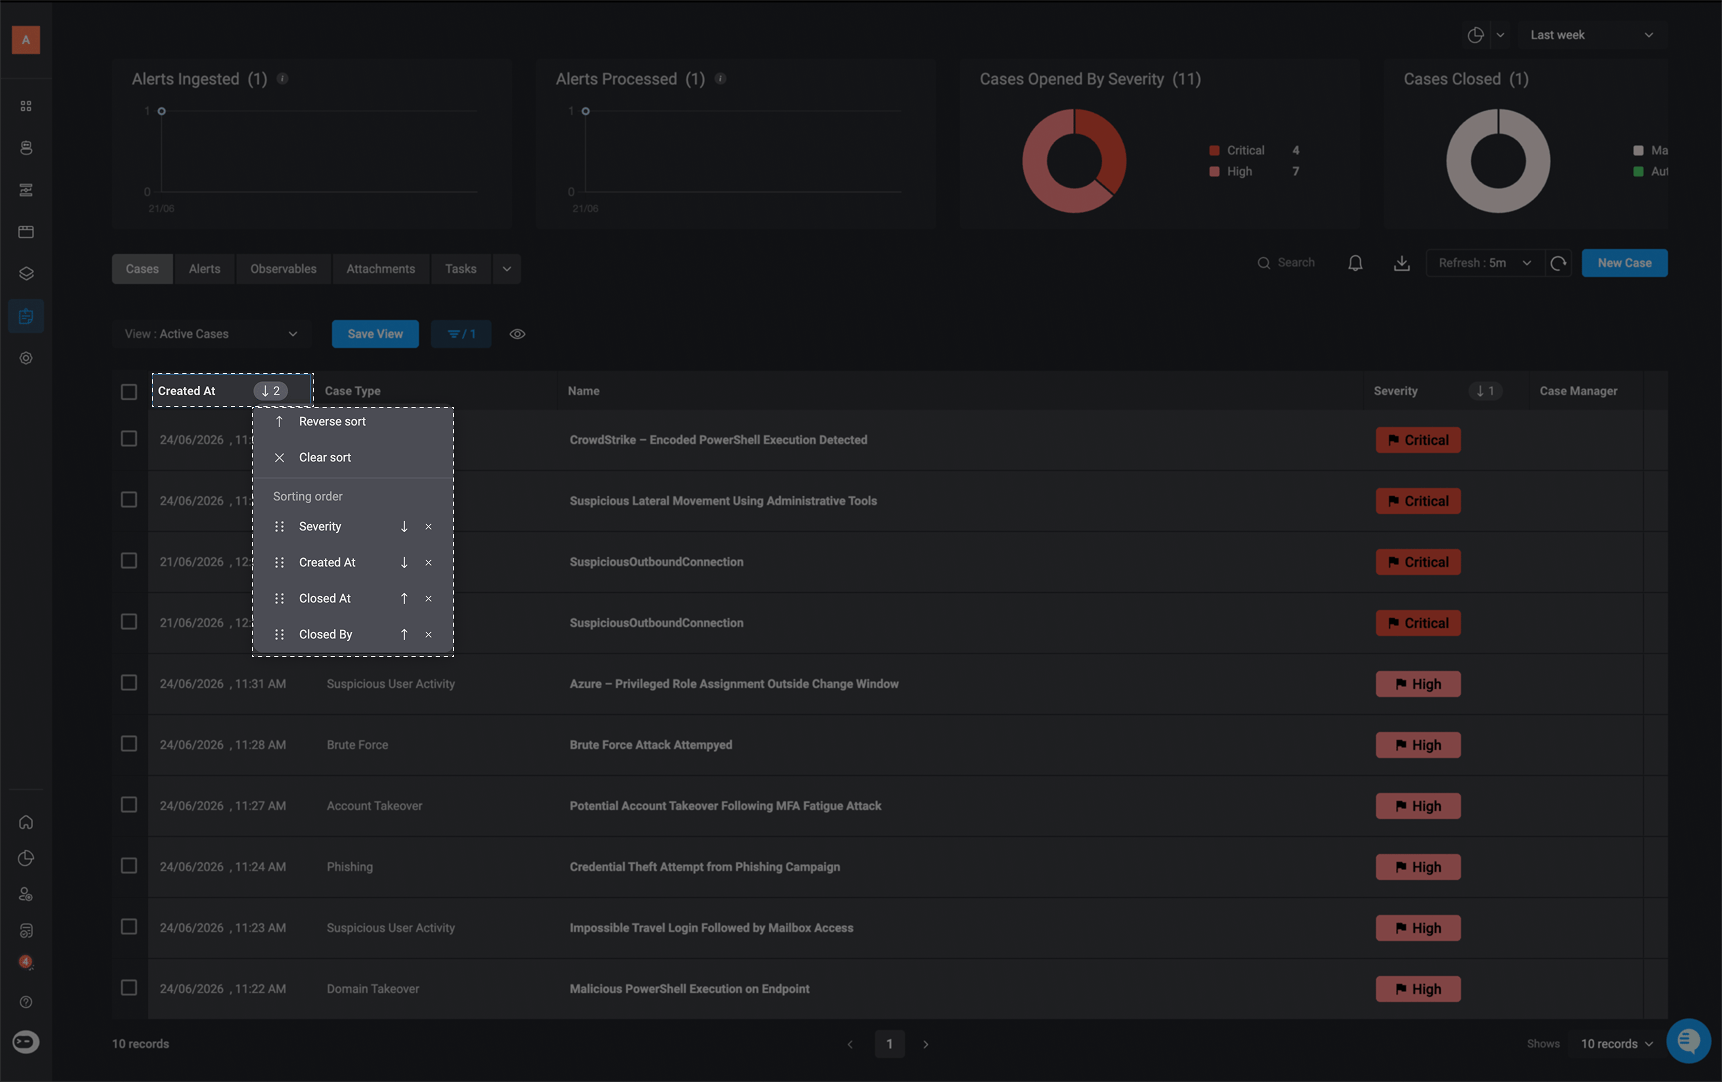
A column header will display an up and down arrow icon to indicate sorting is available. When you click it, a “Sort By” panel opens with options to control how the table is ordered.
In this panel you can:
* **Reverse Sort**: Toggle between ascending and descending order. The up arrow represents ascending order, and the down arrow represents descending order.
* **Clear Sort**: Remove the current sorting configuration and return the table to its default order.
* **Sorting Order**: Choose which available sorting field options to sort by.
* **Reorder or remove sort fields**: Drag and drop fields to change their priority in the sort order, or click the icon next to a field to remove it.
Once you are satisfied with your configuration, click **Save View** to apply and save the record's sorting setup.
***
## Table Records -Sort By
A column header will display an up and down arrow icon to indicate sorting is available. When you click it, a “Sort By” panel opens with options to control how the table is ordered.
In this panel you can:
* **Reverse Sort**: Toggle between ascending and descending order. The up arrow represents ascending order, and the down arrow represents descending order.
* **Clear Sort**: Remove the current sorting configuration and return the table to its default order.
* **Sorting Order**: Choose which available sorting field options to sort by.
* **Reorder or remove sort fields**: Drag and drop fields to change their priority in the sort order, or click the icon next to a field to remove it.
Once you are satisfied with your configuration, click **Save View** to apply and save the record's sorting setup.
 ***
## Pending Question Notifications
***
## Pending Question Notifications
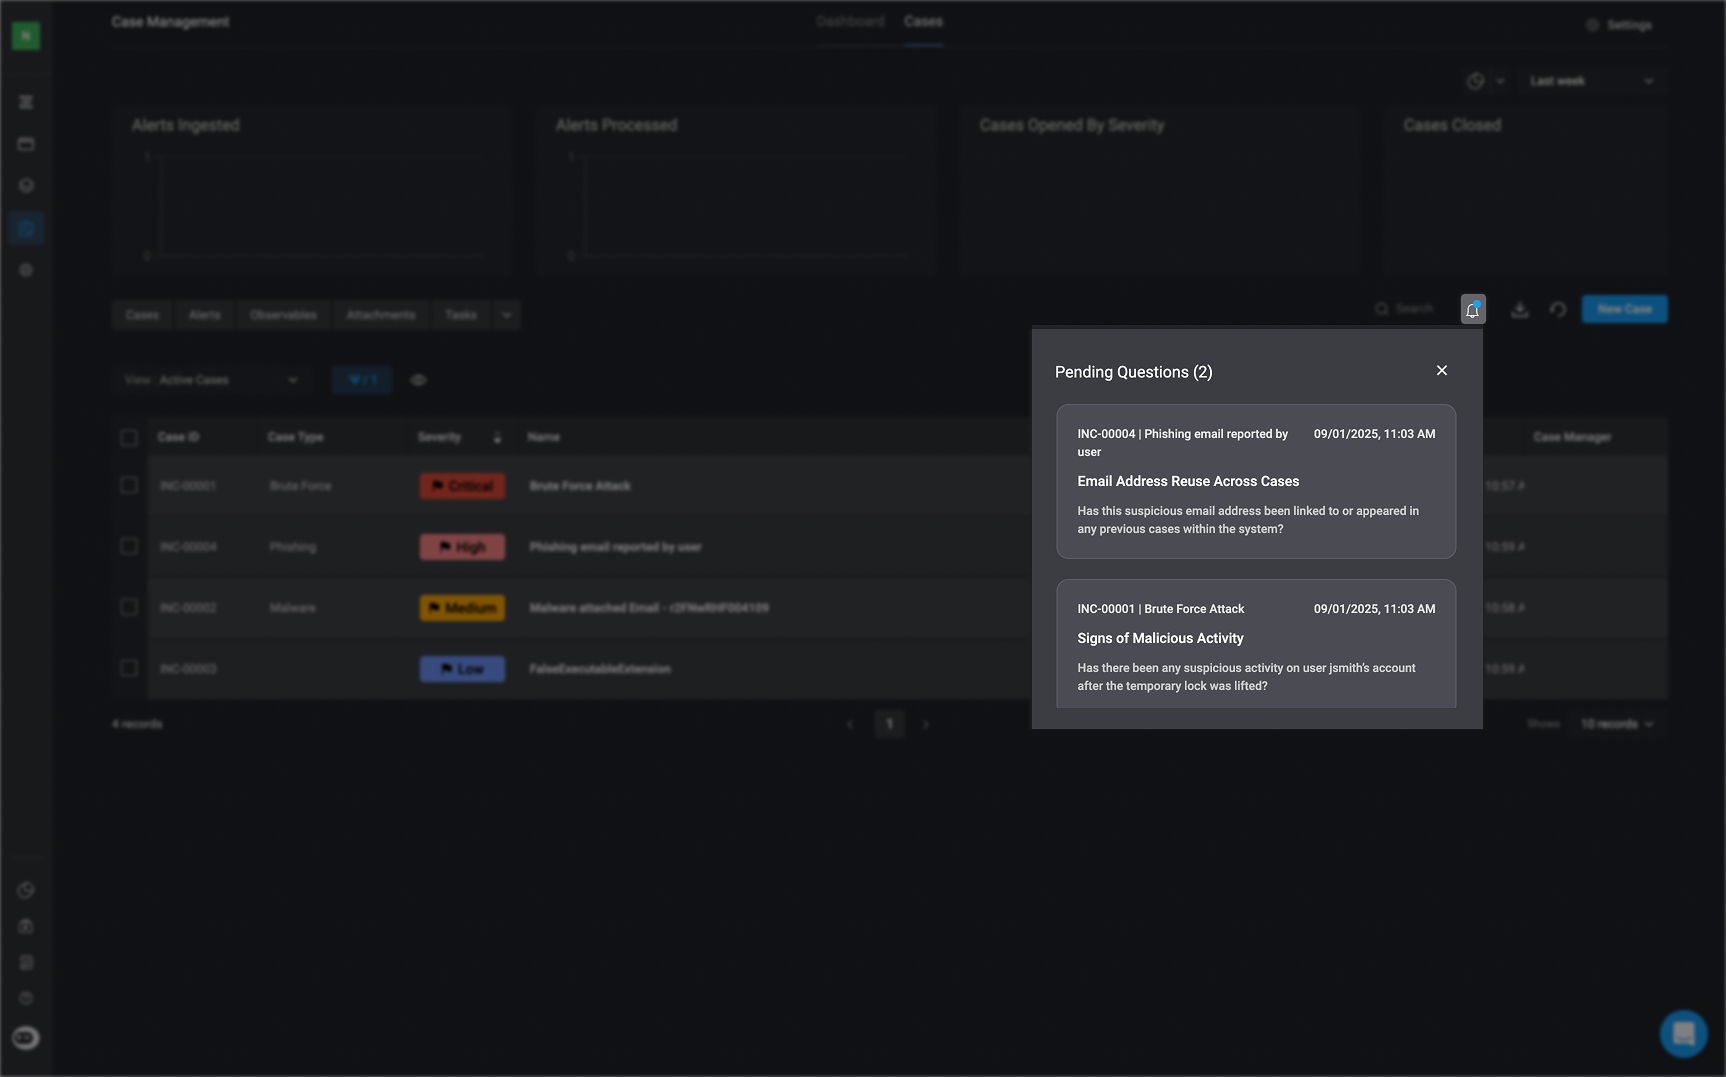
In the top-right corner, click the to view all questions submitted through the [Ask a Question on a Case](/docs/case-management/case-management-workflow-actions/case-actions#ask-a-question-on-a-case) action. Each question is tied to a specific case. Clicking on a pending question will take you directly to that [case’s overview](/docs/case-management/cases/case-overview#ask-a-question-on-a-case), where you can review the details and provide your response.
 ***
## Responses
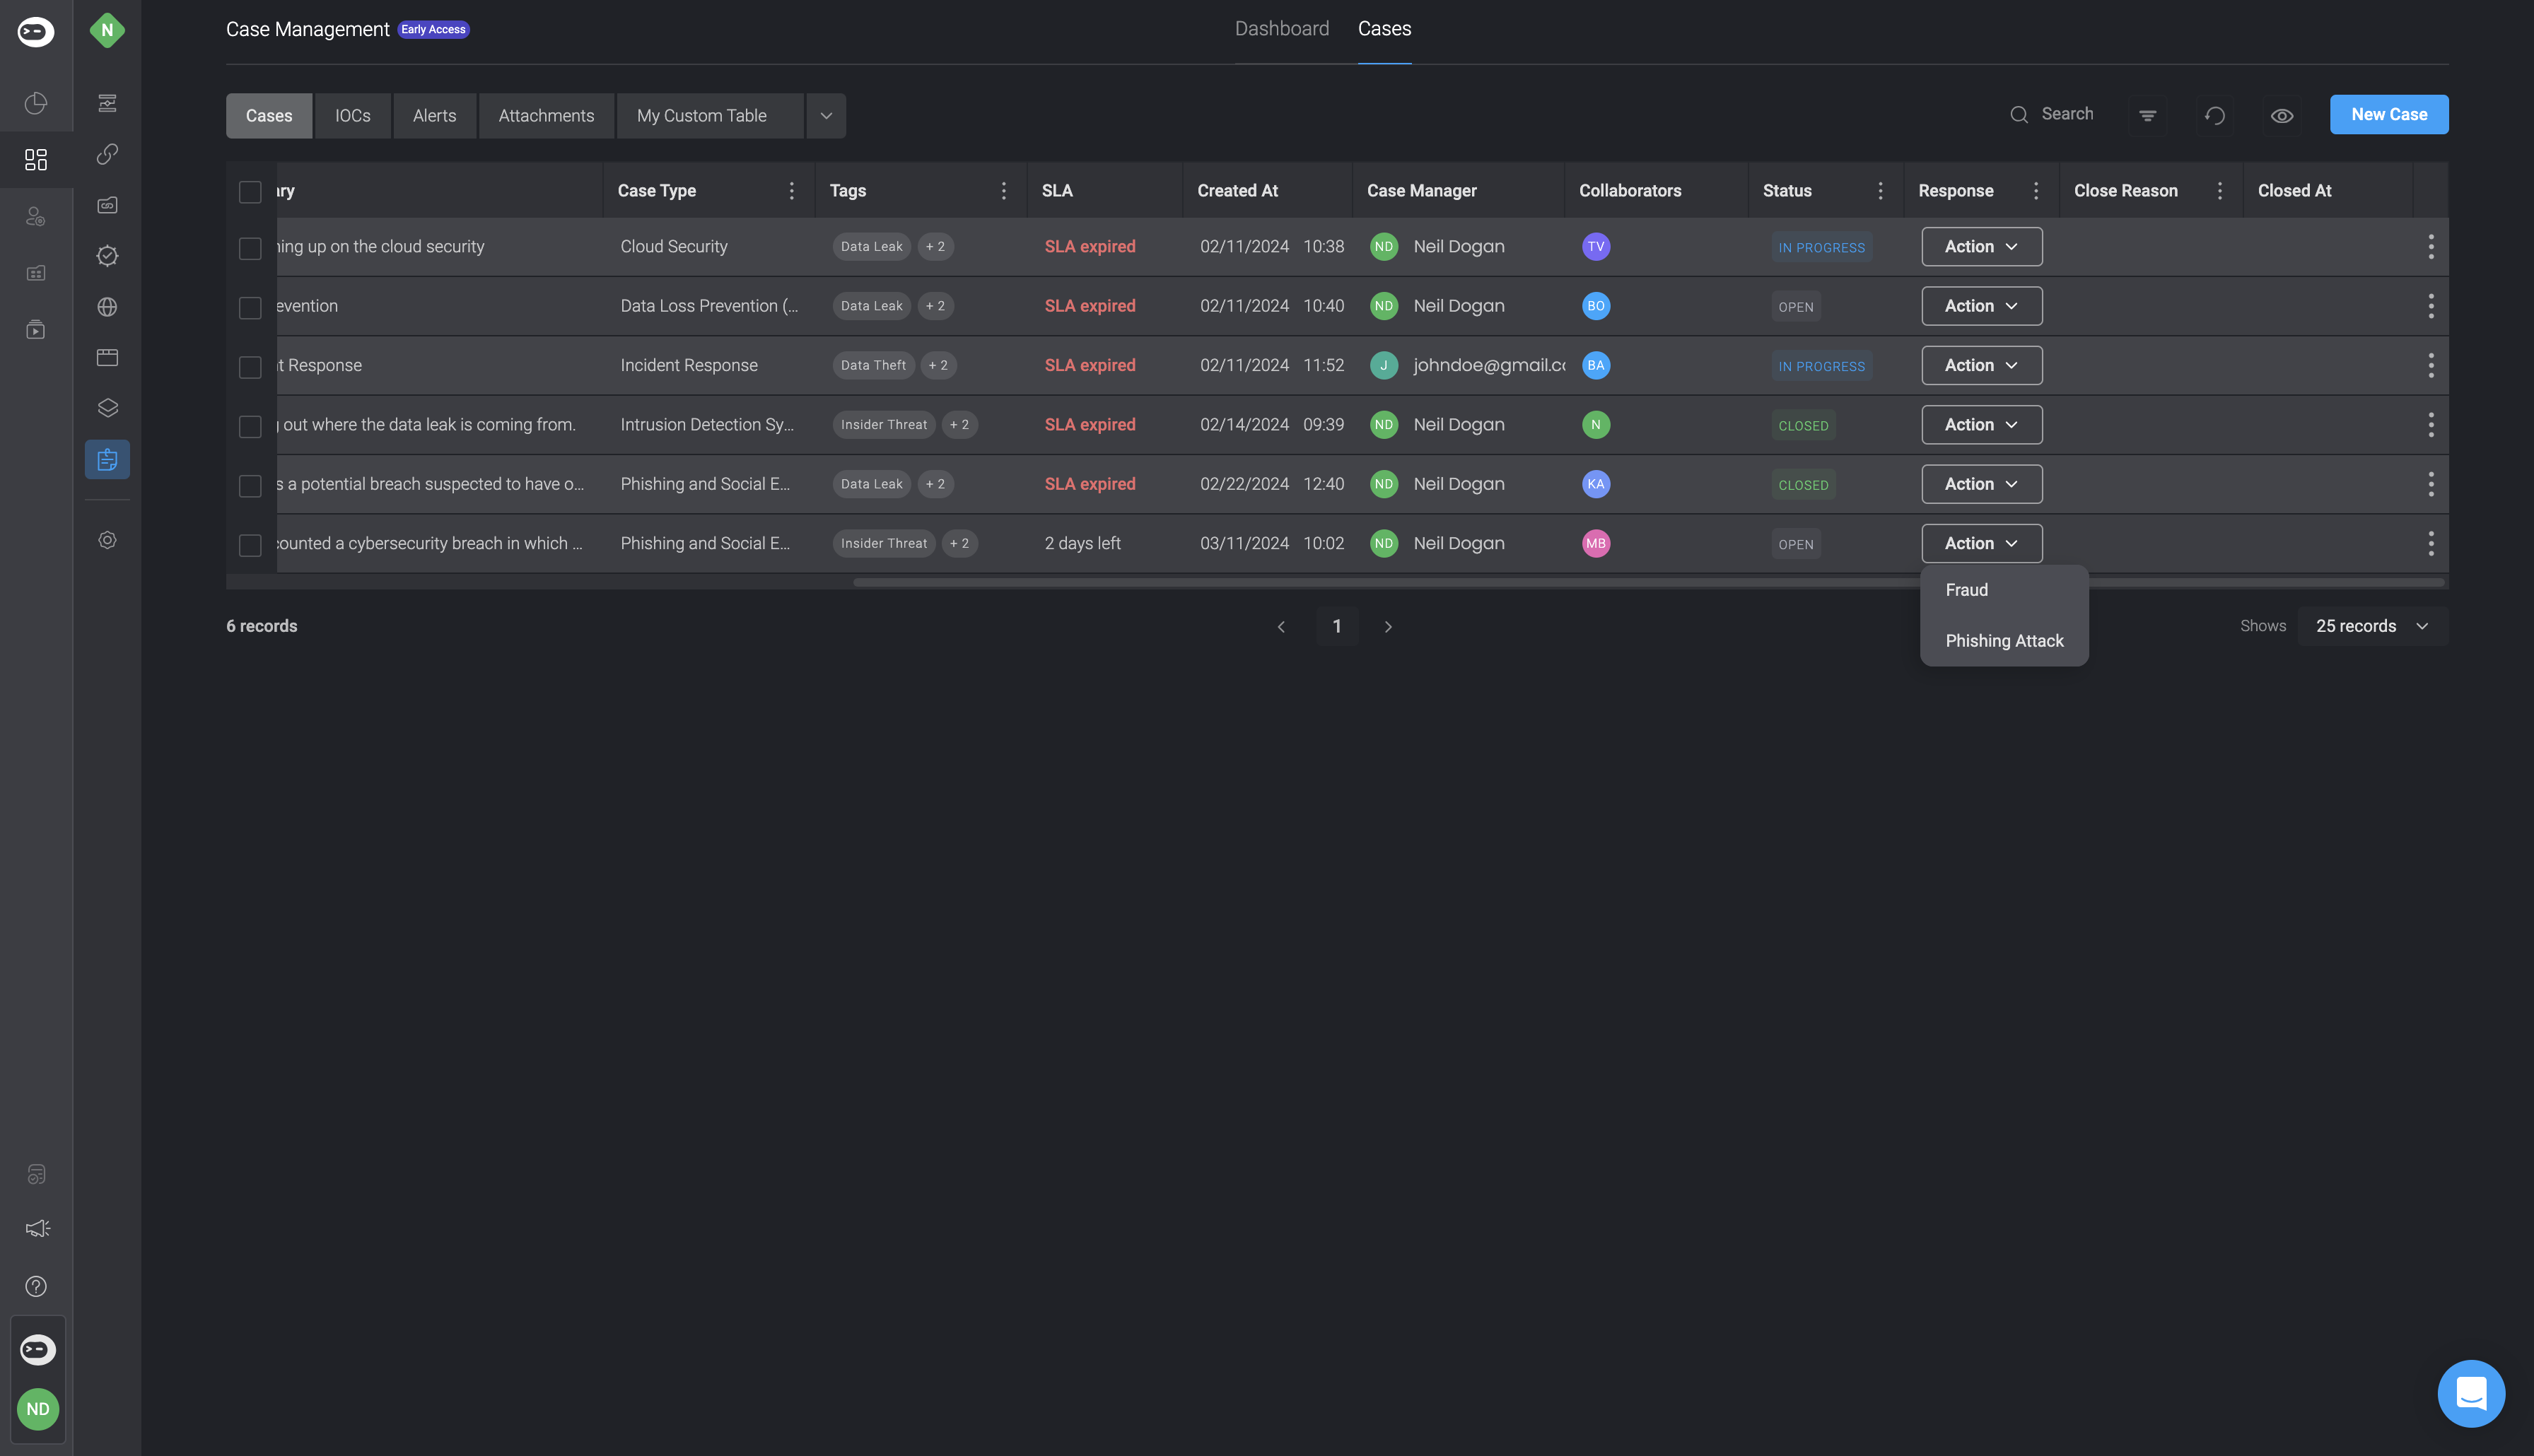
The Response field allows you to configure and trigger incident response workflows for each table. These workflows can be tailored to match your operational needs for Cases, Alerts, Attachments, Observables, and Tasks.
The 'Response' field enables you to add incident response workflows, customized for each table of the Case Management interface. The workflows associated with a table can be then activated by Case Management users.
***
## Responses
The Response field allows you to configure and trigger incident response workflows for each table. These workflows can be tailored to match your operational needs for Cases, Alerts, Attachments, Observables, and Tasks.
The 'Response' field enables you to add incident response workflows, customized for each table of the Case Management interface. The workflows associated with a table can be then activated by Case Management users.
Select the icon and an **edit** option will appear.
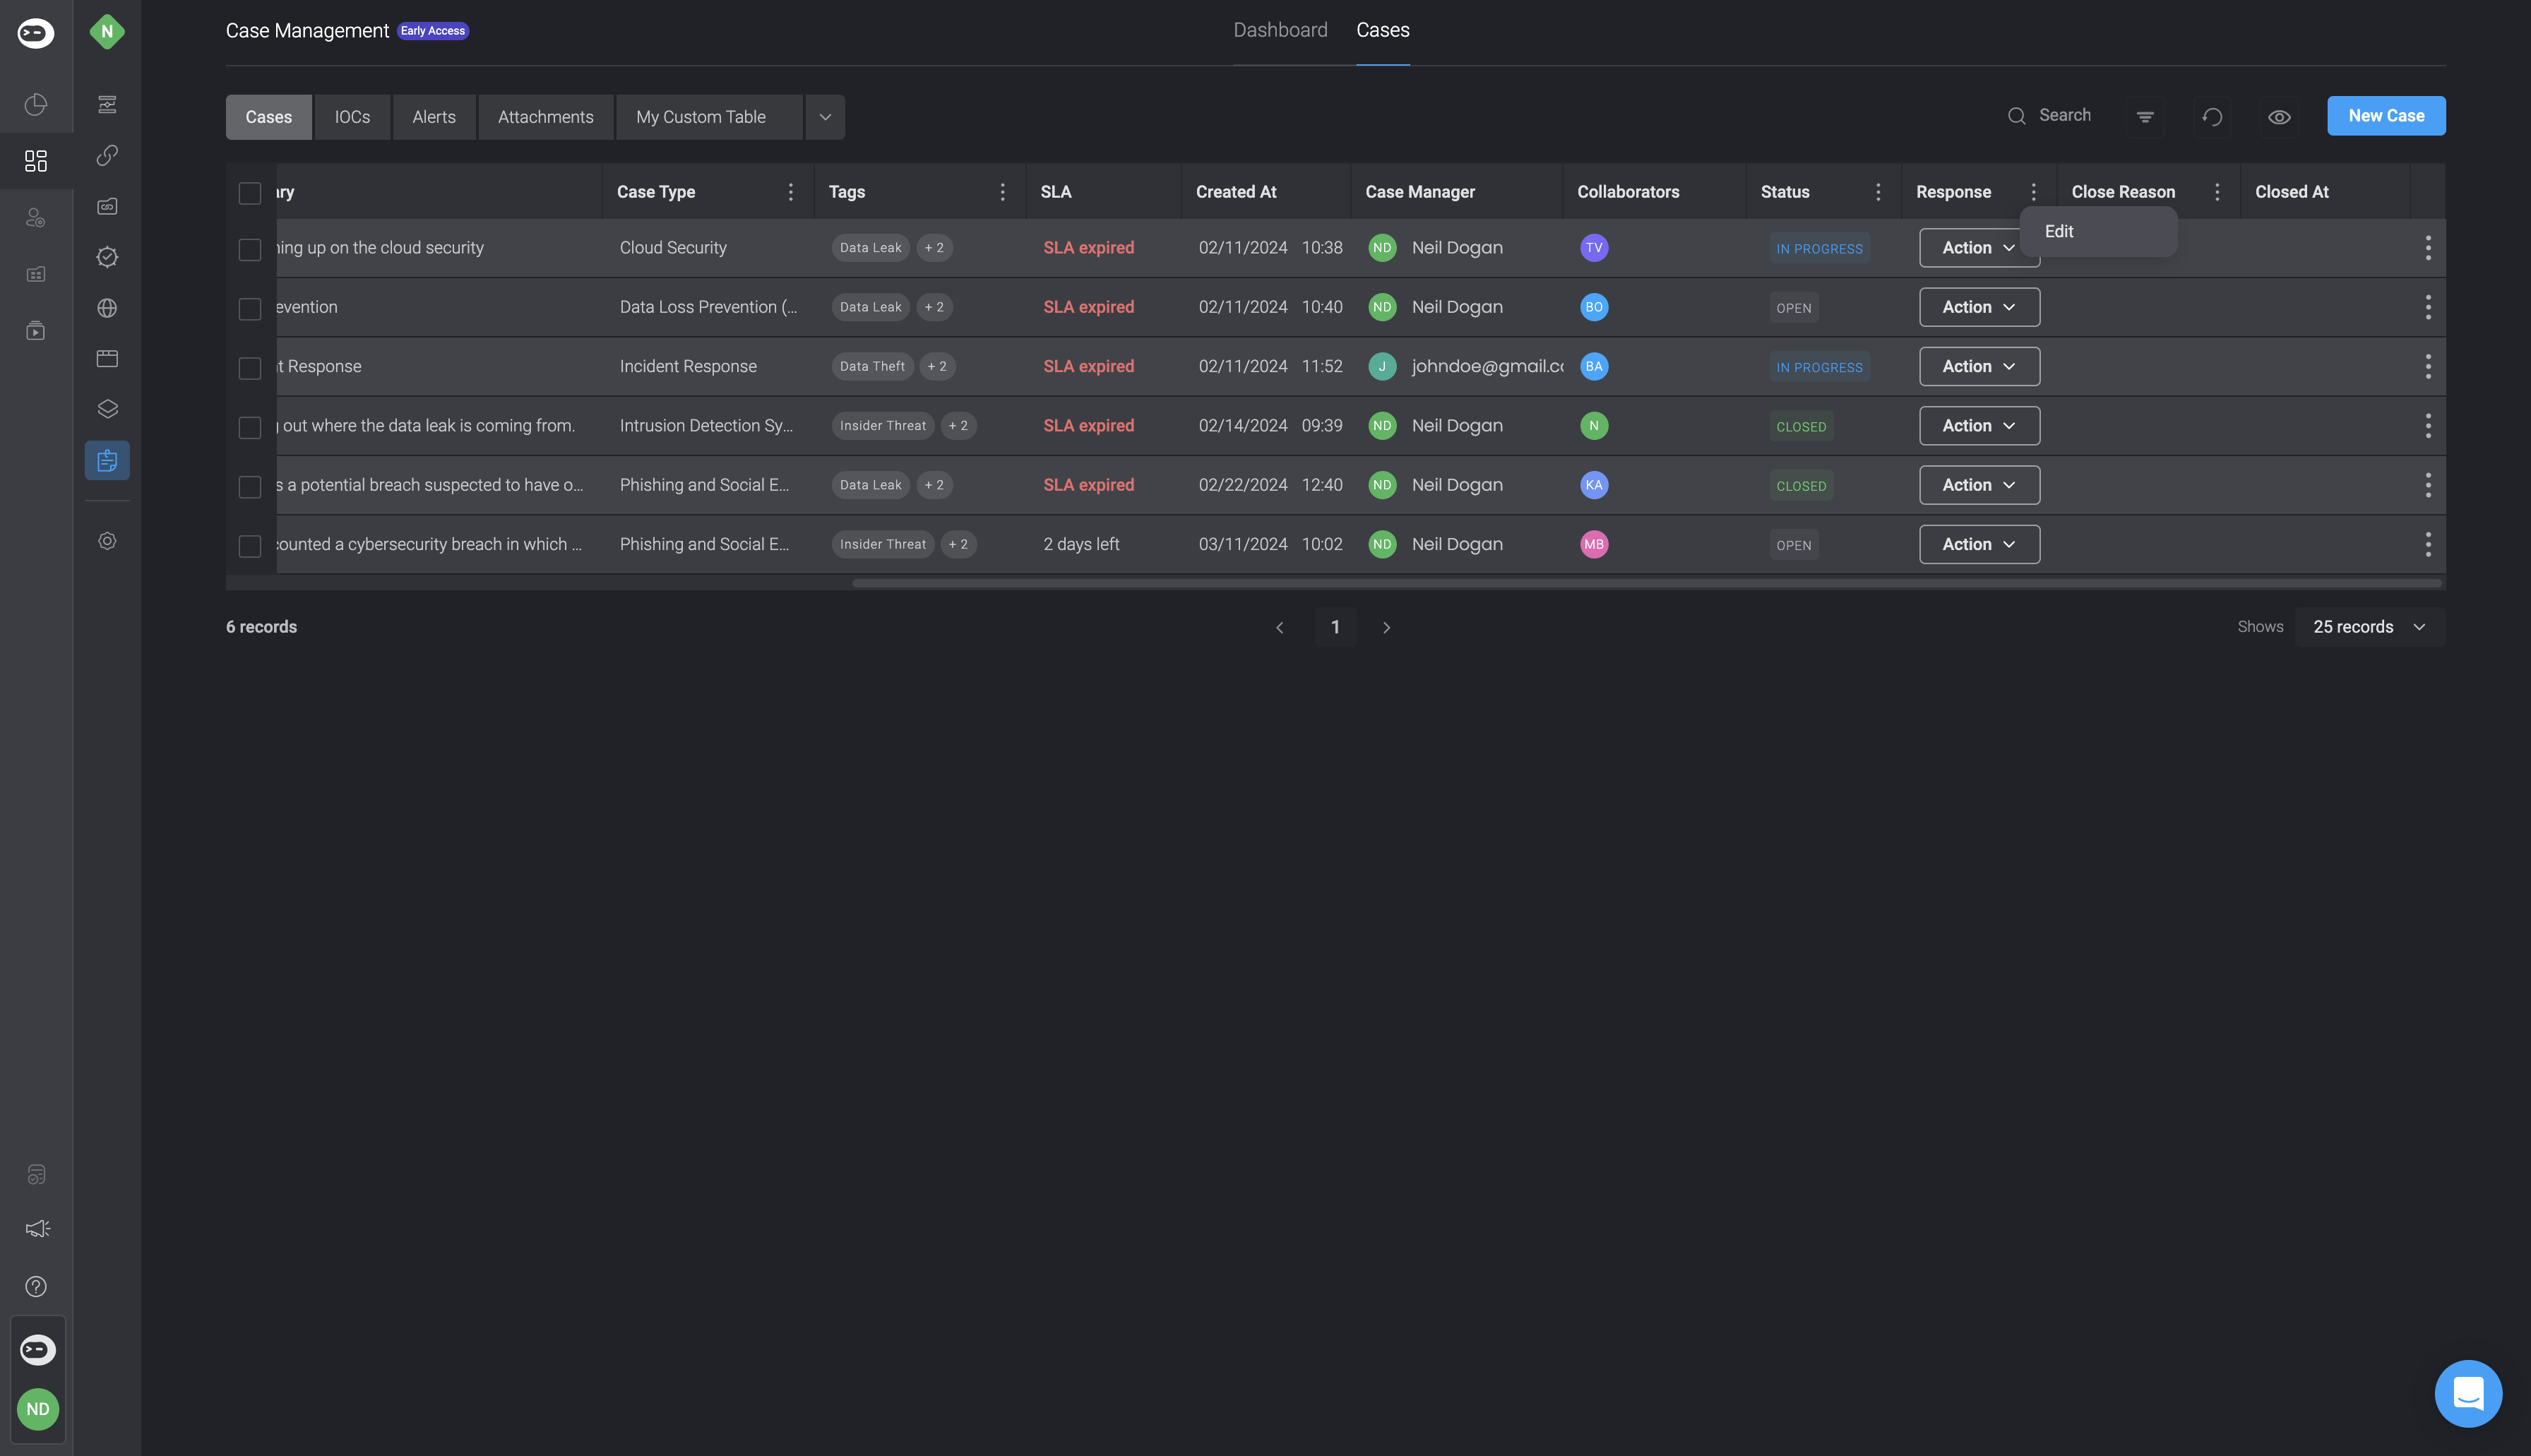 A popup will appear with the option to 'Add Action'.
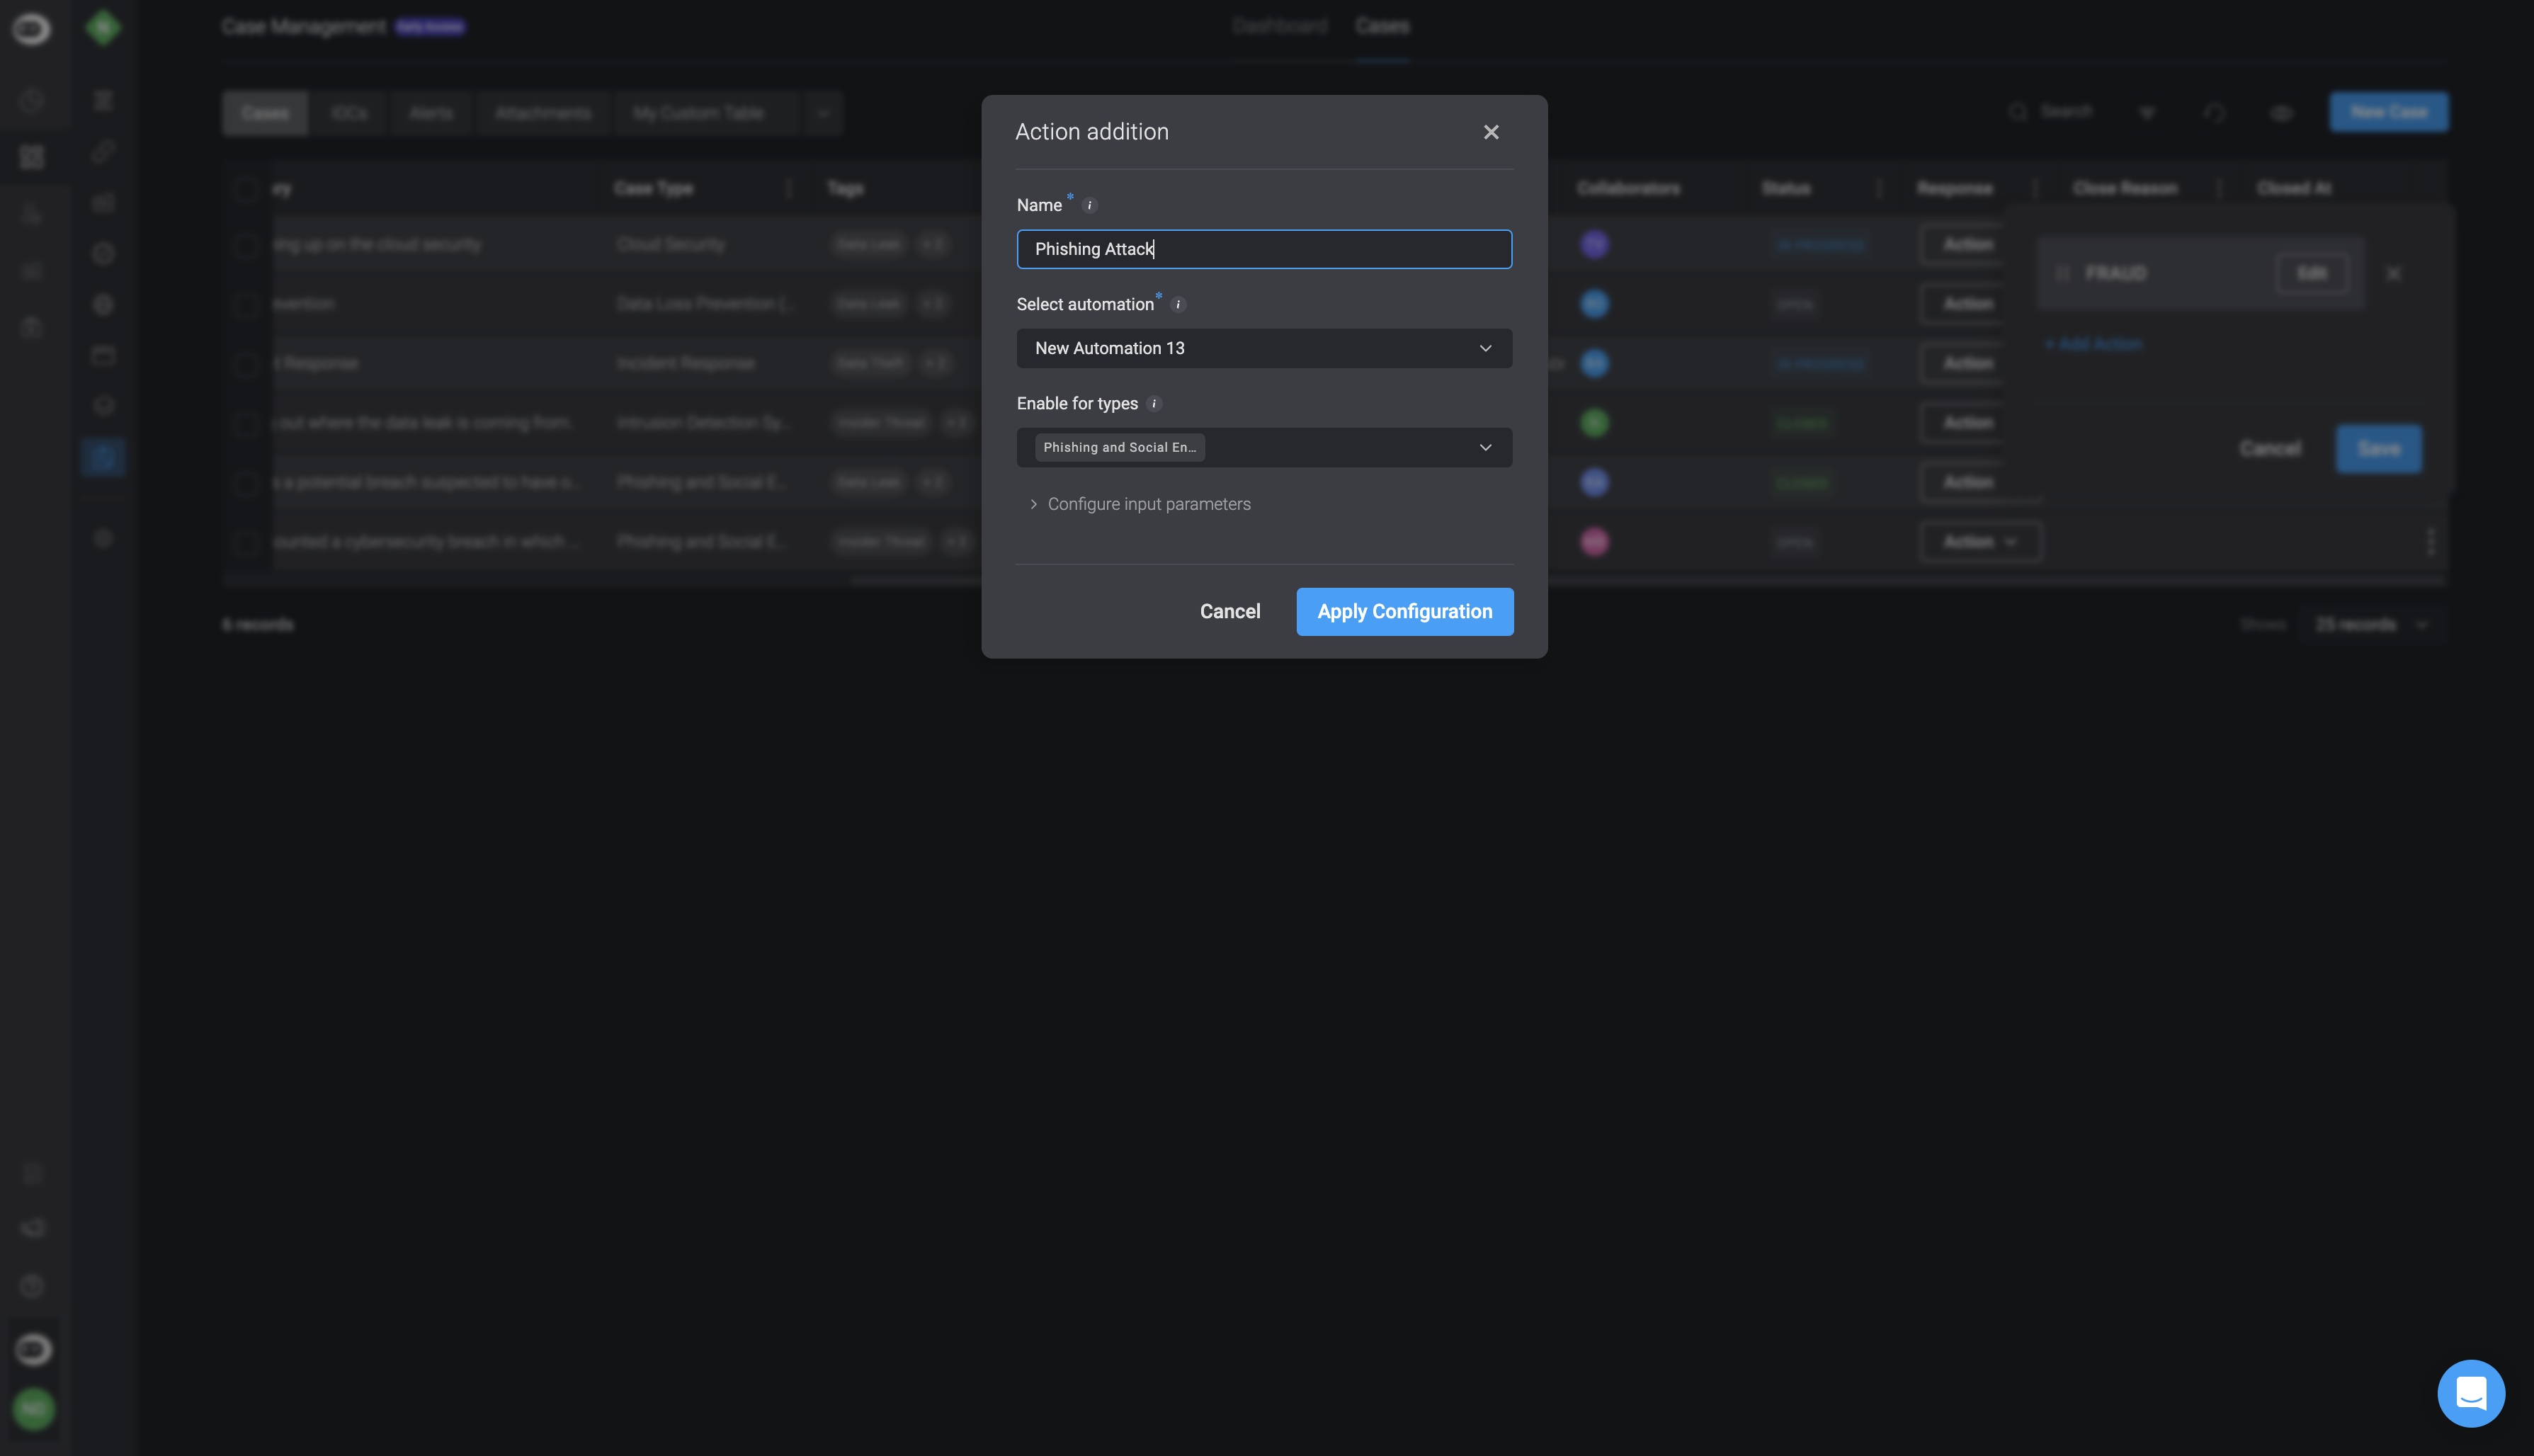
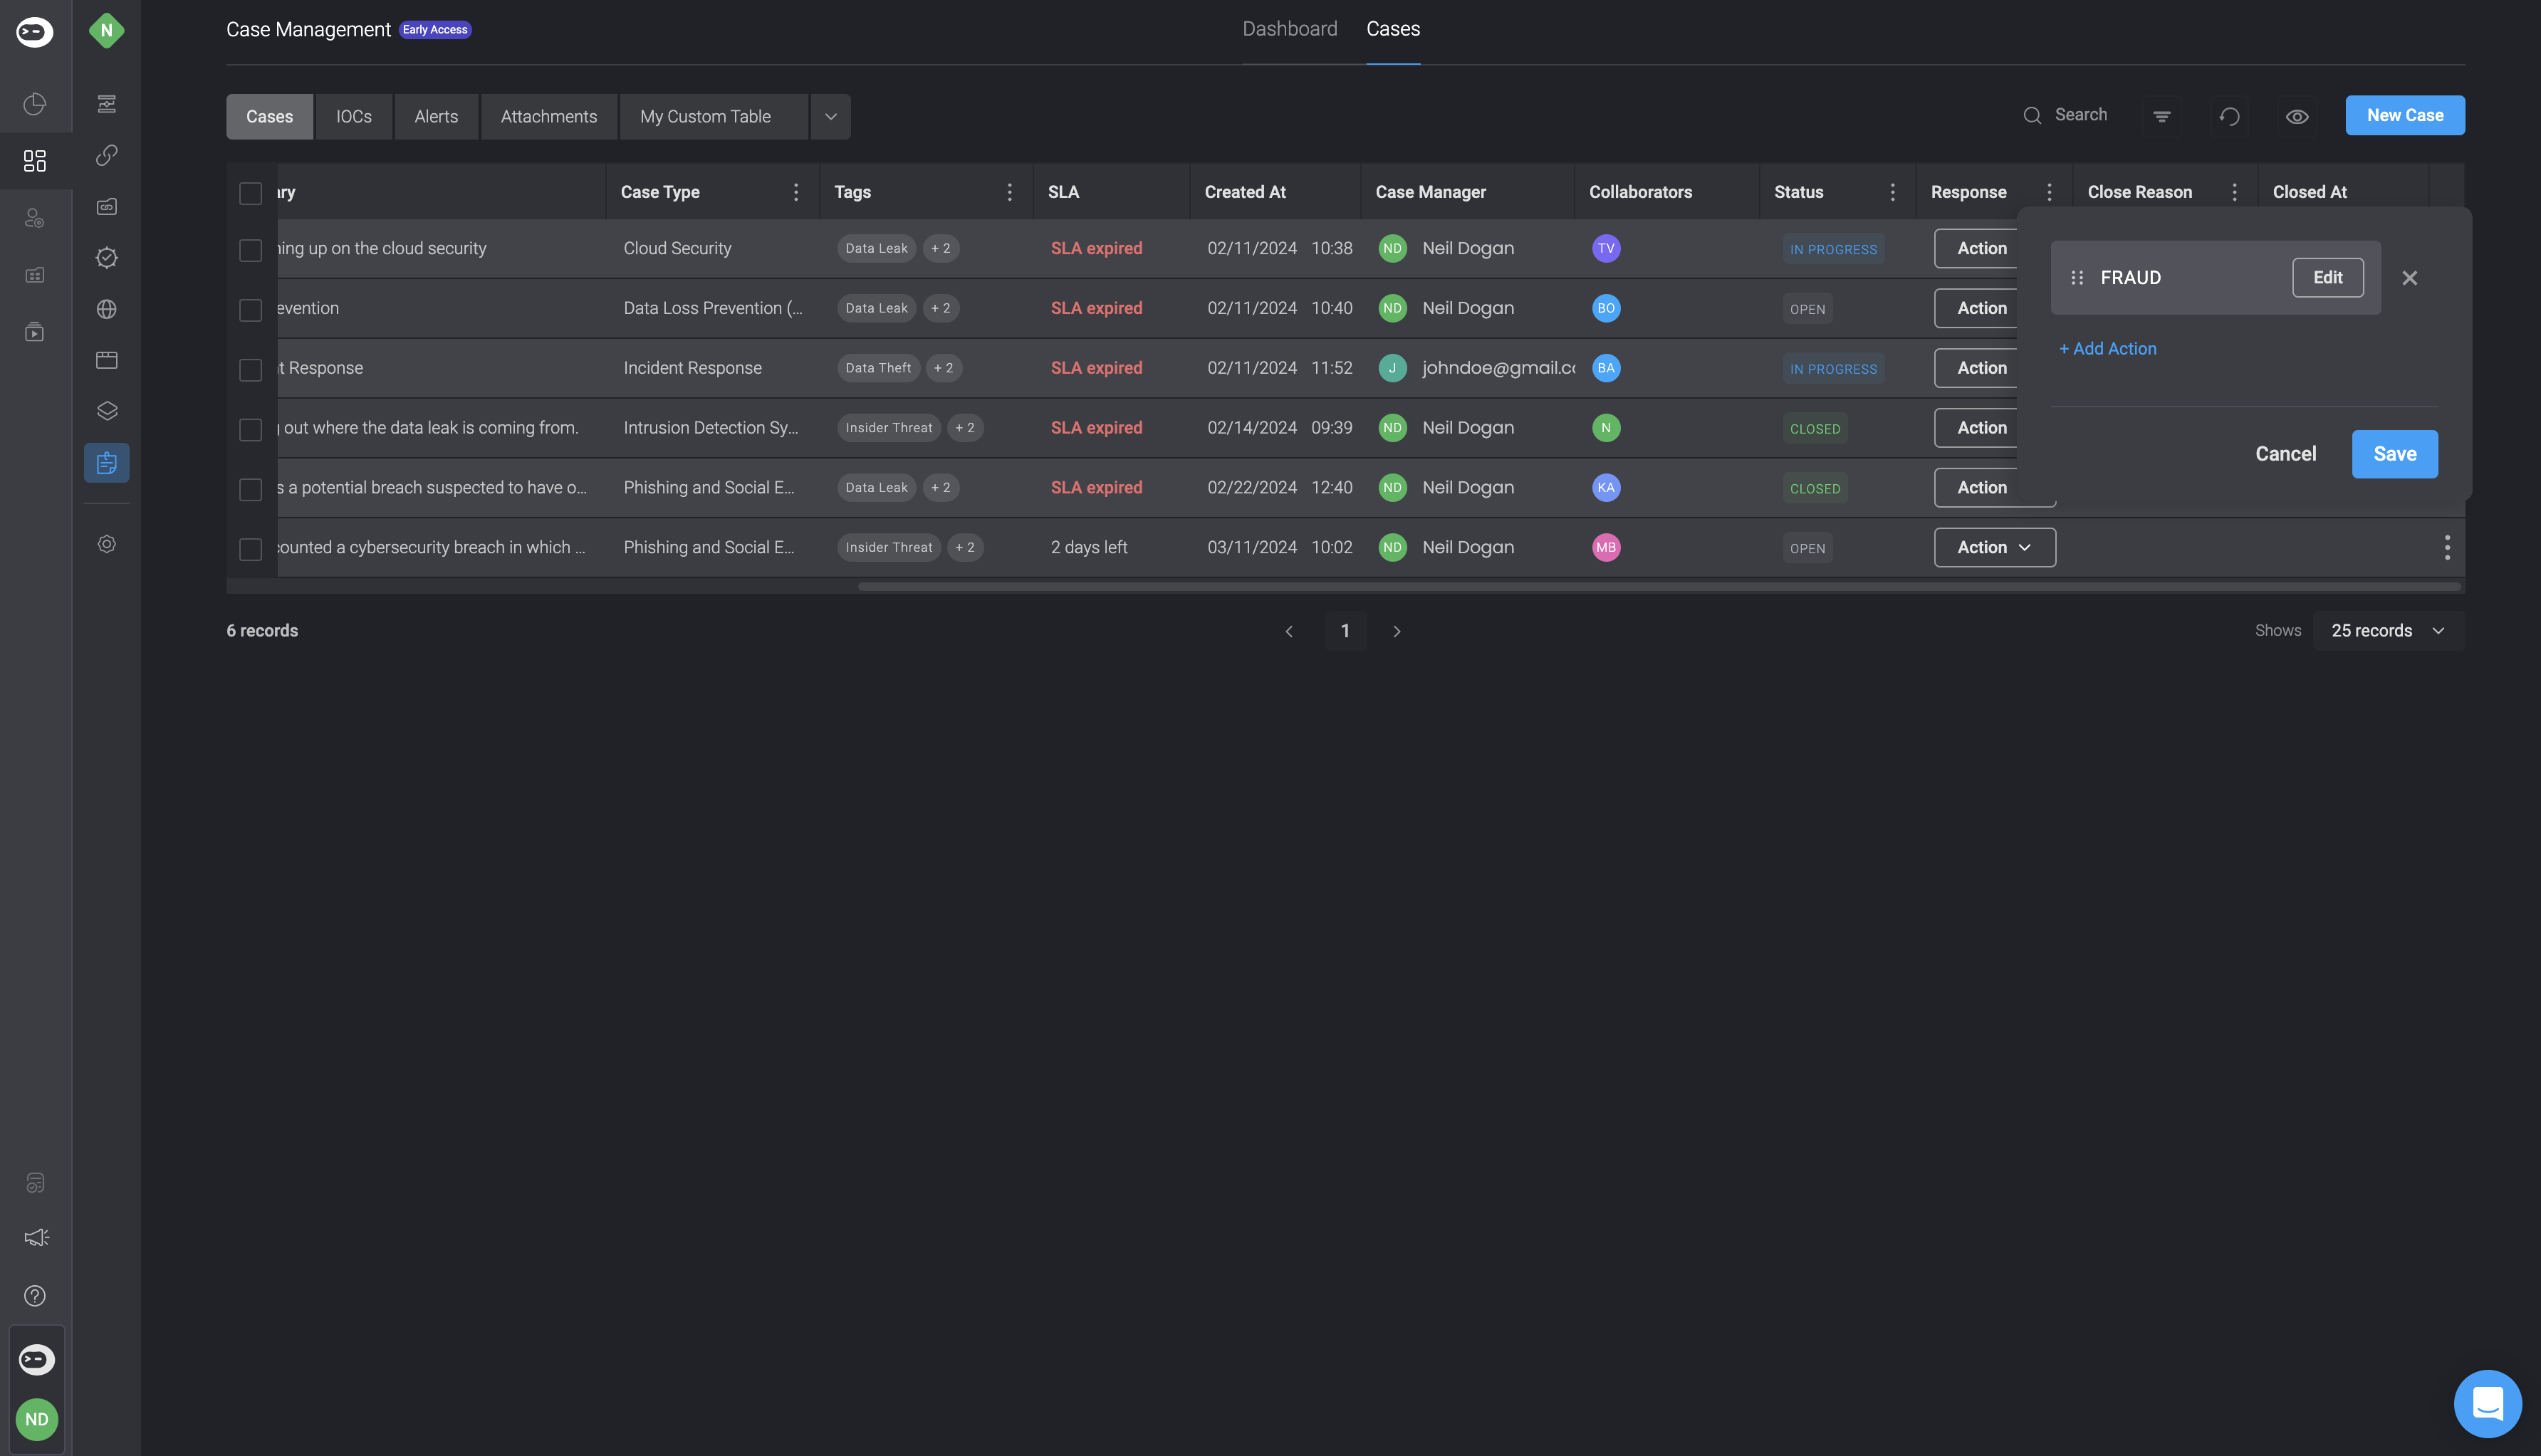 Proceed to select the 'Add Action' option and give the new action a name, choose the desired Workflow, enable for types and then click the apply configuration button.
 You will have the choice to either add another action or save the one you just made.
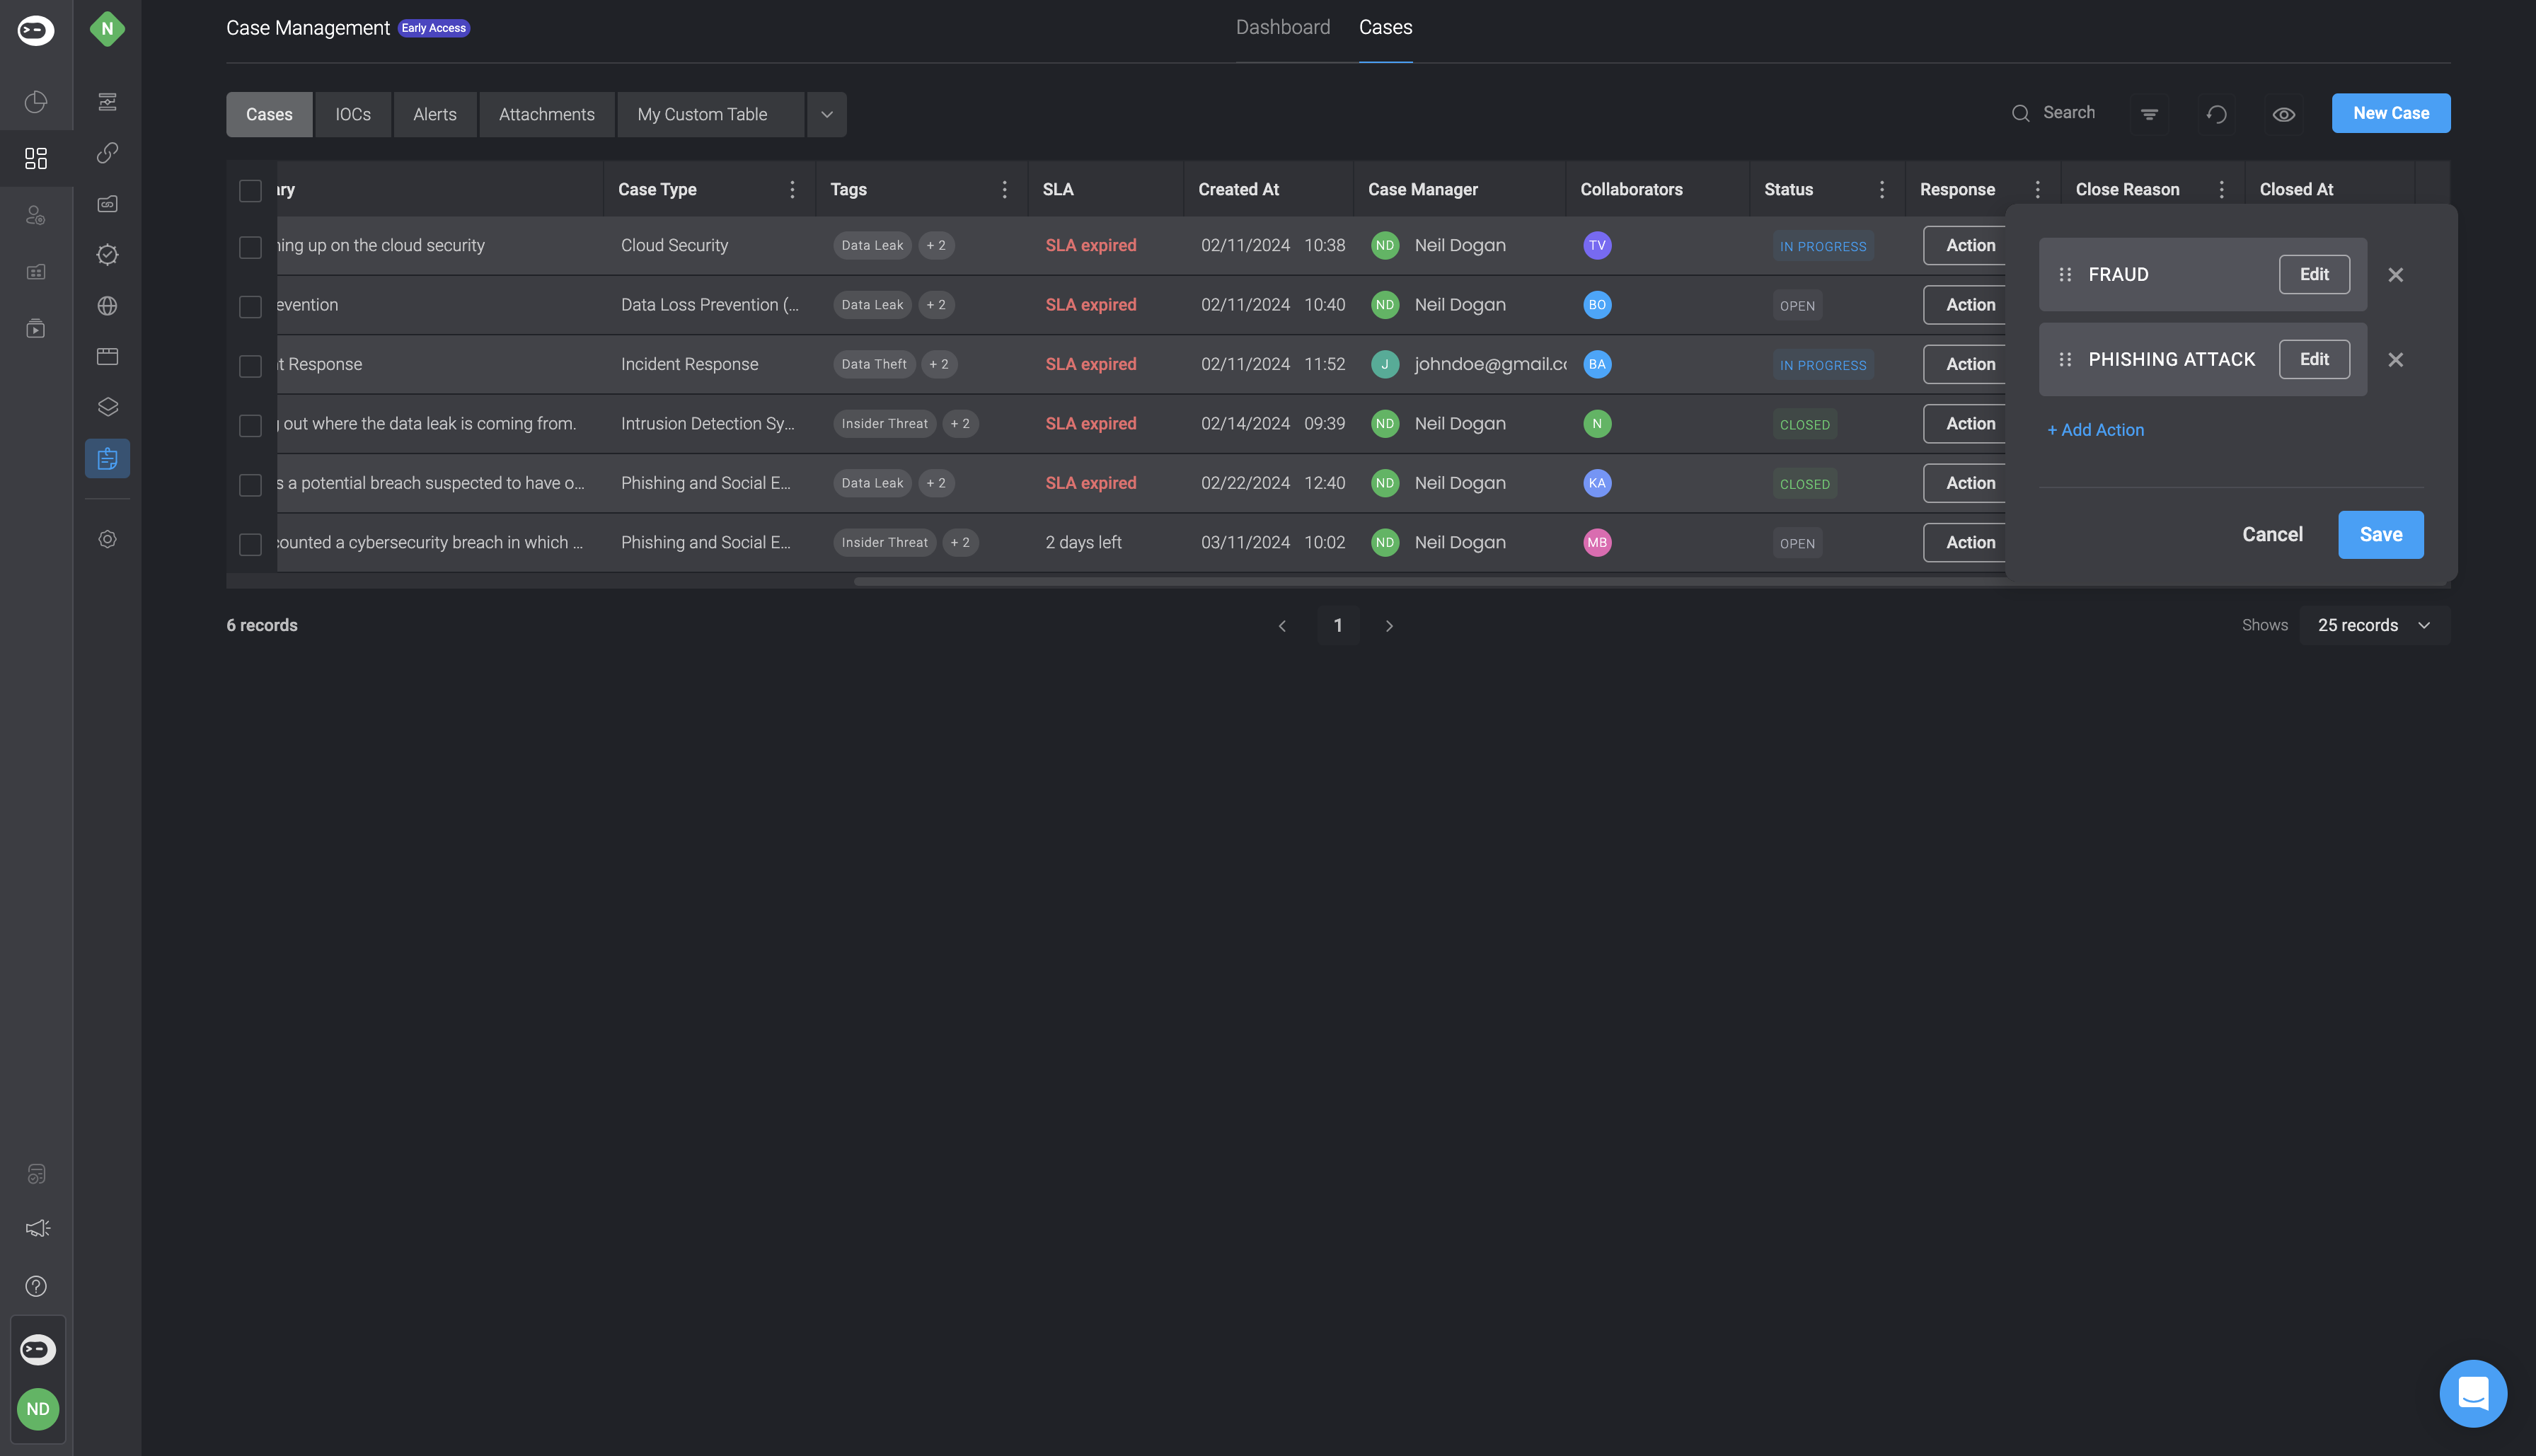 Once completed and saved, you can then trigger all the workflow actions within the dropdown menu for actions.
 ***
## The Search Bar
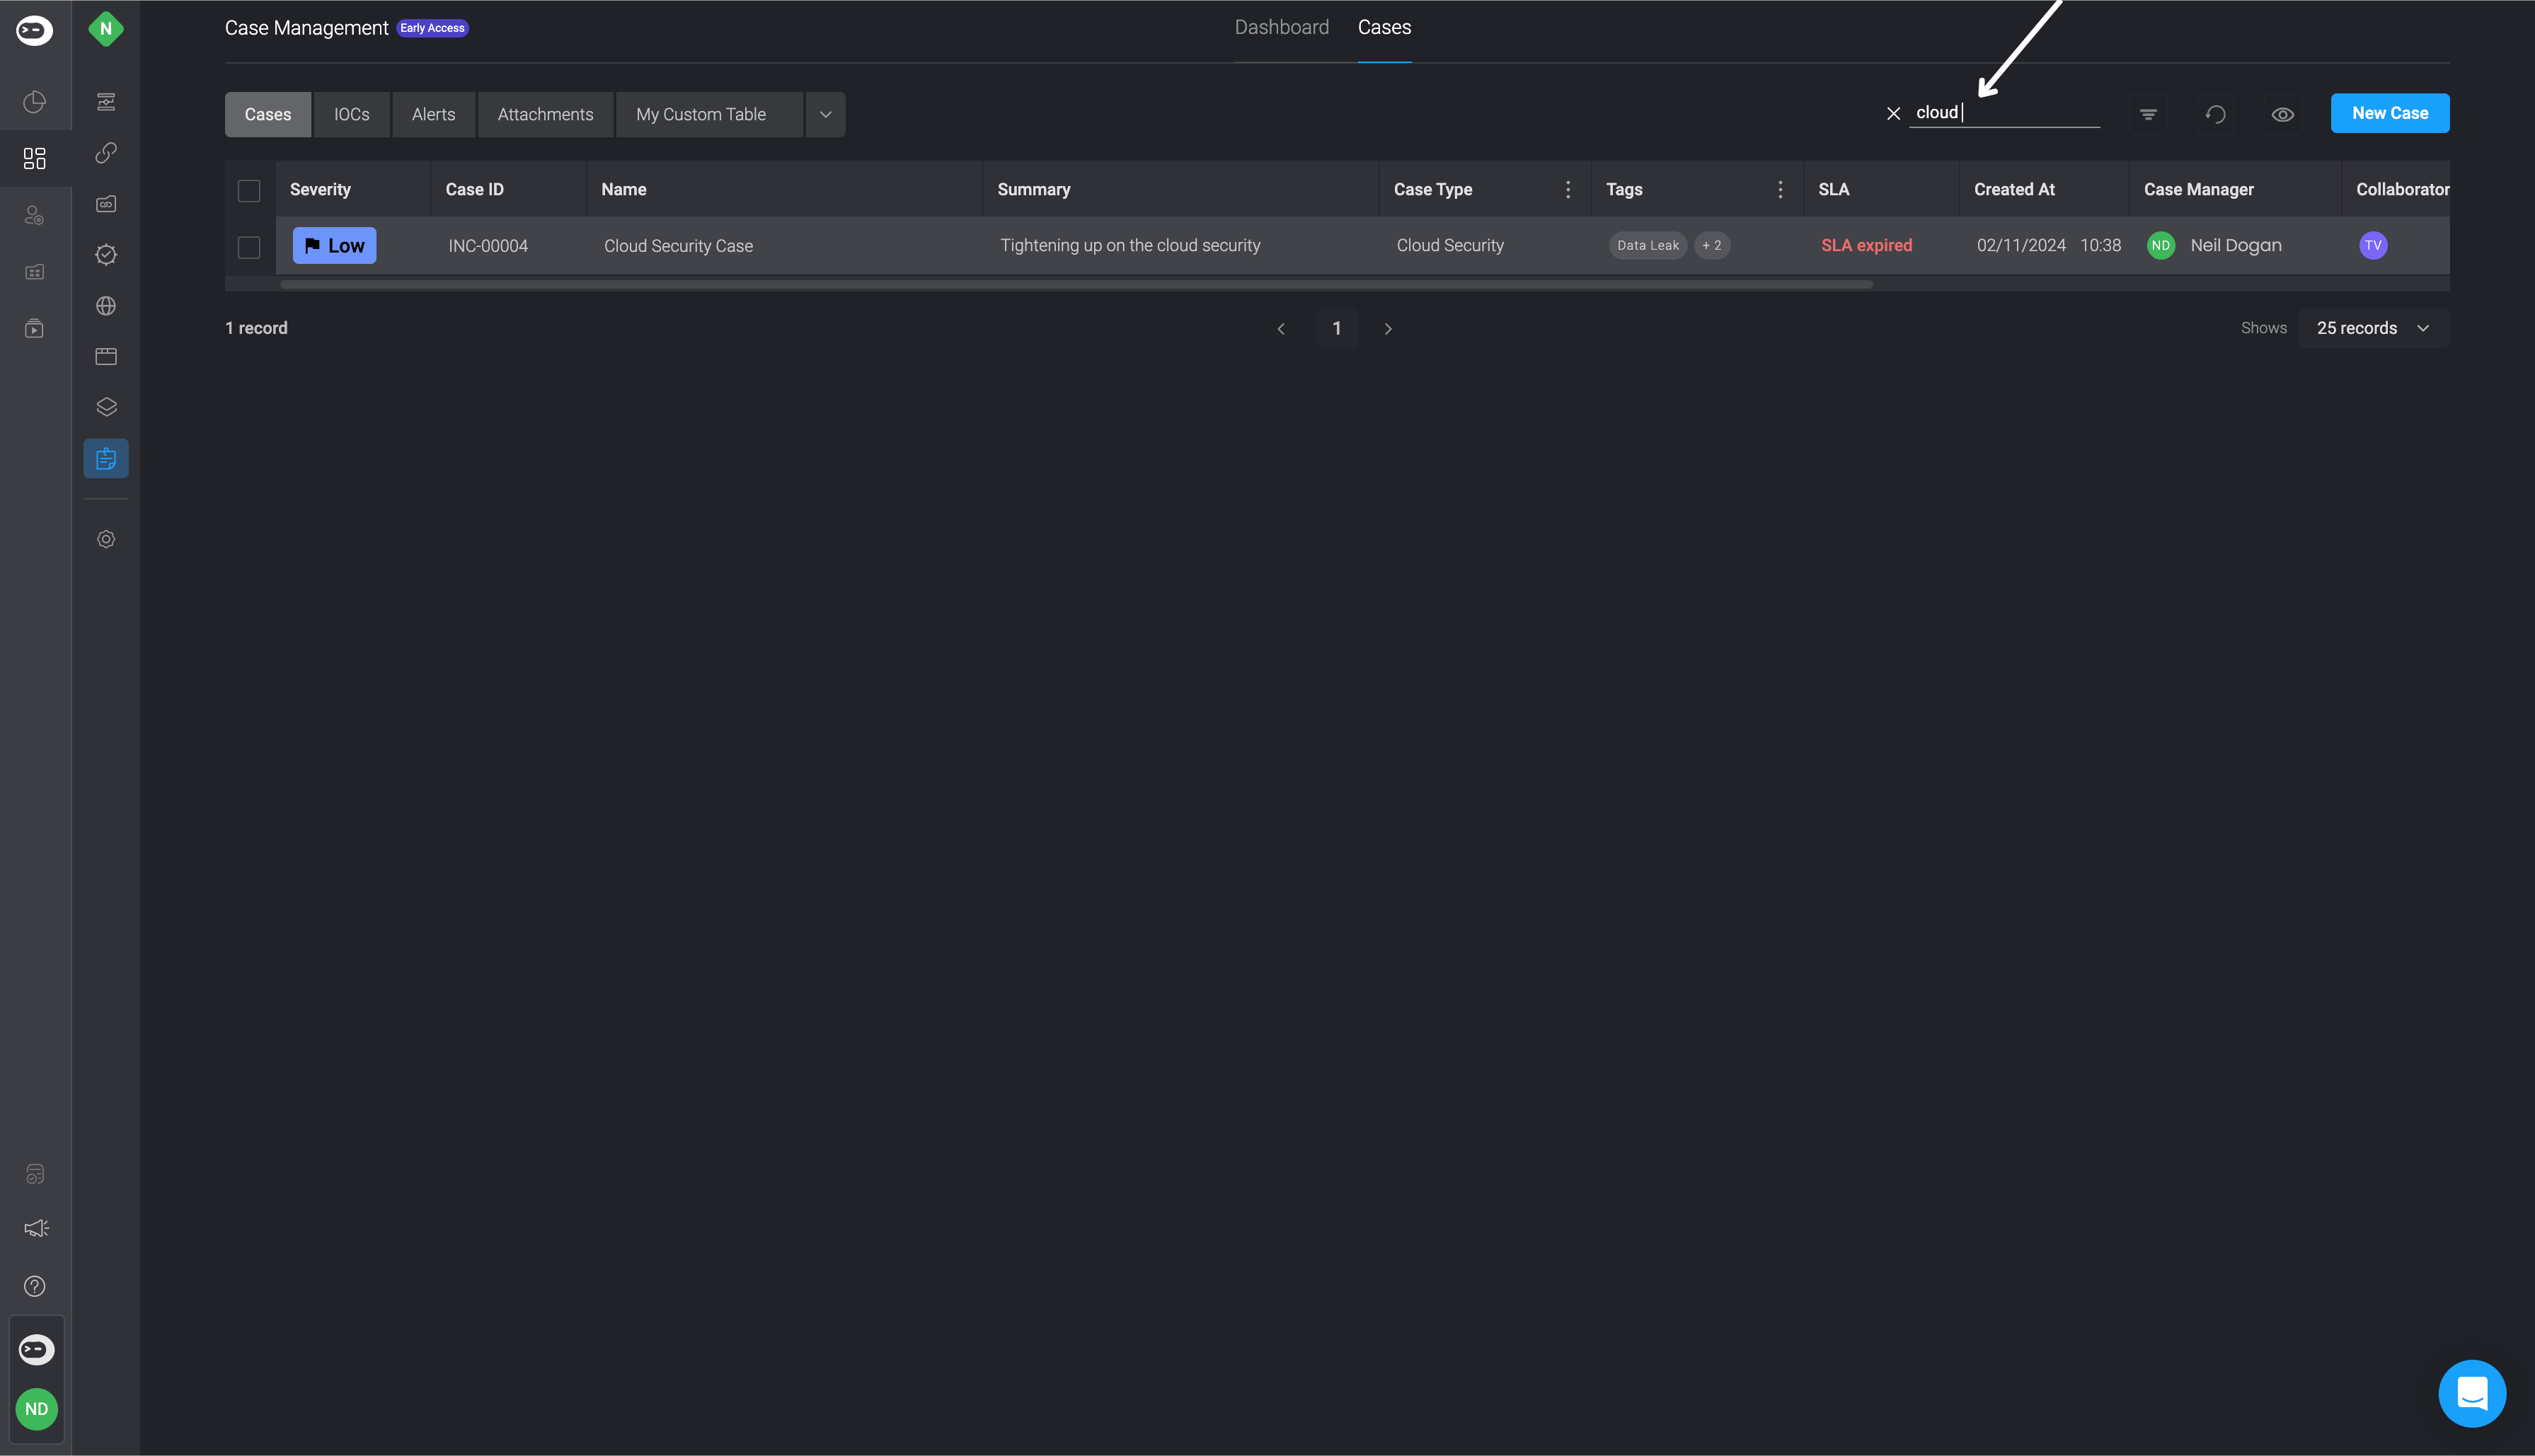
Quickly find records by name, tags, and other metadata. Use the search to find records by entering keywords such as case names, tags, vendors, or overviews.
Searchable fields include Name, Vendors, MITRE mappings, Tags, Close Reasons, and Overviews. Supported data types include Text, Single-Select, Multi-Select, and List.
***
## The Search Bar
Quickly find records by name, tags, and other metadata. Use the search to find records by entering keywords such as case names, tags, vendors, or overviews.
Searchable fields include Name, Vendors, MITRE mappings, Tags, Close Reasons, and Overviews. Supported data types include Text, Single-Select, Multi-Select, and List.
 ***
## Refresh Button
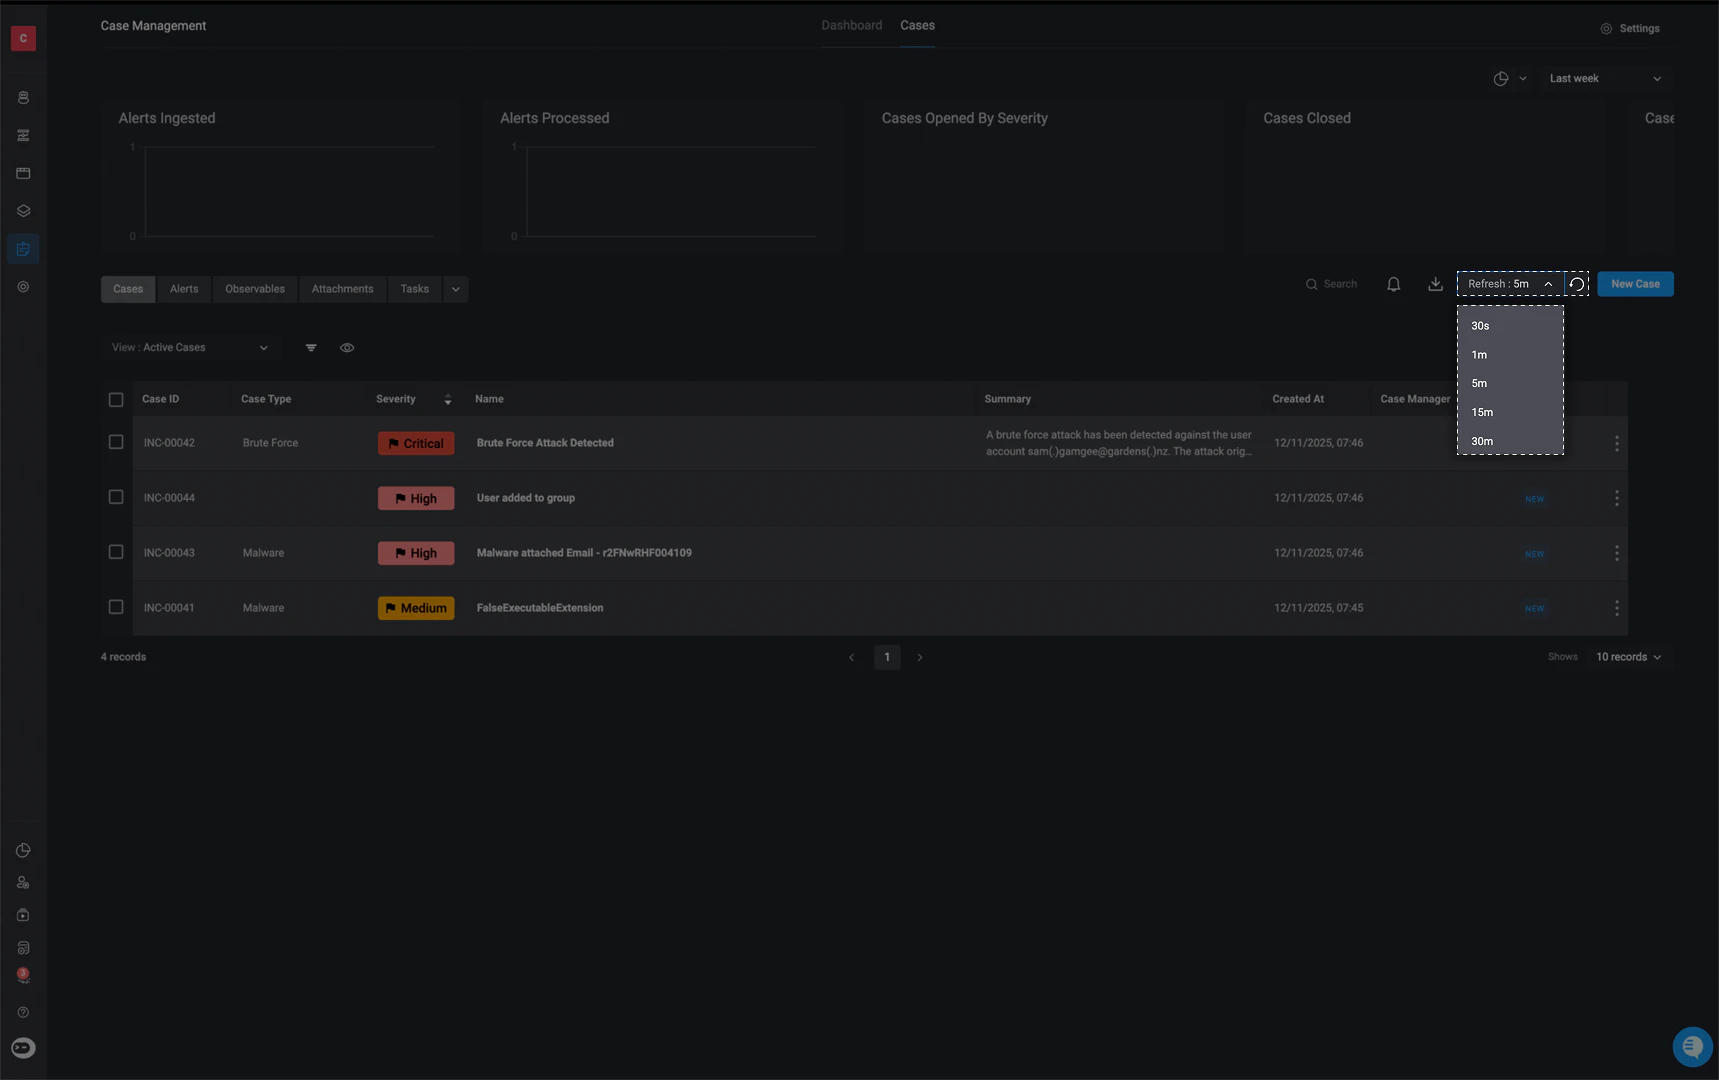
All tables in case management refresh automatically every **5 minutes** by default, ensuring the data stays up to date. You can customize this interval to match your needs by selecting one of the following refresh options:
* 30 seconds
* 1 minute
* 5 minutes
* 15 minutes
* 30 minutes
* 1 hour
To see when the data was last updated, hover over the **Refresh** button in the top-right corner of the table. You can also click the button at any time to manually refresh the data instantly.
***
## Refresh Button
All tables in case management refresh automatically every **5 minutes** by default, ensuring the data stays up to date. You can customize this interval to match your needs by selecting one of the following refresh options:
* 30 seconds
* 1 minute
* 5 minutes
* 15 minutes
* 30 minutes
* 1 hour
To see when the data was last updated, hover over the **Refresh** button in the top-right corner of the table. You can also click the button at any time to manually refresh the data instantly.
 ***
## The View Button
***
## The View Button
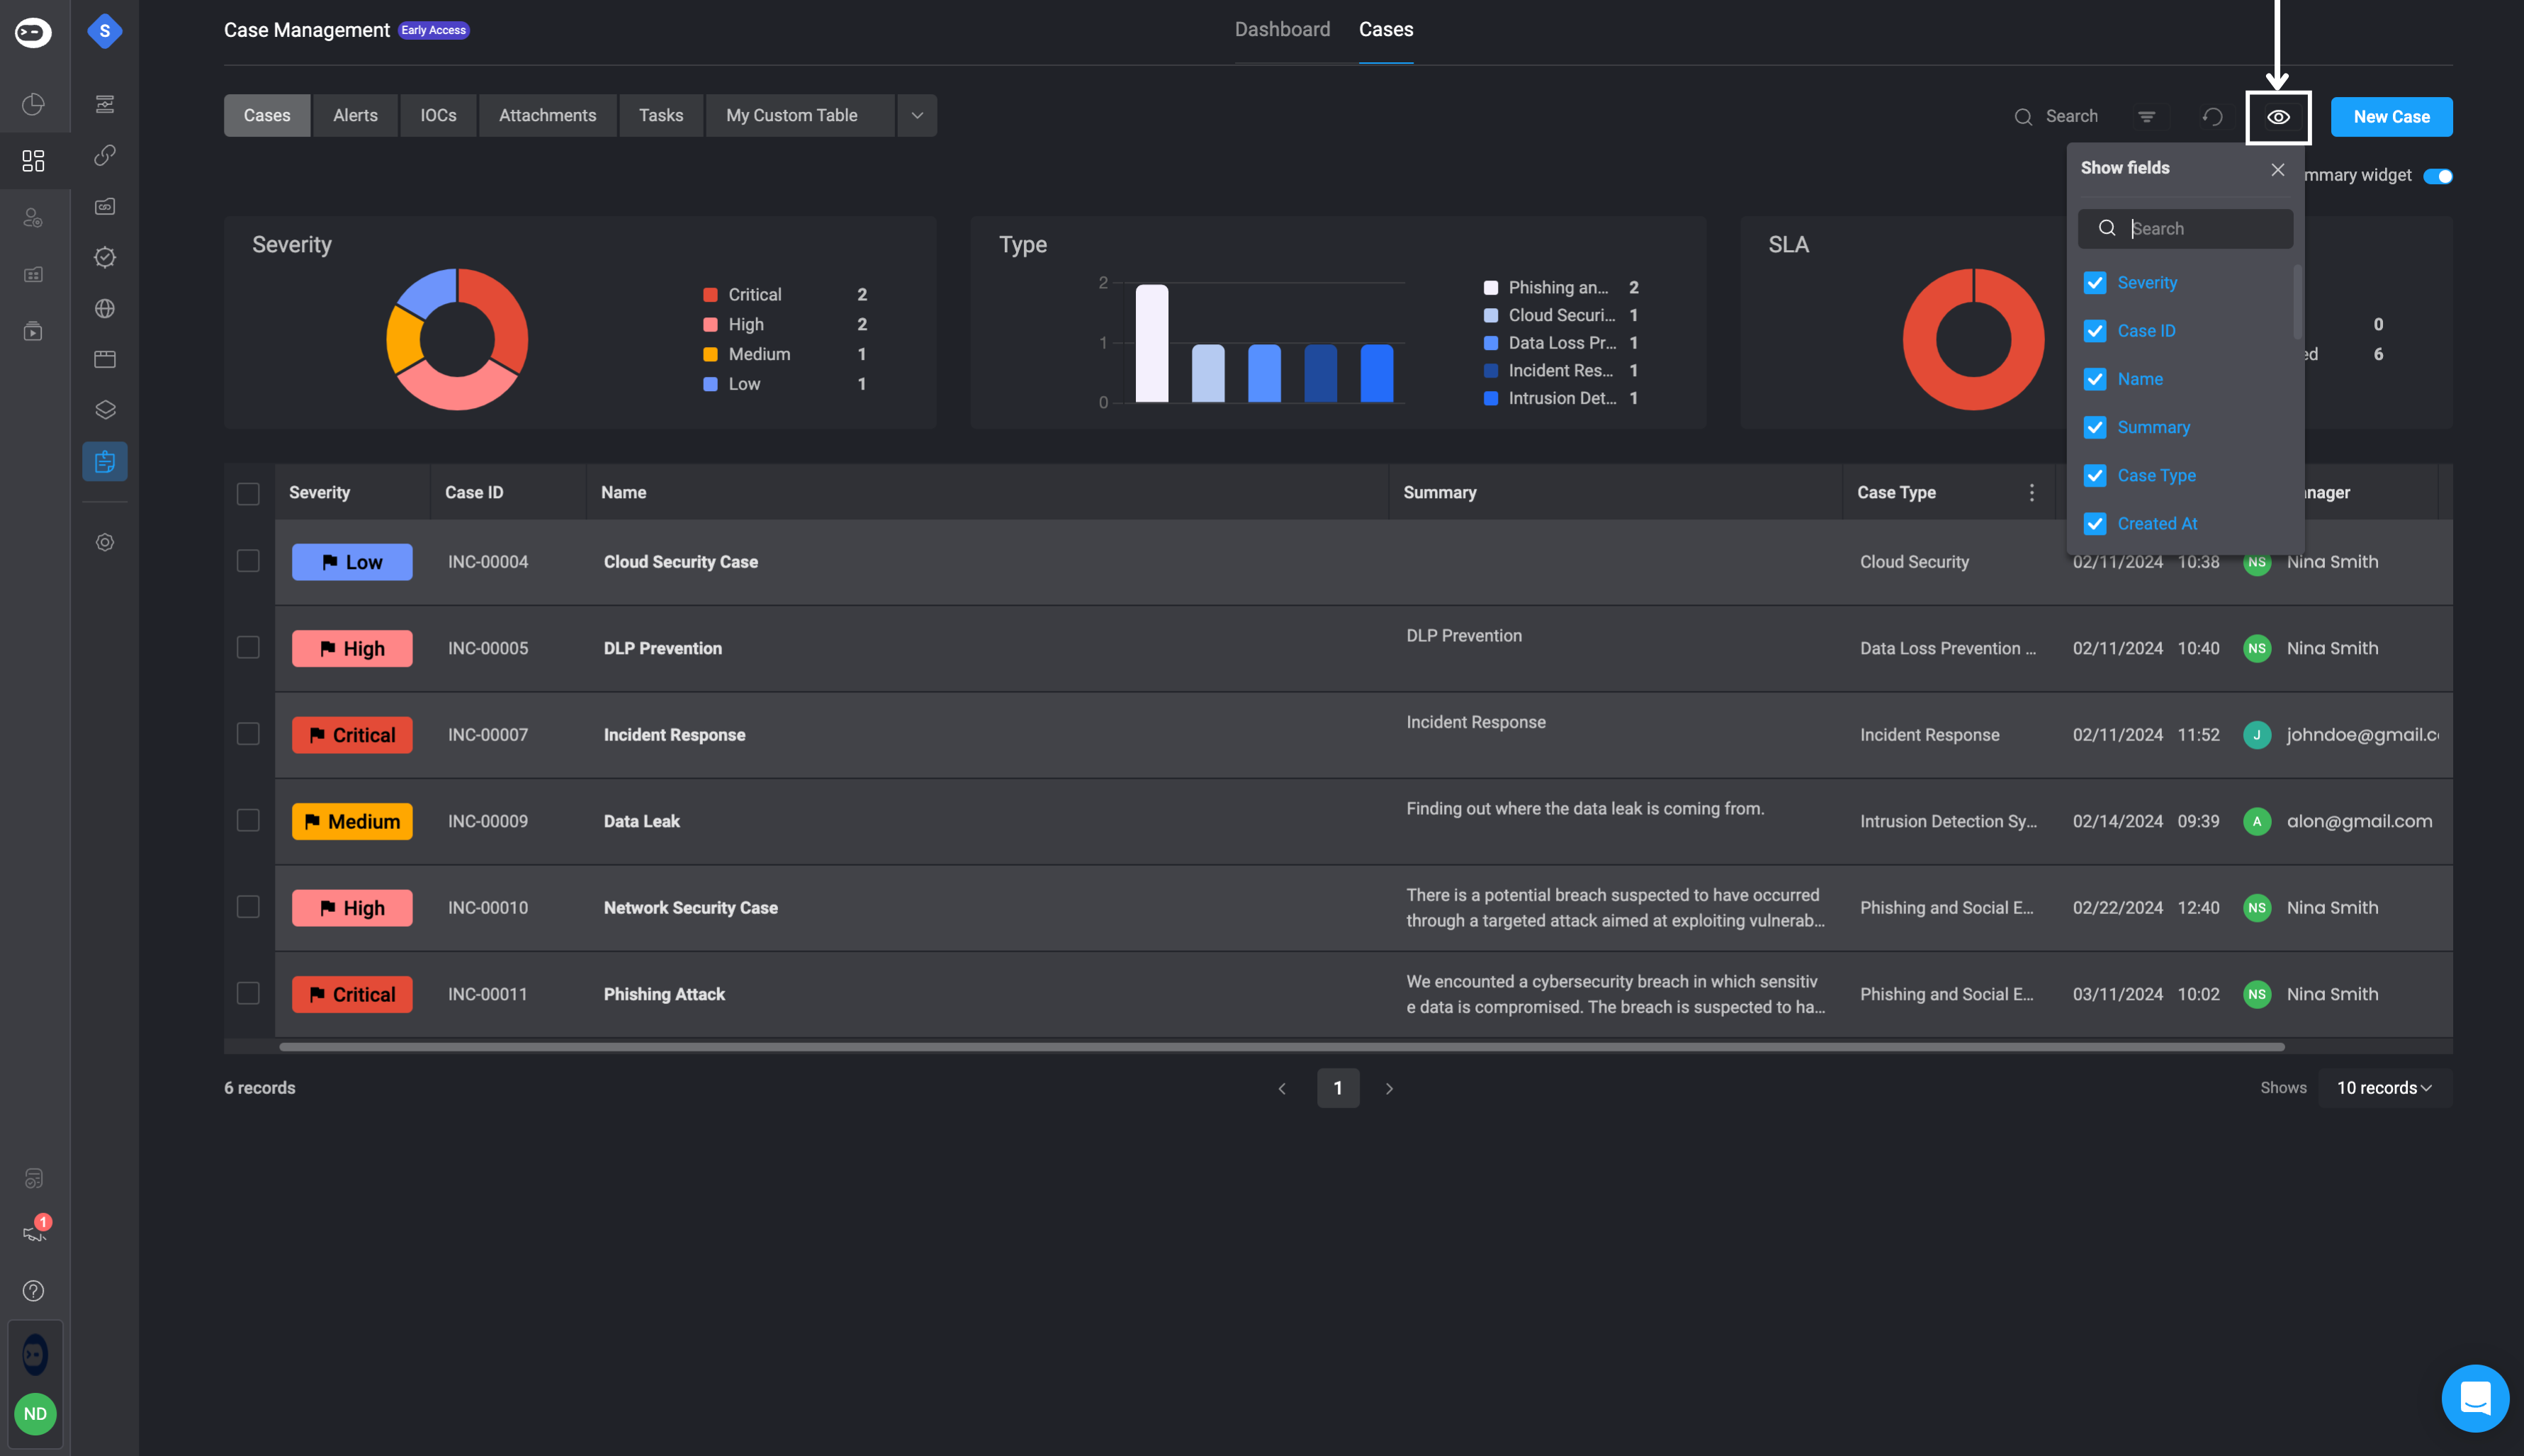
The table contains additional fields, but only a few are initially visible by default. Click on the icon above the table, to configure which table field columns you want to make visible and choose which table field columns you want to remain hidden.
 ***
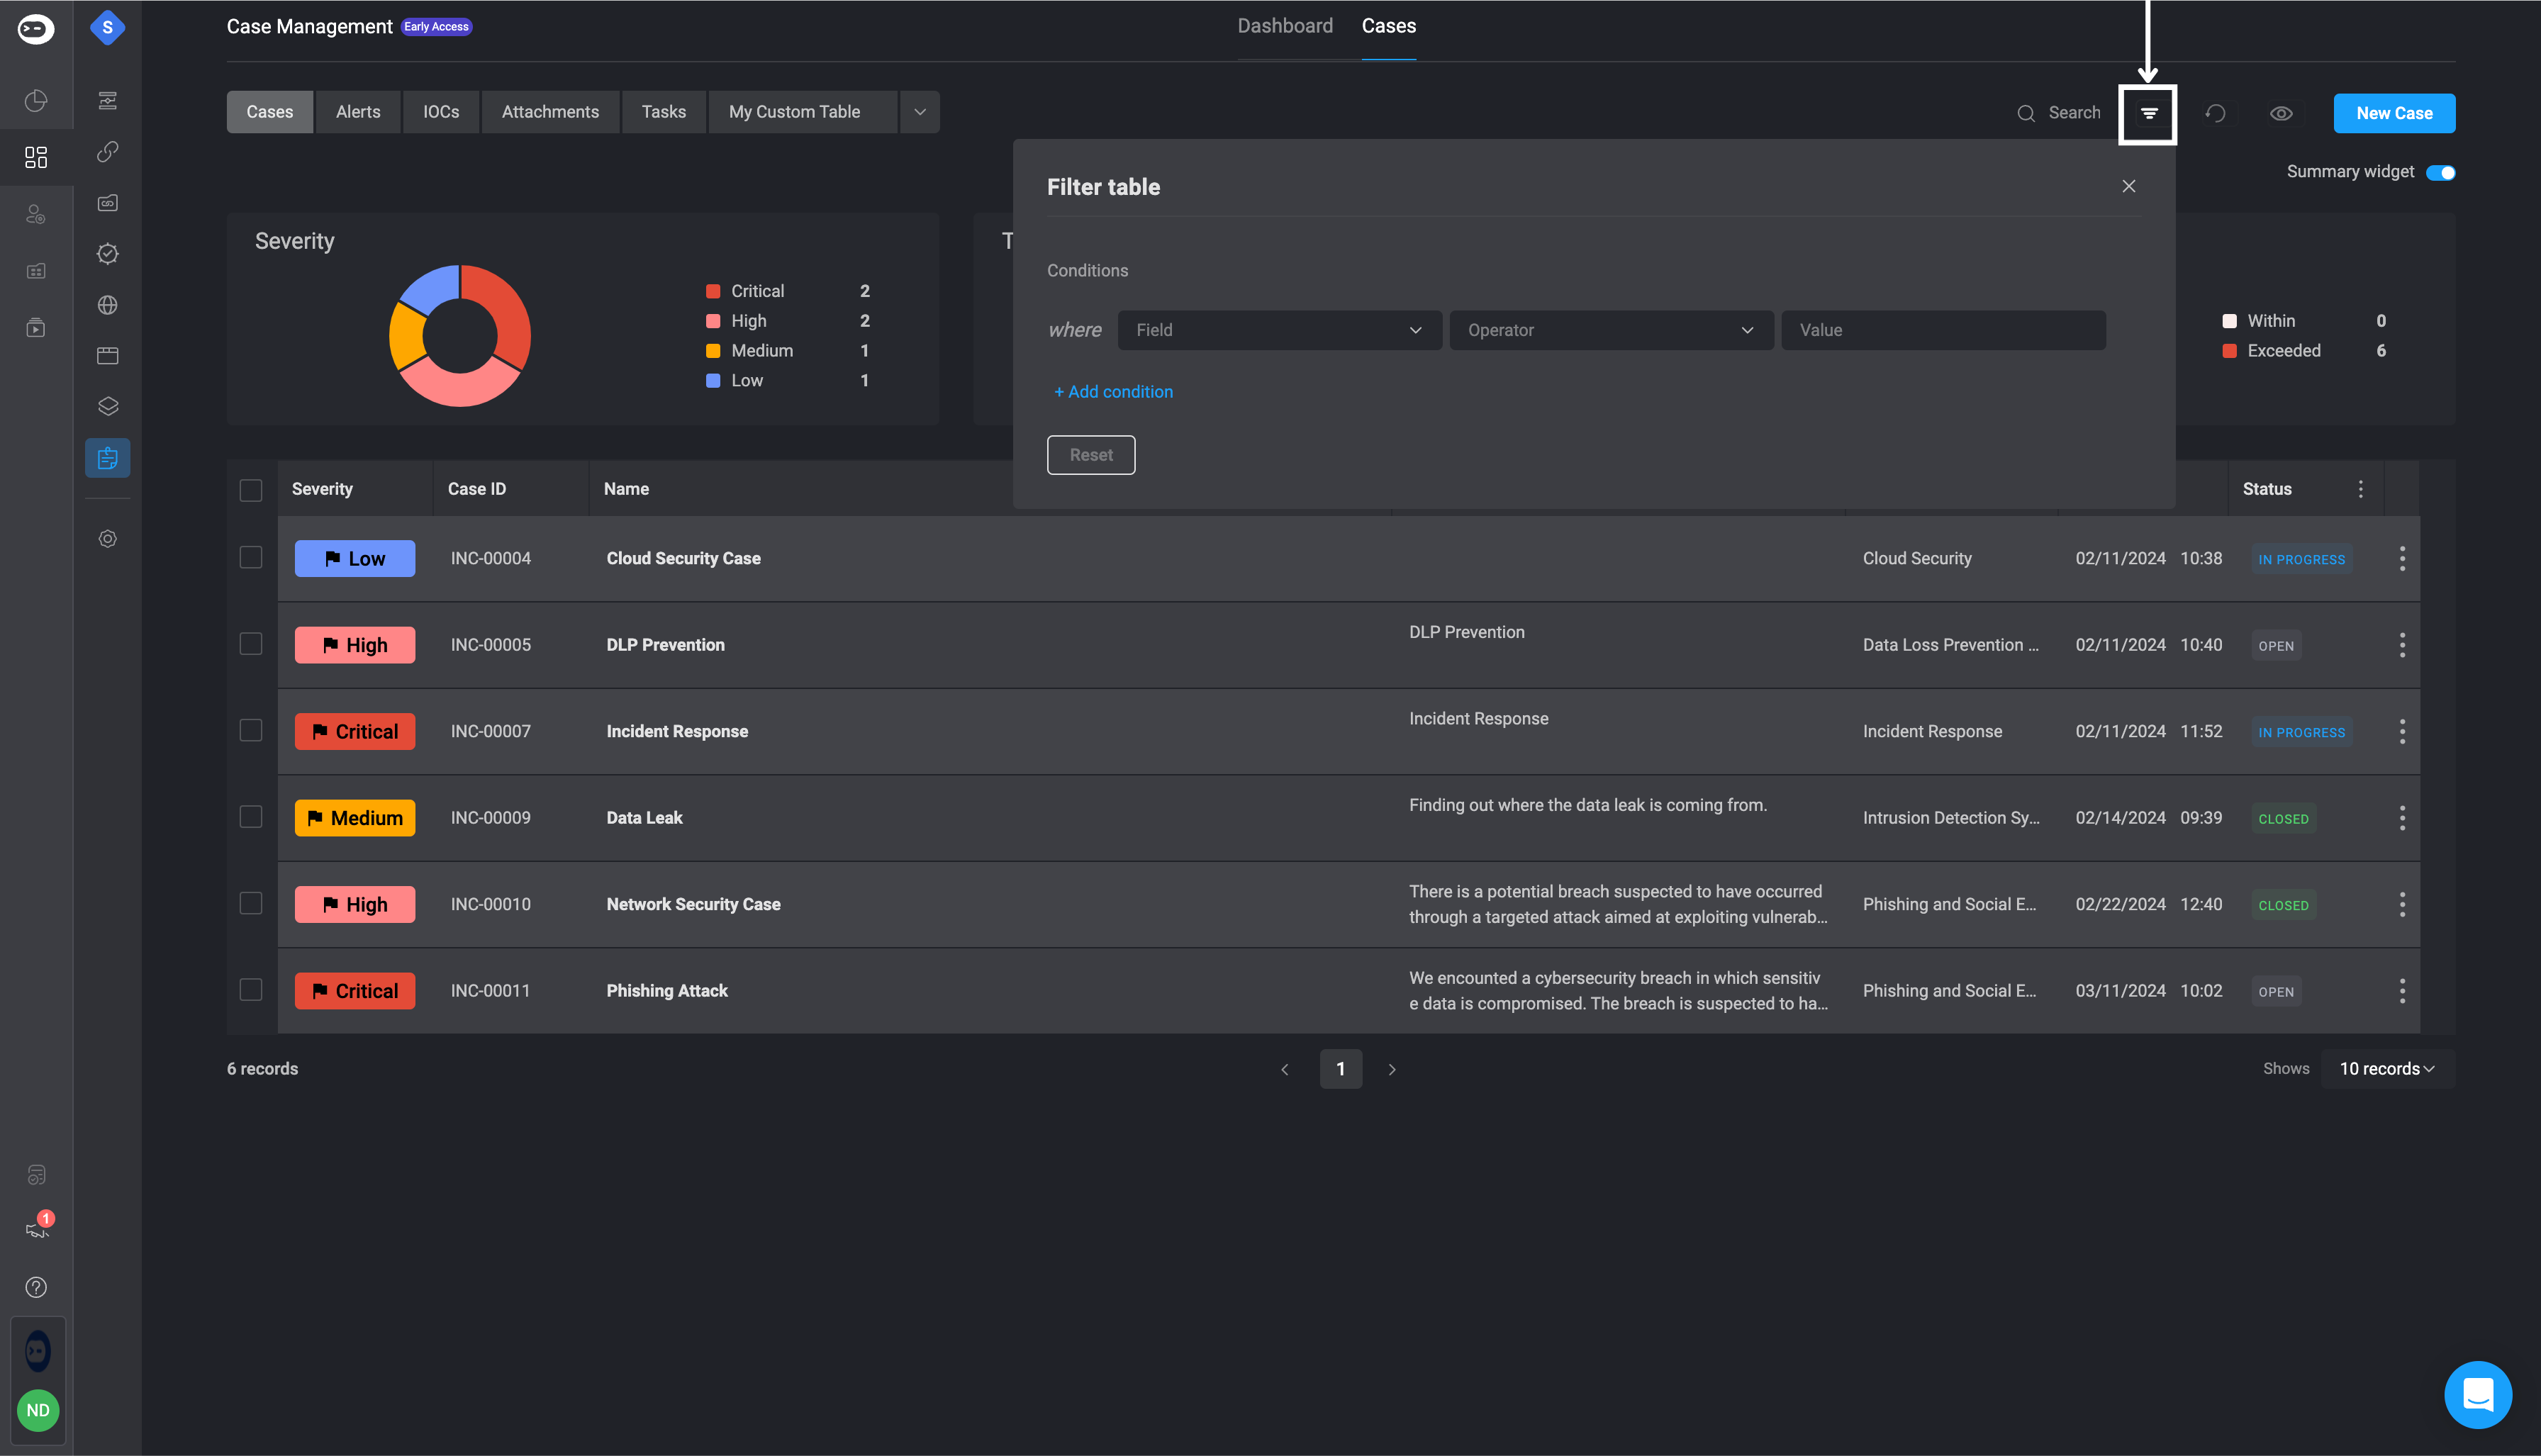
## The Filter Button
The 'Filter' button simplifies filtering through case(s) by applying conditional statements to find the specific case(s) you are looking for.
***
## The Filter Button
The 'Filter' button simplifies filtering through case(s) by applying conditional statements to find the specific case(s) you are looking for.
 ## Table Views
Create and manage personalized or shared table views.
Each table offers pre-configured views (e.g., All Cases, My Tasks, Critical Alerts) and lets you create custom views with filters and layout preferences.
In the dropdown menu in the top-left corner, you will find out of the box options for reviewing your case: all cases, my cases, high & critical severity, or closed cases.
## Table Views
Create and manage personalized or shared table views.
Each table offers pre-configured views (e.g., All Cases, My Tasks, Critical Alerts) and lets you create custom views with filters and layout preferences.
In the dropdown menu in the top-left corner, you will find out of the box options for reviewing your case: all cases, my cases, high & critical severity, or closed cases.
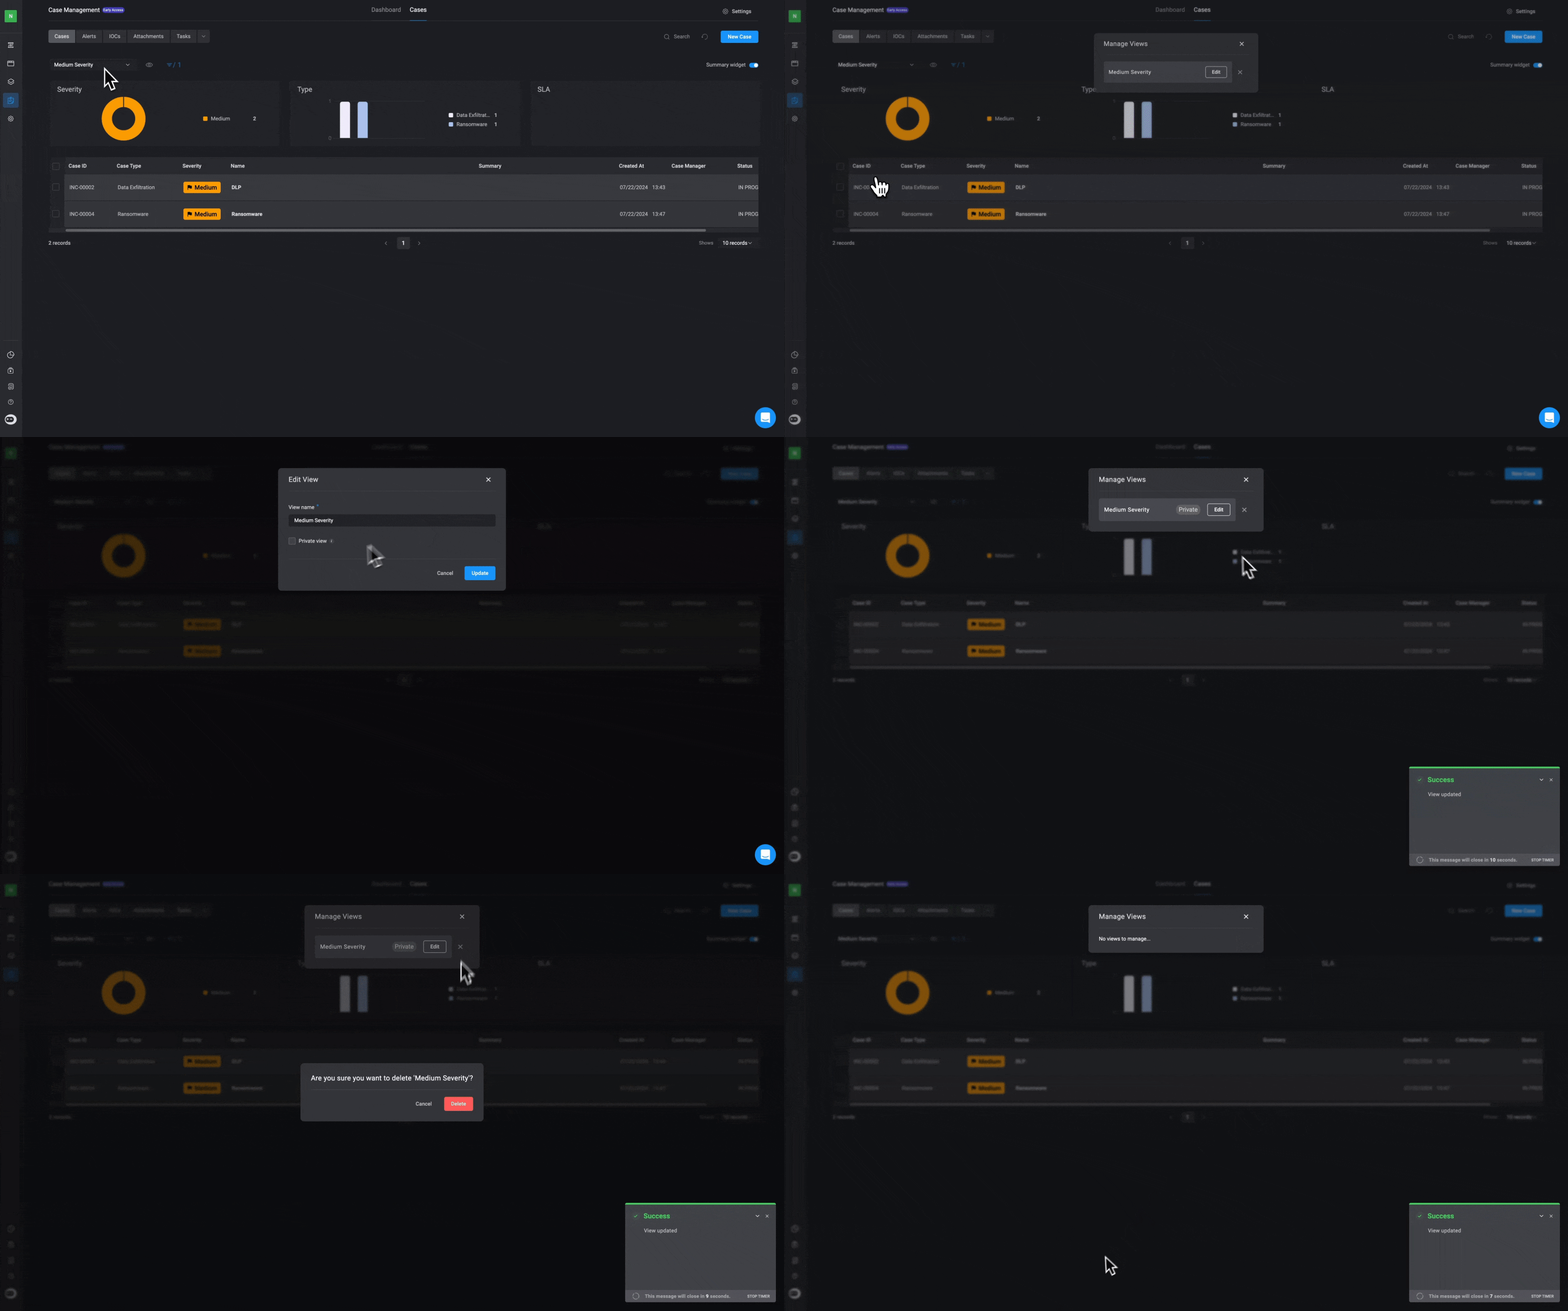
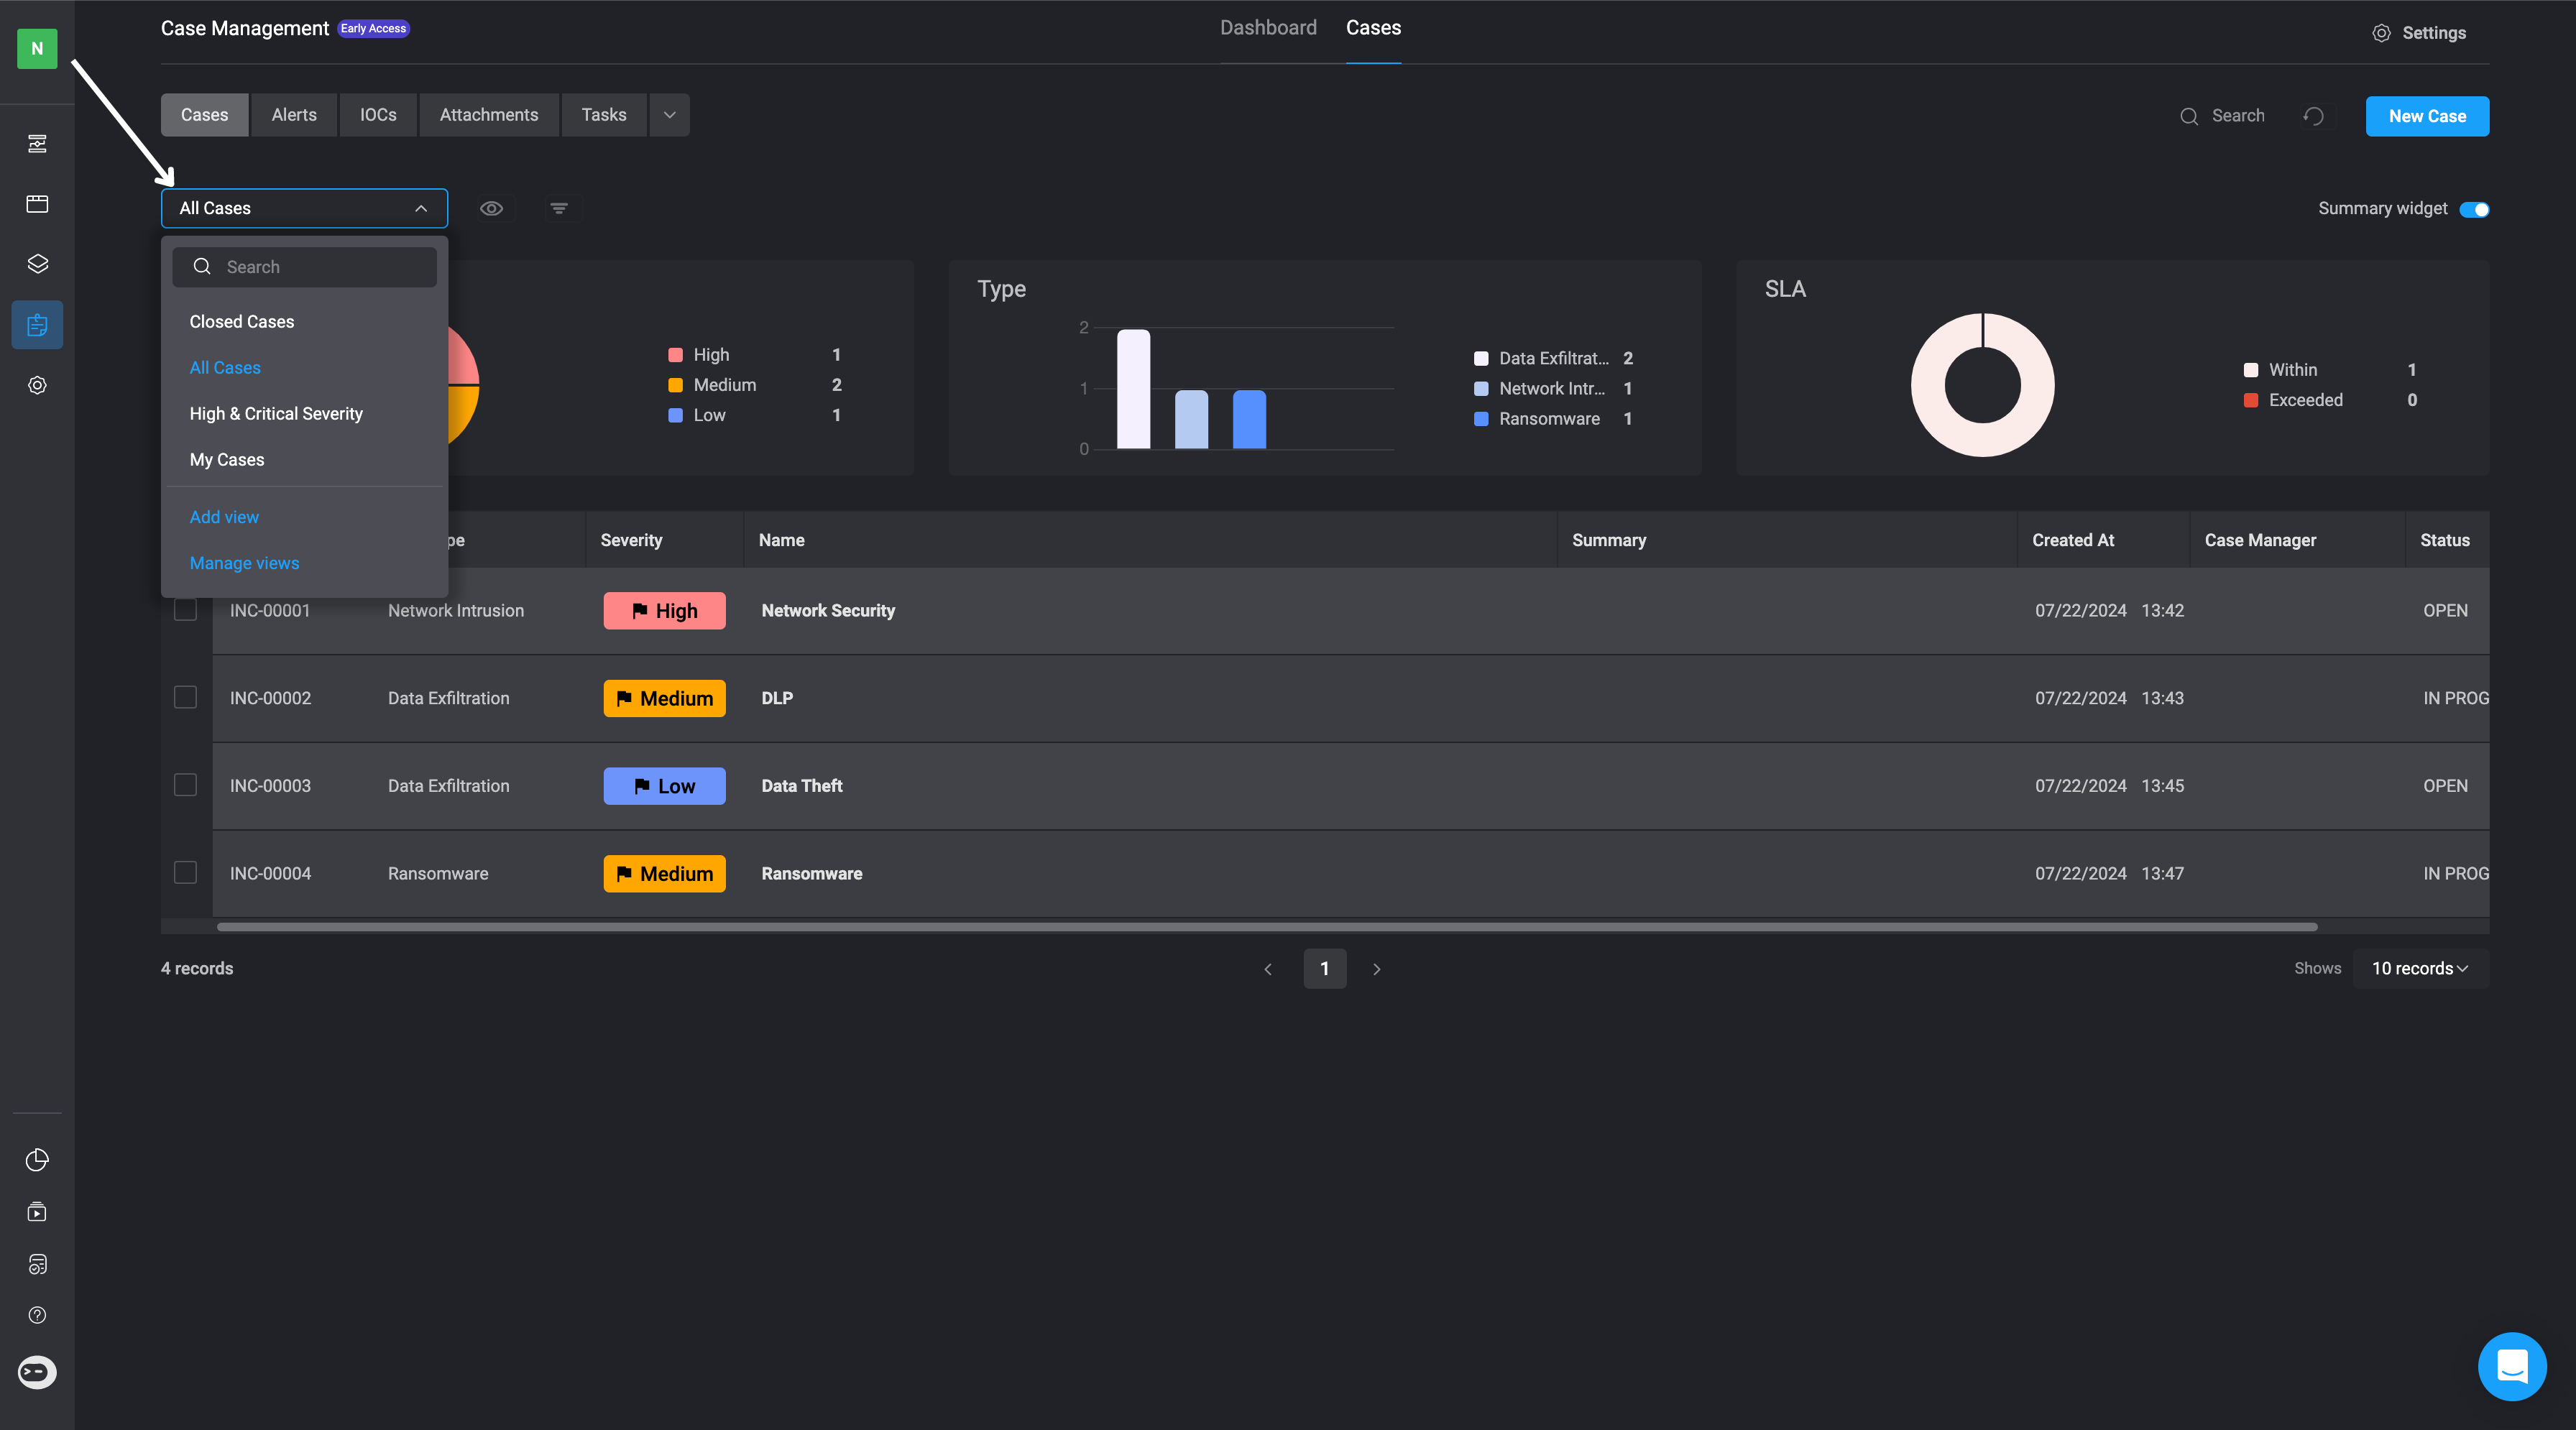 To create a custom table view, click 'Add View' and enter a name for your new view.
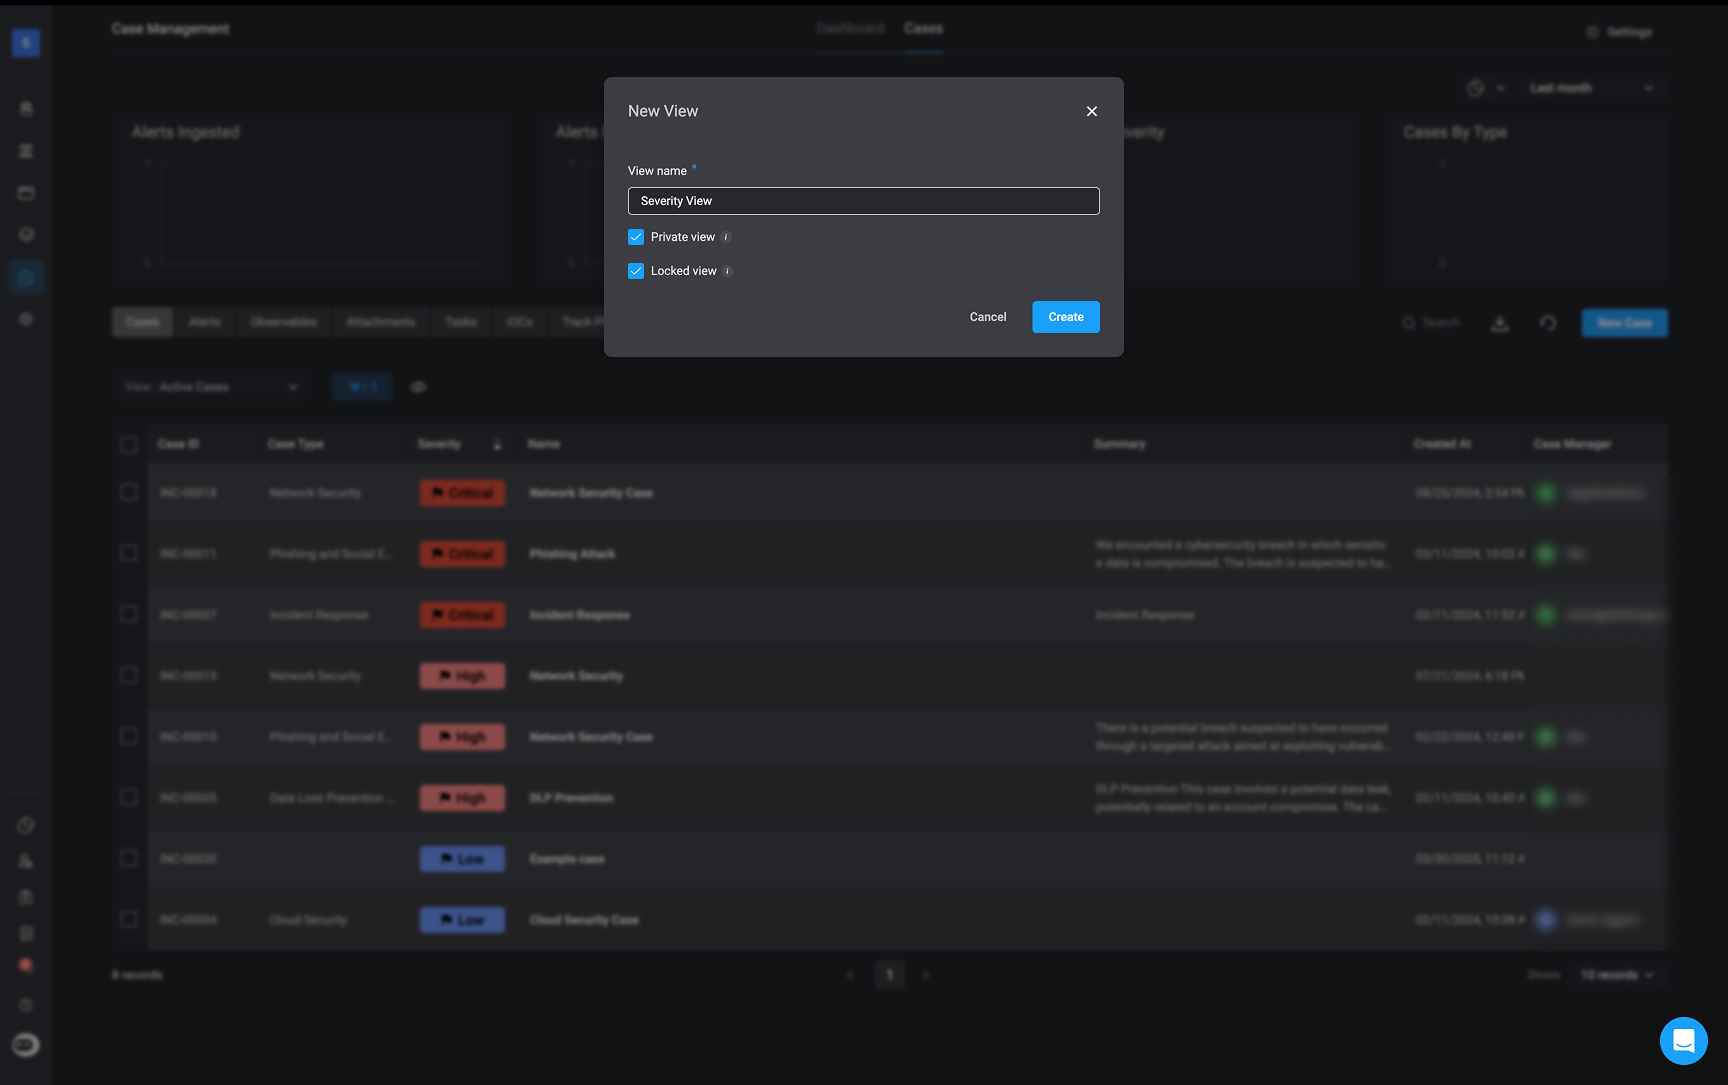
* **Private View**: When selected, the view is only visible to the creator and hidden from other users. If left unchecked, the view is public and can be accessed and modified by all users.
* **Locked view**: When checked, the view will be visible to all users, but only [Case Management Admins](/docs/case-management/permissions#workspace-scope-permissions) will be able to make changes to it.
To make changes to a view when **Locked View** is enabled, a user must have the `case_management:admin` permission.
To create a custom table view, click 'Add View' and enter a name for your new view.
* **Private View**: When selected, the view is only visible to the creator and hidden from other users. If left unchecked, the view is public and can be accessed and modified by all users.
* **Locked view**: When checked, the view will be visible to all users, but only [Case Management Admins](/docs/case-management/permissions#workspace-scope-permissions) will be able to make changes to it.
To make changes to a view when **Locked View** is enabled, a user must have the `case_management:admin` permission.
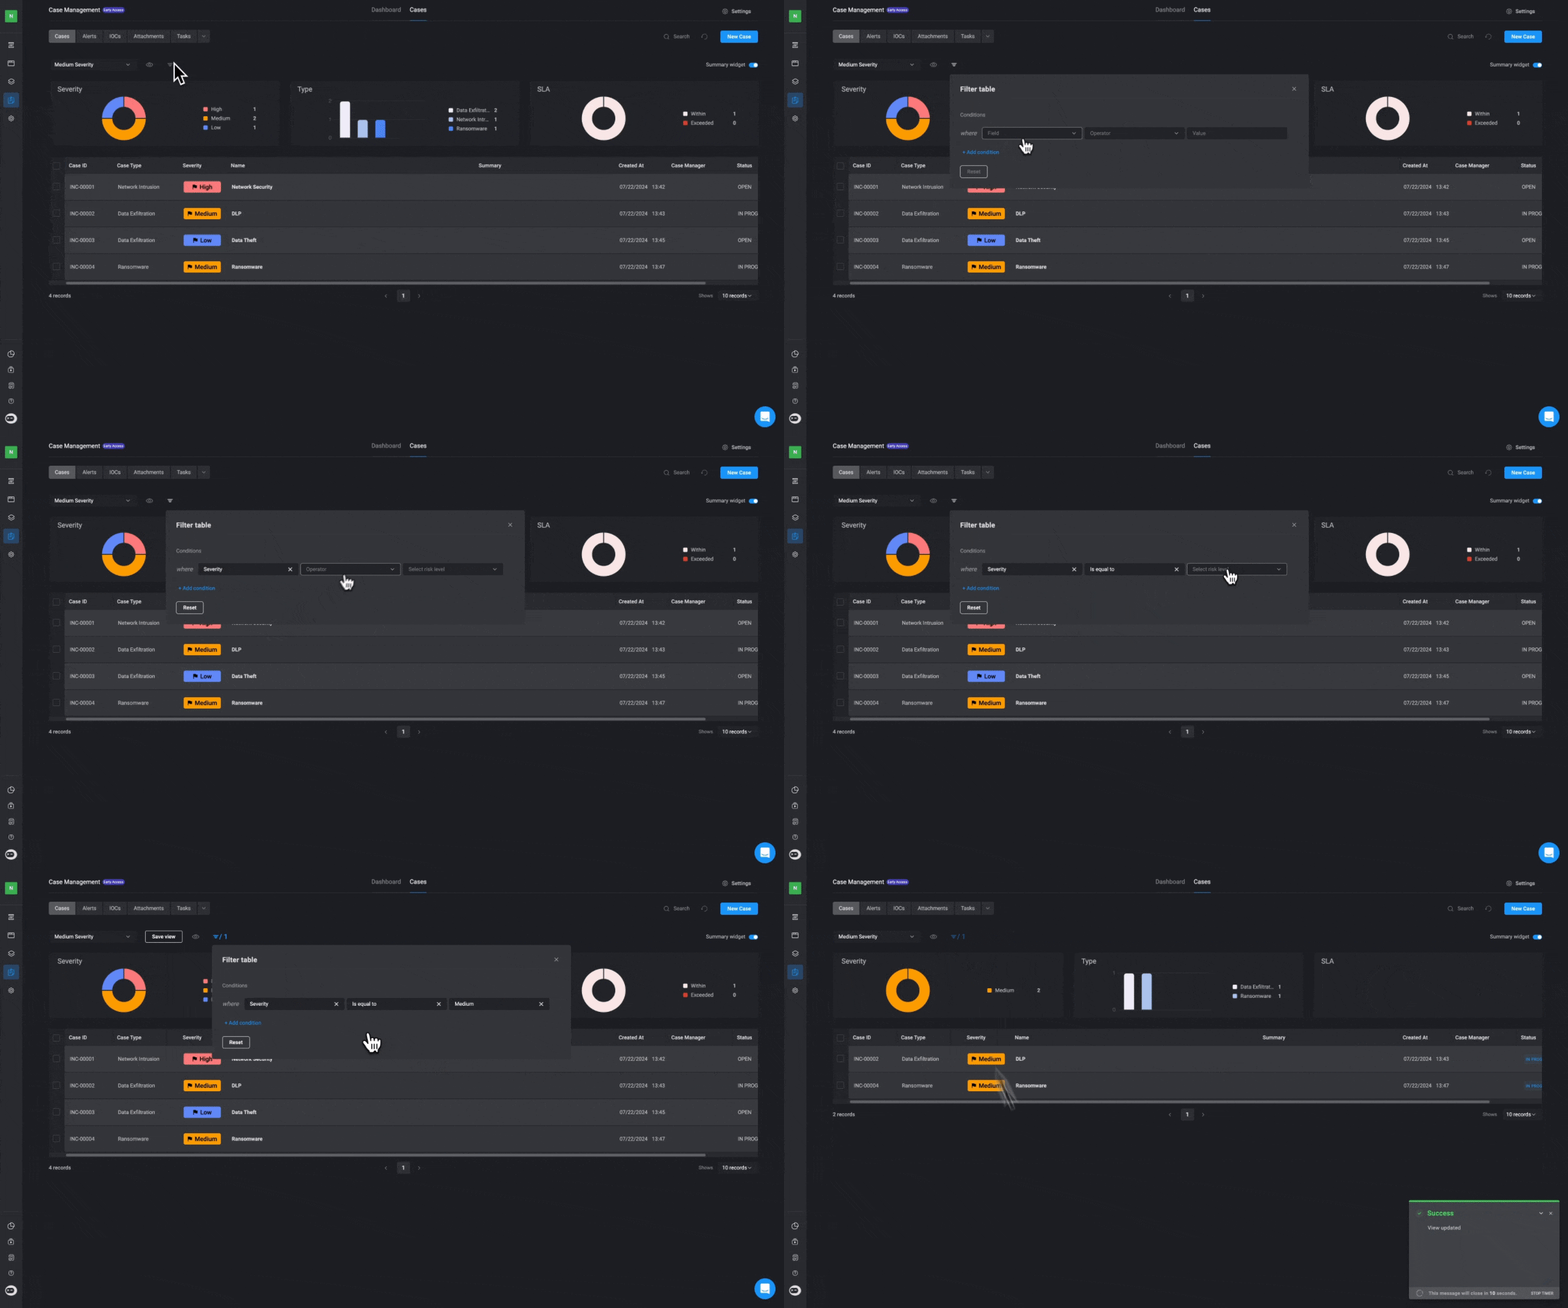
Proceed by creating a conditional statement you would like to apply to the table view you just created. You can also click on the icon to choose which columns you would like to display, drag columns to change their order in the table or sort the columns by hovering over the column headers and clicking the up or down arrow. Then click "Save View."
You can also edit the Table View you created by clicking on the dropdown menu and selecting the 'Manage View' option. To make any changes, click the "Manage View" button. If you want to delete the view you created, click the button.
 ***
## Filter Custom Tables by Case Type.
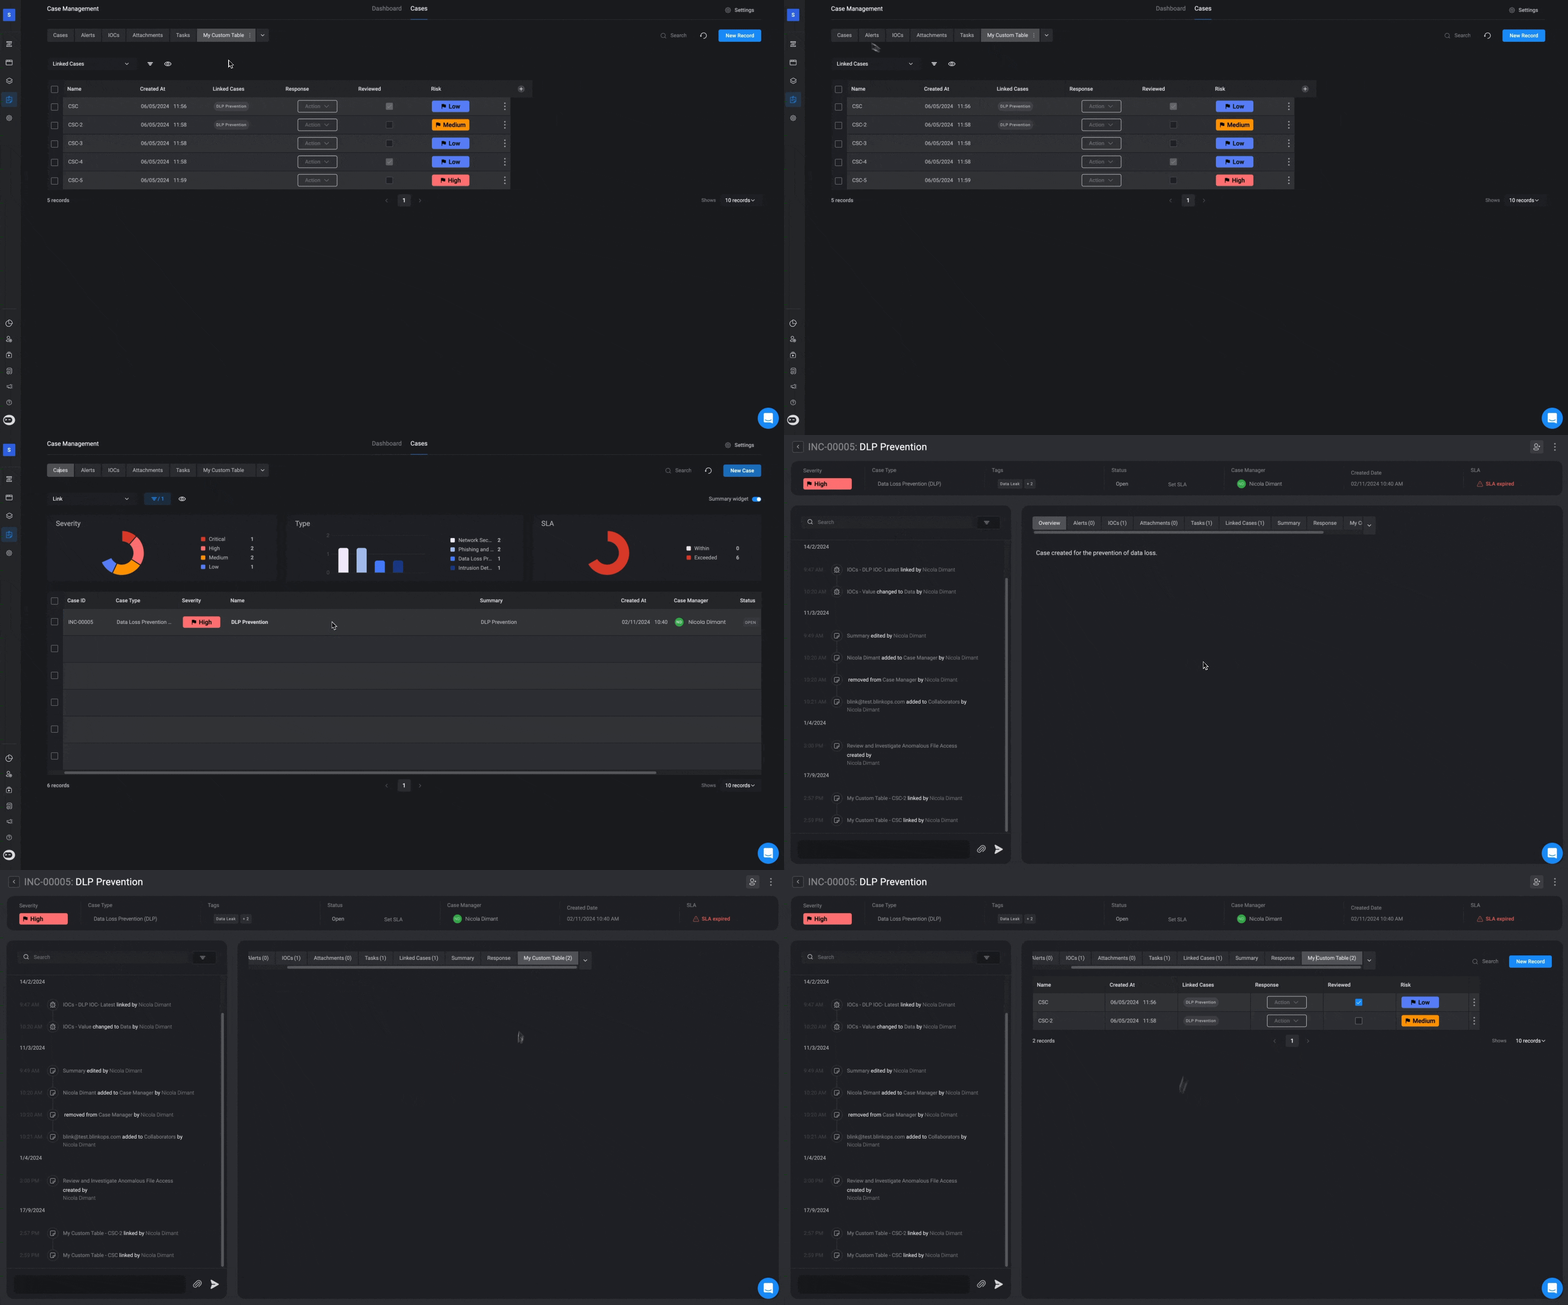
In your Custom Table, if you choose to display the "Linked Cases" column, you can configure it to filter the table by a specific Case Type.
***
## Filter Custom Tables by Case Type.
In your Custom Table, if you choose to display the "Linked Cases" column, you can configure it to filter the table by a specific Case Type.
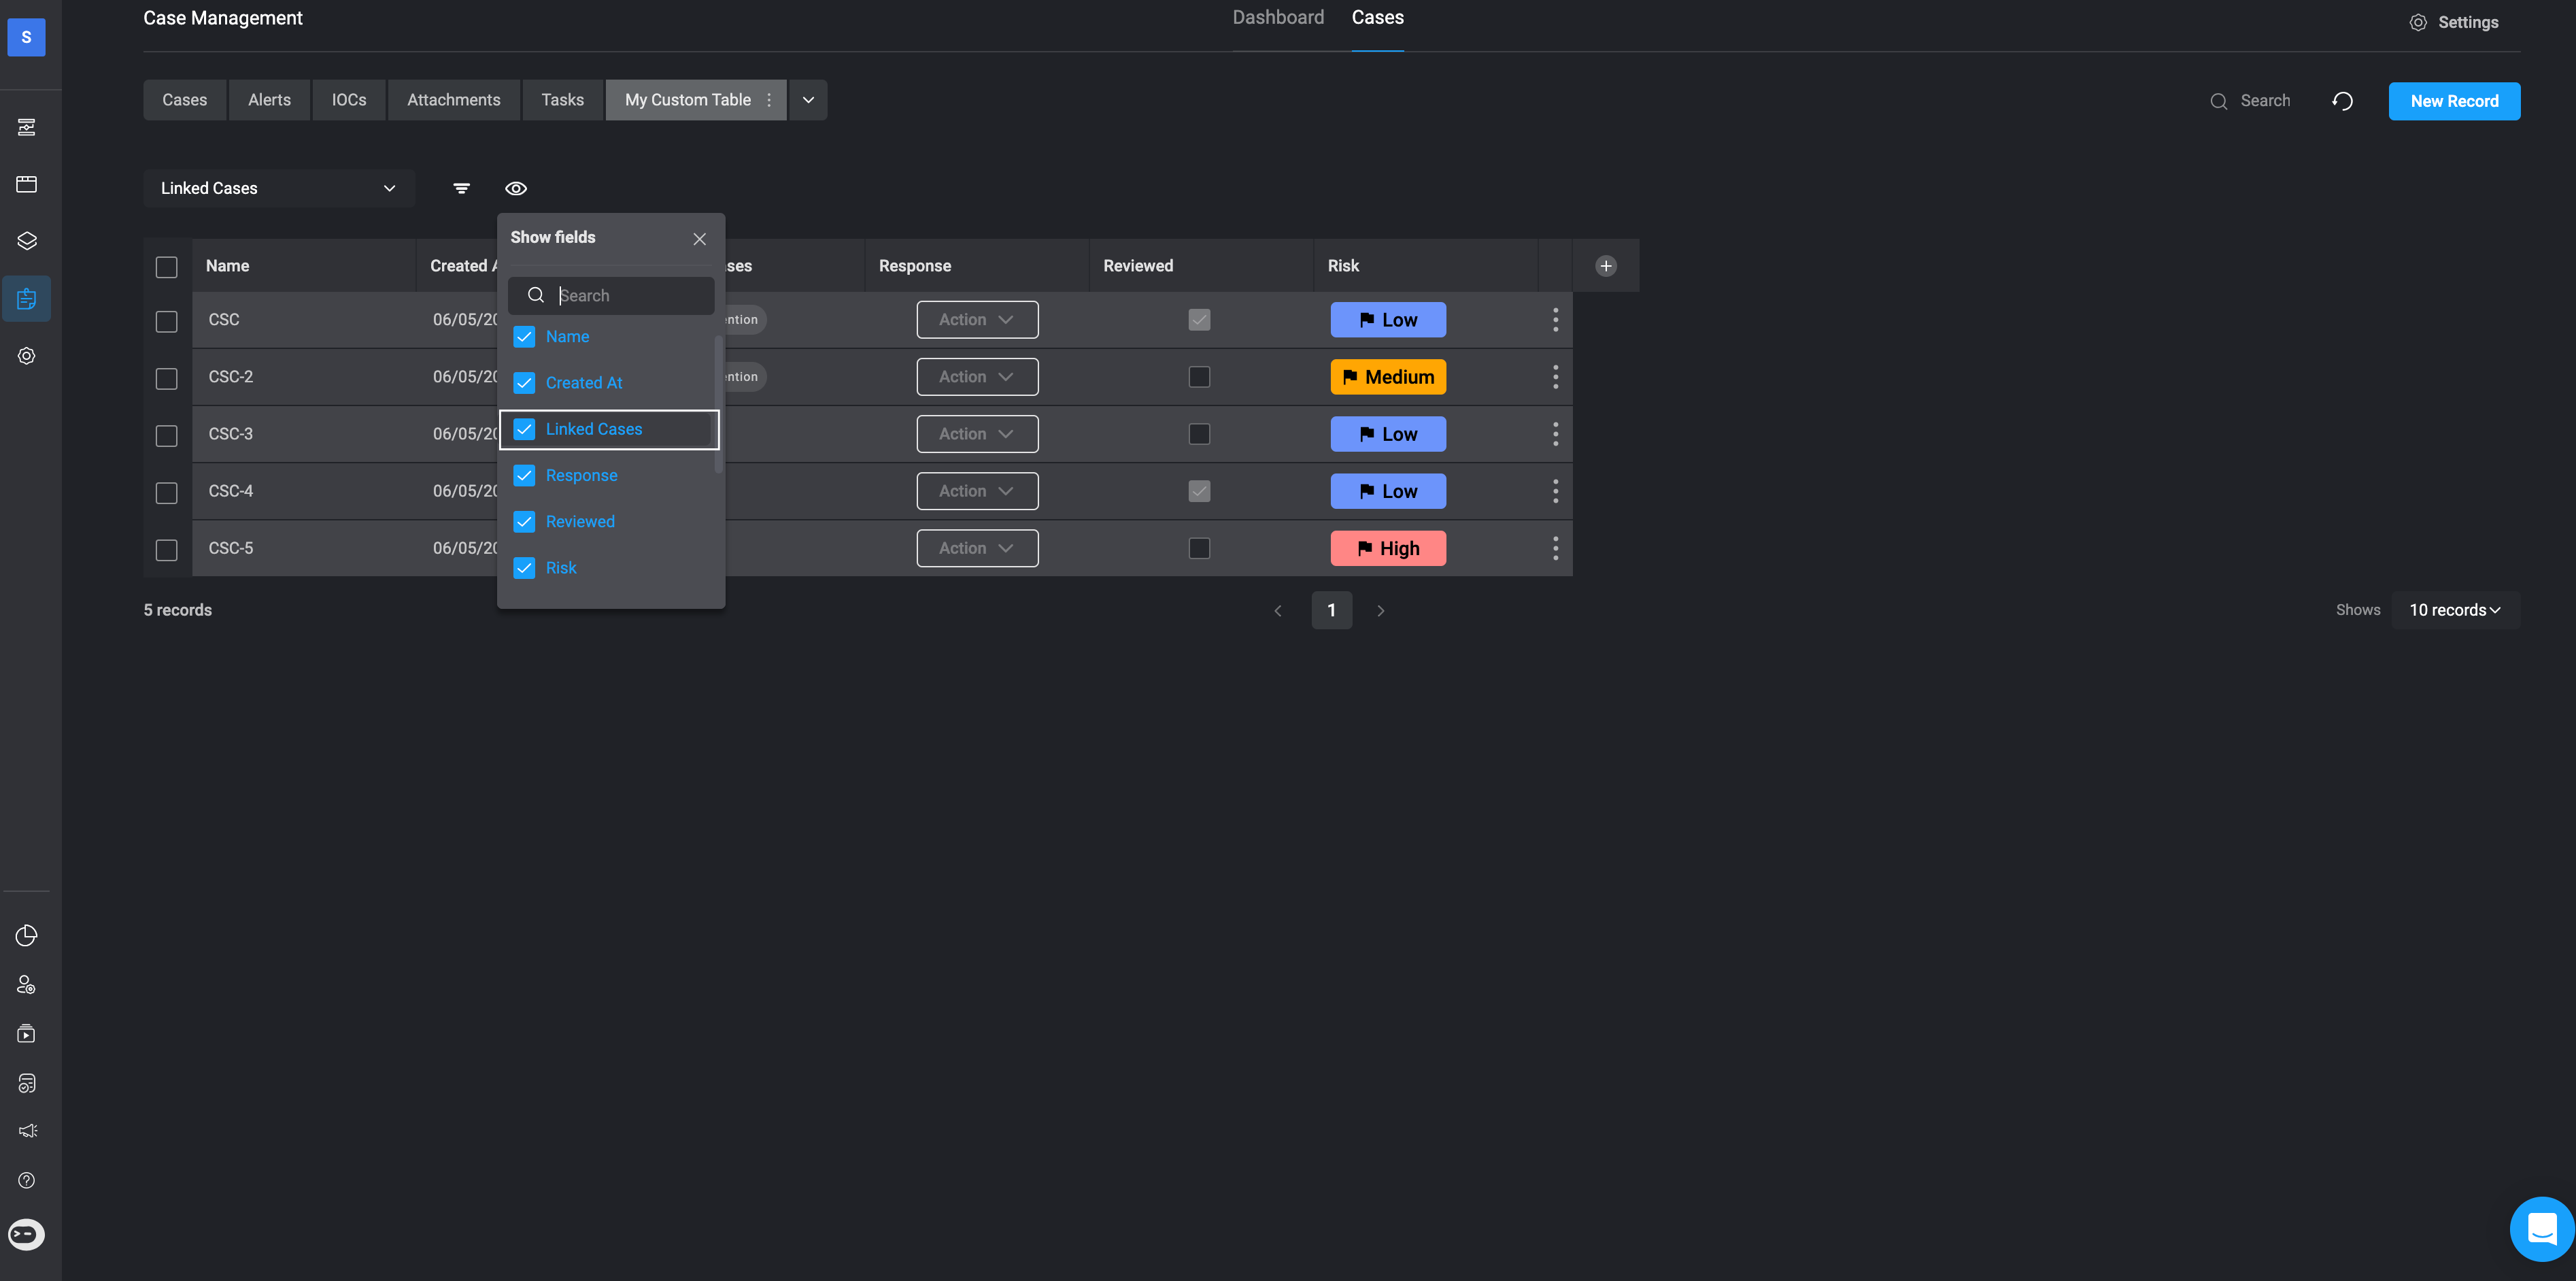
After creating your Custom Table, click the button and check the box next to the "Linked Cases" field. This will display the "Linked Cases" column in your Custom Table.
Next, click the icon next to "Linked Cases" and select "Edit." A popup will appear. In the "Filter By Type" section, check the box next to the Case Types you want to filter the Custom Table by. If you do not select a Case Type under "Filter By Type" section, the Custom Table will be presented on **all Cases**.
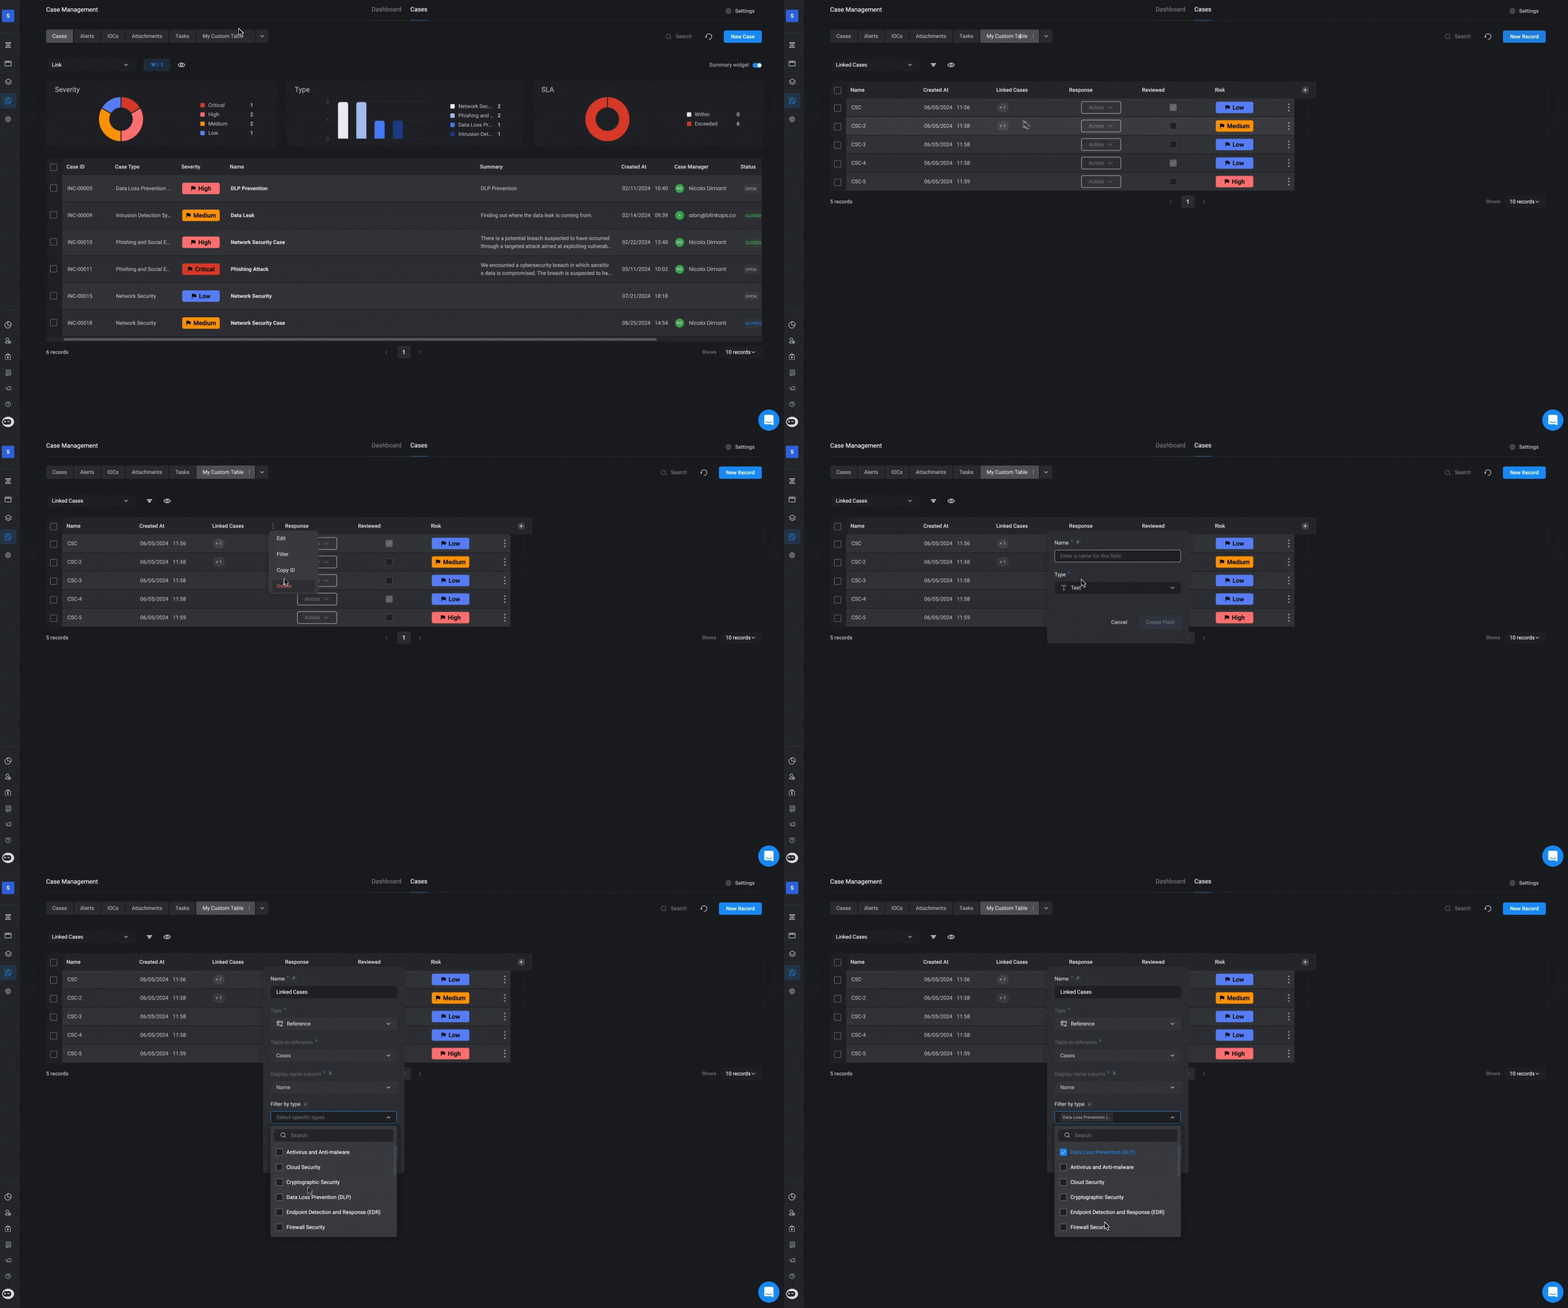 When viewing a Case, your Custom Table will now only appear as a separate tab **if the Case’s Case Type matches** one of the types you selected in the previous step.