> ## Documentation Index
> Fetch the complete documentation index at: https://docs.blinkops.com/llms.txt
> Use this file to discover all available pages before exploring further.

# About Attachments

> Upload and manage file attachments linked to cases, alerts, and observables in Blink case management.

## Attachments in Case Management

Attachments allow you to upload and link important files—such as documents, screenshots, logs, or reports—to Cases, Alerts, Tasks, and Observables. This helps centralize all relevant information in one place, making it easier for teams to collaborate and investigate efficiently.

***

## Create a New Attachment

<Note>You can add attachments directly from a specific Case or through the main Attachments table. Each attachment can be associated with one or more records to provide context and improve traceability during the investigation process.</Note>

<Steps>
  <Step title="Navigate to the Attachments tab">
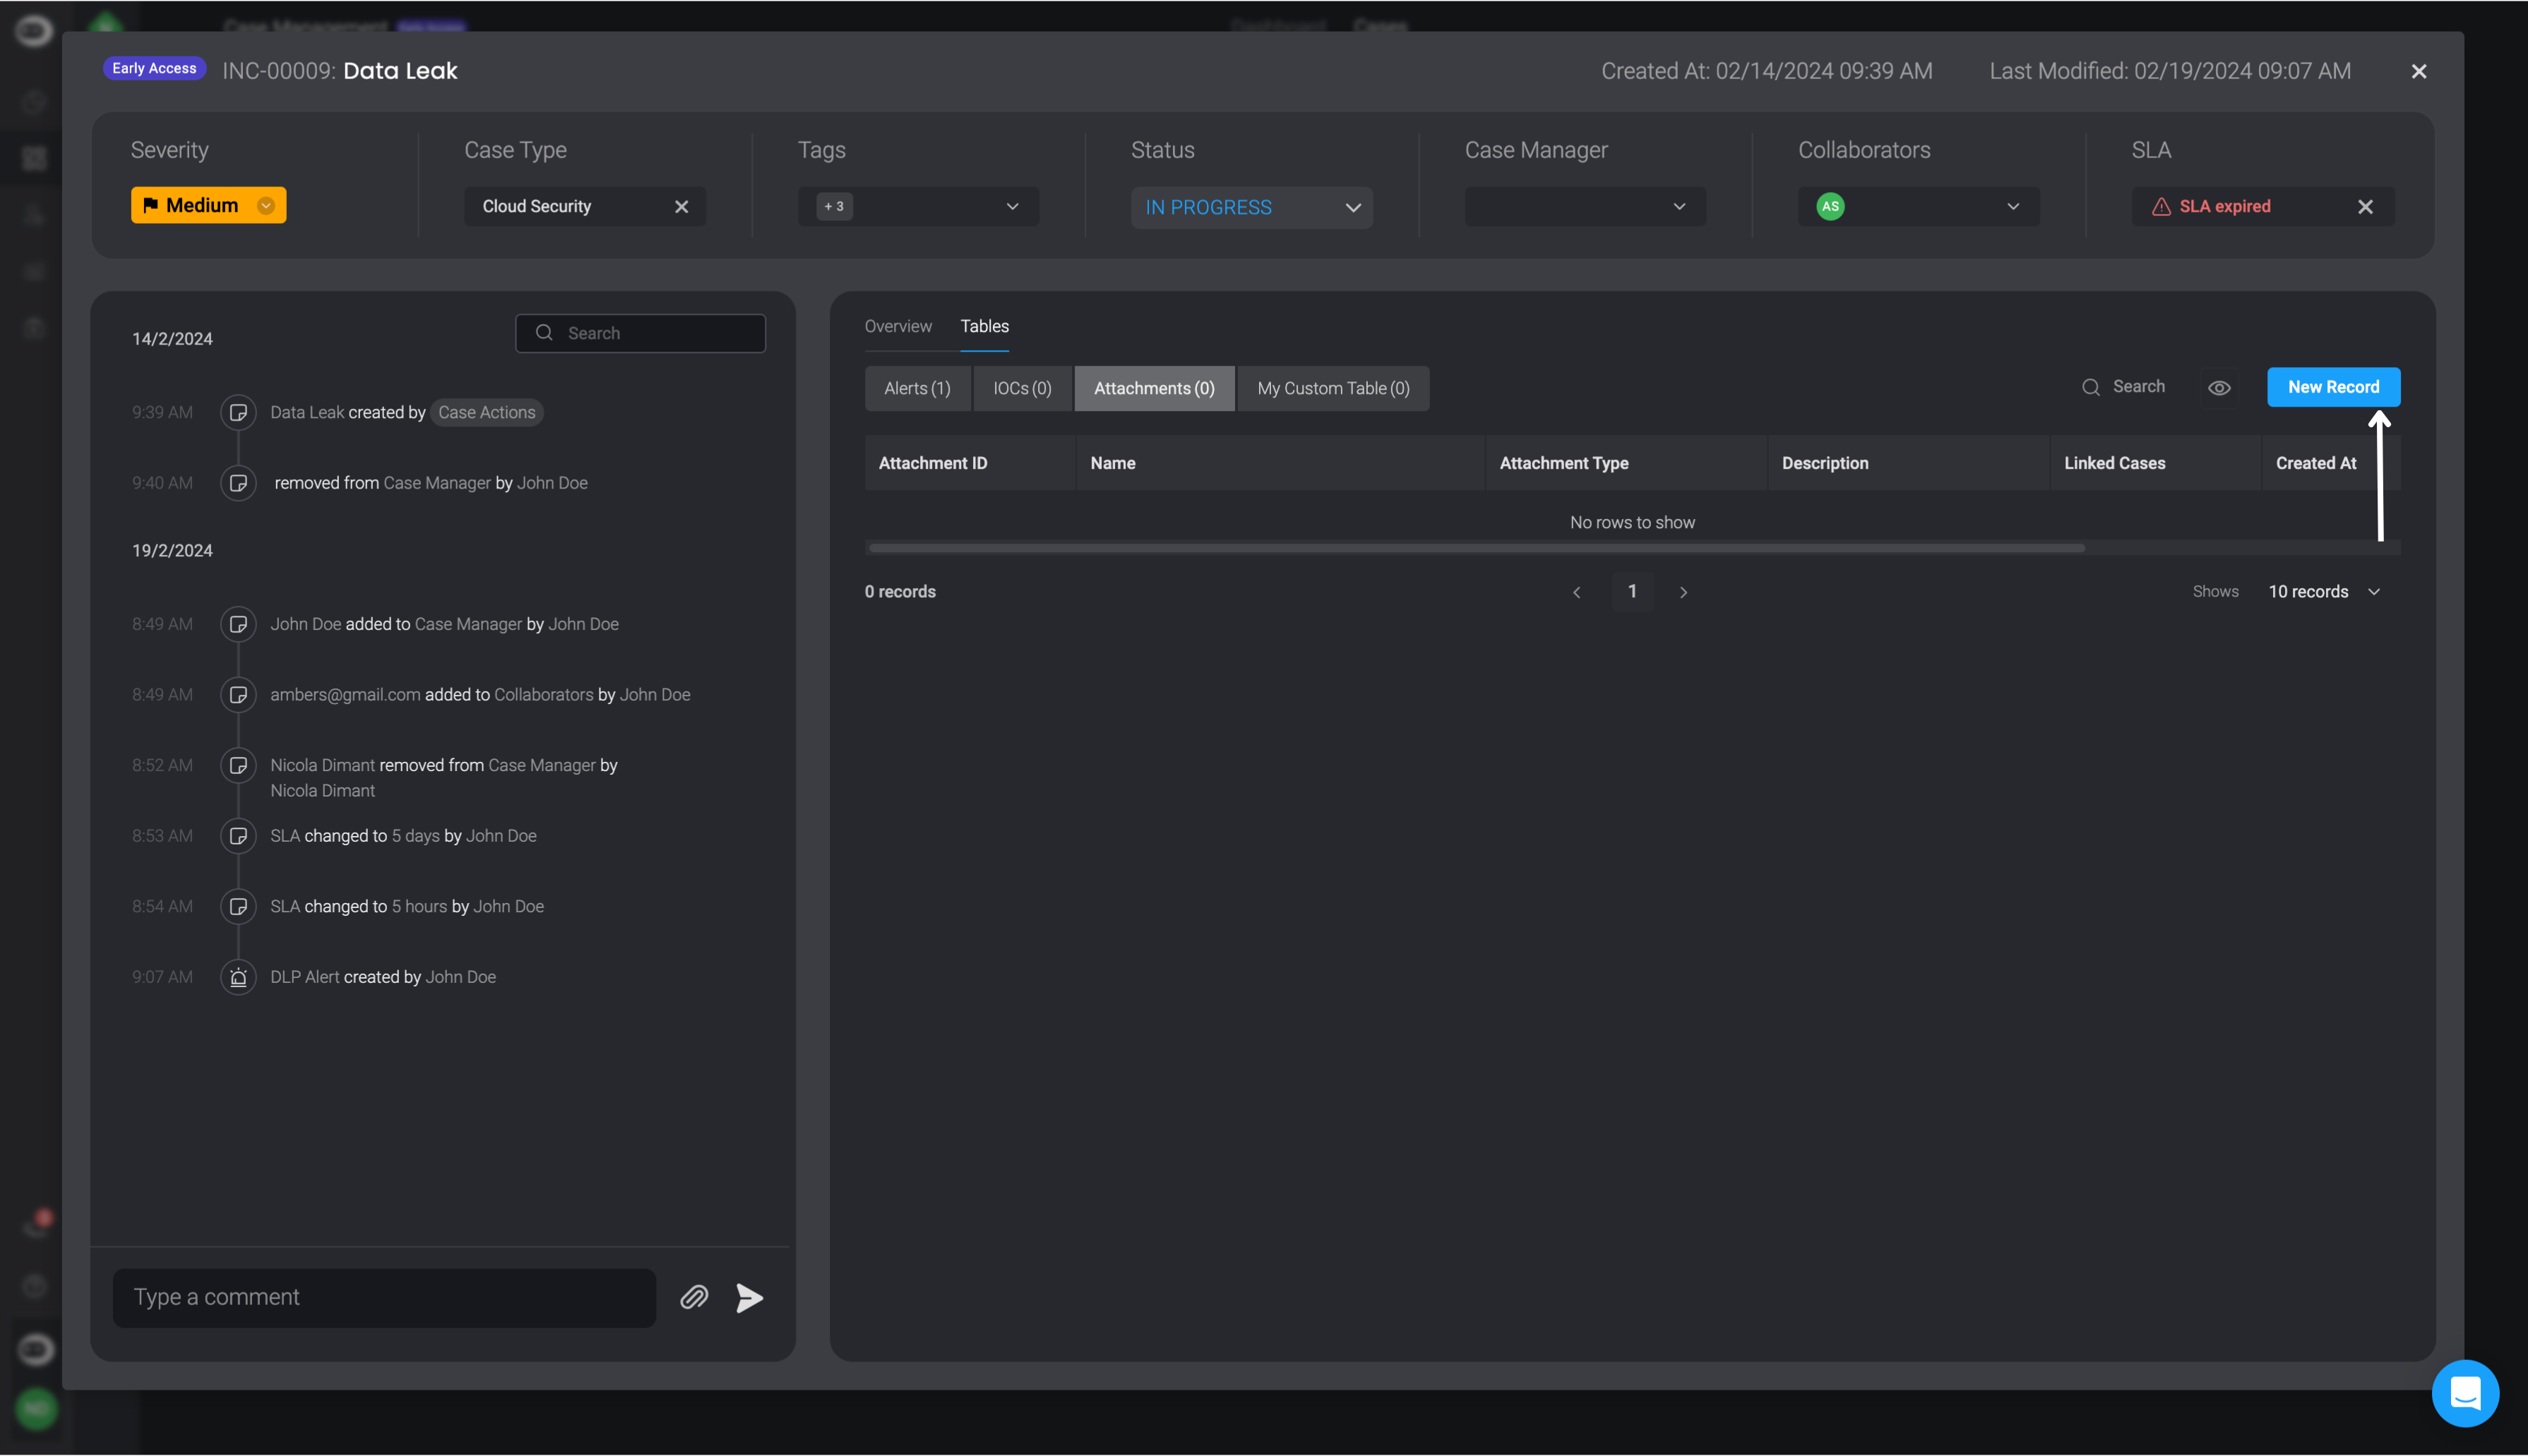
    To attach an Attachment to a Case, first double-click on the desired Case. In the [overview section](/docs/case-management/cases/case-overview#case-overview) of the selected Case, go to the ["Attachment" tab](/docs/case-management/cases/case-overview#tables). Then, click the "New Record" button in the top-right corner.

    <Frame>
      <img src="https://mintcdn.com/blinkops-2/UGyZ3yX79lqyx4Hr/img/CaseManagement/AddNewAttachment.png?fit=max&auto=format&n=UGyZ3yX79lqyx4Hr&q=85&s=ad1c87c012c80c54e7ccf9790eaa0d26" width="3580" height="2062" data-path="img/CaseManagement/AddNewAttachment.png" />
    </Frame>
  </Step>

  <Step title="Open the New Record Dialog Box">
    <Frame>
      <img src="https://mintcdn.com/blinkops-2/a1zzdVRAg2RBMsIZ/img/CaseManagement/NewAttachment.png?fit=max&auto=format&n=a1zzdVRAg2RBMsIZ&q=85&s=c5c55bff5ee4a2d24e22f5305db15ca4" width="3563" height="2057" data-path="img/CaseManagement/NewAttachment.png" />
    </Frame>
  </Step>

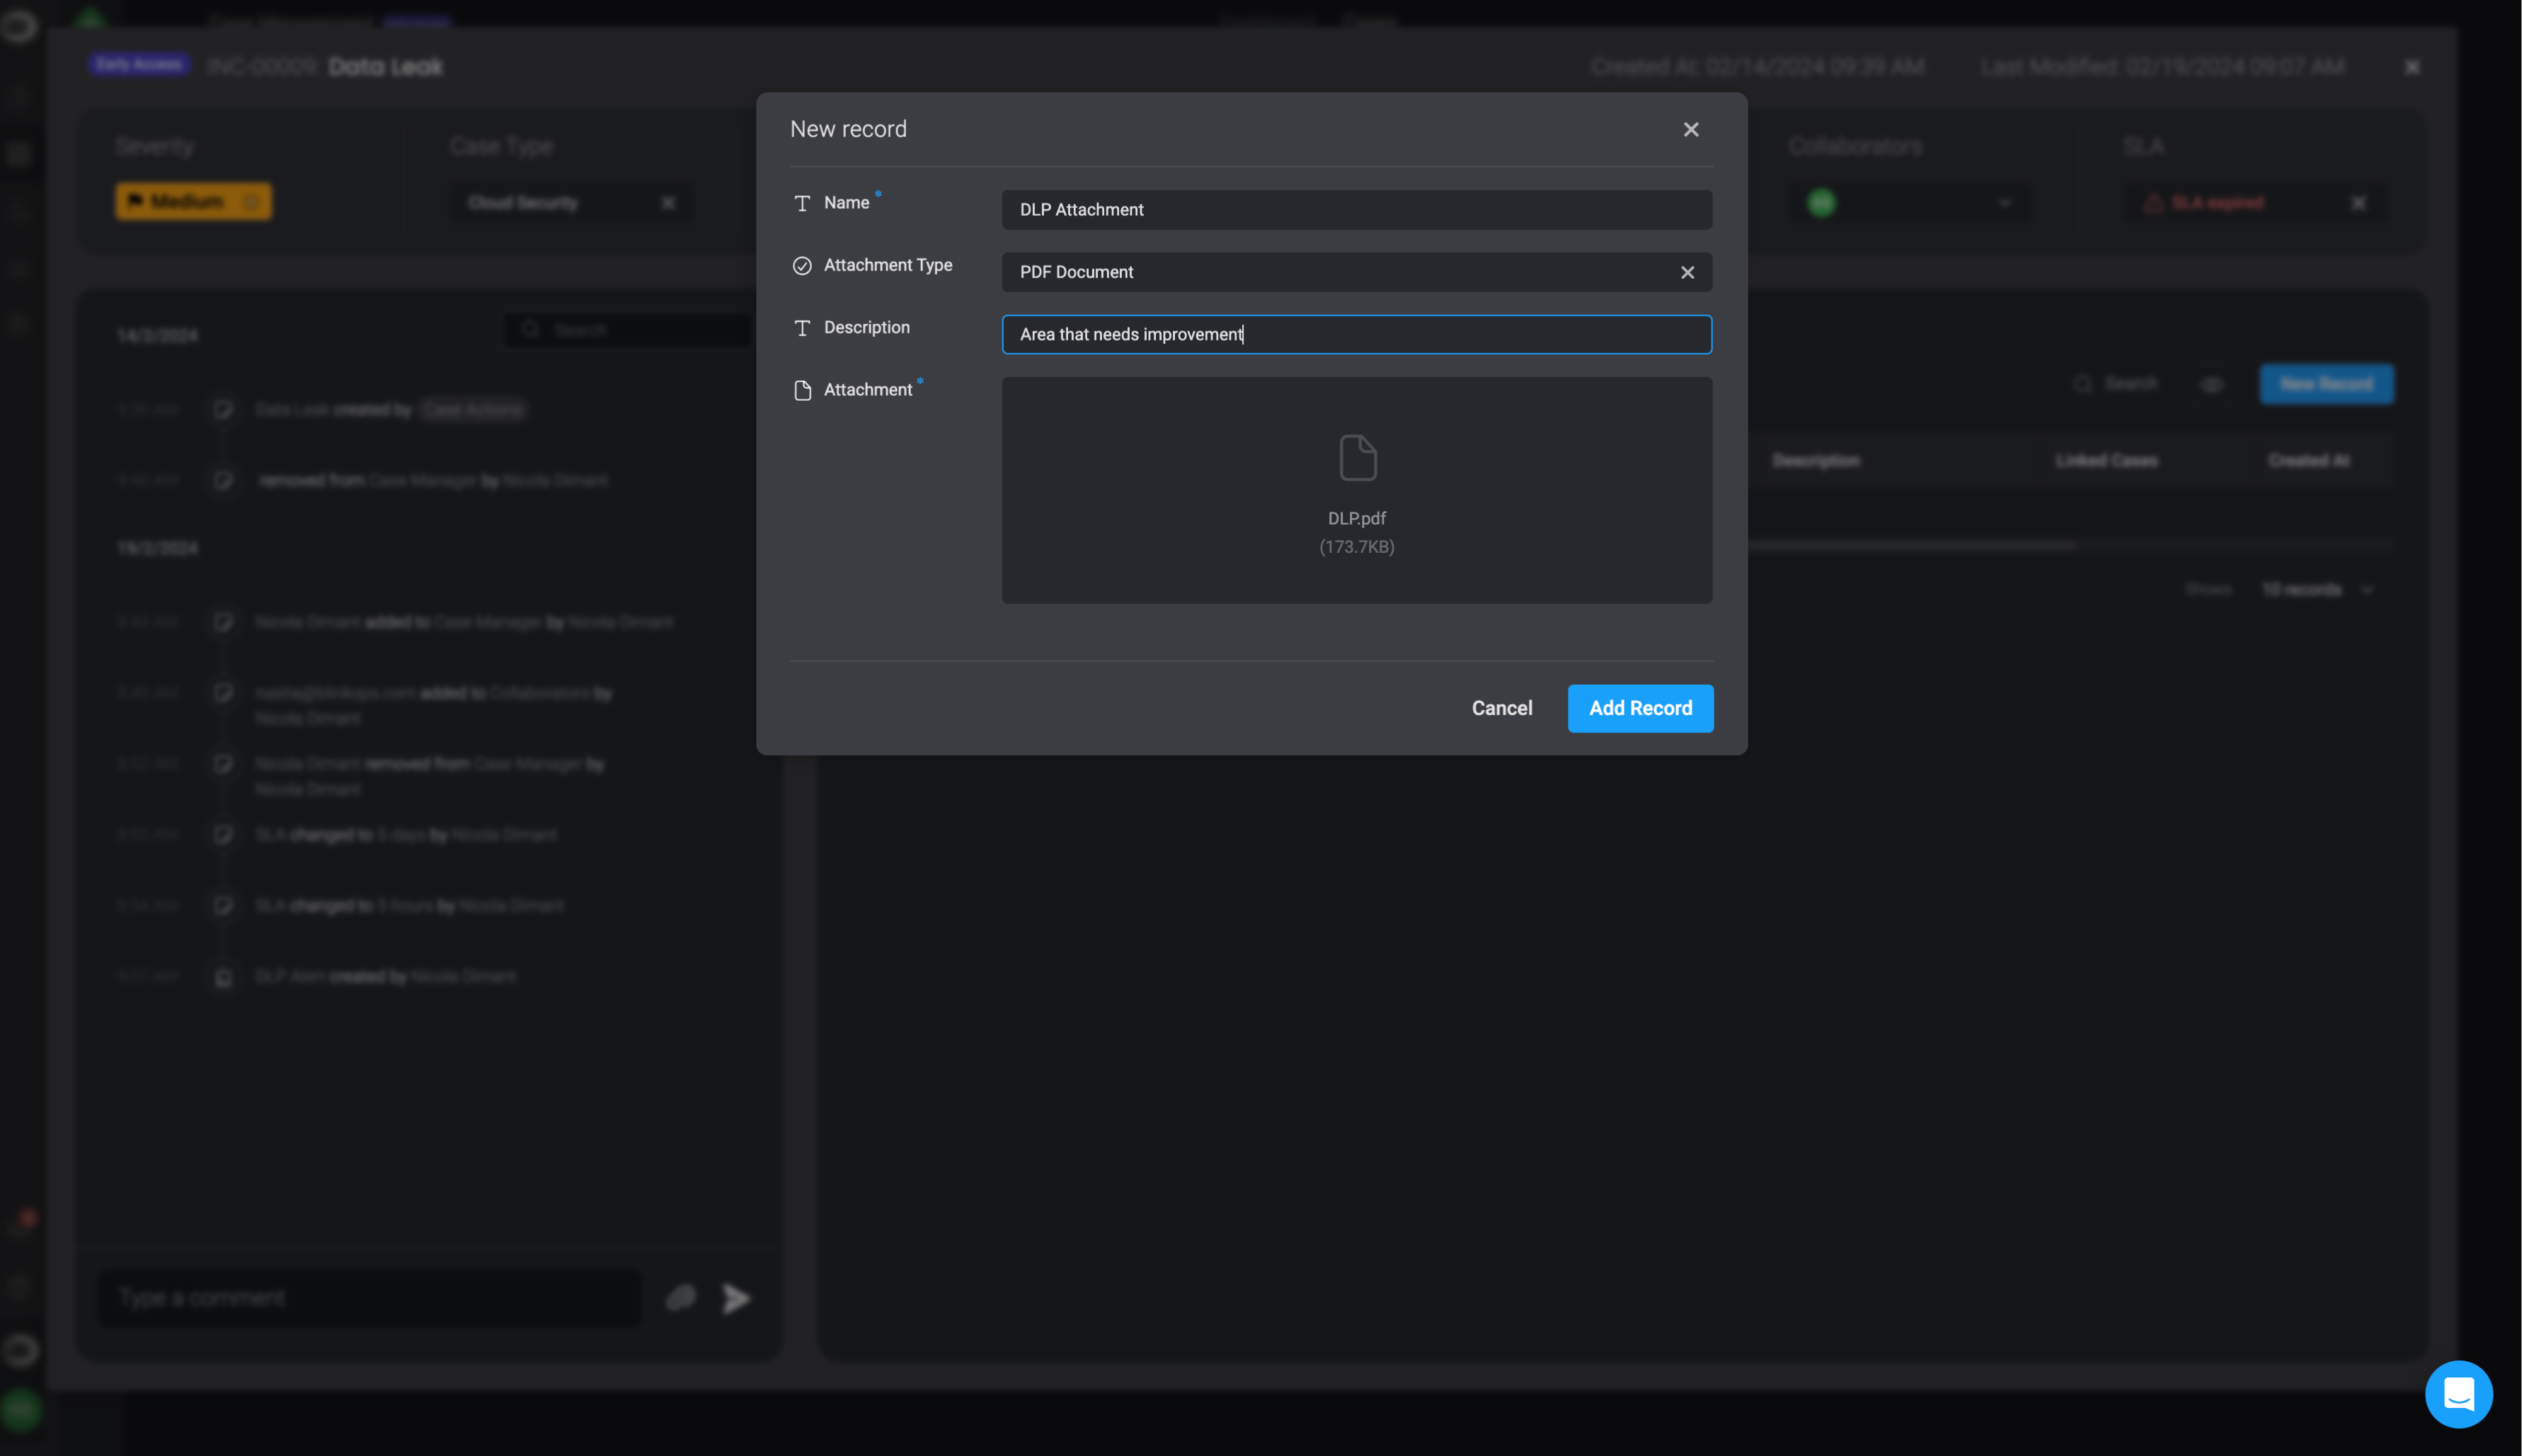
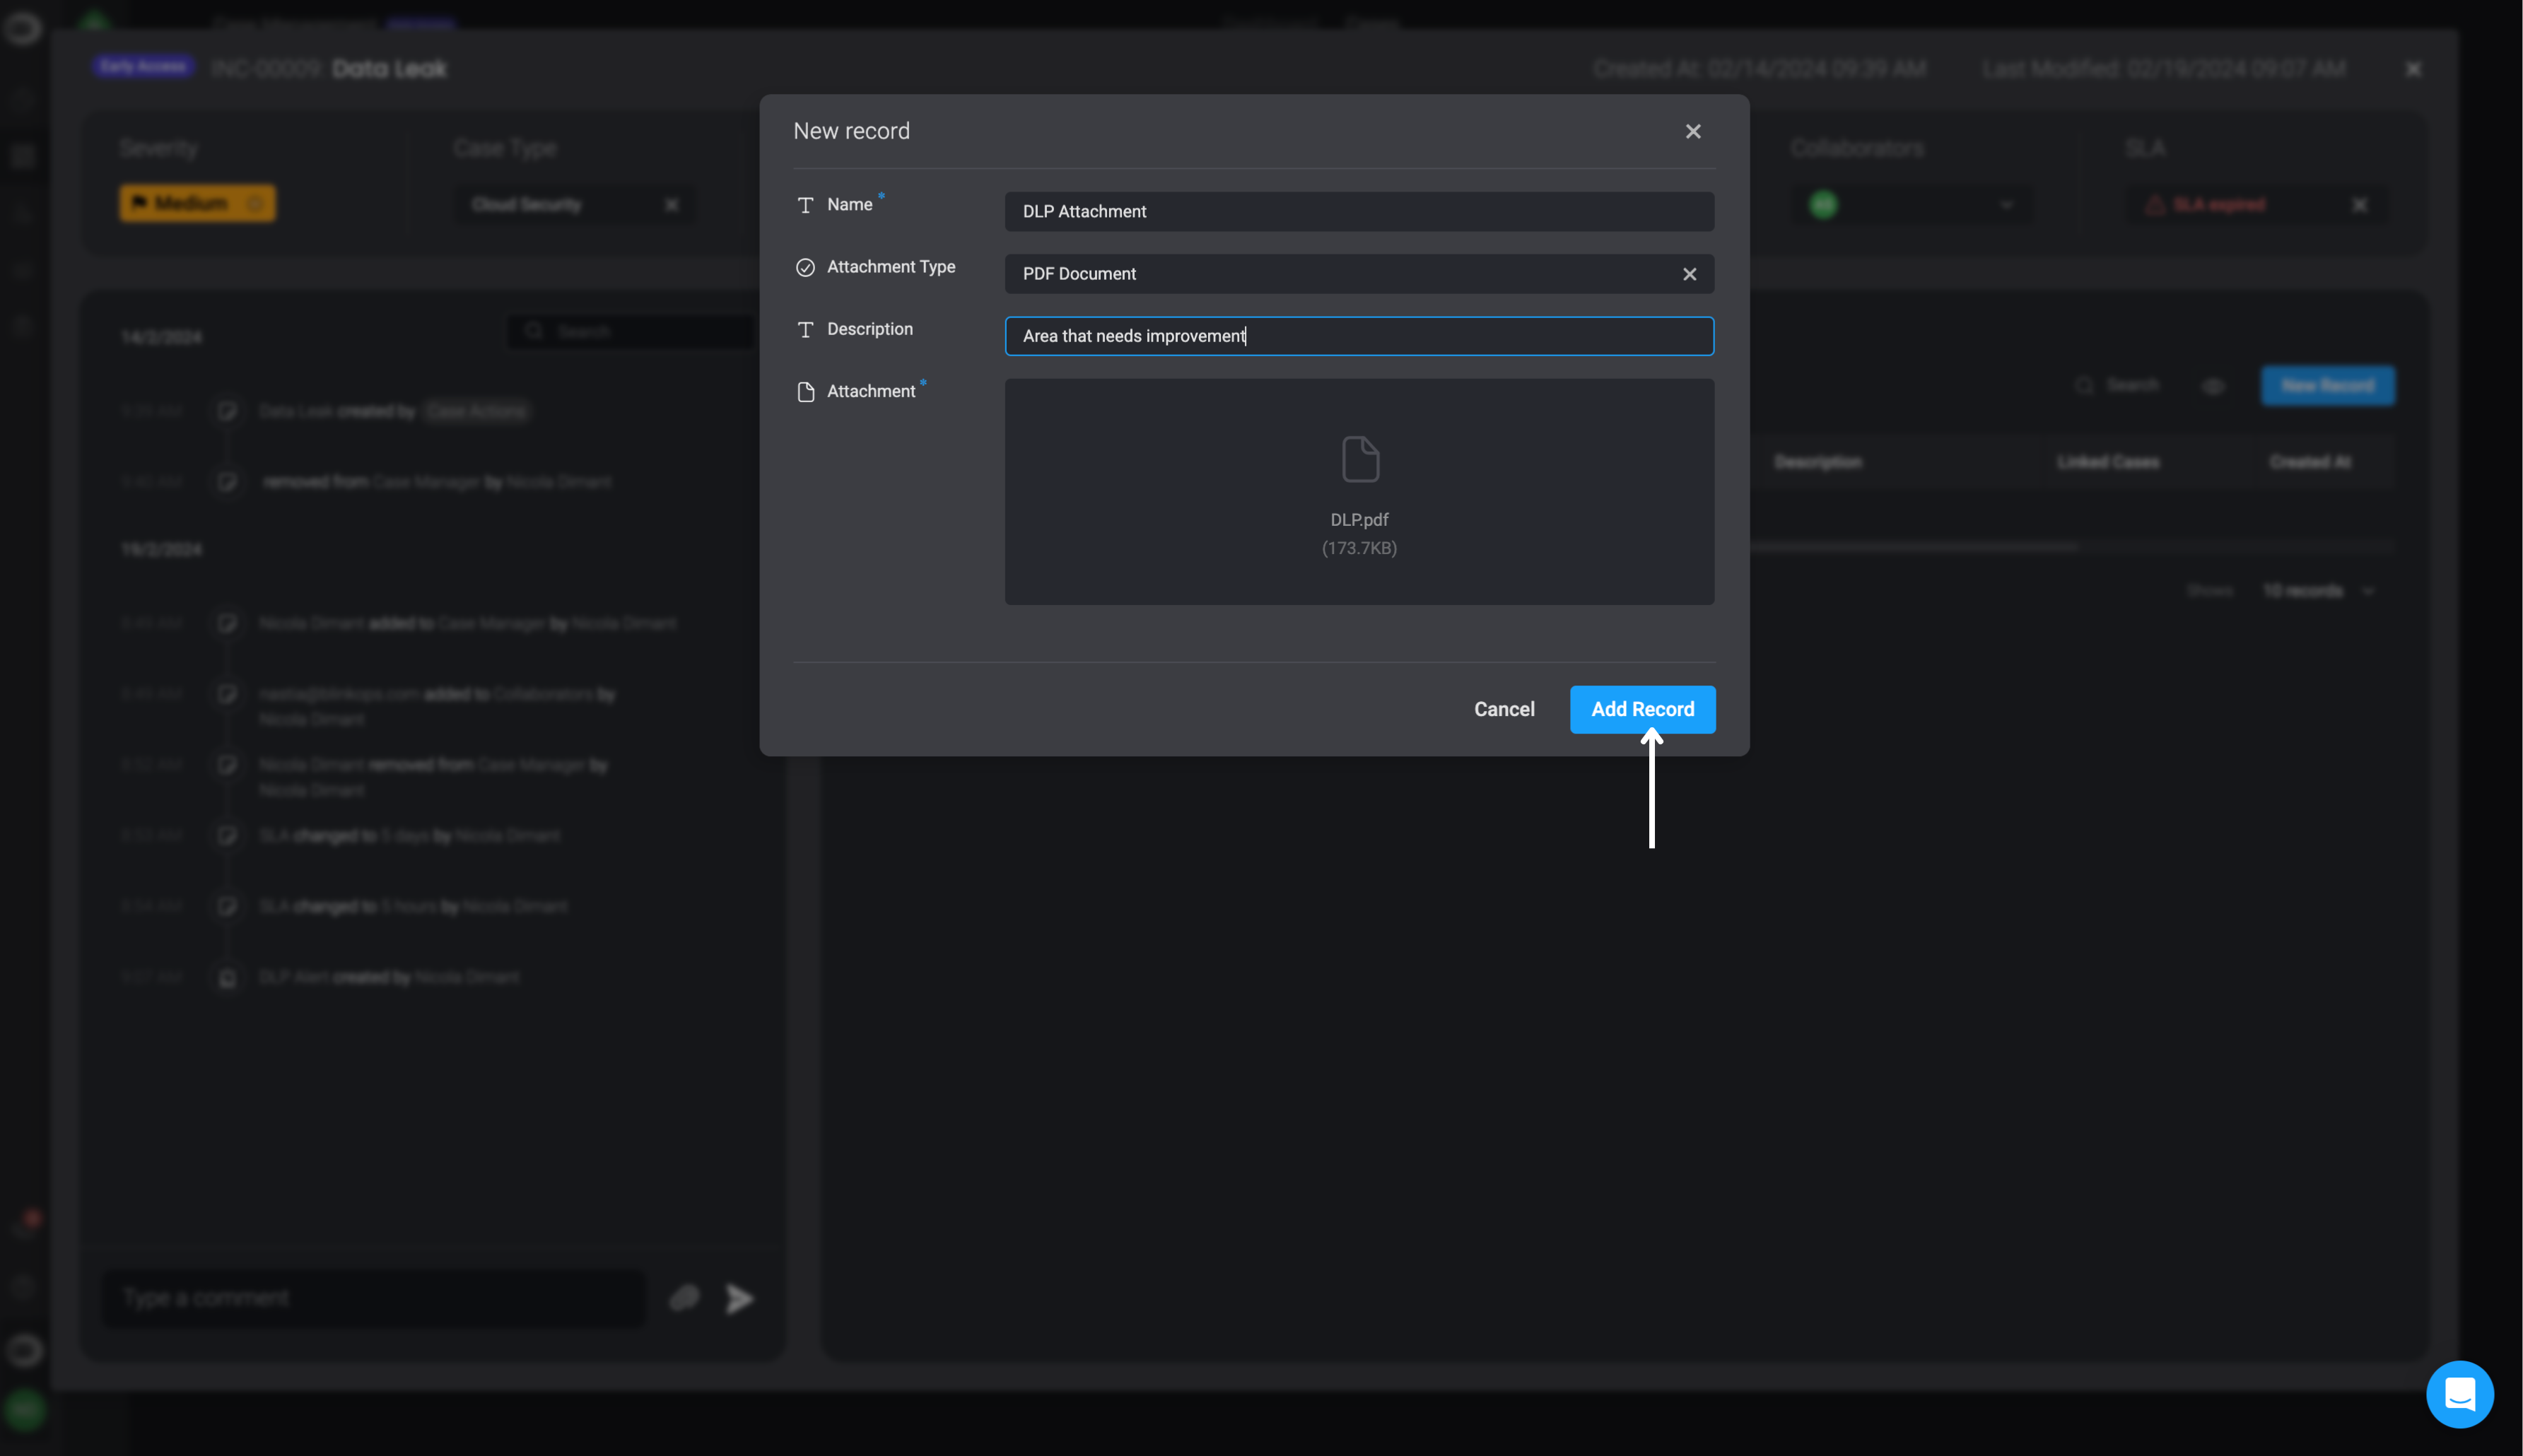
  <Step title="Fill in all the necessary fields.">
    Once completed select the 'Add Record' button in the bottom-right corner

    <div className="integrations-table">
      | Fields                 | Description                                                                       |
      | ---------------------- | --------------------------------------------------------------------------------- |
      | Name                   | The name given to the attachment                                                  |
      | Attachment             | The attachment file being uploaded                                                |
      | Attachment Type        | The type of attachment                                                            |
      | Description (Optional) | A written description for the Attachment                                          |
      | Linked Cases           | The Name and ID of the Case(s) you want to link to this current attachment.       |
      | Linked Alerts          | The Name and ID of the Alerts(s) you want to link to this current attachment.     |
      | Linked Tasks           | The Name and ID of the Task(s) you want to link to this current attachment.       |
      | Linked Observables     | The Name and ID of the Observable(s) you want to link to this current attachment. |
    </div>

    <Frame>
      <img src="https://mintcdn.com/blinkops-2/UGyZ3yX79lqyx4Hr/img/CaseManagement/AddAttachmentButton.png?fit=max&auto=format&n=UGyZ3yX79lqyx4Hr&q=85&s=5a7e8c7625d27cbda71e8532978ad4b1" width="3569" height="2060" data-path="img/CaseManagement/AddAttachmentButton.png" />
    </Frame>
  </Step>
</Steps>

***

## Editing an Attachment

<Note>
  **Note**

  You can also **Edit an Attachment** directly within the **table tab** of a **case overview**. Simply double-click on the table row to make any necessary changes. Once you have completed your edits, click anywhere on the screen to save the changes.
</Note>

<Steps>
  <Step title="Choose an Attachment to Edit">
    Select the **Attachment** you would like to edit and click on it.
  </Step>

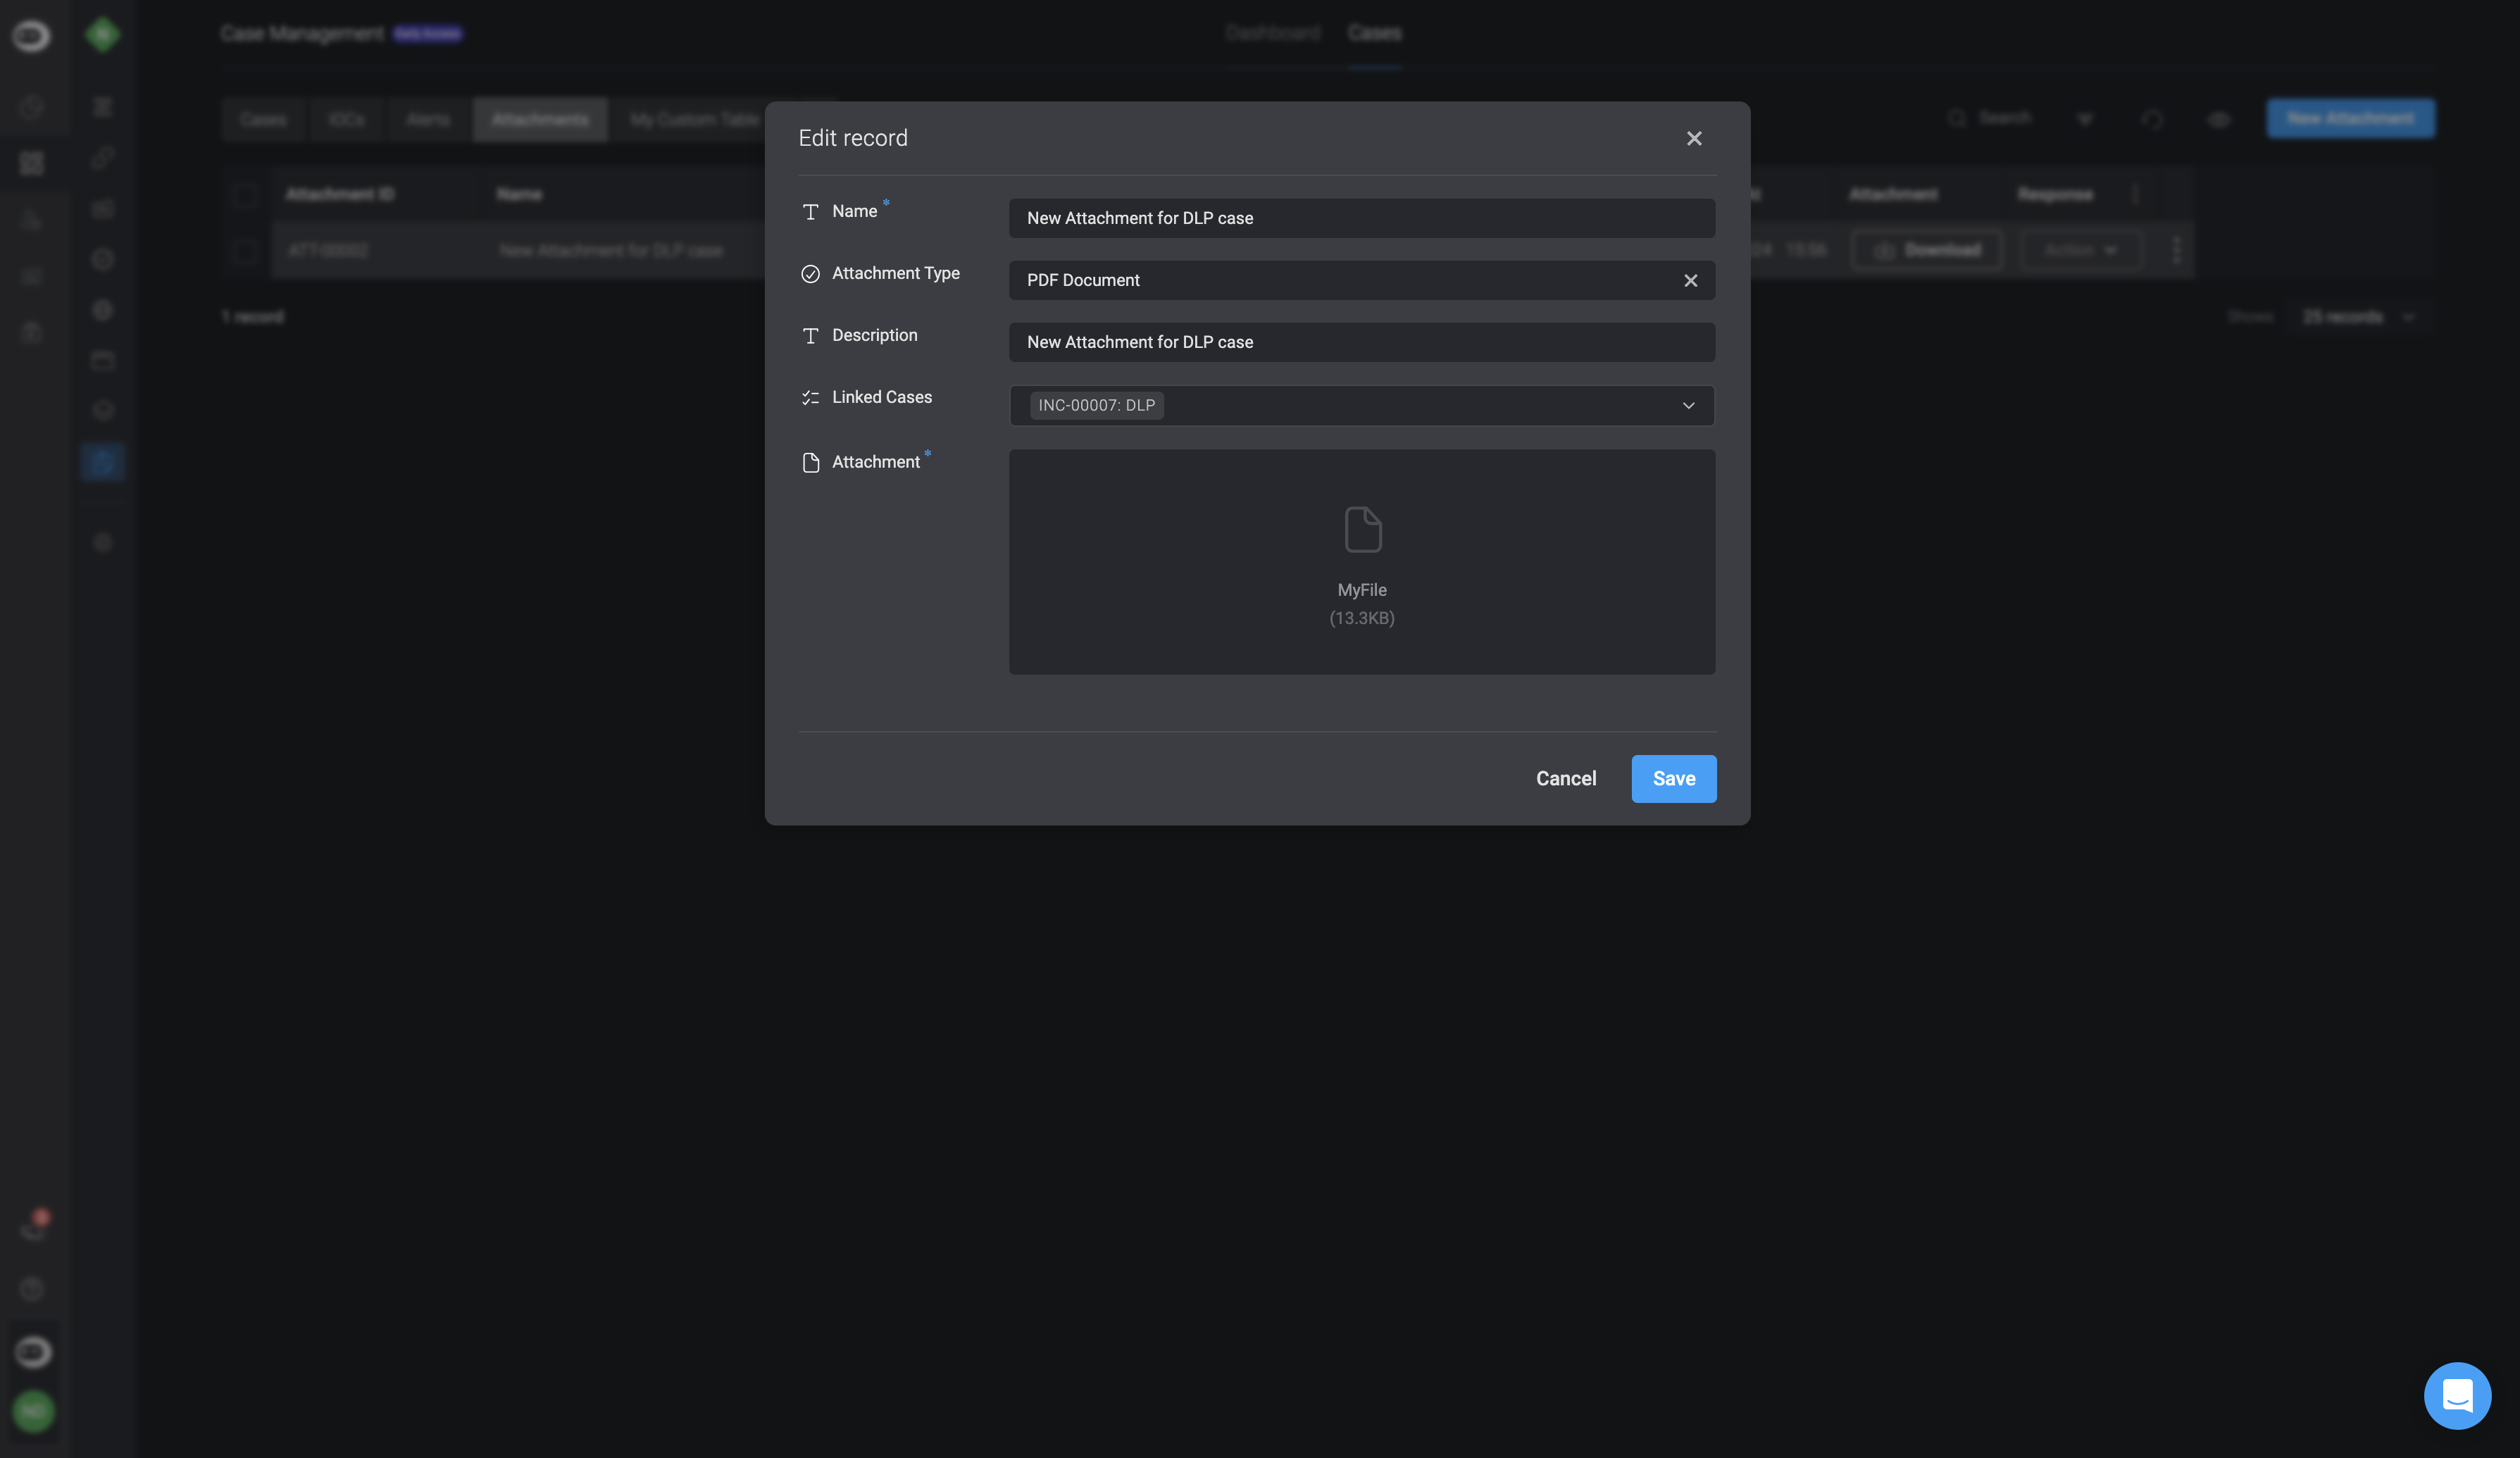
  <Step title="The 'Edit Record' Form will appear">
    <Frame>
      <img src="https://mintcdn.com/blinkops-2/BRfSL_EOO1Uh43ic/img/CaseManagement/EditAttachment.png?fit=max&auto=format&n=BRfSL_EOO1Uh43ic&q=85&s=fa2ec30956564ddf3e226b66ee62f920" width="3578" height="2070" data-path="img/CaseManagement/EditAttachment.png" />
    </Frame>
  </Step>

  <Step title="Make desired changes">
    Make any necessary changes you would like to the Attachment's fields and then click **Save** in the bottom-right corner.
  </Step>

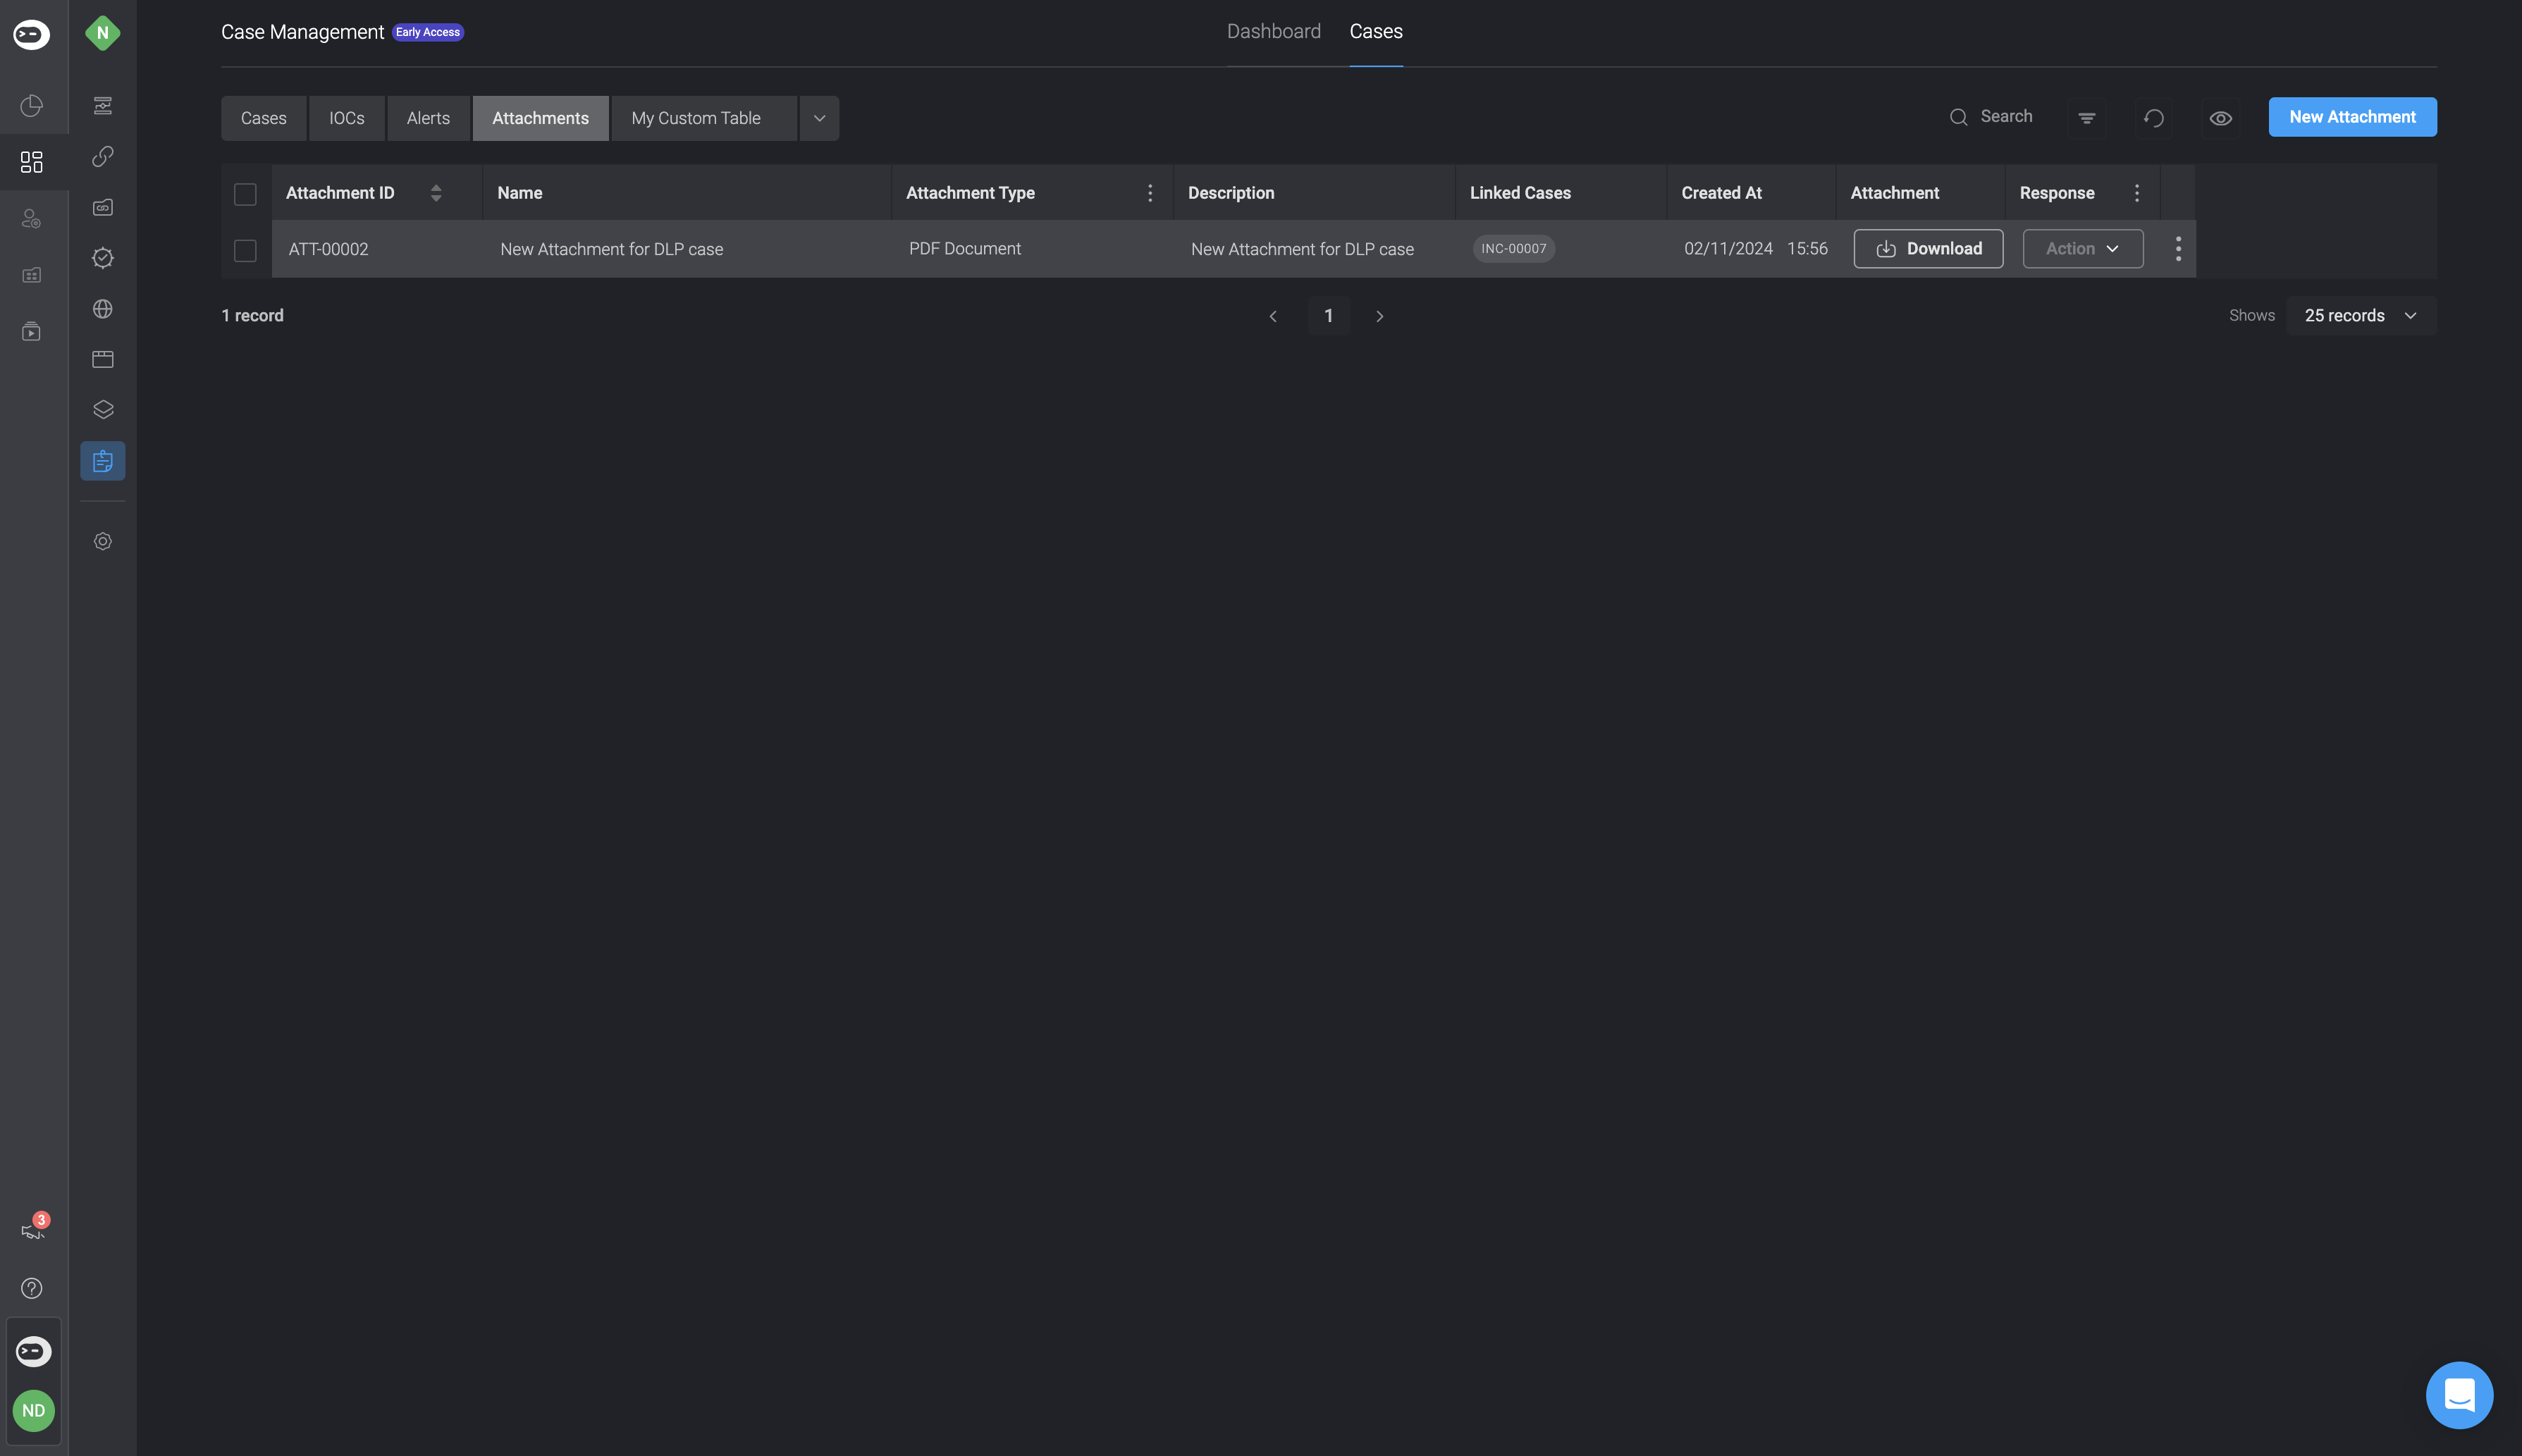
  <Step title="The newly made changes will reflect in the selected Attachments.">
    <Frame>
      <img src="https://mintcdn.com/blinkops-2/Fevyj7fZxoPHa6A-/img/CaseManagement/AttachmentOverview.png?fit=max&auto=format&n=Fevyj7fZxoPHa6A-&q=85&s=1acbc49a2d3cd7415ba864bbe0f07663" width="3578" height="2066" data-path="img/CaseManagement/AttachmentOverview.png" />
    </Frame>
  </Step>
</Steps>

***

## Deleting an Attachment

<Steps>
  <Step title="Choose an Attachment to Delete">
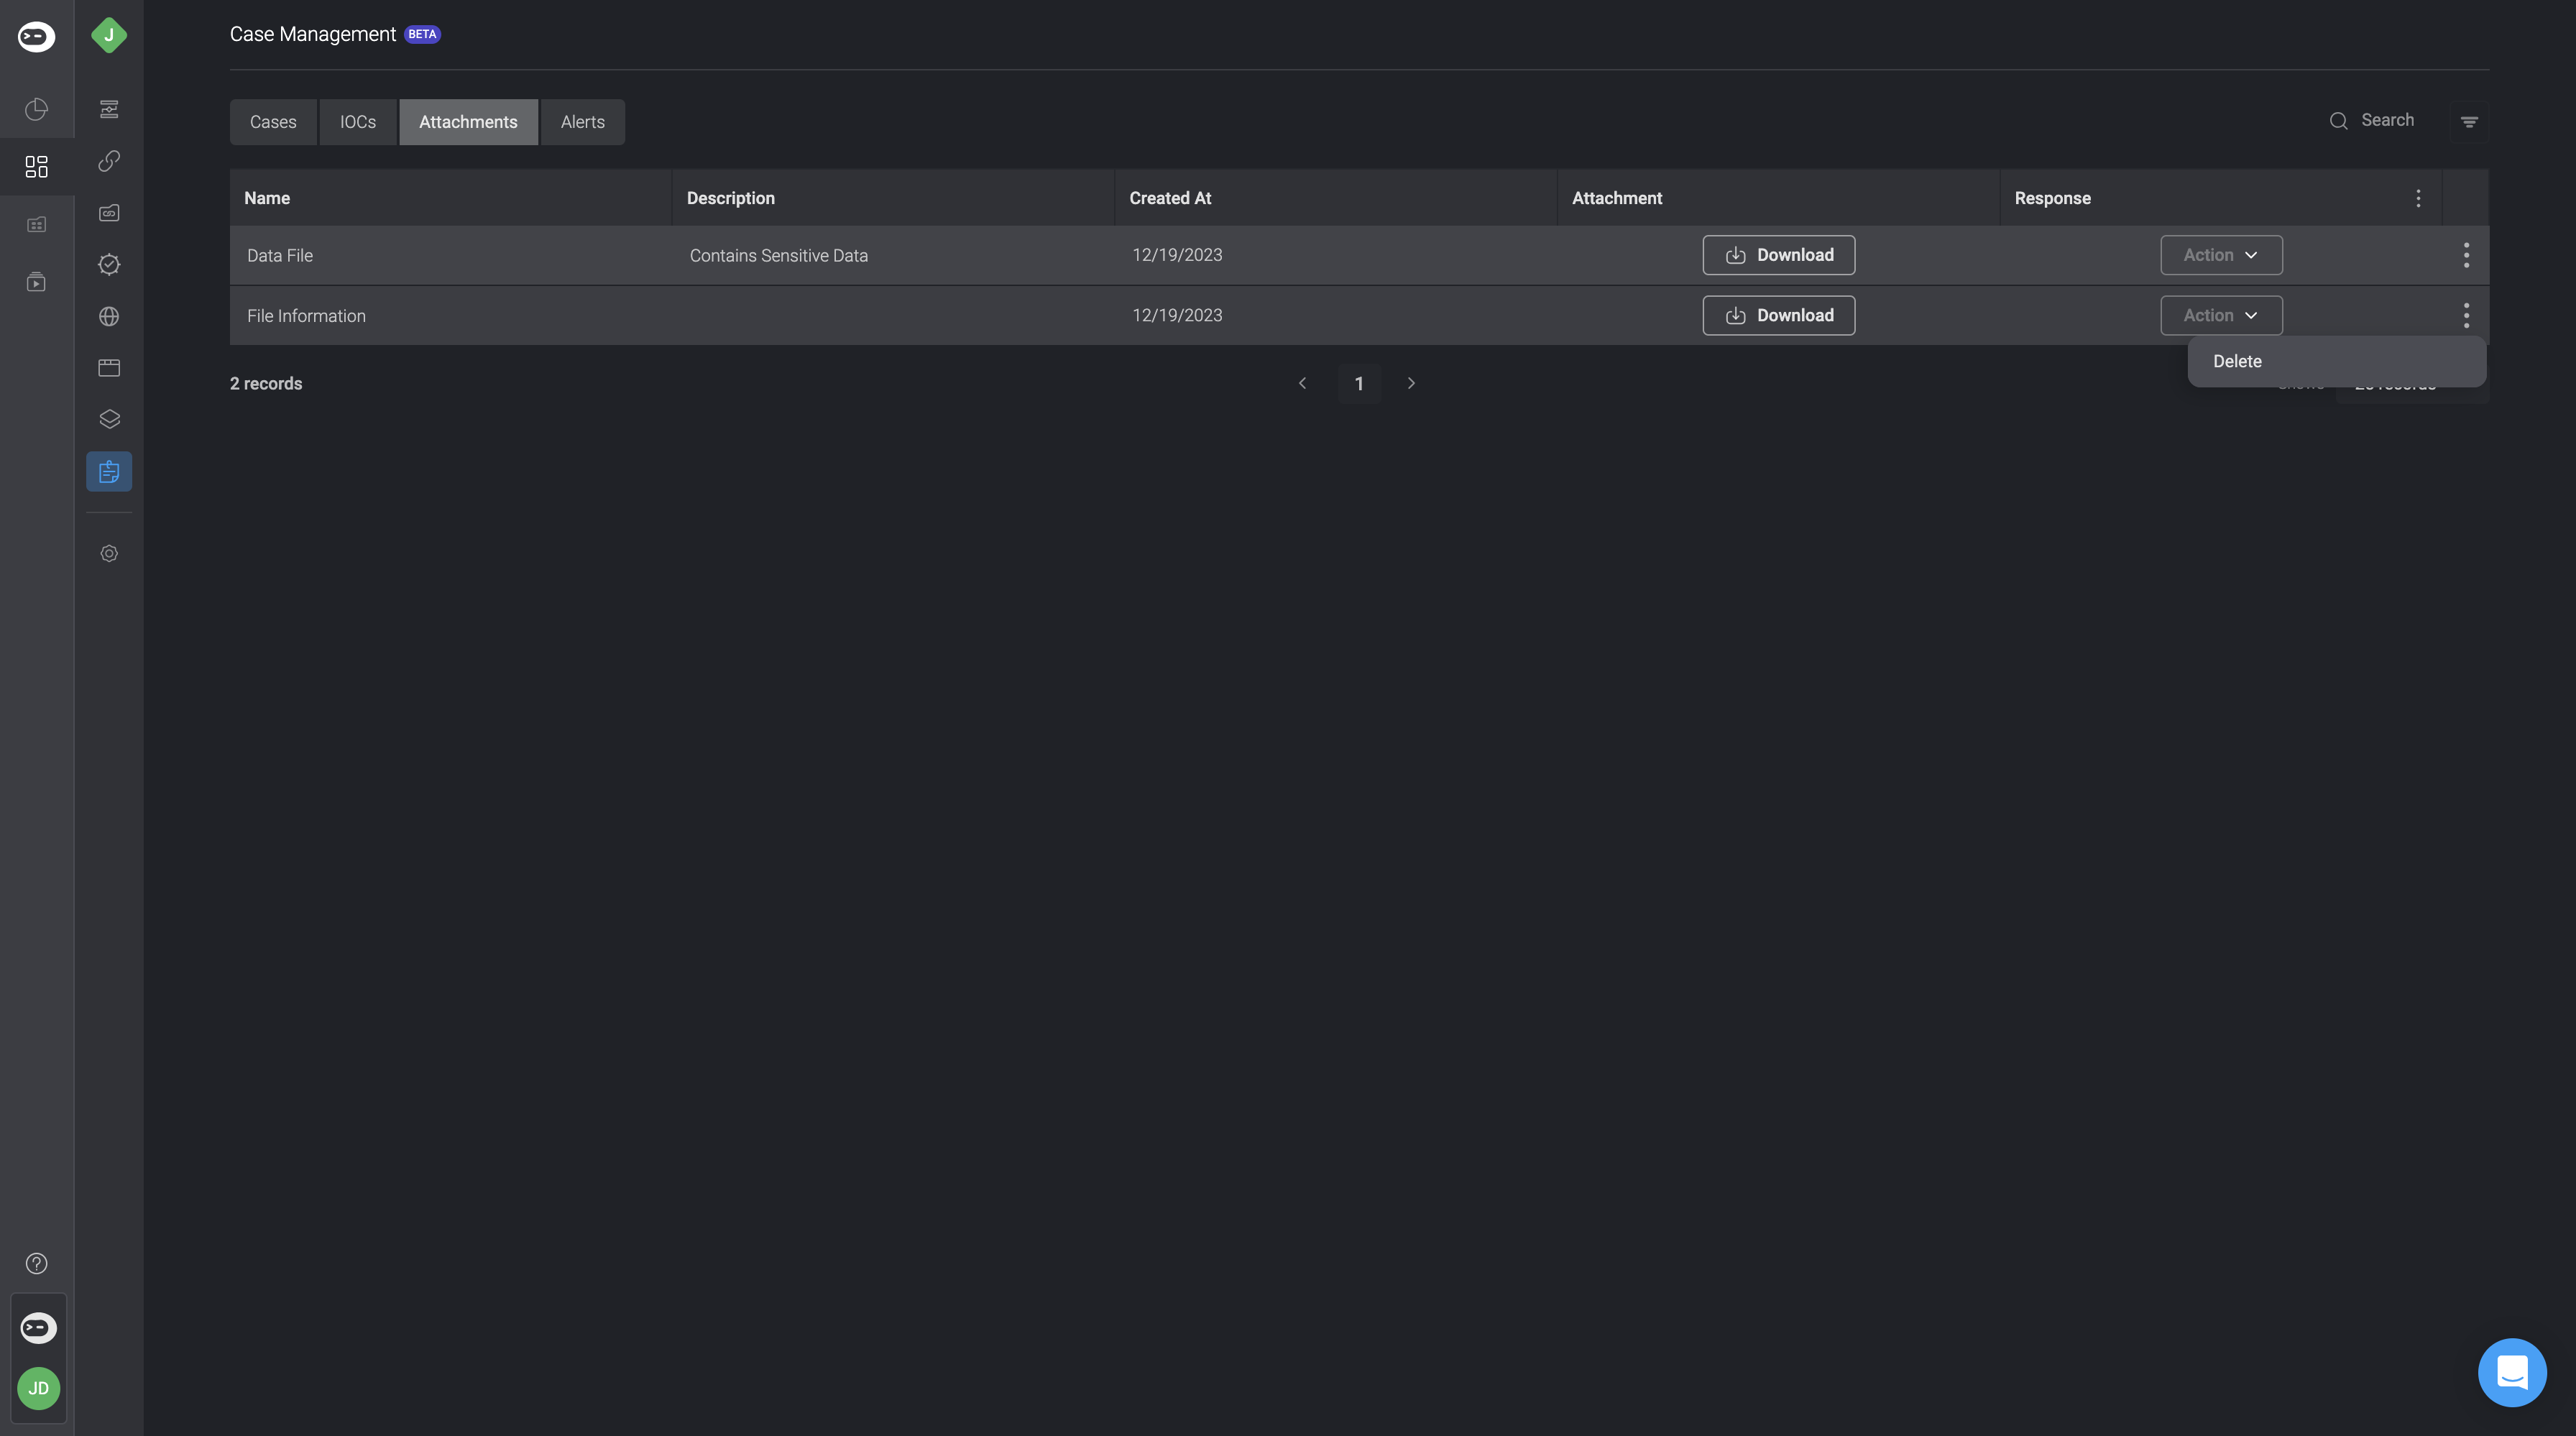
    <p>Navigate to the **Attachment** you want to delete and select the three dots icon <Icon icon="square-ellipsis-vertical" iconType="solid" />.</p>
  </Step>

  <Step title="Delete the Attachment">
    The **delete** option will appear. Click **Delete**, and the selected **Attachment** will be removed from your existing Attachments.

    <Frame>
      <img src="https://mintcdn.com/blinkops-2/BRfSL_EOO1Uh43ic/img/CaseManagement/DeleteAttachment.png?fit=max&auto=format&n=BRfSL_EOO1Uh43ic&q=85&s=daf4e7db6401ff90e53401fd4f067db8" width="3584" height="1998" data-path="img/CaseManagement/DeleteAttachment.png" />
    </Frame>
  </Step>
</Steps>