> ## Documentation Index
> Fetch the complete documentation index at: https://docs.blinkops.com/llms.txt
> Use this file to discover all available pages before exploring further.
# About Builder Copilot
> Overview of Builder Copilot, the AI assistant that helps you create and modify Blink workflows using natural language.
This feature is part of Blink’s Interactive AI Actions and is subject to the same tenant-level limits that apply to those actions:
* Up to `40 requests per minute`
* Up to `3 MB` of processed data per minute
The Builder Copilot is an innovative feature that helps users to create custom workflows from the ground up, using the advanced capabilities of generative AI to enhance and streamline workflows within the Workflow Editor.
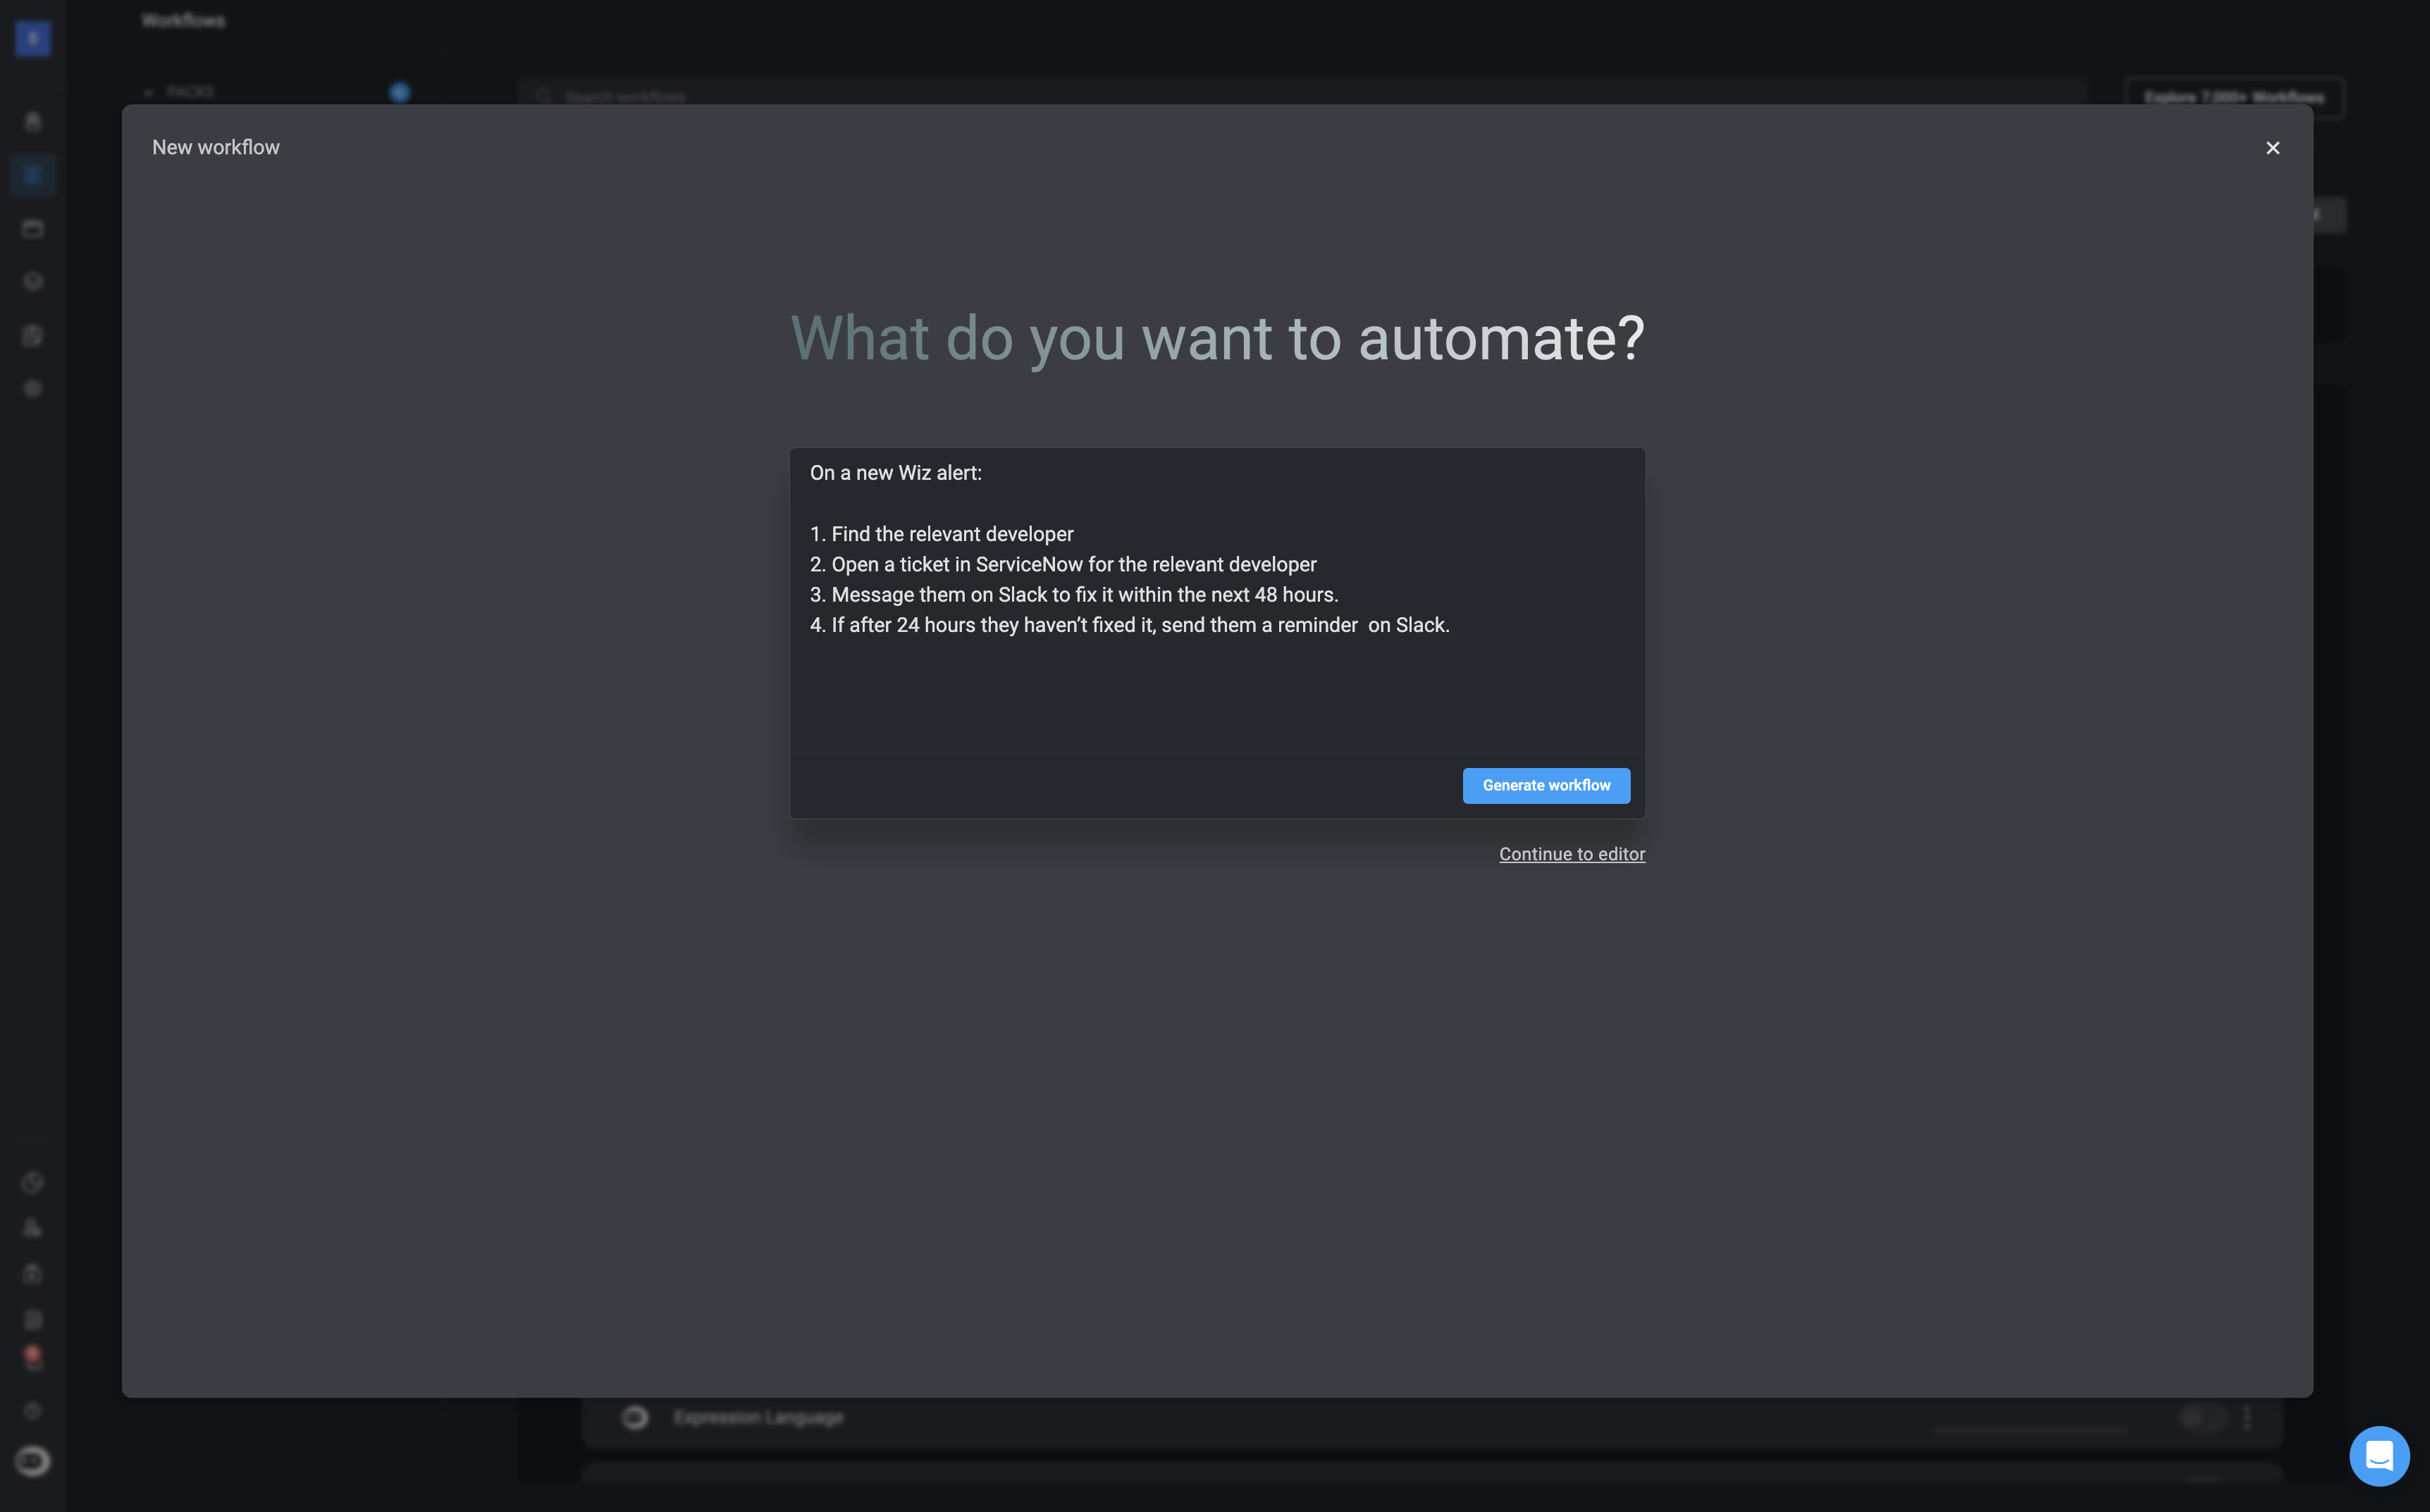 ***
### Safe Use of AI
It is important that Blink does not use customer data for AI training. We adhere to industry standards to ensure your data remains secure, never stored or utilized for these purposes.
***
## Using the Builder Copilot on an Entire Workflow
**Please note**
1. Populating step inputs with Builder Copilot does not support [Blink's Table actions](/docs/blink-platform/tables/tables-in-workflows).
2. In some cases, results may include incorrect or invalid details. It is recommended to validate the generated actions.
Open your workspace and select **[Create New Workflow](/docs/workflows/creating-a-workflow)** and configure the workflow settings.
In the top-left corner select the `Builder Copilot` icon. A prompt interface will appear.
***
### Safe Use of AI
It is important that Blink does not use customer data for AI training. We adhere to industry standards to ensure your data remains secure, never stored or utilized for these purposes.
***
## Using the Builder Copilot on an Entire Workflow
**Please note**
1. Populating step inputs with Builder Copilot does not support [Blink's Table actions](/docs/blink-platform/tables/tables-in-workflows).
2. In some cases, results may include incorrect or invalid details. It is recommended to validate the generated actions.
Open your workspace and select **[Create New Workflow](/docs/workflows/creating-a-workflow)** and configure the workflow settings.
In the top-left corner select the `Builder Copilot` icon. A prompt interface will appear.
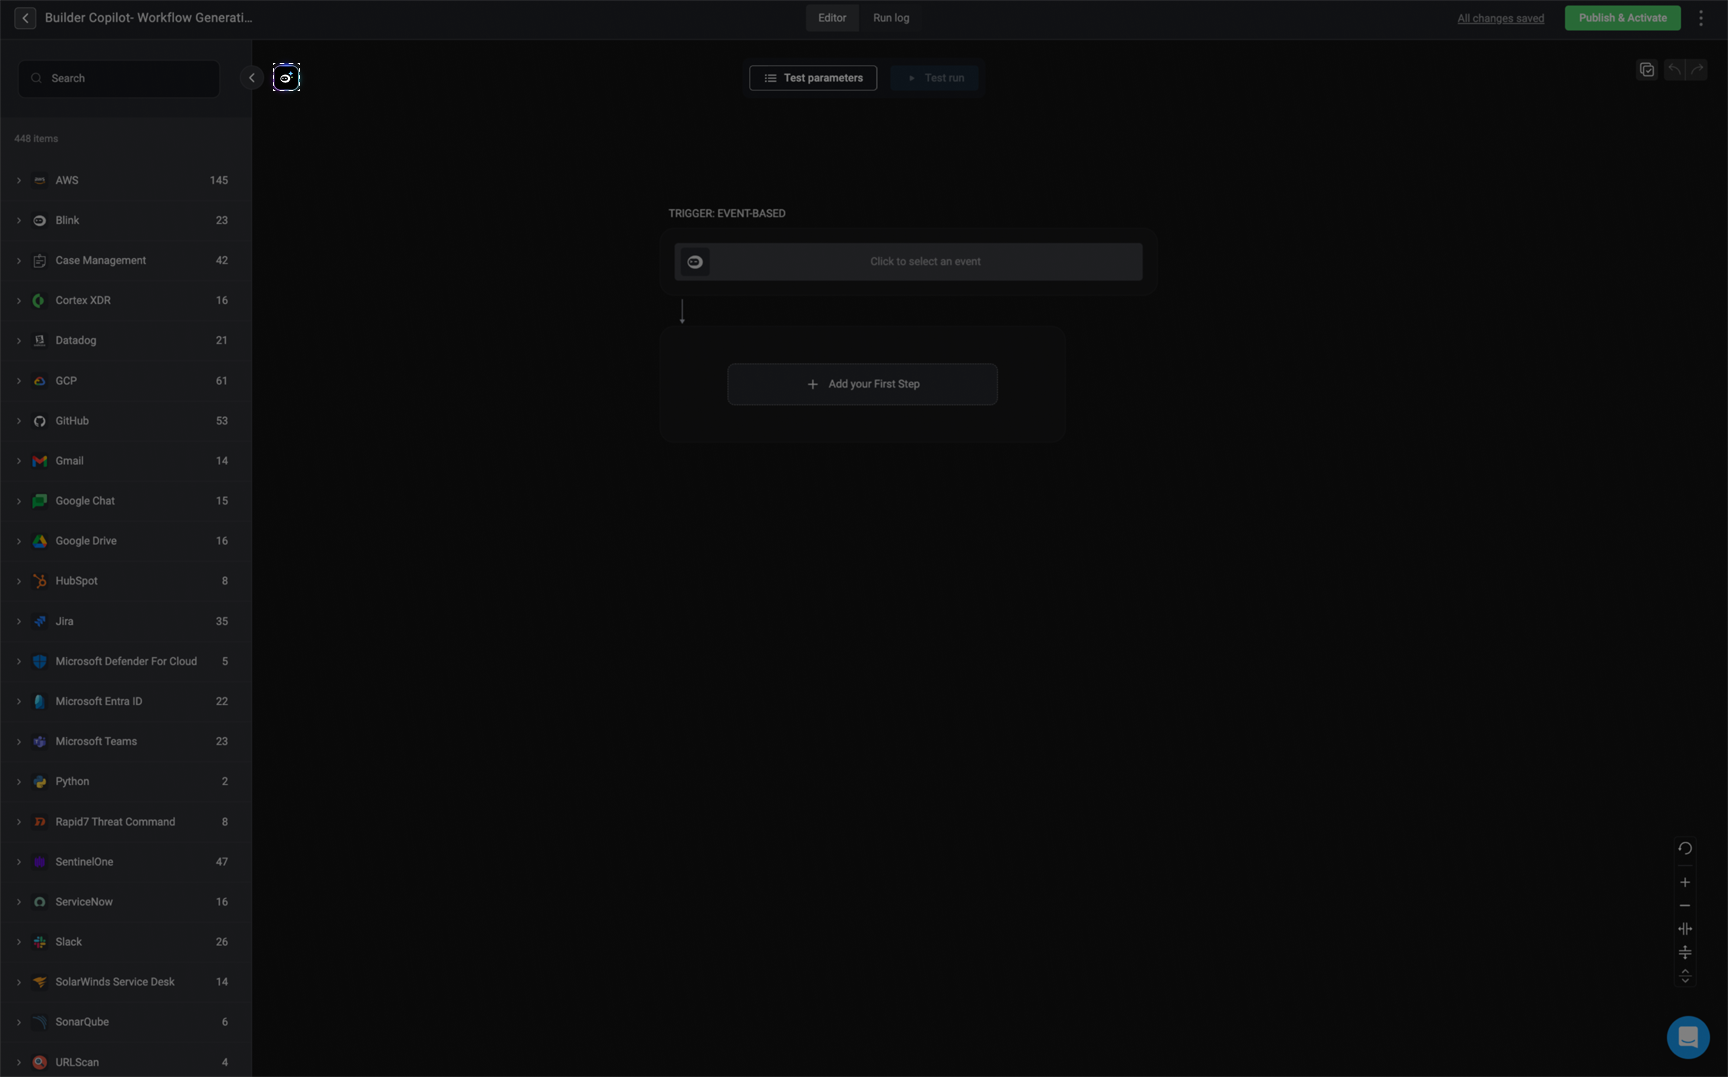 Provide `Builder Copilot` with detailed instructions specifying the type of Workflow you want it to create and then press generate.**It may take a few seconds to generate the Workflow**.
Explore the best methods for generating the ideal prompt by visiting [Best Practices for using Builder Copilot](#best-practices)
Provide `Builder Copilot` with detailed instructions specifying the type of Workflow you want it to create and then press generate.**It may take a few seconds to generate the Workflow**.
Explore the best methods for generating the ideal prompt by visiting [Best Practices for using Builder Copilot](#best-practices)
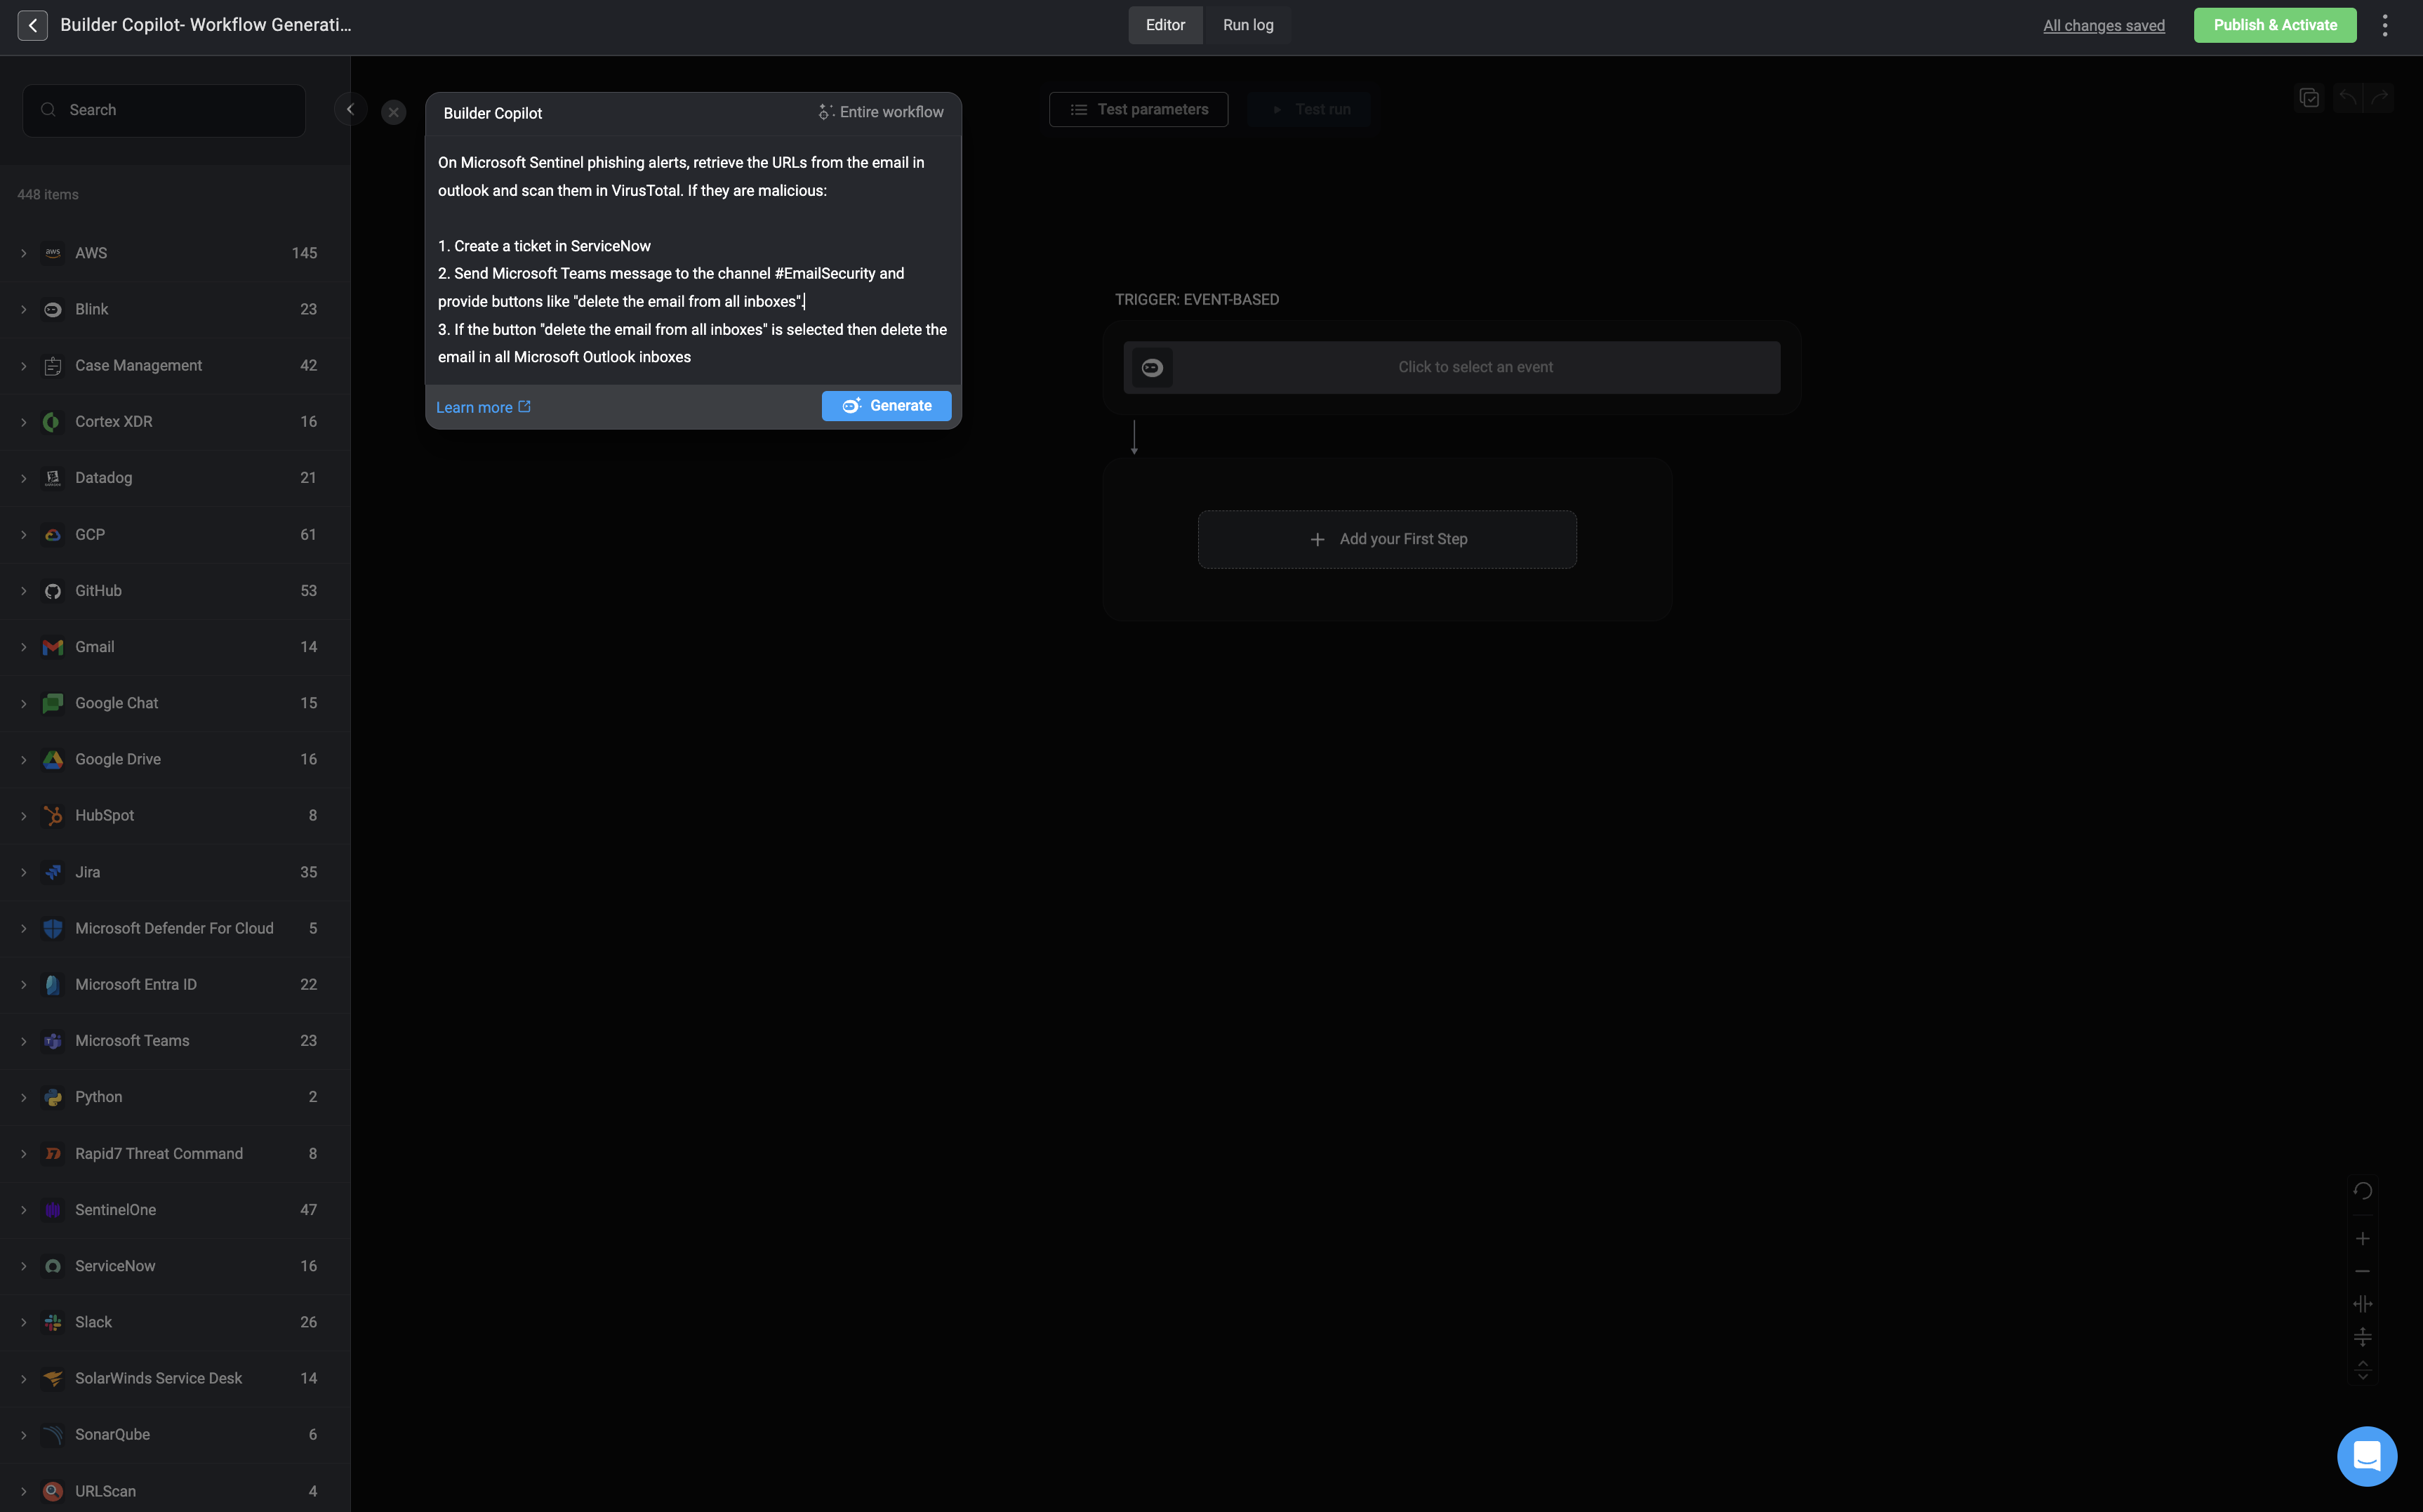 Once the process is complete, `Builder Copilot` will update your canvas with a recommendation based on your prompt.
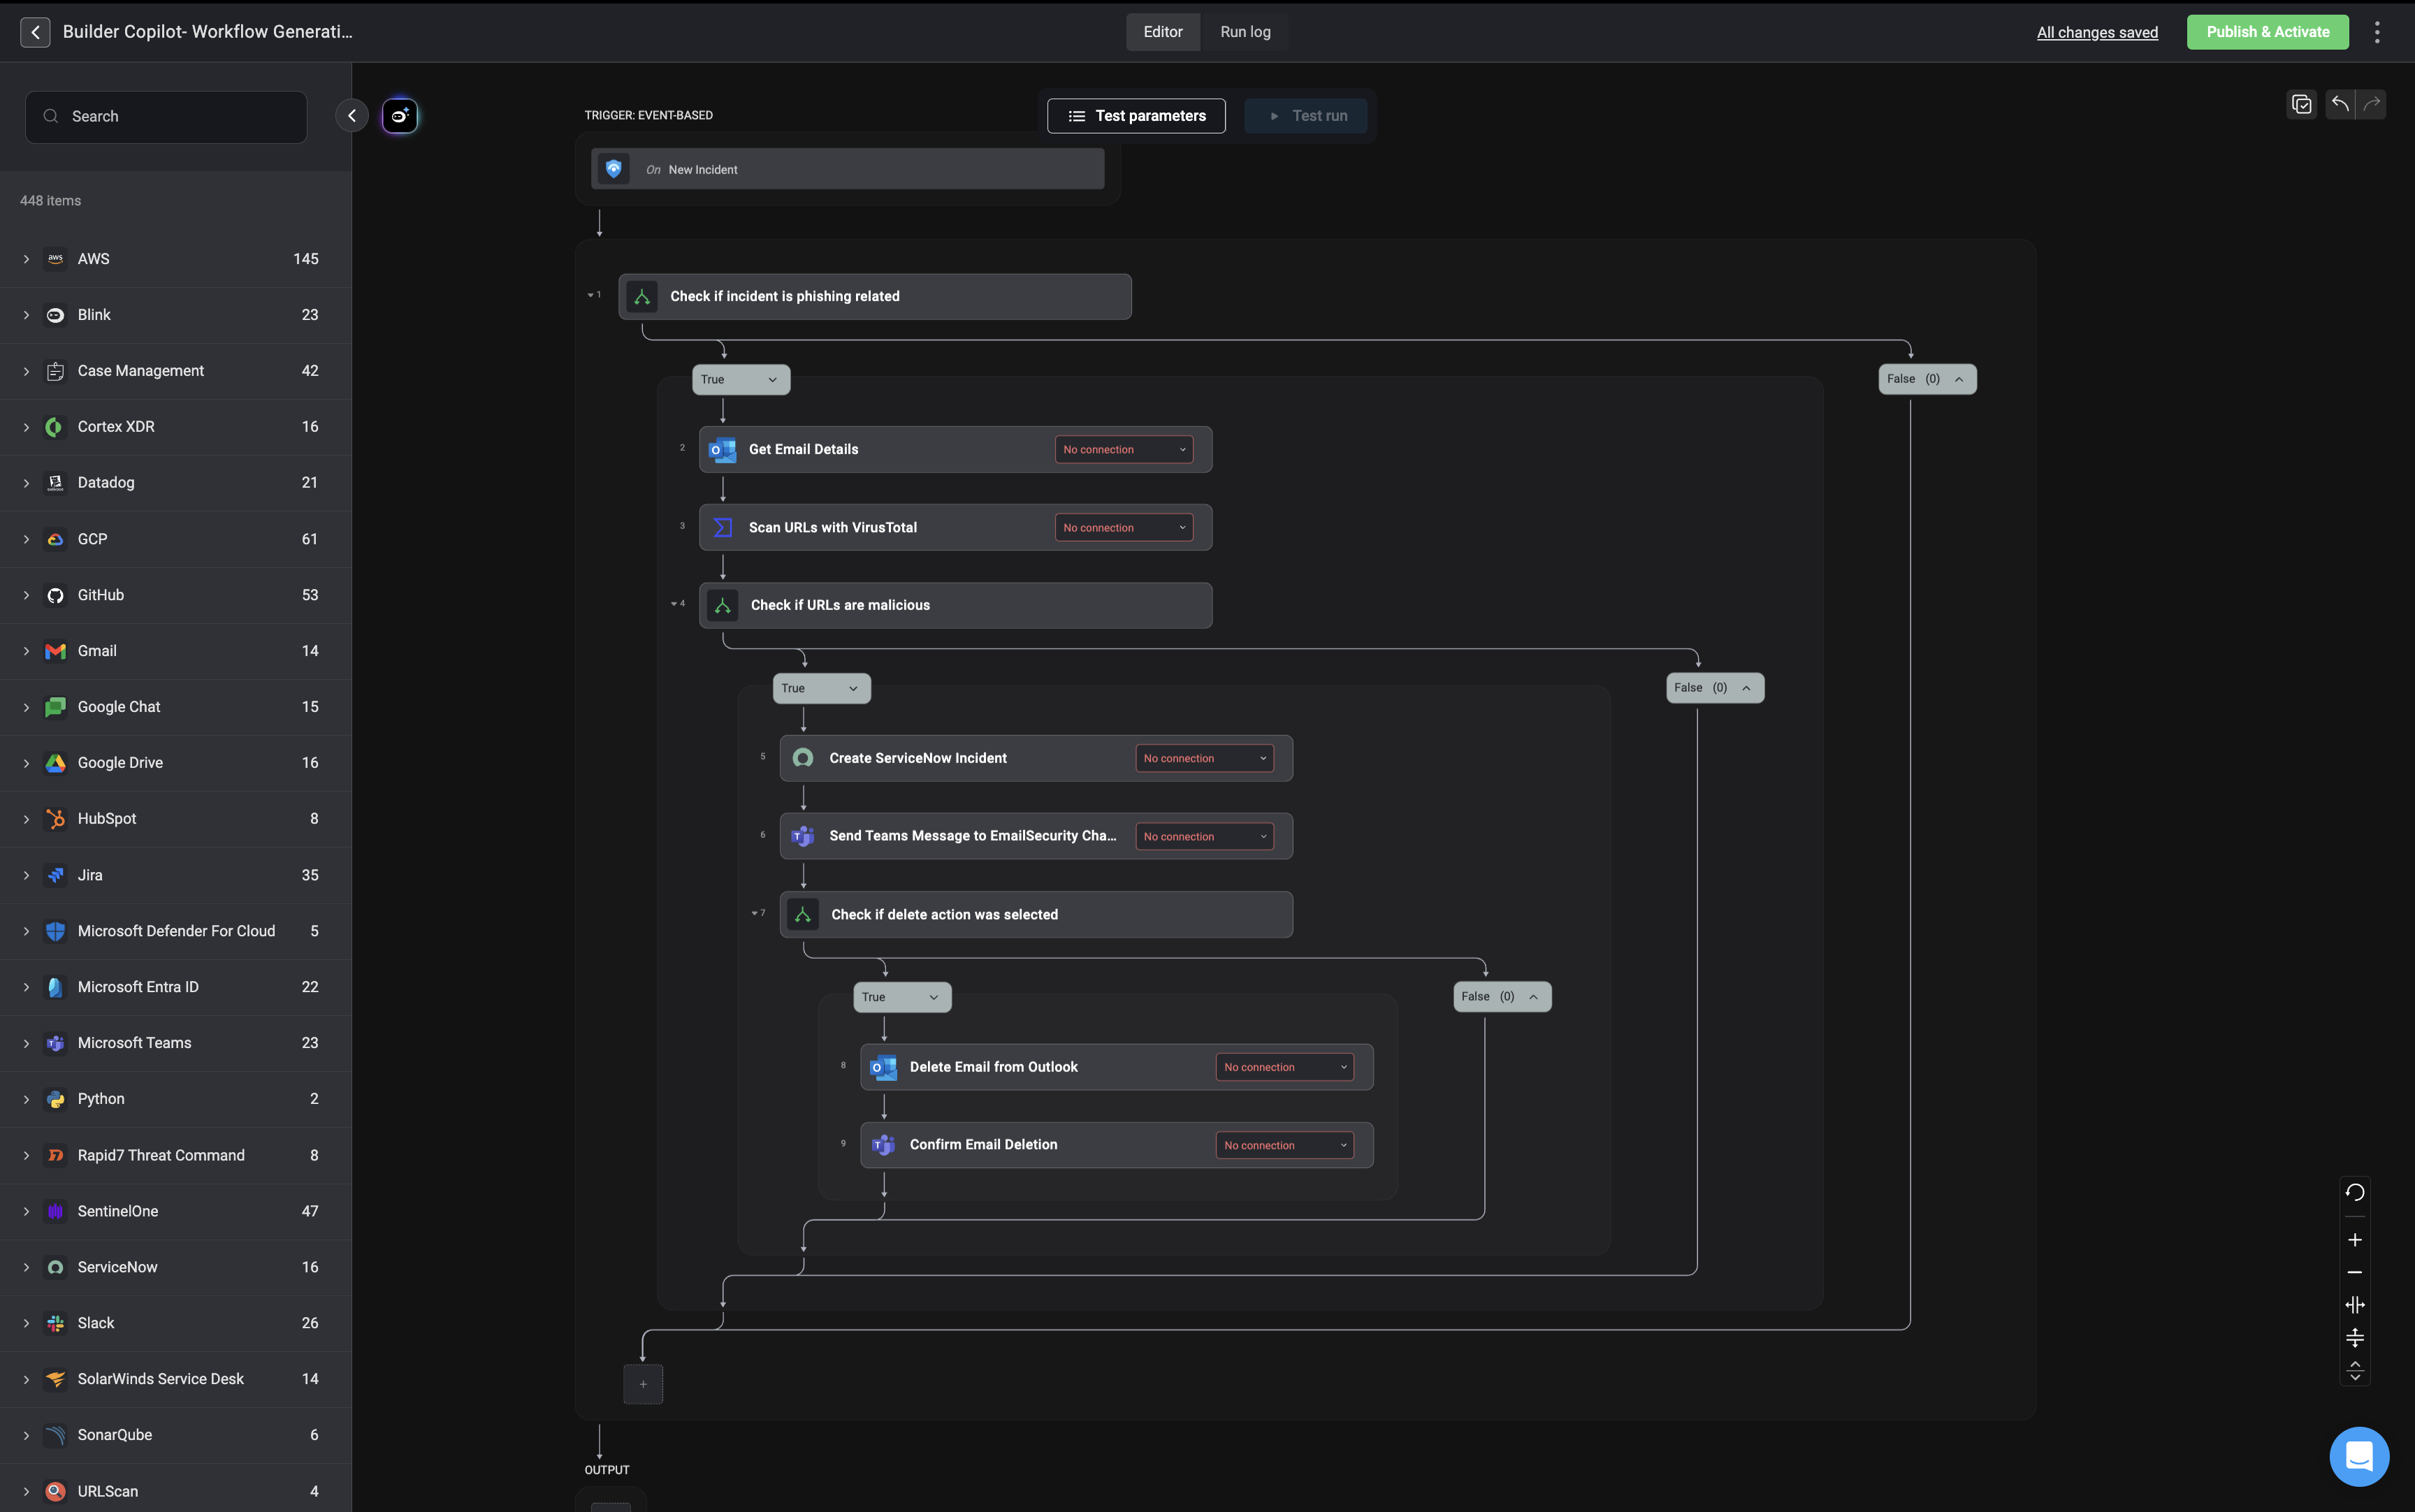 At any stage you can also undo or redo any changes made by the `Builder Copilot` by clicking on the **undo** or **redo** arrows in the top-right corner.
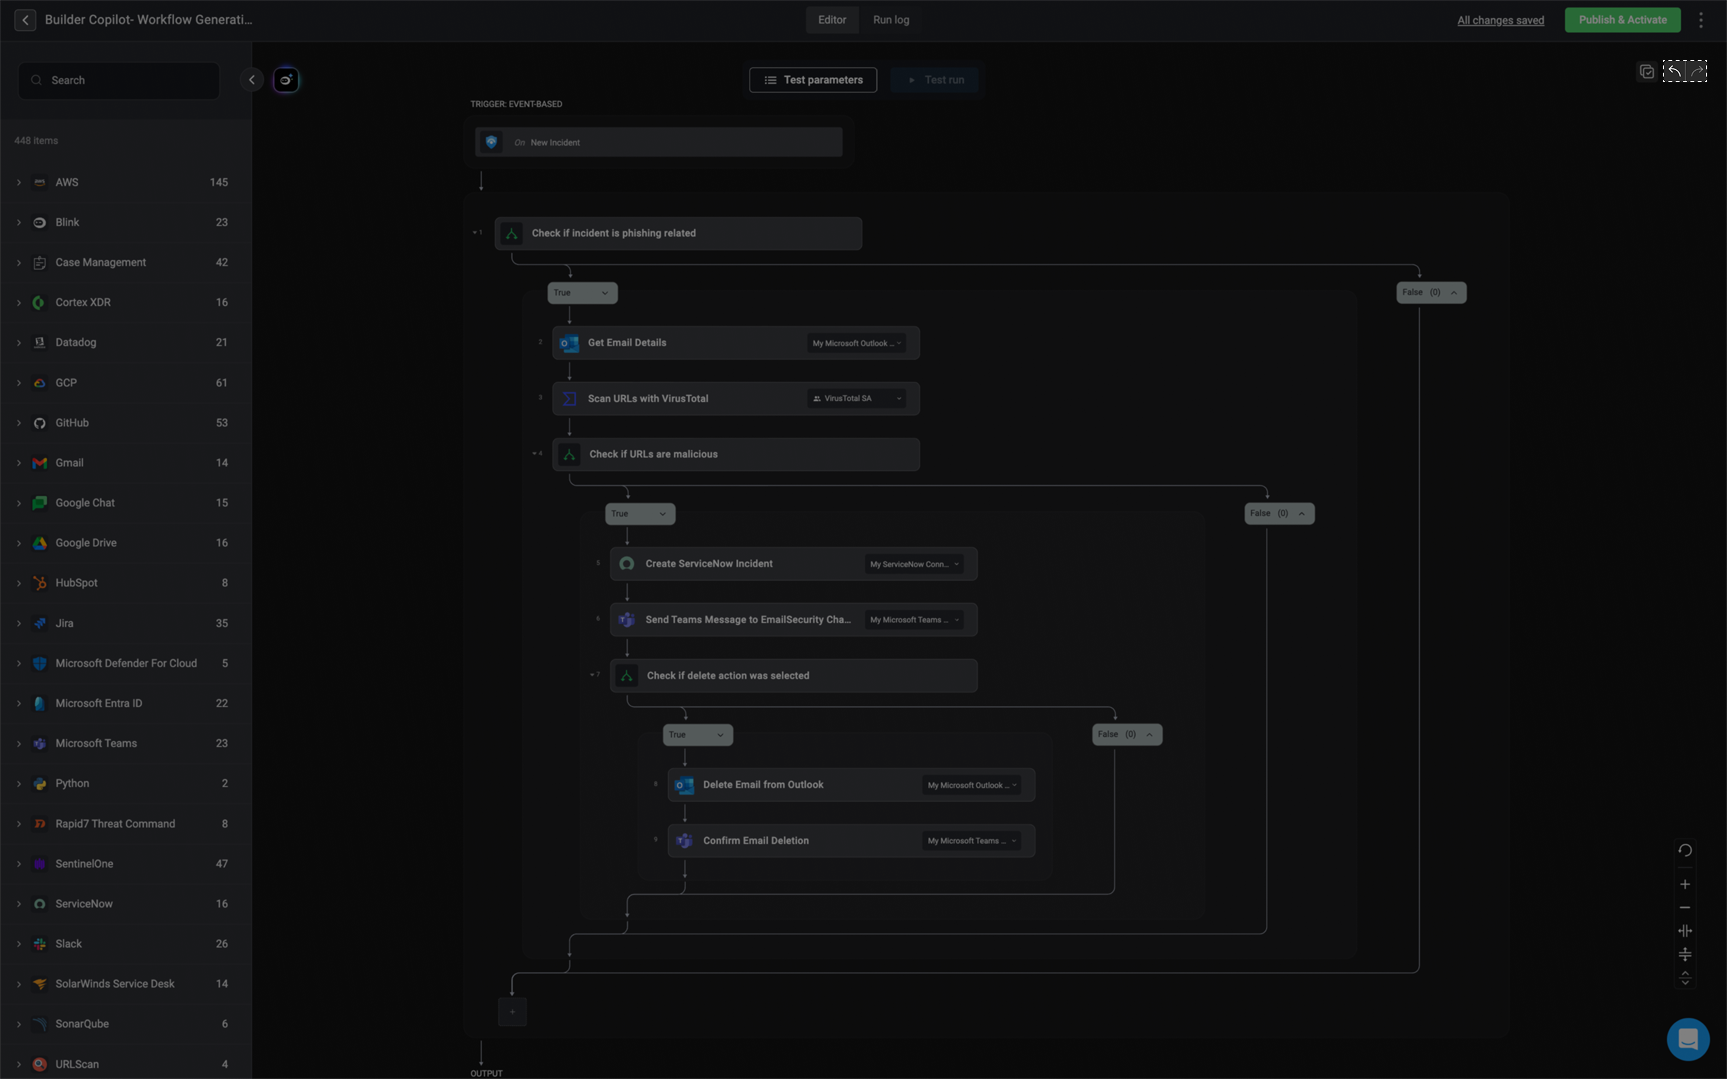 Lastly, you can either make additional changes to the Workflow that `Builder Copilot` has just created or save it to your workspace for future use.
Before executing your Workflow, double-check your Workflow to ensure it meets your requirements perfectly.
***
## Builder Copilot Block Generation
Within the canvas, the Builder Copilot enables you to generate complete workflow blocks, consisting of single or multiple steps, with a single prompt. This streamlines the creation process by eliminating the need to manually add and configure each step individually.
Click the 'Builder Copilot' icon on the canvas or next to a step to open the Builder Copilot's prompt interface. In the prompt field, provide clear and detailed instructions describing the workflow block you want to generate. Once your prompt is ready, click **Generate** to proceed. **It may take a few seconds to generate the workflow blocks and for more complex logic, it may take a while longer**.
To improve your results, refer to [Best Practices for using Builder Copilot](#best-practices).
Lastly, you can either make additional changes to the Workflow that `Builder Copilot` has just created or save it to your workspace for future use.
Before executing your Workflow, double-check your Workflow to ensure it meets your requirements perfectly.
***
## Builder Copilot Block Generation
Within the canvas, the Builder Copilot enables you to generate complete workflow blocks, consisting of single or multiple steps, with a single prompt. This streamlines the creation process by eliminating the need to manually add and configure each step individually.
Click the 'Builder Copilot' icon on the canvas or next to a step to open the Builder Copilot's prompt interface. In the prompt field, provide clear and detailed instructions describing the workflow block you want to generate. Once your prompt is ready, click **Generate** to proceed. **It may take a few seconds to generate the workflow blocks and for more complex logic, it may take a while longer**.
To improve your results, refer to [Best Practices for using Builder Copilot](#best-practices).
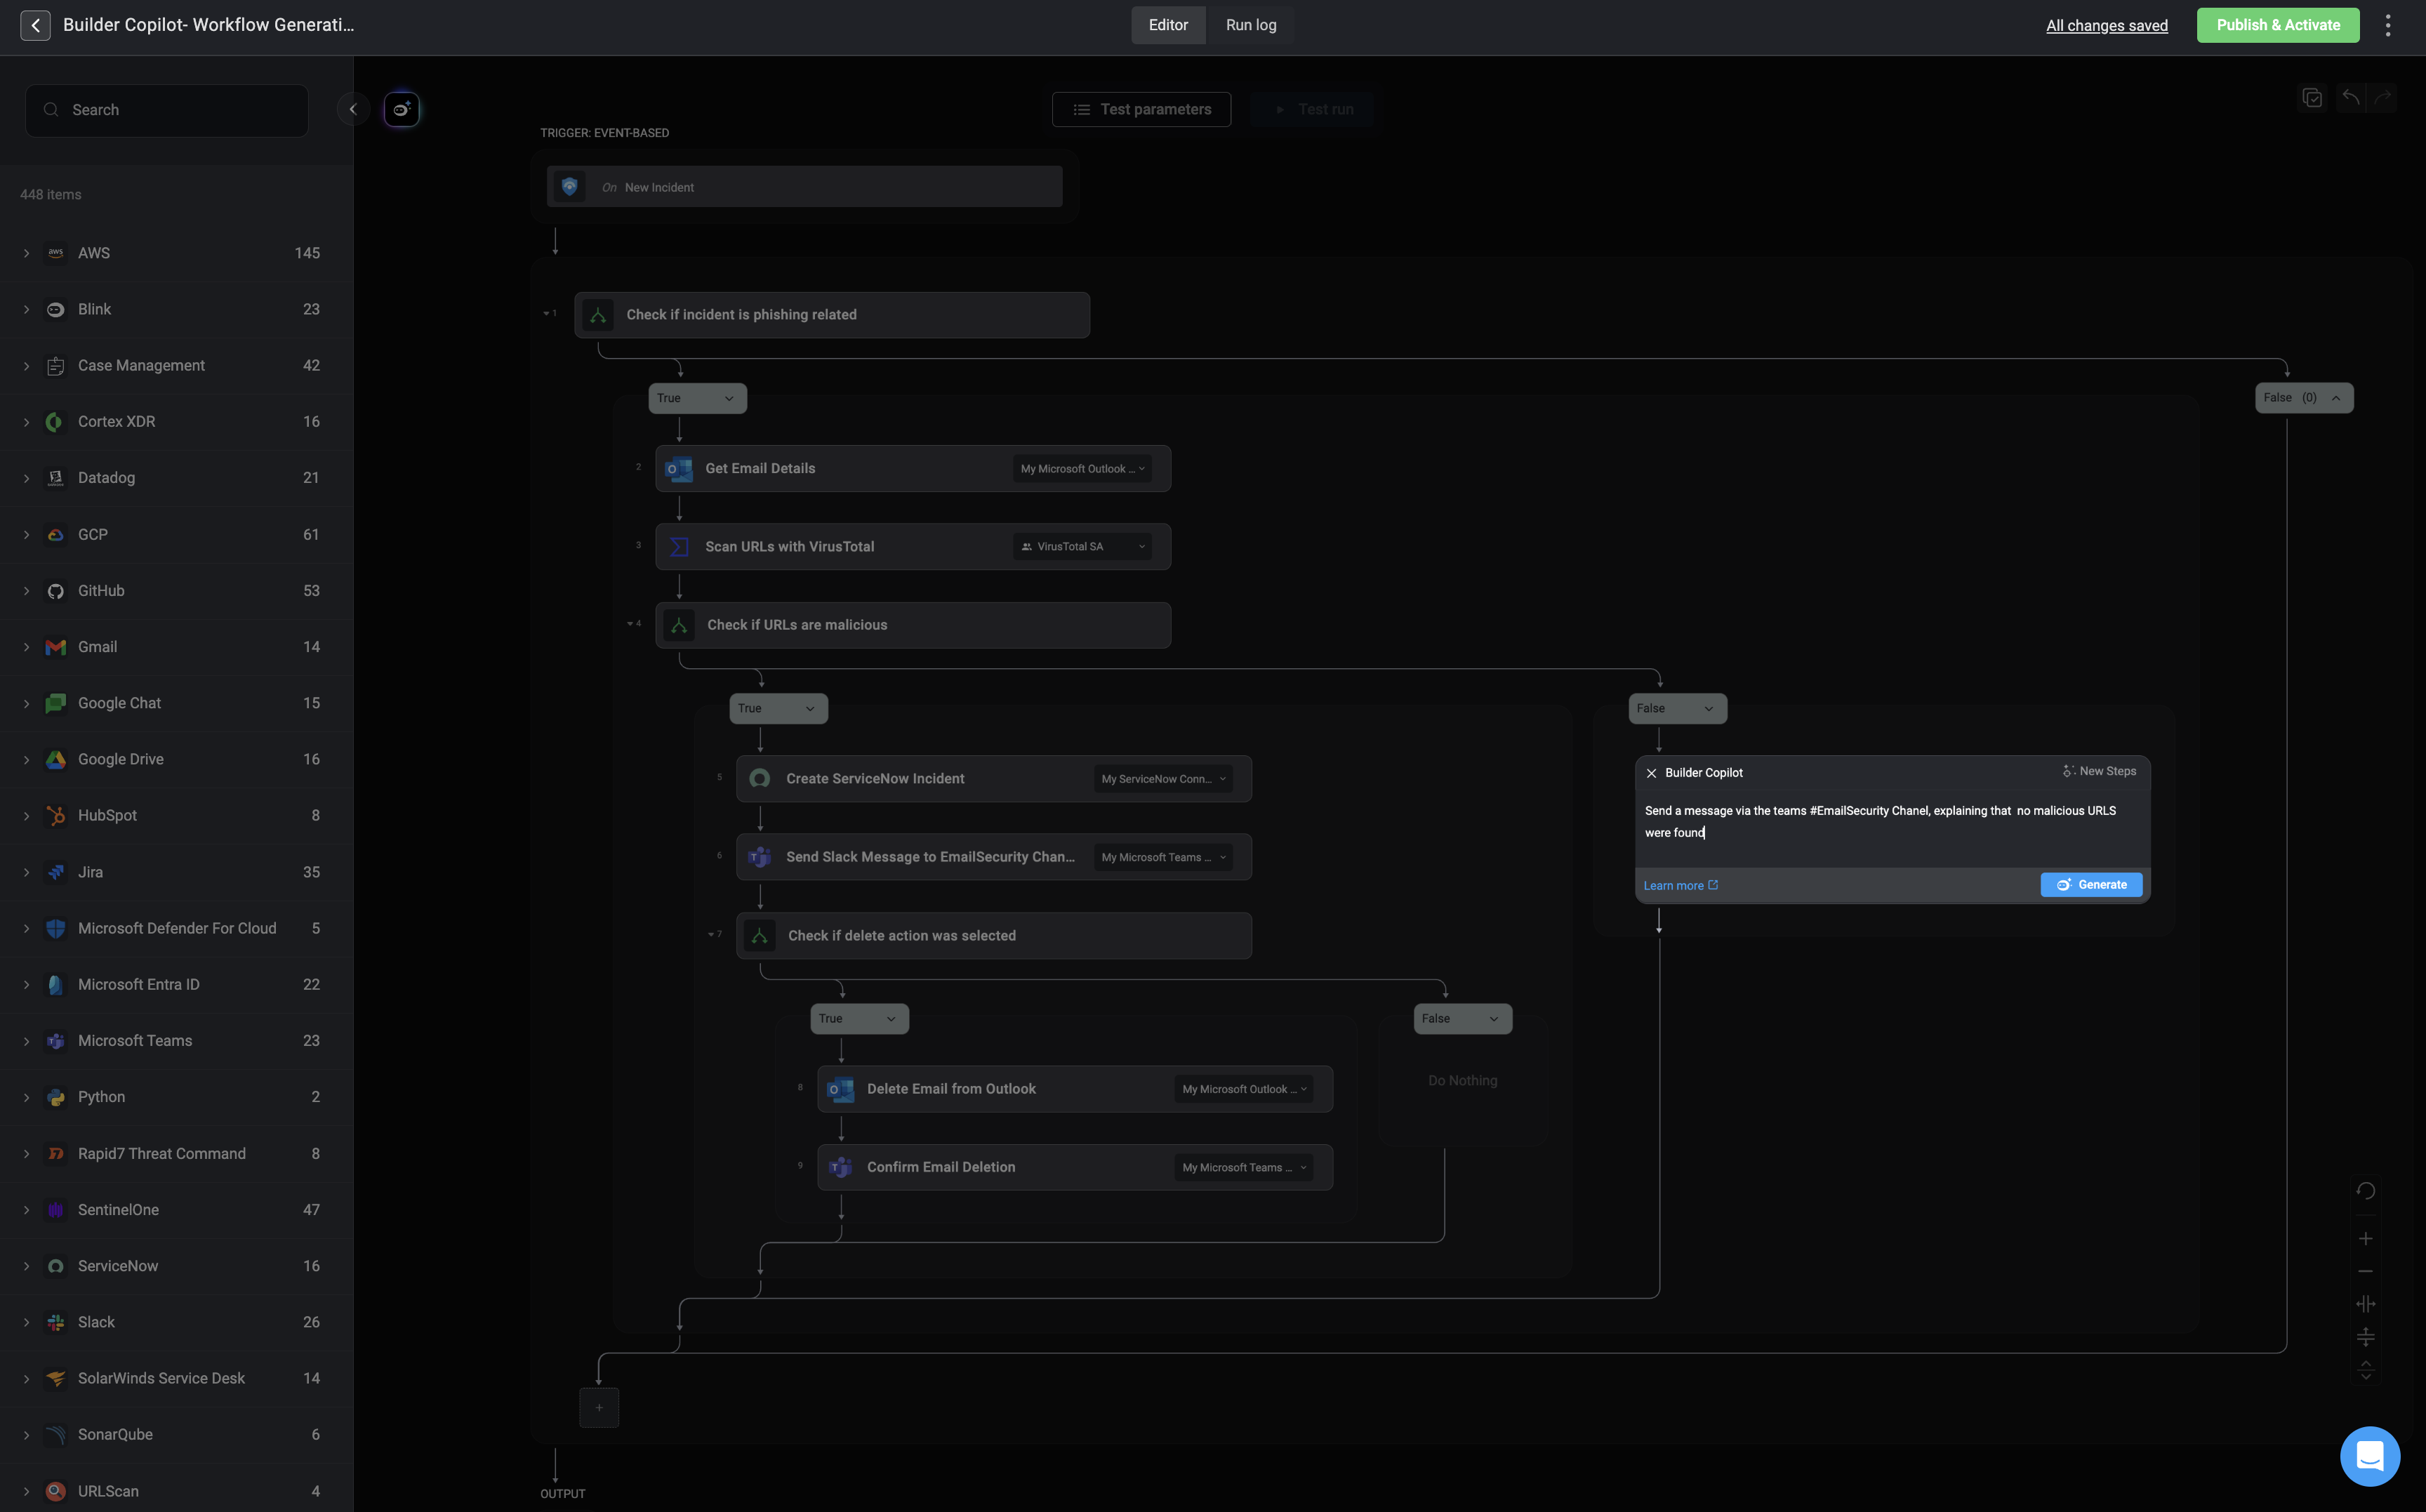 Once the workflow block is generated, all newly created steps are automatically highlighted for easy identification. The prompt interface remains open, allowing you to modify your instructions and regenerate the block if needed.
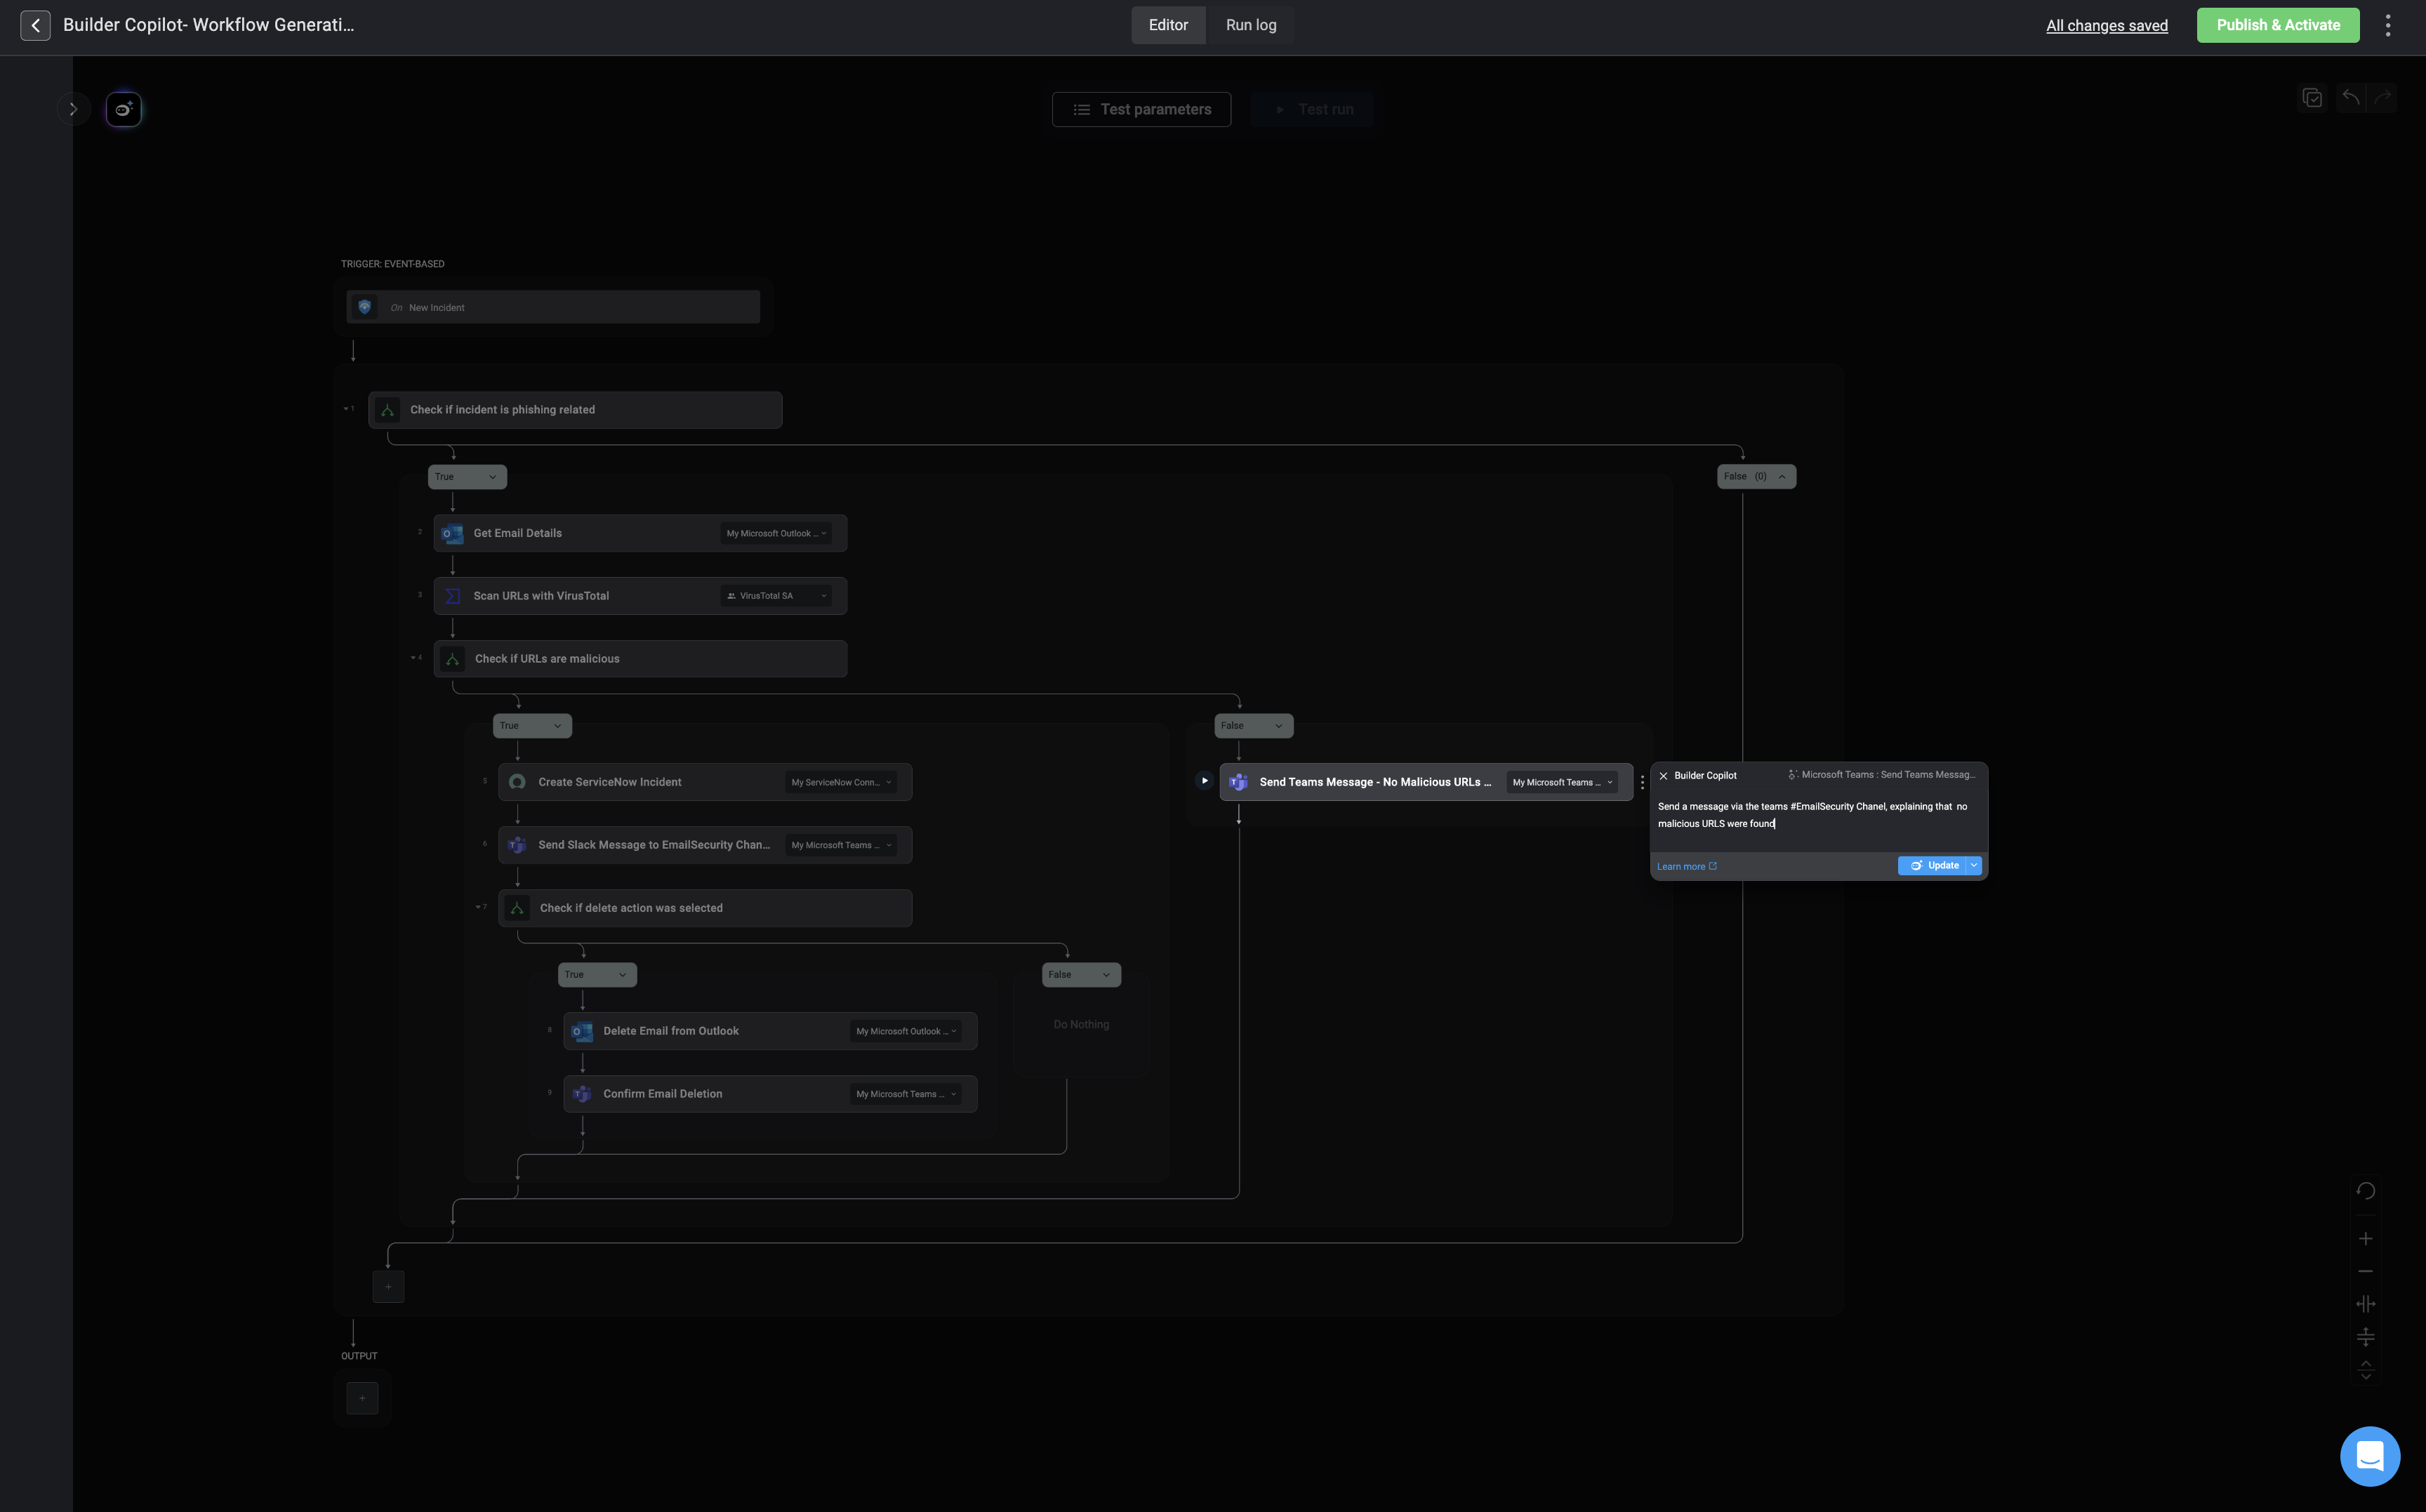
You can update a step by editing its input values or by replacing the step entirely.
Once the workflow block is generated, all newly created steps are automatically highlighted for easy identification. The prompt interface remains open, allowing you to modify your instructions and regenerate the block if needed.
You can update a step by editing its input values or by replacing the step entirely.
 ***
## Best Practices
1. Be clear and precise: Providing clear and specific instructions will assist `Builder Copilot` in understanding your instructions clearly.
2. Use complete integration names: For example, instead of using generic terms like **Compute Instance**, specify the full name of the relevant integrations, such as **AWS EC2 Compute Instance**.
3. Refrain from using unknown or unrecognized vendors in your prompt.
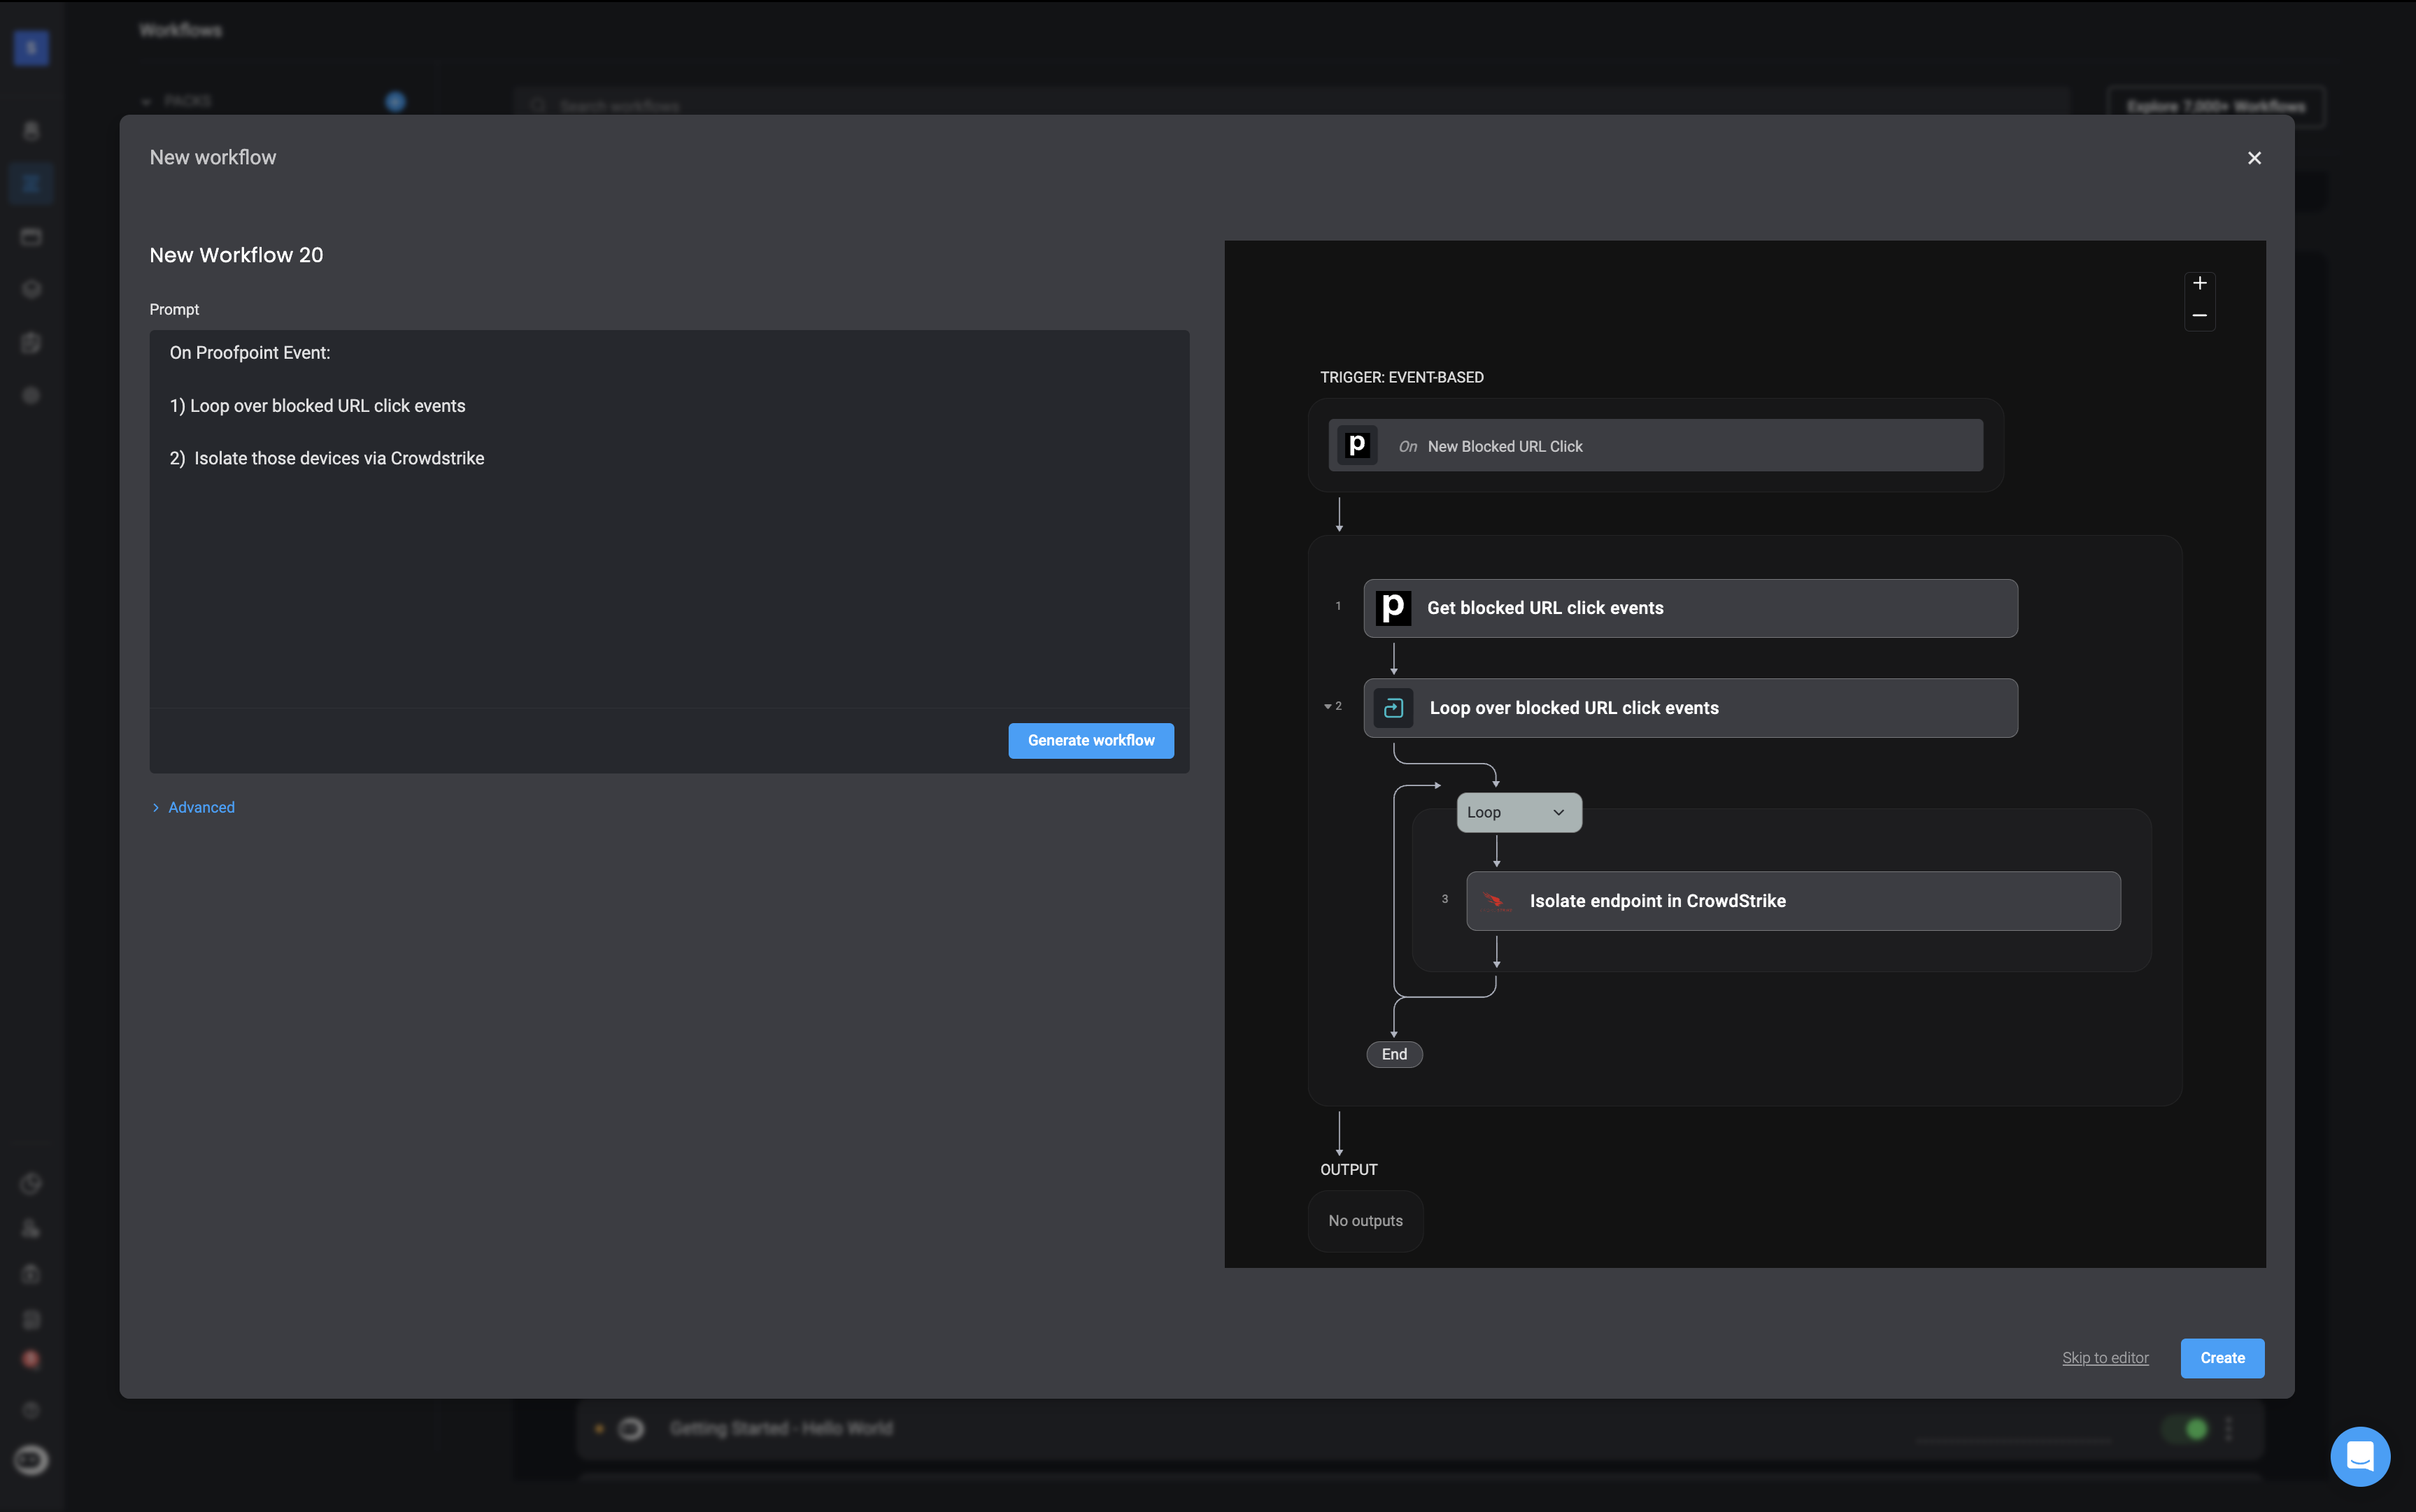
4. Using the word **loop** in your prompt will likely generate a looping action in the results. Try to be as descriptive as possible about what you want the **loop** action to accomplish.
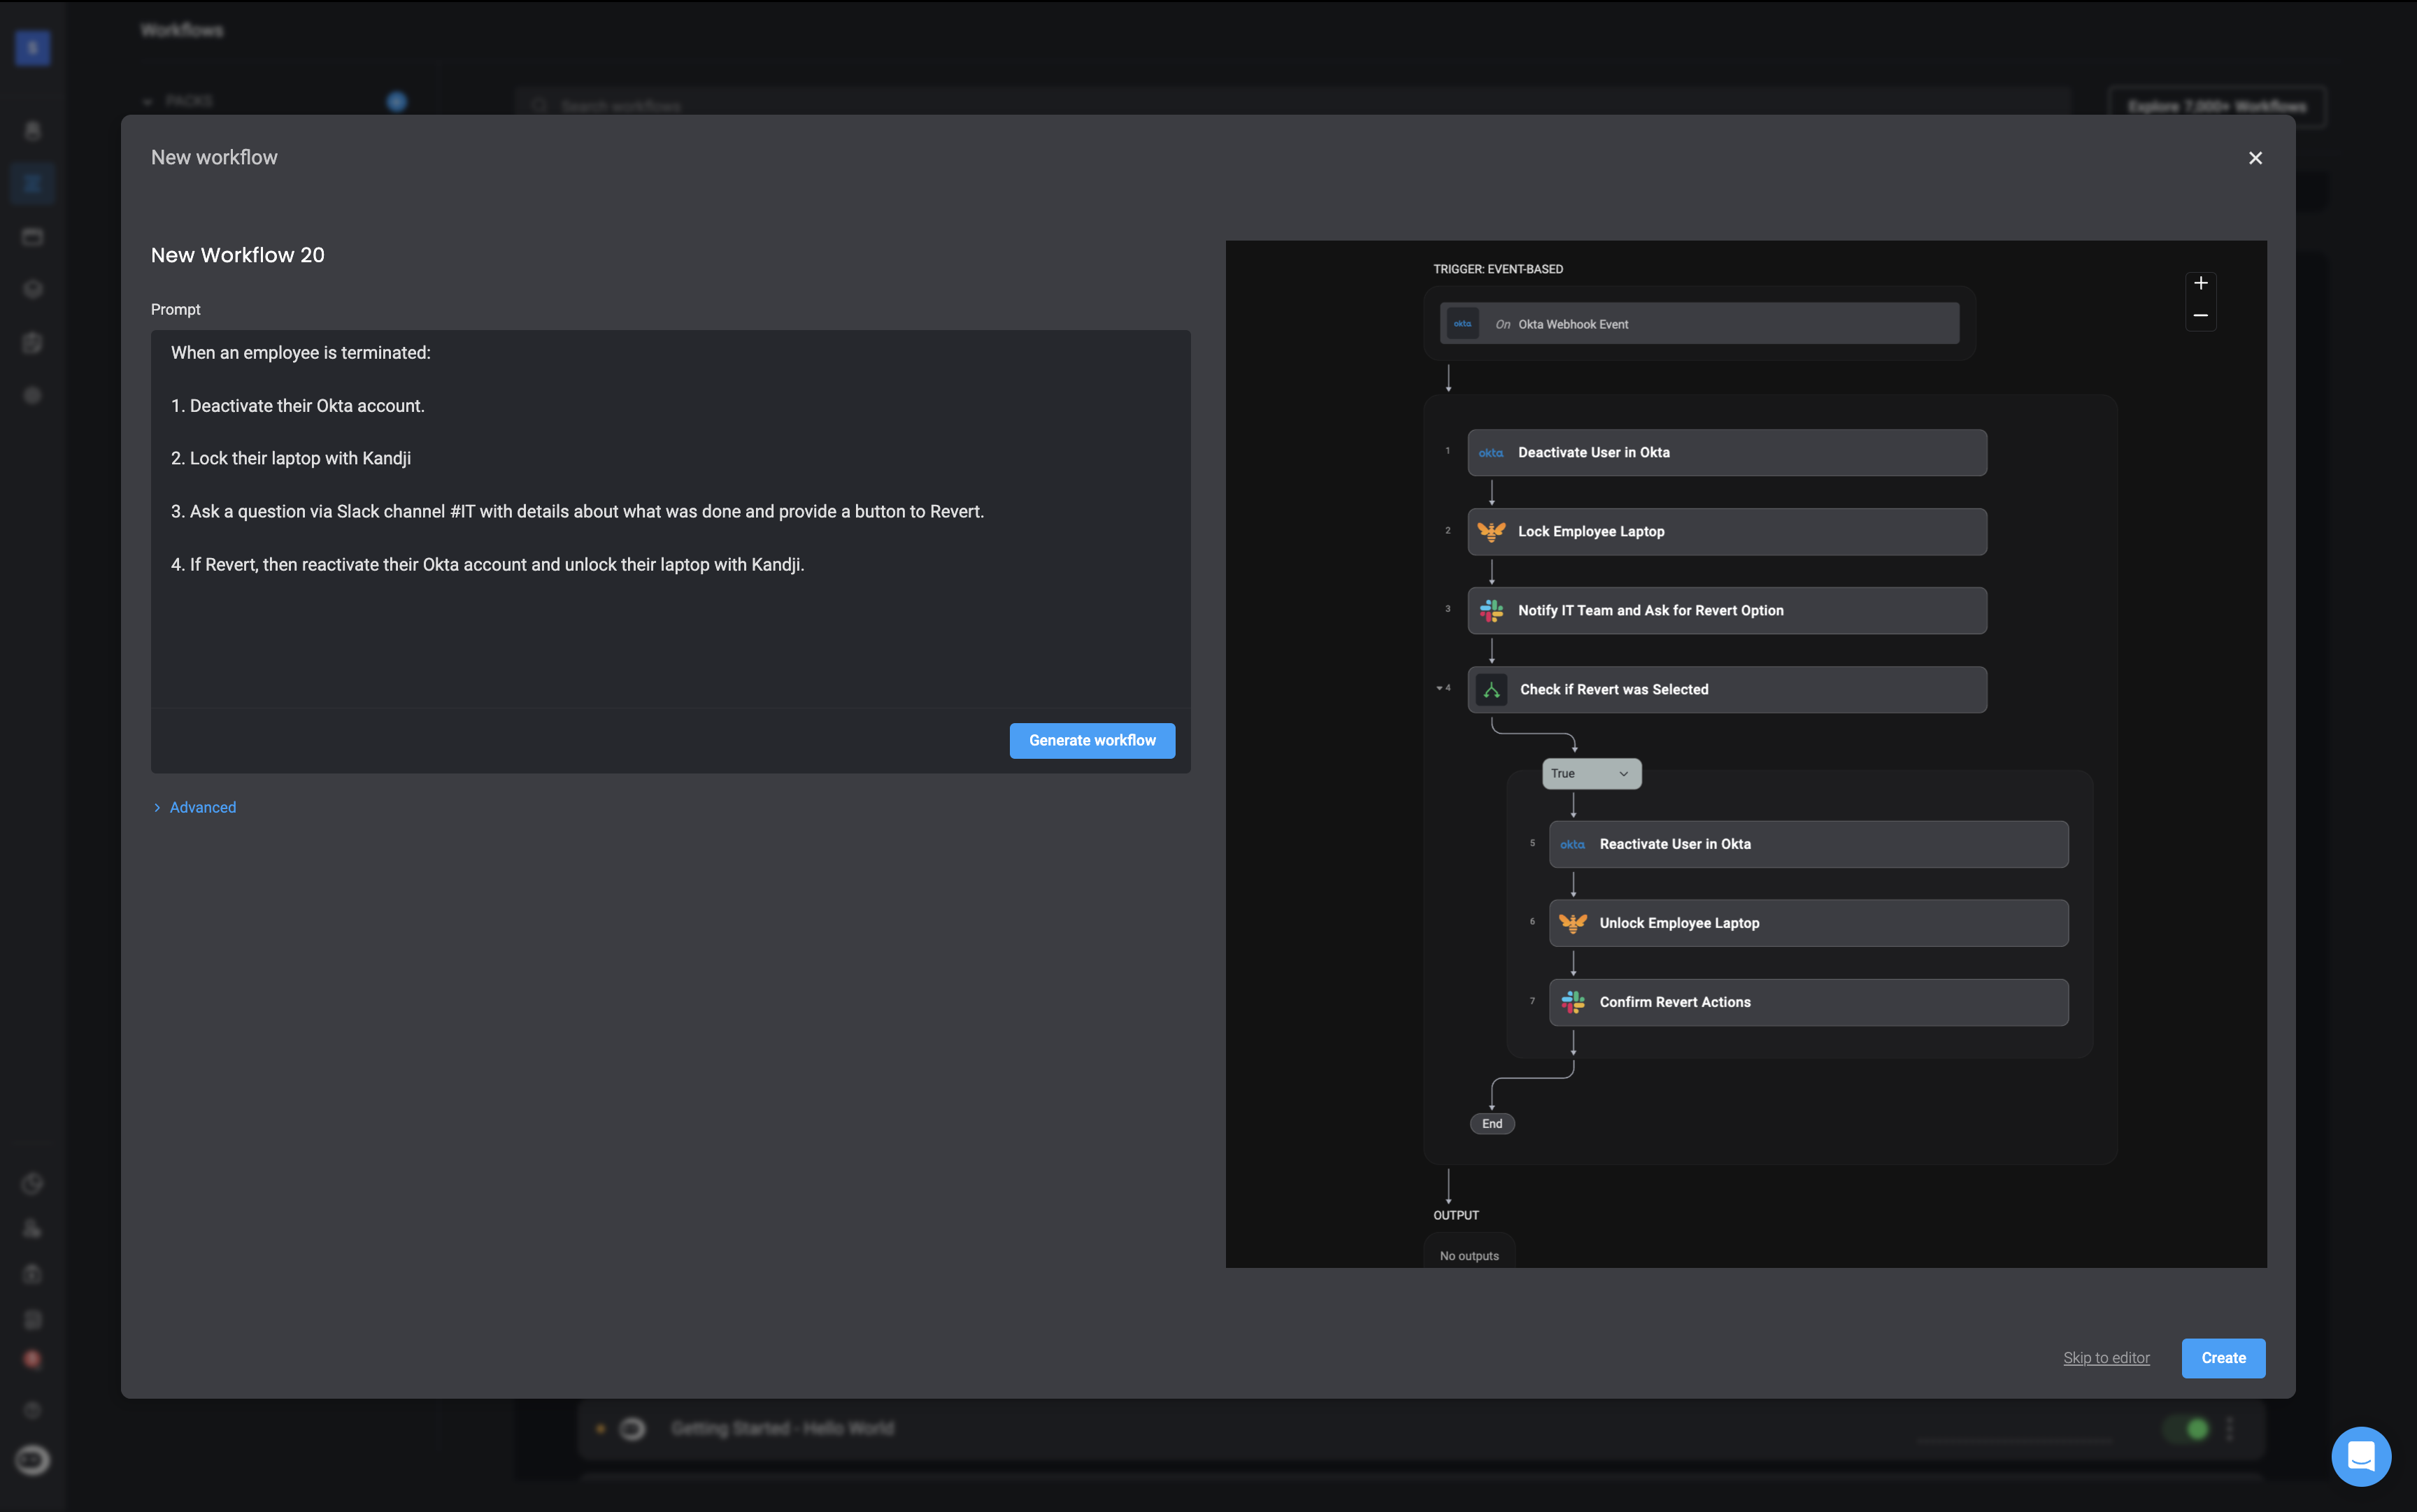
5. Keep it simple and concise: To tackle complex workflows effectively, consider breaking your prompt instructions into bullet points, ensuring each bullet point prompt is concise and straightforward. For Example:
***
## Best Practices
1. Be clear and precise: Providing clear and specific instructions will assist `Builder Copilot` in understanding your instructions clearly.
2. Use complete integration names: For example, instead of using generic terms like **Compute Instance**, specify the full name of the relevant integrations, such as **AWS EC2 Compute Instance**.
3. Refrain from using unknown or unrecognized vendors in your prompt.
4. Using the word **loop** in your prompt will likely generate a looping action in the results. Try to be as descriptive as possible about what you want the **loop** action to accomplish.
5. Keep it simple and concise: To tackle complex workflows effectively, consider breaking your prompt instructions into bullet points, ensuring each bullet point prompt is concise and straightforward. For Example:
 **OR**
 ***
***