> ## Documentation Index
> Fetch the complete documentation index at: https://docs.blinkops.com/llms.txt
> Use this file to discover all available pages before exploring further.
# Managing Your Workspace
> Manage your Blink workspace settings, members, and resources for effective team collaboration.
In the **Workspace** settings you can find all your workspaces in one place making it easier to manage, as well as all the details related to all your workspaces.
## Important Terms to Understand
1. **The Blink Organization** is a logical entity provided to an organization subscribing to Blink Ops.
2. A **Workspace** in Blink, is a compartment within the Blink Organization that organizes hyperautomation resources. An organization can have multiple workspaces, each designed for specific functions. Workspaces are independent, with no hierarchical connections between them, ensuring that each workspace operates separately. Each workspace manages its own set of resources, which can be shared with other workspaces if needed. Access to resources within a workspace is controlled by [RBAC (Role-Based Access Control) scopes](/docs/blink-platform/account-management/roles#workspaces-user-role-scope), which are linked to [user roles](/docs/blink-platform/account-management/roles).
3. **RBAC Scopes**, defined per workspace, govern the ability of a particular user or API client to perform specific operations on specific resources. Each scope is evaluated separately in each workspace. The list of available scopes can be found in our [documentation](/docs/blink-platform/account-management/roles#workspaces-user-role-scope). As new features and functionality are added to the product, new scopes are created.
4. **User Roles**, defined per workspace, are aggregations of scopes within the relevant workspace that allow users assigned to the role to perform specific tasks. Every workspace has a set of predefined user roles, with the option to define customized roles. To learn more about **User Roles** please navigate to the [User Role's Section](/docs/blink-platform/account-management/roles) of our documentation.
5. A **Personal Workspace** is a workspace associated with exactly one user, where the workspace’s internal identifier matches the user’s name.
***
## Settings
### Inviting a New Member to a Workspace (RBAC)
Invite a new member to your workspace by navigating to the "Settings" page from the left hand navigation menu.
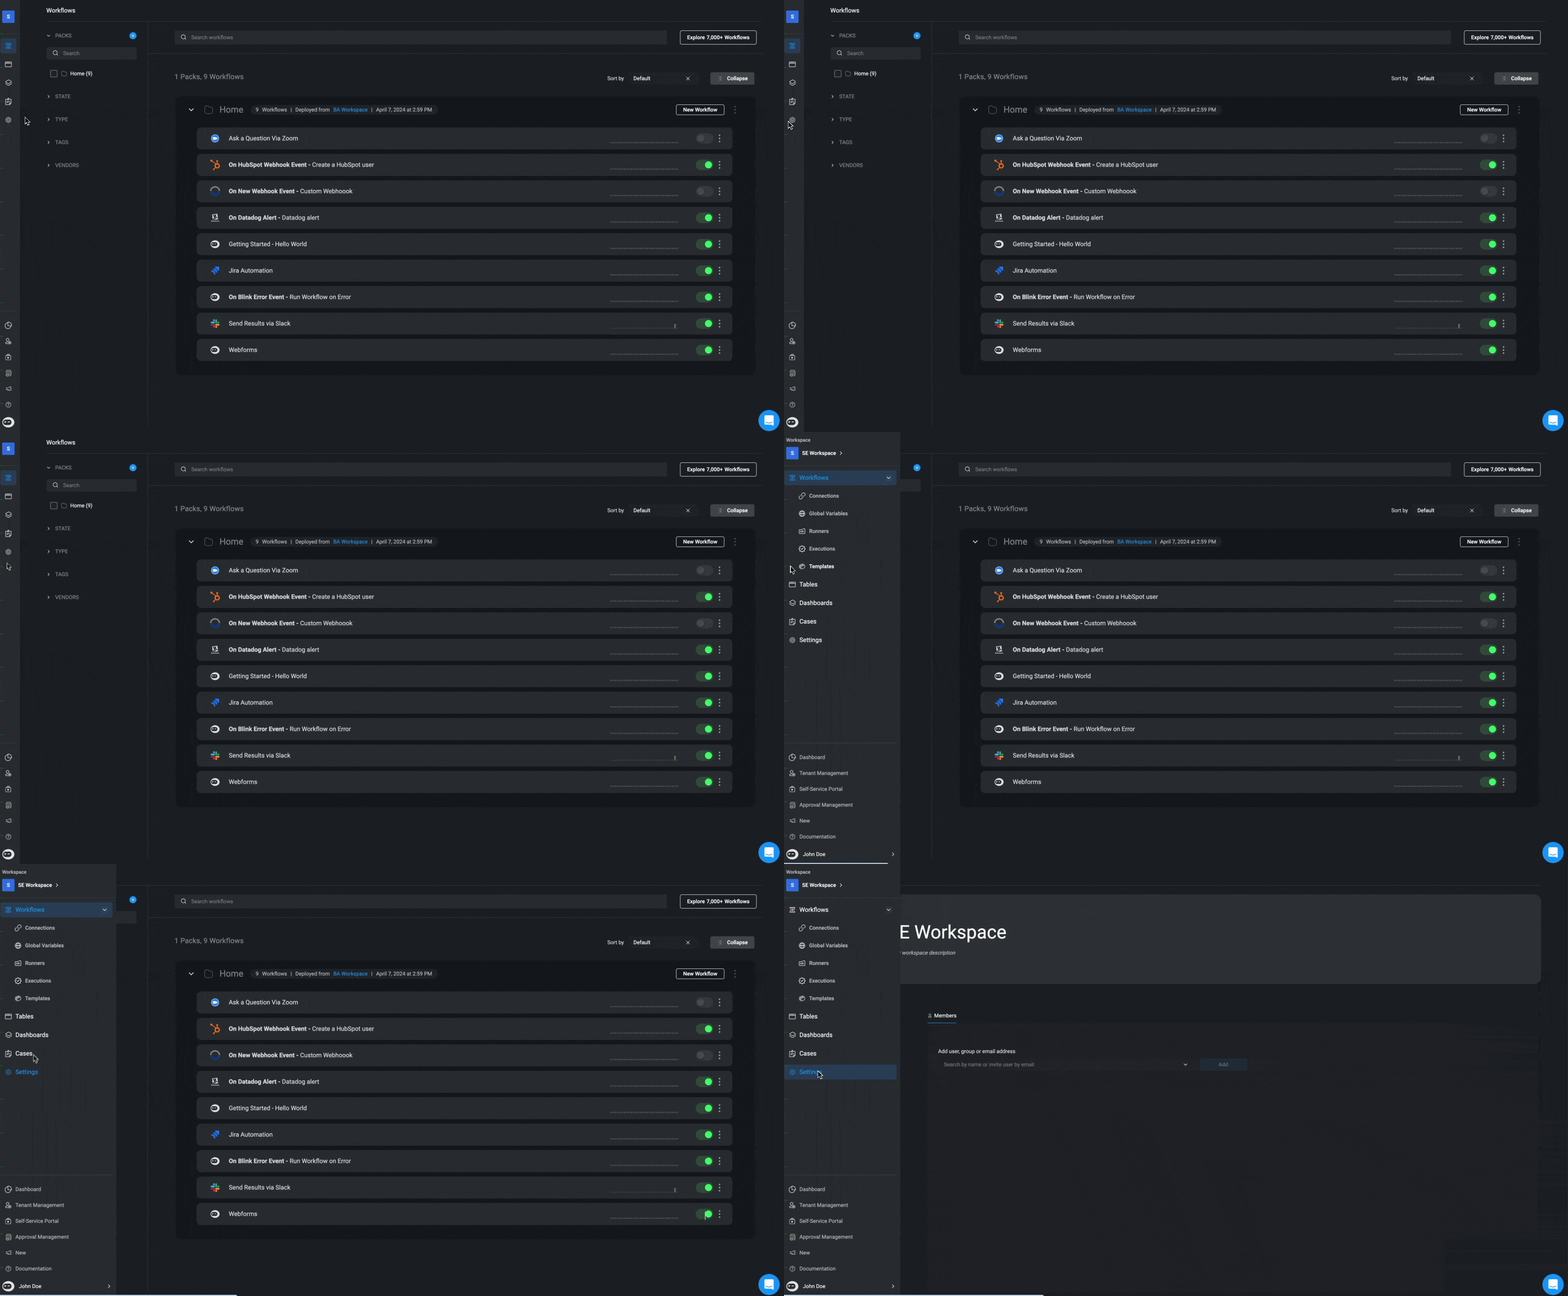 A dialogue box opens with the details of the workspace and the option to invite a new member to your workspace. You can invite only a member of the tenant. You can see a list of all the members of your workspace and control their permissions.
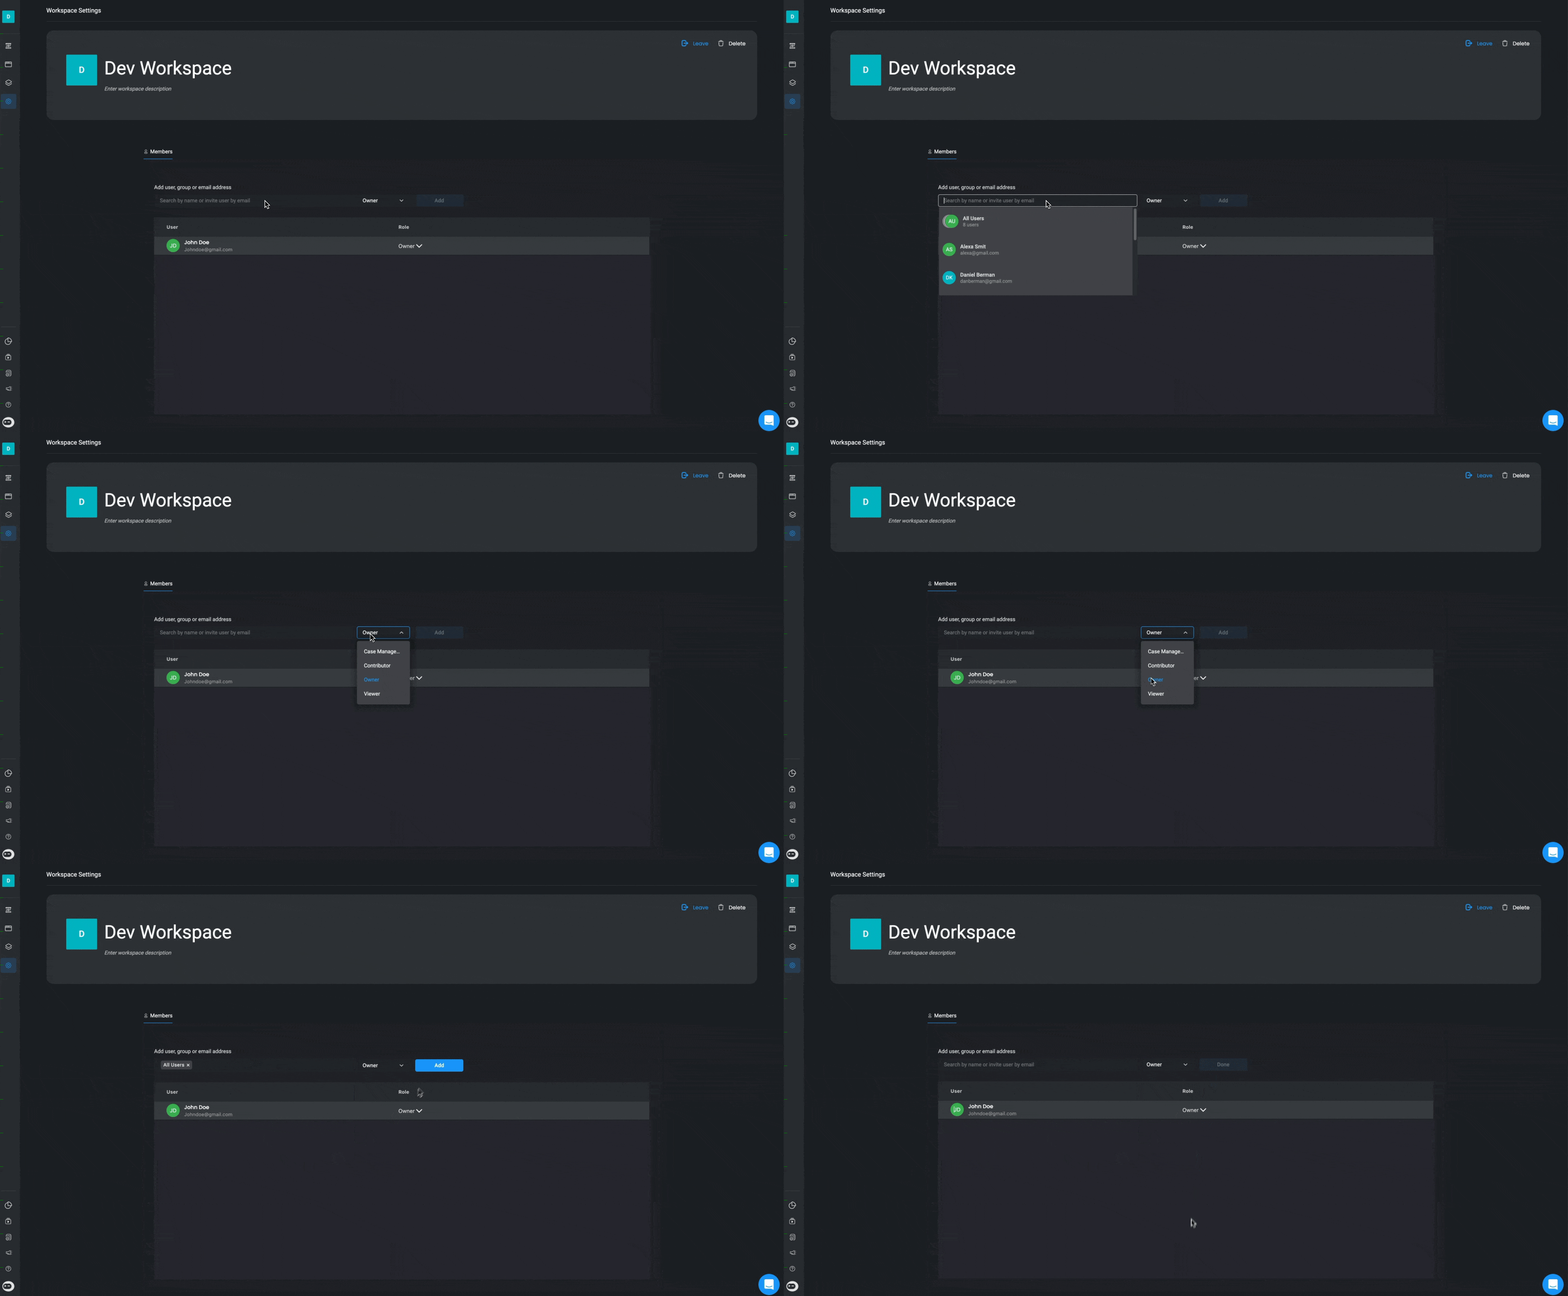 Each member invited to a workspace can be assigned one of the following roles:
**Note**: Every workspace must have at least one owner.
| Role | Description |
| ----------- | ----------------------------------------------------------------------------------------------------------------------- |
| Owner | Can invite new members to the workspace, change user permissions and delete users (full access to workspace settings) |
| Contributor | Has full access to the workspaces. Can design, edit and execute Workflows. |
| Viewer | View-only permission. Cannot create or modify workspace resources and Workflows. Members can execute existing Workflows |
### General
When you enable the “Overview Page” option, the occurs overview page becomes available for that specific workspace.
Each member invited to a workspace can be assigned one of the following roles:
**Note**: Every workspace must have at least one owner.
| Role | Description |
| ----------- | ----------------------------------------------------------------------------------------------------------------------- |
| Owner | Can invite new members to the workspace, change user permissions and delete users (full access to workspace settings) |
| Contributor | Has full access to the workspaces. Can design, edit and execute Workflows. |
| Viewer | View-only permission. Cannot create or modify workspace resources and Workflows. Members can execute existing Workflows |
### General
When you enable the “Overview Page” option, the occurs overview page becomes available for that specific workspace.
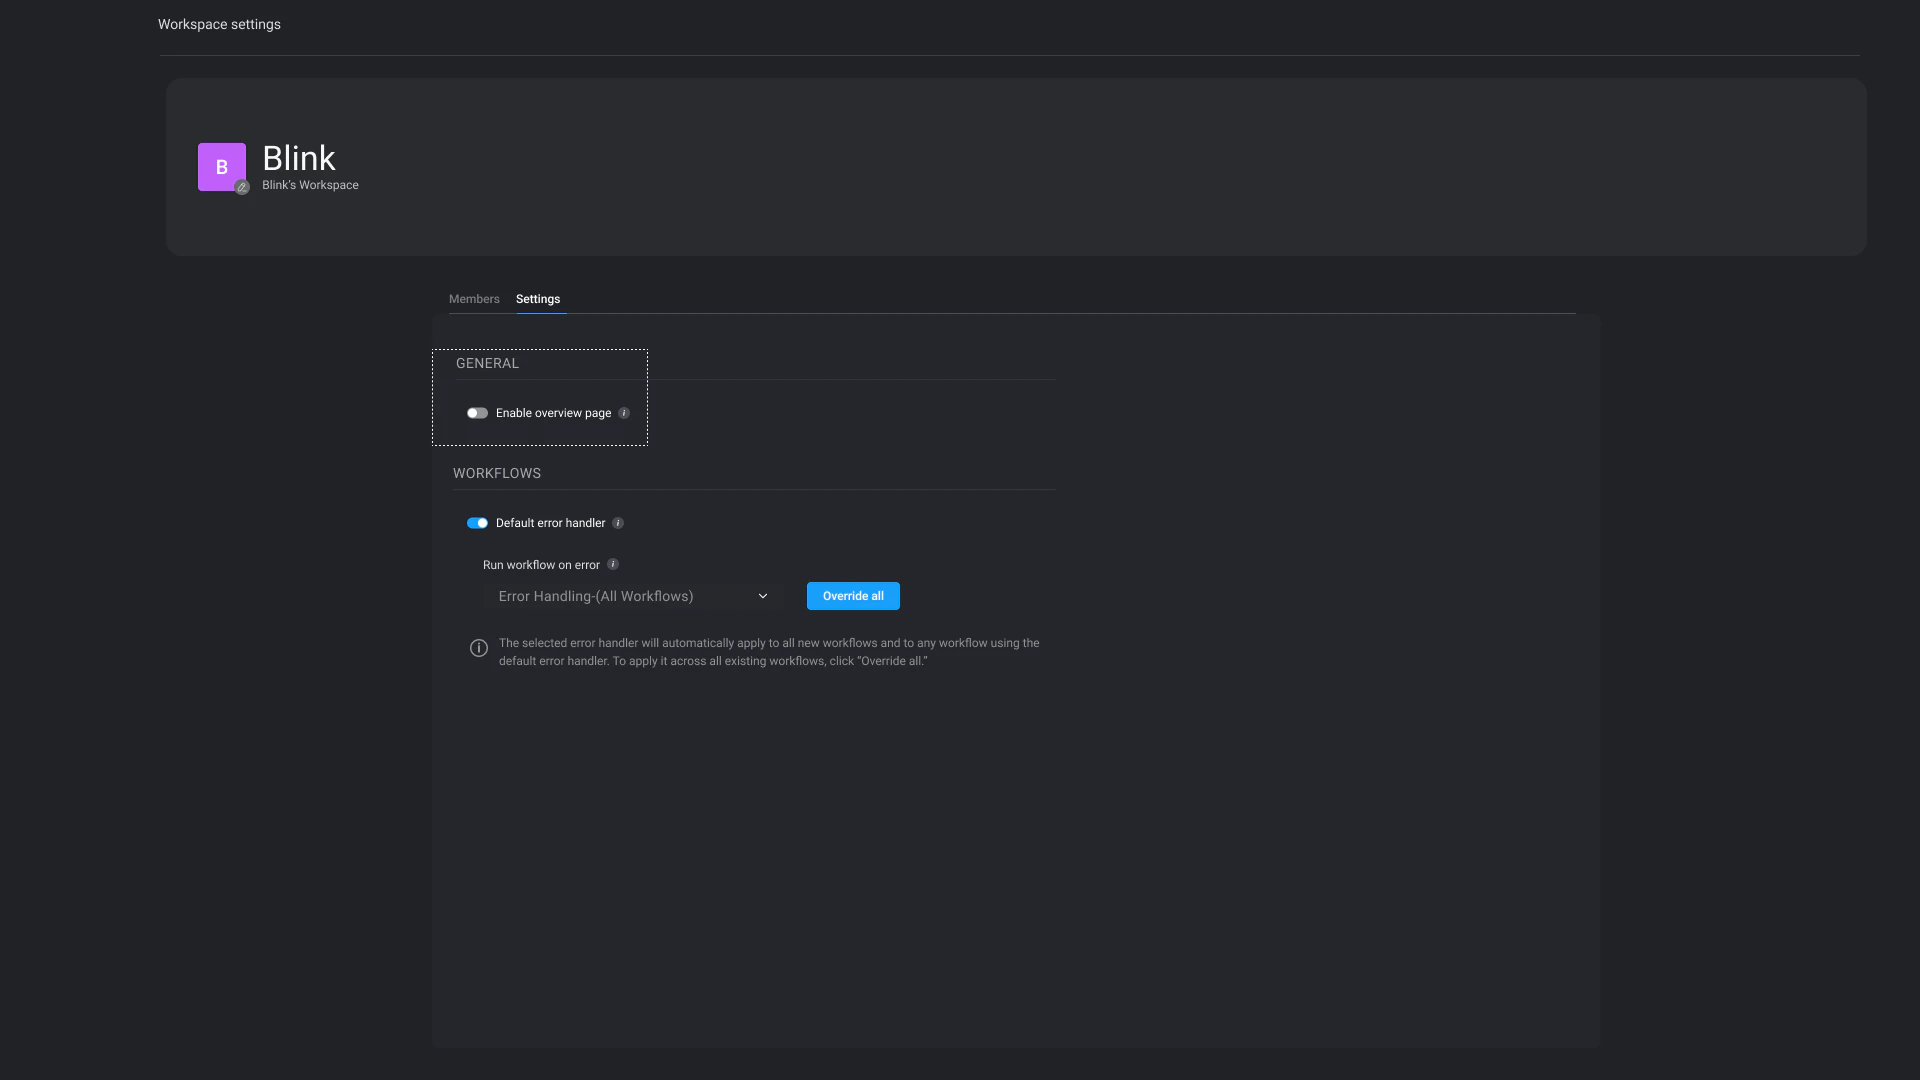 Navigating to the overview page displays all available published dashboards within your workspace.
**Note**:
1. All dashboards displayed are in view mode
2. You can configure a default dashboard to automatically appear on the Overview page through the [Dashboard Management Settings](/docs/blink-platform/dashboards/dashboard-management/dashboard-management#dashboard-table-settings).
Navigating to the overview page displays all available published dashboards within your workspace.
**Note**:
1. All dashboards displayed are in view mode
2. You can configure a default dashboard to automatically appear on the Overview page through the [Dashboard Management Settings](/docs/blink-platform/dashboards/dashboard-management/dashboard-management#dashboard-table-settings).
 ### Workflows- Default Error Handler
Only user's with the `workspace:edit` access permissions, can enable the 'Default Error Handler' in their workspace settings.
The default error-handling logic provides a consistent, generic response across the entire workspace whenever a workflow encounters an error, such as sending a notification to a designated Slack channel or team. This ensures errors are handled uniformly without requiring custom error-handling logic in each individual workflow.
**Note**: Only [Event-based workflows](/docs/workflows/building-workflows/triggers/event-based-triggers/event-based-triggers) that include the [Blink Error Event](/docs/workflows/building-workflows/error-handling/run-error#creating-an-event-based-workflow-using-the-blink-error-event) are available for selection as the default error-handling workflow.
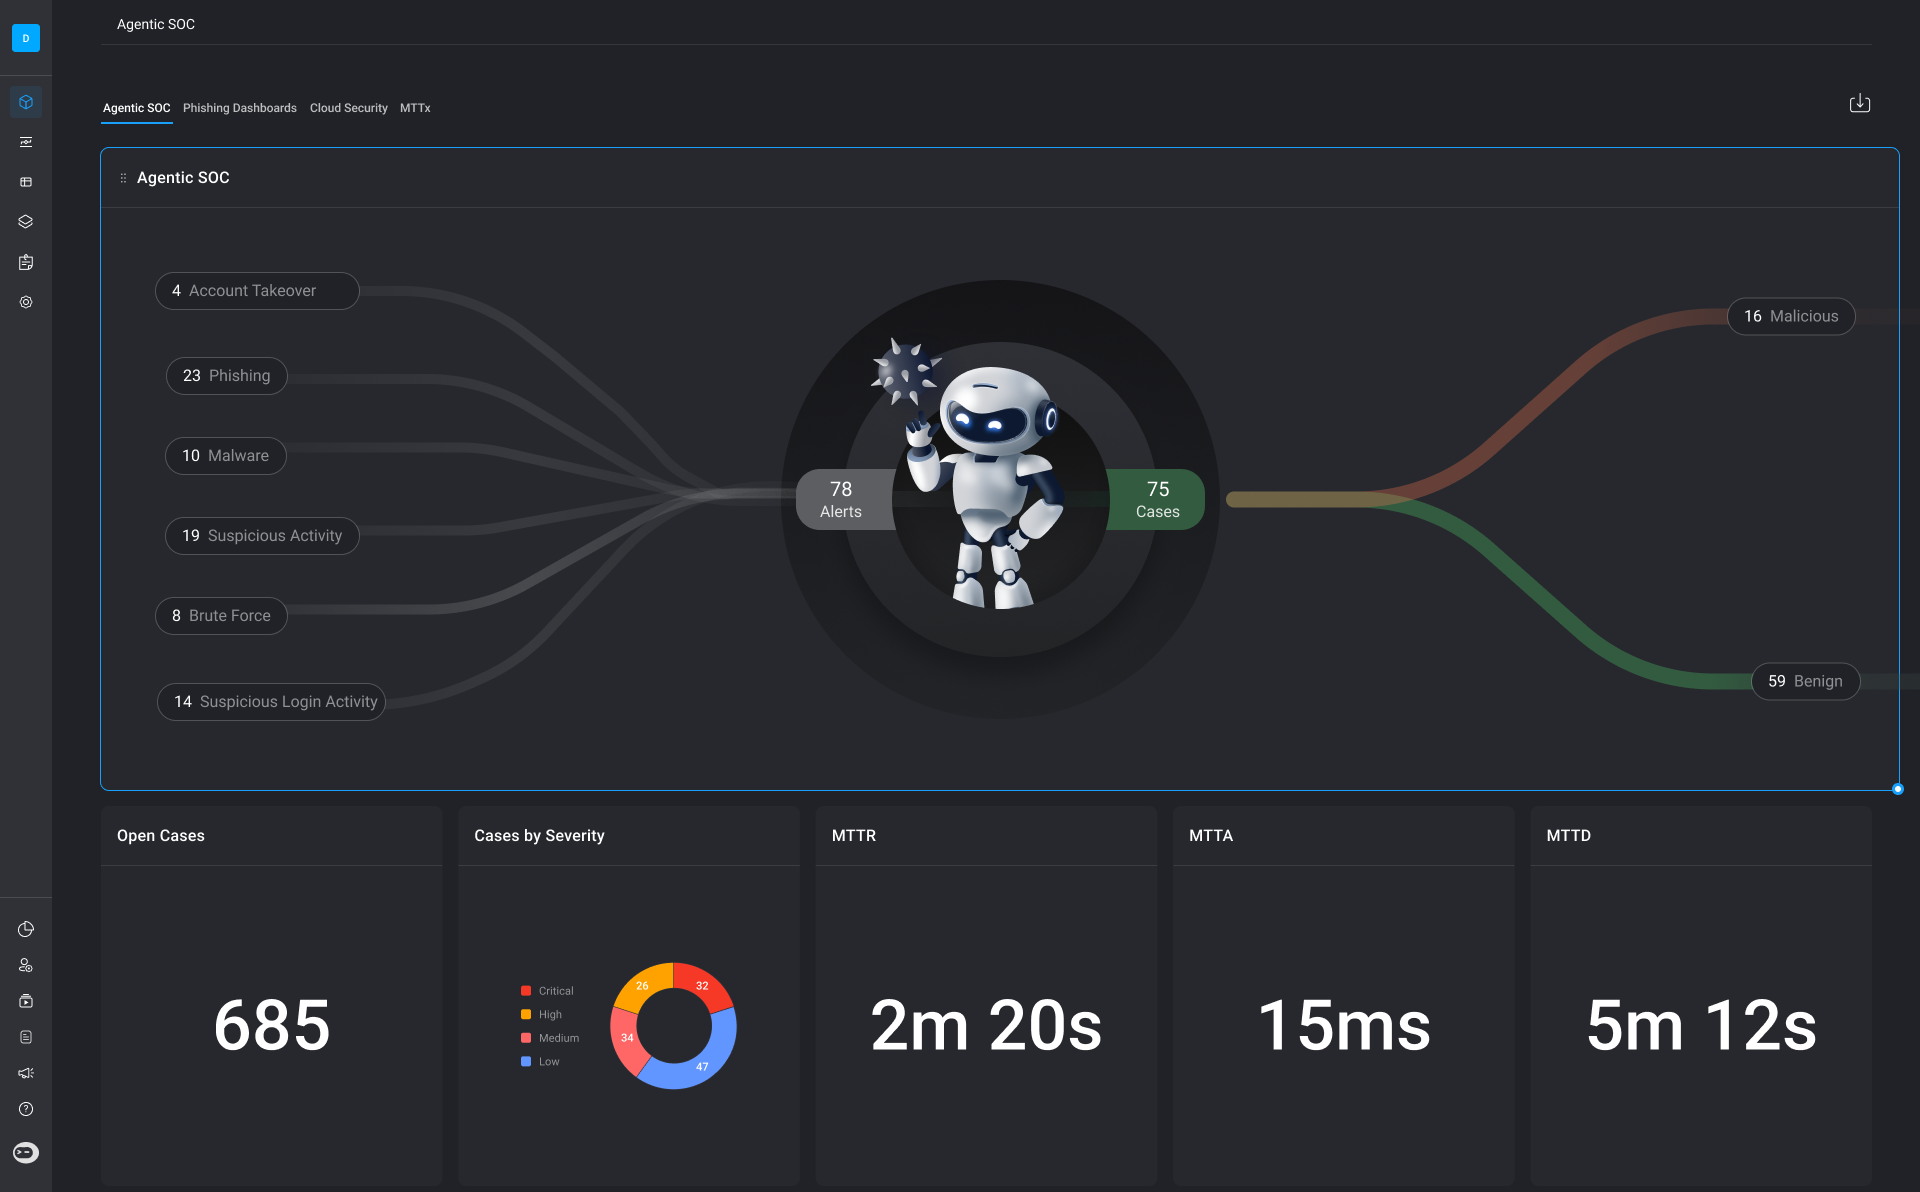
To set a workflow as the default error-handler for all workflows in the workspace, enable the **Default Error Handler** setting and select the desired workflow from the dropdown menu. The selected workflow will then be applied automatically as the default error handler.
### Workflows- Default Error Handler
Only user's with the `workspace:edit` access permissions, can enable the 'Default Error Handler' in their workspace settings.
The default error-handling logic provides a consistent, generic response across the entire workspace whenever a workflow encounters an error, such as sending a notification to a designated Slack channel or team. This ensures errors are handled uniformly without requiring custom error-handling logic in each individual workflow.
**Note**: Only [Event-based workflows](/docs/workflows/building-workflows/triggers/event-based-triggers/event-based-triggers) that include the [Blink Error Event](/docs/workflows/building-workflows/error-handling/run-error#creating-an-event-based-workflow-using-the-blink-error-event) are available for selection as the default error-handling workflow.
To set a workflow as the default error-handler for all workflows in the workspace, enable the **Default Error Handler** setting and select the desired workflow from the dropdown menu. The selected workflow will then be applied automatically as the default error handler.
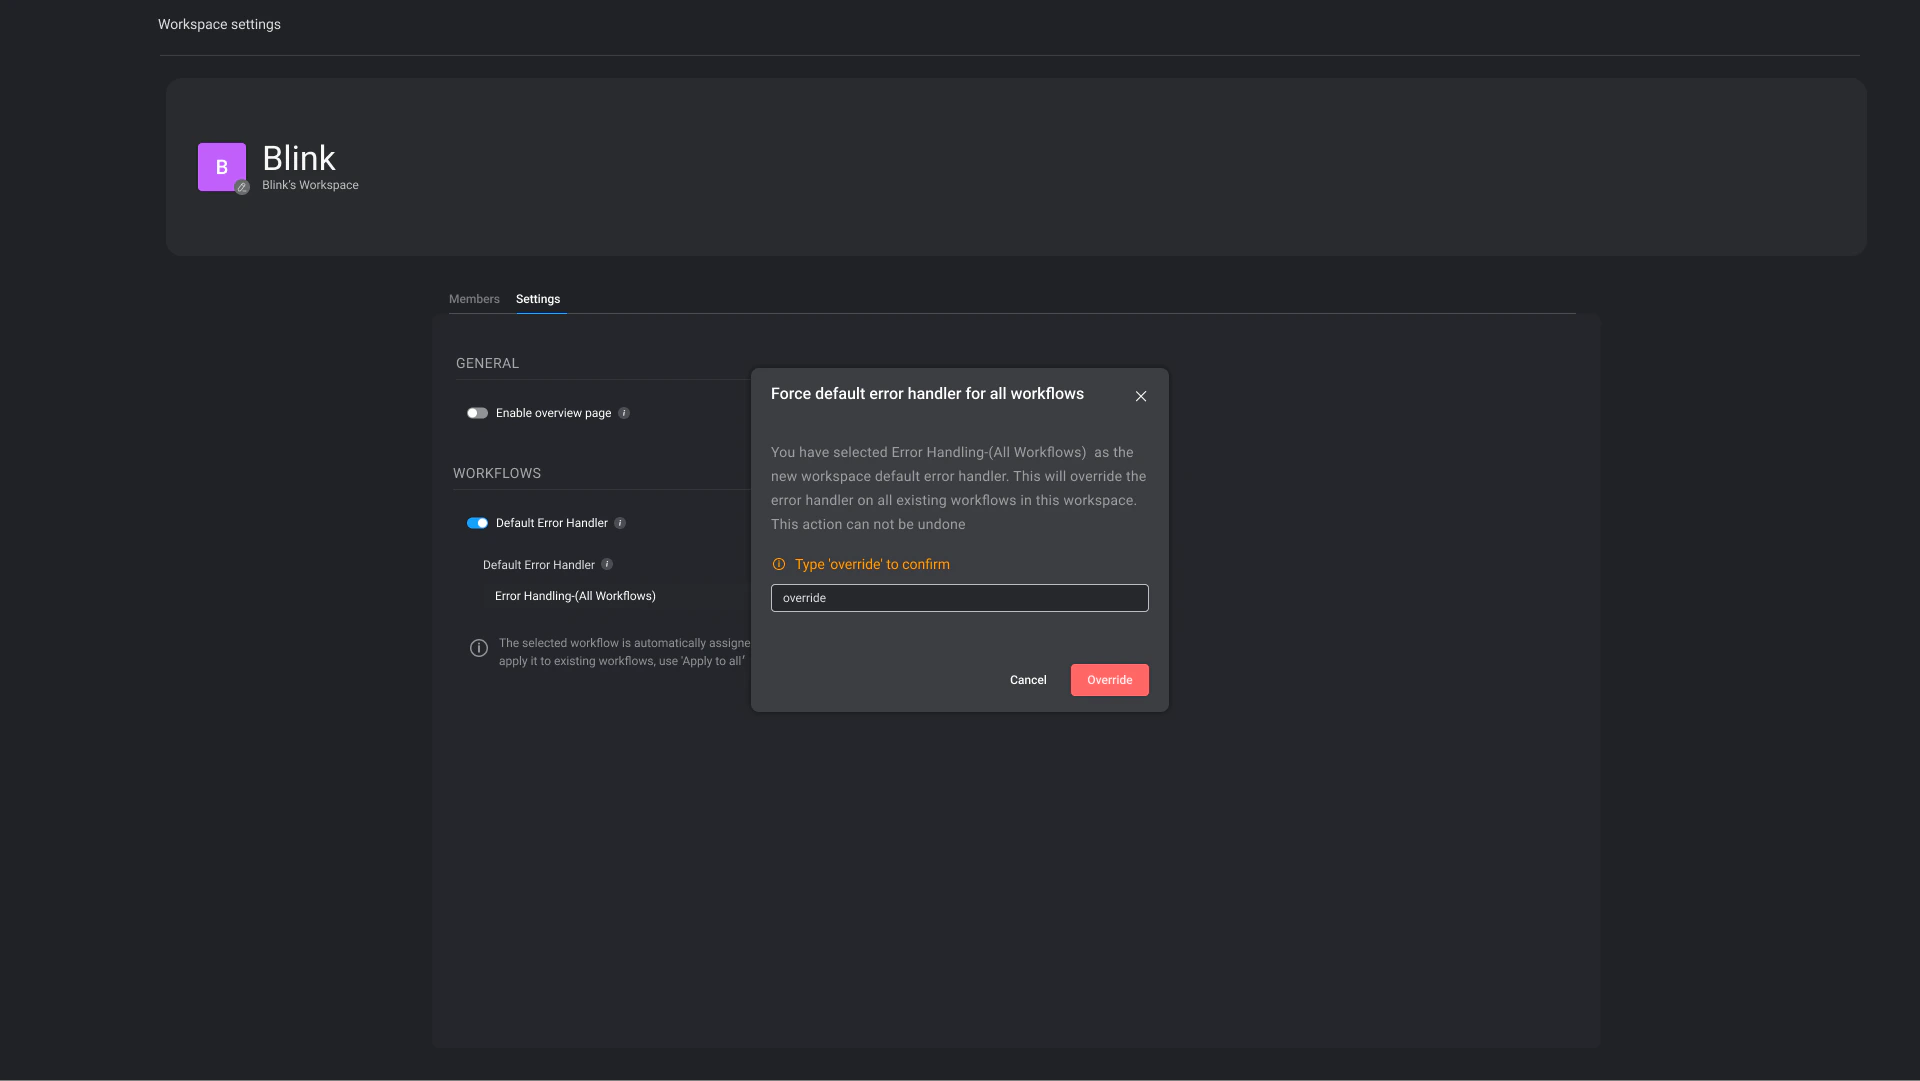
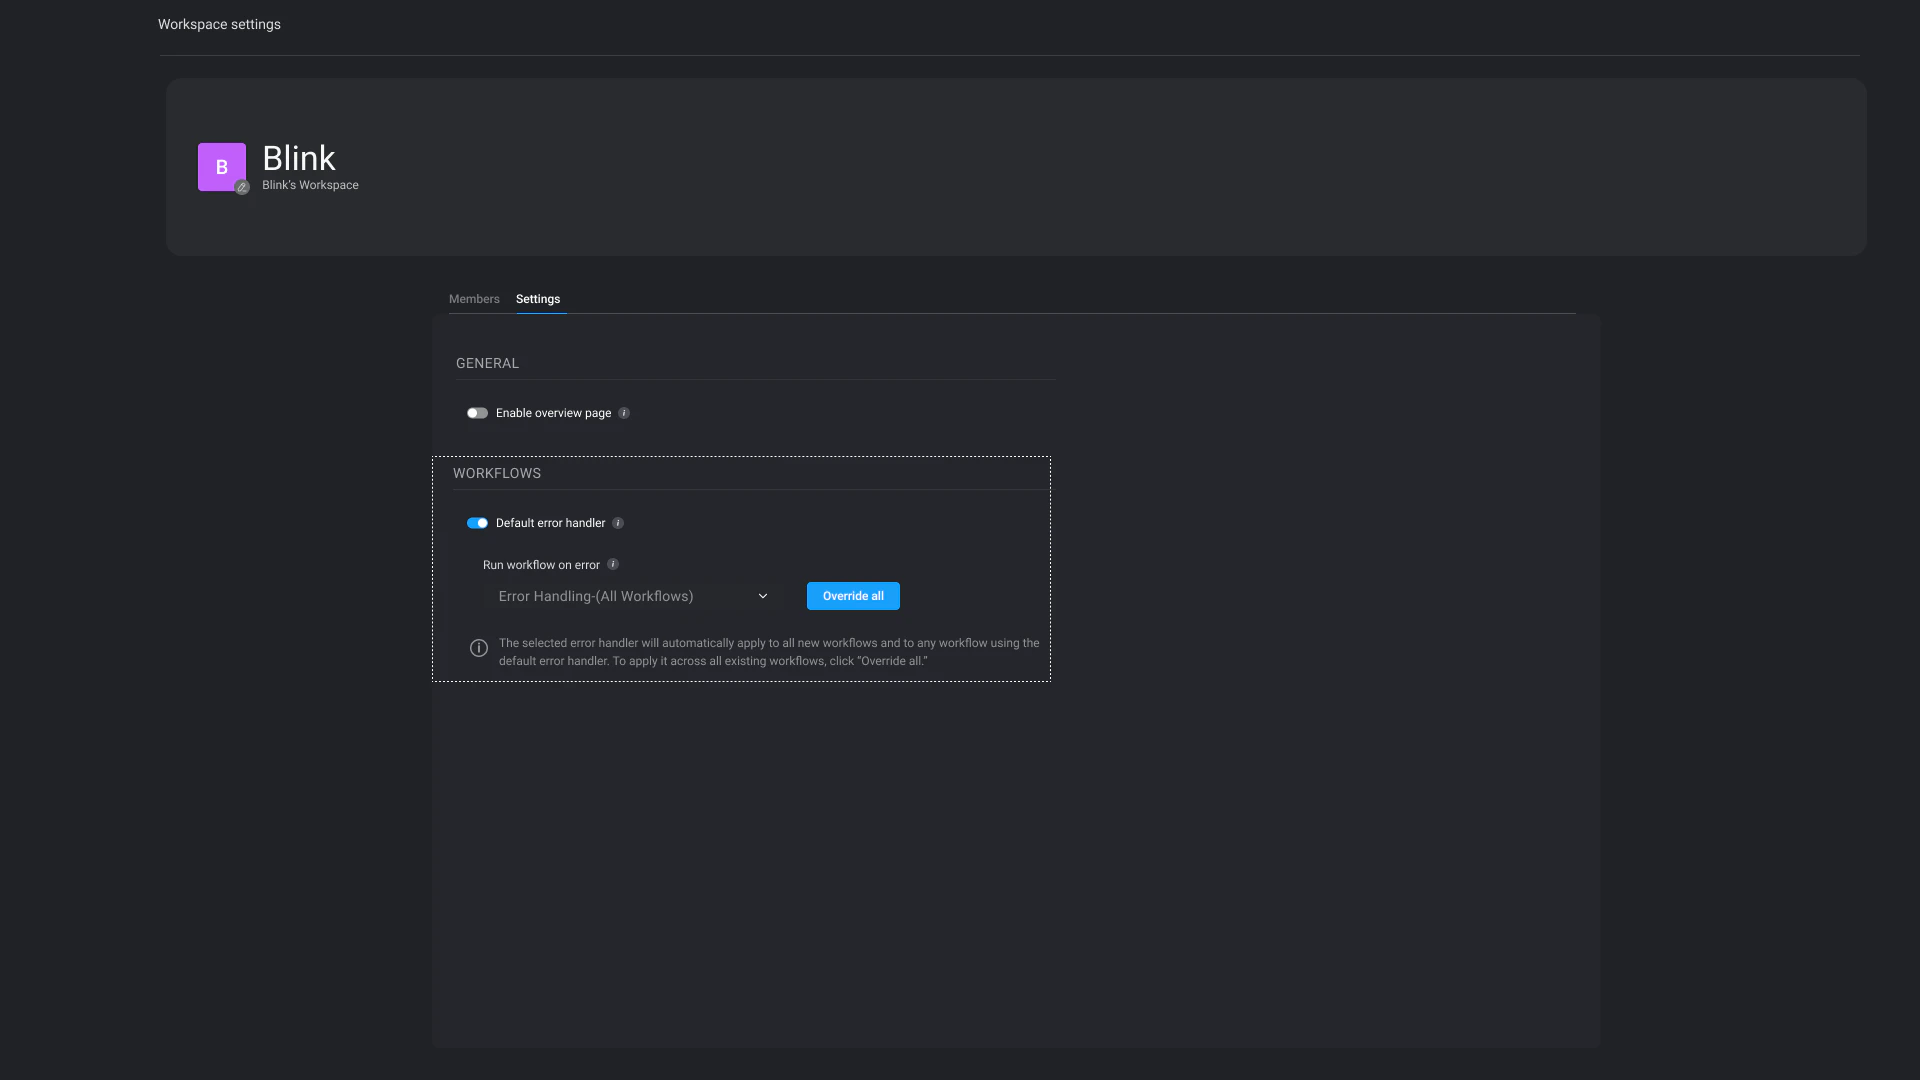 You can optionally choose to apply the selected workflow as the default error handler across all existing workflows in your workspace, overriding any that are currently configured with a custom error handler in the [Workflow Overview Page](/docs/workflows/managing-workflows/workflow-overview-page#error-handling).
Click **“Override All”** and then type **“override”** to confirm.
This action cannot be undone.
You can optionally choose to apply the selected workflow as the default error handler across all existing workflows in your workspace, overriding any that are currently configured with a custom error handler in the [Workflow Overview Page](/docs/workflows/managing-workflows/workflow-overview-page#error-handling).
Click **“Override All”** and then type **“override”** to confirm.
This action cannot be undone.
 ***
## Filtering your Workspaces
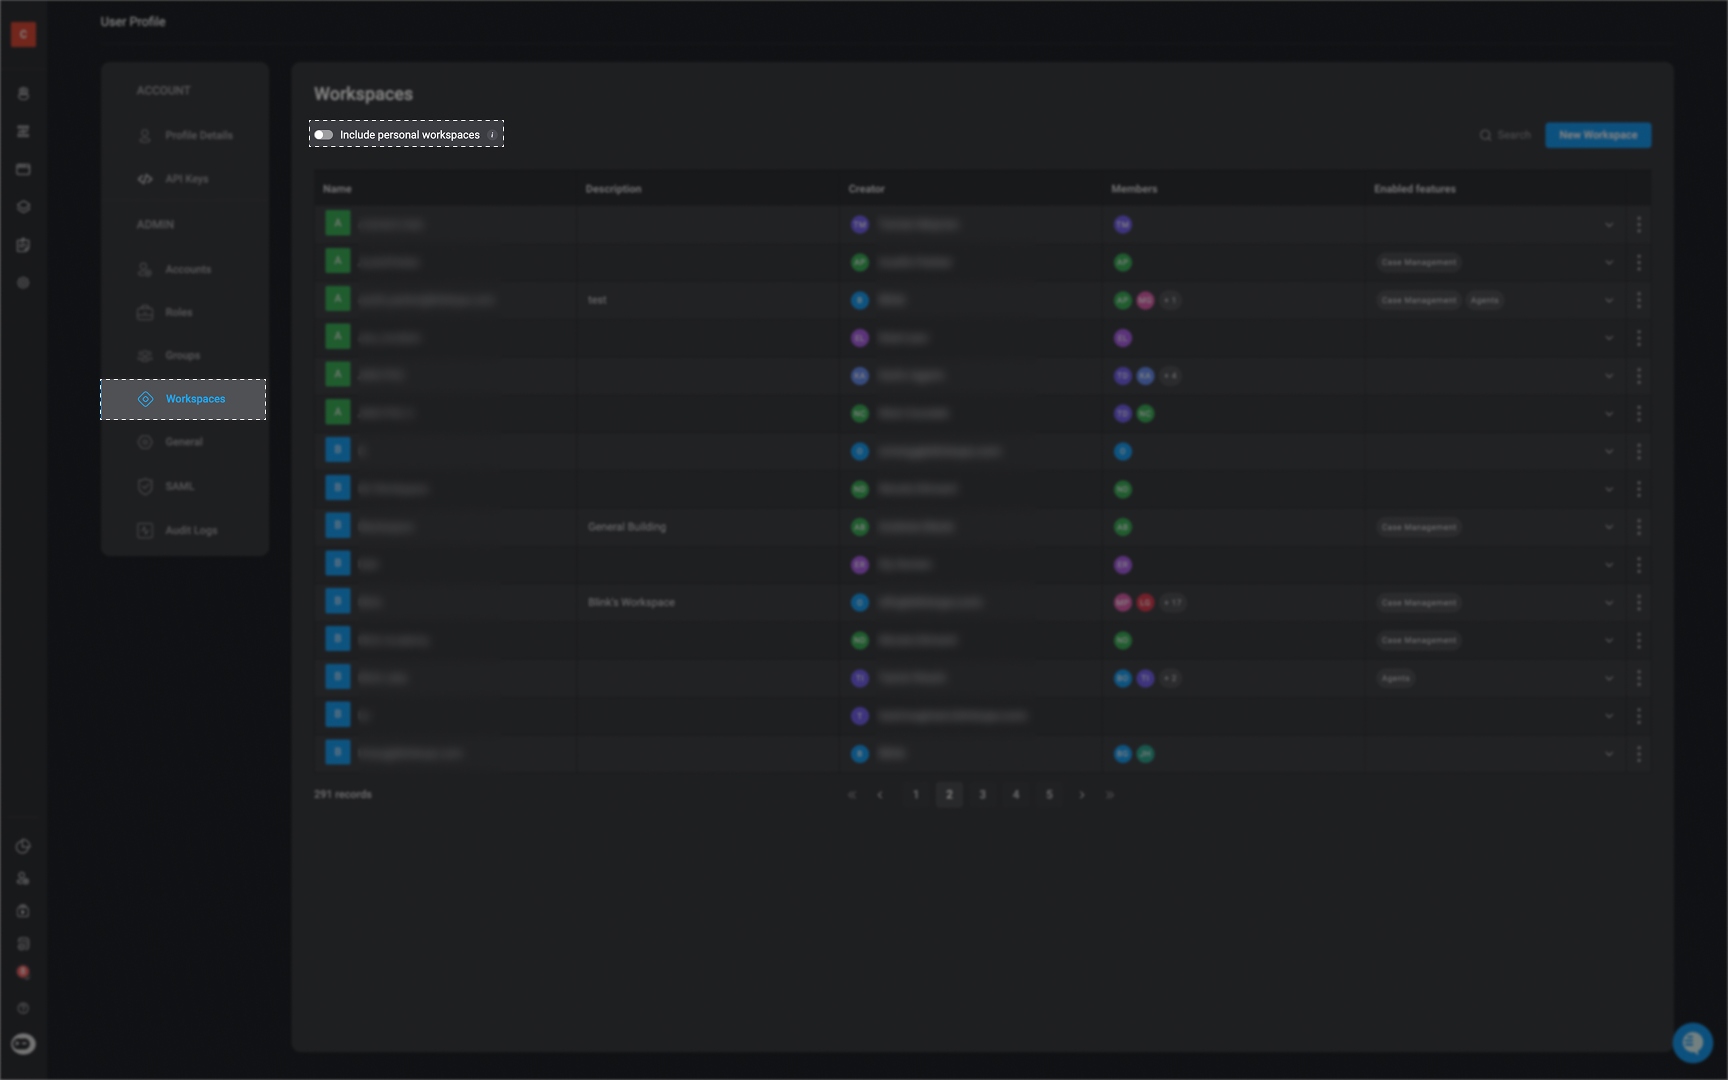
In the Workspace Settings, use the 'Include Personal Workspaces' toggle in the top-left corner to show or hide Personal Workspaces
***
## Filtering your Workspaces
In the Workspace Settings, use the 'Include Personal Workspaces' toggle in the top-left corner to show or hide Personal Workspaces
 ***
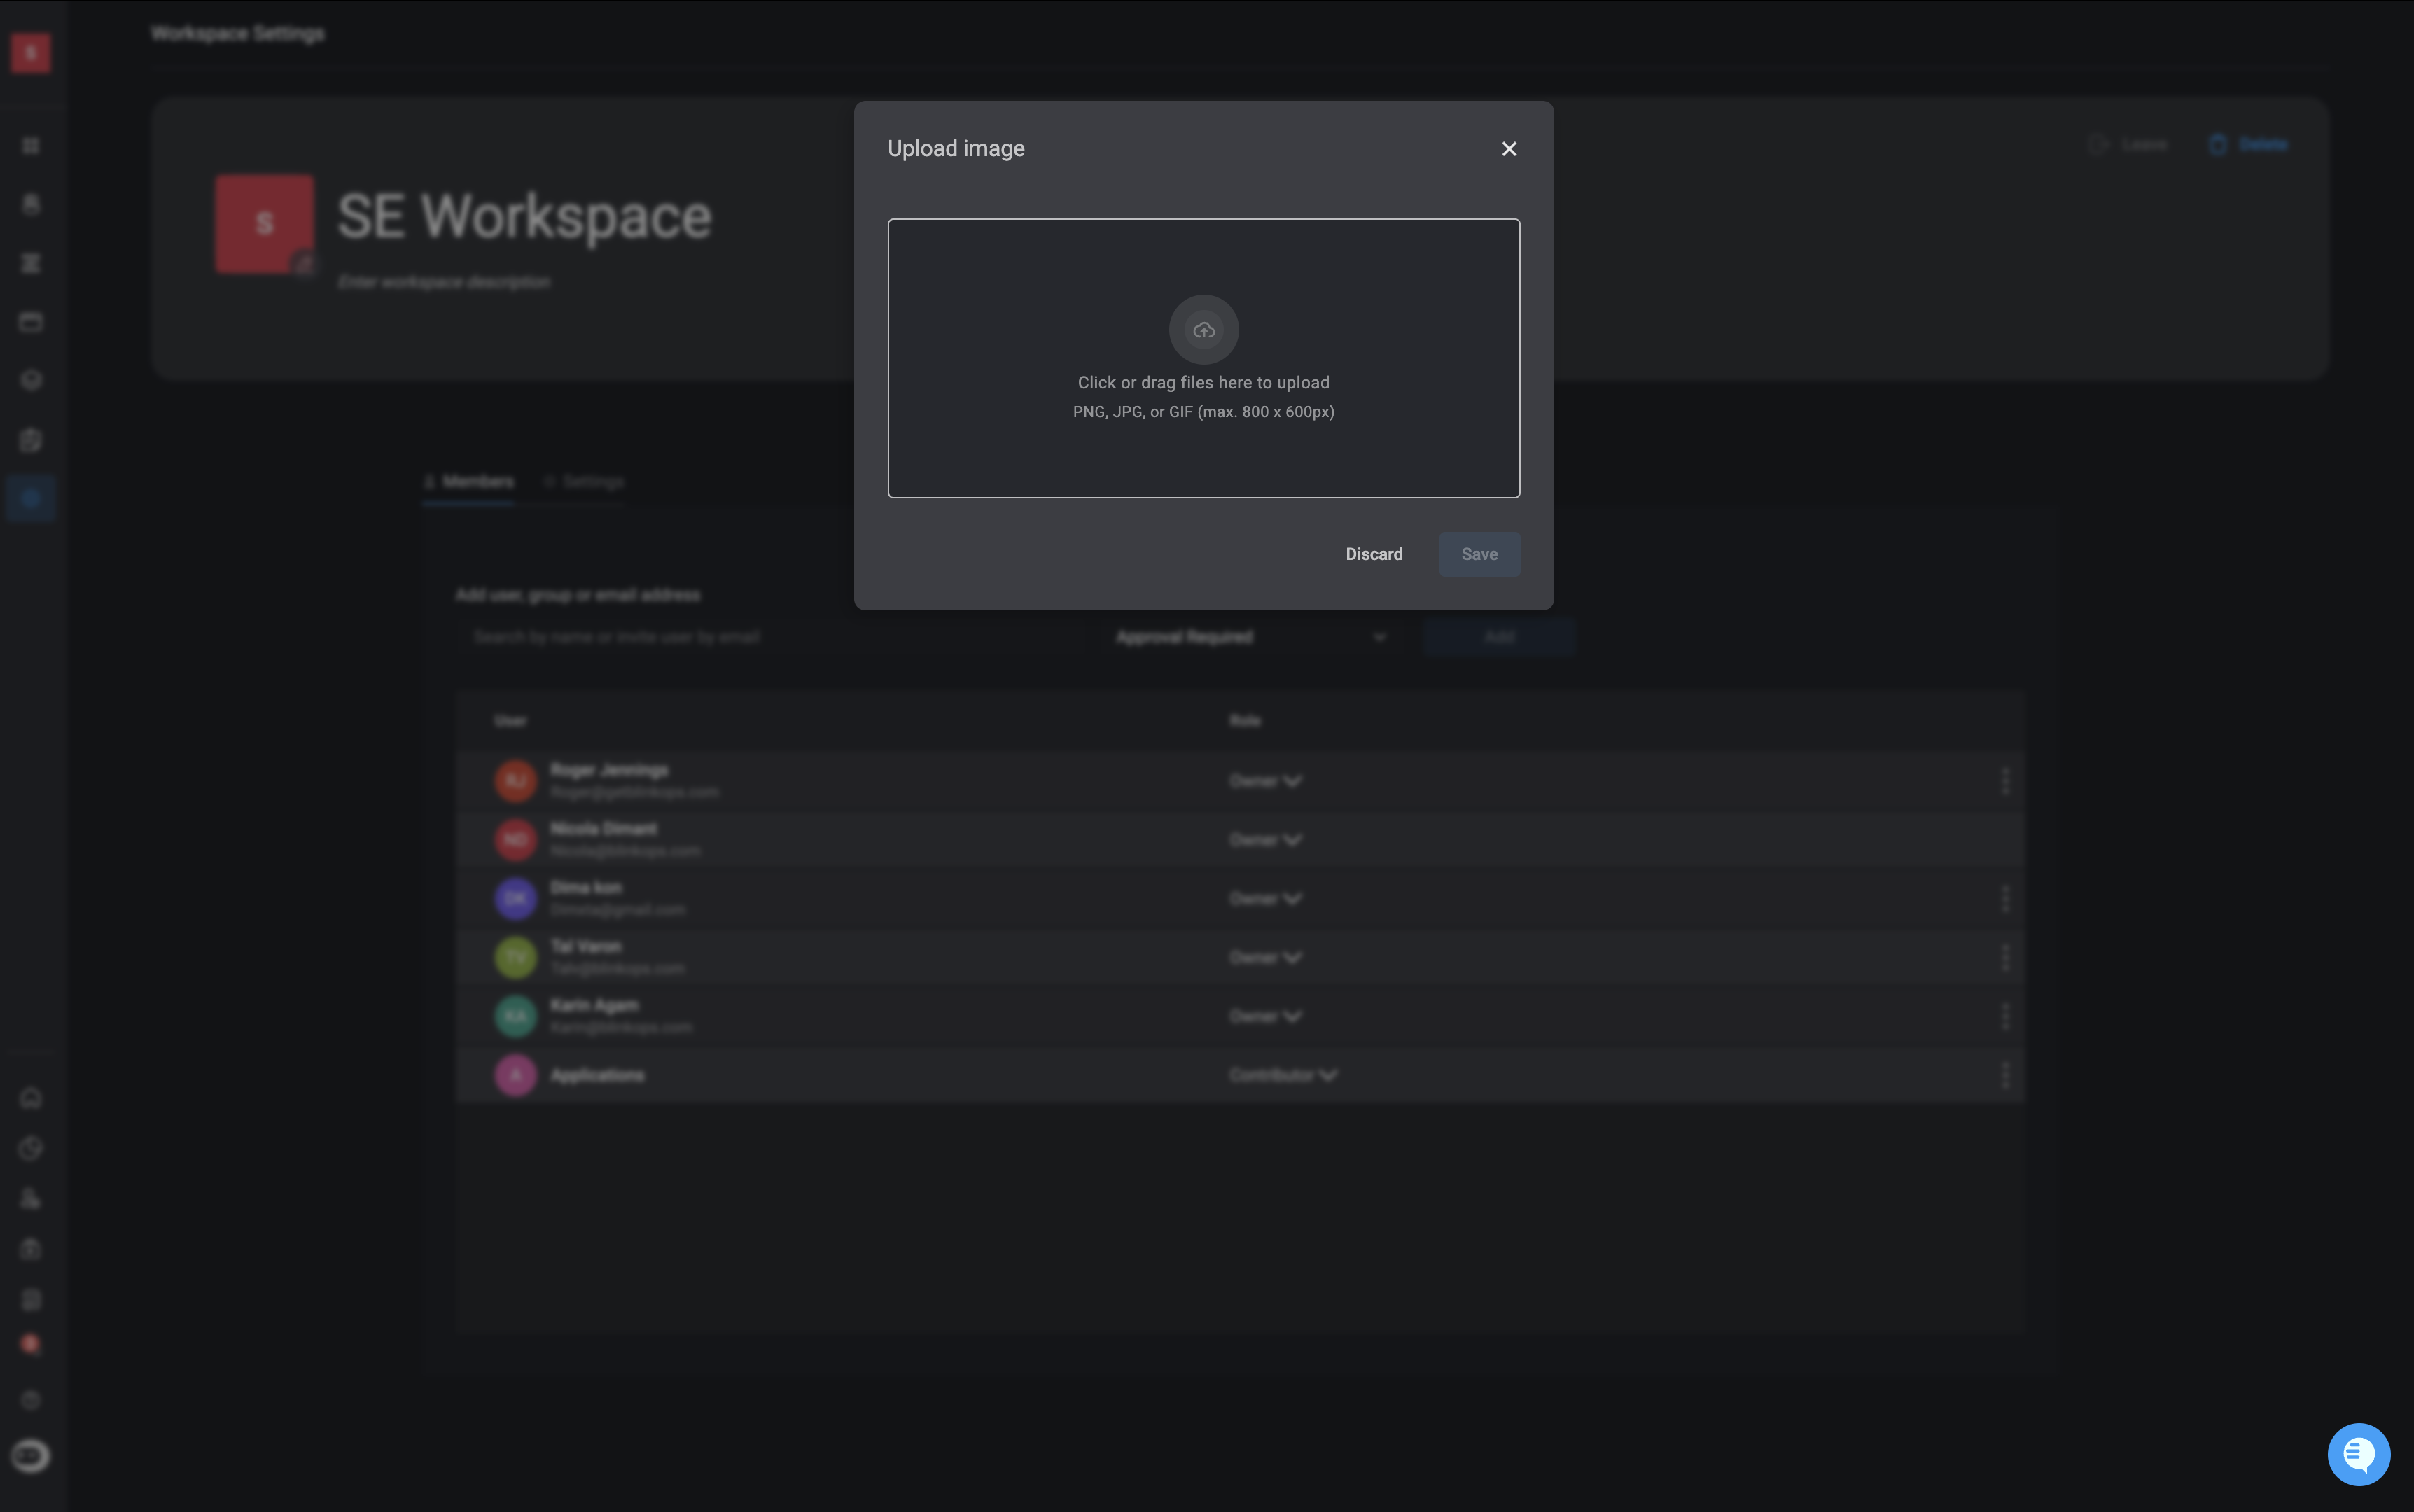
## Change your Workspace's Logo
Once uploaded, your custom logo will automatically appear anywhere the workspace logo is displayed, including the Workspaces menu and across workspace pages.
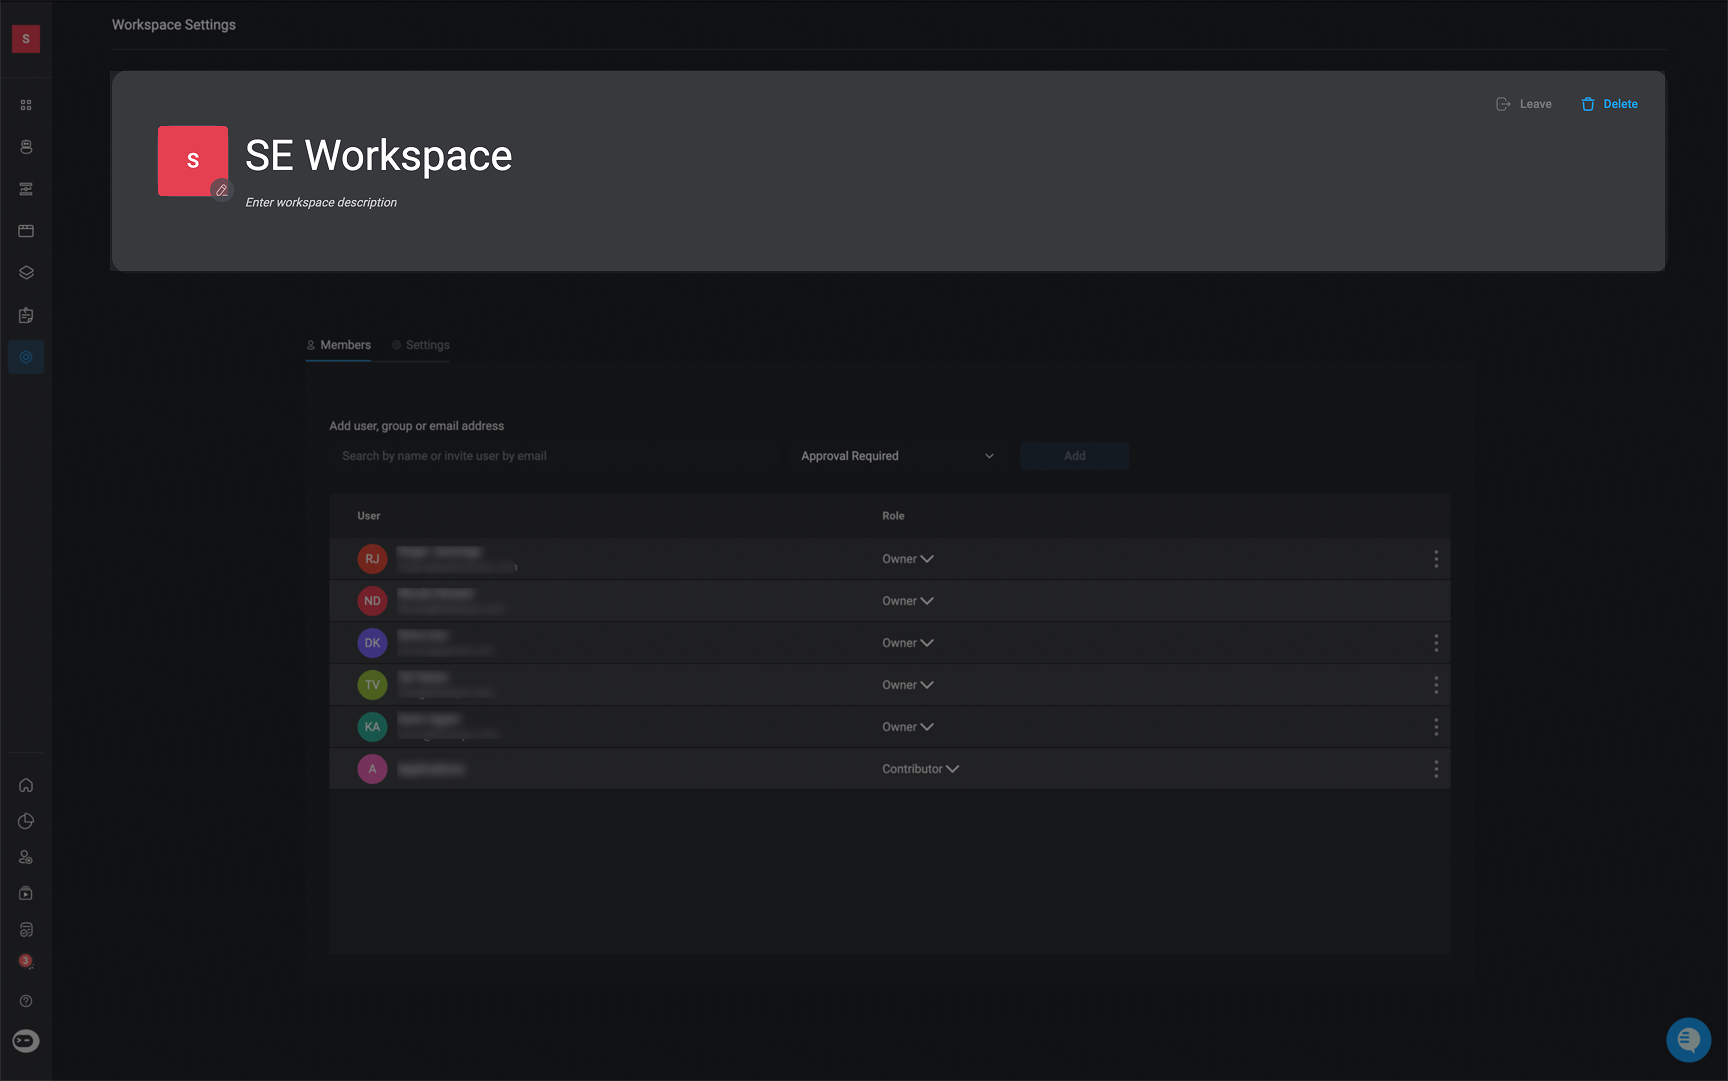
Navigate to the workspace settings and click the icon next to the colored square with your initials to upload a custom workspace logo.
***
## Change your Workspace's Logo
Once uploaded, your custom logo will automatically appear anywhere the workspace logo is displayed, including the Workspaces menu and across workspace pages.
Navigate to the workspace settings and click the icon next to the colored square with your initials to upload a custom workspace logo.
 **Note**: Accepted image formats for upload are `PNG`, `JPG`, or `GIF`, with a maximum size of `800px` × `600px`.
 ***
### Removing a Member from a Workspace
***
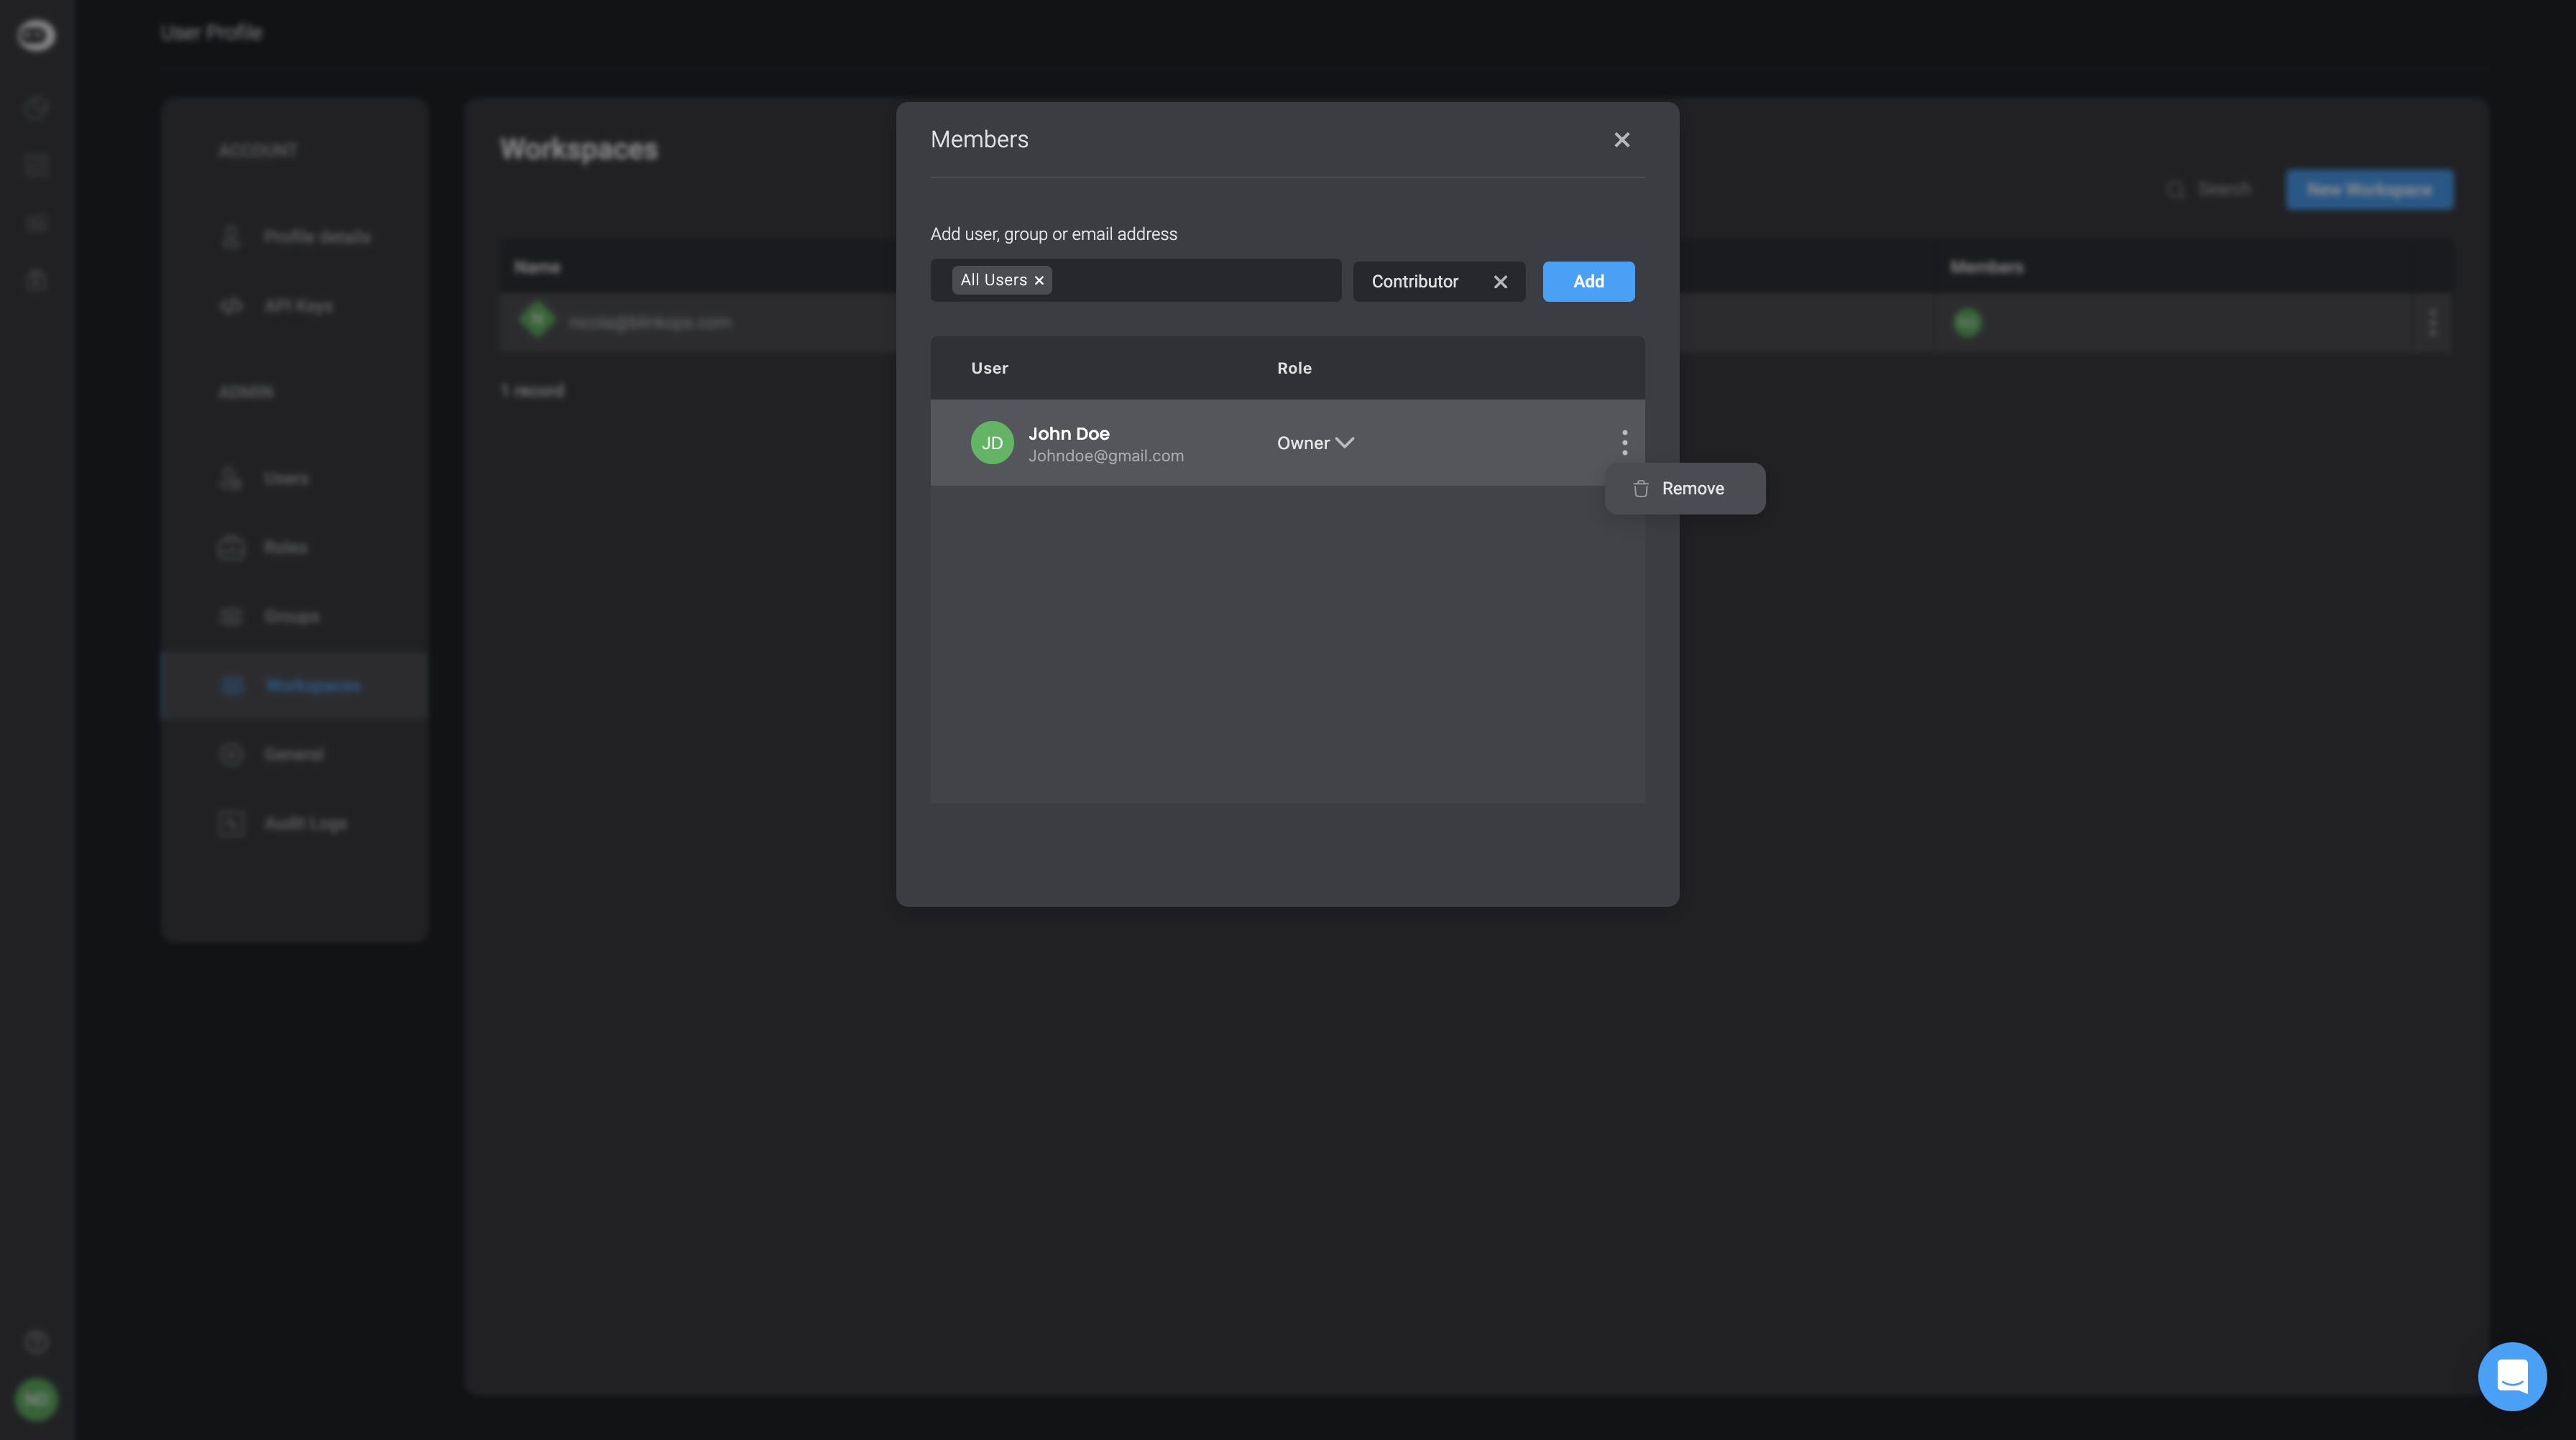
### Removing a Member from a Workspace
If you would like to **remove** a user from the selected workspace, click on icon next to their name and select the **remove** option.
 ***
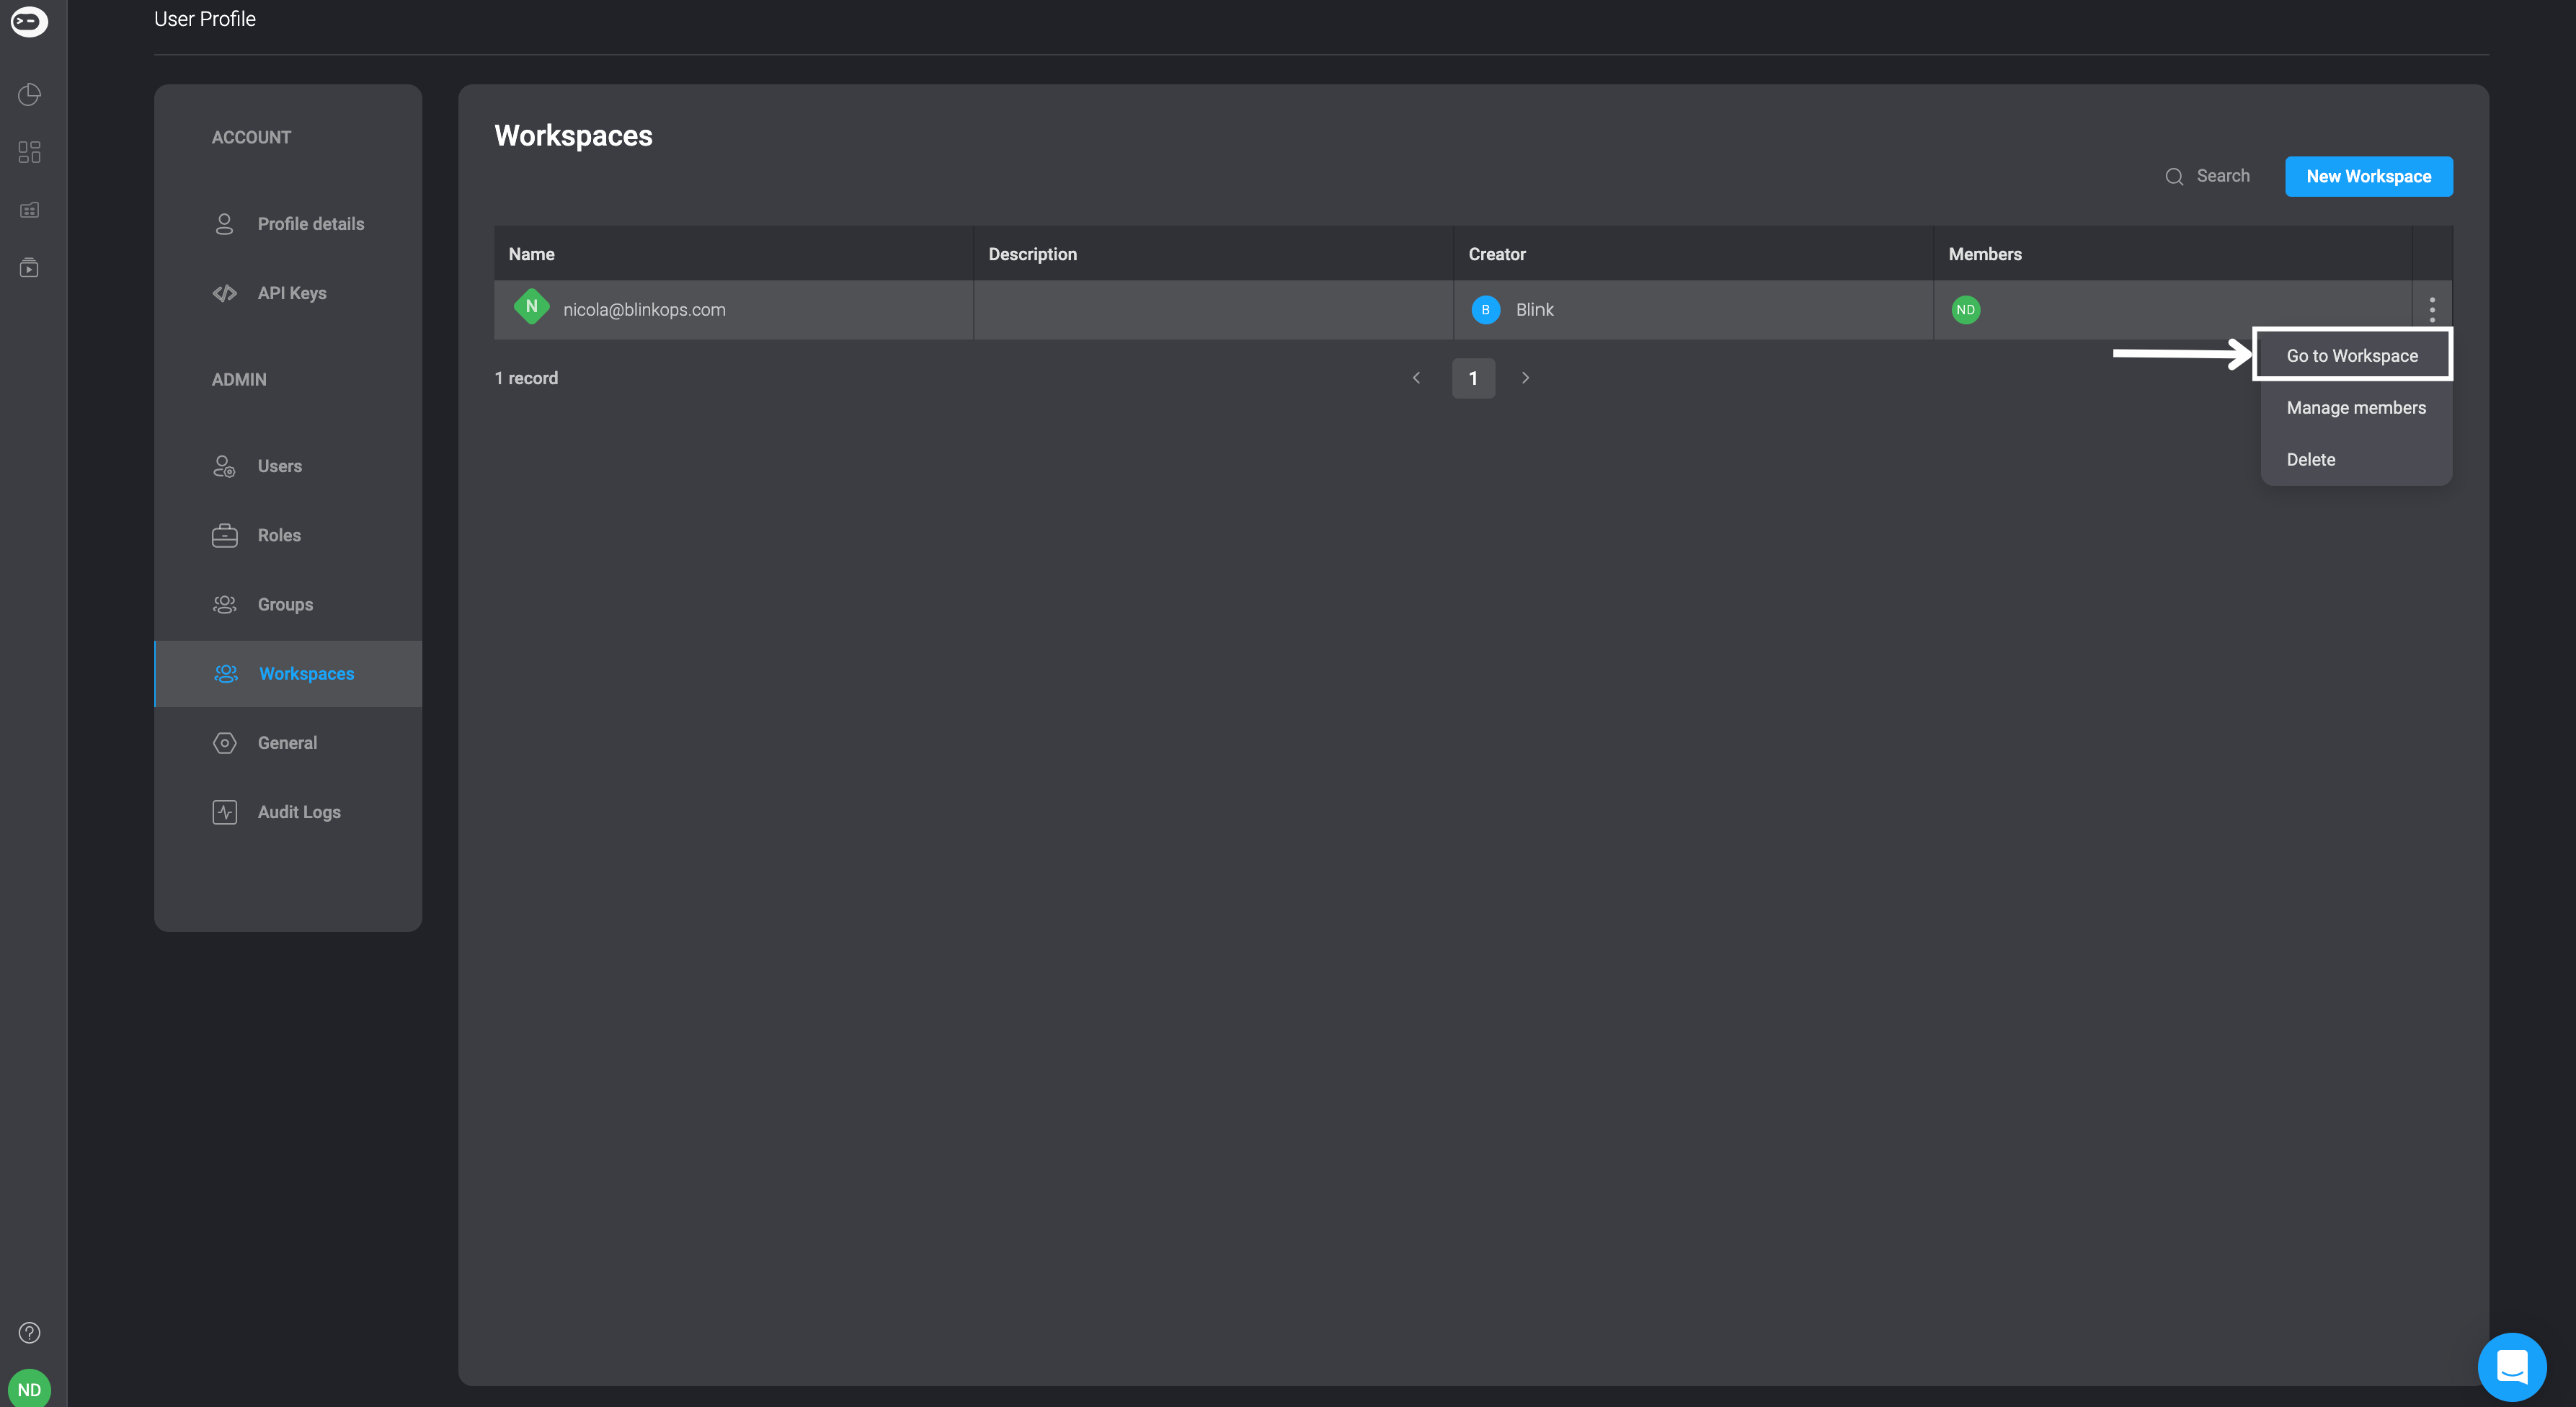
## Workspace Navigation
In the Workspace table, navigate to the chosen workspace by clicking icon on the right-hand side of the row and selecting the **Go to Workspace option**. This will open the selected workspace in a new tab.
***
## Workspace Navigation
In the Workspace table, navigate to the chosen workspace by clicking icon on the right-hand side of the row and selecting the **Go to Workspace option**. This will open the selected workspace in a new tab.
 ***
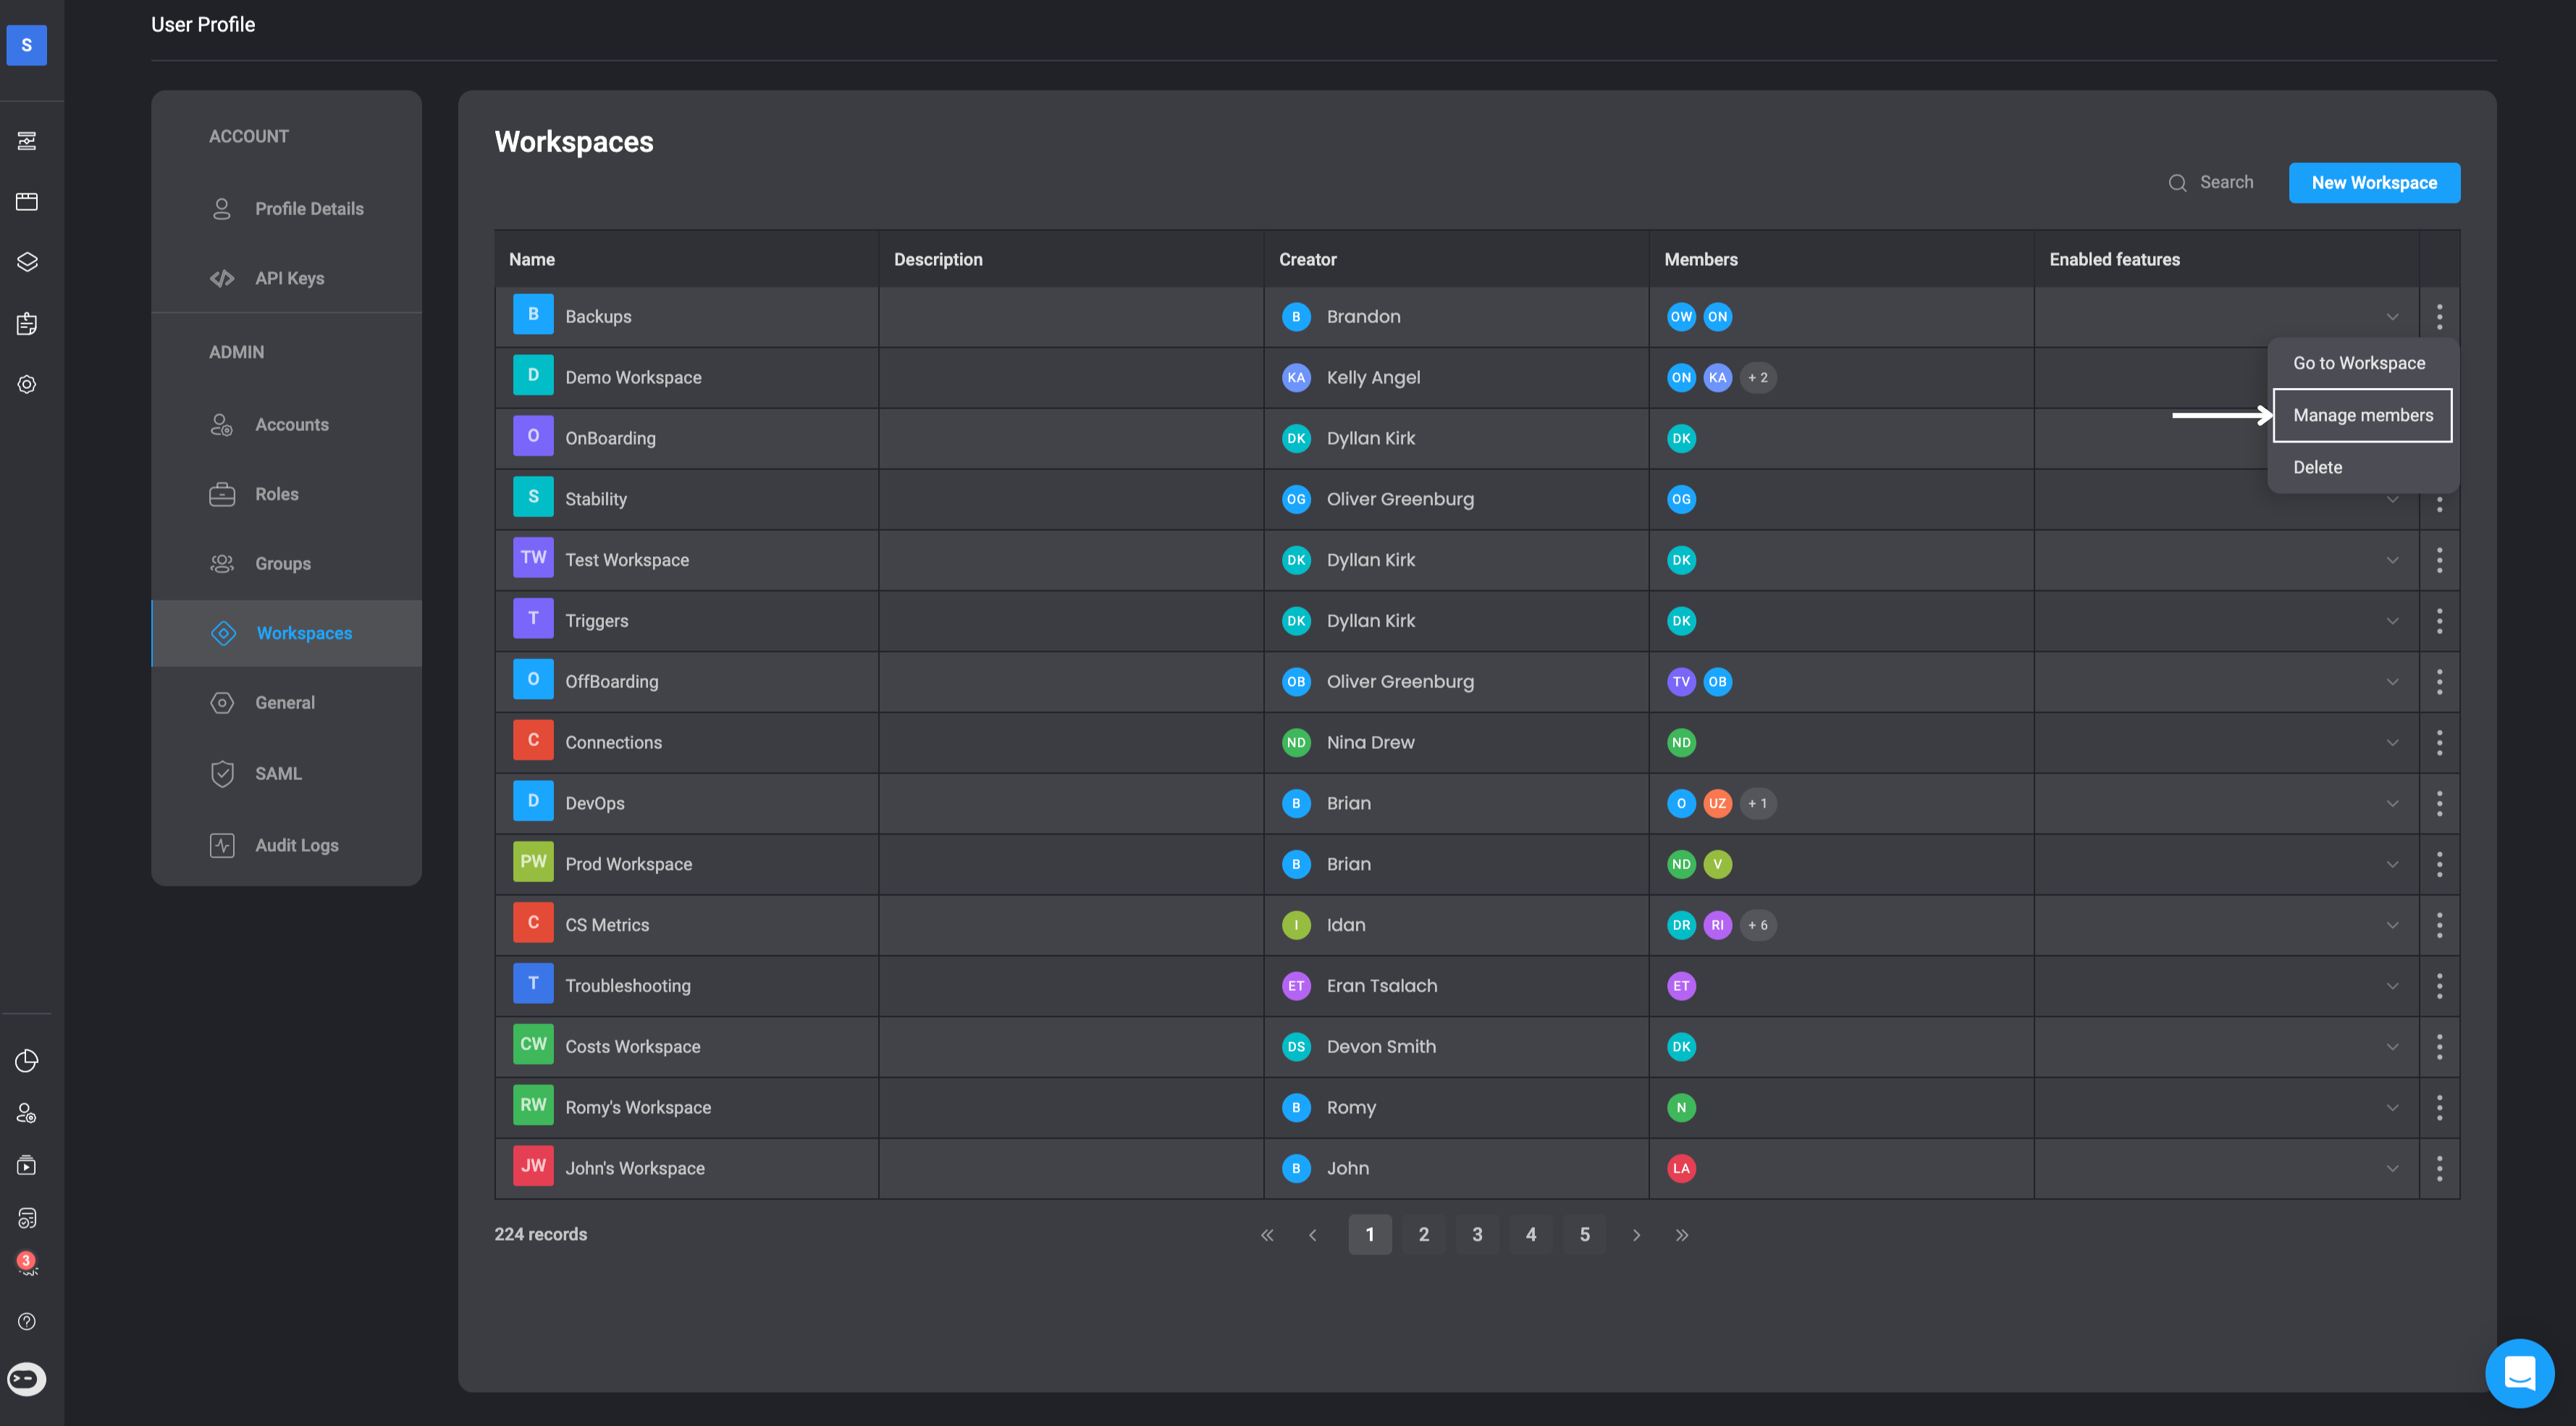
## Manage Workspace Members
1. Manage Members of a workspace by clicking the icon on the right-hand side of the selected Workspace and select the **Manage Members** option.
***
## Manage Workspace Members
1. Manage Members of a workspace by clicking the icon on the right-hand side of the selected Workspace and select the **Manage Members** option.
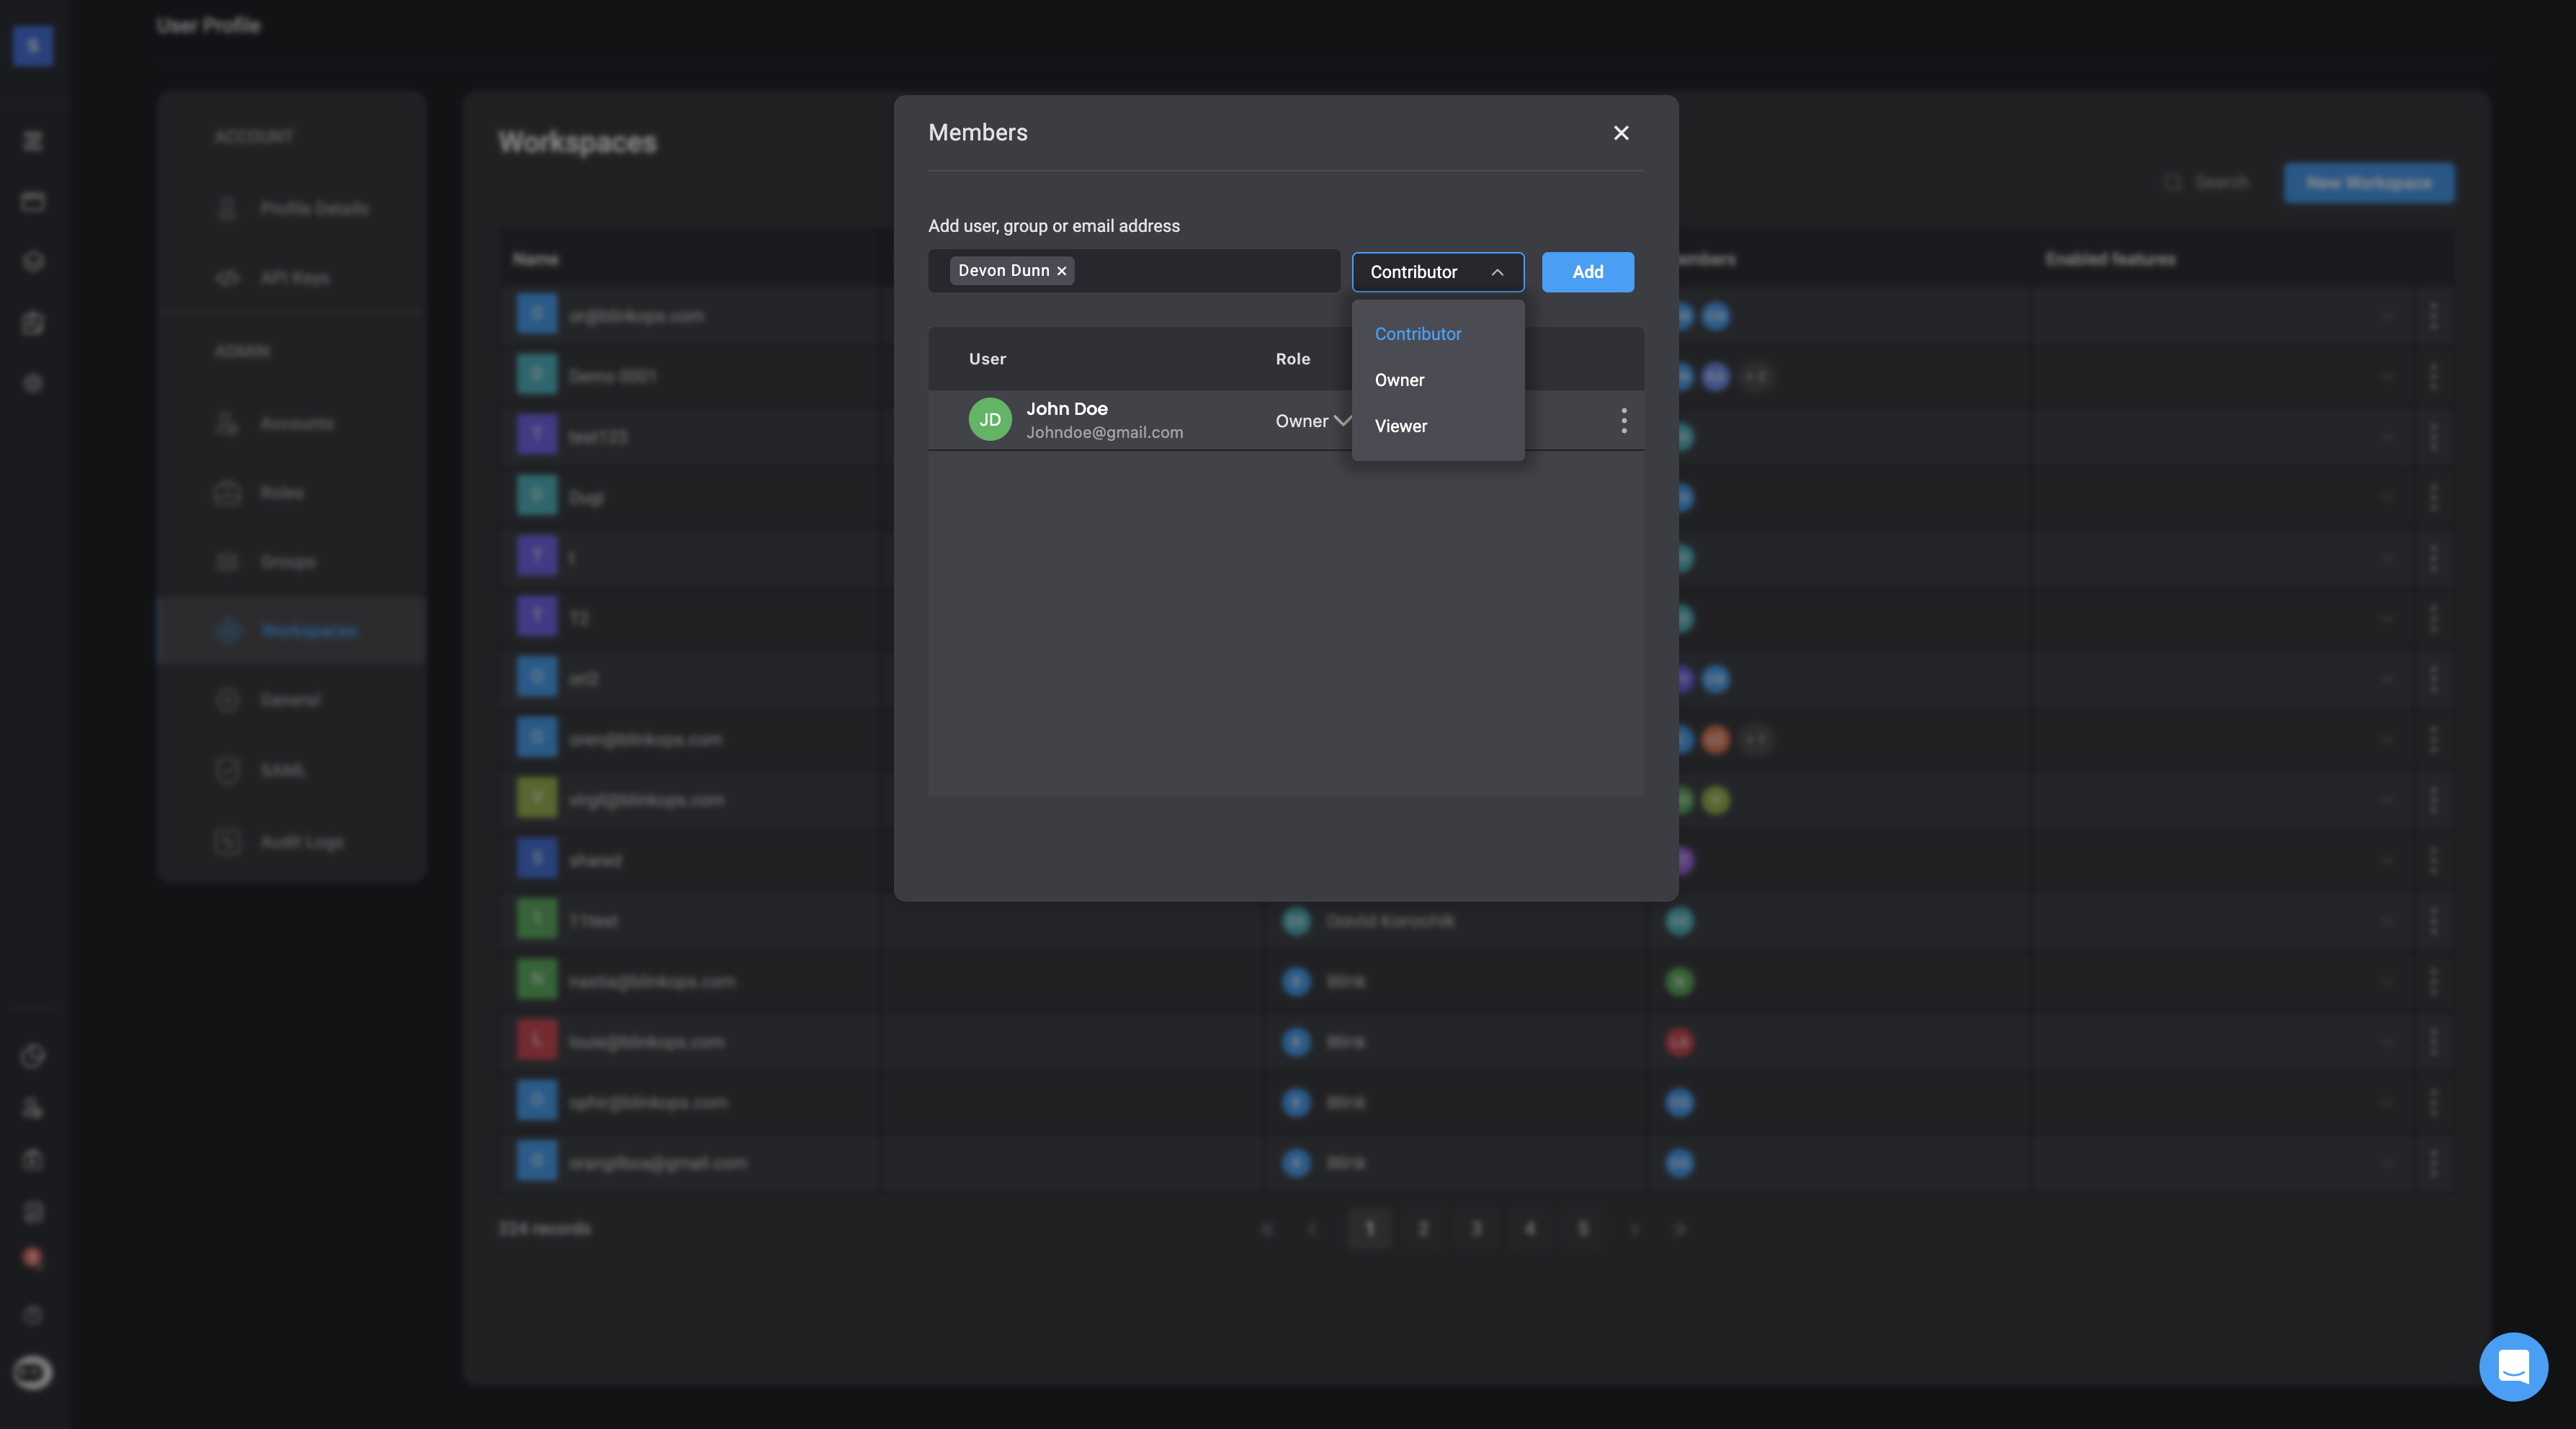
 2. A popup will appear, where you will have the option to **add users or groups** to the selected Workspace by entering the name of the user, group or email addresses and then selecting the **Add** button. You can also assign [roles](/docs/blink-platform/account-management/roles) such as [Contributor](/docs/blink-platform/account-management/roles#contributor), [Owner](/docs/blink-platform/account-management/roles#owner) or [Viewer](/docs/blink-platform/account-management/roles#viewer) to users in the selected workspace.
**Note**: If you have created your own [custom role](/docs/blink-platform/account-management/roles#adding-a-new-role), it will also appear in the dropdown menu and you can choose it to assign to the invited user or group.
2. A popup will appear, where you will have the option to **add users or groups** to the selected Workspace by entering the name of the user, group or email addresses and then selecting the **Add** button. You can also assign [roles](/docs/blink-platform/account-management/roles) such as [Contributor](/docs/blink-platform/account-management/roles#contributor), [Owner](/docs/blink-platform/account-management/roles#owner) or [Viewer](/docs/blink-platform/account-management/roles#viewer) to users in the selected workspace.
**Note**: If you have created your own [custom role](/docs/blink-platform/account-management/roles#adding-a-new-role), it will also appear in the dropdown menu and you can choose it to assign to the invited user or group.
 3. If you would like to **remove** a user from the selected workspace, click on icon next to their name and select the **remove** option.