> ## Documentation Index
> Fetch the complete documentation index at: https://docs.blinkops.com/llms.txt
> Use this file to discover all available pages before exploring further.
# New Web Form Action
> Configure web form flow types and actions for building interactive data collection forms in Blink.
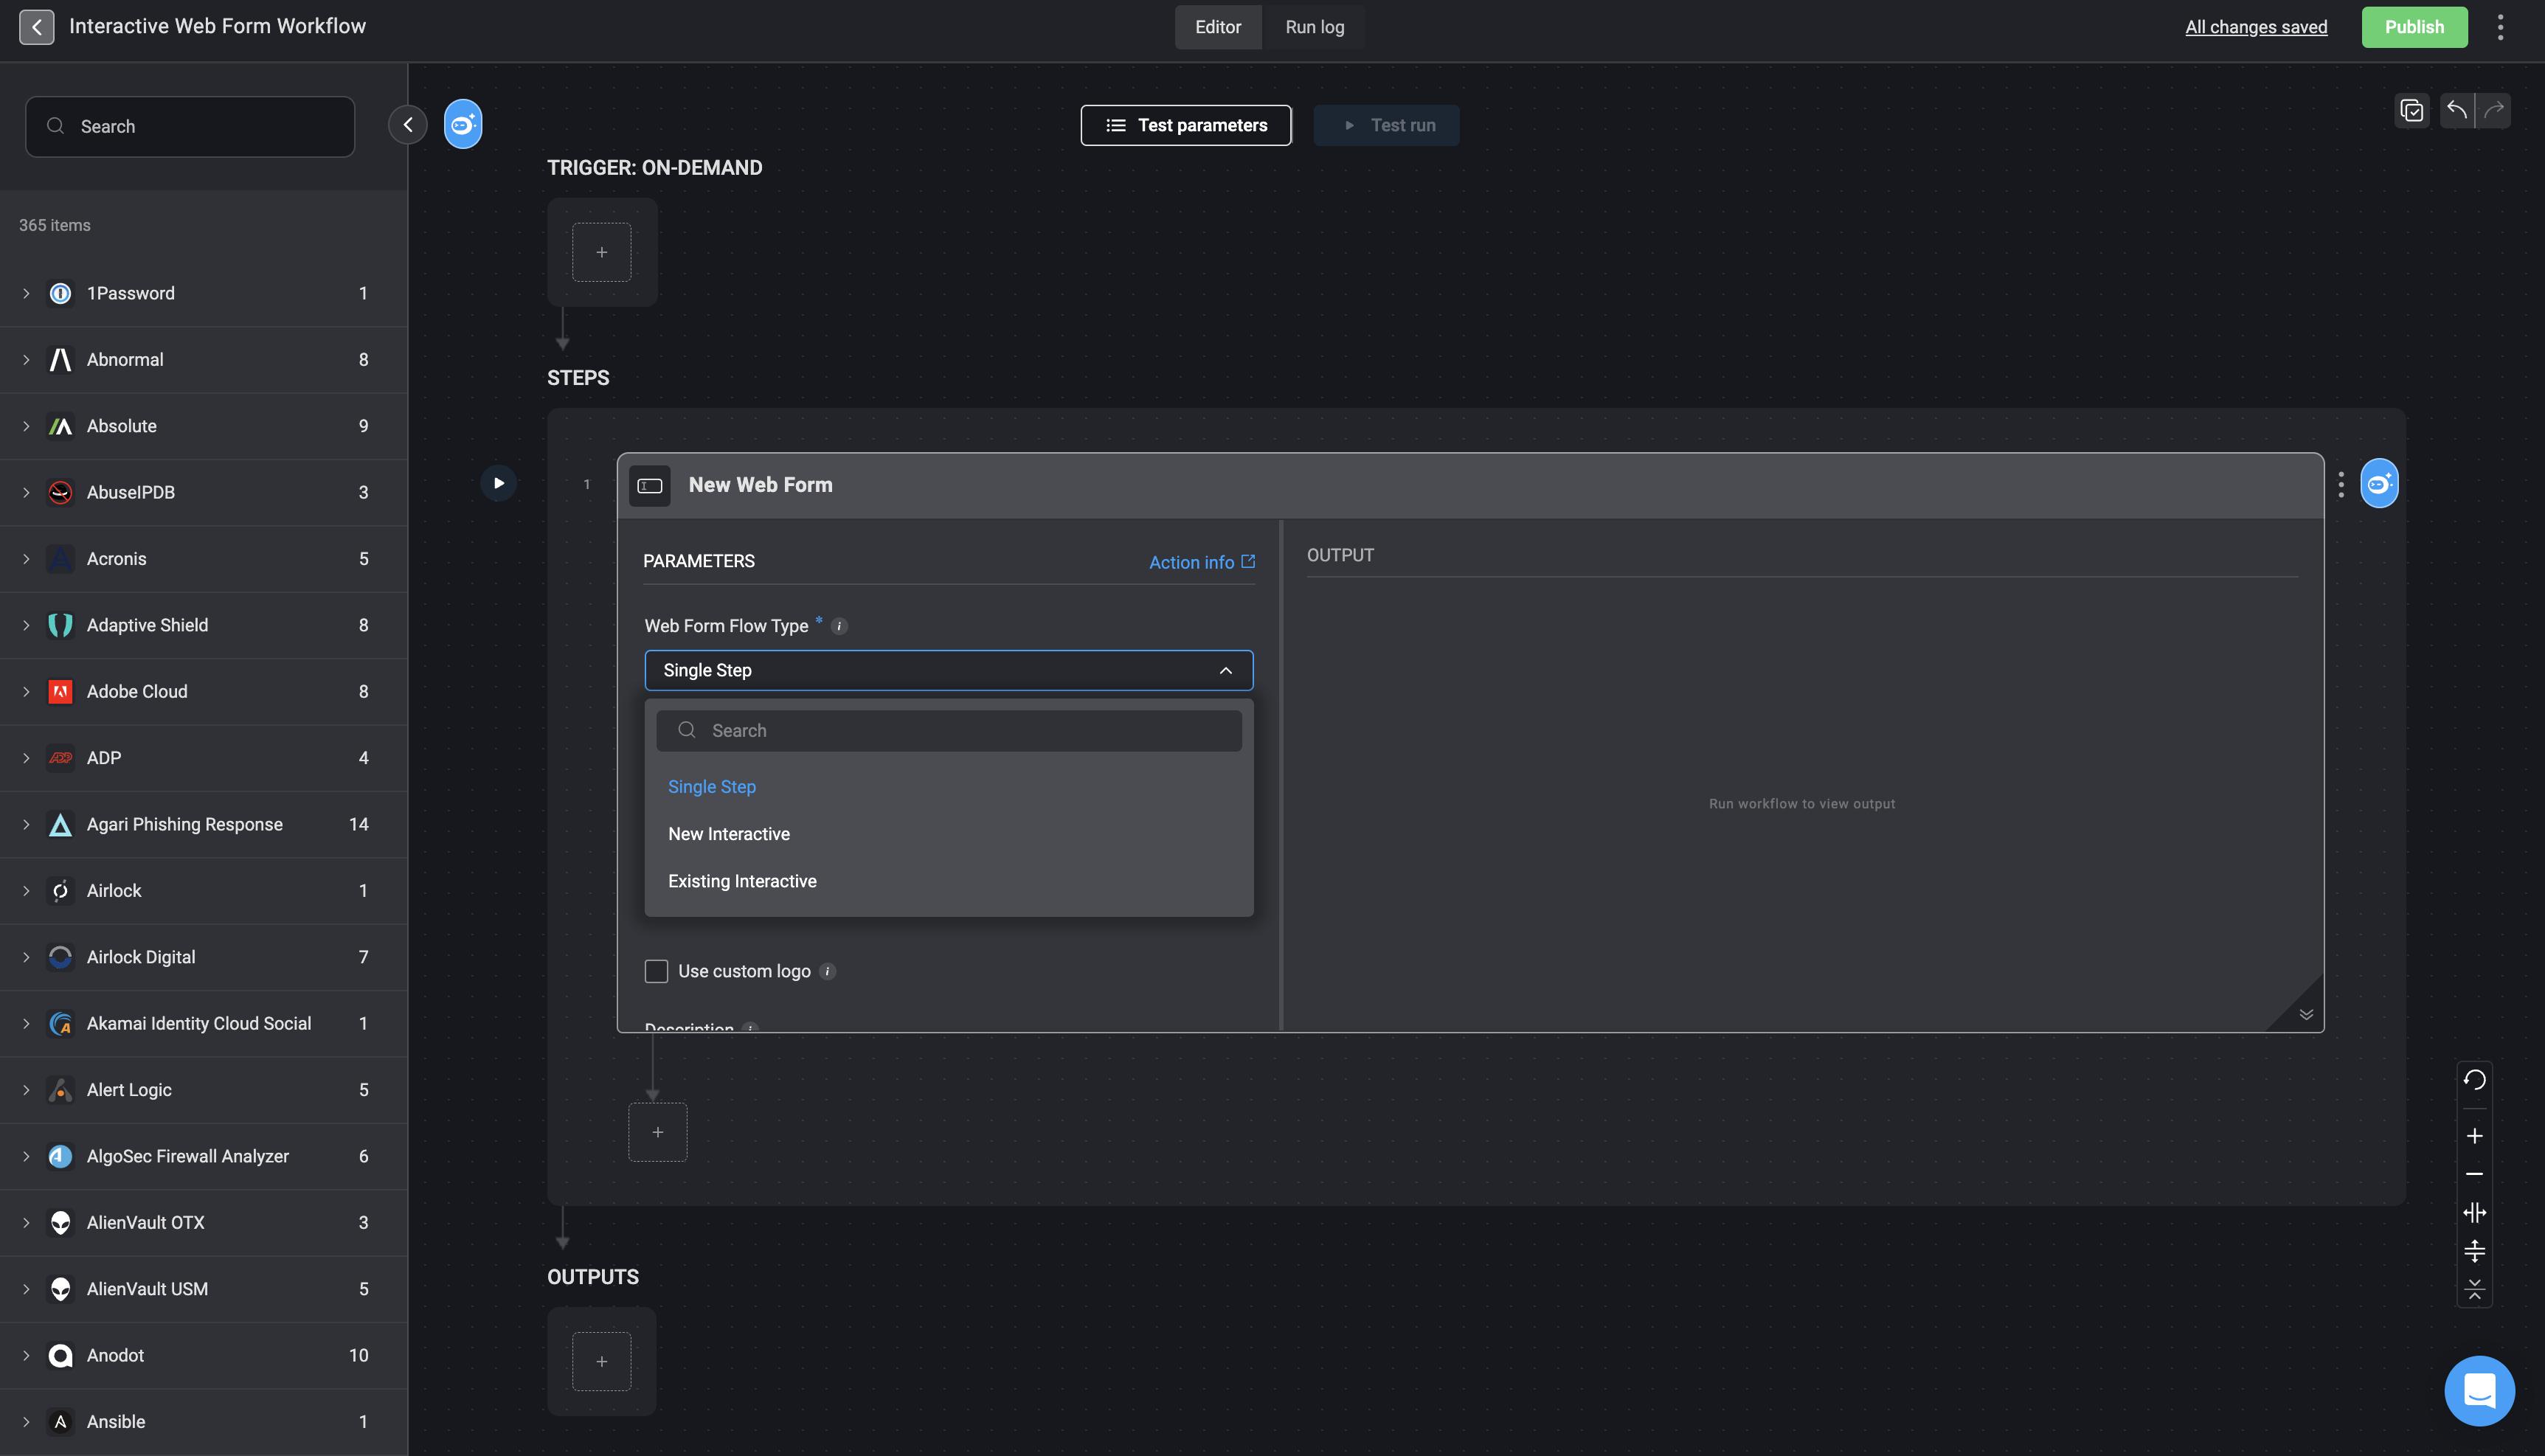
## Supported Web Form Flow Type
1. [Single Step](#new-web-form---single-step)- Creates static and non-interactive web forms.
2. [New interactive](#new-web-form---interactive-web-form)- The first web form initiates a new interactive session, which is used in subsequent workflow steps, including the use of **at least one additional** web form within that session.
3. [Existing Interactive](#how-to-create-a-workflow-using-the-interactive-web-form-actions)- Creates a web form either by a previous web form step or the [web form trigger](/docs/blink-platform/web-form/web-form-trigger)
***
## New Web Form - Single Step
The *New Web Form action* with a *Single Step* web form flow type, allows you to create static, non-interactive web forms that gather information from users without initiating an interactive session. These forms are ideal for straightforward data collection that do not require ongoing interaction. The builder must manually share the form’s URL through communication channels such as email or Slack. Once the form is submitted, the associated workflow proceeds automatically, simplifying the process for both users and builders.
### How to Create a Workflow using the Single Step Web Form Action
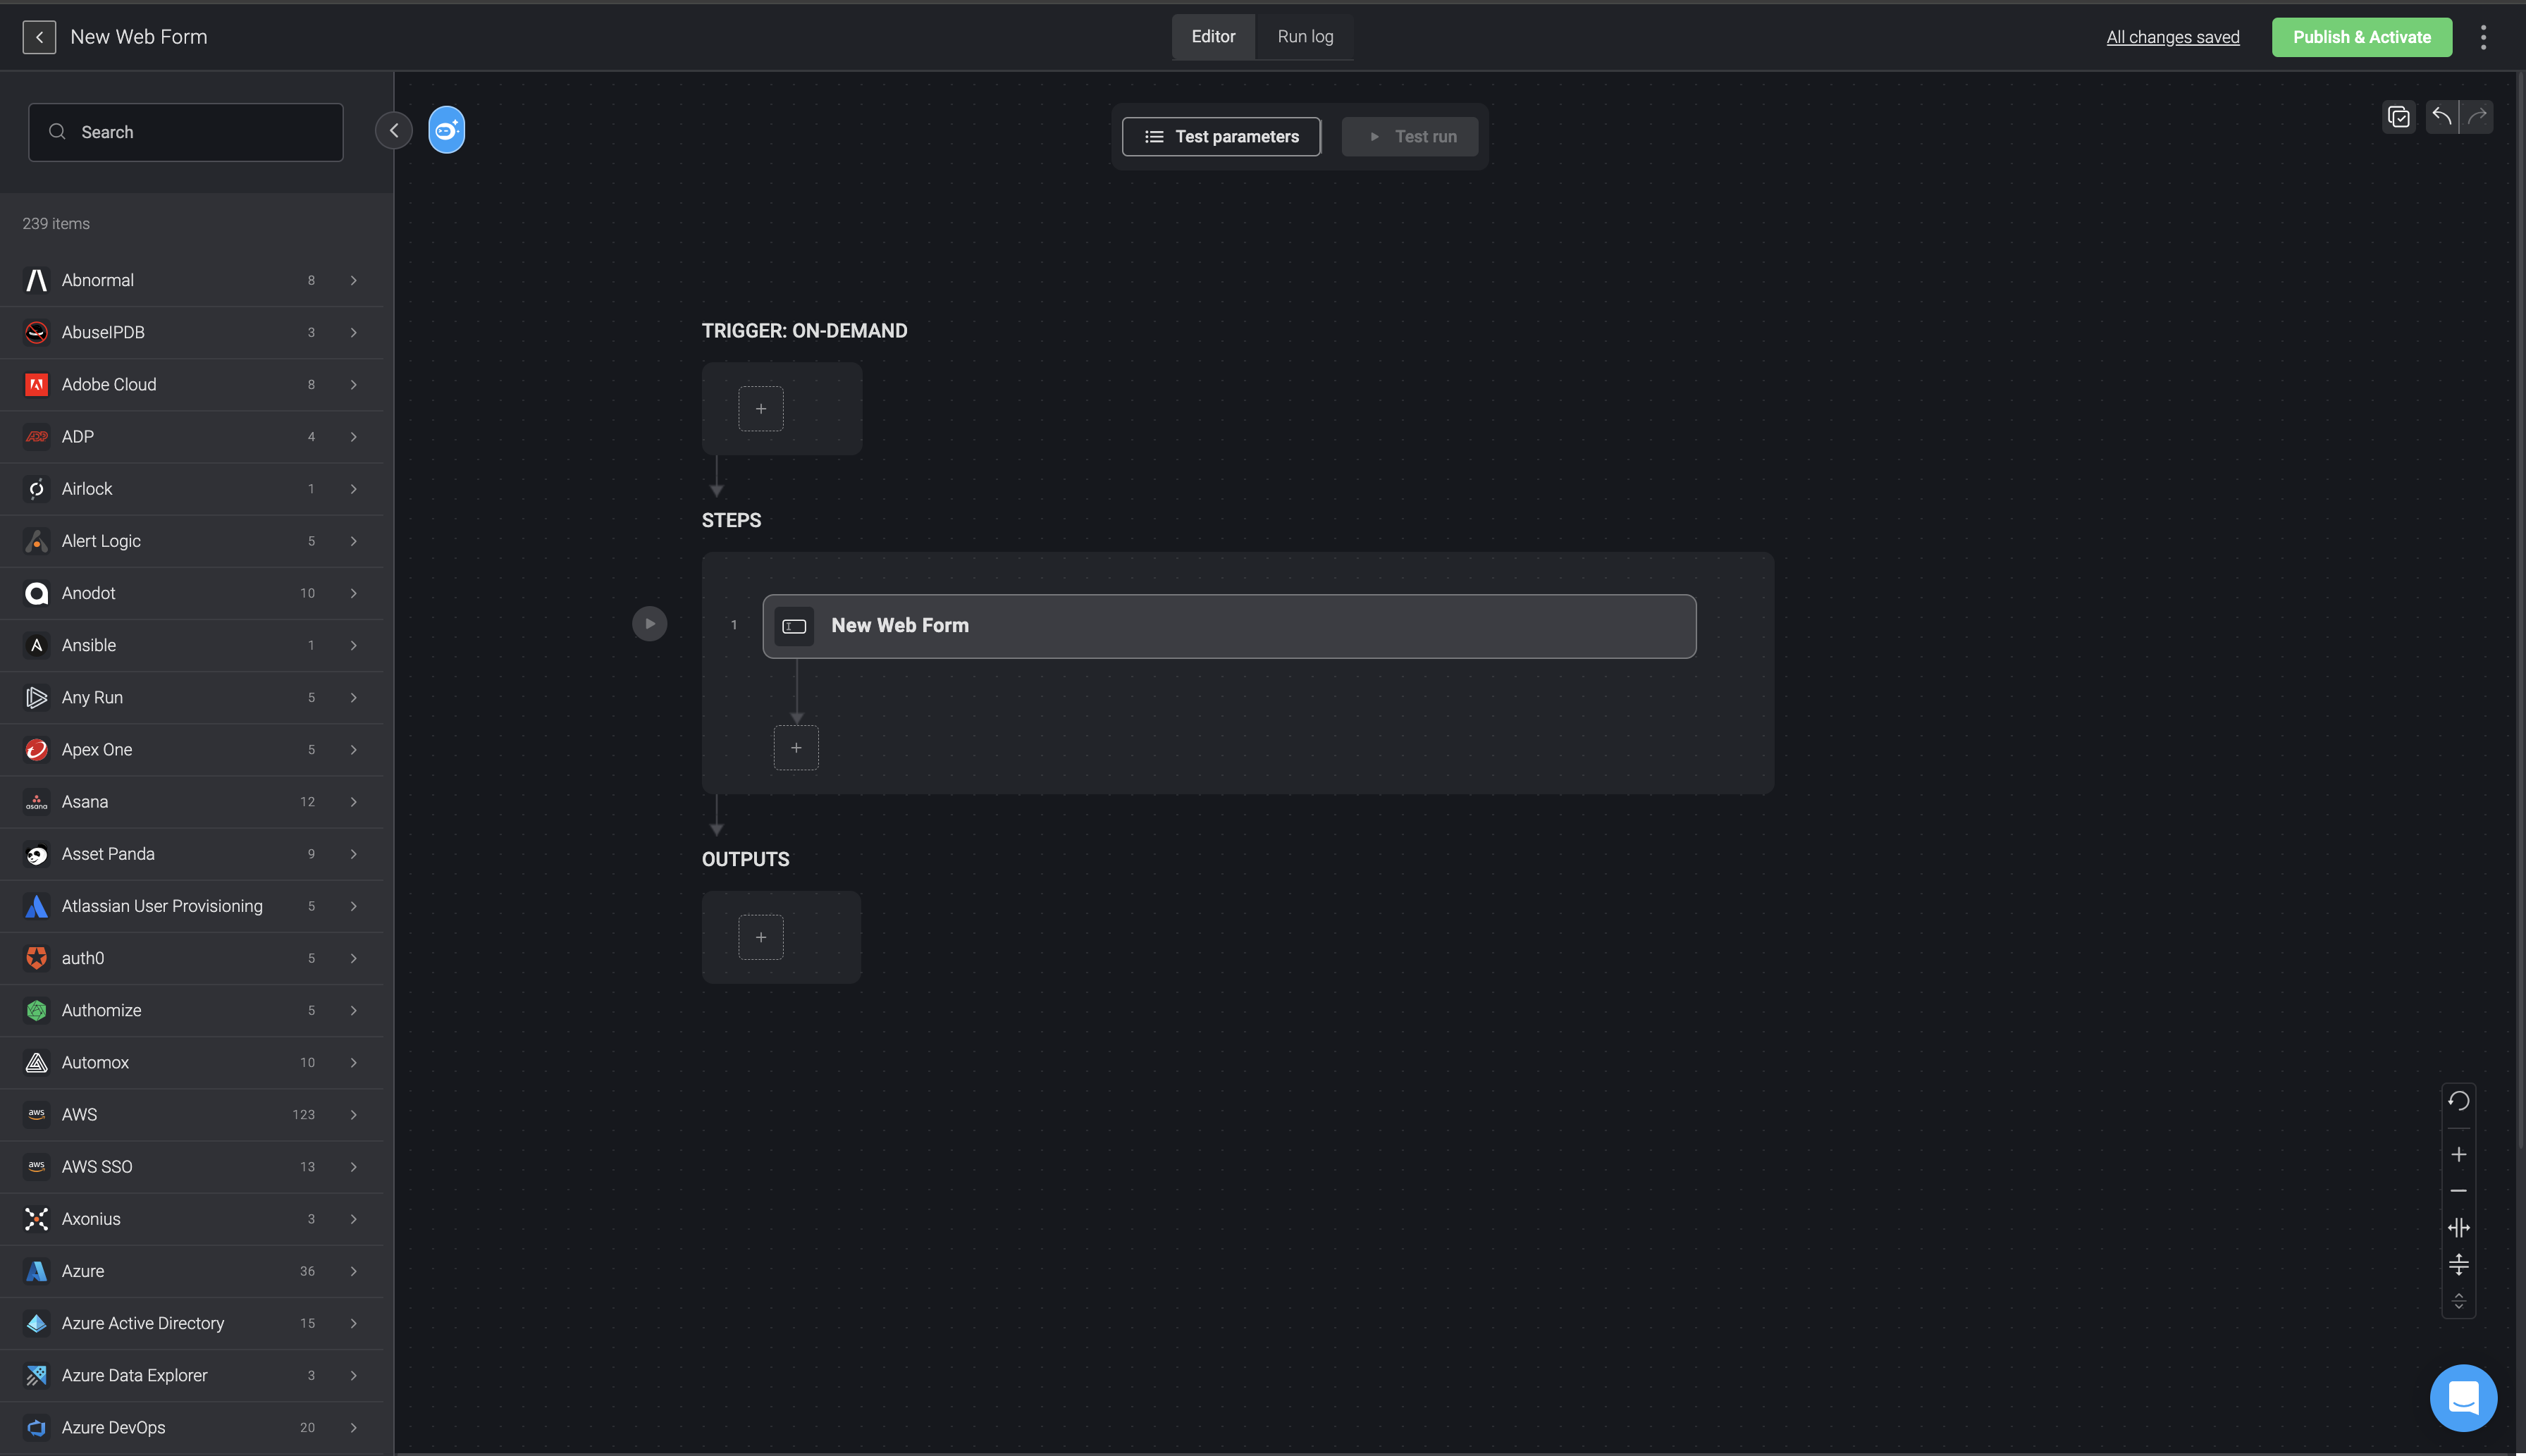
Navigate to the Workflow Editor
Create a step by searching "Web Form" in the search bar and select the *"New Web Form"* action.
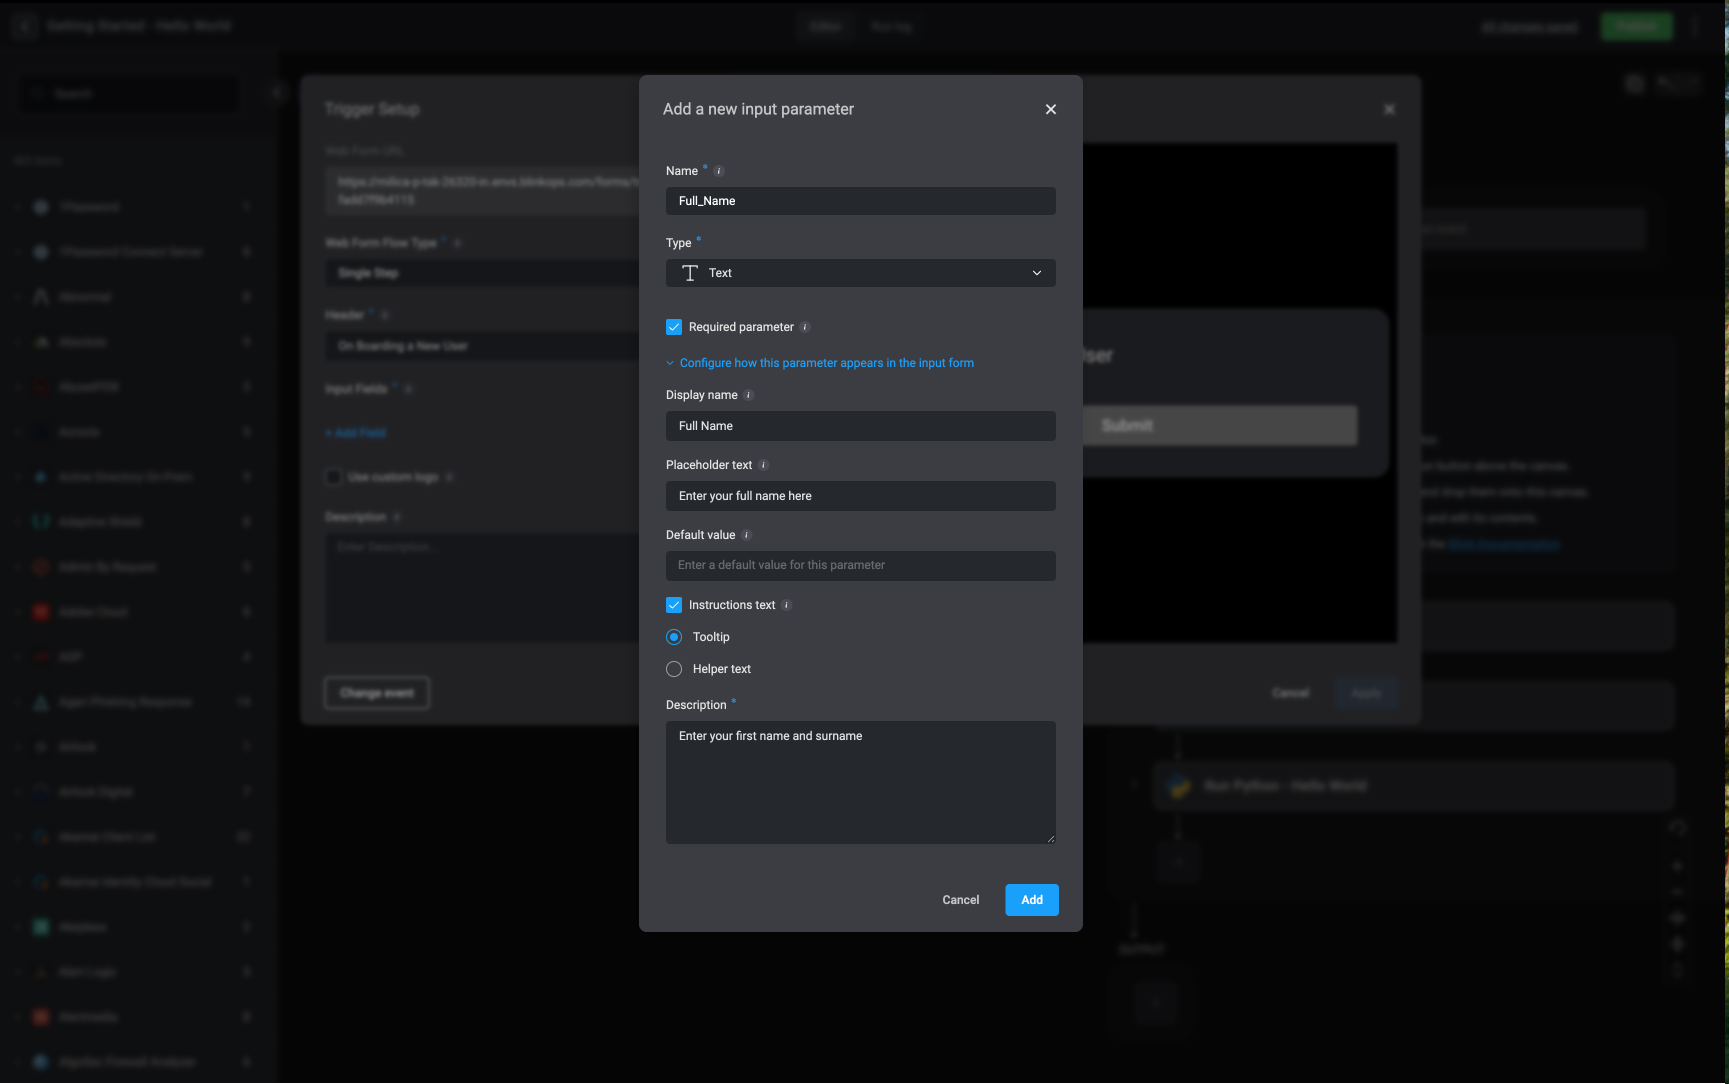
 Next, add input parameters and customize how they are displayed in the Webform
* **Parameter Name**: The name given to the input parameter
* **Parameter Type**: Select the appropriate [input type](/docs/workflows/building-workflows/triggers/on-demand-triggers/input-parameters#input-parameter-types) based on the expected data (for example, string, number, boolean).
* **Optional:**
* **Display Name**: The label shown to users for this input parameter.
* **Required**: Enable this option to make the parameter mandatory. Disable it to allow the parameter to remain optional.
* **Placeholder** *(available for relevant types)*: Optional sample text displayed inside the input field to guide users on the expected format (for example, a sample username or email address).
* **Default Value**: The value automatically used if the user does not provide an input
* **Instructions Text**
* **Tooltip**: Contextual text that appears on hover, offering additional explanation or clarification for the parameter.
* **Helper Text**: Supporting text shown below the input field to guide the user on how to complete it correctly.
* **Description**: The text shown to the user, either as a tooltip or as helper text, depending on the selected option.
Next, add input parameters and customize how they are displayed in the Webform
* **Parameter Name**: The name given to the input parameter
* **Parameter Type**: Select the appropriate [input type](/docs/workflows/building-workflows/triggers/on-demand-triggers/input-parameters#input-parameter-types) based on the expected data (for example, string, number, boolean).
* **Optional:**
* **Display Name**: The label shown to users for this input parameter.
* **Required**: Enable this option to make the parameter mandatory. Disable it to allow the parameter to remain optional.
* **Placeholder** *(available for relevant types)*: Optional sample text displayed inside the input field to guide users on the expected format (for example, a sample username or email address).
* **Default Value**: The value automatically used if the user does not provide an input
* **Instructions Text**
* **Tooltip**: Contextual text that appears on hover, offering additional explanation or clarification for the parameter.
* **Helper Text**: Supporting text shown below the input field to guide the user on how to complete it correctly.
* **Description**: The text shown to the user, either as a tooltip or as helper text, depending on the selected option.
 * **URL Link**: Copy the link provided.
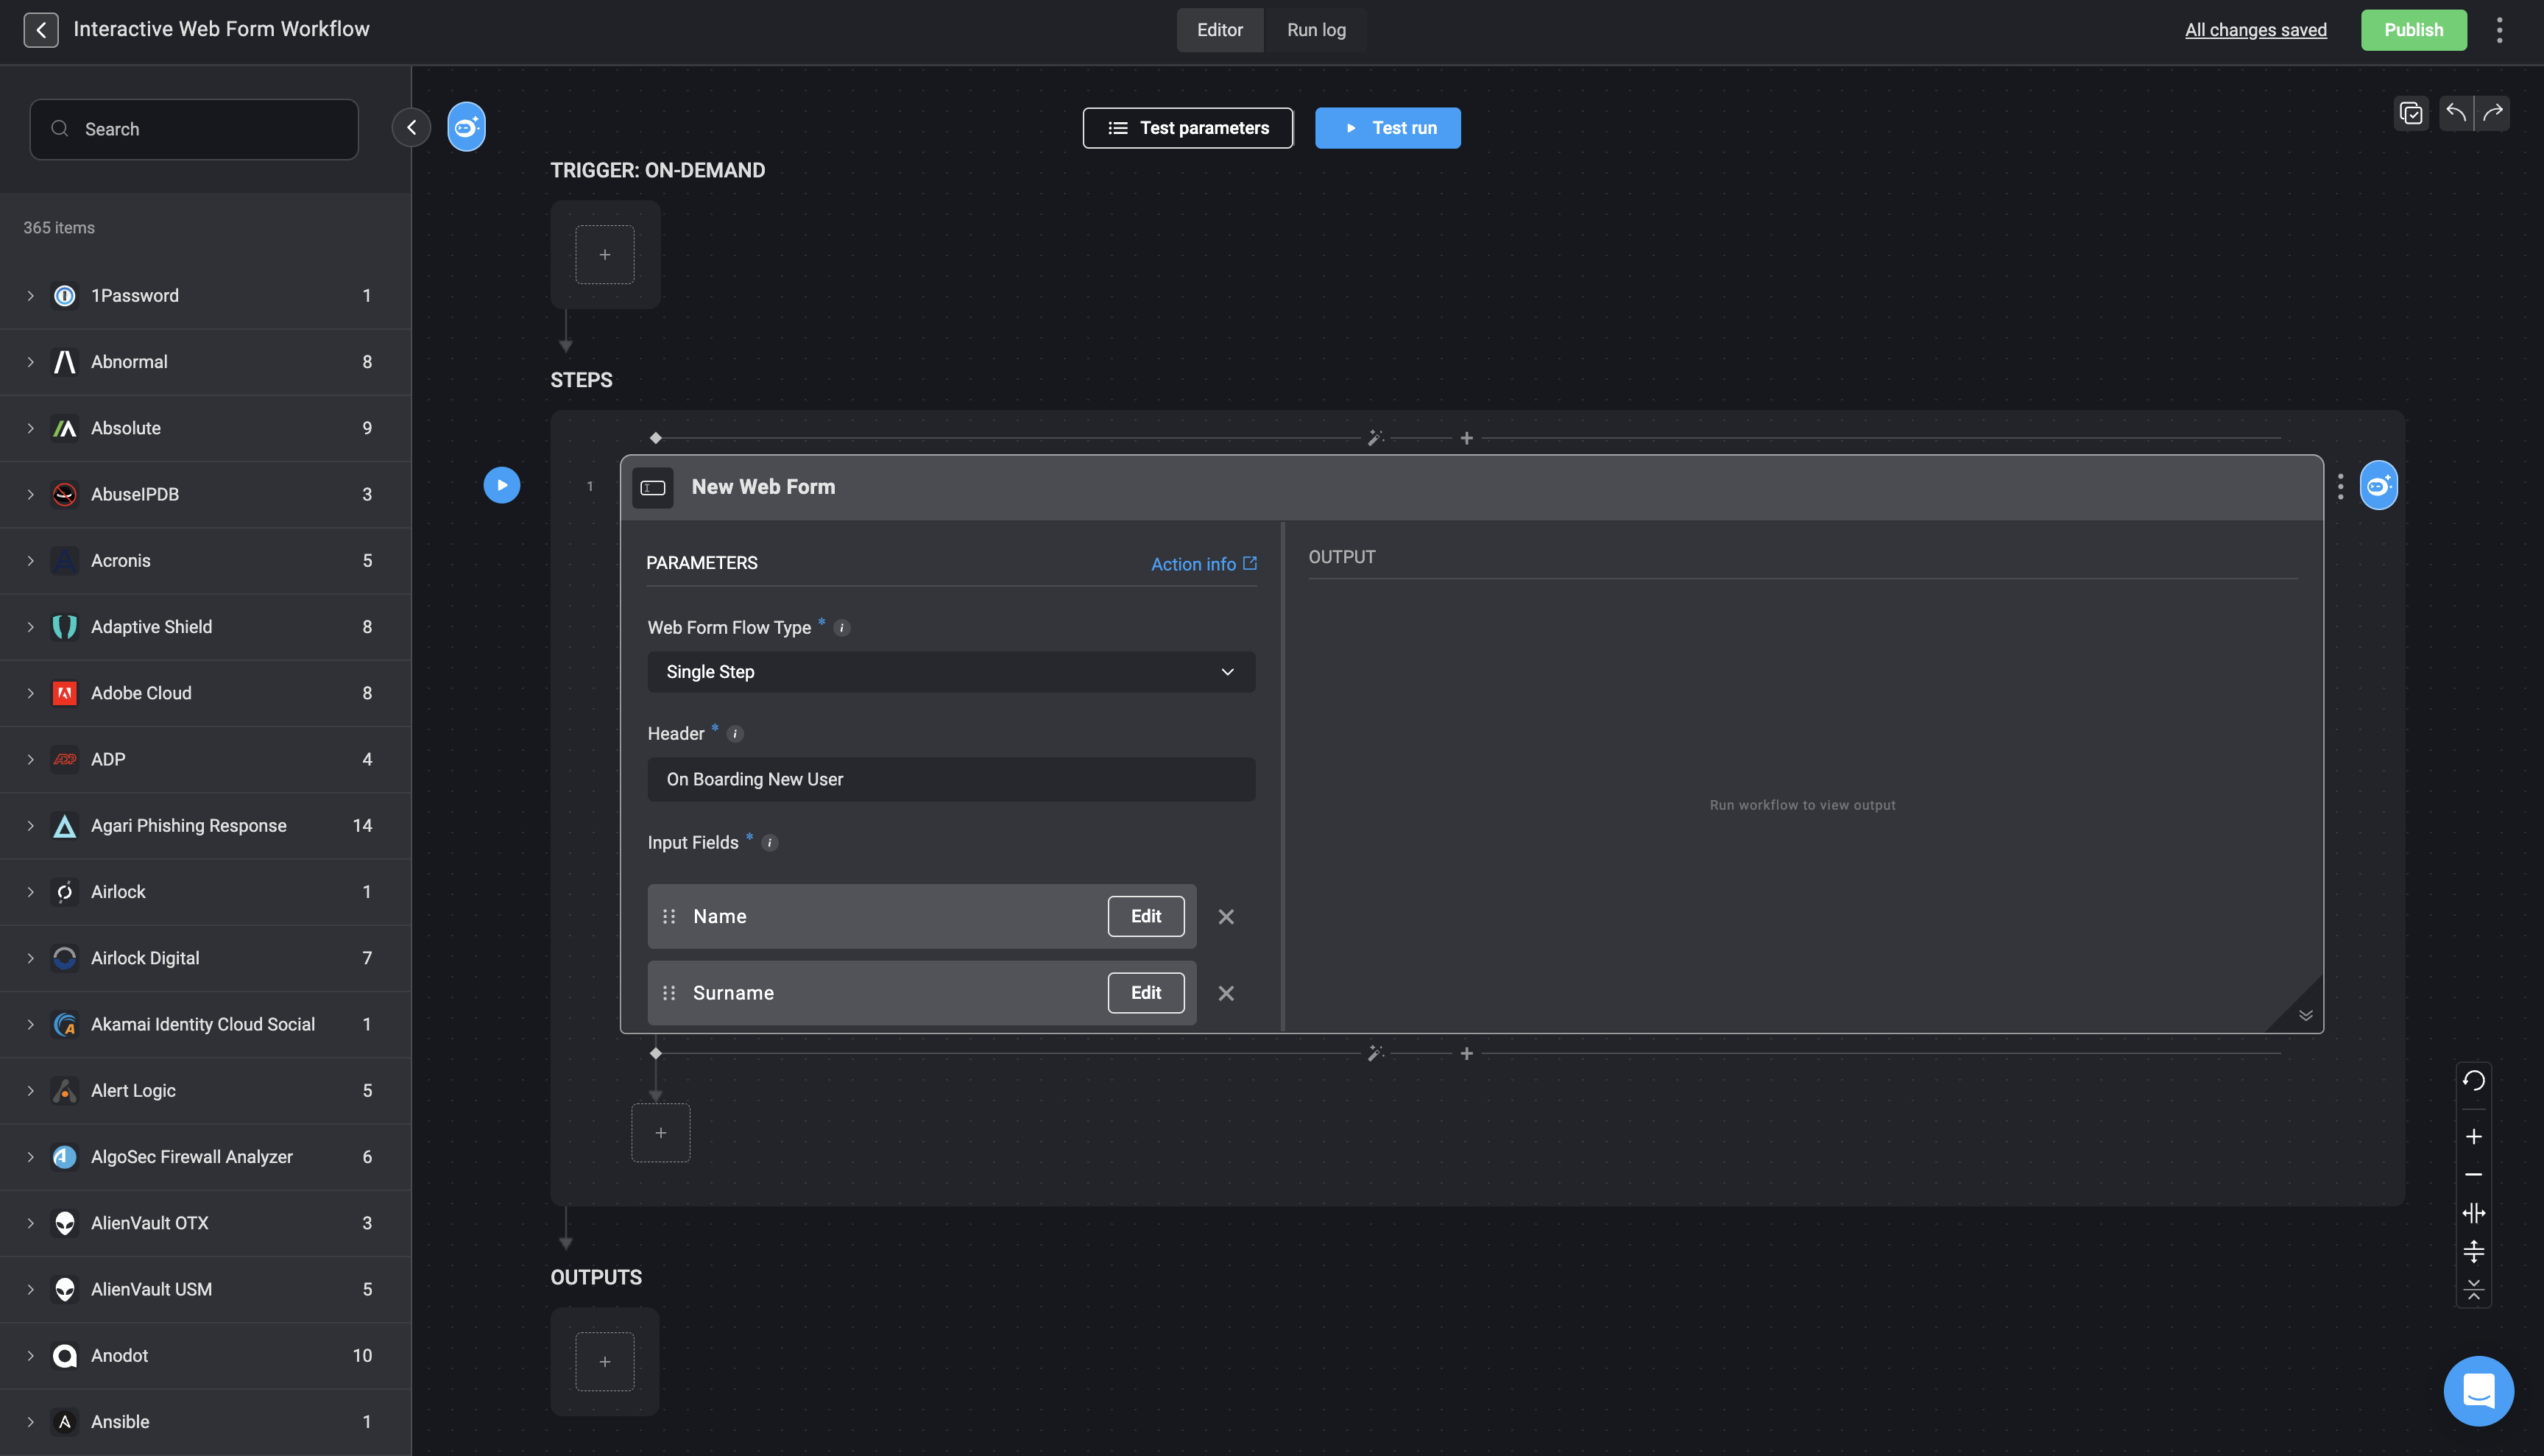
* **Header**: Add a title for your web form.
* **Logo**: **(Optional)** Check the box to include a custom logo and provide the image URL.
* **Description**: **(Optional)** Add a brief description.
* **Button Text**: Enter the text you want displayed on the form’s submit button.
* **URL Link**: Copy the link provided.
* **Header**: Add a title for your web form.
* **Logo**: **(Optional)** Check the box to include a custom logo and provide the image URL.
* **Description**: **(Optional)** Add a brief description.
* **Button Text**: Enter the text you want displayed on the form’s submit button.
 Next, add an action to the next step, to send the web form's generated URL to a specific user. For example, an [Email action](/docs/workflows/building-workflows/actions/advanced-actions/email-actions) or a [Slack action](/docs/workflows/building-workflows/actions/advanced-actions/interactive-actions/slack-interactivity). Use the variable picker to select `step.1` and then select the `webform_form_url` dynamic variable option. Since the web form is generated dynamically on a dynamic URL, it is required to include a step to share it via Slack, Email, or another communication channel.
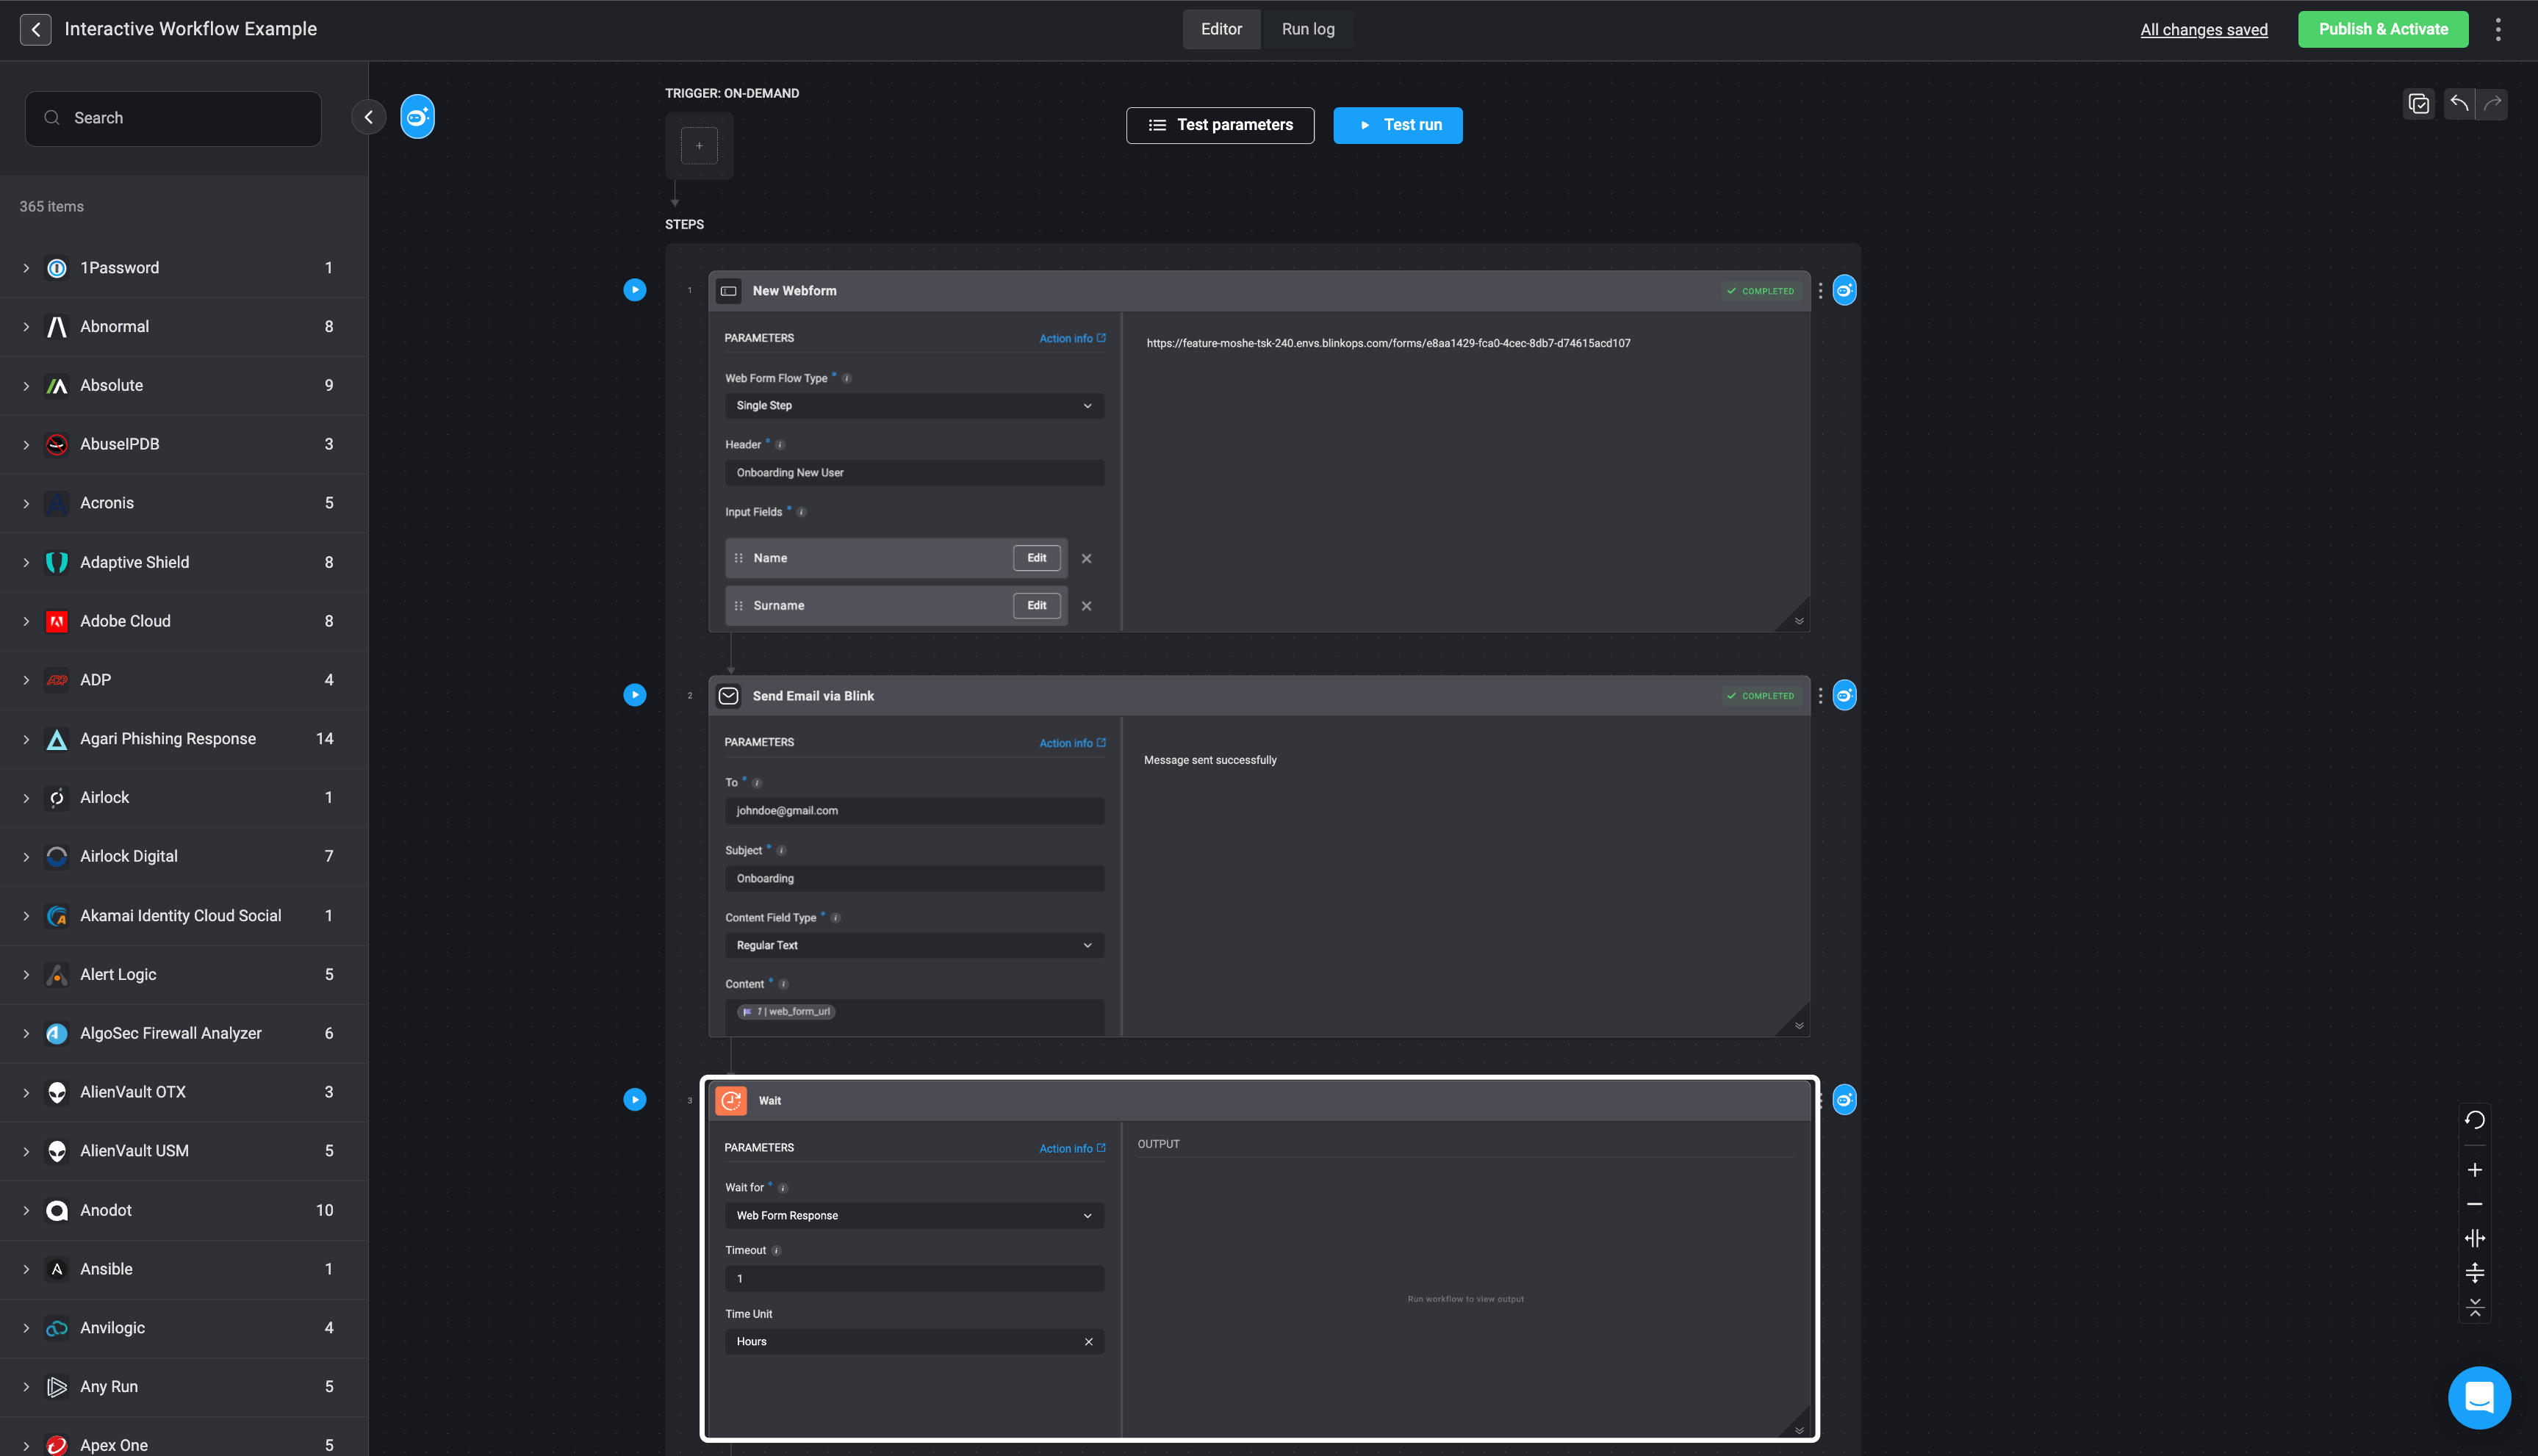
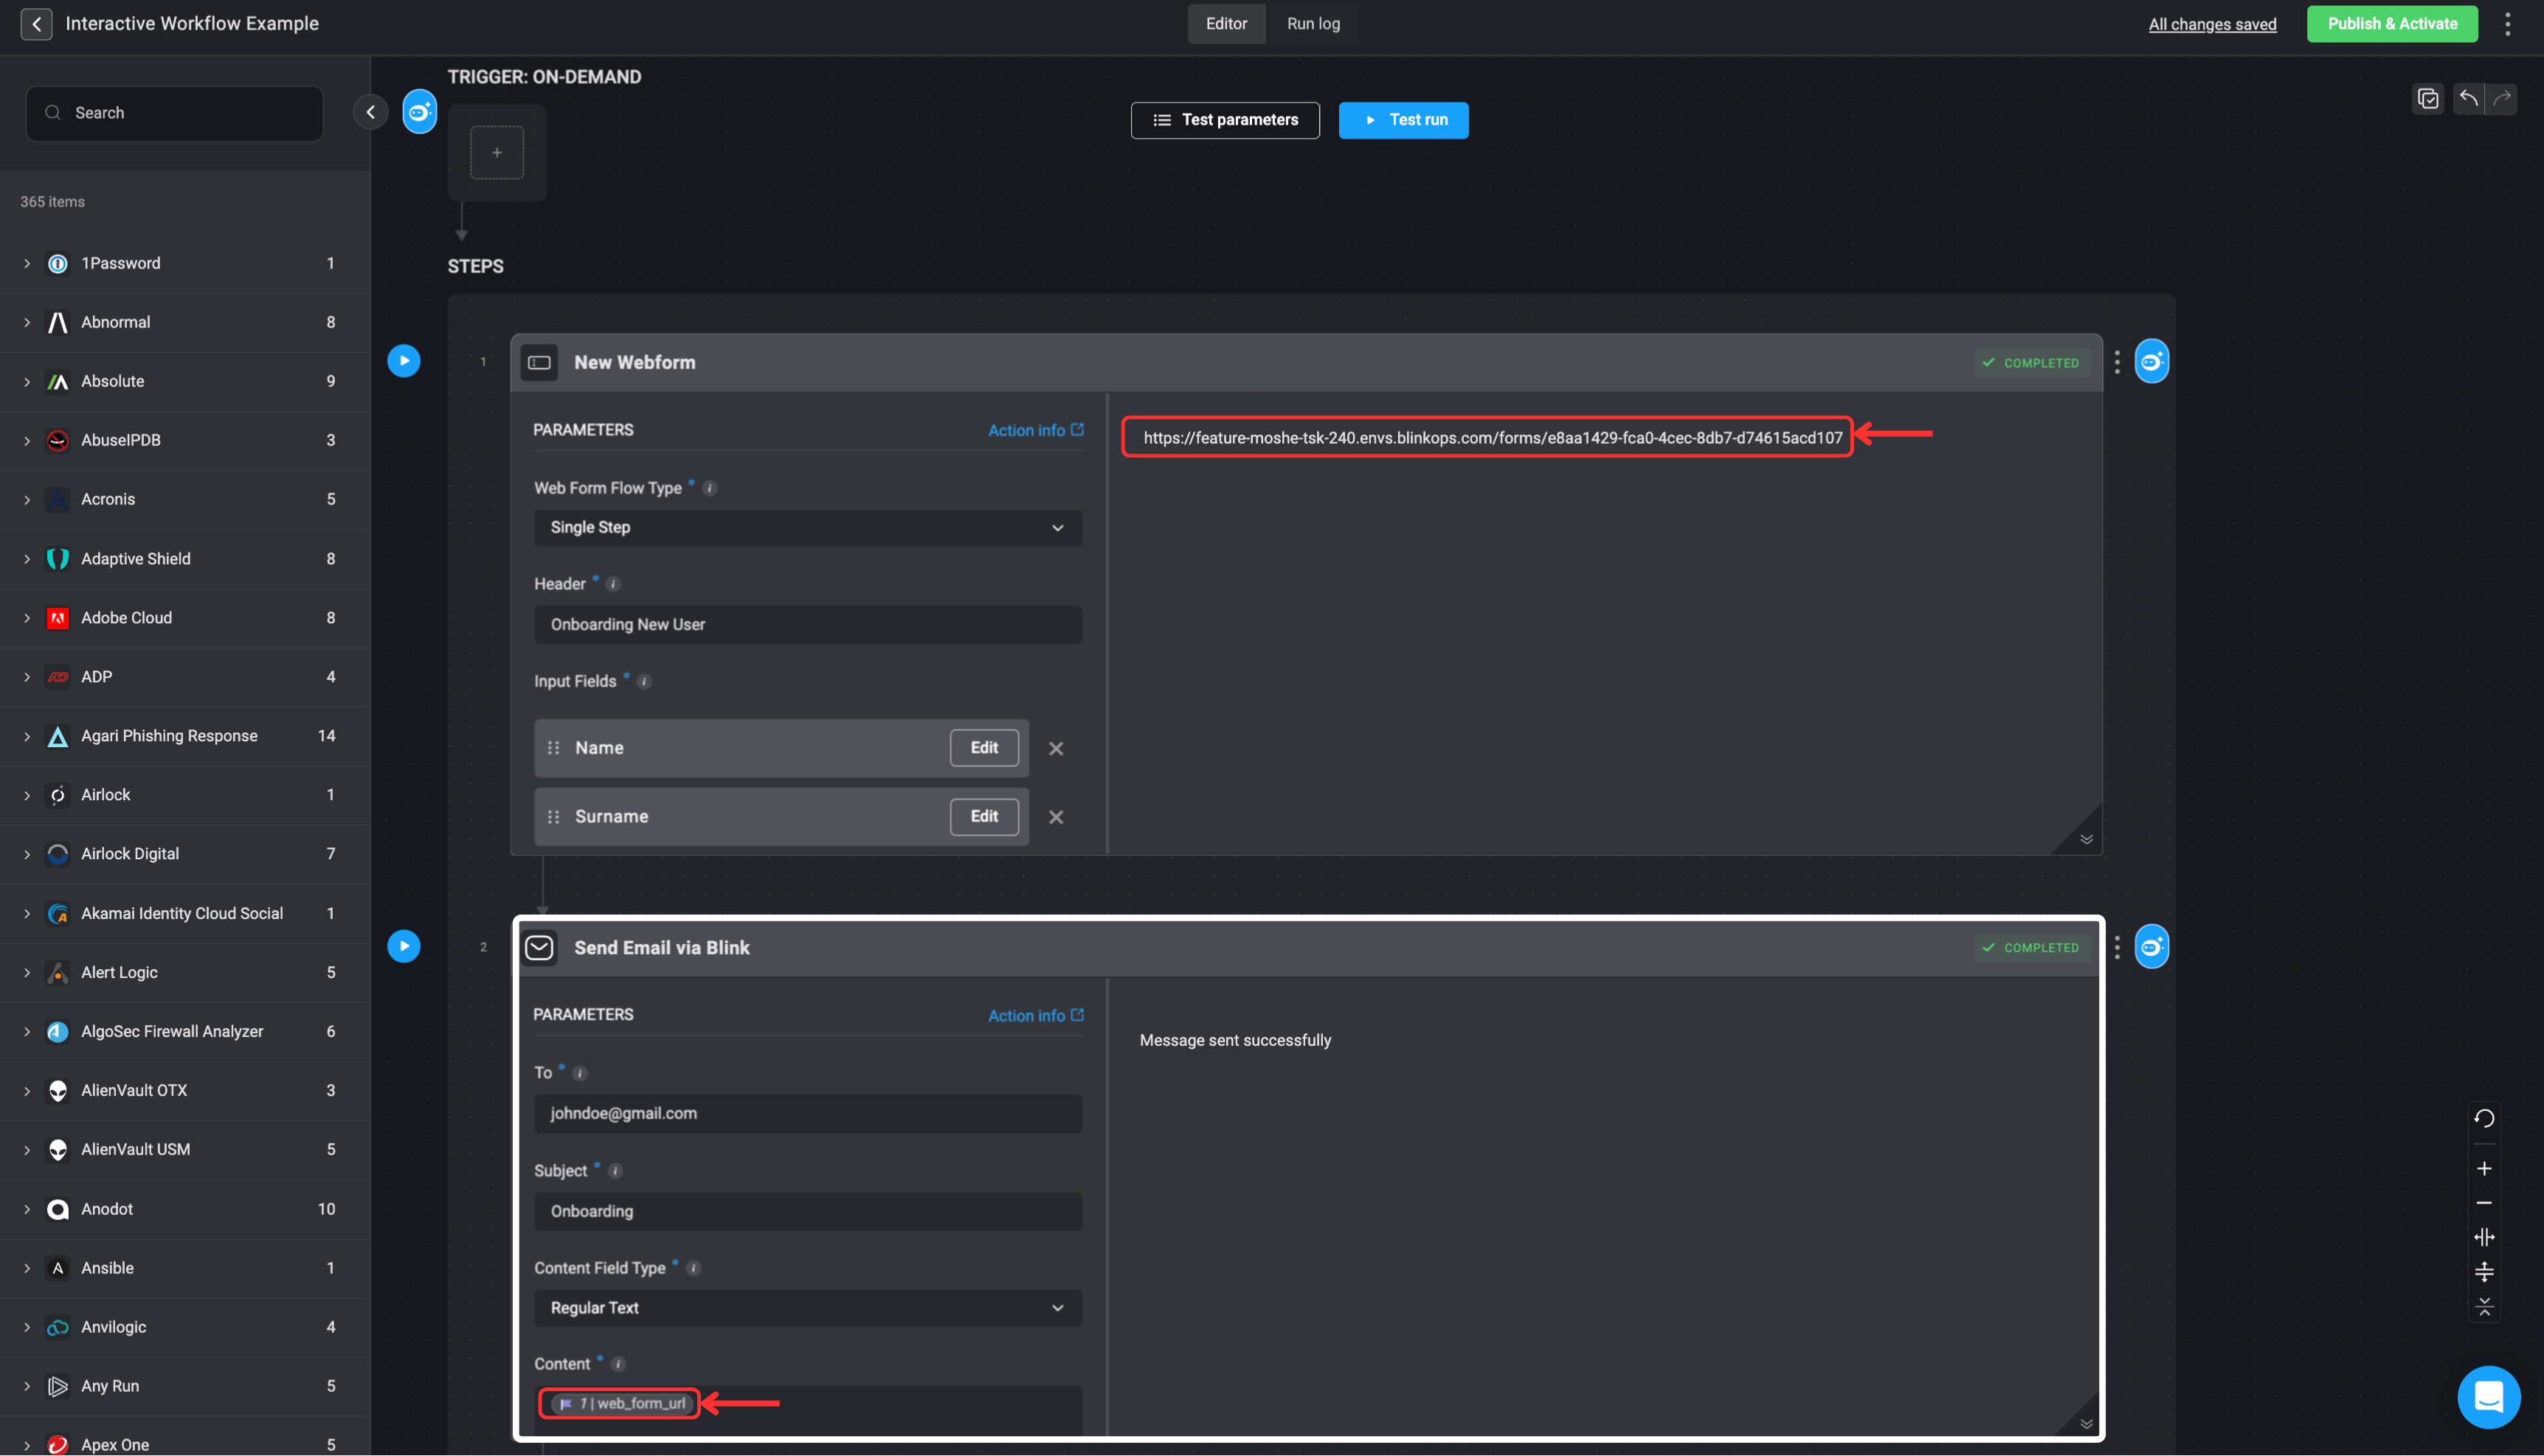 Add a [Wait](/docs/workflows/building-workflows/actions/basic-actions/flow-control-actions#wait) action to the subsequent step to pause the workflow until the user completes and submits the web form. Select the **Wait for: Web Form Response** option from the dropdown menu.
It is crucial to include a [Wait](/docs/workflows/building-workflows/actions/basic-actions/flow-control-actions#wait) action immediately after the step that sends the web form's generated URL to the user. This ensures the workflow pauses and waits for the user's response before continuing with subsequent steps or completing the workflow execution. If a Wait step is not added, the steps designed to handle the user's response to the web form will fail, as the workflow will proceed without waiting for the necessary input.
Add a [Wait](/docs/workflows/building-workflows/actions/basic-actions/flow-control-actions#wait) action to the subsequent step to pause the workflow until the user completes and submits the web form. Select the **Wait for: Web Form Response** option from the dropdown menu.
It is crucial to include a [Wait](/docs/workflows/building-workflows/actions/basic-actions/flow-control-actions#wait) action immediately after the step that sends the web form's generated URL to the user. This ensures the workflow pauses and waits for the user's response before continuing with subsequent steps or completing the workflow execution. If a Wait step is not added, the steps designed to handle the user's response to the web form will fail, as the workflow will proceed without waiting for the necessary input.
 Then publish/activate the workflow when ready
***
## New Web Form - Interactive Web Form
The *Interactive Web Form* capability empowers you to design and build user-driven workflows involving multiple user interactions that are interdependent. By enabling interactive web forms that adapt based on user input, this feature facilitates seamless data collection and decision-making processes. It is ideal for scenarios where user inputs drive subsequent steps in the workflow, allowing for flexible and efficient management of complex workflows.
### How to Create a *Workflow* using the *Interactive Web Form* Actions
**Web Form Flow Type: New Interactive**- This flow creates a new interactive session for use with subsequent workflow steps including **at least one more** web form for that session.
1. Create a new workflow by navigating to the Workflow Editor.
2. Create a step by searching "Web Form" in the search bar and select the "New Web Form" action.
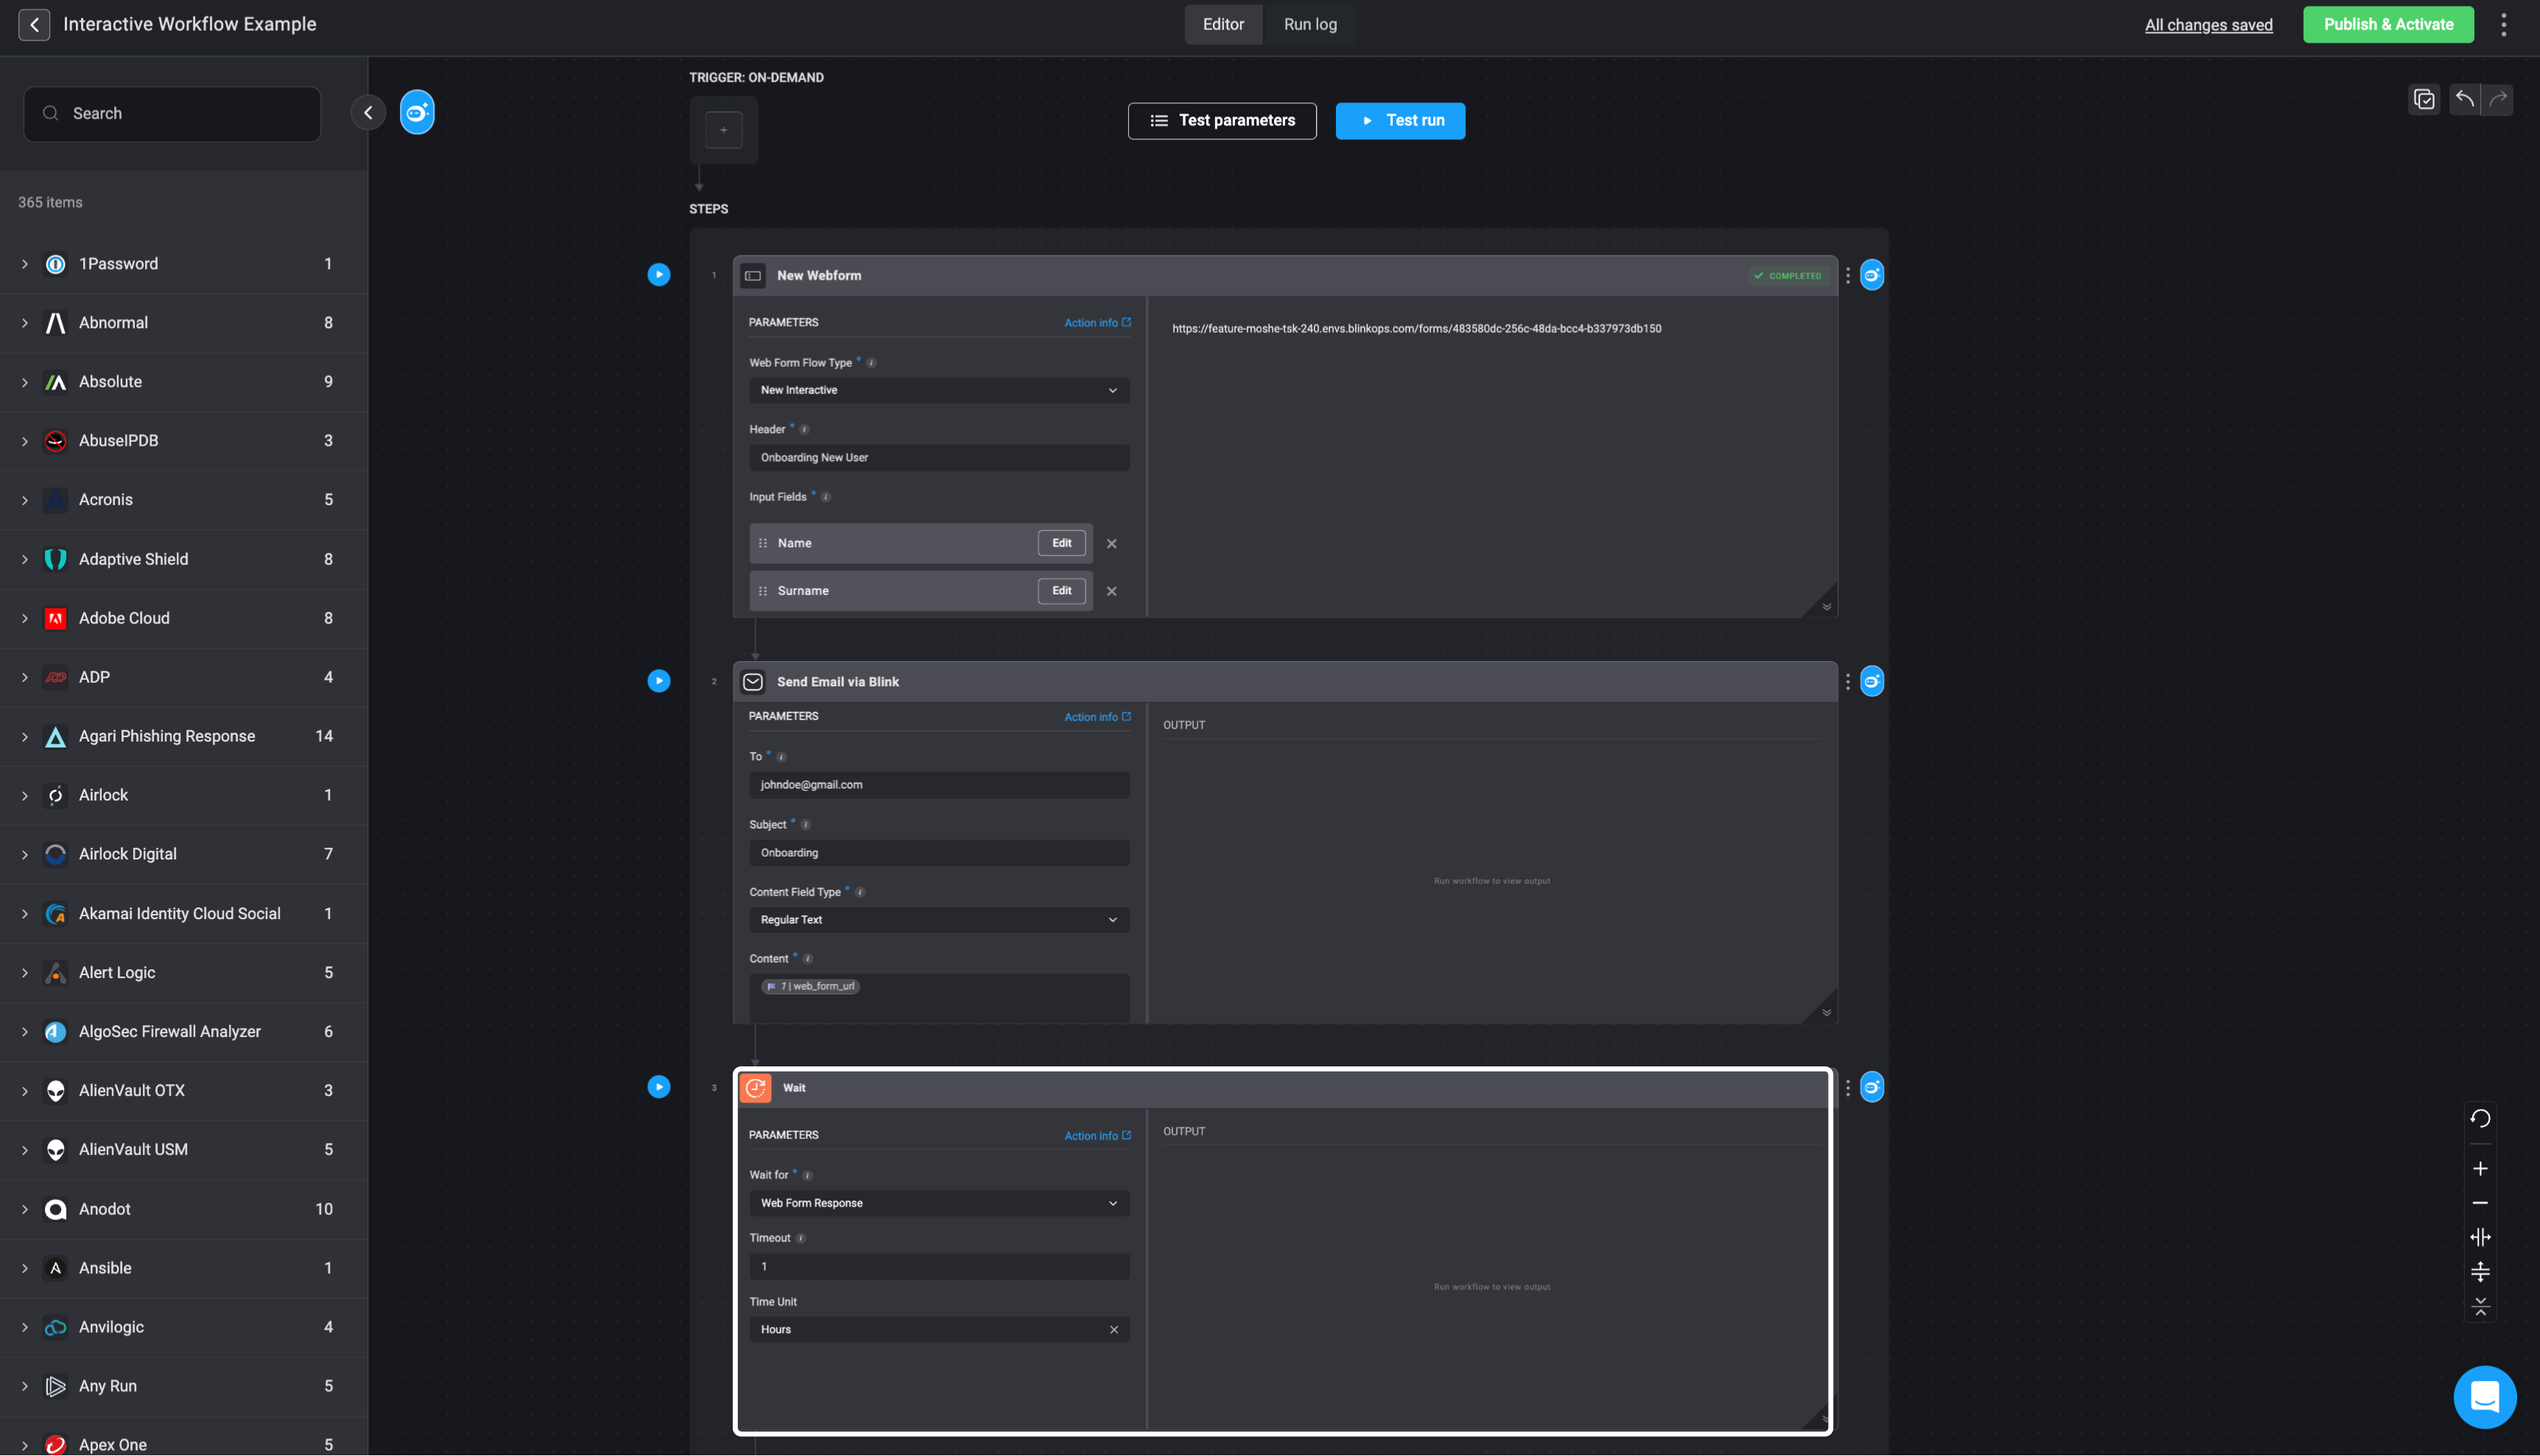
3. Set *Web Form Flow Type* as 'New Interactive'.
Then publish/activate the workflow when ready
***
## New Web Form - Interactive Web Form
The *Interactive Web Form* capability empowers you to design and build user-driven workflows involving multiple user interactions that are interdependent. By enabling interactive web forms that adapt based on user input, this feature facilitates seamless data collection and decision-making processes. It is ideal for scenarios where user inputs drive subsequent steps in the workflow, allowing for flexible and efficient management of complex workflows.
### How to Create a *Workflow* using the *Interactive Web Form* Actions
**Web Form Flow Type: New Interactive**- This flow creates a new interactive session for use with subsequent workflow steps including **at least one more** web form for that session.
1. Create a new workflow by navigating to the Workflow Editor.
2. Create a step by searching "Web Form" in the search bar and select the "New Web Form" action.
3. Set *Web Form Flow Type* as 'New Interactive'.
 4. Next, add input parameters and customize how they are displayed in the Webform
* **Parameter Name**: The name given to the input parameter
* **Parameter Type**: Select the appropriate [input type](/docs/workflows/building-workflows/triggers/on-demand-triggers/input-parameters#input-parameter-types) based on the expected data (for example, string, number, boolean).
* **Optional:**
* **Display Name**: The label shown to users for this input parameter.
* **Required**: Enable this option to make the parameter mandatory. Disable it to allow the parameter to remain optional.
* **Placeholder** *(available for relevant types)*: Optional sample text displayed inside the input field to guide users on the expected format (for example, a sample username or email address).
* **Default Value**: The value automatically used if the user does not provide an input
* **Instructions Text**
* **Tooltip**: Contextual text that appears on hover, offering additional explanation or clarification for the parameter.
* **Helper Text**: Supporting text shown below the input field to guide the user on how to complete it correctly.
* **Description**: The text shown to the user, either as a tooltip or as helper text, depending on the selected option.
5. Complete the additional following fields:
* **URL Link**: Copy the link provided.
* **Header**: Add a title for your web form.
* **Logo**: **(Optional)** Check the box to include a custom logo and provide the image URL.
* **Description**: **(Optional)** Add a brief description.
* **Button Text**: Enter the text you want displayed on the form’s submit button.
6. Next, add an action to the next step, to send the web form's generated URL to a specific user. For example, an [Email action](/docs/workflows/building-workflows/actions/advanced-actions/email-actions) or a [Slack action](/docs/workflows/building-workflows/actions/advanced-actions/interactive-actions/slack-interactivity). Use the [variable picker](/docs/workflows/building-workflows/dynamic-variables/variable-picker) to select `step.1` and then select the `webform_form_url` [dynamic variable](/docs/workflows/building-workflows/dynamic-variables/variable-picker#steps) option.
4. Next, add input parameters and customize how they are displayed in the Webform
* **Parameter Name**: The name given to the input parameter
* **Parameter Type**: Select the appropriate [input type](/docs/workflows/building-workflows/triggers/on-demand-triggers/input-parameters#input-parameter-types) based on the expected data (for example, string, number, boolean).
* **Optional:**
* **Display Name**: The label shown to users for this input parameter.
* **Required**: Enable this option to make the parameter mandatory. Disable it to allow the parameter to remain optional.
* **Placeholder** *(available for relevant types)*: Optional sample text displayed inside the input field to guide users on the expected format (for example, a sample username or email address).
* **Default Value**: The value automatically used if the user does not provide an input
* **Instructions Text**
* **Tooltip**: Contextual text that appears on hover, offering additional explanation or clarification for the parameter.
* **Helper Text**: Supporting text shown below the input field to guide the user on how to complete it correctly.
* **Description**: The text shown to the user, either as a tooltip or as helper text, depending on the selected option.
5. Complete the additional following fields:
* **URL Link**: Copy the link provided.
* **Header**: Add a title for your web form.
* **Logo**: **(Optional)** Check the box to include a custom logo and provide the image URL.
* **Description**: **(Optional)** Add a brief description.
* **Button Text**: Enter the text you want displayed on the form’s submit button.
6. Next, add an action to the next step, to send the web form's generated URL to a specific user. For example, an [Email action](/docs/workflows/building-workflows/actions/advanced-actions/email-actions) or a [Slack action](/docs/workflows/building-workflows/actions/advanced-actions/interactive-actions/slack-interactivity). Use the [variable picker](/docs/workflows/building-workflows/dynamic-variables/variable-picker) to select `step.1` and then select the `webform_form_url` [dynamic variable](/docs/workflows/building-workflows/dynamic-variables/variable-picker#steps) option.
 7. Add a [Wait](/docs/workflows/building-workflows/actions/basic-actions/flow-control-actions#wait) action to the subsequent step to pause the workflow until the user completes and submits the web form. Select the **Wait for: Web Form Response** option from the dropdown menu.
It is crucial to include a [Wait](/docs/workflows/building-workflows/actions/basic-actions/flow-control-actions#wait) action immediately after the step that sends the web form's generated URL to the user. This ensures the workflow pauses and waits for the user's response before continuing with subsequent steps or completing the workflow execution. If a Wait step is not added, the steps designed to handle the user's response to the web form will fail, as the workflow will proceed without waiting for the necessary input.
7. Add a [Wait](/docs/workflows/building-workflows/actions/basic-actions/flow-control-actions#wait) action to the subsequent step to pause the workflow until the user completes and submits the web form. Select the **Wait for: Web Form Response** option from the dropdown menu.
It is crucial to include a [Wait](/docs/workflows/building-workflows/actions/basic-actions/flow-control-actions#wait) action immediately after the step that sends the web form's generated URL to the user. This ensures the workflow pauses and waits for the user's response before continuing with subsequent steps or completing the workflow execution. If a Wait step is not added, the steps designed to handle the user's response to the web form will fail, as the workflow will proceed without waiting for the necessary input.
 8. Build out the rest of your workflow by incorporating additional **Interactive Web Form** steps. You can apply any desired logic between these *web form* steps to customize the workflow process.
1. Add ‘New Web Form’ step
8. Build out the rest of your workflow by incorporating additional **Interactive Web Form** steps. You can apply any desired logic between these *web form* steps to customize the workflow process.
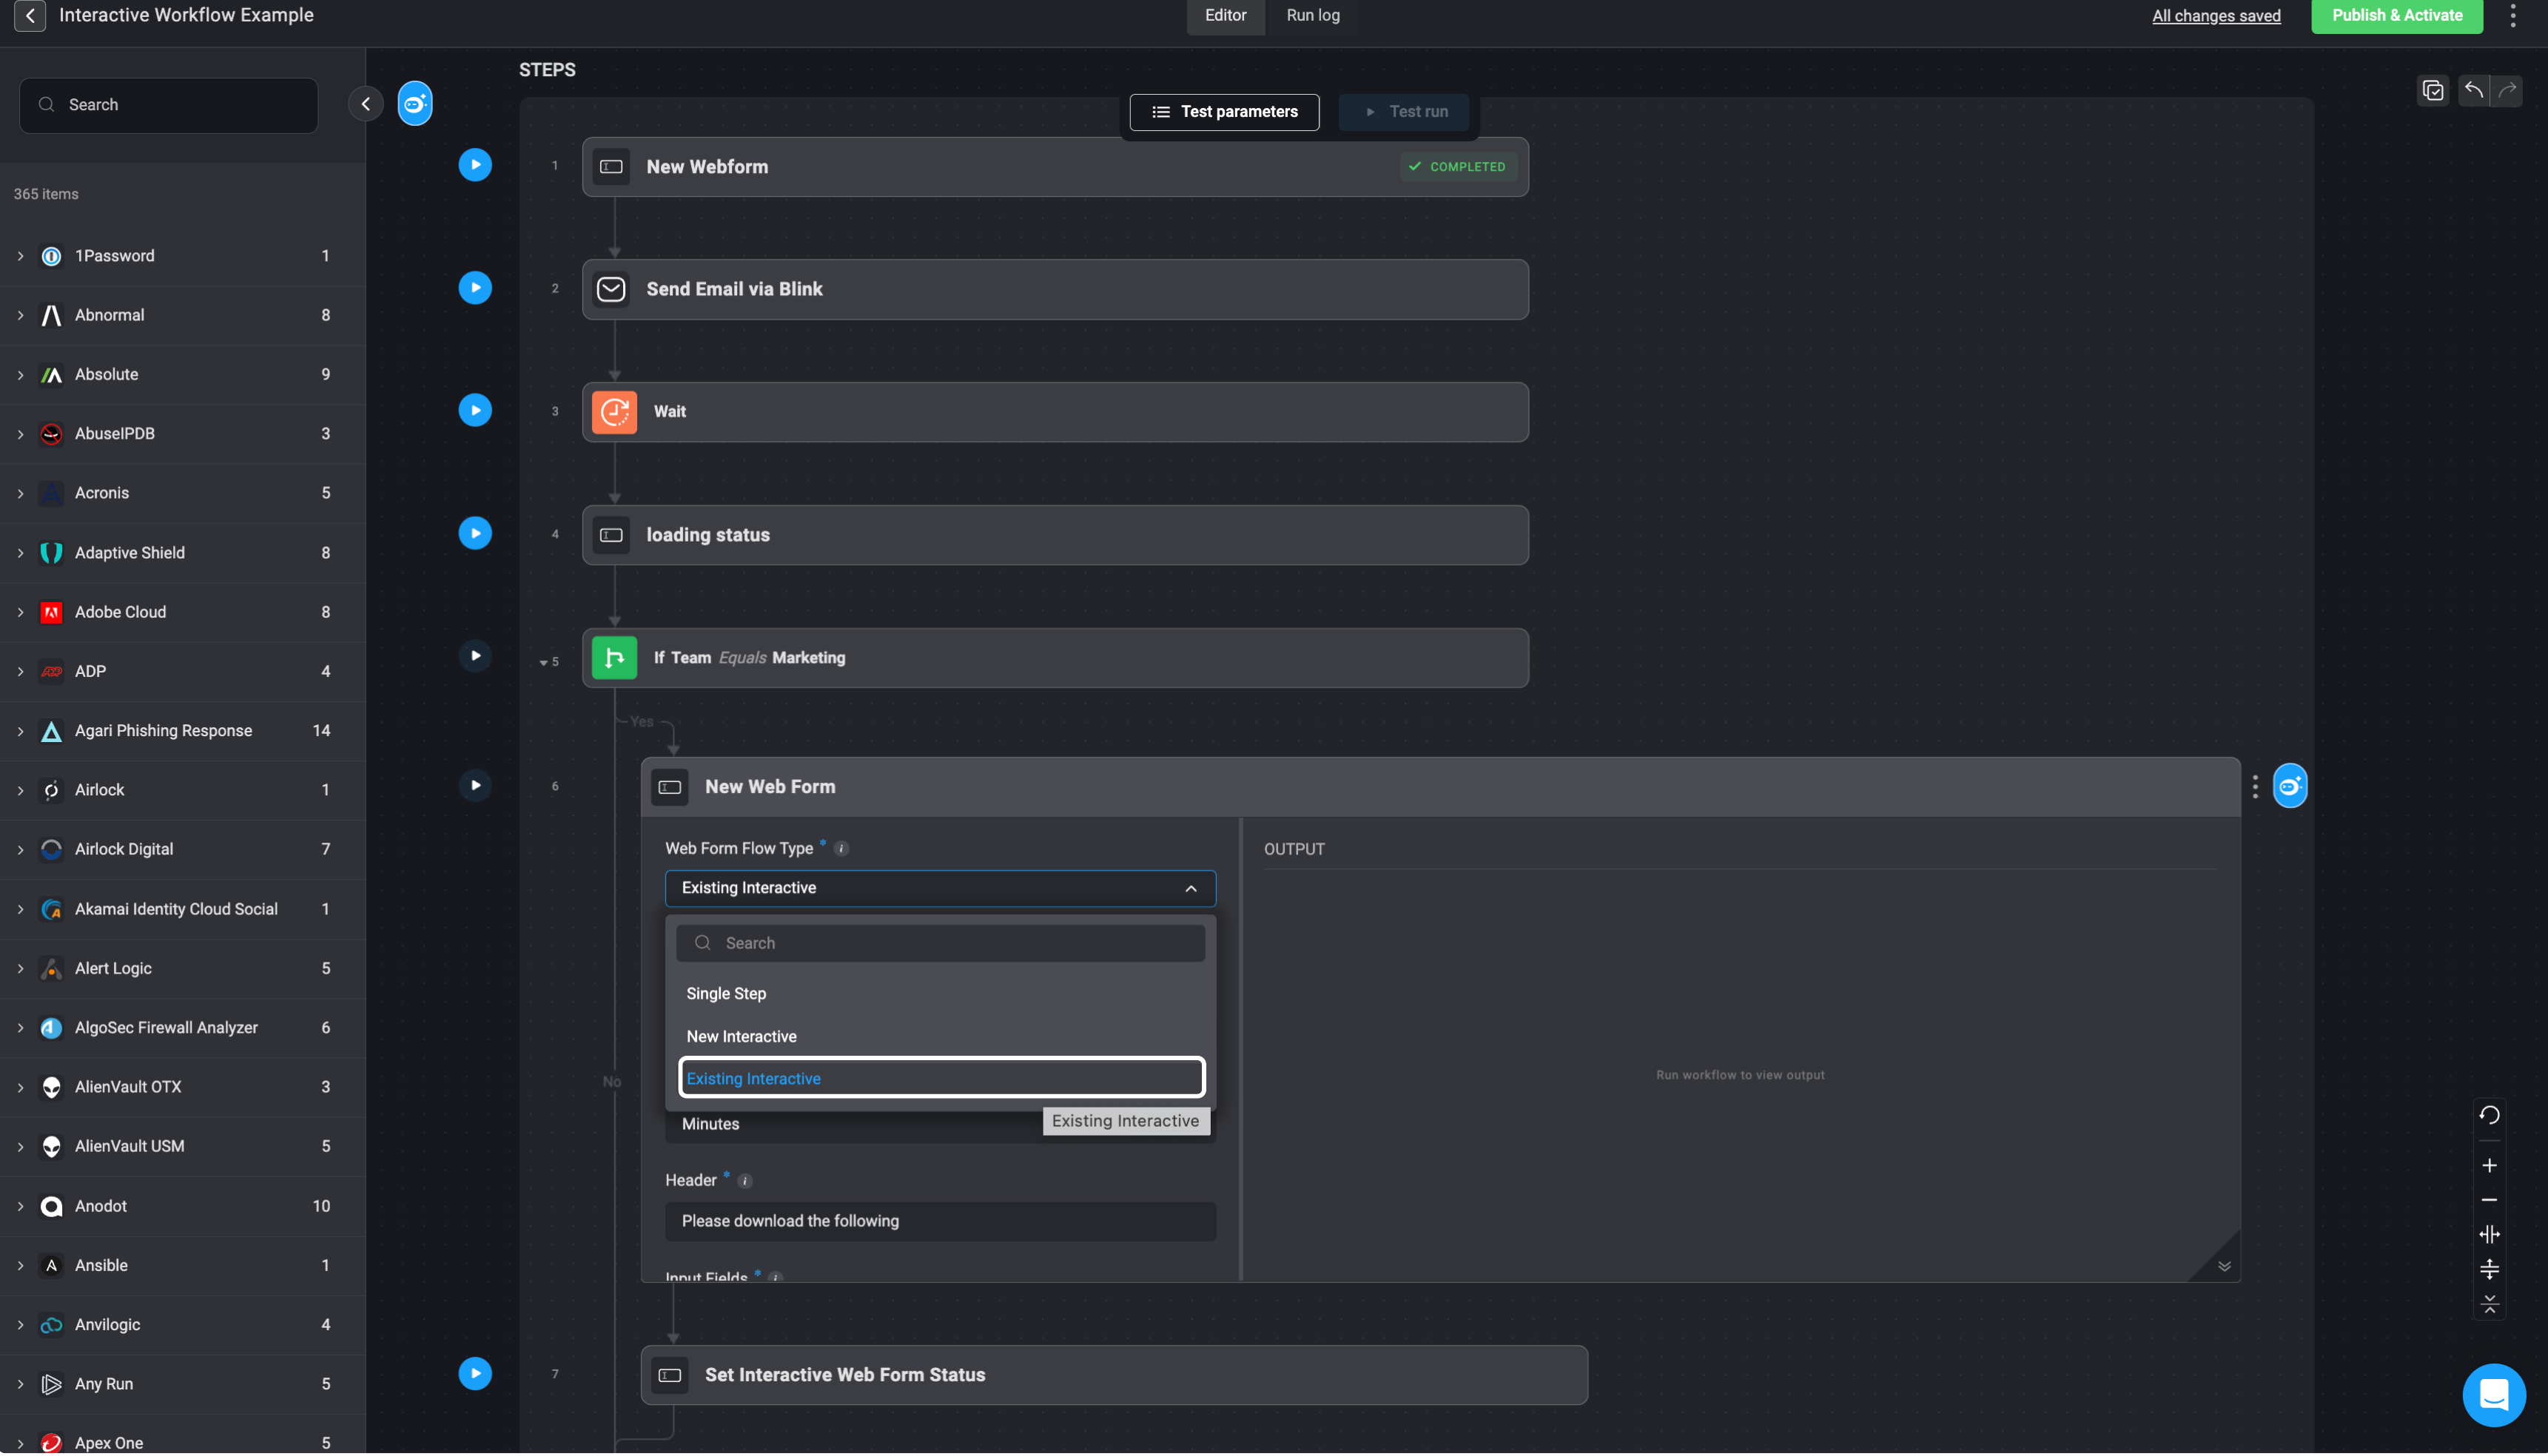
1. Add ‘New Web Form’ step
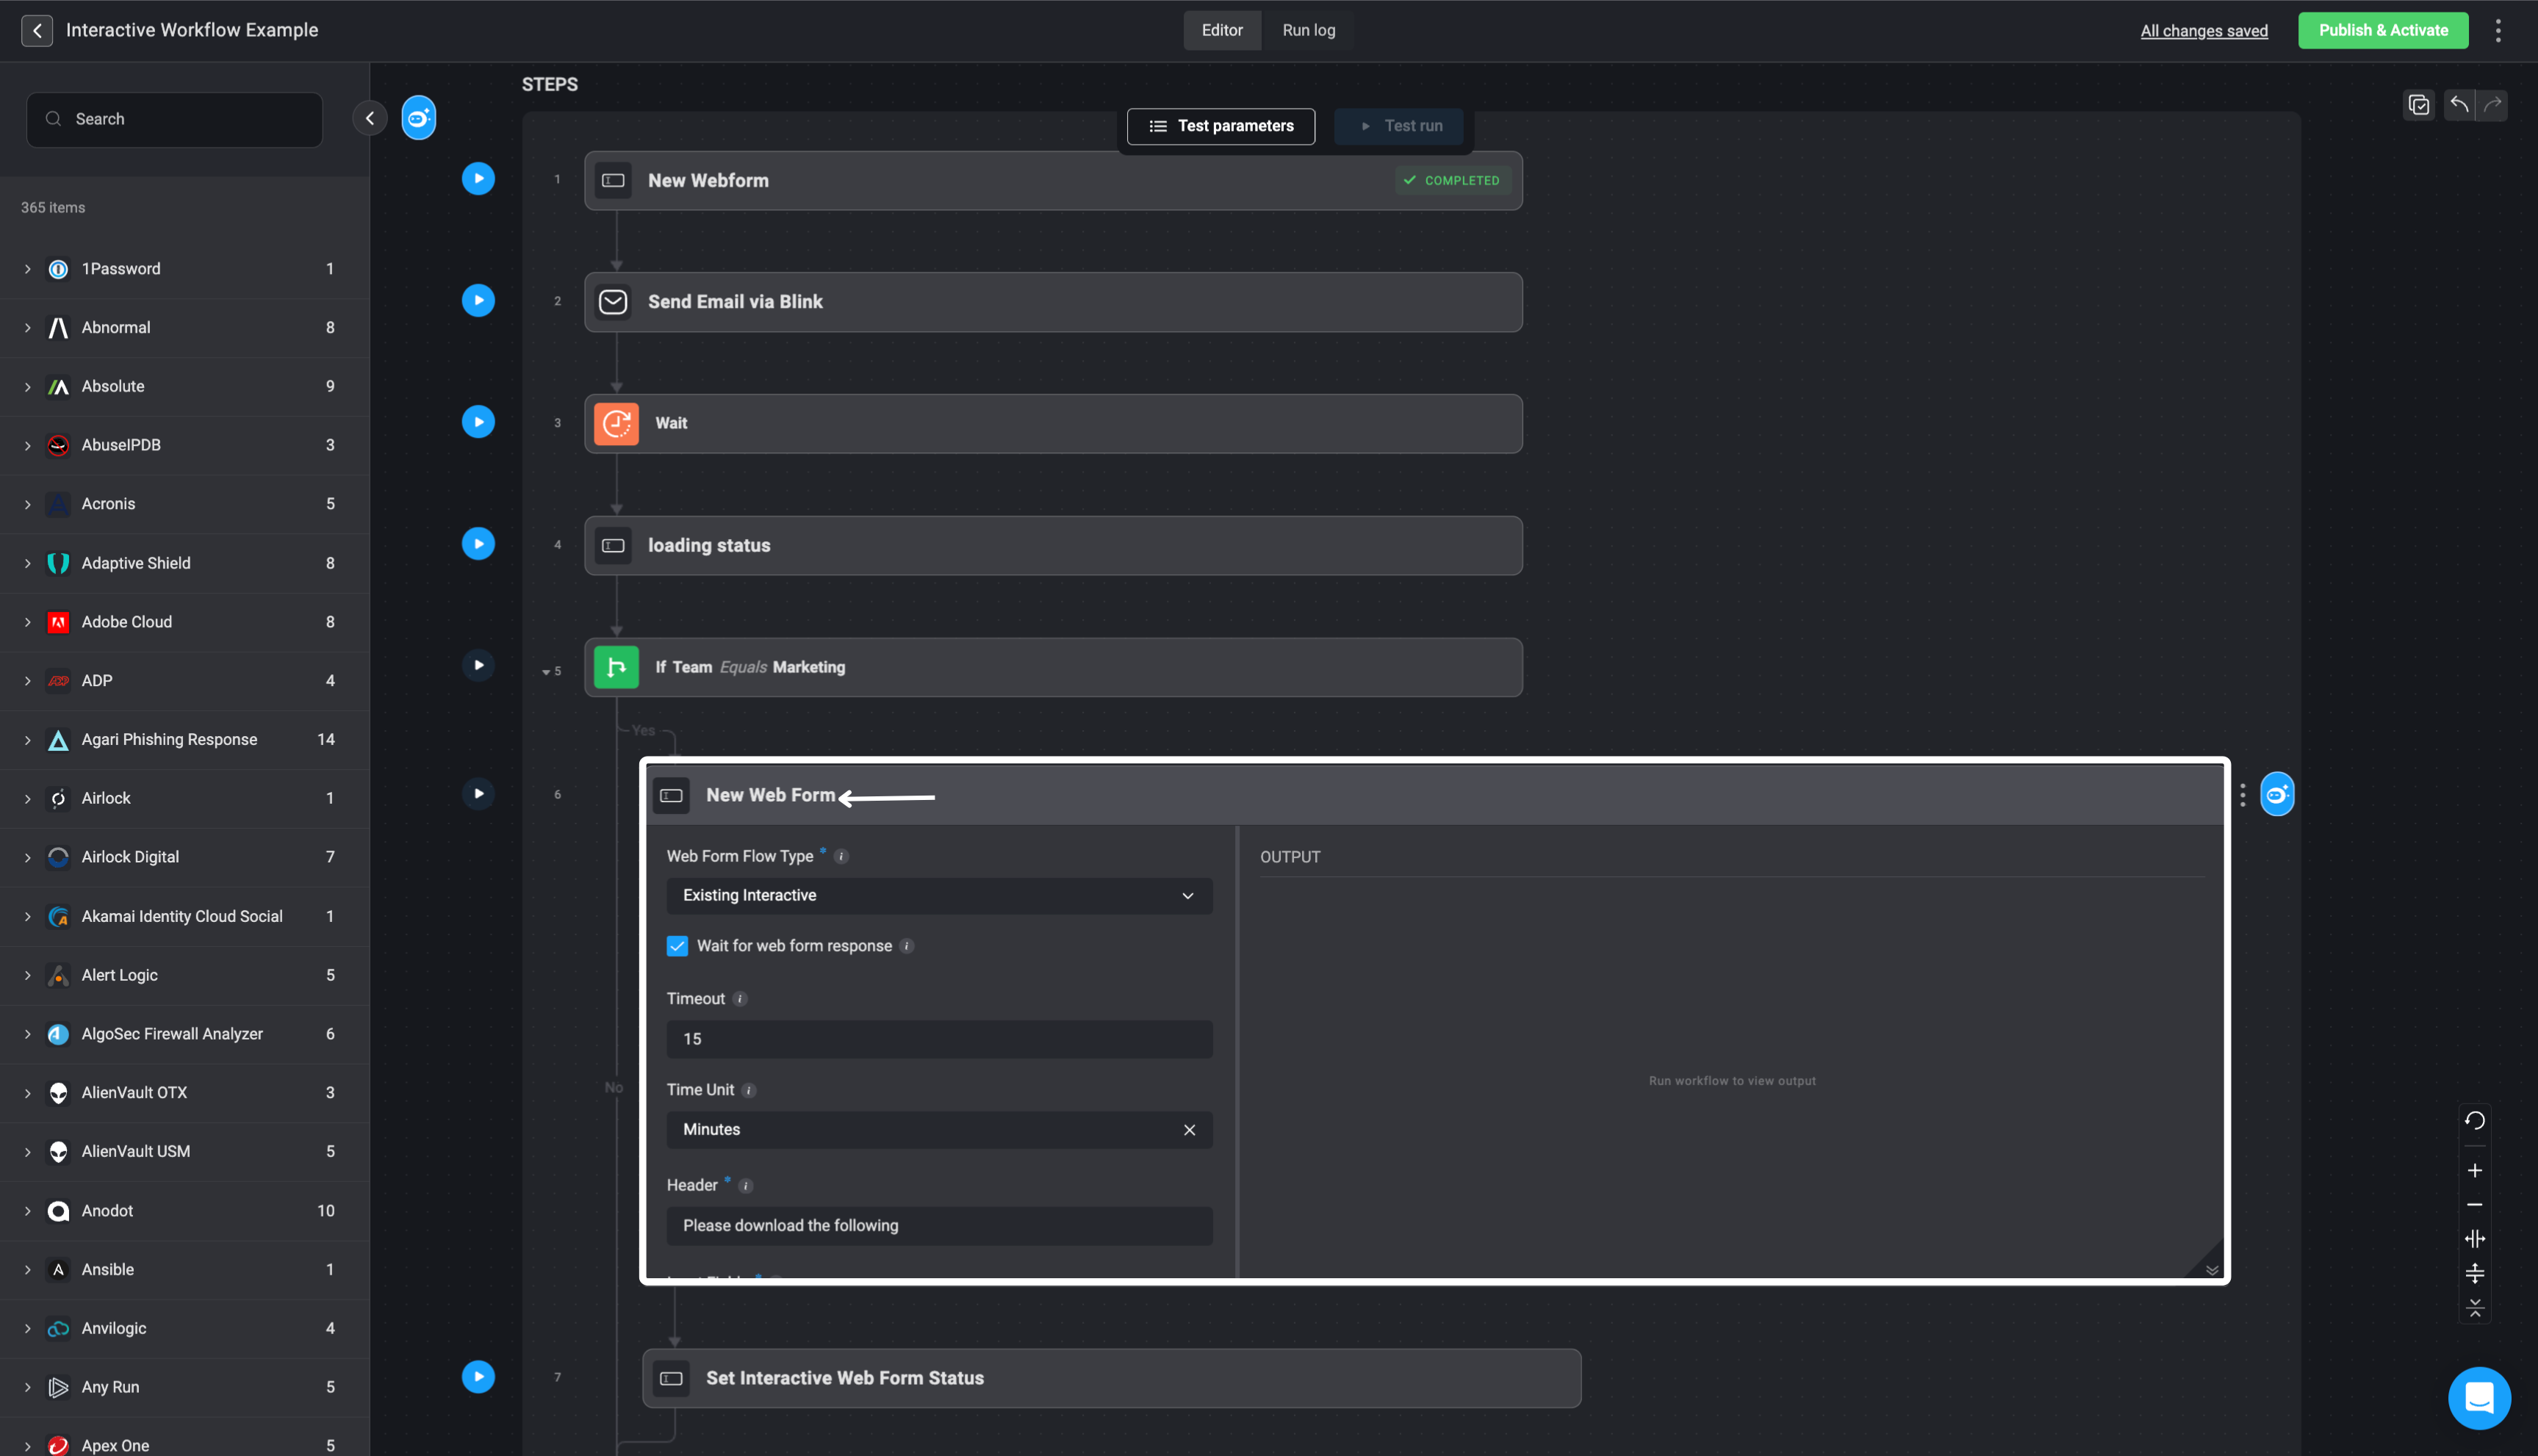 2. Set *Web Form Flow Type* as ‘Existing Interactive’. This flow type creates a web form that can be used in an interactive web form session initiated either by a previous web form step or the web form trigger.
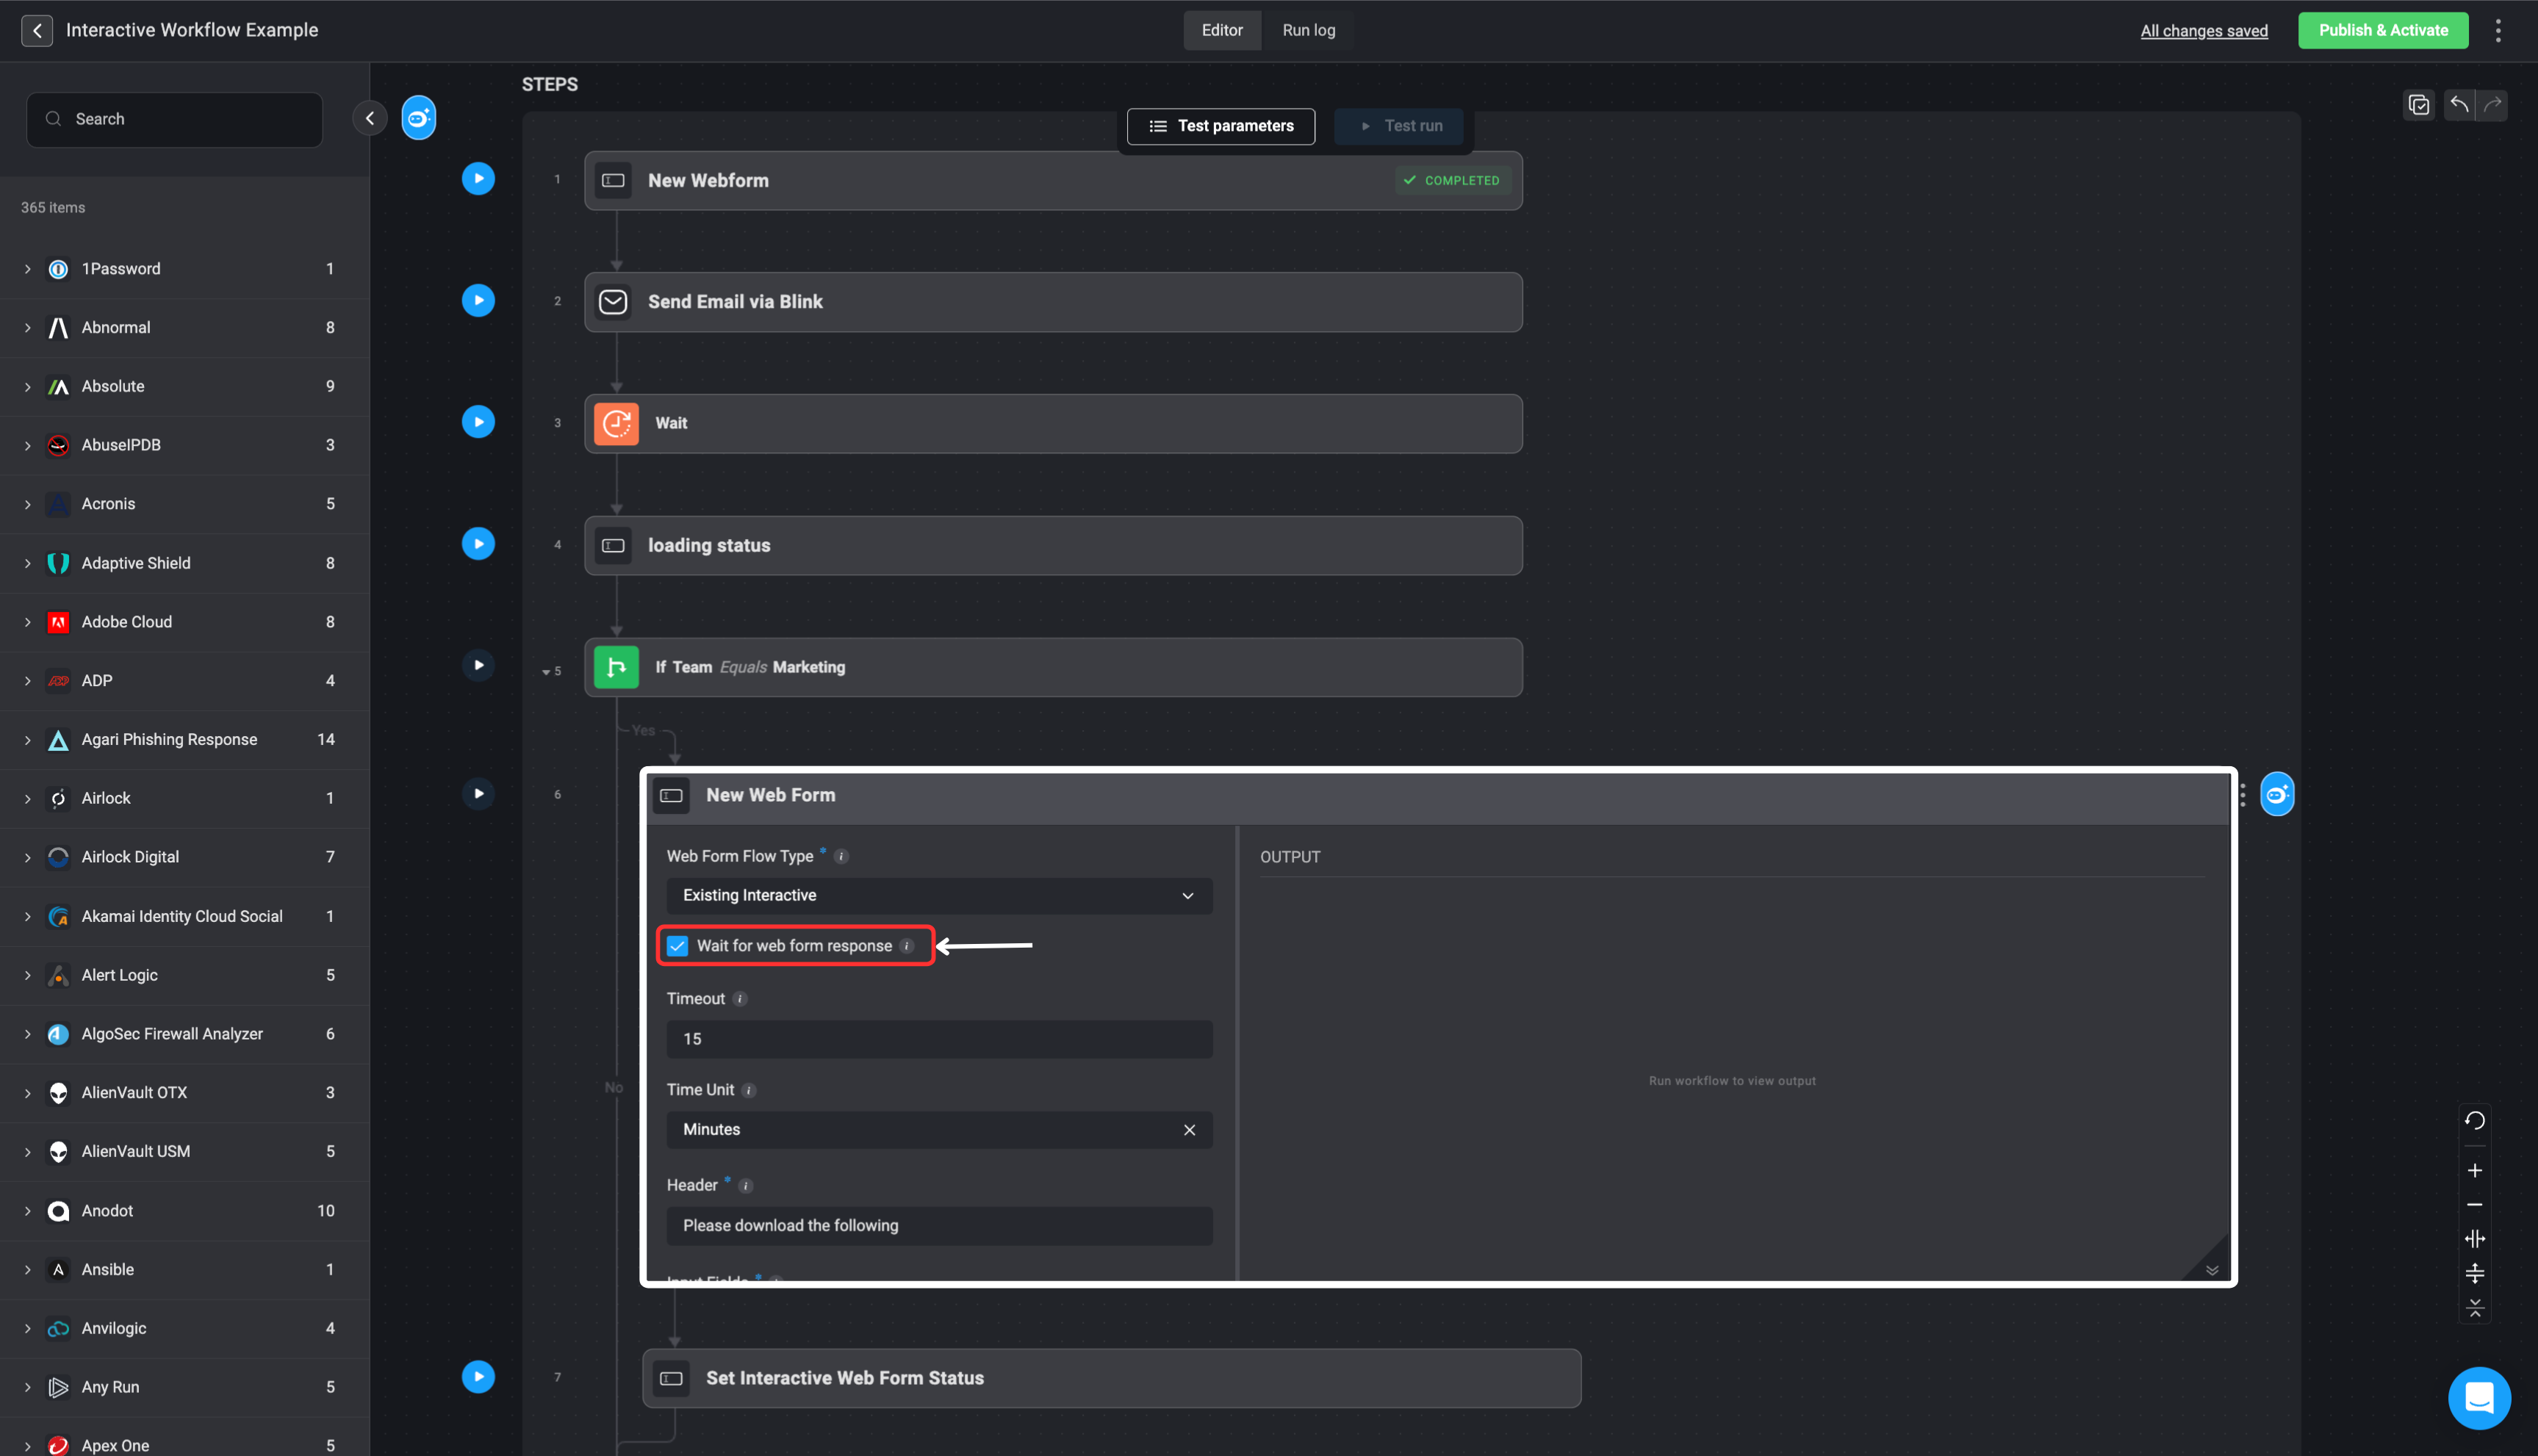
 3. To force the step wait for the web form response, select the ‘Wait for web form response’ checkbox. Alternatively, you can add a subsequent ‘wait’ step, to wait for the web form response.
 9. Once a web form is submitted, a default ‘processing’ status is displayed to indicate that the input is being handled. If the workflow includes additional forms, the next form in the sequence will be shown. Upon submission of the final form, a default success or failure message is displayed based on the outcome of the workflow's response processing.
You can customize the status response [See the *Set Interactive Web Form Status* section below](#set-interactive-web-form-status) for more information.
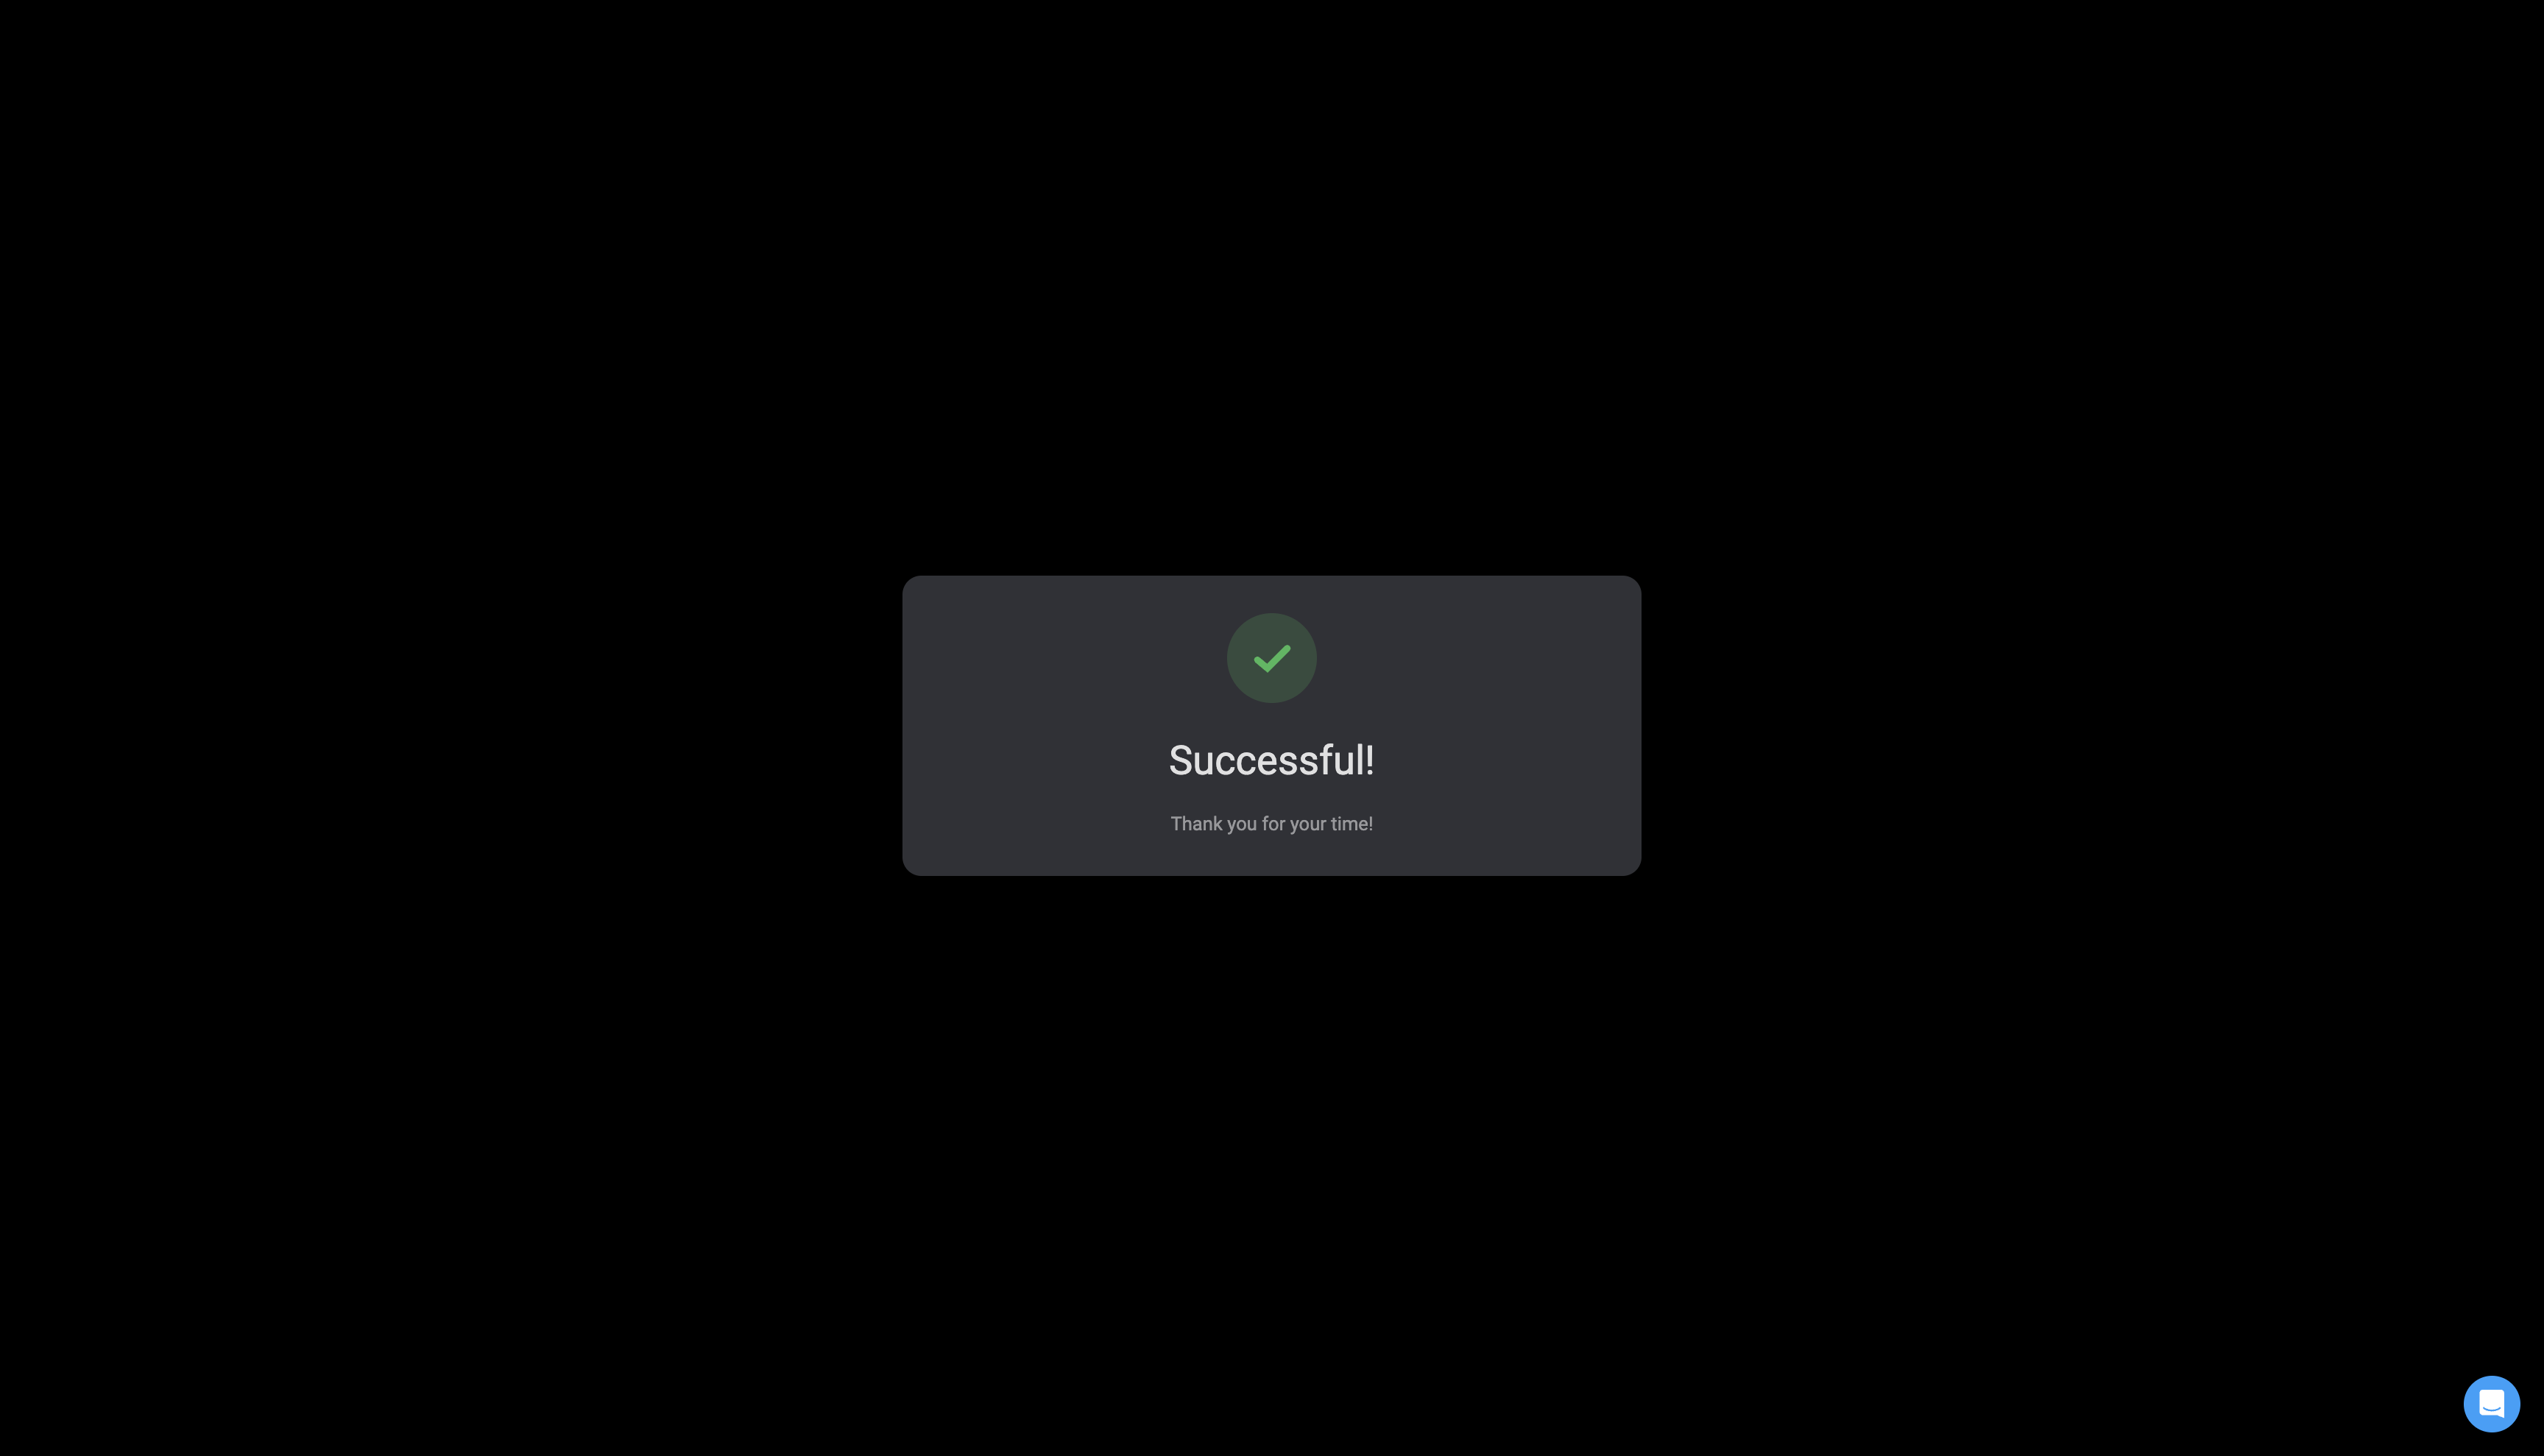
9. Once a web form is submitted, a default ‘processing’ status is displayed to indicate that the input is being handled. If the workflow includes additional forms, the next form in the sequence will be shown. Upon submission of the final form, a default success or failure message is displayed based on the outcome of the workflow's response processing.
You can customize the status response [See the *Set Interactive Web Form Status* section below](#set-interactive-web-form-status) for more information.
 ***
## Set Interactive Web Form Status
If the workflow includes *Interactive Web Form* steps, you have the option to set custom statuses that provide feedback to the user about the progress of the flow. While using custom statuses is optional, they can enhance the user experience by offering clear updates. If no custom statuses are provided, the workflow will automatically update the status of the interactive web form flow upon completion.
Please note that statuses cannot be set for a [Single Step Web Form](#new-web-form---single-step). The [Set Interactive Web Form Status](#set-interactive-web-form-status) actions are exclusively designed for [Interactive Web Forms](#new-web-form---interactive-web-form).
To add a custom status in a workflow, insert a Set Interactive Web Form Status action immediately after a web form step.
1. **Select the status**:
* Loading: Indicates that the process is still in progress.
* Terminal Statuses (Success, Timeout, or Failure): Selecting one of these statuses will mark the interactive web form flow as complete and close the session.
2. **Customize the Title and Message**:
* Provide a custom title and message to be displayed to the user. If you leave this field blank, the default title and message for the selected status will be displayed.
* The custom title and message may include [dynamic variables](/docs/workflows/building-workflows/dynamic-variables/variable-picker)
***
## Set Interactive Web Form Status
If the workflow includes *Interactive Web Form* steps, you have the option to set custom statuses that provide feedback to the user about the progress of the flow. While using custom statuses is optional, they can enhance the user experience by offering clear updates. If no custom statuses are provided, the workflow will automatically update the status of the interactive web form flow upon completion.
Please note that statuses cannot be set for a [Single Step Web Form](#new-web-form---single-step). The [Set Interactive Web Form Status](#set-interactive-web-form-status) actions are exclusively designed for [Interactive Web Forms](#new-web-form---interactive-web-form).
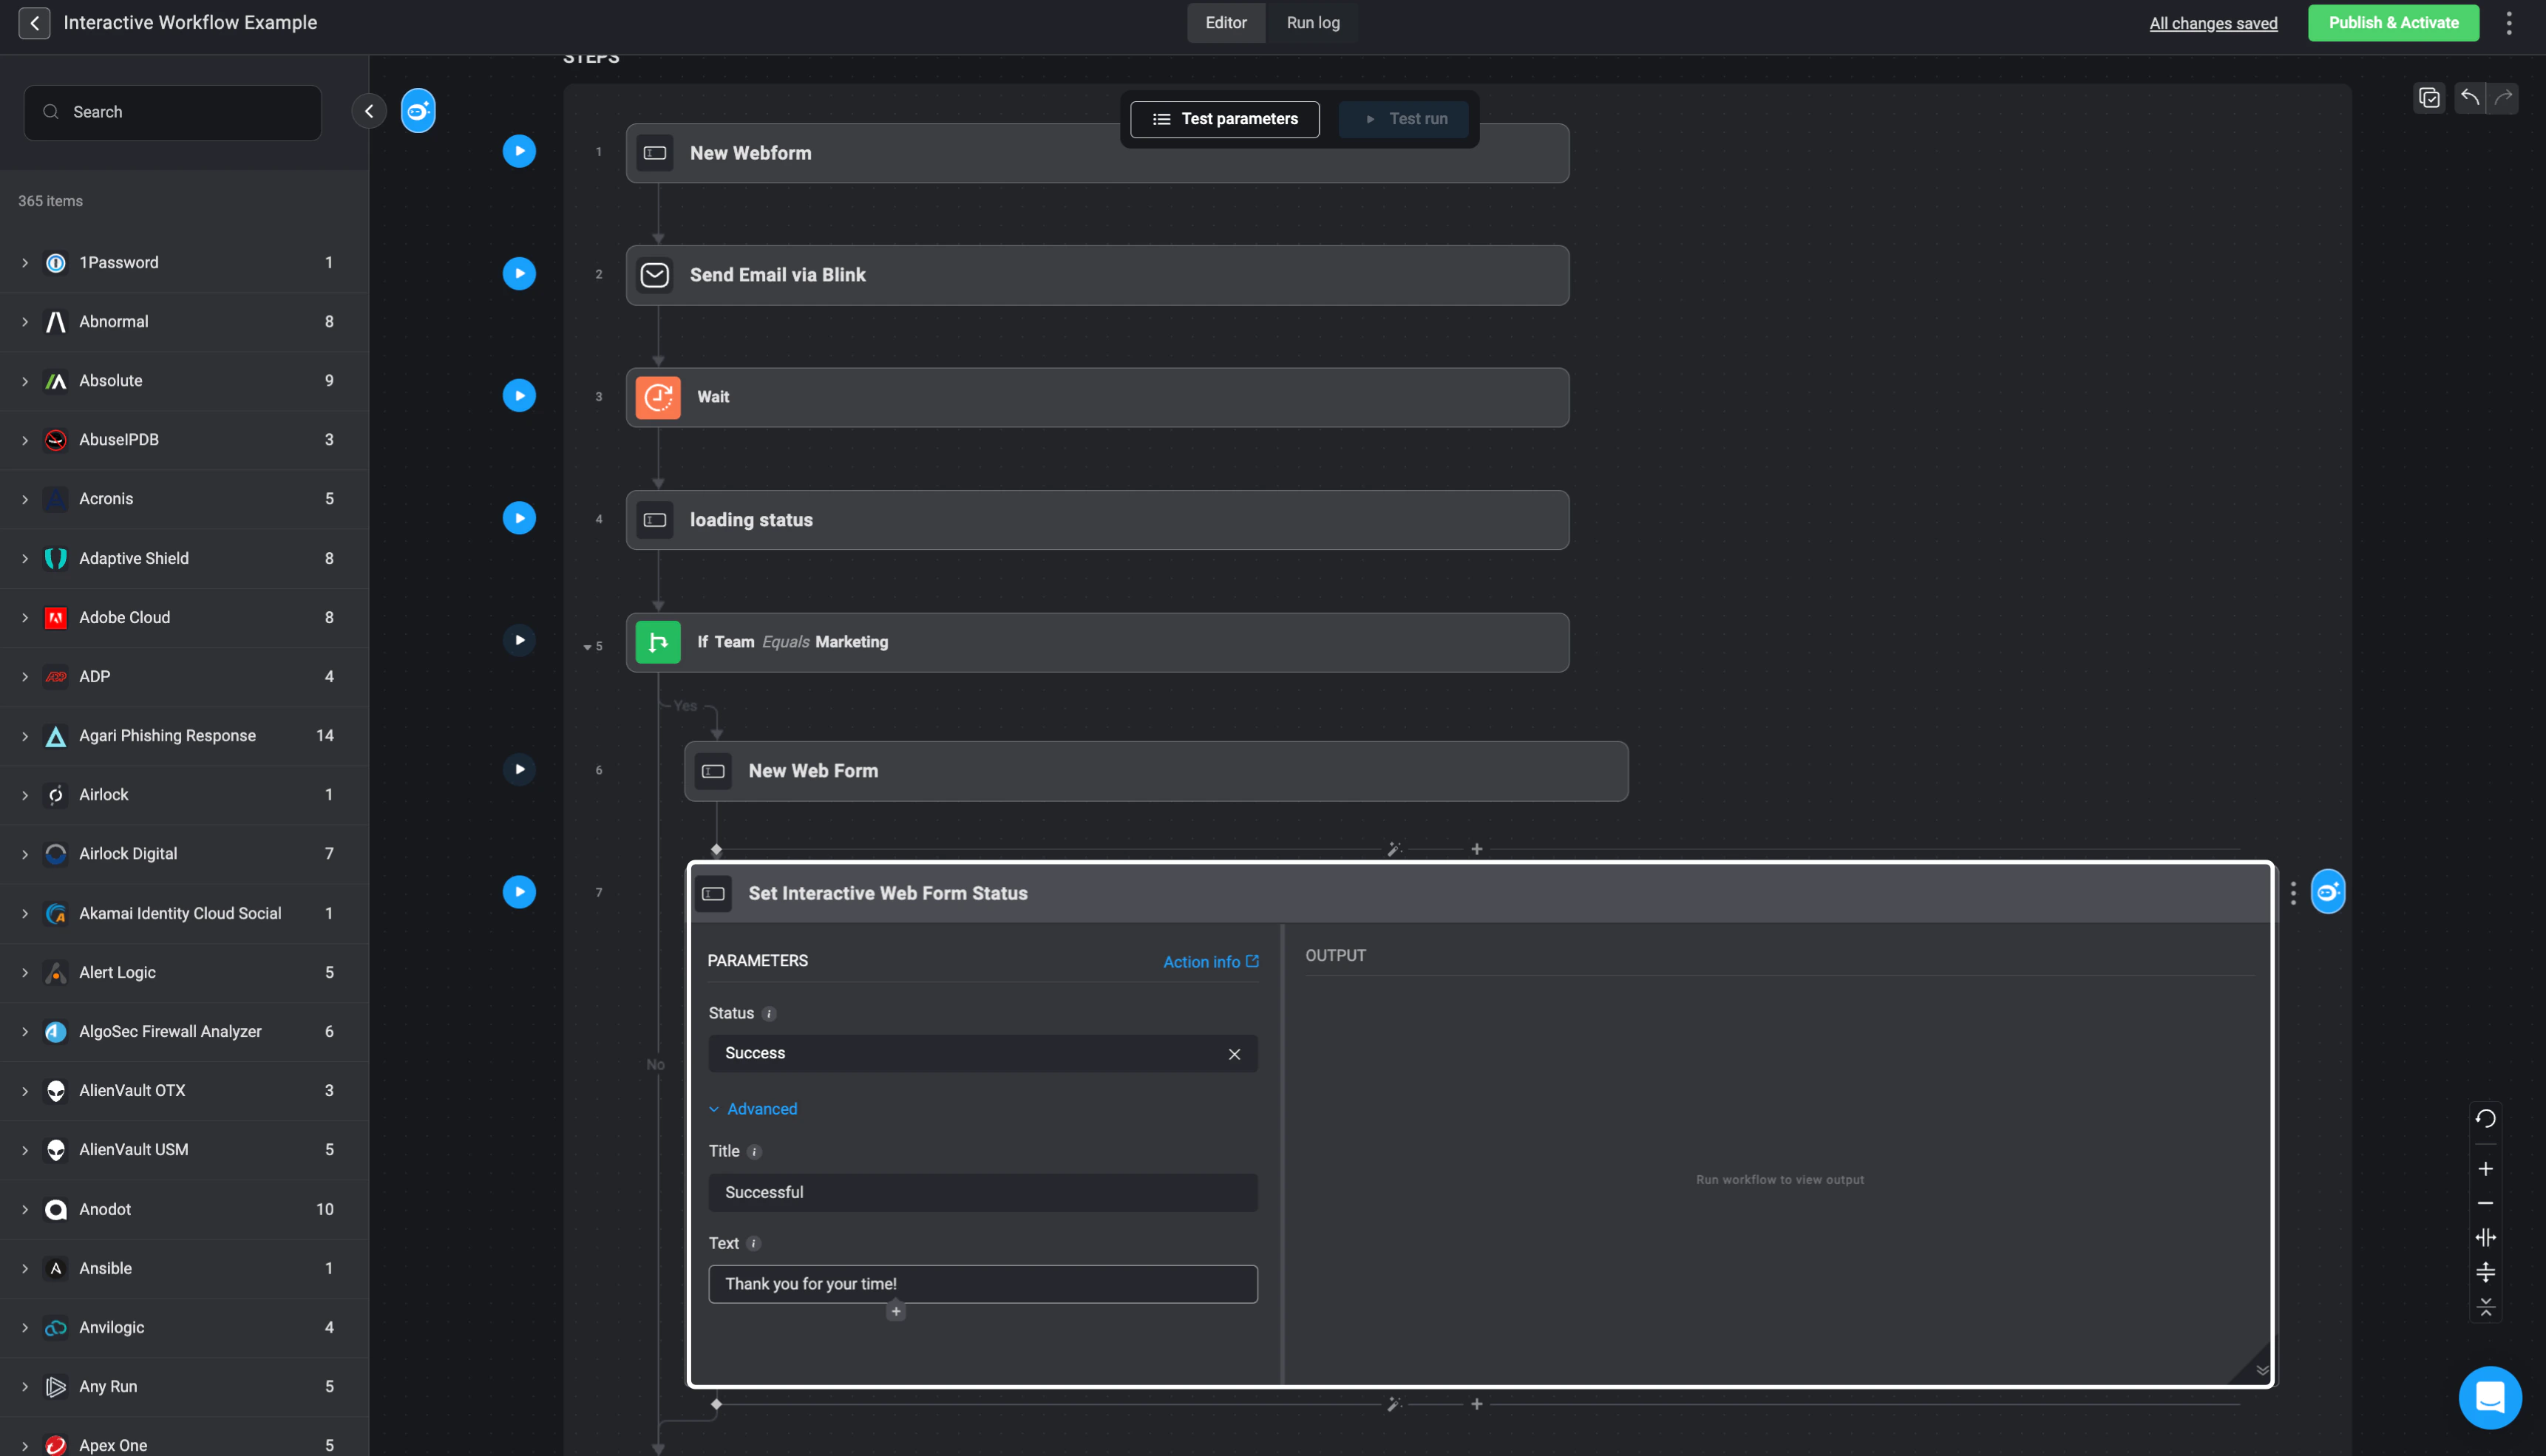
To add a custom status in a workflow, insert a Set Interactive Web Form Status action immediately after a web form step.
1. **Select the status**:
* Loading: Indicates that the process is still in progress.
* Terminal Statuses (Success, Timeout, or Failure): Selecting one of these statuses will mark the interactive web form flow as complete and close the session.
2. **Customize the Title and Message**:
* Provide a custom title and message to be displayed to the user. If you leave this field blank, the default title and message for the selected status will be displayed.
* The custom title and message may include [dynamic variables](/docs/workflows/building-workflows/dynamic-variables/variable-picker)
 ## New Web Form from JSON
This action allows you to create a Web Form using a JSON Schema.
**It is important to note**:
* The *New Web Form from JSON* action allows you to create non-interactive web forms that gather information from users without initiating an interactive session
* If you do not want to include the **key-value pair** in your Web Form, set the value to an **empty string** or an **empty array** if it requires **options**.
* Keep in mind that even though certain parameters like **options\_type, free\_text\_regex, filtering\_field, and enforce\_connection\_types** are always set to either an **empty string ("")** or **null**, they still need to be included in the JSON schema for the Web Form actions to work properly. This inclusion is necessary for the actions to execute smoothly, even though these parameters aren't actively used.
**Each Key-Object pair require the following:**
## New Web Form from JSON
This action allows you to create a Web Form using a JSON Schema.
**It is important to note**:
* The *New Web Form from JSON* action allows you to create non-interactive web forms that gather information from users without initiating an interactive session
* If you do not want to include the **key-value pair** in your Web Form, set the value to an **empty string** or an **empty array** if it requires **options**.
* Keep in mind that even though certain parameters like **options\_type, free\_text\_regex, filtering\_field, and enforce\_connection\_types** are always set to either an **empty string ("")** or **null**, they still need to be included in the JSON schema for the Web Form actions to work properly. This inclusion is necessary for the actions to execute smoothly, even though these parameters aren't actively used.
**Each Key-Object pair require the following:**
| Parameter | Data Type | Description |
| -------------------------- | ------------ | --------------------------------------------------------------------------------------------------------------- |
| label | Text | The **Labels** for the fields on the form. |
| required | Boolean | Set to **True** if the form field is required to be filled out, and set to **False** if it is optional. |
| type | Input Types | **Text**, **Number**, **Date\&Time**, **MultiSelect**, **SingleSelect** and **Checkbox** |
| default | Boolean | Sets to **True** to set the value as the default value or **false** to set it as the default value |
| placeholder | String | Temporary text displayed within an empty input field to indicate the type of information that should be entered |
| options | Array | Labels for the options you want to include in the **MultiSelect** menu. |
| display\_name | String | Generates a **new label name** for the field on the form by overriding the default label. |
| allow\_free\_text | Boolean | Set to **True** if you want to allow free text in dropdown menus or **false** to not allow it. |
| index | Number | The **index** is used to determine the **order** in which you want to arrange your form fields. |
| options\_type | Empty String | Always set it as an empty string: **""**. |
| free\_text\_regex | Empty String | Always set it as an empty string: **""**. |
| filtering\_field | Empty String | Always set it as an empty string: **""**. |
| enforce\_connection\_types | null | Always set it as **null**. |
**JSON Schema Example:**
```
{
"Text": {
"required": false,
"type": "text",
"default": false,
"placeholder": "Name",
"options": [],
"display_name": "",
"options_type": "",
"allow_free_text": false,
"free_text_regex": "",
"index": 1,
"filtering_field": "",
"enforce_connection_types": null
},
"Number": {
"required": false,
"type": "number",
"default": "",
"placeholder": "age",
"options": [],
"display_name": "",
"options_type": "",
"allow_free_text": false,
"free_text_regex": "",
"index": 3,
"filtering_field": "",
"enforce_connection_types": null
},
"Date&Time": {
"required": false,
"type": "date",
"default": "",
"placeholder": "",
"options": [],
"display_name": "",
"options_type": "",
"allow_free_text": false,
"free_text_regex": "",
"index": 4,
"filtering_field": "",
"enforce_connection_types": null
},
"Checkbox": {
"required": false,
"type": "checkbox",
"default": false,
"placeholder": "",
"options": [],
"display_name": "",
"options_type": "",
"allow_free_text": false,
"free_text_regex": "",
"index": 5,
"filtering_field": "",
"enforce_connection_types": null
},
"MultiSelect": {
"required": false,
"type": "multi-select",
"default": "",
"placeholder": "",
"options": ["a", "b", "c", "d"],
"display_name": "",
"options_type": "static",
"allow_free_text": false,
"free_text_regex": "",
"index": 7,
"filtering_field": "",
"enforce_connection_types": null
},
"SingleSelect": {
"required": false,
"type": "single-select",
"default": "",
"placeholder": "",
"options": ["1", "2", "3"],
"display_name": "",
"options_type": "static",
"allow_free_text": false,
"free_text_regex": "",
"index": 4,
"filtering_field": "",
"enforce_connection_types": null
}
}
```
***
### Interactive Guide: Creating a New Web Form from JSON
You can also refer to the following tutorial guides for a more in-depth understanding of how to create New Web Form from JSON
[New Web Form from JSON](https://demo.arcade.software/D5rqMNZfzAYefgG9CWIN?embed\&show_copy_link=true)