> ## Documentation Index
> Fetch the complete documentation index at: https://docs.blinkops.com/llms.txt
> Use this file to discover all available pages before exploring further.
# The Condition Builder
> Use the condition builder to define logic-based rules that control workflow execution paths in Blink.
## The Basic vs Advanced Condition Builder
Conditions allow you to define logic-based rules that control behavior or outcomes across the platform. The **Blink Platform** offers two ways to create conditions
1. The [Basic Condition Builder](#the-basic-condition-builder),
2. The [Advanced Condition Builder](#the-advanced-condition-builder-and-nested-conditions).
***
## The Basic Condition Builder
The Basic Condition Builder provides an intuitive, code-free way to create comparisons. It supports logical operators like `AND` and `OR` and a wide range of comparison types, making it easy to define straightforward workflow logic.
### Using the Basic Condition Builder in the Blink platform
The **Basic Condition Builder** is used in several areas across Blink’s platform, including the following scenarios:
The following are illustrative examples intended to help you understand how the Condition Builder can be used across the Blink platform. Your actual configuration may vary depending on your specific use case and requirements.
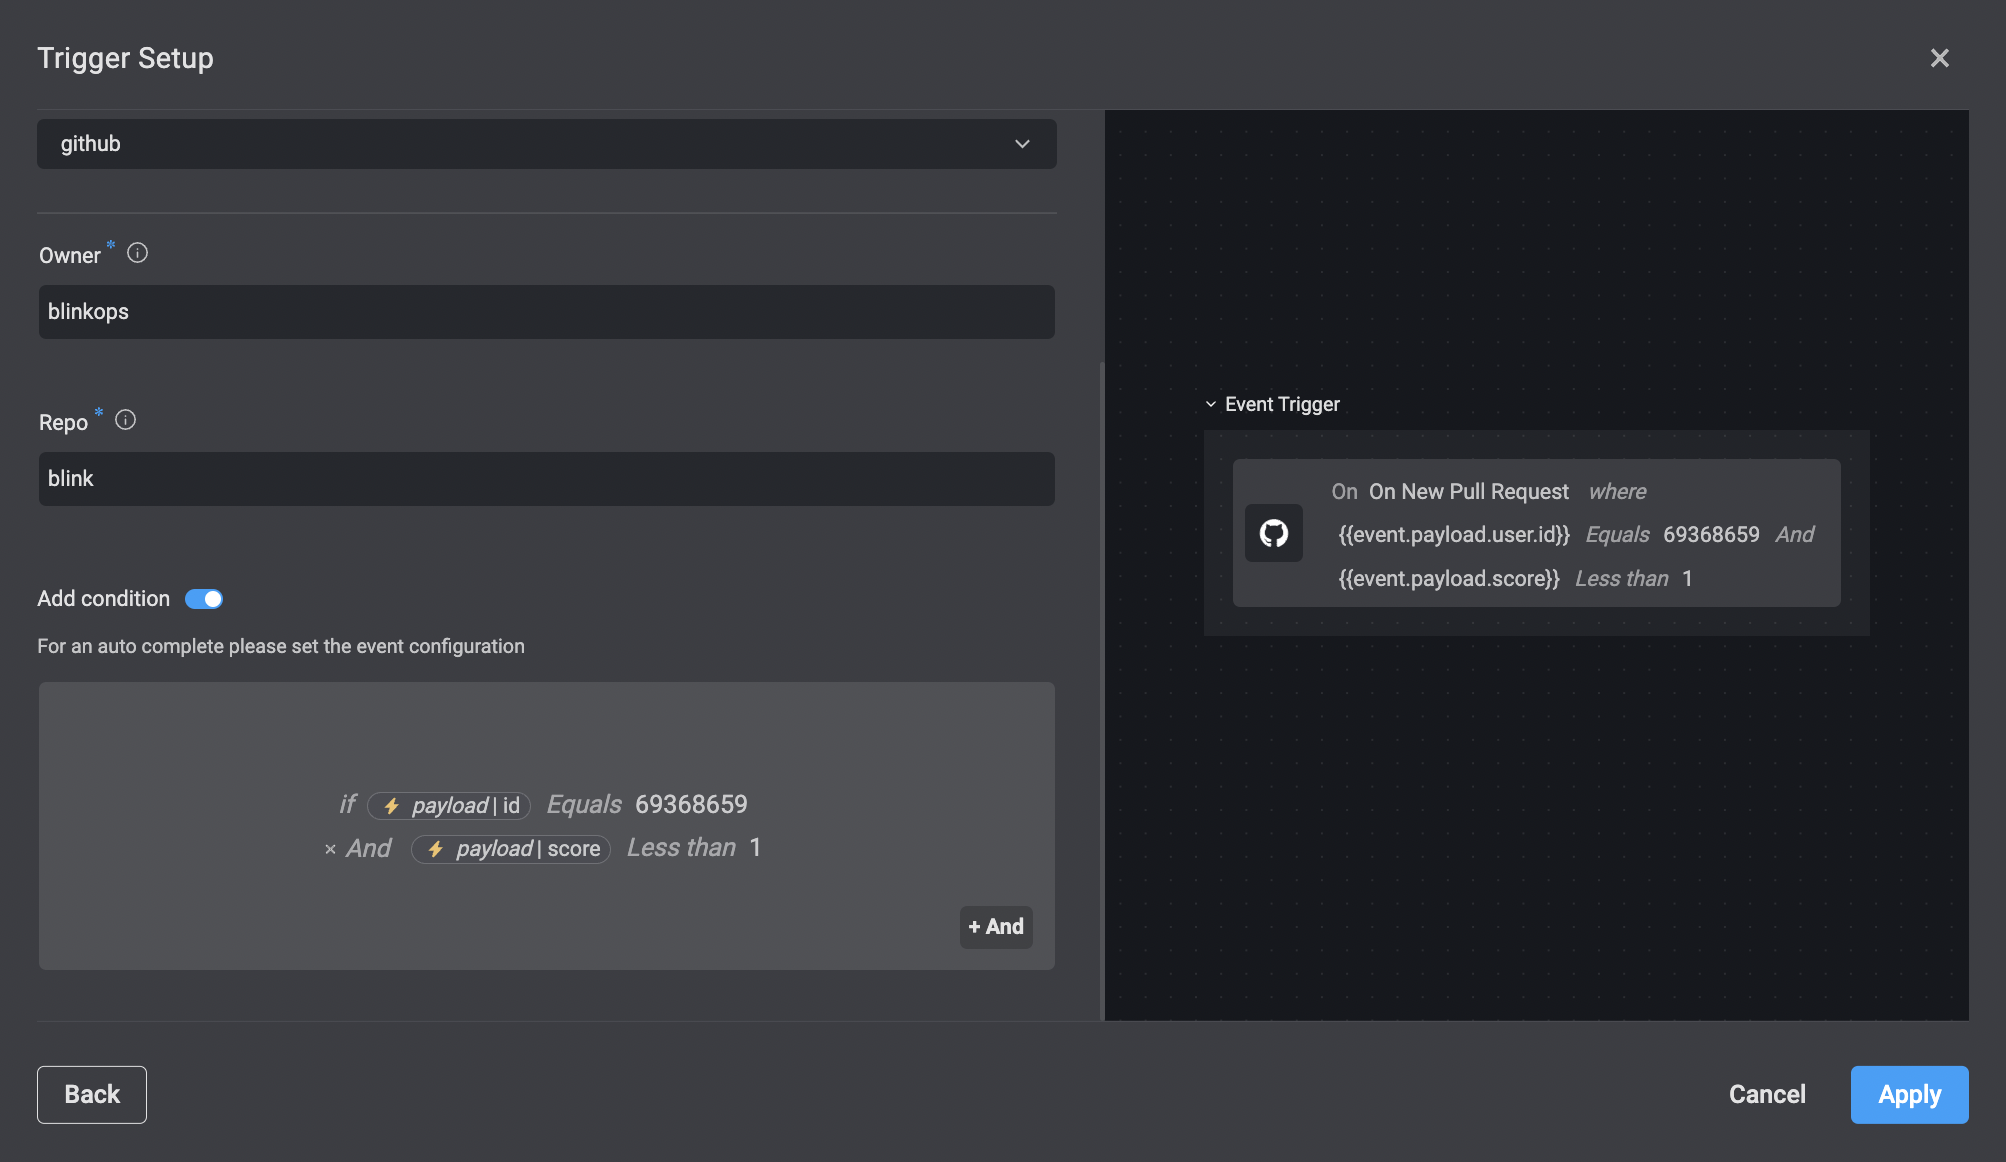
Additional conditions can be applied to limit which events trigger a Workflow. For example, if your Workflow is triggered when an event is received, you can add a condition stating that it will run only if it is received by a user with a specific ID. For more information about the about Event-Based Workflows, navigate [here](/docs/workflows/building-workflows/triggers/event-based-triggers/event-based-triggers)
When creating an Event-Based Workflow, in the 'Trigger setup', select a service provider, and the event you wish to trigger the Workflow.
Toggle the 'Add condition' button. The condition builder consists of three parts: the left value, the operator, and the right value.
To apply a condition, click on and enter each value. Select an operator from the dropdown menu that appears when you click on it.
Use `AND` or `OR` operators to further define your statement. The condition appears in the text window on the right side.
Click **Apply**.
 For more information about the `If` action, navigate [here](/docs/workflows/building-workflows/actions/basic-actions/flow-control-actions#if-%26-if-else-statements)
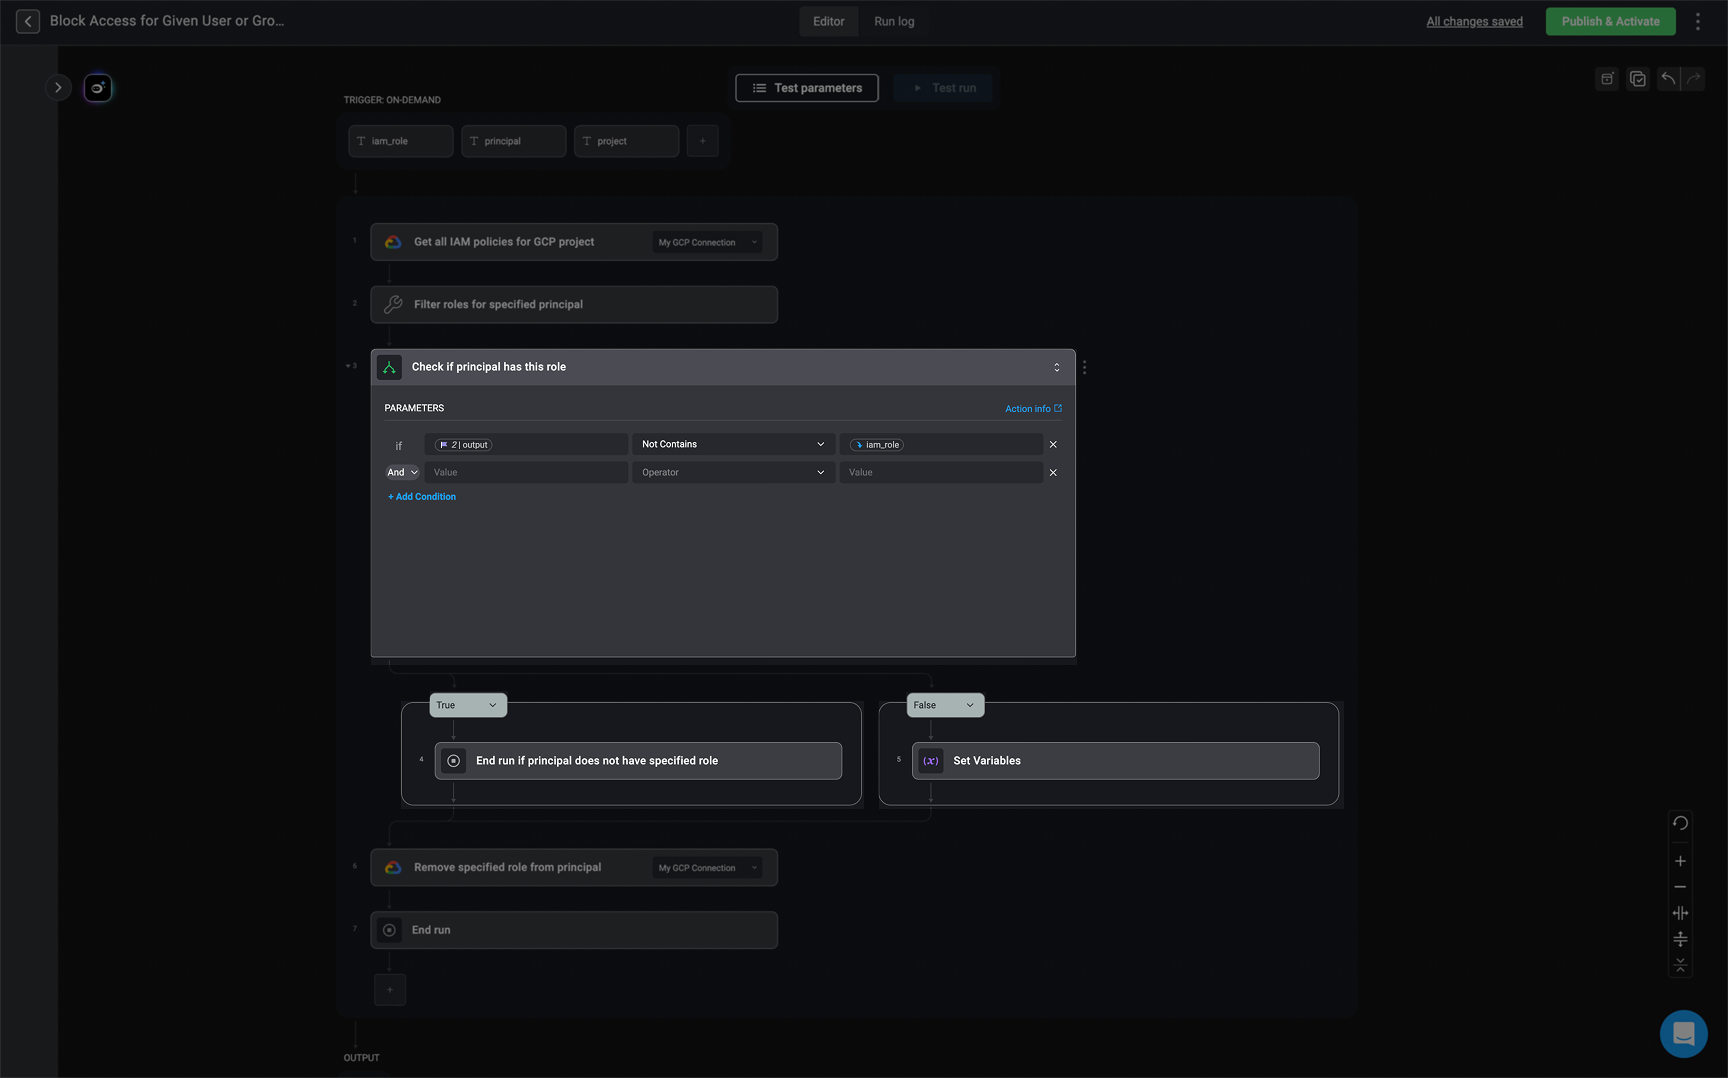
In the [Workflow Editor](/docs/workflows/building-workflows/workflow-editor) page, select an [if](/docs/workflows/building-workflows/actions/basic-actions/flow-control-actions) action.
To apply a condition, click on and enter each value. Select an operator from the dropdown menu that appears when you click on it.
Use `AND` or `OR` operators to further define your statement. The condition appears in the text window on the right side.
For more information about the `If` action, navigate [here](/docs/workflows/building-workflows/actions/basic-actions/flow-control-actions#if-%26-if-else-statements)
In the [Workflow Editor](/docs/workflows/building-workflows/workflow-editor) page, select an [if](/docs/workflows/building-workflows/actions/basic-actions/flow-control-actions) action.
To apply a condition, click on and enter each value. Select an operator from the dropdown menu that appears when you click on it.
Use `AND` or `OR` operators to further define your statement. The condition appears in the text window on the right side.
 For more information about the `Switch Case` action, navigate [here](/docs/workflows/building-workflows/actions/basic-actions/flow-control-actions#switch-case)
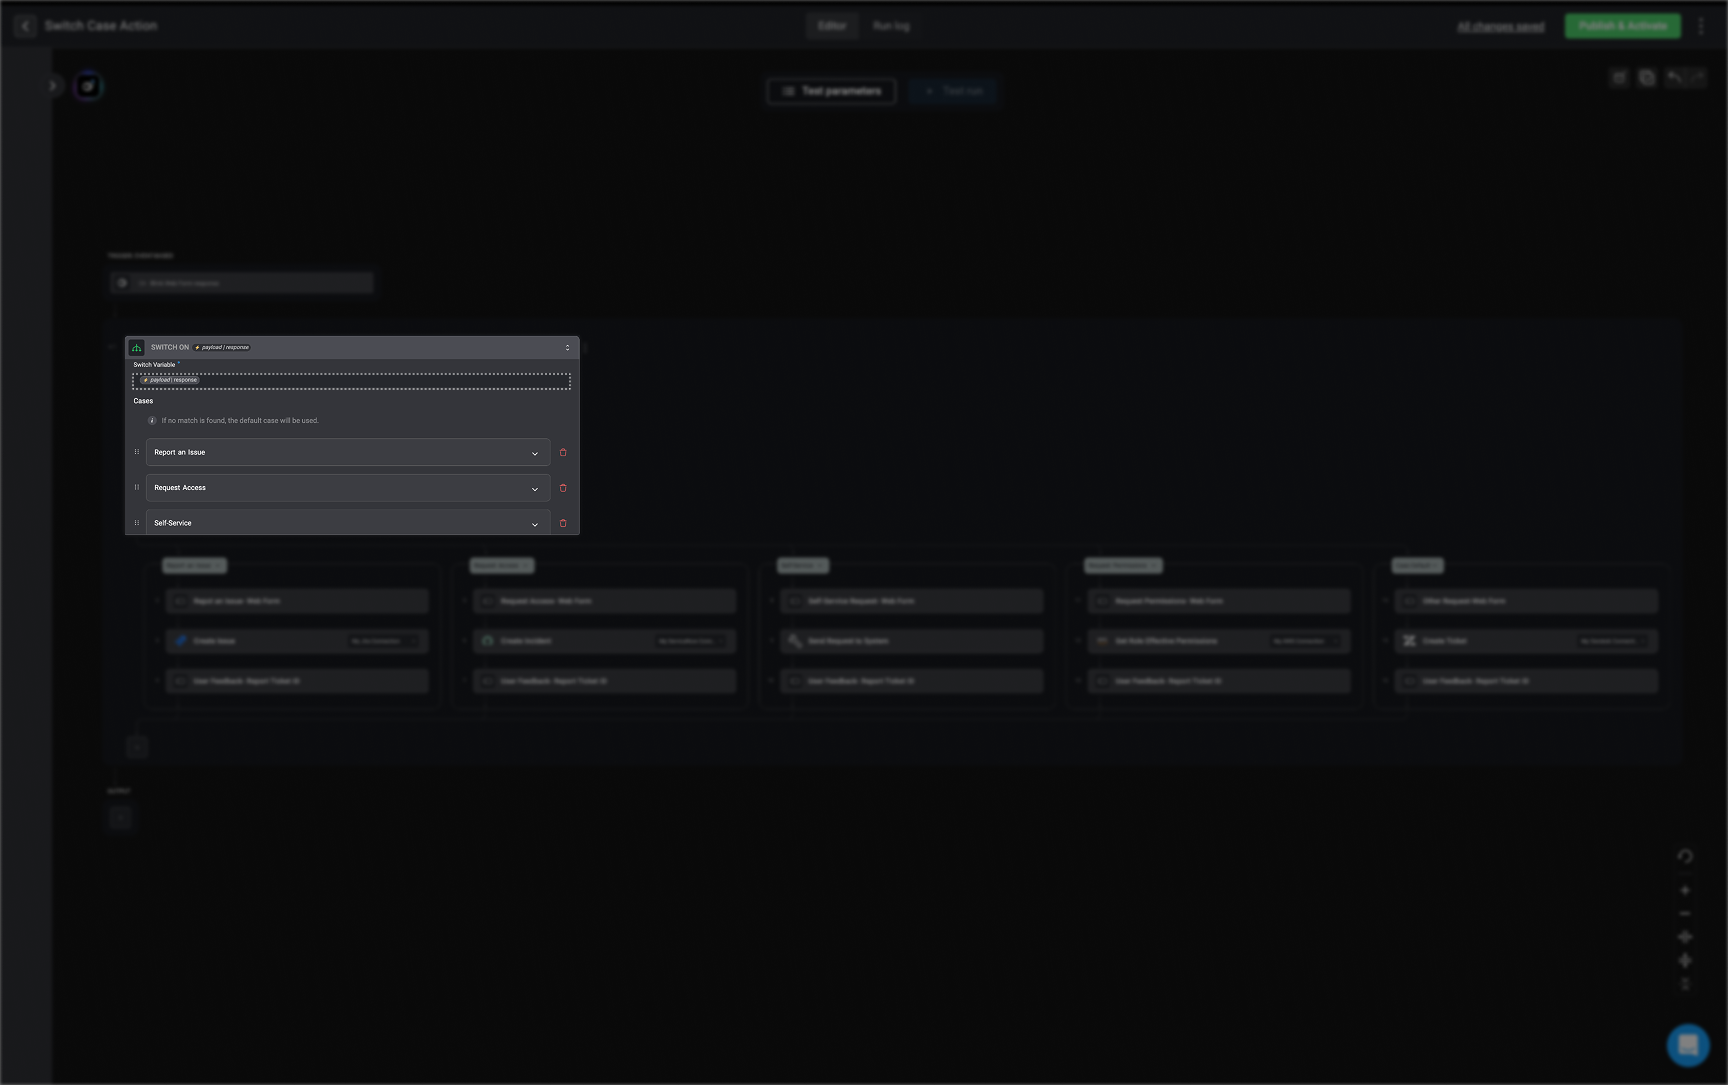
The Basic Condition Builder in the [Switch Case ](/docs/workflows/building-workflows/actions/basic-actions/flow-control-actions#switch-case) Action lets you control workflow execution based on the value of a variable. For each case, you define a specific condition to compare against the switch variable, and only the matching case’s actions will run. This provides an intuitive, code-free way to route workflow logic, making it easy to handle multiple scenarios with clear, straightforward comparisons.
For more information about the `Switch Case` action, navigate [here](/docs/workflows/building-workflows/actions/basic-actions/flow-control-actions#switch-case)
The Basic Condition Builder in the [Switch Case ](/docs/workflows/building-workflows/actions/basic-actions/flow-control-actions#switch-case) Action lets you control workflow execution based on the value of a variable. For each case, you define a specific condition to compare against the switch variable, and only the matching case’s actions will run. This provides an intuitive, code-free way to route workflow logic, making it easy to handle multiple scenarios with clear, straightforward comparisons.
 ***
## The Advanced Condition Builder and Nested Conditions
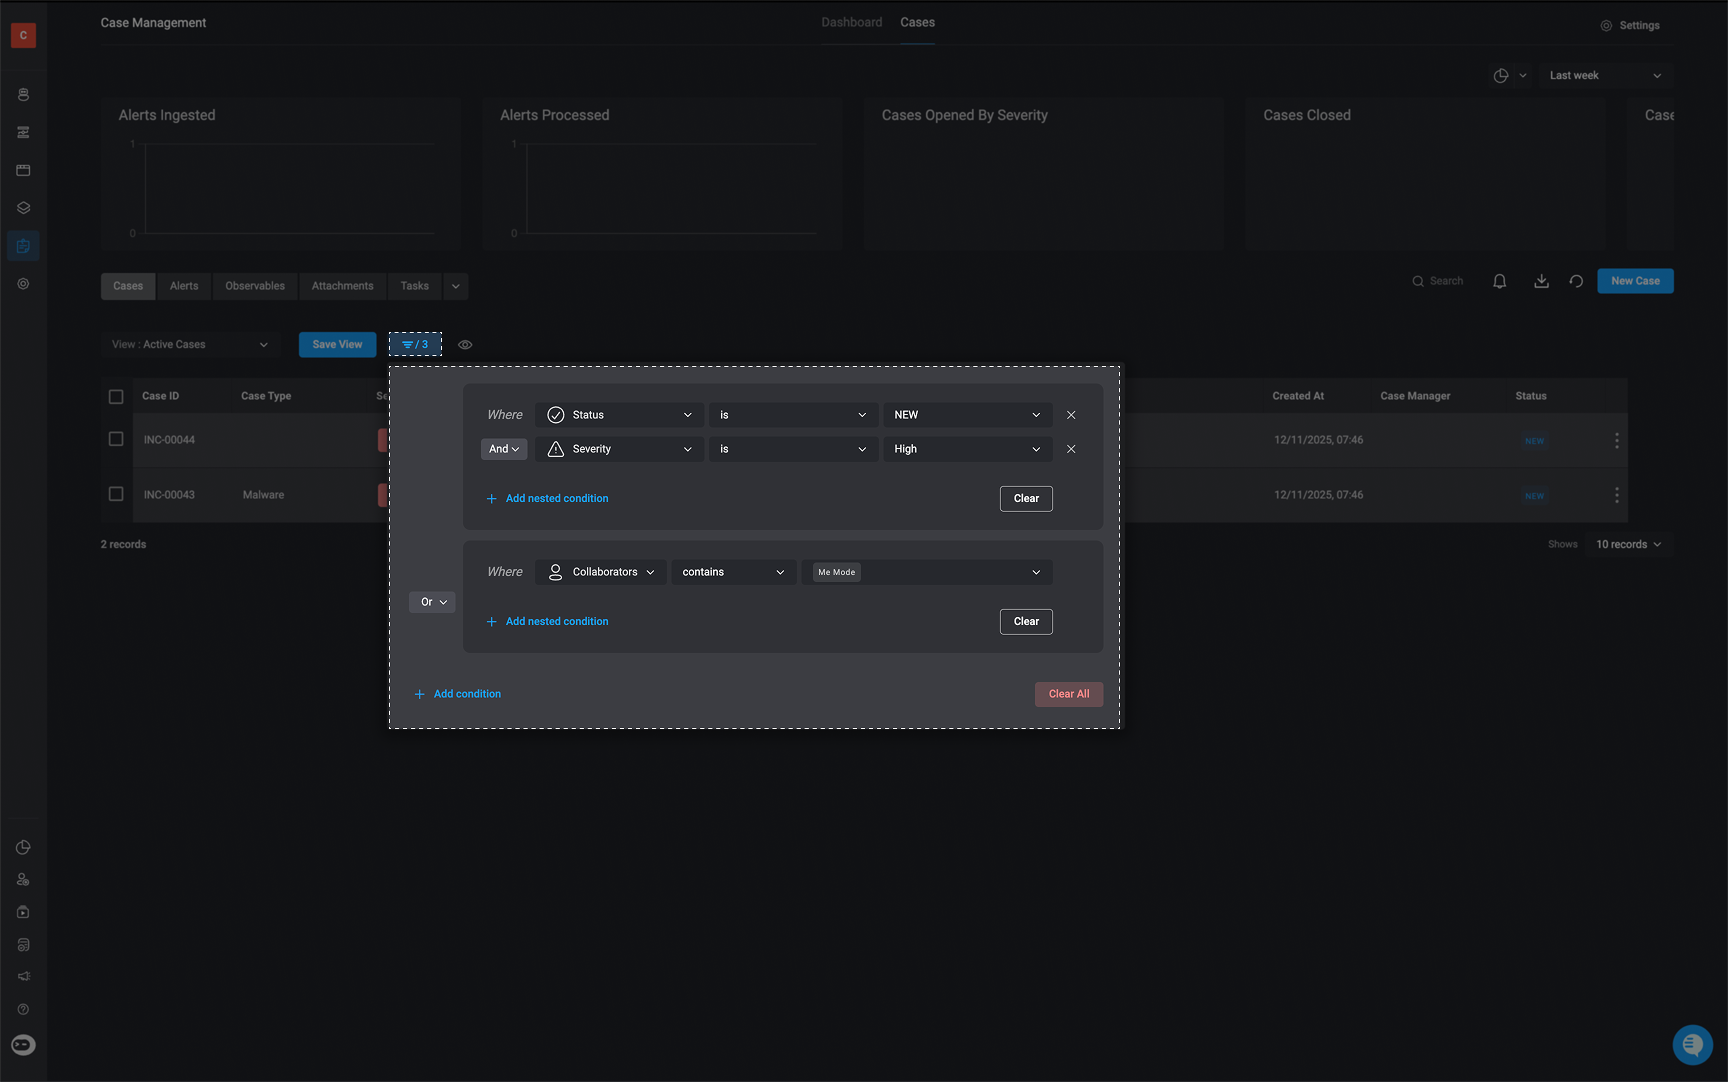
For more advanced scenarios, the **Advanced Condition Builder** allows the use of **nested conditions**, conditions grouped within other conditions. Nested conditions let you apply specific operators (`AND`/`OR`) to a subset of conditions independently from the main set, enabling more sophisticated and precise workflow logic.
***
## The Advanced Condition Builder and Nested Conditions
For more advanced scenarios, the **Advanced Condition Builder** allows the use of **nested conditions**, conditions grouped within other conditions. Nested conditions let you apply specific operators (`AND`/`OR`) to a subset of conditions independently from the main set, enabling more sophisticated and precise workflow logic.
 ***
### Using the Advanced Condition Builder in the Blink Platform
For more information about **Table Views**, see the relevant sections in both [Case Management Tables](/docs/case-management/managing-cases/managing-cases#table-views) and [Tables](/docs/blink-platform/tables/viewing-tables#table-views).
The Condition Builder can be used when creating custom **Table Views**. Table Views allow you to personalize how data is displayed in the [Tables](/docs/blink-platform/tables/viewing-tables#table-views) feature or in [Case Management Tables](/docs/case-management/managing-cases/managing-cases#table-views) like: Cases, Tasks, or Alerts. Each table comes with a few built-in views (such as *All Cases*, *My Tasks*, or *Critical Alerts*), but you can also define your own. When configuring a new view, the condition builder lets you apply filters based on specific conditions so you can tailor what appears in the table.
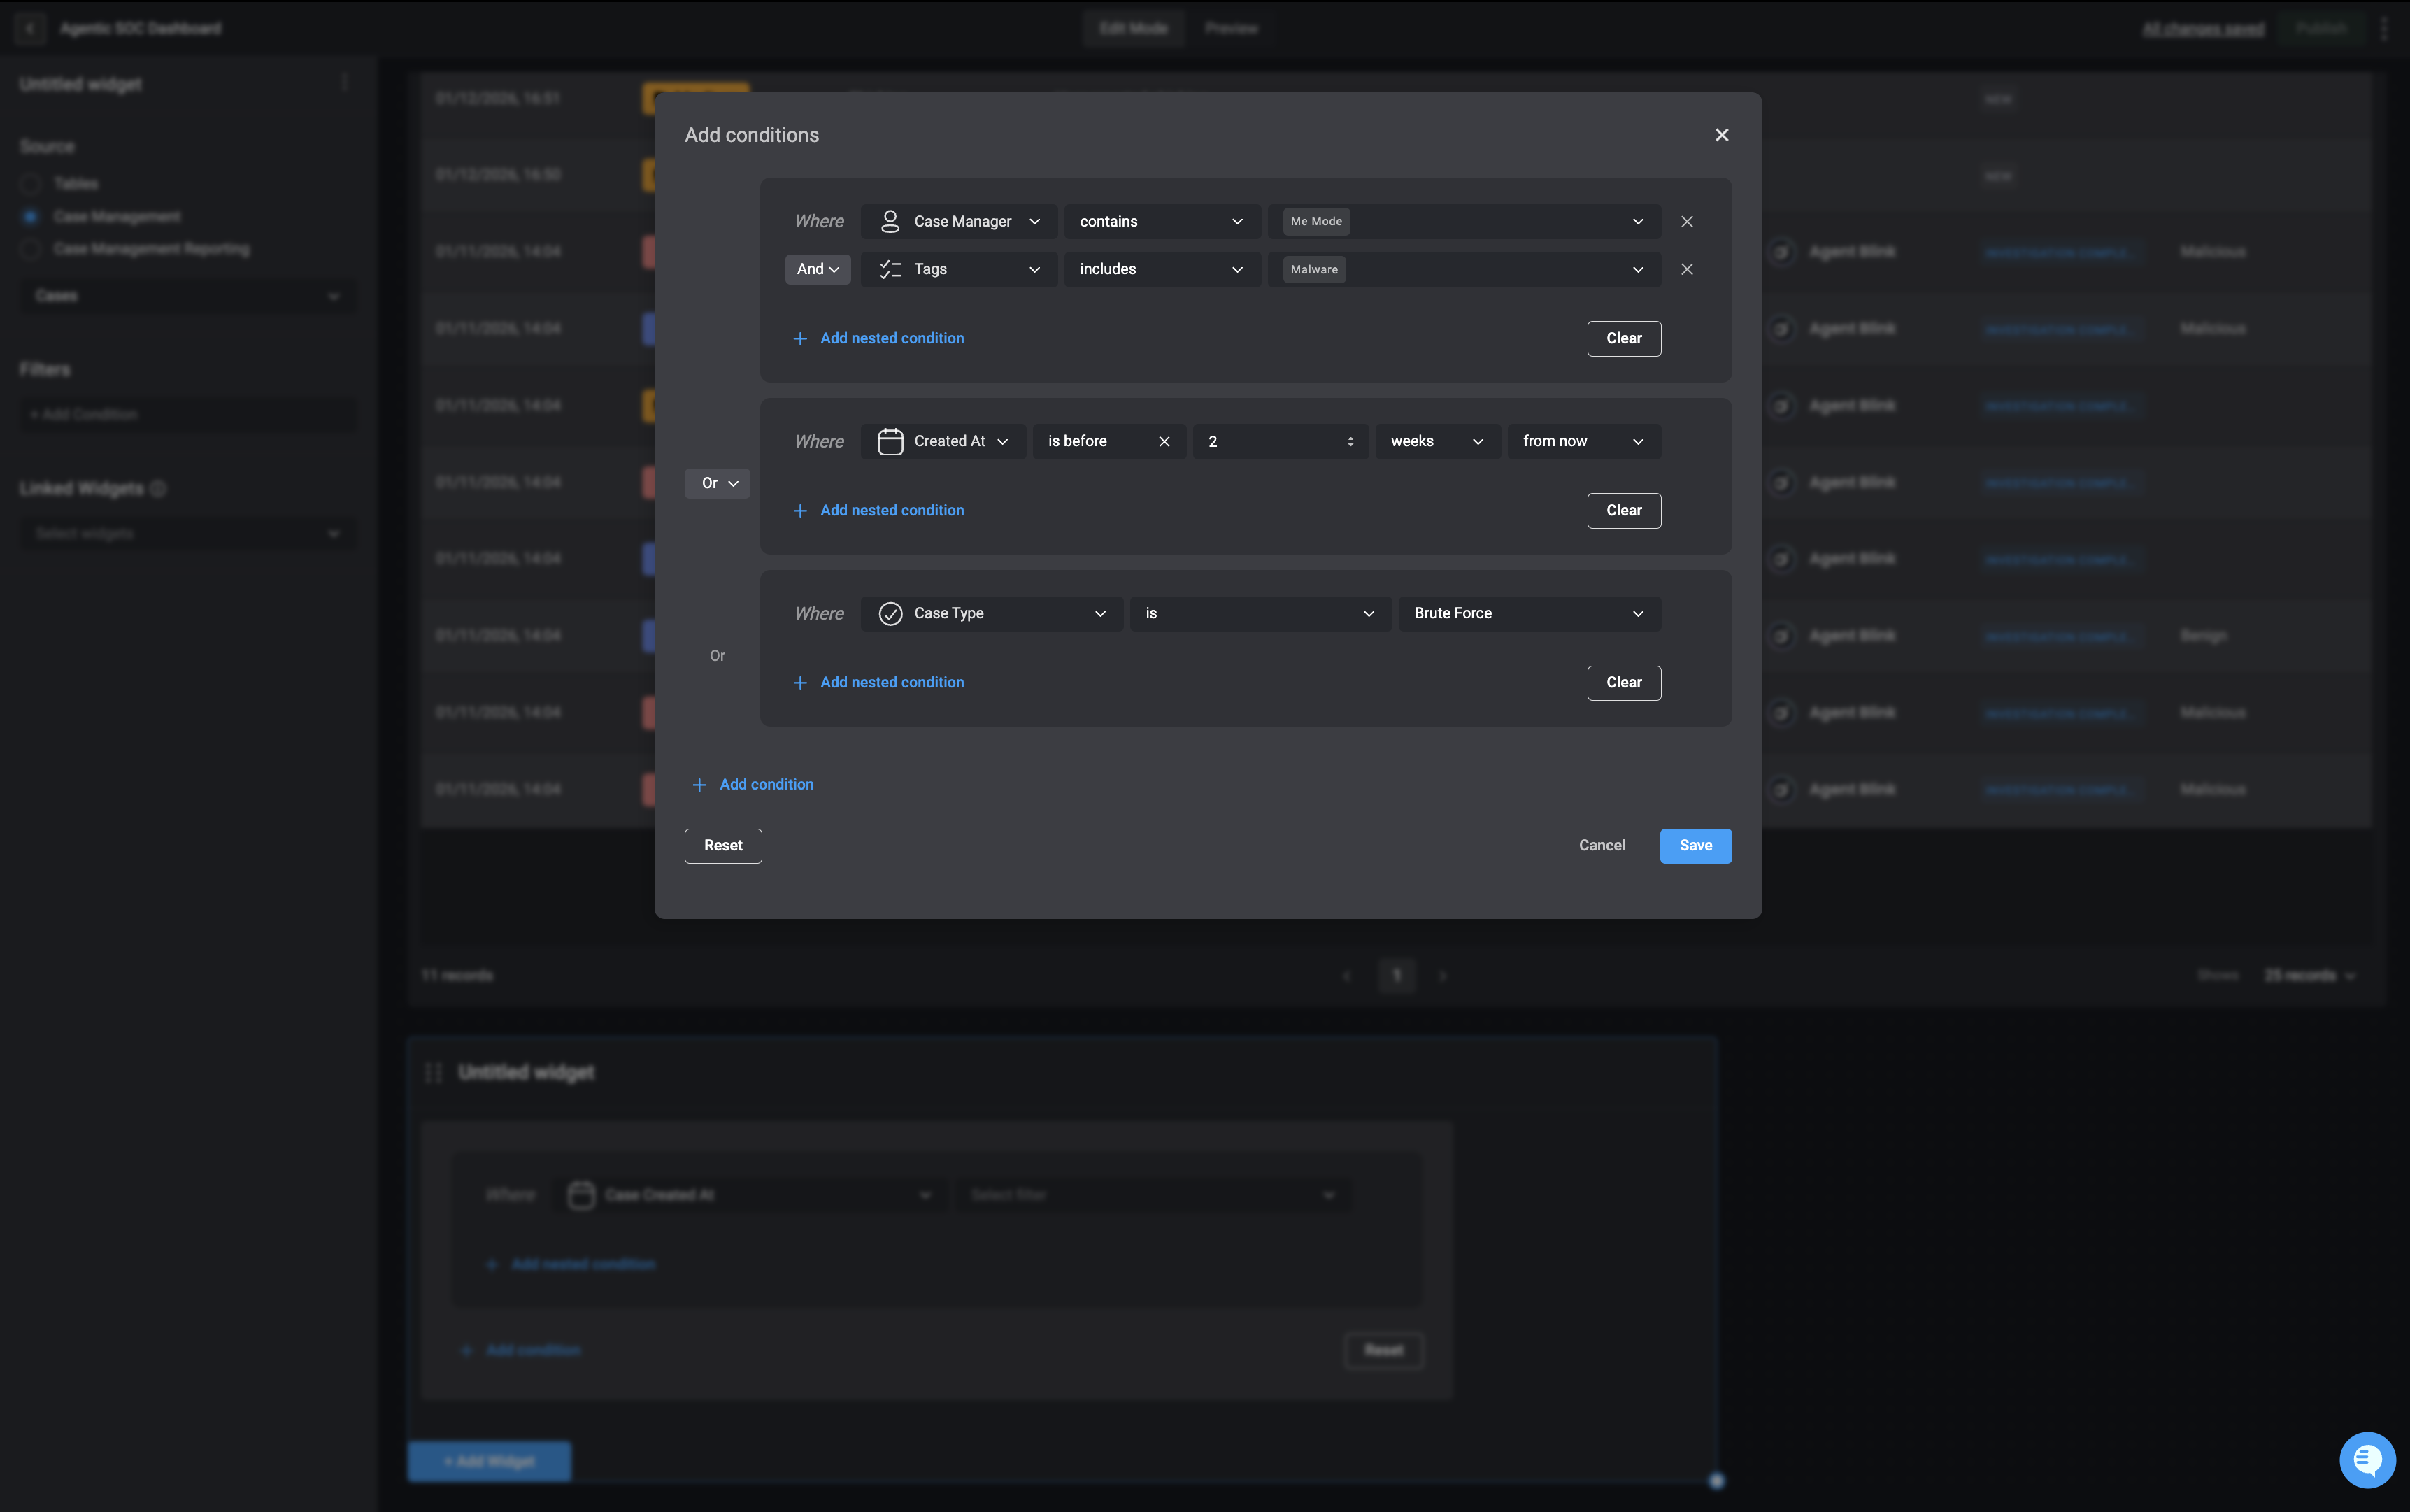
You can also create **nested conditions**, groups of conditions within other conditions. Nested conditions let you define more Advanced logic by applying specific operators (`AND` / `OR`) to a subset of conditions independently from the main set.
For more detailed information about the 'Filter Widget', navigate [here](/docs/blink-platform/dashboards/building-a-dashboard/widgets/filter)
Select 'Add Condition' under the filter section. The condition builder will appear.
***
### Using the Advanced Condition Builder in the Blink Platform
For more information about **Table Views**, see the relevant sections in both [Case Management Tables](/docs/case-management/managing-cases/managing-cases#table-views) and [Tables](/docs/blink-platform/tables/viewing-tables#table-views).
The Condition Builder can be used when creating custom **Table Views**. Table Views allow you to personalize how data is displayed in the [Tables](/docs/blink-platform/tables/viewing-tables#table-views) feature or in [Case Management Tables](/docs/case-management/managing-cases/managing-cases#table-views) like: Cases, Tasks, or Alerts. Each table comes with a few built-in views (such as *All Cases*, *My Tasks*, or *Critical Alerts*), but you can also define your own. When configuring a new view, the condition builder lets you apply filters based on specific conditions so you can tailor what appears in the table.
You can also create **nested conditions**, groups of conditions within other conditions. Nested conditions let you define more Advanced logic by applying specific operators (`AND` / `OR`) to a subset of conditions independently from the main set.
For more detailed information about the 'Filter Widget', navigate [here](/docs/blink-platform/dashboards/building-a-dashboard/widgets/filter)
Select 'Add Condition' under the filter section. The condition builder will appear.
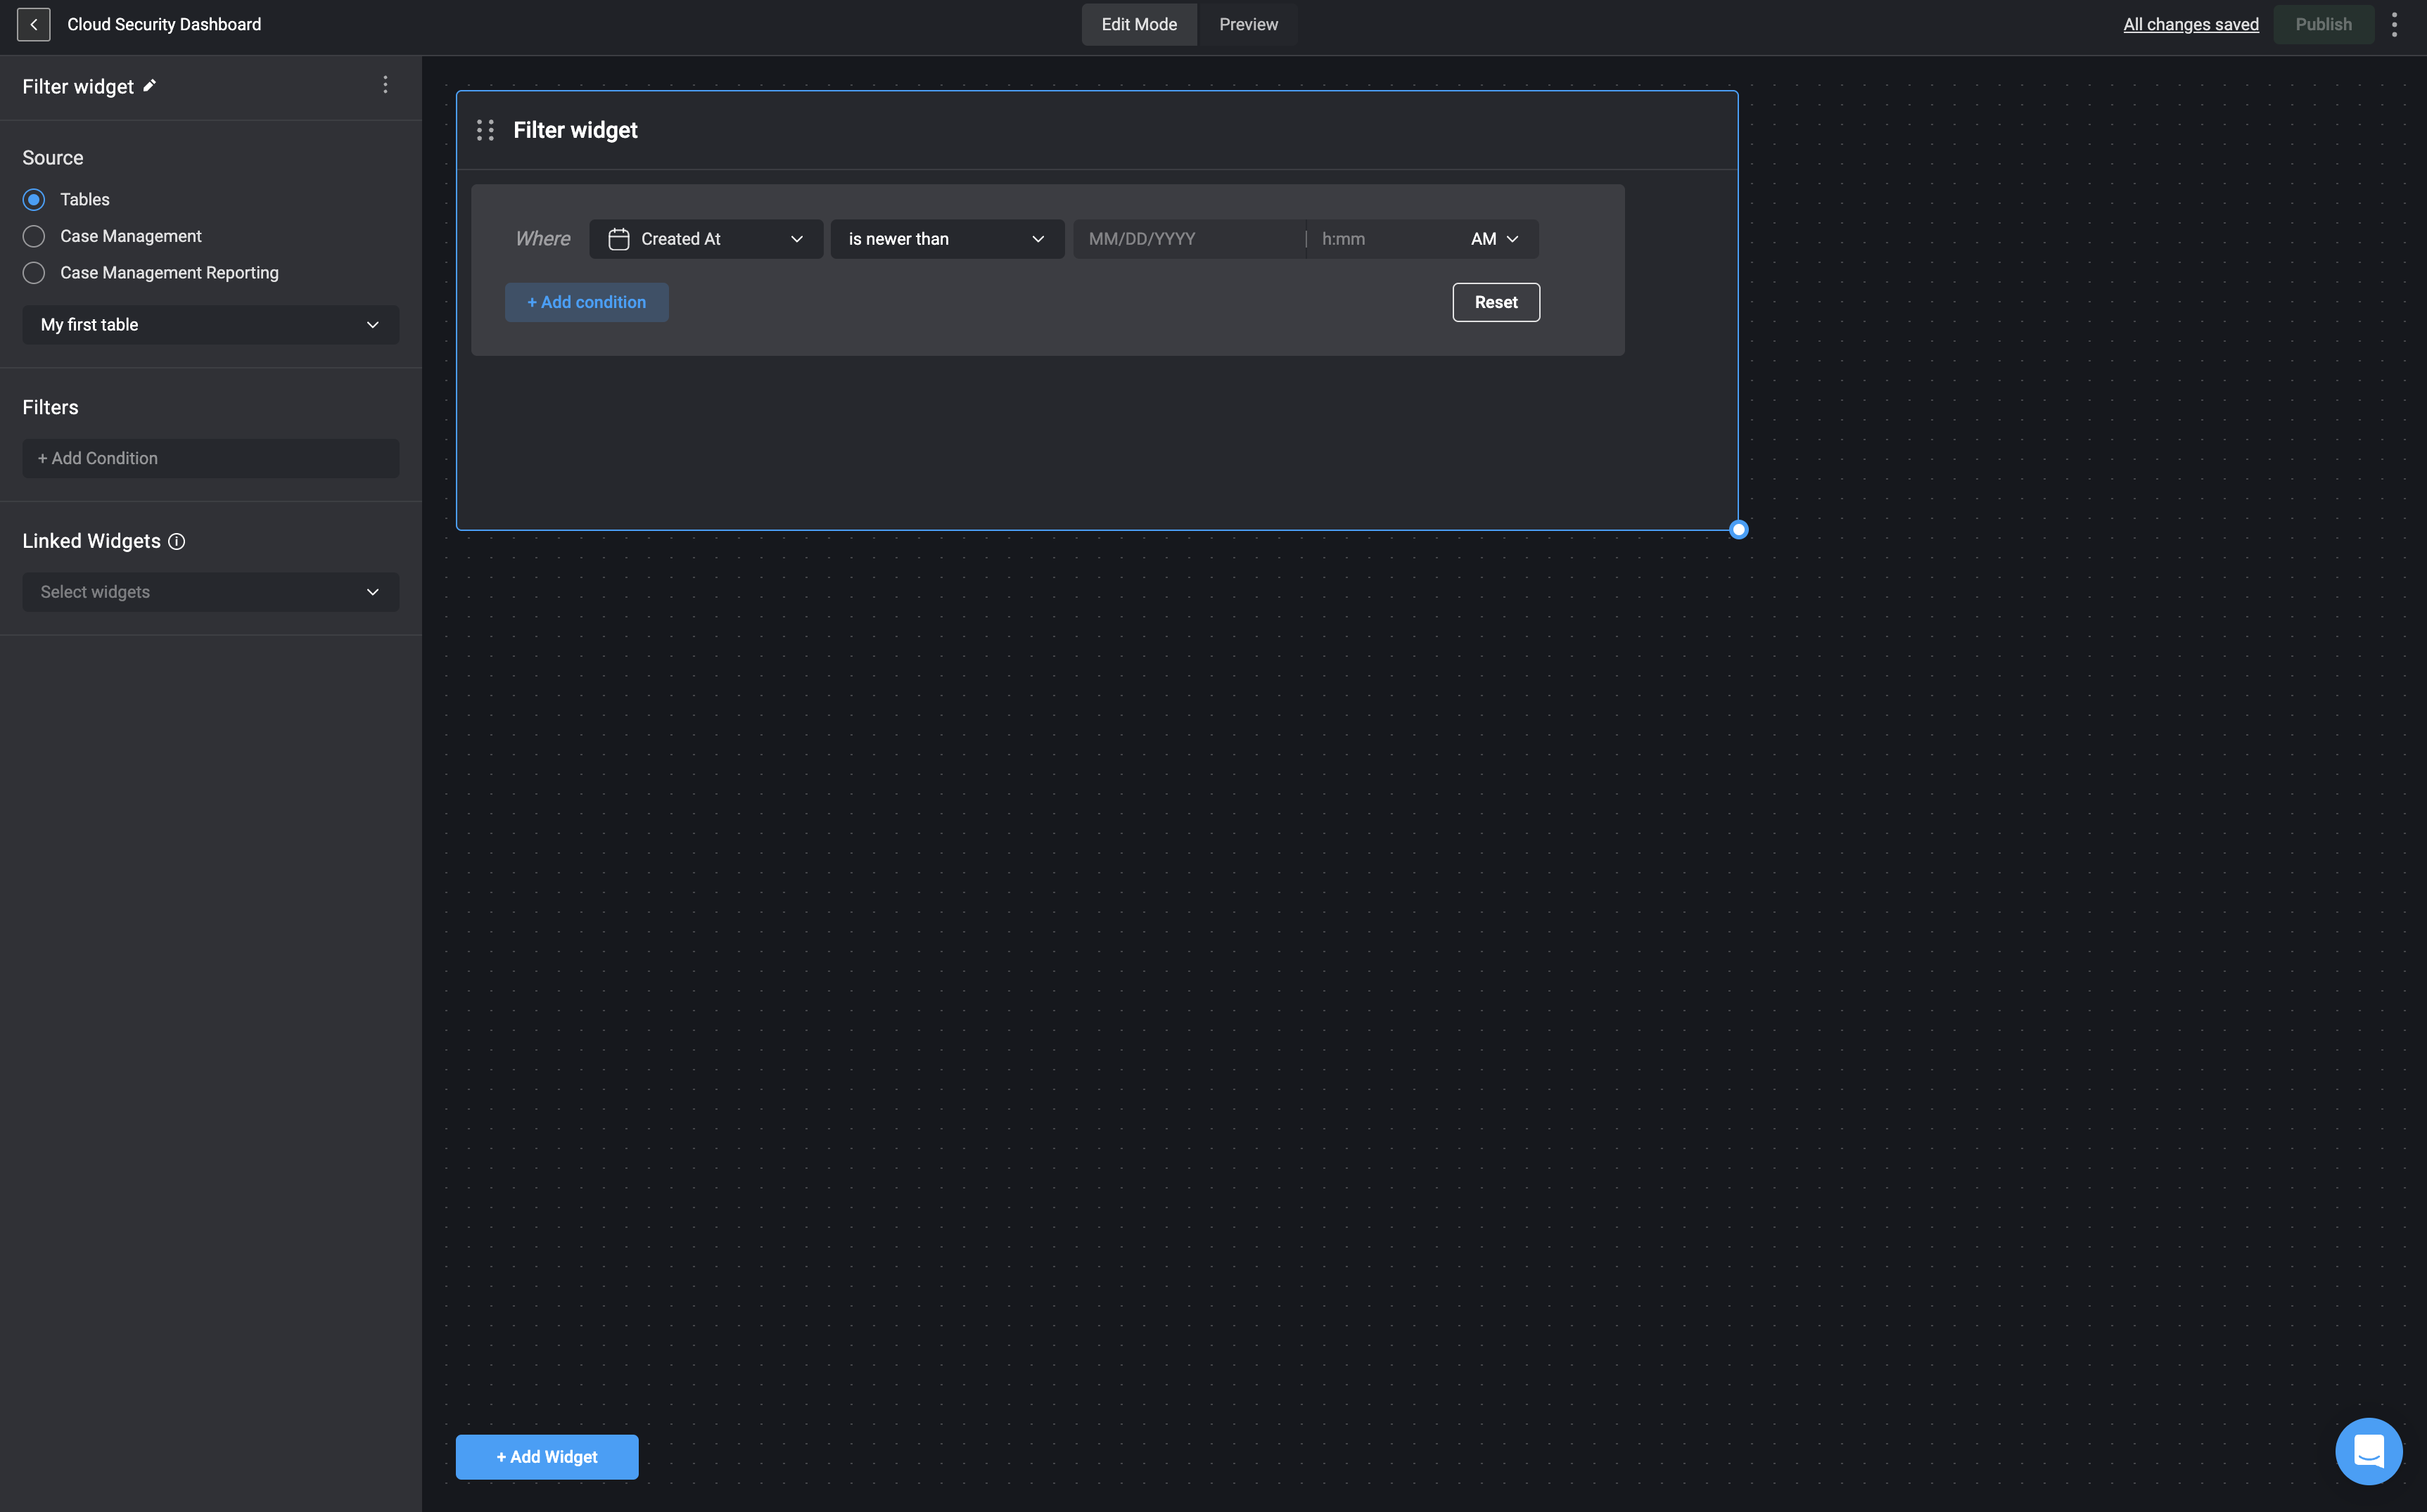 Apply the condition by applying the values and choose an operator from the dropdown menu that appears when you click on it.
You can also create nested conditions, which are conditions grouped within other conditions. Nested conditions allow you to define more Advanced logic, applying specific operators (`AND`/`OR`) to a subset of conditions independently from the main set of conditions.
Apply the condition by applying the values and choose an operator from the dropdown menu that appears when you click on it.
You can also create nested conditions, which are conditions grouped within other conditions. Nested conditions allow you to define more Advanced logic, applying specific operators (`AND`/`OR`) to a subset of conditions independently from the main set of conditions.
 ***
## Condition Operators
The following condition operators can be used to create a condition statement:
**Note**: The list of available condition operators will vary depending on the type of input or data you are working with. For example, numeric fields may include operators like `greater than`, `less than` or `within`, while date/time fields provide options like before, after, or calendar-based selections such as `month`, `year`, or `quarter`. This ensures that only relevant operators are shown for each condition.
`x = b`
The condition is true when the left value is exactly `equal` to the right value.
`x != y`
The condition is true when the left value `is not equal` to the right value.
The condition is true when the `left value` is less than the right value.
The condition is true when the left value is `less than or equal` to the right value.
`x > y`
The condition is true when the left value is `greater` than the right value.
`x >= y`
The condition is true when the left value is `greater than or equal` to the right value.
The condition is true when the left value `contains` the right value
**Example**- a substring in a string or an item in a list.
The condition is true when the left value `does not contain` the right value.
}>
The condition is true when the left value `starts with` the right value.
}>
The condition is true when the left value `ends` with the right value.
The condition is true when the left value `matches the specified Regular Expression pattern.`
The condition is true when the left value `is empty or null.`
This includes empty strings, arrays, objects, or a null value.
} size={26}>
The condition is true when the left value `is not empty or null.`
This operator **does not** require a **right-hand** value.
The condition is true when the left value is `true(boolean)`.
This operator **does not** require a **right-hand** value.
The condition is true when the left value is `false(boolean)`.
This operator **does not** require a **right-hand** value.
**Note**: When using the contains or not contains operators in the condition builder, if the field type is a list, the condition checks whether a specific item is present or absent within that list.
* [contains](#contains): Returns true if the specified value is found as an item within the list.
* [not contains](#not-contains): Returns true if the specified value is not found as an item within the list.
***
***
## Condition Operators
The following condition operators can be used to create a condition statement:
**Note**: The list of available condition operators will vary depending on the type of input or data you are working with. For example, numeric fields may include operators like `greater than`, `less than` or `within`, while date/time fields provide options like before, after, or calendar-based selections such as `month`, `year`, or `quarter`. This ensures that only relevant operators are shown for each condition.
`x = b`
The condition is true when the left value is exactly `equal` to the right value.
`x != y`
The condition is true when the left value `is not equal` to the right value.
The condition is true when the `left value` is less than the right value.
The condition is true when the left value is `less than or equal` to the right value.
`x > y`
The condition is true when the left value is `greater` than the right value.
`x >= y`
The condition is true when the left value is `greater than or equal` to the right value.
The condition is true when the left value `contains` the right value
**Example**- a substring in a string or an item in a list.
The condition is true when the left value `does not contain` the right value.
}>
The condition is true when the left value `starts with` the right value.
}>
The condition is true when the left value `ends` with the right value.
The condition is true when the left value `matches the specified Regular Expression pattern.`
The condition is true when the left value `is empty or null.`
This includes empty strings, arrays, objects, or a null value.
} size={26}>
The condition is true when the left value `is not empty or null.`
This operator **does not** require a **right-hand** value.
The condition is true when the left value is `true(boolean)`.
This operator **does not** require a **right-hand** value.
The condition is true when the left value is `false(boolean)`.
This operator **does not** require a **right-hand** value.
**Note**: When using the contains or not contains operators in the condition builder, if the field type is a list, the condition checks whether a specific item is present or absent within that list.
* [contains](#contains): Returns true if the specified value is found as an item within the list.
* [not contains](#not-contains): Returns true if the specified value is not found as an item within the list.
***