> ## Documentation Index
> Fetch the complete documentation index at: https://docs.blinkops.com/llms.txt
> Use this file to discover all available pages before exploring further.

# Filters

> Instructions on how to create and use the Filter Widget

Dashboards often present a broad overview of data, such as a bar graph displaying all cases grouped by their names. However, there are situations where a more targeted view is necessary. For example, you might want to focus on cases managed by a specific individual or filter for cases only with a "medium" severity level. **The Filter Widget** makes this possible by allowing end-users to apply additional filters. This tool helps refine the displayed data and customize it to show exactly what is most relevant to your needs.

## Important to Note:

Before using the Filter Widget, keep these points in mind:

<Note>
  **Note**

  * The filter widget can only be linked to other widgets that have the same [data source](/docs/blink-platform/dashboards/building-a-dashboard/source-types/source-types).
  * The filter widget can only be applied to a **single** widget where filtering has already been applied.
</Note>

***

## Adding a Filter Widget

<Steps>
  <Step title="Add a Filter Widget">
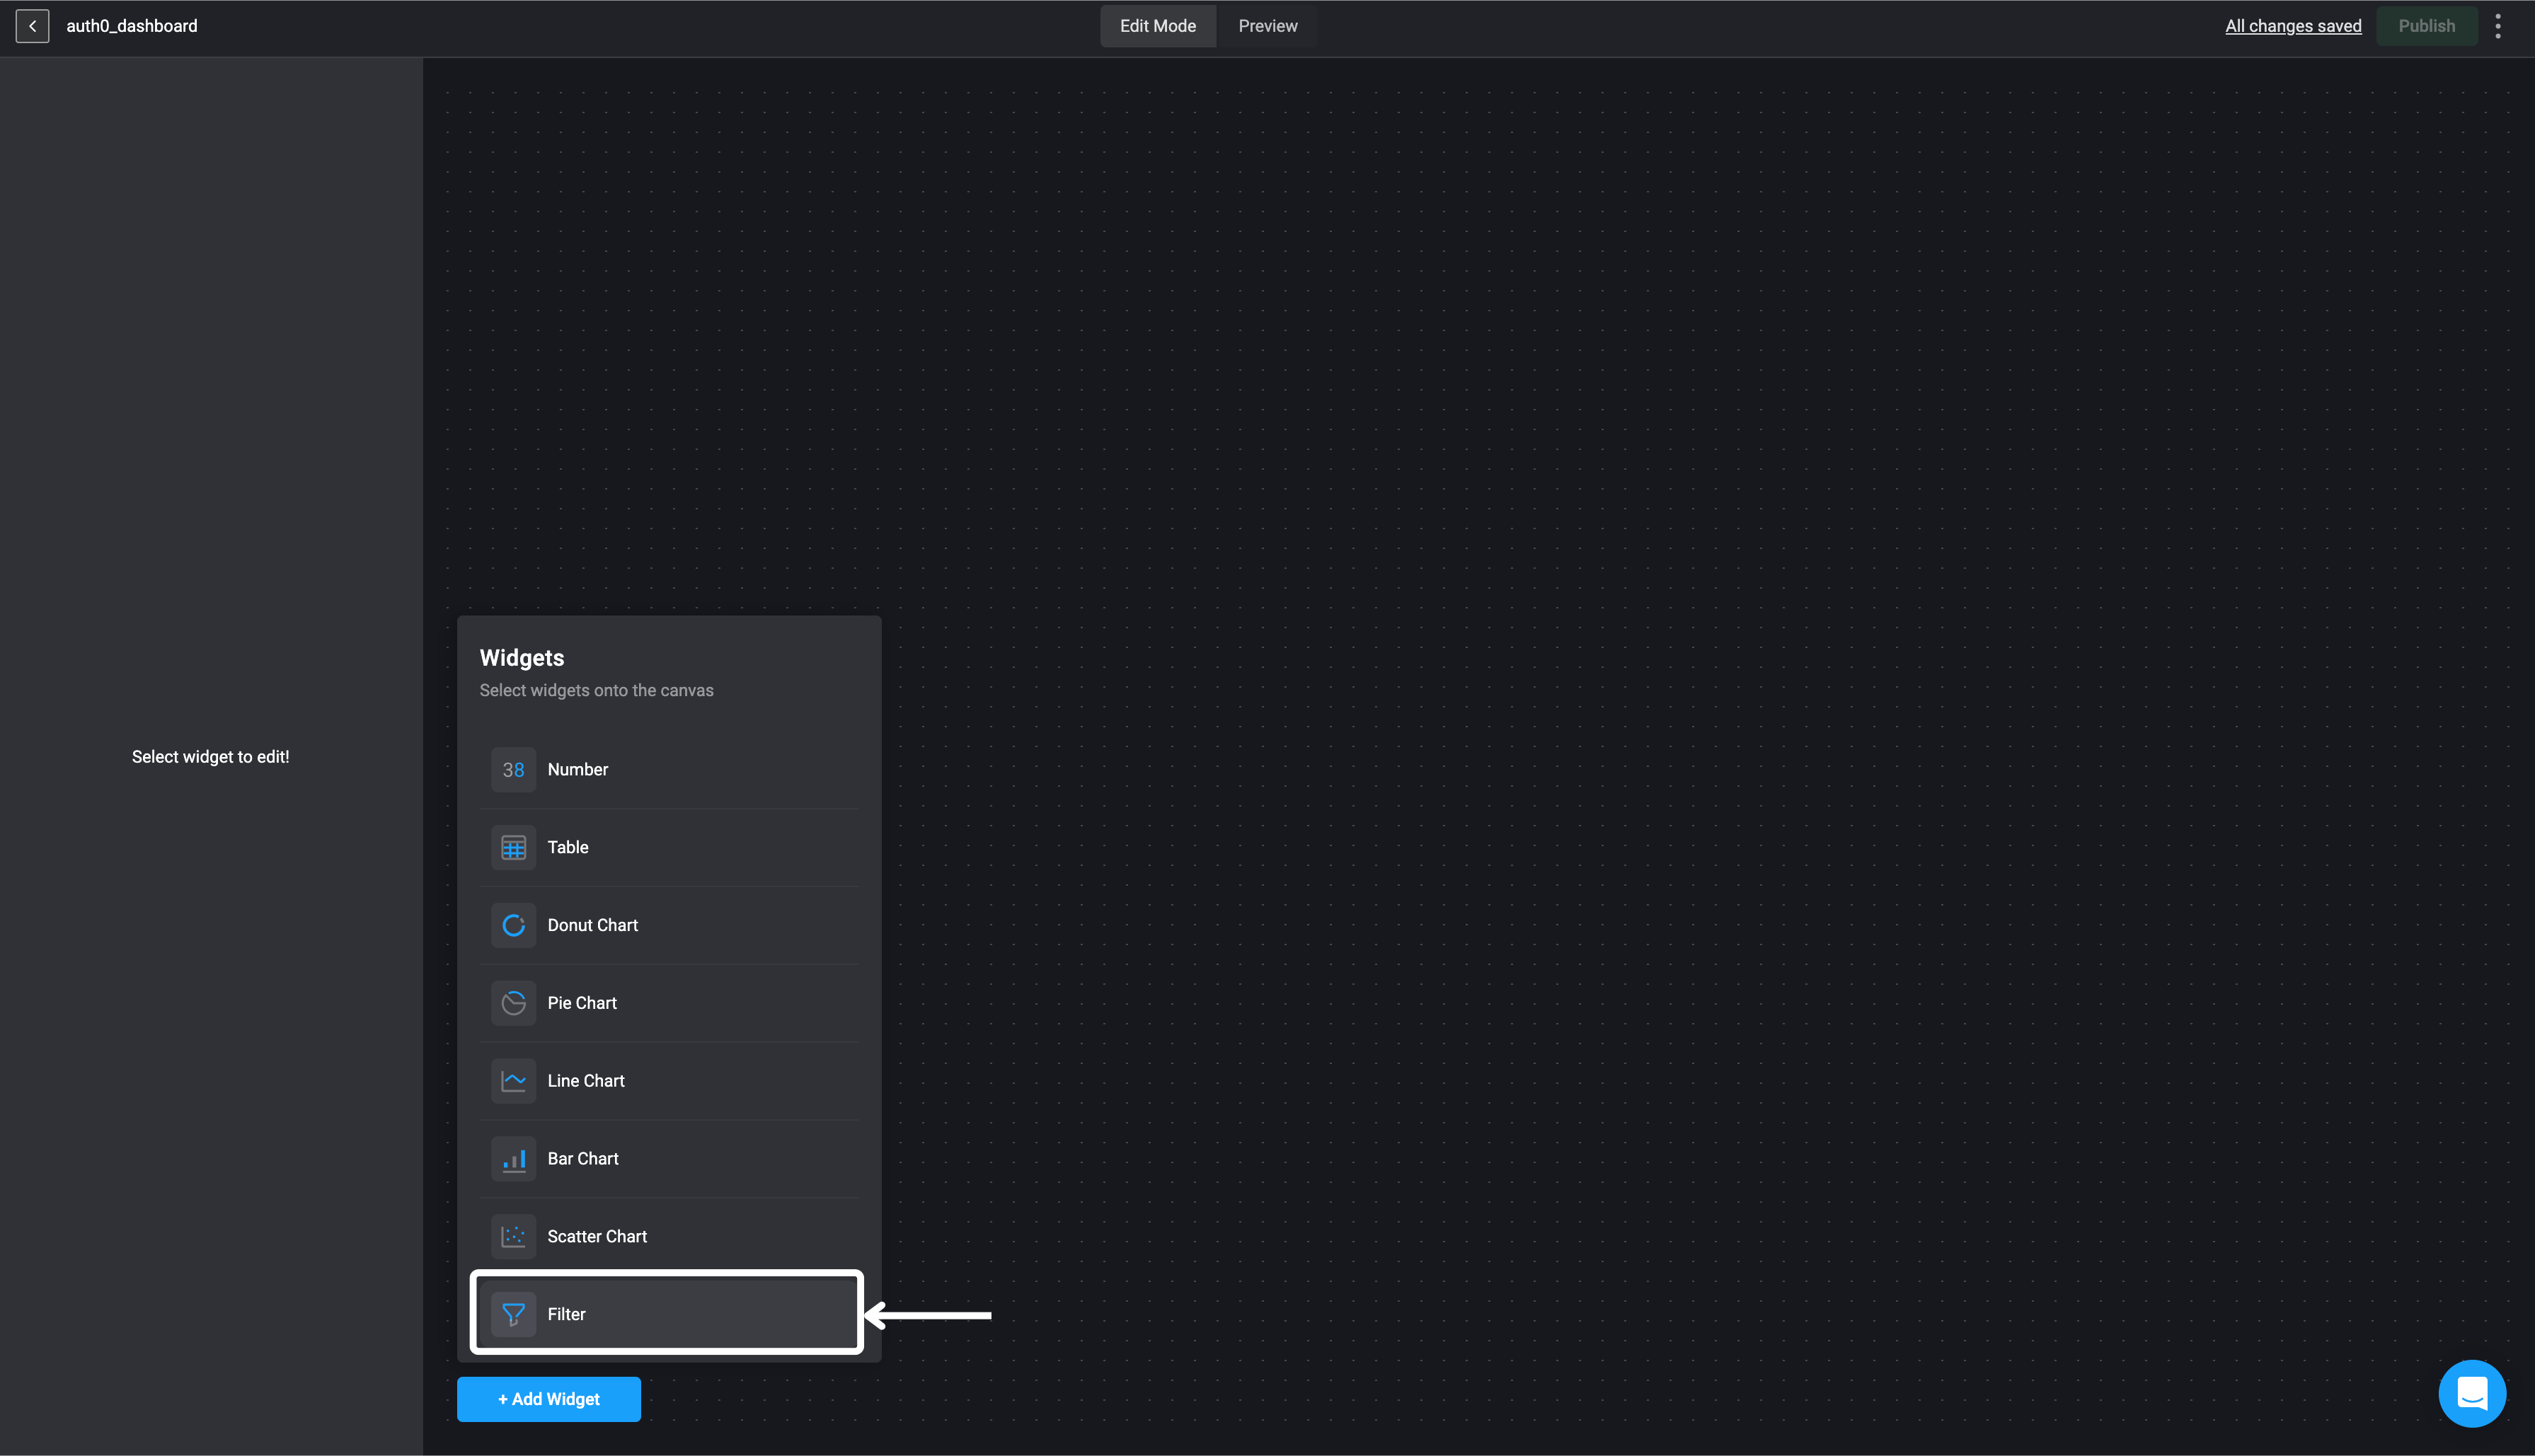
    In the *Edit Mode* tab of the Dashboards Building Interface, click the "add a widget" button. Choose the **Filter** option from the widget list.

    <Frame>
      <img src="https://mintcdn.com/blinkops-2/SbkcEaz7WANh9_cC/img/Dashboards/FilterOption.png?fit=max&auto=format&n=SbkcEaz7WANh9_cC&q=85&s=a6c5ec53742f7033312b436edb0a92f6" width="3582" height="2058" data-path="img/Dashboards/FilterOption.png" />
    </Frame>
  </Step>

  <Step title="Name the Widget">
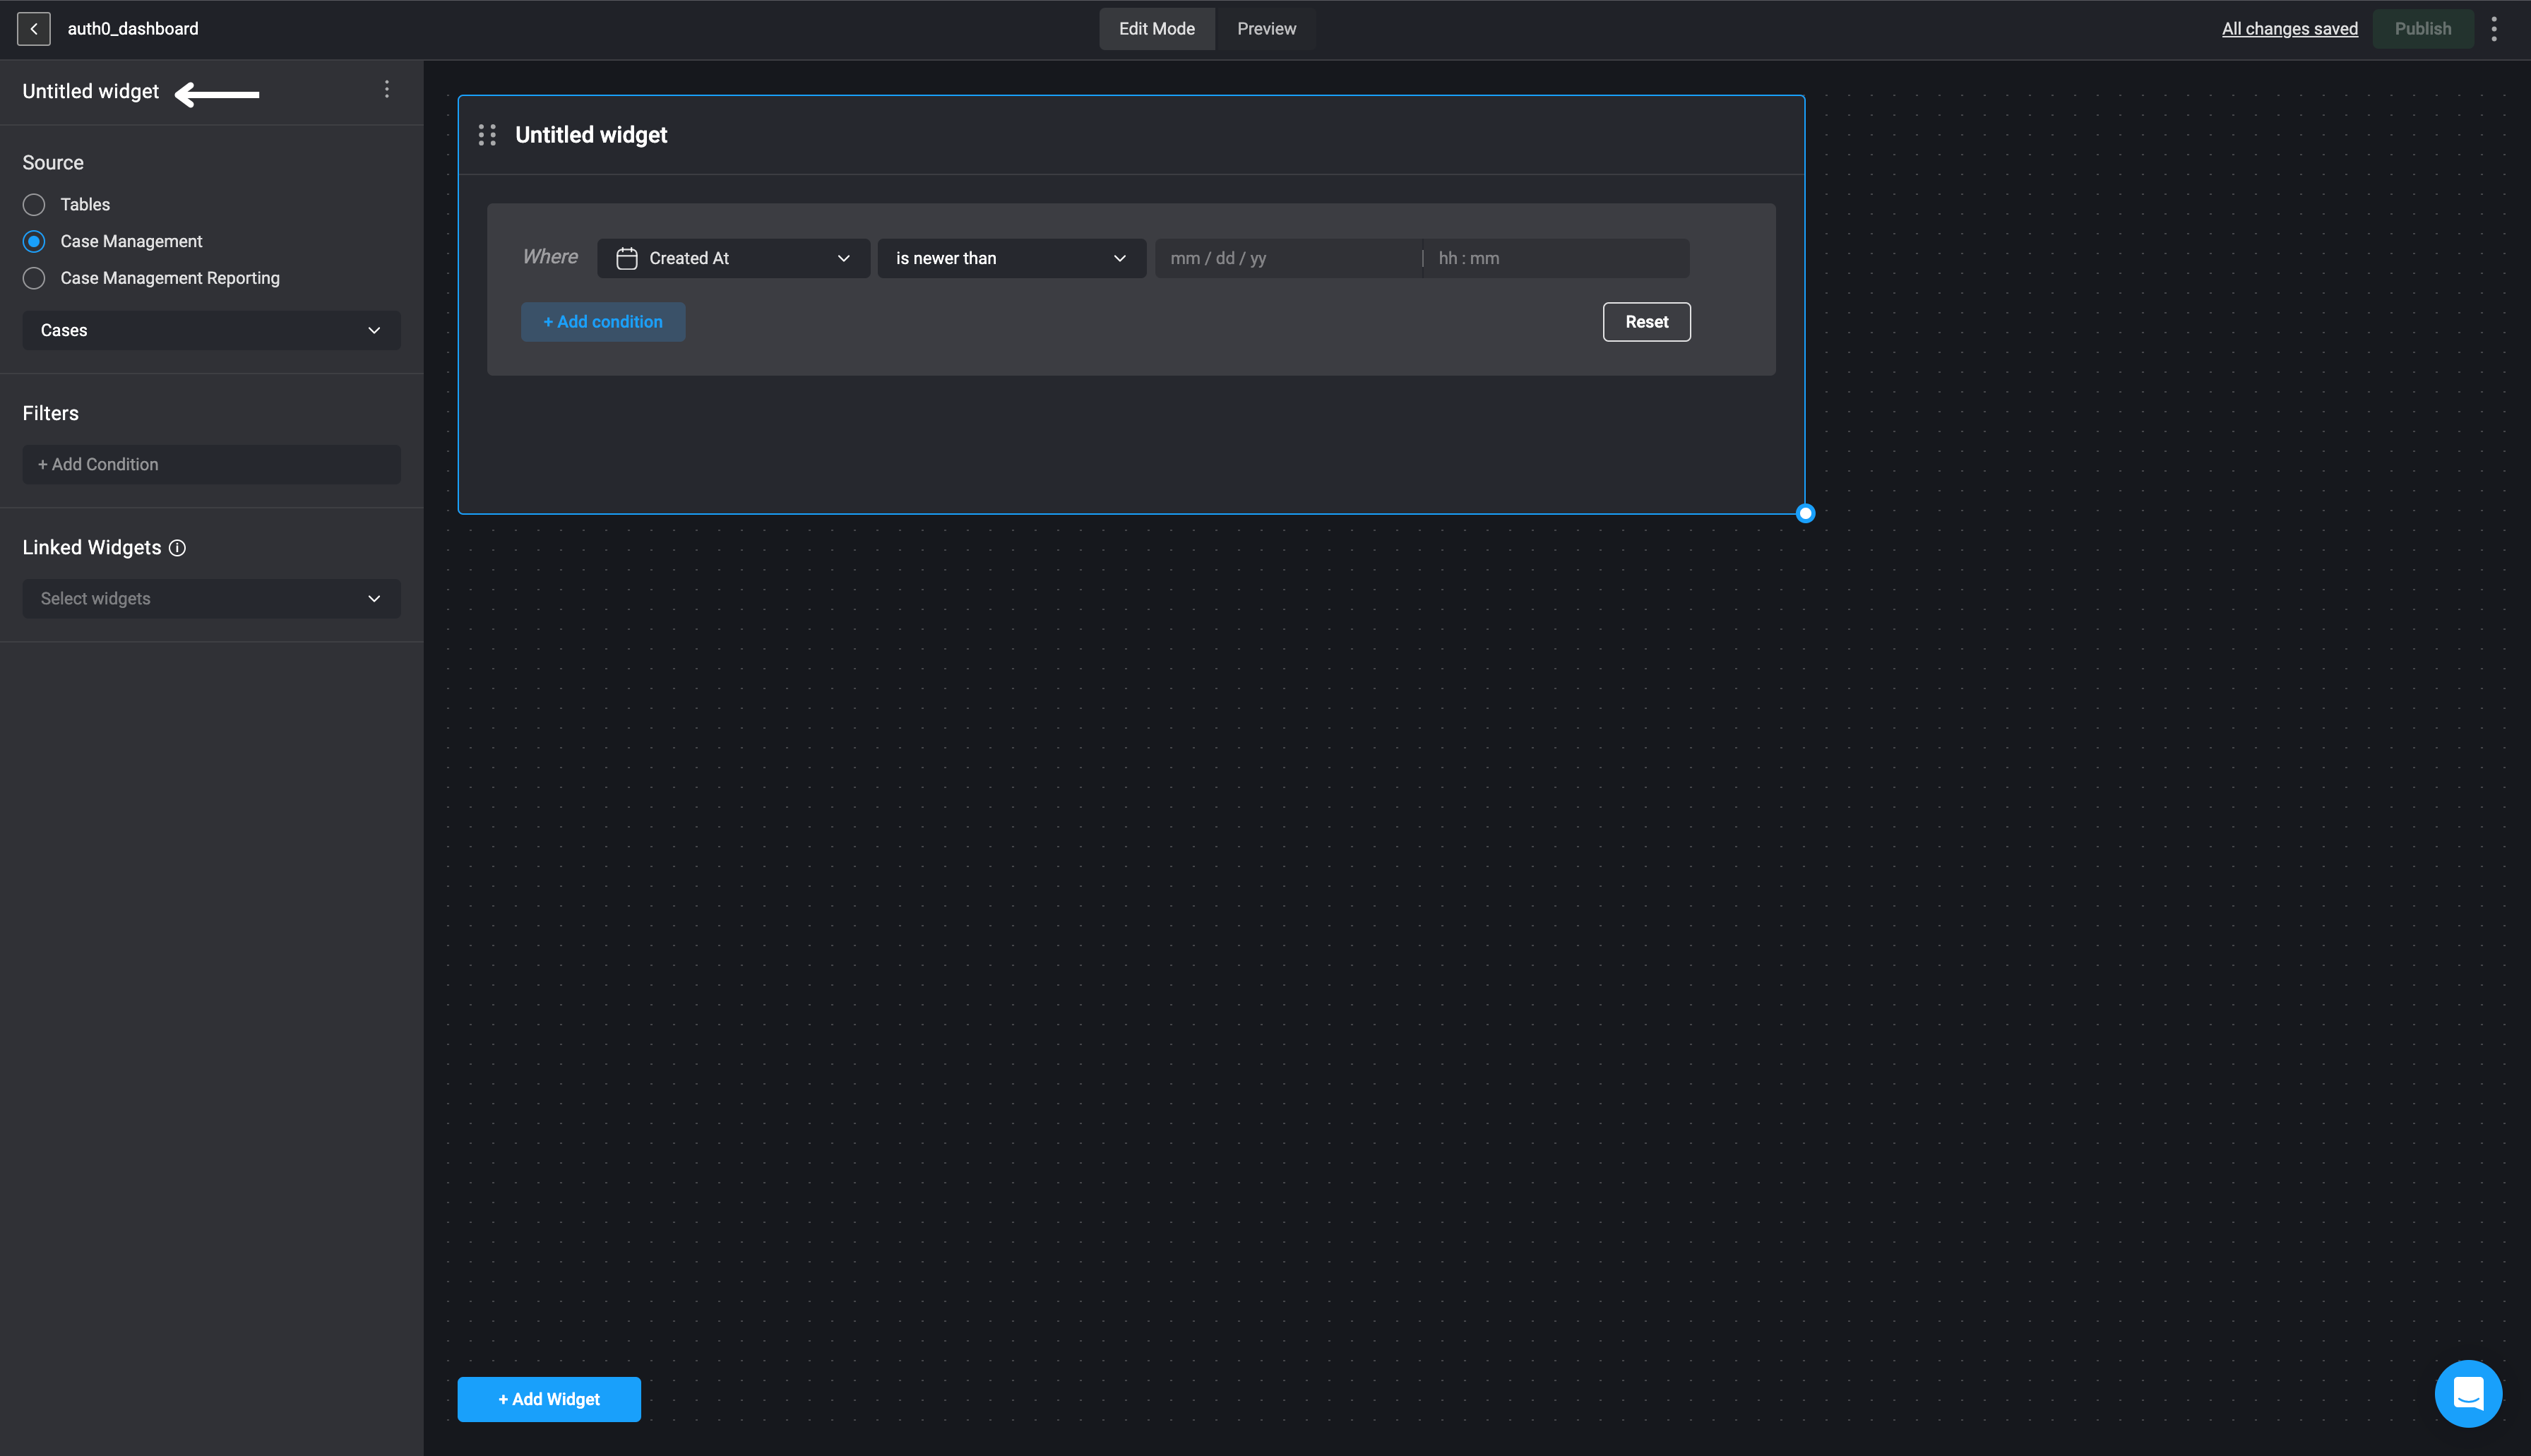
    In the sidebar in the top left corner, double-click on *Untitled widget* and provide a name for the selected widget.

    <Frame>
      <img src="https://mintcdn.com/blinkops-2/SbkcEaz7WANh9_cC/img/Dashboards/EditWidgetName.png?fit=max&auto=format&n=SbkcEaz7WANh9_cC&q=85&s=7c05ad1540c6f23e8200759c956d6763" width="3584" height="2062" data-path="img/Dashboards/EditWidgetName.png" />
    </Frame>
  </Step>

  <Step title="Select a Data Source and Column">
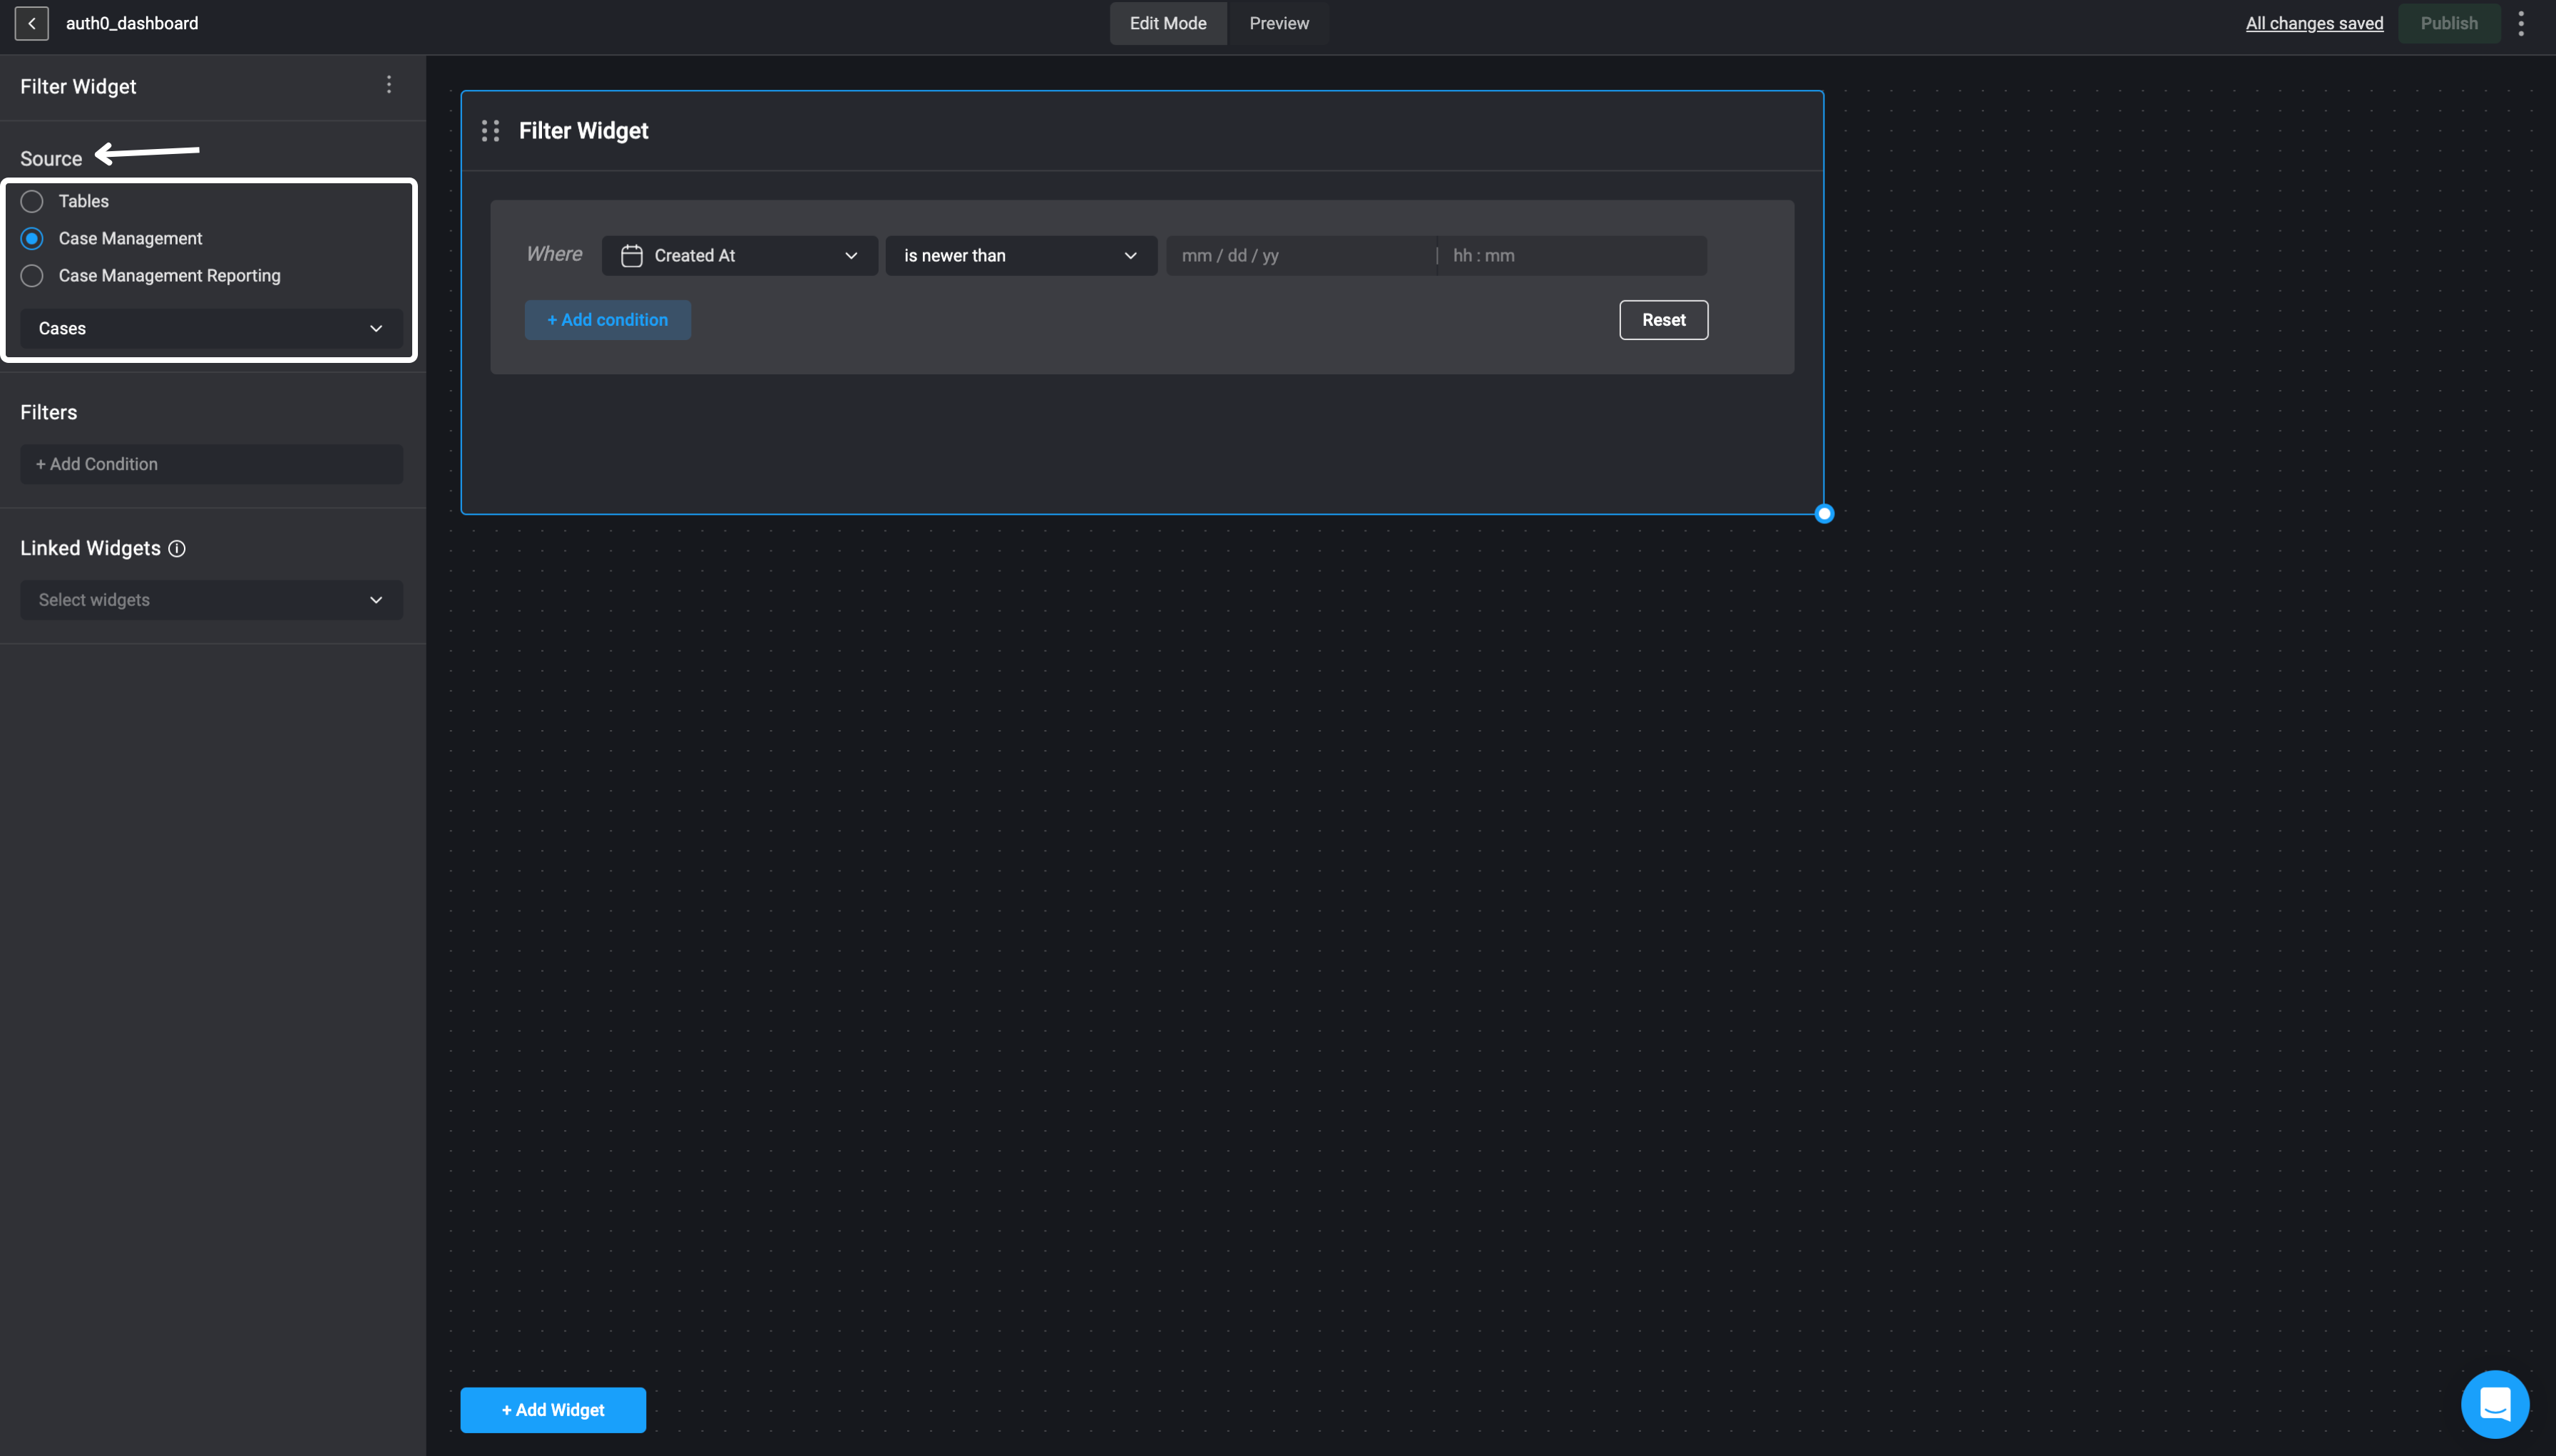
    Choose a data source: [Tables](/docs/blink-platform/tables/tables), [Case Management Tables](/docs/case-management/manage-tables) or [Case Management Reportings](/docs/blink-platform/dashboards/building-a-dashboard/source-types/case-management-reporting) and proceed by selecting the specific table column from the data source you would like to use.

    <Frame>
      <img src="https://mintcdn.com/blinkops-2/SbkcEaz7WANh9_cC/img/Dashboards/FilterSource.png?fit=max&auto=format&n=SbkcEaz7WANh9_cC&q=85&s=8033d2a9d29da63dc25d269590e6d173" width="3584" height="2042" data-path="img/Dashboards/FilterSource.png" />
    </Frame>
  </Step>

  <Step title="Define Filter Conditions">
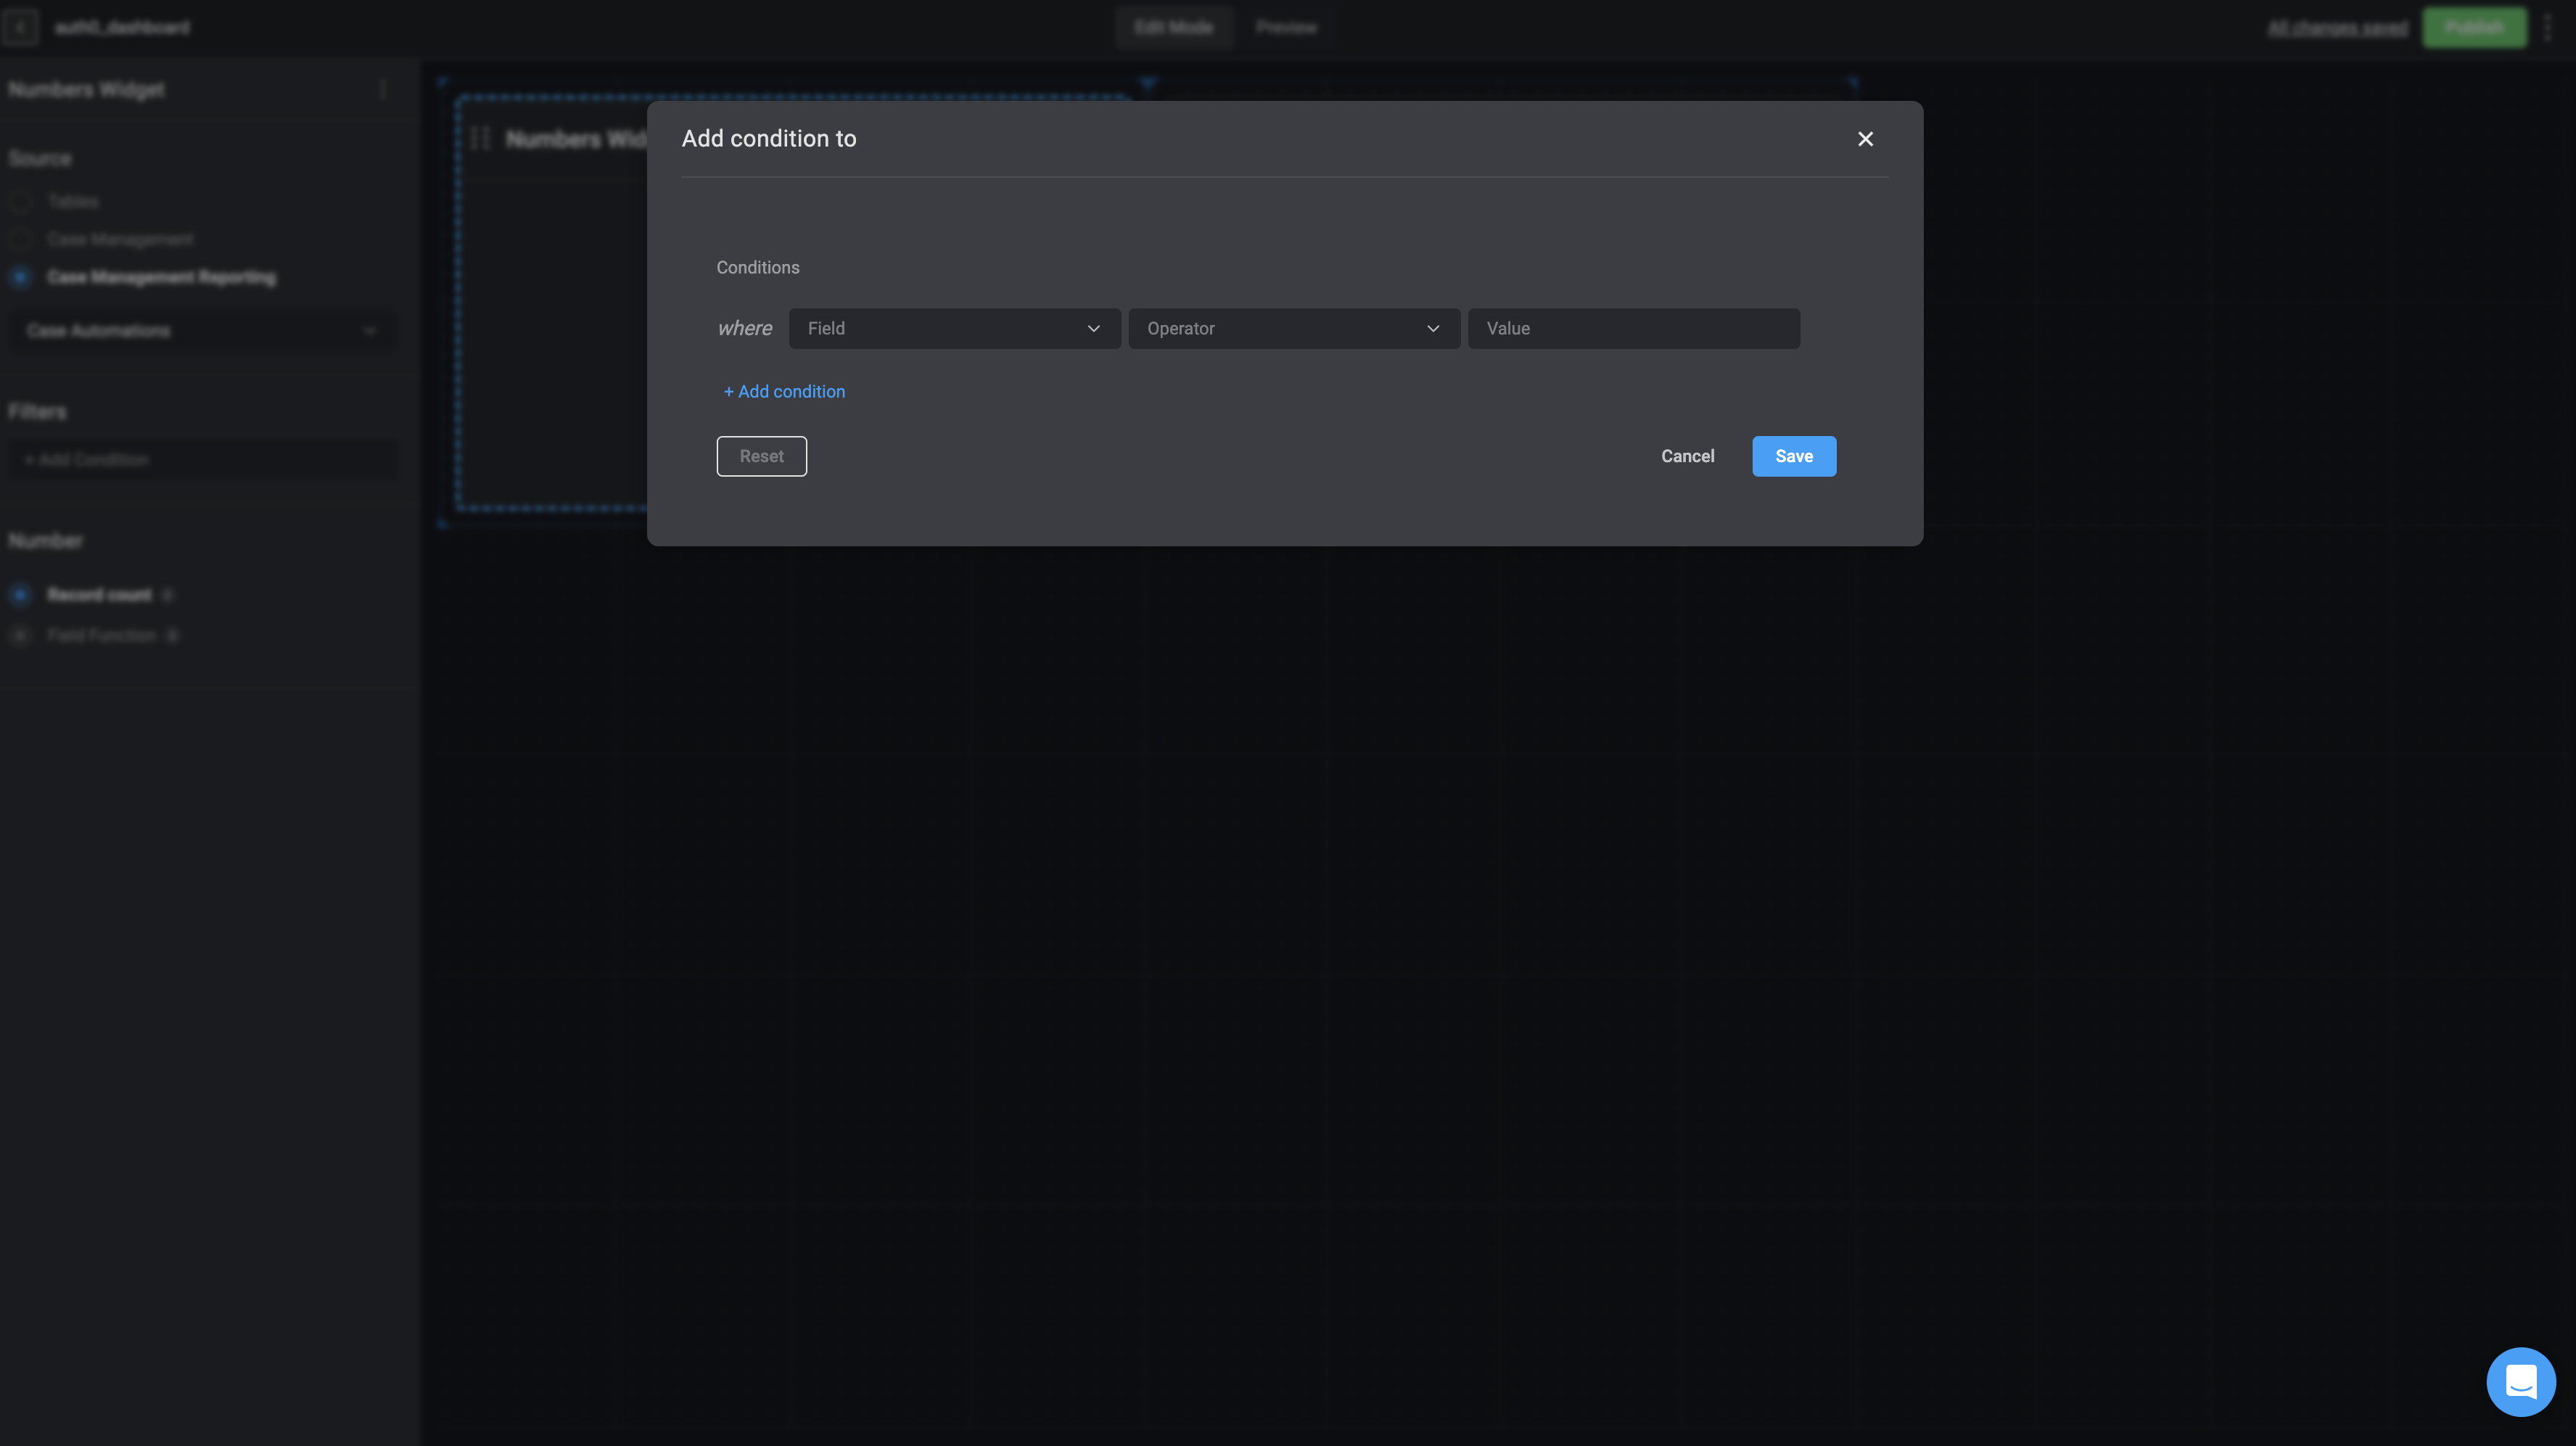
    Under the *Filters* section, click on "add condition(s)" to add conditional statements by using the [condition builder](/docs/blink-platform/condition-builder/condition-builder).

    <Frame>
      <img src="https://mintcdn.com/blinkops-2/yJ58SW0nEEHwB-YX/img/Dashboards/ConditionBuilder.png?fit=max&auto=format&n=yJ58SW0nEEHwB-YX&q=85&s=9c7dbc03dc8e762d1c7d4ade8a3eda5d" width="3551" height="1993" data-path="img/Dashboards/ConditionBuilder.png" />
    </Frame>

    ***

    #### Nested Conditions

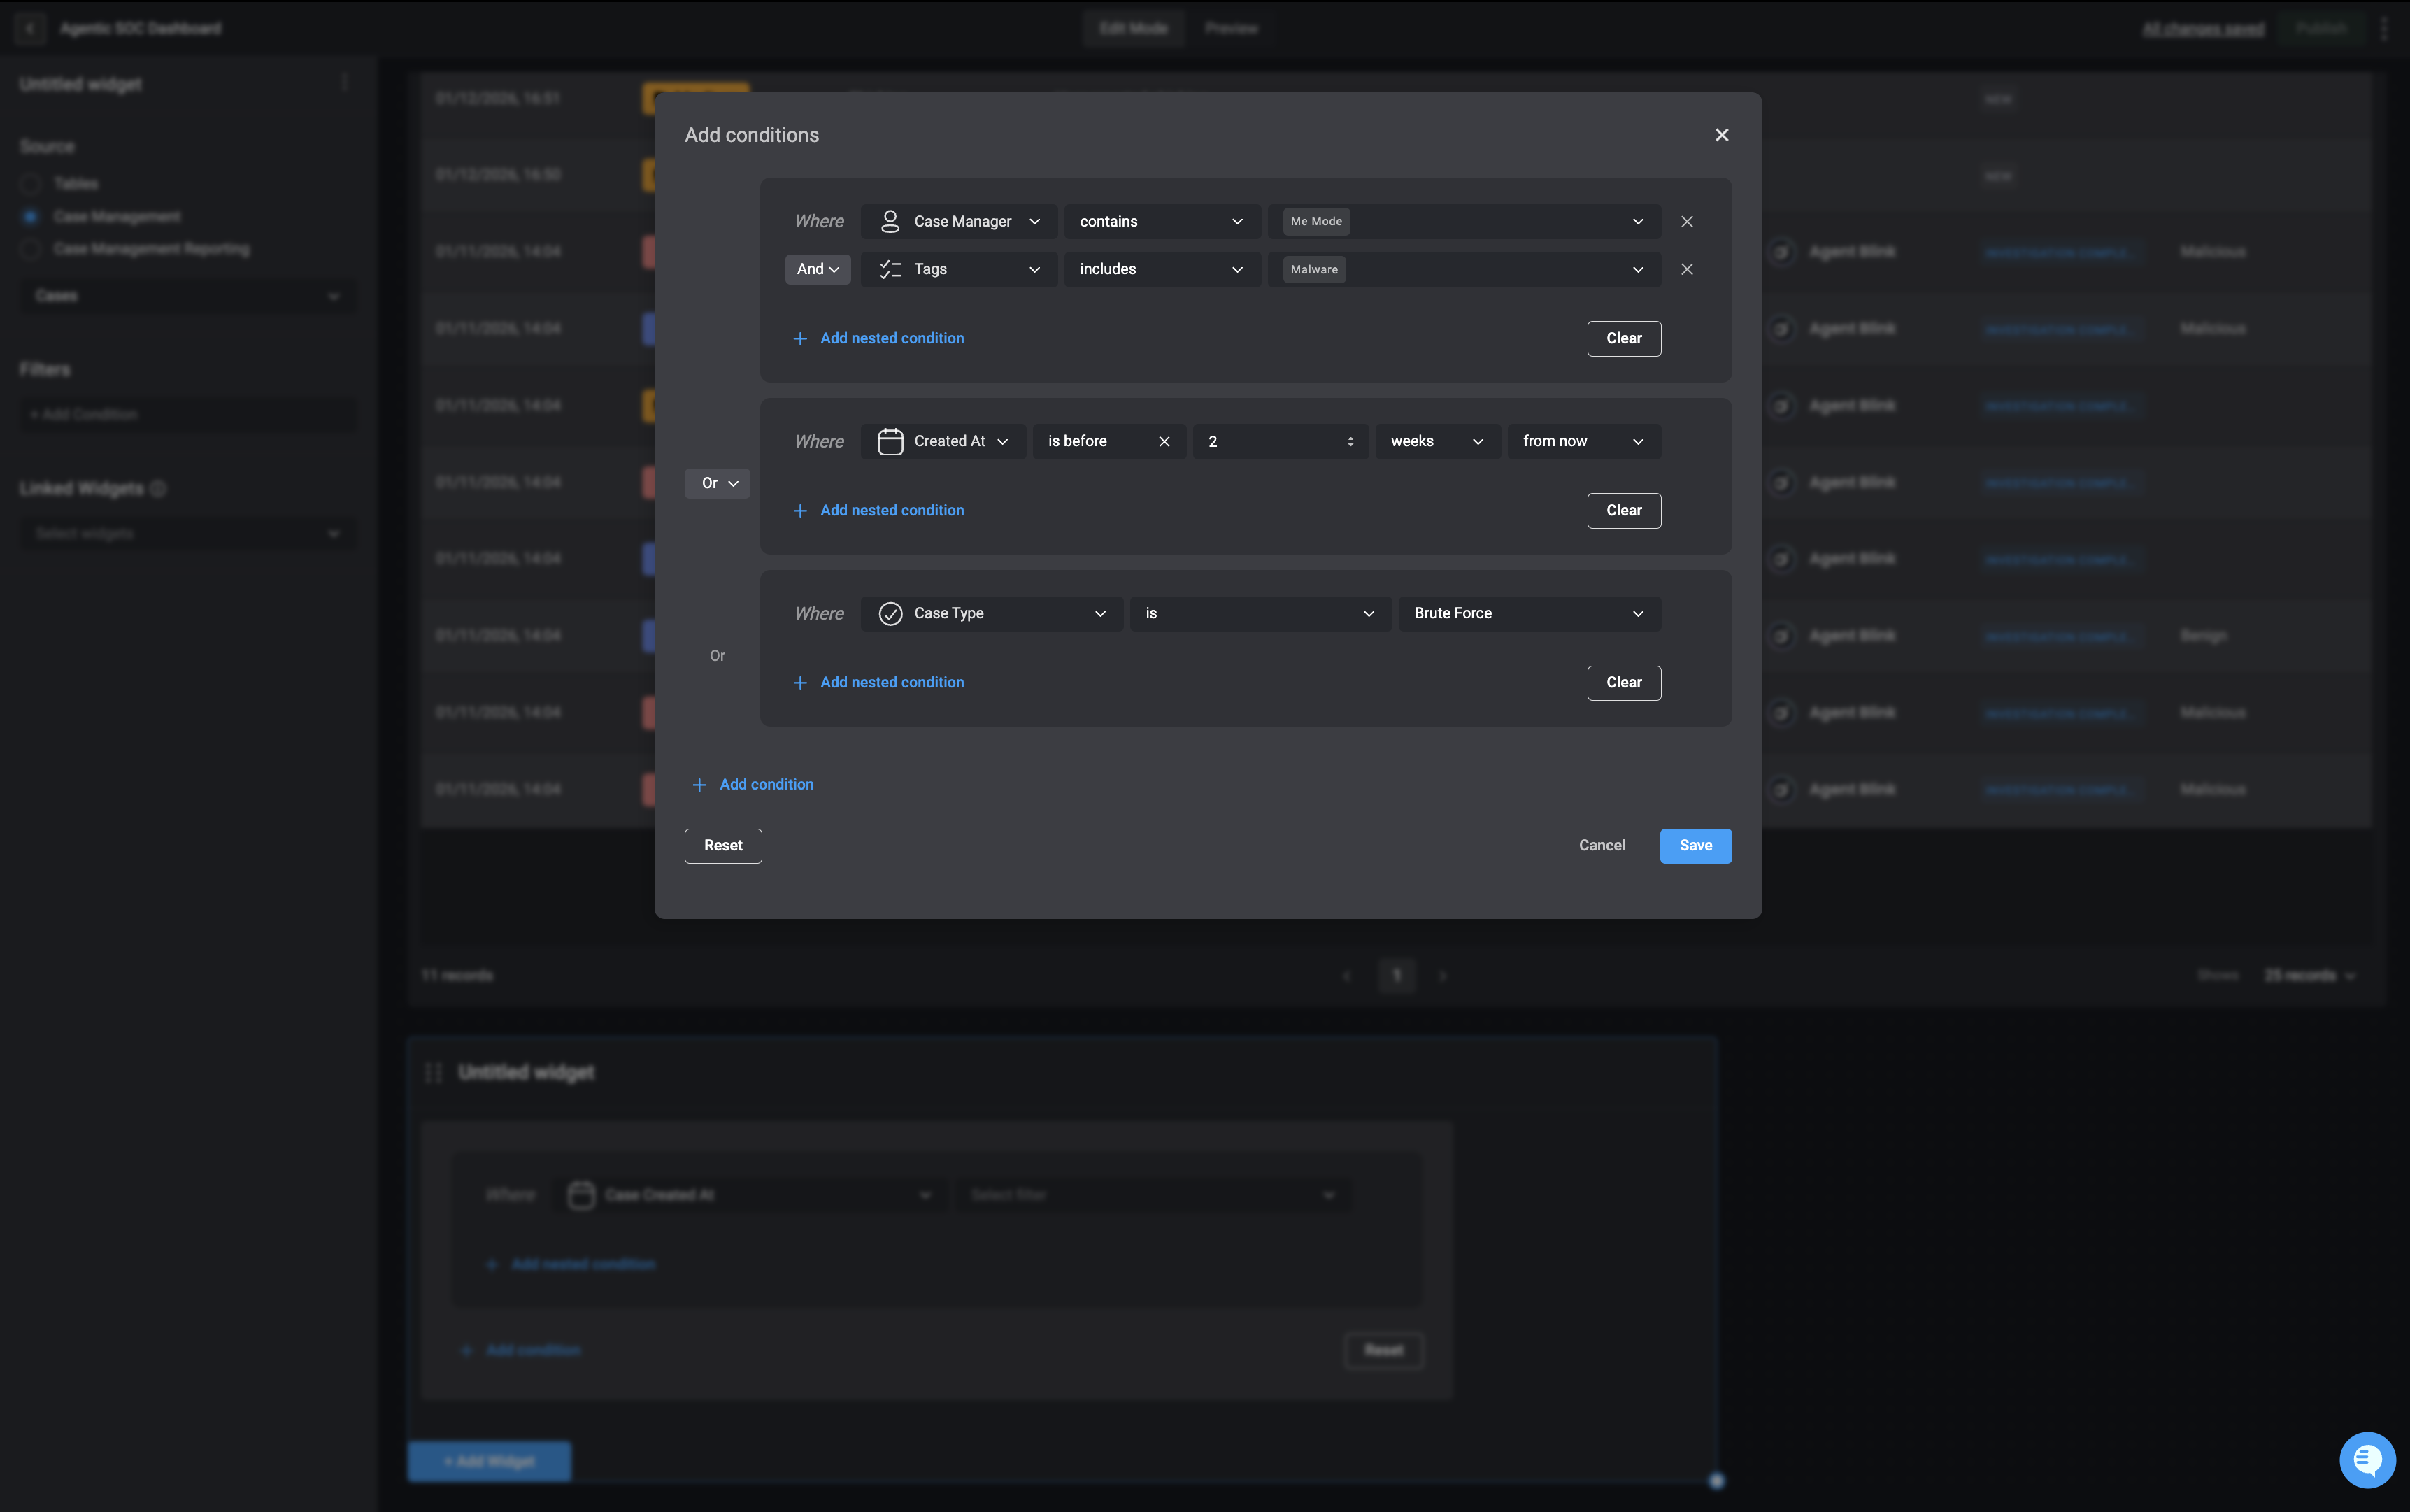
    You can also create nested conditions, which are conditions grouped within other conditions. Nested conditions allow you to define more complex logic, applying specific operators (`AND`/`OR`) to a subset of conditions independently from the main group.
    <Frame>
      <img src="https://mintcdn.com/blinkops-2/jJLC0binSKMKUQ9N/img/Dashboards/ComplexConditionBuilder.png?fit=max&auto=format&n=jJLC0binSKMKUQ9N&q=85&s=28cad27a1eaef42ddaba57e23693d4dd" width="3446" height="2162" data-path="img/Dashboards/ComplexConditionBuilder.png" />
    </Frame>
  </Step>

  <Step title="Connect Filter to Target Widget">
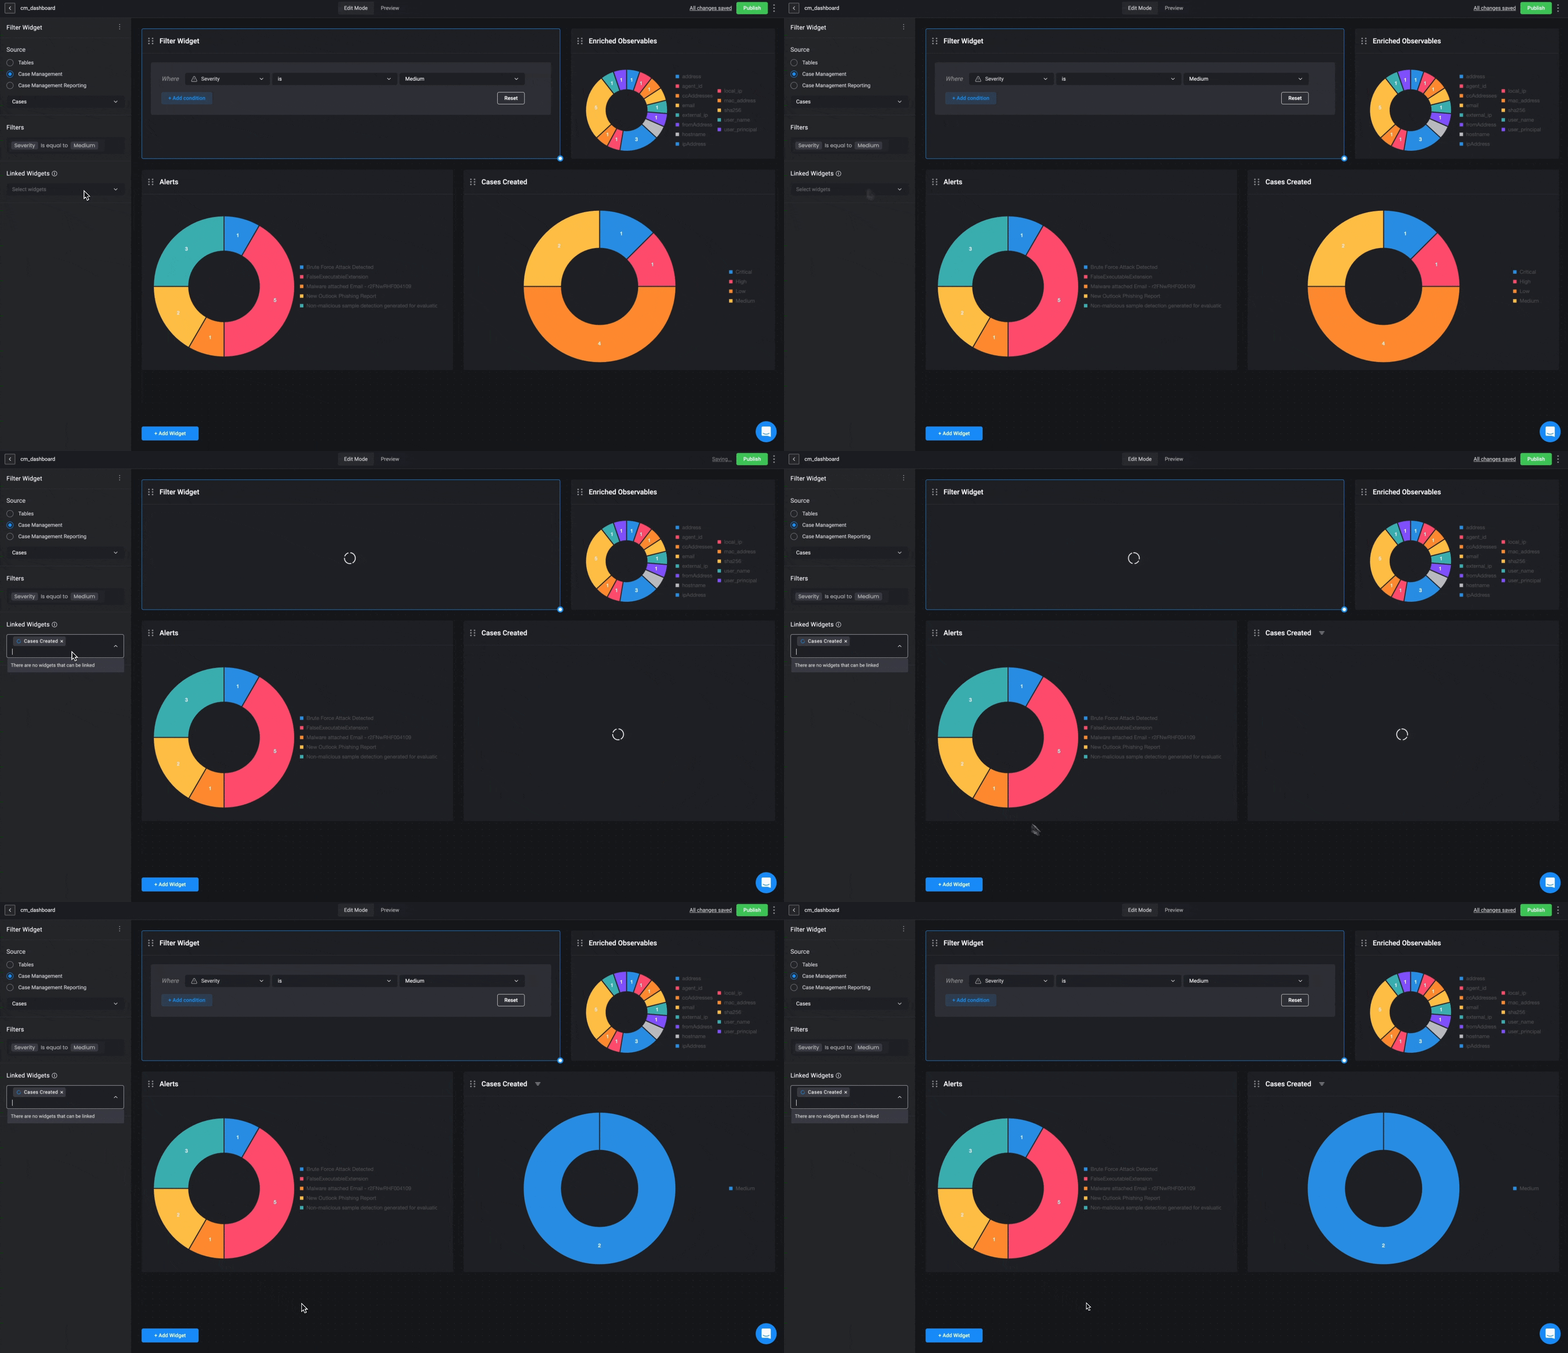
    Lastly, connect your Filter Widget to the widget you want to filter. In the following example, the filter widget is connected to a bar graph displaying case data. The filter is set to show only cases with a "medium" severity level, demonstrating how the widget updates to reflect the applied filter.

    <Frame>
      <img src="https://mintcdn.com/blinkops-2/SbkcEaz7WANh9_cC/img/Dashboards/LinkFilterWidget.gif?s=ce4c90bb0c42d89e98a0ac81de2e34fb" width="1876" height="1080" data-path="img/Dashboards/LinkFilterWidget.gif" />
    </Frame>
  </Step>
</Steps>

***

## Editing the Filter Widget

<Steps>
  <Step title="Making Changes to the Filter Widget">
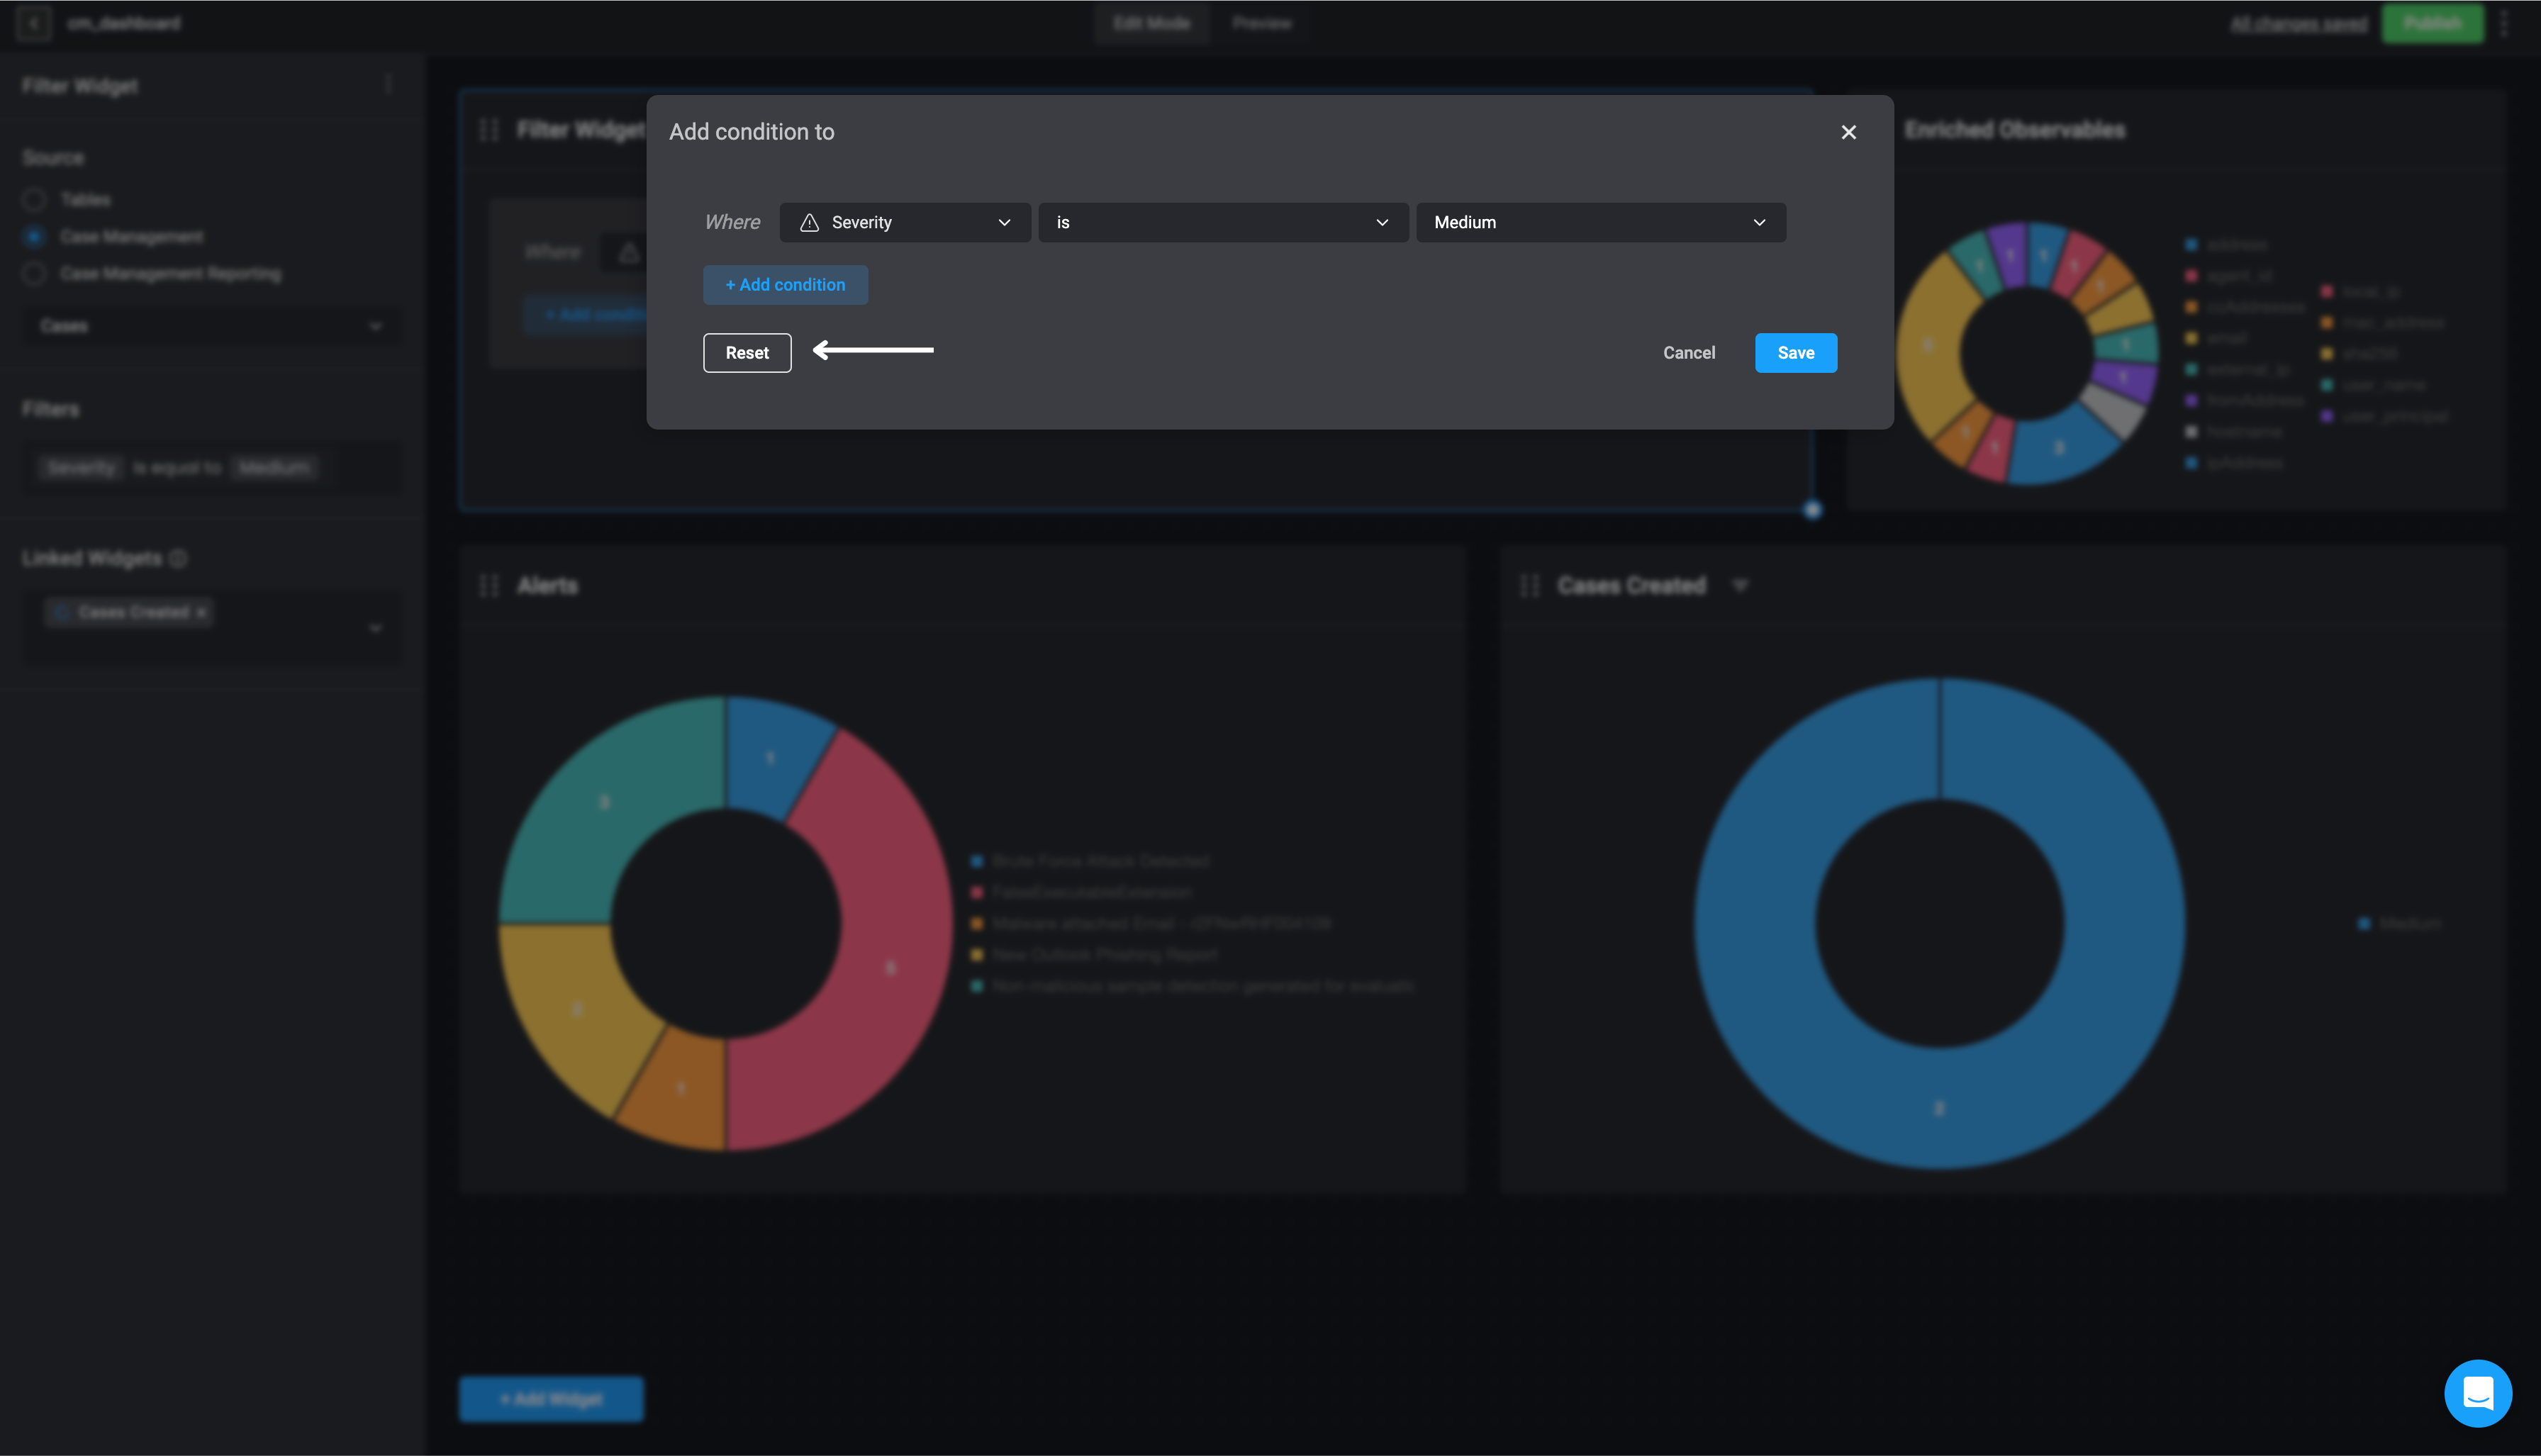
    If you want to remove a conditional statement and stop the filter from being applied to the linked widget, click the Reset button. For any other changes, you can edit directly in the left-hand sidebar. Simply locate the relevant section to adjust or update the information as needed. Changes will be applied automatically

    <Frame>
      <img src="https://mintcdn.com/blinkops-2/yJ58SW0nEEHwB-YX/img/Dashboards/EditFilterWidget.png?fit=max&auto=format&n=yJ58SW0nEEHwB-YX&q=85&s=c174cb112b49b81ce7cff82fd8834e7c" width="3584" height="2054" data-path="img/Dashboards/EditFilterWidget.png" />
    </Frame>
  </Step>
</Steps>

***

## Deleting a Filter Widget

<Steps>
  <Step title="Open Widget Options">
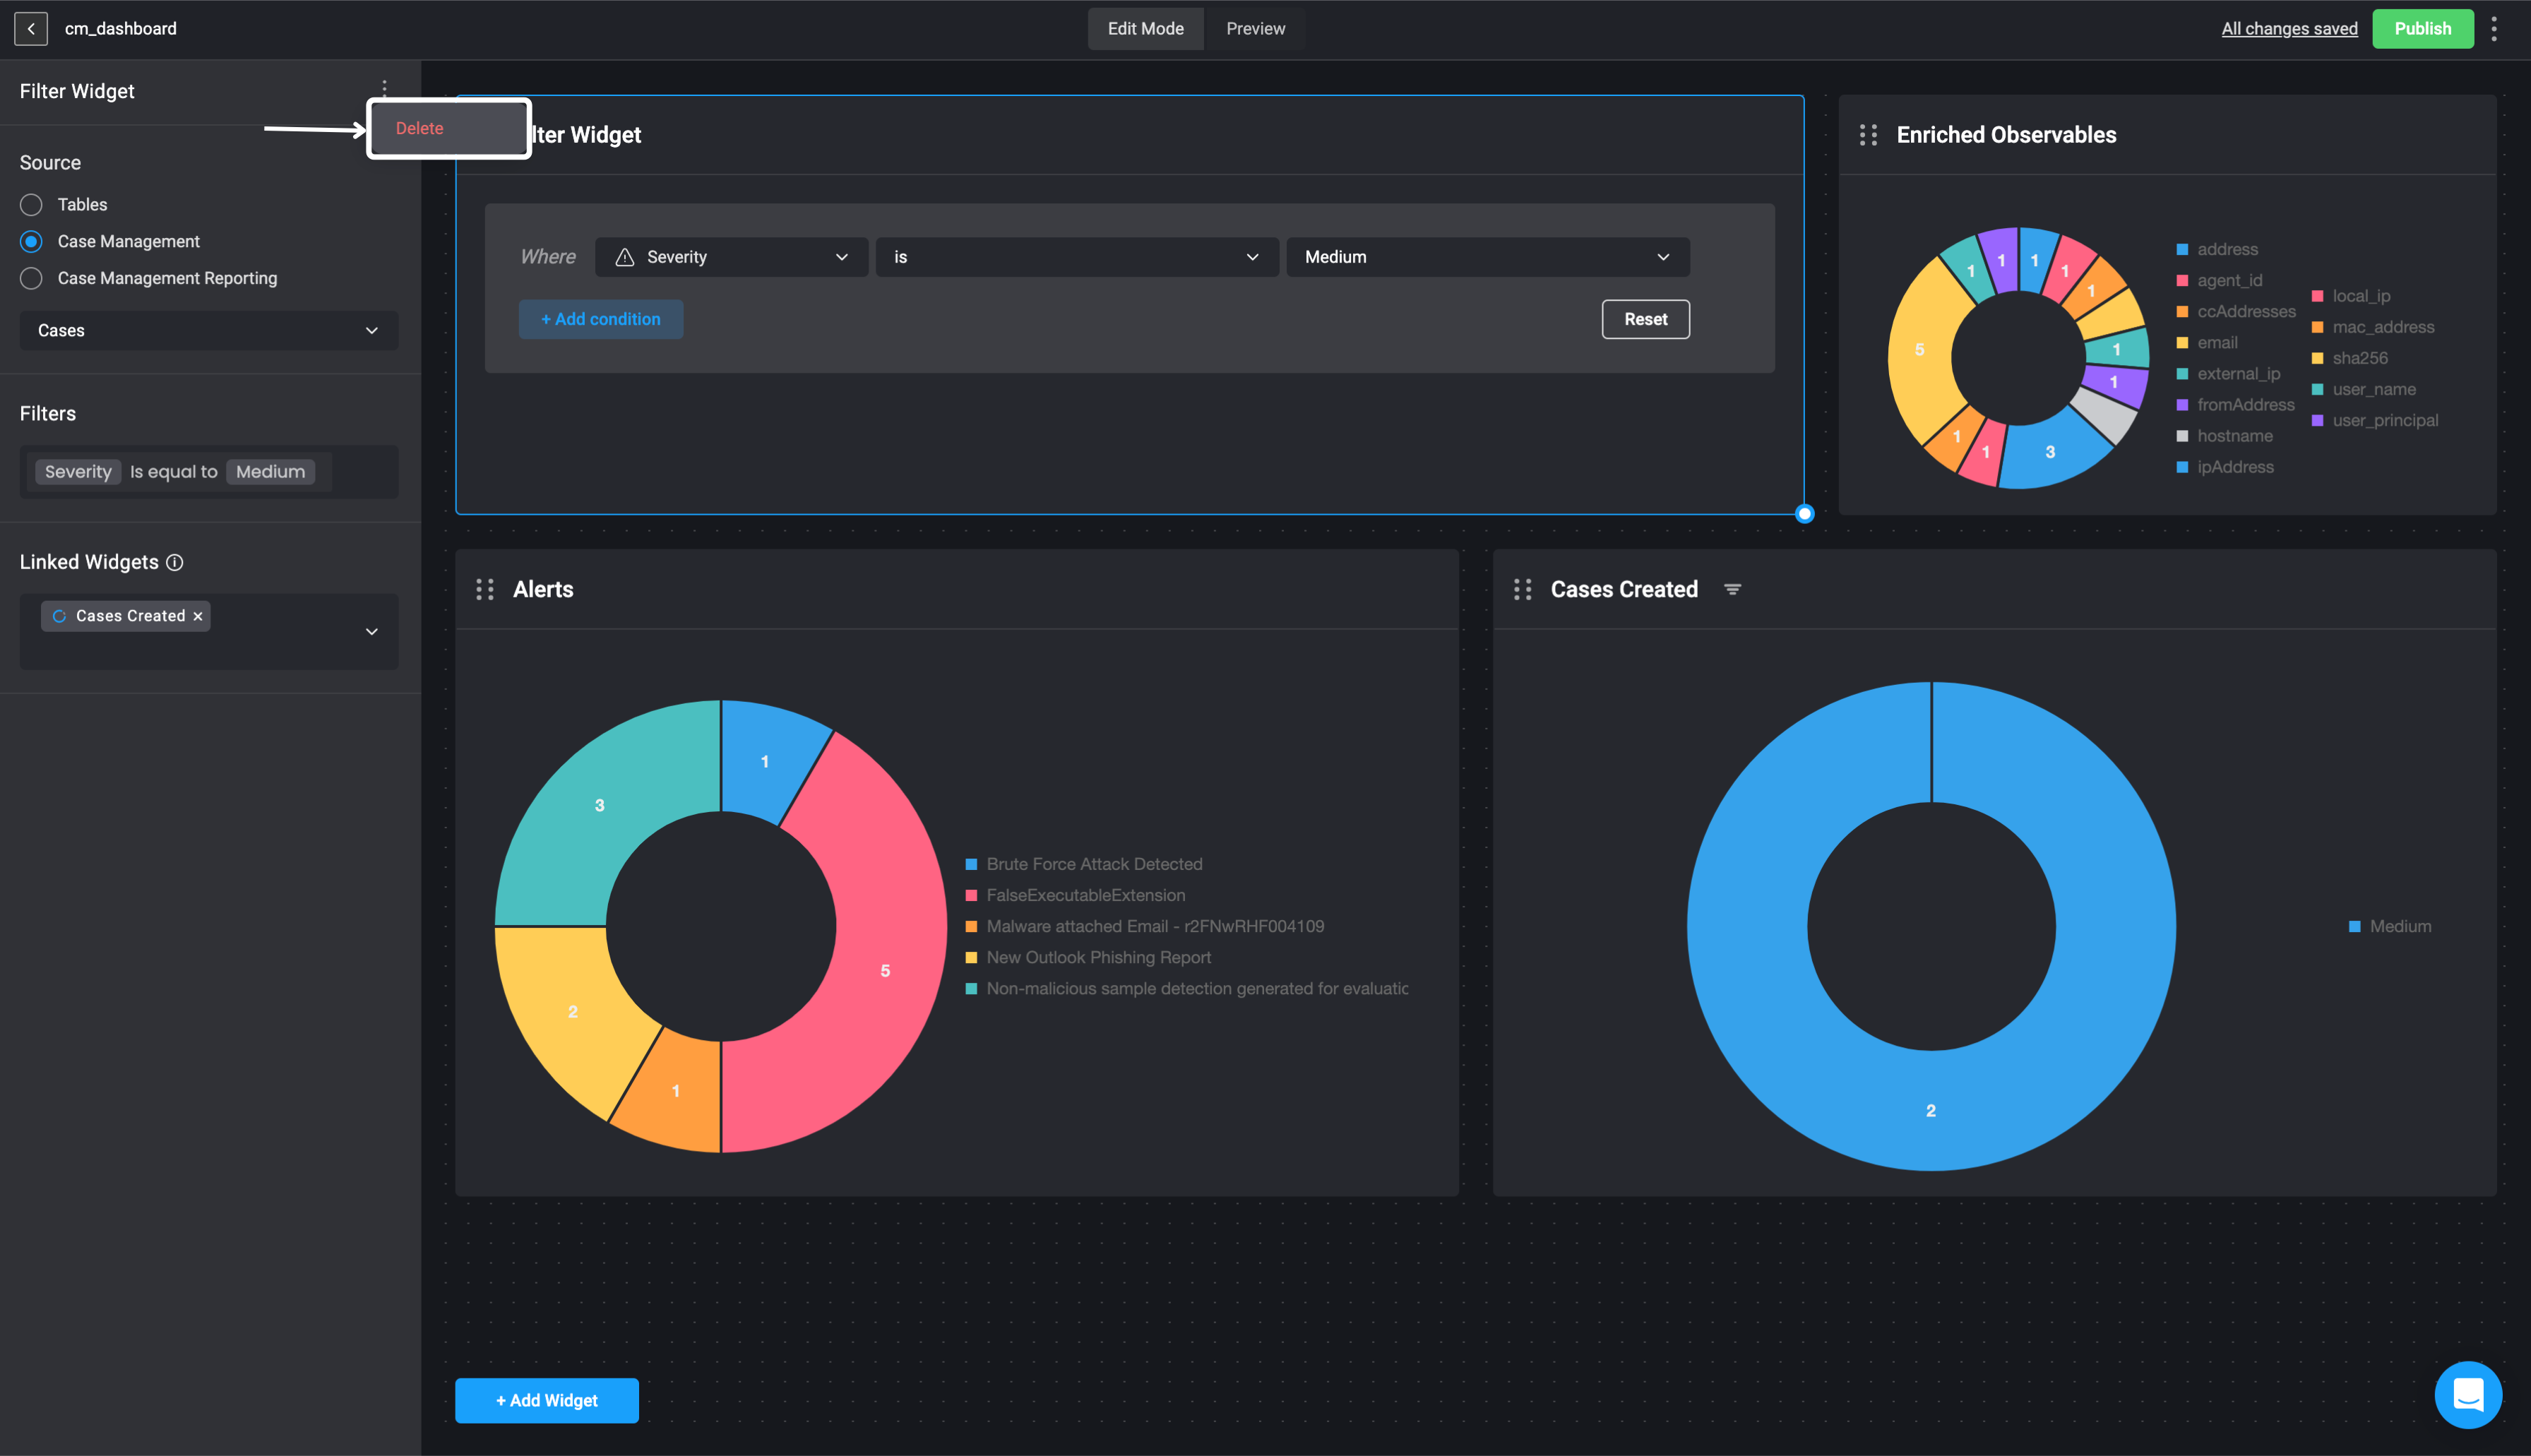
    <p>In the left-hand sidebar, click the <Icon icon="square-ellipsis-vertical" iconType="solid" /> icon in the top-right corner and then select the delete button.</p>
  </Step>

  <Step title="Confirm Widget Removal">
    The Filter widget will be removed from your Dashboard Building Interface.

    <Frame>
      <img src="https://mintcdn.com/blinkops-2/yJ58SW0nEEHwB-YX/img/Dashboards/DeleteFilterWidget.png?fit=max&auto=format&n=yJ58SW0nEEHwB-YX&q=85&s=5e48b9c1be76216e25db9d8bd6f79b49" width="3584" height="2062" data-path="img/Dashboards/DeleteFilterWidget.png" />
    </Frame>
  </Step>
</Steps>

***